Search the Community
Showing results for tags 'pvp'.
-

Version 1.0.2
3 downloads
READ BELOW FOR REQUIRED FIX FOR ABANDONEDBASES PLUGIN (CARBON ONLY)! Sale until July 15, 2024! Features: Tested on Carbon and Oxide Uses SimpleStatus to make a sleek customizable UI to show PVxStatus (PVE, PVP, PVPCooldown) Each UI Component can be individually toggled off or on Color settings allow for both: html color codes or rust colors (eg. #3AC916 OR 0.23 0.79 0.09 1 ) (NOTE: You will need to use the Rust color codes, if you would like to use transparency) Includes PVPDelay display and checking that integrates with: DynamicPVP, AbandonedBases, RaidableBases PVPDelay display should work with any plugin that utilizes DynamicPVP (eg. https://codefling.com/plugins/convoy) As long as the ZoneManger zone's name includes "pvp", the pvp tag will show up Option in config to enable Automatic FullPVP, if there are no PVE plugins detected (TruePVE, RealPVE, NextGenPVE, SImplePVE) Specify additional PVE zones by including "pve" in the zone's name Command to mark the whole server as PVP, regardless of zones (such as PURGE on PVE servers (this setting saves and persists on server restart, you will need to re-issue the command, or edit the settings file to revert back) Customizable information for all 3 PVxStatus UI (Title, Text, Icon, and colors) Ability to use Rust icons, on the UI (eg. assets/icons/weapon.png) Ability to use Rust item images on the UI (eg. itemid:1055319033) NOTE: the itemID MUST have itemid: at the beginning Custom image from URL, and item images instead of only being able to use Icons (NOTE: URL MUST contain http:// OR https:// otherwise it will be seen as invalid) Commands: From the RCON, Console, or chat as an admin, you can type: pvpall (/pvpall for chat) to toggle the server to PVP displayed everywhere Planned Features: A toggleable counting down timer for the PVPDelay (Need to see if this is possible) Languages to provide multi-language support Known Issues: PVP zone will still display, even if you are in a "Safe Zone", with FullPVP enabled Recommended: Set the Default color as needed: eg. if you have PVE hidden, and PVP shown, set the default color to PVP (this is caused by an issue where the UI will flash to the default color scheme when showing the UI) Recommend setting RaidableBases DelayUI to disabled in your RaidableBases config file Delay UI": { "Enabled": false, REQUIRED MODIFICATIONS!! Carbon: AbandonedBases If you are running AbandonedBases version <= 2.1.3, you need modify on Line 2480: (Line number would change depending on version, this line number is as of the most recent version of 2.1.3) if (!TryGetDelayValue(player.userID, out var ds)) to the following: if (TryGetDelayValue(player.userID, out var ds)) { ds.Timer?.Destroy(); PvpDelay.Remove(player.userID); } if (!TryGetDelayValue(player.userID, out ds)) This is to fix a bug with the timers in Carbon with Abandoned bases, as a player can clear their PVP Delay by running in and out of the base (CARBON ONLY) Default Config { "Mark whole server as PVP Zone": false, "Default Colors (PVE, PVP, or PVPDelay)": "PVE", "FullPVP if no PVE Plugins Found": false, "Pvx UI Settings": { "PVE": { "Show on UI": true, "Title": "You are in PVE!", "Title Color": "#FFFFFF", "Text": "SAFE", "Text Color": "#FFFFFF", "Icon": "assets/icons/weapon.png", "Icon Color": "#FFFFFF", "Background Color": "#738D45" }, "PVP": { "Show on UI": true, "Title": "You are in a PVP Zone!", "Title Color": "#FFFFFF", "Text": "UNSAFE", "Text Color": "#FFFFFF", "Icon": "assets/icons/weapon.png", "Icon Color": "#FFFFFF", "Background Color": "#C44D43" }, "PVPDelay": { "Show on UI": true, "Title": "PVP Cooldown!", "Title Color": "#FFFFFF", "Text": "UNSAFE", "Text Color": "#FFFFFF", "Icon": "assets/icons/weapon.png", "Icon Color": "#FFFFFF", "Background Color": "#B35F1E" } } }$15.00 -
Version 1.0.9
34 downloads
Check out RATS, a custom Rust map that brings a whole new gameplay vibe. Dive into an epic adventure in miniature and discover fun, fresh challenges around every corner. It's Rust, but with a cool, unique twist! - FEATURES • Size: 3000. • Objects: 101245. • Map protection plugin included. • The map can be edited: Yes. - CONTAINS ALL OFFICIAL MONUMENTS • Ferry Terminal • Nuclear missile silo • Large oil platform • Small oil platform • Submarine laboratories • Harbor • Large fishing villages • Fishing villages • Launch site • Satellite dish • The Dome • HQM Quarry • Stone quarry • Sulfur quarry • Arctic Research Base • Sewer Branch • Train yard • Junkyard • Abandoned military bases • Military tunnel • Caves • Large barns • Ranch • Bandit camp • Power plant • Swamp • Airfield • Giant excavation • Outpost • Lighthouse - PREFABS AND CUSTOM MONUMENTS • Zeppelin (Puzzle-parkour). • Ghostbusters Barracks, this is a faithful monument to the fire station used by the ghostbusters, contains puzzles, traps, loot, npc, ghostbusters logo. • Civil Guard Barracks, a construction zone for the server administrator. This monument-zone contains helicopter respawns and loot. • Camping, it contains tents and inside you will find loot, the land is surrounded by a kind of Creepers. • Snowball, this large glass dome contains two floors to build, plus on the top floor you will find resources. • Cargo Ship model, full of loot, but watch your step sailor because you will find enemies on board. • Zone for events, a huge space rocket with two floors, on the second floor you can use the Zone Manager plugin to place an event or if you prefer you can use this area for the Raideable Bases plugin. On the second floor players can build, also on this second floor you will find several helicopter respawns. • Crafting areas, these areas are scattered throughout the map, you will find these areas easily, they are marked with a star. • Cake, a huge and delicious chocolate cake, inside you will find a not very pleasant surprise. • Lamps, there are 4 lamps on the map, two are located on the roof (one you will find on the roof, in the center of the map, it contains: Loots, NPCS and a tank), the other lamps you will have to find them, in these three remaining lamps you will be able to build your house. • Train Stations, with waiting room, loot and NPC, with secondary rail respawn. • Mars Attack Arena, an impressive flying saucer, inspired by the movie Mars Attacks, this huge monument is surrounded by multiple fighter planes, inside you will find two floors with a sci-fi style. Use this monument to create an Arena for your players to fight each other. • Fishbowl, a huge aquatic area, contains a great variety of fish, in this area you will find the laboratory among other things. • Pots, in the upper part you will find resources, in the lower part you can build your house. • Trash garbage can, if you need resources this will be a good place to collect them. • Zeppelin with dish, if you need a place far away from your enemies this is a good option to build your house, besides it is located in the air. • Underwater Domes, large spheres located in various places on the map, use these cupolas to build your house. "In RATS you will find many hidden areas that have not been mentioned, so equip yourself and explore this great miniature adventure" - TIPS • Climb through walls, furniture and ceilings. • Take advantage of any area with total freedom to build your home. • Have fun$64.90- 21 comments
- 2 reviews
-
- 5
-

-

-
- #rats
- #miniature
- (and 23 more)
-
Version 1.3.0
5,236 downloads
This plugin adds variety of NPC sets with very high number of parameter sets on standard and custom monuments. Also it is added during dropping the server AirDrop, locked crate and destroying a tank or helicopter Dependencies (optional, not required) AlphaLoot CustomLoot True PVE Kits Economics Server Rewards IQEconomic PveMode Custom maps Maps that have default settings for their custom monuments. For these maps, you will not need to create places for the appearance of NPCs, they have already been created by the map developer and are located inside the archive when buying the map You can also download all these files for all maps here Detroit: Irreparable Damage Oregon 2: Last Hope Lostly Island Frontier – American Old West Oregon: Land of Dead Badlands Foreign Lands Namalsk Kong: Skull Island Destroyed World Deathland Dreamland Last Train Pandora Railway Island Wasteland Cataclysm: Fury of Nature Last Oasis Crazy Island Standard monuments This item of the plugin settings is used for appearing NPCs in all standard monuments. All these settings are located in the Monument folder (oxide/data/BetterNpc/Monument). Each file in this folder corresponds to a standard monument If there is no standard monument file in the folder, you can create it (you need to name the file the same way as the standard monuments on the map inside the game). You can copy the settings from any other standard monument Configuration parameters: Enabled? [true/false] – It allows to enable/disable the appearance of NPC on the monument. If you need NPCs appearing on the map and don’t need it on another map, you can use this option simply The size of the monument – this parameter contains two values. It is the length and width of the monument. This parameter is necessary for random appearance of NPC on the monument and indication of limits of removal of standard NPCs on the monument (if it is necessary) Remove other NPCs? [true/false] – It deletes the standard NPCs inside the limits of this monument Presets – It is a list of all the NPC presets to appear on the monument (the description of the NPC preset settings is located below) Custom monuments This item of the plugin settings is responsible for the appearance of NPCs on custom monuments. All these settings are located in the Custom folder (oxide/data/BetterNpc/Custom). Each file in this folder corresponds to a custom monument If you have bought a map with already configured NPC appearance files for custom monuments you will copy these files into the Custom folder. If you want to create and configure the appearance of NPC in your custom location on the map, you will use the command in the administrators’ chat /SpawnPointAdd {name} (see the description of this command below in the instruction) Configuration parameters: Enabled? [true/false] – It allows to enable/disable the appearance of NPC on the monument. If you need NPCs appearing on the map and don’t need it on another map, you can use this option simply Position – It is a position of the custom monument on the map Rotation – It is a rotation of the custom monument on the map (this parameter is necessary for using custom places to appear of NPC on the monument, if the monument is used on more than one map) Radius – It is the radius of the custom monument from the position on the map Remove other NPCs? [true/false] – It removes the standard NPCs inside the limits of this monument Presets – It is a list of all the NPC presets to appear on the monument (the description of the NPC preset settings is located below) Roads This item of the plugin settings is used to appear NPCs on all types of roads. All these settings are located in the Road folder (oxide/data/BetterNpc/Road). Each file in this folder corresponds to a particular road type ExtraNarrow – It is a narrow, unpaved walkway ExtraWide It is a wide, paved, two-lane, beltway road Standard – It is a regular, paved road Configuration parameters: Enabled? [true/false] – It allows to enable/disable the appearance of NPC on the road. If you need NPCs appearing on the map and don’t need it on another map, you can use this option simply Presets – It is a list of all the NPC presets to appear on the road (the description of the NPC preset settings is located below) Biomes This item of the plugin settings is used to appear NPCs on all types of biomes. All these settings are located in the Biome folder (oxide/data/BetterNpc/Biome). Each file in this folder corresponds to a particular biome type (Arctic, Arid, Temperate, Tundra) Configuration parameters: Enabled? [true/false] – It allows to enable/disable the appearance of NPC on the biome. If you need NPCs appearing on the map and don’t need it on another map, you can use this option simply Presets – It is a list of all the NPC presets to appear on the biome (the description of the NPC preset settings is located below) In-game events This item of the plugin settings is used to appear the NPCs in standard Rust events. All of these settings are located in the Event folder (oxide/data/BetterNpc/Event). Each file in this folder corresponds to its own type of event The supported events: When the plane drops the server AirDrop, it will be guarded by specific NPC presets CH47 – When the chinook drops a locked crate during patrolling the map, it will be guarded by specific NPC presets Bradley – When someone destroys a tank, its crates will be guarded by specific NPC presets Helicopter – When someone shoots down a patrol helicopter, its crates will be guarded by specific NPC presets Configuration parameters: Enabled? [true/false] – It allows to enable/disable the appearance of NPC on the event. If you need NPCs appearing on the map and don’t need it on another map, you can use this option simply Radius – NPC appearance radius Presets – It is a list of all the NPC presets to appear on the event (the description of the NPC preset settings is located below) The NPC preset parameters Enabled? [true/false] – It is enabling/disabling the preset Minimum numbers – Day – It is the minimum number of NPCs from the day preset Maximum numbers – Day – It is the maximum number of NPCs from the day preset Minimum numbers – Night – It is the minimum number of NPCs from the night preset Maximum numbers – Night – It is the maximum number of NPCs from the night preset NPCs setting – It is all NPC settings of this preset (see the description of NPC settings for details) Type of appearance (0 – random; 1 – own list) – It is a type of NPC appearance. You can create your own list of places of NPC appearance. The NPC will appear only randomly. This parameter is not used in Road appearance types Own list of locations – It is your own list of NPC appearances. You need to use the number of locations at least the maximum possible number of NPCs in this preset. This parameter is not used in Road appearance types The path to the crate that appears at the place of death – It is the full path to the crate prefab that appears at the place of death of an NPC. If you don’t need this parameter, you should leave this blank Which loot table should the plugin use (0 – default; 1 – own; 2 – AlphaLoot; 3 – CustomLoot; 4 – loot table of the Rust objects; 5 – combine the 1 and 4 methods) – It is the type of the NPC loot table in this preset. Type 5 includes two types (1 and 4) at the same time and locates items from both types Loot table from prefabs (if the loot table type is 4 or 5) – It is a setting of the loot tables from Rust objects. You can see the loot table of Rust objects description for more details Own loot table (if the loot table type is 1 or 5) – It’s NPC’s own loot table. You can see the description of your own loot table for more details The NPC settings description Names is a list of NPC names. It is selected from the list randomly Health – It’s the HP amount of the NPC Roam Range – It’s the patrolling area distance. It’s the distance that the NPC can move from the place of appearance during patrolling Chase Range – It’s the chase range of the target. It’s the distance that the NPC can chase his target from the place of appearance Attack Range Multiplier – It’s the attack range multiplier of the NPC’s weapon Sense Range – It’s a target detection radius Target Memory Duration [sec.] – It’s the time that the NPC can remember his target Scale damage – It’s the damage multiplier from NPC to the player Aim Cone Scale – It’s the spread of NPC shooting, the default value in Rust is 2. It doesn’t take negative values Detect the target only in the NPCs viewing vision cone? [true/false] – It’s the parameter that allows detecting the target only in a certain NPC viewing. If you want to detect the target in 360 degrees, you will set the parameter “False” Vision Cone – It’s the NPC viewing. The range of values is from 20 to 180 degrees. If the previous parameter is False, this parameter is not used Speed – It’s the NPC speed. The default value in Rust is 5 Minimum time of appearance after death [sec.] – It’s the minimum time of NPC appearance after the death. This parameter is not used in the NPC Event places Maximum time of appearance after death [sec.] – It’s the maximum time of NPC appearance after the death. This parameter is not used in the NPC Event places Disable radio effects? [true/false] – You can disable/enable radio effects Is this a stationary NPC? [true/false] – If this parameter is True, the NPC will not move or run Remove a corpse after death? [true/false] – This parameter can control the deleting of NPC corpses (only backpacks are left). This parameter improves efficiency if there are a lot of NPCs Wear items – It’s a list of NPCs’ clothes and armor Belt items – It’s a list of weapons and items NPCs’ fast slots. Medical syringes are used for healing. If you give grenades to an NPC, he will use them. Smoke grenades are used for creating smoke screens (if you don’t need them, you should remove them from your inventory). If you give a Rocket Launcher to an NPC, he will raid the target’s building (if the target is inside it) Kits – It gives a pack of Kits plugin. If you don’t need this parameter, you should leave this blank. I recommend using the previous 2 points to configure NPC items A description of the Rust loot table settings Minimum numbers of prefabs –It’s the minimum numbers of prefabs that are needed to appear in the NPC loot table Maximum numbers of prefabs –It’s the maximum numbers of prefabs that are needed to appear in the NPC loot table Use minimum and maximum values? [true/false] – this parameter specifies whether to use the minimum and maximum numbers to limit the number of items List of prefabs – It’s a list of prefabs that need to add in the loot table. It is necessary to indicate the full path to the prefab and the probability of falling out this prefab A description of the own loot table settings Minimum numbers of items – It’s the minimum number of items Maximum numbers of items – It’s the maximum number of items Use minimum and maximum values? [true/false] – this parameter specifies whether to use the minimum and maximum numbers to limit the number of items List of items – It’s a total list of all items that can fall out in the NPC loot table. You can specify any standard items, their blueprints and any skinned or custom items The commands in the chat (for admins only) /SpawnPointPos {name} – To show the local admin’s position coordinates relative to the place where the NPC {name} appears /SpawnPointAdd {name} – To create the NPC appearance point {name} in the Admin’s custom coordinates. A file with this name will be created in the folder Custom and you can configure it as you need /SpawnPointAddPos {number} {name} – To write the local admin’s coordinate into the preset with the positional number {number} (starting from 1) to the place where the NPC {name} appears /SpawnPointAddWear {number} {name} – To write all the admin’s dressed clothes into the preset with the positional number {number} (starting from 1) to the place where the NPC {name} appears /SpawnPointAddBelt {number} {name} – To write all the admins’ quick slots cells into a preset with the positional number {number} ( starting from 1) to the place where the NPC {name} appears /SpawnPointShowPos {number} {name} – To show to the Admin all the custom NPC appearance points in the preset with the positional number {number} ( starting from 1) in the place where the NPC {name} appears /SpawnPointReload {name} – Reload Spawn Point with the name {name} Console commands (RCON only) ShowAllNpc – Shows the number of all NPCs of the BetterNpc plugin on your server Hooks object CanAirDropSpawnNpc(SupplyDrop supplyDrop) – It is called before an NPC appearance to guard an AirDrop. The returning of a non-zero value stops an NPC appearance object CanCh47SpawnNpc(HackableLockedCrate crate) – It is called before an NPC appearance to guard a locked chinook crate. The returning of a non-zero value stops an NPC appearance object CanBradleySpawnNpc(BradleyAPC bradley) – It is called before an NPC appearance to guard the boxes from crushed Bradley. The returning of a non-zero value stops an NPC appearance object CanHelicopterSpawnNpc(BaseHelicopter helicopter) – It is called before an NPC appearance to guard the crates from crushed patrol helicopter. The returning of a non-zero value stops an NPC appearance API void DestroyController(string name) – It destroys the place of appearance NPC with the name {name} void CreateController(string name) – It creates the place of appearance NPC with the name {name} These APIs can be used with standard monuments, custom monuments (NPC locations) and roads. The name of this monument is in standard monuments {name}. It is the name of the file in the Custom and Road folder in custom monuments and roads My Discord: KpucTaJl#8923 Join the Mad Mappers Discord here! Check out more of my work here! Creator of the default configuration – jtedal$31.00 -
Version 0.1.8
494 downloads
Plugin for Real PvE servers, featuring damage prevention, anti-griefing measures, claiming vehicles, an automatic loot queue in radtowns and raid zones and much more. The ability to set "server.pve" to "true", which allows the server to have a "PvE" flag; Damage from NPC's are enabled when server.pve is true; The ability to inflict damage to one's own structures with "server.pve true"; The ability to destroy(including external walls) or rotate one's structures without any time constraints; The ability to force the decay of building blocks with Twigs grade, even if there is wood in the Tool Cupboard; No one, except the owner or their friends, will be able to open their loot containers (chests, storages, bodies, etc.); Players can't gather resources within the Building Privilege of someone else; Administrators can bypass loot restrictions; The ability to schedule the killing of players if they disconnect within someone else's Building Privilege; Disabling backpack and active item drop upon death, even if backpack is full; The ability to disable 'Give' messages; The ability to modify the items given at spawn on the beach; The ability to create an unlimited number of custom permissions; The ability to allow players to bypass the queue; The ability to set limits on sleeping bags, shelters and auto turrets for each permission; The ability to set a multiplier for the prices of monuments and events for each permission; The ability to customize the price and amount of vehicles for each of your custom permissions; The ability to assign vehicles to each player; The ability to customize the assigned price and available amount of vehicles for each of your custom permissions; An assigned vehicle can't be damaged, looted or pushed by other players, but it can be pushed if it is within someone else's Building Privilege; The ability to loot monuments through a queue system; The ability to configure monuments, setting their looting price and time, and adjusting status bars for each monument; The ability to acquire the privilege to loot events (helicopters, bradleys, and raidable bases) through a purchase; The ability to customize the price of each event types and loot attempts (lives); NPCs only aggress against players who are looting monuments, events or raidable bases; Only players who are looting monuments, events or raidable bases can inflict damage to NPCs; RaidableBases are protected from griefing(no damage, no loot and etc). Only the owner can interact with the raid; Neutral RaidableBases can be purchased; Prices for purchasing neutral raids are configurable for each difficulty level; Configurable raid limits (currently available) along with discount multipliers for purchases, for each permission. File location: *SERVER*\oxide\data\RealPVE\PermissionConfig.json Default: https://pastebin.com/5VtWZZVr All permissions are created and configured in the config file under the "List of permissions" section. You can create as many permissions as needed and customize them flexibly. It is recommended to use the prefix "realpve" in the permission's name, for example: "realpve.vip". NOTE: The first permission will serve as the default permission for those who do not have any permissions. { "List of permissions. NOTE: The first permission will be used by default for those who do not have any permissions.": [ { "Permission Name": "realpve.default", "Bypass Queue": false, "Limit of beds": 15, "Limit of shelters": 1, "Limit of auto turrets": 12, "Monuments price multiplier": 1.0, "Events price multiplier": 1.0, "Limit of RaidableBases(at the time)": 1, "RaidableBases price multiplier": 1.0, "Vehicles settings": { "Horse": { "Limit": 1, "Price": 10.0 }, "Bike": { "Limit": 1, "Price": 5.0 }, "MotorBike": { "Limit": 1, "Price": 20.0 }, "Car": { "Limit": 1, "Price": 25.0 }, ... } }, { "Permission Name": "realpve.vip", "Bypass Queue": true, "Limit of beds": 20, "Limit of shelters": 2, "Limit of auto turrets": 15, "Monuments price multiplier": 0.9, "Events price multiplier": 0.9, "Limit of RaidableBases(at the time)": 2, "RaidableBases price multiplier": 0.9, "Vehicles settings": { "Horse": { "Limit": 5, "Price": 9.0 }, "Bike": { "Limit": 5, "Price": 4.5 }, "MotorBike": { "Limit": 5, "Price": 18.0 }, "Car": { "Limit": 5, "Price": 22.5 }, ... } } ], "Version": { "Major": 0, "Minor": 1, "Patch": 1 } } An example of a monument/event/rb multipliers using default permissions. For example, if you set the price for the Harbor at $1000, a player with the default permission(1.0) will pay $1000 * 1 = $1000. Meanwhile, a player with a VIP permission(0.9) will pay $1000 * 0.9 = $900. However, if a player possesses a misbehaving permission with a value of 1.1, they will need to pay $1000 * 1.1 = $1100. { "RealPVE command": "realpve", "Is it worth forcibly implementing PvE for a server?": true, "Use GameTip for messages?": true, "Is it worth preventing the sending of 'Give' messages?": true, "Which currency symbol and format will be utilized?": "{0}$", "Is it worth allowing a backpack to drop upon player death?": true, "Is it worth blocking damage to the laptop of the Hackable Crate?": true, "Is it worth preventing the pickup of plants spawned by the server in someone else's building privilege zone?": false, "Anti-Sleeper - Time in seconds after which a player will be killed if they disconnect while inside someone else's Building Privilege. Set to 0 to disable": 1200.0, "PatrolHelicopterAI - Monument Crash. If set to true, the helicopter will attempt to crash into the monument.": false, "PatrolHelicopterAI - Use Danger Zones. If set to false, the helicopter will function as it did before the April update.": false, "PatrolHelicopterAI - Flee Damage Percentage. A value of 1 or above will make the helicopter behave as it did before the April update.": 1.0, "Settings for the events": { "PatrolHelicopter": { "IsEnabled": true, "Is it worth removing fire from crates?": true, "Price": 50.0, "The number of deaths after which the event becomes public.": 5 }, "BradleyAPC": { "IsEnabled": true, "Is it worth removing fire from crates?": true, "Price": 50.0, "The number of deaths after which the event becomes public.": 5 } }, "Is Npc Random Raids enabled?": true, "Wipe ID": null, "Version": { "Major": 0, "Minor": 1, "Patch": 8 } } EN: { "MsgNoteText": "Welcome to our PvE server!\nThis server utilizes the RealPVE plugin.\nYou can find more details about the plugin at the following link: https://codefling.com/plugins/real-pve", "MsgAdminLootEnabled": "You have been added to the loot restriction ignore list!", "MsgAdminLootDisabled": "You have been removed from the loot restriction ignore list!", "MsgTeamFFireEnabled": "Friendly fire enabled by {0}!", "MsgTeamFFireDisabled": "Friendly fire disabled by {0}!", "MsgMonumentOccupied": "{1} occupied {0} in {2} minutes.", "MsgMonumentFree": "{0} is available for looting!", "MsgMonumentOfferTitle": "Unlock Treasures of {0}!", "MsgMonumentOfferDescription": "Tap the notification to pay {0}.\nAnd unlock access to undiscovered riches!", "MsgMonumentLooterDeath": "You died while looting {0}. You have {1} seconds.", "MsgMonumentLooterExit": "You have left the monument. You have {0} seconds to return!", "MsgMonumentLooterRemoved": "Time's up! You have been removed from the monument!", "MsgMonumentLootingNotFree": "You have been added to the loot queue. Loot cost: {0}", "MsgMonumentNotInQueue": "You are not in the queue! You need to re-enter the monument!", "MsgMonumentNoAccess": "no access", "MsgEventOccupied": "{0} is already occupied by {1}!", "MsgEventOfferTitle": "Claim {0}!", "MsgEventOfferDescription": "Tap the notification to pay {0}.\nAnd unlock access to undiscovered riches!", "MsgEventNewLooter": "You have claimed {0}. You have {1} death for your team.", "MsgEventDeathLimit": "{0} is no longer yours! You have exceeded your death limit!", "MsgEventComplete": "{0} destroyed at coordinates: {1}!", "MsgEventPatrolHelicopter": "Patrol Helicopter", "MsgEventBradleyAPC": "Bradley", "MsgRaidableBasesDisabled": "This Raidable Base is either disabled or not found!", "MsgRaidableBasesOccupied": "The Raidable Base is already occupied by {0}!", "MsgRaidableBasesLimit": "Limit exceeded! You have {0} out of {1} available Raidable Bases.", "MsgRaidableBasesPurchaseStart": "Payment successful! Please wait...", "MsgRaidableBasesPurchased": "You have successfully purchased the Raidable Base!", "MsgRaidableBasesPurchaseFailed": "You were unable to purchase the Raidable Base! Funds refunded.", "MsgRaidableBasesOfferTitle": "Claim {0} Raidable Base!", "MsgRaidableBasesOfferDescription": "Tap the notification to pay {0}.\nAnd unlock access to undiscovered riches!", "MsgRaidableBasesBarText": "{0} Base", "MsgRaidableBasesBarTextLootRemaining": "Loot Remaining", "MsgRaidableBasesBarTextLootCompleted": "Completed", "MsgRaidableBasesBarNoAccess": "no access", "MsgRaidableBasesEasy": "Easy", "MsgRaidableBasesMedium": "Medium", "MsgRaidableBasesHard": "Hard", "MsgRaidableBasesExpert": "Expert", "MsgRaidableBasesNightmare": "Nightmare", "MsgPrivlidgeClear": "{0} players have been removed from the Building Privilege.", "MsgPrivlidgeClearEmpty": "Only you are authorized in the Building Privilege.", "MsgVehicleDialogTitle": "Department of Motor Vehicles", "MsgVehicleDialogDescription": "ID: \nType: \nRegistration fee: \nCategory: ", "MsgVehicleDialogDescriptionValue": "<b>{0}</b>\n<b>{1}</b>\n<b>{4}</b>\n<b>{2}</b>", "MsgVehicleDialogDescriptionRegistered": "ID: \nType: \nRegistration date: \nCategory: ", "MsgVehicleDialogDescriptionRegisteredValue": "<b>{0}</b>\n<b>{1}</b>\n<b>{3}</b>\n<b>{2}</b>", "MsgVehicleDialogDescriptionNotOwner": "ID: \nOwner: \nRegistration date: \nType: \nCategory: ", "MsgVehicleDialogDescriptionNotOwnerValue": "<b>{0}</b>\n<b>{4}</b>\n<b>{3}</b>\n<b>{1}</b>\n<b>{2}</b>", "MsgVehicleCarDialogDescription": "ID: \nType: \nRegistration fee: \nCategory: ", "MsgVehicleCarDialogDescriptionValue": "<b>{0}</b>\n<b>{1}</b>\n<b>{4}</b>\n<b>{2}</b>", "MsgVehicleCarDialogDescriptionRegistered": "ID: \nType: \nReg date: \nCategory: ", "MsgVehicleCarDialogDescriptionRegisteredValue": "<b>{0}</b>\n<b>{1}</b>\n<b>{3}</b>\n<b>{2}</b>", "MsgVehicleCarDialogDescriptionNotOwner": "ID: \nOwner: \nReg date: \nType: \nCategory: ", "MsgVehicleCarDialogDescriptionNotOwnerValue": "<b>{0}</b>\n<b>{4}</b>\n<b>{3}</b>\n<b>{1}</b>\n<b>{2}</b>", "MsgVehicleCarGarageEmpty": "The car lift is empty!", "MsgVehicleDialogLink": "Register Vehicle", "MsgVehicleDialogUnLink": "Cancel registration", "MsgVehicleDialogIncorrectPassword": "The password must consist of 4 digits!", "MsgVehicleNotOwner": "You are not the owner!", "MsgVehicleCanNotInteract": "You are not the owner or their friend!", "MsgVehicleNoPermissions": "You do not have permissions for this action!", "MsgVehicleLinked": "The {0} has been successfully linked! You have {1} out of {2} available.", "MsgVehicleUnLinked": "The {0} has been successfully unlinked!", "MsgVehicleFailedDeauthorize": "You can only deauthorize by unlinking the vehicle from you.", "MsgVehicleLimit": "Limit exceeded! You have {1} out of {2} available.", "MsgVehicleDestroyed": "Your vehicle {0}({1}) has been destroyed!", "MsgVehicleFind": "Your vehicle {0} is located in grid {1}!", "MsgVehicleClear": "Removed {0} vehicles!", "MsgVehicleClearEmpty": "No vehicles found for removal!", "MsgVehicleNotFound": "Vehicle not found!", "MsgVehicleTugboatAuthorization": "To authorize in the tugboat, it must be claim!", "MsgVehicleLandVehicle": "Land", "MsgVehicleAirVehicle": "Air", "MsgVehicleWaterVehicle": "Water", "MsgVehicleWinterVehicle": "Winter", "MsgVehicleTrainVehicle": "Train", "MsgVehicleHorse": "horse", "MsgVehicleBike": "bike", "MsgVehicleMotorBike": "motor bike", "MsgVehicleCar": "car", "MsgVehicleBalloon": "air balloon", "MsgVehicleMinicopter": "minicopter", "MsgVehicleTransportHeli": "transportHeli", "MsgVehicleAttackHeli": "attack heli", "MsgVehicleRowBoat": "row boat", "MsgVehicleRHIB": "RHIB", "MsgVehicleTugBoat": "tugboat", "MsgVehicleSubmarineOne": "small submarine", "MsgVehicleSubmarineTwo": "submarine", "MsgVehicleSnowmobile": "snowmobile", "MsgVehicleTrain": "train", "MsgFree": "Free", "MsgNoDate": "null", "MsgEconomicsNotEnough": "Not enough funds!" } RU: { "MsgNoteText": "Добро пожаловать на наш PvE сервер!\nДанный сервер использует RealPVE плагин.\nПодробней о плагине можно узнать по ссылке: https://codefling.com/plugins/real-pve", "MsgAdminLootEnabled": "Вы добавлены в список игнорирования ограничения лутания!", "MsgAdminLootDisabled": "Вы удалены из списка игнорирования ограничения лутания!", "MsgTeamFFireEnabled": "{0} включил дружественный огонь!", "MsgTeamFFireDisabled": "{0} выключил дружественный огонь!", "MsgMonumentOccupied": "{1} занял {0} на {2} минут.", "MsgMonumentFree": "{0} можно лутать!", "MsgMonumentOfferTitle": "Откройте сокровища {0}!", "MsgMonumentOfferDescription": "Нажми на уведомление для оплаты {0}.\nИ разблокируй доступ к неизведанным богатствам!", "MsgMonumentLooterDeath": "Вы умерли во время лутания {0}. У вас есть {1} секунд.", "MsgMonumentLooterExit": "Вы покинули монумент. У вас есть {0} секунд на возвращение!", "MsgMonumentLooterRemoved": "Время вышло! Вы были удалены из монумента!", "MsgMonumentLootingNotFree": "Вас добавили в очередь на лутание. Стоимость лутания: {0}", "MsgMonumentNotInQueue": "Вас нет в очереди! Вам необходимо перезайти в монумент!", "MsgMonumentNoAccess": "нет доступа", "MsgEventOccupied": "{0} уже занят игроком {1}!", "MsgEventOfferTitle": "Займите {0}!", "MsgEventOfferDescription": "Нажми на уведомление для оплаты {0}.\nИ разблокируй доступ к неизведанным богатствам!", "MsgEventNewLooter": "Вы заняли {0}. У вас на команду есть {1} жизней.", "MsgEventDeathLimit": "{0} больше не ваше! Вы исчерпали свой лимит жизней!", "MsgEventComplete": "{0} уничтожен в координатах: {1}!", "MsgEventPatrolHelicopter": "Патрульный вертолет", "MsgEventBradleyAPC": "Танк", "MsgRaidableBasesDisabled": "Эта Рейд база выключена или не найдена!", "MsgRaidableBasesOccupied": "Эта Рейд база уже занята игроком {0}!", "MsgRaidableBasesLimit": "Лимит превышен! У вас {0} из {1} доступных Рейд баз.", "MsgRaidableBasesPurchaseStart": "Оплата прошла! Ожидайте...", "MsgRaidableBasesPurchased": "Вы успешно приобрели Рейд базу!", "MsgRaidableBasesPurchaseFailed": "Вам не удалось приобрести Рейд базу! Деньги возвращены.", "MsgRaidableBasesOfferTitle": "Займите Рейд базу уровня: {0}!", "MsgRaidableBasesOfferDescription": "Нажми на уведомление для оплаты {0}.\nИ разблокируй доступ к неизведанным богатствам!", "MsgRaidableBasesBarText": "Уровень: {0}", "MsgRaidableBasesBarTextLootRemaining": "Осталось лута", "MsgRaidableBasesBarTextLootCompleted": "Выполнено", "MsgRaidableBasesBarNoAccess": "нет доступа", "MsgRaidableBasesEasy": "Легко", "MsgRaidableBasesMedium": "Средне", "MsgRaidableBasesHard": "Сложно", "MsgRaidableBasesExpert": "Эксперт", "MsgRaidableBasesNightmare": "Кошмар", "MsgPrivlidgeClear": "Из шкафа выписано {0} ироков.", "MsgPrivlidgeClearEmpty": "Кроме вас в шкафу ни кто не авторизован.", "MsgVehicleDialogTitle": "ГИБДД", "MsgVehicleDialogDescription": "ID: \nТип: \nСтоимость регистрации: \nКатегория: ", "MsgVehicleDialogDescriptionValue": "<b>{0}</b>\n<b>{1}</b>\n<b>{4}</b>\n<b>{2}</b>", "MsgVehicleDialogDescriptionRegistered": "ID: \nТип: \nДата регистрации: \nКатегория: ", "MsgVehicleDialogDescriptionRegisteredValue": "<b>{0}</b>\n<b>{1}</b>\n<b>{3}</b>\n<b>{2}</b>", "MsgVehicleDialogDescriptionNotOwner": "ID: \nВладелец: \nДата регистрации: \nТип: \nКатегория: ", "MsgVehicleDialogDescriptionNotOwnerValue": "<b>{0}</b>\n<b>{4}</b>\n<b>{3}</b>\n<b>{1}</b>\n<b>{2}</b>", "MsgVehicleCarDialogDescription": "ID: \nТип: \nСтоимость регистрации: \nКатегория: ", "MsgVehicleCarDialogDescriptionValue": "<b>{0}</b>\n<b>{1}</b>\n<b>{4}</b>\n<b>{2}</b>", "MsgVehicleCarDialogDescriptionRegistered": "ID: \nТип: \nДата: \nКатегория: ", "MsgVehicleCarDialogDescriptionRegisteredValue": "<b>{0}</b>\n<b>{1}</b>\n<b>{3}</b>\n<b>{2}</b>", "MsgVehicleCarDialogDescriptionNotOwner": "ID: \nВладелец: \nДата: \nТип: \nКатегория: ", "MsgVehicleCarDialogDescriptionNotOwnerValue": "<b>{0}</b>\n<b>{4}</b>\n<b>{3}</b>\n<b>{1}</b>\n<b>{2}</b>", "MsgVehicleCarGarageEmpty": "Подъемник пустой!", "MsgVehicleDialogLink": "Поставить на учет", "MsgVehicleDialogUnLink": "Снять с учета", "MsgVehicleDialogIncorrectPassword": "Пароль должен состоять из 4-х цифр!", "MsgVehicleNotOwner": "Вы не являетесь владельцем!", "MsgVehicleCanNotInteract": "Вы не являетесь владелецем или его другом!", "MsgVehicleNoPermissions": "У вас нет прав для этого действия!", "MsgVehicleLinked": "{0} успешно привязан(а)! У вас {1} из {2} доступных.", "MsgVehicleUnLinked": "{0} успешно отвязан(а)!", "MsgVehicleFailedDeauthorize": "Вы можете выписаться только при отвязки транспорта от вас.", "MsgVehicleLimit": "Лимит превышен! У вас {1} из {2} доступных.", "MsgVehicleDestroyed": "Ваше транспортное средство {0}({1}) было уничтожено!", "MsgVehicleFind": "Ваше транспортное средство {0} находится в квадрате {1}!", "MsgVehicleClear": "Удалено {0} транспортных средств!", "MsgVehicleClearEmpty": "Транспортные средства для удаления не найдены!", "MsgVehicleNotFound": "Транспортное средство не найдено!", "MsgVehicleTugboatAuthorization": "Для авторизации в буксире, его необходимо поставить на учет!", "MsgVehicleLandVehicle": "Наземный", "MsgVehicleAirVehicle": "Воздушный", "MsgVehicleWaterVehicle": "Водный", "MsgVehicleWinterVehicle": "Зимний", "MsgVehicleTrainVehicle": "ЖД", "MsgVehicleHorse": "Лошадь", "MsgVehicleBike": "Велосипед", "MsgVehicleMotorBike": "Мотоцикл", "MsgVehicleCar": "Машина", "MsgVehicleBalloon": "Воздушный шар", "MsgVehicleMinicopter": "Мини коптер", "MsgVehicleTransportHeli": "Корова", "MsgVehicleAttackHeli": "Боевой вертолет", "MsgVehicleRowBoat": "Лодка", "MsgVehicleRHIB": "Патрульная лодка", "MsgVehicleTugBoat": "Буксир", "MsgVehicleSubmarineOne": "Маленькая подлодка", "MsgVehicleSubmarineTwo": "Подлодка", "MsgVehicleSnowmobile": "Снегоход", "MsgVehicleTrain": "Поезд", "MsgFree": "Бесплатно", "MsgNoDate": "пусто", "MsgEconomicsNotEnough": "Не достаточно средств!" } admin: loot - Enables or disables the ability for the player who enter the command to loot other players' boxes, bodies, backpacks, etc. Permission "realpve.admin" required. vehicle: find - helps to find a player's vehicle; unlink - unlinks the vehicle without the need to approach it; clear - unlinks all vehicles. team: ff - Enable/Disable damage to teammates. Only the group leader can use this command. Example: /realpve vehicle find *netID* This plugin provides the ability to claim vehicles, thereby preventing theft and griefing from other players. In permissions, you can set the price and quantity restrictions for each type of vehicle, ensuring flexible customization according to your preferences. An assigned vehicle can't be damaged, looted or pushed by other players, but it can be pushed if it is within someone else's Building Privilege. File location: *SERVER*\oxide\data\RealPVE\MonumentConfig.json Default: https://pastebin.com/XY1d9YaM This plugin introduces queue system and loot purchases for monuments. You can customize the price and time for looting for each monument. Within monuments, only the "Looter" and his friends have the ability to loot, pick up items or damage entities. Additionally, NPCs and animals within monuments do not aggress against other players and do not receive damage from them. If a player dies within the monument, they will have a grace period to return. This allows players to safely loot monuments without fear of griefing. Example of monument configuration: "ferry_terminal_1": { "Type(This parameter is just a hint. Changes won’t have any effect.)": "RadTown", "ShowSuffix": true, "Broadcast": true, "LootingTime": 900, "Price": 15.0, "BarSettings": { "Order": 10, "Height": 26, "Main_Color": "#FFBF99", "Main_Transparency": 0.8, "Main_Material": "", "Image_Url": "https://i.imgur.com/awUrIwA.png", "Image_Local(Leave empty to use Image_Url)": "RealPVE_ferry_terminal_1", "Image_Sprite(Leave empty to use Image_Local or Image_Url)": "", "Image_IsRawImage": false, "Image_Color": "#FFDCB6", "Image_Transparency": 1.0, "Text_Size": 12, "Text_Color": "#FFFFFF", "Text_Font": "RobotoCondensed-Bold.ttf", "SubText_Size": 12, "SubText_Color": "#FFFFFF", "SubText_Font": "RobotoCondensed-Bold.ttf" } } Type - This field serves only as an indicator for you. The changes won't have any impact; ShowSuffix - Suffix display. Some monuments (for example Warehouses) have suffixes in the name, like "Warehouse #12"; Broadcast - Enabling or disabling broadcasts when a monument is occupied or vacated; LootingTime - Time allocated for looting the monument; Price - The price for which you can start looting the monument. 0 means looting is free; BarSettings - Settings for the Advanced Status Bar. You can also choose the types of monuments by specifying them under the "List of tracked types of monuments" section. A list of all available types can be viewed on the MonumentsWatcher's page in the "Developer API" section. "List of tracked types of monuments": [ "RadTown", "RadTownWater", "RadTownSmall", "TunnelStation", "Custom" ] Events, similar to monuments, offer the opportunity to claim events. All events are configured in the config file under the "Settings for the events" section. You can customize the price of looting and looting attempts(deaths, including friends). Just like in monuments, only the "Looter" and his friends have the ability to loot and damage entities. Additionally, in events, NPCs do not aggress against other players. If a player(including friends) exceeds the death limit, the event became free, thereby providing other players with the opportunity to claim the event. Example of event configuration: "Settings for the events": { "PatrolHelicopter": { "IsEnabled": true, "Is it worth removing fire from crates?": true, "Price": 50.0, "The number of deaths after which the event becomes public.": 5 }, "BradleyAPC": { "IsEnabled": true, "Is it worth removing fire from crates?": true, "Price": 50.0, "The number of deaths after which the event becomes public.": 5 } } Price - The price to claim the event. 0 means looting is free; DeathLimit - Limit of deaths after which the event becomes free. File location: *SERVER*\oxide\data\RealPVE\NewbieConfig.json Default: https://pastebin.com/QHZCqpji An example of an item list given for the main inventory: "List of items for the main inventory": [ { "ShortName": "note", "Slot": 0, "Amount": 1, "SkinID": 0, "Text": "MsgNoteText" } ] P.S. In the Text field, you need to specify the language key. Or, you can just write any text, but there won't be a translation of the text. File location: *SERVER*\oxide\data\RealPVE\RaidableBasesConfig.json Default: https://pastebin.com/rpDng7Fd Integration with the RaidableBases plugin does not restrict its functionality in any way. On the contrary, it adds an anti-grief system that protects bases from malicious players. In raid bases, NPCs and other entities can only receive damage from the raid owner or their friends; Turrets and traps do not aggress against outsiders; You can customize the price of claiming to each difficulty and set individual discounts for each permission. You can still purchase raid bases using the /buyraid command. Raid bases without owners(buyable, maintained, manual and scheduled) can be bought for a price set in the configuration file or assigned to the first player who enters its radius, if the final price(price * discount) less or equals to 0. Additionally, as a bonus, upon buying this plugin, you receive 5 free bases for 3 difficulty levels, along with configured loot for them.$39.99 -
Version 0.1.5
303 downloads
A plugin creating a trigger box around Monuments and CargoShips to track entry and exit of players, npcs and entities from it. The list of all monuments can be viewed in the: Vanilla - *SERVER*\oxide\data\MonumentsWatcher\MonumentsBounds.json Custom - *SERVER*\oxide\data\MonumentsWatcher\CustomMonumentsBounds.json Note: MonumentsWatcher is utilized as an API for other plugins. You won't obtain any functionality beyond displaying monument boundaries without an additional plugin. The ability to automatically generate boundaries for vanilla and custom monuments; The ability to automatically regenerate boundaries for monuments on wipe; The ability to automatically adding languages for custom monuments; The ability to manually configure boundaries for monuments; The ability to track the entrance and exit of players, npcs and entities in a Monument and CargoShip; The ability to display boundaries. monumentswatcher.admin - Provides the capability to recreate or display monument boundaries. { "MonumentsWatcher command": "monument", "Use GameTip for messages?": true, "Is it worth recreating boundaries(excluding custom monuments) upon detecting a wipe?": true, "List of tracked types of monuments. Leave blank to track all": [], "Wipe ID": null, "Version": { "Major": 0, "Minor": 1, "Patch": 5 } } Monument bounds example: "airfield_1": { "Center": { "x": 335.881531, "y": 9.936, "z": 2096.53345 }, "CenterOffset": { "x": 0.0, "y": 15.0, "z": -25.0 }, "Size": { "x": 360.0, "y": 60.0, "z": 210.0 }, "Rotation": { "x": 0.0, "y": 44.06058, "z": 0.0 } }, ... Custom Monument bounds example: "exit69": { "MonumentType": 12, "Center": { "x": 336.676483, "y": 47.65218, "z": -39.02194 }, "CenterOffset": { "x": 0.0, "y": 0.0, "z": 0.0 }, "Size": { "x": 100.0, "y": 100.0, "z": 100.0 }, "Rotation": { "x": 0.0, "y": 0.0, "z": 0.0 } }, ... Note: MonumentType can be found in the Developer API section. ENG: https://pastebin.com/nsjBCqZe RUS: https://pastebin.com/ut2icv9T Note: After initialization, the names of custom monuments will also be added here. rotation - Sets the monument rotation based on the argument or the player's view direction; recreate - Recreating boundaries for all monuments; show - Displays the boundaries of the monument in which the player is located, either by specified ID or key. Example: Rotation: /monument rotation - Rotation of the monument towards the player's head direction, in which the player is located /monument rotation gas_station_1_0 256.5 - Monument rotation with specified arguments: monument ID and Y coordinate Display by monument key(Will display all monuments with such a key): /monument show gas_station_1 Display by monument ID(Will display one monument with the specified ID): /monument show gas_station_1_4 void OnMonumentsWatcherLoaded() Called when the MonumentsWatcher plugin has fully loaded. void OnCargoWatcherCreated(string monumentID, string type) Called when a watcher is created for a CargoShip. void OnCargoWatcherDeleted(string monumentID) Called when a watcher is removed for a CargoShip. void OnMonumentsWatcherLoaded() { Puts("MonumentsWatcher plugin is ready!"); } void OnCargoWatcherCreated(string monumentID, string type) { Puts($"Watcher for monument {monumentID}({type}) has been created!"); } void OnCargoWatcherDeleted(string monumentID) { Puts($"Watcher for monument {monumentID} has been deleted!"); } Entered hooks: void OnPlayerEnteredMonument(string monumentID, BasePlayer player, string type, string oldMonumentID) Called when a player enters any monument void OnNpcEnteredMonument(string monumentID, BasePlayer npcPlayer, string type, string oldMonumentID) Called when an NPC player enters any monument void OnEntityEnteredMonument(string monumentID, BaseEntity entity, string type, string oldMonumentID) Called when any other BaseEntity enters any monument void OnPlayerEnteredMonument(string monumentID, BasePlayer player, string type, string oldMonumentID) { Puts($"{player.displayName} entered to {monumentID}({type}). His previous monument was {oldMonumentID}"); } void OnNpcEnteredMonument(string monumentID, BasePlayer npcPlayer, string type, string oldMonumentID) { Puts($"Npc({npcPlayer.displayName}) entered to {monumentID}({type}). Previous monument was {oldMonumentID}"); } void OnEntityEnteredMonument(string monumentID, BaseEntity entity, string type, string oldMonumentID) { Puts($"Entity({entity.net.ID}) entered to {monumentID}({type}). Previous monument was {oldMonumentID}"); } Exited hooks: void OnPlayerExitedMonument(string monumentID, BasePlayer player, string type, string reason, string newMonumentID) Called when a player exits any monument void OnNpcExitedMonument(string monumentID, BasePlayer npcPlayer, string type, string reason, string newMonumentID) Called when an NPC player exits any monument void OnEntityExitedMonument(string monumentID, BaseEntity entity, string type, string reason, string newMonumentID) Called when any other BaseEntity exits any monument void OnPlayerExitedMonument(string monumentID, BasePlayer player, string type, string reason, string newMonumentID) { Puts($"{player.displayName} left from {monumentID}({type}). Reason: {reason}. They are now at '{newMonumentID}'."); } void OnNpcExitedMonument(string monumentID, BasePlayer npcPlayer, string type, string reason, string newMonumentID) { Puts($"Npc({npcPlayer.displayName}) left from {monumentID}({type}). Reason: {reason}. They are now in {newMonumentID}"); } void OnEntityExitedMonument(string monumentID, BaseEntity entity, string type, string reason, string newMonumentID) { Puts($"Entity({entity.net.ID}) left from {monumentID}({type}). Reason: {reason}. They are now in {newMonumentID}"); } [PluginReference] private Plugin MonumentsWatcher; There are 13 types of monuments: SafeZone(0): Bandit Camp, Outpost, Fishing Village, Ranch and Large Barn. RadTown(1): Airfield, Arctic Research Base, Abandoned Military Base, Giant Excavator Pit, Ferry Terminal, Harbor, Junkyard, Launch Site; Military Tunnel, Missile Silo, Power Plant, Sewer Branch, Satellite Dish, The Dome, Train Yard, Water Treatment Plant. RadTownWater(2): Oil Rig, Underwater Lab and CargoShip. RadTownSmall(3): Lighthouse, Oxum's Gas Station, Abandoned Supermarket and Mining Outpost. TunnelStation(4) MiningQuarry(5): Sulfur Quarry, Stone Quarry and HQM Quarry. BunkerEntrance(6) Cave(7) Swamp(8) IceLake(9) PowerSubstation(10) WaterWell(11) Custom(12) There are 21 api methods: GetMonumentDisplayName: Used to retrieve the nice name of the monument, considering the player's language. Returns an empty string on failure. To call the GetMonumentDisplayName method, you need to pass 3 parameters: monumentID as a string; userID as either a string or a ulong. You can provide 0 or empty string to get default(eng) language; displaySuffix() as a bool. Should the suffix be displayed in the name if there are multiple such monuments? This parameter is optional. (string)MonumentsWatcher?.Call("GetMonumentDisplayName", monumentID, player.userID, true); (string)MonumentsWatcher?.Call("GetMonumentDisplayName", monumentID, player.UserIDString, true); GetMonumentType: Used to retrieve the monument type. Returns an empty string on failure. To call the GetMonumentType method, you need to pass 1 parameter: monumentID as a string. (string)MonumentsWatcher?.Call("GetMonumentType", monumentID); GetMonumentPosition: Used to retrieve the position of the monument. Returns Vector3.zero on failure. To call the GetMonumentPosition method, you need to pass 1 parameter: monumentID as a string. (Vector3)MonumentsWatcher?.Call("GetMonumentPosition", monumentID); GetMonumentsList: Used to retrieve an array of monumentIDs for all available monuments. (string[])MonumentsWatcher?.Call("GetMonumentsList"); GetMonumentsTypeDictionary: Used to retrieve a dictionary of all available monuments with their types. (Dictionary<string, string>)MonumentsWatcher?.Call("GetMonumentsTypeDictionary"); GetMonumentsByType: Used to retrieve an array of all available monuments by type. To call the GetMonumentsByType method, you need to pass 1 parameter: monument type as a string. (string[])MonumentsWatcher?.Call("GetMonumentsByType", "SafeZone"); GetMonumentPlayers: Used to retrieve a list of players in the monument. Returns null on failure. To call the GetMonumentPlayers method, you need to pass 1 parameter: monumentID as a string. (HashSet<BasePlayer>)MonumentsWatcher?.Call("GetMonumentPlayers", monumentID); GetMonumentNpcs: Used to retrieve a list of npc players in the monument. Returns null on failure. To call the GetMonumentNpcs method, you need to pass 1 parameter: monumentID as a string. (HashSet<BasePlayer>)MonumentsWatcher?.Call("GetMonumentNpcs", monumentID); GetMonumentEntities: Used to retrieve a list of entities in the monument. Returns null on failure. To call the GetMonumentEntities method, you need to pass 1 parameter: monumentID as a string. (HashSet<BaseEntity>)MonumentsWatcher?.Call("GetMonumentEntities", monumentID); GetPlayerMonument: Used to retrieve the monumentID of the monument in which the player is located. Returns an empty string on failure. To call the GetPlayerMonument method, you need to pass 1 parameter: player as BasePlayer or userID as a ulong. (string)MonumentsWatcher?.Call("GetPlayerMonument", player); (string)MonumentsWatcher?.Call("GetPlayerMonument", player.userID); GetNpcMonument: Used to retrieve the monumentID of the monument in which the npc player is located. Returns an empty string on failure. To call the GetNpcMonument method, you need to pass 1 parameter: npcPlayer as BasePlayer or NetworkableId. (string)MonumentsWatcher?.Call("GetNpcMonument", npcPlayer); (string)MonumentsWatcher?.Call("GetNpcMonument", npcPlayer.net.ID); GetEntityMonument: Used to retrieve the monumentID of the monument in which the entity is located. Returns an empty string on failure. To call the GetEntityMonument method, you need to pass 1 parameter: entity as a BaseEntity or NetworkableId. (string)MonumentsWatcher?.Call("GetEntityMonument", entity); (string)MonumentsWatcher?.Call("GetEntityMonument", entity.net.ID); GetPlayerMonuments: Used to retrieve an array of monumentIDs for the monuments in which the player is located. Returns null on failure. To call the GetPlayerMonuments method, you need to pass 1 parameter: player as BasePlayer or userID as a ulong. (string[])MonumentsWatcher?.Call("GetPlayerMonuments", player); (string[])MonumentsWatcher?.Call("GetPlayerMonuments", player.userID); GetNpcMonuments: Used to retrieve an array of monumentIDs for the monuments in which the npc player is located. Returns an null on failure. To call the GetNpcMonuments method, you need to pass 1 parameter: npcPlayer as BasePlayer or NetworkableId. (string[])MonumentsWatcher?.Call("GetNpcMonuments", npcPlayer); (string[])MonumentsWatcher?.Call("GetNpcMonuments", npcPlayer.net.ID); GetEntityMonuments: Used to retrieve an array of monumentID for the monuments in which the entity is located. Returns an null on failure. To call the GetEntityMonuments method, you need to pass 1 parameter: entity as a BaseEntity or NetworkableId. (string[])MonumentsWatcher?.Call("GetEntityMonuments", entity); (string[])MonumentsWatcher?.Call("GetEntityMonuments", entity.net.ID); GetMonumentByPos: Used to obtain the monumentID based on coordinates. Returns an empty string on failure. To call the GetMonumentByPos method, you need to pass 1 parameter: position as a Vector3. (string)MonumentsWatcher?.Call("GetMonumentByPos", pos); IsPosInMonument: Used to check if the specified position is within the monument. Returns a false on failure. To call the IsPosInMonument method, you need to pass 2 parameters: monumentID as a string; position as a Vector3. (bool)MonumentsWatcher?.Call("IsPosInMonument", monumentID, pos); IsPlayerInMonument: Used to check if the player is in the monument. Returns a false on failure. To call the IsPlayerInMonument method, you need to pass 2 parameters: monumentID as a string; player as a BasePlayer or userID as a ulong. (bool)MonumentsWatcher?.Call("IsPlayerInMonument", monumentID, player); (bool)MonumentsWatcher?.Call("IsPlayerInMonument", monumentID, player.userID); IsNpcInMonument: Used to check if the npc player is in the monument. Returns a false on failure. To call the IsNpcInMonument method, you need to pass 2 parameters: monumentID as a string; npcPlayer as a BasePlayer or NetworkableId. (bool)MonumentsWatcher?.Call("IsNpcInMonument", monumentID, npcPlayer); (bool)MonumentsWatcher?.Call("IsNpcInMonument", monumentID, npcPlayer.net.ID); IsEntityInMonument: Used to check if the entity is in the monument. Returns a false on failure. To call the IsEntityInMonument method, you need to pass 2 parameters: monumentID as a string; entity as a BaseEntity or NetworkableId. (bool)MonumentsWatcher?.Call("IsEntityInMonument", monumentID, entity); (bool)MonumentsWatcher?.Call("IsEntityInMonument", monumentID, entity.net.ID); ShowBounds: Used to display the monument boundaries to the player. Note: Since an Admin flag is required for rendering, players without it will be temporarily granted an Admin flag and promptly revoked. To call the ShowBounds method, you need to pass 3 parameters: monumentID as a string; player as a BasePlayer; displayDuration as a float. Duration of displaying the monument boundaries in seconds. This parameter is optional. MonumentsWatcher?.Call("ShowBounds", monumentID, player, 20f);$1.99 -
Version 2.0.3
185 downloads
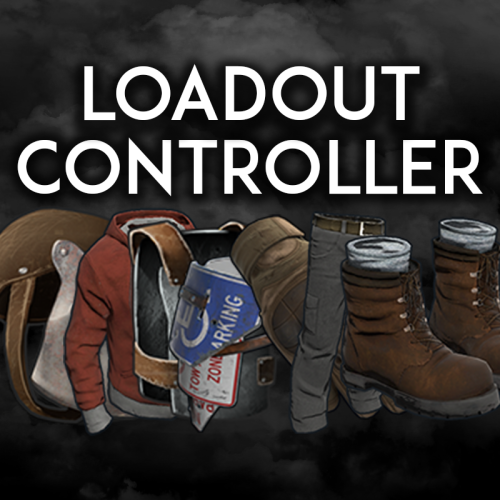
Loadout controller is made to assist in allowing your battlefield or even PVE community to thrive with customizable loadouts. FEATURES - Multiple permission groups - You can set different saveable items for each permission group - You can set different default loadouts for each permission group - You can set the amount of saveable personal loadouts for each permission group - You can limit the amount of items that are able to be saved in each permission group - Very nice UI that tells you what can and cannot be saved and if a partial bit of a stack can be saved - You can view what is in your loadout right in the UI - Supports multiple loadouts for each player - Admins can set new loadouts for each permission group right in the UI - Automatically applies loadout on respawn$19.99 -
Version 1.0.0
12 downloads
This plugin allows you to set how many times per day players can raid bases. It is a very straight forward plugin with lots of features to customize it for your server such as scheduled reset times, custom UI, and protection options. Features: Limit number of raids that players can perform daily Scheduled reset times, even when server is offline Limit sync with teams and clans Assign bonus raid points to individuals Damage thresholds for raids Configurable messages Customizable UI Works with Simple Status Works with Clans Works with protection plugins (configurable) Documentation: A full readme including permissions, command, and config options is available in this google doc link. Disclaimer: Like all of my plugins - this plugin is sold as is. I will be happy to take feature requests into consideration but make no guarantees about which ones get implemented. Please refer to the feature list before you make your purchase$14.99 -

Version 1.0.1
14 downloads
Allows both PVE and PVP players to exist on a server at the same time. PVE players will have certain configurable protections and restrictions. You can have players use a command to flag themselves as PVP/PVE or you can assign it to them when they first spawn. If you have ZoneManager you can also designate specific zones to force player's to be PVE or PVP. Plugin is also compatible with SimpleStatus. Note: features shown in video are configurable! Features: Designate players as PvE or PvP PvE players have configurable protections Players can opt into PvP or PvE via a command SimpleStatus compatible ZoneManager compatible Marker shown on HUD that indicates if a player is a PvE player when you aim a weapon at them Optional UI to show what the configurable protections for PvE player are Documentation: A full readme including permissions, commands, and config options is available in this google doc link. Disclaimer: Like all of my plugins - this plugin is sold as is. I will be happy to take feature requests into consideration but make no guarantees about which ones get implemented. Please refer to the feature list before you make your purchase! Extension Plugins: War Mode Spawn UI Provides a UI that is shown to players when they first spawn that prompts them to choose whether they want to be PVP or PVE. Localization and config options available. Download$14.99 -

Version 1.7.1
71 downloads
During the Unlimited Metal Event, a large Metal node appears at a set location(s) and is marked on the map, drawing attention to all players. This node provides unlimited Metal, giving players a chance to collect a significant amount of Metal within a limited time. This event can add an extra layer of competition and cooperation among your players as they rush to take advantage of these lucrative opportunities. Features Spawns an unlimited metal node/ore for a limited time. Ability to start the MetalEvent manually or automatically at minimum and maximum intervals. Configuration options for MetalEvent duration, minimum player count, UI location, and more. Customizable event start and end messages. Option to play a sound and visual effect when the event starts. Map markers and UI elements to indicate the active event and provide information to players. Game tips and chat messages to inform players about the event. Ability to set and manage metal node spawn positions. Commands to manage the MetalEvent, including starting and stopping the event, setting spawn positions, listing positions, deleting positions, and viewing available commands. Event Overlap Prevention: Prevents the MetalEvent from overlapping with the Stone/Sulfur Event. If overlap occurs, the plugin will retry starting the event after a configurable interval. User Interface: UI customization options include setting the UI location with X and Y coordinates. Enable proximity UI visibility mode and/or a "Players Here: X" Proximity UI. Gather Amounts: Set minimum and maximum gather amounts for sulfur ore and charcoal to control player rewards. Lightning Effects: Enable lightning effects during the event with customizable minimum and maximum intervals. Monument Spawn Locations: Added monument spawn locations that can be individually enabled or disabled. Customize spawns at specific monuments while excluding others (e.g., enable spawns at "xlarge/launch_site_1.prefab" and "medium/nuclear_missile_silo.prefab," but disable spawns at "OilrigAI" and "OilrigAI2"). Monument Spawn Limits: Set a limit for the number of spawns at each monument. For example, limit "roadside/gas_station_1.prefab" to 2 spawns, choosing from 3 Gas Stations if available. Monument Spawn Location Offsets: Customize the offsets for monument spawn locations to fine-tune the exact spawn positions at each monument. Commands /metalevent start - Start MetalEvent /metalevent stop - Stop MetalEvent /metalevent add <name> - Set new MetalEvent spawn position /metalevent list - List all spawn positions /metalevent clear - Clear all spawn positions /metalevent delete <name> - Delete a spawn position /metalevent - View all commands Console Commands - MetalStart, MetalStop, MetalList, MetalListClear Permissions metalevent.admin - Allows the use of MetalEvent commands.' Incompatible plugins: "AlwaysHotSpot" , "InstantGather" Default Config { "Only Command Start Event": false, "Minimum Players to Start Event": 1, "Prevent Overlap with Sulfur/Stone Event": true, "Prevent Overlap Retry Timer (seconds)": 180.0, "Event Minimum Interval (seconds)": 3600, "Event Maximum Interval (seconds)": 7200, "Event Duration Seconds": 1230, "Event Start Notification Sound": true, "Event Start Explosion Effects": true, "Event Chat Messages": true, "Event GameTip Messages": true, "Event GameTip Duration (seconds)": 7.0, "Event Start Message": "<color=red>Metal Event</color> <color=white>Has Started! Check The Map!</color>", "Event End Message": "<color=red>Metal Event</color> <color=white>Has Ended!</color>", "UI Enabled": true, "UI Location X": 0.38, "UI Location Y": 0.8, "UI Handwriting Font": true, "UI Style (1 = With UI Msg, 2 = No UI Msg)": 1, "UI Message": "Unlimited metal node marked on map!", "Proximity UI Visibility Mode": false, "Proximity UI Visibility Range": 350, "Proximity UI 'Players Here: X'": true, "Proximity UI 'Players Here' Visibility Range": 70, "MapMarker Enabled": true, "MapMarker Colour": "#050505", "MapMarker Colour2": "#FF0000", "MapMarker Radius": 0.25, "MapMarker Alpha": 0.7, "MapMarker Name/Message": "UNLIMITED METAL NODE", "Metal Ore Minimum Gather Amount": 1, "Metal Ore Maximum Gather Amount": 10, "HQM Ore Minimum Gather Amount": 0, "HQM Ore Maximum Gather Amount": 3, "Delete MetalNode at Event End": true, "MetalNode is Gatherable": true, "MetalNode Size 1-100": 30, "MetalNode Size Radius": 0.1, "Lightning during Event": true, "Lightning Min Interval (seconds)": 1.0, "Lightning Max Interval (seconds)": 60.0, "MetalNode Spawnmodes ('All' or 'Random')": "Random", "MetalNode Spawnmode 'Random' Amount": 2, "Monument Spawn Locations": { "xlarge/launch_site_1.prefab": true, "medium/nuclear_missile_silo.prefab": true, "large/military_tunnel_1.prefab": true, "large/airfield_1.prefab": true, "small/sphere_tank.prefab": true, "large/water_treatment_plant_1.prefab": true, "railside/trainyard_1.prefab": true, "medium/radtown_small_3.prefab": true, "roadside/gas_station_1.prefab": true, "roadside/supermarket_1.prefab": true, "large/powerplant_1.prefab": true, "lighthouse/lighthouse.prefab": true, "roadside/warehouse.prefab": true, "medium/junkyard_1.prefab": true, "small/satellite_dish.prefab": true, "harbor/harbor_1.prefab": true, "harbor/harbor_2.prefab": true, "arctic_bases/arctic_research_base_a.prefab": true, "military_bases/desert_military_base_a.prefab": false, "military_bases/desert_military_base_b.prefab": false, "military_bases/desert_military_base_c.prefab": false, "military_bases/desert_military_base_d.prefab": false, "OilrigAI": false, "OilrigAI2": false, "ferry_terminal_1": false }, "Monument Spawn Limits": { "xlarge/launch_site_1.prefab": 1, "medium/nuclear_missile_silo.prefab": 1, "large/military_tunnel_1.prefab": 1, "large/airfield_1.prefab": 1, "small/sphere_tank.prefab": 1, "large/water_treatment_plant_1.prefab": 1, "railside/trainyard_1.prefab": 1, "medium/radtown_small_3.prefab": 1, "roadside/gas_station_1.prefab": 3, "roadside/supermarket_1.prefab": 3, "large/powerplant_1.prefab": 1, "lighthouse/lighthouse.prefab": 2, "roadside/warehouse.prefab": 3, "medium/junkyard_1.prefab": 1, "small/satellite_dish.prefab": 1, "harbor/harbor_1.prefab": 1, "harbor/harbor_2.prefab": 1, "arctic_bases/arctic_research_base_a.prefab": 1, "military_bases/desert_military_base_a.prefab": 1, "military_bases/desert_military_base_b.prefab": 1, "military_bases/desert_military_base_c.prefab": 1, "military_bases/desert_military_base_d.prefab": 1, "OilrigAI": 1, "OilrigAI2": 1, "ferry_terminal_1": 1 }, "Monument Spawn Location Offsets": { "xlarge/launch_site_1.prefab": { "x": 150.0, "y": 3.5, "z": -7.5 }, "medium/nuclear_missile_silo.prefab": { "x": 53.3, "y": -13.2, "z": 1.1 }, "large/military_tunnel_1.prefab": { "x": -0.5, "y": 18.35, "z": 25.0 }, "large/airfield_1.prefab": { "x": 20.0, "y": 0.5, "z": -27.5 }, "small/sphere_tank.prefab": { "x": 0.0, "y": 72.0, "z": 0.0 }, "large/water_treatment_plant_1.prefab": { "x": -51.9, "y": 1.5, "z": -98.8 }, "railside/trainyard_1.prefab": { "x": -36.3, "y": 9.1, "z": -33.0 }, "medium/radtown_small_3.prefab": { "x": -21.5, "y": 1.1, "z": -4.5 }, "roadside/gas_station_1.prefab": { "x": 8.4, "y": 9.5, "z": 5.0 }, "roadside/supermarket_1.prefab": { "x": 10.0, "y": 6.0, "z": -3.5 }, "large/powerplant_1.prefab": { "x": -8.0, "y": 0.5, "z": 38.0 }, "lighthouse/lighthouse.prefab": { "x": 0.0, "y": 57.7, "z": 0.36 }, "roadside/warehouse.prefab": { "x": 20.0, "y": 0.3, "z": -7.7 }, "medium/junkyard_1.prefab": { "x": 24.0, "y": 0.3, "z": 0.0 }, "small/satellite_dish.prefab": { "x": 8.0, "y": 6.5, "z": -14.7 }, "harbor/harbor_1.prefab": { "x": 8.1, "y": 8.6, "z": 6.3 }, "harbor/harbor_2.prefab": { "x": 41.5, "y": 5.3, "z": -20.0 }, "arctic_bases/arctic_research_base_a.prefab": { "x": -32.8, "y": 1.85, "z": 5.5 }, "military_bases/desert_military_base_a.prefab": { "x": 0.0, "y": 2.0, "z": 0.0 }, "military_bases/desert_military_base_b.prefab": { "x": 0.0, "y": 2.0, "z": 0.0 }, "military_bases/desert_military_base_c.prefab": { "x": 0.0, "y": 2.0, "z": 0.0 }, "military_bases/desert_military_base_d.prefab": { "x": 0.0, "y": 2.0, "z": 0.0 }, "OilrigAI": { "x": 11.0, "y": 30.3, "z": -25.0 }, "OilrigAI2": { "x": -1.3, "y": 39.15, "z": -14.95 }, "ferry_terminal_1": { "x": 0.0, "y": 2.0, "z": 0.0 } } }$6.47 -
Version 1.7.1
48 downloads
During the Unlimited Stone Event, a large stone node appears at a set location(s) and is marked on the map, drawing attention to all players. This node provides unlimited stone, giving players a chance to collect a significant amount of stone within a limited time. This event can add an extra layer of competition and cooperation among your players as they rush to take advantage of these lucrative opportunities. Features Spawns an unlimited stone node/ore for a limited time. Ability to start the StoneEvent manually or automatically at minimum and maximum intervals. Configuration options for StoneEvent duration, minimum player count, UI location, and more. Customizable event start and end messages. Option to play a sound and visual effect when the event starts. Map markers and UI elements to indicate the active event and provide information to players. Game tips and chat messages to inform players about the event. Ability to set and manage stone node spawn positions. Commands to manage the StoneEvent, including starting and stopping the event, setting spawn positions, listing positions, deleting positions, and viewing available commands. Event Overlap Prevention: Prevents the Stone Event from overlapping with the Metal/Sulfur Event. If overlap occurs, the plugin will retry starting the event after a configurable interval. User Interface: UI customization options include setting the UI location with X and Y coordinates. Enable proximity UI visibility mode and/or a "Players Here: X" Proximity UI. Gather Amounts: Set minimum and maximum gather amounts for sulfur ore and charcoal to control player rewards. Lightning Effects: Enable lightning effects during the event with customizable minimum and maximum intervals. Monument Spawn Locations: Added monument spawn locations that can be individually enabled or disabled. Customize spawns at specific monuments while excluding others (e.g., enable spawns at "xlarge/launch_site_1.prefab" and "medium/nuclear_missile_silo.prefab," but disable spawns at "OilrigAI" and "OilrigAI2"). Monument Spawn Limits: Set a limit for the number of spawns at each monument. For example, limit "roadside/gas_station_1.prefab" to 2 spawns, choosing from 3 Gas Stations if available. Monument Spawn Location Offsets: Customize the offsets for monument spawn locations to fine-tune the exact spawn positions at each monument. Commands /stoneevent start - Start StoneEvent /stoneevent stop - Stop StoneEvent /stoneevent add <name> - Set new StoneEvent spawn position /stoneevent list - List all spawn positions /stoneevent clear - Clear all spawn positions /stoneevent delete <name> - Delete a spawn position /stoneevent - View all commands Console Commands - StoneStart, StoneStop, StoneList, StoneListClear Permissions stoneevent.admin - Allows the use of StoneEvent commands. Possibly Incompatible plugins: "AlwaysHotSpot" , "InstantGather" Default Config { "Only Command Start Event": false, "Minimum Players to Start Event": 1, "Prevent Overlap with Sulfur/Metal Event": true, "Prevent Overlap Retry Timer (seconds)": 180.0, "Event Minimum Interval (seconds)": 3600, "Event Maximum Interval (seconds)": 7200, "Event Duration Seconds": 1230, "Event Start Notification Sound": true, "Event Start Explosion Effects": true, "Event Chat Messages": true, "Event GameTip Messages": true, "Event GameTip Duration (seconds)": 7.0, "Event Start Message": "<color=#efeae6>Stone Event</color> <color=white>Has Started! Check The Map!</color>", "Event End Message": "<color=#efeae6>Stone Event</color> <color=white>Has Ended!</color>", "UI Enabled": true, "UI Location X": 0.38, "UI Location Y": 0.8, "UI Handwriting Font": true, "UI Style (1 = With UI Msg, 2 = No UI Msg)": 1, "UI Message": "Unlimited stone node marked on map!", "Proximity UI Visibility Mode": false, "Proximity UI Visibility Range": 350, "Proximity UI 'Players Here: X'": true, "Proximity UI 'Players Here' Visibility Range": 70, "MapMarker Enabled": true, "MapMarker Colour": "#050505", "MapMarker Colour2": "#efeae6", "MapMarker Radius": 0.25, "MapMarker Alpha": 0.7, "MapMarker Name/Message": "UNLIMITED STONE NODE", "Stones Minimum Gather Amount": 5, "Stones Maximum Gather Amount": 15, "Delete StoneNode at Event End": true, "StoneNode is Gatherable": true, "StoneNode Size 1-100": 30, "StoneNode Size Radius": 0.1, "Lightning during Event": true, "Lightning Min Interval (seconds)": 1.0, "Lightning Max Interval (seconds)": 60.0, "StoneNode Spawnmodes ('All' or 'Random')": "Random", "StoneNode Spawnmode 'Random' Amount": 2, "Monument Spawn Locations": { "xlarge/launch_site_1.prefab": true, "medium/nuclear_missile_silo.prefab": true, "large/military_tunnel_1.prefab": true, "large/airfield_1.prefab": true, "small/sphere_tank.prefab": true, "large/water_treatment_plant_1.prefab": true, "railside/trainyard_1.prefab": true, "medium/radtown_small_3.prefab": true, "roadside/gas_station_1.prefab": true, "roadside/supermarket_1.prefab": true, "large/powerplant_1.prefab": true, "lighthouse/lighthouse.prefab": true, "roadside/warehouse.prefab": true, "medium/junkyard_1.prefab": true, "small/satellite_dish.prefab": true, "harbor/harbor_1.prefab": true, "harbor/harbor_2.prefab": true, "arctic_bases/arctic_research_base_a.prefab": true, "military_bases/desert_military_base_a.prefab": false, "military_bases/desert_military_base_b.prefab": false, "military_bases/desert_military_base_c.prefab": false, "military_bases/desert_military_base_d.prefab": false, "OilrigAI": false, "OilrigAI2": false, "ferry_terminal_1": false }, "Monument Spawn Limits": { "xlarge/launch_site_1.prefab": 1, "medium/nuclear_missile_silo.prefab": 1, "large/military_tunnel_1.prefab": 1, "large/airfield_1.prefab": 1, "small/sphere_tank.prefab": 1, "large/water_treatment_plant_1.prefab": 1, "railside/trainyard_1.prefab": 1, "medium/radtown_small_3.prefab": 1, "roadside/gas_station_1.prefab": 3, "roadside/supermarket_1.prefab": 3, "large/powerplant_1.prefab": 1, "lighthouse/lighthouse.prefab": 2, "roadside/warehouse.prefab": 3, "medium/junkyard_1.prefab": 1, "small/satellite_dish.prefab": 1, "harbor/harbor_1.prefab": 1, "harbor/harbor_2.prefab": 1, "arctic_bases/arctic_research_base_a.prefab": 1, "military_bases/desert_military_base_a.prefab": 1, "military_bases/desert_military_base_b.prefab": 1, "military_bases/desert_military_base_c.prefab": 1, "military_bases/desert_military_base_d.prefab": 1, "OilrigAI": 1, "OilrigAI2": 1, "ferry_terminal_1": 1 }, "Monument Spawn Location Offsets": { "xlarge/launch_site_1.prefab": { "x": 125.0, "y": 3.5, "z": 25.0 }, "medium/nuclear_missile_silo.prefab": { "x": 41.3, "y": -32.9, "z": -2.3 }, "large/military_tunnel_1.prefab": { "x": -27.5, "y": 18.35, "z": 30.0 }, "large/airfield_1.prefab": { "x": 40.0, "y": 0.5, "z": -27.5 }, "small/sphere_tank.prefab": { "x": -22.0, "y": 48.0, "z": -10.0 }, "large/water_treatment_plant_1.prefab": { "x": -26.0, "y": 0.5, "z": -55.0 }, "railside/trainyard_1.prefab": { "x": -30.0, "y": 9.4, "z": -48.0 }, "medium/radtown_small_3.prefab": { "x": 14.5, "y": 1.6, "z": -4.5 }, "roadside/gas_station_1.prefab": { "x": 8.4, "y": 9.5, "z": -6.0 }, "roadside/supermarket_1.prefab": { "x": 2.7, "y": 6.0, "z": -3.5 }, "large/powerplant_1.prefab": { "x": 34.0, "y": 1.0, "z": 56.0 }, "lighthouse/lighthouse.prefab": { "x": 0.0, "y": 55.5, "z": 0.36 }, "roadside/warehouse.prefab": { "x": -20.0, "y": 0.3, "z": -7.7 }, "medium/junkyard_1.prefab": { "x": -18.0, "y": 0.3, "z": 0.0 }, "small/satellite_dish.prefab": { "x": -8.0, "y": 6.5, "z": 1.0 }, "harbor/harbor_1.prefab": { "x": 27.0, "y": 5.6, "z": -21.0 }, "harbor/harbor_2.prefab": { "x": 41.5, "y": 5.3, "z": 10.0 }, "arctic_bases/arctic_research_base_a.prefab": { "x": -13.3, "y": 1.3, "z": 9.5 }, "military_bases/desert_military_base_a.prefab": { "x": 0.0, "y": 1.0, "z": 0.0 }, "military_bases/desert_military_base_b.prefab": { "x": 0.0, "y": 1.0, "z": 0.0 }, "military_bases/desert_military_base_c.prefab": { "x": 0.0, "y": 1.0, "z": 0.0 }, "military_bases/desert_military_base_d.prefab": { "x": 0.0, "y": 1.0, "z": 0.0 }, "OilrigAI": { "x": 13.0, "y": 27.4, "z": -13.0 }, "OilrigAI2": { "x": 0.0, "y": 32.5, "z": -16.75 }, "ferry_terminal_1": { "x": 0.0, "y": 1.0, "z": 0.0 } } }$5.47 -
Version 1.7.1
129 downloads
During the Unlimited Sulfur Event, a large sulfur node appears at a set location(s) and is marked on the map, drawing attention to all players. This node provides unlimited sulfur, giving players a chance to collect a significant amount of sulfur within a limited time. This event can add an extra layer of competition and cooperation among your players as they rush to take advantage of these lucrative opportunities. Features Spawns an unlimited sulfur node/ore for a limited time. Ability to start the SulfurEvent manually or automatically at minimum and maximum intervals. Configuration options for SulfurEvent duration, minimum player count, UI location, and more. Customizable event start and end messages. Option to play a sound and visual effect when the event starts. Map markers and UI elements to indicate the active event and provide information to players. Game tips and chat messages to inform players about the event. Ability to set and manage sulfur node spawn positions. Commands to manage the SulfurEvent, including starting and stopping the event, setting spawn positions, listing positions, deleting positions, and viewing available commands. Event Overlap Prevention: Prevents the SulfurEvent from overlapping with the Stone/Metal Event. If overlap occurs, the plugin will retry starting the event after a configurable interval. User Interface: UI customization options include setting the UI location with X and Y coordinates. Enable proximity UI visibility mode and/or a "Players Here: X" Proximity UI. Gather Amounts: Set minimum and maximum gather amounts for sulfur ore and charcoal to control player rewards. Lightning Effects: Enable lightning effects during the event with customizable minimum and maximum intervals. Monument Spawn Locations: Added monument spawn locations that can be individually enabled or disabled. Customize spawns at specific monuments while excluding others (e.g., enable spawns at "xlarge/launch_site_1.prefab" and "medium/nuclear_missile_silo.prefab," but disable spawns at "OilrigAI" and "OilrigAI2"). Monument Spawn Limits: Set a limit for the number of spawns at each monument. For example, limit "roadside/gas_station_1.prefab" to 2 spawns, choosing from 3 Gas Stations if available. Monument Spawn Location Offsets: Customize the offsets for monument spawn locations to fine-tune the exact spawn positions at each monument. Commands /sulfurevent start - Start SulfurEvent /sulfurevent stop - Stop SulfurEvent /sulfurevent add <name> - Set new SulfurEvent spawn position /sulfurevent list - List all spawn positions /sulfurevent clear - Clear all spawn positions /sulfurevent delete <name> - Delete a spawn position /sulfurevent - View all commands Console Commands - SulfurStart, SulfurStop, SulfurList, SulfurListClear Permissions sulfurevent.admin - Allows the use of SulfurEvent commands. Possibly Incompatible plugins: "AlwaysHotSpot" , "InstantGather" Default Config { "Only Command Start Event": false, "Minimum Players to Start Event": 1, "Prevent Overlap with Metal/Stone Event": true, "Prevent Overlap Retry Timer (seconds)": 180.0, "Event Minimum Interval (seconds)": 3600, "Event Maximum Interval (seconds)": 7200, "Event Duration Seconds": 1230, "Event Start Notification Sound": true, "Event Start Explosion Effects": true, "Event Chat Messages": true, "Event GameTip Messages": true, "Event GameTip Duration (seconds)": 7.0, "Event Start Message": "<color=yellow>Sulfur Event</color> <color=white>Has Started! Check The Map!</color>", "Event End Message": "<color=yellow>Sulfur Event</color> <color=white>Has Ended!</color>", "UI Enabled": true, "UI Location X": 0.38, "UI Location Y": 0.8, "UI Handwriting Font": true, "UI Style (1 = With UI Msg, 2 = No UI Msg)": 1, "UI Message": "Unlimited sulfur node marked on map!", "Proximity UI Visibility Mode": false, "Proximity UI Visibility Range": 350, "Proximity UI 'Players Here: X'": true, "Proximity UI 'Players Here' Visibility Range": 70, "MapMarker Enabled": true, "MapMarker Colour": "#050505", "MapMarker Colour2": "#e5ff00", "MapMarker Radius": 0.25, "MapMarker Alpha": 0.7, "MapMarker Name/Message": "UNLIMITED SULFUR NODE", "Sulfur Ore Minimum Gather Amount": 1, "Sulfur Ore Maximum Gather Amount": 5, "Charcoal Minimum Gather Amount": 1, "Charcoal Maximum Gather Amount": 2, "Delete SulfurNode at Event End": true, "SulfurNode is Gatherable": true, "SulfurNode Size 1-100": 30, "SulfurNode Size Radius": 0.1, "Lightning during Event": true, "Lightning Min Interval (seconds)": 1.0, "Lightning Max Interval (seconds)": 60.0, "SulfurNode Spawnmodes ('All' or 'Random')": "Random", "SulfurNode Spawnmode 'Random' Amount": 2, "Monument Spawn Locations": { "xlarge/launch_site_1.prefab": true, "medium/nuclear_missile_silo.prefab": true, "large/military_tunnel_1.prefab": true, "large/airfield_1.prefab": true, "small/sphere_tank.prefab": true, "large/water_treatment_plant_1.prefab": true, "railside/trainyard_1.prefab": true, "medium/radtown_small_3.prefab": true, "roadside/gas_station_1.prefab": true, "roadside/supermarket_1.prefab": true, "large/powerplant_1.prefab": true, "lighthouse/lighthouse.prefab": true, "roadside/warehouse.prefab": true, "medium/junkyard_1.prefab": true, "small/satellite_dish.prefab": true, "harbor/harbor_1.prefab": true, "harbor/harbor_2.prefab": true, "arctic_bases/arctic_research_base_a.prefab": true, "military_bases/desert_military_base_a.prefab": false, "military_bases/desert_military_base_b.prefab": false, "military_bases/desert_military_base_c.prefab": false, "military_bases/desert_military_base_d.prefab": false, "OilrigAI": false, "OilrigAI2": false, "ferry_terminal_1": false }, "Monument Spawn Limits": { "xlarge/launch_site_1.prefab": 1, "medium/nuclear_missile_silo.prefab": 1, "large/military_tunnel_1.prefab": 1, "large/airfield_1.prefab": 1, "small/sphere_tank.prefab": 1, "large/water_treatment_plant_1.prefab": 1, "railside/trainyard_1.prefab": 1, "medium/radtown_small_3.prefab": 1, "roadside/gas_station_1.prefab": 3, "roadside/supermarket_1.prefab": 3, "large/powerplant_1.prefab": 1, "lighthouse/lighthouse.prefab": 2, "roadside/warehouse.prefab": 3, "medium/junkyard_1.prefab": 1, "small/satellite_dish.prefab": 1, "harbor/harbor_1.prefab": 1, "harbor/harbor_2.prefab": 1, "arctic_bases/arctic_research_base_a.prefab": 1, "military_bases/desert_military_base_a.prefab": 1, "military_bases/desert_military_base_b.prefab": 1, "military_bases/desert_military_base_c.prefab": 1, "military_bases/desert_military_base_d.prefab": 1, "OilrigAI": 1, "OilrigAI2": 1, "ferry_terminal_1": 1 }, "Monument Spawn Location Offsets": { "xlarge/launch_site_1.prefab": { "x": 105.0, "y": 3.5, "z": 7.5 }, "medium/nuclear_missile_silo.prefab": { "x": 36.3, "y": -33.2, "z": -1.8 }, "large/military_tunnel_1.prefab": { "x": -13.5, "y": 13.75, "z": 35.0 }, "large/airfield_1.prefab": { "x": 0.0, "y": 0.5, "z": -27.5 }, "small/sphere_tank.prefab": { "x": 1.6, "y": 57.0, "z": 8.0 }, "large/water_treatment_plant_1.prefab": { "x": -51.7, "y": 1.5, "z": -64.8 }, "railside/trainyard_1.prefab": { "x": -41.8, "y": 39.4, "z": -40.8 }, "medium/radtown_small_3.prefab": { "x": -3.5, "y": -2.6, "z": -4.5 }, "roadside/gas_station_1.prefab": { "x": 0.8, "y": 9.5, "z": -6.0 }, "roadside/supermarket_1.prefab": { "x": -4.0, "y": 6.0, "z": -3.5 }, "large/powerplant_1.prefab": { "x": 2.3, "y": 9.65, "z": 32.85 }, "lighthouse/lighthouse.prefab": { "x": 0.0, "y": 60.7, "z": 0.36 }, "roadside/warehouse.prefab": { "x": 0.0, "y": 6.6, "z": -7.7 }, "medium/junkyard_1.prefab": { "x": -3.0, "y": 0.3, "z": -13.0 }, "small/satellite_dish.prefab": { "x": -5.0, "y": 9.5, "z": -10.7 }, "harbor/harbor_1.prefab": { "x": 44.0, "y": 22.0, "z": -0.5 }, "harbor/harbor_2.prefab": { "x": 41.5, "y": 5.3, "z": -5.0 }, "arctic_bases/arctic_research_base_a.prefab": { "x": -24.5, "y": 0.5, "z": 13.0 }, "military_bases/desert_military_base_a.prefab": { "x": 0.0, "y": 0.0, "z": 0.0 }, "military_bases/desert_military_base_b.prefab": { "x": 0.0, "y": 0.0, "z": 0.0 }, "military_bases/desert_military_base_c.prefab": { "x": 0.0, "y": 0.0, "z": 0.0 }, "military_bases/desert_military_base_d.prefab": { "x": 0.0, "y": 0.0, "z": 0.0 }, "OilrigAI": { "x": -13.5, "y": 23.35, "z": -13.7 }, "OilrigAI2": { "x": -33.0, "y": 32.55, "z": 13.0 }, "ferry_terminal_1": { "x": 0.0, "y": 0.0, "z": 0.0 } } }$7.47 -
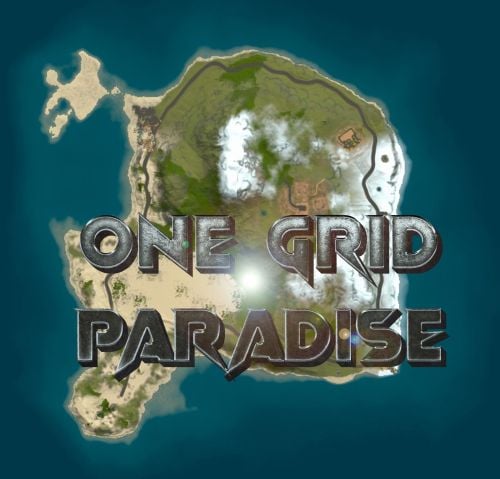
Version 6.0.0
114 downloads
In the heart of this EPIC ONE GRID RUST MAP, spanning a compact 1500 in size, lies a breathtaking landscape crafted for high-FPS and fast-paced PvP gameplay. Amidst towering mountains and sprawling valleys, players navigate custom buildable underwater caves that offer strategic advantages for building and hiding bases. At its center, a colossal mountain dominates the skyline with a Custom Buildable Warehouse Monument and many more Custom Buildable Monuments all optimized for peak performance with minimal entity counts. This central area becomes the hub for players to practice PvP while fending off enemies and honing their raid defense and offense skills. NEW BUILDING EXPERIENCE! Scattered across the terrain are many bespoke buildable monuments, each marked with an X on the map, drawing players in with fresh and exciting base-building locations. This masterpiece of design not only promises thrilling PvP encounters but also showcases a commitment to immersive gameplay and efficient server performance, making it the best released Map for One Grid Rust servers to date! FEATURES • Size: 1500 • Prefab Count: 3874 • Map Optimized for Performance! • Map Password: Included. • Vast array of many EPIC Custom Buildable Monuments! • Designated building zones (marked X on the minimap) • Majestic Underwater Buildable Cave Bunkers! • Legendary Battle Iceberg Build Zone: An expansive above water custom-built zone featuring multiple icebergs for epic building, raiding, and intense PVP combat! • Monuments crafted for peak performance with minimal entities! • EPIC Scale PVP Mountain center of map with Buildable Warehouse Monument! • Everything crafted with One Grid Servers in mind for peak performance and EPIC scaled FUN! • Monumental and realistic landscape! • Underground railway. • Combined Outpost/BanditCamp/Fishing Village Safe Zone Monument on the water. CUSTOM BUILDABLE MONUMENTS • Amount: 6 Total! • Custom Underwater Bunkers • Battle Iceberg • Customized Large Bus Stop Base to Build inside • Bunker Base on Mountain to build inside • + MORE! Facepunch Monuments Airfield Dome Large Oilrig Small Oilrig Satellite Dish 2X Lighthouse Gas Station 1X Quarry Supermarket Help Discord: DarkoRust$14.99 -
Version 1.0.0
4 downloads
It is a copper monument depicting a standing woman dressed in a long tunic. It rises up to 49 meters high, reaching almost 93 meters if we count the pedestal. On her head is a seven-cornered crown, symbolizing the seven continents and the seven seas. 25 windows open on it. In her right hand she carries a torch, redesigned in 1916 to enhance its burning flame appearance. Instead, in her left hand she holds a tablet with the date of the signing of the Declaration of Independence. Readme.txt$3.00 -
-min.thumb.png.3e42e99afda25d83aa26d9af0644acba.png)
Version 1.0.4
753 downloads
I bring to you a new plugin that will add Pogo Sticks to your server! These Pogo Sticks will allow players to jump, somersault, and parkour in ways never seen before in the game. With default configuration, Pogo Sticks don't do as well on sand and snow, for obvious reasons right? But don't worry you can configure any of the pogo presets, such as the speed and height of jump for example. The Pogo Stick is an ordinary worn item with a skinID that can be given to the player by console command, or any of the other unique ways you might want to give them out in your servers. There are two activation modes for Pogo Sticks. With default configuration, the player has to put the item in a belt container. In this mode, the Pogo Stick is only used when it is selected as an active item. In the second mode, the Pogo Stick is activated when it is added to a clothing/armor container. In order to use the second mode, replace the shortnames of all Pogo Sticks with a clothing item. As an example "burlap.gloves.new" to replace a less noticable part of your wardrobe. In this second mode, players will be able to shoot and use items while on the Pogo Stick! The creativity is in your hands, have fun with it! Chat commands (only for administrators) /givepogo <pogoPresetName> - give the pogo stick to yourself Console commands (RCON only) givepogo <userID> <pogoPresetName> <amount> – give the pogo stick to player. Config plugin_en – example of plugin configuration in English plugin_ru – example of plugin configuration in Russian Dependencies (optional, not required) GUI Announcements Notify ZoneManager My Discord: Adem#9554 Join the Mad Mappers Discord here! Check out more of my work here!$9.99 -
.thumb.png.913d4ec299161acf94081154072ade61.png)
Version 1.6.7
9,359 downloads
The New Year is coming and I have prepared for you a new preset customization for the train!After installing the update, customization will be automatically applied to all cars in the configuration of the armored train. To disable this, make the "Customization preset" parameter empty in the config. You can also disable the customization of certain wagons or change the customization of the NPCs in the file oxide/data/ArmoredTrain/NewYear New Year's map from the video: This plugin will add an armored train to your server, which can travel both in the subway and by rail. It can consist of any number of wagons. A helicopter can accompany it. Bradley, npc, turrets, simsites can be installed on the train. The plugin allows you to create any number of train presets, for which the order of wagons, the helicopter preset, the probability of spawn and the duration of patrolling can be specified. Each wagon or locomotive can be configured separately. Any speed can be set by the locomotive.If there is no spawn of trains on the surface on your custom map, read the section “Custom spawn points” Caboose By default, one of the presets of the train is a locomotive and a caboose. This train does not attack players first and there is no loot on it. It is intended only for players to travel around the map. You can add a caboose wagon to any other train, or create your own galley train with any number and any set of wagons. Halloween Update Have you already prepared your server for Halloween? On the eve of the Halloween Rust update, I have prepared for customization of all armored train cars. After installing the update, customization will be automatically applied to all cars in the configuration of the armored train. To disable this, make the "Customization preset" parameter empty in the config. Custom spawn points If you are using a custom map in which there are no spawn trains on the surface, but there is a railway, then for the train to work on the surface, you need to add custom spawn points of the train. Instruction: Stand at the point where you want the train to spawn Enter the command /atrainpoint If you receive a message that a point has been created, enable “Use custom spawn coordinates [true/false]” in config For correct operation, it is recommended to create several spawn points of the train Chat commands (only for administrators) /atrainstart– launches the event in a random configuration /atrainstartunderground - forcibly launches an event underground /atrainstartaboveground - forcibly launches an event aboveground /atrainstart <trainPresetName> – launches the event in the <trainPresetName> configuration /atrainstartunderground <trainPresetName> /atrainstartaboveground <trainPresetName> /atrainstop– stops the event /atrainpoint– creates a custom spawn point of the train in your position Console commands (RCON only) atrainstart– launches the event in a random configuration atrainstartunderground - forcibly launches an event underground atrainstartaboveground - forcibly launches an event aboveground atrainstart <trainPresetName> – launches the event in the <trainPresetName> configuration atrainstartunderground <trainPresetName> atrainstartaboveground <trainPresetName> atrainstop – stops the event Config en – example of plugin configuration in English ru – example of plugin configuration in Russian Dependencies (optional, not required) True PVE PveMode GUI Announcements Notify DiscordMessages AlphaLoot CustomLoot Economics Server Rewards IQEconomic Api bool IsArmoredTrainActive() bool StopArmoredTrain() bool StartArmoredTrainEvent() bool EndArmoredTrainEvent() bool IsTrainBradley(uint netID) bool IsTrainHeli(uint netID) bool IsTrainCrate(uint netID) bool IsTrainSamSite(uint netID) bool IsTrainWagon(uint netID) bool IsTrainTurret(uint netID) Vector3 ArmoredTrainLocomotivePosition() Hooks OnArmoredTrainEventStart OnArmoredTrainEventStop Contact me in Discord: Adem#955$29.99 -
Version 2.1.7
2,012 downloads
A new event includes a lot of game mechanics Description The event starts with a warning in the chat: a submarine will soon be passed near the island. A submarine will appear on the water when the time is up. There are 4 floors in the submarine. 2 floors are over the water and 2 floors are under the water. It is possible to get into the submarine on absolutely any transport. There are 4 outside entrances, 4 underwater entrances, and 2 submarine entrances (added in the Underwater Update). There are about 50 NPCs outside the boat and two upper floors. There are about 120 crates of items, rooms with blue and red doors, locked crates, recyclers, workbenches in the submarine (it is possible to set up in the configuration). There are also 4 cameras on the submarine that you can connect to (Submarine1, Submarine2, Submarine3, Submarine4). The number and location of all NPCs and crates can be changed in the plugin configuration. It is also possible to change the dropdown items in them. It is necessary to blow up the doors on the submarine with explosives to get to the crates (it is possible to set up the amount of damage to the doors in the configuration). When an event appears, a marker will display on the map (configurable in the configuration file). It is possible to set up in the configuration the PVP zone for those who use the TruePVE plugin. A timer with a countdown to the Event end and the number of crates and NPCs will display for all players in the Event zone. The conditions for the completing event are the end of the timer or the end of the loot crates. The submarine will disappear at the end of the event. It is possible to set up an automatic event appear on the map. All timers can be set up in the configuration. It is possible to lower the FPS on the server due to the large number of entities during the submarine appearance or the end of the event! Dependencies Required NpcSpawn Dependencies (optional, not required) True PVE PveMode GUI Announcements Notify Discord Messages AlphaLoot CustomLoot NTeleportation Economics Server Rewards IQEconomic Kits Chat commands (only for administrators) /waterstart - start the event /waterstop - end the event /waterpos - determining the position and rotation coordinates for changing the location of NPCs and crates.It should write in the configuration (Attention! The event must be started, the current position of the administrator in relation to the submarine is read) Console commands (RCON only) waterstart - start the event waterstop - end the event Plugin Config en - example of plugin configuration in English ru - example of plugin configuration in Russian Hooks void OnWaterEventStart(HashSet<BaseEntity> entities, Vector3 position, float radius) – called when the event starts void OnWaterEventEnd() – called when the event ends void OnWaterEventWinner(ulong winnerId) – called at the end of the event, where the winnerId is the player who did more actions to complete the event My Discord: KpucTaJl#8923 Join the Mad Mappers Discord here! Check out more of my work here! The submarine is designed by Jtedal$42.00 -

Version 1.2.3
1,228 downloads
SimplePVE is exactly what it says. An easy simple PVE plugin for your server to modify or change PVE rules individually & now also have a Simple Cui to control PVE rules and Create or edit Schedules. Control PVE Rules from in-game or in the config Easy to understand each individual Rules Create PVP Schedules Discord Embed Messages on PurgeStart or End Many more features are added every update • /simplepve - Use to enable or disable pve toggle • /sprules - Use to Open a Cui to control PVE Rules & Creating Schedules • simplepve.admin - Required to enable or disable SimplePVE • simplepve.adminloot - Required to view Loots • simplepve.admindamage - Required for Admin damages to any entity void OnSPVEPurgeStarted void OnSPVEPurgeEnded TimeSpan GetPVPStartTimeRemaining TimeSpan GetPVPEndTimeRemaining Check Out My Other plugins as Well$14.99 -

Version 3.4.9
2,505 downloads
The ultimate base protection plugin that allows players to pay a resource in exchange for configurable protection for their base or tugboat. This plugin has been rewritten from the ground up for performance, quality, and integrating community suggested features. Features There are many different ways you can configure this plugin to fit the needs of your server. Many features can be modified or disabled entirely through the plugin configuration file. These include: Both online and/or offline base protection Trade currency for protection or provide it for free Players can turn on/off protection Permission based protection tiers Configure what gets protected and who it is protected from Set limits on how long protection lasts Indicator(s) for displaying base protection Option for allowing raiders to bypass protection if they can drain the protection balance with damage Options for making protection more expensive for larger bases/clans and cheaper for small groups. UI that blends in seamlessly with vanilla Rust. Disclaimer This plugin will be updated at the owners discretion. Before purchasing any plugin, I recommend checking the date of the last update and refer to support tickets to see if there might be any issues with the latest Rust game version. If a game update breaks this plugin, please open a support ticket (if it doesn't already exist) and direct message me on Discord (link found below). How to Use Configure the plugin and load it Once loaded, assign yourself (or your group) one of the protection level permissions. Place a new tool cupboard, or find one that YOU have previously placed. Open the tool cupboard inventory, at the top you should see two tabs: "Upkeep" and "Protection". Select the protection tab to view the raid protection info. On this screen, you will be able to spend the configured currency in order to purchase hours of protection. By default, this currency is scrap. Use the buttons on the right to add some hours of protection, you should see that status change to show the time you are protected. Your base will now be protected for the amount of time specified. Notes You can use the Clear button to withdraw all balance, and stop protection The Pause/Resume button can be used to start/stop protection without changing the balance. The Info button will reveal a panel which displays additional information on protection. The +Max button will deposit the maximum amount of time that you can afford Quick Start Presets There is a lot of documentation for this plugin because there is a lot you can do with it! However, it doesn't have to be complicated. If you have a simple use case in mind, you can use one of these preset configurations to get what you need or use as a starting point without having to figure it out yourself! Important: You will want to assign your default permission group the raidprotection.level.1 permission for any of these configurations. Always Free Provides free raid protection for all players with the level 1 permission Protection for tugboat bases Recommended for PvE or light PvP servers Offline Only Same as the default config, but only offers offline protection Has a limit of 48 hours of protection for level 1 Includes a level 2 permission with unlimited hours of protection (VIP) Protection for tugboat bases Recommended for PvP servers Hardcore Offline only protection Two protection levels, one with a 48 hour limit and one with no limit Additional costs that scale with number of owners and building size Raiders can damage a structure and cause it to "bleed" protection balance to attempt to disable the protection with enough damage Significant delay for activating protection No protection for tugboat bases Recommended for hardcore PvP servers Upgrading Versions When a new version is released, you may need delete your config and lang files and reload them to accommodate the new changes. You do NOT need to delete the data file, unless specifically instructed. As long as you do not delete the data file, then all of your protection balances will persist, even between versions. Not all updates will require this process, but if it does, you will be notified with a message like this: To resolve this, simply delete the config and lang files and reload the plugin. You will need to manually update these files to align with what you want. As of v3.4.0 you no longer need to delete your config files when upgrading from a previous version. However, you still should check the config after the update is installed to verify no unintended changes have occurred. Protection Levels Protection levels are how you assign a particular set of rules to a player. These protection levels are added in the configuration file, and are then assigned to an auto-generated permission. Each protection level needs a unique Rank property, this rank determines the order of precedence when a player is assigned multiple protection levels. In this event, a player's protection level will always be the highest ranked protection level they are granted. Protection levels are managed in the configuration file, here is some information on some of the properties: Cost per damage protected - This amount will be deducted from the protection balance for each point of damage that was protected. So if this value is set to 1 and someone attempts to deal 100 damage to a protected structure, and that structure has 100% protection, then 100 balance will be deducted. If in that same example it was only 50% protection, then only 50 balance would be deducted. Entity resistances are taken into account as well (twig will take more damage than metal, ect). Hourly base cost - This is a fixed cost that is charged per hour of protection. Hourly cost per authorized player - This amount will be charged for each owner every hour. Can be used to charge players more if they have a larger clan. Hourly cost per floor - This amount will be charged for each floor every hour. Can be used to charge players more for protecting a larger base. Max protection time - The max number of hours protection can be applied for. If set to null, then there will be no limit. Offline protection percent - The percent of protection a structure will receive when all the owners are offline. A value of 0 will be unprotected, and a value of 100 will be fully protected. Online protection percent - The percent of protection a structure will receive when at least one owner is online. A value of 0 will be unprotected, and a value of 100 will be fully protected. Rank - A number value indicating the order of importance when a player is assigned multiple protection ranks. Higher values indicate a greater importance. For example, if a player is assigned both protection rank 1 and protection rank 2, then tool cupboards they place will be of protection rank 2 instead of 1. These ranks must be unique DO NOT create protection levels with the same rank. This value needs to be 1 or higher, it cannot be 0. Delay after taking damage - The number of seconds before protection may begin after a structure has taken unprotected damage. It is recommended to set this to a higher amount on PvP servers. Delay for offline protection - The number of seconds before offline protection kicks in after the last owner has gone offline. It is recommended to set this to a higher amount on PvP servers. Damage resets timer when owner is offline - If this is set to true, then if a raid has already started on a structure that has offline only protection, but the protection hasn't kicked in yet (due to a delay timer) then the attackers can continue to raid indefinitely as long as they continue to do damage while the owner(s) are offline. If this is set to false, then the attackers will only have a certain amount of time to continue their raid if the owner(s) are offline. Allow tugboat protection - If this is set to true, then players with this protection level may receive protection for tugboat bases. For these tugboat bases the protection panel can be accessed in the fuel inventory of the boat. The founder of a tugboat base is whomever is the FIRST player to authorize on a tugboat. Founder Limit - The number of tool cupboards that a player can be a Founder of and receive raid protection. If a player exceeds this limit, then future tool cupboards will not receive protection until enough previously placed ones have been destroyed in order to be within the limit. If a player places a tool cupboard, and they have exceeded the limit, once they are no longer exceeding the limit they can "activate" that tool cupboard in the info panel to have it gain raid protection. If this value is set to null then there is no limit. Founders and Owners When a tool cupboard is placed, the player who places it is permanently labeled as the "Founder" of that tool cupboard and building privilege. The protection level of that building privilege is derived soley from the founder's protection level, and therefore won't change unless the founder's protection level changes. Whenever a player is authorized on a tool cupboard, they will be permanently branded as an "Owner" of that tool cupboard. Owners are all the players, including the founder, who have EVER been authorized on the tool cupboard. This means that players will still be listed as an owner even if they deauthorize themselves. Owners are important because they affect how Online/Offline protection will be triggered. A base will only be granted offline protection if ALL the owners are offline, otherwise online protection (if available) will be granted if at least one owner is online. For tugboat bases, the founder is whomever is the first player to authorize themselves on the tugboat. Permissions raidprotection.admin raidprotection.level.x - these permissions are autogenerated based on your protection level settings in the config, they will show up in the server console when the plugin is loaded (unless you have Enable Console Messages set to false) raidprotection.ignore - raid protection will not count any player with this permission towards being an owner. They will not show up in the owner list and will not count toward team member count for offline protection. They also will not receive protection on bases they build even if they have a protection level assigned. This is useful for admin groups so that you don't have to remember to deauth on tool cupboards. However, if this permission is ever revoked, that player will be retroactively counted as an owner on ALL tool cupboards they are currently authed on. Commands Player Commands These commands require no permissions and can be used by any player. /pro - displays the raid protection information panel, requires authorization on the tool cupboard in the current area. /lev - displays a screen that tells the player their personal assigned protection level and explains the benefits that comes with it. Admin Commands These commands require the raidprotection.admin permission to use. /tc - displays a screen with all the available admin commands /tc help - same as /tc Use the above commands to see a full command list in game. Configuration The default config file: Here is an explanation for some of the fields: Enable Logging - Set to true to keep logs of tool cupboards protection activity. Logs will be saved to the oxide/logs/RaidProtection folder. It is recommended only to enable this only for debugging purposes, as it will take a significant amount of storage space if you have a larger server. Enable Ledger - Set to true to keep track of protection balance changes for tool cupboard. These ledger files are stored in oxide/data/RaidProtection/Ledgers. It is recommended to keep this enabled, as it will help you roll back balances if a player has an issue. This does not take up as much storage space as logging does as it only keeps track of balances. Enable Console Messages - Set to false to disable the info messages upon plugin reload. Commands - You can change the prefix for the commands this plugin uses here. Chat Message Icon ID - A steam id for the portrait of chat messages. Protection Tabs Offset - This value will adjust the vertical placement of the Protection Tabs in the tool cupboard menu. Positive values will move it up, negative values will move it down. Useful for making it so those tabs don't conflict with other UI plugins that use that area. Image Settings - Links for the images the plugin uses. Indicator Settings - Settings for the indicator that (by default) appears in the top right when you attack a protected structure. You can change its size and position or disable it. Plugin Integration - Set any of these to true if you want this plugin to take advantage of the features of another supported plugin. Custom Status Framework Settings (Ignore if you do not have Custom Status Framework integration enabled) Popup Attack Indicator - If set to true, a status will briefly appear when a player attacks a protected structure. Persistent Status For Owners - If set to true, a status will appear while a player is in a protected area that they are an owner for. Slight performance cost when enabled. Persistent Status For Non Owners - If set to true, a status will appear while a player is in a protected area that they are NOT an owner for. Slight performance cost when enabled. Popup Status When Hammer Equipped - If set to true, a status indicating the protection level of the area they are in will appear while they are holding a hammer. This will appear regardless of if you are an owner of that area or not. Protection Settings Admin owners removed when deauthorized - Normally, you cannot remove an owner even if they deauthorize. But if this setting is enabled, it allows admins to remove themselves as owners when they deauthorize from a tool cupboard. They can also achieve this with commands. Allow balance withdraw - If set to true, then players will see a "Clear" button in the tool cupboard panel that allows them to withdraw any protection balance. Allow max deposit - If set to true, there will be a "+Max" button that will purchase the maximum number of protection hours a player can afford. Award remaining balance when cupboard is destroyed - If set to true, whomever destroys a tool cupboard will be awarded whatever amount was in the protection balance. Currency item - The item that will be used as currency for protection, this will only be overridden if you are using Server Rewards or Economics for your currency. Protected entities - If any of these are set to true, then that type of entity will be covered under Raid Protection. If you are using other protection plugins like TruePvE, then you will want to configure these to not overlap with what other plugins are protecting. Protected from - If these are set to true, then damage from that type of source will be protected. By default Authed Players is set to false, which means that players will be able to damage their own structures, but enemy players cannot. Protection levels - See the section about protection levels for information. Protect twig - If set to true, then twig building blocks will receive raid protection. If set to false, then twig building blocks will not receive raid protection, even if placed by an owner of the base. Ledgers As of Raid Protection v3.2.0, you can optionally configure ledgers to be enabled. When enabled, the plugin will keep logs protection balance changes for all tool cupboards. These logs will be saved to oxide/data/RaidProtection/Ledgers. There is a ledger file for each tool cupboard, and it's filename will make the entity ID of that tool cupboard. You can use the /tc id command to see what the ID of a tool cupboard is (see commands section). The benefit of ledgers is that each balance change has a specific GUID identifier attached to it that can be used to restore a tool cupboard's balance to that exact state in the event that a player has an issue. An example of a ledger file might look like this: Ledger file for tool cupboard with ID 2250729 [ "05/26/2023 16:17:56,ad87f16e-52eb-4689-887f-ecc53cd3ff13,0,Withdraw", "05/26/2023 16:18:20,108e54c0-98c4-46df-9eb3-e17192c37bb3,0,CollectionStopped", "05/26/2023 16:18:23,a2f03162-200c-47ce-948e-b0c703435e51,0,CollectionStarted", "05/26/2023 16:18:28,5c83390e-bbd2-4049-8ec9-8f2951746159,0,Withdraw", "05/26/2023 16:19:29,cd892a3f-249b-4cad-8949-abf904656288,20,Added", "05/26/2023 16:19:31,6e710dfc-23c2-4375-8c4f-07017d4d44c6,40,Added", "05/26/2023 16:19:31,bc51f8c7-3f3a-4abc-8fd2-8bb4c47fe454,60,Added", "05/26/2023 16:20:25,f08cfa34-a623-4de3-9027-7c3acb3e3ec3,60,CollectionStarted", "05/26/2023 16:20:52,a849be59-899c-4779-bba6-2f5f1b0ffb8d,59.93055,CollectionStopped" ] The format of each row goes as follows, from left to right separated by commands. Date and Time of balance activity GUID identifier, used by the /tc restore command to roll back a balance The protection balance of the tool cupboard at that given time A brief descriptive reason as to what changed about that balance For example, using the ledger file listed above, if we wanted to rollback the tool cupboard to before the collection started (the last "Added" one), we could run the following command. /tc restore 2250729 bc51f8c7-3f3a-4abc-8fd2-8bb4c47fe454 Running this command will set the balance of the tool cupboard with ID 2250729 back to its balance of 60. As of v3.2.3 you can also mass restore all tool cupboards to a specific time or date. For example, using the ledger file listed above, if we wanted to rollback the tool cupboard to the time 16:19:00. We could run the following command. /tc ledger rollback 16:19 This will rollback ALL TOOL CUPBOARDS to the first ledger entry that comes BEFORE the given time. In this case that entry would be GUID=5c83390e-bbd2-4049-8ec9-8f2951746159 at time 16:18:28 because that is the latest entry before 16:19:00. Thus the balance will be 0. Rollbacks can also accept a date in addition to a time. For example, if you wanted to rollback to noon the following day you could run the following command. /tc ledger rollback "5/25/2023 12:00" Notice that there is no ledger entry for this tool cupboard that goes back that far. In this case, the balance of the cupboard will be set to ZERO. Please note that if you include a date and time the value MUST be enclosed in quotes (see the example above). Tugboat Bases As of v3.3.0, Raid Protection can optionally be allowed for tugboat bases. This is configurable per protection level. Tugboat bases can utilize all the features of a normal tool cupboard base. You can access the protection panel for tugboat bases in the fuel inventory in the drivers seat. For tugboat bases, the founder of the base is considered to be the FIRST player to authorize on the tugboat. Plugin Integration Clans This plugin provides built-in support for Clans. If a player is in a Clan, it will automatically treat all clan members as owners. This of course means that the owners will not be removed even when a member is kicked from a clan. True PVE This plugin is compatible with True PVE as long as both plugins are configured in a non-conflicting way. For example, if you use True PVE to provide protection to players, then in your Raid Protection config file under the Protected entities section you should set Authed Players and Unauthed Players both to false to avoid hook conflict errors. If you do see hook conflicts, see the section of this documentation about how to resolve hook conflict errors. Zone Manager This plugin is compatible with ZoneManager without any extra configuration. ZoneManager will take priority if the zone has the "undestr" flag. Custom Status Framework If you have CustomStatusFramework installed and want to take advantage of the status indicators (that appear in the bottom right) in your Raid Protection config file under the Plugin Integration section set Custom Status Framework to true. Simple Status Simple Status is a plugin that is still being developed, and will be an alternative, more performance friendly option to Custom Status Framework. This plugin is not yet available, but as of v3.4.0, configuration options have been added to support this plugin when it releases. Preview of indicators: Economics and Server Rewards If you wish to use economics balance or server rewards points as a currency instead of an item, you can set ONE of these to true in the plugin integration section of the config. It is important to set ONLY ONE of these to true, or else both will be disabled and you will get a warning in the console. Protection panel with Economics: NoDecay This plugin is compatible with NoDecay without any extra configuration. Notify If you want to use Notify as your source of indicators you can enable the flag for it in the Raid Protection config. Abandoned Bases If you enable Abandoned Bases in the integration config, then bases that are labeled as Abandoned will not receive raid protection. Raidable Bases Bases spawned by Raidable Bases will be ignored by Raid Protection. They should not show up in ledgers and players cannot add balance to them. Skill Tree If Skill Tree is enabled in the integration config then it will prevent players with the lockpicking skill from picking locks in raid protected areas. Other Plugins Should be compatible with most other plugins given they don't use the onEntityTakeDamage hook. If they do use this hook, it just means you have to change your configuration settings, see the hook conflicts section for more info. Images If you experience any issues with the default images provided by this plugin I recommend hosting them yourself. The urls can be changed in the config. Here is a zip file containing all the images. icons.zip Carbon As of 8/19/2023 I can confirm that this plugin is compatible with Carbon. Please open a support ticket if you experience any Carbon related issues. Hook Conflicts If you're getting messages in the server console that looks similar to this: OnEntityTakeDamage resulted in a conflict between the following plugins: NoDecay - True (Boolean), RaidProtection (False (Boolean)) That means that another plugin is conflicting with Raid Protection. In most cases this is an easy fix, and it just means that you need to update your Raid Protection config file to not protect the same entities that another plugin is already protecting. So for example, if you have a plugin already that makes it so player's cannot attack each other, then there is no need for Raid Protection to do that job, and therefore in the Protected entities section of the config you should set Authed players and Unauthed players to false to avoid conflicts. Previous Versions You may have seen the free version of this plugin available on uMod. That version (2.X.X) will stay available for free on umod, but is no longer supported. If you are upgrading from the free version, you must first delete the config/lang/data files before installing v3.0.0 and above. If you do not delete these files, you will likely run into issues, as despite having the same name, the plugin has been completely rewritten, and therefore is completely incompatible with the free version. Developer API /* * Returns 0 if entity unprotected and 100 if entity fully protected */ private float GetProtectionPercent(BaseEntity entity) /* * Returns a list of the owners of the structure associated with the given entity */ private List<BasePlayer> GetOwners(BaseEntity entity) /* * Returns the player who is the founder of the structure associated with the given entity. Can be null. */ private BasePlayer GetFounder(BaseEntity entity) /* * Returns the protection balance of the structure associated with the given entity */ private float GetProtectionBalance(BaseEntity entity) /* * Returns the hours of protection remaining of the structure associated with the given entity */ private float GetProtectionHours(BaseEntity entity) Discord If you want to report a bug, require support, have a suggestion or want to be notified when I release an update you can join my plugin development discord with this link: Plugin Development Discord Link Donate Writing and maintaining these plugins takes a tremendous amount of work. Donating is one way to give some positive feedback which helps me continue making them! Buy me a coffee here! FAQ Please check out this section before opening a support ticket, it may save us both some time! Q: I don't see the status indicators in the bottom right. A: The status indicators come from another plugin called CustomStatusFramework, you must install it and enable it in the config file to get the indicators. Q: I have protection time, but I am able to damage my own structure. By default "Authed players" are able to damage their own structures. You can change this in the config file. Q: The add hours buttons aren't showing for me in the tool cupboard panel. A: The hours buttons will not show if the protection has 0 cost. Q: I have a max protection time set, but it says "protected for forever" A: If the protection cost is 0, then there cannot be a max protection time. Q: I deauthorized myself from the tool cupboard, but I am still listed as an owner. A: Owners are not removed after deauthorization. Only admins can remove owners. Q: How are overlapping tool cupboards handled? A: If a player has a base with overlapping tool cupboards, then each cupboard will need its own protection. Which entities are protected depend upon which tool cupboard governs that entity. Q: Can player's exploit offline only protection by deauthorizing? A:Deauthorizing will not help players looking to exploit offline only protection because they will still be considered an Owner even if they deauthorize. Q: Can a player exploit offline only protection by never authorizing? A: If a player is never authorized on a cupboard, then they will not count toward being online, and therefore offline protection can occur. However, players cannot add or manage protection balance unless they are authorized, and therefore the protection balance will run out, especially if a max protection time is set. Q: I have protection for horses on, but now the horses never poop A: If horses don't lose health, they will never eat and therefore never poop, this is a side effect of protection for horses. Q: Why does protection say "pending" in the bottom right? A: Pending either means that you have offline only protection or your structure has recently taken damage and therefore protection is delayed. See the tool cupboard protection panel for more info. Q: I'm seeing conflict warnings in my console between Raid Protection and True PvE A: Please refer to the sections of documentation for TruePvE and Hook Conflicts Q: I'm seeing Image failed to download! Error: HTTP/1.1 429 Too Many Requests A: Refer to the Images section of the documentation.$29.99- 214 comments
- 13 reviews
-
- 12
-
-
-
- #protection
- #base
- (and 5 more)
-
Version 1.0.1
20 downloads
NPCKit is a Plugin made for any type of server pvp, pve or roleplay. With this Plugin you can create NPCs and add Kits to each of them as you like. They can be created with Clothing vanilla or skined and will wave to you, once you interact or leave the NPC. Each Kit can have its own cooldown and a default or Vip permission. Once a Kit is created you can delete it as well with the right permission, without deleting the whole NPC. You can also have unlimited Kits. If you create more then 4 kits, you will be able you navigate through multiple pages to see all the kitsyou created. Add as many NPC on you server as you like and give your players the ability to receive kits by interacting with one of your NPCs. All NPCs will also be displayed on the map with a shop marker. To interact with an NPC press the E key on your keyboard Whatch my showcase Video below to get a good starting point of my plugin. Check out my Discord to get even more help or request private plugins. Discord: https://discord.gg/jMfCUJd4eE Showcase video Permission createnpc - create an NPC and Kits (NOTE!: this is the Admin permission so only Admins should have it to create, delete NPCs/Kits) default - grand this permission to any player who will then be able to receive every kit with the default permission vip - grand this permission to any player who will then be able to receive every kit with the vip permission Chat Commands /createnpc - opens a panel to create the NPC (after that interact with the E key on your keyboard) Lang Files German and English translation included Config { "Use_MapMarker_For_NPC": true } Data File with all the NPC, kit and player information stored will be created$25.00 -
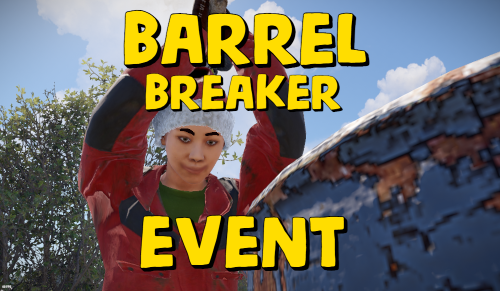
Version 1.0.2
27 downloads
Adds an exciting event for players to your server. When the event starts, players can get more loot from barrels. The event is easy to configure and can be triggered automatically or by command. Commands (admin only): /bbe_start - starts an event /bbe_stop - starts an event /bbe_forcestart - force the event to start Hooks: void BarrelBreakerStarted() // called when the event starts void BarrelBreakerStarted() // called when the event ends Config: { "Autostart event(disable if you want to trigger the event only manually)": true, "Minimum time to event start(in seconds)": 900, "Maximum time to event start(in seconds)": 10800, "Minimum event duration(in seconds)": 300, "Maximum event duration(in seconds)": 900, "Minimum number of online players to trigger an event": 1, "Pre-event message": "Barrel breaker event will start in a minute", "Pre-event message time(in seconds)": 60, "Event message": "The barrel breaker event has begun, go and break all the barrels!", "End event message": "Barrel breaker event ended", "Items list": [ { "prefabName": "scrap", "dropChance": 100, "min": 2, "max": 2 }, { "prefabName": "metal.fragments", "dropChance": 0, "min": 1, "max": 100 } ] }$9.99 -
Version 1.5.3
9,509 downloads
This plugin adds a character progression system to your server in the form of a leveling and skill tree system. Players gain xp by cutting trees, mining rocks, killing NPCs etc, and are rewarded with skill points when they level up. These points can be used to unlock perks and buffs across a number of different skill trees. The plugin is extremely customizable and server owners can change, move, scale or disable any perk to tailor the setup to their server. It features: 115 unique buff types across 130 skill nodes. 13 unique skill trees. 67+ sources of xp, along with custom xp settings for BotRespawn and NpcSpawn. An extremely large amount of xp options to really tweak the plugin for your server. A functional tree system that prevents unlocking/upgrading of nodes if the player has not invested enough skill points into a tree. Fun & unique ultimate abilities across most trees. Global yield settings for servers that want to run 2x/3x etc. Ability to create custom skill trees and nodes using permissions from other plugins. Considerable amount of options for persistent data through server wipes. A prestige system to reward your most hardcore players. SkillTree allows users to focus on multiple skill trees and unlock nodes in each tree as they level, to make their characters more powerful and unique. Plugins that work well with Skill Tree RaidableBases - SkillTree integrates with RaidableBases by rewarding raiders with xp (either handled via SkillTree directly or via RaidableBases directly). The raiding tree can also exclusively work with RaidableBases if servers don't allow raiding. Economics & ServerRewards - integrated as a way to pay for the respec cost. SurvivalArena - Rewards the winner of the event with xp. Cooking - adds new skills to the Cooking tree as well as xp rewards when successfully cooking meals. BotRespawn - Adds additional xp sources for each NPC profile. NpcSpawn - Adds additional xp sources for each NPC profile. UINotify - Shows notifications relevant to leveling etc. ZombieHorde - Provides xp for killing zombies generated by this plugin. LootDefender - Provides the ability for shared xp when killing BradleyAPC. Configured through LootDefender. EpicLoot - Adds a skill to the Scavenging tree FishingHotspots - Allows for modified XP gain while fishing in a hotspot. ZoneManager - Allows you to disable buffs while in a zone. skilltree.chat - required to use the chat commands to access the skill tree menu. skilltree.xp - required to obtain xp from xp sources. skilltree.tree - required to access and use the skill tree. skilltree.admin - required to use the admin commands. skilltree.all - allows user access to all trees. skilltree.Mining - allows the user to access the mining tree. skilltree.Woodcutting - allows the user to access the woodcutting tree. skilltree.Skinning - allows the user to access the skinning tree. skilltree.Harvesting - allows the user to access the harvesting tree. skilltree.Combat - allows the user to access the combat tree. skilltree.Medical - allows the user to access the medical tree. skilltree.Build_Craft - allows the user to access the build craft tree. skilltree.Scavenging - allows the user to access the scavenging tree. skilltree.Vehicles - allows the user to access the vehicles tree. skilltree.Cooking - allows the user to access the cooking tree. skilltree.bag.keepondeath - prevents the ExtraPockets bag from dropping on death. skilltree.notitles - Removes the level title from the player (Requires BetterChat) skilltree.noxploss - Prevents xp loss. skilltree.roguelike - If enabled via the config, will be required to participate in the Roguelike system. skilltree.teabonus - Ignores the config option preventing the yield increases from working with mining and woodcutting teas. skilltree.noscoreboard - Prevents players with this permission from being added to the scoreboard. //Custom permission settings "Modified max skill points based on permissions [must be higher than default]": { "vip": 120 }, "Cost per point to respec based on permissions [must be lower than default]": { "vip": 10.0 }, "Maximum amount of xp a player can lose when they die based on permissions [must be less than default]": { "vip": 500.0 }, "Permissions to adjust xp gain modifiers (skilltree.<perm>) [1.0 is default modifier]": { "vip": 1.2 }, The permission for "vip" would be skilltree.vip Assigning this perm to players would override the default values for the respective settings (max skill points, respec cost, xp gain and xp loss). Command: st Description: Opens the skill tree menu. Requires skilltree.chat permissions. Command: updatexptable Description: Recalculates the xp table based on the config values. Requires Command: togglexpdrops Description: Toggles the xp popup when obtaining xp. Command: togglexphud Description: Toggles the xp hud on the players screen. Command: givexp Parameters: <name> <amount> <optional: Ignore modifiers true/false> Description: Gives the player matching the name parameter, xp equal to the amount parameter. Ignore modifiers will ignore all forms of xp boosts such as rested xp. Command: givesp Parameters: <name> <amount> Description: Gives the player matching the name parameter, skill points equal to the amount parameter. Command: resetdata Parameters: <name> Description: Resets the target players data. Command: turbo Description: Toggles the turbo on the boat if the player has the relevant perk. Command: togglebc Description: Toggles the BetterChat title on/off for the user. Command: movebar Description: brings up a ui that can be used to relocate the xp bar on the players screen. Command: stresetalldata Description: Resets all players data. Command: sb or score or scoreboard Description: Chat and console command that brings up the scoreboard, showing who has the most xp. Command: sttogglenotifications Description: Toggle notifications from buff triggers. Command: stgiveitem Parameters: <id> <shortname> <quantity> <skin ID> <optional: displayName> Description: gives an item to the target ID that matches the parameters. Console Command: strespecallplayers Description: Resets skills for all online and offline players. Console Command: strespecplayer Parameters: <target name/userID> Description: Resets the target online/offline players skills. Console Command: givexptoall Parameters: <amount> <online only: true/false> Description: Will give the amount of xp to all players. If online only is true, it will only give it to those that are online. Console Command: givesptoall Parameters: <amount> <online only: true/false> Description: Will give the amount of skill points to all players. If online only is true, it will only give it to those that are online. Console Command: stremoveplayerdata Parameters: <userid> Description: Will remove the player data file for the specified userid. Experience can be gained from a number of different sources. The value for each source can be adjusted via the config. NodeHit - Hitting a stone, metal or sulfur mining node. NodeHitFinal - Finishing a stone, metal or sulfur mining node. TreeHit - Hitting a tree. TreeHitFinal - Knocking down a tree. SkinHit - Hitting an animal with a skinning tool. SkinHitFinal - Finishing off an animal with a skinning tool. CollectWildPlant - Collecting any map generated collectible, such as hemp, corn, pumpkin, stone, sulfur or metal. CollectGrownPlant - Collecting any player grown produce. BuildingBlockDeployed - Placing down a twig building block. FishCaught - Catching a fish. Crafting - Whenever a craft is successfully completed. XP is calculated based on the duration of the craft. ScientistNormal - Killing a blue scientist. ScientistHeavy - Killing a heavy scientists. SmallAnimal - Killing a small animal such as a chicken. MediumAnimal - Killing a medium animal such as a boar, wolf or stag. LargeAnimal - Killing a large animal such as a horse, shark or bear. Barrel - Destroying barrels. RoadSign - Destroying road signs. Scarecrow - Killing scarecrows or a zombie in ZombieHorde. Mission - Completing a mission in rust. BradleyAPC - Getting the last hit on Bradley. LootHackedCrate - First player to loot a locked crate. LootHeliCrate - First player to loot a heli crate. LootBradleyCrate - First player to loot a bradley crate. CookingMealXP - (Requires cooking plugin) XP is calculated per ingredient used. Example 2 tomatos and 8 bear meat would yield 100xp. RaidableBaseCompletion - Awards raiders of a RaidableBase xp upon the completion of the raid. Win_HungerGames - Awards xp to the winner of the Hunger Games arena. Win_ScubaArena - Awards xp to the winner of the Scuba arena. Win_Skirmish - Awards xp to the winner of the Skirmish arena. Gut_Fish - Awards xp when gutting a fish. default_botrespawn - default amount xp given when killing a bot made using botrespawn. Overriding values can be added to the config based on the bot group. crate_basic - when opening crates crate_elite - when opening crates crate_mine - when opening crates crate_normal - when opening crates carte_normal_2 - when opening crates crate_normal_2_food - when opening crates crate_normal_2_medical - when opening crates crate_tools - when opening crates crate_underwater_advanced - when opening crates crate_underwater_basic - when opening crates crate_ammunition - when opening crates crate_food_1 - when opening crates crate_food_2 - when opening crates crate_fuel - when opening crates crate_medical - when opening crates Harbor_Event_Winner - Winner of the Harbor event plugin Junkyard_Event_Winner - winner of the Junkyard event plugin PowerPlant_Event_Winner - winner of the Power plant event plugin Satellite_Event_Winner - winner of the Satellite event plugin Water_Event_Winner - winner of the Water event plugin Air_Event_Winner - winner of the Air event plugin. Armored_Train_Winner - winner of the Armored train plugin Convoy_Winner - winner of the Convoy event plugin. Supply_drop - first player that opens a supply drop. SurvivalArena_Winner - winning the SurvivalArena event. swipe_card_level_1 - using a green swipe card reader swipe_card_level_2 - using a blue swipe card reader swipe_card_level_3 - using a red swipe card reader boss_monster - killing an NPC from boss monster Zombie - Killing a ZombieHorde zombie UnderwaterDweller NPCs - NPCs in underwater labs JetPilot - JetPilot plugin ArcticBaseEvent_Winner - winner of the Arctic Base Event GasStationEvent_Winner - winner of the Gas Station Event SputnikEvent_Winner - winner of the Sputnik Event detect_diggable - triggered when a metal detector site is dig up. ShipWreckEvent_Winner - winner of the Ship Wreck Event pvp - when a player kills another player (default: off). Name: Mining Yield Description: Increases the amount of resources gained while mining. Name: Instant Mine Description: Gives the user a chance to instantly mine out a stone, sulfur or metal node. Name: Smelt On Mine Description: Gives the user a chance to smelt some of the ore as its mined from sulfur and metal nodes. Name: Mining Luck Description: Gives the user a chance to obtain items from the Mining luck loot table when they finish mining a node. Name: Mining Tool Durability Description: Decreses the durability loss of mining tools. Name: Woodcutting Yield Description: Increases the amount of resources gained while woodcutting. Name: Instant Chop Description: Gives the user a chance to instantly chop down a tree. Name: Woodcutting Coal Description: Gives the user a chance to obtain some charcoal while woodcutting. Name: Woodcutting Luck Description: Gives the user a chance to obtain items from the Woodcutting luck loot table when they finish cutting down a tree. Name: Woodcutting Tool Durability Description: Decreses the durability loss of woodcutting tools. Name: Skinning Yield Description: Increases the amount of resources gained while skinning. Name: Instant Skin Description: Gives the user a chance to instantly cut up an animal. Name: Skinning Tool Durability Description: Decreases the durability loss of skinning tools. Name: Skinning Cook Description: Gives the user a chance to received cooked meat, instead of raw meat, while skinning an animal. Name: Harvest Wild Yield Description: Increases the yield when harvesting map generated collectibles, such as berries, hemp, stone, sulfur and mushrooms. Name: Harvest Grown Yield Description: Increases the yield when harvesting player grown produce. Name: Extra Fish Description: Gives the user a chance of receiving an extra fish while fishing. Name: Double Bandage Heal Description: Doubles the healing power of cloth bandages. Name: Radiation Reduction Description: Reduces the amount of radiation damage taken by the player. Name: Extra Food Description: Increases the amount of calories the player receives when consuming food. Name: Fire Damage Reduction Description: Reduces the amount of fire damage received. Name: Fall Damage Reduction Description: Reduces the amount of fall damage received. Name: No Cold Damage Description: Removes all cold damage from the player. Name: Wounded Resist Description: Gives the player a chance to get straight back on their feet after entering the wounded state. Name: Animal Damage Resist Description: Reduces the damage taken by animals. Name: Riding Speed Description: Increases the speed of a horse while riding it. Name: Free Bullet Chance Description: Gives the player a chance to not expend a bullet when firing a gun. Name: Primitive Expert Description: Removes durability loss for primitive weapons. Name: Upgrade Refund Description: Gives the player a chance to receive their resources back when upgrading a building block. Name: Craft Speed Description: Increases the crafting speed of a player. Name: Research Refund Description: Gives the player a chance to receive their scrap back when researching an item on the research bench. Name: Craft Refund Description: Gives the player a chance to receive their crafting materials back when crafting an item. Name: Extra Scrap Barrel Description: Gives the player a chance to receive additional scrap when destroying a barrel. Name: Barrel Smasher Description: Allows the player to instantly smash a barrel with any weapon. Name: Extra Scrap Crate Description: Gives the player a chance to obtain extra scrap when looting a crate for the first time. Name: Component Chest Description: Gives the player a chance to obtain additional components when looting a crate for the first time. Name: Electronic Chest Description: Gives the player a chance to obtain additional electronics when looting a crate for the first time. Name: Component Barrel Description: Gives the player a chance to obtain additional components when smashing a barrel. Name: Electronic Barrel Description: Gives the player a chance to obtain additional electronics when smashing a barrel. Name: Melee Resist Description: Reduces the damage taken by melee weapons. Name: Iron Stomach Description: Allows the player to eat spoiled and raw food without being poisoned. Name: Boat Speed Description: Allows the user to activate a turbo boost while on a boat, increasing the boats speed. Name: Recycler Speed Description: Increases the speed of recycling for the player. Name: Smelt_Speed Description: Adds a chance for ore to smelt whenever wood is consumed, in addition to the standard smelt rate. Name: Heli_Fuel_Rate Description: Reduces the fuel consumption for your helicopters. Name: Boat_Fuel_Rate Description: Reduces the fuel consumption for your boats. Name: Vehicle_Mechanic Description: Allows the user to repair a vehicle at no cost. Name: Reviver Description: Brings a wounded player up with additional health if the reviving player has the buff. Name: Rationer Description: Provides the consumer a chance to receive their food/tea back once consumed. Name: PVP_Critical Description: Gives the attacker a chance to critically damage the target in PVP. Name: PVP_Damage Description: Increases the damage of all PVP attacks. Name: PVP_Shield Description: Reduces the damage of all incoming PVP attacks. Name: Metabolism_boost Description: Increases your calories and hydration above the maximum. Name: LootPickup Description: Chance to have the loot from destroyed barrels given moved directly to their inventory. Name: Node_Spawn_Chance Description: Chance to spawn a new node when a new one is mined out. Name: HealthRegen Description: Passively regenerates x health per second Name: AnimalTracker Description: Allows the user to use the /track command to find the direction of the closest animal. Name: ExtraPockets Description: Creates a backpack style storage system, providing players the ability to access the storage using a chat command (/pouch). Slots are given based on points spent. Name: Human_NPC_Damage Description: Increases damages against scientists. Name: Animal_NPC_Damage Description: Increases damages against animals. Name: Human_NPC_Defence Description: Decrease damage from scientist. Name: Craft_Duplicate Description: Chance to duplicate an item while crafting. Name: WaterBreathing Description: Breath underwater. Name: SharkResistance Description: Reduce damage taken from sharks. Name: SharkSkinner Description: Chance to receive random items while skinning sharks. Name: DeepSeaLooter Description: Chance to receive additional items while looting sunken crates. Name: InstantUntie Description: Instantly untie sunken crates. Name: UnderwaterDamageBonus Description: Increase damage to all living things while underwater (including underwater labs). Name: Permission Description: Used for permission based skills. Name: MaxRepair Description: Resets the max condition for any items that are repaired. Name: Durability Description: Reduces condition loss for all items that the player is using. Name: Regrowth Description: Provides a chance for a tree to respawn when cut down. Name: Skinning_Luck Description: Provides a chance to receive an item when skinning an animal. Name: Fishing_Luck Description: Provides a chance to receive an item when catching a fish. Name: Trap_Damage_Reduction Description: Reduces the damage received from traps. Name: Trap_Damage_Increase Description: Increases the damage done to traps. Name: Personal_Explosive_Reduction Description: Reduces the damage received from your own explosives. Name: Double_Explosion_Chance Description: Provides a chance for your explosives to trigger twice. Name: Lock_Picker Description: Provides a chance to open a locked entity that you do not have access to. Name: Explosion_Radius Description: Increases the explosion radius of your explosives. Name: Dudless_Explosive Description: Reduces the chance of your satchels and beancans being duds. Name: Woodcutting_Hotspot Description: Treats each hit on a tree as though you hit the hotspot. Name: Mining_Hotspot Description: Treats each hit on a node as though you hit the hotspot. Name: Extended_Tea_Duration Description: Increases the duration of tea buffs by x% per level. Name: Extended_Mag Description: Increases the magazine capacity of weapons by x% per level. Name: Tea_Looter Description: Provides you with a x% chance per level to find tea in certain containers. Name: Bite_Speed Description: Decreases the time it takes to hook a fish by x% per level. Name: Heli_Speed Description: Increases the max thrust speed of the heli by x% per level. Name: Sonar Description: Allows the user to run a command to find all nearby submerged objects (dive sites, sharks, scientists etc). Name: Comfort Description: Provides the player and all nearby team mates with a % of comfort per level. Name:Heal_Share Description: Provides surrounding team mates with a % of health received per level. Name:XP_Share Description: Provides surrounding team mates with a % of the xp you gain per level. Name: Tea_Share Description: Provides surrounding team mates with a % of tea buffs when you consume tea per level. Name: Metabolism_Share Description: Provides surrounding team mates with a % of hydration and calories received per level. Name: Human_Workbench Description: Creates a workbench aura on the player. The player and nearby team mates can use them as a workbench (the level of which is based on the skill level). Name: Recycler_Efficiency Description: Increases the recycler efficiency by x%. Name: Metal_Detector_Luck Description: Provides the player with a chance per level to obtain an additional item when they excavate metal detection sites. Name: Efficient_Digger Description: Provides the player with a chance per level to automatically dig up metal detection sites when they are flagged. Name: Magnetic_Digger Description: Provides the player with a chance per level to automatically collect dug up items. Name: RadiationBaseValue Description: Provides you with a base radiation resistance of % per level, even when naked. Name: RadiationResistModifier Description: Increases the effectiveness of your clothings radiation resistance by % per level. Name: Woodcutting_Ultimate Description: Harvests the surrounding trees when cutting down a tree. Name: Mining_Ultimate Description: Provides access to a chat command to see all surrounding node locations. Name: Combat_Ultimate Description: Heals the player for a percentage of the damage that they deal to all sources. Name: Vehicle_Ultimate Description: Reduces damage dealt to the players mounted vehicle (default 100% deduction). Name: Harvester_Ultimate Description: Allows the player to set the genetic composition of plants. Name: Medical_Ultimate Description: Gives the player a chance to resurrect at their point of death if they choose to. Name: Skinning_Ultimate Description: Killing an animal with this buff active will provide the player with an enhanced ability for a period of time, depending on the animal killed. - Chicken: No fall damage. - Boar: Chance to find components while harvesting mushrooms and berries. - Wolf: Increased healing while near team mates. - Stag: Notification when a neutral player is nearby, and their last known location (configurable). - Bear: Scientists will not attack the player unless attacked. - Polarbear: Overshield. Name: Build_Craft_Ultimate Description: Use any coloured swipe cards in any reader. Name: Scavengers_Ultimate Description: Will automatically recycle components from barrels when they are broken. The xp table uses a common equation to calculate its levels and xp requirements. You can read more about the method here: https://blog.jakelee.co.uk/converting-levels-into-xp-vice-versa/ There is also a spreadsheet you can make a copy of and adjust the x value at the top of. Increasing the number minimizes the xp between levels. Find a good value, then put it in the "x" value under the "Leveling information" section in the config. It is recommended that you leave the y value at 2 or 3, and adjust the x value only. Rule of thumb: - 0.07: default - 0.04: grindy. API object STCanGainXP(BasePlayer player, BaseEntity source, double value, string source_string) object STCanGainXP(BasePlayer player, string plugin, double value) Returning a non-null value will cancel the xp gain. Source can return null so be sure to check that. string[] ST_GetPlayerLevel(BasePlayer player) // Example [ChatCommand("testapi")] void TestAPI(BasePlayer player) { var data = (string[])SkillTree.Call("ST_GetPlayerLevel", player); Puts($"Level: {data.First()}. XP: {data.Last()}"); } Returns the players level [0] and xp [1] values as a string[] object STCanReceiveYield(BasePlayer player, BaseEntity entity) Returning a non-null value will cancel the yield gain. object STOnLoseXP(BasePlayer player) Returning a non null value prevents the xp loss. double GetExcessXP(BasePlayer player) Gets the excess xp over the players current level as a double. RemoveXP(BasePlayer player, double value) Removes xp from the player equal to the value. Will not reduce the value below the start of their current level. void STOnPlayerLevel(BasePlayer player, int oldLevel, int newLevel); Triggers when a player levels up. No return value. void STOnPouchOpened(BasePlayer player, StorageContainer pouch) Triggers when a player opens the ExtraPockets storage. object STCanModifyHorse(BasePlayer player, RidableHorse horse, float modifier) Returning a non-null value will prevent the horse from being modified by the Riding_Speed buff. public void AddNode(string tree, string node, bool enabled, int max_Level, int tier, float value_Per_Buff, string _buff, string _buffType, string icon_url, object[] _perms = null) object[] perms { string perms_description, Dictionary<int, List<string>> tiers_and_perms } void AddCookingNodeToSkillTree() { if (SkillTree != null && SkillTree.IsLoaded) { Dictionary<int, Dictionary<string, string>> _perms = new Dictionary<int, Dictionary<string, string>>() { [1] = new Dictionary<string, string>() { ["cooking.instant"] = "Instant Cook" } }; string Description = "Cooking food with the Cooking plugin will be instant."; object[] perms = new object[] { Description, _perms }; string Tree = "Cooking"; string Node = "Instant Chef"; bool StartOn = true; int Max_Level = 1; int Tier = 2; float Value_per_Level = 1; string Buff = "Permission"; string BuffType = "Permission"; string URL = "https://i.imgur.com/3TMqFKG.png"; SkillTree.Call("AddNode", Tree, Node, StartOn, Max_Level, Tier, Value_per_Level, Buff, BuffType, URL, perms); } } Allows plugins to add custom nodes to trees. [HookMethod("IsExtraPocketsContainer")] public object IsExtraPocketsContainer(uint uid) { if (containers.ContainsKey(uid)) return True; return False; } [HookMethod("GetExtraPocketsContainerProvider")] public Func<uint, bool> GetExtraPocketsContainerProvider() { return new Func<uint, bool>(uid => { if (containers.ContainsKey(uid)) return true; return false; }); } [HookMethod("GetExtraPocketsOwnerIdProvider")] public Func<uint, string> GetExtraPocketsOwnerIdProvider() { return new Func<uint, string>(uid => { Containers data; if (containers.TryGetValue(uid, out data)) return data.userIDString; return null; }); } API for extra pockets. object STCanReceiveBonusLootFromContainer(BasePlayer player, LootContainer container) Prevents buffs from adding loot to containers if returning a non-null value. object STOnItemRepairWithMaxRepair(Item item) Returning non-null prevents the item bring repaired to max. object[] GetXPStats(ulong id) Returns object[]: int level, double xp, double current level start xp, double next level start xp. float GetBuffValue(BasePlayer player, string skill) Returns the current modifier for the specified buff. void AwardXP(ulong userid, double value, string plugin, bool noMod = false) Provides the player with the specified amount of xp public void DisableBuffs(ulong id) Disables buffs for a player public void EnableBuffs(ulong id) Enables buffs for a player$29.99- 1,059 comments
- 35 reviews
-
- 29
-
-
-
- #leveling
- #progression
- (and 13 more)
-
Version 2.8.7
23,624 downloads
Create fully automated raidable bases with NPCs in Rust This is the premium version of Raidable Bases. The differences between this and the free version are too many to list. A few key differences are: five (5) difficulties and associated loot table functionality instead of one (1), buyable events, lockouts for players. Requires latest version of CopyPaste or bases to work. It also requires that you have copypaste files already made. Raidable bases will be spawned using the CopyPaste plugin. This plugin does NOT come with any bases. Packages are sold separately that include bases. Check out my packages for this plugin for tier1, tier2, and tier3 which contain everything you need to get the plugin working in minutes with all bases and loot already configured for you! Packages are sold separately. RBE DEBUG This command exists to aid with issues regarding your configuration, profiles and/or map by displaying information, both good and bad, related to finding spawn points and spawning of bases. It is your responsibility to use this command before asking for help. Loot Table Editor by @beee https://codefling.com/tools/raidable-bases-loot-table-editor Tutorial This is not your run-of-the-mill plugin. DO NOT INSTALL WITHOUT READING THIS DOCUMENTATION FIRST. This plugin is extremely advanced and requires utmost attention to detail to configure properly. Jumping around in the configuration file or profiles will lead to more problems than it's worth. Take your time to understand each option before enabling or disabling its functionality. Raidable Bases is an independent expansion of Dangerous Treasures. You may learn how to enable the expansion mode below. It does not require Dangerous Treasures for any other purpose. Configuration Loot Tables The plugin comes with some very basic items (Default_Loot.json) that only serve as a demo loot list for you to either delete or expand upon. In order to make any use of the plugin (beyond demonstration) you will have to create your own loot lists instead. It will take a very long time to configure your loot tables, and fine-tune each to your specific needs. To start, I recommend that you use the rb.populate all command. This creates files in the Editable_Lists folder for each difficulty that contain every item in the game. Edit each file and set the amounts for the items that you want to spawn, and remove those that you do not want to spawn. It may look intimidating editing a list of 660 items, but don't underestimate how easy it is to delete items from a list compared to adding each one manually. Items that have their amount AND amountMin set to 0 will not spawn. So you may either delete these items from the list, or come back to them later. If you set amountMin to 0 then chance will determine if the item spawns or not, and another item will not replace it unless there are extra items available (as of 1.7.3). You can set the item skin that you want to use, but I suggest using the Skins settings in the configuration file to use random skins, or none at all. The rb.populate command which populates the Editable_Lists folder also includes items already inside of your Difficulty_Loot folder. This allows you to easily repopulate lists in order to re-evaluate which items spawn at a later date. Files inside of the Editable_Lists folder must be copied into an existing loot file in order to use the loot table. As the name implies, it is for editing only. - If you want to use Editable_Lists/Easy.json for your Easy bases then copy the contents of the file into the Difficulty_Loot/Easy.json file. - If you want to use Editable_Lists/Expert.json for the Expert Bases.json profile, then you must copy the contents of the Expert.json file into the Bases_Loot/Expert Bases.json file probability - the chance that the item can spawn. value must be between 0.0 and 1.0 where 1.0 is 100% chance Loot Priority Loot is pulled from all datafiles within the oxide/data/RaidableBases/ folder with the exception of the Profiles folder which is used to configure bases. oxide/data/RaidableBases/Base Loot - If a loot table exists in this folder with the same name as a profile then all of the bases in that profile will use this loot table. If you want items in this loot table to always spawn then you must enable Always Spawn Base Loot Table in the respective profile. oxide/data/RaidableBases/Difficulty Loot - Items will be chosen from these files based on the difficulty of each profile. If Use Day Of Week Loot is enabled then it will choose the loot table for that specific day. Otherwise, it will pick from Default_Loot.json. This is the default list, and is only used when all other loot tables do not have a sufficient amount of loot to spawn based on the Amount Of Items To Spawn setting. Loot Settings Allow Duplicate Items - This is useful when you do not have enough items in your loot tables , and you want to spawn Amount Of Items To Spawn by using the same items more than once. Amount Of Items To Spawn - This is the number of items that you want to spawn. If you do not have enough items in your loot tables then it will only spawn the amount that you have available. It will not spawn items if the container does not have enough space. Drop Tool Cupboard Loot After Raid Is Completed (false) Divide Loot Into All Containers - This allows you to divide loot evenly from all of your loot lists into all containers when enabled. You MUST increase or decrease Amount Of Items To Spawn respective to how many items you want in each container. This includes large boxes, small boxes, coffins and storage barrels. Optional settings include (in order of priority) cupboard, bbq, oven, fridge and lockers. Allow Players To Pickup Deployables (false) - As name implies, overridden by Entities Not Allowed To Be Picked Up Allow Players To Deploy A Cupboard (true) - Block players from placing a TC after destroying the TC in the base. Drop Container Loot X Seconds After It Is Looted (false) - Prevent players from cherry picking items and leaving the rest, in order to despawn the raid quicker. Drop Container Loot Applies Only To Boxes And Cupboards (true) - As name implies Empty All Containers Before Spawning Loot (true) - Useful if using CopyPaste files that contain loot already - I suggest leaving this true as it can complicate how many items spawn if there are too few inventory slots remaining. Ignore Containers That Spawn With Loot Already (false) - Useful if you want specific loot to spawn from a copypaste file. Require Cupboard Access To Loot (false) - Prevent all players from looting until they reach the TC, or destroy it. Skip Treasure Loot And Use Loot In Base Only (false)" - Useful if you want all loot to spawn from a copypaste file - not recommended - will allow players to memorize which boxes to raid and ignore the rest. Always Spawn Base Loot Table (false) - Very useful if you want items in the Base_Loot file to always spawn (such as C4, rockets, ammo, etc) Settings Blacklisted Commands (none) - prevents players from using these commands inside of a raid base Automatically Teleport Admins To Their Map Marker Positions (true) - right-click map to teleport (requires raidablebases.mapteleport permission) Block Wizardry Plugin At Events (false) - Block players from using wands Chat Steam64ID (0) - The steam profile icon to show in chat messages Expansion Mode (Dangerous Treasures) (false) - Allow Dangerous Treasures to take over a random box for its event Remove Admins From Raiders List (false) - Allows admins to help players without receiving any rewards Show X Z Coordinates (false) - Show X Z coordinates alongside grid location Buy Raid Command (buyraid) - Opens the buyable UI to purchase raids for each difficulty Event Command (rbe) - Specify command name Hunter Command (rb) - Specify command name Server Console Command (rbevent) - Specify command name Raid Management Allow Teleport (false) - Allow/prevent players from teleporting Allow Cupboard Loot To Drop (true) - Allows loot to drop when TC is destroyed by a player Allow Players To Build (true) Allow Players To Use Ladders (true) Allow Players To Deploy Barricades (true) Allow Players To Upgrade Event Buildings (false) - Prevent players from upgrading buildings with no TC to prevent this otherwise Allow Player Bags To Be Lootable At PVP Bases (true) - Bypasses Prevent Looting plugin Allow Player Bags To Be Lootable At PVE Bases (true) - Bypasses Prevent Looting plugin Allow Traps To Drop Loot (false) - Allow traps such as guntraps and turrets to drop loot on death Allow Players To Loot Traps (false) - Allows players to loot traps such as guntrap and turrets with TC access Allow Raid Bases On Roads (true) Allow Raid Bases On Rivers (true) Allow Raid Bases On Building Topology (true) - Specifically added for custom map makers Allow Vending Machines To Broadcast (false) - Prevents vending machines from showing on the map Allow Bases To Float Above Water (false) - Keyword: FLOAT Allow Bases To Spawn On The Seabed (false) Prevent Bases From Floating Above Water By Also Checking Surrounding Area (false) - Keyword: FLOAT Maximum Water Depth Level Used For Float Above Water Option (1.0) - Keyword: FLOAT, but allows you to prevent on water if the value is low enough Backpacks Can Be Opened At PVE Bases (true) Backpacks Can Be Opened At PVP Bases (true) Backpacks Drop At PVE Bases (false) - Will drop a backpack on death, even if explicity disabled in Backpack configuration (requires Backpacks 3.4.0 ) Backpacks Drop At PVP Bases (false) Block Mounted Damage To Bases And Players (false) - Prevent players from dealing damage while on mini, scrap heli, etc Block RestoreUponDeath Plugin For PVP Bases (false) Block RestoreUponDeath Plugin For PVE Bases (false) Bypass Lock Treasure To First Attacker For PVE Bases (false) - Do not set an owner for PVE bases Bypass Lock Treasure To First Attacker For PVP Bases (false) - Do not set an owner for PVP bases Despawn Spawned Mounts (true) - Allows mounts such as mini or scrap heli to remain if not abandoned when raid despawns Do Not Destroy Player Built Deployables (true) - Loot is not lost if the plugin destroys a player's box with this option - it is dropped on the ground in a grey loot container just as if they destroyed the box themselves Do Not Destroy Player Built Structures (true) Divide Rewards Among All Raiders (true) Draw Corpse Time (Seconds) (300.0) - The amount of time the players corpse location is drawn on their screen Eject Sleepers Before Spawning Base (true) Extra Distance To Spawn From Monuments (0.0) Flame Turrets Ignore NPCs (false) - Can help with performance on some servers Maximum Land Level (2.5) - The allowed height of the surrounding terrain for spawning bases (this should never be changed) Move Cookables Into Ovens (true) Move Food Into BBQ Or Fridge (true) Move Resources Into Tool Cupboard (true) Move Items Into Lockers (true) Lock Treasure To First Attacker (true) - Sets the first attacker as the owner of a raid. You must set eject enemies settings in each profile if you do not want players entering private raids Lock Treasure Max Inactive Time (Minutes) (20.0) - Resets the raid as public after this time Assign Lockout When Lock Treasure Max Inactive Time Expires (false) - useful those who partially raid bases in order to avoid the lockout timer Lock Players To Raid Base After Entering Zone (false) - Forces players to be locked to a raid once they enter it, even on accident Only Award First Attacker and Allies (false) Minutes Until Despawn After Looting (min 1) (15) - The time until the base despawns after being raided Minutes Until Despawn After Inactive (0 = disabled) (45) - The time until the base despawns after being inactive Minutes Until Despawn After Inactive Resets When Damaged (true) - Resets the time until the base despawns when it is damaged by a player Mounts Can Take Damage From Players (false) Mounts Can Take Damage From SamSites (true) Player Cupboard Detection Radius (100.0) - Extra layer of protection to prevent raid bases from spawning too closely to player bases (this should never be under 100 and never too high either, 100-200 at most) Players With PVP Delay Can Damage Anything Inside Zone (false) - Applies specifically to PVP raid bases Players With PVP Delay Can Damage Other Players With PVP Delay Anywhere (false) PVP Delay Between Zone Hopping (10.0) - The amount of time players can take damage while on a PVE server after stepping outside of a PVP zone - prevents exploiting - recommended value: 120 Prevent Fire From Spreading (true) - Helps with server performance by preventing forest fires, err, fire from spreading after initial spawn Prevent Players From Hogging Raids (true) - Prevents players from tagging multiple raids at once Require Cupboard To Be Looted Before Despawning (false) Destroying The Cupboard Completes The Raid (false) Require All Bases To Spawn Before Respawning An Existing Base (false) - Rotate through all bases specific to each difficulty before reusing an existing base Turn Lights On At Night (true) Turn Lights On Indefinitely (false) Traps And Turrets Ignore Users Using NOCLIP (false) Use Random Codes On Code Locks (true) Wait To Start Despawn Timer When Base Takes Damage From Player (false) - Prevents the inactive despawn timer from starting until it is damaged by a player. Combos well when inactive resets is disabled by giving players a limited time to finish a raid once they start it Additional Containers To Include As Boxes (none) - example: vendingmachine Eject Mounts Boats (false) - Set any true to prevent them from entering a raid base Cars (Basic) (false) Cars (Modular) (false) Campers (true) Chinook (false) Flying Carpet (false) Horses (false) HotAirBalloon (true) MiniCopters (false) Pianos (true) Scrap Transport Helicopters (false) All Other Mounts (false) All Controlled Mounts (false) - Mounts controlled via another plugin Max Amount Of Players Allowed To Enter Each Difficulty (0 = infinite, -1 = none) (infinite) Easy Difficulty => Amount (0) Medium Difficulty => Amount (0) Hard Difficulty => Amount (0) Expert Difficulty => Amount (0) Nightmare Difficulty => Amount (0) Max Amount Allowed To Automatically Spawn Per Difficulty (0 = infinite) -1 = disabled) Easy (0) - Specifies how many of each difficulty can be spawned at any given time Medium (0) Hard (0) Expert (0) Nightmare (0) Player Lockouts (0 = ignore) - this is for PUBLIC raids where buyable events use the Buyable Cooldowns and these are not shared - players may still do 1 public and 1 buyable event if these are both enabled Time Between Raids In Minutes (Easy) (0.0) - Set a cooldown before the player can enter another raid base Time Between Raids In Minutes (Medium) (0.0) Time Between Raids In Minutes (Hard) (0.0) Time Between Raids In Minutes (Expert) (0.0) Time Between Raids In Minutes (Nightmare) (0.0) Block Clans From Owning More Than One Raid (false) - Prevent clans from hogging multiple raid bases Block Friends From Owning More Than One Raid (false) Block Teams From Owning More Than One Raid (false) Easy|Medium|Hard|Expert|Nightmare Raids Can Spawn On Monday (true) Tuesday (true) Wednesday (true) Thursday (true) Friday (true) Saturday (true) Sunday (true) Difficulty Colors (Border) Easy (000000) Medium (000000) Hard (000000) Expert (000000) Nightmare (000000) Difficulty Colors (Inner) Easy (00FF00) Medium (FFEB04) Hard (FF0000) Expert (0000FF) Nightmare (000000) Map Markers Marker Name (Raidable Base Event) Radius (0.25) Use Vending Map Marker (true) Show Owners Name on Map Marker (true) Use Explosion Map Marker (false) Create Markers For Buyable Events (true) Create Markers For Maintained Events (true) Create Markers For Scheduled Events (true) Create Markers For Manual Events (true) Buyable Events Do Not Reward Buyable Events (false) Refunds > Refund Despawned Bases (false) Refunds > Refund Percentage (100.0) Refunds > Refund Resets Cooldown Timer (false) Refunds > Block Refund If Base Is Damaged (true) Cooldowns (0 = No Cooldown) VIP Permission (raidablebases.vipcooldown (300.0) Admin Permission (raidablebases.allow (0.0) Server Admins (0.0) Normal Users (600.0) Allow Players To Buy PVP Raids (false) - If all of your profiles have PVP enabled then players will NOT be able to buy any raids! Convert PVE To PVP (false) Convert PVP To PVE (false) Distance To Spawn Bought Raids From Player (500.0) Lock Raid To Buyer And Friends (true) Ignore Player Entities At Custom Spawn Locations (false) Ignore Safe Checks (false) - if enabled will prevent the plugin from checking the area for a TC, buildings, or deployables Max Buyable Events (1) Reset Purchased Owner After X Minutes Offline (10.0) Spawn Bases X Distance Apart (100.0) - most maps cannot support this being above 200 ! Spawns Database File (Optional) (none) - Useful if you want buyable raids to spawn in specific locations using spawn files from the Spawns Database plugin Maintained Events Always Maintain Max Events (false) - Spawn another raid soon after one despawns Ignore Player Entities At Custom Spawn Locations (false) - spawn regardless of what player entities are built in the area Chance To Randomly Spawn PVP Bases (0 = Ignore Setting) (0.0) - Overrides all PVP Allow profile settings for a chance to make the raid PVE or PVP Convert PVE To PVP (false) Convert PVP To PVE (false) Include PVE Bases (true) Include PVP Bases (true) Ignore Safe Checks (false) - Bypass checks that ensure no buildings or other objects are blocking the spawn Minimum Required Players Online (1) - Max Maintained Events (1) - How many bases you want available at any given time Spawn Bases X Distance Apart (100.0) - most maps cannot support this being above 200 ! Spawns Database File (Optional) (none) - Useful if you want maintained raids to spawn in specific locations using spawn files from the Spawns Database plugin Time To Wait Between Spawns (15.0) - Wait a specific time frame between each paste (can be set to 0) Manual Events Convert PVE To PVP (false) Convert PVP To PVE (false) Max Manual Events (1) Spawn Bases X Distance Apart (100.0) Spawns Database File (Optional) (none) - Useful if you want manually spawned raids to spawn in specific locations using spawn files from the Spawns Database plugin Scheduled Events Enabled (false) - Spawn raids on a timer specific to random amount of time between Every Min and Every Max Seconds Ignore Player Entities At Custom Spawn Locations (false) - spawn regardless of what player entities are built in the area Chance To Randomly Spawn PVP Bases (0 = Ignore Setting) (0.0) - Overrides all PVP Allow profile settings for a chance to make the raid PVE or PVP Convert PVE To PVP (false) Convert PVP To PVE (false) Every Min Seconds (3600.0) Every Max Seconds (7200.0) Include PVE Bases (true) Include PVP Bases (true) Ignore Safe Checks (false) - Bypass checks that ensure no buildings or other objects are blocking the spawn Max Scheduled Events (1) Max To Spawn At Once (0 = Use Max Scheduled Events Amount) (0) Minimum Required Players Online (1) Spawn Bases X Distance Apart (100.0) - most maps cannot support this being above 200 ! Spawns Database File (Optional) (none) - Useful if you want scheduled raids to spawn in specific locations using spawn files from the Spawns Database plugin Time To Wait Between Spawns (15.0) - Wait a specific time frame between each paste (can be set to 0) Economics Buy Raid Costs (0 = disabled) - if you do not configure at least one cost for Buyable Events then players will not be able to buy any raids Easy (0.0) - How much each raid costs, use the /buyraid command to see the UI Medium (0.0) Hard (0.0) Expert (0.0) Nightmare (0.0) ServerRewards Buy Raid Costs (0 = disabled) - if you do not configure at least one cost for Buyable Events then players will not be able to buy any raids Easy (0) - How much each raid costs, use the /buyraid command to see the UI Medium (0) Hard (0) Expert (0) Nightmare (0) Custom Buy Raid Costs (false = disabled) - if you do not configure at least one cost for Buyable Events then players will not be able to buy any raids Easy (50 scrap) - How much each raid costs, use the /buyraid command to see the UI Medium (100 scrap) Hard (150 scrap) Expert (200 scrap) Nightmare (250 scrap) All are disabled by default. All can require its own specific item. Allowed Zone Manager Zones List: pvp, 99999999 - the list of zones where raid bases may spawn at - Zone Manager is not required to use this plugin. Use Grid Locations In Allowed Zone Manager Zones Only - forces all spawns into zones by Zone Manager. Adding flags to your zones may conflict with this plugin. Use of Spawns Database plugin is advised instead Event Messages Notify Plugin (-1 = disabled) Notification Interval (1 second) Announce Raid Unlocked (false) Announce Buy Base Messages (false) Announce Thief Message (true) Announce PVE/PVP Enter/Exit Messages (true) Show Destroy Warning (true) Show Opened Message (true) Show Opened Message For Paid Bases (true) Show Prefix (true) Show Messages To Player (true) - set false if you do not want players to receive CHAT messages, other messages from notifications will still show GUIAnnouncements and Advanced Alerts plugins can be used instead of CHAT messages Advanced Alerts Enabled (true) Anchor Min and Max Time Shown (5) Panel Alpha (0.98) Background Color Title Background Color GUIAnnouncements Enabled (false) Banner Tint Color (Grey) Maximum Distance (300.0) Text Color (White) Lusty Map Enabled (false) Icon File (http://i.imgur.com/XoEMTJj.png) Icon Name (rbevent) Icon Rotation (0.0) Ranked Ladder (based on points system) Award Top X Players On Wipe (3) - Set 0 to disable permissions and groups from being created. Every wipe the top 3 players are awarded the raidablebases.th permission and raidhunter group. Used with plugins that give titles based on permissions/groups, such as BetterChat Enabled (true) Difficulty Points (for each difficulty) Assign To Owner Of Raid Only (false) Assign Rank After X Completions - Players that complete the required amount of completions will receive the relevant above permission and group automatically - Set value above 0 to enable this feature for any given difficulty as it is disabled for all difficulties by default Permissions and groups are given to players for being top 3 in each difficulty at the end of a wipe Set Award Top X Playrs On Wipe to 0 to disable these permissions and groups from being created. permissions: raidablebases.ladder.easy, raidablebases.ladder.medium, raidablebases.ladder.hard, raidablebases.ladder.expert, raidablebases.ladder.nightmare, raidablebases.th groups: raideasy, raidmedium, raidhard, raidexpert, raidnightmare, raidhunter Skins (Boxes, Loot Items, Npcs all have there own settings) (skin settings revamped in 2.7.4) Use Identical Skins Include Workshop Skins (true) Use Random Skin (true) Use Imported Workshop Skins File (true) - copy existing Imported Workshop Skins section from Skinbox to the Imported Workshop Skins json file to apply. Boxes (including above Skins options) Preset Skins - you can add any box skin here and it will randomly apply to any relevant box this skin can be used with Loot Items (including above Skins options) Use Identical Skins For Stackable Items Use Identical Skins For Non-Stackable Items Deployables (including above Skins options) List: Partial Names (door, barricade, chair, fridge, furnace, locker, reactivetarget, rug, sleepingbag, table, vendingmachine, waterpurifier, skullspikes, skulltrophy, summer_dlc, sled) Skin Everything (true) - if true then the Partial Names list will not be used Preset Door Skins - you can add any door skin here and it will randomly apply to any relevant door this skin can be used with Ignore If Skinned Already (false) Treasure Resources Not Moved To Cupboards (skull.human, battery.small, bone.fragments, can.beans.empty, can.tuna.empty, water.salt, water, skull.wolf) Use Day Of Week Loot (false) Do Not Duplicate Base Loot (false) Do Not Duplicate Difficulty Loot (false) Do Not Duplicate Default Loot (false) Use Stack Size Limit For Spawning Items (false) Status UI - Shows PVE/PVP, time left, amount of loot left and the status of owner Details UI - Shows owner and active status Delay UI - Shows UI for PVP delay Buyable Cooldowns UI - Shows UI for the Buyable Cooldowns option Buyable Events UI - Shows players a UI for buying events including the primary cost Lockouts UI - Shows UI for the Player Lockouts option Enabled Offset Min Offset Max Panel Alpha Font Size Background Color Title Background Color etc Weapons Fog Machine Allows Motion Toggle (true) Fog Machine Requires A Power Source (true) SamSite Repairs Every X Minutes (0.0 = disabled) (5.0) SamSite Range (350.0 = Rust default) (75.0) Test Generator Power (100.0) Tesla Coil settings in profiles Infinite Ammo AutoTurret (true) FlameTurret (true) FogMachine (true) GunTrap (true) SamSite (true) Ammo AutoTurret (256) FlameTurret (256) FogMachine (5) GunTrap (128) SamSite (24) Tesla Coil (profiles) Requires A Power Source (true) Max Discharge Self Damage Seconds (0 = None) 120 = Rust default) (0.0) Max Damage Output (35.0) Profiles Difficulty (0 = easy, 1 = medium, 2 = hard, 3 = expert, 4 = nightmare) (0) - very first setting. If your raids show as NORMAL then you're using the free plugin. If all bases show as EASY then this setting is not configured. Entities Not Allowed To Be Picked Up (List: generator.small, generator.static autoturret_deployed - overrides Allow Players To Pickup Deployables) Additional Bases For This Difficulty (default) - A list of bases to use within this profile Paste Options (default) - Paste options specific to the profiles filename if it is also a base Profile Enabled (true)- Useful for disabling a profile instead of deleting it Add Code Lock To Unlocked Or KeyLocked Doors (true) Add Code Lock To Boxes (false) Add Code Lock To Tool Cupboards (false) Close Open Doors With No Door Controller Installed (true) Allow Duplicate Items (false) - [Explained above] Allow Players To Pickup Deployables (false) - [Explained above] Allow Players To Deploy A Cupboard (true)- [Explained above] Allow PVP (true) Allow Friendly Fire (Teams) (true) Amount Of Items To Spawn (30) - [Explained above] Minimum Amount Of Items To Spawn (0 = Use Max Value) (0) Flame Turret Health (300.0) Block Plugins Which Prevent Item Durability Loss (false) - Force items to take condition losses Block Damage Outside Of The Dome To Players Inside (false) - Prevent damage from outside of the dome to players inside of the dome Block Damage Outside Of The Dome To Bases Inside (false) - Prevent damage from outside of the dome to the base inside Block Damage Inside From Npcs To Players Outside (false) Building Blocks Are Immune To Damage (false) Boxes Are Invulnerable (false) Spawn Silently (No Notifcation, No Dome, No Map Marker) (false) Divide Loot Into All Containers (true) - [Explained above] Drop Container Loot X Seconds After It Is Looted (0.0) - [Explained above] Drop Container Loot Applies Only To Boxes And Cupboards (true) - [Explained above] Create Dome Around Event Using Spheres (0 = disabled, recommended = 5) (5) - A visible dome for players to distinguish raid bases from player bases Empty All Containers Before Spawning Loot (true) - [Explained above] Eject Corpses From Enemy Raids (Advanced Users Only) (true) - Prevents corpses from remaining inside of a raid when it becomes private and prevents the user from looting it Eject Enemies From Purchased PVE Raids (true) - Useful when Lock Raid To Buyer And Friends is enabled Eject Enemies From Purchased PVP Raids (false) Eject Enemies From Locked PVE Raids (true) - Useful when Lock Treasure To First Attacker is enabled Eject Enemies From Locked PVP Raids (false) Explosion Damage Modifier (0-999) (100.0) - Modify the damage of all explosives Force All Boxes To Have Same Skin (true) Ignore Containers That Spawn With Loot Already (false) - [Explained above] Penalize Players On Death In PVE (ZLevels) (true) Penalize Players On Death In PVP (ZLevels) (true) Loot Amount Multiplier (1.0) - useful to scale loot amounts without having to adjust them all individually Protection Radius (50.0) - This options controls every single option and feature that relies explicity on distance or radius in one regard or another. Setting an incorrect value, either too low, or too high, will break the functionality of the plugin. It's best to leave it alone. Require Cupboard Access To Loot (false) - [Explained above] Minimum Respawn Npc X Seconds After Death (0.0) - Useful in simulating a real raid where players respawn Maximum Respawn Npc X Seconds After Death (0.0) Skip Treasure Loot And Use Loot In Base Only (false) - [Explained above] Always Spawn Base Loot Table (false) - [Explained above] - Arena Walls Enabled (true) Extra Stacks (1) - How many times you want walls to stack on top of one another Use Stone Walls (true) - set false to use wooden walls instead Use Iced Walls (false) - not advised to use this as it can cause client lag (not a plugin issue) Use Least Amount Of Walls (true) Use UFO Walls (false) - Walls spawn horizontally instead of vertically Radius (25.0) NPC Levels Level 2 - Final Death (false) - Respawns all npcs when raid is completed NPCs Enabled (true) Spawn Inside Bases (Options: Spawn On Floors, Spawn On Rugs, Spawn On Beds) Murderer Items Dropped On Death (none) Scientist Items Dropped On Death (none) Murderer (Items) (metal.facemask, metal.plate.torso, pants, tactical.gloves, boots.frog, tshirt, machete) Scientist (Items) (hazmatsuit_scientist, rifle.ak) Murderer Kits (murderer_kit_1, murderer_kit_2) - Kits have priority over these lists of items Scientist Kits (scientist_kit_1, scientist_kit_2) Random Names (none) - Spawn with a custom random name instead of a provided random name Amount To Spawn (3) Aggression Range (70.0) - Aggression range is increased by 250 meters when engaged Despawn Inventory On Death (true) Health For Murderers (100 min, 5000 max) (150.0) Health For Scientists (100 min, 5000 max) (150.0) Minimum Amount To Spawn (1) Use Dangerous Treasures NPCs (false) - Tells Dangerous Treasures to control and outfit the NPCs instead Spawn Murderers And Scientists (true) Scientist Weapon Accuracy (0 - 100) (30.0) - These bots are meant to be savages. 30% is average for highly skilled players, while the average player has 10-20% accuracy Spawn Murderers (false) Spawn Random Amount (false) Spawn Scientists Only (false) Rewards Economics Money (0.0) - How much is rewarded after a raid. Overridden by Divide Rewards Among All Raiders ServerRewards Points (0) Change Building Material Tier To Wooden (false) - Useful for upgrading or downgrading buildings automatically Stone (false) Metal (false) HQM (false) Change Door Type To Wooden (false) - Useful for upgrading or downgrading doors automatically Metal HQM Player Building Restrictions Wooden (false) Stone (false) Metal (false) HQM (false) Auto Turrets Aim Cone (5.0) - shots fired will spread into a cone pattern based on this radius. Lowering this value will group the shots closer together. Minimum Damage Modifier (1.0) Maximum Damage Modifier (1.0) Start Health (1000.0) Sight Range (30.0) Set Hostile (False = Do Not Set Any Mode) (true) Requires Power Source (false) Remove Equipped Weapon (false) Weapon To Equip When Unequipped (null = Do Not Equip) (rifle.ak) Permissions raidablebases.allow -- Allows player to use the available ADMIN commands. This is NOT recommended as players can use the commands 'buyraid' and 'rb' already. raidablebases.canbypass permission (or to be flying) to bypass dome restrictions (this previously worked for admins, but now requires the permission instead) raidablebases.blockbypass permission to bypass Owning More Than One Raid settings for Clans/Friends/Teams raidablebases.mapteleport Teleporting to map marker now simply requires this permission and to be enabled in config raidablebases.ddraw allows support for FauxAdmin users raidablebases.config allows use of the rb.config command in-game (server console does not require this permission) raidablebases.banned bans the user from entering any raids - DO NOT GIVE THIS TO THE DEFAULT GROUP LOL raidablebases.durabilitybypass to bypass `Block Plugins Which Prevent Item Durability Loss` raidablebases.notitle permission to exclude users from ranked title rewards See other permissions using Permissions Manager Players do not require any permissions by default. Grid This plugin creates it's own spawn points automatically, which cover the entirety of your server's map when the plugin is loaded. This is created one-time when the plugin loads. The grid maintains itself without requiring any input. You may view the grid by typing /rb grid in-game to view detailed drawings of all locations on the grid. X - green - possible spawn point X - Red - currently in use C - Cyan - construction detected nearby TC - yellow - TC detected nearby W - blue - water depth is too high - refreshes on ocean level change Each location on the grid is checked a second time before spawning a base to insure it does not spawn the base on players or their buildings. You can disable using the grid by providing a valid spawn file for each raid type (buyable, maintained, scheduled and manual). Commands buyraid - buys a raid, eg: buyraid easy, buyraid easy steamid, buyraid 0, buyraid 0 steamid. I suggest typing the command and using the UI to buy bases. rb - for players to see the ladder (also for admins to see the status of each raid going on, which includes showing the allies and owners of each raid) rb ui [lockouts|status] - COMMAND REMOVED rbe despawn - despawns a players purchased base if they have raidablebases.despawn.buyraid permission For admins, or players with the admin permission raidablebases.allow: rbe debug - toggles debug messages shown every second to server console for maintained and scheduled warning messages rb grid - see the grid and all monument names rb resettime - reset the time for the next scheduled event rb savefix - to cancel a server save that has become stuck - requires authlevel 2 rb prod - to gather information from a raid base entity for debugging purposes - requires admin or raidablebases.allow rbe - spawns a base at the position you are looking at. You cannot spawn a base on a player (including yourself) rbe draw - draw the raids radius rbe despawn - despawn a base near you (can be used by players with raidablebases.despawn.buyraid permission to despawn a base they purchased) rbe despawnall - despawn all bases rbe [basename] [difficulty] - spawn a raid at the location you are looking at rbe expire steamid|playername - removes a lockout for a specific player rbe expireall rbevent [basename] [difficulty] - spawn a raid randomly on the map - and teleport to it if using the command in-game rb.reloadconfig - allows you to reload the config without needing to reload the plugin. Some changes are not applied immediately, and no changes are retroactive to bases that are already spawned. rb.config - allows you to edit the config by adding, removing, and listing bases. Requires the permission raidablebases.config when not being used from the server console. rb.toggle - toggles Maintained Events and Scheduled Events on/off, if enabled in the config, until plugin reloads rbe setowner name - Sets the player as the owner of the raid rbe clearowner - Clears the owner of the raid Additional Bases allows you to add additional files to an existing base so that all bases in that list share the same configuration as the primary base/profile. This is great for setting up a list of bases for easy, medium, hard, expert and nightmare. Command rb.populate will populate specific loot tables with every item in the game (items are disabled by default as their amounts are set to 0) Arguments: rb.populate easy medium hard expert nightmare loot all Arguments: rb.populate 0 1 2 3 4 loot all easy - Populates oxide/data/RaidableBases/Editable_Lists/Easy.json medium - Populates oxide/data/RaidableBases/Editable_Lists/Medium.json hard - Populates oxide/data/RaidableBases/Editable_Lists/Hard.json expert - Populates oxide/data/RaidableBases/Editable_Lists/Expert.json nightmare - Populates oxide/data/RaidableBases/Editable_Lists/Nightmare.json loot - Populates oxide/data/RaidableBases/Editable_Lists/Default_Loot.json all - Populates ALL above loot tables Configure the items to your liking then copy the files contents into a loot table that you would like to use (for example Difficulty Loot/Easy.json) You cannot use loot tables in the config file anymore. Use the data directory (oxide/data/RaidableBases) API No return behavior: void OnRaidableBaseStarted(Vector3 raidPos, int mode, bool allowPVP) void OnRaidableBaseEnded(Vector3 raidPos, int mode, bool allowPVP) void OnPlayerEnteredRaidableBase(BasePlayer player, Vector3 raidPos, bool allowPVP, int mode) void OnPlayerExitedRaidableBase(BasePlayer player, Vector3 raidPos, bool allowPVP, int mode) OnRaidableBaseDespawn, OnRaidableBaseDespawned, OnRaidableBasePrivilegeDestroyed, OnRaidableBaseCompleted find more hooks and arguments by searching for CallHook in the plugin file Tips Players will be considered raiders after looting, killing an npc, using explosives, eco raiding, destroying a building block/high wall/door or dealing damage from INSIDE of the dome You must change easybase1, mediumbase2, expertbase3, etc to the name of your CopyPaste files, or vis-versa. This plugin doesn't create bases for you. You can use the rb.config command (rb.config add "easy bases" easybase1 easybase2 0) in the server console to make this process easier. You can rename all profiles or additional base filenames. When copying a base with CopyPaste, make certain that you copy the base from eye level of the CENTER foundation within the base, or slightly clipped into this foundation with noclip. Whichever provides better results for you. You must verify that the base pastes down correctly (with /paste command) after you've copied it. I would not change autoheight from false to true. height is the distance the base is spawned off of the ground. elevation determines how flat the surrounding terrain must be in order for bases to spawn on it Scheduled Events is how often you want a random base to spawn on the map. This is disabled by default. This randomness comes from Every Min Seconds and Every Max Seconds Maintain Events will always spawn the Max Events amount of bases on your map. This is disabled by default. When one despawns, another will take its place shortly after. Allow Teleport will prevent players from teleporting when disabled. Compatible with NTeleportation or any plugin that uses the CanTeleport hook. Help This plugin does NOT use Zone Manager - it creates and manages everything on its own. If you are having issues with too few locations on the grid, or each attempt to spawn a base returns a manual spawn was already requested then it is likely because of how you have setup Zone Manager. You either have far too many zones, or you have zones which are far too large. Raidable Bases will not spawn in these zones unless the ZoneID is added to Allowed Zone Manager Zones in the config file. Do not put this plugin in your store/shop. It simply is not designed to work with it. There are far too many cooldowns to make this idea plausible, and the plugin cannot function properly without them. Using /buyraid will open a UI designed specifically for this issue. This plugin requires CopyPaste plugin to work. It also requires that you have copypaste files already made. Raidable bases will be spawned using the CopyPaste plugin. This plugin does NOT come with any bases. PvE server friendly with TruePVE and other plugins that support the hooks CanEntityTakeDamage, CanEntityBeTargeted, and CanEntityTrapTrigger. Bases can have 5 difficulty settings: 0 for easy, 1 for medium, 2 for hard, 3 for expert, and 4 for nightmare. This is configurable per profile. Bases can spawn on roads and other areas that do not allow building by Rust. Building ladders in these areas is allowed by the plugin. I will add support for building twig later. My bases often spawn in the same biome If you're having issues with spawn points being repeatedly used, or with a biome being favored consistently over other biomes then this is an elevation issue with the terrain on your map. You can fix this by increasing the Elevation in the configuration. For example, if your Elevation is 1.0 then set it to 1.5 and try again. This will also increase the height the base is allowed to spawn off of the ground. With certain maps you'll just have to make do with this issue. Corpses appear outside of the dome as backpacks This is intended, and it is optional. The location is drawn on the players screen to notify them that their corpse moved. This allows players to retrieve their backpack in the event that the raid becomes locked privately to another player, and prevents them from entering. Players do not drop their active item when they die. Bases Stop Spawning On Linux Machine [Error] Exception while calling NextTick callback (DllNotFoundException: libgdiplus.so.0) If you see this error after bases spawn then you need to install libgdiplus on your machine. This will mimic the below issue but it is NOT a bug like the below issue is. A quick google search shows the install command is: sudo apt-get install -y libgdiplus This happens when images in the CopyPaste file are being rendered by converting the byte array to bitmap.$40.00 -

Version 1.0.3
26 downloads
Adds hacker kit to the server. Just pick up a geiger counter and use it to hack. Just get close to the crate and hold the left mouse button. This plugin uses a geiger counter. Since this is not an item that players can usually get through loot, it is perfect for this purpose. Just use a plugin like BetterLoot to insert a geiger counter into your loot tables and then any geiger counter picked up by the player can be used as a hacker kit. Permissions: hackerkit.use - required to use hacker kit To assign a permission, use: oxide.grant <user or group> <name or steam id> hackerkit.use To remove a permission, use: oxide.revoke <user or group> <name or steam id> hackerkit.use (or just use the permission manager plugin) Config file: { "Hack speed": 10, "Prohibition message": "You don't have permission to use hackerkit", "SFX prefab": "assets/prefabs/gamemodes/objects/capturepoint/effects/capturepoint_progress_beep.prefab" }$9.99 -

Version 1.0.2
50 downloads
Displays the name of the zone the player is in. You can customize text, text color, background color, etc. This plugin takes information about zones from zonemanager, all information is saved in a config file, after which you can customize information about these zones, which will be displayed Commands: /rzinfo - update zone information Config file: { "Settings outside the zone": { "Id": "0", "Name": "Outside", "AnchorMin": "0.649 0.041", "AnchorMax": "0.695 0.081", "Color_Background": "0.1 0.1 0.8 0.8", "Color_Text": "1 1 1 1", "TextSize": "16", "TextPlaceHolder": "Outside" }, "Default settings for the new zone": { "Id": "0", "Name": "Default", "AnchorMin": "0.649 0.041", "AnchorMax": "0.695 0.081", "Color_Background": "0.1 0.8 0.1 0.8", "Color_Text": "1 1 1 1", "TextSize": "16", "TextPlaceHolder": "Default" }, "Zones list": [] }$4.99 -

Version 1.1.4
400 downloads
Adds homing missiles to the server. Just load the rocket launcher with a smoke rocket and aim. Require a smoke rocket to be used as the ammo type! Great damage system, you can set damage for all types of objects (buildings, animals, NPCs, players, trains, boats, helicopters and others) Great crafting system, you can customize the amount of resources needed to craft homing missiles, set the level of the workbench required for crafting You can customize crosshair size and color, aiming time, aiming sound You can set the type of rocket explosion, set rocket speed, self-detonation time and more You can set zones where you cannot use homing missiles, (you need the ZoneManager plugin) This plugin utilizes the smoke rocket. As it is not a item that players can usually get through loot it makes the perfect placeholder for this purpose. Simply use a plugin such as BetterLoot to insert the smoke rocket into your loot tables, then any smoke rocket that is picked up by a player can be used as a Homing Missile. Or you can just use the crafting system. Commands: /hmcraft - use to craft homing missiles (if enabled in the config) /hmcraft X - use to craft multiple homing missiles, where X is the amount of homing missiles This plugin uses the permission system. Permissions: homingmissiles.use - required to use homing missiles homingmissiles.craft - required to use the craft command To assign a permission, use: oxide.grant <user or group> <name or steam id> homingmissiles.use To remove a permission, use: oxide.revoke <user or group> <name or steam id> homingmissiles.use To assign a permission, use: oxide.grant <user or group> <name or steam id> homingmissiles.craft To remove a permission, use: oxide.revoke <user or group> <name or steam id> homingmissiles.craft Developer API: (void) LaunchHomingMissile(Vector3 launchPosition, Vector3 targetPosition, Vector3 startVelocity, BaseEntity target) Launches a homing missile from a point with coordinates "launchPosition" with velocity "startVelocity" (startVelocity can just be a Vector3.zero). You can set any "targetPosition" value if you have specified a "target". If you set the "target" to null, then the target will be the point with coordinates "targetPosition". Config file: { "Rocket display name": "Homing missile", "Rocket icon skinID": 3018993457, "Allow homing missiles crafting": true, "Workbench level required to craft(0-3)": 3, "Crafting costs": [ { "shortname": "ammo.rocket.basic", "amount": 1 }, { "shortname": "techparts", "amount": 2 } ], "List of zones where homing missiles cannot be used (requires ZoneManager plugin)": [ "111111111", "222222222", "333333333" ], "Make it so that only in these zones you can use homing missiles": false, "A message when you are in an area where homing missiles cannot be used": "You can't use homing missiles here", "Rocket speed": 50, "Rocket acceleration(1 - 10)": 1.0, "Amount of time before the rocket self detonates": 20.0, "Amount of time to acquire target lock(in seconds)": 1.0, "How quickly the target lock is lost if you lose the target(0-1)": 1.0, "First crosshair size": 24.0, "First crosshair color Red (0-1)": 1.0, "First crosshair color Green (0-1)": 0.0, "First crosshair color Blue (0-1)": 0.0, "Left side of the first crosshair": "<", "Right side of the first crosshair": ">", "Middle of the first crosshair": "+", "Second crosshair size": 24.0, "Second crosshair color Red (0-1)": 0.0, "Second crosshair color Green (0-1)": 1.0, "Second crosshair color Blue (0-1)": 0.0, "Second crosshair": "[ + ]", "Enable sound effects when aiming": true, "Base damage of the rocket(affect everything, including buildings)": 100.0, "Damage to players": 100.0, "Damage to animals": 500.0, "Damage to patrol helicopter": 3500.0, "Damage to chinook": 2000.0, "Damage to bradleyAPC": 500.0, "Damage to submarine": 400.0, "Damage to NPCs": 300.0, "Damage to snowmobile": 300.0, "Damage to boat": 400.0, "Damage to modular cars": 400.0, "Damage to hot air baloon": 1000.0, "Damage to scrap transport helicopter": 500.0, "Damage to minicopter": 750.0, "Damage to train": 500.0, "Explosion type: 1 - basic; 2 - fire; 3 - smoke; 4 - heli; 5 - heli napalm; 6 - heli airburst; 7 - sam; 8 - 40mm_grenade_he; 9 - c4; 10 - f1; 11 - beancan grenade; 12 - satchelcharge; 13 - mlrs": 13, "Use homing missiles for building blocks": false, "Use homing missiles for constructions": false, "Use homing missiles for items": false, "Use homing missiles for traps and turrets": false }$11.99


.thumb.jpg.4abde6ce06035db4993ba98aa473b214.jpg)