Search the Community
Showing results for tags 'vip'.
Found 24 results
-
Version 1.0.0
6 downloads
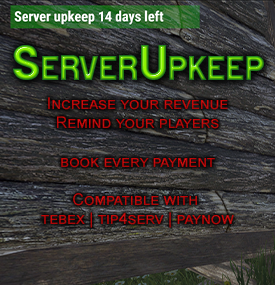
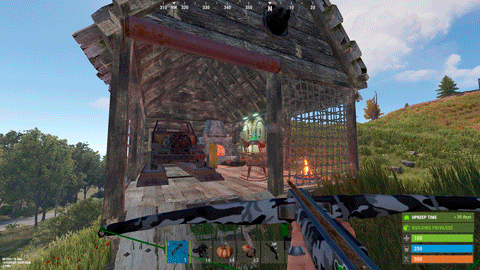
The ServerUpkeep plugin is a handy tool for Rust server owners. This way they can keep their community alive and better cover the costs of running them. Show your players how your server is doing. ServerUpkeep allows administrators to set a default retention period and notify players when the retention time expires. The plugin provides a visual representation and shows the number of days remaining. Administrators also have the ability to extend the ukeep duration if necessary with a simple console command. The plugin is compatible with Tebex, Tip4Serv and also for PayNow. Decide for yourself how many days ServerUpkeep will be credited. Features: What happens if the ServerUpkeep is not enough and the timer falls to 0? - Then the server will be shut down automatically. - You can then make an announcement on Discord or wherever to ask for support. Instructions for use: Simply enter the following in your shop under send command and adjust the days to be credited once the purchase has been completed, depending on the customer's purchase package. upkeep.add [days] You can also subtract days by simply putting the minus operator in front of it: upkeep.add -[days] Config: { „DefaultDays“: 7, „NextUpkeepTime“: „25.02.2024 21:56:32“ } DefaultDays are the days when the plugin is activated to prevent the server from shutting down again immediately after booting. NextUpkeepTime: Is required to calculate the remaining days. The time specification has no direct use yet but will be required for future updates. **load, run, enjoy**$10.99 -
Version 0.1.1
106 downloads
Plugin for Real PvE servers, featuring damage prevention, anti-griefing measures, claiming vehicles, an automatic loot queue in radtowns and raid zones and much more. The ability to set "server.pve" to "true", which allows the server to have a "PvE" flag; Damage from NPC's are enabled when server.pve is true; The ability to inflict damage to one's own structures with "server.pve true"; The ability to destroy or rotate one's structures without any time constraints; The ability to force the decay of building blocks with Twigs grade, even if there is wood in the Tool Cupboard; No one, except the owner or their friends, will be able to open their loot containers (chests, storages, bodies, etc.); Players can't gather resources within the Building Privilege of someone else; The ability to schedule the killing of players if they disconnect within someone else's Building Privilege; Disabling backpack drop upon death(outside of the safe zone), even if it is full; The ability to disable 'Give' messages; The ability to modify the items given at spawn on the beach; The ability to create an unlimited number of custom permissions; The ability to allow players to bypass the queue; The ability to set limits on sleeping bags and shelters for each permission; The ability to set a multiplier for the prices of monuments and events for each permission; The ability to customize the price and amount of vehicles for each of your custom permissions; The ability to assign vehicles to each player; The ability to customize the assigned price and available amount of vehicles for each of your custom permissions; An assigned vehicle can't be damaged, looted or pushed by other players, but it can be pushed if it is within someone else's Building Privilege; The ability to loot monuments through a queue system; The ability to configure monuments, setting their looting price and time, and adjusting status bars for each monument; The ability to acquire the privilege to loot events (helicopters, tanks, and raidable bases) through a purchase; The ability to customize the price of each event types and loot attempts (lives); NPCs only aggress against players who are looting monuments or events; Only players who are looting monuments or events can inflict damage to NPCs; RaidableBases are protected from griefing(no damage, no loot and etc). Only the owner can interact with the raid; Neutral RaidableBases can be purchased; Prices for purchasing neutral raids are configurable for each difficulty level; Configurable raid limits (currently available) along with discount multipliers for purchases, for each permission. All permissions are created and configured in the config file under the "List of permissions" section. You can create as many permissions as needed and customize them flexibly. It is recommended to use the prefix "realpve" in the permission's name, for example: "realpve.vip". NOTE: The first permission will serve as the default permission for those who do not have any permissions. "List of permissions. NOTE: The first permission will be used by default for those who do not have any permissions.": [ { "Permission Name": "realpve.default", "Bypass Queue": false, "Limit of beds": 15, "Limit of shelters": 1, "Monuments price multiplier": 1.0, "Events price multiplier": 1.0, "Limit of RaidableBases(at the time)": 1, "RaidableBases price multiplier": 1.0, "Vehicles settings": { "Horse": { "Limit": 1, "Price": 200.0 }, "Bike": { "Limit": 1, "Price": 200.0 }, "Car": { "Limit": 1, "Price": 200.0 }, ... } }, { "Permission Name": "realpve.vip", "Bypass Queue": true, "Limit of beds": 20, "Limit of shelters": 2, "Monuments price multiplier": 0.9, "Events price multiplier": 0.9, "Limit of RaidableBases(at the time)": 2, "RaidableBases price multiplier": 0.9, "Vehicles settings": { "Horse": { "Limit": 5, "Price": 100.0 }, ... } } ] An example of a monument/event/rb multipliers using default permissions. For example, if you set the price for the Harbor at $1000, a player with the default permission(1.0) will pay $1000 * 1 = $1000. Meanwhile, a player with a VIP permission(0.9) will pay $1000 * 0.9 = $900. However, if a player possesses a misbehaving permission with a value of 1.1, they will need to pay $1000 * 1.1 = $1100. { "ImageLibrary Counter Check": 5, "RealPVE command": "realpve", "Is it worth forcibly implementing PvE for a server? Note: When the 'server.pve' is true, there may be bugs or issues with damage to objects.": true, "Use GameTip for messages?": true, "Is it worth preventing the sending of 'Give' messages?": true, "Which currency symbol will be used?": "$", "Anti-Sleeper - Time in seconds after which a player will be killed if they disconnect while inside someone else's Building Privilege. Set to 0 to disable": 1200.0, "List of permissions. NOTE: The first permission will be used by default for those who do not have any permissions.": [], "Settings for the events": { "CargoShip": { "Price": 100.0, "DeathLimit": 5 }, "PatrolHelicopter": { "Price": 100.0, "DeathLimit": 5 }, "BradleyAPC": { "Price": 100.0, "DeathLimit": 5 } }, "Settings for the RaidableBases": { "Easy": { "Price": 100.0, "BarSettings": { "Order": 10, "Height": 26, "Main_Color": "#00FF00", "Main_Transparency": 0.8, "Main_Material": "", "Image_URL": "https://i.imgur.com/5lkjFih.png", "Image_Sprite": "", "Image_IsRawImage": false, "Image_Color": "#FFDCB6", "Text_Size": 12, "Text_Color": "#FFFFFF", "Text_Font": "RobotoCondensed-Bold.ttf", "SubText_Size": 12, "SubText_Color": "#FFFFFF", "SubText_Font": "RobotoCondensed-Bold.ttf" } }, "Medium": { "Price": 150.0, "BarSettings": { "Order": 10, "Height": 26, "Main_Color": "#FFEB04", "Main_Transparency": 0.8, "Main_Material": "", "Image_URL": "https://i.imgur.com/5lkjFih.png", "Image_Sprite": "", "Image_IsRawImage": false, "Image_Color": "#FFDCB6", "Text_Size": 12, "Text_Color": "#FFFFFF", "Text_Font": "RobotoCondensed-Bold.ttf", "SubText_Size": 12, "SubText_Color": "#FFFFFF", "SubText_Font": "RobotoCondensed-Bold.ttf" } }, "Hard": { "Price": 200.0, "BarSettings": { "Order": 10, "Height": 26, "Main_Color": "#FF0000", "Main_Transparency": 0.8, "Main_Material": "", "Image_URL": "https://i.imgur.com/5lkjFih.png", "Image_Sprite": "", "Image_IsRawImage": false, "Image_Color": "#FFDCB6", "Text_Size": 12, "Text_Color": "#FFFFFF", "Text_Font": "RobotoCondensed-Bold.ttf", "SubText_Size": 12, "SubText_Color": "#FFFFFF", "SubText_Font": "RobotoCondensed-Bold.ttf" } }, "Expert": { "Price": 250.0, "BarSettings": { "Order": 10, "Height": 26, "Main_Color": "#0000FF", "Main_Transparency": 0.8, "Main_Material": "", "Image_URL": "https://i.imgur.com/5lkjFih.png", "Image_Sprite": "", "Image_IsRawImage": false, "Image_Color": "#FFDCB6", "Text_Size": 12, "Text_Color": "#FFFFFF", "Text_Font": "RobotoCondensed-Bold.ttf", "SubText_Size": 12, "SubText_Color": "#FFFFFF", "SubText_Font": "RobotoCondensed-Bold.ttf" } }, "Nightmare": { "Price": 300.0, "BarSettings": { "Order": 10, "Height": 26, "Main_Color": "#000000", "Main_Transparency": 0.8, "Main_Material": "", "Image_URL": "https://i.imgur.com/5lkjFih.png", "Image_Sprite": "", "Image_IsRawImage": false, "Image_Color": "#FFDCB6", "Text_Size": 12, "Text_Color": "#FFFFFF", "Text_Font": "RobotoCondensed-Bold.ttf", "SubText_Size": 12, "SubText_Color": "#FFFFFF", "SubText_Font": "RobotoCondensed-Bold.ttf" } } }, "List of tracked types of monuments": [ "RadTown", "RadTownWater", "RadTownSmall", "TunnelStation" ], "Is it worth changing the list of items given at spawn on the beach?": true, "List of items for the main inventory": [ { "ShortName": "note", "Slot": 0, "Amount": 1, "SkinID": 0, "Text": "MsgNoteText" } ], "List of items for the belt": [ { "ShortName": "rock", "Slot": 0, "Amount": 1, "SkinID": 3034565372, "Text": "" }, { "ShortName": "torch", "Slot": 1, "Amount": 1, "SkinID": 0, "Text": "" } ], "List of items for clothing": [ { "ShortName": "partyhat", "Slot": 0, "Amount": 1, "SkinID": 0, "Text": "" }, { "ShortName": "twitchsunglasses", "Slot": 1, "Amount": 1, "SkinID": 0, "Text": "" }, { "ShortName": "movembermoustache", "Slot": 2, "Amount": 1, "SkinID": 0, "Text": "" }, { "ShortName": "chicken.costume", "Slot": 3, "Amount": 1, "SkinID": 0, "Text": "" } ], "Settings for the monuments": {}, "Wipe ID": null, "Version": { "Major": 0, "Minor": 1, "Patch": 1 } } An example of an item list given for the main inventory: "List of items for the main inventory": [ { "ShortName": "note", "Slot": 0, "Amount": 1, "SkinID": 0, "Text": "MsgNoteText" } ] P.S. In the Text field, you need to specify the language key. Or, you can just write any text, but there won't be a translation of the text. EN: { "MsgNoteText": "Welcome to our PvE server!\nThis server utilizes the RealPVE plugin.\nYou can find more details about the plugin at the following link: https://codefling.com/plugins/real-pve", "MsgMonumentOccupied": "{1} occupied {0} in {2} minutes.", "MsgMonumentFree": "{0} is available for looting!", "MsgMonumentOfferTitle": "Unlock Treasures of {0}!", "MsgMonumentOfferDescription": "Tap the notification to pay {0}.\nAnd unlock access to undiscovered riches!", "MsgMonumentLooterDeath": "You died while looting {0}. You have {1} seconds.", "MsgMonumentLooterExit": "You have left the monument. You have {0} seconds to return!", "MsgMonumentLooterRemoved": "Time's up! You have been removed from the monument!", "MsgMonumentLootingNotFree": "You have been added to the loot queue. Loot cost: {0}", "MsgMonumentNotInQueue": "You are not in the queue! You need to re-enter the monument!", "MsgMonumentNoAccess": "no access", "MsgEventOccupied": "{0} is already occupied by {1}!", "MsgEventOfferTitle": "Claim {0}!", "MsgEventOfferDescription": "Tap the notification to pay {0}.\nAnd unlock access to undiscovered riches!", "MsgEventNewLooter": "You have claimed {0}. You have {1} death for your team.", "MsgEventDeathLimit": "{0} is no longer yours! You have exceeded your death limit!", "MsgEventComplete": "{0} destroyed at coordinates: {1}!", "MsgEventCargoShip": "Cargo Ship", "MsgEventPatrolHelicopter": "Patrol Helicopter", "MsgEventBradleyAPC": "Bradley", "MsgRaidableBasesDisabled": "This Raidable Base is disabled!", "MsgRaidableBasesOccupied": "The Raidable Base is already occupied by {0}!", "MsgRaidableBasesLimit": "Limit exceeded! You have {0} out of {1} available Raidable Bases.", "MsgRaidableBasesPurchaseStart": "Payment successful! Please wait...", "MsgRaidableBasesPurchased": "You have successfully purchased the Raidable Base!", "MsgRaidableBasesPurchaseFailed": "You were unable to purchase the Raidable Base! Funds refunded.", "MsgRaidableBasesOfferTitle": "Claim {0} Raidable Base!", "MsgRaidableBasesOfferDescription": "Tap the notification to pay {0}.\nAnd unlock access to undiscovered riches!", "MsgRaidableBasesBarText": "{0} Base", "MsgRaidableBasesBarNoAccess": "no access", "MsgRaidableBasesEasy": "Easy", "MsgRaidableBasesMedium": "Medium", "MsgRaidableBasesHard": "Hard", "MsgRaidableBasesExpert": "Expert", "MsgRaidableBasesNightmare": "Nightmare", "MsgPrivlidgeClear": "{0} players have been removed from the Building Privilege.", "MsgPrivlidgeClearEmpty": "Only you are authorized in the Building Privilege.", "MsgVehicleDialogTitle": "Department of Motor Vehicles", "MsgVehicleDialogDescription": "ID: \nCategory: \nRegistration fee: ", "MsgVehicleDialogDescriptionValue": "<b>{0}</b>\n<b>{1}</b>\n<b>{2}</b>", "MsgVehicleDialogDescriptionRegistered": "ID: \nCategory: \nRegistration date: ", "MsgVehicleDialogDescriptionValueRegistered": "<b>{0}</b>\n<b>{1}</b>\n<b>{2}</b>", "MsgVehicleDialogDescriptionNotOwner": "ID: \nOwner: \nCategory: \nRegistration date: ", "MsgVehicleDialogDescriptionNotOwnerValue": "<b>{0}</b>\n<b>{1}</b>\n<b>{2}</b>\n<b>{3}</b>", "MsgVehicleCarDialogDescription": "ID: \nCategory: \nRegistration fee: ", "MsgVehicleCarDialogDescriptionValue": "<b>{0}</b>\n<b>{1}</b>\n<b>{2}</b>", "MsgVehicleCarDialogDescriptionRegistered": "ID: \nCategory: \nReg date: ", "MsgVehicleCarDialogDescriptionValueRegistered": "<b>{0}</b>\n<b>{1}</b>\n<b>{2}</b>", "MsgVehicleCarDialogDescriptionNotOwner": "ID: \nOwner: \nCategory: \nReg date: ", "MsgVehicleCarDialogDescriptionNotOwnerValue": "<b>{0}</b>\n<b>{1}</b>\n<b>{2}</b>\n<b>{3}</b>", "MsgVehicleCarGarageEmpty": "The car lift is empty!", "MsgVehicleDialogLink": "Register Vehicle", "MsgVehicleDialogUnLink": "Cancel registration", "MsgVehicleDialogIncorrectPassword": "The password must consist of 4 digits!", "MsgVehicleNotOwner": "You are not the owner!", "MsgVehicleCanNotInteract": "You are not the owner or their friend!", "MsgVehicleNoPermissions": "You do not have permissions for this action!", "MsgVehicleLinked": "The {0} has been successfully linked! You have {1} out of {2} available.", "MsgVehicleUnLinked": "The {0} has been successfully unlinked!", "MsgVehicleFailedDeauthorize": "You can only deauthorize by unlinking the vehicle from you.", "MsgVehicleLimit": "Limit exceeded! You have {1} out of {2} available.", "MsgVehicleDestroyed": "Your vehicle {0}({1}) has been destroyed!", "MsgVehicleFind": "Your vehicle {0} is located in grid {1}!", "MsgVehicleClear": "Removed {0} vehicles!", "MsgVehicleClearEmpty": "No vehicles found for removal!", "MsgVehicleNotFound": "Vehicle not found!", "MsgVehicleTugboatAuthorization": "To authorize in the tugboat, it must be claim!", "MsgVehicleLandVehicle": "Land", "MsgVehicleAirVehicle": "Air", "MsgVehicleWaterVehicle": "Water", "MsgVehicleWinterVehicle": "Winter", "MsgVehicleTrainVehicle": "Train", "MsgVehicleHorse": "horse", "MsgVehicleBike": "bike", "MsgVehicleCar": "car", "MsgVehicleBalloon": "air balloon", "MsgVehicleMinicopter": "minicopter", "MsgVehicleTransportHeli": "transportHeli", "MsgVehicleAttackHeli": "attack heli", "MsgVehicleRowBoat": "row boat", "MsgVehicleRHIB": "RHIB", "MsgVehicleTugBoat": "tugboat", "MsgVehicleSubmarineOne": "small submarine", "MsgVehicleSubmarineTwo": "submarine", "MsgVehicleSnowmobile": "snowmobile", "MsgVehicleTrain": "train", "MsgFree": "Free", "MsgNoDate": "null", "MsgEconomicsNotEnough": "Not enough funds!" } RU: { "MsgNoteText": "Добро пожаловать на наш PvE сервер!\nДанный сервер использует RealPVE плагин.\nПодробней о плагине можно узнать по ссылке: https://codefling.com/plugins/real-pve", "MsgMonumentOccupied": "{1} занял {0} на {2} минут.", "MsgMonumentFree": "{0} можно лутать!", "MsgMonumentOfferTitle": "Откройте сокровища {0}!", "MsgMonumentOfferDescription": "Нажми на уведомление для оплаты {0}.\nИ разблокируй доступ к неизведанным богатствам!", "MsgMonumentLooterDeath": "Вы умерли во время лутания {0}. У вас есть {1} секунд.", "MsgMonumentLooterExit": "Вы покинули монумент. У вас есть {0} секунд на возвращение!", "MsgMonumentLooterRemoved": "Время вышло! Вы были удалены из монумента!", "MsgMonumentLootingNotFree": "Вас добавили в очередь на лутание. Стоимость лутания: {0}", "MsgMonumentNotInQueue": "Вас нет в очереди! Вам необходимо перезайти в монумент!", "MsgMonumentNoAccess": "нет доступа", "MsgEventOccupied": "{0} уже занят игроком {1}!", "MsgEventOfferTitle": "Займите {0}!", "MsgEventOfferDescription": "Нажми на уведомление для оплаты {0}.\nИ разблокируй доступ к неизведанным богатствам!", "MsgEventNewLooter": "Вы заняли {0}. У вас на команду есть {1} жизней.", "MsgEventDeathLimit": "{0} больше не ваше! Вы исчерпали свой лимит жизней!", "MsgEventComplete": "{0} уничтожен в координатах: {1}!", "MsgEventCargoShip": "Карго", "MsgEventPatrolHelicopter": "Патрульный вертолет", "MsgEventBradleyAPC": "Танк", "MsgRaidableBasesDisabled": "Эта Рейд база выключена!", "MsgRaidableBasesOccupied": "Эта Рейд база уже занята игроком {0}!", "MsgRaidableBasesLimit": "Лимит превышен! У вас {0} из {1} доступных Рейд баз.", "MsgRaidableBasesPurchaseStart": "Оплата прошла! Ожидайте...", "MsgRaidableBasesPurchased": "Вы успешно приобрели Рейд базу!", "MsgRaidableBasesPurchaseFailed": "Вам не удалось приобрести Рейд базу! Деньги возвращены.", "MsgRaidableBasesOfferTitle": "Займите Рейд базу уровня: {0}!", "MsgRaidableBasesOfferDescription": "Нажми на уведомление для оплаты {0}.\nИ разблокируй доступ к неизведанным богатствам!", "MsgRaidableBasesBarText": "Уровень: {0}", "MsgRaidableBasesBarNoAccess": "нет доступа", "MsgRaidableBasesEasy": "Легко", "MsgRaidableBasesMedium": "Средне", "MsgRaidableBasesHard": "Сложно", "MsgRaidableBasesExpert": "Эксперт", "MsgRaidableBasesNightmare": "Кошмар", "MsgPrivlidgeClear": "Из шкафа выписано {0} ироков.", "MsgPrivlidgeClearEmpty": "Кроме вас в шкафу ни кто не авторизован.", "MsgVehicleDialogTitle": "ГИБДД", "MsgVehicleDialogDescription": "ID: \nКатегория: \nСтоимость регистрации: ", "MsgVehicleDialogDescriptionValue": "<b>{0}</b>\n<b>{1}</b>\n<b>{2}</b>", "MsgVehicleDialogDescriptionRegistered": "ID: \nКатегория: \nДата регистрации: ", "MsgVehicleDialogDescriptionValueRegistered": "<b>{0}</b>\n<b>{1}</b>\n<b>{2}</b>", "MsgVehicleDialogDescriptionNotOwner": "ID: \nВладелец: \nКатегория: \nДата регистрации: ", "MsgVehicleDialogDescriptionNotOwnerValue": "<b>{0}</b>\n<b>{1}</b>\n<b>{2}</b>\n<b>{3}</b>", "MsgVehicleCarDialogDescription": "ID: \nКатегория: \nСтоимость: ", "MsgVehicleCarDialogDescriptionValue": "<b>{0}</b>\n<b>{1}</b>\n<b>{2}</b>", "MsgVehicleCarDialogDescriptionRegistered": "ID: \nКатегория: \nДата: ", "MsgVehicleCarDialogDescriptionValueRegistered": "<b>{0}</b>\n<b>{1}</b>\n<b>{2}</b>", "MsgVehicleCarDialogDescriptionNotOwner": "ID: \nВладелец: \nКатегория: \nДата: ", "MsgVehicleCarDialogDescriptionNotOwnerValue": "<b>{0}</b>\n<b>{1}</b>\n<b>{2}</b>\n<b>{3}</b>", "MsgVehicleCarGarageEmpty": "Подъемник пустой!", "MsgVehicleDialogLink": "Поставить на учет", "MsgVehicleDialogUnLink": "Снять с учета", "MsgVehicleDialogIncorrectPassword": "Пароль должен состоять из 4-х цифр!", "MsgVehicleNotOwner": "Вы не являетесь владельцем!", "MsgVehicleCanNotInteract": "Вы не являетесь владелецем или его другом!", "MsgVehicleNoPermissions": "У вас нет прав для этого действия!", "MsgVehicleLinked": "{0} успешно привязан(а)! У вас {1} из {2} доступных.", "MsgVehicleUnLinked": "{0} успешно отвязан(а)!", "MsgVehicleFailedDeauthorize": "Вы можете выписаться только при отвязки транспорта от вас.", "MsgVehicleLimit": "Лимит превышен! У вас {1} из {2} доступных.", "MsgVehicleDestroyed": "Ваше транспортное средство {0}({1}) было уничтожено!", "MsgVehicleFind": "Ваше транспортное средство {0} находится в квадрате {1}!", "MsgVehicleClear": "Удалено {0} транспортных средств!", "MsgVehicleClearEmpty": "Транспортные средства для удаления не найдены!", "MsgVehicleNotFound": "Транспортное средство не найдено!", "MsgVehicleTugboatAuthorization": "Для авторизации в буксире, его необходимо поставить на учет!", "MsgVehicleLandVehicle": "Наземный", "MsgVehicleAirVehicle": "Воздушный", "MsgVehicleWaterVehicle": "Водный", "MsgVehicleWinterVehicle": "Зимний", "MsgVehicleTrainVehicle": "ЖД", "MsgVehicleHorse": "Лошадь", "MsgVehicleBike": "Мотоцикл", "MsgVehicleCar": "Машина", "MsgVehicleBalloon": "Воздушный шар", "MsgVehicleMinicopter": "Мини коптер", "MsgVehicleTransportHeli": "Корова", "MsgVehicleAttackHeli": "Боевой вертолет", "MsgVehicleRowBoat": "Лодка", "MsgVehicleRHIB": "Патрульная лодка", "MsgVehicleTugBoat": "Буксир", "MsgVehicleSubmarineOne": "Маленькая подлодка", "MsgVehicleSubmarineTwo": "Подлодка", "MsgVehicleSnowmobile": "Снегоход", "MsgVehicleTrain": "Поезд", "MsgFree": "Бесплатно", "MsgNoDate": "пусто", "MsgEconomicsNotEnough": "Не достаточно средств!" } vehicle: find - helps to find a player's vehicle; unlink - unlinks the vehicle without the need to approach it; clear - unlinks all vehicles. Example: /realpve vehicle find *netID* This plugin provides the ability to claim vehicles, thereby preventing theft and griefing from other players. In permissions, you can set the price and quantity restrictions for each type of vehicle, ensuring flexible customization according to your preferences. An assigned vehicle can't be damaged, looted or pushed by other players, but it can be pushed if it is within someone else's Building Privilege. This plugin introduces queue system and loot purchases for monuments. All monuments are configured in the config file under the "Settings for the monuments" section. You can customize the price and time for looting each monument. Within monuments, only the "Looter" and his friends have the ability to loot, pick up items or damage entities. Additionally, NPCs within monuments do not aggress against other players and do not receive damage from them. If a player dies within the monument, they will have a grace period to return. This allows players to safely loot monuments without fear of griefing. Example of monument configuration: "ferry_terminal_1": { "Type": "RadTown", "ShowSuffix": true, "Broadcast": true, "LootingTime": 900, "Price": 0.0, "BarSettings": { "Order": 10, "Height": 26, "Main_Color": "#A064A0", "Main_Transparency": 0.8, "Main_Material": "", "Image_URL": "https://i.imgur.com/mn8reWg.png", "Image_Sprite": "", "Image_IsRawImage": false, "Image_Color": "#A064A0", "Text_Size": 12, "Text_Color": "#FFFFFF", "Text_Font": "RobotoCondensed-Bold.ttf", "SubText_Size": 12, "SubText_Color": "#FFFFFF", "SubText_Font": "RobotoCondensed-Bold.ttf" } } Type - This field serves only as an indicator for you. The changes won't have any impact; ShowSuffix - Suffix display. Some monuments (for example Warehouses) have suffixes in the name, like "Warehouse #12"; Broadcast - Enabling or disabling broadcasts when a monument is occupied or vacated; LootingTime - Time allocated for looting the monument; Price - The price for which you can start looting the monument. 0 means looting is free; BarSettings - Settings for the Advanced Status Bar. You can also choose the types of monuments by specifying them in the config file under the "List of tracked types of monuments" section. A list of all available types can be viewed on the MonumentsWatcher's page in the "Developer API" section. "List of tracked types of monuments": [ "RadTown", "RadTownWater", "RadTownSmall", "TunnelStation" ] Events, similar to monuments, offer the opportunity to claim events. All events are configured in the config file under the "Settings for the events" section. You can customize the price of looting and looting attempts(deaths, including friends). Just like in monuments, only the "Looter" and his friends have the ability to loot and damage entities. Additionally, in events, NPCs do not aggress against other players. If a player(including friends) exceeds the death limit, the event became free, thereby providing other players with the opportunity to claim the event. Example of event configuration: "Settings for the events": { "CargoShip": { "Price": 100.0, "DeathLimit": 5 }, "PatrolHelicopter": { "Price": 100.0, "DeathLimit": 5 }, "BradleyAPC": { "Price": 100.0, "DeathLimit": 5 } } Price - The price to claim the event. 0 means looting is free; DeathLimit - Limit of deaths after which the event becomes free. Integration with the RaidableBases plugin does not restrict its functionality in any way. On the contrary, it adds an anti-grief system that protects bases from malicious players. In raid bases, NPCs and other entities can only receive damage from the raid owner or their friends; Turrets and traps do not aggress against outsiders; You can customize the price of claiming to each difficulty and set individual discounts for each permission. You can still purchase raid bases using the /buyraid command. Raid bases without owners(buyable, maintained, manual and scheduled) can be bought for a price set in the configuration file or assigned to the first player who enters its radius, if the final price(price * discount) less or equals to 0. Additionally, as a bonus, upon buying this plugin, you receive 5 free bases for 3 difficulty levels, along with configured loot for them.$39.99 -

Version 1.0.0
27 downloads
Welcome Controller Additions is exactly what it sounds like. Some QOL addons for Welcome Controller! MORE FEATURES COMING VERY SOON! FEATURES - Q&A Dropdowns - VIP Rank display - Social links How to add into Welcome Controller... To add in one of the add-ons you need to do the following Firstly, if you want to use the social links, there is a toggle for it in Welcome Controllers config, enable that and fill out the info in the additions plugin and that's good to go. Second, vip ranks. Go to the addons section in the Welcome Controller config, where it says "Plugin Addon Name" You'll need to add "WUIAttachments_VipRanks" Third, Q&A's. Go to the addons section in the Welcome Controller config, where it says "Plugin Addon Name" You'll need to add "WUIAttachments_IdentiferYouSetForTheQ&A" of course replacing "IdentiferYouSetForTheQ&A" with the actual identifier you set in the additions plugin. Need support or want updates about what is coming to the plugin? Join the support discord here https://discord.gg/RVePam7pd7$9.99 -

Version 1.4.0
30 downloads
A little event for your players! Reward your players and give something back! With this plugin, you can make a random player happy! Functions You can start the VIP shuffle event with the following command: /flashvipshuffle From version 1.4.0 you can now create a shedule to start and automate the VIPShuffle at a specific time period: flashvipshuffle To start the event, you need the authorization: vipshuffle.check This permission is used to check if a player has the right to execute the VipShuffle command /flashvipshuffle. If a player does not have this permission, they are informed that they do not have the required permission. Config (new, You can now exclude certain user roles from the competition) If you want to pay out VIP for certain days via the console, you need the free plugin Timed Permissions. Load, run, enjoy Support Discord$7.99 -

Version 1.5.6
1,308 downloads
Skinner allows you to skin all items with ease. Features: Skin any inventory or placed item Very fast loading of skins and icons Light weight and performance efficient code - ONLY USES ONE LIGHT WEIGHT HOOK AND HAS MINIMAL UI FOR PERFORMANCE Automatically imports new and approved workshop skins Ability to add custom workshop skins and collections Multiple skin sets Chat Commands: /Skin or /s - skin items as per normal skinbox /Skinitem or /si - look at items that have already been placed such as a furnace or largebox and type the command and select the desired skin /Skincraft or /sc - select default crafting skins. This will overwrite the default skin when you craft items and when using skincon, skininv, skinbase and skinall commands /Skincon or /scon - sets all items in a container you are looking at to your default craft skins /Skininv or /sinv - sets all items in your inventory to your default craft skins /SkinBase - Allows you to skin all deployables in your base to your default skincraft skins. You can optionally specify certain deplorables such as /skinbase sleepingbag to only skin sleeping bags. /SkinAll Command - This is like the skincon command but it will skin all the items in all the containers in your base. You can optionally specify certain items such as /SkinAll rifle.ak to only skin ak47's. /Skinimport or /sip - Import custom workshop skins using /skinimport workshopID /Colimport or /cip - Import custom workshop collection using /skinimport collectionID /SkinSet or /ss - Select the craft skin set you want to use e.g. /Skinset 2. You can use numbers 1-3 or select via the UI. Note: All chat commands can be customized via the configuration Console Commands: skinimport or sip - Import custom workshop skins using - skinimport workshopID colimport or cip - Import custom workshop collection using - skinimport collectionID Note: All console commands work via rcon as well Permissions: Skinner.default - allows use of the /skin command Skinner.items - allows use of the /skinitem command Skinner.craft - allows use of thee /skincraft command Skinner.skincon - allows use of the /skincon command Skinner.skininv -allows use of the /skininv command Skinner.bypassauth- allows you to bypass the building auth requirement when using /skinitem Skinner.skinbase for use of the /skinbase command Skinner.skinall for the use of the /skinall command Skinner.import – allows use of the /skinimport command and /Colimport Custom command cooldown perms see config. Config: Note: The "Imported Skins (skinid : 'shortnamestring', skinid2 : 'shortnamestring2'": {}" is now redundant and automatically converted to imported skins list. { "Skin Commands (skin items in you inventory": [ "skin", "s", "skinbox", "sb" ], "Skin Items Commands (skin items you have already placed": [ "skinitem", "si" ], "Set default items to be skinned": [ "skincraft", "sc" ], "Automatically set all items in you inventory to your default skins": [ "skininv", "sinv" ], "Automatically set all items a container to your default skins": [ "skincon", "scon" ], "Automatically skin all deployables in your base": [ "skinbase", "skinbuilding" ], "Automatically skin all items in your base": [ "skinall", "sa" ], "Import Custom Skins": [ "skinimport", "sip" ], "Import Workshop Collection Command": [ "colimport", "cip" ], "Custom Page Change UI Positon 'min x, min y', 'max x', max y'": [ "0.66 0.05", "0.82 0.1" ], "Custom Searchbar UI Positon 'min x, min y', 'max x', max y'": [ "0.70 0.88", "0.82 0.91" ], "Custom Set Selection UI Positon 'min x, min y', 'max x', max y'": [ "0.70 0.847", "0.93 0.875" ], "Apply names of skins to skinned items": true, "Add Search Bar UI": true, "Override spraycan behaviour": true, "Use spraycan effect when holding spraycan and skinning deployables": true, "Blacklisted Skins (skinID)": [], "Import Skin collections (steam workshop ID)": [], "Command based cooldowns ('permission' : 'command' seconds": { "Default30CD": { "skin": 30.0, "skinitem": 30.0, "skincraft": 30.0, "skincon": 30.0, "skininv": 30.0, "skinbase": 60.0, "skinall": 60.0 } }, "Imported Skins List": {}, "Imported Skins (skinid : 'shortnamestring', skinid2 : 'shortnamestring2'": {} } API: // Get Dict of all items (shortnames) and cached skins public Dictionary<string, List<CachedSkin>> GetAllCachedSkins() { return _skinsCache; } //Get list of all cached skins of a certain item via itemshortname public List<CachedSkin> GetSkinsItemList(string itemshortname) { List<CachedSkin> cachedSkins = new List<CachedSkin>(); _skinsCache.TryGetValue(itemshortname, out cachedSkins); return cachedSkins; }$38.00 -
Version 1.4.4
1,857 downloads
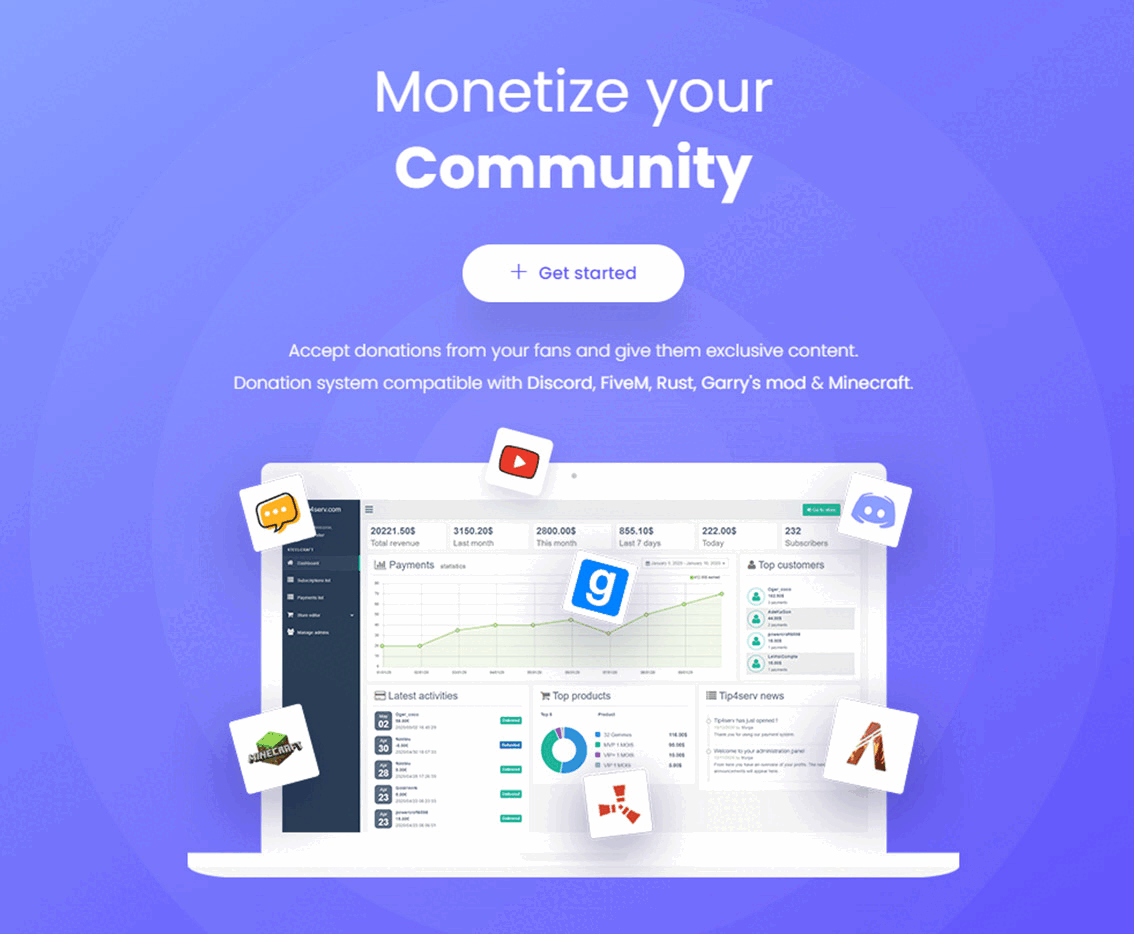
This plugin connects your https://tip4serv.com/ store to your Rust Oxide server. It checks if a player has made a donation on your Tip4Serv store and delivers the order in a minute (group, inventory item...) by typing commands in the server console. Supports Rust Garry's Mod FiveM Minecraft Discord ARK and more HMAC authentication Tip4serv adds a layer of security using HMAC authentication to communicate. It is a strong authentication method that is used by banks HMAC WIKI Features for starter plan (only 5% fee) Unlimited game servers & commands Create subscriptions plan Commands status tracking Stock management Deliver roles & messages on Discord Easily offer a product to a friend Create discount coupon Add managers for your store Purchase email and invoice Sales statistics Private flow for subscribers Custom sub-domain Resend commands Fast delivery of orders (less than 5 minutes) No ads Features for PRO members (subscription required) Dynamic Dark/Light theme Account linking with avatars Product page with gallery & video GUI colors editor & additional CSS Top customers & related products Store available in 15 languages English, Danish, Dutch, French, German, Hungarian, Italian, Norwegian, Polish, Portuguese, Romanian, Russian, Spanish, Swedish and Turkish. Several payment methods Here are the payment methods you can offer your players: Card, Paypal, Venmo, Google Pay, Ideal, Giropay, Bancontact, Sofort, My Bank, Sepa, EPS, BACS, Multibanco, BECS, Przelexy24, BOLETO, OXXO, Mercado Pago. Installation via Plugin Open an account at https://tip4serv.com/, follow the instructions and add a Rust server. Drag and drop tip4serv.cs into the oxide plugins directory on your Rust server Reload the plugin by typing oxide.reload Tip4serv in your Rust server console. Set key to your tip4serv API key in the config file tip4serv.json. Reload plugin by typing oxide.reload Tip4serv in console. You should get this message: Server has been successfully connected Installation via RCON Open an account at https://tip4serv.com/, follow the instructions and add a Rust server. Enter your server IP Enter your server RCON port Enter your server RCON password You should get this message: Server has been successfully connected Setting up commands on Tip4Serv Before setting up your commands on Tip4serv.com, you should know that command work in your server's console (not ingame as an admin). Here are some sample commands you can use in the products configuration: MY PRODUCTS. But you can use any plugin commands you want. Give a group or permission Add a player to a group previously created with oxide.group add [group-name]: oxide.usergroup add {steam_id} group-name Remove a player from a group: oxide.usergroup remove {steam_id} group-name Give a permission to a player: oxide.grant user {steam_id} permission-name Remove a permission from a player: oxide.revoke user {steam_id} permission-name Give an item to a player inventory with steam_id (advised) IMPORTANT: Please select the option [Player must be online] in your product editor inventory.giveto {steam_id} item-short-name quantity Example: inventory.giveto {steam_id} scientist 5 Give an item to a player inventory with Give plugin IMPORTANT: Please select the option [Player must be online] in your product editor giveto {steam_id} item-short-name quantity Example: giveto {steam_id} fun.guitar 1 Give a kit to a player with Give plugin: givekitto {steam_id} kit-name Give money Give money to a player with Economics plugin: deposit {steam_id} amount Give points Give points to a player with Server Rewards plugin: sr add {rust_username} amount Quantity multiplier You can also multiply the quantity choosen by the customer like this: {quantity*50} Note: You must first activate the **Allow quantity choice** option in your product. Use this command on Tip4serv if you want to sell bundles of $200 with economics plugin: deposit {steam_id} {quantity*200} This will run in your server console after a purchase if the player buys product 4 times: deposit 76561198181797231 800 Store examples https://originrust.tip4serv.com/ https://2stonedrust.tip4serv.com/ https://murga.tip4serv.com https://instantcode.tip4serv.com Need Help ? Read the Tip4Serv documentation here https://docs.tip4serv.com Any issues feel free to contact us here https://tip4serv.com/contactFree -
Version 0.1.14
443 downloads
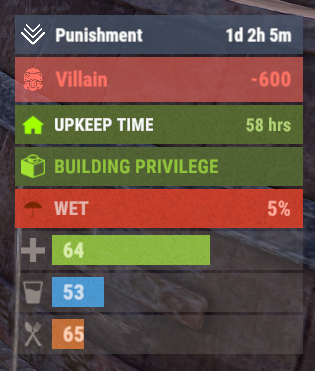
Useful auxiliary plugin that allows other plugins to customize the status bar through an API. Note: AdvancedStatus does not display any bars on its own. This is done by other plugins that work with it. An example plugin demonstrating interaction with AdvancedStatus. The ability to specify the frequency of calculating the number of bars; The ability to specify the order of the bar; The ability to change the height of the bar; The abillity to customize the color and transparency of the background; The ability to set a material for the background; The ability to switch between CuiRawImageComponent and CuiImageComponent for the image; The abillity to set own image and customize the color and transparency of the image; The abillity to set sprite instead of the image; The ability to specify custom text. Additionally, customization options for the color, size, and font of the text; No need to pass all parameters; No need to manually delete your bar when unloading your plugin. { "Client Status Bar Count Interval": 0.5, "Bar - Display Layer(https://umod.org/guides/rust/basic-concepts-of-gui#layers)": "Hud", "Bar - Left to Right": true, "Bar - Offset Between": 2, "Bar - Default Height": 26, "Main - Default Color": "#505F75", "Main - Default Transparency": 0.7, "Main - Default Material(empty to disable)": "", "Image - Default Color": "#6B7E95", "Image - Default Transparency": 1.0, "Text - Default Size": 12, "Text - Default Color": "#FFFFFF", "Text - Default Font(https://umod.org/guides/rust/basic-concepts-of-gui#fonts)": "RobotoCondensed-Bold.ttf", "Text - Default Offset Horizontal": 0, "SubText - Default Size": 12, "SubText - Default Color": "#FFFFFF", "SubText - Default Font(https://umod.org/guides/rust/basic-concepts-of-gui#fonts)": "RobotoCondensed-Bold.ttf", "Progress - Default Color": "#89B840", "Progress - Default Transparency": 0.7, "Progress - Default OffsetMin": "25 2.5", "Progress - Default OffsetMax": "-3.5 -3.5", "Version": { "Major": 0, "Minor": 1, "Patch": 14 } } Note: Default values will be used if the external plugin does not pass the property itself. EN: { "MsgDays": "d", "MsgHours": "h", "MsgMinutes": "m", "MsgSeconds": "s" } RU: { "MsgDays": "д", "MsgHours": "ч", "MsgMinutes": "м", "MsgSeconds": "с" } OnPlayerGainedBuildingPrivilege: Called after the player enters their building privilege. OnPlayerLostBuildingPrivilege: Called after the player exits their building privilege. void OnPlayerGainedBuildingPrivilege(BasePlayer player) { Puts($"{player.displayName} entered the authorized building privilege zone."); } void OnPlayerLostBuildingPrivilege(BasePlayer player) { Puts($"{player.displayName} exited the authorized building privilege zone."); } There are 7 methods: CreateBar UpdateContent DeleteBar DeleteCategory DeleteAllBars BarExists InBuildingPrivilege There are 4 types of bar: Default - A simple bar that displays the provided information. Does not update the value of SubText by itself; Timed - Similar to the default bar, but it automatically disappears after the specified time in the TimeStamp parameter; TimeCounter - The SubText shows the remaining time until TimeStamp. Also automatically removed upon expiration of the TimeStamp; TimeProgress - Similar to the TimeCounter bar, but additionally features a progress bar. CreateBar: Used to create a bar or update bar values for a player. To call the CreateBar method, you need to pass 2 parameters. The first one is BasePlayer or <ulong>playerID. The second one is a dictionary with the parameters you need. In the CreateBar method, all parameters are optional, except for two: Id; Plugin. Parameters not specified when creating a new bar will use the values set in the AdvancedStatus plugin's configuration file. Parameters not specified during bar update will retain the values they had before the update. Note: The plugin does not update values automatically, you need to manually send new values. Dictionary<string, object> parameters = new Dictionary<string, object> { { "Id", _barID }, //<string>Unique identifier for the bar in your plugin. ***This is a required field. { "BarType", "Default" }, //<string>Type of the bar. There are 4 types: Default, Timed, TimeCounter and TimeProgress. { "Plugin", Name }, //<string>Name of your plugin. ***This is a required field. { "Category", "Default" }, //<string>Internal plugin category of the bar. { "Order", 10 }, //<int>The position of your bar relative to others. Order is determined by increasing values(ASC). { "Height", 26 }, //<int>The height of your bar. A standard bar is 26 pixels. { "Main_Color", "#505F75" }, //<string>HTML Hex color of the bar background. { "Main_Transparency", 0.7f }, //<float>Transparency of the bar background. { "Main_Material", "assets/content/ui/uibackgroundblur.mat" }, //<string>Material of the bar background(empty to disable). { "Image", "scrap" }, //<string>Name of the image saved in the ImageLibrary or a direct link to the image if ImageLibrary is not used. { "Image_Sprite", "" }, //<string>Sprite image of the bar. (If empty, Image will be used as the image). { "Is_RawImage", true }, //<bool>Which type of image will be used? True - CuiRawImageComponent. False - CuiImageComponent. { "Image_Color", "#6B7E95" }, //<string>HTML Hex color of the bar image. { "Image_Transparency", 1.0f }, //<float>Transparency of the image. { "Text", "Scrap" }, //<string>Main text. { "Text_Size", 12 }, //<int>Size of the main text. { "Text_Color", "#FFFFFF" }, //<string>HTML Hex color of the main text. { "Text_Font", "RobotoCondensed-Bold.ttf" }, //<string>Font of the main text. { "Text_Offset_Horizontal", 0 }, //<int>Horizontal offset for the main text. { "SubText", "35" }, //<string>Sub text. { "SubText_Size", 12 }, //<int>Size of the sub text. { "SubText_Color", "#FFFFFF" }, //<string>HTML Hex color of the sub text. { "SubText_Font", "RobotoCondensed-Bold.ttf" }, //<string>Font of the sub text. { "TimeStamp", Network.TimeEx.currentTimestamp + 6 }, //<double>Used if the bar type is Timed, TimeCounter or TimeProgress. { "Progress", (float)35 / 100f }, //<float>Progress. From 0.0 to 1.0. { "Progress_Color", "#89B840" }, //<string>Progress color. { "Progress_Transparency", 1f }, //<float>Progress transparency. { "Progress_OffsetMin", "25 2.5" }, //<string>Progress OffsetMin: "*left* *bottom*". { "Progress_OffsetMax", "-3.5 -3.5" }, //<string>Progress OffsetMax: "*right* *top*". { "Command", "kit" } //<string>If the field is not empty, the bar becomes clickable, and the specified command is executed upon clicking. Note: the command must be covalence. }; AdvancedStatus?.Call("CreateBar", player.userID, parameters); //Calling the CreateBar method with the passing of BasePlayer/playerID and a dictionary containing the required parameters. UpdateContent: Used to update only the content of an existing status bar. To call the UpdateContent method, you need to pass 2 parameters. The first one is BasePlayer or <ulong>playerID. The second one is a dictionary with the parameters you need. In the UpdateBar method, all parameters are optional, except for two: Id; Plugin. var parameters = new Dictionary<string, object> { { "Id", "MyID" }, //<string>Unique identifier for the bar in your plugin. ***This is a required field. { "Plugin", Name }, //<string>Name of your plugin. ***This is a required field. { "Text", "MyText" }, //<string>Main text. { "SubText", "MyText" }, //<string>Sub text. { "Progress", (float)amount / 100f }, //<float>Progress. From 0.0 to 1.0. }; AdvancedStatus?.Call("UpdateContent", player, parameters); //Calling the UpdateContent method with the passing of BasePlayer/playerID and a dictionary containing the required parameters. DeleteBar: Used to remove the bar for a player. There are two methods for removing a bar by ID: with specifying a particular player; To call this method, you need to pass 3 parameters. The first one is BasePlayer or <ulong>playerID. The second one is Id of your bar and the third one is name of your plugin. without specifying a particular player (which removes it for all players) To call this method, you need to pass 2 parameters. The first one is Id of your bar and the second one is name of your plugin. AdvancedStatus?.Call("DeleteBar", player, barID, Name);//Calling the DeleteBar method with the passing of BasePlayer/playerID, ID of the bar and the name of your plugin. AdvancedStatus?.Call("DeleteBar", barID, Name);//Calling the DeleteBar method with the passing of ID of the bar and the name of your plugin. If you try to delete a bar that doesn't exist, nothing bad will happen. So feel free to delete the bar without checking its existence. P.S. When unloading your plugin, there is no need to manually delete bars for players, AdvancedStatus will handle it automatically. DeleteCategory: Used to remove all bars associated with the plugin's category. To call the DeleteCategory method, you need to pass 2 parameters. The first one is category and the second one is name of your plugin. AdvancedStatus?.Call("DeleteCategory", "Default", Name);//Calling the DeleteCategory method by passing the category and name of your plugin DeleteAllBars: Used to remove all bars associated with the plugin. To call the DeleteAllBars method, you need to pass only 1 parameter. It is name of your plugin. AdvancedStatus?.Call("DeleteAllBars", Name);//Calling the DeleteAllBars method, passing the name of your plugin BarExists: Used to check if the specified bar exists. To call the BarExists method, you need to pass 3 parameters. The first one is BasePlayer or <ulong>playerID. The second one is Id of your bar. And the third one is name of your plugin. (bool)AdvancedStatus?.Call("BarExists", player, barID, Name);//Calling the BarExists method with the passing of BasePlayer/playerID, ID of the bar and name of your plugin. InBuildingPrivilege: Used to check if the player has authorized building privileges. To call the InBuildingPrivilege method, you need to pass BasePlayer or <ulong>playerID. (bool)AdvancedStatus?.Call("InBuildingPrivilege", player, false);//Checking if the player has Building Privilege.$1.99 -

Version 0.1.0
22 downloads
Plugin rewarding players for their in-game activity. The ability to receive rewards for gathering resources; The ability to receive rewards for: killing players and NPCs; destroying barrels and road signs; The ability to receive rewards for the first opening of loot crates; The ability to receive rewards for collecting resources; The ability to receive rewards for planting plants. { "Is it worth using the AdvancedStatus plugin?": true, "Status Bar Settings": { "Order": 20, "Height": 26, "Main_Color": "#84AB49", "Main_Transparency": 0.8, "Main_Material": "", "Image_URL": "https://i.imgur.com/k8jq7yY.png", "Image_Sprite": "", "Image_IsRawImage": false, "Image_Color": "#B9D134", "Text_Size": 12, "Text_Color": "#DAEBAD", "Text_Font": "RobotoCondensed-Bold.ttf", "SubText_Size": 12, "SubText_Color": "#DAEBAD", "SubText_Font": "RobotoCondensed-Bold.ttf" }, "List of multipliers for rewards, for each group permission": { "realpve.default": 1.0, "realpve.vip": 1.1 }, "Gather Rewards": { "wood": 0.5, "stones": 1.0, "metal.ore": 1.5, "sulfur.ore": 2.0 }, "Kill Rewards": { "player": 1.0, "loot-barrel": 0.5, "loot_barrel": 0.5, "oil_barrel": 1.0, "roadsign": 0.5, "scientistnpc": 1.5, "npc_tunneldweller": 1.5, "npc_underwaterdweller": 1.5, "scientistnpc_junkpile_pistol": 1.0, "scientistnpc_heavy": 2.0, "boar": 1.0, "stag": 1.5, "wolf": 2.0, "bear": 2.0, "boar.corpse": 0.5, "stag.corpse": 0.75, "wolf.corpse": 1.0, "bear.corpse": 1.0, "patrolhelicopter": 50.0, "bradleyapc": 50.0 }, "First Loot Open Rewards": { "foodbox": 0.5, "crate_food_1": 0.5, "crate_food_2": 0.5, "crate_normal_2_food": 1.0, "wagon_crate_normal_2_food": 1.0, "crate_normal_2_medical": 1.0, "vehicle_parts": 0.5, "crate_basic": 0.5, "crate_normal_2": 1.0, "crate_mine": 1.0, "crate_tools": 1.5, "crate_normal": 2.0, "crate_elite": 2.5, "crate_underwater_basic": 0.5, "crate_underwater_advanced": 1.0, "crate_medical": 0.5, "crate_fuel": 1.0, "crate_ammunition": 1.0, "heli_crate": 10.0, "bradley_crate": 10.0, "codelockedhackablecrate": 30.0, "codelockedhackablecrate_oilrig": 30.0 }, "Pickup Rewards": { "Wood": 0.1, "Stone": 0.25, "Metal Ore": 0.5, "Sulfur Ore": 0.75, "Diesel Fuel": 1.0, "Bones": 0.1, "Corn": 0.1, "Potato": 0.1, "Pumpkin": 0.1, "Wild Mushroom": 0.1, "Hemp Fibers": 0.1, "Black Berry": 0.1, "Blue Berry": 0.1, "Green Berry": 0.1, "Red Berry": 0.1, "White Berry": 0.1, "Yellow Berry": 0.1 }, "Planting Rewards": { "hemp.entity": 0.1, "corn.entity": 0.1, "pumpkin.entity": 0.1, "potato.entity": 0.1, "black_berry.entity": 0.1, "blue_berry.entity": 0.1, "green_berry.entity": 0.1, "red_berry.entity": 0.1, "white_berry.entity": 0.1, "yellow_berry.entity": 0.1 }, "Version": { "Major": 0, "Minor": 1, "Patch": 0 } } EN: { "MsgTextBar": "Bonus" } RU: { "MsgTextBar": "Бонус" }$2.99 -
Version 0.1.2
86 downloads
This plugin demonstrates the integration with the AdvancedStatus plugin. It displays the amount of a specific item in the player's inventory in the status bar. In this case, it's Scrap, to track a different item, replace the itemID value on line 16 with the ID of the desired item. This plugin can be downloaded by plugin developers as a reference to understanding how to work with the AdvancedStatus and by server owners to easily display desired items in the status bar.Free -
Version 1.0.8
202 downloads
Sky Base is a plugin that allows your players to get away from standard houses and build themselves a real base in the sky. The plugin is perfect for any server, both PvE and PvP. Video Description The plugin uses a standard construction system, which makes it easier to use and configure the plugin. To start building an air base, the player needs to craft the desired object using the /craftdrone command. 1 sky ceiling equals 1 foundation. In order to make the ceiling airy, just hit the ceiling with a mallet. To improve the ceiling, a drone of the same range as the roof is required. The plugin has a fully customizable crafting system where you can determine for yourself what resources are required to craft all drones. Video Tutorial Chat Commands /craftdrone - Allows you to open the drone crafting system (Permission: "skybase.use") Plugin Config Example of plugin configuration in English Example of plugin configuration in Russian Ideas for updates that may be implemented in the future Current ideas for the future of this plugin. These are things that I want to implement possibly. You can also write to us in Discord to suggest ideas or to vote for any that I share here. Add plugin support for notifications and also add notifications via the built-in gui rust</li> Creating ready-made building patterns Check out more of my work here CASHR's library. Come see our whole teams work Mad Mapper Library. Come by the Mad Mapper Discord for support, feedback, or suggestions!$27.50- 53 comments
- 3 reviews
-
- 3
-

-

-
- #sky bases
- #oxide
- (and 10 more)
-
Version 1.0.4
13 downloads
About Prime Prime is a plugin that allows the players to accumilate coins and then spend them at the dedicated vending machine at Outpost for items,weapons & armour. Coins gathered depends on a Risk VS Reward setup with Prime items providing BUFFS as the player progresses and buys bigger/better gear. Includes a lottery system,gambling, powerful Stones to collect & upgrade and all fully configurable! Hardcore Mode Activation When hardcore is active a Prime Vending Machine will spawn at Out Post allowing players access to Items to earn Prime Coins and Buffs ranging from increase in coins, incoming damage reduction, output damage increase. Players will only be able to progress thier Prime accounts by using items purchased from this vending machine, however if hardcore is NOT active.. players are free to use normal items and weapons to progress accounts and still have lottery active. With hardcore set to 'false' there is no vending machine, no items and no HOF.. you will also not be able to aquire stones. Stones: Requires Green Berries With each tier increase the stones provide a buff in coin yield starting at a base rate of 5% and maxing out at 75%, along with this in the later tiers the stones also provide the user with a increase in damage output.. however the stone needs to be in your inventory.. so it can be taken from you or lost. GREEN -[ Emerald I (5%) , Emerald II (10%), Emerald III (15%), Emerald IV (20%), Emerald V (25%) ] - Hidden Perks = Metabolism & Environment Buffs PURPLE - [ Mystic I (30%) , Mystic II (35%) , Mystic III (40%), Mystic IV (45%), Mystic V (50%) ] - Hidden Perks = Increase in Lottery Chance RED/BLACK - [ Unstable I (55%), Unstable II (60%), Unstable III (65%), Unstable IV (70%), Unstable V (75%) ] - Hidden Perks = Increase in Outgoing Damage by X% Fusion : In order to create the next type of stone youll need x2 Tier 5 Stones The higher the type and tier of the stone the more likely of a failure will occur in ther proccess resulting in the stones exploding..and you losing them..having to restart the process again. Config : Setting up Vending costs & Reward System The config file covers everything from: - Prime item costs at the vending maching - Coins rewarded for each individual task from smashing a barrel to killing an NPC - Coins rewarded for looting - Stone Drop Chance - Amount of Berries required to polish stones - Personal ID for chat (set to server icon) - Lottery chance % Plus much more Discord - Nferno#7163$14.99 -

Version 1.1.7
181 downloads
Monetize and fund your server! This plugin will allow players to purchase a token that represents a current group on your server, such as VIP, which can be traded/sold/gifted to other players in-game. It is functionally similar to bonds in Runescape, Plex in Eve Online and WOW tokens in WOW. The main benefit of this plugin is that it will allow your more generous donators to purchase tokens and sell them in game for items/resources etc to players who otherwise would not financially support the server. The RP server I run has been a shining success for this, increasing our VIP count by almost 50%. Features: Customizable tokens to suit most servers monetary requirements. Scalable quantities of VIP perks. A GUI to manage the show the players token balance, perks that each token provides, and end date of their subscription, all of which is configurable. Supports automatic payments via platforms such as Tebex, allowing for complete automation of purchasing. Automatically adds and removes the player from the designated oxide group. Days are completely configurable via the config file. Fail safes to prevent abuse, restrict the amount of VIP time for each token (configurable), and prevent overlapping of existing group access (configurable). Can optionally run a console command in addition to/instead of adding a player to an oxide group. Update (not mentioned in the video): Added the ability to run a command in addition to/instead of adding a player to a VIP group. Added the option to trigger a hook when a token is consumed (for developers). You will need to delete your old config and load the new config in order to use these new features. Chat commands Command: givetoken Arguments: <token id> <optional: quantity> Example: /givetoken vip 10 -this would give you 10x tokens called "vip" Permissions: viptoken.admin Command: removevip Arguments: <player name/id> <token id> Example: /removevip "new guy" vip - would remove the vip token from a player matching the name "new guy". Use quotation marks when inputting names with spaces, otherwise they aren't required. Permissions: viptoken.admin Command: tokenmenu Arguments: none Example: /tokenmenu Permissions: none Watch the video for more information on the plugin, how it works and how to set it up on a platform such as Tebex. Token links from my video: Thumbs up - https://steamcommunity.com/sharedfiles/filedetails/?id=2544603563 Recycler token - https://steamcommunity.com/sharedfiles/filedetails/?id=2544601457 VIP T1 - https://steamcommunity.com/sharedfiles/filedetails/?id=2529344523 VIP T2 - https://steamcommunity.com/sharedfiles/filedetails/?id=2529343385 VIP T3 - https://steamcommunity.com/sharedfiles/filedetails/?id=2529344741 Bitcoin - https://steamcommunity.com/sharedfiles/filedetails/?id=2530111676 The skin ID is the numbers at the end of each URL. Command syntax for your payment platform: addtoken <password> <steam ID> <tier> An example of a basic vip setup for tebex would be: API This function can be triggered if the configuration has hook = true. It will fire when the token is successfully consumed. void OnTokenConsumed(BasePlayer player, string tokenKey) { Puts($"{player.displayName} consumed a {tokenKey} token"); }$15.00- 71 comments
- 3 reviews
-
- 5
-
-
-
- #vip
- #monetization
- (and 2 more)
-
Version 1.0.1
14 downloads
This plugin is a delightful addition to your server that allows players to enjoy a temporary boost in their resource gathering rate. It's like having a VIP pass to the best resources in the game! With VIPGather, players can activate a command to multiply their gather rate by a configurable amount. Players can activate the VIP gather effect using the /vipgather chat command. This effect lasts for a set duration, also configurable, making each gathering session a strategic decision. But be careful, once the VIP gathering time is up, players will have to wait for a cooldown period before they can use it again. The plugin also provides helpful reminders to players about their VIP gather status. The plugin is highly configurable, allowing server admins to set the VIP gather duration, the cooldown duration, the reminder interval, and the gather rate multiplier. This means you can tailor the VIPGather experience to fit the balance and pacing of your server. If they have the necessary permission (vipgather.use), they'll enjoy a boosted gather rate for the configured duration. If they want to stop the effect early, they can use the /vipgatherstop command. They'll receive messages when their VIP gather rate is about to expire, when it has expired, and when they can use it again after the cooldown. So, why not give your players the VIP treatment? With VIPGather, every player can have a taste of the high life, even in the harsh world of Rust. It's a fun and engaging feature that adds a new layer of strategy to resource gathering. Try VIPGather today and watch your players scramble to become the most efficient gatherers they can be! Config file: { "VIPGatherDuration": 240, "CooldownDuration": 300, "ReminderInterval": 30, "GatherRateMultiplier": 5.0 }$4.99 -
Version 1.0.0
6 downloads
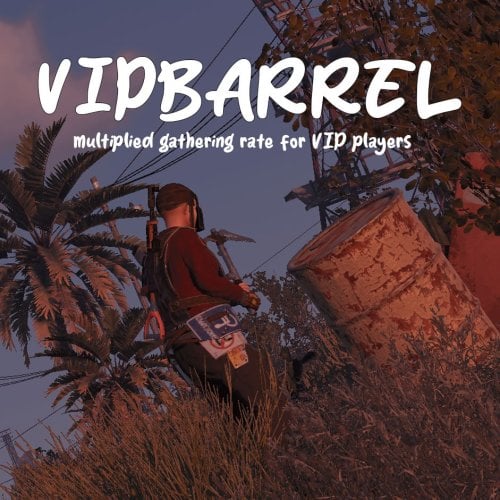
The VIPBarrel plugin is a Rust plugin that enhances the gameplay experience by allowing players to multiply the loot they receive from breaking loot barrels. When a player activates the VIP barrel gather rate using the "/vipbarrel" command, their loot multiplier is set to a configurable value and every loot item obtained from breaking loot barrels is multiplied by this factor. The plugin includes cooldown periods and reminder notifications to manage the usage of the VIP barrel gather rate. Players can stop the VIP barrel gather rate at any time using the "/vipbarrelstop" command. This plugin adds a new dimension to looting gameplay in Rust by providing players with the opportunity to boost their loot gains from loot barrels. Config file: { "VIPGatherDuration": 240, "CooldownDuration": 300, "ReminderInterval": 30, "LootMultiplier": 2.0 }$3.99 -
Version 1.0.9
950 downloads
This plugin allows for your players to receive or purchase personal recyclers that they can place inside of their base. The primary benefit of this plugin vs other similar plugins, is that this plugin will restrict usage of the recyclers to only a user or their team (configurable), and has commands built in that will allow players to purchase it directly via payment gateways like Tebex etc. It will also work with the VIP Token plugin, allowing for a token to be purchased and traded in game, providing the consumer with a redeemable recycler. The plugin itself is fairly straight forward - players type the command into chat, which will provide them with a recycler item. This item is a reskinned box, and will be placed using the box prefab, but once deployed, it will spawn a recycler in with the same positioning as the box, then despawn the box. Recyclers can also be picked up using a hammer or toolgun by pressing mouse 3. Features Automatically clears data on map wipe. Allows players to keep their unredeemed recyclers between wipes (configurable). Prevents other players from accessing the recycler (configurable). Team mate support (configurable). Configurable starting amount of recyclers. Additional recycler(s) are accrued upon a map wipe, if the player had not redeemed their recycler (configurable). External payment gateway support, allowing for you to sell individual recyclers to your players. VIP Tokens support. Check below for the configuration example. Can pick up own recyclers using your hammer/toolgun and mouse 3. Recyclers will lost max condition each time they are picked up to prevent players from deploying them while grinding the roads (configurable). Permissions personalrecycler.use personalrecycler.admin personalrecycler.use commands /recyclers - will print out how many recyclers a player has left to redeem. /redeemrecycler - will spawn a recycler in the players inventory and deduct a recycler from their redeemable count. /crecycler - Will pickup the targeted recycler (requires a hammer to be wielded) if the player has permission. Players with this permission will automatically get the configured number of starting recyclers upon using the commands for the first time, and will have have recyclers added to their redemption pool at the start of each wipe (configurable). personalrecycler.admin commands /addrecycler <player name> - will increase the amount of redeemable recyclers a player has by 1. /clearrecyclers <player name> - will remove all of the saved recycler IDs from the data file, making all of their recyclers publically accessible. /clearrecyclerdata - removes all of the saved recycler IDs from the data file, making all recyclers publically accessible. API This plugin allows for you to add a command to a payment gateway such as Tebex, or via my VIP Tokens plugin. The command is structured as below: addrecycler <Steam ID> <quantity> Most payment gateways required the player to log in with their steam ID. An example command using tebex would be: addrecycler {id} 1 This would add 1 recycler for the steam ID of the account that logged into Tebex. You can also add this as a VIP Token. See configuration options below: "recycler": { "name": "Personal Recycler", "days_to_add": 0, "vip_group": null, "vip_description": "Allows you to place a personal recycler that only you can access.", "remove_tokens_on_wipe": false, "token_item": { "name": "Recycler Token", "skin": 2544601457, "item_shortname": "radiationresisttea.pure" }, "_command": { "command": "addrecycler {id} 1", "message": "You redeemed a recycler token.", "public_message": null, "hook": false } } As you can see, the command follows Tebex's variable style, using {id} to capture the players steam ID. If you require help setting this up with VIP Tokens, or need any assistance with anythign else, feel free to send me a PM. Enjoy!$4.99 -
Version 1.2.21
5,843 downloads
Bundle of four addons made for Welcome Panel UI. All four addons including preset default config files as you see them on screenshots.$11.99 -

Version 1.0.1
6 downloads
Market Station - This is a plugin that will add the ability for your players to install their own trading station on the server Description When installing a computer station, the Market mod is automatically added. In order to trade, the player needs to create a lot at the station and put the item in a Small Stash, after that, any player can also buy it through the station.It is important that this plugin uses only physical items and they are not recreated, which allows you to use your custom items without losing properties. You can also add items available for trading and also prohibit players from trading items in the config. Config Example of plugin configuration in English Example of plugin configuration in Russian Ideas for updates that may be implemented in the future Current ideas for the future of this plugin. These are things that I want to implement possibly. You can also write to us in Discord to suggest ideas or to vote for any that I share here. Add a different number of slots for players with privileges. IMPORTANT, IF YOU HAVE ALREADY BOUGHT THE MY MARKET PLUGIN AND WOULD LIKE TO REPLACE IT WITH THIS ONE, WRITE TO ME IN PRIVATE MESSAGES AND YOU WILL RECEIVE A PERSONAL DISCOUNT OF 60% Check out more of my work here CASHR's library. Come see our whole teams work Mad Mapper Library. Come by the Mad Mapper Discord for support, feedback, or suggestions!$25.00 -

Version 2.2.0
276 downloads
VIP Status is a powerful plugin that shows custom status messages for VIP players (3 different groups) on your Rust server. With the user-friendly configuration options, you can customise the colours, icons and text of the VIP status message of all 3 VIP groups to suit your individual needs. Plus, the plugin comes with a fully customizable language file, so you can translate the status message and other plugin texts into your preferred language. But that's not all: VIP Status is designed to be stable and reliable. Unlike other plugins that use countdown timers to display the remaining time of a VIP status, VIP Status simply shows the expiration date and checks it against the player's permissions file at fixed intervals. This approach ensures that the plugin operates smoothly without causing any lags or performance issues. Many other plugins that constantly perform countdown calculations can be processor-intensive and lead to performance drops. That's why we opt for static end times, eliminating the need for resource-heavy calculations every minute. If you want to enhance the VIP experience on your Rust server and offer your players a premium status that stands out, VIP Status is the plugin for you. Try it out today and see how it can elevate your server to the next level! Please note that VIP Status requires the Free TimedPermissions plugin to function, as it relies on TimedPermissions to set and track the VIP expiration time. If a player is a member of the VIP group but not listed in the TimedPermission file, the VIP status is now displayed without an expiry date. vip groups now possible for a maximum of 3 groups with different settings (pictures, colour etc.) as well as long file for all 3 groups Toggle the visibility of your VIP status. Added new configuration option to display a custom status when the player does not belong to any group, as an example: no vip Commands: /vip - List of Commands /vt - Toggle the visibility of your VIP status. /vi - Shows how long you have left on your VIP status Config: { "VIPGroups": [ { "Color": "0.66 0.66 0.66 0.8", "IconColor": "1.5 0.8 0.0 0.9", "ImageUrl": "https://i.ibb.co/hmC7s0y/vip1.png", "SubTextColor": "1 1 1 0.7", "TextColor": "1.5 0.8 0.0 0.8", "VipStatusId": "vip1" ///name of the vip group 1 }, { "Color": "0.30 0.66 0.66 0.8", "IconColor": "1.5 0.8 0.0 0.9", "ImageUrl": "https://i.ibb.co/yN18d6h/vip2.png", "SubTextColor": "1 1 1 0.7", "TextColor": "1.5 0.8 0.0 0.8", "VipStatusId": "vip2" ///name of the vip group 2 }, { "Color": "1.0 0.0 0.0 0.4", "IconColor": "1.5 0.0 0.0 0.9", "ImageUrl": "https://i.ibb.co/py0GJpj/vip3.png", "SubTextColor": "1 1 1 0.7", "TextColor": "1.5 0.8 0.0 0.8", "VipStatusId": "vip3" ///name of the vip group 3 } ], "ShowCustomStatusWhenNoGroup": false, ///set true to display a custom status when the player does not belong to any group. "NoGroupConfig": { "Color": "1.0 0.0 0.0 0.4", "TextColor": "1.5 0.8 0.0 0.8", "SubTextColor": "1 1 1 0.7", "IconColor": "1.5 0.8 0.0 0.8", "ImageUrl": "https://i.ibb.co/hmC7s0y/vip1.png" } } Lang: { "VIPStatusText_group1": "GROUP1", ///visible name of the vip group 1 "UntilText_group1": "until {0}", ///subtext for Group 1 with expire time "NoExpireText_group1": "Unlimited", ///subtext for Group 1 without an expiry date. "VIPStatusText_group2": "GROUP2", ///visible name of the vip group 2 "UntilText_group2": "until {0}", ///subtext for Group 2 with expire time "NoExpireText_group2": "Unlimited",///subtext for Group 2 without an expiry date. "VIPStatusText_group3": "GROUP3", ///visible name of the vip group 3 "UntilText_group3": "until {0}",///subtext for Group 3 with expire time "NoExpireText_group3": "Unlimited", ///subtext for Group 3 without an expiry date. "VIPStatusOn": "VIP status display turned on.", "VIPStatusOff": "VIP status display turned off.", "VIPStatusExpiration": "{0} expires on: {1}", "VIPStatusUnlimited": "{0} has unlimited VIP status.", "MessageCommandsListTitle": "List of Commands:", "MessageCommandVT": "/vt - Toggle the visibility of your VIP status.", "MessageCommandVIPInfo": "/vi - Shows how long you have left on your VIP status.", "NoGroupStatus": "No VIPs" /// text for the custom status when the player does not belong to any group. }$15.00 -

Version 2.0.0
26 downloads
Gift your supporters / VIP Tier players. Customizable loot table for items to be claimed on a daily cooldown (or set the cooldown in seconds to what you desire) Supports skins and custom item names. Discord Webhook Logging Commands /resetallvip - Resets all player cooldown data. /resetvip "PlayerName" or "ID" - Resets a specific player. /vip - Claims the vip package Both Clear Commands Work in RCON Permissions VIP - Grant this permission to the players that can claim. RESET - For admins and moderators to reset in game via chat RESETALL - For admins and moderators to reset in game via chat Example Config. { "Discord Webhook URL": "INSERT_WEBHOOK_HERE", "Cooldown (Seconds)": 86400, "Clear Data on Wipe?": true, "Effect On Claim?": "assets/prefabs/misc/easter/painted eggs/effects/gold_open.prefab", "VIP Items": [ { "Shortname": "scrap", "Amount": 50, "SkinId": 0, "CustomName": "" }, { "Shortname": "blood", "Amount": 250, "SkinId": 0, "CustomName": "fake blood" }, { "Shortname": "rifle.ak", "Amount": 1, "SkinId": 1167207039, "CustomName": "" }, { "Shortname": "paper", "Amount": 50, "SkinId": 0, "CustomName": "CASH" }, { "Shortname": "sticks", "Amount": 50, "SkinId": 0, "CustomName": "" } ] } Thank you for viewing. - Wrecks$5.00 -
Version 3.1.0
313 downloads
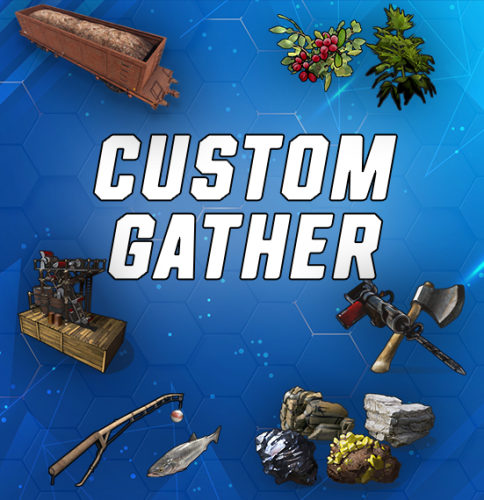
Custom Gather allows you to have dynamic gather rates on your server! This allows you to assign different gather rates for as many groups of players as you would like. What this plugin offers that other gather rate plugins don't: Create custom gather rates based on oxide permission groups Example: Have a global 2x gather rate, but have VIPs gather at 4x, and Elite VIPs gather at 8x. Modify resources in Unloadable Train Wagons Set separate custom rates for Public and Private quarries Modify Fishing Rate Gather rate modifier includes grubs/worms picked from plants Configuring JSON Files This plugin creates two JSON files, one is located in Oxide/Config/CustomGather.json, and the other is in Oxide/Data/CustomGather.json. The config file is used to set the global on/off switches, unloadable train wagon settings, the blacklists and the global override list. The data file is used to create and specify custom groups to be assigned via oxide permissions. The 'default' group makes a permission named customgather.default and automatically assigns it to the default oxide group All other groups generate permissions titled customgather.{groupname} that then must be assigned to an oxide group or player. Do NOT delete the data json file during server wipe. It will reset all your custom group settings and need to be reconfigured. Tutorial Blacklists & Global Override List The Blacklists reverts an item's gather rate to 1x for the specified method of gathering that it is listed under. The Global Override List is similar, but you specify a custom gather rate for specific items that is then applied globally, regardless of permission groups or gather method. Items need to be entered in with their short names. Use this reference to find any item's short name. Insert items by their short names inside quotations and separated by commas. Chat Commands /cg info -- Displays each custom group and their gather rates Config JSON - Example { "Global On/Off Switches. Only set these to false if you use a separate plugin to control specific gather rates.": { "Modify rates for items picked off the terrain (ex: plants, tree stumps, small ore nodes)": true, "Modify rates for items grown in planters": true, "Modify rates for fishing": true, "Modify rates for PUBLIC Quarries and Pumpjacks": true, "Modify rates for PRIVATE Quarries and Pumpjacks": true, "Modify rates for the Giant Excavator": true, "Modify rates for Dispensers (ex: ore nodes, trees, animal corpses)": true, "Modify rates for Resource Train Wagons": true }, "Unloadable Train Wagon Settings": { "Multiplication Rate": 20, "Single Stack of Resources?": true }, "Blacklists (items to gather at vanilla rates)": { "Harvested Items": [ "human.skull", "skull.wolf" ], "Pickup Items": [ "cloth" ], "Planter Box Items": [ "clone.hemp" ], "Fishing": [ "fish.anchovy" ], "Quarries & Pumpjacks": [ "stones" ], "Excavator": [ "stones" ], "Train Resource Wagons": [ "metal.ore" ] }, "Global Override List": { "pumpkin": 20, "hq.metal.ore": 10 } } Data JSON - Example { "Custom Permission Group Settings": { "default": { "Gather Rate": 1, "PUBLIC Quarries & Pumpjacks Rate": 1, "PRIVATE Quarries & Pumpjacks Rate": 1, "Giant Excavator Rate": 1, "Fishing Rate": 1 }, "vip": { "Gather Rate": 2, "PUBLIC Quarries & Pumpjacks Rate": 2, "PRIVATE Quarries & Pumpjacks Rate": 2, "Giant Excavator Rate": 2, "Fishing Rate": 2 }, "Elite": { "Gather Rate": 3, "PUBLIC Quarries & Pumpjacks Rate": 3, "PRIVATE Quarries & Pumpjacks Rate": 3, "Giant Excavator Rate": 3, "Fishing Rate": 3 }, "SuperElite": { "Gather Rate": 4, "PUBLIC Quarries & Pumpjacks Rate": 4, "PRIVATE Quarries & Pumpjacks Rate": 4, "Giant Excavator Rate": 4, "Fishing Rate": 4 }, "MegaElite": { "Gather Rate": 5, "PUBLIC Quarries & Pumpjacks Rate": 5, "PRIVATE Quarries & Pumpjacks Rate": 5, "Giant Excavator Rate": 5, "Fishing Rate": 5 } } }$5.00- 14 comments
- 2 reviews
-
- 1
-
-
- #gathering
- #gather rates
- (and 11 more)
-

Version 1.0.0
16 downloads
What differentiates our plugins from others is the ability to create votes for customized server events in addition to our exclusive and modern design, making it stand out among other servers! A modern and elegant interface inspired by the design of the game League of Legends; Fully customizable interface; Multiple chat commands; Different permission for each sub command; Different cooldown for each event; Plugin default events; Option to enable/disable events without deleting them; Customized icon for each event; Can I assign a price to run the command? Yes, you can set the option "Cost" in the config file to use the Economics plugin and add a cost to the command. Can I give specific event permissions only to VIPs? Yes, you can create specific permission for each sub command and only give it to the users or groups you prefer! You can see the default config of the plugin above:$13.00 -
Version 1.0.1
19 downloads
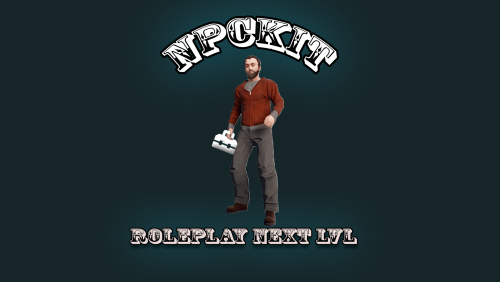
NPCKit is a Plugin made for any type of server pvp, pve or roleplay. With this Plugin you can create NPCs and add Kits to each of them as you like. They can be created with Clothing vanilla or skined and will wave to you, once you interact or leave the NPC. Each Kit can have its own cooldown and a default or Vip permission. Once a Kit is created you can delete it as well with the right permission, without deleting the whole NPC. You can also have unlimited Kits. If you create more then 4 kits, you will be able you navigate through multiple pages to see all the kitsyou created. Add as many NPC on you server as you like and give your players the ability to receive kits by interacting with one of your NPCs. All NPCs will also be displayed on the map with a shop marker. To interact with an NPC press the E key on your keyboard Whatch my showcase Video below to get a good starting point of my plugin. Check out my Discord to get even more help or request private plugins. Discord: https://discord.gg/jMfCUJd4eE Showcase video Permission createnpc - create an NPC and Kits (NOTE!: this is the Admin permission so only Admins should have it to create, delete NPCs/Kits) default - grand this permission to any player who will then be able to receive every kit with the default permission vip - grand this permission to any player who will then be able to receive every kit with the vip permission Chat Commands /createnpc - opens a panel to create the NPC (after that interact with the E key on your keyboard) Lang Files German and English translation included Config { "Use_MapMarker_For_NPC": true } Data File with all the NPC, kit and player information stored will be created$9.99 -
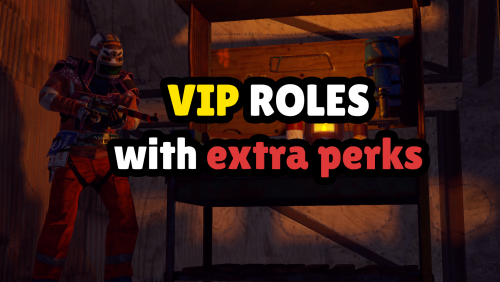
Version 1.2
133 downloads
By installing this addon, that was balanced and made exclusively for my pre-configured 2x Rust server, you will have three VIP roles automatically installed. These roles are: KING Role: [KING] Tag in chat with a colorful name. Ability to change the color of their name. Access to sign artist (Allows importing images on signs). TP cooldowns reduced by 5 seconds compared to an average player. Can set and have access to three additional homes compared to an average player. Will have an exclusive KING kit. Will have access to MASTER and VIP kits, totaling three kits. Kits can be used only 3 hours after wipe. Each kit has a 12-hour cooldown before it can be used again. MASTER Role: [MASTER] Tag in chat with a colorful name. Ability to change the color of their name. Access to sign artist (Allows importing images on signs). TP cooldowns reduced by 5 seconds compared to an average player. Can set and have access to two additional homes compared to an average player. Will have an exclusive MASTER kit. Will have access to the VIP kit, totaling two kits. Kits can be used only 3 hours after wipe. Each kit has a 12-hour cooldown before it can be used again. VIP Role: [VIP] Tag in chat with a colorful name. Ability to change the color of their name. Access to sign artist (Allows importing images on signs). TP cooldowns reduced by 5 seconds compared to an average player. Can set and have access to two additional homes compared to an average player. Will have an exclusive VIP kit. Kits can be used only 3 hours after wipe. Each kit has a 12-hour cooldown before it can be used again. Please note that this order reflects the features and functions of each role, with KING having the most privileges, followed by MASTER, and then VIP.Free -
Version 1.0.0
6 downloads
Cewkies -Trailer Shelter - this is a 55 wide prefab , buildable and lockable custom trailer . PLAYERS can claim this trailer by placing a lock on the garage doors and a tc outside , there are extra chair mounting points for some interesting seating , these could be used as pve / rp / rewards , mmmm trailer flavor enjoy!$4.99