Search the Community
Showing results for tags 'command'.
-
Version 2.0.6
1,824 downloads
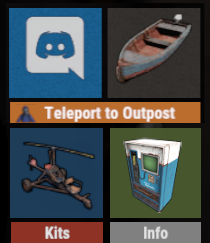
Create your own UI buttons for your rust server! Plugin comes with built ingame editor which makes creating proccess so much easier! • Features - Create as many buttons as you want. - Attach Images or Text to buttons. - Set chat commands to each button. - UI Editor ingame - Toggle hide function to create small gui menu. • Commands • Permissions • Config Example • Cui Data Example Special thanks to @SinKohhfor contributing and testing plugin before release.$7.50 -
Version 1.0.1
42 downloads
Item Sorter: Effortless Crate Sorting for Your Server! With the ItemSorter plugin, managing your crates has never been easier. Whether you're a server admin or a community member, you can now neatly organize your items alphabetically or by categories with a simple commands. Say goodbye to clutter and chaos! Key Features Quick and Intuitive: Just look at the chest you want to sort and use a command. Alphabetical and categorical sorting: Items inside the chest will be sorted alphabetically or by category for easy access. No UI Hassle: No complicated interfaces or menus; it's a command-line solution. Community-Friendly: Perfect for community servers where simplicity and utility matter. Get your server's storage in order today with ItemSorter – the ultimate solution for tidying up your items effortlessly! Permissions ItemSorter.user - Allows the user to have access to the sort command Chat command /sort-a - Sort container alphabetically. /sort-c - Sort container by category. Bind bind <key> "chat.say "/sort-a"" - Bind for alphabetical sort command bind <key> "chat.say "/sort-c"" - Bind for the categorical sort command$9.99 -
Version 1.0.0
11 downloads
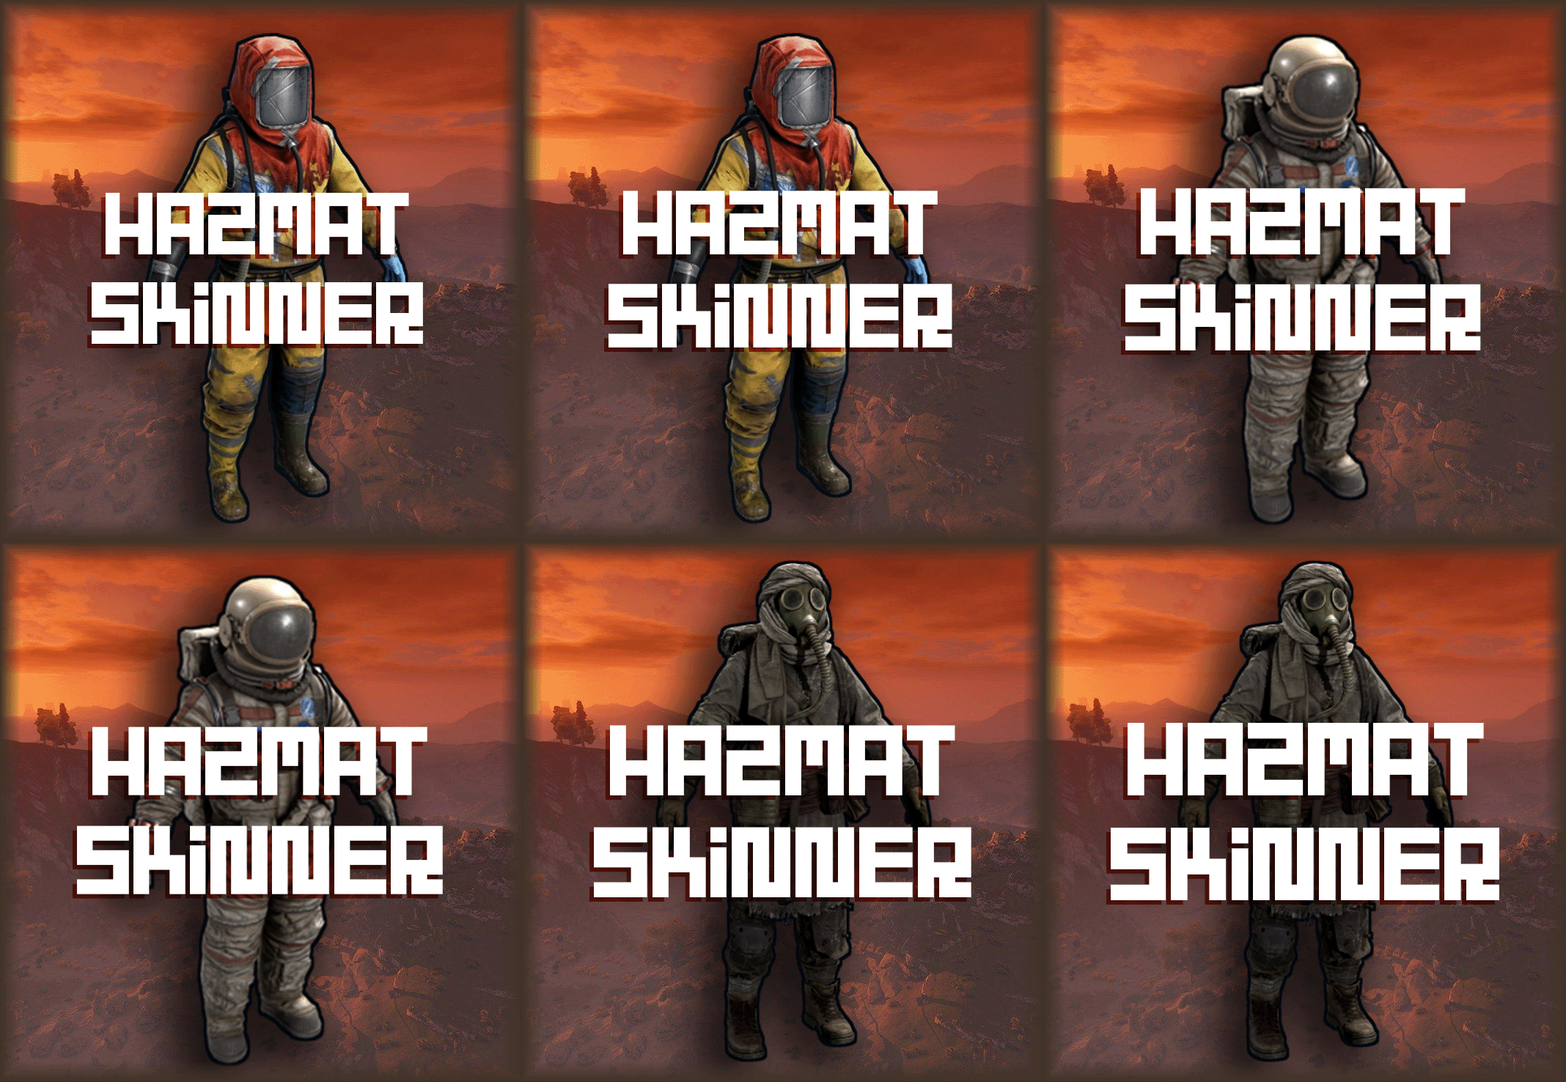
What's "Hazmat Skinner"? "Hazmat Skinner" is the ultimate tool for Rust players who crave unique hazmat skins. Whether you're an admin on a community server or a player, this plugin empowers you to take command of your in-game style. Key Features Easy Customization: Simply use the /hz command followed by the item name to transform your hazmat. No UI Required: Say goodbye to complex user interfaces – it's all done with commands! Permissions hazmatskinner.user: Grants access to the /hs command. Chat Commands /hs <Name>: Change the skin of the hazmat in your hand. List of names Hazmat Abyss Lumberjack Nomad Arctic Space Ninja (Skin cannot be moved back to hazmat or it will break). Surgeon (Skin cannot be moved back to hazmat or it will break). Bind to Your Preferences bind <key> "chat.say "/hs <Name>"" Upgrade your Rust experience today with "Hazmat Skinner" – the ultimate tool for hazmat customization!$7.99 -
Version 1.0.2
16 downloads
What is “Bind Looting”? “BindLooting” is a powerful tool for Rust players who want to loot crates quickly. Whether you’re an admin on a community server or a player, this plugin allows you to control your gaming style. Main Features Easy Looting: Just bind the /bindlooting command and then just press the bind key! All items in the container you're looting will move to your inventory instantly! No UI: Say goodbye to complicated user interfaces – everything happens through bind! Optional settings: Allowing a player to use a bind if they have "building privilige". Allow only "box.wooden.large" and "woodbox_deployed" (or other entities as desired) to be looted. Permissions bindlooting.use: Grants access to the /bindlooting command. Assign According to Your Preferences bind <key> "chat.say "/bindlooting"" Enhance your Rust experience today with “BindLooting” – the ultimate tool for quick looting!$8.99 -
Version 1.0.0
6 downloads
The VIPBarrel plugin is a Rust plugin that enhances the gameplay experience by allowing players to multiply the loot they receive from breaking loot barrels. When a player activates the VIP barrel gather rate using the "/vipbarrel" command, their loot multiplier is set to a configurable value and every loot item obtained from breaking loot barrels is multiplied by this factor. The plugin includes cooldown periods and reminder notifications to manage the usage of the VIP barrel gather rate. Players can stop the VIP barrel gather rate at any time using the "/vipbarrelstop" command. This plugin adds a new dimension to looting gameplay in Rust by providing players with the opportunity to boost their loot gains from loot barrels. Config file: { "VIPGatherDuration": 240, "CooldownDuration": 300, "ReminderInterval": 30, "LootMultiplier": 2.0 }$3.99 -
Version 1.0.3
48 downloads
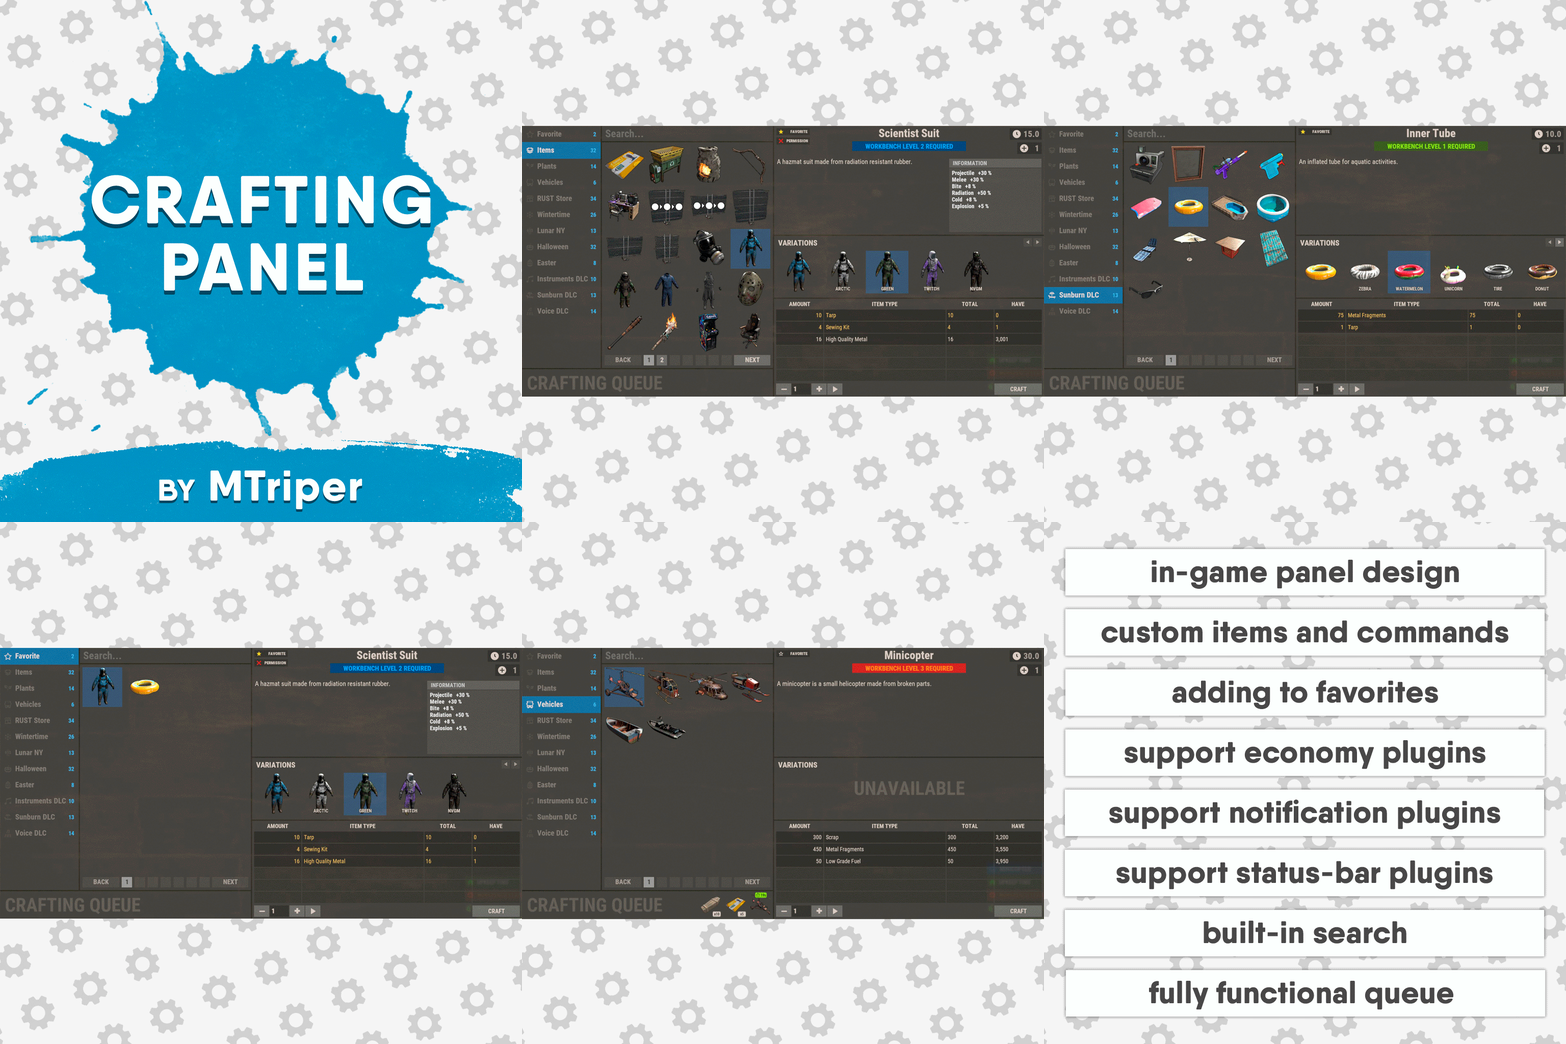
This plugin provides a beautiful and convenient crafting panel for your server. Its design and mechanics are as similar as possible to the in-game Rust crafting panel. Add crafting of any custom items, commands, permissions and anything else you like. Features The design is ~90% similar to the design of Rust's in-game crafting panel. Support for any custom items and commands. The plugin only registers permissions for items that you have specified to it. Thus, preventing the creation of a large number of permissions. Customizable sound effects, notifications in the status bar on the right, and text notifications in popular plugins. The plugin can take and give out items from inventory, backpack and Backpacks plugin, depending on the fullness of any of them. Ability to add item variations (just look at the screenshots). Working with economy plugins. The player can choose whether to craft or buy an item. Add items to favorites, built-in search, fully functional queue and more. Permissions The plugin has immutable and generated permissions. The immutable ones include: craftingpanel._use – is responsible for opening the panel. If there is no permission, the panel will not open. craftingpanel._admin – give this permission only to administrators. It adds an additional "Give yourself" button to get items from the panel for free. This permission is also needed to use the givecraft command (about it below). craftingpanel._instant – all player crafts will be instant. craftingpanel._death – crafting queue will not be reset when the player dies. craftingpanel._disconnect – when a player leaves the server, the craft queue will not be reset. craftingpanel._economics – allows you to purchase items for the currency of the selected economy plugin. If the player does not have permission, the cost panel will still be displayed, but the player will not be able to make a purchase. The generated permissions are created by the plugin itself, here's how it works: craftingpanel.section.vehicles- this is permission for the "vehicles" section. craftingpanel.vehicles.minicopter - this is permission for the item "minicopter" in the "vehicles" section. craftingpanel.vehicles.snowmobile.tomaha - this is permission for the item "snowmobile" in the "vehicles" section and in "tomaha" variation. Commands Only one command is present in the plugin: givecraft steamid/nickname section item 5 skin steamid/nickname – steamid or nickname of your choice. section – section name from the Section permission [required] field. item – item name from the Item permission [required] field. 5 – how much of the current item to give out (craft multiplier). skin - name of the item from the Ingredients section, Item permission [required] fields. All arguments of this command are required. If your item has an empty "Variations" section or you want a default item, specify "default" in place of skin. General settings Allow taking resources from the Backpack? – plugin can take resources for crafting from an additional backpack (Backpacks by WhiteThunder). Delete player data from the Data file if they have not logged into the server for so many days – this setting is added to prevent the plugin from keeping in memory the settings of all players who have ever visited your server. Effect at the start/end/canceling – game effects that will be played at the start of crafting/completion of crafting/cancellation of crafting (effects list, plugin for playing effects). Specify a plugin to work with the economy – specify one plugin from the list or leave the field empty to disable work with economy. Notification settings Notification type (Chat, GameTips, Notify, GUIAnnouncements) – if this section is enabled, you must specify the type/plugin to notify the player of different warnings. Chat – notification to regular chat. GameTips – notification in the in-game Rust tooltips (blue or red at the bottom of the screen). Notify – notification in the Notify plugin by Mevent. GUIAnnouncements – notification in the GUIAnnouncements plugin by JoeSheep. Just below that are the customization fields for the specific type of notification. Game Status Settings Game status is a notification that is shown at the bottom right of the screen (like in-game crafting). The plugin can show 3 types of game status: Current craft – it's the blue panel with the gear. It is displayed while the crafting process is in progress. Giving item – it's the green panel with the down arrow. It is displayed when a player is given a craft item. Dropping item – it's the red panel with the cross. It is displayed when the items given by the plugin do not fit in the inventory and drop out near the player. Crafting Panel working with Rust's in-game status and two plugins (SimpleStatus, AdvancedStatus) that have slightly advanced features. Rust – is the in-game status built into the game. It does not require any additional plugins, but it cannot show the Current craft (blue panel with a gear). SimpleStatus – this plugin displays customizable statuses. It can show Current craft and Giving item. But cannot display Dropping item due to limitations in its operation. AdvancedStatus - this plugin displays customizable statuses. It works with all of the above status types. Section settings Section name – the displayed section name on the menu button. Section permission [required] – be sure to fill in these fields and make sure they are all unique. Because it is by this field that the plugin understands which section it is currently working with. If you specify "favorite" here, the plugin will use this section to display the player's favorite items (don't add items to it, the plugin will delete them anyway). Register this permission? – if enabled, the plugin will register a permission with the above name. In this case this section will be shown only to those players who have this permission. Section item settings Item name [required] – required field. The name of the item is displayed only in this plugin. If you need to create an item with the same name, you will find this setting below. Item permission [required] – required field. Make sure that each item in the section has a unique field. Because by this field the plugin understands which item in the current section it is currently working with. Register this permission? - if enabled, the plugin will register permission with the above name. Keep in mind that the current item will still be shown to all players, but they will not be able to craft it (this is also notified by the icon on the top left of the information section). Item description – item description, is not passed to the item when crafting, only displayed in the panel of this plugin. Item properties – if the item has some characteristics (e.g., damage, radiation protection, etc.) you can specify them here. This data is displayed in a separate panel in the information section of the item. Item shortname – if you are using the command as a craft result, leave this field empty. Create an item with the default name (true) or the above name (false)? – if true, the plugin will create an item with the default game name (which refers to the current shortname), otherwise it will set the name from the Item name field. Item skinId – if the item is custom, specify the required skinId, otherwise set it to 0. Item image [optional] – if as a result of craft, you have to execute some command, you can specify a link to a picture related to this command. Console commands executed after crafting (%steamid%, %username%, %amount%) [optional] – if you need to execute some commands as a result of crafting, you can list them with commas in this field. In the command you can specify %steamid% and %username%, the plugin will replace them with the data of the current player. The plugin can also replace %amount% with the amount per craft (next setting). If the command gives some custom game item and you know its shortname and skinid you can specify them in the fields above. This way you don't need to additionally save the image of this item to the hosting and specify its link. Amount per craft – number of items given out per craft. Max craft multiplier - maximum allowable craft multiplier. The craft multiplier (selected by the player in the Ingredients section) is how many times an item will be dispensed or how many times commands will be executed. If Amount per craft = 3, and the player chose multiplier = 2, he will receive 2 * 3 = 6 items. Crafting time [sec] – time to craft the item. It can be set to 0, then the item will be crafted instantly. Show notification in game status (if they are enabled)? – if a command from another plugin is used to give a custom item and that plugin displays game status, duplication of game statuses may occur. Therefore, it is possible to disable the display of game status for a particular item. Keep in mind that this only disables the Giving item status. Crafting cost in the economy plugin [0 - disable] – the value of the current item in your economy server currency. The customization works if you specified one of the supported economy plugins at the beginning. Item Variation settings In the in-game Rust crafting panel this section is called Skins, here it is called Variations. This is done because here it can include not only skins, but any items or commands related to the parent item. For example, you have several modular car presets, with different types of modules, but they are all related to modular cars. Therefore, you can specify them in one item - "Modular car". The settings in this section are similar to the parent item, except for the crafting ingredients. They will be the same as the parent item. Item Ingredient settings Resource name [required] – required field. Is used to display the name of the ingredient in the plugin panel (it is not taken into account when taking ingredients from the player). When canceling the craft, the plugin can set this ingredient to the specified name, you will find this setting below. Use this resource in ingredients? – enables or disables this resource for use in ingredients. Resource shortname [required] – required field. Shortname of the item that the plugin will look for from the player for crafting. Resource skinId – if it's a custom item, give its skinId, otherwise set it to 0. Return an item with the default name (true) or the above name (false)? – when the craft is canceled, if true, the plugin will create an ingredient with the default game name (which refers to the current shortname), otherwise it will set the name from the Resource name field. Plugin Config Example of plugin configuration in English: Example of plugin configuration in Russian. If you need Russian config, open it (CraftingPanel.cs) before loading the plugin, and at the top set the variable "isRus = true". Then save and upload this file to your server.$30.00- 34 comments
- 1 review
-
- 6
-

-

-
- #craft
- #craft menu
- (and 14 more)
-
Version 1.1.1
287 downloads
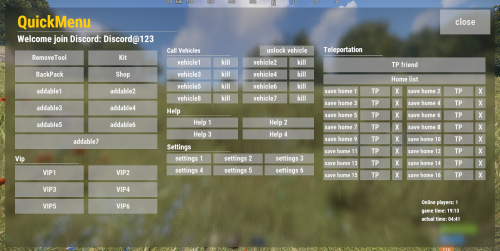
Stop fiddling with commands! This plugin allows you to create arbitrary buttons and give each button a different command! After installing this plugin, players can open this menu with just one command, and then conveniently click buttons to execute various commands! At the same time, this plugin also supports the middle mouse button function, allowing you to open menus without complicated binding of any key! I have created an initial template just like the picture Honestly, I've been using it for over a year, it's very convenient Let's take a look at its details: characteristic: - When the button is clicked, there will be a click sound effect - QuickMenu supports the middle mouse button to open the menu by default(Also applies when closed). If you don't want to use this function, you can enter the chat command /z to close. Of course, it only works for a single player, just like the DATA example below - After disabling the middle mouse button function, you can also enter bind J chat.say /q in the F1 console to bind the J key shortcut to open the Quick Menu(Also applies when closed), where the J key can be replaced with other keys. Chat command: /q - Open QuickMenu /z - Middle mouse button function true/false Config: { "title text size": 45, "Title text content": "<color=#FFcc00>QuickMenu</color>", "title min offset": "0.025 0.9", "title max offset": "0.65 0.98", "background min offset": "0.025 0.05", "background max offset": "0.975 0.95", "background color": "0 0 0 .5", "Discord": "<size=26><color=#FFFFFFFF>Welcome join Discord: Discord@123</color></size>", "Left title": "<size=20><color=#FFFFFFFF>Vip</color></size>", "middle title 1": "<size=18><color=#FFFFFFFF>Call Vehicles</color></size>", "middle title 2": "<size=20><color=#FFFFFFFF>Help</color></size>", "middle title 3": "<size=20><color=#FFFFFFFF>Settings</color></size>", "right title": "<size=20><color=#FFFFFFFF>Teleportation</color></size>", "Image URL": "", "Image min offset": "0.4 0.02", "Image max offset": "0.55 0.2", "Image color": "1 1 1 0.8", "close button text size": 26, "close button text": "close", "close button color": "1 1 1 .7", "close button min offset": "0.888 0.888", "close button max offset": "0.99 0.99", "Middle button function": true, "= = = = = = = = = = = = = [ button settings] = = = = = = = = = = = = =": [ { "button text size": 14, "button color": "0.8 0.8 0.8 0.6", "button text": "", "button text color": "1 1 1 0.9", "Button Min Offset": "0.025 0.899", "button max offset": "0.35 0.9", "button command": "" }, { "button text size": 19, "button color": "0.8 0.8 0.8 0.6", "button text": "RemoveTool", "button text color": "1 1 1 0.9", "Button Min Offset": "0.02 0.76", "button max offset": "0.16 0.82", "button command": "/remove" }, { "button text size": 19, "button color": "0.8 0.8 0.8 0.6", "button text": "Kit", "button text color": "1 1 1 0.9", "Button Min Offset": "0.17 0.76", "button max offset": "0.31 0.82", "button command": "/kit" }, { "button text size": 19, "button color": "0.8 0.8 0.8 0.6", "button text": "BackPack", "button text color": "1 1 1 0.9", "Button Min Offset": "0.02 0.69", "button max offset": "0.16 0.75", "button command": "/backpack" }, { "button text size": 19, "button color": "0.8 0.8 0.8 0.6", "button text": "Shop", "button text color": "1 1 1 0.9", "Button Min Offset": "0.17 0.69", "button max offset": "0.31 0.75", "button command": "/shop" }, { "button text size": 19, "button color": "0.8 0.8 0.8 0.6", "button text": "addable1", "button text color": "1 1 1 0.9", "Button Min Offset": "0.02 0.62", "button max offset": "0.16 0.68", "button command": "/kit" } ] } DATA: { "MiddleMouseButtonEnable": { "76561199161744587": true, "76561199161742450": false } }$12.00- 23 comments
- 1 review
-
- 1
-

-
- #uipanel
- #quickmenu
-
(and 4 more)
Tagged with:
-
Version 2.0.0
26 downloads
Gift your supporters / VIP Tier players. Customizable loot table for items to be claimed on a daily cooldown (or set the cooldown in seconds to what you desire) Supports skins and custom item names. Discord Webhook Logging Commands /resetallvip - Resets all player cooldown data. /resetvip "PlayerName" or "ID" - Resets a specific player. /vip - Claims the vip package Both Clear Commands Work in RCON Permissions VIP - Grant this permission to the players that can claim. RESET - For admins and moderators to reset in game via chat RESETALL - For admins and moderators to reset in game via chat Example Config. { "Discord Webhook URL": "INSERT_WEBHOOK_HERE", "Cooldown (Seconds)": 86400, "Clear Data on Wipe?": true, "Effect On Claim?": "assets/prefabs/misc/easter/painted eggs/effects/gold_open.prefab", "VIP Items": [ { "Shortname": "scrap", "Amount": 50, "SkinId": 0, "CustomName": "" }, { "Shortname": "blood", "Amount": 250, "SkinId": 0, "CustomName": "fake blood" }, { "Shortname": "rifle.ak", "Amount": 1, "SkinId": 1167207039, "CustomName": "" }, { "Shortname": "paper", "Amount": 50, "SkinId": 0, "CustomName": "CASH" }, { "Shortname": "sticks", "Amount": 50, "SkinId": 0, "CustomName": "" } ] } Thank you for viewing. - Wrecks$5.00 -
Version 1.2.6
368 downloads
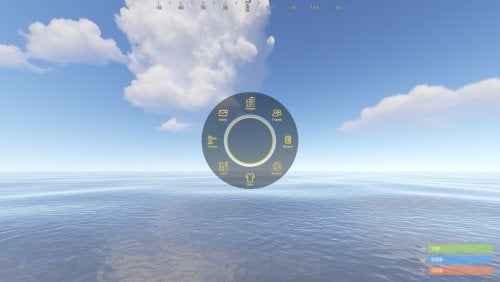
The radial menu is a customizable quick access panel with all popular and frequently used server commands. It makes it a lot easier and faster to interact with various server mechanics, be it teleportation, trades, setting house points and various panels. Features Allows to almost completely eliminate the manual entry of commands by the player. Automatic calculation and arrangement of any number of sections/subsections on a circle. Several display effects. Tracks a press of the MMB or on command (can be keyed to the same MMB). Checks for the privileges of a particular command, before executing it. Ability to use your own panel images. Full customization of the location and scale of icons and panel. Support for popular plugins (NTeleportation, Clans, Friends and Rust teams). Executing console or chat commands. General settings Upload images to players when they connect? - when a player connects to the server, the plugin will automatically download 3 images of menu rings to his client. This avoids displaying black rectangles when opening the menu while the plugin is downloading the images to the client. Section/Subsection settings The plugin has main sections (level 1), subsections at level 1 (level 2) and subsections at level 2 (level 3). Section name - the name of the section, which is displayed under the icon. Enable this section? – on/off section. Section permission [required] - permission required for the plugin to work (without dots). Add "_add" to the end of the name so that the plugin does not register or check permissions for child subsections. Section icon - direct link to the icon (recommended size 64x64). Fill icon with color below? - Completely fills the icon with the color set below. Inactive/active section color [HEX or Unity RGBA] - The plugin supports 2 types of colors: HEX (e.g. "#57de54" or "#57de54ff") and Unity RGBA ("0.34 0.87 0.33 1"). Command executed on behalf of the player - if you do not have subsections in this section, the command (without the "/" if chat) that will be executed for that player is specified here. If there are subsections in this section, the command is not specified. Specify %steamid% or %username% so that the plugin replaces them with the data of the player on whose behalf the command is executed. Command type - Where to run this command: true - chat, false - console. Permissions for above command - if the command above is specified, you can specify the privileges of that command in this field (e.g. "removertool.normal, removertool.structure, removertool.external"). The plugin will check if the player has these privileges before executing the command. Show this section only to those with permissions above? - allows to draw the section automatically (without giving permissions to this plugin) if the player has command permissions. Show this section even to those who don't have permissions? - forcibly displays the section to all players, even those who do not have privileges to it (if you click on it, a message about lack of permissions will be displayed in chat). Subsections layout [n - number] - this setting is responsible for how subsections are arranged. 0 - automatically. Suppose you have 10 subsections, then 360 degrees / 10 subsections = 36 degrees. The plugin will automatically position the 10 subsections every 36 degrees (clockwise, starting from the top). n - from the beginning. The plugin will arrange the subsections clockwise, starting from the top, not automatically, but in a certain step. For example, you have 3 subsections, but you do not want them to be automatically scattered all around the circle, you want them to be displayed at the top, with some small step, this step will be calculated due to the conditional number of subsections n (for example, 15). Now 360 degrees / 15 conditional subsections = 24 degrees, then your 3 subsections will be positioned from the beginning and there will be 24 degrees between them. -n - from the active item. The plugin will arrange the subsections relative to the active section. For example, you have 3 subsections, but you don't want them to be automatically scattered all around the circle, and you also don't want them to be arranged in some clockwise, starting from the top. By choosing this type of arrangement, the subsections will be located in the same place as the active section, in the increments you specify. It works the same way as above, only n is specified with a minus sign (for example, -15, the minus is needed for the plugin to understand what type of arrangement to use). All examples of the layout of the subsections are present in the standard config. Permissions It may be unclear how permissions work in this plugin. Let's figure it out with a simple example from the standard config. It's not hard to figure out that this is the home point section of the standard config. To exclude identical names of permissions the plugin converts them to this form. Because of the large number of permissions generated by the plugin, there are mechanics for reducing them. If you add "_all" to any section, in the "permission" field, the plugin will not register the permissions of child subsections. For example, if the player has the permission "_homes_all", then all displayed houses, all commands (add, remove, etc.), in general everything that belongs to the section "_homes_all" will obey and is checked by the permission "radialmenu._homes_all". The "permission" fields of the child sections still have to be filled in for the plugin to work. I strongly recommend using the "Permissions Manager" plugin to set privileges for players or groups. It draws a simple interface, through which it is very easy to add or remove permissions. Teleportation The plugin supports work with teleportation plugins (set/remove/teleport to home point) NTeleportation and Teleportation by OxideBro (for RU server owners). To do this, in the main section (level 1), you must specify the permission of the "_homes" section, this is necessary for the plugin to understand that it will work with the teleport plugin. Next, in the subsection "_homes" (level 2) you must add the MAXIMUM number of displayed house points, for example 5. If the player has more house points than this number, then only the first 5 will be displayed, if less, then all of them will be displayed. For each such point, you must set its unique name, which begins with "home_n", where "n" is any unique number or word (e.g. home_1, home_2, etc.). In addition to the house points here you can place a section with the establishment of the house point, its name should be "home_add", and the command "home add {0}" (command your plugin teleport), where {0} - the name of the new house point, the plugin itself will set it relative to the square in which the player at the moment is (for example D3, if there are several in the square, then D3h1, D3h2, etc.). After that, in the subsections (level 3) of each such house point, you can specify commands relating specifically to it. For example: "home {0}", "home remove {0}" or any other commands, where {0} is the name of the specific house, the plugin itself will substitute it when executing the command. If you find all of the above complicated, you can take a look at the standard config as an example. Friends The plugin supports work with plugins Friends, Clans by k1lly0u and Rust teams. Here everything is set up similar to Teleportation. But for the plugin to understand what to work with, in the main section (level 1) you must specify one of the three options: "_teammates" - the plugin will work with Rust teams "_friends" - the plugin will work with the Friends plugin "_clans" - the plugin will work with the Clans plugin In subsections (level 2) you must add the MAXIMUM number of displayed friends, for example 8. If the player has more friends than this number, then only the first 8 will be displayed, if less, then all of them will be displayed. For each friend you must set its unique name, which begins with "friend_n", where "n" is any unique number or word (for example friend_1, friend_2, etc.). After that, in the subsections (level 3) of each friend you can specify commands specific to him. For example: "tpr {0}", "trade {0}" or any other commands, where {0} is the nickname of the player, the plugin itself will substitute it when executing the command. An example of the configuration of this section is also present in the standard config. Plugin Config Example of plugin configuration in English Example of plugin configuration in Russian. If you need Russian config, open it (RadialMenu.cs) before loading the plugin, and at the top set the variable "isRus = true". Then save and upload this file to your server.$15.00- 66 comments
- 10 reviews
-
- 4
-

-

-
Version 0.1.1
9 downloads
What is it? A simple plugin that gives you ability to shift someone to other's team. Usage Let's say that somebody wants to join their friend's team, but the leader is offline, so they come for your help... what you gonna do? Yeet them into the team with this command Permissions teamshifter.use - Gives player ability to use /tshift teamshifter.bypass - Noone will be able to shift this player into any other team Functions * Bypass permission - Player with this permission cannot be shifted into any other team * Auto team-creator - If you do f.e. /tshift zeeuss someplayer and the "someplayer" is not in any team, this will automatically create one and will make the "someplayer" a leader and then put zeeuss into the team * If the player that will be shifted is in any team, this will remove him from the team and then shift him, if he wasn't in any then it will just shift him to the other team Localization ["NoPerms"] = "You don't have permission to use this!", ["Syntax"] = "Syntax: /tshift (player_to_move) (player_of_new_team)", ["NoPlayerToMove"] = "Couldn't find the player to move", ["NoPlayerOfNewTeam"] = "Couldn't find the player of new team", ["MoveMessage"] = "Moved {0} to {1}'s team", ["AlreadyInThatTeam"] = "{0} already is in {1}'s team", ["NeedsDifferentPlayers"] = "This command needs 2 different players and not the same one", ["CannotBeShifted"] = "{0} cannot be shifted by anyone into other teams",Free- 3 comments
-
Version 1.8.0
158 downloads
Support for up to 18 command buttons, with standard configuration. Change the button background color, button text, button color! When adding or removing buttons, they are automatically positioned in the center of the screen! Convenient configuration, you just need to add a new button, write the name and command! Choose any color for the background of the button, change the color of the name to your taste! You can also hide the panel for the player with the /FAST command and open it as well (everything is saved in the plugin's date file) Permission SvFastMenu.use issue to a group or player to display the command bar { "AnchorMax_Main": "0.6125930 0.01822916", "AnchorMin_Main": "0.3696925 0.001302288", "Buttons": [ { "ButtonName": "UP", "ColorButton": "0.24 0.29 0.15 0.9", "ColorText": "1 1 1 0.89", "Command": "/up 4", "Permission": "" }, { "ButtonName": "TURRET", "ColorButton": "0.24 0.29 0.15 0.9", "ColorText": "1 1 1 0.89", "Command": "/turret", "Permission": "" }, { "ButtonName": "LSAVE", "ColorButton": "0.24 0.29 0.15 0.9", "ColorText": "1 1 1 0.89", "Command": "/load save", "Permission": "" }, { "ButtonName": "NOMINI", "ColorButton": "0.24 0.29 0.15 0.9", "ColorText": "1 1 1 0.89", "Command": "/nomini", "Permission": "SvFastMenu.default" }, { "ButtonName": "MINI", "ColorButton": "0.24 0.29 0.15 0.9", "ColorText": "1 1 1 0.89", "Command": "/mymini", "Permission": "" } ], "ChatTag": "SVFAST", "FontName": "robotocondensed-bold.ttf", "FontSize": 10, "Overlay": "Overlay" }$5.00 -
Version 1.0.0
2 downloads
Time Check provides a simple global chat command for players to check the ingame time, as well as providing information on how long it'll be until the next morning or night. Players can use the command !time once per minute - Time Check works with day length plugins including TimeOfDay as the time until day/night counter measures ingame hours rather than real-time hours. Cooldown timer & message colours can be easily edited via the file itself, however feel free to reach out on Discord if you have issues with this (@rustbojack).$1.99 -
Version 1.0.6
66 downloads
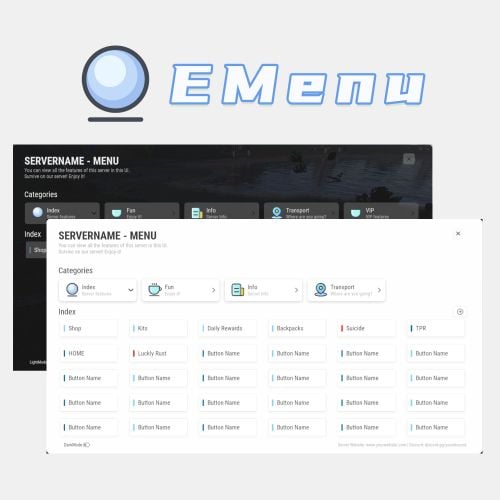
A Beautiful Server Menu UI, allows for unlimited categories and buttons customization. Features Supports Light and Dark Mode. Allows players to input custom parameters. Allows players to input command arguments manually. Supports adding an unlimited of categories and buttons. Categories and buttons can be configured with permissions, ensuring that only players with the permissions can access them. Support console or chat commands. Support for command running on the server. Commands ChatCommands /menu - Open EMenu ConsoleCommands emenu.open - Open EMenu Config { "Title": "SERVERNAME - MENU", "Description": "You can view all the features of this server in this UI.\nSurvive on our server! Enjoy it!", "Bottom Description": "Server Website: www.yourwebsite.com | Discord: discord.gg/yourdisocrd", "Open Commands": [ "/menu", "emenuopen" ], "Quick Open (Press the middle mouse)": false, "Default UI Mode (true = dark, false = light)": false, "Button Category List": [ { "Category Title": "Index", "Category Description": "Server features", "Category Icon": "https://i.imgur.com/sAeRp8j.png", "Category Permission": "", "Button List": [ { "Button Name": "Shop", "Button Lable Color": "#7AD9FF", "Button Command": "/shop", "Button Permission": "", "Button Description (For Input UI)": "", "Players Input Args": false, "Server Run Command": false, "Default Input Args": "" }, { "Button Name": "Kits", "Button Lable Color": "#7AD9FF", "Button Command": "/kit", "Button Permission": "", "Button Description (For Input UI)": "", "Players Input Args": false, "Server Run Command": false, "Default Input Args": "" }, { "Button Name": "Daily Rewards", "Button Lable Color": "#7AD9FF", "Button Command": "/daily", "Button Permission": "", "Button Description (For Input UI)": "", "Players Input Args": false, "Server Run Command": false, "Default Input Args": "" }, { "Button Name": "Backpacks", "Button Lable Color": "#7AD9FF", "Button Command": "/backpacks", "Button Permission": "", "Button Description (For Input UI)": "", "Players Input Args": false, "Server Run Command": false, "Default Input Args": "" }, { "Button Name": "Suicide", "Button Lable Color": "#ff0000", "Button Command": "kill", "Button Permission": "", "Button Description (For Input UI)": "", "Players Input Args": false, "Server Run Command": false, "Default Input Args": "" } ] }, { "Category Title": "Fun", "Category Description": "Enjoy it!", "Category Icon": "https://i.imgur.com/qmw5cNL.png", "Category Permission": "", "Button List": [ { "Button Name": "Luckly Rust", "Button Lable Color": "#0B72B2", "Button Command": "/lr", "Button Permission": "", "Button Description (For Input UI)": "", "Players Input Args": false, "Server Run Command": false, "Default Input Args": "" } ] }, { "Category Title": "Info", "Category Description": "Server Info", "Category Icon": "https://i.imgur.com/uQKMAT2.png", "Category Permission": "", "Button List": [ { "Button Name": "Info", "Button Lable Color": "#0B72B2", "Button Command": "/info", "Button Permission": "", "Button Description (For Input UI)": "", "Players Input Args": false, "Server Run Command": false, "Default Input Args": "" }, { "Button Name": "WelcomePanel", "Button Lable Color": "#0B72B2", "Button Command": "/welcome", "Button Permission": "", "Button Description (For Input UI)": "", "Players Input Args": false, "Server Run Command": false, "Default Input Args": "" } ] }, { "Category Title": "Transport", "Category Description": "Where are you going?", "Category Icon": "https://i.imgur.com/Wsqh9J6.png", "Category Permission": "", "Button List": [ { "Button Name": "TPR", "Button Lable Color": "#0B72B2", "Button Command": "/tpr %ARGS%", "Button Permission": "", "Button Description (For Input UI)": "Please enter the name of the player", "Players Input Args": true, "Server Run Command": false, "Default Input Args": "" }, { "Button Name": "HOME", "Button Lable Color": "#0B72B2", "Button Command": "/home %ARGS%", "Button Permission": "", "Button Description (For Input UI)": "Please enter the name of the home", "Players Input Args": true, "Server Run Command": false, "Default Input Args": "" } ] }, { "Category Title": "VIP", "Category Description": "VIP features", "Category Icon": "https://i.imgur.com/qmw5cNL.png", "Category Permission": "EMenu.vip", "Button List": [ { "Button Name": "Vip Shop", "Button Lable Color": "#7AD9FF", "Button Command": "/vipshop", "Button Permission": "", "Players Input Args": false, "Server Run Command": false, "Default Input Args": "" }, { "Button Name": "Bank", "Button Lable Color": "#7AD9FF", "Button Command": "/bank", "Button Permission": "", "Players Input Args": false, "Server Run Command": false, "Default Input Args": "" } ] } ] } Title - The title displayed in UI. Description - The description displayed in UI. Bottom Description - The description displayed at the bottom of UI. Open Commands - Command to open UI. Start with / for chat commands Quick Open (Press the middle mouse) - If enabled, players can use the middle mouse button to quickly open the Menu UI. When enabled, a toggle button is displayed in the UI for players to switch on and off this feature. Button Category List: Category Title - Category Title Category Description - Category Description Category Icon - Category icon, Png Url Category Permission - Permissions required to access this category If leave blank, no permission is required. Button List: Button Name - Button Name Button Lable Color - Button Lable Color (HEX) Button Command - Command run by button Start with / to run a chat command, otherwise it is a console command If "Players Input Args" is set to true, you should use "%ARGS%" to represent the arguments input by the players. If "Server Run Command" is set to true, you can use "%STEAMID%", "%PLAYERNAME%", "%PLAYER.POS.X%", "%PLAYER.POS.Y%", and "%PLAYER.POS.Z%" as variables. Button Permission - Permissions required to access this button If leave blank, no permission is required. Players Input Args - set to "true," it allows players to input arguments manually. It will open a UI for players to input arguments. Server Run Command - true = Server, false = Client If the command still starts with /, it will still run as a chat command Default Input Args - Default input arguments.$32.99 -
Version 0.0.1
18 downloads
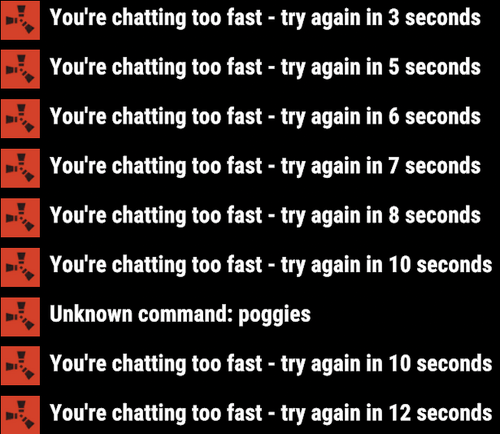
This harmony plugin makes it so that you can use commands even while typing too quickly. You will also not extend your cooldown by opening chat and pressing enter anymore, as I have fixed that as well. These two changes are a LARGE QoL improvement, in my opinion at least, that you will likely notice pretty quickly. This plugin is a drag and drop, just drop it into your normal plugins folder and you're good to go! Will do everything by itself. Example: You send a message and press a keybind for a chat command, you get told you're chatting to fast, or even just trying to type a command right after typing. With this plugin, you will NEVER have that issue again. Example 2: Send a message, and then have a cooldown of 5 seconds, you open chat and press enter to close it, your cooldown will not be updated.$1.69 -
Version 1.0.3
240 downloads
Timed Commands is an updated version of ComTimer. Features: This plugin is great for calling events and console commands - Commands run from a random time between an interval you set - Option to run commands in a random order Config: Default Configuration: { "Command List": [], "Longer Time In Seconds": 500.0, "Shorter Time In Seconds": 200.0, "In Order": true } Setting a single command: { "Command List": ["junkyardeventstart"], "Longer Time In Seconds": 500.0, "Shorter Time In Seconds": 200.0, "In Order": true } Setting more than one command: { "Command List": [ "junkyardeventstart", "callheli 1", "harborstart" ], "Longer Time In Seconds": 500.0, "Shorter Time In Seconds": 200.0, "In Order": true }Free -
Version 0.1.0
48 downloads
What is it? A simple command to jump from one place to another. How to use it? Look at anything and type /jump and you will be teleported to the place you are looking at if the place is further than the MaxDistance in config you will be teleported (MaxDistance meters) into that direction. Permission jump.use -- Gives you ability to use the /jump command ChatCommand /jump Configuration { "Max jump distance": 300.0 }Free -
Version 1.0.0
15 downloads
Custom Command is a plugin that allows admins to create new commands aliases for players to use and assign permissions to them. There is no limit to what you can create, go crazy and innovate your server with this plugin today! Config: { "Gobal Settings": { "Global - On Status": true, "Global - Use global permissions": true, "Global - Notify after command execution": true, "Global - Chat notification avatar ID (0=Rust)": 0 }, "Project Configuration": { "Project - Project List": [ { "Project - Name (can be named arbitrarily)": "demo", "Project - Open Status": true, "Project - Command Content (without '/')": "demo", "Project - Command Type (chat/console)": "chat", "Project - Use separate permissions": true, "Project - Individual Permissions": "customcommand.use.demo", "Project - Feedback Message Type (chat/console)": "chat", "Project - Feedback message on successful operation": true, "Project - Run Success Feedback Message": "Project {0} ran successfully", "Project - Use Run Failure Feedback Message": true, "Project - Run Failure Feedback Message": "Project {0} failed to run. Reason: {1}", "Project - Event List": [ { "Event - On Status": true, "Event - Command execution end (player/server)": "player", "Event - Execution Count": 1, "Event - Command Type (chat/console)": "console", "Event - Command Content (without '/')": "chat.say \"demo\"" } ] } ] } }$3.00 -
Version 0.0.2
97 downloads
SimpleEvents allows scheduling console commands for in-game events and separate timed commands. Features: - Schedule custom console commands. - Schedule console commands for in-game events. - Configure independent timed commands. - Choose between sequential or simultaneous execution of timed commands. - Define minimum and maximum intervals for timed commands. - Set minimum player count requirements for timed commands. - In-game events, such as Patrol Helicopter, CH47 Helicopter, Cargo Ship, Cargo Plane, Easter Egg Hunt, Santa's Sleigh, Halloween Hunt, and Bradley APC. Default Config: { "Custom Commands Execution Mode | 1 = Sequentially, 2 = Simultaneously, 3 = Disabled": 1, "Custom Commands": [ { "Commands": [ "", "" ], "Min Interval (s)": 60, "Max Interval (s)": 120, "Min Players": 0 }, { "Commands": [ "", "" ], "Min Interval (s)": 180, "Max Interval (s)": 300, "Min Players": 0 } ], "Patrol Helicopter": { "Commands": [ "", "" ], "Min Players": 0, "Prefab": "assets/prefabs/npc/patrol helicopter/patrolhelicopter.prefab" }, "CH47 Helicopter": { "Commands": [ "", "" ], "Min Players": 0, "Prefab": "assets/prefabs/npc/ch47/ch47scientists.entity.prefab" }, "Cargo Ship": { "Noninitial LootRound Min Players": [], "Commands": [ "", "" ], "Min Players": 0, "Prefab": "assets/content/vehicles/boats/cargoship/cargoshiptest.prefab" }, "Cargo Plane": { "Commands": [ "", "" ], "Min Players": 0, "Prefab": "assets/prefabs/npc/cargo plane/cargo_plane.prefab" }, "Easter Egg Hunt": { "Commands": [ "", "" ], "Min Players": 0, "Prefab": "assets/prefabs/misc/easter/egghunt.prefab" }, "Santa's Sleigh": { "Commands": [ "", "" ], "Min Players": 0, "Prefab": "assets/prefabs/misc/xmas/sleigh/santasleigh.prefab" }, "Halloween Hunt": { "Commands": [ "", "" ], "Min Players": 0, "Prefab": "assets/prefabs/misc/halloween/halloweenhunt.prefab" }, "Bradley APC": { "Commands": null, "Min Players": 0, "Prefab": null } }Free -
Version 1.1.1
11 downloads
Video - Link KillBonus provides a variety of rewards to players each time they kill an enemy player. This can include health recovery, metabolism recovery, ammo reloading, or the execution of pre-defined custom commands. It supports a range of commands. Furthermore, it records the kill counts of both players and clans, allowing the execution of custom commands upon achieving certain kill milestones. The KillBonus plugin is highly useful for various events and offers a high degree of versatility depending on the user's customization. [Features] 1. Dynamic Reward System: It offers a variety of rewards each time a player defeats an enemy, including health recovery, metabolism recovery, ammo reloading, or executing pre-defined custom commands. 2. Kill Count Tracking: The plugin tracks the kill counts of both individual players and clans, thereby providing a comprehensive performance analysis. 3. Custom Command Execution: Upon achieving certain kill milestones, the plugin allows for the execution of custom commands, offering an exciting reward system for players. 4. Player and Clan Kill Data Reset: The plugin supports data reset functionality for both individual players and clans, ensuring the gameplay remains fresh and engaging. 5. Localization: KillBonus offers multi-language support, ensuring seamless integration and interaction with the game, regardless of the player's language. 6. Console and Chat Command: Offers a wide range of commands for customization and game management, accessible through both the game console and chat. 7. Customizable Settings: With the configuration file, you can easily customize the game settings to suit your needs. 8. Advanced Data Management: All player and clan kill data is managed using a dedicated data management system, ensuring accurate tracking and storage. 9. Event Trigger System: This feature enables custom commands to be executed when certain conditions are met, such as after a specific number of kills. 10. Integration: KillBonus has been designed to be compatible with a variety of gaming setups, offering compatibility with other plugins and systems. 11. Remember that the maximum value of the KillBonus plugin lies in its flexibility and adaptability, providing server owners with a tool that can be customized to suit their unique gameplay and reward systems. [Permissions] killbonus.default - Required to use default settings killbonus.vip - Required to use vip settings killbonus.vvip - Required to use vvip settings killbonus.admin - Required to use commands [Config] { "Wipe Data on new map save": true, // Whether to wipe data when a new map is saved "ChatMessage Enabled": true, // Whether chat messaging is enabled "UI Enabled(Required - Notify.cs/notify.see)": false, // Whether the UI is enabled (Notify.cs/notify.see is required for this) "Is logging enabled?": true, // Whether logging is enabled "Player kill settings": { "Are player kill bonus enabled?": true, // Whether bonuses for killing players are enabled // Following settings specify the default recovery amount and limit for health, thirst, hunger and whether auto-reload and ammo consumption are enabled "Default player settings": { "Is HP recovery enabled?": true, "HP recovery amount": 10.0, "Maximum HP for recovery": 100.0, "Is thirst recovery enabled?": true, "Thirst recovery amount": 10.0, "Maximum thirst for recovery": 250.0, "Is hunger recovery enabled?": true, "Hunger recovery amount": 10.0, "Maximum hunger for recovery": 500.0, "Is auto-reload enabled?": true, "Is ammo consumption enabled?": true, "How many custom commands will be executed?(-1 : All)": -1, "Custom commands": [ // The custom commands to be executed "giveto $player.id scrap 100", "giveto $player.id wood 100" ], "Every X kill bonus commands": [ { "Kill count for command trigger": 5, // Execute commands for every X kills achieved "How many Every Xkill Bonus commands will be executed?(-1 : All)": -1, "Commands to execute": [ "giveto $player.id scrap 500", "giveto $player.id wood 500" ] } ] }, // Similar settings for VIP players "VIP player settings": { "Is HP recovery enabled?": true, "HP recovery amount": 20.0, "Maximum HP for recovery": 100.0, "Is thirst recovery enabled?": true, "Thirst recovery amount": 20.0, "Maximum thirst for recovery": 250.0, "Is hunger recovery enabled?": true, "Hunger recovery amount": 20.0, "Maximum hunger for recovery": 500.0, "Is auto-reload enabled?": true, "Is ammo consumption enabled?": true, "How many custom commands will be executed?(-1 : All)": -1, "Custom commands": [ // The custom commands to be executed "giveto $player.id scrap 300", "giveto $player.id wood 300" ], "Every X kill bonus commands": [ { "Kill count for command trigger": 5, "How many Every Xkill Bonus commands will be executed?(-1 : All)": -1, "Commands to execute": [ "giveto $player.id scrap 500", "giveto $player.id wood 500" ] } ] }, // Similar settings for VVIP players "VVIP player settings": { "Is HP recovery enabled?": true, "HP recovery amount": 30.0, "Maximum HP for recovery": 100.0, "Is thirst recovery enabled?": true, "Thirst recovery amount": 30.0, "Maximum thirst for recovery": 250.0, "Is hunger recovery enabled?": true, "Hunger recovery amount": 30.0, "Maximum hunger for recovery": 500.0, "Is auto-reload enabled?": true, "Is ammo consumption enabled?": true, "How many custom commands will be executed?(-1 : All)": -1, "Custom commands": [ // The custom commands to be executed "giveto $player.id scrap 500", "giveto $player.id wood 500" ], "Every X kill bonus commands": [ { "Kill count for command trigger": 5, "How many Every Xkill Bonus commands will be executed?(-1 : All)": -1, "Commands to execute": [ "giveto $player.id scrap 500", "giveto $player.id wood 500" ] } ] }, // Custom commands based on kill count "Custom kill bonus commands": [ { "Kill count for command trigger": 10, // The kill count required to trigger the command "How many Achieved custom commands will be executed?(-1 : All)": -1, "Commands to execute": [ // The commands to be executed "giveto $player.id scrap 500", "giveto $player.id wood 500" ] }, { "Kill count for command trigger": 20, "How many Achieved custom commands will be executed?(-1 : All)": -1, "Commands to execute": [ "giveto $player.id scrap 500", "giveto $player.id wood 500" ] } ] }, "Clan kill settings (Required - Clans)": { "Are clan kill rewards enabled?": false, // Whether rewards for clan kills are enabled "Custom clan kill reward commands": [ // Custom commands for clan kill rewards { "Kill count for command trigger": 10, // The kill count required to trigger the command "How many ClanKill Clan commands will be executed?(-1 : All)": -1, "Clan commands to execute": [ // 'Clan commands to execute' will be executed as many times as there are clan members. "giveto $clanmembers scrap 500", // Here, the variable "$clanmembers" will only be active. "giveto $clanmembers wood 500" ], "How many ClanKill Player commands will be executed?(-1 : All)": -1, "Player commands to execute": [ // The commands to be executed for the player "giveto $player.id scrap 500", "giveto $player.id wood 500" ] }, { "Kill count for command trigger": 20, // The kill count required to trigger the command "How many ClanKill Clan commands will be executed?(-1 : All)": -1, "Clan commands to execute": [ // The commands to be executed for the clan "giveto $clanmembers scrap 500", "giveto $clanmembers wood 500" ], "How many ClanKill Player commands will be executed?(-1 : All)": -1, "Player commands to execute": [ // The commands to be executed for the player "giveto $player.id scrap 500", "giveto $player.id wood 500" ] } ], "Every X kill bonus commands": [ { "Kill count for command trigger": 5, // Execute commands for every X kills achieved "How many ClanEvery X Kill Clan commands will be executed?(-1 : All)": -1, "Clan commands to execute": [ "giveto $clanmembers scrap 500", "giveto $clanmembers wood 500" ], "How many ClanEvery X Kill Player commands will be executed?(-1 : All)": -1, "Player commands to execute": [ "giveto $player.id scrap 500", "giveto $player.id wood 500" ] } ] }, "version": "1.1.1" // The version of this configuration } [Command] For chat or console(not /) commands: /kb addpk <playernameorid> <amount>: Adds kills for a specific player. /kb removepk <playernameorid> <amount>: Removes kills for a specific player. /kb addpa <playernameorid> <achievementname>: Adds an achievement for a specific player. /kb removepa <playernameorid> <achievementname>: Removes an achievement for a specific player. /kb addck <playernameorid> <amount>: Adds kills for the clan. /kb removeck <playernameorid> <amount>: Removes kills for the clan. /kb addca <playernameorid> <achievementname>: Adds an achievement for the clan. /kb removeca <playernameorid> <achievementname>: Removes an achievement for the clan. /kbreset all: Resets all kill data and clan kill data. /kbreset player: Resets only the kill data for players. /kbreset clan: Resets only the clan kill data. [Placeholders] $player.clanname $player.clankilldata $player.clankillachievedata $clanmembers $player.killdata $player.killachievedata $player.id $player.name $player.ip $player.ping $player.position $player.health [Localization] { "KillReward": "{0}<color=red>Kill</color> {1} {2} {3} {4}", "KillRewardWithClan": "{0}<color=red>Kill</color> {1}<color=red>ClanKill</color> {2} {3} {4} {5}", "HPRecovery": "<color=green>HP</color>+{0} ", "ThirstRecovery": "<color=#45BCFF>Hydration</color>+{0} ", "HungerRecovery": "<color=orange>Calories</color>+{0} ", "AmmoRefill": "<color=purple>Ammo</color>+{0} ", "Achieved": "<color=#45BCFF>You achieved</color> {0}<color=red>Kill</color>!", "ClanAchieved": "<color=#45BCFF>Your clan achieved</color> {0}<color=red>Kill</color>!", "anounceAchieved": "<color=green>[{0}]</color> {1}<color=red>Kill</color> Achieved!", "anounceClanAchieved": "<color=green>[{0}]Clan</color> {1}<color=red>Kill</color> Achieved!", "EveryXkill": "<color=#FF009B>Every</color> {0}<color=red>Kill Bonus</color>!", "ClanEveryXkill": "<color=#FF009B>Every</color> {0}<color=red>ClanKill Bonus</color>!", "UsagePlayerAmount": "Usage: /kb addpk or /kb removepk <playerNameOrId> <amount>", "AmountMustBeInteger": "Amount must be an integer.", "PlayerKillsAdded": "Player kills has been added.", "PlayerKillsRemoved": "Player kills has been removed.", "KillDataReset": "Player Kill data has been reset.", "ClanKillDataReset": "Clan kill data has been reset.", "AllDataReset": "All data has been reset.", "PlayerAchievementAdded": "Player achievement has been added.", "PlayerAchievementRemoved": "Player achievement has been removed.", "ClanKillsAdded": "Clan kills have been added.", "ClanKillsRemoved": "Clan kills have been removed.", "ClanAchievementAdded": "Clan achievement has been added.", "ClanAchievementRemoved": "Clan achievement has been removed.", "Amountpositivenumber": "Amount must be an positive number.", "InvalidKbCommand": "Invalid command. Usage: /kb(kb) <command> <target> <amount>", "FailedCommand": "Failed command.", "InvalidResetCommand": "Invalid command. Usage: /kbreset | kbreset <player | clan>", "Noperm": "You don't have permission to do this." } [API] private string GetPlayerKills(string playerNameOrId) // Retrieves the kill count of a specific player. private Dictionary<int, bool> GetPlayerAchievements(string playerNameOrId) // Retrieves the achievement information of a specific player. private string GetClanKills(string clanID) // Retrieves the kill count of a specific clan. private Dictionary<int, bool> GetClanAchievements(string clanID) // Retrieves the achievement information of a specific clan. private bool PlayerHasAchievement(string playerNameOrId, int achievementID) // Checks if a specific player has a particular achievement. private bool ClanHasAchievement(string clanID, int achievementID) // Checks if a specific clan has a particular achievement. private void AddPlayerKills(string playerNameOrId, int amount, BasePlayer playermsg = null, string message = null) // Adds kills to a specific player. private void RemovePlayerKills(string playerNameOrId, int amount, BasePlayer playermsg = null, string message = null) // Removes kills from a specific player. private void AddPlayerAchievement(string playerNameOrId, int achievementID, BasePlayer playermsg = null, string message = null) // Adds an achievement to a specific player. private void RemovePlayerAchievement(string playerNameOrId, int achievementID, BasePlayer playermsg = null, string message = null) // Removes an achievement from a specific player. private void AddClanKills(string clanTag, int amount, BasePlayer playermsg = null, string message = null) // Adds kills to a specific clan. private void RemoveClanKills(string clanTag, int amount, BasePlayer playermsg = null, string message = null) // Removes kills from a specific clan. private void AddClanAchievement(string clanTag, int achievementID, BasePlayer playermsg = null, string message = null) // Adds an achievement to a specific clan. private void RemoveClanAchievement(string clanTag, int achievementID, BasePlayer playermsg = null, string message = null) // Removes an achievement from a specific clan. private void ResetKillData() // Resets all kill data. private void ResetClanKillData() // Resets all clan kill data.$6.99 -
Version 2.1.0
52 downloads
This plugin make it possible, to have a Question database, with 1 valid and 1 to several invalid answer, and it will post a question into the chat in every configured X time, for configured Y time long. It support 4 different reward type, Economy, ServerReward, Item and Command. To win, the player need to type in the good answer. First good answer win. If the "Prevent bruteforce against answers" set to true, only the first guess will be considered. The current variables you can use in a command are: $player.name - Player display name $player.id - Player Steam ID $player.x, $player.y, $player.z - Vector3 coordinates Examples: say You are the best: $player.name! oxide.grant user $player.id randompermission randomairstrike $player.x, $player.y, $player.z Configuration { "Repeat in every X second": 30, "Notification before a game start enabled": false, "Hide game Close message": false, "Notification before a game start (in seconds, please watch for the overlap between questions)": 25, "Economy enabled?": false, "Serverrewards enabled?": false, "Commands as reward enabled?": true, "Duration of the Question in second": 10, "Play Sound to notify the event": true, "Prevent bruteforce against answers": true, "Player need to type in the Index of the valid answer": true, "Player need to type in the FULL valid answer, without typo": false, "Broadcast player winning notification.": false, "Text after the question duration number": "seconds, starting now!", "Sound prefab to play on start to notify players": "assets/prefabs/tools/pager/effects/beep.prefab", "Show valid answer at the end of the game, if nobody guessed good.") - false "Remove question from the available question pool, if it was not guessed and and valid answer was displayed before.") - false } Data [ { "question": "Test Question for Economy?", "valid_answer": "This is a valid answer", "incorrect_answer": [ "Random wrong answer 1", "Random wrong answer 2" ], "customreward": { "type": 0, "command": "", "itemid": 0, "amount": 3000 } }, { "question": "Test Question for ServerReward?", "valid_answer": "This is a valid answer", "incorrect_answer": [ "Random wrong answer 1", "Random wrong answer 2", "Random wrong answer 3" ], "customreward": { "type": 1, "command": "", "itemid": 0, "amount": 5000 } }, { "question": "Test Question for Item?", "valid_answer": "This is a valid answer, and give scrap as Item", "incorrect_answer": [ "Random wrong answer 1" ], "customreward": { "type": 2, "command": "", "itemid": -932201673, "amount": 150 } }, { "question": "Test Question for Command?", "valid_answer": "This is a valid answer, and will run a command", "incorrect_answer": [ "Random wrong answer 1", "Random wrong answer 2", "Random wrong answer 3" ], "customreward": { "type": 3, "command": "", "itemid": 0, "amount": 0 } } ]$2.00- 6 comments
-
Version 1.0.0
177 downloads
Prevents spamming of chat & console commands perfect for players abusing plugins excessively! Includes Debugging issues for any configuration mishaps! Example of adding GUIShop: "Add commands to block ( Must be lowercased do not add the slash! / ) ( 3 = Block Both | 1 = Block Chat | 2 = Block Console )": { "shop": 3, "shop.buy": 2, "shop.sell": 2, }, ## Configuration { "Add commands to block ( Must be lowercased do not add the slash! / ) ( 3 = Block Both | 1 = Block Chat | 2 = Block Console )": { "command": 3 }, "Sets the time between command usage": 3.0, "Sets the max accumulated cooldown time limit before kicking the player if they keep trying to spam": 120.0, "Exclude players from being blocked ( Add their steam 64 id's to the list )": [ 4678678647, 4678678678 ], "Message Responses": { "( Chat Icon ) Just insert a valid steam 64 ID to set": 0, "CommandBlocked": "You are on command cooldown, try again in {0} seconds", "KickReason": "Kicked for excessive command spam!" } }Free









.thumb.png.2b2d47b853ad20eaa2082b67dbb495c6.png)





.thumb.jpg.4abde6ce06035db4993ba98aa473b214.jpg)

.thumb.png.8fb9cb5db33376288eba94beb961d0c6.png)
