Search the Community
Showing results for tags 'qol'.
-
Version 0.1.1
13 downloads
What is it? Reporter is a administration plugin to make sure your playerbase is happy. Usage? If anything bad is going on, make sure that your players can report it to you via nice UI menu and that admins can check that. Permissions: reporter.use - Basic permission to allow open menu and create New report. reporter.admin - Admin permission to allow view to Live Reports and ability to see/manage pop-up report reporter.sadmin - SuperAdmin permission to allow view to Reports history and see stats of your staff team Commands: /report - Opens the UI menu /report.tp {id} - Teleports you to the creator of specified report /report.claim {id} - Claims specified report /report.finish {id} - Finishes specified report /report.clearall - ! Requires SAdmin permissions and will wipe your data folder - causing to delete all reports and staff's statistics ! Discord logging: Enable/disable and set webhookURL for report claim/create/finish/tp Data file: Data of all reports and staff's statistics are being saved into a data file. Path: Your_Server\oxide\data\Reporter\Reporter.json Config file: You can set here settings for discord notification F.e. Enable/Disable, embed color of the notification, WebhookURL Path: Your_Server\oxide\config\Reporter.json Localization: ["Syntax"] = "Commands:\n/report (Opens Reporter GUI)", ["SyntaxConsole"] = "Can't open GUI in console", ["claimMsg"] = "You have claimed a report\nID: {0}\nBy: {1}", ["finishMsg"] = "You have finished a report with ID: {0}", ["statusUnclaimed"] = "Unclaimed", ["statusClaimed"] = "Claimed", ["statusFinished"] = "Finished", ["reported"] = "Successfully reported", ["fillField"] = "<color=#c93232><--Fill this field</color>", ["noReports"] = "There are not any reports yet", ["noStaff"] = "There are not any staff stats yet", ["playerNotFound"] = "Couldn't find player", ["alreadyClaimed"] = "Report is already claimed", ["labelPAGES"] = "Page {0}/{1}", ["alreadyFinished"] = "This report is already finished", ["CUI newReport"] = "New report", ["CUI liveReport"] = "Live reports", ["CUI historyReport"] = "Reports history", ["CUI staffStats"] = "Staff stats", ["CUI close"] = "Close", ["CUI claim"] = "Claim", ["CUI finish"] = "Finish", ["CUI claimed"] = "Claimed", ["CUI tp"] = "TP", ["CUI next"] = "Next", ["CUI previous"] = "Previous", ["CUI newPopReport"] = "New Report -- ID: {0}", ["CUI reportBy"] = "Reported by <color=#4ccf49>{0}</color>", ["CUI reportedPlayer"] = "Reported player <color=#e00a0a>{0}</color>", ["CUI subject"] = "Subject of report: <color=#e0a00a>{0}</color>", ["CUI liveReportClaimed"] = "<color=#e0a00a>{0}</color> Report: {1}", ["CUI liveReportUnClaimed"] = "<color=#1bc2d1>{0}</color> Report: {1}", ["CUI historyReportFinished"] = "<color=#4ccf49>{0}</color> Report: {1}", ["CUI liveReportClaimedBy"] = "<color=#e0a00a>--Claimed by {0}</color>", ["CUI finishedBy"] = "<color=#4ccf49>--Finished by--\n{0}</color>", ["staffName"] = "Staff's Name", ["staffID"] = "Staff's ID", ["staffFinished"] = "Finished reports", ["Category"] = "Category", ["Message"] = "Message", ["dcCreate"] = "{0} has created report: {1}", ["dcClaim"] = "{0} has claimed report {1} by - {2}", ["dcFinish"] = "{0} has finished report {1} by - {2}", ["dcTp"] = "{0} has teleported to report {1} by - {2}", ["dcCatCreate"] = "Report Create", ["dcCatClaim"] = "Report Claim", ["dcCatFinish"] = "Report Finish", ["dcCatTp"] = "Report TP", Configuration: { "Claim report - discord": { "WebhookURL": "", "Enabled?": true, "Embed Color:": "16538684" }, "Finish report - discord": { "WebhookURL": "", "Enabled?": true, "Embed Color:": "16538684" }, "Create report - discord": { "WebhookURL": "", "Enabled?": true, "Embed Color:": "16538684" }, "TP to report - discord": { "WebhookURL": "", "Enabled?": true, "Embed Color:": "16538684" } }$9.99- 3 comments
- 1 review
-
- 1
-

-
- #reporting
- #report system
-
(and 12 more)
Tagged with:
-
Version 0.1.2
9 downloads
What is it? A nice user-friendly warning system Usage When someone is breaking rules or trolling others just warn them, you can also set a command that will be executed through server console that will get executed upon reachin certain amount of warnings (can be configured in cfg) Permissions warnmenu.use -- Gives you full control to operate the WarnMenu Chat command /warn -- Opens the WarnMenu /warn "Name/SteamID" "Warning reason" -- Warns the specified player with your reason /warnmenu.save -- Force the plugin to write the data from memory to the data file Data files All Data files can be located at: \oxide\data\WarnMenu\warns There you can find all the warnings for each player Features WarnMenu features * Online Tab - In this tab you can easily select any online player that you want to warn * Search All Tab - Once you open this tab, there you can see all the players and browse in them * Find player Tab - When you click on the button you will be able to search for a specific player using his Name or SteamID Warn Types * CUI-Based - A CUI warning message will pop-up on player's screen when he gets warned * Chat-Based - A chat message will pop-up in player's chat when he gets warned Executable commands * On reaching certain amount of warnings, you can make the server execute a command on a player(configurable in cfg) F.e.: "1": "say {0} just reached 1 warning! SHAME on him!", "3": "kick {0} Kicked for reaching 3 warnings", Localization { "Syntax": "Commands:\n/report (Opens Reporter GUI)", "CUI Online": "Online Players", "CUI Player": "Player: {0}", "CUI SteamID": "SteamID64: {0}", "CUI Warnings": "Warnings: <color=#8f1919>{0}</color>", "CUI NewWarn": "New\nWarning", "CUI WarningID": "Warning ID: {0}", "CUI WarnedBy": "Warned by: {0}", "CUI Date": "Date: {0}", "CUI Reason": "Reason: \n{0}", "CUI Remove": "Remove", "CUI Close": "close", "CUI Warn": "Warn", "CUI WarnAddMenuPlayer": "Warning for\n<color=#d43939>{0}</color>", "CUI SearchAll": "Search All", "CUI SelectPlayer": "Select a player to warn:", "CUI Find": "Find player", "CUI Find2": "Select", "CUI Find3": "Find player:\n(steamID/Name)", "CUI CantFindPlayer": "Couldn't find the player\nsearching argument: {0}", "CUI FoundPlayer": "Found player: {0}", "CUI Refresh": "Refresh", "CantFindPlayer": "Couldn't find that player", "WarnMessage": "Warned: <color=#8f1919>{0}</color>\nReason: {1}", "JoinMessage": "{0} has joined with <color=#8f1919>{1}</color> warnings", "WarnReceive": "You have received a <color=#8f1919>warning</color>\nBy: {0}\nReason: {1}", "CUI WarnReceive": "<color=#8f1919>Warning</color>\nreceived", "CUI WarnReceive2": "By: {0}\nReason: {1}" } Configuration { "Announce on join with warnings?(to admins)": true, "Execute commands on reaching count:": { "Enabled?": true, "(Format: 5 : mute {0}) where 5 is number of warns and {0} is player's id": { "5": "say {0} just reached 5 warnings! SHAME on him!", "7": "example.command {0}", "10": "example.command {0}" } }, "Warn message settings": { "Text-based warn message?": true, "CUI-based warn message?": true, "How long until CUI message gets removed (secs)": 5.0 } }$9.99 -
Version 0.1.2
23 downloads
What is it? An addition to regular workbenches Usage Ease your players wrists by allowing them to research all remaining BPs with just a one click. Allow your players to directly use Repair Bench or Research Table from the Workbench. Permissions smartworkbench.use -- Gives user permission to see and use the Smart Workbench Features Virtual Repair Bench Virtual Research Table Research All button Supported plugins: Server Rewards Economics Configuration { "Research All currency": "scrap", "Rate (Based on scrap)": 1.0, "Type of money (1 = default currency, 2 = Server Reward points, 3 = Economics cash)": 1 } Localization { "SWResearch": "RESEARCH ALL\n{0}\n{1}", "NoResources": "Not enough resources", "Success": "Successfully learned BPs from WB lvl {0}", "AlreadyKnow": "You already know everything from this workbench", "SRPoints": "Points", "Economics": "Cash", "SWResearchTable": "RESEARCH TABLE", "SWRepairTable": "REPAIR TABLE" }$10.00- 11 comments
- 1 review
-
- 3
-

-

-
- #smart
- #workbench
-
(and 8 more)
Tagged with:
-
Version 2.4.5
1,764 downloads
This is a High Performance Oven Splitter, without the need for excess data files, or heavy configuration. There is only a few settings in the configuration, "Oven Smelting Overrides": { "furnace": 1, "refinery_small_deployed": 2 }, "Oven charcoal Overrides - Higher the number the less often charcoal is made": { "campfire": 4, "bbq.deployed": 2}, "Fuel * This = Additional Charcoal per Tick": 1.0, "Delays Smelting by a Factor 0-25 (Used to reduce speeds below vanilla)": 2, "Disable Multi Fuel Speed Bonus": false, "Enable Composters - Splitting items into Composters": true, "Enable QuickSmelt - Smelting of multiple slots at once": true, "Enable Charcoal Creation in Electric Furnace": false, "Fuel Burned Per Tick": 1, "Max Smelt slots at once": 5, "Max Ore Smelted Per Tick": 3, "Smelting Speed (Time Between Ticks 0.5 Default)": 0.5, "Ignore Stack Limit In Smelted Output Slots": false The plugin properly handles splitting mixed materials, smelting speeds, and charcoal output, and works as you would natively expect the oven to work. Only 1 permission is required simplesplitter.use to enable the splitter functionality. NOTE THIS SETTING "Enable QuickSmelt - Smelting of multiple slots at once": true When this is True, Simple Splitter controls the Smelting rates and slots (Can not be used with the "QuickSmelt" plugin) When this is False, Simple Splitter only controls the splitting of slots (Use this if you want to change to the "QuickSmelt" plugin) If you run a high pop server and want a performant Splitter... This is for you! Demo Video Seen Here NOTE: There is a known conflict with StacksExtended >2.0.4 which may prevent these 2 working together Discord: Shady14u https://discord.gg/8mvvBrrw4Y$10.50 -
Version 1.0.1
90 downloads
Rust Snippets is a tool for developers to enable them to speed up programming and avoid them to have to visit forums or repeat repetitive tasks. Rust Snippets currently has all hooks built in to your visual studio so you never have to go look at the docs again, code on the fly with comments per hook. There is some other secrets and ideas I have for this, so expect updates Shortcuts: Setup - Sets up default oxide plugin setup Harmony - Sets up default Harmony oxide plugin Config - Sets up basic config file Language - Sets up base language file Rest are hooks, so typing "On" or "Can" will bring up all the hooks Tutorial is included in download, its very easy and well guided. Feel free to message me with any questions. Credits: JMarkson - Getting me the uMod link with hooks and giving me the idea$5.00- 10 comments
- 3 reviews
-
- 2
-

-

-
- #christmas sale
- #coding
-
(and 7 more)
Tagged with:
-
Version 0.2.3
213 downloads
What is it? This is a logger for multiple categories with nice gui. Usage If you want to know what's going on your server this logger will surely help you achieve that. Permission zlogs.use -- Gives you permission to use the command zlogs.heli.spawn -- Gives player a permission to get notified in chat when heli spawns(must be set in config) zlogs.heli.down -- Gives player a permission to get notified in chat when heli gets shot down(must be set in config) Chat Command /zlogs -- Opens the GUI Discord Logging: In config you can set a webhook for each category to have the important info right on your discord Data All the datas are being saved into data folders and each category has it's data file Path to data files: Your_Server\oxide\data\ZLogs Features & some info: I've been trying to aim for the most important data logging, but this definitelly isn't FINAL version of plugin in future I am planning on making the GUI better - by clicking on log displaying menu, ability to wipe category from in-game etc... Every category can be disabled in config and plugin won't display the logs in menu and won't log for the disabled category anymore. By clicking on a certain log it teleports you to the position where it happend(admin permissions needed to use teleport command!), by using the log teleport it also writes it into command category where you can see it was ZLog teleport. I've been testing any performance issues and tried to fix most of them, also by distributing this plugin to other server owners, and with maximum about 4,5k+ logs in 1 category everything seemed fine. I am also OPEN to any suggestions for more categories! Localization: { "NoPerms": "You don't have permission to use this!", "pdataSucc": "Successfully loaded playerDeaths.json", "pdataFail": "Failed to load playerDeaths.json. Creating new playerDeaths.json", "itemSucc": "Successfully loaded itemDropsPicks.json", "itemFail": "Failed to load itemDropsPicks.json. Creating new itemDropsPicks.json", "connSucc": "Successfully loaded playerConns.json", "connFail": "Failed to load playerConns.json. Creating new playerConns.json", "commandSucc": "Successfully loaded commands.json", "commandFail": "Failed to load commands.json. Creating new commands.json", "animalSucc": "Successfully loaded animalKills.json", "animalFail": "Failed to load animalKills.json. Creating new animalKills.json", "exploSucc": "Successfully loaded explosives.json", "exploFail": "Failed to load explosives.json. Creating new explosives.json", "chatSucc": "Successfully loaded chat.json", "chatFail": "Failed to load chat.json. Creating new chat.json", "heliSucc": "Successfully loaded heli.json", "heliFail": "Failed to load heli.json. Creating new heli.json", "tcSucc": "Successfully loaded tc.json", "tcFail": "Failed to load tc.json. Creating new tc.json", "npcSucc": "Successfully loaded npc.json", "npcFail": "Failed to load npc.json. Creating new npc.json", "triggerSucc": "Successfully loaded triggers.json", "triggerFail": "Failed to load triggers.json. Creating new triggers.json", "vendingSucc": "Successfully loaded vending.json", "vendingFail": "Failed to load vending.json. Creating new vending.json", "newJson": "New .json was created recently, please wait few seconds.", "logsDisabled": "These logs are disabled in the config!", "noLogs": "There are no logs to be displayed yet!", "labelPAGES": "Page {0} / {1}", "bttnPDATA": "Player Deaths", "bttnITEMS": "Items Picks & Drops", "bttnCONNS": "Connections & Disconnections", "bttnCOMMANDS": "Commands", "bttnANIMALS": "Animal Kills", "bttnEXPLO": "Explosives", "bttnCHAT": "Chat", "bttnHELI": "Heli", "bttnTC": "Tool Cupboard", "bttnNPC": "NPC Kills", "bttnTriggers": "Triggers/Warnings", "bttnVending": "Vending Machines", "pdeaths": "{0} {1} was killed by {2} - {3}", "pdeaths2": "{0} {1} was killed by {2}", "itemPickup": "{0} {1} picked up {2}(x{3})", "itemCollect": "{0} {1} collected up {2}({3} x{4})", "itemDrop": "{0} {1} dropped {2}(x{3})", "playerConn": "{0} {1} has connected", "playerDis": "{0} {1} has disconnected({2})", "playerCommand": "{0} {1} has used {2}", "playerKillAnimal": "{0} {1} has killed a {2} with {3}", "exploUse": "{0} {1} has thrown {2}", "playerChat": "{0} [{1} Chat] {2} said: {3}", "heliSpawn": "{0} a patrol heli has spawned at: {1}", "heliDown": "{0} a patrol heli has been shot down at: {1} by {3}", "tcSpawn": "{0} {1} has placed TC at: {2}", "tcDestroyed": "{0} {1} has destroyed TC at: {2}", "tcAuth": "{0} {1} has authorized TC at: {2}", "tcClear": "{0} {1} has cleared TC authorizations at: {2}", "tcDeAuth": "{0} {1} has deauthorized TC at: {2}", "npckill": "{0} {1} has killed {2}", "itemSpam": "{0} {1} has dropped {2} items in less than {3} seconds", "itemPickSpam": "{0} {1} has picked {2} items in less than {3} seconds", "vendingBuy": "{0} {1} has bought {2}(x{3}) for {4}(x{5})" } Configuration: { "Player Deaths logs?": { "WebhookURL": "", "Enabled?": true }, "Item Picks & Drops logs?": { "WebhookURL": "", "Enabled?": true }, "Connection and Disconnection logs?": { "WebhookURL": "", "Enabled?": true }, "Command logs?": { "WebhookURL": "", "Enabled?": true }, "Animal Kills logs?": { "WebhookURL": "", "Enabled?": true }, "Explosives logs?": { "WebhookURL": "", "Enabled?": true }, "Chat logs?": { "WebhookURL": "", "Enabled?": true }, "Heli Logs?": { "WebhookURL": "", "Enabled?": true, "NotifyOnHeliSpawn?": true, "NotifyOnHeliDown?": true }, "Tool Cupboard logs?": { "WebhookURL": "", "Enabled?": true }, "NPC Kills logs?": { "WebhookURL": "", "Enabled?": true }, "Vending Machine logs?": { "WebhookURL": "", "Enabled?": true }, "Item drop spam detection:": { "Enabled?": true, "WebhookURL": "", "Items needed to detect:": 5, "Time(seconds)": 8.0, "Ignored items(shortnames like: ammo.rifle etc..):": [ "wood", "horsedung" ] }, "Item pick spam detection:": { "Enabled?": true, "WebhookURL": "", "Items needed to detect:": 5, "Time(seconds)": 8.0, "Ignored items(shortnames like: ammo.rifle etc..):": [ "wood", "horsedung" ] } }$12.99- 17 comments
- 3 reviews
-
- 4
-

-

-
- #administration
- #logging
- (and 6 more)
-
Version 1.1.0
37 downloads
Info: Allows players with permission to equip Night Vision Goggles with any clothing items using the chat command: "/nvg" Players must already have NVGs in their inventory and can still only wear 7 clothing items total, so if you opt for NVGs you might have to choose whether to leave behind gloves or boots. oxide permission: nightvisiongoggles.equip chat command: /nvg$5.00 -
Version 1.0.3
9 downloads
Adds an easy and automated way for players to get rid of unwanted items. Configuration: { "Skin ID to use as the trash box": 3009357235, "Blacklist of items that trash box will not delete": [ "rifle.ak", "rifle.ak.ice", "hq.metal.ore", "metal.refined" ], "Use permission system?": false } Permissions: trashbox.use Example video$2.49 -
Version 1.4.5
76 downloads
Adds a simplistic range finder to the binoculars and any weapon/scope combination you desire! Configuration: { "Refresh interval (seconds) (Values too low may cause performance issues, but do make it more fluid)": 1.0, "anchorMax for held items (Holdable items that do not require attachments)": "0.552 0.205", "anchorMin for held items (Holdable items that do not require attachments)": "0.448 0.147", "Guns or held items that can accept, or be, a range finder, attachment and range finder settings": { "tool.binoculars": { "Is this a held item? (Does not require any attachments) (Will use the default rangefinder.use permission)": true, "Maximum distance of the held item": 350.0, "ItemID of a weapon attachment to be used as a range finder and settings of the attachment": null }, "rifle.l96": { "Is this a held item? (Does not require any attachments) (Will use the default rangefinder.use permission)": false, "Maximum distance of the held item": 350.0, "ItemID of a weapon attachment to be used as a range finder and settings of the attachment": { "174866732": { "SkinID of the attachment and settings for attachment skins": { "0": { "Maximum distance of the attachment": 550.0, "Permission required for this specific attachment?": true, "Permission required to use attachment as range finder": "defaultskin16x", "anchorMax of attachment": "0.552 0.205", "anchorMin of attachment": "0.448 0.147" }, "1234": { "Maximum distance of the attachment": 69.42, "Permission required for this specific attachment?": true, "Permission required to use attachment as range finder": "trololscope", "anchorMax of attachment": "0.552 0.205", "anchorMin of attachment": "0.448 0.147" }, "5678": { "Maximum distance of the attachment": 3000.0, "Permission required for this specific attachment?": true, "Permission required to use attachment as range finder": "icanseemyhousefromhere", "anchorMax of attachment": "0.552 0.205", "anchorMin of attachment": "0.448 0.147" } } }, "567235583": { "SkinID of the attachment and settings for attachment skins": { "0": { "Maximum distance of the attachment": 100.0, "Permission required for this specific attachment?": true, "Permission required to use attachment as range finder": "defaultskin8x", "anchorMax of attachment": "0.552 0.205", "anchorMin of attachment": "0.448 0.147" } } } } }, "rifle.ak": { "Is this a held item? (Does not require any attachments) (Will use the default rangefinder.use permission)": false, "Maximum distance of the held item": 350.0, "ItemID of a weapon attachment to be used as a range finder and settings of the attachment": { "442289265": { "SkinID of the attachment and settings for attachment skins": { "0": { "Maximum distance of the attachment": 550.0, "Permission required for this specific attachment?": true, "Permission required to use attachment as range finder": "holosight", "anchorMax of attachment": "0.552 0.205", "anchorMin of attachment": "0.448 0.147" } } } } }, "rifle.bolt": { "Is this a held item? (Does not require any attachments) (Will use the default rangefinder.use permission)": false, "Maximum distance of the held item": 350.0, "ItemID of a weapon attachment to be used as a range finder and settings of the attachment": { "174866732": { "SkinID of the attachment and settings for attachment skins": { "0": { "Maximum distance of the attachment": 550.0, "Permission required for this specific attachment?": false, "Permission required to use attachment as range finder": "defaultskin16x", "anchorMax of attachment": "0.552 0.205", "anchorMin of attachment": "0.448 0.147" }, "1234": { "Maximum distance of the attachment": 69.42, "Permission required for this specific attachment?": true, "Permission required to use attachment as range finder": "mountaindewgamerfart", "anchorMax of attachment": "0.552 0.205", "anchorMin of attachment": "0.448 0.147" }, "5678": { "Maximum distance of the attachment": 3000.0, "Permission required for this specific attachment?": true, "Permission required to use attachment as range finder": "icanseemyhousefromhere", "anchorMax of attachment": "0.552 0.205", "anchorMin of attachment": "0.448 0.147" } } }, "567235583": { "SkinID of the attachment and settings for attachment skins": { "0": { "Maximum distance of the attachment": 100.0, "Permission required for this specific attachment?": false, "Permission required to use attachment as range finder": "defaultskin8x", "anchorMax of attachment": "0.552 0.205", "anchorMin of attachment": "0.448 0.147" } } } } } } } Permissions: rangefinder.use ranged.{0} <- Defined in config Important!! Some permissions may or may not automatically register, I am aware of the issue and looking into a fix, please let me know if you experience this issue. Upcoming: Official website for configuration modification made easy$5.00 -
Version 0.1.1
9 downloads
What is it? A simple plugin that gives you ability to shift someone to other's team. Usage Let's say that somebody wants to join their friend's team, but the leader is offline, so they come for your help... what you gonna do? Yeet them into the team with this command Permissions teamshifter.use - Gives player ability to use /tshift teamshifter.bypass - Noone will be able to shift this player into any other team Functions * Bypass permission - Player with this permission cannot be shifted into any other team * Auto team-creator - If you do f.e. /tshift zeeuss someplayer and the "someplayer" is not in any team, this will automatically create one and will make the "someplayer" a leader and then put zeeuss into the team * If the player that will be shifted is in any team, this will remove him from the team and then shift him, if he wasn't in any then it will just shift him to the other team Localization ["NoPerms"] = "You don't have permission to use this!", ["Syntax"] = "Syntax: /tshift (player_to_move) (player_of_new_team)", ["NoPlayerToMove"] = "Couldn't find the player to move", ["NoPlayerOfNewTeam"] = "Couldn't find the player of new team", ["MoveMessage"] = "Moved {0} to {1}'s team", ["AlreadyInThatTeam"] = "{0} already is in {1}'s team", ["NeedsDifferentPlayers"] = "This command needs 2 different players and not the same one", ["CannotBeShifted"] = "{0} cannot be shifted by anyone into other teams",Free- 3 comments
-
Version 0.1.4
141 downloads
What is it? A utility that gives you ability to view sent or received emails and of course gives you ability to send EMAILS with simple GUI! Usage Just use the command and click on a category depending if you want to view something or send a new email. Permissions zmail.use -- Gives player ability to use the command zmail.send -- Gives player ability to send new emails zmail.view -- Gives player ability to view sent and received emails Chat Command /zmail -- Opens the GUI Localization { "NoPerms": "You don't have permission to use this!", "noPlayerFound": "No player found!", "foundPlayerToSend": "Recipient {0}", "newEmailButton": "NEW Email", "receivedEmailsButton": "Received", "sentEmailsButton": "Sent", "clearAllButton": "Clear All", "succussfullySend": "Message succussfully sent!", "selectedFieldID": "ID:", "selectedFieldFrom": "From:", "selectedFieldTo": "Sent to:", "selectedFieldMessage": "Message:", "defaultInputUser": ".....Set player username or id.....", "defaultInputMessage": "Type your message here.....", "noEmails": "You have not received any emails yet!", "noSentEmails": "You have not sent any emails yet!", "receivedEmails": "You have received {0} emails({1} Unread emails)", "sentEmails": "You have sent {0} emails", "pageOfMaxPages": "Page: {0} / {1}", "previous": "Previous", "next": "Next", "findOnline": "Find Online Players", "receivedNew": "[<color=#13ad0f>Z</color>Mail]\nYou have just received new mail from <color=#05ba00>{0}</color>\nYou have total amount of <color=#a10800>{1}</color> unread emails", "conMails": "[<color=#13ad0f>Z</color>Mail]\nYou have total amount of <color=#a10800>{0}</color> unread emails" } Configuration { "Get message on connection?": true, "Real time notification?": true }Free -
it would be nice if you could look at all your files by recently updated
-
Version 0.1.0
45 downloads
Force Joiner is an admin plugin, which allows administrators to force join players to different server Usage Let's say you want to wipe your server, but don't want to lose the playerbase, well just connect them for a while to your other server and then you can redirect them back Permissions: forcejoiner.use Gives user ability to use /fjoin command forcejoiner.useall Gives user ability to use /fjoinall command forcejoiner.bypass Admins won't be able to redirect this user Commands: /fjoin (player) (ip:port) This will force join the specified player to specified server. /fjoinall (ip:port) This will force join all players to specified server. Localization: ["Syntax fjoin"] = "Syntax: /fjoin (player) (ip:port)", ["Syntax fjoinall"] = "Syntax: /fjoinall (ip:port)", ["No Player"] = "Couldn't find the target player", ["Fjoin"] = "Forcing {0} to {1}:{2}", ["Fjoinall"] = "Forcing everyone({0} players) to {1}:{2}", ["Bypass"] = "{0} cannot be forced to other server.",Free -
Version 0.0.1
18 downloads
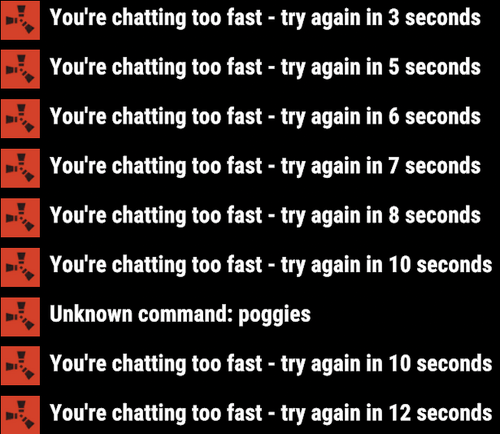
This harmony plugin makes it so that you can use commands even while typing too quickly. You will also not extend your cooldown by opening chat and pressing enter anymore, as I have fixed that as well. These two changes are a LARGE QoL improvement, in my opinion at least, that you will likely notice pretty quickly. This plugin is a drag and drop, just drop it into your normal plugins folder and you're good to go! Will do everything by itself. Example: You send a message and press a keybind for a chat command, you get told you're chatting to fast, or even just trying to type a command right after typing. With this plugin, you will NEVER have that issue again. Example 2: Send a message, and then have a cooldown of 5 seconds, you open chat and press enter to close it, your cooldown will not be updated.$1.69 -
Version 0.1.0
48 downloads
What is it? A simple command to jump from one place to another. How to use it? Look at anything and type /jump and you will be teleported to the place you are looking at if the place is further than the MaxDistance in config you will be teleported (MaxDistance meters) into that direction. Permission jump.use -- Gives you ability to use the /jump command ChatCommand /jump Configuration { "Max jump distance": 300.0 }Free -
Version 0.1.2
47 downloads
What is it? This allows players to unlock codelocks on any storage containers, there are 2 options: With a command (most likely for admins), where you come to a locked chest, type /loothack and the codelock instantly unlocks With an item (targeting computer), where you come to a locked chest, select targeting computer in your hotbar, then left-click the storage container and there you will need to wait for few seconds (if set) untill the container unlocks, also you can set in the config if the targeting computer gets consumed. Permissions loothacker.cmnd -- Gives player permission to use the command. loothacker.item -- Gives player permission to use the item. Chat Command /loothack -- Instantly unlocks the codelock on the storage cont. you are looking at Localization //FORMAT: {0} = storage short prefab name, {1} = seconds to unlock ["MustLookAtStorage"] = "You must be looking at a locked storage container to hack it!", ["NoPerms"] = "You don't have permission to use this!", ["UnlocksIn"] = "{0} will unlock in {1} secs", ["Unlocked"] = "Unlocked {0}" Configuration { "Seconds until storage unlocks": 5.0, "Consume Targeting Computer on use": true }Free -
Version 0.1.6
124 downloads
What is it? Player Entity Remover gives player/admin with permission ability to remove all entities of any other player. You can also set in config to delete player's entities after he gets banned. Usage If someone spammed entities on the map, you can easily clean them like this OR if you have it set in config then just ban him and it will auto-delete his entities. Permissions playerentityremover.use -- Gives player permission to use the command. playerentityremover.bypass -- Gives you a protection when a one of these hooks get called: OnPlayerBanned, OnPlayerDeath Commands /entremove (playerName/playerID) - Chat command entremove (playerName/playerID) - Console command Localization { "NoPerms": "You don't have permission to use this command!", "Syntax": "Syntax: /entremove playerName", "NoPlayer": "Player not found!", "RemoveMessage": "Removing {0}'s entities...({1})", "NoEnts": "No entities found for this player." } Configuration { "Remove player's entities if banned": true, "Remove player's entities on death": false }Free -
Version 0.1.0
120 downloads
What is it ZPunisher is a utility for punishing cheaters or bad players a better/funnier way Permissions zpunisher.use -- Gives you access to all commands Commands zpunisher -- Opens a GUI where you can choose a player and then punish him zpunisher {playerNameOrID} -- Opens punish menu with already selected player zpunisher.freeze {playerNameOrID} -- Freezes the player zpunisher.unfreeze {playerNameOrID} -- Unfreezes the player zpunisher.lag {playerNameOrID} -- Start lagging the player zpunisher.stoplag {playerNameOrID} -- Stops lagging the player zpunisher.kill {playerNameOrID} -- Kills the player zpunisher.rocket {playerNameOrID} -- Starts rocketing the player zpunisher.stoprocket {playerNameOrID} -- Stops rocketing the player zpunisher.ignite {playerNameOrID} -- Ignites the player zpunisher.extinguish {playerNameOrID} -- Extinguishes the player zpunisher.stop {playerNameOrID} -- Stops all effects on the player All these commands except the main one with GUI can be used even in console Features Target's info: Target's Name Target's ID Target's IP Address Target's Ping Target's Status (Alive/Dead) Target's XYZ pos with TP button Refresh button Freezer: Once you execute this command on the player he won't be able to move untill you stop the effect Lagger: Once you execute this command on the player his game will start lagging soon untill he won't be able to do anything/untill his game crashes Rocketboy: Once you execute this command on the player an hv rockets are gonna start spawning in him Simple Kill: Once you execute this command on the player he will die Igniter: Once you execute this command a fire will spawn on a player and will follow it untill it disappears Stop All Effects Button: You think that the player had enough? Or have you forgot which effects you gave him? No worries just click the button and all the effects are gone! Localization: { ["noPlayer"] = "There's not such a player", ["stopAllSyntax"] = "Syntax: /zpunisher.stop player", ["stoppedAll"] = "Stopped all effects on: {0}", ["freezeSyntax"] = "Syntax: /zpunisher.freeze player", ["startFreeze"] = "Starting to freeze: {0}", ["unfreezeSyntax"] = "Syntax: /zpunisher.unfreeze player", ["stoppedFreezing"] = "Stopped freezing: {0}", ["lagSyntax"] = "Syntax: /zpunisher.lag player", ["startLag"] = "Starting to lag: {0}", ["stopLagSyntax"] = "Syntax: /zpunisher.stoplag player", ["stoppedLag"] = "Stopped lagging: {0}", ["killSyntax"] = "Syntax: /zpunisher.kill player", ["killMsg"] = "You have killed: {0}", ["rocketSyntax"] = "Syntax: /zpunisher.rocket player", ["startRocket"] = "Started rocketing: {0}", ["stopRocketSyntax"] = "Syntax: /zpunisher.stoprocket player", ["stopRocket"] = "Stopped rocketing: {0}", ["igniteSyntax"] = "Syntax: /zpunisher.ignite player", ["startIgnite"] = "Ignited: {0}", ["extSyntax"] = "Syntax: /zpunisher.extinguish player", ["startExt"] = "Poured water on: {0}", ["infoTitle"] = "Target's Info:", ["infoName"] = "Name: {0}", ["infoID"] = "ID: {0}", ["infoIP"] = "IP Address: {0}", ["infoPing"] = "Ping: {0}ms", ["infoStatusAlive"] = "Status: <color=#52bd36>Alive</color>", ["infoStatusDead"] = "Status: <color=#c70000>Dead</color>", ["infoPos"] = "XYZ Position: {0},{1},{2}", ["infoTPBttn"] = "TP", ["infoRefresh"] = "Refresh", ["choosePl"] = "Choose a player:", ["dsc"] = "..........Description..........", ["freezer"] = "Freezer", ["freezerDsc"] = "Once you execute this command on the player he won't be able to move untill you stop the effect", ["enable"] = "Enable", ["disable"] = "Disable", ["kill"] = "Kill", ["lagger"] = "Lagger", ["lagDsc"] = "Once you execute this command on the player his game will start lagging soon untill he won't be able to do anything/untill his game crashes", ["lagPS"] = "P.S. If you enable this on yourself you must disable it via console - zpunisher.stoplag {Your nick}", ["rocketer"] = "Rocketboy", ["rocketerDsc"] = "Once you execute this command on the player an hv rockets are gonna start spawning in him", ["ignite"] = "Ignite", ["pw"] = "Pour Water", ["killTitle"] = "Simple Kill", ["killDsc"] = "Once you execute this command on the player he will die", ["igniterTitle"] = "Igniter", ["igniterDsc"] = "Once you execute this command a fire will spawn on a player and will follow it untill it disappears", ["stopAllEffects"] = "Stop All Effects!", ["previous"] = "Previous", ["Next"] = "Next" }Free -
Version 0.3
32 downloads
Weapon Mod Menu is a plugin that allows players on your server to swap between weapon mods without having to open up their inventory. No longer will your teammate slack behind because they had to switch between a flashlight and a laser. This plugin uses an easy-to-use configuration file where you can choose which weapon mods can be selected in the menu, and has a simple but pretty UI. Permission needed to use: WeaponModMenu.use o.grant user <Username> WeaponModMenu.use Commands: modmenu Bind z modmenu$10.00 -
Version 1.0.2
21 downloads
NO LONGER FOR SALE ! Need help with watching other players? Automatically? On demand? Hello, I present you Watchdog. What is Watchdog ? A plugin/mod for your server, whose whole purpose is to record players on demand An essential tool for server admins Why to use Watchdog ? > One of the main problem with Rust and any game in general is always those pesky cheaters > But catching cheaters requires constant watching and making sure that the person being reported is indeed cheating > Watchdog solves this problem! > You as an admin may never even join the server if you wanted, and yet, you still can find and ban the cheaters, almost entirely from Discord! Features of Watchdog 24/7 Demo recording Very customizable triggers for starting a recording & managing that recording Very customizable combatlog saving Notifications of triggers & events entirely in Discord Compression! Watchdog can compress the demo files and save on avarage 70% of your machine's disk space Memory usage control Disk usage control (with Hard Limit for when your VPS/VM is limited) How to use Watchdog ? > After a recording of a player is saved > Just get the .dem file and place it in your 'demos' folder which is located in Rust's game folder > Go in game and type in the console 'demo.browser' > Thats it, you can now watch the demo Section 1: Hardware Recommended server/VPS/VM hardware: - The more RAM, the more demos can be recorded simultaneously without triggering the memory control, also better performance when compressing demos. - At least 4 virtual cores are recommended. Rust's server is well known to not utilize multithreading technologies, Watchdog is heavily optimized for multithreading. - Disk space. I really mean it, A LOT is needed, the more the better! Watchdog is able to produce over 20gb/hour of data for 300 player server (even with compression turned on). The more disk space you have the more demos can be stored on your server. Of course Watchdog is optimized for limited systems as well, so it has a Hard Limit option which will limit the data production with demos. - Fairly powerful CPU. While this may not be needed for non-compressed demos, the compression of demos is pretty computationally intensive, as the algorithm used for compressing is aggressive (LZMA) All of the recommendations are based on the testing I've done on my machine, you need to do your own testing to see what you need. The recommended hardware is just that, recommendation. My recommendations might even be incorrect. Section 2: Software Because of the insane capabilities of Watchdog, it can generate a really big amounts of data. So for this reason Watchdog should be used with other custom software for ease of use. This is not required, but recommended. This includes: - A discord bot that can read the combatlog file format and the compressed demos. This can be found here: https://codefling.com/discord-bots/watchdog-discord-bot Section 3: Installation This is a Harmony mod, its not an oxide plugin. Watchdog works with full-vanilla servers and with Oxide servers! On Windows: - To install Watchdog you need to place the 'Watchdog.dll' file in your HarmonyMods folder, and either restart the server or type 'harmony.load Watchdog' which will dynamically load Watchdog while the server is running. On Linux: - To install Watchdog you first need to set your terminal emulator to 'xterm', this is done with the following linux command: 'export TERM=xterm'. IMPORTANT: If the terminal emulator is not xterm Watchdog WILL FAIL to load, this is because of a bug with Mono - After that place the 'Watchdog.dll' file in your HarmonyMods folder, and either restart the server or type 'harmony.load Watchdog' (NOTE: On linux this name is case-sensitive) which will dynamically load Watchdog while the server is running. After watchdog runs for the first time a folder with the name 'Watchdog' will be created in the root folder of the server. Inside this folder there will be 2 folders and 1 file named 'config.json', don't forget to change the default config to your taste, and if you want you can change the localization file with your custom messages More on this in sections 4 and 5 ... Section 4: Configuration Before we start with the configuration, remember that if you change the config file, in order to see the changes you need to either reload Watchdog with: 'harmony.load Watchdog' or restart the server. NOTE: There is a bug with the Harmony loader in Rust's Dedicated Server and sometimes (unpredictable) when you load Watchdog it will not be loaded fully and might have strange bugs, this is fixed with a server restart. If you are familiar with JSON every setting is a string. (even if its a number) If you are not familiar with JSON, just dont delete the quotes ("") at the most right & left of the setting and type only in between them, always! Everything is non case-sensitive, except webhook URLs in the Feedback settings. The configuration file is split up into sections for easier presentation, these sections are the following: - General - Main settings of Watchdog - Specific - Settings that are specific to what main setting was chosen - Optimization - Settings for optimization - Limit - Limiters for Memory and Disk usage - Privacy - Privacy related settings - Feedback - Watchdog feedback info, mostly discord information In general settings section: - recording_mode When and how to record players, you might want to record players 24/7 or only when they kill something, this is the setting you use for that This setting should be a number and can be one or combination of the follwing: 0 : Always - Players will be recorded 24/7 while they are in the server 1 : On Kill - Players will be recorded only when they have killed X amount of players/scientist. If this setting is selected, 'include_scientists' and 'kill_threshold' options from specific settings will be used 2 : On Report - Players will be recorded only when they have been reported X amount of times. If this setting is selected, 'report_threshold' setting from specific settings will be used 4 : On HitArea - Players will be recorded only when they have hit a player/scientist in X area of their body, X amount of times. If this setting is selected, 'include_scientists', 'hit_areas' and 'hit_count_threshold' options from specific settings will be used 8 : On Stash - Players will be recorded only when they have uncovered X amount of stashes. If this setting is selected, 'stashes_threshold' and 'remember_stash_owner' options from specific settings will be used You can use these triggers individually or combine them, if you want to combine them you just add the numbers together. For example if you want to record OnKill and OnReport you will add them up, 1 + 2 = 3, so you type 3 in the config. If you want to record on every trigger its all of them added up, which is 15 - recording_timout When to stop the recording after being triggered, this is applicable only when 'recording_mode' is not Always This setting should be a time, this is in the format <number>s<number>m<number>h, set to 0 to be infinite (until user disconnects) Examples: If you want to record someone for 30 minutes on recording trigger "recording_timout": "30m" If you want to record someone for 90 minutes on recording trigger "recording_timout": "1h30m" or "recording_timout": "90m" If you want to record someone for 2 hours, 30 minutes and 20 seconds on recording trigger "recording_timout": "2h30m20s" the order can also be different "recording_timout": "30m20s2h" If you want to record someone until they disconnect on recording trigger "recording_timout": "0" - combatlog_saving If you want to save the combatlog of players This setting can be one of the following: - never : This setting is off and will not save anything to disk - on_humanoid_combat - Saves combatlog of any combat to a player or scientist - on_player_combat - Saves combatlog of any combat to a player - on_humanoid_kill - Saves combatlog of killing a player or scientist - on_player_kill - Saves combatlog of killing a player - always - Saves every combatlog of every player to disk, this includes someone hitting a stone wall for example When any of the kill settings are set, the setting 'combatlog_history' from specific settings will be used to determine how many logs (including body hits) in the past are to be saved when someone kills a target This is for example if 'combatlog_history' is set to "10" and 'combatlog_saving' is set to "on_humanoid_kill", when a player kills a scientist or a player, the combatlog of that entire fight will be saved with up to 10 older hits, so the last 9 combat logs (anything, including stone wall hits) and the last kill hit log In specific settings section: - include_scientists Should scientists be included in the trigger filter, this is applicable to 'recording_mode' setting with OnKill and OnHitArea This should be a yes/no answer For example: "include_scientists": "yes" You can use a short form of 'y','n' or '+','-' or 'true','false' or 't','f' and there is more - kill_threshold How many kills to make to trigger a recording This should be a number For example: "kill_threshold": "5" - report_threshold How many reports to receive to trigger a recording This should be a number For example: "report_threshold": "2" - hit_areas Which HitAreas to watch for. This is applicable to 'recording_mode' setting with OnHitArea This should be a number and can be a combination 1 : Head 2 : Chest 4 : Stomach 8 : Arms 16 : Hands 32 : Legs 64 : Feet To select multiple again as in recording_mode setting you just add up the numbers For example if you want to watch for headshots, chest and stomach hits you will do: 1 + 2 + 4 = 7 - hit_count_threshold How many times a player needs to hit someone in 'hit_areas' areas in order to trigger a recording This should be a number For example: "hit_count_threshold": "2" So with this example and the one before if someone hits a player/scientist (depends on setting) in the head,chest or stomach 2 times or more they will start being recorded - stashes_threshold How many stashes should a player uncover to trigger a recording This should be a number For example: "stashes_threshold": "2" - remember_stash_owner If a player uncovers their own potentially forgotten stash, should they trigger a recording This should be a yes/no answer For example: "remember_stash_owner": "yes" I recommend setting this to 'yes' always - combatlog_history How many combat logs to save when a kill event is triggered in 'combatlog_saving' setting This should be a number For example: "combatlog_history": "10" For example: Player A kills Player B, but in the process of their fight, Player A hits another player behind Player B, you can see it, with this setting you can see up to X amount of combatlog hits before their fight finished In optimization settings section: - compress_recorded_demos Should the saved demos be compressed. Compression is saving ~70% of space but uses more CPU & RAM This should be a yes/no answer For example: "compress_recorded_demos": "yes" - compress_recorded_demos_thread_model If 'compress_recorded_demos' is turned on, should the demo be compressed on the main server thread or on a separate thread This should be one of the following values - threaded - default For example: "compress_recorded_demos": "threaded" I recommend setting to threaded if the machine hosting the server has spare CPU cores. Be careful with fewer core machines, the compression operation can take up to 200ms per demo (maybe even more on larger demos) - stop_demo_for_afk_players Should the demo recording be paused if a player goes AFK This should be a yes/no answer For example: "stop_demo_for_afk_players": "yes" I recommend setting this to yes as it will save you disk space on players who are AFK and being recorded. A small lagspike for the player might occur when they come back from being afk (for example move their mouse), the demo might be choppy at the start if its a transition between AFK and non AFK - afk_time_threshold Should the demo recording be paused if a player goes AFK This should be time, this is in the format <number>s<number>m<number>h (this is the same format as in setting 'recording_timout') For example, at 1 minute AFK user's recording will get paused: "afk_time_threshold": "1m" - suppress_console_demo_messages When a player is being recorded or their recording is stopped you get a message in the console, this setting will remove that message if turned on This should be a yes/no answer For example: "suppress_console_demo_messages": "no" - combatlog_buffer_size_threshold When this RAM threshold is reached the buffer of the global combatlog will be saved to disk This should be a size (in B, KB, MB or GB) For example: "combatlog_buffer_size_threshold": "10MB" I recommend leaving this to default if you are not experiencing issues. Might need to be increased with more player activity for optimal performance - combatlog_buffer_time_threshold When this time threshold is reached the buffer of the global combatlog will be saved to disk. This should be a time, this is in the format <number>s<number>m<number>h (this is the same format as in setting 'recording_timout') For example: "combatlog_buffer_size_threshold": "10s" I recommend leaving this to default if you are not experiencing issues. Might need to be increased with more player activity for optimal performance NOTE: If both combatlog_buffer_thresholds are set to 0, the combatlog will be only saved to disk when Watchdog is unloaded (aka on server restart/stop). If one of them is 0 only the other one is active, if both are not 0 then whichever threshold first gets reached In limit settings section: - max_total_gb_ram Memory limit for all currently recording demos, if this limit is reached all of them are stopped This should be a size (in B, KB, MB or GB) For example: "max_total_gb_ram": "4GB" - max_total_gb_disk_hardlimit Disk limit for all saved demos and combatlog file. When this limit is reached no further demos/combatlogs will be saved. This hardlimit is useful if your VPS/Machine has limited storage or you pay for every GB. IMPORTANT: Do not set the limit to the exact size of your disk size or free space, leave some wiggle room This should be a size (in B, KB, MB or GB) For example: "max_total_gb_disk_hardlimit": "300GB" In privacy settings section: - notify_users_when_recording Should the user get notified in chat & their console that they are being currently recorded This should be a yes/no answer For example: "notify_users_when_recording": "no" - notify_users_when_joining Should the user get notified in chat & their console that the server is using Watchdog This should be a yes/no answer For example: "notify_users_when_joining": "yes" - send_diagnostics_information Should Watchdog send diagnostic information that will be used to further optimize and improve watchdog This should be a yes/no answer For example: "send_diagnostics_information": "yes" I recommend leaving this turned on because it will greatly help me to see what needs to get optimized and/or changed The data being collected is the following: - Internal performance & error data - Server identity (server ip, port, player count, server uptime, server average fps) - Plugins/Mods being used - send_diagnostics_interval How often to send the diagnostics information This should be a time. this is in the format <number>s<number>m<number>h (this is the same format as in setting 'recording_timout') For example: "send_diagnostics_interval": "5m" I recommend leaving this on the default. Increase if you notice more than comfortable network usage. The higher this interval is the higher the network impact will be when the data is being uploaded as its being uploaded as a big chunk In privacy settings section: - notify_recording_triggered_webhook Discord Webhook that will be used to send messages to when a recording is started This should be a URL, leave empty to disable For example: "notify_recording_triggered_webhook": "https://discord.com/api/webhooks/1095317841874187282/LHjjksahd_tokengoeshere_d182u9182" - player_reported_webhook Discord Webhook that will be used to send messages to when a player is F7 reported This should be a URL, leave empty to disable For example: "player_reported_webhook": "https://discord.com/api/webhooks/1095317841874187282/LHjjksahd_tokengoeshere_d182u9182" - recording_about_to_finish_webhook Discord Webhook that will be used to send messages to when a recording is about to finish This should be a URL, leave empty to disable For example: "recording_about_to_finish_webhook": "https://discord.com/api/webhooks/1095317841874187282/LHjjksahd_tokengoeshere_d182u9182" - recording_about_to_finish_threshold When the recording time hits this percentage threshold a message will be sent in discord informing you that the recording is about to finish This should be a percentage For example: "recording_about_to_finish_threshold": "90%" If this is set to 100% you will get a message when the recording stopped (roughly, timing is not exact millisecond precision) NOTE: You can always see what the default generated config is by deleting or renaming the file 'config.json', if you want to use it as a reference Ingame config settings: These settings are built-in ConVars and can be changed via the console like any other ConVar - demo.splitmegabytes : When a demo reaches this amount of megabytes in size it gets stopped and another is started, this is to split them - demo.splitseconds : When a demo reaches this amount of time recording it gets stopped and another is started, this is to split them - demo.recordlist : Add player steamids in here to record them automatically on join - demo.recordlistmode : 0 for whitelist, 1 for blacklist. Whitelist means all players in 'demo.recordlist' will be recorded on server join, blacklist means all player NOT in 'demo.recordlist' will be recorded on server join Section 5: Localization Watchdog supports localization (although currently only 1 type of language is supported) To edit the localization, go to the 'Watchdog' folder which is at the root of your server folder, from there go into the directory 'localization', a file 'english.txt' will contain the localization strings Just open that file with any text editor and edit the messages to your liking The format of the localization file is "some locale = some text" After the equals sign is the message, you edit that, do not touch the text that is at the left of the equals sign Whenever you see a percentage in front and back of some text that means this is a variable and is replaced with the actual value when that event happens For example %steamid% means the steamid64 of the person who initiated this message Here are the meanings of all the variables: %steamid% - steamid64 of player %username% - in-game name of player %recording_trigger% - what triggered the recording, this can tell you for example if it was someone uncovering a stash or killing a player or any other thing %reported_times% - how many times this person was reported since the last recording %progress% - current recording progress at the time of sending this message Section 6: Commands Watchdog has some built-in commands and modifies another, the commands are: - watchdog.version - Prints the version of Watchdog - watchdog.webhooktest - Sends test messages to all enabled webhooks. This is used if you want to see if the link you provided is working - demo.record - Starts a manual demo recording, this will not stop automatically until you stop with manually again, even if the user disconnects, this is useful if you want to record someone 24/7 - demo.stop - Stops a manual demo recording, if a demo is started with 'demo.record' this is the only way to stop that demo Section 7: Contact If you have any questions, suggestions or want to report a bug you can contact me on discord: turner#7777$999,999.00- 2 comments
-
- #antimacros
- #antiscript
- (and 18 more)
-
Version 1.0.0
3 downloads
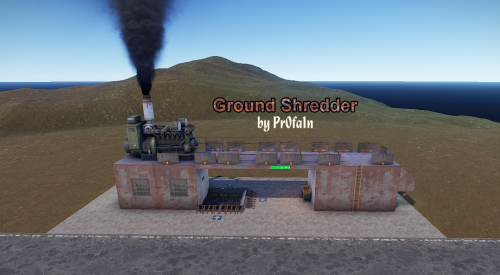
Forget the Magnet Crane and forget the Junkyard! Here comes the Ground Shredder by Pr0fa1n; a simple way to drive cars directly into the shredder and reap the rewards out the other end! Includes a recycler, a ladder leading up to cover from enemies, a prevent-build volume, Height and Alpha layering, and ample lighting for any environment. Enjoy!$4.99



















.thumb.png.0cbb1686d57f37a63dd5cb315afe4e98.png)
