Search the Community
Showing results for tags 'harmony'.
-
Version 0.0.3
27 downloads
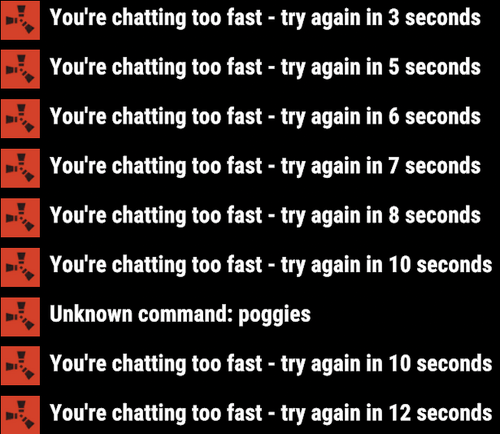
This harmony plugin makes it so that you can use commands even while typing too quickly. You will also not extend your cooldown by opening chat and pressing enter anymore, as I have fixed that as well. These two changes are a LARGE QoL improvement, in my opinion at least, that you will likely notice pretty quickly. This plugin is a drag and drop, just drop it into your normal plugins folder and you're good to go! Will do everything by itself. Example: You send a message and press a keybind for a chat command, you get told you're chatting to fast, or even just trying to type a command right after typing. With this plugin, you will NEVER have that issue again. Example 2: Send a message, and then have a cooldown of 5 seconds, you open chat and press enter to close it, your cooldown will not be updated.$1.69 -
Version 1.1.4
1,187 downloads
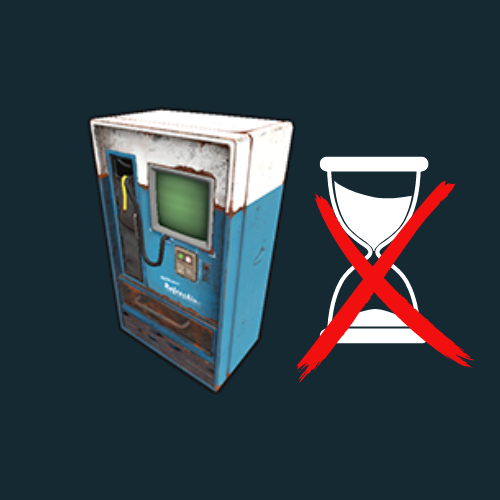
Features Removes the delay between vending machine and shopkeeper (in bandit camp) transactions. Usage - Copy the downloaded DLL file into server/HarmonyMods folder Support - If you need help or If you have any issues or suggestions you can contact me by joining my discord server: https://discord.gg/efVKDG6z6F or by adding me on discord: Farkas#6006Free- 4 comments
- 1 review
-
- 2
-

-

-
- #vending machine
- #outpost
- (and 3 more)
-
Version 2024.5.2.1658
202 downloads
SAVE 13% WHEN BUYING THE BUNDLE NOW SUPPORTING PROCGEN AND CUSTOM URL BASED MAPS ! This plugin will allow you to setup automatic server wipes without requiring external scripts. This plugin is very useful for any server owner but I'm positive that it will be really useful for those hosting providers running panel based game instances where you do not have full access to customize the server or the provided wipe tool is very limited. You should have a look at the suggested plugins for Oxidation's Scheduler which is a perfect fit for a fully in-game automatic wipe process. The plugin also allows you to set a list of seeds that will be used at server wipe to select the new map seed. You can define as many different wipe types as you'd like on the config file like so: This example is for a "forced" wipe. In order to execute the wipe type on the rcon console "wipe forced". "Forced": { "Restart": 120, "Message": "A server wipe is being executed, we'll be back shortly", "Game": { "Blueprints": true, "Logs": true, "Map": true, "PlayerDeaths": true, "PlayerIdentities": true, "PlayerStates": true, "PlayerTokens": true }, "Plugins": { "Convalence": true, "Data": true, "Groups": true, "Language": true, "Logs": true, "Users": true }, "Files": [ "my/custom/path/this_file_will_be_deleted.json" ], "Blacklist": [ "carbon/data/this_file_will_never_be_deleted.json" ] } This example is for a "weekly" wipe. In order to execute the wipe type on the rcon console "wipe weekly". "Weekly": { "Restart": 120, "Message": "A server wipe is being executed, we'll be back shortly", "Game": { "Blueprints": false, "Logs": true, "Map": true, "PlayerDeaths": true, "PlayerIdentities": false, "PlayerStates": true, "PlayerTokens": false }, "Plugins": { "Convalence": false, "Data": true, "Groups": false, "Language": true, "Logs": true, "Users": false }, "Files": [ "my/custom/path/this_file_will_be_deleted.json" ], "Blacklist": [ "carbon/data/this_file_will_never_be_deleted.json" ] } This is a standalone Harmony patch, Oxide installation is optional. Copy the Oxidation.Wiper.X.dll file into your HarmonyMods folder and restart your server. At the first server start after installing the patch a new configuration file Oxidation.Wiper.json will be created at the HarmonyMods folder. What is Harmony ? Harmony is a library for patching .NET code during runtime, it directly manipulates game code (CIL) without any additional abstraction layer such as Oxide. The direct patching of the game's byte code allows more performant modding as developers no longer need to rely on third party code, events or hooks to build custom functionality.$4.99 -
Version 1.0.3
19 downloads
Allows players to activate Headlight (Miner's Hat) without taking up any wearable slots, and does not conflict with any headwear. This is useful for having better vision at night without compromising armor or taking off hazmat suit, especially when farming ore/wood. Auto Equip You can define whether you would the headlight to auto equip at Sunset and unequip at Sunrise by setting default state to NightOnly, and define game times in config. If set to Always instead, it will always equip a headlight to players with permission (light will be turned off, they can turn it on/off like any other worn miner's hat while equipped). Permissions headlight.use Chat Commands /headlight - Shows available commands (can be changed in config) Console Commands giveheadlight %steamid% - Equips a headlight on a target player Config { "Command": "headlight", "Auto Equip Settings": { "Default State (Always|NightOnly|Off)": "NightOnly" }, "Night Time Settings": { "Sunset InGame Time (00:00)": "22:00", "Sunrise InGame Time (00:00)": "07:00" }, "Alert Settings": { "Send in Chat": false, "Send as Game Tip": true }, "Version": { "Major": 1, "Minor": 0, "Patch": 2 } }$4.99- 3 comments
- 1 review
-
- 2
-
-

-
- #headlight
- #rust
- (and 5 more)
-
Version 1.1.2
601 downloads
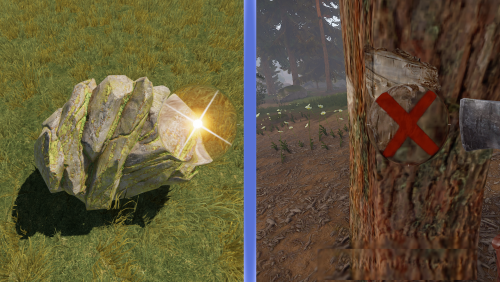
A harmony mod for Rust that makes the player's always hit the "X" markers on trees and "hotspots" on nodes Showcase video: Config: { "Enable atuo tree X farming": true, "Enable atuo node star farming": true }$2.99 -

Version 1.2.13
434 downloads
Filter chat messages by keywords and convert them to notifications. You can configure what messages to exclude in the config file to show as a notification instead. Multiline messages now supported. Use examples Clear chat spam caused by some plugins by moving them from chat area to notification area, players can then actually see each other's messages. Give your players the ability to look back at some of the messages sent by an event plugin for example (which is usually essential for them to complete the event and is usually lost in chat), they can look back at these messages by typing /n, and read what they missed. Highlight your broadcasted messages to players when you use the 'say' command. On PVE servers, you can convert messages sent by players when they call a monument they are looting by adding them to the filters (@bradley, @trainyard, etc..). Chat Commands /n - (Shows list of recently appeared notifications - can be changed in config) /n disable - (Disables notifications for player) /n enable - (Enables back notifications for player) Video (shows an older version) Configuration { "Version": { "Major": 1, "Minor": 2, "Patch": 7 }, "General settings": { "Can filter player messages?": false, "Recent notifications command": "n", "Show time (gametime, servertime, none)": "gametime" }, "Server messages settings - 'say' command": { "Convert all server messages?": false, "Prefix": "[Server]", "Prefix color": "#FFB84C" }, "Notification area settings": { "Time visible (in seconds)": 10, "Max # of notifications visible": 10, "Alternate color 1": "#212741", "Alternate color 2": "#303856", "Opacity": 70.0, "Width": 350.0, "Position (Top, TopLeft, TopRight, Left, Right, Center, Bottom, BottomLeft, BottomRight)": "TopRight", "X axis": 15.0, "Y axis": 15.0, "Single notification settings": { "Height": 20.0, "Font size": 11, "Text alignment (left, right, center)": "center", "Default text color (if not formatted)": "#ffffff" } }, "Recent notifications modal settings": { "Primary color": "#212741", "Secondary color 1": "#18122B", "Secondary color 2": "#303856" }, "Chat partial text to convert to notification": { "[DeathNotes]": { "Shows as? (NotificationOnly | ChatAndNotification | Neither)": "NotificationOnly", "Force Color": false, "Color": "#ffffff", "Enable Regex Formatting": false, "Advanced Formatting - Regex Pattern": "", "Advanced Formatting - Regex Replacement": "" }, "ServerRewards:": { "Shows as? (NotificationOnly | ChatAndNotification | Neither)": "NotificationOnly", "Force Color": false, "Color": "#ffffff", "Enable Regex Formatting": true, "Advanced Formatting - Regex Pattern": "^(ServerRewards:)(\\s)(.*)", "Advanced Formatting - Regex Replacement": "<color=#42C6FF>$3</color>" } }, "Regex filters (Advanced)": { "(Rust Rewards :)": { "Shows as? (NotificationOnly | ChatAndNotification | Neither)": "NotificationOnly", "Force Color": false, "Color": "#ffffff", "Enable Regex Formatting": true, "Advanced Formatting - Regex Pattern": "(Rust Rewards :)(.*)", "Advanced Formatting - Regex Replacement": "<color=#FFE932>[Rust Rewards]</color>$2" } } }$9.99 -
Version 1.1.0
46 downloads
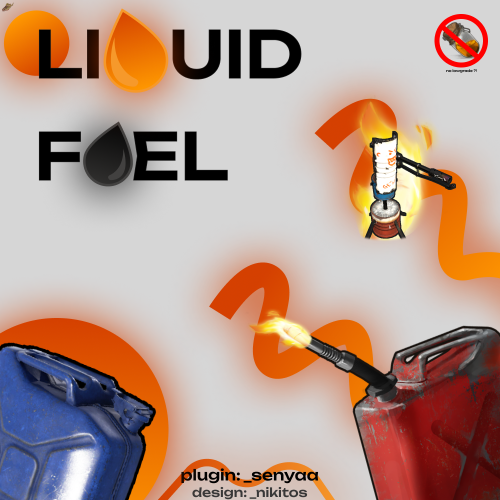
In short, this plugin turns low grade, crude oil and diesel into a liquid, which forces players to use jugs, bota bags and bottles to interact with fuel. Based on this, we can introduce new features such as fuel splashing, refining crude oil in regular purifiers or building autonomous refining factories using powered water purifiers and pumps! Also players can get their fuel from Oxum's Gas Station. 1. Introducing Liquid Fuel This plugin introduces 3 new liquids: Low Grade, Crude Oil and Diesel. 1 ml of the liquid represents 1 respecting "vanilla" item. Vanilla fuel is completely replaced by its liquid form. All items, vehicles, weapons and deployables now use liquid fuel. Players need to use liquid containers in order to get and store fuel. 2. Getting fuel There are several ways players can get fuel From Oxum's Gas Station Gas pumps now contain a bit of low grade inside them. Players can come to gas station and loot them. You can modify behaviour of this in the configuration file. From Red Oil Barrels Just like the regular old red barrels, players can get fuel from them, but they need to have free liquid containers inside their inventory. But players should be careful, because this plugin introduces gas explosions. From Pump Jacks. Since pump jacks now only farm crude oil, this plugin adds an option to increase crude oil production rates, see [3. Looting] Aditional Crude Oil in pumpjack configuration option. All drop rates are configurable. 2.1 Commands There are several chat and console commands so players, admins and other plugins could give liquid fuel. Chat commands: /buylowgrade /buycrudeoil /buydiesel these chat commands require liquidfuel.buyfuel permission liquidfuel.freefuel permission gives fuel for free Admin console commands: givefuel <1 - LGF , 2 - Crude Oil l, 3 - Diesel > <amount> <player name> 3. Refining Crude Oil This plugin completely rethinks the way players refine their crude oil. Old oil refineries become non-existent the second you load the plugin, which makes players use purifiers. Players are able to refine the fuel at their base almost immediately after starting out. They use regular water purifiers, that run on campfires, these purifier are slower and refine at a slower pace. Mid-game way to get fuel is to place a powered water purifier. By default, it refines faster and more efficiently, producing more low grade. Also, all purifiers have a input/output slots for connecting them to barrels or other purifiers. This allows players to build complicated autonomous fuel refining factories, which I find very interesting. Remember, speed and refining rates are configurable, so you can balance it the way you see it! 4. Fuel Splashing Now players can splash and then ignite fuel anywhere and in any pattern they wish. This allows players to raid bases, use it in PvP, create interesting trap contraptions and much more! 5. XM42 Flamethrower It was removed from the plugin, since it was added in vanilla Rust. 6. Explosions Red fuel barrels now explode when they are ignited or shot. Players should carefully farm oil barrels using tools, because one shot can initiate a chain reaction of explosions of other neighbouring oil barrels and can easily kill them. Also, fuel wagons now have a chance of exploding when hit with something flammable. You can change the projectiles and the explosion chance in the configuration file. 7. Crafting Crafting with liquid fuel is quite easy - to craft low grade you just need to have a liquid container in your inventory to store the crafted fuel inside, to craft something with low grade, you need to have a liquid container with enough fuel inside it. 7.2 Crafting with mixing table mixing low grade is done as before, by placing cloth and fat, players can get fuel, it's just in liquid form mixing recipes that require low grade are done by placing a liquid container in place of low grade. 8. Localization Built-in localization: English Russian But you can always add your own or change existing ones by modifying files in /oxide/lang/{your_language}/LiquidFuel.json 9. Configuration LiquidFuel's configuration is quite easy to understand and work with. Here is the example of the configuration file. It is located in /oxide/config/LiquidFuel.json { "[1. Prices] Low Grade Fuel Amount": 300, "[1. Prices] Low Grade Fuel Price (set value to 0 to make it free, use ServerRewards or Economics as a shortname to use RP points or Economics balance respectively)\"": { "ShortName": "scrap", "Amount": 50, "SkinID": 0 }, "[1. Prices] Crude Oil Amount": 150, "[1. Prices] Crude Oil Price (set value to 0 to make it free, use ServerRewards or Economics as a shortname to use RP points or Economics balance respectively)\"": { "ShortName": "scrap", "Amount": 75, "SkinID": 0 }, "[1. Prices] Diesel Amount": 10, "[1. Prices] Diesel Price (set value to 0 to make it free, use ServerRewards or Economics as a shortname to use RP points or Economics balance respectively)\"": { "ShortName": "scrap", "Amount": 100, "SkinID": 0 }, "[2. Entity Fuel Tanks] Max interaction distance (m)": 4.0, "[2. Entity Fuel Tanks] Fuel tank stack limits": { "fuel_storage_scrapheli": 1000, "fuel_storage_attackheli": 1000, "fuel_storage": 500, "fuelstorage": 20, "engine": 20, "crudeoutput": 5000, "crate_fuel": 100, "modular_car_fuel_storage": 250, "snowmobilefuelstorage": 250, "submarinefuelstorage": 250, "tugboat fuel_storage": 250, "workcart_fuel_storage": 250, "locomotive_fuel_storage": 250, "wagon_storage_fuel": 2500, "coaling_tower_fuel_storage.entity": 5000, "flameturret.deployed": 250, "tunalight.deployed": 250, "lantern.deployed": 250, "carvable.pumpkin": 100, "jackolantern.happy": 100, "jackolantern.angry": 100, "chineselantern.deployed": 250, "skylantern.deployed": 250, "skylantern.skylantern.red": 250, "skylantern.skylantern.green": 250, "skylantern.skylantern.orange": 250, "skylantern.skylantern.purple": 250, "fogmachine": 500, "snowmachine": 500 }, "[3. Looting] Minumum of Low Grade Fuel in red barrel": 5, "[3. Looting] Maximum of Low Grade Fuel in red barrel": 9, "[3. Looting] Minumum of Crude Oil in red barrel": 15, "[3. Looting] Maximum of Crude Oil in red barrel": 19, "[3. Looting] Minumum of Diesel per diesel barrel": 1, "[3. Looting] Maximum of Diesel per diesel barrel": 1, "[3. Looting] Aditional Crude Oil in pumpjack": 3, "[3.1. Looting Oxum's Gas Station] Enable gas pumps in Oxum's Gas Station (true/false)": true, "[3.1. Looting Oxum's Gas Station] Max interaction distance": 2.0, "[3.1. Looting Oxum's Gas Station] Raycasting interval (higher number results in better performance, but slower UI)": 0.2, "[3.1. Looting Oxum's Gas Station] Minimum gas refill time (minutes)": 2.0, "[3.1. Looting Oxum's Gas Station] Maximum gas refill time (minutes)": 5.0, "[3.1. Looting Oxum's Gas Station] Minimum Low Grade Fuel": 15, "[3.1. Looting Oxum's Gas Station] Maximum Low Grade Fuel": 40, "[4. Refineries] Regular purifier purification ratio (per 1 crude oil)": 1, "[4. Refineries] Powered purifier purification ratio (per 1 crude oil)": 3, "[4. Refineries] Regular purifier purification speed (per minute)": 24, "[4. Refineries] Powered purifier purification speed (per minute)": 60, "[5. Fuel splashing] Enable fuel splashing (true/false)": true, "[5. Fuel splashing] Minimum burn time (seconds)": 20.0, "[5. Fuel splashing] Maximum burn time (seconds)": 25.0, "[5. Fuel splashing] Fire damage radius (m)": 0.2, "[5. Fuel splashing] Fire damage (per second)": 5.0, "[5. Fuel splashing] Delay between igniting next fuel path node (seconds)": 0.1, "[5. Fuel splashing] Fuel spent per second of splashing": 15, "[5. Fuel splashing] Fuel path decay time (seconds)": 180.0, "[6. XM42 Flamethrower] Price": { "ShortName": "scrap", "Amount": 500, "SkinID": 0 }, "[6. XM42 Flamethrower] Item Name": "XM42 Flamethrower", "[6. XM42 Flamethrower] Fuel capacity": 150, "[6. XM42 Flamethrower] Damage per second": 90, "[7. Explosions] Fuel wagon explosion chance": 0.2, "[7. Explosions] Projectiles that initiate fuel wagon explosion": [ "riflebullet_fire", "pistolbullet_fire", "riflebullet_explosive" ], "[7. Explosions] Red barrel explosion damage": 60, "[8. Misc] Fuel poisoning amount": 15.0 } 10. API This plugin exposes the following API methods: // Type: 1 - LGF; 2 - Crude Oil; 3 - Diesel Item CreateFuel(int type, int amount) -> Returns the stack of the requested fuel 11. Notes Because this plugin quite drastically changes Rust world and items, it is not recommended to install/uninstall this plugin mid-wipe. Even though it preserves its state after reloads, it's not recommended to unload the plugin for long periods of time. 12. Credits Thanks to @Nikita and @kyrich for helping me with testing and video production.$18.99 -
Version 2.0.4
911 downloads
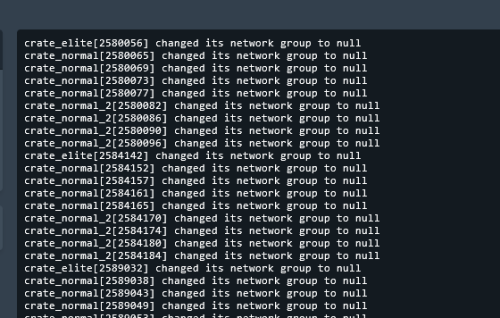
Removes 99% of Face Punches Debug Code/Spam & Removes Borked NPC/Animals From NavMesh Custom Built Log Manager Patch that Ties Into FacePunche's Log-Handler to fix Oxides system breaking it resulting in more spam then normal. Note Remove the: 'NavMeshErrorFix' plugin from umod if you use it! 'NoSunGlare' plugin from umod if you use it! 'PersonalNPC' <causes duplication msg's> disable this in config “Clear console of ‘ownerPlayer is not player’ spam" To stop the double output of logs in console for 'PersonalNPC' Patched the Following Methods 1. Base Navigator Place On Nav Mesh ( Fixed Default logic not killing the npcs/animals resulting in repeated spam ) 2. Base Navigator Validate Next Position ( Logic works fine by default but now no longer spams console each time they Delete an NPC/Animal.. ) 3. Base Entity On Invalid Position ( Logic works fine by default but now no longer spams console ) 4. Base Networkable Send Network Group Change ( Fixed it's Spam ) HOW TO UPDATE: 1. in console type': o.unload ConsoleSpamCleaner 2. Delete cs file 3. Add New cs file 4. in console type': o.load ConsoleSpamCleaner The following spam should no longer be an issue: ( Some Additional Ones Not On List Have Also Been Patched Out ) "Invalid NavAgent Position: prefab entity pos destroying", "failed to sample navmesh at position ", "changed its network group to null", "Bone error in SkeletonProperties.BuildDictionary for ", "HandleD3DDeviceLost", "ResetD3DDevice", "dev->Reset", "D3Dwindow device not lost anymore", "D3D device reset", "group < 0xfff", "Mesh can not have more than 65000 vert", "Trying to add (Layout Rebuilder for)", "Coroutine continue failure", "No texture data available to upload", "Trying to reload asset from disk that is not", "Unable to find shaders used for the terrain engine.", "Canvas element contains more than 65535 vertices", "RectTransform.set_anchorMin", "FMOD failed to initialize the output device", "Cannot create FMOD::Sound", "invalid utf-16 sequence", "missing surrogate tail", "Failed to create agent because it is not close enough to the Nav", "user-provided triangle mesh descriptor is invalid", "Releasing render texture that is set as", "AngryAnt Behave version", "alphamapResolution is clamped to the range of", "api.facepunch.com/api/public/manifest/", "Checking for new Steam Item Definitions..", "Floating point textures aren't supported on this device", "HDR Render Texture not supported, disabling HDR on reflection probe", "Image Effects are not supported on this platform", "Loading Prefab Bundle", "Missing shader in", "Missing projectileID", "Motion vectors not supported on a platform that does not support", "SwitchParent Missed", "saddletest", "The image effect Main Camera", "The image effect effect -", "The referenced script", "Unsupported encoding: 'utf8'", "Warning, null renderer for ScaleRenderer!", "[AmplifyColor]", "[AmplifyOcclusion]", "[CoverageQueries] Disabled due to unsupported", "[CustomProbe]", "[Manifest] URI IS", "[SpawnHandler] populationCounts", ", disk("$15.00 -

Version 0.24.0520
5,684 downloads
Carbon is a self-updating, lightweight, intelligent mod loader for Rust utilizing the latest C# and Harmony for the best performance and stability possible. Its robust framework and backward compatibility with Oxide plugins make it the ultimate replacement for those wanting better functionality and performance from their plugins! Carbon has all the creature comforts you need to run your server, such as a permission system, user system, and so much more. Carbon is developed by experienced developers and server owners working to take the tedium out of hosting servers and make configuration and setup seamless with an integrated GUI in-game to manage everything! Join our official Discord server for more frequent development info, discussions, and future plans. To find this page more easily, check out carbonmod.gg! Features Extremely lightweight, stripped out of additional, unrelated-to-Rust processes Seamless transition from Oxide to Carbon Permissions system Hook system MySQL & SQLite support DRM support Chat, Console, and Covalence support Built-in Carbon Modules (internal plugins) that help your server for the better Carbon-only methods that speed up and better the performance of your plugins Integrated RustEdit extensions (Module) Integrated Stack manager (Module) Integrated Gather manager (Module) Embedded error/exception Demystifier, which shows accurate error outputs Very fast & helpful error handling for plugin compilation Documentation Installing Carbon - https://docs.carbonmod.gg/docs/readme/installing-carbon Configuring Carbon - https://docs.carbonmod.gg/docs/readme/configuring-carbon Staging Builds Would you like to run Carbon on staging or aux branches of Rust throughout the month? Our staging and aux branches are always up-to-date, so you can properly test plugins prior to a major update or provide a modded server for players to try out new Rust updates before they're live! Staging - https://github.com/CarbonCommunity/Carbon.Core/releases/tag/rustbeta_staging_build Aux01 - https://github.com/CarbonCommunity/Carbon.Core/releases/tag/rustbeta_aux01_build Aux02 - https://github.com/CarbonCommunity/Carbon.Core/releases/tag/rustbeta_aux02_build For Developers If you're a developer, you can enjoy all of the latest improvements of C# 10 as well as the ability to add your own methods anywhere in the assembly without being locked down to pre-existing hooks. All of your existing Oxide plugins will be compatible, though we recommend making a Carbon-specific version available to utilize Carbon to its fullest. Check out Creating your First Plugin to get started!Free -

Version 1.0.2
70 downloads
No Building Debris is a plugin that will help improve players client fps a lot by getting rid of the gibs on Building Blocks destruction. I provided 4 options so if you want to keep some gibs on you can! These will work on all objects that are considered building blocks, such as high external walls! PLEASE READ BEFORE BUYING! For this to work it requires the server to disable sandbox, it uses Harmony code which allows me to modify the server code to allow this to be possible. You can find out how to disable sandbox below. After disabling, you can drop the plugin in the plugin folder like normal. To disable Sandbox, head to your RustDedicated_Data/Managed folder and create a file called oxide.disable-sandbox then restart your server to apply the change. Config { "Remove Admin Kill Gibs?": true, "Remove Stability Gibs?": true, "Remove Demolish Gibs?": true, "Remove Killed Gibs?": true }$10.00 -
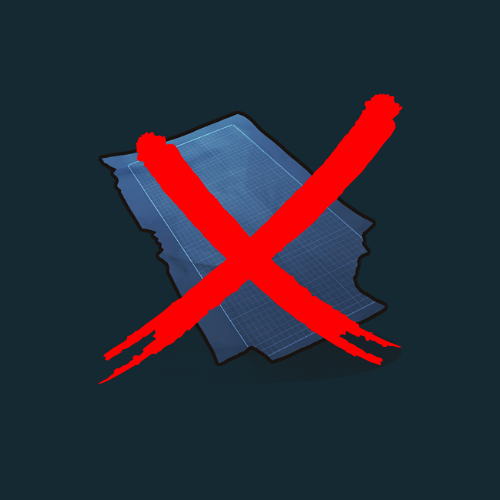
Version 1.0.3
878 downloads
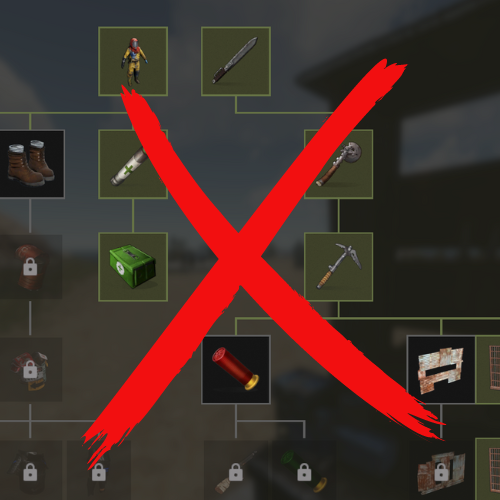
Features Prevents players unlocking blueprints from the tech tree. Usage - Copy the downloaded DLL file into server/HarmonyMods folder Support - If you need help or If you have any issues or suggestions you can contact me by joining my discord server: https://discord.gg/efVKDG6z6F or by adding me on discord: Farkas#6006Free- 9 comments
- 1 review
-
- 1
-
-
- #tech tree
- #disable
- (and 1 more)
-
 Hey everyone, I am looking to hire a developer to create a plugin that would increase the chance of green genes to appear when a seed is planted (not to be mistaken with clones). The plugin would basically just take what the server does to calculate seed genes and make a higher chance for any green gene to appear. This shouldn't be too difficult of a task, I'd be willing to pay $40 USD to have it done, counter offers are welcome but please be reasonable. Types of seeds currently in the game: seed.blue.berry seed.black.berry seed.green.berry seed.red.berry seed.white.berry seed.yellow.berry seed.corn seed.hemp seed.potato seed.pumpkin seed.corn This is the current server implementation by Facepunch from decompiled server: private GrowableGenetics.GeneType PickWeightedGeneType() { IOrderedEnumerable<GrowableGenetics.GeneWeighting> weighting = from w in (IEnumerable<GrowableGenetics.GeneWeighting>)GrowableGenes.slotWeights orderby w.Weighting select w; float single = 0f; foreach (GrowableGenetics.GeneWeighting geneWeighting in weighting) { single += geneWeighting.Weighting; } GrowableGenetics.GeneType geneType = GrowableGenetics.GeneType.Empty; float single1 = Random.Range(0f, single); float weighting1 = 0f; foreach (GrowableGenetics.GeneWeighting geneWeighting1 in weighting) { weighting1 += geneWeighting1.Weighting; if (single1 >= weighting1) { continue; } geneType = geneWeighting1.GeneType; return geneType; } return geneType; }
 -

Version 1.0.1
1,499 downloads
Custom Map Name is a plugin that allows server owners to customize the map name that is displayed on the server list. Get rid of the pesky map names displayed, and show off your server with some fashion! This shows in not only the rust server list, but also all the server sites that display your server! PLEASE READ BEFORE BUYING! For this to work it requires the server to disable sandbox, it uses Harmony code which allows me to modify the server code to allow this to be possible. You can find out how to disable sandbox below. After disabling, you can drop the plugin in the plugin folder like normal. To disable Sandbox, head to your RustDedicated_Data/Managed folder and create a file called oxide.disable-sandbox then restart your server to apply the change. Config: { "Custom Map Name": "Billy Joe's Custom Map" } Any questions, don't hesitate to message me on discord. I am available in the codefling discord.Free -
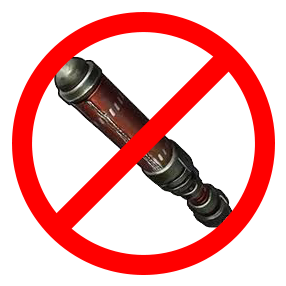
Version 0.0.3
70 downloads
This is a harmony plugin that prevents the new Attack Helicopters from being able to use Incendiary Rockets. The rockets will not be able to be put into the helicopters rocket storage, and thus will not be able to be used. This is perfect for battlefield servers, or high multiplier servers that don't want incendiary rockets spammed everywhere. Just place this plugin in your plugins folder like any other plugin. This plugin does use harmony, but does so while still remaining a .cs file. As such, it needs to be placed in the plugins folder. DO NOT put it into the harmonymods folder, as it will not work.Free -
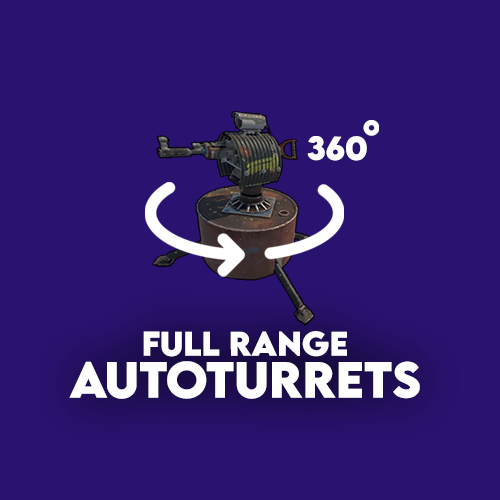
Version 2.0.0.0
1,227 downloads
About Allows server admins fine-grain control over the detection ranges and rotation ranges for AutoTurrets and FlameTurrets. You can make them even harder to mess with by giving them 360° detection range, or you can effectively make them harmless by setting their detection range to 0, making them just for show. It's all up to you. Hardcore server? We gotchu. Chill server? Ain't nobody got time for turrets, make 'em limp. This project was made as a learning exercise to learn Harmony with. The code is pretty organized, and arguably well documented, but will probably have a ton of code smells and I'm sure there's ample room for optimization. But since there's only a handful of Harmony developers for Rust, it can't hurt, right? If you learn anything from it, great. Simply drop the .dll into your /HarmonyMods folder and restart your server. Modifies both AutoTurrets and FlameTurrets. Check out the source code on GitHub! Features A few of the things you can do with this mod: Modify detection range from 0° to 360° for AutoTurrets and FlameTurrets. Modify rotation range from 0° to 360° for AutoTurrets and FlameTurrets. Use its' fully documented open source code to learn Harmony with. Take it out for a cup of coffee, idk. It's a mod. Configuration This mod creates a configuration file in ./HarmonyMods_Data/FullRangeAutoturrets/Configuration.json By default it'll look something like... { "Modification enabled (true/false)": true, "AutoTurret Options": { "Modify all AutoTurrets (true/false)": true, "Detection Range Degrees (0-360)": 360.0, "Rotation Range Degrees (0-360)": 360.0 }, "FlameTurret Options": { "Modify all FlameTurrets (true/false)": true, "Detection Range Degrees (0-360)": 360.0, "Rotation Range Degrees (0-360)": 360.0 } } This should all be pretty self-explanatory, but in case it's not... "Modification enabled (true/false)" => Enables or disables the entire mod "Modify all AutoTurrets (true/false)" => Enables or disables the modification of AutoTurrets (all of them!) "Modify all FlameTurrets (true/false)" => Enables or disables the modification of FlameTurrets (all of them!) "Detection Range Degrees (0-360)" => Sets the detection range for a turret. This does NOT change the animation. If set to 0, disables the turret type. "Rotation Range Degrees (0-360)" => Sets the rotation range for a turret. This does NOT change the detection behavior. If set to 0, disables animation. If set to 360, will cause the AutoTurret to randomly choose a direction, and will cause the flame turret to rotate in circles infinitely. Commands There's only one command included in this mod so far, and that's the reloading of configuration. This is done by doing; fullrangeautoturrets.reload Changes will be propagated immediately. Note: Due to the nature of the modification enabler booleans ("Modification enabled (true/false)", "Modify all ... (true/false)"), changing these will require a restart of the server. This is because the booleans indicate whether or not to change the source code, which can't change while the server is running. Changing the detection/range degrees and reloading should be fine, though. Feedback Feel free to send me feedback on Discord by adding Airathias#0001 or file an issue on GitHub.Free -

Version 1.3.4
265 downloads
SAVE 10% WHEN BUYING THE BUNDLE We are proud to announce the release of Crafting Manager superseding "Instant Crafting". Crafting Manager main features: Instant crafting (craftingmanager.instant.allow) Define a global scaling per workbench tier to be applied to all users by default Create as many "custom" profiles you need, each one will have a permission to control who gets access to the custom scaling Item blacklist allows you to block items from being crafted. Players get a message when the item is uncraftable. PermanentWorkbenchLevel permanently assigns workbench level to your players. Example of a custom profile, the values are in percentage of the original crafting duration. If you want to craft a Cupboard (30s original) and set tier0 to 0.5 (50%) then the Cupboard will take 15s to craft. "vip1": { "0": 0.25, "1": 0.5, "2": 0.75, "3": 1.0 } To assign the vip1 profile to a user type "o.grant user my_player craftingmanager.profile.example1", to assign it to a group type "o.grant group my_group craftingmanager.profile.example1". If you'd like to assign instant crafting it to all your players just grant the permission to the default group by typing "o.grant group default craftingmanager.instant.allow". Full configuration example: { "CraftingScale": { "Global": { "0": 1.0, "1": 1.0, "2": 1.0, "3": 1.0 }, "Profiles": { "example1": { "0": 0.25, "1": 0.5, "2": 0.75, "3": 1.0 }, "example2": { "0": 0.0, "1": 0.25, "2": 0.5, "3": 0.75 } } }, "Miscellaneous": { "InstantCrafting": 1.0, "PermanentWorkbenchLevel": 0 }, "BlacklistedItems": [ "syringe.medical", "explosives", "autoturret" ] }$4.99 -

Version 1.0.1
4 downloads
Ever wanted to prevent your players from having homing launchers target their teammates helicopters? Well with these 2 plugins you can! They can even toggle between being able to target their teammates and not being able to using a simple command. This can be configured from the config and has the ability to have more than 1 command to toggle it. Just open the zip (or unzip it) and place the two .cs plugins in your plugin folder. To switch between team targeting, just type /teamlock or /nolock. Can also do /teamlock on and /nolock off. (Assuming you have those as the commands in the command list in the config) Default Config: { "The command a user will use to toggle the locking of teammates.": [ "teamlock", "nolock" ] } Video Example:$1.99-
- 1
-
-
- #homing
- #homing missiles
- (and 3 more)
-
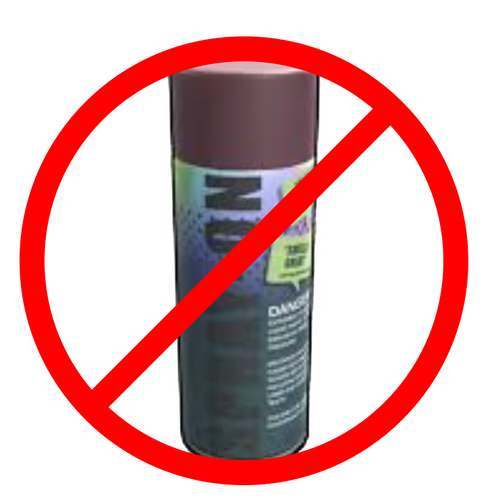
Version 0.0.2
18 downloads
This Harmony Plugin prevents ALL players who own the spray can from being able to use ONLY free spraying with the spray can. This means it still allows both the reskinning of entities, and allows the spray images (the ones similar to CS:GO). It will only prevent the use of the free spray, the one that allows a user to draw with the spray can. This means for servers who disabled the Spray Can because it was allowing players to spray things they shouldn't now can enable it! My next goal is to make it so staff (BasePlayer.Developer/BasePlayer.Admin) are allowed to use it if they own it, but regular players are not, so long as its possible. Just place this plugin in your plugins folder like any other plugin. This plugin does use harmony, but does so while still remaining a .cs file. As such, it needs to be placed in the plugins folder. DO NOT put it into the harmonymods folder, as it will not work.Free -

Version 0.0.20
467 downloads
This plugin removes the sending of map markers through the API, which prevents users from using services such as RustLink from tracking when cargo, crates, heli, or other things spawn or despawn from the map. This plugin uses Harmony. Follow the instructions on https://umod.org/guides/oxide/disabling-plugin-sandboxing to disable plugin-sandboxing and enable Harmony. This should block the functionality of: Abused tracking of Vending Machines Abused tracking of the Bradley APC Abused tracking of Oil Rig Crates Abused tracking of Helicopters Abused tracking of Chinooks Abused usage of the Team Chat via 3rd Parties This plugin also allows for the specific blocking/unblocking of: -Explosion Markers (Downed Heli Locations, etc) -Vending Machine Markers -Patrol Helicopter Marker -Crate Location Marker -CargoShip Marker -Chinook Marker -Player Markers Edit the boolean values within the plugin to toggle the above markers.Free- 5 comments
- 1 review
-
- 4
-
-
-
- #rust plus
- #block
- (and 3 more)
-
Version 1.0.3
1,185 downloads
Features Unlocks all blueprints for each player when they join. Usage - Copy the downloaded DLL file into server/HarmonyMods folder Support - If you need help or If you have any issues or suggestions you can contact me by joining my discord server: https://discord.gg/efVKDG6z6F or by adding me on discord: Farkas#6006Free-
- 1
-
-
- #blueprint
- #blueprints
- (and 1 more)
-

Version 1.0.3
917 downloads
Features Removes the delay after suiciding. Usage - Copy the downloaded DLL file into server/HarmonyMods folder Support - If you need help or If you have any issues or suggestions you can contact me by joining my discord server: https://discord.gg/efVKDG6z6F or by adding me on discord: Farkas#6006Free -
Version 1.0.3
1,060 downloads
Features Allows players to craft items without workbench. Usage - Copy the downloaded DLL file into server/HarmonyMods folder Support - If you need help or If you have any issues or suggestions you can contact me by joining my discord server: https://discord.gg/efVKDG6z6F or by adding me on discord: Farkas#6006Free -

Version 1.0.3
1,883 downloads
Changes the speed of recycling. Usage - Copy the downloaded DLL file into server/HarmonyMods folder - After loading the plugin it will create a directory in the server's folder called HarmonyConfig, where you will be able to change the config options. Support - If you need help or If you have any issues or suggestions you can contact me by joining my discord server: https://discord.gg/efVKDG6z6F or by adding me on discord: Farkas#6006Free -

Version 1.0.3
965 downloads
Changes the speed of the research table. Usage - Copy the downloaded DLL file into server/HarmonyMods folder - After loading the plugin it will create a directory in the server's folder called HarmonyConfig, where you will be able to change the config options. Support - If you need help or If you have any issues or suggestions you can contact me by joining my discord server: https://discord.gg/efVKDG6z6F or by adding me on discord: Farkas#6006Free -

Version 1.0.4
1,472 downloads
Features Changes the speed of crafting. Usage - Copy the downloaded DLL file into server/HarmonyMods folder - After loading the plugin it will create a directory in the server's folder called HarmonyConfig, where you will be able to change the config options. Support - If you need help or If you have any issues or suggestions you can contact me by joining my discord server: https://discord.gg/efVKDG6z6F or by adding me on discord: Farkas#6006Free