
.thumb.gif.c307d70618c13c911fe1d652a2c179f1.gif)

🥇Ready to level up your server's raiding experience?
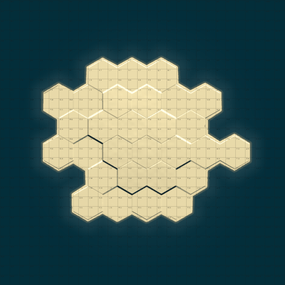
This premium pack contains 210 unique, handcrafted raidable bases divided into 5 distinct difficulty tiers (Easy, Medium, Hard, Expert, and Nightmare). Each tier comes with its own custom, balanced loot tables —the bigger the challenge, the better the reward! Everything is 100% Plug & Play. You don’t need to spend hours editing configurations; just copy, paste, and you're good to go!
🕹️What makes this pack unique:
Easy & Medium Bases: Built to be starter-friendly, utilizing a massive variety of awesome skins to make your server look incredibly alive and high-quality.
Hard, Expert & Nightmare Bases: Features complex layouts, multiple entrances, clever trap placements, and a heavy challenge loaded with top-tier rewards.
Plug & Play Setup: Comes with everything pre-configured—loot tables, difficulty profiles, and the main plugin settings are all included. No setup required!
🎮How to Install (Step-by-Step)
As detailed in the README.txt.txt file, setting this up on your server takes less than 2 minutes:
Base Files: Extract all .json files from the copypaste/ folders and place them directly into: oxide/data/copypaste/ (Do not copy the subfolders, only the files inside them!)
Loot Tables: Copy all files from Difficulty_Loot/ into: oxide/data/RaidableBases/Loot/
Profiles: Copy all files from Profiles/ into: oxide/data/RaidableBases/Profiles/
Plugin Config (Optional): If you want to use the included custom config, copy RaidableBases.json from the config/ folder into: oxide/config/ (Note: This will overwrite your existing config!)
Reload: Run o.reload RaidableBases in your server console.
Note: This pack requires the paid Raidable Bases plugin (by nivex) and the CopyPaste plugin installed on an Oxide/uMod Rust server.
IMPORTANT: Remove Stone Walls (Enclosures):
By default, the plugin spawns a giant stone wall around bases. To remove it:
Open oxide/config/RaidableBases/Profiles/Easy.json
Find "Spawns Enclosure": true and change it to false.
Run command: rb.reload in console.
In Case that you feel that it's too much loot:
Open oxide/config/RaidableBases/Profiles/Easy.json or any tother Difficulty
"Amount Of Items To Spawn": 45,
Change the Amount Of Items to a lower number.
Modifying Base Despawn Timers:
If you want to change how long a base stays on the map before disappearing, find these lines under "Raid Management" in config:
"Minutes Until Despawn After Looting (min: 1)": 15,
"Minutes Until Despawn After Inactive (0 = disabled)": 45
Controlling Automatically Maintained Events:
It's spawning 6 bases at every 30 mins - 1h 30 mins, randomly. Easy & Medium got higher chances to spawn. Takes 30 seconds per base to spawn so it's not going to make the server to lag.
"Always Maintain Max Events": true,
"Max Maintained Events": 6
Auto-Cooking & Sorting (Furnace & Base Sorting):
If you want to know how the pack automatically moves resources or food into the right containers when a base spawns, look for these options under "Raid Management" in config:
"Move Cookables Into Ovens": true,
"Move Food Into BBQ Or Fridge": true,
"Move Resources Into Tool Cupboard": true,
"Move Items Into Lockers": true
Turning Lights and Furnaces On Automatically:
"Turn Lights On At Night": true,
"Turn Lights On Indefinitely": true,
"Furnace Starting Fuel": 1000
Automatic Chat Announcements:
If you want the entire server to know when a new raid has appeared on the map, look for "Event Messages" in config:
"Announce Buy Base Messages": false,
"Show Opened Message For PVE Bases": true,
"Show Opened Message For PVP Bases": true
If you already have other bases installed and don't want to use the included Profiles, you can register all 210 bases directly into your difficulty profiles by running the commands below in your server console (F1 or RCON). After pasting all commands, reload the plugin with o.reload RaidableBases.
rb.config add "Easy Bases" easy1 easy2 easy3 easy4 easy5 easy6 easy7 easy8 easy9 easy10
rb.config add "Easy Bases" easy11 easy12 easy13 easy14 easy15 easy16 easy17 easy18 easy19 easy20
rb.config add "Easy Bases" easy21 easy22 easy23 easy24 easy25 easy26 easy27 easy28 easy29 easy30
rb.config add "Easy Bases" easy31 easy32 easy33 easy34 easy35 easy36 easy37 easy38 easy39 easy40
rb.config add "Easy Bases" easy41 easy42 easy43 easy44 easy45 easy46 easy47 easy48 easy49 easy50
rb.config add "Easy Bases" easy51 easy52 easy53 easy54 easy55 easy56 easy57 easy58 easy59 easy60
rb.config add "Medium Bases" medium1 medium2 medium3 medium4 medium5 medium6 medium7 medium8 medium9 medium10
rb.config add "Medium Bases" medium11 medium12 medium13 medium14 medium15 medium16 medium17 medium18 medium19 medium20
rb.config add "Medium Bases" medium21 medium22 medium23 medium24 medium25 medium26 medium27 medium28 medium29 medium30
rb.config add "Medium Bases" medium31 medium32 medium33 medium34 medium35 medium36 medium37 medium38 medium39 medium40
rb.config add "Medium Bases" medium41 medium42 medium43 medium44 medium45 medium46 medium47 medium48 medium49 medium50
rb.config add "Medium Bases" medium51 medium52 medium53 medium54 medium55 medium56 medium57 medium58 medium59 medium60
rb.config add "Hard Bases" hard1 hard2 hard3 hard4 hard5 hard6 hard7 hard8 hard9 hard10
rb.config add "Hard Bases" hard11 hard12 hard13 hard14 hard15 hard16 hard17 hard18 hard19 hard20
rb.config add "Hard Bases" hard21 hard22 hard23 hard24 hard25 hard26 hard27 hard28 hard29 hard30
rb.config add "Expert Bases" expert1 expert2 expert3 expert4 expert5 expert6 expert7 expert8 expert9 expert10
rb.config add "Expert Bases" expert11 expert12 expert13 expert14 expert15 expert16 expert17 expert18 expert19 expert20
rb.config add "Expert Bases" expert21 expert22 expert23 expert24 expert25 expert26 expert27 expert28 expert29 expert30
rb.config add "Nightmare Bases" nightmare1 nightmare2 nightmare3 nightmare4 nightmare5 nightmare6 nightmare7 nightmare8 nightmare9 nightmare10
rb.config add "Nightmare Bases" nightmare11 nightmare12 nightmare13 nightmare14 nightmare15 nightmare16 nightmare17 nightmare18 nightmare19 nightmare20
rb.config add "Nightmare Bases" nightmare21 nightmare22 nightmare23 nightmare24 nightmare25 nightmare26 nightmare27 nightmare28 nightmare29 nightmare30
You will see photos only with 5 bases per Difficulty, beacause I am aware of people stealing my designs.
In the pack you will se a file named: RaidableBases_Testing_cfg (this is another config for the pack, that makes the bases to spawn without any cooldown, while the main configuration in the pack makes the bases to spawn between 30 min up to 1h 30 mins)
🛡️ Optimized NPCs
The number of NPCs is fully optimized for each difficulty tier. You can find and tweak these balanced guard configurations inside the Profiles/ folder!
A Note From Me 👋
Hello and welcome! I’ve put my heart and countless hours into creating this professional, 100% plug-and-play pack. Everything was built by me from absolute scratch on my local server. I am incredibly proud of it, especially the loot tables—honestly, you won't find a better-balanced reward system out there!
Why only $30?
A massive pack like this usually costs around $70–$80. But as a former server owner myself, I know how hard and expensive it is to find high-quality setups that don't break the bank. I wanted to give back and support the Rust community with a top-tier pack at an affordable price.
⭐ Support the Work
If you love this pack, please consider leaving a 5-star review! Your feedback means the world to me and motivates me to keep building and improving the configurations for you!
Thank you for your support, and happy raiding! 🚀


.thumb.png.fdca67acbe8b7d3bf2f136b3742964e5.png)
Highest Rated
Top-rated picks trusted and loved by the community.
-
 $16.99
By David
-
sale
$40.00$30.00By nivex
-
 $24.99
By LosGranada
-
 $29.99
By imthenewguy
-
sale

$40.00$31.95By Mevent
-
 $24.99
By Whispers88
-
-
-
 $14.99
By AhigaO
-
 Free
FreeBy Steenamaroo
-
sale

$19.99$15.99By Fruster
-
 $14.99
By David
-
 $45.99
By Monster
-
 $19.99
By Fruster
Trending Files
Popular picks members are downloading the most right now.
-
-
 Free
FreeBy tofurahie
-
sale
$40.00$31.95By Mevent
-
$29.99
By imthenewguy
-
-
 $49.99
By Adem
-
 $40.00
By Steenamaroo
-
-
.thumb.png.ceba89717ce72b32fcd6b6aed73fdd80.png) $29.99
$29.99By Adem
-

By 0xF
-
sale
$40.00$30.00By nivex
-
By realedwin
-
Free
By Steenamaroo
-
$14.99
By AhigaO
Great Deals
Discounted picks, limited-time deals, and sale items worth grabbing now.
-
sale
$29.99$24.99By SlayersRust
-
sale
-
sale
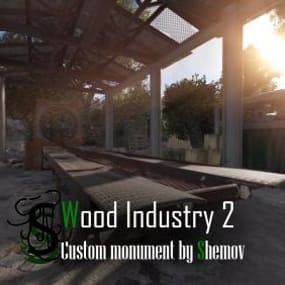
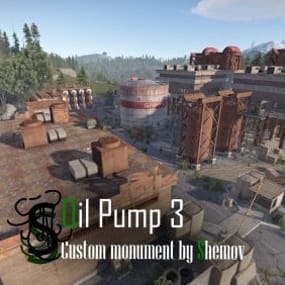
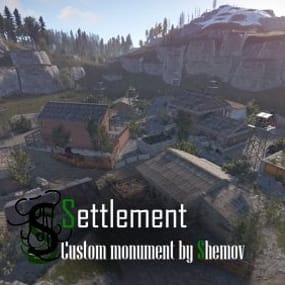
$8.30$7.05By Shemov
-
sale
$8.30$7.05By Shemov
-
sale
$8.30$7.05By Shemov
-
sale

$3.99$1.00 -
sale
$8.30$7.05By Shemov
-
sale

$11.95$7.95By Mevent
-
sale

$8.30$7.05By Shemov
-
sale
$5.00$1.75By kykyxa
-
sale

$8.30$7.05By Shemov
-
sale
$15.00$9.99By Khan
-
sale
$9.99$4.99By SlayersRust
-
sale
$9.30$7.90By Shemov


.thumb.png.20dd904bced65044f9a4c258301ffeb2.png)

Latest Reviews
See what customers are saying about their experience with files.

not operable as is.
only reason for the 1 star. bought with a blind view since no reviews. will adjust and or rate once and or if fixed.

Good map with good potential however significant patching required, military tunnels was floating 50 metres in the air and every single river had to be fixed as the water was clipping through the surrounding areas

This paired with Custom Item Definitions is next level

sick, made my upgrade to 5x painless. appreciate all the help!

Great plugin and excellent customer service; they solve any problems you have right away. 10/10 Highly recommended

LuffyRust 1000x PvP had an incredible experience running Battle Planet. Our players thoroughly enjoyed the map, and many now ask for it by name whenever we discuss future wipes.
The map is beautifully designed, performs extremely well, and provides plenty of exciting areas for players to explore, build, fight, and create memorable wipe experiences.
We can confidently recommend Nomad and his work. The quality, creativity, and attention to detail are outstanding. You will not be disappoi

Each base feels methodically designed. The easier bases start out approachable, while the higher difficulty levels are designed to lure players into a false sense of security, only for them to instantly regret their decision when they’re sent back to the respawn button.
This provides a challenge that requires them to pay attention and think, keeping them engaged with your content, and helping with player retention long term.

This is an excellent map. My players had alot of fun and were engaged the entire time. The map has a great selection of monuments that encourages high-stakes PvP while providing plenty of build space. My players and I also did not have any kind of issues at all in regards to terrain glitches or anything else that could possibly go wrong with a custom map. Furthermore, the creator was very quick to answer any questions I had even after purchase.

Very good developer. I was initially skeptical and honestly didn't think this project would last, but I've been proven completely wrong. The developer consistently updates, maintains, and improves the plugin, and it's clear they genuinely care about its quality.
The plugin works like a charm—it's intuitive, well optimized, and incredibly easy to use. I ended up replacing the old Player Administration plugin from uMod with this one, and the difference is night and day. This plugin offers a m

I really enjoy this plugin. it makes beach living a bit more interesting.
Thank you for making this available.