

About Figma To Rust UI Exporter
The Figma to Rust UI Export Plugin converts Figma interfaces into UI code for Rust game plugins. Designers and developers can turn their Figma designs into working UI elements for Rust.


 Guidelines
 Use Frames, Not Groups
- Why: Groups with rectangles won't export correctly. Frames with fills give the correct Rust UI hierarchy.
- How: Always use Frames (Shift + A) for containers. Apply fills directly to the frame (not nested rectangles).
-
Frame Example:


 Icons: Vector or PNG Only
- Why: Nested icon frames cause export errors.
- How: Flatten icons into a single vector shape (Combine paths) or export as PNG.
- Right-click icon layers → Flatten Selection or export via Export Settings.
 Parent Naming Conventions
- Why: Rust requires parent layers to be named Overlay or Hud (case-sensitive).
-
How: Rename root frames in Figma to exactly
OverlayorHudin the Layers panel.
 Constraints Configuration
- Why: Defines how elements scale/position in Rust's UI system.
-
Horizontal Constraints:
- Left/Right/Center: Anchors to screen edges.
- Scale: Full-width (AnchorMin="0 0" AnchorMax="1 1").
-
Vertical Constraints:
- Top/Bottom/Center: Anchors to top/bottom edges.
- Scale: Full-height (AnchorMin="0 0" AnchorMax="1 1").
-
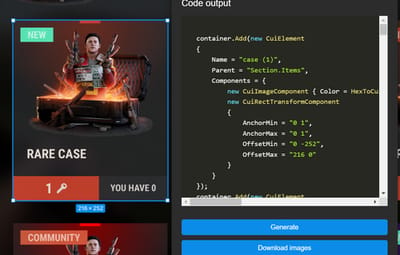
Constraints Example:

 Pro Tips
- Test constraints in Figma's Prototype mode to preview scaling behavior.
- Avoid mixed constraints (e.g., Left + Scale) unless intentional.
- Use Auto Layout for responsive elements (supports padding/spacing).
 Troubleshooting
- Export fails? Check for unnamed parents or nested groups.
- Icons missing? Make sure they're flattened vectors or PNGs.
- UI misaligned in Rust? Check the constraints and parent names again.