Search the Community
Showing results for tags 'fun'.
-
Version 2.0.0
55 downloads
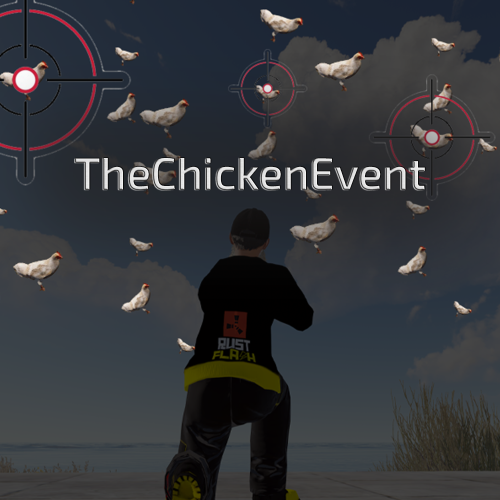
Features This plugin enables players to trigger an entertaining event in Rust - the so-called "Chicken Event". If a player has the required authorisation, they can start the event. During the event, chickens are spawned near the player and the goal is to shoot as many chickens as possible. After a set time, the event ends and the players with the most chicken kills receive rewards. The plugin tracks the performance of the players and determines the winners based on their kills. The main functions of the plugin are: Launching of the Chicken Event by eligible players. Randomly spawning chickens near the player. Tracking the number of chickens shot down by each player. Announcement of winners and their rewards at the end of the event. This plugin adds a fun activity to the game of Rust and rewards players who are successful in this event. It's a great way to encourage player interaction on your server and have fun. Functions You can start the ChickenEvent command: /flashchickenevent You can start the ChickenEvent Console: flashchickenevent Config { "EventDuration": 60, "ChickenSpawnRadius": 20.0, "EnableChickenMovement": true, "WinItemShortname": "rock", "WinItemCount": 3, "WinItemSkinId": 2843316584, "VipDuration": 7, ## Set to 0 to disregard this win "RemoveDeadChickensAfterEvent": true } load, run, enjoy$12.99 -
Version 0.1.8
494 downloads
Plugin for Real PvE servers, featuring damage prevention, anti-griefing measures, claiming vehicles, an automatic loot queue in radtowns and raid zones and much more. The ability to set "server.pve" to "true", which allows the server to have a "PvE" flag; Damage from NPC's are enabled when server.pve is true; The ability to inflict damage to one's own structures with "server.pve true"; The ability to destroy(including external walls) or rotate one's structures without any time constraints; The ability to force the decay of building blocks with Twigs grade, even if there is wood in the Tool Cupboard; No one, except the owner or their friends, will be able to open their loot containers (chests, storages, bodies, etc.); Players can't gather resources within the Building Privilege of someone else; Administrators can bypass loot restrictions; The ability to schedule the killing of players if they disconnect within someone else's Building Privilege; Disabling backpack and active item drop upon death, even if backpack is full; The ability to disable 'Give' messages; The ability to modify the items given at spawn on the beach; The ability to create an unlimited number of custom permissions; The ability to allow players to bypass the queue; The ability to set limits on sleeping bags, shelters and auto turrets for each permission; The ability to set a multiplier for the prices of monuments and events for each permission; The ability to customize the price and amount of vehicles for each of your custom permissions; The ability to assign vehicles to each player; The ability to customize the assigned price and available amount of vehicles for each of your custom permissions; An assigned vehicle can't be damaged, looted or pushed by other players, but it can be pushed if it is within someone else's Building Privilege; The ability to loot monuments through a queue system; The ability to configure monuments, setting their looting price and time, and adjusting status bars for each monument; The ability to acquire the privilege to loot events (helicopters, bradleys, and raidable bases) through a purchase; The ability to customize the price of each event types and loot attempts (lives); NPCs only aggress against players who are looting monuments, events or raidable bases; Only players who are looting monuments, events or raidable bases can inflict damage to NPCs; RaidableBases are protected from griefing(no damage, no loot and etc). Only the owner can interact with the raid; Neutral RaidableBases can be purchased; Prices for purchasing neutral raids are configurable for each difficulty level; Configurable raid limits (currently available) along with discount multipliers for purchases, for each permission. File location: *SERVER*\oxide\data\RealPVE\PermissionConfig.json Default: https://pastebin.com/5VtWZZVr All permissions are created and configured in the config file under the "List of permissions" section. You can create as many permissions as needed and customize them flexibly. It is recommended to use the prefix "realpve" in the permission's name, for example: "realpve.vip". NOTE: The first permission will serve as the default permission for those who do not have any permissions. { "List of permissions. NOTE: The first permission will be used by default for those who do not have any permissions.": [ { "Permission Name": "realpve.default", "Bypass Queue": false, "Limit of beds": 15, "Limit of shelters": 1, "Limit of auto turrets": 12, "Monuments price multiplier": 1.0, "Events price multiplier": 1.0, "Limit of RaidableBases(at the time)": 1, "RaidableBases price multiplier": 1.0, "Vehicles settings": { "Horse": { "Limit": 1, "Price": 10.0 }, "Bike": { "Limit": 1, "Price": 5.0 }, "MotorBike": { "Limit": 1, "Price": 20.0 }, "Car": { "Limit": 1, "Price": 25.0 }, ... } }, { "Permission Name": "realpve.vip", "Bypass Queue": true, "Limit of beds": 20, "Limit of shelters": 2, "Limit of auto turrets": 15, "Monuments price multiplier": 0.9, "Events price multiplier": 0.9, "Limit of RaidableBases(at the time)": 2, "RaidableBases price multiplier": 0.9, "Vehicles settings": { "Horse": { "Limit": 5, "Price": 9.0 }, "Bike": { "Limit": 5, "Price": 4.5 }, "MotorBike": { "Limit": 5, "Price": 18.0 }, "Car": { "Limit": 5, "Price": 22.5 }, ... } } ], "Version": { "Major": 0, "Minor": 1, "Patch": 1 } } An example of a monument/event/rb multipliers using default permissions. For example, if you set the price for the Harbor at $1000, a player with the default permission(1.0) will pay $1000 * 1 = $1000. Meanwhile, a player with a VIP permission(0.9) will pay $1000 * 0.9 = $900. However, if a player possesses a misbehaving permission with a value of 1.1, they will need to pay $1000 * 1.1 = $1100. { "RealPVE command": "realpve", "Is it worth forcibly implementing PvE for a server?": true, "Use GameTip for messages?": true, "Is it worth preventing the sending of 'Give' messages?": true, "Which currency symbol and format will be utilized?": "{0}$", "Is it worth allowing a backpack to drop upon player death?": true, "Is it worth blocking damage to the laptop of the Hackable Crate?": true, "Is it worth preventing the pickup of plants spawned by the server in someone else's building privilege zone?": false, "Anti-Sleeper - Time in seconds after which a player will be killed if they disconnect while inside someone else's Building Privilege. Set to 0 to disable": 1200.0, "PatrolHelicopterAI - Monument Crash. If set to true, the helicopter will attempt to crash into the monument.": false, "PatrolHelicopterAI - Use Danger Zones. If set to false, the helicopter will function as it did before the April update.": false, "PatrolHelicopterAI - Flee Damage Percentage. A value of 1 or above will make the helicopter behave as it did before the April update.": 1.0, "Settings for the events": { "PatrolHelicopter": { "IsEnabled": true, "Is it worth removing fire from crates?": true, "Price": 50.0, "The number of deaths after which the event becomes public.": 5 }, "BradleyAPC": { "IsEnabled": true, "Is it worth removing fire from crates?": true, "Price": 50.0, "The number of deaths after which the event becomes public.": 5 } }, "Is Npc Random Raids enabled?": true, "Wipe ID": null, "Version": { "Major": 0, "Minor": 1, "Patch": 8 } } EN: { "MsgNoteText": "Welcome to our PvE server!\nThis server utilizes the RealPVE plugin.\nYou can find more details about the plugin at the following link: https://codefling.com/plugins/real-pve", "MsgAdminLootEnabled": "You have been added to the loot restriction ignore list!", "MsgAdminLootDisabled": "You have been removed from the loot restriction ignore list!", "MsgTeamFFireEnabled": "Friendly fire enabled by {0}!", "MsgTeamFFireDisabled": "Friendly fire disabled by {0}!", "MsgMonumentOccupied": "{1} occupied {0} in {2} minutes.", "MsgMonumentFree": "{0} is available for looting!", "MsgMonumentOfferTitle": "Unlock Treasures of {0}!", "MsgMonumentOfferDescription": "Tap the notification to pay {0}.\nAnd unlock access to undiscovered riches!", "MsgMonumentLooterDeath": "You died while looting {0}. You have {1} seconds.", "MsgMonumentLooterExit": "You have left the monument. You have {0} seconds to return!", "MsgMonumentLooterRemoved": "Time's up! You have been removed from the monument!", "MsgMonumentLootingNotFree": "You have been added to the loot queue. Loot cost: {0}", "MsgMonumentNotInQueue": "You are not in the queue! You need to re-enter the monument!", "MsgMonumentNoAccess": "no access", "MsgEventOccupied": "{0} is already occupied by {1}!", "MsgEventOfferTitle": "Claim {0}!", "MsgEventOfferDescription": "Tap the notification to pay {0}.\nAnd unlock access to undiscovered riches!", "MsgEventNewLooter": "You have claimed {0}. You have {1} death for your team.", "MsgEventDeathLimit": "{0} is no longer yours! You have exceeded your death limit!", "MsgEventComplete": "{0} destroyed at coordinates: {1}!", "MsgEventPatrolHelicopter": "Patrol Helicopter", "MsgEventBradleyAPC": "Bradley", "MsgRaidableBasesDisabled": "This Raidable Base is either disabled or not found!", "MsgRaidableBasesOccupied": "The Raidable Base is already occupied by {0}!", "MsgRaidableBasesLimit": "Limit exceeded! You have {0} out of {1} available Raidable Bases.", "MsgRaidableBasesPurchaseStart": "Payment successful! Please wait...", "MsgRaidableBasesPurchased": "You have successfully purchased the Raidable Base!", "MsgRaidableBasesPurchaseFailed": "You were unable to purchase the Raidable Base! Funds refunded.", "MsgRaidableBasesOfferTitle": "Claim {0} Raidable Base!", "MsgRaidableBasesOfferDescription": "Tap the notification to pay {0}.\nAnd unlock access to undiscovered riches!", "MsgRaidableBasesBarText": "{0} Base", "MsgRaidableBasesBarTextLootRemaining": "Loot Remaining", "MsgRaidableBasesBarTextLootCompleted": "Completed", "MsgRaidableBasesBarNoAccess": "no access", "MsgRaidableBasesEasy": "Easy", "MsgRaidableBasesMedium": "Medium", "MsgRaidableBasesHard": "Hard", "MsgRaidableBasesExpert": "Expert", "MsgRaidableBasesNightmare": "Nightmare", "MsgPrivlidgeClear": "{0} players have been removed from the Building Privilege.", "MsgPrivlidgeClearEmpty": "Only you are authorized in the Building Privilege.", "MsgVehicleDialogTitle": "Department of Motor Vehicles", "MsgVehicleDialogDescription": "ID: \nType: \nRegistration fee: \nCategory: ", "MsgVehicleDialogDescriptionValue": "<b>{0}</b>\n<b>{1}</b>\n<b>{4}</b>\n<b>{2}</b>", "MsgVehicleDialogDescriptionRegistered": "ID: \nType: \nRegistration date: \nCategory: ", "MsgVehicleDialogDescriptionRegisteredValue": "<b>{0}</b>\n<b>{1}</b>\n<b>{3}</b>\n<b>{2}</b>", "MsgVehicleDialogDescriptionNotOwner": "ID: \nOwner: \nRegistration date: \nType: \nCategory: ", "MsgVehicleDialogDescriptionNotOwnerValue": "<b>{0}</b>\n<b>{4}</b>\n<b>{3}</b>\n<b>{1}</b>\n<b>{2}</b>", "MsgVehicleCarDialogDescription": "ID: \nType: \nRegistration fee: \nCategory: ", "MsgVehicleCarDialogDescriptionValue": "<b>{0}</b>\n<b>{1}</b>\n<b>{4}</b>\n<b>{2}</b>", "MsgVehicleCarDialogDescriptionRegistered": "ID: \nType: \nReg date: \nCategory: ", "MsgVehicleCarDialogDescriptionRegisteredValue": "<b>{0}</b>\n<b>{1}</b>\n<b>{3}</b>\n<b>{2}</b>", "MsgVehicleCarDialogDescriptionNotOwner": "ID: \nOwner: \nReg date: \nType: \nCategory: ", "MsgVehicleCarDialogDescriptionNotOwnerValue": "<b>{0}</b>\n<b>{4}</b>\n<b>{3}</b>\n<b>{1}</b>\n<b>{2}</b>", "MsgVehicleCarGarageEmpty": "The car lift is empty!", "MsgVehicleDialogLink": "Register Vehicle", "MsgVehicleDialogUnLink": "Cancel registration", "MsgVehicleDialogIncorrectPassword": "The password must consist of 4 digits!", "MsgVehicleNotOwner": "You are not the owner!", "MsgVehicleCanNotInteract": "You are not the owner or their friend!", "MsgVehicleNoPermissions": "You do not have permissions for this action!", "MsgVehicleLinked": "The {0} has been successfully linked! You have {1} out of {2} available.", "MsgVehicleUnLinked": "The {0} has been successfully unlinked!", "MsgVehicleFailedDeauthorize": "You can only deauthorize by unlinking the vehicle from you.", "MsgVehicleLimit": "Limit exceeded! You have {1} out of {2} available.", "MsgVehicleDestroyed": "Your vehicle {0}({1}) has been destroyed!", "MsgVehicleFind": "Your vehicle {0} is located in grid {1}!", "MsgVehicleClear": "Removed {0} vehicles!", "MsgVehicleClearEmpty": "No vehicles found for removal!", "MsgVehicleNotFound": "Vehicle not found!", "MsgVehicleTugboatAuthorization": "To authorize in the tugboat, it must be claim!", "MsgVehicleLandVehicle": "Land", "MsgVehicleAirVehicle": "Air", "MsgVehicleWaterVehicle": "Water", "MsgVehicleWinterVehicle": "Winter", "MsgVehicleTrainVehicle": "Train", "MsgVehicleHorse": "horse", "MsgVehicleBike": "bike", "MsgVehicleMotorBike": "motor bike", "MsgVehicleCar": "car", "MsgVehicleBalloon": "air balloon", "MsgVehicleMinicopter": "minicopter", "MsgVehicleTransportHeli": "transportHeli", "MsgVehicleAttackHeli": "attack heli", "MsgVehicleRowBoat": "row boat", "MsgVehicleRHIB": "RHIB", "MsgVehicleTugBoat": "tugboat", "MsgVehicleSubmarineOne": "small submarine", "MsgVehicleSubmarineTwo": "submarine", "MsgVehicleSnowmobile": "snowmobile", "MsgVehicleTrain": "train", "MsgFree": "Free", "MsgNoDate": "null", "MsgEconomicsNotEnough": "Not enough funds!" } RU: { "MsgNoteText": "Добро пожаловать на наш PvE сервер!\nДанный сервер использует RealPVE плагин.\nПодробней о плагине можно узнать по ссылке: https://codefling.com/plugins/real-pve", "MsgAdminLootEnabled": "Вы добавлены в список игнорирования ограничения лутания!", "MsgAdminLootDisabled": "Вы удалены из списка игнорирования ограничения лутания!", "MsgTeamFFireEnabled": "{0} включил дружественный огонь!", "MsgTeamFFireDisabled": "{0} выключил дружественный огонь!", "MsgMonumentOccupied": "{1} занял {0} на {2} минут.", "MsgMonumentFree": "{0} можно лутать!", "MsgMonumentOfferTitle": "Откройте сокровища {0}!", "MsgMonumentOfferDescription": "Нажми на уведомление для оплаты {0}.\nИ разблокируй доступ к неизведанным богатствам!", "MsgMonumentLooterDeath": "Вы умерли во время лутания {0}. У вас есть {1} секунд.", "MsgMonumentLooterExit": "Вы покинули монумент. У вас есть {0} секунд на возвращение!", "MsgMonumentLooterRemoved": "Время вышло! Вы были удалены из монумента!", "MsgMonumentLootingNotFree": "Вас добавили в очередь на лутание. Стоимость лутания: {0}", "MsgMonumentNotInQueue": "Вас нет в очереди! Вам необходимо перезайти в монумент!", "MsgMonumentNoAccess": "нет доступа", "MsgEventOccupied": "{0} уже занят игроком {1}!", "MsgEventOfferTitle": "Займите {0}!", "MsgEventOfferDescription": "Нажми на уведомление для оплаты {0}.\nИ разблокируй доступ к неизведанным богатствам!", "MsgEventNewLooter": "Вы заняли {0}. У вас на команду есть {1} жизней.", "MsgEventDeathLimit": "{0} больше не ваше! Вы исчерпали свой лимит жизней!", "MsgEventComplete": "{0} уничтожен в координатах: {1}!", "MsgEventPatrolHelicopter": "Патрульный вертолет", "MsgEventBradleyAPC": "Танк", "MsgRaidableBasesDisabled": "Эта Рейд база выключена или не найдена!", "MsgRaidableBasesOccupied": "Эта Рейд база уже занята игроком {0}!", "MsgRaidableBasesLimit": "Лимит превышен! У вас {0} из {1} доступных Рейд баз.", "MsgRaidableBasesPurchaseStart": "Оплата прошла! Ожидайте...", "MsgRaidableBasesPurchased": "Вы успешно приобрели Рейд базу!", "MsgRaidableBasesPurchaseFailed": "Вам не удалось приобрести Рейд базу! Деньги возвращены.", "MsgRaidableBasesOfferTitle": "Займите Рейд базу уровня: {0}!", "MsgRaidableBasesOfferDescription": "Нажми на уведомление для оплаты {0}.\nИ разблокируй доступ к неизведанным богатствам!", "MsgRaidableBasesBarText": "Уровень: {0}", "MsgRaidableBasesBarTextLootRemaining": "Осталось лута", "MsgRaidableBasesBarTextLootCompleted": "Выполнено", "MsgRaidableBasesBarNoAccess": "нет доступа", "MsgRaidableBasesEasy": "Легко", "MsgRaidableBasesMedium": "Средне", "MsgRaidableBasesHard": "Сложно", "MsgRaidableBasesExpert": "Эксперт", "MsgRaidableBasesNightmare": "Кошмар", "MsgPrivlidgeClear": "Из шкафа выписано {0} ироков.", "MsgPrivlidgeClearEmpty": "Кроме вас в шкафу ни кто не авторизован.", "MsgVehicleDialogTitle": "ГИБДД", "MsgVehicleDialogDescription": "ID: \nТип: \nСтоимость регистрации: \nКатегория: ", "MsgVehicleDialogDescriptionValue": "<b>{0}</b>\n<b>{1}</b>\n<b>{4}</b>\n<b>{2}</b>", "MsgVehicleDialogDescriptionRegistered": "ID: \nТип: \nДата регистрации: \nКатегория: ", "MsgVehicleDialogDescriptionRegisteredValue": "<b>{0}</b>\n<b>{1}</b>\n<b>{3}</b>\n<b>{2}</b>", "MsgVehicleDialogDescriptionNotOwner": "ID: \nВладелец: \nДата регистрации: \nТип: \nКатегория: ", "MsgVehicleDialogDescriptionNotOwnerValue": "<b>{0}</b>\n<b>{4}</b>\n<b>{3}</b>\n<b>{1}</b>\n<b>{2}</b>", "MsgVehicleCarDialogDescription": "ID: \nТип: \nСтоимость регистрации: \nКатегория: ", "MsgVehicleCarDialogDescriptionValue": "<b>{0}</b>\n<b>{1}</b>\n<b>{4}</b>\n<b>{2}</b>", "MsgVehicleCarDialogDescriptionRegistered": "ID: \nТип: \nДата: \nКатегория: ", "MsgVehicleCarDialogDescriptionRegisteredValue": "<b>{0}</b>\n<b>{1}</b>\n<b>{3}</b>\n<b>{2}</b>", "MsgVehicleCarDialogDescriptionNotOwner": "ID: \nВладелец: \nДата: \nТип: \nКатегория: ", "MsgVehicleCarDialogDescriptionNotOwnerValue": "<b>{0}</b>\n<b>{4}</b>\n<b>{3}</b>\n<b>{1}</b>\n<b>{2}</b>", "MsgVehicleCarGarageEmpty": "Подъемник пустой!", "MsgVehicleDialogLink": "Поставить на учет", "MsgVehicleDialogUnLink": "Снять с учета", "MsgVehicleDialogIncorrectPassword": "Пароль должен состоять из 4-х цифр!", "MsgVehicleNotOwner": "Вы не являетесь владельцем!", "MsgVehicleCanNotInteract": "Вы не являетесь владелецем или его другом!", "MsgVehicleNoPermissions": "У вас нет прав для этого действия!", "MsgVehicleLinked": "{0} успешно привязан(а)! У вас {1} из {2} доступных.", "MsgVehicleUnLinked": "{0} успешно отвязан(а)!", "MsgVehicleFailedDeauthorize": "Вы можете выписаться только при отвязки транспорта от вас.", "MsgVehicleLimit": "Лимит превышен! У вас {1} из {2} доступных.", "MsgVehicleDestroyed": "Ваше транспортное средство {0}({1}) было уничтожено!", "MsgVehicleFind": "Ваше транспортное средство {0} находится в квадрате {1}!", "MsgVehicleClear": "Удалено {0} транспортных средств!", "MsgVehicleClearEmpty": "Транспортные средства для удаления не найдены!", "MsgVehicleNotFound": "Транспортное средство не найдено!", "MsgVehicleTugboatAuthorization": "Для авторизации в буксире, его необходимо поставить на учет!", "MsgVehicleLandVehicle": "Наземный", "MsgVehicleAirVehicle": "Воздушный", "MsgVehicleWaterVehicle": "Водный", "MsgVehicleWinterVehicle": "Зимний", "MsgVehicleTrainVehicle": "ЖД", "MsgVehicleHorse": "Лошадь", "MsgVehicleBike": "Велосипед", "MsgVehicleMotorBike": "Мотоцикл", "MsgVehicleCar": "Машина", "MsgVehicleBalloon": "Воздушный шар", "MsgVehicleMinicopter": "Мини коптер", "MsgVehicleTransportHeli": "Корова", "MsgVehicleAttackHeli": "Боевой вертолет", "MsgVehicleRowBoat": "Лодка", "MsgVehicleRHIB": "Патрульная лодка", "MsgVehicleTugBoat": "Буксир", "MsgVehicleSubmarineOne": "Маленькая подлодка", "MsgVehicleSubmarineTwo": "Подлодка", "MsgVehicleSnowmobile": "Снегоход", "MsgVehicleTrain": "Поезд", "MsgFree": "Бесплатно", "MsgNoDate": "пусто", "MsgEconomicsNotEnough": "Не достаточно средств!" } admin: loot - Enables or disables the ability for the player who enter the command to loot other players' boxes, bodies, backpacks, etc. Permission "realpve.admin" required. vehicle: find - helps to find a player's vehicle; unlink - unlinks the vehicle without the need to approach it; clear - unlinks all vehicles. team: ff - Enable/Disable damage to teammates. Only the group leader can use this command. Example: /realpve vehicle find *netID* This plugin provides the ability to claim vehicles, thereby preventing theft and griefing from other players. In permissions, you can set the price and quantity restrictions for each type of vehicle, ensuring flexible customization according to your preferences. An assigned vehicle can't be damaged, looted or pushed by other players, but it can be pushed if it is within someone else's Building Privilege. File location: *SERVER*\oxide\data\RealPVE\MonumentConfig.json Default: https://pastebin.com/XY1d9YaM This plugin introduces queue system and loot purchases for monuments. You can customize the price and time for looting for each monument. Within monuments, only the "Looter" and his friends have the ability to loot, pick up items or damage entities. Additionally, NPCs and animals within monuments do not aggress against other players and do not receive damage from them. If a player dies within the monument, they will have a grace period to return. This allows players to safely loot monuments without fear of griefing. Example of monument configuration: "ferry_terminal_1": { "Type(This parameter is just a hint. Changes won’t have any effect.)": "RadTown", "ShowSuffix": true, "Broadcast": true, "LootingTime": 900, "Price": 15.0, "BarSettings": { "Order": 10, "Height": 26, "Main_Color": "#FFBF99", "Main_Transparency": 0.8, "Main_Material": "", "Image_Url": "https://i.imgur.com/awUrIwA.png", "Image_Local(Leave empty to use Image_Url)": "RealPVE_ferry_terminal_1", "Image_Sprite(Leave empty to use Image_Local or Image_Url)": "", "Image_IsRawImage": false, "Image_Color": "#FFDCB6", "Image_Transparency": 1.0, "Text_Size": 12, "Text_Color": "#FFFFFF", "Text_Font": "RobotoCondensed-Bold.ttf", "SubText_Size": 12, "SubText_Color": "#FFFFFF", "SubText_Font": "RobotoCondensed-Bold.ttf" } } Type - This field serves only as an indicator for you. The changes won't have any impact; ShowSuffix - Suffix display. Some monuments (for example Warehouses) have suffixes in the name, like "Warehouse #12"; Broadcast - Enabling or disabling broadcasts when a monument is occupied or vacated; LootingTime - Time allocated for looting the monument; Price - The price for which you can start looting the monument. 0 means looting is free; BarSettings - Settings for the Advanced Status Bar. You can also choose the types of monuments by specifying them under the "List of tracked types of monuments" section. A list of all available types can be viewed on the MonumentsWatcher's page in the "Developer API" section. "List of tracked types of monuments": [ "RadTown", "RadTownWater", "RadTownSmall", "TunnelStation", "Custom" ] Events, similar to monuments, offer the opportunity to claim events. All events are configured in the config file under the "Settings for the events" section. You can customize the price of looting and looting attempts(deaths, including friends). Just like in monuments, only the "Looter" and his friends have the ability to loot and damage entities. Additionally, in events, NPCs do not aggress against other players. If a player(including friends) exceeds the death limit, the event became free, thereby providing other players with the opportunity to claim the event. Example of event configuration: "Settings for the events": { "PatrolHelicopter": { "IsEnabled": true, "Is it worth removing fire from crates?": true, "Price": 50.0, "The number of deaths after which the event becomes public.": 5 }, "BradleyAPC": { "IsEnabled": true, "Is it worth removing fire from crates?": true, "Price": 50.0, "The number of deaths after which the event becomes public.": 5 } } Price - The price to claim the event. 0 means looting is free; DeathLimit - Limit of deaths after which the event becomes free. File location: *SERVER*\oxide\data\RealPVE\NewbieConfig.json Default: https://pastebin.com/QHZCqpji An example of an item list given for the main inventory: "List of items for the main inventory": [ { "ShortName": "note", "Slot": 0, "Amount": 1, "SkinID": 0, "Text": "MsgNoteText" } ] P.S. In the Text field, you need to specify the language key. Or, you can just write any text, but there won't be a translation of the text. File location: *SERVER*\oxide\data\RealPVE\RaidableBasesConfig.json Default: https://pastebin.com/rpDng7Fd Integration with the RaidableBases plugin does not restrict its functionality in any way. On the contrary, it adds an anti-grief system that protects bases from malicious players. In raid bases, NPCs and other entities can only receive damage from the raid owner or their friends; Turrets and traps do not aggress against outsiders; You can customize the price of claiming to each difficulty and set individual discounts for each permission. You can still purchase raid bases using the /buyraid command. Raid bases without owners(buyable, maintained, manual and scheduled) can be bought for a price set in the configuration file or assigned to the first player who enters its radius, if the final price(price * discount) less or equals to 0. Additionally, as a bonus, upon buying this plugin, you receive 5 free bases for 3 difficulty levels, along with configured loot for them.$39.99 -

Version 1.7.1
71 downloads
During the Unlimited Metal Event, a large Metal node appears at a set location(s) and is marked on the map, drawing attention to all players. This node provides unlimited Metal, giving players a chance to collect a significant amount of Metal within a limited time. This event can add an extra layer of competition and cooperation among your players as they rush to take advantage of these lucrative opportunities. Features Spawns an unlimited metal node/ore for a limited time. Ability to start the MetalEvent manually or automatically at minimum and maximum intervals. Configuration options for MetalEvent duration, minimum player count, UI location, and more. Customizable event start and end messages. Option to play a sound and visual effect when the event starts. Map markers and UI elements to indicate the active event and provide information to players. Game tips and chat messages to inform players about the event. Ability to set and manage metal node spawn positions. Commands to manage the MetalEvent, including starting and stopping the event, setting spawn positions, listing positions, deleting positions, and viewing available commands. Event Overlap Prevention: Prevents the MetalEvent from overlapping with the Stone/Sulfur Event. If overlap occurs, the plugin will retry starting the event after a configurable interval. User Interface: UI customization options include setting the UI location with X and Y coordinates. Enable proximity UI visibility mode and/or a "Players Here: X" Proximity UI. Gather Amounts: Set minimum and maximum gather amounts for sulfur ore and charcoal to control player rewards. Lightning Effects: Enable lightning effects during the event with customizable minimum and maximum intervals. Monument Spawn Locations: Added monument spawn locations that can be individually enabled or disabled. Customize spawns at specific monuments while excluding others (e.g., enable spawns at "xlarge/launch_site_1.prefab" and "medium/nuclear_missile_silo.prefab," but disable spawns at "OilrigAI" and "OilrigAI2"). Monument Spawn Limits: Set a limit for the number of spawns at each monument. For example, limit "roadside/gas_station_1.prefab" to 2 spawns, choosing from 3 Gas Stations if available. Monument Spawn Location Offsets: Customize the offsets for monument spawn locations to fine-tune the exact spawn positions at each monument. Commands /metalevent start - Start MetalEvent /metalevent stop - Stop MetalEvent /metalevent add <name> - Set new MetalEvent spawn position /metalevent list - List all spawn positions /metalevent clear - Clear all spawn positions /metalevent delete <name> - Delete a spawn position /metalevent - View all commands Console Commands - MetalStart, MetalStop, MetalList, MetalListClear Permissions metalevent.admin - Allows the use of MetalEvent commands.' Incompatible plugins: "AlwaysHotSpot" , "InstantGather" Default Config { "Only Command Start Event": false, "Minimum Players to Start Event": 1, "Prevent Overlap with Sulfur/Stone Event": true, "Prevent Overlap Retry Timer (seconds)": 180.0, "Event Minimum Interval (seconds)": 3600, "Event Maximum Interval (seconds)": 7200, "Event Duration Seconds": 1230, "Event Start Notification Sound": true, "Event Start Explosion Effects": true, "Event Chat Messages": true, "Event GameTip Messages": true, "Event GameTip Duration (seconds)": 7.0, "Event Start Message": "<color=red>Metal Event</color> <color=white>Has Started! Check The Map!</color>", "Event End Message": "<color=red>Metal Event</color> <color=white>Has Ended!</color>", "UI Enabled": true, "UI Location X": 0.38, "UI Location Y": 0.8, "UI Handwriting Font": true, "UI Style (1 = With UI Msg, 2 = No UI Msg)": 1, "UI Message": "Unlimited metal node marked on map!", "Proximity UI Visibility Mode": false, "Proximity UI Visibility Range": 350, "Proximity UI 'Players Here: X'": true, "Proximity UI 'Players Here' Visibility Range": 70, "MapMarker Enabled": true, "MapMarker Colour": "#050505", "MapMarker Colour2": "#FF0000", "MapMarker Radius": 0.25, "MapMarker Alpha": 0.7, "MapMarker Name/Message": "UNLIMITED METAL NODE", "Metal Ore Minimum Gather Amount": 1, "Metal Ore Maximum Gather Amount": 10, "HQM Ore Minimum Gather Amount": 0, "HQM Ore Maximum Gather Amount": 3, "Delete MetalNode at Event End": true, "MetalNode is Gatherable": true, "MetalNode Size 1-100": 30, "MetalNode Size Radius": 0.1, "Lightning during Event": true, "Lightning Min Interval (seconds)": 1.0, "Lightning Max Interval (seconds)": 60.0, "MetalNode Spawnmodes ('All' or 'Random')": "Random", "MetalNode Spawnmode 'Random' Amount": 2, "Monument Spawn Locations": { "xlarge/launch_site_1.prefab": true, "medium/nuclear_missile_silo.prefab": true, "large/military_tunnel_1.prefab": true, "large/airfield_1.prefab": true, "small/sphere_tank.prefab": true, "large/water_treatment_plant_1.prefab": true, "railside/trainyard_1.prefab": true, "medium/radtown_small_3.prefab": true, "roadside/gas_station_1.prefab": true, "roadside/supermarket_1.prefab": true, "large/powerplant_1.prefab": true, "lighthouse/lighthouse.prefab": true, "roadside/warehouse.prefab": true, "medium/junkyard_1.prefab": true, "small/satellite_dish.prefab": true, "harbor/harbor_1.prefab": true, "harbor/harbor_2.prefab": true, "arctic_bases/arctic_research_base_a.prefab": true, "military_bases/desert_military_base_a.prefab": false, "military_bases/desert_military_base_b.prefab": false, "military_bases/desert_military_base_c.prefab": false, "military_bases/desert_military_base_d.prefab": false, "OilrigAI": false, "OilrigAI2": false, "ferry_terminal_1": false }, "Monument Spawn Limits": { "xlarge/launch_site_1.prefab": 1, "medium/nuclear_missile_silo.prefab": 1, "large/military_tunnel_1.prefab": 1, "large/airfield_1.prefab": 1, "small/sphere_tank.prefab": 1, "large/water_treatment_plant_1.prefab": 1, "railside/trainyard_1.prefab": 1, "medium/radtown_small_3.prefab": 1, "roadside/gas_station_1.prefab": 3, "roadside/supermarket_1.prefab": 3, "large/powerplant_1.prefab": 1, "lighthouse/lighthouse.prefab": 2, "roadside/warehouse.prefab": 3, "medium/junkyard_1.prefab": 1, "small/satellite_dish.prefab": 1, "harbor/harbor_1.prefab": 1, "harbor/harbor_2.prefab": 1, "arctic_bases/arctic_research_base_a.prefab": 1, "military_bases/desert_military_base_a.prefab": 1, "military_bases/desert_military_base_b.prefab": 1, "military_bases/desert_military_base_c.prefab": 1, "military_bases/desert_military_base_d.prefab": 1, "OilrigAI": 1, "OilrigAI2": 1, "ferry_terminal_1": 1 }, "Monument Spawn Location Offsets": { "xlarge/launch_site_1.prefab": { "x": 150.0, "y": 3.5, "z": -7.5 }, "medium/nuclear_missile_silo.prefab": { "x": 53.3, "y": -13.2, "z": 1.1 }, "large/military_tunnel_1.prefab": { "x": -0.5, "y": 18.35, "z": 25.0 }, "large/airfield_1.prefab": { "x": 20.0, "y": 0.5, "z": -27.5 }, "small/sphere_tank.prefab": { "x": 0.0, "y": 72.0, "z": 0.0 }, "large/water_treatment_plant_1.prefab": { "x": -51.9, "y": 1.5, "z": -98.8 }, "railside/trainyard_1.prefab": { "x": -36.3, "y": 9.1, "z": -33.0 }, "medium/radtown_small_3.prefab": { "x": -21.5, "y": 1.1, "z": -4.5 }, "roadside/gas_station_1.prefab": { "x": 8.4, "y": 9.5, "z": 5.0 }, "roadside/supermarket_1.prefab": { "x": 10.0, "y": 6.0, "z": -3.5 }, "large/powerplant_1.prefab": { "x": -8.0, "y": 0.5, "z": 38.0 }, "lighthouse/lighthouse.prefab": { "x": 0.0, "y": 57.7, "z": 0.36 }, "roadside/warehouse.prefab": { "x": 20.0, "y": 0.3, "z": -7.7 }, "medium/junkyard_1.prefab": { "x": 24.0, "y": 0.3, "z": 0.0 }, "small/satellite_dish.prefab": { "x": 8.0, "y": 6.5, "z": -14.7 }, "harbor/harbor_1.prefab": { "x": 8.1, "y": 8.6, "z": 6.3 }, "harbor/harbor_2.prefab": { "x": 41.5, "y": 5.3, "z": -20.0 }, "arctic_bases/arctic_research_base_a.prefab": { "x": -32.8, "y": 1.85, "z": 5.5 }, "military_bases/desert_military_base_a.prefab": { "x": 0.0, "y": 2.0, "z": 0.0 }, "military_bases/desert_military_base_b.prefab": { "x": 0.0, "y": 2.0, "z": 0.0 }, "military_bases/desert_military_base_c.prefab": { "x": 0.0, "y": 2.0, "z": 0.0 }, "military_bases/desert_military_base_d.prefab": { "x": 0.0, "y": 2.0, "z": 0.0 }, "OilrigAI": { "x": 11.0, "y": 30.3, "z": -25.0 }, "OilrigAI2": { "x": -1.3, "y": 39.15, "z": -14.95 }, "ferry_terminal_1": { "x": 0.0, "y": 2.0, "z": 0.0 } } }$6.47 -
Version 1.7.1
48 downloads
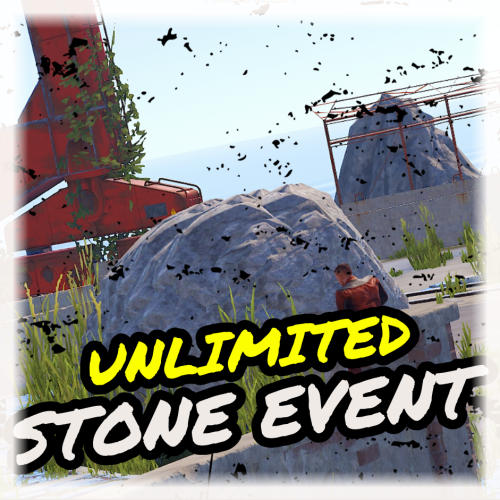
During the Unlimited Stone Event, a large stone node appears at a set location(s) and is marked on the map, drawing attention to all players. This node provides unlimited stone, giving players a chance to collect a significant amount of stone within a limited time. This event can add an extra layer of competition and cooperation among your players as they rush to take advantage of these lucrative opportunities. Features Spawns an unlimited stone node/ore for a limited time. Ability to start the StoneEvent manually or automatically at minimum and maximum intervals. Configuration options for StoneEvent duration, minimum player count, UI location, and more. Customizable event start and end messages. Option to play a sound and visual effect when the event starts. Map markers and UI elements to indicate the active event and provide information to players. Game tips and chat messages to inform players about the event. Ability to set and manage stone node spawn positions. Commands to manage the StoneEvent, including starting and stopping the event, setting spawn positions, listing positions, deleting positions, and viewing available commands. Event Overlap Prevention: Prevents the Stone Event from overlapping with the Metal/Sulfur Event. If overlap occurs, the plugin will retry starting the event after a configurable interval. User Interface: UI customization options include setting the UI location with X and Y coordinates. Enable proximity UI visibility mode and/or a "Players Here: X" Proximity UI. Gather Amounts: Set minimum and maximum gather amounts for sulfur ore and charcoal to control player rewards. Lightning Effects: Enable lightning effects during the event with customizable minimum and maximum intervals. Monument Spawn Locations: Added monument spawn locations that can be individually enabled or disabled. Customize spawns at specific monuments while excluding others (e.g., enable spawns at "xlarge/launch_site_1.prefab" and "medium/nuclear_missile_silo.prefab," but disable spawns at "OilrigAI" and "OilrigAI2"). Monument Spawn Limits: Set a limit for the number of spawns at each monument. For example, limit "roadside/gas_station_1.prefab" to 2 spawns, choosing from 3 Gas Stations if available. Monument Spawn Location Offsets: Customize the offsets for monument spawn locations to fine-tune the exact spawn positions at each monument. Commands /stoneevent start - Start StoneEvent /stoneevent stop - Stop StoneEvent /stoneevent add <name> - Set new StoneEvent spawn position /stoneevent list - List all spawn positions /stoneevent clear - Clear all spawn positions /stoneevent delete <name> - Delete a spawn position /stoneevent - View all commands Console Commands - StoneStart, StoneStop, StoneList, StoneListClear Permissions stoneevent.admin - Allows the use of StoneEvent commands. Possibly Incompatible plugins: "AlwaysHotSpot" , "InstantGather" Default Config { "Only Command Start Event": false, "Minimum Players to Start Event": 1, "Prevent Overlap with Sulfur/Metal Event": true, "Prevent Overlap Retry Timer (seconds)": 180.0, "Event Minimum Interval (seconds)": 3600, "Event Maximum Interval (seconds)": 7200, "Event Duration Seconds": 1230, "Event Start Notification Sound": true, "Event Start Explosion Effects": true, "Event Chat Messages": true, "Event GameTip Messages": true, "Event GameTip Duration (seconds)": 7.0, "Event Start Message": "<color=#efeae6>Stone Event</color> <color=white>Has Started! Check The Map!</color>", "Event End Message": "<color=#efeae6>Stone Event</color> <color=white>Has Ended!</color>", "UI Enabled": true, "UI Location X": 0.38, "UI Location Y": 0.8, "UI Handwriting Font": true, "UI Style (1 = With UI Msg, 2 = No UI Msg)": 1, "UI Message": "Unlimited stone node marked on map!", "Proximity UI Visibility Mode": false, "Proximity UI Visibility Range": 350, "Proximity UI 'Players Here: X'": true, "Proximity UI 'Players Here' Visibility Range": 70, "MapMarker Enabled": true, "MapMarker Colour": "#050505", "MapMarker Colour2": "#efeae6", "MapMarker Radius": 0.25, "MapMarker Alpha": 0.7, "MapMarker Name/Message": "UNLIMITED STONE NODE", "Stones Minimum Gather Amount": 5, "Stones Maximum Gather Amount": 15, "Delete StoneNode at Event End": true, "StoneNode is Gatherable": true, "StoneNode Size 1-100": 30, "StoneNode Size Radius": 0.1, "Lightning during Event": true, "Lightning Min Interval (seconds)": 1.0, "Lightning Max Interval (seconds)": 60.0, "StoneNode Spawnmodes ('All' or 'Random')": "Random", "StoneNode Spawnmode 'Random' Amount": 2, "Monument Spawn Locations": { "xlarge/launch_site_1.prefab": true, "medium/nuclear_missile_silo.prefab": true, "large/military_tunnel_1.prefab": true, "large/airfield_1.prefab": true, "small/sphere_tank.prefab": true, "large/water_treatment_plant_1.prefab": true, "railside/trainyard_1.prefab": true, "medium/radtown_small_3.prefab": true, "roadside/gas_station_1.prefab": true, "roadside/supermarket_1.prefab": true, "large/powerplant_1.prefab": true, "lighthouse/lighthouse.prefab": true, "roadside/warehouse.prefab": true, "medium/junkyard_1.prefab": true, "small/satellite_dish.prefab": true, "harbor/harbor_1.prefab": true, "harbor/harbor_2.prefab": true, "arctic_bases/arctic_research_base_a.prefab": true, "military_bases/desert_military_base_a.prefab": false, "military_bases/desert_military_base_b.prefab": false, "military_bases/desert_military_base_c.prefab": false, "military_bases/desert_military_base_d.prefab": false, "OilrigAI": false, "OilrigAI2": false, "ferry_terminal_1": false }, "Monument Spawn Limits": { "xlarge/launch_site_1.prefab": 1, "medium/nuclear_missile_silo.prefab": 1, "large/military_tunnel_1.prefab": 1, "large/airfield_1.prefab": 1, "small/sphere_tank.prefab": 1, "large/water_treatment_plant_1.prefab": 1, "railside/trainyard_1.prefab": 1, "medium/radtown_small_3.prefab": 1, "roadside/gas_station_1.prefab": 3, "roadside/supermarket_1.prefab": 3, "large/powerplant_1.prefab": 1, "lighthouse/lighthouse.prefab": 2, "roadside/warehouse.prefab": 3, "medium/junkyard_1.prefab": 1, "small/satellite_dish.prefab": 1, "harbor/harbor_1.prefab": 1, "harbor/harbor_2.prefab": 1, "arctic_bases/arctic_research_base_a.prefab": 1, "military_bases/desert_military_base_a.prefab": 1, "military_bases/desert_military_base_b.prefab": 1, "military_bases/desert_military_base_c.prefab": 1, "military_bases/desert_military_base_d.prefab": 1, "OilrigAI": 1, "OilrigAI2": 1, "ferry_terminal_1": 1 }, "Monument Spawn Location Offsets": { "xlarge/launch_site_1.prefab": { "x": 125.0, "y": 3.5, "z": 25.0 }, "medium/nuclear_missile_silo.prefab": { "x": 41.3, "y": -32.9, "z": -2.3 }, "large/military_tunnel_1.prefab": { "x": -27.5, "y": 18.35, "z": 30.0 }, "large/airfield_1.prefab": { "x": 40.0, "y": 0.5, "z": -27.5 }, "small/sphere_tank.prefab": { "x": -22.0, "y": 48.0, "z": -10.0 }, "large/water_treatment_plant_1.prefab": { "x": -26.0, "y": 0.5, "z": -55.0 }, "railside/trainyard_1.prefab": { "x": -30.0, "y": 9.4, "z": -48.0 }, "medium/radtown_small_3.prefab": { "x": 14.5, "y": 1.6, "z": -4.5 }, "roadside/gas_station_1.prefab": { "x": 8.4, "y": 9.5, "z": -6.0 }, "roadside/supermarket_1.prefab": { "x": 2.7, "y": 6.0, "z": -3.5 }, "large/powerplant_1.prefab": { "x": 34.0, "y": 1.0, "z": 56.0 }, "lighthouse/lighthouse.prefab": { "x": 0.0, "y": 55.5, "z": 0.36 }, "roadside/warehouse.prefab": { "x": -20.0, "y": 0.3, "z": -7.7 }, "medium/junkyard_1.prefab": { "x": -18.0, "y": 0.3, "z": 0.0 }, "small/satellite_dish.prefab": { "x": -8.0, "y": 6.5, "z": 1.0 }, "harbor/harbor_1.prefab": { "x": 27.0, "y": 5.6, "z": -21.0 }, "harbor/harbor_2.prefab": { "x": 41.5, "y": 5.3, "z": 10.0 }, "arctic_bases/arctic_research_base_a.prefab": { "x": -13.3, "y": 1.3, "z": 9.5 }, "military_bases/desert_military_base_a.prefab": { "x": 0.0, "y": 1.0, "z": 0.0 }, "military_bases/desert_military_base_b.prefab": { "x": 0.0, "y": 1.0, "z": 0.0 }, "military_bases/desert_military_base_c.prefab": { "x": 0.0, "y": 1.0, "z": 0.0 }, "military_bases/desert_military_base_d.prefab": { "x": 0.0, "y": 1.0, "z": 0.0 }, "OilrigAI": { "x": 13.0, "y": 27.4, "z": -13.0 }, "OilrigAI2": { "x": 0.0, "y": 32.5, "z": -16.75 }, "ferry_terminal_1": { "x": 0.0, "y": 1.0, "z": 0.0 } } }$5.47 -
Version 1.7.1
129 downloads
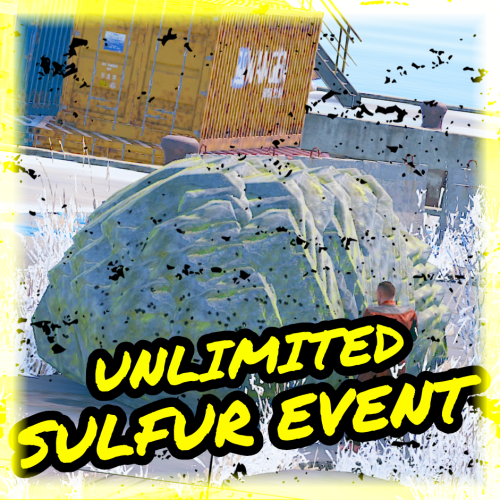
During the Unlimited Sulfur Event, a large sulfur node appears at a set location(s) and is marked on the map, drawing attention to all players. This node provides unlimited sulfur, giving players a chance to collect a significant amount of sulfur within a limited time. This event can add an extra layer of competition and cooperation among your players as they rush to take advantage of these lucrative opportunities. Features Spawns an unlimited sulfur node/ore for a limited time. Ability to start the SulfurEvent manually or automatically at minimum and maximum intervals. Configuration options for SulfurEvent duration, minimum player count, UI location, and more. Customizable event start and end messages. Option to play a sound and visual effect when the event starts. Map markers and UI elements to indicate the active event and provide information to players. Game tips and chat messages to inform players about the event. Ability to set and manage sulfur node spawn positions. Commands to manage the SulfurEvent, including starting and stopping the event, setting spawn positions, listing positions, deleting positions, and viewing available commands. Event Overlap Prevention: Prevents the SulfurEvent from overlapping with the Stone/Metal Event. If overlap occurs, the plugin will retry starting the event after a configurable interval. User Interface: UI customization options include setting the UI location with X and Y coordinates. Enable proximity UI visibility mode and/or a "Players Here: X" Proximity UI. Gather Amounts: Set minimum and maximum gather amounts for sulfur ore and charcoal to control player rewards. Lightning Effects: Enable lightning effects during the event with customizable minimum and maximum intervals. Monument Spawn Locations: Added monument spawn locations that can be individually enabled or disabled. Customize spawns at specific monuments while excluding others (e.g., enable spawns at "xlarge/launch_site_1.prefab" and "medium/nuclear_missile_silo.prefab," but disable spawns at "OilrigAI" and "OilrigAI2"). Monument Spawn Limits: Set a limit for the number of spawns at each monument. For example, limit "roadside/gas_station_1.prefab" to 2 spawns, choosing from 3 Gas Stations if available. Monument Spawn Location Offsets: Customize the offsets for monument spawn locations to fine-tune the exact spawn positions at each monument. Commands /sulfurevent start - Start SulfurEvent /sulfurevent stop - Stop SulfurEvent /sulfurevent add <name> - Set new SulfurEvent spawn position /sulfurevent list - List all spawn positions /sulfurevent clear - Clear all spawn positions /sulfurevent delete <name> - Delete a spawn position /sulfurevent - View all commands Console Commands - SulfurStart, SulfurStop, SulfurList, SulfurListClear Permissions sulfurevent.admin - Allows the use of SulfurEvent commands. Possibly Incompatible plugins: "AlwaysHotSpot" , "InstantGather" Default Config { "Only Command Start Event": false, "Minimum Players to Start Event": 1, "Prevent Overlap with Metal/Stone Event": true, "Prevent Overlap Retry Timer (seconds)": 180.0, "Event Minimum Interval (seconds)": 3600, "Event Maximum Interval (seconds)": 7200, "Event Duration Seconds": 1230, "Event Start Notification Sound": true, "Event Start Explosion Effects": true, "Event Chat Messages": true, "Event GameTip Messages": true, "Event GameTip Duration (seconds)": 7.0, "Event Start Message": "<color=yellow>Sulfur Event</color> <color=white>Has Started! Check The Map!</color>", "Event End Message": "<color=yellow>Sulfur Event</color> <color=white>Has Ended!</color>", "UI Enabled": true, "UI Location X": 0.38, "UI Location Y": 0.8, "UI Handwriting Font": true, "UI Style (1 = With UI Msg, 2 = No UI Msg)": 1, "UI Message": "Unlimited sulfur node marked on map!", "Proximity UI Visibility Mode": false, "Proximity UI Visibility Range": 350, "Proximity UI 'Players Here: X'": true, "Proximity UI 'Players Here' Visibility Range": 70, "MapMarker Enabled": true, "MapMarker Colour": "#050505", "MapMarker Colour2": "#e5ff00", "MapMarker Radius": 0.25, "MapMarker Alpha": 0.7, "MapMarker Name/Message": "UNLIMITED SULFUR NODE", "Sulfur Ore Minimum Gather Amount": 1, "Sulfur Ore Maximum Gather Amount": 5, "Charcoal Minimum Gather Amount": 1, "Charcoal Maximum Gather Amount": 2, "Delete SulfurNode at Event End": true, "SulfurNode is Gatherable": true, "SulfurNode Size 1-100": 30, "SulfurNode Size Radius": 0.1, "Lightning during Event": true, "Lightning Min Interval (seconds)": 1.0, "Lightning Max Interval (seconds)": 60.0, "SulfurNode Spawnmodes ('All' or 'Random')": "Random", "SulfurNode Spawnmode 'Random' Amount": 2, "Monument Spawn Locations": { "xlarge/launch_site_1.prefab": true, "medium/nuclear_missile_silo.prefab": true, "large/military_tunnel_1.prefab": true, "large/airfield_1.prefab": true, "small/sphere_tank.prefab": true, "large/water_treatment_plant_1.prefab": true, "railside/trainyard_1.prefab": true, "medium/radtown_small_3.prefab": true, "roadside/gas_station_1.prefab": true, "roadside/supermarket_1.prefab": true, "large/powerplant_1.prefab": true, "lighthouse/lighthouse.prefab": true, "roadside/warehouse.prefab": true, "medium/junkyard_1.prefab": true, "small/satellite_dish.prefab": true, "harbor/harbor_1.prefab": true, "harbor/harbor_2.prefab": true, "arctic_bases/arctic_research_base_a.prefab": true, "military_bases/desert_military_base_a.prefab": false, "military_bases/desert_military_base_b.prefab": false, "military_bases/desert_military_base_c.prefab": false, "military_bases/desert_military_base_d.prefab": false, "OilrigAI": false, "OilrigAI2": false, "ferry_terminal_1": false }, "Monument Spawn Limits": { "xlarge/launch_site_1.prefab": 1, "medium/nuclear_missile_silo.prefab": 1, "large/military_tunnel_1.prefab": 1, "large/airfield_1.prefab": 1, "small/sphere_tank.prefab": 1, "large/water_treatment_plant_1.prefab": 1, "railside/trainyard_1.prefab": 1, "medium/radtown_small_3.prefab": 1, "roadside/gas_station_1.prefab": 3, "roadside/supermarket_1.prefab": 3, "large/powerplant_1.prefab": 1, "lighthouse/lighthouse.prefab": 2, "roadside/warehouse.prefab": 3, "medium/junkyard_1.prefab": 1, "small/satellite_dish.prefab": 1, "harbor/harbor_1.prefab": 1, "harbor/harbor_2.prefab": 1, "arctic_bases/arctic_research_base_a.prefab": 1, "military_bases/desert_military_base_a.prefab": 1, "military_bases/desert_military_base_b.prefab": 1, "military_bases/desert_military_base_c.prefab": 1, "military_bases/desert_military_base_d.prefab": 1, "OilrigAI": 1, "OilrigAI2": 1, "ferry_terminal_1": 1 }, "Monument Spawn Location Offsets": { "xlarge/launch_site_1.prefab": { "x": 105.0, "y": 3.5, "z": 7.5 }, "medium/nuclear_missile_silo.prefab": { "x": 36.3, "y": -33.2, "z": -1.8 }, "large/military_tunnel_1.prefab": { "x": -13.5, "y": 13.75, "z": 35.0 }, "large/airfield_1.prefab": { "x": 0.0, "y": 0.5, "z": -27.5 }, "small/sphere_tank.prefab": { "x": 1.6, "y": 57.0, "z": 8.0 }, "large/water_treatment_plant_1.prefab": { "x": -51.7, "y": 1.5, "z": -64.8 }, "railside/trainyard_1.prefab": { "x": -41.8, "y": 39.4, "z": -40.8 }, "medium/radtown_small_3.prefab": { "x": -3.5, "y": -2.6, "z": -4.5 }, "roadside/gas_station_1.prefab": { "x": 0.8, "y": 9.5, "z": -6.0 }, "roadside/supermarket_1.prefab": { "x": -4.0, "y": 6.0, "z": -3.5 }, "large/powerplant_1.prefab": { "x": 2.3, "y": 9.65, "z": 32.85 }, "lighthouse/lighthouse.prefab": { "x": 0.0, "y": 60.7, "z": 0.36 }, "roadside/warehouse.prefab": { "x": 0.0, "y": 6.6, "z": -7.7 }, "medium/junkyard_1.prefab": { "x": -3.0, "y": 0.3, "z": -13.0 }, "small/satellite_dish.prefab": { "x": -5.0, "y": 9.5, "z": -10.7 }, "harbor/harbor_1.prefab": { "x": 44.0, "y": 22.0, "z": -0.5 }, "harbor/harbor_2.prefab": { "x": 41.5, "y": 5.3, "z": -5.0 }, "arctic_bases/arctic_research_base_a.prefab": { "x": -24.5, "y": 0.5, "z": 13.0 }, "military_bases/desert_military_base_a.prefab": { "x": 0.0, "y": 0.0, "z": 0.0 }, "military_bases/desert_military_base_b.prefab": { "x": 0.0, "y": 0.0, "z": 0.0 }, "military_bases/desert_military_base_c.prefab": { "x": 0.0, "y": 0.0, "z": 0.0 }, "military_bases/desert_military_base_d.prefab": { "x": 0.0, "y": 0.0, "z": 0.0 }, "OilrigAI": { "x": -13.5, "y": 23.35, "z": -13.7 }, "OilrigAI2": { "x": -33.0, "y": 32.55, "z": 13.0 }, "ferry_terminal_1": { "x": 0.0, "y": 0.0, "z": 0.0 } } }$7.47 -
-min.thumb.png.3e42e99afda25d83aa26d9af0644acba.png)
Version 1.0.4
753 downloads
I bring to you a new plugin that will add Pogo Sticks to your server! These Pogo Sticks will allow players to jump, somersault, and parkour in ways never seen before in the game. With default configuration, Pogo Sticks don't do as well on sand and snow, for obvious reasons right? But don't worry you can configure any of the pogo presets, such as the speed and height of jump for example. The Pogo Stick is an ordinary worn item with a skinID that can be given to the player by console command, or any of the other unique ways you might want to give them out in your servers. There are two activation modes for Pogo Sticks. With default configuration, the player has to put the item in a belt container. In this mode, the Pogo Stick is only used when it is selected as an active item. In the second mode, the Pogo Stick is activated when it is added to a clothing/armor container. In order to use the second mode, replace the shortnames of all Pogo Sticks with a clothing item. As an example "burlap.gloves.new" to replace a less noticable part of your wardrobe. In this second mode, players will be able to shoot and use items while on the Pogo Stick! The creativity is in your hands, have fun with it! Chat commands (only for administrators) /givepogo <pogoPresetName> - give the pogo stick to yourself Console commands (RCON only) givepogo <userID> <pogoPresetName> <amount> – give the pogo stick to player. Config plugin_en – example of plugin configuration in English plugin_ru – example of plugin configuration in Russian Dependencies (optional, not required) GUI Announcements Notify ZoneManager My Discord: Adem#9554 Join the Mad Mappers Discord here! Check out more of my work here!$9.99 -
Version 1.0.25
1,645 downloads
Adds 53 new deployable items to your server!. Custom item collection system. Players can obtain these items while cutting trees, mining rocks and collecting plants. Includes a built in market that can be accessed via a chat command or a HumanNPC. Each base item can be configured to allow for a wide variety of placement options/restrictions. A large amount of configuration options are available for each item. Adjustable placement options while holding shift. Items can be picked up by holding a hammer, looking at the deployed entity and pressing your mouse3 button (scroll wheel button). deployablenature.admin - Required to use the giveprefab command. deployablenature.market.chat - Required to use the market chat command. deployablenature.ignore.restrictions - Allows a player to deploy items without restriction (TC etc). deployablenature.gather - Required for players to obtain drops while gathering. deployablenature.use - Required to deploy nature items. deployablenature.free - allows access to the nature market for free. There is also the option to create groups via the config, which will receive discounts in the market based on the value assigned to them. Example: "Permissions that will receive a discount on the store cost when purchasing [1.0 is full price]. Prefix with deployablenature.": { "deployablenature.vip": 0.5 }, This would give players with the deployablenature.vip permission a discount of 50% off of the market price. Command: giveprefab Parameters: <skin id> <quantity> Example: /giveprefab 2609145017 100 - spawns the user 100x medium clutter rocks" Permission: deployablenature.admin Command: naturemarket Permission: deployablenature.market.chat Command: dnpickup Permission: None Command: giveprefab (console) Parameters: <player id/name> <skin id> <quantity> Example: /giveprefab "new guy" 2609145017 100 - spawns the user 100x medium clutter rocks for new guy" Permission: deployablenature.admin Console Command: dnkillentities - wipes all nature entities from the map. Parameters: <optional parameter: true> - this wipes the data after the command executes. If not used, the nature items will respawn on plugin reload. Example: dnkillentities or dnkillentities true. Permission: deployablenature.admin if running from player console. Console Command: dnkillentitiesforplayer - wipes all nature entities from the map for the specified player Parameters: <player name/id> Example: dnkillentitiesforplayer "new guy" - would delete all entities for the player whose name contained "new guy". Permission: deployablenature.admin if running from player console. Console Command: dnpurge - enables purge mode, wiping all entities from the map (does not delete data), and preventing them from spawning on server start/being deployed by players while active. Automatically resets to false on server wipe. Parameters: <true/false> Example: dnpurge true - would enable purge mode. Permission: deployablenature.admin if running from player console. You most likely won't need the below information, but it is here for more advanced users. Prefab Types 0: Rock 1: Tree 2: Bush 3: Animal Tree Types 0: None 1: Palm 2: Oak 3: Swamp 4: Birch 5: Beech 6: Pine 7: Cacti 8: Snow Bush Types 0: None 1: Willow 2: Willow_snow 3: Spice 4: Spice_snow 5: Creosote 6: Berries 7: Mushrooms Example config https://pastebin.com/E5duDqtf API public bool IsDeployableNature(BaseEntity entity) Returns if an entity is a DeployableNature entity that has the prevent_gather attribute.$15.00 -
Version 1.6.3
7,306 downloads
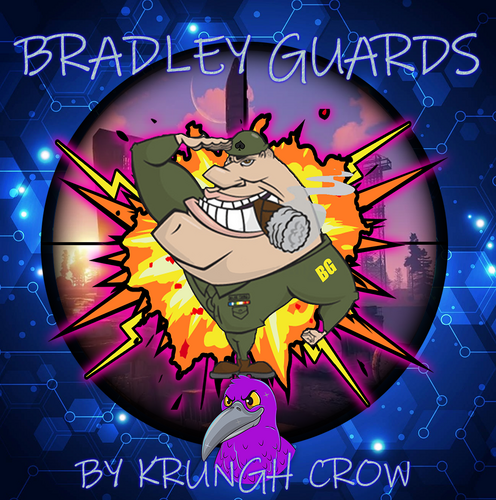
BradleyGuards minigame will make more fun of the boring Bradley. Spawning bombs molotovs and a Tank Crew Features : Minigame with Scientist NPC spawning after Bradley gets destroyed and various events during its attack phase It will throw random Bombs and Molotov when attacked. Hardmode will throw the Bombs and Molotov towards player instead around the Bradley When destroyed the Bradley does a close range Last Ditch Effort if the Driver is still alive and gets a last air support As of version 1.1.1 napalm support will be set to target player instead of Bradley position Give the NPC the choice of using some predefined outfits or use the vanilla Scientist Outfits Predefined weapon or a different weapon through config if using outfits Crew will be Despawned upon plugin unload or reload Compatible with NPCKITS Support for BetterNpcNames (v1.0.2 and higher) Support for Kits Permission system Warnings : backup your configs before plugin updates This is not compatible with BradleyControl Plugin !!!!! (since version 1.0.5) Version 1.4.0 has new options for MLRS and Convoy Bradleys "External Plugins": { "Armored Train : Can trigger Events": false, "Convoy : Can trigger Events": false, "SatDish/Harbor Event : Can trigger Events": false, "BradleyDrops : Can trigger Events": false, "BetterNpcNames : Driver Title": "Pilot", "BetterNpcNames : Guard Title": "Commander", "BetterNpcNames : Gunner Title": "Grunt" }, "Last Ditch Effort MLRS rocket Amount": 15 Permissions : BradleyGuards.ShowMessages (to show interaction messages) BradleyGuards.ShowKillMessages (to show messages after bradley is destroyed) Commands : (new in V1.0.5) /bginfo : Shows the available commands/version/author Logfiles : Log files are found in the oxide.logs folder Will log the Player and info regarding the spawns after destroying the Bradley Configuration : Example config below : { "Global NPC dont target": true, "External Plugins": { "Armored Train : Can trigger Events": false, "Convoy : Can trigger Events": false, "SatDish/Harbor Event : Can trigger Events": false, "BradleyDrops : Can trigger Events": false, "BetterNpcNames : Driver Title": "Pilot", "BetterNpcNames : Guard Title": "Commander", "BetterNpcNames : Gunner Title": "Grunt" }, "Bradley Settings": { "Change Values": true, "Bradley Health": 2222, "Bradley Max Fire Range": 100, "Bradley Throttle Responce": 1.0 }, "Bradley Loot": { "Change Values": true, "Bradley Max crates after kill": 4 }, "Bradley Canon": { "Change Values": true, "Bradley Canon Fire delay": 0.3, "Bradley Canon Firerate": 0.25 }, "Bradley Machinegun": { "Change Values": true, "Bradley Machinegun Bullet Damage": 15, "Bradley Machinegun Firerate": 0.06667 }, "Event Settings": { "Bradley Crew Max Spawn Distance": 10, "Bradley Crew Max Roam Distance": 20, "Bradley Crew Body to Bags": true, "Max throwing range of a Grenade": 25.0, "Max Grenades per trigger": 1, "Max throwing range of a Molotov": 25.0, "Max Molotovs per trigger": 1, "Use Firerockets (instead of Molotovs)": false, "Hard Mode : Throws towards player (Grenades)": true, "Hard Mode : Max Grenades per trigger": 1, "Hard Mode : Max radius of a Grenade on player": 15.0, "Hard Mode : Throws towards player (Molotovs)": true, "Hard Mode : Max Molotovs per trigger": 1, "Hard Mode : Max radius of a Molotov on player": 15.0, "Napalm Support": true, "Napalm Support Area Radius": 25.0, "Napalm Support Rocket Amount": 3, "Napalm Support Rocket Height": 150, "Last Ditch Effort Rocket Amount": 0, "Last Ditch Effort Grenade Amount": 5, "Last Ditch Effort MLRS rocket Radius": 15, "Last Ditch Effort MLRS rocket Amount": 15, "Last Ditch Effort Hard Mode : targets player location": true }, "Tank Crew Driver": { "Tank Driver Health": 450.0, "Tank Driver Lifetime (minutes)": 1.0, "Tank Driver Damage multiplier": 1.0, "Tank Driver Spawn Chance 0-1": 1.0, "Tank Driver Spawn Amount": 5, "Tank Driver Use Outfit": true, "Tank Driver Use other gun with outfit": false, "Tank Driver gun short prefabname": "smg.mp5", "Tank Driver gun skin id": 0, "Tank Driver Use kit (clothing)": false, "Tank Driver Kit ID": "" }, "Tank Crew Guards": { "Tank Guards Health": 800.0, "Tank Guards Lifetime (minutes)": 1.0, "Tank Guards Damage multiplier": 1.0, "Tank Guards Spawn Chance 0-1": 1.0, "Tank Guards Spawn Amount": 3, "Tank Guards Use Outfit": true, "Tank Guards Use other gun with outfit": false, "Tank Guards gun short prefabname": "smg.mp5", "Tank Guards gun skin id": 0, "Tank Guards Use kit (clothing)": false, "Tank Guards Kit ID": "" }, "Tank Crew Gunners": { "Tank Gunners Health": 600.0, "Tank Gunners Lifetime (minutes)": 1.0, "Tank Gunners Damage multiplier": 1.0, "Tank Gunners Spawn Chance 0-1": 1.0, "Tank Gunners Spawn Amount": 3, "Tank Gunners Use Outfit": true, "Tank Gunners Use other gun with outfit": false, "Tank Gunners gun short prefabname": "smg.mp5", "Tank Gunners gun skin id": 0, "Tank Gunners Use kit (clothing)": false, "Tank Gunners Kit ID": "" } } Localization : English language file included to use a diffrent language just make a new file in the language folder. { "BradleyDriver": "<color=yellow>Bradley Driver : </color>Damnit i just washed it!", "BradleyGuards": "<color=yellow>Bradley Guard : </color>Stay away from our Bradley!", "BradleyGunner": "<color=yellow>Bradley Gunner : </color>Prepare to die!", "BradleyDriverBomb": "<color=yellow>Bradley Driver : </color>Catch this!", "BradleyGunnerFire": "<color=yellow>Bradley Gunner : </color>Fire in the hooole!", "BradleyNapalmSupport": "<color=yellow>Bradley Operator : </color>Support incomming!" } API : bool IsBradleyNpc(global::HumanNPC npc) OnBradleyNPCGotHit(global::HumanNPC npc, HitInfo info) OnBradleyNPCDeath(global::HumanNPC npc, HitInfo info) example call : object OnEntityDeath(global::HumanNPC npc, HitInfo info) { if (npc == null) return null; if (BradleyGuards.Call<bool>("IsBradleyNpc", npc)) { Puts($"Target : {npc} net.ID : [{npc.net.ID}] Event : BradleyGuards NPC"); } return null; } private void OnBradleyNPCGotHit(global::HumanNPC npc, HitInfo info) { Debugmsg("OnBradleyNPCGotHit works!"); BasePlayer player = info.InitiatorPlayer; if (npc.health < (npc._maxHealth * 0.8) && npc.health > (npc._maxHealth * 0.72)) { if (!Burned) Player.Message(player , npcmsg(MSG) , Chaticon); return; } } private void OnBradleyNPCDeath(global::HumanNPC npc, HitInfo info) { Debugmsg("OnBradleyNPCDeath works!"); BasePlayer player = info.InitiatorPlayer; Debugmsg($"{player.displayName} killed {npc.displayName}"); } Changes made in 1.0.5 !!! Updated/Cleaned/Organized the Documentation. Added lifetime for each individual Crew Added use of kits + checks (if incorrect kit name Crew will spawn with default scientist or heavy scientist outfit). Changed the Npc Naming so they can be shown correctly with AdminRadar Added prefix and chaticon to chat messages (language file changed so delete it before updating to avoid weird chat messages). Added max roam range for the Bradley Crew Bradley Crew will now despawn when plugin gets unloaded/reloaded Removed the death sound when a npc dies. Fixed : Bradley will now ignore scientists from junkpiles added cfg : Tank Crew Lifetime (minutes) added cfg : Damage multiplier for each driver/guards/gunners added cfg : Napalm Support Rocket Height added cfg : Use kit (clothing) (for each driver/guards/gunners) added cfg : Kit ID (for each driver/guards/gunners) added cfg : Bradley Crew max roam rangeFree -

Version 0.1.0
52 downloads
What is it? A simple command to jump from one place to another. How to use it? Look at anything and type /jump and you will be teleported to the place you are looking at if the place is further than the MaxDistance in config you will be teleported (MaxDistance meters) into that direction. Permission jump.use -- Gives you ability to use the /jump command ChatCommand /jump Configuration { "Max jump distance": 300.0 }Free -
Version 1.1.5
61 downloads
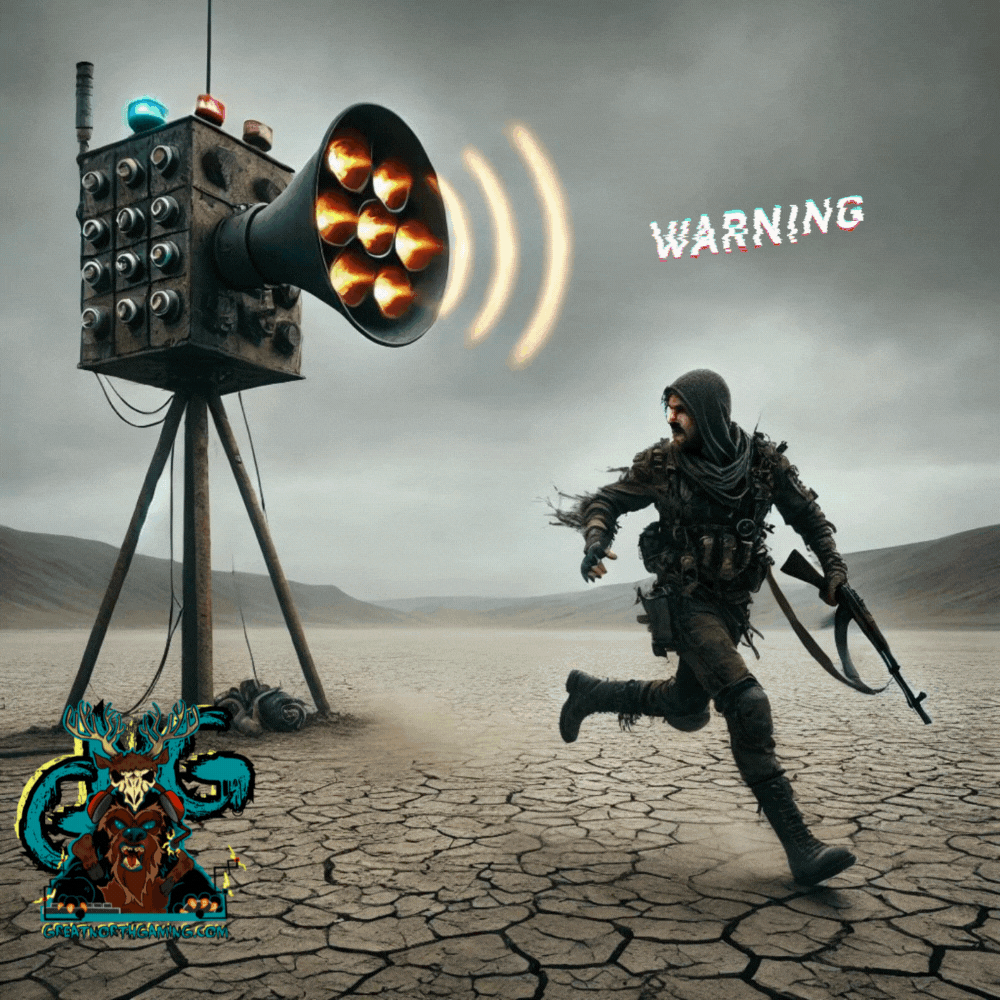
Add some excitement to your Rust server with the Siren plugin! This plugin lets you play a loud siren sound that all players can hear, perfect for creating intense moments in the game. Key Features: Siren Command: Players with the appropriate permissions can activate the siren using a simple console or chat command. Customizable Siren Duration: Easily set the duration for how long the siren should play. Configurable Sound Path: Change the siren sound to fit the theme of your server by specifying a different sound path. Notification System: Enable or disable notifications that alert players when the siren is triggered. Permission-Based Usage: Ensure only authorized players can activate the siren using the siren.use permission. Commands: 1. Play Siren: Console: siren Chat: /siren 2. Set Siren Duration: Console: siren.setduration <duration> 3. Set Siren Sound Path: Console: siren.setsound <soundpath> 4. Set Notification Message: Console: siren.setnotification <message> 5. Enable/Disable Notification: Console: siren.enablenotification <true|false> Configuration: The plugin’s configuration is highly customizable, allowing you to tailor it to your server’s needs. The default configuration includes: Command to trigger the siren: "siren" Default siren duration: 15.0 seconds Default siren sound path: "assets/prefabs/io/electric/other/alarmsound.prefab" Default notification message: "The siren has been triggered!" Notifications enabled: true Debug mode: false Installation: Place the Siren plugin in your oxide/plugins directory. Start your Rust server to generate the default configuration file. Modify the configuration file located at oxide/config/Siren.json to suit your preferences. Reload the plugin to apply the new configuration. Permissions: siren.use: Grants permission to use the siren command.Free -
Version 1.3.0
3,824 downloads
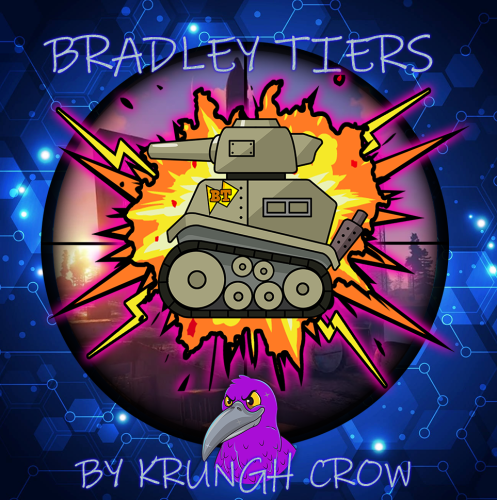
Bradleys now spawn in Tiers with small config and lootcrate spawn options. Features : Spawns as Easy,Medium,Hard or Nightmare Tiers Easy configuration and setup BradleyGuards and BradleyOptions will disable their HP and Cratedrop settings automaticly (Krungh Crow versions). Works on any Bradley no exceptions Spawn and Kill Messages Option to make a vanilla bradley spawn instead of a Tiered one at random. Set a extra reward in the form of Economics or ServerRewards Support for Tiered loot systems (using it set to false by default) v1.0.3 Showing Bradley tier on 1st damage then after each 2 minutes will show it again. API for other developers is made available Permissions : bradleytiers.use : To be able to use the /bt info chatcommand Commands : /bt info : Just prints plugin info version and author to chat Configuration : Want a certain item to spawn as a blue print just add .bp behind its shortname ! Example of custom items like the ExtendedRecycler plugins recycler item. { "probability": 0.6, "shortname": "box.repair.bench", "name": "Recycler", "skin": 1594245394, "amountMin": 1, "amount": 1 }, { "Main config": { "Debug": false, "Chat Prefix": "[<color=yellow>Bradley Tiers</color>] ", "Use GUIAnnouncement": false, "Reply to player in chat on attack": true, "Reply to player in chat on reward": true, "Show kills/spawns in Global chat": true, "Use Notify": false, "Notify profile ID": 0, "Include Vanilla Bradley": false, "Include ArmoredTrain Bradley": false, "Include Convoy Bradley": false, "Include SatDish/Harbor Event Bradley": false, "Bradley Tiers can interact with NPC": false }, "Tier Names": { "Vanilla": "Vanilla", "Easy": "Easy", "Medium": "Medium", "Hard": "Hard", "Nightmare": "Nightmare" }, "Kill Rewards": { "Use Economics?": true, "Use ServerRewards?": false, "Vanilla amount": 500, "Easy amount": 1000, "Medium amount": 1500, "Hard amount": 2000, "Nightmare amount": 2500 }, "Loot Tables": { "Use lootsystem": true, "Use Random Skins": false }, "Easy Bradley": { "Bradley Health": 1500, "Bradley Max Fire Range": 100, "Bradley Bulletdamage (15 is vanilla)": 15.0, "Bradley Throttle Responce": 1.0, "Bradley Accuracy (0-1)": 0.6, "Bradley Damage scale (0-1)": 0.6, "Add Custom Loot": true, "Bradley Max crates after kill": 4, "Spawn Min Amount Items": 2, "Spawn Max Amount Items": 6, "Loot Table": [ { "probability": 1.0, "shortname": "ammo.pistol", "name": "", "skin": 0, "amountMin": 5, "amount": 5 } ] }, "Medium Bradley": { "Bradley Health": 1800, "Bradley Max Fire Range": 100, "Bradley Bulletdamage (15 is vanilla)": 15.0, "Bradley Throttle Responce": 1.0, "Bradley Accuracy (0-1)": 0.75, "Bradley Damage scale (0-1)": 0.7, "Add Custom Loot": true, "Bradley Max crates after kill": 5, "Spawn Min Amount Items": 2, "Spawn Max Amount Items": 6, "Loot Table": [] }, "Hard Bradley": { "Bradley Health": 2000, "Bradley Max Fire Range": 100, "Bradley Bulletdamage (15 is vanilla)": 15.0, "Bradley Throttle Responce": 1.0, "Bradley Accuracy (0-1)": 0.8, "Bradley Damage scale (0-1)": 0.85, "Add Custom Loot": true, "Bradley Max crates after kill": 8, "Spawn Min Amount Items": 2, "Spawn Max Amount Items": 6, "Loot Table": [] }, "Nightmare Bradley": { "Bradley Health": 2500, "Bradley Max Fire Range": 100, "Bradley Bulletdamage (15 is vanilla)": 15.0, "Bradley Throttle Responce": 1.0, "Bradley Accuracy (0-1)": 0.85, "Bradley Damage scale (0-1)": 1.0, "Add Custom Loot": true, "Bradley Max crates after kill": 12, "Spawn Min Amount Items": 2, "Spawn Max Amount Items": 6, "Loot Table": [] } } Localisation : English language file included to use a different language just make a new file in the language folder. { "Bradley": "Bradley", "Destroyed": "finally destroyed the", "Info": "\n<color=green>Available Commands</color>\n<color=green>/bt info</color> : Shows info on version/author and commands", "InvalidInput": "<color=red>Please enter a valid command!</color>", "KillRewardMessage": "You recieved {0}$ for Destroying the {1} BradleyApc", "AttackMessage": "You are taking on a {0} Bradleyapc", "Version": "Version : V", "NoPermission": "<color=green>You do not have permission to use that command!</color>", "KillNotification": "<color=orange>{0}</color> Destroyed a {1} BradleyApc", "SpawnMessage": "A {0} Bradley has spawned around {1}" } API : When a Bradley has been updated to a Bradley Tier OnBradleyTiersVanillaSpawned(BradleyAPC bradley) OnBradleyTiersEasySpawned(BradleyAPC bradley) OnBradleyTiersMediumSpawned(BradleyAPC bradley) OnBradleyTiersHardSpawned(BradleyAPC bradley) OnBradleyTiersNightmareSpawned(BradleyAPC bradley) When a Bradley Tier has been destroyed OnDestroyBradleyTiersVanilla(BradleyAPC apc, HitInfo info) OnDestroyBradleyTiersEasy(BradleyAPC apc, HitInfo info) OnDestroyBradleyTiersMedium(BradleyAPC apc, HitInfo info) OnDestroyBradleyTiersHard(BradleyAPC apc, HitInfo info) OnDestroyBradleyTiersNightmare(BradleyAPC apc, HitInfo info) When a Bradley Tier is taking damage OnBradleyTiersHitVanilla(BradleyAPC bradley, HitInfo info) OnBradleyTiersHitEasy(BradleyAPC bradley, HitInfo info) OnBradleyTiersHitMedium(BradleyAPC bradley, HitInfo info) OnBradleyTiersHitHard(BradleyAPC bradley, HitInfo info) OnBradleyTiersHitNightmare(BradleyAPC bradley, HitInfo info)Free- 181 comments
- 11 reviews
-
- 11
-

-

-
- #bradley
- #krunghcrow
- (and 4 more)
-
Version 1.0.12
614 downloads
Are your players tired of waiting for Airdrops? This little plugin makes them appear almost instantly, no cargo plane, no parachutes. Airdrop will spawn wherever the supply signal lands. The delay can be modified in the config file. The default is 5 seconds to allow the supply signal to land and smoke briefly. Config File { "Delay Before Spawn": 5.0, "Use Permission": false, "Prevent Deploying Inside (Players will only be able to deploy supply signals outside)": false, "Skin IDs To Ignore": [] } if "Use Permission" is set true then permission to be set is instantairdrop.use If "Prevent Deploying Inside" the Airdrop will be cancelled, the supply signal will be refunded to the player and a message will inform the player that supply signals can only be deployed outside. This is to prevent instant airdrops spawning inside of bases and is optional. Tested to work nicely along side other plugins such as: Heli Signals Bradley Drops Fancy Drop Loot Defender Signal Cooldown Helpful Supply Supply Lock Vehicle Airdrops Note: The plugin is designed to operate without causing issues when used with these plugins. However, it does not integrate or alter the functionality of these plugins.$3.99 -
Version 1.1.0
164 downloads
A free plugin to entertain your players and you, allowing you to become a ghost racer and race across the expanses of Rust at high speeds. Features: Beautiful fire effect on the wheels and driver's head Change the engine power of the motorcycles Available for both two-wheeled and three-wheeled motorcycles (you can change this in the config) Really fun Important Clarifications: Don't ask me to add permissions for this, they were not added intentionally, I want my plugin to bring fun to all players, not just dedicated VIP personalities and for making money. You are not allowed to modify the plugin in any way, if you want to suggest something, post it in the discussions. Video:Free -
Version 1.0.1
48 downloads
Zombie Infection is an arena style plugin that creates an arena high in the sky. It pits 2 teams against each other: Survivors and Zombies. All players spawn as Survivors when the game begins. The survivors must find weapons and ammunition to defend themselves from the oncoming Horde. After 45 seconds (configurable), a random player is selected to become the leader of the Zombies, otherwise known as Zombie Prime. They are re-equipped and are allocated a large amount of health When a zombie hits a survivor with a melee weapon, that player is infected and is re-spawned as a zombie. Regular zombies do not have as much health as Zombie Prime, but they will re-spawn an infinite amount of times when killed. The survivors win by surviving for the entire round (default 10 minutes), or by eliminating Zombie Prime. The Zombies win by infecting all of the survivors. It is worth mentioning that only Zombie Prime is rewarded for the zombie team win. Regular zombies are instead rewarded based on the number of survivors they infect. Each prize type can be changed via the config. zistart <arena name> - Manually starts the Zombie Infection game [requires zombieinfection.admin] ziend - Manually ends the game [requires zombieinfection.admin] zisetcentrepoint - Changes the spawn location of the arena [requires zombieinfection.admin] ziwipeoldarena - Manually wipes old arena data [requires zombieinfection.admin] zijoin - Joins an active lobby zileave - Leaves the game and returns the player to their last location with all of their equipment ziprize - Redeems outstanding prizes to the players inventory$19.99 -
Version 1.0.11
356 downloads
Introducing portable 3 x 3 bases in a box - that you can carry in your inventory! Deploy them and open them to go inside - to store, craft, smelt, grow, party... live. Expand and maintain the upkeep to protect from raiders. Pick them up and deploy somewhere else. Think outside of the box... and inside too! Questions? Support? Join the discord: https://discord.nikhub.dev WATCH THE TUTORIAL BY SRTBULL! AS FEATURED BY SHADOWFRAX! (around 0:55 mark) Just like the TARDIS from Doctor Who, they're bigger on the inside! In the "real" Rust world, an entire 9x9x9 metre large (over 25000 cubic foot) Pocket Dimension fits neatly inside of a Small Wooden Box. You can skin that box any way you like to camouflage or disguise it - whatever the player's Workshop Skins / server skin plugins allow. Players can convert existing buildings into Pocket Dimensions easily with one button in the Tool Cupboard's UI. Or if that's too much of an effort, entire, fresh, ready-to-be-moved-in Copy Paste files can be sold as boxes with your own, custom defined skin - this is entirely optional and requires Copy Paste, more on that in the dedicated section below. Whether to allow either approach is entirely up to your configuration. By default, the configuration allows raiding the Pocket Dimensions in several different ways - but if you're planning on running this plugin on a PVE server and you don't want any of that, there's many configuration options that can be adjusted to enhance your server experience. Both styles of servers have their own dedicated sections on this page - just read below. Make sure you maintain the integrity of your Pocket Dimension! If any of the external structures (wall/doorway) of the Pocket Dimension building either 1) decays 2) is raided 3) is removed by an admin/plugin, or 4) the box housing the dimension itself gets destroyed, the Dimension will Collapse, teleporting all players inside of it, and dropping all contents of storage containers, turrets, the Tool Cupboard, and anything else that can store any items, to the location where the box is/was last deployed. Easy come, easy go! You can pick the Pocket Dimension boxes up and move them somewhere else at any time, and everything will still be there. You can even deploy Pocket Dimensions inside Pocket Dimensions inside Pocket Dimensions... a box-ception! By default, the configuration does not allow picking up boxes with players inside of them, but you can toggle this setting. Quick Start As an admin: make sure you grant your groups/players appropriate permissions from the list below. Make sure Copy Paste, No Escape and Server Rewards / Economics are loaded in and configured properly, if you're planning on utilising any of the extended capabilities. More on the support for those plugins below. That also goes for any potentially compatible plugins that dispense/support skinned box templates from the config, like Kits or Shop by Mevent, or Copy Paste - based plugins, like Raidable Bases. As a player: make a 3 x 3 x 3 cube that meets the validity requirements (more on that below) - if you have the proper permission and the appropriate amount of required currency, open the Tool Cupboard and press the pink "Convert to Pocket Dimension" button. If built correctly, you will now receive a box containing that entire cube inside. Alternatively, deploy a new Small Wooden Box skinned with a skin ID mentioned in the config that references a valid Copy Paste template - no construction by players necessary, but still possible. This plugin comes with several pre-built, already known to be valid Pocket Dimensions, ready to be enjoyed by your players. Permissions (Oxide.Grant user YourName [permission name starting with pocketdimensions.]) This plugin utilises the plain Oxide permission system. For a quick setup on a typical server, grant yourself the pocketdimensions.admin permission, and grant the default group in Oxide the pocketdimensions.player.all permission. pocketdimensions.admin - this permission is required to execute the admin commands mentioned in the section Admin Commands just below this section. pocketdimensions.player.all - this permission is the quick-start equivalent of giving all 4 permissions mentioned below. Don't grant this if you want a more customised permission setup. For example, if you don't want to allow respawning inside and converting by players, and you only want to allow deployment/pickup and entering/exiting, use the combination of the 4 permissions below. pocketdimensions.deploy.pickup - holders of this permission can deploy and pick up Pocket Dimension boxes, be it already existing ones and fresh ones based on skin ID/Copy Paste file combo in your config. Of course, this takes into account building block/other conditions, too. pocketdimensions.player.enter.exit - holders of this permission can enter Pocket Dimensions by opening their boxes, and exit them by interacting with their portals. If a player doesn't have that permission, they will be informed upon opening/interaction, and barred from traversing in/out. pocketdimensions.player.convert - holders of this permission can create new Pocket Dimensions by converting an existing building from its Tool Cupboard's UI - as long as they have the required amount of currency (certain required item / Server Rewards / Economics), and the building itself meets the structural requirements. Players without this permission won't even see the conversion button in the UI. pocketdimensions.player.respawn - holders of this permission can respawn on bags, beds and towels deployed inside Pocket Dimensions. If a player doesn't have that permission, and a bag is deployed by them (or someone else bags them in) inside a Pocket Dimension, the players will not see that bag on their Death Screen as a possible respawn location. Admin Commands (require the pocketdimensions.admin permission) These commands can be executed both from console and the chat - in case of chat, they must be prefixed with a forward slash ( / ), and in case of console, no forward slash. /pd.check Come close to a TC and look directly at it, then issue this command from the chat or F1 console. It will perform the validity check without actually converting anything. If any problems are found, it will tell you exactly what's wrong. Useful for making your own Copy Paste templates. /pd.convert Come close to a TC and look directly at it, then issue this command from the chat or F1 console. It will first perform the validity check. If any problems are found, it will tell you exactly what's wrong. Then, if no problems are found, it will convert the building into a Pocket Dimension and you will receive it as a deployable Small Wooden Box item. /pd.lostnfound When a Pocket Dimension Item despawns, is recycled, is placed in a container that gets destroyed, or is otherwise removed from the world, the Dimension that it represents will be marked as "lost". This special marking will NOT happen as long as the Item still exists in a container (including players' inventories) somewhere in the World. Pocket Dimensions marked as "lost" can then be reclaimed as a newly created Item tied to the building by an admin, deployed and inspected, and given back to the rightful owner... or Collapsed by the admin, if the admin has a hunch that the player "lost" their dimension on purpose so nobody would be able to access anything while the player was offline. Using this command will either give you ALL newly reclaimed box items (so make sure you have room in your inventory), or it will tell you there's nothing in the lost-and-found to be reclaimed. /pd.givebox [skin ID or Copy Paste filename] [optionally: player partial name / full steam ID] Use this command to create a Small Wooden Box item, skinned with a special skin mentioned in your config, and then given to a player. A new Pocket Dimension based on the Copy Paste template will be created inside of that box the first time it's deployed somewhere. This command requires Copy Paste to be installed to work properly, and a properly set up Skin ID - to - Copy Paste filename entries in your config. The filenames mentioned must exist in your Copy Paste data folder, too. Use the first parameter to identify the template mentioned in your Copy Paste section of the config either by its skin ID or its Copy Paste file name. Multiple skin IDs can lead to the same Copy Paste filename, so if you're identifying the template by filename, the skin ID of the first entry in your config that leads to this file name will be picked as the skin of the newly created and given box. If the optional second parameter is not provided, it will be assumed a freshly skinned box should be given to the player executing this command - typically an admin. This command can be used by plugins that support executing commands with the STEAM ID or player name parameter. /pd.emergencycleanup Use this as a last resort to completely get rid of ALL Pocket Dimensions entities on the server for whatever reason. This is a very experimental plugin after all and things COULD go wrong... This includes all the Pocket Dimension buildings, their contents, loot inside of them, and the boxes containing Pocket Dimensions deployed in the world. If a dimension was not deployed as a box, but held as an Item in a container, those items will NOT be removed, but when deployed, the player will be informed that its associated Pocket Dimension was raided or decayed away. USE WITH CAUTION, THIS COMMAND CANNOT BE UNDONE. Those are all the admin commands so far. There's no player commands, as I consider them to be the last resort option when there's just no other elegant way of player input/interaction. What makes buildings "valid" candidates to be used as a Pocket Dimension? Not every building is viable to be converted. Generally speaking, a 3 x 3 x 3 cube with exactly 1 external single doorway anywhere on the side must be constructed - and nothing else on the outside (apart from the potential exception for Solar Panels / Wind Turbines on the roof, if your config allows them). The building blocks can be of any tier or a mix of tiers - from Twig to Armoured. It doesn't matter what's inside of the cube, only the outer "shell" matters. Once converted into a Pocket Dimension, players can build/expand/demolish inside just like they would with regular bases. To be more specific, when a check for the validity of a building is made, the following criteria are tested for, and the answer to each consecutive question must be "yes" before the test proceeds to the next question - if the answer is "no", the player will be informed of the reason: Does the building have exactly 9 square foundations overall? Does the building have exactly 9 square floors overall (presumably, for the ceilings)? Does the building have at least 1 single doorway overall? Does the building have at least 35 normal walls overall? Are the 9 square foundations all at the same level? For each of the 9 square foundations, does it have a matching square floor for ceiling, exactly 9 metres above it? Is the building's middle foundation NOT marked as belonging to a Pocket Dimension already? Does the building have either a normal wall (or a single doorway, but only one) all 4 sides, and not a wall frame, window frame, or a missing building block, to make the shell "air-tight" and prevent players from falling out of the Dimension into the void? Does the building have exactly 1 single doorway - no more, no less - on the external shell? Is the only external doorway currently "empty", i.e. no doors / vending machines are deployed there at this moment? If the config doesn't allow Solar Panels / Wind Turbines placed on the ceiling, is the building free of those potentially forbidden structures? Are all the electrical/water entities inside of the 3 x 3 x 3 cube free of any wire/hose connections to entities outside of that cube? (if Solar Panels / Wind Turbines are allowed in your config, those entities get a special pass at this stage of the check) Is the building free of ANY entities "sticking out" from the 3 x 3 x 3 cube - for instance roofs, honeycombs, porches, SAM sites, stairs etc, or Solar Panels / Windmills if your config does not allow them? If the answer to all those questions is a resounding "yes" - don't worry, it's the plugin's job to ask and answer those, not you! - the building is considered valid and as such can be converted into a Pocket Dimension! You will be informed of the result, whether it was successful or not. Raiding Pocket Dimensions (only applies to the default PVP-enabled settings) This is the default behaviour on a fresh configuration. If you're planning on running this plugin on a PVE server (player vs. environment, i.e. no raiding/hurting between human players themselves), you can skip this section and go straight to the Recommended PVE Settings section below. There are two main ways of raiding a Pocket Dimension: From the inside, by damaging the building structures belonging to the external shell - either the wall or the doorway housing the exit portal From the outside, by damaging the deployed Pocket Dimension box. By default, no locks can be placed on boxes containing Pocket Dimensions, to allow players raiding from the inside, too - but this setting can be toggled if you only want players to raid the boxes in the boring way. Of course, anything INSIDE of the Pocket Dimension can - and should - be locked! When raiding from the outside, on default configuration, the dimensional box will take 2% (1/50) of the damage it would normally take if it were just a regular Small Wooden Box. In other words, on default configuration, it takes about 7-8 C4 charges to make the dimension inside of it Collapse (so more or less as much as an Armoured-tier foundation). Just like with regular vanilla building raids, the same strategies (or combinations of those) can be applied here, too: The Deep - get in, take the goods, get out, leave, say GG to the building owner, who gets to keep their Pocket Dimension. The quintessence of sportsmanship in Rust raiding. The Grief - get in, take the goods (or not), make the building unusable till it eventually decays (and the dimension Collapses), leave. Highly malicious, but sometimes the only option... The Yoink - get in, take the goods, re-seal the entrance, and claim the dimension as now yours. You might want to move its box to another location though. The End - get in, and immediately start damaging one of the external blocks of the shell (typically the doorway housing the exit portal, or a wall next to it - or even both!). As soon as one of the external shell elements is gone (or is "ent killed" by an admin, or removed with a plugin), the entire dimension Collapses. More on dimensional Collapses in the section below. Recommended PVE Settings (only applies to default PVE-enabled settings) This will require adjusting some config settings and reloading the plugin. If you're planning on running this plugin on a PVP server (player vs. player, i.e. raiding/hurting between human players allowed), go back to the Raiding Pocket Dimensions section above - most default settings should work fine in the majority of scenarios. To find out what each of these recommended settings does, check out the Configuration section below for details. "DimensionalBoxesSubtractItemConditionWhenPickingUp": 0.0, "DimensionalBoxesAllowLockingWithLocks": true, "DimensionalBoxesAllowDamage": false, "DimensionaBoxesDamageResistanceDivisor": 50.0, "DimensionalBoxesAlwaysHaveStability": true, "DimensionalBoxesCheckForPlayersInsideWhenPickingUp": false, "DimensionalBoxesCheckBuildingBlockOutsideWhenEnteringDimension": true, "DimensionalBoxesCheckTCAuthInsideWhenEnteringDimension": false, "DimensionalBoxesCheckTCAuthInsideWhenPickingUp": false, "DimensionalPocketsAllowSolarAndWindmill": true, "DimensionalPocketsTrapImmunityAfterTeleport": 5.0, "DimensionalPocketsExteriorBlocksAllowNonDecayDamage": false, "DimensionalPocketsActualAltitudeMin": 3200.0, "DimensionalPocketsActualAltitudeMax": 3900.0, "DimensionaPocketsAllowVendingMachineBroadcast": true, "EffectPlayerTeleportAppear": "assets/prefabs/missions/portal/proceduraldungeon/effects/appear.prefab", "EffectPlayerTeleportDisappear": "assets/prefabs/missions/portal/proceduraldungeon/effects/disappear.prefab", "EffectsPlayerTeleportEnable": true, Collapse of a Pocket Dimension All good things eventually come to an end. "Collapse" in this context means that a certain Pocket Dimension and all its associated entities get destroyed and in the end, it's as if the Pocket Dimension never existed at all - save for all the juicy loot dropped from it. This can happen when... The box containing a Pocket Dimension gets "ent killed" by an admin/plugin, or gets damaged to the point of destruction One of the external shell structures inside of the Pocket Dimension (wall/external doorway) gets "ent killed" by an admin plugin, or decays/gets damaged to the point of destruction The exit portal housed in the external doorway gets "ent killed" by an admin/plugin Under normal circumstances, on a typical PVP server, you only expect the Pocket Dimensions to Collapse when they decay away, are raided, or purposefully removed by an admin (by "ent killing" the box or the external shell structure). If the Dimensions suddenly disappear with no apparent reason, it probably comes from another plugin's functionality, for example Abandoned Bases - but that's a completely expected outcome in this case: the Pocket Dimensions should behave as much as normal bases on the server as possible! On the topic of Abandoned Bases, if you use that plugin, you should definitely NOT allow locks on boxes containing Pocket Dimensions - otherwise the now-unlocked abandoned Pocket Dimension won't be accessible, as the box itself will not count as a base, and it will stay locked! During the Collapse, the last known position of the box associated with the Dimension will serve as the nexus point, where... All players inside of the dimension, asleep or online, alive or as dead bodies or bodybags, will be teleported to the nexus point, unharmed All entities that have an inventory, i.e. something stored inside of them - TC, boxes, turrets, traps, lockers etc - will drop their grey loot bags at the nexus points, as if all those entities were raided at the same time All building blocks and other structures will die, crumbling with gibs at the nexus point If the collapsing Dimension also contains Pocket Dimensions inside of it, and so on (A.K.A. box-ception), the entire "tree" collapses as well, at the root. That way, the best way to raid is always at the Dimension deployed directly in the world (the first one in the "box-ception" sequence), because it involved the least materials and effort. Works great with CopyPaste (and any plugin utilising it, like Raidable Bases) This plugin is fully compatible with Copy Paste and includes it as an optional dependency: i.e. Copy Paste is not needed for Pocket Dimensions to operate, but can potentially enhance the player's experience with extra capabilities. It's strongly recommended. Both the uMod version and the custom patched version distributed to work with Raidable Bases will work. As an admin, you can /copy and /paste a building and either convert it straight away (either with a command or in the Tool Cupboard UI), or just check if it's a valid candidate to be converted - more on validity below. You can also define some Skin IDs as special in the plugin configuration: when boxes with those particular skins are spawned for the first time (either being deployed by players, spawned/pasted by other plugins - Copy Paste itself or plugins utilising it, like Raidable Bases, or entirely separate plugins ), whatever Copy Paste filename you define, this box will be instantly made into a Pocket Dimension containing everything from the building that was copied under that name. And after that, the box can be re-skinned without any issues, too. You can also use the /pd.give command to give individual fresh Pocket Dimensions to players, by name or steam ID (look in the section Admin Commands above) from the server / F1 console or the chat - it's made in a way that shop/kit plugins relying on custom commands can utilise those easily. Useful if you don't want your players to convert their own buildings. Pocket Dimensions plugin even comes with a few predefined templates for those, so you can see how to set up your own. Just issue the /pd.give command without any arguments to get the list. If you want them to work properly, make sure you install the latest version of Copy Paste, and also upload the included Copy Paste files to the proper folder on your server. Compatible with Server Rewards / Economics Converting a valid building to a pocket dimension should NOT be free - and it isn't. By default, players need to deposit 500 Scrap into the TC - or have that amount ready in their inventory, both will work. You can adjust the amount and the shortname of the currency item in your config to your liking. You can even make it so that not only the shortname of this currency item is checked, but also its skin - useful if you have plugins that come with custom items. But you can also use Server Rewards or Economics as potential currencies, too! Check out the Configuration section above for more details. For this, either Server Rewards or Economics must be installed, depending on which one you want to use. Additionally, boxes with skin IDs mentioned in your config (leading to Copy Paste templates) can be sold in the Server Rewards shop, so it works both ways. Compatibility with No Escape If you don't use the No Escape plugin on your server, you can skip this section. Pocket Dimensions are just regular bases in many regards, so damaging any entities belonging to them will impose a Raid Block, and attacking any players inside will impose a Combat Block. Both of these count as an Escape Block. If this plugin detects that a player is Escape Blocked, several optional restrictions can be enabled/disabled in the Pocket Dimension config, to change how this Escape Block affects the gameplay for affected players: Entering Pocket Dimensions Exiting Pocket Dimensions Deploying Pocket Dimension Items into Boxes Picking up Pocket Dimension Boxes into Items Compatibility with other plugins Any plugin capable of issuing /utilising skinned items / spawning skinned Small Wooden Boxes, should work with Pocket Dimensions right out of the box (pun not intended). If there are any that have issues, please don't hesitate to let me know. Configuration (oxide/config/PocketDimensions.json) Below is a rundown of all the config values (and their defaults) that, combined with player permissions, will affect the gameplay on your server. Everything apart from the advanced stuff (like positioning/styling of the TC UI Button, or the CopyPaste templates) is explained in this section: "DimensionalBoxesSubtractItemConditionWhenPickingUp": 0.0, It would be highly inconvenient to be forced to constantly fix your Pocket Dimension box pretty much every time you pick it up, so this value will determine how much condition (in the range of 0.0 to 1.0, representing 0% to 100%) will be lost - and by default, it's 0.0, so the box will only lose condition when damaged. Set it to higher values (but never more than 1.0) to discourage players from moving their boxes too much, too effortlessly. "DimensionalBoxesAllowLockingWithLocks": false, Self-explanatory. By default, if a Key Lock or a Code Lock is placed on a Pocket Dimension box (be it automatically, with plugins, or manually, by players), the lock will just fall to the ground. It's to give the raiding players an opportunity to do the arguably HARDER option for raiding (statistically speaking) a dimension - from the inside. Set this to true to disable this behaviour and allow locks. "DimensionalBoxesAllowDamage": true, By default, boxes containing Pocket Dimensions will take damage - this enables the arguably easier raiding option, to raid from the outside, by destroying the box. How much damage is taken depends on the ResistanceDivisor value defined below. Set this to false if you want to make deployed Pocket Dimensions indestructible from the outside, by not letting players damage the box that contains it. "DimensionaBoxesDamageResistanceDivisor": 50.0, This value will determine how much stronger a Dimensional box is compared to its regular Small Wooden Box counterpart. For example, the default value of 50 means that it takes 50 times less damage, i.e 2% (1 divided over 50). Increase and decrease this value to make raiding from the outside harder or easier, accordingly. "DimensionalBoxesAlwaysHaveStability": true, This setting is true by default and it means that if a floor/foundation that the Dimensional box is placed on is suddenly destroyed, the box itself will remain floating in the air, instead of being destroyed along with it. It basically treats all boxes with Pocket Dimensions as if they were always placed directly on indestructible terrain. Of course, this never applies to Dimensions that are collapsing - no child Dimension in a "box-ception" sequence will ever remain floating "in Narnia". Set this to false if you want to make raiding the Dimensions from the outside easier if a box is not placed directly on actual terrain. "DimensionalBoxesCheckForPlayersInsideWhenPickingUp": true, If a player is inside of a Pocket Dimension and its box was just picked up, the player inside is now stuck, until the box gets re-deployed somewhere else. On the other hand... entire 30-man teams could be "smuggled" this way, all tucked quietly inside! Thus, by default, you cannot pick up pocket dimensions with players inside, and it's also not recommended to allow players to respawn inside, either, for the same reason. Set this to false if you really know what you're doing. "DimensionalBoxesCheckBuildingBlockOutsideWhenEnteringDimension": false, In vanilla Rust, if a box is unlocked, it can be opened, even if the player attempting it is not authorised on the TC. As such, this value is set to false, so that even if you're not authorised on the TC, you can still enter inside of a Dimensional Box. Set this value to true if you want that extra layer of security, in lieu of having a lock on the box that contains a Dimension. "DimensionalBoxesCheckTCAuthInsideWhenEnteringDimension": false, This setting, on the other hand, makes sure that an authorization on the TC is needed INSIDE of the pocket dimension itself (if there's one present at that point). For the same reason as above, it's set to false, but if you're feeling extra EXTRA paranoid, feel free to set it to false, and the only players that will be able to enter a Pocket Dimension were those originally authed on the TC before it as converted - and others bagged in later, but this requires the pocketdimensions.player.respawn permission, too. "DimensionalBoxesCheckTCAuthInsideWhenPickingUp": false, Similar to above, but related to picking up the Dimensional Box - of course, all the other checks for picking up are tested for, too (like building block outside). By default, this value is set to false, but if you want, you can toggle it to true, so that the only way to pick up a pocket dimension is to be authorised on its TC inside. "DimensionalPocketsAllowSolarAndWindmill": false, Allowing pretty much unlimited AND unchallenged electrical power inside of a Pocket Dimension can have several consequences for gameplay - and as such the default is false. Also, when the wires connection to the Solar/Wind generators on the roof are severed, the only way to restore them is with an intervention of an admin using "noclip". If you don't want your players to rely on fuel generators when inside of a Pocket Dimension, set this to true. "DimensionalPocketsAllowTestGenerators": true, Similar to the setting above, just dealing with Test Generators (either the static one, static invisible one, or deployable one). Normally those cannot be obtained by regular players (unless admins/plugins are involveds), and as such, this setting is true. If you have plugins/kits that make it possible for players to get them/spawn them, you should set it to false. "DimensionalPocketsTrapImmunityAfterTeleport": 1.5, When you enter an unknown Pocket Dimension, you never know if a shotgun trap or a turret are placed aiming right at the entry portal. Similarly, when you're inside of a Pocket Dimension, you don't know what's going on outside, so you can never be sure if somebody hasn't placed a trap aiming at the box containing the Dimension. Because of that, the default cooldown to be targeted by auto-traps right after a player enters/exits a pocket dimension is set to 1.5 seconds. Make it longer or shorter as you please, just not negative, and preferably no longer than 60 seconds. "DimensionalPocketsExteriorBlocksAllowNonDecayDamage": true, This effectively enables Collapsing an entire Pocket Dimension by attacking one of its external shell blocks (wall/doorway) from the inside - and as such, it's set to true. If you want to make the entire external shell impervious to damage (other than decay damage), set this to false. "DimensionalPocketsActualAltitudeMin": 3200.0, So here's the trick: in reality, the actual Pocket Dimension buildings exist at a randomly picked position on the map, but high up in the sky, and players are physically teleported to and from them - so it creates an illusion of being in a completely secluded place outside of "normal reality", where you can't even hear anything happening on the actual map. Similar to how Halloween Portals work. This setting defines the minimum random altitude at which Pocket Dimensions will physically reside for the duration of the wipe - by default, 3200 metres (3.2 kilometres, or roughly 2 miles). Adjust it if you have any other plugins that spawn things high up in the sky. IT'S NOT RECOMMENDED TO SET IT TO LOWER THAN 1000 - PLAYERS INSIDE MIGHT THEN HEAR THINGS HAPPENING ON THE ACTUAL MAP, LIKE C4, SUPPLY PLANES, HELI ETC. "DimensionalPocketsActualAltitudeMax": 3900.0, Similar to the setting above, this defines the maximum altitude. Both settings, together, effectively create a cuboid space high up in the sky, where Pocket Dimensions are expected to actually physically reside, at randomly picked locations. By default, this value is set to 3900.0, and there's a very good reason for that: AT EXACTLY 4000 METRES OF ALTITUDE, ALL PLAYERS WILL INSTANTLY DIE, INCLUDING ADMINS IN GOD MODE, AND THIS IS VANILLA RUST BEHAVIOUR. AS SUCH, IT IS NOT RECOMMENDED TO SET THIS VALUE TO HIGHER THAN DEFAULT. "DimensionaPocketsAllowVendingMachineBroadcast": false, While on the topic of maintaining an illusion - allowing players to effectively broadcast the location of their Pocket Dimension on the map would definitely break that illusion, so this value is false by default. Players who try to enable broadcasting in the Vending Machines deployed inside Pocket Dimensions will receive a warning instead, and the broadcast won't be enabled. Set this to true if you honestly couldn't care less about a visual detail like that. "DimensionalPocketsRespawningInsideRequiresDeployment": true, A safeguard against players trying to respawn inside bags/beds/towelrs in dimensions that are not currently deployed, to prevent the players from being effectively stuck inside (until they respawn somewhere else, at least, or until the box is re-deployed on the outside). "DimensionalPocketsTeleportingInsideRequiresDeployment": true, Similar to the setting above, but rather than dealing with respawning inside sleeping bags, this will prevent players from teleporting into a pocket dimension that is currently not deployed (works for any type of warp/teleport plugin). NOTE: Admins who are currently in noclip are allowed to teleport as they please, this is only checked for regular players. "DimensionalPocketsMaxInceptionDepth": 10, If you want to limit the amount of dimensions inside of dimensions inside of dimensions etc, this is the setting for you. If you change this value mid-wipe, only newly deployed boxes will be checked to see if they stay within the limit, and it won't affect already existing dimension trees. "DimensionalPocketsLocationMinTemperature": 15.0, When a new random location for a pocket dimension is checked, this setting will ensure that the biome-based temperature at 12PM (noon) will always be larger than this value. Decrease this value if you want a cooler climate. "DimensionalPocketsLocationMaxTemperature": 32.0, Similar to the setting above, this will put the upper limit on the biome-based temperature at 12PM (noon) when a new random location for a Pocket Dimension is considered. Increase this value if you don't mind a hotter climate. "EffectPlayerTeleportAppear": "assets/prefabs/missions/portal/proceduraldungeon/effects/appear.prefab", This is a purely cosmetic setting. When a player enters or exits a Pocket Dimension, it counts as a teleport. An audio-visual effect of your choosing will be played at the player's new location when that happens. By default, it's the same one used for the Halloween Dungeon. You can use most prefab effect on this list, just filter by "effect" in the "Search" box. "EffectPlayerTeleportDisappear": "assets/prefabs/missions/portal/proceduraldungeon/effects/disappear.prefab", The counterpart of the setting above - it just creates an effect at the old position of the player that's being teleported. And similarly, it's an effect from the Halloween Dungeon. Check out the prefab list I linked above if you want to use a different effect. You can use the Play FX plugin to test all the ones you can find in-game first, before you commit. "EffectsPlayerTeleportEnable": true, Effects can be loud and attract attention. Maybe you don't want. By default, the teleport effects are enabled, but if you set this setting's value to false, no special effects will be played while players are entering or exiting. "CheckEscapeBlockWhenEnteringDimensions": true, If you have No Escape installed, this will prevent players that are Escape Blocked from entering Pocket dimensions, like the name suggests. By default it's true. Feel free to change it to false if you believe that players raiding from the outside should still be able to enter inside. "CheckEscapeBlockWhenExitingDimensions": true, Again, if you don't have No Escape installed, ignore this setting and the next two after that. Similar to above, just when exiting the dimensions. Players will be informed that they cannot exit or enter dimensions for the reason of being Escape Blocked. Change the default value to false if you feel like the Escape Block should not matter for exiting. "CheckEscapeBlockWhenDeployingDimensions": true, No Escape specific setting number 3. You get it by now: if this setting is true (and it IS by default), Escape Blocked players won't be able to deploy any Pocket Dimension Items into their Box form that can be entered. Change the default "true" value to false if you consider this restriction to be too tight. "CheckEscapeBlockWhenPickingUpDimensions": true, And the last setting that's applicable to No Escape - it's the reverse of the one above. By default, players with an Escape Block imposed on them cannot pick up boxes with Pocket Dimensions inside. Change this to false if you beg to differ. "ForbiddenCommandsInsideDimensions": ["tp","warp","back","home","tpr","tpa","kit"], This blacklist contains the default chat and console commands that players without the admin permission will NOT be able run, while they themselves are within the Pocket Dimension layer altitude range. You can add or remove your own sets of commands (do not include the forward slash). "ForbiddenCommandsCheckingEnabled": true, If you set this to false, this will disable relying on the blacklist above, and any command will be permitted inside a Pocket Dimension to be executed by any player. "ConversionCostCurrencyUsed": "CustomItemAmount", By default, conversion from a normal base to a Pocket Dimension costs a certain physical Item that exists in Rust, and that setting is reflected by the value of "CustomItemAmount". If you instead prefer Server Rewards / Economics to be used to pay for conversion, set this value to "ServerRewards" or "Economics", respectively. You can even set this to "NoCost" - and the conversion will be free for the player (but the base will still need to be built correctly and maintained). "ConversionCostAmount": 500, 500 scrap to convert sounds like a moderate amount. 500 RP, or ¤500 however, do not - so you can adjust this amount to be higher or lower however you like,depending on your currency used. Only integers larger than 0 are accepted. "ConversionCostCustomItemShortname": "scrap", What else but "scrap" by default - the universal currency. Of course, if you picked Server Rewards or Economics instead, this setting won't matter in the slightest. Whatever valid item shortname from the approved list you pick, this is what players will be charged for conversion. Since not everything can be put in the TC, it will also check the player's inventory for that item. "ConversionCostCustomItemOverrideName": null, Again, this only applies to the "CustomItemAmount" option. If you want to use a completely custom item, for example, one registered by another plugin, that has a different icon/behaviour, those items often have a custom name. If this value is null (with no quotes) or empty (just the "" quotes), the Item's definition name translated to the client's language will be used. "ConversionCostCustomItemSkinID": 0, And finally: if you only want to accept certain skinned variants of an item - again, useful for plugins with custom items like Water Bases - set the default value of 0 to any valid item ID available on the Steam Workshop. This setting will also be ignored if your currency is not set to "CustomItemAmount". There's a few more settings, but these are all the most important ones that will shape your unique server experience. Translation support (oxide/lang/en/PocketDimensions.json) Almost every string the players see, including the text displaying in the chat and the GUI, can be edited. Just load the plugin and let it generate the file - after you edit it, reload the plugin. Hooks/API (for plugin developers) You can call these through Interface.CallHook() as well, if you don't want to add a [PluginReference] //get an array of BasePortal entities that are assigned to Dimensional Pockets // - or null if none are present var portalArray = PocketDimensions?.CallHook("GetDimensionalPortals") as BasePortal[]; //get an array of BuildingManager.Building instances that are assigned to Dimensional Pockets // - or null if none are present var pocketArray = PocketDimensions?.CallHook("GetDimensionalPockets") as BuildingManager.Building[]; //get an array of StorageContainer entities that are assigned to Dimensional Pockets // - or null if none are present var boxArray = PocketDimensions?.CallHook("GetDimensionalBoxes") as StorageContainer[]; //pass a BasePortal entity and get a boolean true if it's assigned to a Dimensional Pocket // - or false if it's not var isDimensionalPortal = PocketDimensions?.CallHook("CheckIsDimensionalBox", basePortal).Equals(true); //pass a BuildingManager.Building instance and get a boolean true if it's assigned to a Dimensional Pocket // - or false if it's not var isDimensionalPocket = PocketDimensions?.CallHook("CheckIsDimensionalPocket", building).Equals(true); //pass a StorageContainer entity and get a boolean true if it's assigned to a Dimensional Pocket //- or false if it's not var isDimensionalBox = PocketDimensions?.CallHook("CheckIsDimensionalBox", storageContainer).Equals(true); //pass a BuildingBlock entity and get a boolean true if it's assigned to a Dimensional Pocket SPECIFICALLY as a Shell Block // - or false if it's not var isDimensionalShellBlock = PocketDimensions?.CallHook("CheckIsDimensionalShellBlock", buildingBlock).Equals(true); //pass a DecayEntity entity and get a boolean true if inside a DimensionalPocket Building // - or false if it's not var doesBelongToDimensionalPocket = PocketDimensions?.CallHook("CheckBelongsToDimensionalPocket", decayEntity).Equals(true); //pass a global::Item instance and get a boolean true if it's assigned to a Dimensional Pocket // - or false if it's not. //You must also specify whether you're looking for "fresh", unopened dimensions in that item OR an already existing dimensions. //If you want to check both cases, you must do two separate checks, passing a different boolean (true when looking for fresh, //false when not) as the second (counting from 0th) argument. var isDimensionalItem = PocketDimensions?.CallHook("CheckIsDimensionalItem", item, lookingForFresh).Equals(true);$24.99- 17 comments
- 7 reviews
-
- 5
-
-
-
- #dimensions
- (and 11 more)
-
Version 1.1.0
20 downloads
Shoot vehicles out of the snowball gun! Prerequisites A snowball gun in hand. No need for ammo. Permissions TheFunGun uses Oxides permission system To assign a user permission use oxide.grant user "username|steam id" "permission" in console. To assign a group permission use oxide.grant group "groupname" "permission" in console. TheFunGun.CarGun.Use TheFunGun.RhibGun.Use TheFunGun.BoatGun.Use TheFunGun.SnowGun.Use TheFunGun.RandGun.Use TheFunGun.SharkGun.Use TheFunGun.TugGun.Use TheFunGun.MiniGun.Use TheFunGun.SideCar.Use TheFunGun.Pedal.Use TheFunGun.Motor.Use TheFunGun.BypassCooldown Chat Commands /cargun - To enable the car gun (sedan). /rhibgun - To enable the rhib gun. /boatgun - To enable the row boat gun. /snowgun - To enable the snow mobile gun. /sharkgun - shark corpses /minigun - mini copters /sidecar - motorbike with sidecar /motor - motorbike without sidecar /tuggun - tugboats /pedalgun - pedal bikes /randgun - To enable the random gun that choose a random vehicle. Caveats Be mindful when choosing your de-spawn timer in the config. Having a high de-spawn timer means the vehicles stay on the server for longer. To avoid any spam or server lag, be sure to keep this number low. Configuration The configuration file can be found in your server directory at .../oxide/config/TheFunGun.json The use of an editor and validator is recommended to avoid formatting issues { "Despawn Timer": 5.0, "Velocity": 75.0 "Cooldown": 1.0 } Localization { ["randGunEnable"] = "<color=#ffc34d>TheFunGun</color>: Random Gun <color=#36802d>Enabled</color>", ["randGunDisable"] = "<color=#ffc34d>TheFunGun</color>: Random Gun <color=#ff6666>Disabled</color>", ["sharkGunEnable"] = "<color=#ffc34d>TheFunGun</color>: Shark Gun <color=#36802d>Enabled</color>", ["sharkGunDisable"] = "<color=#ffc34d>TheFunGun</color>: Shark Gun <color=#ff6666>Disabled</color>", ["carGunEnable"] = "<color=#ffc34d>TheFunGun</color>: Car Gun <color=#36802d>Enabled</color>", ["carGunDisable"] = "<color=#ffc34d>TheFunGun</color>: Car Gun <color=#ff6666>Disabled</color>", ["rhibGunEnable"] = "<color=#ffc34d>TheFunGun</color>: Rhib Gun <color=#36802d>Enabled</color>", ["rhibGunDisable"] = "<color=#ffc34d>TheFunGun</color>: Rhib Gun <color=#ff6666>Disabled</color>", ["boatGunEnable"] = "<color=#ffc34d>TheFunGun</color>: Boat Gun <color=#36802d>Enabled</color>", ["boatGunDisable"] = "<color=#ffc34d>TheFunGun</color>: Boat Gun <color=#ff6666>Disabled</color>", ["snowGunEnable"] = "<color=#ffc34d>TheFunGun</color>: Snow Gun <color=#36802d>Enabled</color>", ["snowGunDisable"] = "<color=#ffc34d>TheFunGun</color>: Snow Gun <color=#ff6666>Disabled</color>", ["tugGunEnable"] = "<color=#ffc34d>TheFunGun</color>: Tug Gun <color=#36802d>Enabled</color>", ["tugGunDisable"] = "<color=#ffc34d>TheFunGun</color>: Tug Gun <color=#ff6666>Disabled</color>", ["miniGunEnable"] = "<color=#ffc34d>TheFunGun</color>: Mini Gun <color=#36802d>Enabled</color>", ["miniGunDisable"] = "<color=#ffc34d>TheFunGun</color>: Mini Gun <color=#ff6666>Disabled</color>", ["sidecarGunEnable"] = "<color=#ffc34d>TheFunGun</color>: Sidecar Gun <color=#36802d>Enabled</color>", ["sidecarGunDisable"] = "<color=#ffc34d>TheFunGun</color>: Sidecar Gun <color=#ff6666>Disabled</color>", ["pedalGunEnable"] = "<color=#ffc34d>TheFunGun</color>: Pedal Gun <color=#36802d>Enabled</color>", ["pedalGunDisable"] = "<color=#ffc34d>TheFunGun</color>: Pedal Gun <color=#ff6666>Disabled</color>", ["motorGunEnable"] = "<color=#ffc34d>TheFunGun</color>: Motor Gun <color=#36802d>Enabled</color>", ["motorGunDisable"] = "<color=#ffc34d>TheFunGun</color>: Motor Gun <color=#ff6666>Disabled</color>", ["noPermission"] = "<color=#ffc34d>TheFunGun</color>: You do not have permission to use this command", ["Cooldown"] = "<color=#ffc34d>TheFunGun</color>: You are on a {0} second cooldown.", } Special Thanks Thank you to unboxingman for his assistance in the development of this plugin. Support Dark Side Development Discord$5.00 -
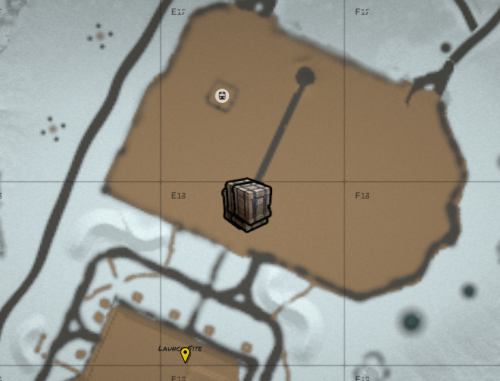
Version 0.0.1
1,618 downloads
This is a plugin that I made for my server, to bring more PvP into monuments. It will spawn a total of 4 crates inside the monuments that I have setup with offsets, the monuments that are setup are Launch Site, Dome, Water Treatment and Train Yard. Hopeful this will bring more PvP into our server. How It Works: It will generate a random number from 1 - 4, depending on the number it lands on is the monument that will be picked: 1 - Launch Site 2 - Dome 3 - Train Yard 4 - Water Treatment It will then spawn the 4 crates within the offsets I have set. If the plugin is unloaded or the command it called again it will delete the crates before spawning in new ones, so you don't end up with a bunch of crates in one spot. Permissions: In order to use the command you need to have the permission - cratesevent.admin o.grant user [Username / Steam ID] cratesevent.admin o.grant group [Group Name] cratesevent.admin Automation: If you want the event to start on its own on a timer, I would recommend you a plugin to help you do that. uMod - Timed Execute by misticos Go into the TimedExecute.json config and in TimerRepeat add - "startCratesEvent": Timer in seconds For Example: "TimerRepeat": { "startCratesEvent": 300 } This will start the event every 5 minutes.Free -
Version 1.4.8
1,057 downloads
This plugin adds jet skis with customizable physics! Chat Commands /jetski - Spawns jet ski near player (requires jetski.spawn permission) /jetski remove - despawns player's jet ski (requires jetski.despawn permission) /buyjetski - allows player to buy jet ski item and deploy it later (requires jetski.buy permission) Console Commands givejetski <amount> <player name> - give specified amount of jet skis to specified player (can be run in the server console or by player with jetski.admin permission) Admin Chat Commands (requires jetski.admin permission) /jetski_debug - show buoyancy points Each buoyancy point has force and size parameters Permissions jetski.admin - admin permission jetski.spawn - allows players to spawn a jetski via /jetski jetski.buy - allows players to buy jet ski deployable via /buyjetski jetski.free - allows players to use /jetski for free (if price is not 0) jetski.despawn - allows players to despawn a jet ski via /jetski remove Localization English Russian Configuration Example of JetSki.json { "(1.1) Jet ski price (set value to 0 to make it free, use ServerRewards or Economics as a shortname to use RP points or Economics balance respectively)": { "ShortName": "scrap", "Amount": 75, "SkinID": 0 }, "(1.2) Spawn cooldown (in seconds)": 120, "(1.3) Allow only 1 jet ski per player": false, "(1.4) Allow spawning jet skis only on beaches": false, "(1.5) Amount of jet skis /buyjetski command gives": 1, "(1.6) Starting fuel": 0, "(2.1) Allow picking up the jet ski only in building privilege": false, "(2.2) How much HP is reduced when the jet ski is picked up (0-100)": 25.0, "(2.3) Jet ski item name": "Jet Ski", "(2.4) Jet ski item skin ID": 2935987835, "(2.5) Jet ski item ID": 794443127, "(3.1)Make all snowmobiles jet ski": true, "(3.2) Allow Jet ski to drive on land": true, "(4.1) Enable 'boost' button (Left Shift)": false, "(4.2) 'Boost' button thrust": 10000.0, "(4.3) 'Boost' duration (seconds)": 5.0, "(4.4) 'Boost' cooldown (seconds)": 30.0, "(5.1) Engine thrust": 5000, "(5.2) Engine thrust on land": 49, "(5.3) Move slowly on grass or roads": true, "(5.4) Steering scale": 0.05, "(5.5) Automatically flip jet skis": false, "(5.6) Off axis drag": 0.35, "(5.7) Buoyancy force": 730.0, "(6.1) Jet ski prefab": "assets/content/vehicles/snowmobiles/tomahasnowmobile.prefab", "(6.2) Thrust point position": { "x": -0.001150894, "y": 0.055, "z": -1.125 }, "(6.3) Buoyancy points": [ { "Position": { "x": -0.62, "y": 0.09, "z": -1.284 }, "Size": 1.3 }, ... } ] } API BaseEntity SpawnJetski(Vector3 position, Quaternion rotation) Item CreateJetskiItem()$16.99 -
Version 1.0.4
469 downloads
Skill Tree: XP Event is a plugin that creates an event that will randomly select a task, providing players with bonus XP for performing the task while the event is running. Events are started automatically on interval (default every 30 minutes), and will select 1 of 38 tasks for the event. This could be chopping down trees, skinning animals, killing scientists or looting crates. The plugin will also roll a random duration for the event to run for, and a random bonus to the XP (all of which is configurable). Additional XP gained with this plugin will stack with xp bonuses from Skill Tree. The stacking works in the following order: Default xp value is calculated. Skill Tree will check if Skill Tree: XP Event is loaded, and will ask for any bonuses if applicable Skill Tree continues on with its additional modifiers (other plugins, permission overrides, rested xp etc) This event will provide an incentive for players to engage with content on your server that they might otherwise avoid. SkillTreeXPEvent.use - required for players to participate in the events. SkillTreeXPEvent.admin - required to use the below commands if running them from player console. Console command: startxpevent <optional: task> Description: This command will manually start an XP event. If the task is not specified, it will roll the event randomly. Running this command resets the interval timer. Console command: stopxpevent Description: This command ends the current xp event. Chat command: stemoveui Description: Brings up an interface to reposition the UI. NodeHitFinal TreeHitFinal SkinHitFinal CollectWildEntities CollectWildBerries CollectWildHemp CollectWildPumpkin CollectWildPotato CollectWildCorn CollectMushrooms CollectOreNodes CollectGrownEntities CollectGrownBerries CollectGrownHemp CollectGrownCorn CollectGrownPotato CollectGrownPumpkin SkinWolfFinal SkinBearFinal SkinChickenFinal SkinBoarFinal SkinStagFinal SkinPolarBearFinal CatchAnyFish KillScientist KillTunnelDweller KillUnderwaterDweller KillAnyAnimal KillBear KillStag KillBoar KillChicken KillWolf KillPolarBear LootCrate BreakBarrel BreakRoadSign SwipeCard All$7.99- 25 comments
- 2 reviews
-
- 2
-
-
-
- #skilltree
- #event
- (and 4 more)
-

Version 1.1.0
321 downloads
This plugin may not work perfectly as you expect. Please read the Q/A at the bottom before making a purchase! Please have a hosting service ready for your MP3 files before making a purchase! Enhance your server's ambiance by welcoming players with delightful tunes as they join! Welcome Music feature lets you curate a musical experience for new players, complete with customizable playback delays and durations. Chat Command: /wm - Disable / Enable the Welcome Music. /musicto <Player> <MusicURL> <MusicDuration> - Play music for target player (Requires welcomemusic.toplayer permission). /musicall <MusicURL> <MusicDuration> - Play music for all player (Requires welcomemusic.toplayer permission). /testwm - Test Welcome Music (Not need to rejoin the server | only admin) . Console Command: musicto <Player> <MusicURL> <MusicDuration> - Play music for target player. musicall <MusicURL> <MusicDuration> - Play music for all player. Config { "Permission Name": "welcomemusic.use", "Need Permission": true, "Welcome Music List": [ { "Need Permission (Empty = none)": "", "Music URL": "https://github.com/blgarust/music/raw/main/WelcomeToOurServer.mp3", "Music Duration (sec)": 5.0, "Welcome Message (Empty = No Message)": "Welcome To Our Server, Now playing music for you~ (You can use command /wm to disable)" }, { "Need Permission (Empty = none)": "welcomemusic.vip", "Music URL": "https://github.com/blgarust/music/raw/main/NeverGonnaGiveYouUp.mp3", "Music Duration (sec)": 30.0, "Welcome Message (Empty = No Message)": "Never Gonna Give You Up ~" } ], "Only first-time join the server": false, "(First-time) Music URL (Empty = none)": "", "(First-time) Music Duration (sec)": 15.0, "Music Delay (sec)": 5.0, "Players can disable the WelcomeMusic (/wm)": false } Tips Ensure that your Music URL is a valid mp3 stream link. For optimal experience, keep the music duration under 30 seconds. Provide a hosting space for your .mp3 file (services like GitHub work well for many, but not for everyone). The Music Delay determines the seconds after player entry before the music starts. Q/A Why does playing music result in stuttering / loop? This is due to low FPS on the player's client side (Improved in the Rust December 2022 patch). Why does playing music result in white noise? This happens when the client fails to successfully retrieve the music from your provided MP3 URL. Please check your URL or consider switching hosting services. Are there requirements for the URL format? Yes, the URL must be a complete web address without ports or special characters. Why do certain players hear default music during playing? This occurs because some players have disabled the "INTERNET AUDIO STREAMS" option in their game settings. How to find free MP3 hosting services? You can try uploading to GitHub and copy the raw link, but GitHub may not work for everyone.. However, it's best to have your own web server to host your MP3 files. Or use Google to search for "free MP3 hosting" to find available free services.$9.90 -
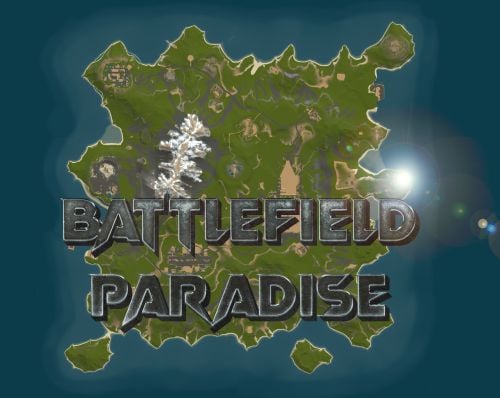
Version 2.0.0
107 downloads
In the heart of this EPIC RUST BATTLEFIELD MAP lies a breathtaking landscape crafted for High-FPS and fast paced PVP Gameplay. Amidst towering mountains and sprawling valleys, players navigate custom buildable underwater caves that offer strategic advantages for building and hiding bases. At its center, a colossal mountain dominates the skyline with the iconic Large Oil Rig and a meticulously designed Buildable Dome, all optimized for peak performance with minimal entity counts. This will be the central area where your players gather to practice PVP in the Large Oil Rig and fend off enemies practicing Raid Defense and Offense in the EPIC scale Buildable Dome! NEW EXPERIENCE! Battle Towers Buildable Zone stands as a fortress of opportunity and conflict. Towering HUGE structures invite players to build bases on top of, defend against raids, and engage in intense PvP battles atop their formidable heights, giving one of the most FUN experiences any player can have in Rust! Scattered across the terrain are 22 bespoke buildable monuments, each marked with an X on the map, bringing in your players with a fresh take on base building locations. This masterpiece of design not only promises thrilling PvP encounters but also showcases a commitment to immersive gameplay and efficient server performance, making it the best released Map for Battlefield Rust servers to date! FEATURES • Size: 2800 • Prefab Count: 6352 • Map Optimized for Performance! • Map Password: Included. • Vast array of 22 EPIC Custom Buildable Monuments! • Designated building zones (marked X on the minimap) • Several Majestic Underwater Buildable Cave Bunkers! • Legendary Battle Towers Build Zone: An expansive custom-built zone featuring multiple towers for epic building, raiding, and intense PVP combat! • Monuments crafted for peak performance with minimal entities! • EPIC Scale PVP Mountain center of map with Large Oil Rig and Buildable Dome! • Everything crafted with Battlefield PVP Servers in mind for peak performance and EPIC scale FUN! • Monumental and realistic landscape! • Underground railway. CUSTOM BUILDABLE MONUMENTS: • Amount: 22 Total! • Buildable Dome • Custom Underwater Bunkers • Custom Large Size Bus Stop Base • EPIC Scale Rock Formation Cave • Medium Sized Glass Roof Cave • + MANY MORE! Facepunch Monuments: Launch Site Dome Giant Excavator Military Base 2X Large Oilrig Small Oilrig Nuclear Missile Silo Ferry Terminal Satellite Dish Small Harbor 2X Lighthouse 2X Gas Station 2X HQM Quarry Sulfur Quarry Stone Quarry Supermarket Cave Large Sewers Hard Cave Large Hard Cave Medium Medium Cave Large Medium Bandit Town Outpost Help Discord: @DarkoRust$24.99 -
Version 1.1.1
501 downloads
Heavy Oil Rig Event is a configurable plugin that allows for a new type of random event. Randomly a message will appear letting players know that there is a heavy oil rig being formed. The Oil Rig will then be equipped with extra scientists, auto turrets, and a Bradley. Players must try to clear the oil rig and find the scientist who drops the code to disable the auto turrets OR destroy all the turrets. If the code is found, it can be entered into the code lock on the second to highest floor to disable the turrets. Once the turrets and scientists are dealt with, players must defeat the Bradley which guards the hackable crates. Finally, once the Bradley is defeated, players can collect all the loot. That's if someone else doesn't get to it first! This is a great event to add to your server to give it a little more variety. It can be a fun PVP zone or a PVE event for non PVP servers. EASY OPTIONAL SETUP - NO SETUP REQUIRED You can simple drop the plugin in as-is and it will start the random event every 1 to 2 hours OR you can modify the config to your specific needs. Configuration Example - en Admin Only Commands /HeavyOilStart /HeavyOilStop Hooks void HeavyOilRigEventStarted() void HeavyOilRigEventStopped() Customization Spawn locations as well as the total number turrets, scientists, hackable crates, & APCbradleys can be modified. Simply go to the location in game you want to place the new item and use the command /HoPOS. It will message you the location. You can the add that location to the config in the appropriate section for want you want to modify. Reload the plugin and you're good to go! Discord: cahnu$19.99 -
Version 1.0.4
223 downloads
I introduce to you a brand new plugin to make custom and configurable use of the new addition of parachutes to the game of Rust! This plugin will add the ability for players on your server to use a Paraplane! Paragliders have the ability to gain altitude with the help of an engine on the player's back, as well as gain more speed in comparison with a parachute. You can create a great number of paraglider presets that can differ in HP, Speed, Drag, Fuel Consumption, and more! This plugin will give you the opportunity to create countless presets, your imagination is one of the only limitations! You can create parachute presets without an engine, where you can also configure and customize the default and additional parachutes that can appear in your loot tables. Paraplanes and Custom Parachutes can be given to yourself or players with the use of commands, or you can add them to any of your existing loot tables! The plugin comes with configuration options to place them in whatever loot tables you decide. Paraglider control The control of the paraglider completely coincides with the control of the parachute. To climb, hold down the [S] key and the engine key [SHIFT]. By default, to turn on the engine, the player needs to have fuel in the inventory. Chat commands (only for administrators) - /giveparaplane <paraplanePresetName> Console commands (RCON only) - giveparaplane <paraplanePresetName> <userid> <amount> Config - plugin_en – example of plugin configuration in English - plugin_ru – example of plugin configuration in Russian My Discord: Adem#9554 Join the Mad Mappers Discord here! Check out more of my work here!$14.99- 15 comments
- 3 reviews
-
- 4
-
-
-
- #parachute
- #vehicle
- (and 10 more)
-
Version 1.1.7
69 downloads
Details Barnacle Reef is a small to medium-sized map (3300) designed to feel bigger than default maps at a similar size and this is done by maximizing space with more land than water and better-proportioned monuments as well as moving some space-wasting monuments underground and out to sea. all-new custom monuments to discover as well as a mixture of the default monuments scattered around creating a nice balance of looting across the map. Fully custom landscape to explore and lots of interesting places to build bases and should provide players with hours of fun. highly optimised map with a healthy entity count that will result in smooth wipe performance. I would like to say a big thank you to Steenamaroo for all his help with plugins. Railway Features a working surface railway with twin directional lines that runs around the full map and through underground tunnels and over rivers and even down to the subways and with no dead ends its perfect for other train plugin events as well as its own custom work cart and wagon spawning plugin. Map Editing Yes, you are allowed to edit the map and add stuff etc. Custom NPCs Normal RustEdit Scientist’s have been replaced with my own set of NPC’S from the various factions from the rust world (Normal Scientist, Arctic Scientist, Tunnel Dweller and Underwater Dweller) if you do not like my NPC’s simply don’t install the plug-in and supply your own with any bot plugin you want. Monuments Airfield Nuclear Missile Silo Bandit Town Fishing Village Gas Station Horse Stable Lighthouse Underground Military Tunnels Oil Rig Large Oil Rig Small Outpost Sewer Branch Sphere Tank Supermarket Warehouse Trainyard Subway Greenhouse Deep Water Harbour Navy Shipyard Launch Site Junkyard Early Warning Radar Underwater Labs Desert Military Base Help And Contact If you need to contact me discord is best: RobJ2210#2553 For help/support my discord group is best: Join Rust Maps By RobJ Discord$40.00- 8 comments
- 1 review
-
- 5
-
-
- #railway
- #workcarts
- (and 12 more)

.thumb.jpg.4abde6ce06035db4993ba98aa473b214.jpg)


.thumb.png.67a98d42e59baa0ab131fc277054bd26.png)


.thumb.gif.b68fcc45abe70ab7d7235dffc8a0c770.gif)