Search the Community
Showing results for tags 'storage'.
Found 19 results
-
Version 1.5.17
926 downloads
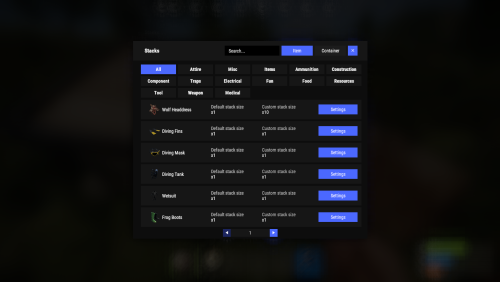
New plugin for changing item stacks and their multipliers in containers with convenient customization right in the game Commands stacks - open an UI stacks sethandstack [stack size] - set the stack size for the item in hand stacks setstack [short name] [stack size] - set the stack size for the item Permissions stacks.admin - using a plugin Config { "Commands": [ "stacks" ], "Work with Notify?": true, "Changing multiplies in containers using a hammer": false, "Default Multiplier for new containers": 1.0 } Containers Data { "assets/bundled/prefabs/static/bbq.static.prefab": { "Image": "https://i.imgur.com/L28375p.png", "Multiplier": 1.0 }, "assets/bundled/prefabs/static/hobobarrel_static.prefab": { "Image": "https://i.imgur.com/v8sDTaP.png", "Multiplier": 1.0 }, "assets/bundled/prefabs/static/recycler_static.prefab": { "Image": "https://i.imgur.com/V1smQYs.png", "Multiplier": 1.0 }, "assets/bundled/prefabs/static/repairbench_static.prefab": { "Image": "https://i.imgur.com/8qV6Z10.png", "Multiplier": 1.0 } ... Items Data [ { "ShortName": "hat.wolf", "Name": "Wolf Headdress", "Default Stack Size": 10, "Custom Stack Size": 0 }, { "ShortName": "fogmachine", "Name": "Fogger-3000", "Default Stack Size": 2, "Custom Stack Size": 0 }, { "ShortName": "strobelight", "Name": "Strobe Light", "Default Stack Size": 1, "Custom Stack Size": 0 }, { "ShortName": "kayak", "Name": "Kayak", "Default Stack Size": 1, "Custom Stack Size": 0 }, { "ShortName": "minihelicopter.repair", "Name": "MC repair", "Default Stack Size": 1, "Custom Stack Size": 0 }, { "ShortName": "scraptransportheli.repair", "Name": "ScrapTransportHeliRepair", "Default Stack Size": 1, "Custom Stack Size": 0 }, ...$19.95- 50 comments
- 9 reviews
-
- 4
-

-

-

-
- #stacks
- #chest stacks
- (and 9 more)
-
Version 1.3.1
117 downloads
TCLevels is a plugin that will make your server more fun and have more things to do! FEATURES ★ • Reduce the decay damage by tick; • Upgrade the authorizations limit; • Upgrade the building grade limit; • Upgrade the storage capacity of the cupboard; • Upgrade the stack size limit of the cupboard; • Unlock some deployable items; • Set a default building grade for the server; • Modify the default decay; • Keep the cupboard attributes when remove; Make your server fun ^u^ PERMISSIONS The plugin has a unique permission, which allows the player to use the cupboard upgrade: tclevels.use F.A.Q 1. How many items can be blocked? and which? You can block unlimited items and all items must be deployable or they will not be blocked. 2. Which area will be checked when i place my cupboard? The entire privilege area will be checked. But you can also disable checks in the configuration file. 3. Could it cause conflict with any plugin? Yes, but i am providing an API for the plugin so that other developers can integrate with it, so if there is a conflict, just go to the developer's plugin support and ask them to integrate it. Also if it is possible for me to integrate it from my plugin, i will do so without any problem. API </> // Gets the current cupboard allowed building grade limit // If the cupboard isn't provided, it will return the default building grade limit of the config; private BuildingGrade.Enum GetBuildingGradeLimit(BuildingPrivlidge? cupboard); // Gets the current cupboard decay multiplier // If the cupboard isn't provided, it will return the default decay multiplier of the config; private float GetDecayMultiplier(BuildingPrivlidge? cupboard); // Gets the current cupboard authorization limit // If the cupboard isn't provided, it will return the default auth limit of the config; private int GetAuthLimit(BuildingPrivlidge? cupboard); // Gets the current cupboard storage capacity // If the cupboard isn't provided it will throw an exception; private int GetCapacity(BuildingPrivlidge cupboard); // Gets a list of the cupboard blocked items // If the cupboard isn't provided it will return all locked items listed in the config; private List<string> GetLockedItems(BuildingPrivlidge? cupboard); CONFIGURATION TCLevels.json$20.00 -
Version 1.0.10
291 downloads
Introducing portable 3 x 3 bases in a box - that you can carry in your inventory! Deploy them and open them to go inside - to store, craft, smelt, grow, party... live. Expand and maintain the upkeep to protect from raiders. Pick them up and deploy somewhere else. Think outside of the box... and inside too! Questions? Support? Join the discord: https://discord.nikhub.dev WATCH THE TUTORIAL BY SRTBULL! AS FEATURED BY SHADOWFRAX! (around 0:55 mark) Just like the TARDIS from Doctor Who, they're bigger on the inside! In the "real" Rust world, an entire 9x9x9 metre large (over 25000 cubic foot) Pocket Dimension fits neatly inside of a Small Wooden Box. You can skin that box any way you like to camouflage or disguise it - whatever the player's Workshop Skins / server skin plugins allow. Players can convert existing buildings into Pocket Dimensions easily with one button in the Tool Cupboard's UI. Or if that's too much of an effort, entire, fresh, ready-to-be-moved-in Copy Paste files can be sold as boxes with your own, custom defined skin - this is entirely optional and requires Copy Paste, more on that in the dedicated section below. Whether to allow either approach is entirely up to your configuration. By default, the configuration allows raiding the Pocket Dimensions in several different ways - but if you're planning on running this plugin on a PVE server and you don't want any of that, there's many configuration options that can be adjusted to enhance your server experience. Both styles of servers have their own dedicated sections on this page - just read below. Make sure you maintain the integrity of your Pocket Dimension! If any of the external structures (wall/doorway) of the Pocket Dimension building either 1) decays 2) is raided 3) is removed by an admin/plugin, or 4) the box housing the dimension itself gets destroyed, the Dimension will Collapse, teleporting all players inside of it, and dropping all contents of storage containers, turrets, the Tool Cupboard, and anything else that can store any items, to the location where the box is/was last deployed. Easy come, easy go! You can pick the Pocket Dimension boxes up and move them somewhere else at any time, and everything will still be there. You can even deploy Pocket Dimensions inside Pocket Dimensions inside Pocket Dimensions... a box-ception! By default, the configuration does not allow picking up boxes with players inside of them, but you can toggle this setting. Quick Start As an admin: make sure you grant your groups/players appropriate permissions from the list below. Make sure Copy Paste, No Escape and Server Rewards / Economics are loaded in and configured properly, if you're planning on utilising any of the extended capabilities. More on the support for those plugins below. That also goes for any potentially compatible plugins that dispense/support skinned box templates from the config, like Kits or Shop by Mevent, or Copy Paste - based plugins, like Raidable Bases. As a player: make a 3 x 3 x 3 cube that meets the validity requirements (more on that below) - if you have the proper permission and the appropriate amount of required currency, open the Tool Cupboard and press the pink "Convert to Pocket Dimension" button. If built correctly, you will now receive a box containing that entire cube inside. Alternatively, deploy a new Small Wooden Box skinned with a skin ID mentioned in the config that references a valid Copy Paste template - no construction by players necessary, but still possible. This plugin comes with several pre-built, already known to be valid Pocket Dimensions, ready to be enjoyed by your players. Permissions (Oxide.Grant user YourName [permission name starting with pocketdimensions.]) This plugin utilises the plain Oxide permission system. For a quick setup on a typical server, grant yourself the pocketdimensions.admin permission, and grant the default group in Oxide the pocketdimensions.player.all permission. pocketdimensions.admin - this permission is required to execute the admin commands mentioned in the section Admin Commands just below this section. pocketdimensions.player.all - this permission is the quick-start equivalent of giving all 4 permissions mentioned below. Don't grant this if you want a more customised permission setup. For example, if you don't want to allow respawning inside and converting by players, and you only want to allow deployment/pickup and entering/exiting, use the combination of the 4 permissions below. pocketdimensions.deploy.pickup - holders of this permission can deploy and pick up Pocket Dimension boxes, be it already existing ones and fresh ones based on skin ID/Copy Paste file combo in your config. Of course, this takes into account building block/other conditions, too. pocketdimensions.player.enter.exit - holders of this permission can enter Pocket Dimensions by opening their boxes, and exit them by interacting with their portals. If a player doesn't have that permission, they will be informed upon opening/interaction, and barred from traversing in/out. pocketdimensions.player.convert - holders of this permission can create new Pocket Dimensions by converting an existing building from its Tool Cupboard's UI - as long as they have the required amount of currency (certain required item / Server Rewards / Economics), and the building itself meets the structural requirements. Players without this permission won't even see the conversion button in the UI. pocketdimensions.player.respawn - holders of this permission can respawn on bags, beds and towels deployed inside Pocket Dimensions. If a player doesn't have that permission, and a bag is deployed by them (or someone else bags them in) inside a Pocket Dimension, the players will not see that bag on their Death Screen as a possible respawn location. Admin Commands (require the pocketdimensions.admin permission) These commands can be executed both from console and the chat - in case of chat, they must be prefixed with a forward slash ( / ), and in case of console, no forward slash. /pd.check Come close to a TC and look directly at it, then issue this command from the chat or F1 console. It will perform the validity check without actually converting anything. If any problems are found, it will tell you exactly what's wrong. Useful for making your own Copy Paste templates. /pd.convert Come close to a TC and look directly at it, then issue this command from the chat or F1 console. It will first perform the validity check. If any problems are found, it will tell you exactly what's wrong. Then, if no problems are found, it will convert the building into a Pocket Dimension and you will receive it as a deployable Small Wooden Box item. /pd.lostnfound When a Pocket Dimension Item despawns, is recycled, is placed in a container that gets destroyed, or is otherwise removed from the world, the Dimension that it represents will be marked as "lost". This special marking will NOT happen as long as the Item still exists in a container (including players' inventories) somewhere in the World. Pocket Dimensions marked as "lost" can then be reclaimed as a newly created Item tied to the building by an admin, deployed and inspected, and given back to the rightful owner... or Collapsed by the admin, if the admin has a hunch that the player "lost" their dimension on purpose so nobody would be able to access anything while the player was offline. Using this command will either give you ALL newly reclaimed box items (so make sure you have room in your inventory), or it will tell you there's nothing in the lost-and-found to be reclaimed. /pd.givebox [skin ID or Copy Paste filename] [optionally: player partial name / full steam ID] Use this command to create a Small Wooden Box item, skinned with a special skin mentioned in your config, and then given to a player. A new Pocket Dimension based on the Copy Paste template will be created inside of that box the first time it's deployed somewhere. This command requires Copy Paste to be installed to work properly, and a properly set up Skin ID - to - Copy Paste filename entries in your config. The filenames mentioned must exist in your Copy Paste data folder, too. Use the first parameter to identify the template mentioned in your Copy Paste section of the config either by its skin ID or its Copy Paste file name. Multiple skin IDs can lead to the same Copy Paste filename, so if you're identifying the template by filename, the skin ID of the first entry in your config that leads to this file name will be picked as the skin of the newly created and given box. If the optional second parameter is not provided, it will be assumed a freshly skinned box should be given to the player executing this command - typically an admin. This command can be used by plugins that support executing commands with the STEAM ID or player name parameter. /pd.emergencycleanup Use this as a last resort to completely get rid of ALL Pocket Dimensions entities on the server for whatever reason. This is a very experimental plugin after all and things COULD go wrong... This includes all the Pocket Dimension buildings, their contents, loot inside of them, and the boxes containing Pocket Dimensions deployed in the world. If a dimension was not deployed as a box, but held as an Item in a container, those items will NOT be removed, but when deployed, the player will be informed that its associated Pocket Dimension was raided or decayed away. USE WITH CAUTION, THIS COMMAND CANNOT BE UNDONE. Those are all the admin commands so far. There's no player commands, as I consider them to be the last resort option when there's just no other elegant way of player input/interaction. What makes buildings "valid" candidates to be used as a Pocket Dimension? Not every building is viable to be converted. Generally speaking, a 3 x 3 x 3 cube with exactly 1 external single doorway anywhere on the side must be constructed - and nothing else on the outside (apart from the potential exception for Solar Panels / Wind Turbines on the roof, if your config allows them). The building blocks can be of any tier or a mix of tiers - from Twig to Armoured. It doesn't matter what's inside of the cube, only the outer "shell" matters. Once converted into a Pocket Dimension, players can build/expand/demolish inside just like they would with regular bases. To be more specific, when a check for the validity of a building is made, the following criteria are tested for, and the answer to each consecutive question must be "yes" before the test proceeds to the next question - if the answer is "no", the player will be informed of the reason: Does the building have exactly 9 square foundations overall? Does the building have exactly 9 square floors overall (presumably, for the ceilings)? Does the building have at least 1 single doorway overall? Does the building have at least 35 normal walls overall? Are the 9 square foundations all at the same level? For each of the 9 square foundations, does it have a matching square floor for ceiling, exactly 9 metres above it? Is the building's middle foundation NOT marked as belonging to a Pocket Dimension already? Does the building have either a normal wall (or a single doorway, but only one) all 4 sides, and not a wall frame, window frame, or a missing building block, to make the shell "air-tight" and prevent players from falling out of the Dimension into the void? Does the building have exactly 1 single doorway - no more, no less - on the external shell? Is the only external doorway currently "empty", i.e. no doors / vending machines are deployed there at this moment? If the config doesn't allow Solar Panels / Wind Turbines placed on the ceiling, is the building free of those potentially forbidden structures? Are all the electrical/water entities inside of the 3 x 3 x 3 cube free of any wire/hose connections to entities outside of that cube? (if Solar Panels / Wind Turbines are allowed in your config, those entities get a special pass at this stage of the check) Is the building free of ANY entities "sticking out" from the 3 x 3 x 3 cube - for instance roofs, honeycombs, porches, SAM sites, stairs etc, or Solar Panels / Windmills if your config does not allow them? If the answer to all those questions is a resounding "yes" - don't worry, it's the plugin's job to ask and answer those, not you! - the building is considered valid and as such can be converted into a Pocket Dimension! You will be informed of the result, whether it was successful or not. Raiding Pocket Dimensions (only applies to the default PVP-enabled settings) This is the default behaviour on a fresh configuration. If you're planning on running this plugin on a PVE server (player vs. environment, i.e. no raiding/hurting between human players themselves), you can skip this section and go straight to the Recommended PVE Settings section below. There are two main ways of raiding a Pocket Dimension: From the inside, by damaging the building structures belonging to the external shell - either the wall or the doorway housing the exit portal From the outside, by damaging the deployed Pocket Dimension box. By default, no locks can be placed on boxes containing Pocket Dimensions, to allow players raiding from the inside, too - but this setting can be toggled if you only want players to raid the boxes in the boring way. Of course, anything INSIDE of the Pocket Dimension can - and should - be locked! When raiding from the outside, on default configuration, the dimensional box will take 2% (1/50) of the damage it would normally take if it were just a regular Small Wooden Box. In other words, on default configuration, it takes about 7-8 C4 charges to make the dimension inside of it Collapse (so more or less as much as an Armoured-tier foundation). Just like with regular vanilla building raids, the same strategies (or combinations of those) can be applied here, too: The Deep - get in, take the goods, get out, leave, say GG to the building owner, who gets to keep their Pocket Dimension. The quintessence of sportsmanship in Rust raiding. The Grief - get in, take the goods (or not), make the building unusable till it eventually decays (and the dimension Collapses), leave. Highly malicious, but sometimes the only option... The Yoink - get in, take the goods, re-seal the entrance, and claim the dimension as now yours. You might want to move its box to another location though. The End - get in, and immediately start damaging one of the external blocks of the shell (typically the doorway housing the exit portal, or a wall next to it - or even both!). As soon as one of the external shell elements is gone (or is "ent killed" by an admin, or removed with a plugin), the entire dimension Collapses. More on dimensional Collapses in the section below. Recommended PVE Settings (only applies to default PVE-enabled settings) This will require adjusting some config settings and reloading the plugin. If you're planning on running this plugin on a PVP server (player vs. player, i.e. raiding/hurting between human players allowed), go back to the Raiding Pocket Dimensions section above - most default settings should work fine in the majority of scenarios. To find out what each of these recommended settings does, check out the Configuration section below for details. "DimensionalBoxesSubtractItemConditionWhenPickingUp": 0.0, "DimensionalBoxesAllowLockingWithLocks": true, "DimensionalBoxesAllowDamage": false, "DimensionaBoxesDamageResistanceDivisor": 50.0, "DimensionalBoxesAlwaysHaveStability": true, "DimensionalBoxesCheckForPlayersInsideWhenPickingUp": false, "DimensionalBoxesCheckBuildingBlockOutsideWhenEnteringDimension": true, "DimensionalBoxesCheckTCAuthInsideWhenEnteringDimension": false, "DimensionalBoxesCheckTCAuthInsideWhenPickingUp": false, "DimensionalPocketsAllowSolarAndWindmill": true, "DimensionalPocketsTrapImmunityAfterTeleport": 5.0, "DimensionalPocketsExteriorBlocksAllowNonDecayDamage": false, "DimensionalPocketsActualAltitudeMin": 3200.0, "DimensionalPocketsActualAltitudeMax": 3900.0, "DimensionaPocketsAllowVendingMachineBroadcast": true, "EffectPlayerTeleportAppear": "assets/prefabs/missions/portal/proceduraldungeon/effects/appear.prefab", "EffectPlayerTeleportDisappear": "assets/prefabs/missions/portal/proceduraldungeon/effects/disappear.prefab", "EffectsPlayerTeleportEnable": true, Collapse of a Pocket Dimension All good things eventually come to an end. "Collapse" in this context means that a certain Pocket Dimension and all its associated entities get destroyed and in the end, it's as if the Pocket Dimension never existed at all - save for all the juicy loot dropped from it. This can happen when... The box containing a Pocket Dimension gets "ent killed" by an admin/plugin, or gets damaged to the point of destruction One of the external shell structures inside of the Pocket Dimension (wall/external doorway) gets "ent killed" by an admin plugin, or decays/gets damaged to the point of destruction The exit portal housed in the external doorway gets "ent killed" by an admin/plugin Under normal circumstances, on a typical PVP server, you only expect the Pocket Dimensions to Collapse when they decay away, are raided, or purposefully removed by an admin (by "ent killing" the box or the external shell structure). If the Dimensions suddenly disappear with no apparent reason, it probably comes from another plugin's functionality, for example Abandoned Bases - but that's a completely expected outcome in this case: the Pocket Dimensions should behave as much as normal bases on the server as possible! On the topic of Abandoned Bases, if you use that plugin, you should definitely NOT allow locks on boxes containing Pocket Dimensions - otherwise the now-unlocked abandoned Pocket Dimension won't be accessible, as the box itself will not count as a base, and it will stay locked! During the Collapse, the last known position of the box associated with the Dimension will serve as the nexus point, where... All players inside of the dimension, asleep or online, alive or as dead bodies or bodybags, will be teleported to the nexus point, unharmed All entities that have an inventory, i.e. something stored inside of them - TC, boxes, turrets, traps, lockers etc - will drop their grey loot bags at the nexus points, as if all those entities were raided at the same time All building blocks and other structures will die, crumbling with gibs at the nexus point If the collapsing Dimension also contains Pocket Dimensions inside of it, and so on (A.K.A. box-ception), the entire "tree" collapses as well, at the root. That way, the best way to raid is always at the Dimension deployed directly in the world (the first one in the "box-ception" sequence), because it involved the least materials and effort. Works great with CopyPaste (and any plugin utilising it, like Raidable Bases) This plugin is fully compatible with Copy Paste and includes it as an optional dependency: i.e. Copy Paste is not needed for Pocket Dimensions to operate, but can potentially enhance the player's experience with extra capabilities. It's strongly recommended. Both the uMod version and the custom patched version distributed to work with Raidable Bases will work. As an admin, you can /copy and /paste a building and either convert it straight away (either with a command or in the Tool Cupboard UI), or just check if it's a valid candidate to be converted - more on validity below. You can also define some Skin IDs as special in the plugin configuration: when boxes with those particular skins are spawned for the first time (either being deployed by players, spawned/pasted by other plugins - Copy Paste itself or plugins utilising it, like Raidable Bases, or entirely separate plugins ), whatever Copy Paste filename you define, this box will be instantly made into a Pocket Dimension containing everything from the building that was copied under that name. And after that, the box can be re-skinned without any issues, too. You can also use the /pd.give command to give individual fresh Pocket Dimensions to players, by name or steam ID (look in the section Admin Commands above) from the server / F1 console or the chat - it's made in a way that shop/kit plugins relying on custom commands can utilise those easily. Useful if you don't want your players to convert their own buildings. Pocket Dimensions plugin even comes with a few predefined templates for those, so you can see how to set up your own. Just issue the /pd.give command without any arguments to get the list. If you want them to work properly, make sure you install the latest version of Copy Paste, and also upload the included Copy Paste files to the proper folder on your server. Compatible with Server Rewards / Economics Converting a valid building to a pocket dimension should NOT be free - and it isn't. By default, players need to deposit 500 Scrap into the TC - or have that amount ready in their inventory, both will work. You can adjust the amount and the shortname of the currency item in your config to your liking. You can even make it so that not only the shortname of this currency item is checked, but also its skin - useful if you have plugins that come with custom items. But you can also use Server Rewards or Economics as potential currencies, too! Check out the Configuration section above for more details. For this, either Server Rewards or Economics must be installed, depending on which one you want to use. Additionally, boxes with skin IDs mentioned in your config (leading to Copy Paste templates) can be sold in the Server Rewards shop, so it works both ways. Compatibility with No Escape If you don't use the No Escape plugin on your server, you can skip this section. Pocket Dimensions are just regular bases in many regards, so damaging any entities belonging to them will impose a Raid Block, and attacking any players inside will impose a Combat Block. Both of these count as an Escape Block. If this plugin detects that a player is Escape Blocked, several optional restrictions can be enabled/disabled in the Pocket Dimension config, to change how this Escape Block affects the gameplay for affected players: Entering Pocket Dimensions Exiting Pocket Dimensions Deploying Pocket Dimension Items into Boxes Picking up Pocket Dimension Boxes into Items Compatibility with other plugins Any plugin capable of issuing /utilising skinned items / spawning skinned Small Wooden Boxes, should work with Pocket Dimensions right out of the box (pun not intended). If there are any that have issues, please don't hesitate to let me know. Configuration (oxide/config/PocketDimensions.json) Below is a rundown of all the config values (and their defaults) that, combined with player permissions, will affect the gameplay on your server. Everything apart from the advanced stuff (like positioning/styling of the TC UI Button, or the CopyPaste templates) is explained in this section: "DimensionalBoxesSubtractItemConditionWhenPickingUp": 0.0, It would be highly inconvenient to be forced to constantly fix your Pocket Dimension box pretty much every time you pick it up, so this value will determine how much condition (in the range of 0.0 to 1.0, representing 0% to 100%) will be lost - and by default, it's 0.0, so the box will only lose condition when damaged. Set it to higher values (but never more than 1.0) to discourage players from moving their boxes too much, too effortlessly. "DimensionalBoxesAllowLockingWithLocks": false, Self-explanatory. By default, if a Key Lock or a Code Lock is placed on a Pocket Dimension box (be it automatically, with plugins, or manually, by players), the lock will just fall to the ground. It's to give the raiding players an opportunity to do the arguably HARDER option for raiding (statistically speaking) a dimension - from the inside. Set this to true to disable this behaviour and allow locks. "DimensionalBoxesAllowDamage": true, By default, boxes containing Pocket Dimensions will take damage - this enables the arguably easier raiding option, to raid from the outside, by destroying the box. How much damage is taken depends on the ResistanceDivisor value defined below. Set this to false if you want to make deployed Pocket Dimensions indestructible from the outside, by not letting players damage the box that contains it. "DimensionaBoxesDamageResistanceDivisor": 50.0, This value will determine how much stronger a Dimensional box is compared to its regular Small Wooden Box counterpart. For example, the default value of 50 means that it takes 50 times less damage, i.e 2% (1 divided over 50). Increase and decrease this value to make raiding from the outside harder or easier, accordingly. "DimensionalBoxesAlwaysHaveStability": true, This setting is true by default and it means that if a floor/foundation that the Dimensional box is placed on is suddenly destroyed, the box itself will remain floating in the air, instead of being destroyed along with it. It basically treats all boxes with Pocket Dimensions as if they were always placed directly on indestructible terrain. Of course, this never applies to Dimensions that are collapsing - no child Dimension in a "box-ception" sequence will ever remain floating "in Narnia". Set this to false if you want to make raiding the Dimensions from the outside easier if a box is not placed directly on actual terrain. "DimensionalBoxesCheckForPlayersInsideWhenPickingUp": true, If a player is inside of a Pocket Dimension and its box was just picked up, the player inside is now stuck, until the box gets re-deployed somewhere else. On the other hand... entire 30-man teams could be "smuggled" this way, all tucked quietly inside! Thus, by default, you cannot pick up pocket dimensions with players inside, and it's also not recommended to allow players to respawn inside, either, for the same reason. Set this to false if you really know what you're doing. "DimensionalBoxesCheckBuildingBlockOutsideWhenEnteringDimension": false, In vanilla Rust, if a box is unlocked, it can be opened, even if the player attempting it is not authorised on the TC. As such, this value is set to false, so that even if you're not authorised on the TC, you can still enter inside of a Dimensional Box. Set this value to true if you want that extra layer of security, in lieu of having a lock on the box that contains a Dimension. "DimensionalBoxesCheckTCAuthInsideWhenEnteringDimension": false, This setting, on the other hand, makes sure that an authorization on the TC is needed INSIDE of the pocket dimension itself (if there's one present at that point). For the same reason as above, it's set to false, but if you're feeling extra EXTRA paranoid, feel free to set it to false, and the only players that will be able to enter a Pocket Dimension were those originally authed on the TC before it as converted - and others bagged in later, but this requires the pocketdimensions.player.respawn permission, too. "DimensionalBoxesCheckTCAuthInsideWhenPickingUp": false, Similar to above, but related to picking up the Dimensional Box - of course, all the other checks for picking up are tested for, too (like building block outside). By default, this value is set to false, but if you want, you can toggle it to true, so that the only way to pick up a pocket dimension is to be authorised on its TC inside. "DimensionalPocketsAllowSolarAndWindmill": false, Allowing pretty much unlimited AND unchallenged electrical power inside of a Pocket Dimension can have several consequences for gameplay - and as such the default is false. Also, when the wires connection to the Solar/Wind generators on the roof are severed, the only way to restore them is with an intervention of an admin using "noclip". If you don't want your players to rely on fuel generators when inside of a Pocket Dimension, set this to true. "DimensionalPocketsAllowTestGenerators": true, Similar to the setting above, just dealing with Test Generators (either the static one, static invisible one, or deployable one). Normally those cannot be obtained by regular players (unless admins/plugins are involveds), and as such, this setting is true. If you have plugins/kits that make it possible for players to get them/spawn them, you should set it to false. "DimensionalPocketsTrapImmunityAfterTeleport": 1.5, When you enter an unknown Pocket Dimension, you never know if a shotgun trap or a turret are placed aiming right at the entry portal. Similarly, when you're inside of a Pocket Dimension, you don't know what's going on outside, so you can never be sure if somebody hasn't placed a trap aiming at the box containing the Dimension. Because of that, the default cooldown to be targeted by auto-traps right after a player enters/exits a pocket dimension is set to 1.5 seconds. Make it longer or shorter as you please, just not negative, and preferably no longer than 60 seconds. "DimensionalPocketsExteriorBlocksAllowNonDecayDamage": true, This effectively enables Collapsing an entire Pocket Dimension by attacking one of its external shell blocks (wall/doorway) from the inside - and as such, it's set to true. If you want to make the entire external shell impervious to damage (other than decay damage), set this to false. "DimensionalPocketsActualAltitudeMin": 3200.0, So here's the trick: in reality, the actual Pocket Dimension buildings exist at a randomly picked position on the map, but high up in the sky, and players are physically teleported to and from them - so it creates an illusion of being in a completely secluded place outside of "normal reality", where you can't even hear anything happening on the actual map. Similar to how Halloween Portals work. This setting defines the minimum random altitude at which Pocket Dimensions will physically reside for the duration of the wipe - by default, 3200 metres (3.2 kilometres, or roughly 2 miles). Adjust it if you have any other plugins that spawn things high up in the sky. IT'S NOT RECOMMENDED TO SET IT TO LOWER THAN 1000 - PLAYERS INSIDE MIGHT THEN HEAR THINGS HAPPENING ON THE ACTUAL MAP, LIKE C4, SUPPLY PLANES, HELI ETC. "DimensionalPocketsActualAltitudeMax": 3900.0, Similar to the setting above, this defines the maximum altitude. Both settings, together, effectively create a cuboid space high up in the sky, where Pocket Dimensions are expected to actually physically reside, at randomly picked locations. By default, this value is set to 3900.0, and there's a very good reason for that: AT EXACTLY 4000 METRES OF ALTITUDE, ALL PLAYERS WILL INSTANTLY DIE, INCLUDING ADMINS IN GOD MODE, AND THIS IS VANILLA RUST BEHAVIOUR. AS SUCH, IT IS NOT RECOMMENDED TO SET THIS VALUE TO HIGHER THAN DEFAULT. "DimensionaPocketsAllowVendingMachineBroadcast": false, While on the topic of maintaining an illusion - allowing players to effectively broadcast the location of their Pocket Dimension on the map would definitely break that illusion, so this value is false by default. Players who try to enable broadcasting in the Vending Machines deployed inside Pocket Dimensions will receive a warning instead, and the broadcast won't be enabled. Set this to true if you honestly couldn't care less about a visual detail like that. "DimensionalPocketsRespawningInsideRequiresDeployment": true, A safeguard against players trying to respawn inside bags/beds/towelrs in dimensions that are not currently deployed, to prevent the players from being effectively stuck inside (until they respawn somewhere else, at least, or until the box is re-deployed on the outside). "DimensionalPocketsTeleportingInsideRequiresDeployment": true, Similar to the setting above, but rather than dealing with respawning inside sleeping bags, this will prevent players from teleporting into a pocket dimension that is currently not deployed (works for any type of warp/teleport plugin). NOTE: Admins who are currently in noclip are allowed to teleport as they please, this is only checked for regular players. "DimensionalPocketsMaxInceptionDepth": 10, If you want to limit the amount of dimensions inside of dimensions inside of dimensions etc, this is the setting for you. If you change this value mid-wipe, only newly deployed boxes will be checked to see if they stay within the limit, and it won't affect already existing dimension trees. "DimensionalPocketsLocationMinTemperature": 15.0, When a new random location for a pocket dimension is checked, this setting will ensure that the biome-based temperature at 12PM (noon) will always be larger than this value. Decrease this value if you want a cooler climate. "DimensionalPocketsLocationMaxTemperature": 32.0, Similar to the setting above, this will put the upper limit on the biome-based temperature at 12PM (noon) when a new random location for a Pocket Dimension is considered. Increase this value if you don't mind a hotter climate. "EffectPlayerTeleportAppear": "assets/prefabs/missions/portal/proceduraldungeon/effects/appear.prefab", This is a purely cosmetic setting. When a player enters or exits a Pocket Dimension, it counts as a teleport. An audio-visual effect of your choosing will be played at the player's new location when that happens. By default, it's the same one used for the Halloween Dungeon. You can use most prefab effect on this list, just filter by "effect" in the "Search" box. "EffectPlayerTeleportDisappear": "assets/prefabs/missions/portal/proceduraldungeon/effects/disappear.prefab", The counterpart of the setting above - it just creates an effect at the old position of the player that's being teleported. And similarly, it's an effect from the Halloween Dungeon. Check out the prefab list I linked above if you want to use a different effect. You can use the Play FX plugin to test all the ones you can find in-game first, before you commit. "EffectsPlayerTeleportEnable": true, Effects can be loud and attract attention. Maybe you don't want. By default, the teleport effects are enabled, but if you set this setting's value to false, no special effects will be played while players are entering or exiting. "CheckEscapeBlockWhenEnteringDimensions": true, If you have No Escape installed, this will prevent players that are Escape Blocked from entering Pocket dimensions, like the name suggests. By default it's true. Feel free to change it to false if you believe that players raiding from the outside should still be able to enter inside. "CheckEscapeBlockWhenExitingDimensions": true, Again, if you don't have No Escape installed, ignore this setting and the next two after that. Similar to above, just when exiting the dimensions. Players will be informed that they cannot exit or enter dimensions for the reason of being Escape Blocked. Change the default value to false if you feel like the Escape Block should not matter for exiting. "CheckEscapeBlockWhenDeployingDimensions": true, No Escape specific setting number 3. You get it by now: if this setting is true (and it IS by default), Escape Blocked players won't be able to deploy any Pocket Dimension Items into their Box form that can be entered. Change the default "true" value to false if you consider this restriction to be too tight. "CheckEscapeBlockWhenPickingUpDimensions": true, And the last setting that's applicable to No Escape - it's the reverse of the one above. By default, players with an Escape Block imposed on them cannot pick up boxes with Pocket Dimensions inside. Change this to false if you beg to differ. "ForbiddenCommandsInsideDimensions": ["tp","warp","back","home","tpr","tpa","kit"], This blacklist contains the default chat and console commands that players without the admin permission will NOT be able run, while they themselves are within the Pocket Dimension layer altitude range. You can add or remove your own sets of commands (do not include the forward slash). "ForbiddenCommandsCheckingEnabled": true, If you set this to false, this will disable relying on the blacklist above, and any command will be permitted inside a Pocket Dimension to be executed by any player. "ConversionCostCurrencyUsed": "CustomItemAmount", By default, conversion from a normal base to a Pocket Dimension costs a certain physical Item that exists in Rust, and that setting is reflected by the value of "CustomItemAmount". If you instead prefer Server Rewards / Economics to be used to pay for conversion, set this value to "ServerRewards" or "Economics", respectively. You can even set this to "NoCost" - and the conversion will be free for the player (but the base will still need to be built correctly and maintained). "ConversionCostAmount": 500, 500 scrap to convert sounds like a moderate amount. 500 RP, or ¤500 however, do not - so you can adjust this amount to be higher or lower however you like,depending on your currency used. Only integers larger than 0 are accepted. "ConversionCostCustomItemShortname": "scrap", What else but "scrap" by default - the universal currency. Of course, if you picked Server Rewards or Economics instead, this setting won't matter in the slightest. Whatever valid item shortname from the approved list you pick, this is what players will be charged for conversion. Since not everything can be put in the TC, it will also check the player's inventory for that item. "ConversionCostCustomItemOverrideName": null, Again, this only applies to the "CustomItemAmount" option. If you want to use a completely custom item, for example, one registered by another plugin, that has a different icon/behaviour, those items often have a custom name. If this value is null (with no quotes) or empty (just the "" quotes), the Item's definition name translated to the client's language will be used. "ConversionCostCustomItemSkinID": 0, And finally: if you only want to accept certain skinned variants of an item - again, useful for plugins with custom items like Water Bases - set the default value of 0 to any valid item ID available on the Steam Workshop. This setting will also be ignored if your currency is not set to "CustomItemAmount". There's a few more settings, but these are all the most important ones that will shape your unique server experience. Translation support (oxide/lang/en/PocketDimensions.json) Almost every string the players see, including the text displaying in the chat and the GUI, can be edited. Just load the plugin and let it generate the file - after you edit it, reload the plugin. Hooks/API (for plugin developers) You can call these through Interface.CallHook() as well, if you don't want to add a [PluginReference] //get an array of BasePortal entities that are assigned to Dimensional Pockets // - or null if none are present var portalArray = PocketDimensions?.CallHook("GetDimensionalPortals") as BasePortal[]; //get an array of BuildingManager.Building instances that are assigned to Dimensional Pockets // - or null if none are present var pocketArray = PocketDimensions?.CallHook("GetDimensionalPockets") as BuildingManager.Building[]; //get an array of StorageContainer entities that are assigned to Dimensional Pockets // - or null if none are present var boxArray = PocketDimensions?.CallHook("GetDimensionalBoxes") as StorageContainer[]; //pass a BasePortal entity and get a boolean true if it's assigned to a Dimensional Pocket // - or false if it's not var isDimensionalPortal = PocketDimensions?.CallHook("CheckIsDimensionalBox", basePortal).Equals(true); //pass a BuildingManager.Building instance and get a boolean true if it's assigned to a Dimensional Pocket // - or false if it's not var isDimensionalPocket = PocketDimensions?.CallHook("CheckIsDimensionalPocket", building).Equals(true); //pass a StorageContainer entity and get a boolean true if it's assigned to a Dimensional Pocket //- or false if it's not var isDimensionalBox = PocketDimensions?.CallHook("CheckIsDimensionalBox", storageContainer).Equals(true); //pass a BuildingBlock entity and get a boolean true if it's assigned to a Dimensional Pocket SPECIFICALLY as a Shell Block // - or false if it's not var isDimensionalShellBlock = PocketDimensions?.CallHook("CheckIsDimensionalShellBlock", buildingBlock).Equals(true); //pass a DecayEntity entity and get a boolean true if inside a DimensionalPocket Building // - or false if it's not var doesBelongToDimensionalPocket = PocketDimensions?.CallHook("CheckBelongsToDimensionalPocket", decayEntity).Equals(true); //pass a global::Item instance and get a boolean true if it's assigned to a Dimensional Pocket // - or false if it's not. //You must also specify whether you're looking for "fresh", unopened dimensions in that item OR an already existing dimensions. //If you want to check both cases, you must do two separate checks, passing a different boolean (true when looking for fresh, //false when not) as the second (counting from 0th) argument. var isDimensionalItem = PocketDimensions?.CallHook("CheckIsDimensionalItem", item, lookingForFresh).Equals(true);$24.99- 13 comments
- 7 reviews
-
- 5
-
-
-
- #dimensions
- (and 11 more)
-
Version 1.0.10
205 downloads
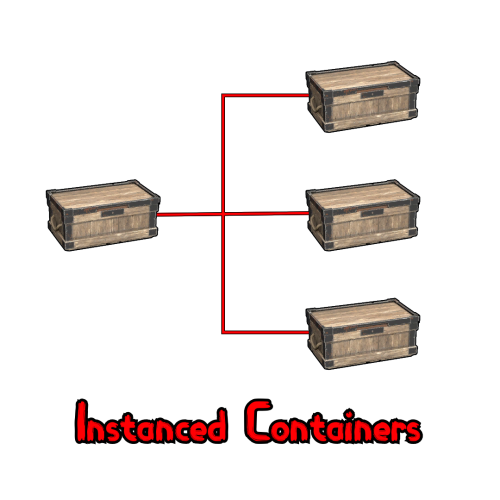
Are you sick of your base being cluttered by countless items and having nowhere to store them? Have you had to build an extra wing on your base entirely for storage? Look no further, Instanced Containers has you covered! Instanced containers is a plugin that allows for players to create multiple containers inside of 1 container, saving them a significant amount of space in their base. It supports small/large wooden boxes and coffins by default, but can be used for any container by adjusting the config. The plugins has 3 user based permissions included: instancedcontainers.use - will allow the user to create instances of a container (3 instances per container by default). instancedcontainers.free - bypasses the cost for creating an instance of a container. You can also create your own permission groups through the config and add your own instance limits. Example: "vip": 6 would create a permission called instancedcontainers.vip and give players with the permission access to add 6 instances per container.$15.00- 59 comments
- 5 reviews
-
- 4
-
-
-
- #storage
- #containers
- (and 4 more)
-
Version 1.0.7
28 downloads
UItemSort UItemSort - this plugin allows the player to sort, and stack items in boxes and inventory. Plugin config variables "Use button images?": false, "Send plugin messages/reply?": true, "Sort button color.": "0.968627453 0.921568632 0.882352948 0.2", "Take similar button color.": "0.968627453 0.921568632 0.882352948 0.2", "Take all button color.": "0.968627453 0.921568632 0.882352948 0.2", "Sort image.": "https://i.imgur.com/uEiuf3N.png", "Similar image.": "https://i.imgur.com/3PkbAH8.png", "Take/Put all.": "https://i.imgur.com/beKBAl3.png", "Allow only containers with owners?": false, "All containers allowed?": false, "Black list if all allowed else this is white list.": [ "assets/prefabs/deployable/woodenbox/woodbox_deployed.prefab", "assets/prefabs/deployable/large wood storage/box.wooden.large.prefab", ] Plugin lang "UILootSimilar": "Same items, that you already own, were looted! (if exist)", "UILootAll": "You've looted everything you could!", "UISort": "Items were successfully sorted!", "UIPutSimilar": "You've put same items that are in a storage! (if exist)", "UIPutAll": "You've put all the items you could!", "UIBtnSort": "Sort", "UIBtnTakeSimilar": "Take Similar", "UIBtnTakeAll": "Take All", "UIBtnPutSimilar": "Put Similar", "UIBtnPutAll": "Put All" Permissions: uitemsort.use - allows to see and use sorting buttons. uitemsort.ignore - prevents from using sorting buttons if player has 'uitemsort.use' permission. Contacts: Need help or custom plugin for your server? Contact me using Discord: metangerine ---------------------------------------------------------------------- Video how plugin works: https://www.youtube.com/watch?v=n_m8-Hv_lm4$9.99 -
Version 1.9.2
775 downloads
Features Allows players to store items in portable bags Allows limiting the number of bags players can use at once Allows placing bags into storage containers, with limits Allows placing bags inside other bags, with limits Allows restricting which items can go inside bags Allows players to upgrade bags linearly Allows using Economics and Server Rewards for purchasing bag upgrades Allows players to recycle bags Allows items to be pulled into bags automatically Allows unlimited types of bags to be defined, each with different appearance, capacity and rules Allows players to open and switch bags quickly via a UI Allows players to create custom key binds to open and close bags Allows creating bags that are preloaded with items from Kits Allows bags to be placed in wearable slots, including the backpack slot Allows a visual backpack to be displayed while the player is wearing a bag Quick start Give yourself a bag Grant the bagofholding.givebag permission to an administrator role. For example, run the command o.grant group admin bagofholding.givebag. Give yourself a bag with the command boh.givebag <player> generic.small (replace <player> with your in-game name). By default, this bag has 18 slots, and can hold any type of item, but it cannot hold other bags (unless those other bags are empty). Click on the bag in your inventory and click the "Open Bag" button. This will display the bag container in the loot panel, allowing you to place items into the bag. Upgrade the bag Grant the bagofholding.upgrade.generic.small permission to an appropriate role. For example, run the command o.grant group default bagofholding.upgrade.generic.small. Open the bag. Click the "Upgrade" button. Click the "Purchase upgrade" button (costs 300 scrap by default). This will upgrade the bag capacity to 24 slots, and it will change the bag's appearance. Note: Every bag has a separate permission which determines whether players can upgrade that specific type of bag. If you intend to allow players to upgrade bags, you will have to grant quite a few different permissions. We suggest using a permissions manager UI plugin for this. Enable gather mode Set Gather mode -> Enabled to true in the config. Reload the plugin. Open the bag. Click the "Gather: Off" button so that it changes to "Gather: On". This will show a flame icon on the bag, indicating that it is in gather mode. Drop and pick up an item. You will see the item get pulled into the bag automatically. Add bags to loot tables Note: If you are using a dedicated loot plugin to add bags to loot tables, this built-in feature might not work. For best results, configure your dedicated loot plugin to spawn bags instead. Set Loot spawns -> Enabled to true in the config. For testing, set the spawn chance for one type of bag to 100.0 for the assets/bundled/prefabs/radtown/crate_normal.prefab container prefab. Reload the plugin. Spawn some containers to confirm that they can spawn bags in them. For example, run the command spawn crate_normal in the client F1 console while aiming at the ground, and look for a bag in the container. If none of the loot containers are spawning with a bag in them, then you are probably using a loot plugin which is conflicting, in which case you may need to configure loot spawns in your dedicated loot plugin. Once you have confirmed that this feature is working on your server, configure the spawn chances to your liking. Once you have configured the spawn chances to your liking, you can use the bagofholding.spawnloot command to spawn bags into existing loot containers according to the config. You can also remove all bags from loot containers using the bagofholding.clearloot command if you accidentally added too many. Realistic backpacks If you want to allow backpacks to be usable only in the backpack slot, along with a 3D visual backpack model, proceed with the following steps. Set Wearable bags -> Allow wearing bags in the backpack slot to true in the config. This allows players to equip a bag in the backpack slot. Set Visual backpack -> Display while a bag is worn in the backpack slot to true in the config. This causes the visual backpack model to appear when the player is wearing a bag in the backpack slot. Set Player wearable bag limits -> Enabled to true in the config. This causes the player wearable inventory to have different bag limits than the rest of the player inventory. Set Player wearable bag limits -> Default limits -> Max total bags to 1 in the config. This allows players to wear at most one non-empty bag. Technically, this number could be set higher and it wouldn't matter, as long as you don't permit bags to be worn in other slots, since there is only one backpack slot. Set Player bag limits -> Default limits -> Max total bags to 0 in the config. This prevents players from placing non-empty bags in their main/belt inventory. Reload the plugin. Change bag theme By default, bags use fantasy-themed skins. Alternatively, you may choose leather-themed or tactical-themed skins. You may also choose between colored chevron icons (default) and colored circle icons which are larger and therefore easier to see. Bag skins can be directly changed in the config, but for first time users, this plugin provides multiple commands to help you edit the config in bulk. To change the bag theme, run the command boh.settheme <theme>. For example, boh.settheme tactical_chevrons. This command will update the skin IDs in the config and update existing bags in your server to the appropriate theme. Available themes are: fantasy_chevrons, fantasy_circles,leather_chevrons,leather_circles, tactical_chevrons, tactical_circles. This command works best when using a freshly generated config. If you have significantly altered the config (i.e., changed the number of bags per category), then you may have to use a lower level command such as boh.setskins, or manually update the config. In addition to the skins assigned to the preset themes which include 6 variations (no icon, light blue, green, yellow, orange, blue), there are 5 additional colors available (gray, white, black, red, pink). See the "Alternative bag skins" section for a list of all 400+ skins. Additionally, you can create your own skins and add them to the configuration. Some servers provide multiple themes at once, allowing players to use whichever style they prefer. To do this, you first need to define the alternative themes in the config. To add alternative themes, you can run the command boh.addtheme <theme>. Note: The fantasy_chevrons, leather_chevrons and tactical_chevrons themes are already included in the default config (as of v1.9.0), so you don't need to run this command if those are the only themes you care about, unless you are using a config from a prior version. Once the config is updated, you will then have to provide the alternative skins to your players somehow, such as via kits, vending machines, shop plugins, crafting plugins, loot plugins, etc. The boh.givebag command has an optional parameter to designate which skin to apply, which some servers use for integration with custom shops. In addition to changing bag skins, you may also want to change the skin displayed on the belt icon via UI settings -> Belt button -> Display skin ID in the configuration. For reference, the default generic.small bag skins are 2824115881 (fantasy), 2831029422 (leather), and 2828573095 (tactical). How it works How players obtain bags Bags are simply skinned large halloween loot bags (short name: halloween.lootbag.large, item ID: 479292118). Any plugin that can create skinned items can be used to make bags available on your server. For example, bags can be distributed via kits, vending machines (via Custom Vending Setup), shop plugins, crafting plugins, loot plugins (e.g., Alpha Loot), and more. The plugin also has native support for adding bags to loot containers, and provides the command boh.givebag <player> <profile> <amount> for use by admins or plugins. How players open bags Players can open bags multiple ways. "Open Bag" button: When a player clicks on a bag item, they will see the "Open Bag" button appear next to the "Drop" button. Clicking the "Open Bag" button will open the bag container on the right side of the inventory, the same as opening a storage container. Extra belt button: Players with a bag in their inventory will see a bag button next to their belt. Clicking that button will open the first bag in their inventory (via the bag.open command). Requires "UI settings" -> "Belt button" -> "Enabled": true in the config. This is enabled by default. Subsequent presses of that button will cycle through the remaining bags in the player's inventory. Custom key binds: Players may bind commands such as bag.open, bag.next, and bag.prev to keys for quick access. See the "Commands" section for a complete list of available commands and how they function. Tip: Players can also move items into a bag without even opening it, by simply dragging and dropping items directly onto the bag. Bag limits As a balancing mechanism, you can limit how many bags a given player or container can use at once. Empty bags can be placed almost anywhere, but bags with contents will count toward a limit. When that limit is reached, empty bags in the same container will become locked and unable to receive items. The default configuration of the plugin allows players to use up to 3 bags at a time in their inventory, with 0 bags in their backpack (Backpacks plugin on uMod), and 0 bags in storage containers. To configure bag limits for player inventories, see Player bag limits in the config. To configure bag limits for Backpacks, see Backpack bag limits in the config. To configure bag limits for storage containers, see Default container bag limits and Container bag limits by prefab in the config. If desired, you can assign bag limits according to player permission. Bag upgrades Each bag profile may define an upgrade target, dictating which bag profile it can be upgraded to. While a player is looting a bag, if they have permission to upgrade that bag, they will see an "Upgrade" button. Clicking that button will display the cost, as well as what the bag will be upgraded to, allowing the player to confirm the purchase if they have sufficient funds. Tip: One immersive upgrade technique is to set the upgrade cost to another instance of the same bag, to make it so players have to combine bags together to produce a better bag. Bag recycling Each bag profile may define a set of ingredients that it will recycle into when processed by a recycler. Each bag can recycle into as many ingredients as you want, each with an optional skin ID. Tip: One immersive recycling technique is to configure larger bags to recycle into smaller bags (possibly multiple). This technique can be used to allow players to effectively reverse bag upgrades, as well as to split larger bags into smaller bags that the player can then upgrade independently. Wearable bags To free up main inventory space, you can enable players to carry bags in their wearable inventory slots. To enable, see Wearable bags in the config. Note: Wearing a bag will only display the visual backpack if the visual backpack is also enabled. Visual backpack To increase immersion, you can display a visual backpack while a player is wearing a bag. To enable, see Visual backpack in the config. Gather mode To optimize player looting, players can enable gather mode for each bag. While gather mode is enabled, any item that gets added to the bag's parent container will automatically be moved into the bag if possible. For example, if you have a Food & Medical bag in your inventory, and that bag is in gather mode, picking up a food or medical item (or moving such an item from a container to your inventory) will automatically move that item into the bag if there is space. Notes: Gather mode can be enabled by setting Gather mode -> Enabled to true in the config Bags which have gather mode enabled will display a flame icon to easily identify them Throwing a bag onto the ground will automatically toggle off gather mode Gather mode only moves newly added item stacks, so existing item stacks will be ignored, even when replenished When multiple bags are in gather mode, the plugin will attempt to add items to bags according to their order in the container When nesting bags and enabling gather mode at multiple levels, new items will recursively be moved to child bags until they cannot be moved further Kit bags A kit bag is a type of bag that only allows players to remove items from the bag, but not add items. Kit bags are intended to be used as a mechanism to give players multiple items at once, without requiring that the player initially have the inventory space to hold all the items, since the player only needs to be able to hold the bag itself. Also, for convenience, once a kit bag has been emptied, the bag will automatically delete itself since it is no longer useful at that point (since players cannot place items in it). How to redeem a kit as a bag: If you have already created a kit via the Rust Kits plugin on uMod, you can give that kit to a player as a bag. That means the player will receive a bag item that is filled with the contents of that kit. To give a player a kit as a bag, simply run the command boh.givekitbag <player> kitbag.red.locked <kit>, where <player> should be replaced with a player name or steam ID, and <kit> should be replaced with the name of the kit. You may replace kitbag.red.locked with the name of a different locked kit bag if you want. Note: If running this command as a player (as opposed to in the server console or via another plugin), ensure you first have the bagofholding.givekitbag permission (caution: only grant that permission to trusted administrators). Tip: If you want to allow players to store items in a bag that is redeemed this way, then simply use a bag profile which has the "Allow player item input" config option set to true. How to add a kit bag to a kit: The Rust Kits plugin on uMod supports bags with items in them. If you want to allow players to redeem kits that contain bags with items in them, simply create a bag, add the items you want, then create a kit from your inventory. Note: Players will not be able to see the contents of the bag from the Kits UI, so it will be a mystery to the player until they have redeemed the kit, though the Kits plugin might be updated in the future to allow inspecting bag contents. If you want to add a bag to a kit, but don't want to allow players to use the bag as storage, follow the below steps create a kit bag. Give yourself an unlocked kit bag with the command boh.givebag <player> kitbag.red.unlocked, where <player> should be replaced with your user name or steam ID. Place items in the bag. Ensure you have the bagofholding.upgrade.kitbag.red.unlocked permission. Note: If you gave yourself a different color bag, the permission you must grant will be different. Caution: Only grant that permission to administrators who will be creating kits. Use the "Upgrade" feature to transform the bag into a kitbag.red.locked bag, which makes it so players can no longer add items to the bag. Use the Kits plugin to create or update the kit from your inventory. If you want to edit the bag contents, but don't want to do it from scratch, follow the below steps. Redeem the kit. Ensure you have the bagofholding.upgrade.kitbag.red.locked permission. Note: If this is a different color bag, the permission you must grant will be different. Caution: Only grant that permission to administrators who will be creating kits. Use the "Upgrade" feature to transform the bag into a kitbag.red.unlocked bag. Update the items in the bag. Use the "Upgrade" feature to transform the bag back into a kitbag.red.locked bag, which makes it so players can no longer add items to the bag. Use the Kits plugin to update the kit from your inventory. Permissions Admin permissions bagofholding.manageloot -- Allows running the commands boh.spawnloot and boh.clearloot. bagofholding.stats -- Allows running the command boh.stats. bagofholding.listbags -- Allows running the command boh.listbags. bagofholding.listcontainers -- Allows running the command boh.listcontainers. bagofholding.config -- Allows running the commands boh.setskins, boh.addskins, boh.settheme and boh.addtheme. bagofholding.givebag -- Allows running the command boh.givebag <player> <bag profile> <amount>. bagofholding.givekitbag -- Allows running the command boh.givekitbag <player> <bag profile> <kit name>. Limit permissions Depending on how you have configured the plugin, there will be additional permissions following the pattern bagofholding.limit.<type>.<suffix>, one for each limit permission profile. The plugin comes with the following limit profiles by default. bagofholding.limit.player.unlimited -- Allows the player to store unlimited bags in their inventory. bagofholding.limit.wearable.unlimited -- Allows the player to wear unlimited bags. This permission, and other bagofholding.limit.wearable.* permissions won't exist unless you enable Player wearable bag limits in the config. Otherwise, the wearable container will share bag limits with the rest of the player inventory. bagofholding.limit.backpack.unlimited -- Allows the player to store unlimited bags in their backpack (Backpacks plugin on uMod). bagofholding.limit.container.unlimited -- Allows the player to store unlimited bags in storage containers that they deploy. You can define additional limit profiles in the Player bag limits, Player wearable bag limits, Backpack bag limits, Default container bag limits and Container bag limits by prefab sections of the config. Note: When adding container bag limits by prefab, the permission will look like bagofholding.limit.container.<short_prefab_name>.<suffix>. Upgrade permissions Each bag profile that is configured with a valid upgrade target will generate a permission following the pattern bagofholding.upgrade.<profile>. Granting that permission allows players to upgrade that type of bag. For example, the bagofholding.upgrade.generic.small permission allows players to upgrade generic.small bags to generic.medium bags. We suggest using a permissions manager UI plugin to discover and grant bag upgrade permissions. Commands This plugin provides both chat and console commands using the same syntax. When using a command in chat, prefix it with a forward slash: /. Admin / server commands boh.spawnloot -- Spawns loot in loot containers throughout the map. Intended for first-time setup, since enabling loot spawns in the config will only add bags to loot containers that spawn while the plugin is loaded. boh.clearloot -- Removes bags from all loot containers. Intended for first-time setup in conjunction with the boh.spawnloot command. boh.stats -- Prints an overview of how many bags are present on the server. Note: Some bags may not show up in the results if another plugin has deleted them and backed up their data on disk (for example, bags inside player Backpacks if the player is not connected or has not opened their Backpack during this play session). boh.listbags <filter> -- Prints a table view in console, showing all of the bag profiles defined in the config, matching the keyword filter if provided. Requires the bagofholding.listbags permission. boh.listcontainers -- Prints all container prefabs in the game. Requires the bagofholding.listcontainers permission. boh.setskins <category> <skin1> <skin2> <skin3> <skin4> <skin5> <skin6> <skin7> -- Updates the primary skin of all bag profiles in the specified category. The exact number of skins you supply must match the number of bags in the specified category. For example, if there are 7 bag profiles in the generic category (one for each size), then you can use this command with 7 distinct skins to update the config for all of those bag profiles at once. The first bag profile will be given the first skin, the second bag profile will be given the second skin, and so on. In addition to updating the config for you, this will change all the currently known bags on the server, which have the affected bag profiles, to use the specified skins, saving you the trouble of having to recreate the bags. This command will ensure that the specified skins are made the primary skins of the affected bag profiles. boh.addskins <category> <skin1> <skin2> <skin3> <skin4> <skin5> <skin6> <skin7> -- Adds the specified skins as secondary skins to all bag profiles in the specified category. The first bag profile will be given the first skin, the second profile will be given the second skin, and so on. Similar to the boh.setskins command, this will update the config, but will not update the skins of existing bags on your server. boh.settheme <theme> -- Updates the primary skin of the preset bag categories (bagofholding, generic, armor_clothing, food_medical, items_construction, resources_components, weapons_tools) to the specified theme. Valid themes: fantasy_chevrons, fantasy_circles,leather_chevrons,leather_circles, tactical_chevrons, tactical_circles. Note: If the config has significantly changed (i.e., if any of the preset bag categories no longer have exactly 7 bag profiles), this command will not work, but you can alternatively use boh.setskins or manually update the config. boh.addtheme -- Like boh.settheme, but instead of changing the primary skin of the affected bag profiles, this will only add the specified theme as secondary skins. boh.givebag <player> <bag profile> <amount> <skin index> -- Creates a stack of bags and gives it to the specified player. Requires the bagofholding.givebag permission. If the bag has multiple skins defined, you can specify which one via the skin-index argument. For example, boh.givebag Somebody generic.small 1 3 to give one bag with the 3rd skin applied. The amount and skin index parameters are optional, both defaulting to 1. boh.givekitbag <player> <bag profile> <kit name> -- Creates a bag, populates it with the specified kit (from the Kits plugin on uMod), then gives it to the specified player. Requires the bagofholding.givekitbag permission. Player commands bag.open -- Depending on the context, this command will either open the first unlocked bag in your inventory, open the next bag in your inventory, or close your inventory if no more bags are found. bag.next -- Like bag.open, but will continuously cycle bags rather than closing your inventory when no more bags are found. bag.prev -- Like bag.next, but will start at the end of your inventory, and will cycle bags in reverse order. Configuration The settings and options can be configured in the BagOfHolding file under the config directory. The use of an editor and validator is recommended to avoid formatting issues and syntax errors. General settings Wearable bags -- Determines whether players can place bags in their wearable inventory slots. Disabled by default. Enabling this will incur a very minor performance cost. Allow wearing bags in the backpack slot (true or false) -- Determines whether players can wear bags in the backpack/parachute slot. Default: false. Allow wearing bags in non-backpack slots (true or false) -- Determines whether players can wear bags in non-backpack slots. Default: false. Visual backpack -- Determines whether the visual backpack will be displayed on players while wearing a bag. Enabling this will incur a minor performance cost. Display while a bag is worn in the backpack slot (true or false) -- Determines whether the visual backpack will be enabled while the player is wearing a bag in their backpack slot. Default: false. You should set Wearable bags -> Allow wearing bags in the backpack slot to the same value that you set here. Display while a bag is worn in a non-backpack slot (true or false) -- Determines whether the visual backpack will be enabled while the player is wearing a bag in a non-backpack slot. Default: false. You should set Wearable bags -> Allow wearing bags in non-backpack slots to the same value that you set here. Gather mode Enabled (true or false) -- Determines whether players can toggle gather mode on bags. While gather mode is enabled for a given bag, any item that gets added to the bag's parent container will automatically be moved into the bag if possible. Default: false. Enable stack improvements (true or false) -- Determines whether the plugin will attempt to auto stack bags when dropping them onto each other in the player inventory (as long as the destination bag is not currently open). Default: true. Setting to false will improve performance. Note that dropping a bag with contents onto an empty bag will never stack them; the empty bag must be dropped onto the bag that has contents. Dropped bag item settings Dropped bag item settings -- Determines the behavior of dropped bag items. Enable dropped bag buoyancy (true or false) -- Determines whether dropped bag items will float in water. Default: true. Enable opening dropped bags while at bag limit (true or false) -- Determines whether attempting to pick up a bag will actually open the bag instead, if the player cannot carry the bag due to their current bag limits. Default: true. Auto equip dropped bags while at bag limit (true or false) -- Determines whether attempting to pick up a bag will attempt to equip it in a wearable slot instead, if the player cannot carry the bag in their main inventory due to their current bag limits. Default true. This feature only applies while bags are configured to be wearable. Minimum despawn time (seconds) -- Determines the minimum time (in seconds) before a dropped bag item will despawn. This option also affects the despawn time of dropped backpacks that contain bag items. Note: The despawn time of bags will also take into account the despawn time of items within them. Default: 1800 (30 minutes). UI settings UI settings Belt button -- Determines the display of the button next to the player's belt. By default, the button appears on the right side of the belt. The button will only appear if you have at least one bag in your inventory. Clicking the button will open the first bag in your inventory via the bag.open command. Enabled (true or false) -- Determines whether the belt button is displayed. Default: true. Only show while bags are worn (true or false) -- Determines whether bags must be worn in order to display the belt button. OffsetX -- Determines where the belt button is displayed, relative to the bottom center of the screen. Set to 185.0 to place the button on the right side of the belt. Set to -263.0 to place the button on the left side of the belt. Default: 185.0. Display skin ID -- Determines the skin ID displayed on the belt button. Default: 2824115881 (the fantasy style generic.small bag). Loot interface -- Determines the display of the loot panel while the player has a bag open. Enable back button (true or false) -- Determines whether a back button is displayed when the player is looting a bag that is inside another container. Clicking the back button will switch the loot interface to the bag's parent container. Default: true. Bag selector -- Determines the display of the bag selector. While looting a bag, the bag selector will display an icon for each lootable bag in the bag's parent container, allowing for 1-click access to other bags. The bag selector also displays a vertical progress bar to indicate how full each bag is. The bag selector automatically resizes depending on how many bags need to be displayed. The default settings allow a maximum of 10 bags to be displayed. Enabled (true or false) -- Determines whether the bag selector is displayed. Default: true. Max width -- Determines how much space the bag selector can use. By default, it can take up to 5 inventory slots worth of space, but that may cause the "LOOT" text to overlap the bag selector for players using non-English languages. If your players are seeing overlap, consider reducing this value. Default: 310.0. Min bag size -- Determines the minimum size (height and width) of each bag displayed in the bag selector. When many bags are displayed, each bag icon will be no smaller than this value. Default: 29.0. Max bag size -- Determines the maximum size (height and width) of each bag displayed in the bag selector. When few bags are displayed, each bag icon will be no larger than this value. Default: 58.0. Effects Effects Open effect -- Determines the effect played when a player opens a bag. Only the player that opens the bag will witness this effect, so it will not give away their location. Default: "assets/prefabs/deployable/small stash/effects/small-stash-deploy.prefab". Set to "" to disable the effect. Disabling effects will improve performance. Upgrade effect -- Determines the effect played when a player upgrades a bag. Only the player that upgrades the bag will witness this effect, so it will not give away their location. Default: "assets/prefabs/misc/halloween/lootbag/effects/silver_open.prefab". Set to "" to disable the effect. Disabling effects will improve performance. Loot spawns Loot spawns -- Determines which loot containers bags may spawn in. This feature is disabled by default. As an alternative to using this feature, you might want to use a dedicated loot plugin to spawn bags, by designating that the loot plugin should spawn a large halloween loot bag (short name: halloween.lootbag.large, item ID: 479292118) with an appropriate skin ID from the Bag profiles section of the config. Enabled (true or false) -- Determines whether this plugin will attempt to add bags to loot containers. Default: false. Bag spawn chance percent by prefab -- Determines the probability (0.0 to 100.0 percent) of bags spawning in loot containers, according to the prefab of the loot container. For each type of loot container, you may define the spawn chance for each bag profile. To see which container prefabs this can accept, run the command boh.listcontainers (requires the bagofholding.listcontainers permission). Bag limits Player bag limits -- Determines how many non-empty bags that players can hold in their inventory at once. This applies to the entire player inventory, including the wearable container, unless Player wearable bag limits is enabled, in which case limits for the wearable container is configured separately. Default limits -- These limits apply to all players, except those who have been granted a permission from Bag limits by permission. Max total bags -- See below. Max bags by category name -- See below. Bag limits by permission -- List of bag limits which override the defaults. Permission suffix -- Determines the permission generated, following the pattern bagofholding.limit.player.<suffix>. For example: bagofholding.limit.player.unlimited. You may define unlimited bag limit profiles, but at most one will be assigned to each player. Limit profiles toward the end of the list have highest priority. Max total bags -- See below. Max bags by category name -- See below. Player wearable bag limits -- Determines how many non-empty bags that players can wear. Enabled -- Determines whether wearable limits are separate from Player bag limits. While true, limits defined in this section apply to the wearable container, and limits defined in Player bag limits apply only to the rest of the player inventory. While false, limits defined in this section have no effect. Default limits -- These limits apply to all players, except those who have been granted a permission from Bag limits by permission. Max total bags -- See below. Max bags by category name -- See below. Bag limits by permission -- List of bag limits which override the defaults. Permission suffix -- Determines the permission generated, following the pattern bagofholding.limit.wearable.<suffix>. For example: bagofholding.limit.wearable.unlimited. You may define unlimited bag limit profiles, but at most one will be assigned to each player. Limit profiles toward the end of the list have highest priority. Max total bags -- See below. Max bags by category name -- See below. Vanilla backpack bag limits -- Determines how many non-empty bags that vanilla backpacks can hold (while equipped or while dropped on the ground). Enabled -- Determines whether vanilla backpack bag limits are determined by this section or by Default container bag limits -> Default limits. While true, limits defined in this section apply to vanilla backpacks. While false, limits defined in this section have no effect, and vanilla backpacks will follow the rules defined for default container limits. Default limits -- These limits apply to all backpacks. There is not currently a way to override this for players with permission. Max total bags -- See below. Max bags by category name -- See below. Backpack bag limits -- Determines how many non-empty bags that players can hold in their backpack at once (Backpacks plugin on uMod). Default limits -- These limits apply to all players, except those who have been granted a permission from Bag limits by permission. Max total bags -- See below. Max bags by category name -- See below. Bag limits by permission -- List of bag limits which override the defaults. Permission suffix -- Determines the permission generated, following the pattern bagofholding.limit.backpack.<suffix>. For example: bagofholding.limit.backpack.unlimited. You may define unlimited bag limit profiles, but at most one will be assigned to each player. Limit profiles toward the end of the list have highest priority. Max total bags -- See below. Max bags by category name -- See below. Default container bag limits -- Determines how many non-empty bags can be placed into storage containers. Can be overriden for specific container prefabs via Container bag limits by prefab. Default limits -- These limits apply to all storage containers, except those owned by players who have been granted a permission from Bag limits by permission. Max total bags -- See below. Max bags by category name -- See below. Bag limits by permission -- List of bag limits which override the defaults. Permission suffix -- Determines the permission generated, following the pattern bagofholding.limit.container.<suffix>. For example: bagofholding.limit.container.unlimited. You may define unlimited bag limit profiles, but at most one will be assigned to each player. Limit profiles toward the end of the list have highest priority. Max total bags -- See below. Max bags by category name -- See below. Container bag limits by prefab -- Determines how many non-empty bags can be placed into storage containers, by container prefab, superseding Default container bag limits. See below for an example. [full_prefab_path] -- For each prefab you want to define limits, you will need to define a new subsection with the full prefab path, then declare the bag limit definition under that section. Default limits -- These limits apply to all storage containers with this prefab, except for those owned by players who have been granted a permission from Bag limits by permission. Max total bags -- See below. Max bags by category name -- See below. Bag limits by permission -- List of bag limits which override the defaults for this prefab. Permission suffix -- Determines the permission generated, following the pattern bagofholding.limit.container.<short_prefab_name>.<suffix>. For example: bagofholding.limit.container.locker.deployed.unlimited. You may define unlimited bag limit profiles, but at most one will be assigned to each player. Limit profiles toward the end of the list have highest priority. Max total bags -- See below. Max bags by category name -- See below. Every bag limit profile has the following options. Max total bags -- Determines how many total non-empty bags (of any category) are allowed. Max bags by category name -- Determines how many non-empty bags of each category are allowed. This references the optional Category name property of each bag profile. For example, if you set this to { "resources_components": 2 }, players will be able to hold at most 2 Resources & Components bags. Example Container bag limits by prefab: "Container bag limits by prefab": { "assets/prefabs/deployable/locker/locker.deployed.prefab": { "Default limits": { "Max total bags": 0, "Max bags by category name": {} }, "Bag limits by permission": [ { "Permission suffix": "unlimited", "Max total bags": -1, "Max bags by category name": {} } ] } }, Bag content rulesets Bag content rulesets -- This section allows you to determine which items can be placed inside bags. It also allows you to define limits for bags inside bags. Each bag profile can refer to a content ruleset that you define in this section, to determine what is allowed in that type of bag. This design allows you to define a ruleset once, and reference it in many bag profiles. Name -- The name of the ruleset. Once you have defined this ruleset, you can assign it a specific bag profile by going to the Bag profiles section of the config and setting the Contents ruleset option to this ruleset name. Allowed item categories -- Determines which categories of items are allowed to be placed into bags that use this ruleset. Allowed values: All, Ammunition, Attire, Common, Component, Construction, Electrical, Favourite, Food, Fun, Items, Medical, Misc, Resources, Search, Tool, Traps, Weapon. Any item within allowed categories may be forcibly disallowed by specifying its short name in Disallowed item short names, or by specifying its skin ID in Disallowed skin IDs. Disallowed item categories -- Determines which categories of items are disallowed from being placed into bags that use this ruleset. This option is useful if you want to allow most categories, with explicit denial of specific categories. Note: For this option to work, you'll also need to set Allowed item categories to ["All"]. Any item disallowed this way can be forcibly allowed by specifying its short name in Allowed item short names, or by specifying its skin ID in Allowed skin IDs. Allowed item short names -- Determines which items are allowed to be placed into bags that use this ruleset, in addition to the categories specified in Allowed item categories. Any item allowed this way can be forcibly allowed by specifying its skin ID in Disallowed skin IDs. Disallowed item short names -- Determines which item short names are disallowed from being placed into bags that use this ruleset. Any item disallowed this way can be forcibly allowed if its skin ID is specified in Allowed skin IDs. Allowed skin IDs -- Determines which skin IDs are allowed to be placed into bags that use this ruleset. By default, all skin IDs are allowed, as long as the item is allowed via Allowed item categories or Allowed item short names. This option is useful for allowing specific skins of specific items that are not otherwise allowed. For example, if you want a specific bag to only be able to hold other bags (and no other items), simply set this option to the list of bag skin IDs, and leave all of the other options blank. Disallowed skin IDs -- Determines which skin IDs are disallowed from being placed into bags that use this ruleset. This option is useful for disallowing specific skins of specific items that are otherwise allowed via Allowed item categories or Allowed item short names. Bag limits -- Determines how many non-empty bags can fit inside this bag. Max total bags -- See the section on bag limits. Max bags by category name -- See the section on bag limits. Order of precedence: Disallowed skin IDs > Allowed skin IDs > Disallowed item short names > Allowed item short names > Disallowed item categories > Allowed item categories. Bag profiles Bag profiles -- This section defines every type of bag. For an item to function as a bag, it must be a large halloween loot bag (short name: halloween.lootbag.large, item ID: 479292118) with a skin ID from this section. Name -- The short name of the bag. This must be unique. The bag profile name is used by various features of the plugin, including bag limits, bag upgrades, upgrade permissions, loot spawns, the bagofholding.givebag command, developer hooks, and the developer API. Skin IDs -- Determines the skin IDs associated with this bag profile. Any halloween.lootbag.large item that has one of these skin IDs will be considered a bag controlled by this plugin and will use this profile. You can associate as many skin IDs per bag profile as you want. By default, most bag profiles will have three skins in the config, for fantasy, leather and tactical themes, in that order. Defining multiple skin IDs allows you to provide multiple themes of bags to players, letting them choose which they prefer, as long as you provide players with a means to get the alternative skins. The first skin ID is considered the primary skin ID, and will be used when creating a bag for loot spawns, when giving a bag via the boh.givebag command (unless the skin index parameter is supplied), and when other plugins create bags via API methods. When a bag is upgraded, if the target bag profile has multiple skin IDs defined, the new skin ID will be selected according to the order in the list of skin IDs. For example, if the bag's current profile lists three skin IDs, and the current skin is second, then the upgraded bag will use the second skin ID in the target profile. If there is no corresponding skin in the same position in the target profile (e.g., 3rd skin on current profile, but the target has only 2 skins), then the first skin will be selected. Capacity -- Determines how many container slots this bag will have. Maximum: 48. Display name -- Determines the display name of the bag item. This shows at the top of the screen when a bag item is selected in your inventory. Category name -- Determines the bag category. Other sections of the config will refer to this name to define bag limits. This should not be confused with item categories, which are used to define content rulesets. Contents ruleset -- Determines which items are allowed inside this bag. This must refer to the name of a ruleset defined in the Bag content rulesets section of the config. Allow player item input (true or false) -- Determines whether players can place items into this bag. Setting to false is useful if you want to provide a player with a bag full of items, as a sort of temporary container. This feature is intended primarily for "kit bags". Upgrade -- Determines which bag profile this bag can be upgraded to, as well as the items required to purchase the upgrade. To -- The name of the target bag profile. Cost -- The cost to purchase the upgrade. Item short name -- The short name of the currency item. Default: "scrap". Item skin ID -- The skin ID of the currency item. Set to 0 to accept any skin. Default: 0. Amount -- The amount of currency required to purchase the upgrade. Use Economics (true or false) -- Set to true to require Economics currency instead of item currency. Default: false. Use Server Rewards (true or false) -- Set to true to require Server Rewards currency instead of item currency. Default: false. Recyclable -- Determines whether the bag can be recycled, as well as which items it will recycle into. Enabled (true or false) -- Determines whether the bag can be recycled. Default: false. Setting to false for every bag will improve performance by disabling recycling hooks. Ingredients -- List of items that will be produced by recycling the bag. Item short name -- The short name of the ingredient item. Default: "scrap". Item skin ID -- The skin ID of the ingredient item. Default: 0. Amount -- The amount of the ingredient item to produce. Item display name -- The display name of the ingredient item. Localization The default messages are in the BagOfHolding file under the lang/en directory. To add support for another language, create a new language folder (e.g. de for German) if not already created, copy the default language file to the new folder and then customize the messages. Frequently asked questions (FAQ) Q: How do I configure this plugin with Alpha Loot? The built-in Loot spawns feature of this plugin is compatible with popular loot plugins such as Better Loot and Alpha Loot. Alpha Loot users also have the option of spawning bags directly via the Alpha Loot plugin. To do so, use the Alpha Loot Editor to add skinned large halloween loot bags to the loot table (short name: halloween.lootbag.large, item ID: 479292118). Tutorial: https://www.youtube.com/watch?v=54A77rQ0Ld8. Caution: Make sure that the bag skin IDs you configure to spawn via Alpha Loot are assigned to bag profiles in the Bag of Holding config. If you configure a particular skin ID in the loot table that does not correspond to a bag profile, then those bags will function as just normal halloween loot bags. Q: How do I make players spawn with bags? One way is via the Auto Kits feature of the Rust Kits plugin on uMod. Other plugins that allow you to manage default loadouts for players should also work, as long as they support skinned items. Q: Can bags be placed inside other bags? Yes, but by default, only the bagofholding bag profile can contain other bags, and it cannot contain other bagofholding bags. You can fine tune this behavior in the configuration. Q: Can this plugin replace Backpack plugins? Yes, for the majority of use cases. If you are using a Backpack plugin for the sole purpose of allowing players to carry more items (with backpacks dropping on death), then you can simply switch to using bags instead. The main difference is that Backpacks allow players to spawn with additional storage, which players cannot lose, whereas players must acquire bags to use additional storage, and players can lose or trade that storage capacity. If you are currently allowing players to keep their Backpack items on death, bags cannot replace that use case, but bags can enhance that use case since you can configure certain bags to be allowed in Backpacks to effectively increase the Backpack storage capacity. Q: Is this plugin compatible with Backpack plugins? Yes, this plugin has native support for the Backpacks plugin on uMod. By default, only empty bags can be placed inside Backpacks, but you can configure that behavior under the Backpack bag limits. Q: Can bags have more than 7 upgrade stages? Yes, you can have as many upgrade stages as you want. By default, each bag category has 7 stages (one for each row of capacity), but it's possible to have 48 bag stages per bag category (one for each slot of capacity). The simplest way to add more stages is to create additional bag profiles that reuse the existing skins but have different capacity. For example, you can define "Small Bag (13)" with 13 capacity and "Small Bag (14)" with 14 capacity, both with skin ID 2824115881. Q: How can I change bag icons? See the Default bags section below for instructions on changing the bag icons to other presets created by our development team. If you want to create your own bag icons, simply upload them to the Steam workshop as you would any Rust skin, then assign the corresponding workshop/skin ID to a bag profile in the Bag Profiles section of the config. Q: Can I configure bag upgrades to require multiple items? No. Currently, bag upgrades can only be configured to require a single type of item. Q: Where is this plugin's data file? This plugin doesn't use nor need a data file in its current design. This plugin utilizes a vanilla Rust capability to store items inside other items, similar to how attachments are placed inside weapons. Plugin compatibility / troubleshooting During initial development of this plugin, many plugin compatibility issues were identified and fixed. Some themes of compatibility issues were systematically eliminated, never to be seen again. However, some conflicts may remain undiscovered. If you encounter a new compatibility issue, please report it to the maintainers of both plugins so that we can work out a solution. This section also provides tips on how you can mitigate various plugin conflicts. Hook conflict with OnItemSplit The simplest way to mitigate this issue is by disabling stacking of the halloween.lootbag.large item. You can also avoid this issue by ensuring each bag profile uses a unique skin ID. Hook conflict with CanStackItem The simplest way to mitigate this issue is by disabling stacking of the halloween.lootbag.large item. Tips for maintainers of other plugins: Don't allow stacking when the item being moved is not empty Don't allow stacking two items whose containers have different capacity Hook conflict with CanCombineDroppedItem The simplest way to mitigate this issue is by disabling stacking of the halloween.lootbag.large item. Hook conflict with CanMoveItem This can happen in two possible situations: When quick-looting an item from a bag into your inventory. If this is when you see the conflict, you will have to contact us to troubleshoot further. When dropping a bag onto another bag. If this is when you see the conflict, the simplest way to mitigate this issue is by disabling stacking of the halloween.lootbag.large item. You can also mitigate this issue by setting Enable stack improvements to false in the config. Hook conflict with CanBeRecycled or OnItemRecycle The simplest way to mitigate this issue is by disabling recycling on all bag profiles. The belt icon overlaps with other plugin icons To mitigate this issue, you can either disable the belt icon or reposition it in the config. Opening a bag spawns loot There are two likely possibilities. The bag had a skin ID that is not configured in the plugin. One way this can happen is if you use another plugin to acquire bags, and the skin ID you configured in that plugin isn't assigned to any bag profiles in the Bag of Holding config. If this is the case, please reconfigure either plugin so that they refer to the same skin ID. You have a loot plugin which is using the OnItemAction hook to override the behavior of opening halloween.lootbag.large items. There is little that you can do to mitigate this. Please suggest to the maintainer of the loot plugin that they add a check to ignore halloween loot bags that are skinned. Opening a bag inside a special container just closes the container This probably means that the plugin that controls the special container immediately deleted the container when it was closed. In this case, the plugin that manages that container will need to implement changes to allow that container to persist after closed. Pressing the back button inside a bag just closes the bag This probably means that the bag has been placed inside a special container which the plugin doesn't know how to open. It could be due to a miss in this plugin, but more likely, that container is a special type of container controlled by another plugin (such as a Backpack or Bank). In this case, we will have to develop a solution to enable compatibility. Quick Sort UI overlaps bag selector UI The simplest way to mitigate this issue is by reducing the max bag size to 6 rows (36 slots). Alternatively, you can update the Quick Sort plugin's configuration to reposition or resize the UI. We are also planning to introduce an option to reposition the bag selector to the right side of the loot panel in a future update. Weapons/deployables placed in bags eventually become unusable This may happen if you are using an incompatible item cleaner or entity cleaner plugin. Most likely, the cleaner plugin doesn't know to account for situations where items are deeply nested. It should be easy for the cleaner plugin's maintainer to fix this issue. After attending an event, items inside bags are missing or changed This can happen if the plugin which manages the event temporarily replaces the player's items and restores the items when the player leaves the event. This issue usually manifests as items losing their skins and contents (e.g., weapons losing attachments, water jugs losing water). To resolve, the maintainer of the event plugin will need to update that plugin to recursively save items to infinite depth. If the developer needs help, they can look at the code of other plugins such as Backpacks, Kits, and Restore Upon Death. After placing a bag inside a special container, items inside the bag are missing or changed This may happen if the plugin which manages the special container tries to save the items in a custom way, such as via a data file. This issue usually manifests as items losing their skins and losing contents (e.g., weapons losing attachments, water jugs losing water). To resolve, the maintainer of the container plugin (e.g., Bank, Backpacks, Extra Pockets feature of Skill Tree) will need to update that plugin to recursively save items to infinite depth. If the developer needs help, they can look at the code of other plugins such as Backpacks, Kits, and Restore Upon Death. Default bags The default configuration provides many bag profiles, detailed below. See this workshop collection to find hundreds of bag skins created specifically for this plugin. Armor & Clothing Bags Name Skin ID Capacity Display Name Upgrades to Upgrade cost Recycle output armor_clothing.xxsmall 2824111863 6 XXSmall Armor & Clothing Bag armor_clothing.xsmall 100 Scrap 100 Scrap armor_clothing.xsmall 2824114542 12 XSmall Armor & Clothing Bag armor_clothing.small 200 Scrap 200 Scrap armor_clothing.small 2824116781 18 Small Armor & Clothing Bag armor_clothing.medium 300 Scrap 300 Scrap armor_clothing.medium 2824118678 24 Medium Armor & Clothing Bag armor_clothing.large 400 Scrap 400 Scrap armor_clothing.large 2824120619 30 Large Armor & Clothing Bag armor_clothing.xlarge 500 Scrap 500 Scrap armor_clothing.xlarge 2824122747 36 XLarge Armor & Clothing Bag armor_clothing.xxlarge 600 Scrap 600 Scrap armor_clothing.xxlarge 2824124690 42 XXLarge Armor & Clothing Bag generic.xxlarge 900 Scrap 900 Scrap Food & Medical Bags Name Skin ID Capacity Display Name Upgrades to Upgrade cost Recycle output food_medical.xxsmall 2824111462 6 XXSmall Food & Medical Bag food_medical.xsmall 100 Scrap 100 Scrap food_medical.xsmall 2824114220 12 XSmall Food & Medical Bag food_medical.small 200 Scrap 200 Scrap food_medical.small 2824116431 18 Small Food & Medical Bag food_medical.medium 300 Scrap 300 Scrap food_medical.medium 2824118433 24 Medium Food & Medical Bag food_medical.large 400 Scrap 400 Scrap food_medical.large 2824120423 30 Large Food & Medical Bag food_medical.xlarge 500 Scrap 500 Scrap food_medical.xlarge 2824122439 36 XLarge Food & Medical Bag food_medical.xxlarge 600 Scrap 600 Scrap food_medical.xxlarge 2824124459 42 XXLarge Food & Medical Bag generic.xxlarge 900 Scrap 900 Scrap Items & Construction Bags Name Skin ID Capacity Display Name Upgrades to Upgrade cost Recycle output items_construction.xxsmall 2824113019 6 XXSmall Items & Construction Bag items_construction.xsmall 100 Scrap 100 Scrap items_construction.xsmall 2824115483 12 XSmall Items & Construction Bag items_construction.small 200 Scrap 200 Scrap items_construction.small 2824117546 18 Small Items & Construction Bag items_construction.medium 300 Scrap 300 Scrap items_construction.medium 2824119338 24 Medium Items & Construction Bag items_construction.large 400 Scrap 400 Scrap items_construction.large 2824121607 30 Large Items & Construction Bag items_construction.xlarge 500 Scrap 500 Scrap items_construction.xlarge 2824123520 36 XLarge Items & Construction Bag items_construction.xxlarge 600 Scrap 600 Scrap items_construction.xxlarge 2824125425 42 XXLarge Items & Construction Bag generic.xxlarge 900 Scrap 900 Scrap Resources & Components Bags Name Skin ID Capacity Display Name Upgrades to Upgrade cost Recycle output resources_components.xxsmall 2824112139 6 XXSmall Resources & Components Bag resources_components.xsmall 100 Scrap 100 Scrap resources_components.xsmall 2824114807 12 XSmall Resources & Components Bag resources_components.small 200 Scrap 200 Scrap resources_components.small 2824117061 18 Small Resources & Components Bag resources_components.medium 300 Scrap 300 Scrap resources_components.medium 2824118878 24 Medium Resources & Components Bag resources_components.large 400 Scrap 400 Scrap resources_components.large 2824121055 30 Large Resources & Components Bag resources_components.xlarge 500 Scrap 500 Scrap resources_components.xlarge 2824123001 36 XLarge Resources & Components Bag resources_components.xxlarge 600 Scrap 600 Scrap resources_components.xxlarge 2824124960 42 XXLarge Resources & Components Bag generic.xxlarge 900 Scrap 900 Scrap Weapons & Tools Bags Name Skin ID Capacity Display Name Upgrades to Upgrade cost Recycle output weapons_tools.xxsmall 2824110902 6 XXSmall Weapons & Tools Bag weapons_tools.xsmall 100 Scrap 100 Scrap weapons_tools.xsmall 2824113791 12 XSmall Weapons & Tools Bag weapons_tools.small 200 Scrap 200 Scrap weapons_tools.small 2824116147 18 Small Weapons & Tools Bag weapons_tools.medium 300 Scrap 300 Scrap weapons_tools.medium 2824118115 24 Medium Weapons & Tools Bag weapons_tools.large 400 Scrap 400 Scrap weapons_tools.large 2824120210 30 Large Weapons & Tools Bag weapons_tools.xlarge 500 Scrap 500 Scrap weapons_tools.xlarge 2824122197 36 XLarge Weapons & Tools Bag weapons_tools.xxlarge 600 Scrap 600 Scrap weapons_tools.xxlarge 2824124162 42 XXLarge Weapons & Tools Bag generic.xxlarge 900 Scrap 900 Scrap Generic Bags Name Skin ID Capacity Display Name Upgrades to Upgrade cost Recycle output generic.xxsmall 2824110403 6 XXSmall Bag generic.xsmall 100 Scrap 100 Scrap generic.xsmall 2824113497 12 XSmall Bag generic.small 200 Scrap 200 Scrap generic.small 2824115881 18 Small Bag generic.medium 300 Scrap 300 Scrap generic.medium 2824117824 24 Medium Bag generic.large 400 Scrap 400 Scrap generic.large 2824119889 30 Large Bag generic.xlarge 500 Scrap 500 Scrap generic.xlarge 2824121905 36 XLarge Bag generic.xxlarge 600 Scrap 600 Scrap generic.xxlarge 2824123811 42 XXLarge Bag bagofholding 3000 Scrap 1500 Scrap Bag Of Holding The Bag of Holding is the ultimate bag. It can hold all items, including 6 other bags. Name Skin ID Capacity Display Name Recycle output bagofholding 2824136143 48 Bag of Holding 1500 Scrap Kit bags All kits bags accept all items and have 42 capacity. Kit bags also upgrade in a circular fashion, making it easy for admins to edit them. Name Skin ID Display Name Upgrades to kitbag.red.unlocked 2830974120 Kit Bag (Editable) kitbag.red.locked kitbag.red.locked 2830952942 Kit Bag kitbag.red.unlocked kitbag.orange.unlocked 2830974662 Kit Bag (Editable) kitbag.orange.locked kitbag.orange.locked 2830963984 Kit Bag kitbag.orange.unlocked kitbag.yellow.unlocked 2830975150 Kit Bag (Editable) kitbag.yellow.locked kitbag.yellow.locked 2830964495 Kit Bag kitbag.yellow.unlocked kitbag.green.unlocked 2830975690 Kit Bag (Editable) kitbag.green.locked kitbag.green.locked 2830965006 Kit Bag kitbag.green.unlocked kitbag.cyan.unlocked 2830976173 Kit Bag (Editable) kitbag.cyan.locked kitbag.cyan.locked 2830965451 Kit Bag kitbag.cyan.unlocked kitbag.blue.unlocked 2830976481 Kit Bag (Editable) kitbag.blue.locked kitbag.blue.locked 2830965789 Kit Bag kitbag.blue.unlocked Alternative bag skins By default, the bag profiles in the config use the fantasy style skins. If you want to change them to the leather or tactical style skins, you can use the boh.setskins command to edit the config in bulk. For example, to change the generic bag set to use tactical style skins, run the command boh.setskins generic 2828559961 2828562701 2828573095 2828576548 2828579661 2828582369 2828585532. Fantasy bag skins As of v1.9.0, you can apply the fantasy theme by running the command boh.settheme fantasy_chevrons. The old way is to run all of the following commands. boh.setskins bagofholding 2824136143 boh.setskins generic 2824110403 2824113497 2824115881 2824117824 2824119889 2824121905 2824123811 boh.setskins armor_clothing 2824111863 2824114542 2824116781 2824118678 2824120619 2824122747 2824124690 boh.setskins food_medical 2824111462 2824114220 2824116431 2824118433 2824120423 2824122439 2824124459 boh.setskins items_construction 2824113019 2824115483 2824117546 2824119338 2824121607 2824123520 2824125425 boh.setskins resources_components 2824112139 2824114807 2824117061 2824118878 2824121055 2824123001 2824124960 boh.setskins weapons_tools 2824110902 2824113791 2824116147 2824118115 2824120210 2824122197 2824124162 Additionally, you should set UI settings -> Belt button -> Display skin ID to one of the fantasy skins such as 2824115881. Here are all the fantasy skin sequences, in case you want to use other icons or colors. Fantasy plain: 2824110403 2824113497 2824115881 2824117824 2824119889 2824121905 2824123811 Fantasy gray chevrons: 2828128662 2828134240 2828137909 2828146246 2828148357 2828150051 2828152784 Fantasy white chevrons: 2828128323 2828133931 2828137681 2828146038 2828148160 2828149845 2828152530 Fantasy black chevrons: 2828128041 2828133673 2828137257 2828145823 2828148006 2828149681 2828152306 Fantasy red chevrons: 2828127703 2828133308 2828136874 2828145607 2828147808 2828149504 2828152062 Fantasy yellow chevrons: 2824113019 2824115483 2824117546 2824119338 2824121607 2824123520 2824125425 Fantasy pink chevrons: 2824112653 2824115134 2824117246 2824119088 2824121332 2824123291 2824125171 Fantasy orange chevrons: 2824112139 2824114807 2824117061 2824118878 2824121055 2824123001 2824124960 Fantasy light blue chevrons: 2824111863 2824114542 2824116781 2824118678 2824120619 2824122747 2824124690 Fantasy green chevrons: 2824111462 2824114220 2824116431 2824118433 2824120423 2824122439 2824124459 Fantasy blue chevrons: 2824110902 2824113791 2824116147 2824118115 2824120210 2824122197 2824124162 Fantasy gray circles: 2828493103 2828497364 2828501735 2828506499 2828509849 2828514060 2828517736 Fantasy white circles: 2828493673 2828498179 2828502089 2828506819 2828510161 2828514392 2828518167 Fantasy black circles: 2828494015 2828498546 2828502435 2828507169 2828510478 2828514709 2828518812 Fantasy red circles: 2828494496 2828498987 2828502735 2828507528 2828510830 2828515098 2828515098 Fantasy yellow circles: 2828494894 2828499337 2828503050 2828507851 2828511170 2828515395 2828519489 Fantasy pink circles: 2828495354 2828499673 2828503432 2828508323 2828511498 2828515725 2828519798 Fantasy orange circles: 2828495777 2828500070 2828503778 2828508555 2828511912 2828516131 2828520212 Fantasy light blue circles: 2828496161 2828500606 2828504060 2828508821 2828512403 2828516540 2828520492 Fantasy green circles: 2828496570 2828500962 2828504356 2828509103 2828512690 2828516933 2828520819 Fantasy blue circles: 2828496949 2828501318 2828504627 2828509404 2828513595 2828517346 2828521099 Leather bag skins As of v1.9.0, you can apply the leather theme by running the command boh.settheme leather_chevrons. The old way is to run all of the following commands. boh.setskins bagofholding 2860178102 boh.setskins generic 2831018252 2831025047 2831029422 2831036209 2831041769 2831047418 2831052354 boh.setskins armor_clothing 2831016990 2831023499 2831028259 2831032725 2831040190 2831046214 2831050372 boh.setskins food_medical 2831017392 2831023974 2831028588 2831033068 2831040759 2831046638 2831050826 boh.setskins items_construction 2831015836 2831021553 2831027189 2831031578 2831038734 2831044485 2831049142 boh.setskins resources_components 2831016651 2831023019 2831027874 2831032305 2831039657 2831045812 2831049942 boh.setskins weapons_tools 2831017759 2831024390 2831028922 2831033383 2831041231 2831047014 2831051442 Additionally, you should set UI settings -> Belt button -> Display skin ID to one of the leather skins such as 2831029422. Here are all the leather style skin sequences, in case you want to use other icons or colors. Leather plain: 2831018252 2831025047 2831029422 2831036209 2831041769 2831047418 2831052354 Leather gray chevrons: 2831013773 2831019060 2831025741 2831029969 2831036925 2831042295 2831047827 Leather white chevrons: 2831014482 2831019741 2831026169 2831030357 2831037360 2831042761 2831048137 Leather black chevrons: 2831015051 2831020041 2831026487 2831030777 2831037873 2831043219 2831048450 Leather red chevrons: 2831015444 2831020436 2831026854 2831031160 2831038330 2831043696 2831048702 Leather yellow chevrons: 2831015836 2831021553 2831027189 2831031578 2831038734 2831044485 2831049142 Leather pink chevrons: 2831016234 2831022032 2831027551 2831031924 2831039240 2831045338 2831049495 Leather orange chevrons: 2831016651 2831023019 2831027874 2831032305 2831039657 2831045812 2831049942 Leather light blue chevrons: 2831016990 2831023499 2831028259 2831032725 2831040190 2831046214 2831050372 Leather green chevrons: 2831017392 2831023974 2831028588 2831033068 2831040759 2831046638 2831050826 Leather blue chevrons: 2831017759 2831024390 2831028922 2831033383 2831041231 2831047014 2831051442 Leather gray circles: 2831053189 2831057140 2831060554 2831063925 2831066897 2831070017 2831082280 Leather white circles: 2831053670 2831057586 2831060848 2831064201 2831067178 2831071006 2831082963 Leather black circles: 2831054069 2831057911 2831061109 2831064444 2831067379 2831072147 2831084280 Leather red circles: 2831054490 2831058281 2831061382 2831064726 2831067561 2831073121 2831084887 Leather yellow circles: 2831054841 2831058559 2831061614 2831065014 2831067781 2831073592 2831085402 Leather pink circles: 2831055215 2831058892 2831061919 2831065349 2831068032 2831073925 2831085778 Leather orange circles: 2831055582 2831059194 2831062274 2831065681 2831068304 2831074420 2831087653 Leather light blue circles: 2831055919 2831059491 2831062555 2831066018 2831068615 2831076575 2831088591 Leather green circles: 2831056306 2831059795 2831062808 2831066320 2831068905 2831078713 2831088956 Leather blue circles: 2831056740 2831060200 2831063168 2831066588 2831069218 2831079950 2831089185 Tactical bag skins As of v1.9.0, you can apply the tactical theme by running the command boh.settheme tactical_chevrons. The old way is to run all of the following commands. boh.setskins bagofholding 2828612528 boh.setskins generic 2828559961 2828562701 2828573095 2828576548 2828579661 2828582369 2828585532 boh.setskins armor_clothing 2828558763 2828562098 2828571752 2828575986 2828579117 2828581616 2828584535 boh.setskins food_medical 2828559062 2828562247 2828572006 2828576133 2828579288 2828581907 2828584822 boh.setskins items_construction 2828557975 2828561492 2828570571 2828574809 2828578159 2828580887 2828583748 boh.setskins resources_components 2828558453 2828561930 2828571212 2828575734 2828578707 2828581409 2828584212 boh.setskins weapons_tools 2828559313 2828562454 2828572778 2828576369 2828579499 2828582142 2828585357 Additionally, you should set UI settings -> Belt button -> Display skin ID to one of the tactical skins such as 2828573095. Here are all the tactical style skin sequences, in case you want to use other icons or colors. Tactical plain: 2828559961 2828562701 2828573095 2828576548 2828579661 2828582369 2828585532 Tactical gray chevrons: 2828556434 2828560310 2828563014 2828573659 2828577253 2828580012 2828582671 Tactical white chevrons: 2828557125 2828560646 2828563283 2828573927 2828577583 2828580260 2828582975 Tactical black chevrons: 2828557433 2828560923 2828563544 2828574322 2828577810 2828580491 2828583268 Tactical red chevrons: 2828557692 2828561221 2828570104 2828574605 2828578000 2828580701 2828583514 Tactical yellow chevrons: 2828557975 2828561492 2828570571 2828574809 2828578159 2828580887 2828583748 Tactical pink chevrons: 2828558240 2828561757 2828570867 2828575078 2828578530 2828581157 2828583990 Tactical orange chevrons: 2828558453 2828561930 2828571212 2828575734 2828578707 2828581409 2828584212 Tactical light blue chevrons: 2828558763 2828562098 2828571752 2828575986 2828579117 2828581616 2828584535 Tactical green chevrons: 2828559062 2828562247 2828572006 2828576133 2828579288 2828581907 2828584822 Tactical blue chevrons: 2828559313 2828562454 2828572778 2828576369 2828579499 2828582142 2828585357 Tactical gray circles: 2828590059 2828592435 2828596053 2828598607 2828600574 2828602840 2828605402 Tactical white circles: 2828590364 2828592713 2828596309 2828598848 2828600805 2828603043 2828605787 Tactical black circles: 2828590658 2828592930 2828596615 2828599070 2828601043 2828603298 2828605999 Tactical red circles: 2828590870 2828593147 2828596818 2828599291 2828601240 2828603494 2828606193 Tactical yellow circles: 2828591083 2828593355 2828597034 2828599512 2828601444 2828603677 2828606367 Tactical pink circles: 2828591226 2828593626 2828597285 2828599643 2828601590 2828603900 2828606490 Tactical orange circles: 2828591389 2828594143 2828597493 2828599829 2828601859 2828604283 2828606662 Tactical light blue circles: 2828591603 2828594846 2828597739 2828600017 2828602079 2828604553 2828606893 Tactical green circles: 2828591817 2828595022 2828598019 2828600169 2828602304 2828604782 2828607054 Tactical blue circles: 2828592115 2828595430 2828598248 2828600324 2828602571 2828605041 2828607208 Developer API API_GetApi Dictionary<string, object> API_GetApi() Returns a dictionary where each key is a delegate for an API method. The purpose of this API is for high-performance scenarios where you don't want the overhead of calling the Bag of Holding via Oxide. Instead, your plugin should call Bag of Holding once (when Bag of Holding loads), cache the API, and invoke specific API methods via delegates whenever needed. Example: // Get the API. Ideally you should cache this. You should also re-cache this when Bag of Holding reloads. var api = BagOfHolding.Call("API_GetApi") as Dictionary<string, object>; // Get the API function you want. Ideally you should cache this too. The names are the same as documented below, but without the "API_" prefix. var isBagFunction = api["IsBag"] as Func<Item, bool>; // Call the API function. This call doesn't go through Oxide, so it saves CPU cycles, and allows you to avoid heap allocations when passing value types (e.g., when passing numbers). var isBag = isBagFunction(item); API_IsBag bool API_IsBag(Item item) Returns true if the item is a bag, else returns false. API_IsLootingBag bool API_IsLootingBag(BasePlayer player) Returns true if the player is looting a bag, else returns false. Note: If you call this immediately after the OnLootEntity Oxide hook is called, this will return false, because the plugin has to inspect the ItemContainers that the player is looting (basePlayer.inventory.loot.containers) which are populated after the OnLootEntity hook call has finished (that is where the Oxide hook is placed, and the plugin follows that pattern when explicitly calling OnLootEntity). Therefore, if you wish to detect whether a player has just opened a bag via the OnLootEntity hook, you should run your logic on the next frame (e.g., using NextTick). You may avoid calling this API entirely by simply verifying that the basePlayer.inventory.loot.containers list has only one container, and that it has a parentItem. If both of those criteria are met, the player is looting some sort of item, not necessary from this plugin, but that should be close enough. Note that this logic still needs to be in NextTick for the aforementioned reason. API_GetBagProfileName string API_GetBagProfileName(Item item) Returns the profile name of the bag (not the display name), else returns null if the item is not a bag. If you want the display name, simply read item.name. API_OpenBag bool API_OpenBag(BasePlayer player, Item item) Attempts to make the player open the bag Returns true if the item is a valid lootable bag (not a locked bag), and if not blocked by a plugin via the OnBagOpen hook Returns false if the item was not a valid lootable bag, or if blocked by a plugin via the OnBagOpen hook API_CreateBag Item API_CreateBag(string profileName, int amount = 1) Creates a bag using the specified profile name, with specified stack amount Returns the bag Item if successful Returns null if the specified profile name or stack amount is invalid Note: Bags can also be created using ItemManager.CreateByName("halloween.lootbag.large", amount, skinId) if the skin ID is known API_CreateKitBag Item API_CreateKitBag(string profileName, string kitName, BasePlayer initiator = null) Creates a bag using the specified profile name, and populates it with the specified kit Returns the bag Item if successful Returns null if the specified profile name or kit name is invalid If any kit items do not fit in the bag, they will be given to the BasePlayer initiator if provided, else deleted. API_ChangeBagProfile bool API_ChangeBagProfile(Item item, string profileName, BasePlayer initiator = null) Updates the bag item to the specified profile Returns true if the item is a valid bag, and if the specified profile name is valid Returns false if the item is not a valid bag, or if specified profile name is invalid If the target profile has less capacity than the current profile... Overflowing items will attempt to be compacted into the bag by moving them to earlier slots If compaction fails, the remaining items will be given to the BasePlayer initiator if provided If the BasePlayer initiator is not provided, the bag capacity will be increased to fit the overflowing items Caution: If the item is a stack of bags, it will change the profile for all of the bags in the stack Caution: Changing the profile of a bag that is already inside a container may cause the container to exceed configured bag limits API_UpgradeBag bool API_UpgradeBag(Item item, BasePlayer initiator = null) Updates the bag item to the profile designated as the upgrade target in the config Returns true if the item is a valid bag, and if the bag profile has a valid upgrade target in the config Returns false if the item is not a valid bag, or if the bag profile does not have a valid upgrade target in the config If the target profile has less capacity than the current profile... Overflowing items will attempt to be compacted into the bag by moving them to earlier slots If compaction fails, the remaining items will be given to the BasePlayer initiator if provided If the BasePlayer initiator is not provided, the bag capacity will be increased to fit the overflowing items Caution: If the item is a stack of bags, it will upgrade all of the bags in the stack Caution: Upgrading a bag that is already inside a container may cause the container to exceed configured bag limits Developer hooks OnBagOpen object OnBagOpen(Item item, BasePlayer player) Called when a player attempts to open a bag Returning false will prevent the bag from being opened Returning null will result in the default behavior OnBagOpened void OnBagOpened(Item item, BasePlayer player) Called after a player has started looting a bag No return behavior OnBagClosed void OnBagClosed(Item item, BasePlayer player) Called after a player has stopped looting a bag No return behavior OnBagUpgrade object OnBagUpgrade(Item item, string newProfileName, BasePlayer initiator) Called when a player or a plugin attempts to upgrade a bag Returning false will prevent the bag from being upgraded Returning null will result in the default behavior Note: The BasePlayer argument will be null if the upgrade was not initiated by a player. OnBagUpgraded void OnBagUpgraded(Item item, string newProfileName, BasePlayer initiator) Called after a bag has been upgraded to the profile designated in the config No return behavior Note: The BasePlayer argument will be null if the upgrade was not initiated by a player OnBagProfileChanged void OnBagProfileChanged(Item item, string newProfileName) Called after a bag's profile has been changed No return behavior$24.99 -
Version 1.0.2
18 downloads
The problem: Let's be honest: each of us found himself in a situation with too much storage containers and without any knowledge on where to find which item. Sure, you could just add some storage adaptors and pipes to your boxes but then you'll need to configurate each conveyor and care about splitting, routing and combining multiple pipes with multiple conveyors. Finally set up, the items - configured in the conveyor filters - will just be thrown into the next free slot and it will still be a big mess. Chest slot config gets you rid of this problem by sorting each item into the slot it belongs in, either by using an industrial conveyor system or by manually moving items into boxes. Save your (vip) players a ton of work and time they otherwise would waste on searching for items in boxes. Features: - Assign an item definition for each slot in small and large wooden boxes - Automatic sorting when attached to an industrial conveyor system - Manual sorting when right clicking, drag'n'dropping or hover looting items from your inventory - Display an overlay for the assigned item definition on each slot - Open the configuration by holding a configurable item or hold the secondary fire button while opening a chest - Quick select item definitions from categories - Search for item definitions by name - Removing and overwriting assigned item definitions - View-Only mode for players that should not be able to change the configuration Attention: Items will be sorted into the first slot with a matching item definition assigned OR with no item definition assigned. Since an unconfigured slot will accept every item, the inserted items will be dropped into it even if there's a slot with the correct item definition assigned AFTER the unconfigured slot. This logic does apply when storing items manually AND using a conveyor system. Permissions: ChestSlotConfig.use Player can open and use the full slot configuration. ChestSlotConfig.viewOnly Player can only view the assigned item definitions but not change them. Roadmap / Planned features: - Full UI rewrite: Yes I know the UI is flickering and looks awful. I'm a developer, not a designer - "Clear all" button: Removes all assigned item definitions. - "Move box" feature: Destroy a box and place it somewhere else without loosing the slot configuration. Just use the plugin "Telekinesis by WhiteThunder", move the box and reattach the storage adaptor. He did a great work with this plugin. - "Block slot" feature: Blocks a slot entirely so that no item will be sorted into. Useful for later assignment. - "Copy and paste" feature: Let's you copy and paste the configuration for a whole box (of the same type). - "Assign slot range" feature: Let's you assign a range of slot instead of having to click every single slot when assigning the same item definition. - Adding more storage containers: Tool cupboards, lockers etc. - "Favourite" feature: Let's you mark item definitions as favourite to let you find/access them faster. - Translation of item definition names: Currently only english is supported since the server does not know which language the clients use. Maybe I will use the "Rust Translation API by Arainrr". - "Assigned slot first" feature: Items will fill up slots with a matching item definition assigned to it first, even if there are free/unconfigured slots BEFORE matching slots. Known issues / bugs: - Conveyors not working when placing storage adaptors with "Ubertool by k1lly0u" (chaos code): Not a bug with my plugin only, just an information: if you place storage adaptors while "Ubertool" is active, the adaptor will snap to the boxes but will now connect logically. The conveyor will not transport items until you remove the adaptor and place it again with disabled "Ubertool"$29.99- 1 review
-
- 2
-
-
- #conveyor
- #industrial
- (and 8 more)
-

Version 1.0.5
629 downloads
This plugin creates a global storage system for each user. It will automatically create a storage container at each of the safe zones on the map (Outpost, Bandit camp and each Fishing Village), that users can use to access their global storage chest. The contents of this chest can be accessed from any other global storage chest on the map, or via the chat command (with permission). Chests can also be added manually via a chat command, or deployed via a skinned item which can be given via a chat or console command. Multiple players can use the chest at the same time, all of whom will access their own storage. Permissions globalstorage.admin - Required for certain chat commands. globalstorage.chat - Required for using the "gstorage" chat command. globalstorage.access - Required to access a the global storage chest. Chat commands Command: giveglobalbox Parameters: <optional: target name> <optional: quantity> Description: Gives the player a deployable Global Storage chest. Example: /giveglobalbox "new guy" 10 Permission: globalstorage.admin Command: gstorage Parameters: None Description: A chat command to open the players global storage. Example: /gstorage Permission: globalstorage.chat Command: addglobalstorage Parameters: None Description: A chat command to set a deployed chest as a Global Storage chest. Example: /addglobalstorage (while looking at a large wooden box). Permission: globalstorage.chat Command: addcustomlocation Parameters: None Description: Spawns a box using the users location and orientation. Location is saved to the config so will persist through wipes. Only recommended for servers that use the same map each wipe. Example: /addcustomlocation Permission: globalstorage.admin Command: removecustomlocation Parameters: None Description: Removes the targeted custom location box and deletes it from the config. Example: /removecustomlocation (while targeting a custom location box) Permission: globalstorage.admin API object CanAccessGlobalStorage(BasePlayer player) { // Returning a boolean value prevents the global storage from being accessed. return null; } void OnGlobalStorageOpened(BasePlayer player, StorageContainer container) { // Triggers after the container has been opened. }Free -

Version 1.0.2
3 downloads
Are you tired of filling up multiple "public" containers only to see that person X has walked by and completely looted them? "STORAGE LOCK" is our solution. With a simple chat command you can now lock certain public containers. The command will automatically fill the containers with 1 or more predefined items. Already implemented containers: - Hitchtrough - Cursed Cauldron - Lantern - Tuna light - Skull fire pit - Hobo barrel - Bonfire - Chinese lantern - Fireplace - Fireplace - Tool cabinet Locked fireboxes do not turn off anymore, as far as the charcoal slot is full. (Attention: these containers do not produce charcoal at all). Just be sure to set the predefined amount of resources high enough so you don't get any nasty surprises. -------------------------------- Sind Sie es leid, immer wieder mehrere "öffentliche" Container aufzufüllen, nur um zu sehen, dass Person X vorbeigegangen ist und sie komplett geplündert hat? "STORAGE LOCK" ist unsere Lösung. Mit einem einfachen Chatbefehl könnt ihr nun bestimmte öffentliche Container sperren. Durch den Befehl werden die Container automatisch mit 1 oder mehreren vordefinierten Gegenständen gefüllt. Bereits implementierte Containers: - Hitchtrough - Verfluchter Kessel - Laterne - Tunalicht - Totenkopf-Feuergrube - Hobo-Fass - Lagerfeuer - Chinesische Laterne - Feuerstelle - Feuerstelle - Werkzeugschrank Verschlossene Brennbehälter schalten sich nicht meh aus, insofern der Holzkohleslot voll ist. (Achtung: Diese Container produzieren gar keine Holzkohle) Achten Sie nur darauf, die vordefinierte Menge an Ressourcen hoch genug einzustellen, damit Sie keine bösen Überraschungen erleben. { "Main config": { "Debug": false, "Use Permissions": true, "Use Permission": "storagelock.use", "Auto Lock Permission": "storagelock.autolock", "Chaticon": 76561199180049293, "Chat Prefix": "[<color=#00ffff>StorageLock</color>] ", "Chat Command": "lock", "Items set invulnerable?": true }, "Container Settings": { "hitchtrough.deployed": { "Items": [ { "Input Item": "pumpkin", "Input Amount": 10000 } ], "Remove charcoal": false, "Autolock when player has permission": true }, "cursedcauldron.deployed": { "Items": [ { "Input Item": "wood", "Input Amount": 100000 } ], "Remove charcoal": true, "Autolock when player has permission": true }, "lantern.deployed": { "Items": [ { "Input Item": "lowgradefuel", "Input Amount": 100000 } ], "Remove charcoal": false, "Autolock when player has permission": true }, "tunalight.deployed": { "Items": [ { "Input Item": "lowgradefuel", "Input Amount": 100000 } ], "Remove charcoal": false, "Autolock when player has permission": true }, "skull_fire_pit": { "Items": [ { "Input Item": "wood", "Input Amount": 100000 } ], "Remove charcoal": true, "Autolock when player has permission": true }, "hobobarrel.deployed": { "Items": [ { "Input Item": "wood", "Input Amount": 100000 } ], "Remove charcoal": true, "Autolock when player has permission": true }, "campfire": { "Items": [ { "Input Item": "wood", "Input Amount": 100000 } ], "Remove charcoal": true, "Autolock when player has permission": true }, "campfire_static": { "Items": [ { "Input Item": "wood", "Input Amount": 100000 } ], "Remove charcoal": true, "Autolock when player has permission": true }, "chineselantern.deployed": { "Items": [ { "Input Item": "lowgradefuel", "Input Amount": 100000 } ], "Remove charcoal": false, "Autolock when player has permission": true }, "furnace": { "Items": [ { "Input Item": "wood", "Input Amount": 100000 } ], "Remove charcoal": true, "Autolock when player has permission": true }, "fireplace.deployed": { "Items": [ { "Input Item": "wood", "Input Amount": 100000 } ], "Remove charcoal": true, "Autolock when player has permission": true }, "cupboard.tool.deployed": { "Items": [ { "Input Item": "wood", "Input Amount": 1000000 }, { "Input Item": "stones", "Input Amount": 1000000 }, { "Input Item": "metal.fragments", "Input Amount": 1000000 }, { "Input Item": "metal.refined", "Input Amount": 1000000 } ], "Remove charcoal": false, "Autolock when player has permission": true } } }$4.99 -
Version 1.2.7
20 downloads
Adds up to 12 storage containers to the Chinook, configurable in the config\ChinookStorage.json file. (Default is 4, can be changed to anything from 1 to 12) All containers are small wooden boxes with 5 rows each, stacked up to 2 high in up to 6 stacks. The containers drop their loot upon destruction/crash of the Chinook, configurable to be disabled by setting false instead of true (Default is true). Option to set plugin to remove storage containers from the Chinooks on Unload of the plugin by changing to true (Default is false). Tested and Verified that it will not remove the Storage containers from the Scrap Transport Helicopters (from the ScrapHeliStorage plugin on umod) or from Minicopters (from my Minicopter Storage plugin). ChinookStorage.json$8.00 -
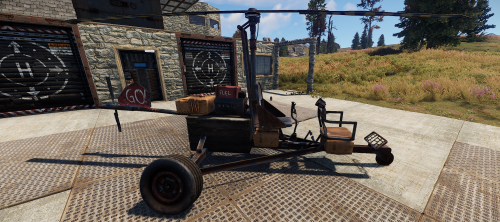
Version 2.0.1
105 downloads
Adds 1 to 4 storage containers to the Minicopter, configurable in the config\MinicopterStorage.json file. (Default is first 2 listed, can be changed to any combination of the 4.) 1st container is a small wooden box with 5 rows placed behind the pilot seat under the fuel tank & motor. (Default is true) 2nd container is a small stash with 2 rows placed under the pilot seat. (Default is true) 3rd container is a small stash with 2 rows placed under the passenger seat. (Default is false) 4th container is a small stash with 2 rows placed on top of the box and tail behind the fuel tank & motor. (Default is false) The containers drop their loot upon destruction/crash of the Minicopter, configurable to be disabled by setting false instead of true (Default is true). Option to set plugin to remove storage containers from the Minicopters on Unload of the plugin by changing to true (Default is false). Tested and Verified that it will not remove the Storage containers from the Scrap Transport Helicopters that have them added from the ScrapHeliStorage plugin on umod. MinicopterStorage.json$6.00 -
Version 1.0.1
4 downloads
A Medieval Storage House!! This prefab comes with some loot too!$8.00 -
Version 1.0.1
177 downloads
Redeem Storage API allows you to move all your plugin item sources to one inventory. It can reduce your multiple storage containers to one and remove requirement of having free space in inventory. The plugin doesn't have any real functionality by its own. Requires some plugin that uses this API. Features Move your all plugin item rewards/outputs to one storage. You can create multiple custom redeem inventories. Each storage have their own data file, so it's easy to clear only certain inventories on wipes. For Developers void AddItem(ulong userId, string name, Item item, bool popUp = false) - Moves the previously created item to the desired inventory of the player. Default Configuration (Version 1.0.0) { "Redeem Commands": [ "redeem", "red" ], "PopUp API Preset": "Legacy", "Redeem Storage Item Reminder (in seconds, 0 to disable)": 600, "Redeem Inventories": { "default": { "Default Redeem Inventory (only one)": true, "PopUp Message (configurable in lang file)": false, "Redeem Only In Safezone": true, "Redeem Only If Authed": true }, "shop": { "Default Redeem Inventory (only one)": false, "PopUp Message (configurable in lang file)": true, "Redeem Only In Safezone": false, "Redeem Only If Authed": false } } }Free -
Version 1.0.0
74 downloads
This is a simple plugin that lock the SnowMobile storage . When you spawn a new snowmobile on map you need to open one time the storage of the Snowmobile and after that it will never be able to open again. This plugin was meant and made for a RolePlay server.Free-
- 1
-
-
- #snowmobile
- #block
- (and 1 more)
-
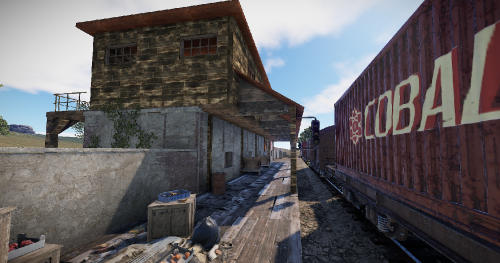
Version 1.0.0
4 downloads
A small abandoned train station in the middle of nowhere. There is a large warehouse with loot boxes on the upper floor. Please note: Download the prefab files and place them in RustEdit/CustomPrefabs directory of RustEdit. The prefabs can be accessed in the custom section of prefab browser. To use sinlge letters, the prefab has to be broken by selecting it (once placed) and using the "break prefab" function. Important: I don't use "prevent building sphere/cubes" in any of my prefabs, also no monument markers are set. These need to be added by yourself. If the NPCs are not wanted, press the H key (overview of all prefabs) and delete them from the prefab. Questions and suggestions: If you have any problems you can contact me via Katalaner - Discord: https://discord.gg/e2vrPszZFX Katalaner Webseite: http://katalaner.de Youtube: https://www.youtube.com/channel/UC_5P_wAFKl5bdndkDEQDK4g$6.94 -
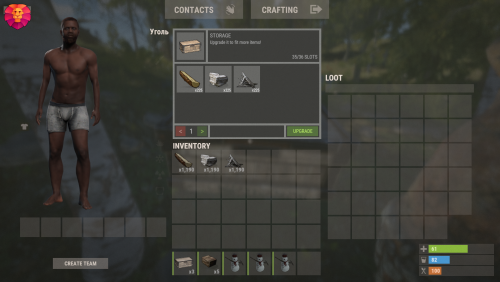
Version 1.0.6
44 downloads
XStorageUP - an increase in the number of slots in crates/campfires/furnaces. - Optimization of the interface for different monitor resolutions. - Storing crates data in - oxide/data/XStorageUP - There is a lang ru/en. - Sound effects when interacting with the menu. - Automatic cleaning of oxide/data after wipe. - There is an improvement coefficient. [ The more slots, the more expensive ] - There are permissions to limit the number of slots. - Improved crates/campfires/furnaces retain their properties after restart. - Checking for interaction with the desired crated. [If the box is destroyed, lifted or the player moves away from it, then nothing can be improved, and the player will receive a corresponding message on the screen. ] -> Overview - YouTube <- Change the location of the UI button. "Button - AnchorMin": "1 0", "Button - AnchorMax": "1 0", "Button - OffsetMin": "-441 16", "Button - OffsetMax": "-222 98", Working with the backpack plugin. Two options for how to eliminate the backpack improvement (plugin): - Remove the assignment of the player ID to the container (OwnerID) so that it is always 0. [ Only if the OwnerID of the container (backpack) is not used anywhere ] - Replace the Backpack container with one not used in the upgrade. [ For instance: SUPER Stocking - assets/prefabs/misc/xmas/stockings/stocking_large_deployed.prefab ] Permissions xstorageup.use - allow upgrading crates/campfires/furnaces. xstorageup.vip - allow placement of improved crates/campfires/furnaces. Config { "General settings": { "Setting permissions to enhance N slots [ Leave blank to make unlimited for everyone ]": { "xstorageup.10": 10, "xstorageup.6": 6, "xstorageup.2": 2 }, "Button - AnchorMin": "1 0", "Button - AnchorMax": "1 0", "Button - OffsetMin": "-441 16", "Button - OffsetMax": "-222 98", "Button text size - А": 16, "Button text size - B": 11, "Button text size - C": 13 }, "Container settings": { "box.wooden.large": { "Maximum number of slots": 36, "Container type": "generic_resizable", "Coefficient. Make a crate upgrade more expensive with every N slot": 0.25, "List of resources for improving one slot": { "wood": 100, "stones": 100, "metal.fragments": 100 } }, "woodbox_deployed": { "Maximum number of slots": 20, "Container type": "generic_resizable", "Coefficient. Make a crate upgrade more expensive with every N slot": 0.2, "List of resources for improving one slot": { "wood": 100, "stones": 100, "metal.fragments": 100 } }, "furnace": { "Maximum number of slots": 16, "Container type": "largefurnace", "Coefficient. Make a crate upgrade more expensive with every N slot": 0.1, "List of resources for improving one slot": { "wood": 100, "stones": 100, "metal.fragments": 100 } }, "campfire": { "Maximum number of slots": 10, "Container type": "bbq", "Coefficient. Make a crate upgrade more expensive with every N slot": 0.1, "List of resources for improving one slot": { "wood": 100, "stones": 100, "metal.fragments": 100 } }, "hobobarrel.deployed": { "Maximum number of slots": 10, "Container type": "bbq", "Coefficient. Make a crate upgrade more expensive with every N slot": 0.1, "List of resources for improving one slot": { "wood": 100, "stones": 100, "metal.fragments": 100 } }, "cursedcauldron.deployed": { "Maximum number of slots": 10, "Container type": "bbq", "Coefficient. Make a crate upgrade more expensive with every N slot": 0.1, "List of resources for improving one slot": { "wood": 100, "stones": 100, "metal.fragments": 100 } }, "skull_fire_pit": { "Maximum number of slots": 10, "Container type": "bbq", "Coefficient. Make a crate upgrade more expensive with every N slot": 0.1, "List of resources for improving one slot": { "wood": 100, "stones": 100, "metal.fragments": 100 } }, "fireplace.deployed": { "Maximum number of slots": 10, "Container type": "bbq", "Coefficient. Make a crate upgrade more expensive with every N slot": 0.1, "List of resources for improving one slot": { "wood": 100, "stones": 100, "metal.fragments": 100 } }, "refinery_small_deployed": { "Maximum number of slots": 10, "Container type": "largefurnace", "Coefficient. Make a crate upgrade more expensive with every N slot": 0.1, "List of resources for improving one slot": { "wood": 100, "stones": 100, "metal.fragments": 100 } } }, "If the prefab and item shorts do not match [ ShortnamePrefab -> ShortnameItem ]": { "woodbox_deployed": "box.wooden", "hobobarrel.deployed": "hobobarrel", "cursedcauldron.deployed": "cursedcauldron", "fireplace.deployed": "fireplace.stone", "refinery_small_deployed": "small.oil.refinery" }, "Standard container slots": { "box.wooden.large": 30, "woodbox_deployed": 12, "furnace": 6, "campfire": 5, "hobobarrel.deployed": 5, "cursedcauldron.deployed": 5, "skull_fire_pit": 5, "fireplace.deployed": 5, "refinery_small_deployed": 6 } }$14.99 -
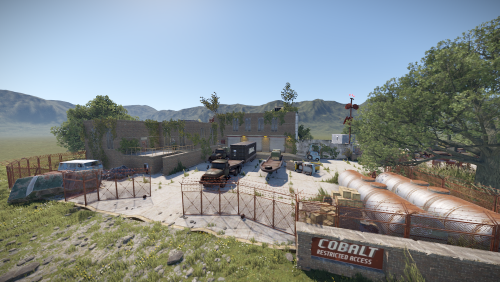
Version 1.05
2 downloads
This storage facility monument comes with 2 versions one has a blue key card with scientists and a red key card spawn. The other version is all open has no card or scientists and includes a recycler, it would be a good replacement for a gas station or supermarket with a bit more loot. Prefab count : Open 1821 – Closed 1859 Details – No card Version Recycler 2 Military Crates 3 Basic Crates Some smaller crates and barrels Tier 1 workbench Repair bench Details – Blue card Version Two fuse puzzle 2 Elite crates 5 Military Crates Some smaller crates and barrels Tier 1 workbench Repair bench Hidden tunnel exit$14.99 -
Version 1.0.0
15 downloads
This monument is largely underground set of secure storage vaults guarded with a team of scientists and APC defending the central control tower to the vaults battle your way up and start to open up the vaults one by one to see what cobalt is storing out of sight. Quick Start Extract the zip file into your RustEdit install folder. Start Rust Edit. Click on Prefabs at the top & open up your Prefab List. Under the Custom category you will now find RobJs Premium Prefabs. Double click on the prefab file and it will spawn it into the map for you. Drag it to the general area you want to place it and click on Snap To Terrain Apply the Height Mask, Topology Mask, and Splat Mask. Dependencies: Oxide and RustEdit.dll Contact And Help If you need to contact me discord is best: RobJ2210#2553 For help/support my discord group is best: Join RustMaps Discord$19.99 -
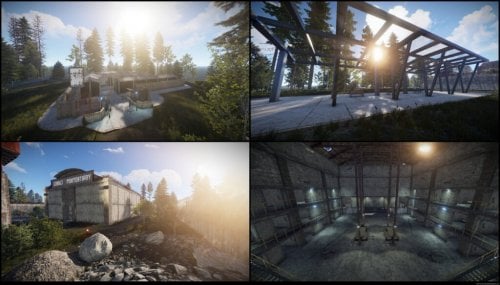
Version 1.0.0
5 downloads
A bundle of 3 different modern facilities perfect for your custom rust experience. Includes a Bus stop, Prison, and Self Storage prefabs tailored for use in a modern cityscape or roleplay scene. Note: These prefabs are not fully fledged monuments on their own and do not include any loot within them, these prefabs are intended for use in a modern town or city to add more facilities in which players can explore or use functionally in a roleplay scene. [HDRP Compatible] Prefab Count Bus Stop- 445 Prison- 1364 Self Storage- 833$10.00


.thumb.gif.b68fcc45abe70ab7d7235dffc8a0c770.gif)