Search the Community
Showing results for tags 'carbon'.
-
Version 0.1.17
1,710 downloads
Useful API plugin that imitates in-game status bars, allowing the addition of custom status bars. Note: AdvancedStatus does not display any bars on its own. This is done by other plugins that work with it. An example plugin demonstrating interaction with AdvancedStatus. The ability to specify the frequency of calculating the number of bars; The ability to specify the order of the bar; The ability to change the height of the bar; The abillity to customize the color and transparency of the background; The ability to set a material for the background; The ability to switch between CuiRawImageComponent and CuiImageComponent for the image; The ability to get images from the local folder(*SERVER*\oxide\data\AdvancedStatus\Images); The abillity to set own image and customize the color and transparency of the image; The abillity to set sprite instead of the image; The ability to specify custom text; The ability to customize the color, size and font of the text; No need to pass all parameters; No need to manually delete your bar when unloading your plugin. advancedstatus.admin - Grants access to the chat command(by default /bar). { "Chat command": "bar", "Is it worth enabling console notifications for the successful loading of local images?": false, "Interval(in seconds) for counting in-game status bars": 0.5, "Interval(in seconds) for counting Building Privilege status bars. Note: Calculating Building Privilege is significantly more resource-intensive than other counts": 1.0, "Bar - Display Layer. If you have button bars, it's advisable to use Hud(https://umod.org/guides/rust/basic-concepts-of-gui#layers)": "Under", "Bar - Left to Right": true, "Bar - Offset between status bars": 2, "Bar - Default Height": 26, "Main - Default Color": "#505F75", "Main - Default Transparency": 0.7, "Main - Default Material(empty to disable)": "", "Image - Default Image": "AdvancedBar_Image", "Image - Default Color": "#6B7E95", "Image - Default Transparency": 1.0, "Image - Outline Default Color": "#000000", "Image - Outline Default Transparency": 1.0, "Image - Outline Default Distance": "0.75 0.75", "Text - Default Size": 12, "Text - Default Color": "#FFFFFF", "Text - Default Transparency": 1.0, "Text - Default Font(https://umod.org/guides/rust/basic-concepts-of-gui#fonts)": "RobotoCondensed-Bold.ttf", "Text - Default Offset Horizontal": 0, "Text - Outline Default Color": "#000000", "Text - Outline Default Transparency": 1.0, "Text - Outline Default Distance": "0.75 0.75", "SubText - Default Size": 12, "SubText - Default Color": "#FFFFFF", "SubText - Default Transparency": 1.0, "SubText - Default Font": "RobotoCondensed-Bold.ttf", "SubText - Outline Default Color": "#000000", "SubText - Outline Default Transparency": 1.0, "SubText - Outline Default Distance": "0.75 0.75", "Progress - Default Color": "#89B840", "Progress - Default Transparency": 0.7, "Progress - Default OffsetMin": "25 2.5", "Progress - Default OffsetMax": "-3.5 -3.5", "Version": { "Major": 0, "Minor": 1, "Patch": 17 } } Note: Default values will be used if the external plugin does not pass the property itself. EN: { "MsgDays": "d", "MsgHours": "h", "MsgMinutes": "m", "MsgSeconds": "s" } RU: { "MsgDays": "д", "MsgHours": "ч", "MsgMinutes": "м", "MsgSeconds": "с" } images reload *ImageName* - Reloads the specified image from the image folder; all - Reloads all local images from the image folder. Example: /bar images reload all Note: To access the commands, the player must be an admin(console or owner) or have the advancedstatus.admin permission. OnAdvancedStatusLoaded: Called after the AdvancedStatus plugin is fully loaded and ready. OnPlayerGainedBuildingPrivilege: Called after the player enters their building privilege. OnPlayerLostBuildingPrivilege: Called after the player exits their building privilege. void OnAdvancedStatusLoaded() { Puts("The AdvancedStatus plugin is loaded and ready to go!"); } void OnPlayerGainedBuildingPrivilege(BasePlayer player) { Puts($"{player.displayName} entered the authorized building privilege zone."); } void OnPlayerLostBuildingPrivilege(BasePlayer player) { Puts($"{player.displayName} exited the authorized building privilege zone."); } [PluginReference] private Plugin AdvancedStatus; There are 15 methods: IsReady CreateBar UpdateContent DeleteBar DeleteCategory DeleteAllBars GetTotalClientBars GetTotalPlayerBars LoadImages LoadImage CopyImage DeleteImages DeleteImage BarExists InBuildingPrivilege There are 5 types of bar: Default - A simple bar that displays the provided information. Does not update the value of SubText by itself; Timed - Similar to the default bar, but it automatically disappears after the specified time in the TimeStamp parameter; TimeCounter - The SubText shows the remaining time until TimeStamp. Also automatically removed upon expiration of the TimeStamp; TimeProgress - Similar to the Timed bar, but additionally features an automatically filling progress bar; TimeProgressCounter - Similar to the TimeCounter bar, but additionally features an automatically filling progress bar. IsReady: Used to check if the AdvancedStatus plugin is loaded and ready to work. The IsReady method returns true if it is ready, or null if it is not. (bool)AdvancedStatus?.Call("IsReady");//Calling the IsReady method. If the result is not null(bool true), the plugin is ready. CreateBar: Used to create a bar or update bar values for a player. To call the CreateBar method, you need to pass 2 parameters. The first one is BasePlayer or <ulong>playerID. The second one is a dictionary with the parameters you need. In the CreateBar method, all parameters are optional, except for two: Id; Plugin. Parameters not specified when creating a new bar will use the values set in the AdvancedStatus plugin's configuration file. Parameters not specified during bar update will retain the values they had before the update. Note: The plugin does not update values automatically, you need to manually send new values. Dictionary<string, object> parameters = new Dictionary<string, object> { { "Id", "AdvancedStatusDemo_1" }, //<string>Unique identifier for the bar in your plugin. ***This is a required field. { "BarType", "Default" }, //<string>Type of the bar. There are 4 types: Default, Timed, TimeCounter and TimeProgress. { "Plugin", "AdvancedStatusDemo" }, //<string>Name of your plugin. ***This is a required field. { "Category", "Default" }, //<string>Internal plugin category of the bar. { "Order", 10 }, //<int>The position of your bar relative to others. Order is determined by increasing values(ASC). { "Height", 26 }, //<int>The height of your bar. A standard bar is 26 pixels. { "Main_Color", "#505F75" }, //<string>HTML Hex color of the bar background. { "Main_Transparency", 0.7f }, //<float>Transparency of the bar background. { "Main_Material", "assets/content/ui/uibackgroundblur.mat" }, //<string>Material of the bar background(empty to disable). { "Image", "scrap" }, //<string>Name of the image saved in the ImageLibrary or a direct link to the image if ImageLibrary is not used. { "Image_Local", "AdvancedStatusDemo_Scrap" }, //<string>The name of the image file(without its extension) located in *SERVER*\data\AdvancedStatus\Images. Leave empty to use Image. { "Image_Sprite", "" }, //<string>Sprite image of the bar. Leave empty to use Image_Local or Image. { "Is_RawImage", true }, //<bool>Which type of image will be used? True - CuiRawImageComponent. False - CuiImageComponent. { "Image_Color", "#6B7E95" }, //<string>HTML Hex color of the bar image. { "Image_Transparency", 1.0f }, //<float>Transparency of the image. { "Text", "Scrap" }, //<string>Main text. { "Text_Size", 12 }, //<int>Size of the main text. { "Text_Color", "#FFFFFF" }, //<string>HTML Hex color of the main text. { "Text_Font", "RobotoCondensed-Bold.ttf" }, //<string>Font of the main text. { "Text_Offset_Horizontal", 0 }, //<int>Horizontal offset for the main text. { "SubText", "35" }, //<string>Sub text. { "SubText_Size", 12 }, //<int>Size of the sub text. { "SubText_Color", "#FFFFFF" }, //<string>HTML Hex color of the sub text. { "SubText_Font", "RobotoCondensed-Bold.ttf" }, //<string>Font of the sub text. { "TimeStampStart", Network.TimeEx.currentTimestamp }, //<double>Responsible for specifying the start point of the time reference and 0% for TimeProgress and TimeProgressCounter bars. Used if the bar type is Timed, TimeCounter, TimeProgress or TimeProgressCounter. { "TimeStamp", Network.TimeEx.currentTimestamp + 6 }, //<double>Specifies the end time point after which the bar will be destroyed and 100% for TimeProgress and TimeProgressCounter bars. Used if the bar type is Timed, TimeCounter, TimeProgress or TimeProgressCounter. { "TimeStampDestroy", Network.TimeEx.currentTimestamp + 3 }, //<double>If TimeStampDestroy is specified and it is less than TimeStamp, the bar will be destroyed by TimeStampDestroy. Used if the bar type is Timed, TimeCounter, TimeProgress or TimeProgressCounter. { "Progress", (float)35 / 100f }, //<float>Progress. From 0.0 to 1.0. { "Progress_Reverse", false }, //<bool>Progress reverse. A value of false means that the progress will increase. Used if the bar type is TimeProgress or TimeProgressCounter. { "Progress_Color", "#89B840" }, //<string>Progress color. { "Progress_Transparency", 1f }, //<float>Progress transparency. { "Progress_OffsetMin", "25 2.5" }, //<string>Progress OffsetMin: "*left* *bottom*". { "Progress_OffsetMax", "-3.5 -3.5" }, //<string>Progress OffsetMax: "*right* *top*". { "Command", "kit" } //<string>If the field is not empty, the bar becomes clickable, and the specified command is executed upon clicking. Note: the command must be covalence. }; AdvancedStatus?.Call("CreateBar", player.userID.Get(), parameters); //Calling the CreateBar method with the passing of BasePlayer/playerID and a dictionary containing the required parameters. UpdateContent: Used to update only the content of an existing status bar. To call the UpdateContent method, you need to pass 2 parameters. The first one is BasePlayer or <ulong>playerID. The second one is a dictionary with the parameters you need. In the UpdateBar method, all parameters are optional, except for two: Id; Plugin. var parameters = new Dictionary<string, object> { { "Id", "MyID" }, //<string>Unique identifier for the bar in your plugin. ***This is a required field. { "Plugin", Name }, //<string>Name of your plugin. ***This is a required field. { "Text", "MyText" }, //<string>Main text. { "SubText", "MyText" }, //<string>Sub text. { "Progress", (float)amount / 100f }, //<float>Progress. From 0.0 to 1.0. }; AdvancedStatus?.Call("UpdateContent", player.userID.Get(), parameters); //Calling the UpdateContent method with the passing of BasePlayer/playerID and a dictionary containing the required parameters. DeleteBar: Used to remove the bar for a player. There are two methods for removing a bar by ID: with specifying a particular player; To call this method, you need to pass 3 parameters. The first one is BasePlayer or <ulong>playerID. The second one is Id of your bar and the third one is name of your plugin. without specifying a particular player (which removes it for all players) To call this method, you need to pass 2 parameters. The first one is Id of your bar and the second one is name of your plugin. AdvancedStatus?.Call("DeleteBar", player.userID.Get(), barID, Name); //Calling the DeleteBar method with the passing of BasePlayer/playerID, ID of the bar and the name of your plugin. AdvancedStatus?.Call("DeleteBar", barID, Name); //Calling the DeleteBar method with the passing of ID of the bar and the name of your plugin. If you try to delete a bar that doesn't exist, nothing bad will happen. So feel free to delete the bar without checking its existence. P.S. When unloading your plugin, there is no need to manually delete bars for players, AdvancedStatus will handle it automatically. DeleteCategory: Used to remove all bars associated with the plugin's category. To call the DeleteCategory method, you need to pass 2 parameters. The first one is category and the second one is name of your plugin. AdvancedStatus?.Call("DeleteCategory", "Default", Name);//Calling the DeleteCategory method by passing the category and name of your plugin DeleteAllBars: Used to remove all bars associated with the plugin. To call the DeleteAllBars method, you need to pass only 1 parameter. It is name of your plugin. AdvancedStatus?.Call("DeleteAllBars", Name);//Calling the DeleteAllBars method, passing the name of your plugin GetTotalClientBars: Used to get the number of client bars for the player. To call the GetTotalClientBars method, you need to pass only 1 parameter. It is BasePlayer or <ulong>playerID. (int)AdvancedStatus?.Call("GetTotalClientBars", player.userID.Get());//Calling the GetTotalClientBars method, passing the name of BasePlayer/playerID GetTotalPlayerBars: Used to get the number of active custom bars for the player. To call the GetTotalPlayerBars method, you need to pass only 1 parameter. It is BasePlayer or <ulong>playerID. (int)AdvancedStatus?.Call("GetTotalPlayerBars", player.userID.Get());//Calling the GetTotalPlayerBars method, passing the name of BasePlayer/playerID LoadImages: Used to check if the local images specified in the list are loaded. If any of the images are not loaded but their files exist in the images folder, the plugin will load them. To call the LoadImages method, you need to pass only 2 parameters. The first one is the <List<string>>list of image's name and the second one(optional) is <bool>force, which, if set to true, will force reload the image even if it already exists. AdvancedStatus?.Call("LoadImages", list, false);//Calling the LoadImages method, passing a list of image names LoadImage: Used to check if the local image is loaded. If the file is not loaded and exists in the images folder, the plugin will load it. To call the LoadImage method, you need to pass 2 parameters. The first one is the <string>image's name and the second one(optional) is <bool>force, which, if set to true, will force reload the image even if it already exists. AdvancedStatus?.Call("LoadImage", imgName, false);//Calling the LoadImage method, passing an image's name CopyImage: Used to create and load a copy of an existing image. To call the CopyImage method, you need to pass 3 parameters. The first parameter is the <string>source image's name, the second parameter is the <string>new image's name and the third one(optional) is <bool>force, which, if set to true, will force copy and reload the image even if it already exists. AdvancedStatus?.Call("CopyImage", "ZoneStatus_Default", "ZoneStatus_NewZone", false);//Calling CopyImage, passing the source image name and the new image name. DeleteImages: Used to delete a list of images and their files. To call the DeleteImages method, you need to pass 2 parameters. The first one is the <List<string>>list of image's name and the second one(optional) parameter is <bool>deleteFile, which, if set to true, will delete image's file too. AdvancedStatus?.Call("DeleteImages", list, true);//Calling DeleteImages, passing a list of image names. DeleteImage: Used for removing the image and the image file. To call the DeleteImage method, you need to pass 2 parameters. The first parameter is the <string>image's name and the second one(optional) parameter is <bool>deleteFile, which, if set to true, will delete image's file too. AdvancedStatus?.Call("DeleteImage", "ZoneStatus_NewZone", true);//Calling DeleteImage, passing the image name. BarExists: Used to check if the specified bar exists. To call the BarExists method, you need to pass 3 parameters. The first one is BasePlayer or <ulong>playerID. The second one is Id of your bar. And the third one is name of your plugin. (bool)AdvancedStatus?.Call("BarExists", player.userID.Get(), barID, Name);//Calling the BarExists method with the passing of BasePlayer/playerID, ID of the bar and name of your plugin. InBuildingPrivilege: Used to check if the player has authorized building privileges. To call the InBuildingPrivilege method, you need to pass BasePlayer or <ulong>playerID. (bool)AdvancedStatus?.Call("InBuildingPrivilege", player.userID.Get());//Checking if the player has Building Privilege.$1.99 -
Version 0.1.13
785 downloads
Plugin for Real PvE servers, featuring damage prevention, anti-griefing measures, customizable PvP zones, an automatic loot queue in radtowns and raid zones, and much more. P.S. Since the previous implementation with DynamicPVP was not correct and had some issues, I have added universal hooks(Developer API section) for general access from all PvP plugins, which are currently missing in DynamicPVP. I have requested the author to add them(3 lines), but for now, you will need to use the modified version of DynamicPVP.cs The ability to set "server.pve" to "true", which allows the server to have a "PvE" flag; Damage from NPC's are enabled when server.pve is true; The ability to inflict damage to one's own structures with "server.pve true"; The ability to destroy(including external walls) or rotate one's structures without any time constraints; The ability to force the decay of building blocks with Twigs grade, even if there is wood in the Tool Cupboard; The ability to toggle the gather resource restriction in someone else's Building Privileges; No one, except the owner or their friends, will be able to open their loot containers (chests, storages, bodies, etc.); Administrators can bypass loot restrictions; The ability to schedule the killing of players if they disconnect within someone else's Building Privilege; Disabling backpack and active item drop upon death, even if backpack is full; The ability to disable 'Give' messages; The ability to modify the items given at spawn on the beach; The ability to create an unlimited number of custom permissions; The ability to allow players to bypass the queue; The ability to set limits on sleeping bags, shelters and auto turrets for each permission; The ability to set a multiplier for the prices of monuments and events for each permission; The ability to customize the price and amount of vehicles for each of your custom permissions; The ability to assign vehicles to each player; The ability to customize the assigned price and available amount of vehicles for each of your custom permissions; An assigned vehicle can't be damaged, looted or pushed by other players, but it can be pushed if it is within someone else's Building Privilege; The ability to loot monuments through a queue system; The ability to configure monuments, setting their looting price and time, and adjusting status bars for each monument; The ability to acquire the privilege to loot events (helicopters, bradleys, and raidable bases) through a purchase; The ability to customize the price of each event types and loot attempts (lives); NPCs only aggress against players who are looting monuments, events or raidable bases; Only players who are looting monuments, events or raidable bases can inflict damage to NPCs; RaidableBases are protected from griefing(no damage, no loot and etc). Only the owner can interact with the raid; Neutral RaidableBases can be purchased; Prices for purchasing neutral raids are configurable for each difficulty level; Configurable raid limits (currently available) along with discount multipliers for purchases, for each permission. File location: *SERVER*\oxide\data\RealPVE\PermissionConfig.json Default: https://pastebin.com/5VtWZZVr All permissions are created and configured in the config file under the "List of permissions" section. You can create as many permissions as needed and customize them flexibly. It is recommended to use the prefix "realpve" in the permission's name, for example: "realpve.vip". NOTE: The first permission will serve as the default permission for those who do not have any permissions. { "List of permissions. NOTE: The first permission will be used by default for those who do not have any permissions.": [ { "Permission Name": "realpve.default", "Bypass Queue": false, "Limit of beds": 15, "Limit of shelters": 1, "Limit of auto turrets": 12, "Seconds that will be skipped when opening HackableLockedCrate. Range from 0 to 900": 0.0, "Monuments price multiplier": 1.0, "Events price multiplier": 1.0, "Limit of RaidableBases(at the time)": 1, "RaidableBases price multiplier": 1.0, "Vehicles settings": { "Horse": { "Limit": 1, "Price": 10.0 }, "Bike": { "Limit": 1, "Price": 5.0 }, "MotorBike": { "Limit": 1, "Price": 20.0 }, "Car": { "Limit": 1, "Price": 25.0 }, ... } }, { "Permission Name": "realpve.vip", "Bypass Queue": true, "Limit of beds": 20, "Limit of shelters": 2, "Limit of auto turrets": 15, "Seconds that will be skipped when opening HackableLockedCrate. Range from 0 to 900": 450.0, "Monuments price multiplier": 0.9, "Events price multiplier": 0.9, "Limit of RaidableBases(at the time)": 2, "RaidableBases price multiplier": 0.9, "Vehicles settings": { "Horse": { "Limit": 5, "Price": 9.0 }, "Bike": { "Limit": 5, "Price": 4.5 }, "MotorBike": { "Limit": 5, "Price": 18.0 }, "Car": { "Limit": 5, "Price": 22.5 }, ... } } ], "Version": { "Major": 0, "Minor": 1, "Patch": 1 } } An example of a monument/event/rb multipliers using default permissions. For example, if you set the price for the Harbor at $1000, a player with the default permission(1.0) will pay $1000 * 1 = $1000. Meanwhile, a player with a VIP permission(0.9) will pay $1000 * 0.9 = $900. However, if a player possesses a misbehaving permission with a value of 1.1, they will need to pay $1000 * 1.1 = $1100. { "Chat admin command": "adminpve", "Chat command": "realpve", "Is it worth forcibly implementing PvE for a server?": true, "Is it worth enabling GameTips for messages?": true, "Is it worth preventing the sending of 'Give' messages?": true, "Is it worth preventing resource gathering in someone else's building privilege area?": false, "Is it worth preventing the pickup of plants spawned by the server in someone else's building privilege zone?": false, "Is it worth assigning portals(Halloween and Christmas) to the first player?": true, "Is it worth preventing players from handcuffing others?": true, "Is it worth preventing a backpack from dropping upon player death?": true, "Is it worth preventing damage to the laptop of the Hackable Crate?": true, "Is it worth removing the penalties for recyclers in safe zones?": true, "Which currency symbol and format will be utilized?": "${0}", "Vehicles - Time(in seconds) to display the marker when searching for a vehicle. A value of 0 disables the marker": 15.0, "Anti-Sleeper - Time in seconds after which a player will be killed if they disconnect while inside someone else's Building Privilege. Set to 0 to disable": 1200.0, "PatrolHelicopterAI - Monument Crash. If set to true, the helicopter will attempt to crash into the monument": false, "PatrolHelicopterAI - Use Danger Zones. If set to false, the helicopter will function as it did before the April update": false, "PatrolHelicopterAI - Flee Damage Percentage. A value of 1 or above will make the helicopter behave as it did before the April update": 1.0, "Is Npc Random Raids enabled?": true, "PvP - Is friendly fire enabled by default when creating a team?": false, "PvP - Is it worth adding map markers for PvP zones?": true, "PvP - Name of the map maker": "PvP Zone!", "PvP - Settings for the status bar": { "Order": 9, "Height": 26, "Main_Color(Hex or RGBA)": "1 0.39 0.28 0.7", "Main_Transparency": 0.8, "Main_Material": "", "Image_Url": "https://i.imgur.com/oi5vIkk.png", "Image_Local(Leave empty to use Image_Url)": "RealPVE_PvP", "Image_Sprite(Leave empty to use Image_Local or Image_Url)": "", "Image_IsRawImage": false, "Image_Color(Hex or RGBA)": "1 0.39 0.28 1", "Image_Transparency": 1.0, "Is it worth enabling an outline for the image?": false, "Image_Outline_Color(Hex or RGBA)": "0.1 0.3 0.8 0.9", "Image_Outline_Transparency": 0.0, "Image_Outline_Distance": "0.75 0.75", "Text_Size": 12, "Text_Color(Hex or RGBA)": "1 1 1 1", "Text_Font(https://umod.org/guides/rust/basic-concepts-of-gui#fonts)": "RobotoCondensed-Bold.ttf", "Is it worth enabling an outline for the text?": false, "Text_Outline_Color(Hex or RGBA)": "#000000", "Text_Outline_Transparency": 1.0, "Text_Outline_Distance": "0.75 0.75", "SubText_Size": 12, "SubText_Color(Hex or RGBA)": "1 1 1 1", "SubText_Font": "RobotoCondensed-Bold.ttf", "Is it worth enabling an outline for the sub text?": false, "SubText_Outline_Color(Hex or RGBA)": "0.5 0.6 0.7 0.5", "SubText_Outline_Transparency": 0.0, "SubText_Outline_Distance": "0.75 0.75" }, "PvP - Settings for the progress status bar": { "Main_Color(Hex or RGBA)": "1 1 1 0.15", "Main_Transparency": 0.15, "Progress_Reverse": true, "Progress_Color": "#FF6347", "Progress_Transparency": 0.7, "Progress_OffsetMin": "0 0", "Progress_OffsetMax": "0 0" }, "Wipe ID": null, "Version": { "Major": 0, "Minor": 1, "Patch": 13 } } ENG: https://pastebin.com/ZMUL6pYL RUS: https://pastebin.com/Mx8cbMts Main commands(/realpve ) : autobuy - Toggle autobuy for monuments, vanilla events and raid bases with a total price greater than 0; pickup - Toggle access to pick up your items from the ground for all players; share - Manage access to looting your entities by other players(outside of the team): status *entityID*(optional) - Display information about the settings of the entity you are looking at or the one you specified; add *nameOrID* *entityID*(optional) - Add the specified player to the entity list you are looking at or the one you specified; remove *nameOrID* *entityID*(optional) - Remove the specified player from the entity list you are looking at or the one you specified; toggle *entityID*(optional) - Toggle the entity list you are looking at or the one you specified; delete *entityID*(optional) - Delete the settings for the entity you are looking at or the one you specified; clear - Delete the settings for all your entities. team - Manage your team: ff - Toggle the ability to damage your teammates. vehicle - Manage your vehicles: list - List of IDs for all your vehicles; find *vehicleID*(optional) - Help finding the vehicle you are looking at or the one you specified; unlink *vehicleID*(optional) - Unlink the vehicle you are looking at or the one you specified; clear - Unlink all your vehicles. Admin commands(/adminpve). Permission "realpve.admin" required: autobuy - Manage autobuy for monuments, vanilla events and raid bases: *nameOrId* - Toggle autobuy for the specified player; force monument/event/rb - Toggle forced autobuy. If enabled, player settings will be ignored; clear - Disable autobuy for everyone. config - Manage settings for values in the configuration file: forcepve *boolValue*(optional) - Is it worth forcibly implementing PvE for a server? gametips *boolValue*(optional) - Is it worth enabling GameTips for messages? givemsg *boolValue*(optional) - Is it worth preventing the sending of 'Give' messages? resource_privilege *boolValue*(optional) - Is it worth preventing resource gathering in someone else's building privilege area? plant_privilege *boolValue*(optional) - Is it worth preventing the pickup of plants spawned by the server in someone else's building privilege zone? heli_damage *boolValue*(optional) - Is it worth forcibly blocking damage from the patrol helicopter to building blocks and deployables? handcuffs *boolValue*(optional) - Is it worth assigning portals(Halloween and Christmas) to the first player? portals *boolValue*(optional) - Is it worth preventing players from handcuffing others? backpack_drop *boolValue*(optional) - Is it worth preventing a backpack from dropping upon player death? laptop_damage *boolValue*(optional) - Is it worth preventing damage to the laptop of the Hackable Crate? recycler_safezone *boolValue*(optional) - Is it worth removing the penalties for recyclers in safe zones? item_pickup *boolValue*(optional) - Is it worth allowing all players to pick up items dropped by others? If enabled, personal settings will be ignored; priceformat *stringValue* - The format that will be used for prices; vehicle_marker_time *floatValue* - Vehicles - Time in seconds to display the marker when searching for a vehicle. A value of 0 disables the marker; antisleeper *floatValue* - Anti-Sleeper - Time in seconds after which a player will be killed if they disconnect while inside someone else's Building Privilege. Set to 0 to disable; randomraids *boolValue*(optional) - Is it worth enabling support for the 'Npc Random Raids' plugin? teamff *boolValue*(optional) - Is friendly fire enabled by default when creating a new team? pvpmarkers *boolValue*(optional) - PvP - Is it worth adding map markers for PvP zones? pvpmarkersname *stringValue* - PvP - Name of the map maker. loot - Manage player access to entities without restrictions: *nameOrId* - Toggle unrestricted access for the specified player; self - Toggle unrestricted access for yourself; clear - Revoke unrestricted access for all players. monument - Manage monuments: list - List of available monuments; *monumentID*/this - Instead of the monumentID, you can use the word "this", but you must be inside the monument: suffix *boolValue*(optional) - Toggle the suffix display in the monument's name; broadcast *boolValue*(optional) - Toggle notifications about monument occupancy/release; time *intValue* - Set the looting time limit for the monument in seconds; price *floatValue* - Set the cost for looting rights. A value of 0 makes the monument free; offer *floatValue* - Set the offer duration for purchasing the monument in seconds; map_mode *intValue* - Set the marker display mode on the map. 0 - disabled, 1 - enabled, 2 - enabled during PvP mode; map_circle *boolValue*(optional) - Toggle the display of the monument's circle marker on the map; pvp *boolValue*(optional) - Toggle PvP mode for the monument; pvp_delay *floatValue* - Set the PvP mode duration in seconds for players after leaving the PvP monument; bar_progress *boolValue*(optional) - Toggle between TimeProgressCounter and TimeCounter bars for the monument. perm - Manage permissions: add *permName* - Adds a new permission to the list by copying values from the first(default) permission in the list. If the permission name starts with 'realpve', it will also register a new permission; add *permName* *sourcePermName* - Adds a new permission to the list by copying values from an existing permission in the list; remove *permName* - Removes an existing permission from the list; edit *permName* - Edits a permission: queue - Toggle the permission to bypass the server queue; beds *intValue* - Restriction on the number of available beds; shelters *intValue* - Restriction on the number of available shelters; turrets *intValue* - Restriction on the number of available turrets; hackable *floatValue* - Number of seconds(0-900) to skip when opening a hackable crate; monuments *floatValue* - Price multiplier for monuments; events *floatValue* - Price multiplier for vanilla events; rb_limit *intValue* - Restriction on the number of raid bases available simultaneously; rb_mult *floatValue* - Price multiplier for raid bases; vehicles *vehType* - Vehicles settings: limit *intValue* - Limit on the number of available vehicles by type; price *floatValue* - Price for registering a vehicle by type. clear - Removes all permissions from the list except the first one. pickup - Manage access to picking up another player's items from the ground: *nameOrId* - Toggle access to picking up a specific player's items from the ground; clear - Revoke access for all players to pick up items from the ground. share - Manage access to looting entities by other players(outside of the team): status *entityID*(optional) - Display information about the settings of the entity you are looking at or the one you specified; add *nameOrID* *entityID*(optional) - Add the specified player to the entity list you are looking at or the one you specified; remove *nameOrID* *entityID*(optional) - Remove the specified player from the entity list you are looking at or the one you specified; toggle *entityID*(optional) - Toggle the entity list you are looking at or the one you specified; delete *entityID*(optional) - Delete the settings for the entity you are looking at or the one you specified; clear *nameOrID*(optional) - Delete the settings for all entities or all entities of the specified player. vehicle - List of all available vehicle types: types - List of available vehicle types. Example: /realpve pickup /realpve vehicle find *netID* /realpve team ff /adminpve perm add realpve.vip2 /adminpve perm add realpve.vip2 realpve.vip /adminpve perm edit realpve.vip2 queue true /adminpve perm edit realpve.vip2 vehicles horse limit 5 /adminpve monument list /adminpve monument *monumentID* pvp /adminpve monument *monumentID* price 7.5 /adminpve loot iiiaka /adminpve pickup iiiaka /adminpve vehicle types This plugin provides the ability to claim vehicles, thereby preventing theft and griefing from other players. In permissions, you can set the price and quantity restrictions for each type of vehicle, ensuring flexible customization according to your preferences. An assigned vehicle can't be damaged, looted or pushed by other players, but it can be pushed if it is within someone else's Building Privilege. File location: *SERVER*\oxide\data\RealPVE\MonumentConfig.json Default: https://pastebin.com/XY1d9YaM This plugin introduces queue system and loot purchases for monuments. You can customize the price and time for looting for each monument. Within monuments, only the "Looter" and his friends have the ability to loot, pick up items or damage entities. Additionally, NPCs and animals within monuments do not aggress against other players and do not receive damage from them. If a player dies within the monument, they will have a grace period to return. This allows players to safely loot monuments without fear of griefing. Example of monument configuration: "ferry_terminal_1": { "Type(This parameter is just a hint. Changes won’t have any effect)": "RadTown", "Time in seconds(1-15) given to respond for purchasing monument looting": 5.0, "ShowSuffix": true, "Broadcast": true, "PvP - Is PvP enabled at this monument? If so, players will be able to kill each other, and loot will be publicly accessible": false, "PvP - Sets the delay in seconds that a player remains in PvP mode after leaving a PvP monument. 0 disables the delay": 10.0, "PvP - Is it worth adding map markers for monuments if they are PvP zones?": true, "LootingTime": 900, "Price": 15.0, "Is it worth using a progress bar for bars with a counter?": true, "Settings for the status bar": { "Order": 10, "Height": 26, "Main_Color(Hex or RGBA)": "#FFBF99", "Main_Transparency": 0.8, "Main_Material": "", "Image_Url": "https://i.imgur.com/awUrIwA.png", "Image_Local(Leave empty to use Image_Url)": "RealPVE_ferry_terminal_1", "Image_Sprite(Leave empty to use Image_Local or Image_Url)": "", "Image_IsRawImage": false, "Image_Color(Hex or RGBA)": "#FFDCB6", "Image_Transparency": 1.0, "Is it worth enabling an outline for the image?": false, "Image_Outline_Color(Hex or RGBA)": "0.1 0.3 0.8 0.9", "Image_Outline_Transparency": 0.0, "Image_Outline_Distance": "0.75 0.75", "Text_Size": 12, "Text_Color(Hex or RGBA)": "1 1 1 1", "Text_Font(https://umod.org/guides/rust/basic-concepts-of-gui#fonts)": "RobotoCondensed-Bold.ttf", "Is it worth enabling an outline for the text?": false, "Text_Outline_Color(Hex or RGBA)": "#000000", "Text_Outline_Transparency": 1.0, "Text_Outline_Distance": "0.75 0.75", "SubText_Size": 12, "SubText_Color(Hex or RGBA)": "1 1 1 1", "SubText_Font": "RobotoCondensed-Bold.ttf", "Is it worth enabling an outline for the sub text?": false, "SubText_Outline_Color(Hex or RGBA)": "0.5 0.6 0.7 0.5", "SubText_Outline_Transparency": 0.0, "SubText_Outline_Distance": "0.75 0.75" }, "Settings for the progress status bar": { "Main_Color(Hex or RGBA)": "1 1 1 0.15", "Main_Transparency": 0.15, "Progress_Reverse": true, "Progress_Color": "#FFBF99", "Progress_Transparency": 0.7, "Progress_OffsetMin": "0 0", "Progress_OffsetMax": "0 0" } } Type - This field serves only as an indicator for you. The changes won't have any impact; ShowSuffix - Suffix display. Some monuments (for example Warehouses) have suffixes in the name, like "Warehouse #12"; Broadcast - Enabling or disabling broadcasts when a monument is occupied or vacated; LootingTime - Time allocated for looting the monument; Price - The price for which you can start looting the monument. 0 means looting is free; BarSettings - Settings for the Advanced Status Bar. You can also choose the types of monuments by specifying them under the "List of tracked types of monuments" section. A list of all available types can be viewed on the MonumentsWatcher's page in the "Developer API" section. "List of tracked types of monuments": [ "RadTown", "RadTownWater", "RadTownSmall", "TunnelStation", "Custom" ] Events, similar to monuments, offer the opportunity to claim events. All events are configured in the config file under the "Settings for the events" section. You can customize the price of looting and looting attempts(deaths, including friends). Just like in monuments, only the "Looter" and his friends have the ability to loot and damage entities. Additionally, in events, NPCs do not aggress against other players. If a player(including friends) exceeds the death limit, the event became free, thereby providing other players with the opportunity to claim the event. Example of event configuration: { "Settings for the PatrolHelicopter events": { "IsEnabled": true, "Time in seconds (1-15) given to respond for purchasing this event. Note: This is shown to everyone who deals damage, and the first person to buy it will claim it": 5.0, "Is it worth removing fire from crates?": true, "The price to capture the event. 0 means the event is free": 50.0, "The number of deaths after which the event becomes public": 5 }, "Settings for the BradleyAPC events": { "IsEnabled": true, "Time in seconds (1-15) given to respond for purchasing this event. Note: This is shown to everyone who deals damage, and the first person to buy it will claim it": 5.0, "Is it worth removing fire from crates?": true, "The price to capture the event. 0 means the event is free": 50.0, "The number of deaths after which the event becomes public": 5 }, "Version": { "Major": 0, "Minor": 1, "Patch": 0 } } Price - The price to claim the event. 0 means looting is free; DeathLimit - Limit of deaths after which the event becomes free. File location: *SERVER*\oxide\data\RealPVE\NewbieConfig.json Default: https://pastebin.com/QHZCqpji An example of an item list given for the main inventory: "List of items for the main inventory": [ { "ShortName": "note", "Slot": 0, "Amount": 1, "SkinID": 0, "Text": "MsgNoteText" } ] P.S. In the Text field, you need to specify the language key. Or, you can just write any text, but there won't be a translation of the text. File location: *SERVER*\oxide\data\RealPVE\RaidableBasesConfig.json Default: https://pastebin.com/rpDng7Fd Integration with the RaidableBases plugin does not restrict its functionality in any way. On the contrary, it adds an anti-grief system that protects bases from malicious players. In raid bases, NPCs and other entities can only receive damage from the raid owner or their friends; Turrets and traps do not aggress against outsiders; You can customize the price of claiming to each difficulty and set individual discounts for each permission. You can still purchase raid bases using the /buyraid command. Raid bases without owners(buyable, maintained, manual and scheduled) can be bought for a price set in the configuration file or assigned to the first player who enters its radius, if the final price(price * discount) less or equals to 0. Additionally, as a bonus, upon buying this plugin, you receive 5 free bases for 3 difficulty levels, along with configured loot for them. [PluginReference] private Plugin RealPVE; There are 6 universal hooks that the plugin is subscribed to, the use of which allows interaction with PVP in various PVE plugins: OnPlayerEnterPVP OnPlayerExitPVP OnEntityEnterPVP OnEntityExitPVP CreatePVPMapMarker DeletePVPMapMarker OnPlayerEnterPVP: Used to add a player to PVP mode/zone. To call the OnPlayerEnterPVP hook, you need to pass 2 parameters: <BasePlayer>player - The player to add to PVP; <string>zoneID - A unique identifier for your PVP zone. This parameter is very important because a player can be in multiple PVP zones at the same time and passing the zoneID in this case allows for correct processing of the player's location within them. Interface.CallHook("OnPlayerEnterPVP", player, "*Your unique zone identifier*");//Calling the OnPlayerEnterPVP hook to tell PVE plugins that the player needs to be added to the specified PVP zone. OnPlayerExitPVP: Used to remove a player from PVP mode/zone. Calling this hook guarantees the player’s removal from the specified PVP zone, but does not guarantee the removal from PVP mode, as there may be other zones in addition to yours. Also, when a player dies, they are automatically removed from all PVP zones. To call the OnPlayerExitPVP hook, you need to pass 3 parameters, 1 of which is optional: <BasePlayer>player - The player to remove from PVP; <string>zoneID - A unique identifier for your PVP zone; <float>pvpDelay - Optional. When the player exits your PVP zone, you can also pass the PVP delay time. However, if the player still has other active PVP zones, your PVP delay will not take effect. Interface.CallHook("OnPlayerExitPVP", player, "*Your unique zone identifier*", 10f);//Calling the OnPlayerExitPVP hook to tell PVE plugins that the player needs to be removed from the specified PVP zone, with the pvpDelay(10 seconds) specified if the player no longer has any active PVP zones. OnEntityEnterPVP: Used to add an entity to PVP mode/zone. In the case of RealPVE, this hook is only necessary to add entities with an owner(player) to a PVP, allowing other players to interact with them, such as a player's corpse after death(PlayerCorpse) or a backpack after the corpse disappears(DroppedItemContainer). To call the OnEntityEnterPVP hook, you need to pass 2 parameters: <BaseEntity>entity - The entity to add to PVP; <string>zoneID - A unique identifier for your PVP zone. Interface.CallHook("OnEntityEnterPVP", entity, "*Your unique zone identifier*");//Calling the OnEntityEnterPVP hook to tell PVE plugins that the entity needs to be added to the specified PVP zone. OnEntityExitPVP: Used to remove an entity from PVP mode/zone. When an entity dies, it is automatically removed from all PVP zones. To call the OnEntityExitPVP hook, you need to pass 3 parameters, 1 of which is optional: <BaseEntity>entity - The entity to remove from PVP; <string>zoneID - A unique identifier for your PVP zone; <float>pvpDelay - Optional. When the entity exits your PVP zone, you can also pass the PVP delay time. However, if the entity still has other active PVP zones, your PVP delay will not take effect. Interface.CallHook("OnEntityExitPVP", entity, "*Your unique zone identifier*", 10f);//Calling the OnEntityExitPVP hook to tell PVE plugins that the entity needs to be removed from the specified PVP zone, with the pvpDelay(10 seconds) specified if the entity no longer has any active PVP zones. CreatePVPMapMarker: Used to create a map marker for the PVP zone. To call the CreatePVPMapMarker hook, you need to pass 5 parameters, 2 of which is optional: <string>zoneID - A unique identifier for your PVP zone; <Vector3>pos - The position of your PVP zone; <float>radius - The radius of the circle for your PVP zone; <string>displayName - Optional. The display name for the map marker; <BaseEntity>entity - Optional. The entity to which the map marker should be attached. Interface.CallHook("CreatePVPMapMarker", "*Your unique zone identifier*", pos, 25f, "ATTENTION! This is a PVP zone!");//Calling the CreatePVPMapMarker hook to tell PVE plugins to create a map marker for the specified zone, at the specified position with the given radius, but without specifying a parent entity. DeletePVPMapMarker: Used to delete a map marker for the PVP zone. To call the DeletePVPMapMarker hook, you need to pass only 1 parameter: <string>zoneID - A unique identifier for your PVP zone. Interface.CallHook("DeletePVPMapMarker", "*Your unique zone identifier*");//Calling the DeletePVPMapMarker hook to tell PVE plugins to delete a map marker for the specified zone. There are 5 hooks that the plugin calls: OnPlayerPVPDelay OnPlayerPVPDelayed OnPlayerPVPDelayRemoved OnZoneStatusText CanRedeemKit OnPlayerPVPDelay: Called when a player exits the last active PVP zone, allowing other plugins to overwrite the value for pvpDelay. Returning a float value allows changing the pvpDelay for the player. A value less than zero disables the pvpDelay. When calling the OnPlayerPVPDelay hook, 3 parameters are passed: <BasePlayer>player - The player to whom the pvpDelay is applied; <float>pvpDelay - The initial value of pvpDelay; <string>zoneID - A unique identifier of PVP zone. object OnPlayerPVPDelay(BasePlayer player, float pvpDelay, string zoneID) { Puts($"Attempting to set a PvP delay of {pvpDelay} seconds for player {player.displayName} in zone {zoneID}!"); if (zoneID == "*Your unique zone identifier*") { return 15f;//Overriding the values for pvpDelay } return null;//Leave unchanged } OnPlayerPVPDelayed: Called after the PVP delay has been set for the player. When calling the OnPlayerPVPDelayed hook, 3 parameters are passed: <BasePlayer>player - The player to whom the pvpDelay is applied; <float>pvpDelay - The value of pvpDelay; <string>zoneID - A unique identifier of PVP zone. void OnPlayerPVPDelayed(BasePlayer player, float pvpDelay, string zoneID) { Puts($"A PvP delay of {pvpDelay} seconds has been set for player {player.displayName} in zone {zoneID}!"); } OnPlayerPVPDelayRemoved: Called when the PVP delay is removed from the player after they enter a PVP zone with an active PVP delay. When calling the OnPlayerPVPDelayRemoved hook, only 1 parameter is passed: <BasePlayer>player - The player from whom the PVP delay has been removed. void OnPlayerPVPDelayRemoved(BasePlayer player) { Puts($"PVP delay has been removed for player {player.displayName} as they entered a PVP zone!"); } OnZoneStatusText: Called when the text with the nice name for the specified zone is needed, to be displayed in the status bar. When calling the OnZoneStatusText hook, 2 parameters are passed: <BasePlayer>player - The player for whom the nice name for the zone is being requested; <string>zoneID - A unique identifier of PVP zone. object OnZoneStatusText(BasePlayer player, string zoneID) { Puts($"Text for the status bar is required for zone {zoneID}"); if (zoneID == "*Your unique zone identifier*") { return lang.GetMessage("*langKey*", this, player.UserIDString);//<string>Overriding the value for the status bar text } return null;//Leave unchanged } CanRedeemKit: Called before giving the starter kit, in the OnDefaultItemsReceive hook. A non-zero value cancels this action. When calling the CanRedeemKit hook, only 1 parameter is passed: <BasePlayer>player - The player to whom the kit is being attempted to be given. object CanRedeemKit(BasePlayer player) { Puts($"Attempting to give the kit to player {player.displayName}!"); if (player.IsAdmin) { return false;//Cancel the action } return null;//Leave unchanged }$39.99- 32 comments
- 1 review
-
- 3
-

-
- #rust
- #real
-
(and 56 more)
Tagged with:
- #rust
- #real
- #pve
- #pvp
- #solo
- #build
- #friendly
- #raid
- #npc
- #monument
- #monuments
- #loot
- #looting
- #farm
- #newbie
- #custom
- #bar
- #ui
- #cui
- #panel
- #vehicle
- #claim
- #limit
- #limits
- #sleeping
- #bag
- #sleeping bag
- #bed
- #shelter
- #permission
- #permissions
- #vip
- #economy
- #economics
- #rad
- #town
- #radtown
- #queue
- #bypass
- #vehicles
- #raidable
- #base
- #bases
- #raidablebases
- #raider
- #raiders
- #humannpc
- #event
- #events
- #copy
- #paste
- #copypaste
- #plugin
- #plugins
- #umod
- #oxide
- #carbon
- #iiiaka
-
Version 1.0.0
1 download
Bradley Arena is a Bradley vs Player battlefield. Inspired by the popular Helldivers game, this Arena contains a large Helldivers style decoration. Bradley Arena is ready to use in Rustedit and has all the modifiers to apply easily: Terrain Height, Splats and the Bradley Path. HOW DOES IT WORK? To access the inside of the Arena you will need to follow these steps: Go to the top of the Arena, climb up the legs of the building. At the top you will find three red card readers. These card readers are numbered 1 to 3, insert your red cards to activate the red button. Press the red button, an alarm will sound throughout the complex, the red lights will turn on to warn other players that the dome is occupied, access to the red card reader will be blocked by electricity so that other players do not use the card reader, the hatch will open for 2 minutes. Access the inside of the Arena, the hatch will remain closed. After 25 minutes the electricity of the red card reader will be activated giving access to other players. Fight against NPCs and destroy the three tanks that will impede your mission objective. On the walkways you will find food, medicine and glass walls that will protect you from your enemies. Use the zip lines or climb the walls to access the underground. In the underground you will face NPCs and sometimes a Bradley. It's time to leave, press the red button, the hatch will open for 5 minutes, climb the walls, follow your steps to the exit. CONTAINS: Puzzles Parkour Ziplines Loots, Locked crates and Elites crates Two kinds of NPCs Alarm sound Automatic lighting for the night Traps Three Bradleys$12.90-
- 2
-

-
- #bradley
- #bradleyarena
-
(and 40 more)
Tagged with:
- #bradley
- #bradleyarena
- #bradleyapc
- #bradley apc
- #bradley arena
- #bradley monument
- #bradley guards
- #npc
- #arena
- #playervsplayer
- #playervsbradley
- #bradleyvsplayer
- #pvp
- #pve
- #rp
- #roleplay
- #role play
- #oxide
- #carbon
- #facepunch
- #badgyver
- #steam
- #playrust
- #console
- #rust
- #rustgame
- #decor
- #helldivers
- #helldivers2
- #battlefield
- #dome
- #zonemanager
- #zone manager
- #bradleymod
- #automaton
- #zipline
- #tramp
- #puzle
- #parkour
- #puzzle
- #light
- #rustedit
-
Version 1.0.6
211 downloads
The plugin adds a dungeon event to your server. Dungeons are bases with puzzles, NPC defenders, turrets and more. You can create your own dungeons of varying difficulty You can build your own bases or modify existing ones: There are moving NPC guardians in the dungeons: There are puzzles with protective doors in the dungeons: In the dungeons there are secret notes with codes in boxes or on NPCs: Commands: dungbase_start - force start event dungbase_stop - force stop event Hooks: void DungeonBasesEventStarted() - // called when event starts void DungeonBasesEventEnded() - // called when event ends Configuration: { "Allow only the event owner (the one who entered the dungeon first) into the dungeon": true, "Allow owner's teammates to enter the dungeon": true, "Message that you cannot enter the dungeon without being the owner of the event or its teammate": "You cannot enter the dungeon without being the owner of the event or its teammate", "Event marker on the map": true, "Event marker name": "Dungeon Base", "Event marker transparency(0-1)": 0.55, "Event marker radius": 0.5, "Event marker color.R(0-1)": 1.0, "Event marker color.G(0-1)": 0.0, "Event marker color.B(0-1)": 0.0, "Display event owner name on marker": true, "Display the time remaining until the end of the event on the marker": true, "Autostart event(disable if you want to trigger the event only manually)": false, "Minimum time to event start(in seconds)": 3600, "Maximum time to event start(in seconds)": 7200, "Minimum event duration(in seconds)": 2000, "Maximum event duration(in seconds)": 3000, "Minimum number of online players to trigger an event": 1, "Event message": "The dungeon bases event has started, find the entrance to the base and get the loot", "End event message": "The dungeon bases event has ended", "Dungeons list": [ "#dung#base1", "#dung#base2", "#dung#base3", "#dung#base4" ], "Entrances list": [ "#dung#entrance1", "#dung#entrance2", "#dung#entrance3", "#dung#entrance4" ], "Random order of choosing a dungeon from the list (if false, will be selected in turn)": false, "Random order of choosing the entrance to the dungeon from the list (if false, will be selected in turn)": false, "Change the time of day when entering the dungeon(from 0 to 23, if -1 - do not change the time)": 0.0, "How long before the end of the event does radiation start to affect players inside the dungeon": 180, "How long after the event ends should the entrance be destroyed": 60, "Close the entrance and exit to the dungeon when the event time is over": true, "Message about closing the entrance and exit": "Time is up, the entrance and exit to the dungeon are closed forever!" } Note: The plugin is guaranteed to work correctly with bases enabled. NPCs will not behave as standard, as they use different algorithms. Only one dungeon can spawn on the map at a time.$19.99 -
Version 1.1.9
797 downloads
UltimateLocker - Lock Everything, Auto Lock & Auto Closing UltimateLocker - Lock Everything, Auto Lock & Auto Closing, allows you to place Code Locks/Key Lock on Vehicles, Furnaces, Weapon Racks, Turrets, Mining Quarry, Pump Jack, Motorbike, Motorbike With Sidecar, Pedal Bike, Pedal Trike, Deployable Items and much more. Plus you can decide whether to automatically position the code locks, with many configurations and share locks with your clan/team members. You can also enable automatic closing by positioning door closers automatically or manually, change the closing delay time and decide on which entities to enable it. Place Code Lock wherever you want, Auto Lock and Auto Closing (Door Closer) with a single plugin, 3 plugin in 1. You can decide which entities to enable Code Lock on or Door Closer. It has commands for administrators to lock, unlock and remove Code Locks/Key Lock. IMPORTANT: Added the ability to also place Key Locks, in addition to Code Locks. Place Code Lock/Key Lock wherever you want with a single plugin: Vehicle Locks Motorbike, Motorbike With Sidecar, Pedal Bike, Pedal Trike Furnaces, Refineries, and more Weapon Rack Lock Farming Lock Electricity Lock / Electrical Lock Industrial Lock Construction Lock Mining Quarry, Pump Jack Items Lock Trap Lock Turrets Lock Misc Lock Fun Lock Deployable Lock And so on... EXAMPLES OF OPERATION/USE: Some examples of how the plugin works when there is a Code Lock/Key Lock to which you do not have access: Usage block/loot furnaces, refineries, electric furnaces, water dispensers, industrial conveyor, industrial crafter, car lift, elevator, small generator, metal shop front, dropbox, mail box, vending machine, etc... Usage block: workbench, research table, repair table, computer station, mixing table, etc... Device Identifier: If the Auto Turrets, CCTV Camera, PTZ CCTV Camera, etc…, are locked with Code Lock/Key Lock, you cannot access them remotely if you do not have access to Code lock/Key Lock, even if you know the identification number. Block use and loot of vehicles, including horses Block use and loot of vehicles, including Motorbike, Motorbike With Sidecar, Pedal Bike, Pedal Trike. Block use and loot of: Mining Quarry, Pump Jack. Auto Turret authorization lock, rotation, attack mode, remote control, lock to change identification ID. Locking loot and usafe of SAM Site. Lock to change camera identification ID and remote control. Block personal Quarry Mining usage and loot FARM: fertilizer container block, sowing block, harvesting/cutting plants and clone, or harvesting dead plants, composter block, etc... Weapon rack: weapons storage and collection block, weapon reloading, weapon exchange. Blocking the insertion and removal of electrical cables and pipes from the various components. Blocking the use of electrical components: switching on/off switches, switches, buttons, changing timer duration and much more... Blocking use and frequency change of transceiver components, RF Broadcaster, RF Receiver. Blocking the use of some entertainment objects such as the piano, drums, boom box, arcade games, etc... Block fun objects such as Strobe Light, Laser Light, Sound Light, Neon Sign, etc... And much more, with new items that will be added in future releases or at your suggestion via a request for support or comment AUTO LOCK: The plugin integrates an automatic positioning system for Code Lock or Key Lock. Using the /autolock or /codelock command the player can manage all the settings: Sharing locks with clan/team members. Create a code lock pin and/or update all your codelock pins with 1 click. Create a Guest pin for your Code Lock and/or update all Guest pins of your code locks with 1 click. Enable the ability to use Key Locks, if you do not have Code Locks in your inventory. Streamer mode: to hide the display of the Code Lock pin on the screen. In addition, there will be many other options that can be enabled/disabled. These options will be available based on how the plugin has been configured. For example: has the ability to place the code lock on the furnaces been enabled? Then there will be the option to enable and/or disable the automatic positioning of the locks on the furnaces. And so on for all the other configurations. And many other new features and features that will arrive with the next plugin updates. ---------- AUTO CLOSING (DOOR CLOSER): The plugin integrates a system for automatic closing, via Door Closer, of various entities. The player can change the settings through a simple and intuitive interface and apply these settings automatically or manually. Using the /autolock or /codelock command and by pressing the button "Auto Closing Settings" the player can manage all the settings: PERMISSIONS: ultimatelocker.use - Allows you to use the plugin to place Code Locks/Key Locks. ultimatelocker.admin - Allows you to execute some commands reserved for administrators. ultimatelocker.bypass.force - Allows you to bypass Code Locks/Key Locks. ultimatelocker.autolock.enabled - This role is required to be able to use the automatic positioning system of Code Lock or Key Lock. ultimatelocker.autolock.nolockrequired - With this role you do not need to have the Code Lock in your inventory, the Code Lock will be placed even if you do not have one. ultimatelocker.autoclosing.enabled - This role is required to be able to use the automatic closing system, Door Closer. ultimatelocker.autoclosing.nodoorcloserrequired - With this role you do not need to have the Door Closer in your inventory, the Door Closer will be placed even if you do not have one. COMMANDS FOR PLAYERS Commands can be typed in chat (by putting the / character in front of the command), or from console. /autolock or /codelock — Open Auto Lock/Auto Closing settings UI. /locker — Command to add lock manually. /closer — Command to add door closer manually. /ul code <code> — Change the Code Lock code of the entity you are looking at, if you own the entity or if it belongs to a clan/team member. /ul codeall <code> — Change the Code Lock code on all entities owned by the player. /ul ctime <time> — Set the closing delay time (seconds) for the Door Closer you are looking at. ---------- COMMANDS FOR ADMIN Commands can be typed in chat (by putting the / character in front of the command), or from console. To use these commands you must have the role: ultimatelocker.admin /ul unlock — Unlock the Code Lock/Key Lock of the entity you are watching. /ul unlockall <steamID> — Unlock all player Code Locks/Key Locks. /ul lock — Lock the Code Lock/Key Lock of the entity you are watching. /ul lockall <steamID> — Lock all player Code Locks/Key Locks. /ul remove — Removes the Code Lock/Key Lock of the entity you are watching. /ul removeall <steamID> — Removes all player Code Locks/Key Locks. /ul code <code> — Change the Code Lock code of the entity you are looking at. Instead of <code> you must insert the new code. Must consist of 4 numbers. /ul codeall <code> <steamID> — Change the Code Lock code on all entities owned by the player. You must pass the steamID of the player whose code you want to change instead of the <steamID>. Instead of <code> you must insert the new code. Must consist of 4 numbers. /ul show — Shows the Code Lock code of the entity you are looking at. -------------------- NB: To use these commands you must set the configuration AllowAdminToBypassCodeLock to be set to true or have the role ultimatelocker.bypass.force. -------------------- Commands can be added or modified in the configuration file: /oxide/config/UltimateLocker.json CLAN/TEAM If the player is part of a clan/team, he can block, unlock or remove Code Locks/Key Locks placed by other teammates, if enabled in the configurations. CONFIGURATION The settings and options can be configured in the UltimateLocker under the config directory. The use of an editor and validator is recommended to avoid formatting issues and syntax errors. { "TimeZone": "Europe/London", "ChatPrefix": "UltimateLocker", "AllowAdminToBypassCodeLock (Allows admin to bypass Code Lock without using commands). Default False.)": false, "Chat Command": [ "ul", "ultimatelocker" ], "Auto Lock Configuration": { "Chat Command": [ "autolock", "codelock" ], "Add Lock manually - Chat Command": "locker", "Player default settings": { "Allow automatic lock placement by default. (Default: TRUE)": true, "Allow automatic placement of Key Locks if there are no Code Locks in the inventory. (Default: TRUE)": true, "Allow Guest Code by default. (Default: FALSE)": false, "Allow automatic Share locks with clan/team members by default. (Default: TRUE)": true, "Enable streamer mode by default. (Default: FALSE)": false, "Allow automatic lock on Doors by default. (Default: TRUE)": true, "Allow automatic lock on Boxes by default. (Default: FALSE)": false, "Allow automatic lock on Storage Container by default. (Default: FALSE)": false, "Allow automatic lock on Lockers by default. (Default: TRUE)": true, "Allow automatic lock on TC (Cupboards) by default. (Default: TRUE)": true, "Allow automatic lock on Vehicle by default. (Default: TRUE)": true, "Allow automatic lock on Furnace by default. (Default: FALSE)": false, "Allow automatic lock on Vending Machine by default. (Default: FALSE)": false, "Allow automatic lock on Composter by default. (Default: FALSE)": false, "Allow automatic lock on Mixing Table by default. (Default: FALSE)": false, "Allow automatic lock on Planter by default. (Default: FALSE)": false, "Allow automatic lock on Auto Turret by default. (Default: FALSE)": false, "Allow automatic lock on SAM Site by default. (Default: FALSE)": false, "Allow automatic lock on Traps by default. (Default: FALSE)": false, "Allow automatic lock on Weapon Rack by default. (Default: TRUE)": true, "Allow automatic lock on Stash by default. (Default: FALSE)": false, "Allow automatic lock on Neon Sign by default. (Default: FALSE)": false, "Allow automatic lock on Other Lockable Entities by default. (Default: FALSE)": false, "Allow automatic lock on Other Custom Entities by default. (Default: FALSE)": false } }, "Auto Closing Configuration": { "Add Door Closer manually - Chat Command": "closer", "Player Can Pickup Door Closer. (Default: TRUE)": true, "Enable automatic closing of Door. (Default: FALSE)": false, "Enable automatic closing of Double Door. (Default: FALSE)": false, "Enable automatic closing of Garage. (Default: FALSE)": false, "Enable automatic closing of Ladder Hatch. (Default: FALSE)": false, "Enable automatic closing of External Gate. (Default: FALSE)": false, "Enable automatic closing of Fence Gate. (Default: FALSE)": false, "Enable automatic closing of Legacy Wood Shelter Door. (Default: FALSE)": false, "Minimum Closing Delay Time. (Default: 10 seconds)": 10, "Maximum Closing Delay Time. (Default: 60 seconds)": 60, "Default Closing Delay Time. (Default: 30 seconds)": 30 }, "Requires Building Privilege to place Code Locks. (Default: TRUE)": true, "Requires Building Privilege to place Code Locks in unowned vehicles. (Default: FALSE)": false, "Allow deployment of Code Lock in vehicles owned by other players. (Default: FALSE)": false, "Allow deployment of Code Lock in unowned vehicles. (Default: TRUE)": true, "Allow pushing vehicles blocked by the Code Lock (Default: TRUE)": true, "Set player as owner when placing a Mining Quarry or Pump Jack (also static). (Default: TRUE)": true, "Enable Lock": { "Vehicles": [ { "ItemName": "Minicopter", "EnableLock": true, "PrefabName": "assets/content/vehicles/minicopter/minicopter.entity.prefab", "RequiredPermission": [ "" ] }, { "ItemName": "Scrap Transport Helicopter", "EnableLock": true, "PrefabName": "assets/content/vehicles/scrap heli carrier/scraptransporthelicopter.prefab", "RequiredPermission": [ "" ] }, { "ItemName": "Attack Helicopter", "EnableLock": true, "PrefabName": "assets/content/vehicles/attackhelicopter/attackhelicopter.entity.prefab", "RequiredPermission": [ "" ] }, { "ItemName": "Armored / Hot Air Balloon", "EnableLock": true, "PrefabName": "assets/prefabs/deployable/hot air balloon/hotairballoon.prefab", "RequiredPermission": [ "" ] }, { "ItemName": "Row Boat", "EnableLock": true, "PrefabName": "assets/content/vehicles/boats/rowboat/rowboat.prefab", "RequiredPermission": [ "" ] }, { "ItemName": "RHIB", "EnableLock": true, "PrefabName": "assets/content/vehicles/boats/rhib/rhib.prefab", "RequiredPermission": [ "" ] }, { "ItemName": "Tugboat", "EnableLock": true, "PrefabName": "assets/content/vehicles/boats/tugboat/tugboat.prefab", "RequiredPermission": [ "" ] }, { "ItemName": "Submarinesolo", "EnableLock": true, "PrefabName": "assets/content/vehicles/submarine/submarinesolo.entity.prefab", "RequiredPermission": [ "" ] }, { "ItemName": "Submarine Duo", "EnableLock": true, "PrefabName": "assets/content/vehicles/submarine/submarineduo.entity.prefab", "RequiredPermission": [ "" ] }, { "ItemName": "Horse", "EnableLock": true, "PrefabName": "assets/rust.ai/nextai/testridablehorse.prefab", "RequiredPermission": [ "" ] }, { "ItemName": "Tomaha Snowmobile", "EnableLock": true, "PrefabName": "assets/content/vehicles/snowmobiles/tomahasnowmobile.prefab", "RequiredPermission": [ "" ] }, { "ItemName": "Snowmobile", "EnableLock": true, "PrefabName": "assets/content/vehicles/snowmobiles/snowmobile.prefab", "RequiredPermission": [ "" ] }, { "ItemName": "Sedan", "EnableLock": true, "PrefabName": "assets/content/vehicles/sedan_a/sedantest.entity.prefab", "RequiredPermission": [ "" ] }, { "ItemName": "2 Module Car", "EnableLock": true, "PrefabName": "assets/content/vehicles/modularcar/2module_car_spawned.entity.prefab", "RequiredPermission": [ "" ] }, { "ItemName": "3 Module Car", "EnableLock": true, "PrefabName": "assets/content/vehicles/modularcar/3module_car_spawned.entity.prefab", "RequiredPermission": [ "" ] }, { "ItemName": "4 Module Car", "EnableLock": true, "PrefabName": "assets/content/vehicles/modularcar/4module_car_spawned.entity.prefab", "RequiredPermission": [ "" ] } ], "Deployables": [ { "ItemName": "Large Furnace", "EnableLock": true, "PrefabName": "assets/prefabs/deployable/furnace.large/furnace.large.prefab", "RequiredPermission": [ "" ] }, { "ItemName": "Furnace", "EnableLock": true, "PrefabName": "assets/prefabs/deployable/furnace/furnace.prefab", "RequiredPermission": [ "" ] }, { "ItemName": "Legacy Furnace", "EnableLock": true, "PrefabName": "assets/prefabs/deployable/legacyfurnace/legacy_furnace.prefab", "RequiredPermission": [ "" ] }, { "ItemName": "Refinery", "EnableLock": true, "PrefabName": "assets/prefabs/deployable/oil refinery/refinery_small_deployed.prefab", "RequiredPermission": [ "" ] }, { "ItemName": "Electric Furnace", "EnableLock": true, "PrefabName": "assets/prefabs/deployable/playerioents/electricfurnace/electricfurnace.deployed.prefab", "RequiredPermission": [ "" ] }, { "ItemName": "Stone Fireplace", "EnableLock": true, "PrefabName": "assets/prefabs/deployable/fireplace/fireplace.deployed.prefab", "RequiredPermission": [ "" ] }, { "ItemName": "BBQ", "EnableLock": true, "PrefabName": "assets/prefabs/deployable/bbq/bbq.deployed.prefab", "RequiredPermission": [ "" ] }, { "ItemName": "Hobo Barrel", "EnableLock": true, "PrefabName": "assets/prefabs/misc/twitch/hobobarrel/hobobarrel.deployed.prefab", "RequiredPermission": [ "" ] }, { "ItemName": "Storage Barrel B", "EnableLock": true, "PrefabName": "assets/prefabs/misc/decor_dlc/storagebarrel/storage_barrel_b.prefab", "RequiredPermission": [ "" ] }, { "ItemName": "Storage Barrel C", "EnableLock": true, "PrefabName": "assets/prefabs/misc/decor_dlc/storagebarrel/storage_barrel_c.prefab", "RequiredPermission": [ "" ] }, ............ ] }, "VersionNumber": { "Major": 1, "Minor": 1, "Patch": 5 } } TimeZone: Default: Europe/London ChatPrefix: — Chat message prefix. AllowAdminToBypassCodeLock (Allows admin to bypass Code Locks/Key Locks without using commands). Default FALSE. Chat Command: Here you can add, edit or delete Commands can be typed in chat (by putting the / character in front of the command), or from console. Requires Building Privilege to place Code Locks: Requires Building Privilege to place Code Locks/Key Lock. Default: TRUE Requires Building Privilege to place Code Locks in unowned vehicles: Requires Building Privilege to place Code Locks/Key Lock in unowned vehicles. Default: FALSE Allow deployment of Code Lock in vehicles owned by other players: Allow deployment of Code Lock in vehicles owned by other players. Default: FALSE Allow deployment of Code Lock in unowned vehicles: Allow deployment of Code Lock in unowned vehicles. Default: TRUE Allow pushing vehicles blocked by the Code Lock: Allow pushing vehicles/horses blocked by the Code Lock. Default: TRUE Sets player as owner when placing a Mining Quarry or Pump Jack (also static): Set the player as owner of the Mining Quarry or Pump Jack placed (also those statistics). Default: TRUE Enable Lock: Here you can set which entities to enable, on which you can place a Code Lock/Key Lock. ItemName: The name of the entity EnableLock: Whether or not to enable Code Lock/Key Lock placement for this entity. RequiredPermission: Here you can specify the roles required to be able to insert a Code Lock/Key Lock in the entities enabled in the configuration. You can specify 1 or more roles, and as long as the player has at least one of these roles he can enter the Code Lock/Key Lock. Here you can specify the roles required to be able to insert a Code Lock/Key Lock in the entities enabled in the configuration. You can specify 1 or more roles, and as long as the player has at least one of these roles he can enter the Code Lock/Key Lock. When you enter a role, a server-side role will be created which must then be assigned to the player, here are some examples. “RequiredPermission”: [ “vip_1”]: In this case the ultimatelocker.vip_1 role will be created, it will be necessary to assign this role to the player to enable the insertion of the Code Lock/Key Lock in the configured entity. “RequiredPermission”: [ “user_1”, “vip_2” ]: In this case the ultimatelocker.user_1 and ultimatelocker.vip_2 roles will be created and it will be necessary to assign one of these roles to the player (or even both) to enable the insertion of the Code Lock/Key Lock in the configured entity. The role name must respect certain parameters and can only contain these alphanumeric characters: a-z A-Z 0-9 . _ – Any unsupported characters will be removed, the space character will be replaced by the _ character. AUTO LOCK – CONFIGURATION Chat Command: Here you can specify 1 or more commands to open the UI for Auto Lock settings Add Lock manually – Chat Command: Command to add lock manually. Default /locker Allow automatic …. …. by default: The settings that start with “Allow automatic …. …. by default“, are the basic settings once the Auto Lock system is enabled. EXAMPLE: If you have Auto Lock enabled and have the setting “Allow automatic lock on Doors by default = true“, then it will be set to automatically place the code lock /key lock on doors by default. After that the player can change this setting via the UI. This applies to all basic “allow configuration properties”. AUTO CLOSING (DOOR CLOSER) - CONFIGURATION Add Door Closer manually – Chat Command: Command to add door closer manually. Default /closer Player Can Pickup Door Closer. (Default: TRUE): If set to false, the player does not get the Door Close back once it is removed. Enable automatic closing of Door. (Default: FALSE): Enable automatic closing for Single Doors. Permission is still required: ultimatelocker.autoclosing.enabled Enable automatic closing of Double Door. (Default: FALSE): Enable automatic closing for Double Doors. Permission is still required: ultimatelocker.autoclosing.enabled Enable automatic closing of Garage. (Default: FALSE): Enable automatic closing for Garage. Permission is still required: ultimatelocker.autoclosing.enabled Enable automatic closing of Ladder Hatch. (Default: FALSE): Enable automatic closing for Ladder Hatch. Permission is still required: ultimatelocker.autoclosing.enabled Enable automatic closing of External Gate. (Default: FALSE): Enable automatic closing for External Gate. Permission is still required: ultimatelocker.autoclosing.enabled Enable automatic closing of Fence Gate. (Default: FALSE): Enable automatic closing for Fence Gate. Permission is still required: ultimatelocker.autoclosing.enabled Enable automatic closing of Legacy Wood Shelter Door. (Default: FALSE): Enable automatic closing for Legacy Wood Shelter Door. Permission is still required: ultimatelocker.autoclosing.enabled Minimum Closing Delay Time. (Default: 10 seconds): Minimum delay time usable for automatic closing, Door Closer. Maximum Closing Delay Time. (Default: 60 seconds): Maximum delay time that can be used for automatic closing, Door Closer. Default Closing Delay Time. (Default: 30 seconds): Default delay time for automatic closing, Door Closer. LOCALIZATION The plugin, therefore the automatic messages and statistics, are translated into the following languages: English Italian Translation files are located in the /oxide/lang folder, here is an example of a /oxide/lang/en/UltimateLocker.json translation file. You can add translations for other languages by adding them to the folder: /oxide/lang AVAILABLE ENTITIES VEHICLES: Minicopter, Scrap Transport Helicopter, Attack Helicopter, Armored / Hot Air Balloon, Kayak, Row Boat, RHIB, Tugboat, Submarine Solo, Submarine Duo, Horse, Tomaha Snowmobile, Snowmobile, Sedan, 2 Module Car, 3 Module Car, 4 Module Car, Motorbike, Motorbike With Sidecar, Pedal Bike, Pedal Trike. DEPLOYABLES: Large Furnace, Furnace, Legacy Furnace, Refinery, Electric Furnace, Stone Fireplace, BBQ, Hobo Barrel, Storage Barrel B, Storage Barrel C, RHIB Storage, Metal Shop Front, Dropbox, Mail Box, Vending Machine, Computer Station, Twitch Rivals Desk, Mixing Table, Composter, Small Planter Box, Large Planter Box, Minecart Planter, Bath Tub Planter, Rail Road Planter, Hitch & Trough, Small Water Catcher, Large Water Catcher, Water Barrel, Powered Water Purifier, Fluid Switch & Pump, Repair Bench, Research Table, Workbench Level 1, Workbench Level 2, Workbench Level 3, Button, Switch, Smart Switch, Timer, Small Generator, SAM Site, Auto Turret, Flame Turret, Shotgun Trap, Modular Car Lift, Snow Machine, Fogger-3000, Elevator, Mining Quarry, Pump Jack, Tall Weapon Rack, Horizontal Weapon Rack, Wide Weapon Rack, Weapon Rack Stand, Frontier Bolts Single Item Rack, Frontier Horseshoe Single Item Rack, Frontier Horns Single Item Rack, Small Stash, Chippy Arcade Game, Strobe Light, Laser Light, Sound Light, Small Neon Sign, Medium Neon Sign, Large Neon Sign, Medium Animated Neon Sign, Large Animated Neon Sign, Search Light, CCTV Camera, PTZ CCTV Camera, RF Broadcaster, RF Receiver, Industrial Conveyor, Industrial Crafter, Wheelbarrow Piano, Junkyard Drum Kit, Boom Box, Chinese Lantern, Chinese Lantern White, Tuna Can Lamp, Lantern, Camp Fire, Cursed Cauldron, Skull Fire Pit, Jack O Lantern Angry, Jack O Lantern Happy NEW ENTITIES New entities will be added with future releases. If you want to request the addition of a specific entity, feel free to open a support request and it will be added to the plugin. ENTITY IMAGE PREVIEW VEHICLES: Minicopter Scrap Transport Helicopter Attack Helicopter Hot Air Balloon Armored Hot Air Balloon Kayak Row Boat RHIB Tugboat Submarine Solo Submarine Duo Horse Snowmobile Tomaha Snowmobile Sedan 2 Module Car 3 Module Car 4 Module Car Motorbike Motorbike With Sidecar Pedal Bike Pedal Trike DEPLOYABLES: Large Furnace Furnace Legacy Furnace Small Oil Refinery Electric Furnace Stone Fireplace Barbeque (BBQ) Hobo Barrel Storage Barrel Vertical Storage Barrel Horizontal Metal Shop Front Drop Box Mail Box Vending Machine Computer Station Twitch Rivals Desk Mixing Table Composter Small Planter Box Large Planter Box Minecart Planter Bath Tub Planter Rail Road Planter Hitch & Trough Small Water Catcher Large Water Catcher Water Barrel Powered Water Purifier Fluid Switch & Pump Repair Bench Research Table Workbench Level 1 Workbench Level 2 Workbench Level 3 Button Switch Smart Switch Timer Small Generator SAM Site Auto Turret Flame Turret Shotgun Trap Modular Car Lift Snow Machine Fogger-3000 Elevator Mining Quarry Pump Jack RHIB Storage Tall Weapon Rack Horizontal Weapon Rack Wide Weapon Rack Weapon Rack Stand Frontier Bolts Single Item Rack Frontier Horseshoe Single Item Rack Frontier Horns Single Item Rack Small Stash Chippy Arcade Game Strobe Light Laser Light Sound Light Small Neon Sign Medium Neon Sign Large Neon Sign Medium Animated Neon Sign Large Animated Neon Sign Search Light CCTV Camera PTZ CCTV Camera RF Broadcaster RF Receiver Industrial Conveyor Industrial Crafter Wheelbarrow Piano Junkyard Drum Kit Boom Box Chinese Lantern Chinese Lantern White Tuna Can Lamp Lantern Camp Fire Cursed Cauldron Skull Fire Pit Jack O Lantern Angry Jack O Lantern Happy$8.99 -
Version 4.7.1
13,657 downloads
MyRustServer is a Rust Server Tool that allows you to create and manage your own Rust Server in just a few clicks. The tool brings many possibilities and options that simplify your life as a server admin. No unnecessary creation of batch files, easy installation of the server and extensions, easy updating of your plugins, wipe your server with one click and manage your players. Join the discord for better and faster support Big thanks to everyone who supports the project and helped me It is a standalone program, with which you can host your own server, connecting to other server host service providers is not possible. You can run MyRustServer on up to 4 different systems. You can create as many servers on one system as your hardware allows. The dashboard shows you all relevant information about your server. Here you control your server. Auto Restart Server Auto Update Server Auto Update Oxide Only Updates on Startup Force Restart Set Game Mode (Vanilla, Softcore, Survival and Hardcore) Set CPU Affinity Set Process Priority Stop Server Restart Server Kill Server With the installer you can easily install and update your server. No batch files are used. Install or Update Server (Master, BETA, AUX01 and AUX02) Verify Server Files Install Discord Extension Install RustEdit Under Settings you give your server your personal touch. Here you can set everything for your server. Name Logo URL Web URL App Logo URL Description Tags Max Players Add Users (Admins, Mods) RCON Password Add Ports to Windows Firewall Server Port Server IP RCON Port RCON IP Query Port App Port Add Custom Maps Server Map (Procedural, Custom, Barren, Hapis, Craggy, Savas) Map Size Map Seed - Advanced Settings Add Start Configs (convars) Backups (MRS Folder, Oxide Folder, Server Folder) Start Rust Server on MyRustServer Startup Repair MyRustServer In Plugins you can easily manage your plugins. No annoying manual reload after editing. - Editor Edit (Auto Reload Plugin on Save, create a backup) Reload Update View Website Enable/Disable Delete - Update Check Plugins for Update (Supported sites for checking are: umod, codefling, chaoscode, lone.design, rustplugins and myvector) Update Plguins (Only plguins from uMod can be installed automatically after checking) Paid Plugins (here you set your purchased plugins) Blacklist Plugins Update All Plugins Auto Update Plugins - Plugin Installer Install Plugins from uMod Auto Wipe Shedule Custom Map Custom Seed Custom Folder/File Full Wipe Blueprints Map Oxide Data Backpacks Logs Player Deaths Player Identities Player Stats Player Tokens New Map Seed on Wipe Install or Update Oxide and Carbon Uninstall Oxide or Carbon Show Server in Modded or Community Choose your build (Production, Staging or Development) Permissions Manager View Server Console Send Commands to your Server Add Quick Commands Open Steam profile Copy SteamID Copy Name Check IP Kick Player Ban Player Teleport to Me to Player Teleport Player to Me Set/Remove Admin/Mod Send Server Messages (Restart, Updates and Wipe) Send Custom Messages Send Custom Commands Sets for each Message a Time Connect your server to your Discord to use as remote control or status information. Start Bot on MyRustServer Startup Send Server Status (Online, Offline, Restart) Send new Updates (Server, Client and Oxide) Send Wipe Notification - Send Commands Start Server Stop Server Restart Server Kill Server Update Server Update Oxide Update Carbon !No Support for OneDrive Drives! !No Support for Cracked Servers! Windows Only$34.99- 224 comments
- 55 reviews
-
- 36
-

-

-

-
- #rust server tool
- #rust server management
-
(and 28 more)
Tagged with:
- #rust server tool
- #rust server management
- #server administration
- #game server hosting
- #rust game
- #server creation
- #server installation
- #plugin management
- #server wiping
- #game server tools
- #easy server setup
- #rust gaming community
- #multiplayer server
- #server extensions
- #rust community
- #server modding
- #server hosting
- #rust server hosting
- #rust server setup
- #server automation
- #myrustserver
- #umod
- #carbon
- #wipe
- #rust
- #installer
- #auto update
- #auto restart
- #discord integration
- #plugin update
-
Version 2.0.10
2,697 downloads
Skin Controller is meant to bring together a ton of skinning options for your player all in one place! Easy for the player, easy for the server owner. FEATURES - Supports backpacks - Saving of outfits (A list of skins for doors, weapons, clothing, etc*) - Add infinite items in an outfit - Skin stacks of items - Skin your whole inventory with one click - Skin items in containers that you're looking at with one command - Skin all the deployed items in your base with one command - Search items in the skin list to easily find the skin you're looking for - Auto skin items when crafted and picked up - Auto imports all accepted workshop skins - Manual imports of non-accepted workshop skins and collections - Infinite outfit saves, you can limit the amount of outfit saves someone has via perms. - Server owners can toggle whether they want players to be able to skin items on pickup and craft - If server owners allow skinning on craft and pickup, players can toggle that on and off for themselves - Set your own custom commands for all available types of commands - Blacklist skins COMMANDS /skin or /sb (Configurable) - Opens the skin menu /skinc (Configurable) - Skins the items in the container that you're looking at /skinbase (Configurable) - Skins all the deployed items in your base /skinitem (Configurable) - Skins the item you're looking at /addskin - Command for admins to add workshop skins to the skinbox /addcollection - Command for admins to add collections of workshop skins to the skinbox PERMISSIONS skincontroller.addskins skincontroller.use skincontroller.skinoncraft skincontroller.skinonpickup skincontroller.skinbase skincontroller.skinitem skincontroller.skincontainer To set the amount of outfits someone can save, go into the config, there will be a setting where you can set custom permission and how many outfits each outfit can save Need support or want updates about what is coming to the plugin? Join the support discord here https://discord.gg/RVePam7pd7$39.99 -
Version 1.1.3
15 downloads
Admin Turret Blind Eye - Rust Plugin A Rust plugin that prevents Turrets, Bradley, and Patrol Heli from shooting at admins, even when they are not in vanish mode. Permission: turretpermission.toggle: Allows admins to toggle turret fire on or off. turretpermission.perm: Ensures admins are always immune to turret fire, even when not in vanish mode.(Overrides Turret Toggle) Default Command: /toggleturret Config: { "Commands": [ "toggleturret", "tt" ], "EnableForAdminsOnStart": true, "LogToConsole": true, "UIEnabled": true } VIdeo:$6.00 -
Version 1.1.15
2,017 downloads
The Offline Raid Protection plugin is a comprehensive solution designed to protect players' structures and vehicles while they are offline. It offers a range of customisable protection levels based on real-time or the length of time a player has been offline, and integrates with the Clans plugin and the in-game teams feature to determine protection status based on the online status of all clan or team members and authorised players. Key Features Configurable Protection Levels: Set protection levels based on real time or the amount of time since a player went offline. For example, a building can have 100% protection one hour after a player goes offline, and 50% protection after two hours. This feature is highly configurable. Clan/Team Integration: The plugin integrates with the Clans plugin and the in-game teams feature. The protection status of a structure or vehicle is determined by the online status of all clan or team members and authorised players. Penalty System: An optional penalty system is implemented to prevent abuse of the protection feature. For example, if a player leaves a clan or team, a penalty can be applied to all members and protection can be disabled for a configurable period of time. Game Tip Messages: The plugin displays game tip messages to players when they hit a protected structure or vehicle. The message includes the percentage of protection and is colour coded according to the level of protection. It supports all the languages available in Rust. Commands: Players with permission can use commands to check the protection status of other players, change the offline time of other players, and change the penalty status. Cache System: The plugin uses a caching system to optimise performance and keep the impact on the server to a bare minimum. Configuration: The plugin includes a configuration file that allows you to customise the behaviour of the plugin. Commands All commands can be configured. /orp or /ao <steam id or full name> — Check a player's offline protection status. You can type the command without a name when looking at a player's structure. /raidprot — Display offline raid protection information. /orp.fill.onlinetimes — Fill all players offline times. (Chat & Console command) /orp.test.offline <steam id or full name> <hours> — Change a player's offline time. /orp.test.online <steam id or full name> — Change a player's offline time to the current time. /orp.test.penalty <steam id or full name> <hours> — Change the duration of a player's penalty. A negative value or zero would disable the penalty. /orp.update.permission — Update the permissions status (offlineraidprotection.protect) for all players. orp.update.prefabs <true> - Updates the 'Prefabs to protect' list in the configuration. Overwrites the list with the 'true' argument. (Console command) orp.dump.prefabs - Clears the 'Prefabs to protect' list in the configuration. (Console command) Permissions All permissions can be configured. offlineraidprotection.protect — Allows a player to be protected from raids. offlineraidprotection.check — Allows a player to check the offline protection status of other players. offlineraidprotection.admin — Allows a player to use all admin commands of the plugin. To grant a permission, use carbon/oxide.grant <user or group> <steamname or ID> <permission>. To revoke a permission, use carbon/oxide.revoke <user or group> <steamname or ID> <permission>. Configuration The configuration is to a large extent self-explanatory. Raid Protection Options Only mitigate damage caused by players: Choose whether or not to only mitigate damage caused directly by players. Protect players that are online: Choose whether or not to protect the bases of the players who are online. Works when "Scale of damage depending on the current hour of the real day" is configured. Scale of damage depending on the current hour of the real day: Defines the protection levels based on the current hour of the real day. The key is the hour of the day (0-23), and the value is the protection scale (0 — 340282300000000000000000000000000000000). Example: "0": 0.0, "1": 0.0, "2": 0.0, "3": 0.0 This means that the protection level is 100% from midnight to 3am. Scale of damage depending on the offline time in hours: Defines the protection levels based on the time since the player went offline. The key is the number of hours since the player went offline, and the value is the protection scale (0 — 340282300000000000000000000000000000000). The value of the hours can also be a decimal number. Example: "12": 0.25, "24": 0.5, "48": 1.0, "96": 2.0 This means that 12 hours after the player goes offline, the protection level will be 75%. After 24 hours it will be 50% and after 48 hours it will be 0%. After 96 hours, the damage is increased by 200%. Cooldown in minutes: During this time, damage levels will remain vanilla. Raids are possible. Scale of damage between the cooldown and the first configured time: During this time, the level of damage between the cooldown and the first configured time can be set to a specific value, such as 0.0 Online time to qualify for offline raid protection in minutes: Time to qualify for offline raid protection after a player connects Protect all prefabs: Choose whether to protect all prefabs or only specific ones. This will protect anything in the TC range. Protect AI (animals, NPCs, Bradley and attack helicopters etc.) if 'Protect all Prefabs' is enabled: Choose whether or not to protect AI entities if "Protect all Prefabs" is enabled. May cause high hook times if set to true. Protect vehicles: Choose whether to protect vehicles or not. Vehicle authorisation always has priority. If you want to exclude certain vehicles from protection, add them to the blacklist. Protect twigs: Choose whether to protect twigs or not. Prefabs to protect: List of prefabs that will be protected. Make sure you remove the prefabs you don't want to protect, some of them are pointless. Prefabs blacklist: List of prefabs that will not be protected. Prefabs in the blacklist will always have priority to be unprotected. Timezone Options The fallback timezone is UTC if you leave it blank in the configuration, or if your configured timezone doesn't exist. The timezone identifiers are different for Windows and Linux. You can check the appendices to find your preferred timezone. Conclusion: The Offline Raid Protection plugin provides a comprehensive solution for protecting players' structures and vehicles when they are offline. This plugin is essential for any Rust server owner who wants to provide a fair and enjoyable gaming experience for their players. Acknowledgments Special thanks to @Kulltero for his valuable feedback and suggestions during the development of this plugin. Windows_Timezones.txt Linux_Timezones.txt Prefabs.txtFree -
Version 1.0.1
10 downloads
- FEATURES • Size: 4000. • Objects: 147114. • Map protection plugin included. • The map can be edited: Yes. - CONTAINS ALL OFFICIAL MONUMENTS • Radtown • Ferry Terminal • Nuclear missile silo • Large oil platform • Small oil platform • Submarine laboratories • Harbor • Large fishing villages • Fishing villages • Launch site • Satellite dish • The Dome • HQM Quarry • Stone quarry • Sulfur quarry • Arctic Research Base • Sewer Branch • Train yard • Junkyard • Abandoned military bases • Military tunnel • Caves • Large barns • Ranch • Bandit camp • Power plant • Swamp • Airfield • Giant excavation • Outpost • Lighthouse - PREFABS AND CUSTOM MONUMENTS • Zeppelin (Puzzle-parkour). • Ghostbusters Barracks, this is a faithful monument to the fire station used by the ghostbusters, contains puzzles, traps, loot, npc, ghostbusters logo. • Resource areas with flies: Lakes, Ore, Wood, Food. • Scalextric: A huge racing track with remote control, a tank watches over the tracks. • Skateboard: Build your base here. • Cargo Ship model: Full of loot, but watch your step sailor because you will find enemies on board. • Bullring: Use the Zone Manager plugin to place an event. • Ball: Build your base indoors. • Cake, a huge and delicious chocolate cake, inside you will find a not very pleasant surprise. • Billiard: An original area to build your base, access through the holes to discover a new world inspired by Mario Bross. • Train Stations, with waiting room, loot and NPC, with secondary rail respawn. • Fireplace: Look up, the Grinch is stuck. • Fishbowl, a huge aquatic area, contains a great variety of fish, in this area you will find the laboratory among other things. • Rubik's Cube: A colorful place to build your base. • Concert: Make your players have fun in this music zone. Turn on the music and lights, ants and flies will be your chorus. • Zeppelin with dish, if you need a place far away from your enemies this is a good option to build your house, besides it is located in the air. • Nintendo: A safe area to recycle, buy and trade. build your base on the controls. • Big Xmas Tree: A gigantic Xmas Tree. Build your base anywhere on the Xmas Tree. Moreover, BIG Xmas Tree is not only a decoration, it also contains a snowy village inside the pot. • Maze: Be careful and don't get lost, this maze contains loot, but also npcs. "In RATS you will find many hidden areas that have not been mentioned, so equip yourself and explore this great miniature adventure" - TIPS • Climb through walls, furniture and ceilings. • Take advantage of any area with total freedom to build your home. • Have fun .$54.90- 4 comments
- 1 review
-
- 3
-

-
- #rats
- #rats2
-
(and 47 more)
Tagged with:
- #rats
- #rats2
- #ratsmap
- #rats custom map
- #xmas
- #xmassale
- #xmastree
- #miniature
- #adventure
- #custom map
- #rust
- #rustedit
- #build area
- #monument
- #zipline
- #mrhankey
- #ants
- #fly
- #bugs
- #trainstation
- #toystory
- #nintendo
- #mario
- #mariobross
- #creeper
- #fantasy
- #christmas
- #christmas map
- #xmas map
- #xmasmap
- #zeppelin
- #oxide
- #carbon
- #steam
- #playrust
- #pve
- #pvp
- #roleplay
- #arena
- #bullring
- #puzzle
- #mazingerz
- #ghostbusters
- #badgyver
- #facepunch
- #rustconsole
- #fuckingxmas
- #part2
- #rats 2
-
Version 1.1.0
111 downloads
KillFeed is a fully customizable Rust plugin that instantly broadcasts real-time kill and death notifications, fueling your server with immediate combat insights and intensifying the multiplayer experience for every player. Key Features Killer Settings: Text Format: Customize which data is displayed (e.g., killer's nickname). Font: Choose the font (e.g., robotoсondensed-bold.ttf). Font Size: Adjust the text size. Color: Precisely set the text color using RGBA values. Distance Settings: Text Format: Display the distance to the target (e.g., {0}m). Font: Choose the font (e.g., robotoсondensed-regular.ttf). Font Size: Adjust the text size. Color: Precisely set the text color using RGBA values. Target Settings: Text Format: Configure the display of the target's nickname. Font: Choose the font and its parameters. Font Size and Color: Similar to killer settings. Images: Customize images for various events (e.g., default death image and headshot icon). Other Settings: Offsets: Adjust the position of the text on the screen. Lifetime: Set the duration for which the notification is visible. Max Kills on Screen: Set the number of events displayed simultaneously. Background Color: Adjust the background color of the notifications. Commands: /killfeed — Enable/disable the kill feed. /kf.edit — Open the admin panel. Permissions: killfeed.use — View kills. killfeed.admin — Access the admin panel. Images for FileManager mode: Link Configuration { "Which method of download images use? (ImageLibrary, Internal, FileManager)": "FileManager", "Add bots deaths to killfeed?": true, "Add animals deaths to killfeed?": true, "Add BradleyAPC deaths to killfeed?": false, "Add patrol helicopter deaths to killfeed?": false, "Kill lifetime in UI": 10, "Default death image (types - Sprite, URL, Shortname)": { "If type = shortname, enter here ItemId": "assets/icons/skull.png", "Type": "Sprite" }, "UI Settings": { "Fadein": 1.0, "Background color": "0.177 0.0658 0.481 0.945", "Max kills panels in UI": 3, "Anchor settings": { "AnchorMin": "1 1", "AnchorMax": "1 1" }, "Offset settings": { "OffsetMinX": -361.4165, "OffsetMaxX": -4.899963, "OffsetMinY": -29.91622, "OffsetMaxY": -5.100018, "Indent": 3.0 }, "Killer settings": { "TextFormat": "{0}", "FontSize": 12, "Font": "robotocondensed-bold.ttf", "Color": "0.5499007 0.4764151 1 1", "OutlineDistance": "-1 1", "OutlineColor": "0 0 0 1" }, "Target settings": { "TextFormat": "{0}", "FontSize": 12, "Font": "robotocondensed-bold.ttf", "Color": "0.5499007 0.4764151 1 1", "OutlineDistance": "-1 1", "OutlineColor": "0 0 0 1" }, "Distance settings": { "TextFormat": "{0}m", "FontSize": 12, "Font": "robotocondensed-regular.ttf", "Color": "0.5499007 0.4764151 1 1", "OutlineDistance": "-1 1", "OutlineColor": "0 0 0 1" }, "Headshot image (types - URL, Sprite, Shortname)": { "If type = shortname, enter here ItemId": "assets/icons/skull.png", "Type": "Sprite" } }, "Entity -> Image (U can enter URL, Sprite and item shortname)": { "banditguard": "https://imgur.com/mHezn4c.png", "bear": "https://imgur.com/pGJEhQ1.png", "Bleeding": "assets/icons/bleeding.png", "boar": "https://imgur.com/0vxJltU.png", "bradleyapc": "https://imgur.com/IbewPwI.png", "chicken": "https://imgur.com/G2U82Ot.png", "Cold": "assets/icons/cold.png", "ColdExposure": "assets/icons/cold.png", "Drowned": "assets/icons/drowning.png", "dweller": "https://imgur.com/0ggNDr2.png", "Fall": "assets/icons/fall.png", "heavyscientist": "https://imgur.com/zeYbIzO.png", "Hunger": "assets/icons/eat.png", "patrolhelicopter": "https://imgur.com/5FoBIMF.png", "peacekeeper": "https://imgur.com/3MMosBY.png", "polarbear": "https://imgur.com/VEEaBef.png", "Radiation": "assets/icons/radiation.png", "scarecrow": "https://imgur.com/us7ElEg.png", "scientist": "https://imgur.com/jMQbEpW.png", "scientistnvg": "https://imgur.com/waL20B9.png", "shark": "https://imgur.com/Lrd3kkM.png", "stag": "https://imgur.com/7rfxrty.png", "Suicide": "assets/icons/skull.png", "underwaterdweller": "https://imgur.com/0ggNDr2.png", "wolf": "https://imgur.com/Hw58x41.png" }, "Entity -> Name": { "bear": { "de": "Bär", "en": "Bear", "ru": "Медведь" }, "Bleeding": { "de": "Blutung", "en": "Bleeding", "ru": "Кровотечение" }, "boar": { "de": "Wildschwein", "en": "Boar", "ru": "Кабан" }, "bradleyapc": { "de": "Bradley-Schützenpanzer", "en": "Bradley APC", "ru": "БТР Брэдли" }, "chicken": { "de": "Huhn", "en": "Chicken", "ru": "Курица" }, "Cold": { "de": "Erfrieren", "en": "Freezed", "ru": "Замерзание" }, "ColdExposure": { "de": "Kälteschaden", "en": "Freezed", "ru": "Переохлаждение" }, "Drowned": { "de": "Ertrunken", "en": "Crashed", "ru": "Утонул" }, "Fall": { "de": "Sturz aus der Höhe", "en": "Fall from high", "ru": "Падение с высоты" }, "horse": { "de": "Pferd", "en": "Horse", "ru": "Лошадь" }, "Hunger": { "de": "Verhungert", "en": "Died of starvation", "ru": "Умер от голода" }, "patrolhelicopter": { "de": "Patrouillenhubschrauber", "en": "Patrol helicopter", "ru": "Патрульный вертолет" }, "Radiation": { "de": "Strahlenvergiftung", "en": "Radiation poison", "ru": "Радиационное отравление" }, "scientistnpc": { "de": "Wissenschaftler", "en": "Scientist", "ru": "Ученый" }, "stag": { "de": "Hirsch", "en": "Stag", "ru": "Олень" }, "Suicide": { "de": "Selbstmord", "en": "Suicide", "ru": "Самоубийство" }, "wolf": { "de": "Wolf", "en": "Wolf", "ru": "Волк" } }, "Version": { "Major": 1, "Minor": 0, "Patch": 4 } }$20.00- 21 comments
- 4 reviews
-
- 1
-

-
Version 1.0.6
354 downloads
Want to spice up the Ferry Terminal location on your map? Look no further! Captors have taken hostages and are going to execute them if they cannot enslave them. Liberate the hostages while waves of backup arrive Johnny Blaze style on their motorcycles. They will be relentless and merciless. It's recommended that you bring a friend or two for this one! Description The event will begin with a notification that captors have taken hostages and will be trying to take them away to enslave them from the Ferry Terminal monument. First you will want to dispatch as many of the enemies on site as possible without alerting them of your intent or presence. Once you are ready though, alarms will be sounded and they will attempt to call for backup. Once the backup begins coming on motorcycle they will continue to send units to keep you from liberating the hostages, or execute them as opposed to letting you get them to freedom! Each hostage will have a small radius and a configurable countdown will begin as you work on releasing them from their shackles. Once freed you will still need to escort them to a ferry nearby, and they will thank you by opening a hackable crate for you. There are indicators that help highlight important event items such as the hostages. The configuration file gives plenty of options to customize the event, from NPCs, timers, rewards, and plenty of other options like integration with plugins you already own, in game UI, and more! Dependencies (optional, not required) True PVE Pve Mode GUI Announcements Notify Discord Messages Alpha Loot Custom Loot NTeleportation Economics Server Rewards IQEconomic XPerience Kits Better Npc Monument Owner Chat commands (only for administrators) /ftstart - start the event /ftstop - end the event /ftpos - determining the position coordinates for changing the location of NPCs and crates. It should write in the configuration (Attention! The event must be started, the current position of the administrator in relation to the monument is read) Console commands (RCON only) ftstart - start the event ftstop - end the event Plugin Config en - example of plugin configuration in English ru - example of plugin configuration in Russian Hooks void OnFerryTerminalEventStart(Vector3 pos, float radius) – called when the event starts void OnFerryTerminalEventEnd() – called when the event ends void OnFerryTerminalEventWinner(ulong winnerId) – called at the end of the event, where the winnerId is the player who did more actions to complete the event My Discord: kpuctajl Join the Mad Mappers Discord here! Check out more of my work here!$35.00- 4 comments
- 4 reviews
-
- 5
-

-

-
- #ferry terminal
- #ch47
- (and 25 more)
-
Version 1.0.0
11 downloads
The promo code plugin for Rust game provides the ability to reward players for entering a code word. This plugin includes a variety of settings and functionality for easy management and configuration of promo codes in the admin panel. Main Features Creation and Configuration of Promo Codes: Promo Code: The administrator can create unique promo codes. Item Configuration: The administrator can determine which items will be given when the promo code is activated. Item Parameters Shortname: The code word for issuing a specific item. SkinID: The skin identifier of the item. DisplayName: The displayed name of the item. Amount: The number of items given by the promo code. Flexible Settings Promo Code Duration: Ability to set an end date until which the promo code will be active. Usage Limit: Setting a limit on the number of times the promo code can be used. Command Configuration Ability to replace item issuance with the execution of a specific server command when the promo code is activated. Example Usage Admin usage Give admin permission - promocodes.admin Open UI with command (can be changed in config, default: /p) Creating a Promo Code: Create the promo code "SUMMER21". Set its expiration date to July 31. Set a usage limit of 100 times. Player usage Open UI with command (can be changed in config, default: /p) Enter promocode Press CHECK button Item Configuration Add an item: shortname - "rifle.ak", skinid - "123456", displayname - "AK-47 Elite", amount - 1. Add an item: shortname - "ammo.rifle", skinid - "0", displayname - "Rifle Ammo", amount - 100. Command Replacement Set the command "give %STEAMID% some_reward" to be executed when the promo code is activated instead of issuing items. Configuration file { "Cooldown for promocode": 65, "Commands to open UI": [ "promocode", "promo", "code", "pc", "p" ] }$9.99-
- #reward
- #promocode
-
(and 7 more)
Tagged with:
-
Version 1.1.3
182 downloads
Ultimate Beds, allows you to change the number of sleeping bags and beds you can place compared to the basic limit imposed by rust. You can also decide the time within which a sleeping bag/bed becomes available for spawning and adjust the time for successful spawns, all through various permissions, including VIP permissions. It also allows you to define the distance between the various beds, preventing them from going into cooldown between them. You can set a custom decay for sleeping bags or beach towels, so that sleeping bags or beach towels without maintenance have a longer or shorter decay, based on the configuration for each individual group. Oxide/Carbon compatibility Permissions ultimatebeds.admin — Permission to execute commands reserved for admins. ultimatebeds.default — Assign the limits configured in the group: default. ultimatebeds.vip1 — Assign the limits configured in the group: vip1. ultimatebeds.vip2 — Assign the limits configured in the group: vip2. ultimatebeds.vip3 — Assign the limits configured in the group: vip3. These are the groups that are created by default, but you can add and/or edit groups as you wish. For example, if you change the group vip1 to vip_elite, the permission ultimatebeds.vip_elite will be created If you create a new group, for example vipvanilla, the permission ultimatebeds.vipvanilla will be created. COMMANDS FOR ADMIN Commands can be typed in chat (by putting the / character in front of the command), or from console. To use these commands you must have the role: ultimatebeds.admin /ub info — Shows some information about the state of decay of the sleeping bag or beach towel you are looking at. Default Configuration The configurationcan be found in the file: /oxide/config/UltimateBeds.json { "Chat Command": [ "ub", "ultimatebeds" ], "Chat Prefix": "UltimateBeds", "Disable Bag Gifting. Default false": false, "RolePermission": { "default": { "Priority. (lower = higher priority)": 100, "Player Max Sleeping Bag/Bed limit": 15, "Exclude camper beds from the limit. Default false": false, "Sleeping bag unlock time after placed": 300, "Bed unlock time after placed": 120, "Sleeping bag respawn cooldown": 300, "Bed respawn cooldown": 120, "Sleeping Bag Range: Radius within which to check other Sleeping Bags placed. Default: 50 (lower = more Sleeping Bags close to each other)": 50, "Bed Range: Radius within which to check other Beds placed. Default: 50 (lower = more Beds close to each other)": 50, "Sleeping Bag Decay Settings": { "Enable Custom Decay. Default: false": false, "Disable Decay. Default: false": false, "Delay before decay starts. Default: 24 hours": 24, "Duration of decay. Default: 12 hours": 12 } }, "vip1": { "Priority. (lower = higher priority)": 1, "Player Max Sleeping Bag/Bed limit": 60, "Exclude camper beds from the limit. Default false": false, "Sleeping bag unlock time after placed": 60, "Bed unlock time after placed": 30, "Sleeping bag respawn cooldown": 40, "Bed respawn cooldown": 20, "Sleeping Bag Range: Radius within which to check other Sleeping Bags placed. Default: 50 (lower = more Sleeping Bags close to each other)": 50, "Bed Range: Radius within which to check other Beds placed. Default: 50 (lower = more Beds close to each other)": 50, "Sleeping Bag Decay Settings": { "Enable Custom Decay. Default: false": false, "Disable Decay. Default: false": false, "Delay before decay starts. Default: 24 hours": 24, "Duration of decay. Default: 12 hours": 12 } }, "vip2": { "Priority. (lower = higher priority)": 2, "Player Max Sleeping Bag/Bed limit": 40, "Exclude camper beds from the limit. Default false": false, "Sleeping bag unlock time after placed": 100, "Bed unlock time after placed": 50, "Sleeping bag respawn cooldown": 80, "Bed respawn cooldown": 40, "Sleeping Bag Range: Radius within which to check other Sleeping Bags placed. Default: 50 (lower = more Sleeping Bags close to each other)": 50, "Bed Range: Radius within which to check other Beds placed. Default: 50 (lower = more Beds close to each other)": 50, "Sleeping Bag Decay Settings": { "Enable Custom Decay. Default: false": false, "Disable Decay. Default: false": false, "Delay before decay starts. Default: 24 hours": 24, "Duration of decay. Default: 12 hours": 12 } }, "vip3": { "Priority. (lower = higher priority)": 3, "Player Max Sleeping Bag/Bed limit": 20, "Exclude camper beds from the limit. Default false": false, "Sleeping bag unlock time after placed": 200, "Bed unlock time after placed": 100, "Sleeping bag respawn cooldown": 180, "Bed respawn cooldown": 80, "Sleeping Bag Range: Radius within which to check other Sleeping Bags placed. Default: 50 (lower = more Sleeping Bags close to each other)": 50, "Bed Range: Radius within which to check other Beds placed. Default: 50 (lower = more Beds close to each other)": 50, "Sleeping Bag Decay Settings": { "Enable Custom Decay. Default: false": false, "Disable Decay. Default: false": false, "Delay before decay starts. Default: 24 hours": 24, "Duration of decay. Default: 12 hours": 12 } } }, "VersionNumber": { "Major": 1, "Minor": 1, "Patch": 2 } } Basically 4 groups are created, and you can change the settings for each of these groups default vip1 vip2 vip3 These are the groups that are created by default, but you can add and/or edit groups as you wish. For example, if you change the group vip1 to vip_elite, the permission ultimatebeds.vip_elite will be created If you create a new group, for example vipvanilla, the permission ultimatebeds.vipvanilla will be created. FIELDS Chat Command — Here you can add, edit or delete Commands can be typed in chat (by putting the / character in front of the command), or from console. Chat Prefix — Chat message prefix. Disable Bag Gifting — Disables bed assignment by other players. Default false. Priority. (lower = higher priority) — Each group has its own property, the lower this number is, the more important the group is. This is useful in the case where a player has more roles assigned. In this case, the group with the lowest priority will be assigned, the most important group. Negative numbers are also allowed. PlayerMaxSleepingBagBed — Defines the maximum number of sleeping bags/beds a player can place. Exclude camper beds from the limit — You can choose to exclude beds that are located in campers from the bed limit count. Default FALSE SleepingBagUnlockTime — Defines after how many seconds the sleeping bag is ready for use when placed for the first time. BedUnlockTime — Defines after how many seconds the bed is ready for use when positioned for the first time. SleepingBagRespawnCooldown — Defines after how many seconds the sleeping bag can be used to spawn after the sleeping bag has already been used. BedRespawnCooldown — Defines after how many seconds the bed can be used for spawning after the bed has already been used. Sleeping Bag Range: Radius within which to check other Sleeping Bags placed. Default: 50 (lower = more Sleeping Bags close to each other) : 50, Bed Range: Radius within which to check other Beds placed. Default: 50 (lower = more Beds close to each other) : 50 Sleeping Bag Decay Settings Enable Custom Decay — Enable or disable custom decay. Default: false Disable Decay — Disables sleeping bags or beach towels decay. Default: false Delay before decay starts — Delay before the start of the decay for sleeping bags or beach towels without maintenance. Default: 24 hours NB: Applies only to newly placed sleeping bags or beach towels, after this group has been assigned to the player. Duration of decay — Time taken for decay and then removal of sleeping bags or beach after decay has started. Default: 12 hours Applies to all sleeping bags or beach towels, both old and new, after this group has been assigned to the player. LOCALIZATION The plugin, therefore the automatic messages and statistics, are translated into the following languages: English Italian Translation files are located in the /oxide/lang folder, here is an example of a /oxide/lang/en/UltimateLocker.json translation file. You can add translations for other languages by adding them to the folder: /oxide/lang$7.99- 48 comments
- 1 review
-
- 1
-

-
- #beach towel
- #beachtowel
-
(and 24 more)
Tagged with:
- #beach towel
- #beachtowel
- #beachtowel limiter
- #beachtowel respawn cooldown
- #beachtowel unlock time
- #bed
- #bed cooldown
- #bed distance
- #bed distance range
- #bed limiter
- #bed respawn cooldown
- #bed unlock time
- #carbon
- #distance range
- #oxide
- #sleeping bag
- #sleeping bag cooldown
- #sleeping bag limiter
- #sleeping bag respawn time
- #sleeping bag unlock time
- #ultimatebeds
- #umod
- #bed custom decay
- #bed decay
- #custom decay
- #sleeping bag decay
-
Version 2.0.164
7,276 downloads
Carbon is a self-updating, lightweight framework for Rust offering the best performance and stability possible. It's backwards compatibility Oxide data files and plugins make it the ultimate replacement for those wanting more from their plugins with less headache and performance overhead. Why use Carbon Carbon manages hooks in memory, instead of having to physically patch server files like Oxide does. This allows you to freely update the server without having to update Carbon, and the convenient fact that a Carbon update is rarely required, even if a new server update is released. It has much better performance thanks to dynamic hooks, which allows Carbon to dynamically load and unload hooks depending on the plugins you're running, instead of having over 800 hooks invoking that aren't being used. In addition to our full-time development team, we're able to hyper-optimize everything to ensure the best performance possible. Switching from Oxide This process is very simple thanks to our backwards compatibility and automatic migration when you boot the server with Carbon for the first time. It automatically copies all of your Oxide user and user data files, plugins, plugin configs, plugin data files, extensions and Harmony patches over to the managed Carbon directory. It's as easy as installing Carbon and letting it work! Automatic migration to Carbon Manual migration to Carbon More Reasons to Switch Carbon is free and will always be free Extremely lightweight Seamless migration from Oxide MySQL and SQLite user permission and data support Built-in modules maintained by the Carbon team to ensure essentials plugins are always ready for the big update Accurate and detailed error logging (No more incorrect stack traces. Find the issue quickly.) Native profiler to quickly identify performance issues with an intuitive in-game interface Plugin metrics to also identify performance issues at a glance that offers detailed print outs of plugin and hook usage Carbon is updated hours in advanced to force updates so you're never worrying if you can update your servers on-time Carbon updates itself when your server boots. No more auto update scripts or manual updates needed! Install, update and configure plugins all from our panel in-game without ever having to touch files again! Carbon offers a staging build that's updated all month to enable you to run modded staging servers and test your plugins well in advance to the big update Documentation Installing Carbon - https://docs.carbonmod.gg/docs/readme/installing-carbon Configuring Carbon - https://docs.carbonmod.gg/docs/readme/configuring-carbon Staging Builds Would you like to run Carbon on staging or aux branches of Rust throughout the month? Our staging and aux branches are always up-to-date, so you can properly test plugins prior to a major update or provide a modded server for players to try out new Rust updates before they're live! Staging - https://github.com/CarbonCommunity/Carbon.Core/releases/tag/rustbeta_staging_build Aux01 - https://github.com/CarbonCommunity/Carbon.Core/releases/tag/rustbeta_aux01_build Aux02 - https://github.com/CarbonCommunity/Carbon.Core/releases/tag/rustbeta_aux02_build For Developers If you're a developer, you can enjoy all of the latest improvements of C# 10 as well as the ability to add your own methods anywhere in the assembly without being locked down to pre-existing hooks. All of your existing Oxide plugins will be compatible, though we recommend making a Carbon-specific version available to utilize Carbon to its fullest. Check out Creating your First Plugin to get started!Free- 53 comments
- 7 reviews
-
- 26
-

-

-

-
Version 1.0.2
10 downloads
Mazinger Z (Head), the robot that made a generation of children dream now available for Rust. Mazinger Z's head is wrapped in a collector's box. "Do you dare to discover its interior?" - CONTAINS: Maze Parkour Puzzle Loot Room NPCs - TIPS: Measure your steps with caution or you will meet your death. Have fun$14.90- 1 review
-
- 2
-

-
- #mazingerz
- #z
-
(and 46 more)
Tagged with:
- #mazingerz
- #z
- #mazinger z
- #robot
- #character
- #head
- #toy
- #toys
- #collection
- #premium
- #rats
- #rat
- #pvp
- #pve
- #rp
- #roleplay
- #role play
- #prefab
- #monument
- #halloween
- #halloweensale
- #epic
- #rust
- #rust prefab
- #rust monument
- #playrust
- #rustconsole
- #console
- #custom
- #traps
- #trap
- #badgyver
- #glow
- #pvppve
- #oxide
- #carbon
- #steam
- #facepunch
- #scifi
- #sci-fi
- #pve/pvp
- #japon
- #gonagai
- #go nagai
- #wajima
- #70s
- #80s
- #retro
-
Version 1.0.6
421 downloads
This plugin allows you to quickly and easily add unique locations for building houses to any map. There are 17 different locations of three types: ground sites, islands, and flying platforms — choose what suits you best! Key benefits of the plugin: Suitable for any map; No need to use RustEdit; Random automatic spawn after wipe; Ability to give a Building Site to a certain player. With this plugin, you can build the perfect house for yourself and your friends! Spawn locations The plugin has a function for automatically generating spawn points for BuildingSites on any map. You can independently enable and disable the spawning of water, land, and air BuildingSites. For each type, you can set the number of BuildingSites that will appear after the wipe. You can also give players flare to summon a BuildingSite. With their help, players will be able to call the desired BuildingSite anywhere. When the player holds the flyer in their hands, they are shown information about whether their position is suitable for spawning the BuildingSite or not. Players can be given flyers in any way, for example, by kits or in the in-game store. Chat commands (admin only) /respawnsites - forcibly launches automatic respawn of BuildingSites /spawnsite PresetName - spawn the BuildingSite in your position /killsite- destroys the BuildingSite you're looking at /killallsites - destroys all BuildingSites on the server /givesite PresetName - give the BuildingSite to yourself Console commands (RCON only) respawnsites - forcibly launches automatic respawn of BuildingSites killallsites - destroys all BuildingSites on the server givesite PresetName userID - give the BuildingSites to the player Plugin Config en – example of plugin configuration in English ru – example of plugin configuration in Russian Check out the rest of my work: Adem's Codefling Library You can reach out to me in Discord: Adem's Discord Profile Join the Mad Mappers Discord!$29.99- 27 comments
- 5 reviews
-
- 13
-

-

-

-
- #adem
- #madmappers
-
(and 6 more)
Tagged with:
-
Version 1.0.21
25 downloads
ObjectLimiter is a plugin for the game Rust designed to limit the number of objects a player can build on the server. The plugin provides a convenient and intuitive interface (UI) that allows the server administrator to set individual limits for different user groups. Main features of the plugin: Limit Settings: The administrator can set the maximum number of each type of object that a player can place on the map. Limits can be configured for all players (Default group) as well as for specific groups like VIP and Admin. Flexible Privilege System: The plugin allows you to create new privilege groups and copy settings from existing groups for easier configuration. The ability to set different limits for each group enables a diverse gameplay experience for different categories of players. Object Management: The plugin's interface allows easy enabling or disabling of restrictions on specific objects. The option to quickly enable or disable all objects for a specific user group. Optimization: ObjectLimiter is highly optimized, allowing the plugin to run without significant load on the server. This ensures stable performance even on servers with a large number of players and objects. Team limits support: Plugin contains implementation for some clans plugins and rust teams Profiling: *build 51 twig foundation server fps limit = 30 PC spec: i5 11400f, 32gb ddr4 ram Commands: /ol - open main ui(requires permission objectlimiter.admin This plugin is ideal for administrators who want to control construction on their server, ensuring balance and preventing the excessive use of certain objects.$20.00- 4 comments
-
Version 0.1.2
316 downloads
Useful plugin for managing temporary permissions, temporary groups and temporary permissions for groups. This is done through chat commands, built-in Oxide commands, and API methods. This is an alternative to the well-known TimedPermissions plugin, which was abandoned about three years ago, and it offers more advanced features. Note: The dates is in UTC format. The ability to grant players temporary permissions by specifying either the number of seconds, an exact expiration date or until the wipe occurs; The ability to add players to temporary groups by specifying either the number of seconds, an exact expiration date or until the wipe occurs; The ability to grant groups temporary permissions by specifying either the number of seconds, an exact expiration date or until the wipe occurs; The ability to revoke temporary permissions from players and groups prematurely; The ability to remove players from groups prematurely; The ability to perform all the above actions using existing and familiar console commands(e.g., o.grant), simply by adding the number of seconds, the expiration date or the word "wipe" at the end; The ability to perform all the above actions using a chat command (by default /tperm); The ability to perform all the above actions using API methods; The ability to remove all temporary permissions and groups upon wipe detection. temporarypermissions.admin - Grants access to the chat command(by default /tperm). { "Chat command": "tperm", "Interval in seconds for expiration check": 1.0, "Interval in seconds for checking the presence of temporary permissions and temporary groups. There are cases where removal cannot be tracked in the usual way. A value of 0 disables the check": 600.0, "Is it worth restoring removed temporary permissions and temporary groups if the timer hasn't expired?": true, "Is it worth removing temporary permissions and temporary groups when unloading the plugin?": true, "Is it worth using console logging?": true, "Is it worth clearing all temporary permissions upon detecting a wipe?": false, "Wipe ID": null, "Version": { "Major": 0, "Minor": 1, "Patch": 2 } } EN: { "MsgPermissionNotFound": "Permission not found!", "MsgPlayerNotFound": "Player not found!", "MsgGroupNotFound": "Group not found!", "MsgGrantWrongFormat": "Invalid command format! Example: /tperm grant user/group *NameOrId* realpve.vip *secondsOrDateTime*", "MsgRevokeWrongFormat": "Invalid command format! Example: /tperm revoke user/group *NameOrId* realpve.vip", "MsgUserGroupWrongFormat": "Invalid command format! Example: /tperm group add/remove *NameOrId* *groupName*", "MsgUserGranted": "Permission {0} granted to player {1}", "MsgGroupGranted": "Permission {0} granted to group {1}", "MsgUserGroupAdded": "Player {0} has been added to group {1}", "MsgUserRevoked": "Permission {0} has been removed for player {1}", "MsgGroupRevoked": "Permission {0} has been removed for group {1}", "MsgUserGroupRemoved": "Player {0} has been removed from group {1}" } RU: { "MsgPermissionNotFound": "Пермишен не найден!", "MsgPlayerNotFound": "Игрок не найден!", "MsgGroupNotFound": "Группа не найдена!", "MsgGrantWrongFormat": "Не верный формат команды! Пример: /tperm grant user/group *NameOrId* realpve.vip *secondsOrDateTime*", "MsgRevokeWrongFormat": "Не верный формат команды! Пример: /tperm revoke user/group *NameOrId* realpve.vip", "MsgUserGroupWrongFormat": "Не верный формат команды! Пример: /tperm group add/remove *NameOrId* *groupName*", "MsgUserGranted": "Пермишен {0} выдан игроку {1}", "MsgGroupGranted": "Пермишен {0} выдан группе {1}", "MsgUserGroupAdded": "Игрок {0} был добавлен в группу {1}", "MsgUserRevoked": "Пермишен {0} был удален для игрока {1}", "MsgGroupRevoked": "Пермишен {0} был удален для группы {1}", "MsgUserGroupRemoved": "Игрок {0} был удален из группы {1}" } grant - Grants a temporary permission to a player or group. user *NameOrId* realpve.vip wipe - Grants a temporary permission to a player until the next wipe by specifying the player's name or Id, the permission name and the word "wipe"; *NameOrId* realpve.vip 3600 true/false - Grants a temporary permission to a player by specifying the player's name or Id, the permission name, the number of seconds and true/false(optional). If true, the specified seconds will count from the current moment, otherwise(default), they will be added to the existing time; *NameOrId* realpve.vip "2024-08-19 17:57" "2024-08-19 16:57" - Grants a temporary permission to a player by specifying the player's name or Id, the permission name, the expiration date and the assigned date(optional). If not specified, the assigned date will default to the current date, otherwise, it will be set to the provided date. group *GroupName* realpve.vip wipe - Grants a temporary permission to a group until the next wipe by specifying the group's name, the permission name and the word "wipe"; *GroupName* realpve.vip 3600 true/false - Grants a temporary permission to a group by specifying the group's name, the permission name, the number of seconds, and true/false(optional). If true, the specified seconds will count from the current moment, otherwise(default), they will be added to the existing time; *GroupName* realpve.vip "2024-08-19 17:57" "2024-08-19 16:57" - Grants a temporary permission to a group by specifying the group's name, the permission name, the expiration date and the assigned date(optional). If not specified, the assigned date will default to the current date, otherwise, it will be set to the provided date. revoke - Revokes a temporary permission from a player or group. user *NameOrId* realpve.vip - Revokes a temporary permission from a player by specifying the player's name or Id and the permission name; group *GroupName* realpve.vip - Revokes a temporary permission from a group by specifying the group's name and the permission name. add - Temporary addition of a player to a group. *NameOrId* *GroupName* wipe - Temporary addition of a player to a group until the next wipe by specifying the player's name or Id, the group name and the word "wipe"; *NameOrId* *GroupName* 3600 true/false - Temporary addition of a player to a group by specifying the player's name or Id, the group name, the number of seconds, and true/false(optional). If true, the specified seconds will count from the current moment, otherwise(default), they will be added to the existing time; *NameOrId* *GroupName* "2024-08-19 17:57" "2024-08-19 16:57" - Temporary addition of a player to a group by specifying the player's name or Id, the group name, the expiration date and the assigned date(optional). If not specified, the assigned date will default to the current date, otherwise, it will be set to the provided date. remove *NameOrId* *GroupName* - Removal of a player from a temporary group by specifying the player's name or Id and the group name. Example: /tperm grant user iiiaka realpve.vip wipe /tperm grant user iiiaka realpve.vip 3600 true /tperm grant user iiiaka realpve.vip "2024-08-19 17:57" "2024-08-19 16:57" Note: To access the commands, the player must be an admin(console or owner) or have the temporarypermissions.admin permission. P.S. Templates for the commands above can also be used with existing console commands. For example: o.grant user iiiaka realpve.vip 3600 true OnTemporaryPermissionsLoaded: Called after the TemporaryPermissions plugin is fully loaded and ready. OnTemporaryPermissionGranted: Called after the player has been granted a temporary permission. OnTemporaryPermissionUpdated: Called after the player's temporary permission has been updated. OnTemporaryPermissionRevoked: Called after the player's temporary permission has expired or been revoked. OnTemporaryGroupAdded: Called after the player has been temporarily added to the group. OnTemporaryGroupUpdated: Called after the player's temporary group has been updated. OnTemporaryGroupRemoved: Called after the player's temporary group has expired or been removed. OnGroupTemporaryPermissionGranted: Called after the group has been granted a temporary permission. OnGroupTemporaryPermissionUpdated: Called after the group's temporary permission has been updated. OnGroupTemporaryPermissionRevoked: alled after the group's temporary permission has expired or been revoked. void OnTemporaryPermissionsLoaded(VersionNumber version = default) { Puts("The TemporaryPermissions plugin is loaded and ready to go!"); } void OnTemporaryPermissionGranted(string userID, string perm, DateTime expireDate, DateTime assignedDate) { Puts($"Player {userID} has been granted the temporary permission {perm} from {assignedDate} until {expireDate}."); } void OnTemporaryPermissionUpdated(string userID, string perm, DateTime expireDate, DateTime assignedDate) { Puts($"Player {userID}'s temporary permission {perm} has been updated. New expiration date: {expireDate}. Assigned date: {assignedDate}."); } void OnTemporaryPermissionRevoked(string userID, string perm, bool isExpired) { Puts($"Player {userID} has had the temporary permission {perm} revoked. Permission expired: {isExpired}."); } void OnTemporaryGroupAdded(string userID, string groupName, DateTime expireDate, DateTime assignedDate) { Puts($"Player {userID} has been added to the temporary group {groupName} from {assignedDate} until {expireDate}."); } void OnTemporaryGroupUpdated(string userID, string groupName, DateTime expireDate, DateTime assignedDate) { Puts($"Player {userID}'s temporary group {groupName} has been updated. New expiration date: {expireDate}. Assigned date: {assignedDate}."); } void OnTemporaryGroupRemoved(string userID, string groupName, bool isExpired) { Puts($"Player {userID} has had the temporary group {groupName} revoked. Group expired: {isExpired}."); } void OnGroupTemporaryPermissionGranted(string groupName, string perm, DateTime expireDate, DateTime assignedDate) { Puts($"Group {groupName} has been granted the temporary permission {perm}, valid from {assignedDate} until {expireDate}."); } void OnGroupTemporaryPermissionUpdated(string groupName, string perm, DateTime expireDate, DateTime assignedDate) { Puts($"Group {groupName}'s temporary permission {perm} has been updated. New expiration date: {expireDate}. Assigned date: {assignedDate}."); } void OnGroupTemporaryPermissionRevoked(string groupName, string perm, bool isExpired) { Puts($"Group {groupName} has had the temporary permission {perm} revoked. Permission expired: {isExpired}."); } [PluginReference] private Plugin TemporaryPermissions; There are 28 methods: IsReady User's Permissions: GrantUserPermission RevokeUserPermission UserHasPermission GrantActiveUsersPermission GrantAllUsersPermission RevokeActiveUsersPermission RevokeAllUsersPermission UserGetAllPermissions ActiveUsersGetAllPermissions AllUsersGetAllPermissions User's Groups: AddUserGroup RemoveUserGroup UserHasGroup AddActiveUsersGroup AddAllUsersGroup RemoveActiveUsersGroup RemoveAllUsersGroup UserGetAllGroups ActiveUsersGetAllGroups AllUsersGetAllGroups Group's Permissions: GrantGroupPermission RevokeGroupPermission GroupHasPermission GrantAllGroupsPermission RevokeAllGroupsPermission GroupGetAllPermissions AllGroupsGetAllPermissions IsReady: Used to check if the TemporaryPermissions plugin is loaded and ready to work. The IsReady method returns true if it is ready, or null if it is not. (bool)TemporaryPermissions?.Call("IsReady");//Calling the IsReady method. If the result is not null(bool true), the plugin is ready. GrantUserPermission: Used to grant a temporary permission to a player. Returns true if the grant was successful. To call the GrantUserPermission method, you need to pass 5 parameters, 3 of which are optional: IPlayer or BasePlayer or <string>playerID - The player object or their Id; <string>permName - The name of the permission; <int>secondsToAdd or <DateTime>expireDate - Optional. The time in seconds to add, or the end date. If a number less than 1 is specified, or if this parameter is not specified, the permission will be valid until the wipe; <bool>fromNow or <DateTime>assignedDate - Optional. true/false to specify whether the seconds should be added to the current date or to the existing time, or an exact assignment date. Defaults to the current date; <bool>checkExistence - Optional. Whether to check for the existence of the permission. (bool)TemporaryPermissions?.Call("GrantUserPermission", player.UserIDString, "realpve.vip");//Calling the GrantUserPermission method without specifying the third parameter, to grant temporary permission until the wipe. (bool)TemporaryPermissions?.Call("GrantUserPermission", player.UserIDString, "realpve.vip", 0);//Calling the GrantUserPermission method with the specified number less than 1, to grant temporary permission until the wipe. (bool)TemporaryPermissions?.Call("GrantUserPermission", player.UserIDString, "realpve.vip", 3600, true, true);//Calling the GrantUserPermission method with the specified number of seconds to add. (bool)TemporaryPermissions?.Call("GrantUserPermission", player.UserIDString, "realpve.vip", expireDate, assignedDate, true);//Calling the GrantUserPermission method with the specified DateTime for the end and start of the temporary permission. RevokeUserPermission: Used to revoke a temporary permission from a player. Returns true if the revoke was successful. To call the RevokeUserPermission method, you need to pass 2 parameters: IPlayer or BasePlayer or <string>playerID - The player object or their Id; <string>permName - The name of the permission. (bool)TemporaryPermissions?.Call("RevokeUserPermission", player.UserIDString, "realpve.vip"); UserHasPermission: Used to check if a player has a temporary permission. Returns true if the player has the specified temporary permission. To call the UserHasPermission method, you need to pass 2 parameters: IPlayer or BasePlayer or <string>playerID - The player object or their Id; <string>permName - The name of the permission. (bool)TemporaryPermissions?.Call("UserHasPermission", player.UserIDString, "realpve.vip"); GrantActiveUsersPermission: Used to temporarily grant a permission to all online players. Returns the <int>number of successful grants of temporary permissions to players. To call the GrantActiveUsersPermission method, you need to pass 3 parameters, 2 of which is optional: <string>permName - The name of the permission; <int>secondsToAdd or <DateTime>expireDate - Optional. The time in seconds to add, or the end date. If a number less than 1 is specified, or if this parameter is not specified, the permission will be valid until the wipe; <bool>fromNow or <DateTime>assignedDate - Optional. true/false to specify whether the seconds should be added to the current date or to the existing time, or an exact assignment date. Defaults to the current date. (int)TemporaryPermissions?.Call("GrantActiveUsersPermission", "realpve.vip");// Calling the GrantActiveUsersPermission method without specifying the second parameter, to grant all online players temporary permission until the wipe. (int)TemporaryPermissions?.Call("GrantActiveUsersPermission", "realpve.vip", 0);//Calling the GrantActiveUsersPermission method with the specified number less than 1, to grant all online players temporary permission until the wipe. (int)TemporaryPermissions?.Call("GrantActiveUsersPermission", "realpve.vip", 3600, true);//Calling the GrantActiveUsersPermission method with the specified number of seconds to add. (int)TemporaryPermissions?.Call("GrantActiveUsersPermission", "realpve.vip", expireDate, assignedDate);//Calling the GrantActiveUsersPermission method with the specified DateTime for the end and start of the temporary permission. GrantAllUsersPermission: Used to grant a temporary permission to all players. Returns the <int>number of successful grants of temporary permissions to players. To call the GrantAllUsersPermission method, you need to pass 3 parameters, 2 of which is optional: <string>permName - The name of the permission; <int>secondsToAdd or <DateTime>expireDate - Optional. The time in seconds to add, or the end date. If a number less than 1 is specified, or if this parameter is not specified, the permission will be valid until the wipe; <bool>fromNow or <DateTime>assignedDate - Optional. true/false to specify whether the seconds should be added to the current date or to the existing time, or an exact assignment date. Defaults to the current date. (int)TemporaryPermissions?.Call("GrantAllUsersPermission", "realpve.vip");//Calling the GrantAllUsersPermission method without specifying the second parameter, to grant all players temporary permission until the wipe. (int)TemporaryPermissions?.Call("GrantAllUsersPermission", "realpve.vip", 0);//Calling the GrantAllUsersPermission method with the specified number less than 1, to grant all players temporary permission until the wipe. (int)TemporaryPermissions?.Call("GrantAllUsersPermission", "realpve.vip", 3600, true);//Calling the GrantAllUsersPermission method with the specified number of seconds to add. (int)TemporaryPermissions?.Call("GrantAllUsersPermission", "realpve.vip", expireDate, assignedDate);//Calling the GrantAllUsersPermission method with the specified DateTime for the end and start of the temporary permission. RevokeActiveUsersPermission: Used to revoke a temporary permission from all online players. Returns the <int>number of successful revokes of temporary permissions to players. To call the RevokeActiveUsersPermission method, you need to pass 1 parameter: <string>permName - The name of the permission. (int)TemporaryPermissions?.Call("RevokeActiveUsersPermission", "realpve.vip"); RevokeAllUsersPermission: Used to revoke a temporary permission from all players. Returns the <int>number of successful revokes of temporary permissions to players. To call the RevokeAllUsersPermission method, you need to pass 1 parameter: <string>permName - The name of the permission. (int)TemporaryPermissions?.Call("RevokeAllUsersPermission", "realpve.vip"); UserGetAllPermissions: Used to retrieve all temporary permissions of a player. Returns a Dictionary<string, DateTime[]> where the key is the permission name and the value is an array of 2 DateTimes: the first date is the assignment date and the second date is the expiration date of the permission. If the expiration date is set to default, it means the permission is valid until the wipe. To call the UserGetAllPermissions method, you need to pass 1 parameter: <string>playerID - The player's Id. (Dictionary<string, DateTime[]>)TemporaryPermissions?.Call("UserGetAllPermissions", player.UserIDString); ActiveUsersGetAllPermissions: Used to retrieve all temporary permissions of all online players who have temporary permissions. Returns a Dictionary<string, Dictionary<string, DateTime[]>> where the key is userID and the value is another Dictionary<string, DateTime[]>, where the key is the permission name and the value is an array of 2 DateTimes: the first date is the assignment date and the second date is the expiration date of the permission. If the expiration date is set to default, it means the permission is valid until the wipe. (Dictionary<string, Dictionary<string, DateTime[]>>)TemporaryPermissions?.Call("ActiveUsersGetAllPermissions"); AllUsersGetAllPermissions: Used to retrieve all temporary permissions of all players who have temporary permissions. Returns a Dictionary<string, Dictionary<string, DateTime[]>> where the key is userID and the value is another Dictionary<string, DateTime[]>, where the key is the permission name and the value is an array of 2 DateTimes: the first date is the assignment date and the second date is the expiration date of the permission. If the expiration date is set to default, it means the permission is valid until the wipe. (Dictionary<string, Dictionary<string, DateTime[]>>)TemporaryPermissions?.Call("AllUsersGetAllPermissions"); AddUserGroup: Used to temporarily add a player to a group. Returns true if the addition was successful. To call the AddUserGroup method, you need to pass 5 parameters, 3 of which are optional: IPlayer or BasePlayer or <string>playerID - The player object or their Id; <string>groupName - The name of the group; <int>secondsToAdd or <DateTime>expireDate - Optional. The time in seconds to add, or the end date. If a number less than 1 is specified, or if this parameter is not specified, the group will be valid until the wipe; <bool>fromNow or <DateTime>assignedDate - Optional. true/false to specify whether the seconds should be added to the current date or to the existing time, or an exact assignment date. Defaults to the current date; <bool>checkExistence - Optional. Whether to check for the existence of the group. (bool)TemporaryPermissions?.Call("AddUserGroup", player.UserIDString, "vip");//Calling the AddUserGroup method without specifying the third parameter to temporarily add a player, to a group until the wipe. (bool)TemporaryPermissions?.Call("AddUserGroup", player.UserIDString, "vip", 0);//Calling the AddUserGroup method with the specified number less than 1, to temporarily add a player to a group until the wipe. (bool)TemporaryPermissions?.Call("AddUserGroup", player.UserIDString, "vip", 3600, true, true);//Calling the AddUserGroup method with the specified number of seconds to add. (bool)TemporaryPermissions?.Call("AddUserGroup", player.UserIDString, "vip", expireDate, assignedDate, true);//Calling the AddUserGroup method with the specified DateTime for the end and start of the temporary permission. RemoveUserGroup: Used to remove a temporary group from a player. Returns true if the removal was successful. To call the RemoveUserGroup method, you need to pass 2 parameters: IPlayer or BasePlayer or <string>playerID - The player object or their Id; <string>groupName - The name of the group. (bool)TemporaryPermissions?.Call("RemoveUserGroup", player.UserIDString, "vip"); UserHasGroup: Used to check if a player has a temporary group. Returns true if the player has the specified temporary group. To call the UserHasGroup method, you need to pass 2 parameters: IPlayer or BasePlayer or <string>playerID - The player object or their Id; <string>groupName - The name of the group. (bool)TemporaryPermissions?.Call("UserHasGroup", player.UserIDString, "vip"); AddActiveUsersGroup: Used to temporarily add a group to all online players. Returns the <int>number of successful additions of the temporary group to players. To call the AddActiveUsersGroup method, you need to pass 3 parameters, 2 of which is optional: <string>groupName - The name of the group; <int>secondsToAdd or <DateTime>expireDate - Optional. The time in seconds to add, or the end date. If a number less than 1 is specified, or if this parameter is not specified, the group will be valid until the wipe; <bool>fromNow or <DateTime>assignedDate - Optional. true/false to specify whether the seconds should be added to the current date or to the existing time, or an exact assignment date. Defaults to the current date. (int)TemporaryPermissions?.Call("AddActiveUsersGroup", "vip");//Calling the AddActiveUsersGroup method without specifying the second parameter to temporarily add all online players to a group until the wipe. (int)TemporaryPermissions?.Call("AddActiveUsersGroup", "vip", 0);//Calling the AddActiveUsersGroup method with the specified number less than 1, to temporarily add all online players to a group until the wipe. (int)TemporaryPermissions?.Call("AddActiveUsersGroup", "vip", 3600, true);//Calling the AddActiveUsersGroup method with the specified number of seconds to add. (int)TemporaryPermissions?.Call("AddActiveUsersGroup", "vip", expireDate, assignedDate);//Calling the AddActiveUsersGroup method with the specified DateTime for the end and start of the temporary permission. AddAllUsersGroup: Used to temporarily add a group to all players. Returns the <int>number of successful additions of the temporary group to players. To call the AddAllUsersGroup method, you need to pass 3 parameters, 2 of which is optional: <string>groupName - The name of the group; <int>secondsToAdd or <DateTime>expireDate - Optional. The time in seconds to add, or the end date. If a number less than 1 is specified, or if this parameter is not specified, the group will be valid until the wipe; <bool>fromNow or <DateTime>assignedDate - Optional. true/false to specify whether the seconds should be added to the current date or to the existing time, or an exact assignment date. Defaults to the current date. (int)TemporaryPermissions?.Call("AddAllUsersGroup", "vip");//Calling the AddAllUsersGroup method without specifying the second parameter to temporarily add all players to a group until the wipe. (int)TemporaryPermissions?.Call("AddAllUsersGroup", "vip", 0);//Calling the AddAllUsersGroup method with the specified number less than 1, to temporarily add all players to a group until the wipe. (int)TemporaryPermissions?.Call("AddAllUsersGroup", "vip", 3600, true);//Calling the AddAllUsersGroup method with the specified number of seconds to add. (int)TemporaryPermissions?.Call("AddAllUsersGroup", "vip", expireDate, assignedDate);//Calling the AddAllUsersGroup method with the specified DateTime for the end and start of the temporary permission. RemoveActiveUsersGroup: Used to remove a temporary group from all online players. Returns the <int>number of successful removals of temporary groups from players. To call the RemoveActiveUsersGroup method, you need to pass 1 parameter: <string>groupName - The name of the group. (int)TemporaryPermissions?.Call("RemoveActiveUsersGroup", "vip"); RemoveAllUsersGroup: Used to remove a temporary group from all players. Returns the <int>number of successful removals of temporary groups from players. To call the RemoveAllUsersGroup method, you need to pass 1 parameter: <string>permName - The name of the permission. (int)TemporaryPermissions?.Call("RemoveAllUsersGroup", "vip"); UserGetAllGroups: Used to retrieve all temporary groups of a player. Returns a Dictionary<string, DateTime[]> where the key is the group name and the value is an array of 2 DateTimes: the first date is the assignment date and the second date is the expiration date of the group. If the expiration date is set to default, it means the group is valid until the wipe. To call the UserGetAllGroups method, you need to pass 1 parameter: <string>permName - The name of the permission. (Dictionary<string, DateTime[]>)TemporaryPermissions?.Call("UserGetAllGroups", player.UserIDString); ActiveUsersGetAllGroups: Used to retrieve all temporary groups of all online players who have temporary groups. Returns a Dictionary<string, Dictionary<string, DateTime[]>> where the key is userID and the value is another Dictionary<string, DateTime[]>, where the key is the group name and the value is an array of 2 DateTimes: the first date is the assignment date and the second date is the expiration date of the group. If the expiration date is set to default, it means the group is valid until the wipe. (Dictionary<string, Dictionary<string, DateTime[]>>)TemporaryPermissions?.Call("ActiveUsersGetAllGroups"); AllUsersGetAllGroups: Used to retrieve all temporary groups of all players who have temporary groups. Returns a Dictionary<string, Dictionary<string, DateTime[]>> where the key is userID and the value is another Dictionary<string, DateTime[]>, where the key is the group name and the value is an array of 2 DateTimes: the first date is the assignment date and the second date is the expiration date of the group. If the expiration date is set to default, it means the group is valid until the wipe. (Dictionary<string, Dictionary<string, DateTime[]>>)TemporaryPermissions?.Call("AllUsersGetAllGroups"); GrantGroupPermission: Used to grant a temporary permission to a group. Returns true if the grant was successful. To call the GrantGroupPermission method, you need to pass 5 parameters, 3 of which are optional: <string>groupName - The name of the group; <string>permName - The name of the permission; <int>secondsToAdd or <DateTime>expireDate - Optional. The time in seconds to add, or the end date. If a number less than 1 is specified, or if this parameter is not specified, the permission will be valid until the wipe; <bool>fromNow or <DateTime>assignedDate - Optional. true/false to specify whether the seconds should be added to the current date or to the existing time, or an exact assignment date. Defaults to the current date; <bool>checkExistence - Optional. Whether to check for the existence of the permission. (bool)TemporaryPermissions?.Call("GrantGroupPermission", "vip", "realpve.vip");//Calling the GrantGroupPermission method without specifying the third parameter, to grant temporary permission until the wipe. (bool)TemporaryPermissions?.Call("GrantGroupPermission", "vip", "realpve.vip", 0);//Calling the GrantGroupPermission method with the specified number less than 1, to grant temporary permission until the wipe. (bool)TemporaryPermissions?.Call("GrantGroupPermission", "vip", "realpve.vip", 3600, true, true);//Calling the GrantGroupPermission method with the specified number of seconds to add. (bool)TemporaryPermissions?.Call("GrantGroupPermission", "vip", "realpve.vip", expireDate, assignedDate, true);//Calling the GrantGroupPermission method with the specified DateTime for the end and start of the temporary permission. RevokeGroupPermission: Used to revoke a temporary permission from a group. Returns true if the revoke was successful. To call the RevokeGroupPermission method, you need to pass 2 parameters: <string>groupName - The name of the group; <string>permName - The name of the permission. (bool)TemporaryPermissions?.Call("RevokeGroupPermission", "vip", "realpve.vip"); GroupHasPermission: Used to check if a group has a temporary permission. Returns true if the group has the specified temporary permission. To call the GroupHasPermission method, you need to pass 2 parameters: <string>groupName - The name of the group; <string>permName - The name of the permission. (bool)TemporaryPermissions?.Call("GroupHasPermission", "vip", "realpve.vip"); GrantAllGroupsPermission: Used to temporarily grant a permission to all groups. Returns the <int>number of successful grants of temporary permissions to groups. To call the GrantAllGroupsPermission method, you need to pass 3 parameters, 2 of which is optional: <string>permName - The name of the permission; <int>secondsToAdd or <DateTime>expireDate - Optional. The time in seconds to add, or the end date. If a number less than 1 is specified, or if this parameter is not specified, the permission will be valid until the wipe; <bool>fromNow or <DateTime>assignedDate - Optional. true/false to specify whether the seconds should be added to the current date or to the existing time, or an exact assignment date. Defaults to the current date. (int)TemporaryPermissions?.Call("GrantAllGroupsPermission", "realpve.vip");//Calling the GrantAllGroupsPermission method without specifying the second parameter, to grant all groups temporary permission until the wipe. (int)TemporaryPermissions?.Call("GrantAllGroupsPermission", "realpve.vip", 0);//Calling the GrantAllGroupsPermission method with the specified number less than 1, to grant all groups temporary permission until the wipe. (int)TemporaryPermissions?.Call("GrantAllGroupsPermission", "realpve.vip", 3600, true);//Calling the GrantAllGroupsPermission method with the specified number of seconds to add. (int)TemporaryPermissions?.Call("GrantAllGroupsPermission", "realpve.vip", expireDate, assignedDate);//Calling the GrantAllGroupsPermission method with the specified DateTime for the end and start of the temporary permission. RevokeAllGroupsPermission: Used to revoke a temporary permission from all groups. Returns the <int>number of successful revokes of temporary permissions to groups. To call the RevokeAllGroupsPermission method, you need to pass 1 parameter: <string>permName - The name of the permission. (int)TemporaryPermissions?.Call("RevokeAllGroupsPermission", "realpve.vip"); GroupGetAllPermissions: Used to retrieve all temporary permissions of a group. Returns a Dictionary<string, DateTime[]> where the key is the permission name and the value is an array of 2 DateTimes: the first date is the assignment date and the second date is the expiration date of the permission. If the expiration date is set to default, it means the permission is valid until the wipe. To call the GroupGetAllPermissions method, you need to pass 1 parameter: <string>groupName - The name of the group. (Dictionary<string, DateTime[]>)TemporaryPermissions?.Call("GroupGetAllPermissions", "vip"); AllGroupsGetAllPermissions: Used to retrieve all temporary permissions of all groups that have temporary permissions. Returns a Dictionary<string, Dictionary<string, DateTime[]>> where the key is the group name and the value is another Dictionary<string, DateTime[]>, where the key is the permission name and the value is an array of 2 DateTimes: the first date is the assignment date and the second date is the expiration date of the permission. If the expiration date is set to default, it means the permission is valid until the wipe. (Dictionary<string, Dictionary<string, DateTime[]>>)TemporaryPermissions?.Call("AllGroupsGetAllPermissions");Free -
So new to running servers, And am using a Host. i was wondering what went wrong? Every other plugin works as intended as far as i know as NPCspawn i think is specific for Convoy and Event plugins from what i gathered?? Also Watching a guide atm on Magic panel as command works but i don't notice any differnces
- 7 replies
-
- #convoy
- #carbon plugin
-
(and 2 more)
Tagged with:
-
Version 1.0.0
1 download
Helldivers Spawn is a spawn area for players on your Rust server. Inspired by the popular Helldivers game, this monument contains a large Helldivers style decoration. CONTAINS: Eight spawn points. Pictures on the walls, use these pictures to put images. Large windows with views to the outside. Doors to go outside, press the buttons to open the doors. Automatic lighting, when the night comes the light turns on automatically. Helldivers logo.$12.90-
- #spawn
- #spawner
-
(and 38 more)
Tagged with:
- #spawn
- #spawner
- #spawning
- #spawnpoint
- #spawn point
- #helldivers
- #helldivers2
- #helldivers 2
- #helldiverslogo
- #helldivers logo
- #room
- #spawn point room
- #spawnpointroom
- #badgyver
- #oxide
- #carbon
- #steam
- #facepunch
- #rust
- #playrust
- #console
- #pvp
- #pve
- #rp
- #roleplay
- #role play
- #decor
- #decoration
- #picture
- #pictureframe
- #frame
- #solarpanel
- #skeleton
- #button
- #electric
- #electricity
- #automatic
- #light
- #glow
- #glass
-
Version 0.1.8
357 downloads
Allows automating the entire manure collection process and adds other useful features in this area, by adding Industial Adapters and BoxStorage to the HitchTrough and Composter. Also auto spliting dungs in the Composter container. Note: During plugin unloading, modified entities are not removed, to prevent the removal of pipes every time the plugin/server is restarted. To remove modifications from entities, you should use the "idung unload" command. industrialdung.admin - Provides unrestricted access to the plugin's functionality. This includes the ability to add/remove or clear modificated entities from other players. Note: In the configuration file, within the "Max ammount of modified entites per group" section, you can specify limits for any existing permission by simply listing its name. "Max amount of modified entites for each permission. Leave null or empty to recreate the default": { "industrialdung.default": { "HitchTroughs": 5, "Composters": 2 }, ... }, ... If you want to create a new permission, you can also include it in the list, but the name must begin with "industrialdung". { "Chat command": "idung", "Is it worth enabling GameTips for messages?": true, "Use auto-splitting in the Composter?": true, "Item's short name for auto-splitting in the Composter. Leave the field empty to use the default": "horsedung", "AutoModify - Default value for new players": true, "Wood Storage Box Workshop Skin ID": 2911301119, "The list of items(short name) available for the composter. Leave empty to use vanilla": [ "horsedung", "fertilizer", "plantfiber" ], "Popup - Duration": 6.0, "Popup - Position AnchorMin": "0 0.9", "Popup - Position AnchorMax": "0.25 1", "Popup - Position OffsetMin": "20 0", "Popup - Position OffsetMax": "0 -30", "Popup - Icon Url": "https://i.imgur.com/4Adzkb8.png", "Popup - Icon Color": "#CCE699", "Popup - Icon Transparency": 0.8, "Popup - Text Font(https://umod.org/guides/rust/basic-concepts-of-gui#fonts)": "RobotoCondensed-Bold.ttf", "Popup - Text Font Size": 14, "Popup - Text Font Color": "#FFFFFF", "Popup - Description Font": "RobotoCondensed-Regular.ttf", "Popup - Description Font Size": 12, "Popup - Description Font Color": "#FFFFFF", "Popup - Text FadeIn": 1.0, "Popup - Sound Prefab Name": "assets/bundled/prefabs/fx/invite_notice.prefab", "Max amount of modified entites for each permission. Leave null or empty to recreate the default": { "industrialdung.default": { "HitchTroughs": 5, "Composters": 2 }, "industrialdung.vip": { "HitchTroughs": 10, "Composters": 4 }, "realpve.vip": { "HitchTroughs": 15, "Composters": 6 } }, "Version": { "Major": 0, "Minor": 1, "Patch": 8 } } EN: { "MsgNotAllowed": "You do not have permission to use this command!", "MsgNotHitchOwner": "You are not the owner of this hitch trough!", "MsgNotComposterOwner": "You are not the owner of this composter!", "MsgNotEntity": "You need to look at the hitch trough/composter or provide correct net ID!", "MsgNotModifiedEntity": "This entity is not modified!", "MsgLimitReached": "You cannot to modify this entity as you have reached your limit of {0}!", "MsgPopupTextHitch": "Modify this hitch trough?", "MsgPopupTextComposter": "Modify this composter?", "MsgPopupSubText": "Click on the notification to confirm", "MsgHitchTroughModified": "The hitch trough has been successfully modified!", "MsgComposterModified": "The composter has been successfully modified!", "MsgMyRemovedHitch": "The modification from the hitch trough has been successfully removed!", "MsgMyRemovedComposter": "The modification from the composter has been successfully removed!", "MsgMyAllRemoved": "All your modifications from the hitch troughs and composters have been successfully removed!", "MsgPlayerMsgAllRemoved": "All {0}'s modifications from the hitch troughs and composters have been successfully removed!", "MsgAllRemoved": "All modifications from the hitch troughs and composters have been successfully removed!", "MsgAutoModifyEntityEnabled": "Automatic entity modification is enabled!", "MsgAutoModifyEntityDisabled": "Automatic entity modification is disabled!" } RU: { "MsgNotAllowed": "У вас недостаточно прав для использования этой команды!", "MsgNotHitchOwner": "Вы не являетесь владельцем данной кормушки!", "MsgNotComposterOwner": "Вы не являетесь владельцем данного компостера!", "MsgNotEntity": "Вам необходимо смотреть на кормушку/компостер или указать корректный net ID!", "MsgNotModifiedEntity": "Данная сущность не является модифицированной!", "MsgLimitReached": "Вы не можете модифицировать данную сущность, так как вы превысили свой лимит в {0}!", "MsgPopupTextHitch": "Модифицировать данную кормушку?", "MsgPopupTextComposter": "Модифицировать данный компостер?", "MsgPopupSubText": "Нажмите на уведомление для подтверждения", "MsgHitchTroughModified": "Кормушка успешно модифицирована!", "MsgComposterModified": "Компостер успешно модифицирован!", "MsgMyRemovedHitch": "Модификация с кормушки успешно удалена!", "MsgMyRemovedComposter": "Модификация с компостера успешно удалена!", "MsgMyAllRemoved": "Все ваши модификации из кормушек и компостеров успешно удалены!", "MsgPlayerMsgAllRemoved": "Все модификации из кормушек и компостеров игрока {0} успешно удалены!", "MsgAllRemoved": "Все модификации из кормушек и компостеров успешно удалены!", "MsgAutoModifyEntityEnabled": "Автоматическая модификация сущностей включена!", "MsgAutoModifyEntityDisabled": "Автоматическая модификация сущностей выключена!" } add - Adding a modification to the HitchTrough/Composter that you are looking at from a distance of no more than 10 meters. *netID* - Adding a modification to the HitchTrough/Composter with the specified netID; remove - Removing a modification from the HitchTrough/Composter that you are looking at from a distance of no more than 10 meters. *netID* - Removing a modification from the HitchTrough/Composter with the specified netID; clear - Removing all modification from your HitchTroughs and Composters. *userID* - Removing all modification from specified player's HitchTroughs and Composters. Permission "industrialdung.admin" required. all - Removing all modification from all HitchTroughs and Composters. Permission "industrialdung.admin" required. auto - Enabling/Disabling automatic modification of HitchTroughs and Composters, if possible. aclear - Removing all modifications from the HitchTroughs and Composters that were not added to the data files for some reason. Permission "industrialdung.admin" required. unload - Unloading the plugin with the removal of all modifications from HitchTroughs and Composters without deleting them from the data file. Permission "industrialdung.admin" required. Example: /idung add /idung add *netID* /idung clear all /idung auto$9.99- 58 comments
- 2 reviews
-
- 1
-

-
- #rust
- #industrial
- (and 25 more)
-
Version 1.1.1
705 downloads
Discover the beauty of the open sea, with versatile barges perfect for transforming into your floating abode. Glide across the water effortlessly, by attaching a Tugboat, a Submarine, a RHIB, and more! You can traverse the waters of your Rust server with a custom Barge motor as well. Elevate your gaming experience, go on a wet and wild adventure with Barges, take the fight into the waves and beyond! The plugin includes 7 configurable platform shapes, each of which has it's own customization options in the config file. Note that the modules are configured within the config file, not in game. With proper TC authorization teammates can also access the Barge and it's modules. In the config file you can also adjust the maximum building height, movement speed, and several other parameters. Modules Barges each come with a variety of modules that you can enable, disable, or swap out for alternate modules, all within the config file. Regarding access to the modules in the game, this is restricted to players who have TC authorization. Connector Connector module allows attaching to a tugboat, a RHIB, or another barge. To allow attachment, press the button on the connector. You cannot install more than one Connector module on each Barge. Dock Dock module allows attaching boats and submarines to the Barge. Just approach it with your vehicle to activate and attach it. Mutliple Dock modules can be added to any Barge with available slots. Cabin Cabin module is used to drive the Barge. If this module is installed, the Barge can be driven with the help of an engine. To get into the Cabin, use the button on the door. To start the engine, fuel must be placed in the fuel tank behind the cabin. You can only connect one Cabin module on each Barge. Ramp Ramp module is used for loading and unloading vehicles, like motorcycles, cars, or minis! To open cor close the gate, use the button on the post. Multiple Ramp modules can be installed to each Barge. Anchor Anchor module will be the most used module for many who brave the sea on a Barge! Press the button to drop the Anchor, and stop movement so that you can build, or if you get a little seasick. Press the button again to go with the flow! Features and limitations • By default the construction on any Barge is restricted to either wood or metal. Stone and high quality are not currently an option. Those building parts will automatically receive the Legacy and Container skins. You can disable the restriction in the config, but this will negatively impact the performance on some servers and appear to have rougher movement of build parts with a large number of barges on the server • These actions are available only while the Barge is Anchored, not while moving - Base construction - Use of chairs and sofas - Installation of objects - Interact with wires pipes or conveyors • For optimization installing Wallpaper on Barges is not allowed • Building parts can not exceed the boundaries of the Barge itself • Frankenstein tables are not able to be installed on any Barge • By default you are not able to approach Fishing Village by Barge Please consider this plugin in BETA testing. The plugin is functional but I cannot make it compatible with the many plugins out there without your help. Please feel free to reach out with ideas but be patient with new ideas, as many common functions of a base are not so easy to do on a constantly moving rocking and rolling unique water base. Please give feedback and make tickets for support. Please be patient as all support requests are always going to be answered. If you are willing to join the Mad Mapper Discord this is a great resource for creating tickets for suggestions feedback and support. Chat commands (admin only) /spawnbarge PresetName - spawn the barge in your position /killbarge - destroys the barge you're looking at /killallbarges - destroys all barges on the server /givebarge PresetName - give the barge to yourself Console commands (RCON only) givebarge PresetName userID - give the barge to the player Plugin Config en – example of plugin configuration in English ru – example of plugin configuration in Russian Check out the rest of my work: Adem's Codefling Library You can reach out to me in Discord: Adem's Discord Profile Join the Mad Mappers Discord!$29.99- 73 comments
- 6 reviews
-
- 10
-

-

-
Version 1.0.9
330 downloads
Sky Base is a plugin that allows your players to get away from standard houses and build themselves a real base in the sky. The plugin is perfect for any server, both PvE and PvP. Video Description The plugin uses a standard construction system, which makes it easier to use and configure the plugin. To start building an air base, the player needs to craft the desired object using the /craftdrone command. 1 sky ceiling equals 1 foundation. In order to make the ceiling airy, just hit the ceiling with a mallet. To improve the ceiling, a drone of the same range as the roof is required. The plugin has a fully customizable crafting system where you can determine for yourself what resources are required to craft all drones. Video Tutorial Chat Commands /craftdrone - Allows you to open the drone crafting system (Permission: "skybase.use") Plugin Config Example of plugin configuration in English Example of plugin configuration in Russian Ideas for updates that may be implemented in the future Current ideas for the future of this plugin. These are things that I want to implement possibly. You can also write to us in Discord to suggest ideas or to vote for any that I share here. Add plugin support for notifications and also add notifications via the built-in gui rust</li> Creating ready-made building patterns Check out more of my work here CASHR's library. Come see our whole teams work Mad Mapper Library. Come by the Mad Mapper Discord for support, feedback, or suggestions!$27.50- 66 comments
- 3 reviews
-
- 4
-

-

-
- #sky bases
- #oxide
- (and 10 more)
-
-
- 1
-

-
- #helldivers
- #helldiver
- (and 13 more)


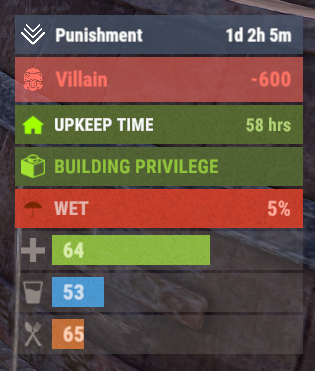
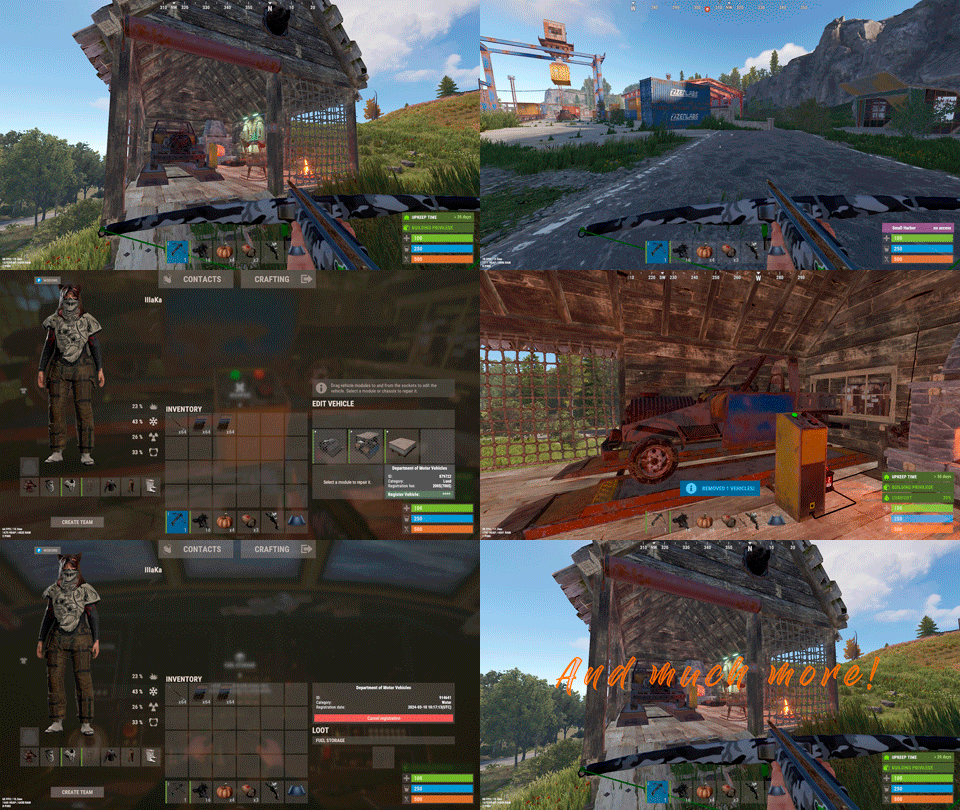


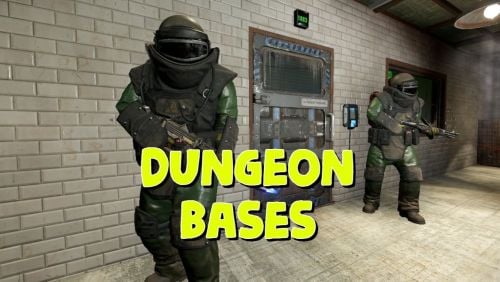








.thumb.png.d8730004887666a2775699ef18eb252c.png)



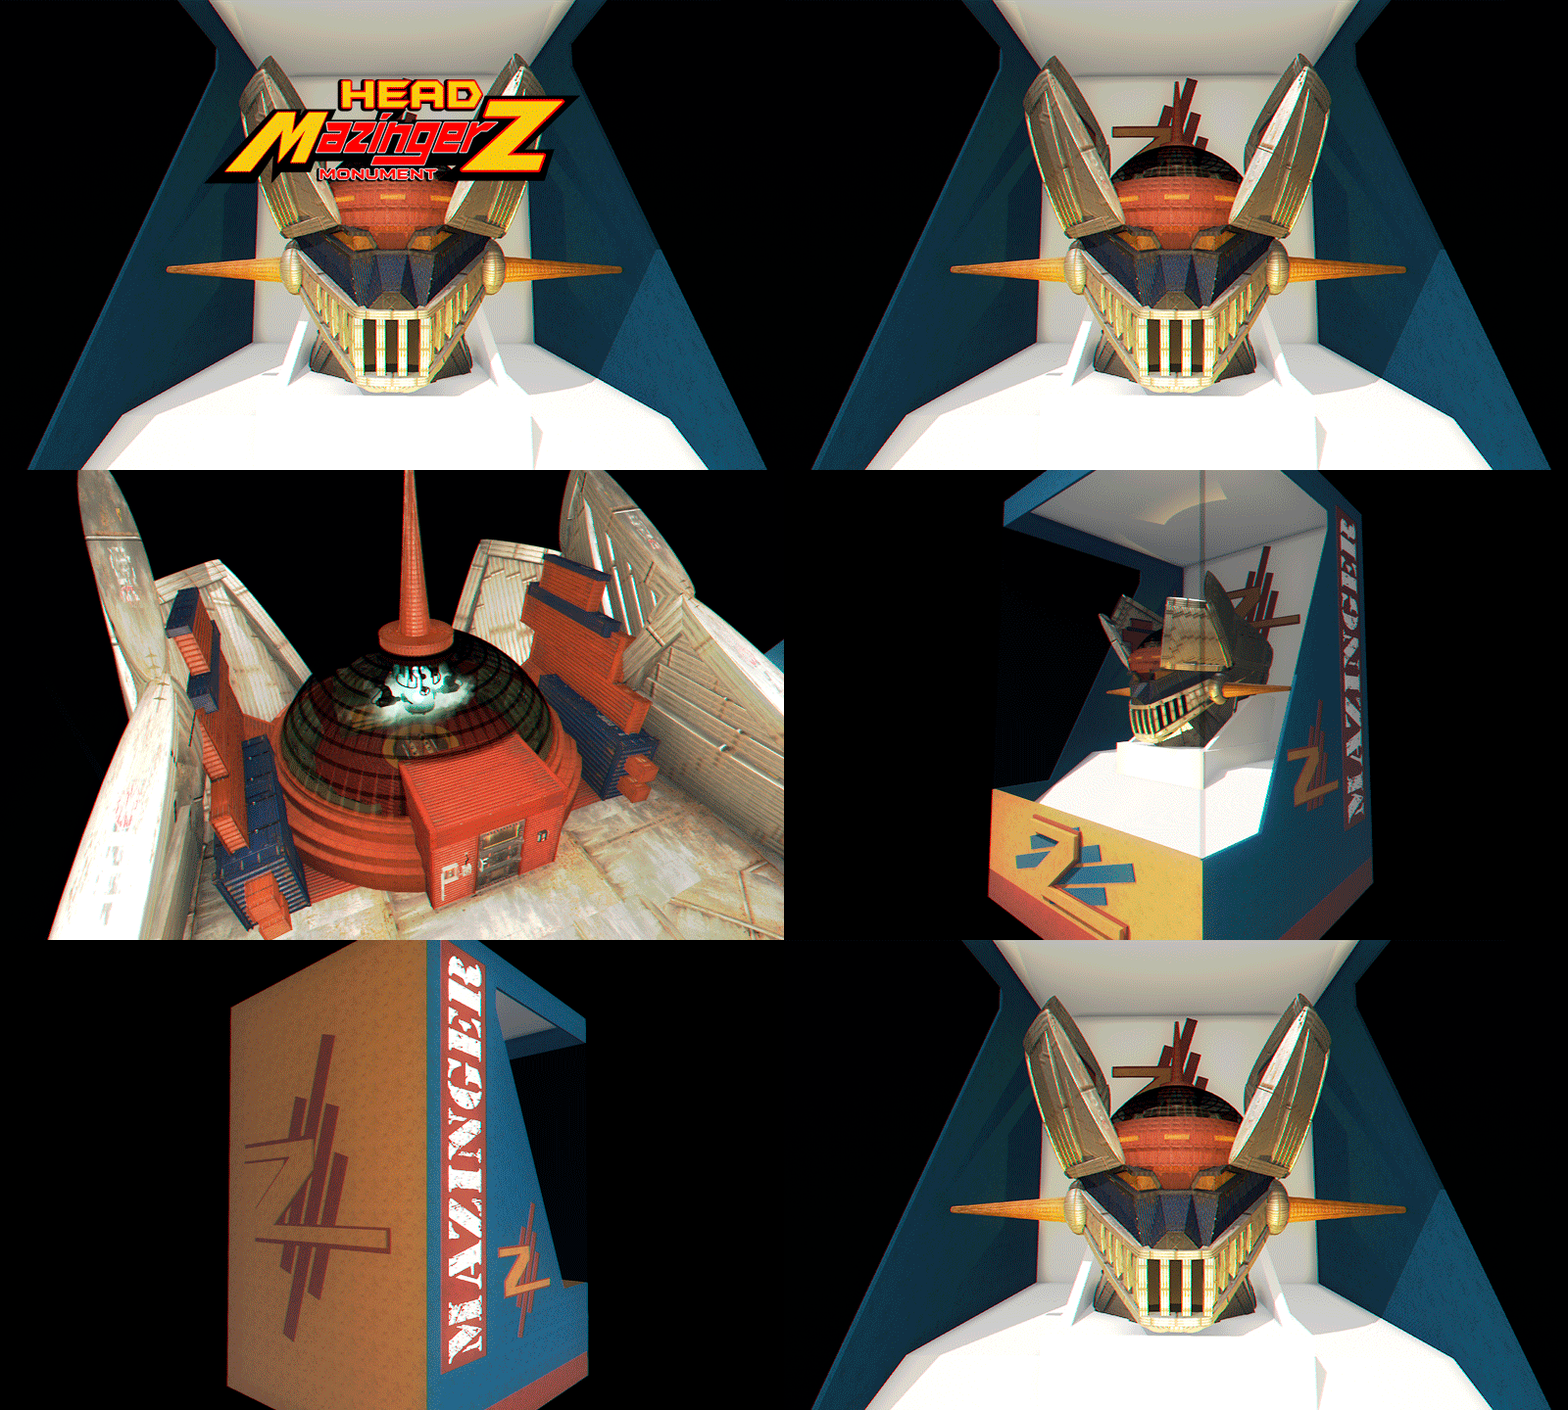



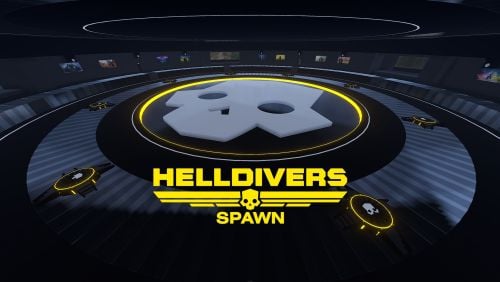
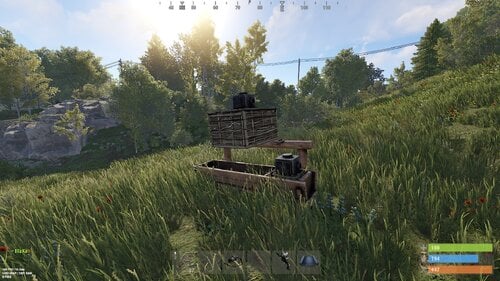
.thumb.jpg.4d4104cb1162e8596dbfb89d7235b858.jpg)

