Search the Community
Showing results for tags 'plugins'.
-
Version 3.0.1
34,045 downloads
Create fully automated raidable bases with NPCs in Rust This is the premium version of Raidable Bases. The differences between this and the free version are too many to list. A few key differences are: five (5) difficulties and associated loot table functionality instead of one (1), buyable events, lockouts for players. Requires latest version of CopyPaste or bases to work. It also requires that you have copypaste files already made. Raidable bases will be spawned using the CopyPaste plugin. This plugin does NOT come with any bases. Packages are sold separately that include bases. Check out my packages for this plugin for tier1, tier2, and tier3 which contain everything you need to get the plugin working in minutes with all bases and loot already configured for you! Packages are sold separately. RBE DEBUG This command exists to aid with issues regarding your configuration, profiles and/or map by displaying information, both good and bad, related to finding spawn points and spawning of bases. It is your responsibility to use this command before asking for help. Loot Table Editor by @beee https://codefling.com/tools/raidable-bases-loot-table-editor There are just a few steps required to get bases spawn on your server within minutes. You must have the CopyPaste plugin installed. (Disclaimer: Configuring this to your servers specific needs will require a lot of time and effort) Step 1: Obtain Your Bases You can get bases by: Downloading them from Fortify Purchasing a tier package from me Buying a base package from third-party sellers (be wary that some sellers include items in their CopyPaste files!) Creating your own bases Step 2: Set Up Profiles Profiles are located in: oxide/data/RaidableBases/Profiles/ carbon/data/RaidableBases/Profiles/ There are five different profiles. You can add the filenames of your CopyPaste bases manually, or by using the command: For example (You must use straight double quotes. Curly double quotes are not supported!): Step 3: Edit the Configuration The configuration file is located in: oxide/config/RaidableBases.json carbon/configs/RaidableBases.json Make the following changes: Always Maintain Max Events: Set this to true. Max Maintained Events: Set this to the number of bases you want to spawn. Minimum Required Players Online: If you want bases to spawn even when no players are online, set this to 0. Step 4: Save and Reload After making your changes: Save your files. Reload the plugin. The bases will now start spawning automatically. They will use the Default Loot table, located in: oxide/data/RaidableBases/Default_Loot.json carbon/data/RaidableBases/Default_Loot.json Step 5: Customize Loot Tables Refer to the documentation to learn how to set up your own custom loot tables. Additional Information If you want buyable events using the /buyraid command, you can set a cost under the Buyable Event Costs section. This includes: Economics Buy Raid Costs ServerRewards Buy Raid Costs Custom Buy Raid Costs Tips for Customizing Your Setup The plugin has many settings to customize. No guide can cover everything, so you will need to go through each setting and adjust it to meet your server’s needs. Important: Make backups as you configure the settings. Don’t rush—take it one step at a time. Dynamic difficulties (added in 3.0.0): Easily add or remove your own difficulties. You should reload the plugin whenever you make changes! Add a difficulty: rb.difficulty add "Sky" This will create the profile "Sky Bases.json" and set the difficulty to "Sky" rb.config add "Sky Bases" sky1 sky2 sky3 sky4 sky5 Reload the plugin! This will create language messages in the EN and RU language files which you can copy to other language files. If your messages do not update after a reload then you must restart your Rust server to reset Oxide cache. This will create all relevant settings for "Sky" within the config file where you must set them all as desired You need your own copypaste files and loot tables using their new respective names. Base Loot folder - add a loot table with the filename "Sky Bases.json" to match the profile name. Difficulty Loot folder - add a loot table with the filename "Sky.json" to match the difficulty name. Remove a difficulty: rb.difficulty remove "Sky" This will remove all settings for this difficulty from the config file - and disable the profile - only. No files are deleted! Edit or change a difficulty name: This is not supported and will not be - some hosts restrict System.File.IO namespace Please avoid trying to do this unless you are an expert user - you must rename EVERYTHING yourself Configuration errors are shown in rcon when the plugin loads If you make a mistake, you can use the add command a second time which will re-add any missing settings. If you feel overwhelmed or frustrated, take a break and return to it later. I am always here to answer your questions and help you (even if it takes some hours for me to respond). Tutorial This is not your run-of-the-mill plugin. DO NOT INSTALL WITHOUT READING THIS DOCUMENTATION FIRST. This plugin is extremely advanced and requires utmost attention to detail to configure properly. Jumping around in the configuration file or profiles will lead to more problems than it's worth. Take your time to understand each option before enabling or disabling its functionality. Raidable Bases is an independent expansion of Dangerous Treasures. You may learn how to enable the expansion mode below. It does not require Dangerous Treasures for any other purpose. Configuration Loot Tables The plugin comes with some very basic items (Default_Loot.json) that only serve as a demo loot list for you to either delete or expand upon. In order to make any use of the plugin (beyond demonstration) you will have to create your own loot lists instead. It will take a very long time to configure your loot tables, and fine-tune each to your specific needs. To start, I recommend that you use the rb.populate all command. This creates files in the Editable_Lists folder for each difficulty that contain every item in the game. Edit each file and set the amounts for the items that you want to spawn, and remove those that you do not want to spawn. It may look intimidating editing a list of 660 items, but don't underestimate how easy it is to delete items from a list compared to adding each one manually. Items that have their amount AND amountMin set to 0 will not spawn. So you may either delete these items from the list, or come back to them later. If you set amountMin to 0 then chance will determine if the item spawns or not, and another item will not replace it unless there are extra items available (as of 1.7.3). You can set the item skin that you want to use, but I suggest using the Skins settings in the configuration file to use random skins, or none at all. The rb.populate command which populates the Editable_Lists folder also includes items already inside of your Difficulty_Loot folder. This allows you to easily repopulate lists in order to re-evaluate which items spawn at a later date. Files inside of the Editable_Lists folder must be copied into an existing loot file in order to use the loot table. As the name implies, it is for editing only. - If you want to use Editable_Lists/Easy.json for your Easy bases then copy the contents of the file into the Difficulty_Loot/Easy.json file. - If you want to use Editable_Lists/Expert.json for the Expert Bases.json profile, then you must copy the contents of the Expert.json file into the Bases_Loot/Expert Bases.json file probability - the chance that the item can spawn. value must be between 0.0 and 1.0 where 1.0 is 100% chance Loot Priority Loot is pulled from all datafiles within the oxide/data/RaidableBases/ folder with the exception of the Profiles folder which is used to configure bases. oxide/data/RaidableBases/Base Loot - If a loot table exists in this folder with the same name as a profile then all of the bases in that profile will use this loot table. If you want items in this loot table to always spawn then you must enable Always Spawn Base Loot Table in the respective profile. oxide/data/RaidableBases/Difficulty Loot - Items will be chosen from these files based on the difficulty of each profile. If Use Day Of Week Loot is enabled then it will choose the loot table for that specific day. Otherwise, it will pick from Default_Loot.json. This is the default list, and is only used when all other loot tables do not have a sufficient amount of loot to spawn based on the Amount Of Items To Spawn setting. Loot Settings Allow Duplicate Items - This is useful when you do not have enough items in your loot tables , and you want to spawn Amount Of Items To Spawn by using the same items more than once. Amount Of Items To Spawn - This is the number of items that you want to spawn. If you do not have enough items in your loot tables then it will only spawn the amount that you have available. It will not spawn items if the container does not have enough space. Drop Tool Cupboard Loot After Raid Is Completed (false) Divide Loot Into All Containers - This allows you to divide loot evenly from all of your loot lists into all containers when enabled. You MUST increase or decrease Amount Of Items To Spawn respective to how many items you want in each container. This includes large boxes, small boxes, coffins and storage barrels. Optional settings include (in order of priority) cupboard, bbq, oven, fridge and lockers. Allow Players To Pickup Deployables (false) - As name implies, overridden by Entities Not Allowed To Be Picked Up Allow Players To Deploy A Cupboard (true) - Block players from placing a TC after destroying the TC in the base. Drop Container Loot X Seconds After It Is Looted (false) - Prevent players from cherry picking items and leaving the rest, in order to despawn the raid quicker. Drop Container Loot Applies Only To Boxes And Cupboards (true) - As name implies Empty All Containers Before Spawning Loot (true) - Useful if using CopyPaste files that contain loot already - I suggest leaving this true as it can complicate how many items spawn if there are too few inventory slots remaining. Ignore Containers That Spawn With Loot Already (false) - Useful if you want specific loot to spawn from a copypaste file. Require Cupboard Access To Loot (false) - Prevent all players from looting until they reach the TC, or destroy it. Skip Treasure Loot And Use Loot In Base Only (false)" - Useful if you want all loot to spawn from a copypaste file - not recommended - will allow players to memorize which boxes to raid and ignore the rest. Always Spawn Base Loot Table (false) - Very useful if you want items in the Base_Loot file to always spawn (such as C4, rockets, ammo, etc) Settings Blacklisted Commands (none) - prevents players from using these commands inside of a raid base Automatically Teleport Admins To Their Map Marker Positions (true) - right-click map to teleport (requires raidablebases.mapteleport permission) Block Wizardry Plugin At Events (false) - Block players from using wands Chat Steam64ID (0) - The steam profile icon to show in chat messages Expansion Mode (Dangerous Treasures) (false) - Allow Dangerous Treasures to take over a random box for its event Remove Admins From Raiders List (false) - Allows admins to help players without receiving any rewards Show X Z Coordinates (false) - Show X Z coordinates alongside grid location Buy Raid Command (buyraid) - Opens the buyable UI to purchase raids for each difficulty Event Command (rbe) - Specify command name Hunter Command (rb) - Specify command name Server Console Command (rbevent) - Specify command name Raid Management Allow Teleport (false) - Allow/prevent players from teleporting Allow Cupboard Loot To Drop (true) - Allows loot to drop when TC is destroyed by a player Allow Players To Build (true) Allow Players To Use Ladders (true) Allow Players To Deploy Barricades (true) Allow Players To Upgrade Event Buildings (false) - Prevent players from upgrading buildings with no TC to prevent this otherwise Allow Player Bags To Be Lootable At PVP Bases (true) - Bypasses Prevent Looting plugin Allow Player Bags To Be Lootable At PVE Bases (true) - Bypasses Prevent Looting plugin Allow Traps To Drop Loot (false) - Allow traps such as guntraps and turrets to drop loot on death Allow Players To Loot Traps (false) - Allows players to loot traps such as guntrap and turrets with TC access Allow Raid Bases On Roads (true) Allow Raid Bases On Rivers (true) Allow Raid Bases On Building Topology (true) - Specifically added for custom map makers Allow Vending Machines To Broadcast (false) - Prevents vending machines from showing on the map Allow Bases To Float Above Water (false) - Keyword: FLOAT Allow Bases To Spawn On The Seabed (false) Prevent Bases From Floating Above Water By Also Checking Surrounding Area (false) - Keyword: FLOAT Maximum Water Depth Level Used For Float Above Water Option (1.0) - Keyword: FLOAT, but allows you to prevent on water if the value is low enough Backpacks Can Be Opened At PVE Bases (true) Backpacks Can Be Opened At PVP Bases (true) Backpacks Drop At PVE Bases (false) - Will drop a backpack on death, even if explicity disabled in Backpack configuration (requires Backpacks 3.4.0 ) Backpacks Drop At PVP Bases (false) Block Mounted Damage To Bases And Players (false) - Prevent players from dealing damage while on mini, scrap heli, etc Block RestoreUponDeath Plugin For PVP Bases (false) Block RestoreUponDeath Plugin For PVE Bases (false) Bypass Lock Treasure To First Attacker For PVE Bases (false) - Do not set an owner for PVE bases Bypass Lock Treasure To First Attacker For PVP Bases (false) - Do not set an owner for PVP bases Despawn Spawned Mounts (true) - Allows mounts such as mini or scrap heli to remain if not abandoned when raid despawns Do Not Destroy Player Built Deployables (true) - Loot is not lost if the plugin destroys a player's box with this option - it is dropped on the ground in a grey loot container just as if they destroyed the box themselves Do Not Destroy Player Built Structures (true) Divide Rewards Among All Raiders (true) Draw Corpse Time (Seconds) (300.0) - The amount of time the players corpse location is drawn on their screen Eject Sleepers Before Spawning Base (true) Extra Distance To Spawn From Monuments (0.0) Flame Turrets Ignore NPCs (false) - Can help with performance on some servers Maximum Land Level (2.5) - The allowed height of the surrounding terrain for spawning bases (this should never be changed) Move Cookables Into Ovens (true) Move Food Into BBQ Or Fridge (true) Move Resources Into Tool Cupboard (true) Move Items Into Lockers (true) Lock Treasure To First Attacker (true) - Sets the first attacker as the owner of a raid. You must set eject enemies settings in each profile if you do not want players entering private raids Lock Treasure Max Inactive Time (Minutes) (20.0) - Resets the raid as public after this time Assign Lockout When Lock Treasure Max Inactive Time Expires (false) - useful those who partially raid bases in order to avoid the lockout timer Lock Players To Raid Base After Entering Zone (false) - Forces players to be locked to a raid once they enter it, even on accident Only Award First Attacker and Allies (false) Minutes Until Despawn After Looting (min 1) (15) - The time until the base despawns after being raided Minutes Until Despawn After Inactive (0 = disabled) (45) - The time until the base despawns after being inactive Minutes Until Despawn After Inactive Resets When Damaged (true) - Resets the time until the base despawns when it is damaged by a player Mounts Can Take Damage From Players (false) Mounts Can Take Damage From SamSites (true) Player Cupboard Detection Radius (100.0) - Extra layer of protection to prevent raid bases from spawning too closely to player bases (this should never be under 100 and never too high either, 100-200 at most) Players With PVP Delay Can Damage Anything Inside Zone (false) - Applies specifically to PVP raid bases Players With PVP Delay Can Damage Other Players With PVP Delay Anywhere (false) PVP Delay Between Zone Hopping (10.0) - The amount of time players can take damage while on a PVE server after stepping outside of a PVP zone - prevents exploiting - recommended value: 120 Prevent Fire From Spreading (true) - Helps with server performance by preventing forest fires, err, fire from spreading after initial spawn Prevent Players From Hogging Raids (true) - Prevents players from tagging multiple raids at once Require Cupboard To Be Looted Before Despawning (false) Destroying The Cupboard Completes The Raid (false) Require All Bases To Spawn Before Respawning An Existing Base (false) - Rotate through all bases specific to each difficulty before reusing an existing base Turn Lights On At Night (true) Turn Lights On Indefinitely (false) Traps And Turrets Ignore Users Using NOCLIP (false) Use Random Codes On Code Locks (true) Wait To Start Despawn Timer When Base Takes Damage From Player (false) - Prevents the inactive despawn timer from starting until it is damaged by a player. Combos well when inactive resets is disabled by giving players a limited time to finish a raid once they start it Additional Containers To Include As Boxes (none) - example: vendingmachine Eject Mounts Boats (false) - Set any true to prevent them from entering a raid base Cars (Basic) (false) Cars (Modular) (false) Campers (true) Chinook (false) Flying Carpet (false) Horses (false) HotAirBalloon (true) MiniCopters (false) Pianos (true) Scrap Transport Helicopters (false) All Other Mounts (false) All Controlled Mounts (false) - Mounts controlled via another plugin Max Amount Of Players Allowed To Enter Each Difficulty (0 = infinite, -1 = none) (infinite) Easy Difficulty => Amount (0) Medium Difficulty => Amount (0) Hard Difficulty => Amount (0) Expert Difficulty => Amount (0) Nightmare Difficulty => Amount (0) Max Amount Allowed To Automatically Spawn Per Difficulty (0 = infinite) -1 = disabled) Easy (0) - Specifies how many of each difficulty can be spawned at any given time Medium (0) Hard (0) Expert (0) Nightmare (0) Player Lockouts (0 = ignore) - this is for PUBLIC raids where buyable events use the Buyable Cooldowns and these are not shared - players may still do 1 public and 1 buyable event if these are both enabled Time Between Raids In Minutes (Easy) (0.0) - Set a cooldown before the player can enter another raid base Time Between Raids In Minutes (Medium) (0.0) Time Between Raids In Minutes (Hard) (0.0) Time Between Raids In Minutes (Expert) (0.0) Time Between Raids In Minutes (Nightmare) (0.0) Block Clans From Owning More Than One Raid (false) - Prevent clans from hogging multiple raid bases Block Friends From Owning More Than One Raid (false) Block Teams From Owning More Than One Raid (false) Easy|Medium|Hard|Expert|Nightmare Raids Can Spawn On Monday (true) Tuesday (true) Wednesday (true) Thursday (true) Friday (true) Saturday (true) Sunday (true) Difficulty Colors (Border) Easy (000000) Medium (000000) Hard (000000) Expert (000000) Nightmare (000000) Difficulty Colors (Inner) Easy (00FF00) Medium (FFEB04) Hard (FF0000) Expert (0000FF) Nightmare (000000) Map Markers Marker Name (Raidable Base Event) Radius (0.25) Use Vending Map Marker (true) Show Owners Name on Map Marker (true) Use Explosion Map Marker (false) Create Markers For Buyable Events (true) Create Markers For Maintained Events (true) Create Markers For Scheduled Events (true) Create Markers For Manual Events (true) Buyable Events Do Not Reward Buyable Events (false) Refunds > Refund Despawned Bases (false) Refunds > Refund Percentage (100.0) Refunds > Refund Resets Cooldown Timer (false) Refunds > Block Refund If Base Is Damaged (true) Cooldowns (0 = No Cooldown) VIP Permission (raidablebases.vipcooldown (300.0) Admin Permission (raidablebases.allow (0.0) Server Admins (0.0) Normal Users (600.0) Allow Players To Buy PVP Raids (false) - If all of your profiles have PVP enabled then players will NOT be able to buy any raids! Convert PVE To PVP (false) Convert PVP To PVE (false) Distance To Spawn Bought Raids From Player (500.0) Lock Raid To Buyer And Friends (true) Ignore Player Entities At Custom Spawn Locations (false) Ignore Safe Checks (false) - if enabled will prevent the plugin from checking the area for a TC, buildings, or deployables Max Buyable Events (1) Reset Purchased Owner After X Minutes Offline (10.0) Spawn Bases X Distance Apart (100.0) - most maps cannot support this being above 200 ! Spawns Database File (Optional) (none) - Useful if you want buyable raids to spawn in specific locations using spawn files from the Spawns Database plugin Maintained Events Always Maintain Max Events (false) - Spawn another raid soon after one despawns Ignore Player Entities At Custom Spawn Locations (false) - spawn regardless of what player entities are built in the area Chance To Randomly Spawn PVP Bases (0 = Ignore Setting) (0.0) - Overrides all PVP Allow profile settings for a chance to make the raid PVE or PVP Convert PVE To PVP (false) Convert PVP To PVE (false) Include PVE Bases (true) Include PVP Bases (true) Ignore Safe Checks (false) - Bypass checks that ensure no buildings or other objects are blocking the spawn Minimum Required Players Online (1) - Max Maintained Events (1) - How many bases you want available at any given time Spawn Bases X Distance Apart (100.0) - most maps cannot support this being above 200 ! Spawns Database File (Optional) (none) - Useful if you want maintained raids to spawn in specific locations using spawn files from the Spawns Database plugin Time To Wait Between Spawns (15.0) - Wait a specific time frame between each paste (can be set to 0) Manual Events Convert PVE To PVP (false) Convert PVP To PVE (false) Max Manual Events (1) Spawn Bases X Distance Apart (100.0) Spawns Database File (Optional) (none) - Useful if you want manually spawned raids to spawn in specific locations using spawn files from the Spawns Database plugin Scheduled Events Enabled (false) - Spawn raids on a timer specific to random amount of time between Every Min and Every Max Seconds Ignore Player Entities At Custom Spawn Locations (false) - spawn regardless of what player entities are built in the area Chance To Randomly Spawn PVP Bases (0 = Ignore Setting) (0.0) - Overrides all PVP Allow profile settings for a chance to make the raid PVE or PVP Convert PVE To PVP (false) Convert PVP To PVE (false) Every Min Seconds (3600.0) Every Max Seconds (7200.0) Include PVE Bases (true) Include PVP Bases (true) Ignore Safe Checks (false) - Bypass checks that ensure no buildings or other objects are blocking the spawn Max Scheduled Events (1) Max To Spawn At Once (0 = Use Max Scheduled Events Amount) (0) Minimum Required Players Online (1) Spawn Bases X Distance Apart (100.0) - most maps cannot support this being above 200 ! Spawns Database File (Optional) (none) - Useful if you want scheduled raids to spawn in specific locations using spawn files from the Spawns Database plugin Time To Wait Between Spawns (15.0) - Wait a specific time frame between each paste (can be set to 0) Economics Buy Raid Costs (0 = disabled) - if you do not configure at least one cost for Buyable Events then players will not be able to buy any raids Easy (0.0) - How much each raid costs, use the /buyraid command to see the UI Medium (0.0) Hard (0.0) Expert (0.0) Nightmare (0.0) ServerRewards Buy Raid Costs (0 = disabled) - if you do not configure at least one cost for Buyable Events then players will not be able to buy any raids Easy (0) - How much each raid costs, use the /buyraid command to see the UI Medium (0) Hard (0) Expert (0) Nightmare (0) Custom Buy Raid Costs (false = disabled) - if you do not configure at least one cost for Buyable Events then players will not be able to buy any raids Easy (50 scrap) - How much each raid costs, use the /buyraid command to see the UI Medium (100 scrap) Hard (150 scrap) Expert (200 scrap) Nightmare (250 scrap) All are disabled by default. All can require its own specific item. Allowed Zone Manager Zones List: pvp, 99999999 - the list of zones where raid bases may spawn at - Zone Manager is not required to use this plugin. Use Grid Locations In Allowed Zone Manager Zones Only - forces all spawns into zones by Zone Manager. Adding flags to your zones may conflict with this plugin. Use of Spawns Database plugin is advised instead Event Messages Notify Plugin (-1 = disabled) Notification Interval (1 second) Announce Raid Unlocked (false) Announce Buy Base Messages (false) Announce Thief Message (true) Announce PVE/PVP Enter/Exit Messages (true) Show Destroy Warning (true) Show Opened Message (true) Show Opened Message For Paid Bases (true) Show Prefix (true) Show Messages To Player (true) - set false if you do not want players to receive CHAT messages, other messages from notifications will still show GUIAnnouncements and Advanced Alerts plugins can be used instead of CHAT messages Advanced Alerts Enabled (true) Anchor Min and Max Time Shown (5) Panel Alpha (0.98) Background Color Title Background Color GUIAnnouncements Enabled (false) Banner Tint Color (Grey) Maximum Distance (300.0) Text Color (White) Lusty Map Enabled (false) Icon File (http://i.imgur.com/XoEMTJj.png) Icon Name (rbevent) Icon Rotation (0.0) Ranked Ladder (based on points system) Award Top X Players On Wipe (3) - Set 0 to disable permissions and groups from being created. Every wipe the top 3 players are awarded the raidablebases.th permission and raidhunter group. Used with plugins that give titles based on permissions/groups, such as BetterChat Enabled (true) Difficulty Points (for each difficulty) Assign To Owner Of Raid Only (false) Assign Rank After X Completions - Players that complete the required amount of completions will receive the relevant above permission and group automatically - Set value above 0 to enable this feature for any given difficulty as it is disabled for all difficulties by default Permissions and groups are given to players for being top 3 in each difficulty at the end of a wipe Set Award Top X Playrs On Wipe to 0 to disable these permissions and groups from being created. permissions: raidablebases.ladder.easy, raidablebases.ladder.medium, raidablebases.ladder.hard, raidablebases.ladder.expert, raidablebases.ladder.nightmare, raidablebases.th groups: raideasy, raidmedium, raidhard, raidexpert, raidnightmare, raidhunter Skins (Boxes, Loot Items, Npcs all have there own settings) (skin settings revamped in 2.7.4) Use Identical Skins Include Workshop Skins (true) Use Random Skin (true) Use Imported Workshop Skins File (true) - copy existing Imported Workshop Skins section from Skinbox to the Imported Workshop Skins json file to apply. Boxes (including above Skins options) Preset Skins - you can add any box skin here and it will randomly apply to any relevant box this skin can be used with Loot Items (including above Skins options) Use Identical Skins For Stackable Items Use Identical Skins For Non-Stackable Items Deployables (including above Skins options) List: Partial Names (door, barricade, chair, fridge, furnace, locker, reactivetarget, rug, sleepingbag, table, vendingmachine, waterpurifier, skullspikes, skulltrophy, summer_dlc, sled) Skin Everything (true) - if true then the Partial Names list will not be used Preset Door Skins - you can add any door skin here and it will randomly apply to any relevant door this skin can be used with Ignore If Skinned Already (false) Treasure Resources Not Moved To Cupboards (skull.human, battery.small, bone.fragments, can.beans.empty, can.tuna.empty, water.salt, water, skull.wolf) Use Day Of Week Loot (false) Do Not Duplicate Base Loot (false) Do Not Duplicate Difficulty Loot (false) Do Not Duplicate Default Loot (false) Use Stack Size Limit For Spawning Items (false) Status UI - Shows PVE/PVP, time left, amount of loot left and the status of owner Details UI - Shows owner and active status Delay UI - Shows UI for PVP delay Buyable Cooldowns UI - Shows UI for the Buyable Cooldowns option Buyable Events UI - Shows players a UI for buying events including the primary cost Lockouts UI - Shows UI for the Player Lockouts option Enabled Offset Min Offset Max Panel Alpha Font Size Background Color Title Background Color etc Weapons Fog Machine Allows Motion Toggle (true) Fog Machine Requires A Power Source (true) SamSite Repairs Every X Minutes (0.0 = disabled) (5.0) SamSite Range (350.0 = Rust default) (75.0) Test Generator Power (100.0) Tesla Coil settings in profiles Infinite Ammo AutoTurret (true) FlameTurret (true) FogMachine (true) GunTrap (true) SamSite (true) Ammo AutoTurret (256) FlameTurret (256) FogMachine (5) GunTrap (128) SamSite (24) Tesla Coil (profiles) Requires A Power Source (true) Max Discharge Self Damage Seconds (0 = None) 120 = Rust default) (0.0) Max Damage Output (35.0) Profiles Difficulty - very first setting. If your raids show as NORMAL then you're using the free plugin. If all bases show as EASY then this setting is not configured. Entities Not Allowed To Be Picked Up (List: generator.small, generator.static autoturret_deployed - overrides Allow Players To Pickup Deployables) Additional Bases For This Difficulty (default) - A list of bases to use within this profile Paste Options (default) - Paste options specific to the profiles filename if it is also a base Profile Enabled (true)- Useful for disabling a profile instead of deleting it Add Code Lock To Unlocked Or KeyLocked Doors (true) Add Code Lock To Boxes (false) Add Code Lock To Tool Cupboards (false) Close Open Doors With No Door Controller Installed (true) Allow Duplicate Items (false) - [Explained above] Allow Players To Pickup Deployables (false) - [Explained above] Allow Players To Deploy A Cupboard (true)- [Explained above] Allow PVP (true) Allow Friendly Fire (Teams) (true) Amount Of Items To Spawn (30) - [Explained above] Minimum Amount Of Items To Spawn (0 = Use Max Value) (0) Flame Turret Health (300.0) Block Plugins Which Prevent Item Durability Loss (false) - Force items to take condition losses Block Damage Outside Of The Dome To Players Inside (false) - Prevent damage from outside of the dome to players inside of the dome Block Damage Outside Of The Dome To Bases Inside (false) - Prevent damage from outside of the dome to the base inside Block Damage Inside From Npcs To Players Outside (false) Building Blocks Are Immune To Damage (false) Boxes Are Invulnerable (false) Spawn Silently (No Notifcation, No Dome, No Map Marker) (false) Divide Loot Into All Containers (true) - [Explained above] Drop Container Loot X Seconds After It Is Looted (0.0) - [Explained above] Drop Container Loot Applies Only To Boxes And Cupboards (true) - [Explained above] Create Dome Around Event Using Spheres (0 = disabled, recommended = 5) (5) - A visible dome for players to distinguish raid bases from player bases Empty All Containers Before Spawning Loot (true) - [Explained above] Eject Corpses From Enemy Raids (Advanced Users Only) (true) - Prevents corpses from remaining inside of a raid when it becomes private and prevents the user from looting it Eject Enemies From Purchased PVE Raids (true) - Useful when Lock Raid To Buyer And Friends is enabled Eject Enemies From Purchased PVP Raids (false) Eject Enemies From Locked PVE Raids (true) - Useful when Lock Treasure To First Attacker is enabled Eject Enemies From Locked PVP Raids (false) Explosion Damage Modifier (0-999) (100.0) - Modify the damage of all explosives Force All Boxes To Have Same Skin (true) Ignore Containers That Spawn With Loot Already (false) - [Explained above] Penalize Players On Death In PVE (ZLevels) (true) Penalize Players On Death In PVP (ZLevels) (true) Loot Amount Multiplier (1.0) - useful to scale loot amounts without having to adjust them all individually Protection Radius (50.0) - This options controls every single option and feature that relies explicity on distance or radius in one regard or another. Setting an incorrect value, either too low, or too high, will break the functionality of the plugin. It's best to leave it alone. Require Cupboard Access To Loot (false) - [Explained above] Minimum Respawn Npc X Seconds After Death (0.0) - Useful in simulating a real raid where players respawn Maximum Respawn Npc X Seconds After Death (0.0) Skip Treasure Loot And Use Loot In Base Only (false) - [Explained above] Always Spawn Base Loot Table (false) - [Explained above] - Arena Walls Enabled (true) Extra Stacks (1) - How many times you want walls to stack on top of one another Use Stone Walls (true) - set false to use wooden walls instead Use Iced Walls (false) - not advised to use this as it can cause client lag (not a plugin issue) Use Least Amount Of Walls (true) Use UFO Walls (false) - Walls spawn horizontally instead of vertically Radius (25.0) NPC Levels Level 2 - Final Death (false) - Respawns all npcs when raid is completed NPCs Enabled (true) Spawn Inside Bases (Options: Spawn On Floors, Spawn On Rugs, Spawn On Beds) Murderer Items Dropped On Death (none) Scientist Items Dropped On Death (none) Murderer (Items) (metal.facemask, metal.plate.torso, pants, tactical.gloves, boots.frog, tshirt, machete) Scientist (Items) (hazmatsuit_scientist, rifle.ak) Murderer Kits (murderer_kit_1, murderer_kit_2) - Kits have priority over these lists of items Scientist Kits (scientist_kit_1, scientist_kit_2) Random Names (none) - Spawn with a custom random name instead of a provided random name Amount To Spawn (3) Aggression Range (70.0) - Aggression range is increased by 250 meters when engaged Despawn Inventory On Death (true) Health For Murderers (100 min, 5000 max) (150.0) Health For Scientists (100 min, 5000 max) (150.0) Minimum Amount To Spawn (1) Use Dangerous Treasures NPCs (false) - Tells Dangerous Treasures to control and outfit the NPCs instead Spawn Murderers And Scientists (true) Scientist Weapon Accuracy (0 - 100) (30.0) - These bots are meant to be savages. 30% is average for highly skilled players, while the average player has 10-20% accuracy Spawn Murderers (false) Spawn Random Amount (false) Spawn Scientists Only (false) Rewards Economics Money (0.0) - How much is rewarded after a raid. Overridden by Divide Rewards Among All Raiders ServerRewards Points (0) Change Building Material Tier To Wooden (false) - Useful for upgrading or downgrading buildings automatically Stone (false) Metal (false) HQM (false) Change Door Type To Wooden (false) - Useful for upgrading or downgrading doors automatically Metal HQM Player Building Restrictions Wooden (false) Stone (false) Metal (false) HQM (false) Auto Turrets Aim Cone (5.0) - shots fired will spread into a cone pattern based on this radius. Lowering this value will group the shots closer together. Minimum Damage Modifier (1.0) Maximum Damage Modifier (1.0) Start Health (1000.0) Sight Range (30.0) Set Hostile (False = Do Not Set Any Mode) (true) Requires Power Source (false) Remove Equipped Weapon (false) Weapon To Equip When Unequipped (null = Do Not Equip) (rifle.ak) Permissions raidablebases.allow -- Allows player to use the available ADMIN commands. This is NOT recommended as players can use the commands 'buyraid' and 'rb' already. raidablebases.canbypass permission (or to be flying) to bypass dome restrictions (this previously worked for admins, but now requires the permission instead) raidablebases.blockbypass permission to bypass Owning More Than One Raid settings for Clans/Friends/Teams raidablebases.mapteleport Teleporting to map marker now simply requires this permission and to be enabled in config raidablebases.ddraw allows support for FauxAdmin users raidablebases.config allows use of the rb.config command in-game (server console does not require this permission) raidablebases.banned bans the user from entering any raids - DO NOT GIVE THIS TO THE DEFAULT GROUP LOL raidablebases.durabilitybypass to bypass `Block Plugins Which Prevent Item Durability Loss` raidablebases.notitle permission to exclude users from ranked title rewards See other permissions using Permissions Manager Players do not require any permissions by default. Grid This plugin creates it's own spawn points automatically, which cover the entirety of your server's map when the plugin is loaded. This is created one-time when the plugin loads. The grid maintains itself without requiring any input. You may view the grid by typing /rb grid in-game to view detailed drawings of all locations on the grid. X - green - possible spawn point X - Red - currently in use C - Cyan - construction detected nearby TC - yellow - TC detected nearby W - blue - water depth is too high - refreshes on ocean level change Each location on the grid is checked a second time before spawning a base to insure it does not spawn the base on players or their buildings. You can disable using the grid by providing a valid spawn file for each raid type (buyable, maintained, scheduled and manual). Commands buyraid - buys a raid, eg: buyraid easy, buyraid easy steamid, buyraid 0, buyraid 0 steamid. I suggest typing the command and using the UI to buy bases. rb - for players to see the ladder (also for admins to see the status of each raid going on, which includes showing the allies and owners of each raid) rb ui [lockouts|status] - COMMAND REMOVED rbe despawn - despawns a players purchased base if they have raidablebases.despawn.buyraid permission For admins, or players with the admin permission raidablebases.allow: rb.config stability true/false - sets stability in every profile rbe debug - toggles debug messages shown every second to server console for maintained and scheduled warning messages rb grid - see the grid and all monument names rb resettime - reset the time for the next scheduled event rb savefix - to cancel a server save that has become stuck - requires authlevel 2 rb prod - to gather information from a raid base entity for debugging purposes - requires admin or raidablebases.allow rbe - spawns a base at the position you are looking at. You cannot spawn a base on a player (including yourself) rbe draw - draw the raids radius rbe despawn - despawn a base near you (can be used by players with raidablebases.despawn.buyraid permission to despawn a base they purchased) rbe despawnall - despawn all bases rbe [basename] [difficulty] - spawn a raid at the location you are looking at rbe expire steamid|playername - removes a lockout for a specific player rbe expireall rbe active - shows status for each event rbevent [basename] [difficulty] - spawn a raid randomly on the map - and teleport to it if using the command in-game rb.reloadconfig - allows you to reload the config without needing to reload the plugin. Some changes are not applied immediately, and no changes are retroactive to bases that are already spawned. rb.config - allows you to edit the config by adding, removing, and listing bases. Requires the permission raidablebases.config when not being used from the server console. rb.toggle - toggles Maintained Events and Scheduled Events on/off, if enabled in the config, until plugin reloads rbe setowner name - Sets the player as the owner of the raid rbe clearowner - Clears the owner of the raid Additional Bases allows you to add additional files to an existing base so that all bases in that list share the same configuration as the primary base/profile. This is great for setting up a list of bases for easy, medium, hard, expert and nightmare. Command rb.populate will populate specific loot tables with every item in the game (items are disabled by default as their amounts are set to 0) Arguments: rb.populate easy medium hard expert nightmare loot all Arguments: rb.populate 0 1 2 3 4 loot all easy - Populates oxide/data/RaidableBases/Editable_Lists/Easy.json medium - Populates oxide/data/RaidableBases/Editable_Lists/Medium.json hard - Populates oxide/data/RaidableBases/Editable_Lists/Hard.json expert - Populates oxide/data/RaidableBases/Editable_Lists/Expert.json nightmare - Populates oxide/data/RaidableBases/Editable_Lists/Nightmare.json loot - Populates oxide/data/RaidableBases/Editable_Lists/Default_Loot.json all - Populates ALL above loot tables Configure the items to your liking then copy the files contents into a loot table that you would like to use (for example Difficulty Loot/Easy.json) You cannot use loot tables in the config file anymore. Use the data directory (oxide/data/RaidableBases) API No return behavior: void OnRaidableBaseStarted(Vector3 raidPos, int mode, bool allowPVP) void OnRaidableBaseEnded(Vector3 raidPos, int mode, bool allowPVP) void OnPlayerEnteredRaidableBase(BasePlayer player, Vector3 raidPos, bool allowPVP, int mode) void OnPlayerExitedRaidableBase(BasePlayer player, Vector3 raidPos, bool allowPVP, int mode) OnRaidableBaseDespawn, OnRaidableBaseDespawned, OnRaidableBasePrivilegeDestroyed, OnRaidableBaseCompleted find more hooks and arguments by searching for CallHook in the plugin file Tips Players will be considered raiders after looting, killing an npc, using explosives, eco raiding, destroying a building block/high wall/door or dealing damage from INSIDE of the dome You must change easybase1, mediumbase2, expertbase3, etc to the name of your CopyPaste files, or vis-versa. This plugin doesn't create bases for you. You can use the rb.config command (rb.config add "easy bases" easybase1 easybase2 0) in the server console to make this process easier. You can rename all profiles or additional base filenames. When copying a base with CopyPaste, make certain that you copy the base from eye level of the CENTER foundation within the base, or slightly clipped into this foundation with noclip. Whichever provides better results for you. You must verify that the base pastes down correctly (with /paste command) after you've copied it. I would not change autoheight from false to true. height is the distance the base is spawned off of the ground. elevation determines how flat the surrounding terrain must be in order for bases to spawn on it Scheduled Events is how often you want a random base to spawn on the map. This is disabled by default. This randomness comes from Every Min Seconds and Every Max Seconds Maintain Events will always spawn the Max Events amount of bases on your map. This is disabled by default. When one despawns, another will take its place shortly after. Allow Teleport will prevent players from teleporting when disabled. Compatible with NTeleportation or any plugin that uses the CanTeleport hook. Help This plugin does NOT use Zone Manager - it creates and manages everything on its own. If you are having issues with too few locations on the grid, or each attempt to spawn a base returns a manual spawn was already requested then it is likely because of how you have setup Zone Manager. You either have far too many zones, or you have zones which are far too large. Raidable Bases will not spawn in these zones unless the ZoneID is added to Allowed Zone Manager Zones in the config file. Do not put this plugin in your store/shop. It simply is not designed to work with it. There are far too many cooldowns to make this idea plausible, and the plugin cannot function properly without them. Using /buyraid will open a UI designed specifically for this issue. This plugin requires CopyPaste plugin to work. It also requires that you have copypaste files already made. Raidable bases will be spawned using the CopyPaste plugin. This plugin does NOT come with any bases. PvE server friendly with TruePVE and other plugins that support the hooks CanEntityTakeDamage, CanEntityBeTargeted, and CanEntityTrapTrigger. Bases can have 5 difficulty settings: 0 for easy, 1 for medium, 2 for hard, 3 for expert, and 4 for nightmare. This is configurable per profile. Bases can spawn on roads and other areas that do not allow building by Rust. Building ladders in these areas is allowed by the plugin. I will add support for building twig later. My bases often spawn in the same biome If you're having issues with spawn points being repeatedly used, or with a biome being favored consistently over other biomes then this is an elevation issue with the terrain on your map. You can fix this by increasing the Elevation in the configuration. For example, if your Elevation is 1.0 then set it to 1.5 and try again. This will also increase the height the base is allowed to spawn off of the ground. With certain maps you'll just have to make do with this issue. Corpses appear outside of the dome as backpacks This is intended, and it is optional. The location is drawn on the players screen to notify them that their corpse moved. This allows players to retrieve their backpack in the event that the raid becomes locked privately to another player, and prevents them from entering. Players do not drop their active item when they die. Bases Stop Spawning On Linux Machine [Error] Exception while calling NextTick callback (DllNotFoundException: libgdiplus.so.0) If you see this error after bases spawn then you need to install libgdiplus on your machine. This will mimic the below issue but it is NOT a bug like the below issue is. A quick google search shows the install command is: sudo apt-get install -y libgdiplus This happens when images in the CopyPaste file are being rendered by converting the byte array to bitmap.$40.00 -
Version 0.1.1
78 downloads
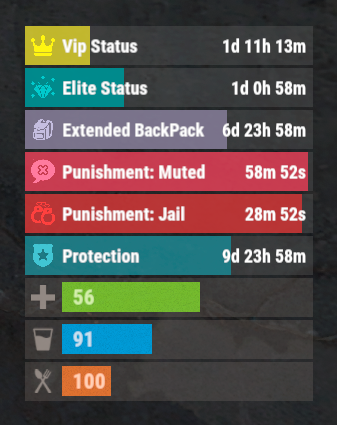
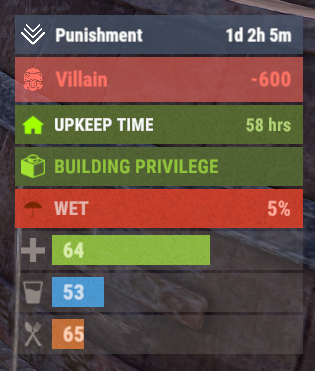
The plugin that displays temporary permissions and groups in the status bar. Depends on TemporaryPermissions and AdvancedStatus plugins. The ability to choose between bar types(TimeCounter and TimeProgressCounter); The ability to specify the order of the bar; The ability to change the height of the bar; The abillity to customize the color and transparency of the background; The ability to set a material for the background; The ability to switch between CuiRawImageComponent and CuiImageComponent for the image; The ability to get images from the local folder(*SERVER*\oxide\data\AdvancedStatus\Images); The abillity to set own image and customize the color and transparency of the image; The abillity to set sprite instead of the image; The ability to customize the color, size and font of the text; The ability to customize the bar for each permission and group; The ability to generate language keys for each permission and group; The ability to specify additional languages for generation. { "Chat command": "pstatus", "Is it worth enabling GameTips for messages?": true, "Is it worth clearing saved settings for permissions and groups upon detecting a wipe?": false, "Is it worth copying local images for new permissions or groups? Note: If set to true, it may create a lot of unnecessary images": false, "Is it worth enabling the bar display for new permissions?": true, "Is it worth enabling the bar display for new groups?": true, "Language - Addition languages (except en and ru)": [ "" ], "Type of status bar for permissions. Note: You can only choose between TimeProgressCounter and TimeCounter": "TimeProgressCounter", "Type of status bar for groups. Note: You can only choose between TimeProgressCounter and TimeCounter": "TimeProgressCounter", "Default status bar settings for new permissions and groups": { "BarType - You can choose only between TimeProgressCounter and TimeCounter": "TimeProgressCounter", "Order": 20, "Height": 26, "Main_Color(Hex or RGBA)": "#FFFFFF", "Main_Transparency": 0.15, "Main_Material": "", "Image_Url": "https://i.imgur.com/BtK7YHa.png", "Image_Local(Leave empty to use Image_Url)": "PermissionsStatus_Default", "Image_Sprite(Leave empty to use Image_Local or Image_Url)": "", "Image_IsRawImage": false, "Image_Color(Hex or RGBA)": "#FFF53D", "Image_Transparency": 1.0, "Is it worth enabling an outline for the image?": false, "Image_Outline_Color(Hex or RGBA)": "0.1 0.3 0.8 0.9", "Image_Outline_Transparency": 1.0, "Image_Outline_Distance": "0.75 0.75", "Text_Size": 12, "Text_Color(Hex or RGBA)": "1 1 1 1", "Text_Font(https://umod.org/guides/rust/basic-concepts-of-gui#fonts)": "RobotoCondensed-Bold.ttf", "Text_Offset_Horizontal": 0, "Is it worth enabling an outline for the text?": false, "Text_Outline_Color(Hex or RGBA)": "#000000", "Text_Outline_Transparency": 1.0, "Text_Outline_Distance": "0.75 0.75", "SubText_Size": 12, "SubText_Color(Hex or RGBA)": "1 1 1 1", "SubText_Font": "RobotoCondensed-Bold.ttf", "Is it worth enabling an outline for the sub text?": false, "SubText_Outline_Color(Hex or RGBA)": "0.5 0.6 0.7 0.5", "SubText_Outline_Transparency": 1.0, "SubText_Outline_Distance": "0.75 0.75", "Progress_Reverse": true, "Progress_Color(Hex or RGBA)": "#FFD700", "Progress_Transparency": 0.7, "Progress_OffsetMin": "0 0", "Progress_OffsetMax": "0 0" }, "Wipe ID": null, "Version": { "Major": 0, "Minor": 1, "Patch": 1 } } EN: { "MsgDisplayEnabled": "Displaying the bar is enabled!", "MsgDisplayDisabled": "Displaying the bar is disabled!", "MsgUntilWipe": "Until wipe" } RU: { "MsgDisplayEnabled": "Отображение бара включено!", "MsgDisplayDisabled": "Отображение бара выключено!", "MsgUntilWipe": "До вайпа" } The language file is generated during the plugin initialization process. Additionally, when creating a new permission or group, a key for it will be automatically added. Note: You can also specify in the configuration file the generation of language files for other languages besides en and ru.$9.99 -
Version 0.1.18
2,145 downloads
A useful API plugin that mimics in-game status bars and allows the addition of custom ones. Note: AdvancedStatus does not display any bars on its own. This is done by other plugins that work with it. An example plugin demonstrating interaction with AdvancedStatus. The ability to specify the frequency of calculating the number of bars; The ability to specify the order of the bar; The ability to change the height of the bar; The abillity to customize the color and transparency of the background; The ability to set a material for the background; The ability to switch between CuiRawImageComponent and CuiImageComponent for the image; The ability to get images from the local folder(*SERVER*\oxide\data\AdvancedStatus\Images); The abillity to set own image and customize the color and transparency of the image; The abillity to set sprite instead of the image; The ability to specify custom text; The ability to customize the color, size and font of the text; No need to pass all parameters; No need to manually delete your bar when unloading your plugin. advancedstatus.admin - Grants access to the chat command(by default /bar). { "Chat command": "bar", "Is it worth enabling console notifications for the successful loading of local images?": false, "Interval(in seconds) for counting in-game status bars": 0.5, "Interval(in seconds) for counting Building Privilege status bars. Note: Calculating Building Privilege is significantly more resource-intensive than other counts": 1.0, "Bar - Display Layer. If you have button bars, it's advisable to use Hud(https://umod.org/guides/rust/basic-concepts-of-gui#layers)": "Under", "Bar - Left to Right": true, "Bar - Offset between status bars": 2, "Bar - Default Height": 26, "Main - Default Color": "#505F75", "Main - Default Transparency": 0.7, "Main - Default Material(empty to disable)": "", "Image - Default Image": "AdvancedBar_Image", "Image - Default Color": "#6B7E95", "Image - Default Transparency": 1.0, "Image - Outline Default Color": "#000000", "Image - Outline Default Transparency": 1.0, "Image - Outline Default Distance": "0.75 0.75", "Text - Default Size": 12, "Text - Default Color": "#FFFFFF", "Text - Default Transparency": 1.0, "Text - Default Font(https://umod.org/guides/rust/basic-concepts-of-gui#fonts)": "RobotoCondensed-Bold.ttf", "Text - Default Offset Horizontal": 0, "Text - Outline Default Color": "#000000", "Text - Outline Default Transparency": 1.0, "Text - Outline Default Distance": "0.75 0.75", "SubText - Default Size": 12, "SubText - Default Color": "#FFFFFF", "SubText - Default Transparency": 1.0, "SubText - Default Font": "RobotoCondensed-Bold.ttf", "SubText - Outline Default Color": "#000000", "SubText - Outline Default Transparency": 1.0, "SubText - Outline Default Distance": "0.75 0.75", "Progress - Default Color": "#89B840", "Progress - Default Transparency": 0.7, "Progress - Default OffsetMin": "25 2.5", "Progress - Default OffsetMax": "-3.5 -3.5", "Version": { "Major": 0, "Minor": 1, "Patch": 18 } } EN: { "MsgDays": "d", "MsgHours": "h", "MsgMinutes": "m", "MsgSeconds": "s" } RU: { "MsgDays": "д", "MsgHours": "ч", "MsgMinutes": "м", "MsgSeconds": "с" } images reload *ImageName* - Reloads the specified image from the image folder; all - Reloads all local images from the image folder. Example: /bar images reload all Note: To access the commands, the player must be an admin(console or owner) or have the advancedstatus.admin permission. OnAdvancedStatusLoaded: Called after the AdvancedStatus plugin is fully loaded and ready. OnPlayerGainedBuildingPrivilege: Called after the player enters their building privilege. OnPlayerLostBuildingPrivilege: Called after the player exits their building privilege. void OnAdvancedStatusLoaded() { Puts("The AdvancedStatus plugin is loaded and ready to go!"); } void OnPlayerGainedBuildingPrivilege(BasePlayer player) { Puts($"{player.displayName} entered the authorized building privilege zone."); } void OnPlayerLostBuildingPrivilege(BasePlayer player) { Puts($"{player.displayName} exited the authorized building privilege zone."); } [PluginReference] private Plugin AdvancedStatus; There are 15 methods: IsReady CreateBar UpdateContent DeleteBar DeleteCategory DeleteAllBars GetTotalClientBars GetTotalPlayerBars LoadImages LoadImage CopyImage DeleteImages DeleteImage BarExists InBuildingPrivilege There are 5 types of bar: Default - A simple bar that displays the provided information. Does not update the value of SubText by itself; Timed - Similar to the default bar, but it automatically disappears after the specified time in the TimeStamp parameter; TimeCounter - The SubText shows the remaining time until TimeStamp. Also automatically removed upon expiration of the TimeStamp; TimeProgress - Similar to the Timed bar, but additionally features an automatically filling progress bar; TimeProgressCounter - Similar to the TimeCounter bar, but additionally features an automatically filling progress bar. IsReady: Used to check if the AdvancedStatus plugin is loaded and ready to work. The IsReady method returns true if it is ready, or null if it is not. (bool)AdvancedStatus?.Call("IsReady");//Calling the IsReady method. If the result is not null(bool true), the plugin is ready. CreateBar: Used to create a bar or update bar values for a player. To call the CreateBar method, you need to pass 2 parameters. The first one is BasePlayer or <ulong>playerID. The second one is a dictionary with the parameters you need. In the CreateBar method, all parameters are optional, except for two: Id; Plugin. Parameters not specified when creating a new bar will use the values set in the AdvancedStatus plugin's configuration file. Parameters not specified during bar update will retain the values they had before the update. Note: The plugin does not update values automatically, you need to manually send new values. Dictionary<string, object> parameters = new Dictionary<string, object> { { "Id", "AdvancedStatusDemo_1" }, //<string>Unique identifier for the bar in your plugin. ***This is a required field. { "BarType", "Default" }, //<string>Type of the bar. There are 4 types: Default, Timed, TimeCounter and TimeProgress. { "Plugin", "AdvancedStatusDemo" }, //<string>Name of your plugin. ***This is a required field. { "Category", "Default" }, //<string>Internal plugin category of the bar. { "Order", 10 }, //<int>The position of your bar relative to others. Order is determined by increasing values(ASC). { "Height", 26 }, //<int>The height of your bar. A standard bar is 26 pixels. { "Main_Color", "#505F75" }, //<string>HTML Hex color of the bar background. { "Main_Transparency", 0.7f }, //<float>Transparency of the bar background. { "Main_Material", "assets/content/ui/uibackgroundblur.mat" }, //<string>Material of the bar background(empty to disable). { "Image", "scrap" }, //<string>Name of the image saved in the ImageLibrary or a direct link to the image if ImageLibrary is not used. { "Image_Local", "AdvancedStatusDemo_Scrap" }, //<string>The name of the image file(without its extension) located in *SERVER*\data\AdvancedStatus\Images. Leave empty to use Image. { "Image_Sprite", "" }, //<string>Sprite image of the bar. Leave empty to use Image_Local or Image. { "Is_RawImage", true }, //<bool>Which type of image will be used? True - CuiRawImageComponent. False - CuiImageComponent. { "Image_Color", "#6B7E95" }, //<string>HTML Hex color of the bar image. { "Image_Transparency", 1.0f }, //<float>Transparency of the image. { "Text", "Scrap" }, //<string>Main text. { "Text_Size", 12 }, //<int>Size of the main text. { "Text_Color", "#FFFFFF" }, //<string>HTML Hex color of the main text. { "Text_Font", "RobotoCondensed-Bold.ttf" }, //<string>Font of the main text. { "Text_Offset_Horizontal", 0 }, //<int>Horizontal offset for the main text. { "SubText", "35" }, //<string>Sub text. { "SubText_Size", 12 }, //<int>Size of the sub text. { "SubText_Color", "#FFFFFF" }, //<string>HTML Hex color of the sub text. { "SubText_Font", "RobotoCondensed-Bold.ttf" }, //<string>Font of the sub text. { "TimeStampStart", Network.TimeEx.currentTimestamp }, //<double>Responsible for specifying the start point of the time reference and 0% for TimeProgress and TimeProgressCounter bars. Used if the bar type is Timed, TimeCounter, TimeProgress or TimeProgressCounter. { "TimeStamp", Network.TimeEx.currentTimestamp + 6 }, //<double>Specifies the end time point after which the bar will be destroyed and 100% for TimeProgress and TimeProgressCounter bars. Used if the bar type is Timed, TimeCounter, TimeProgress or TimeProgressCounter. { "TimeStampDestroy", Network.TimeEx.currentTimestamp + 3 }, //<double>If TimeStampDestroy is specified and it is less than TimeStamp, the bar will be destroyed by TimeStampDestroy. Used if the bar type is Timed, TimeCounter, TimeProgress or TimeProgressCounter. { "Progress", (float)35 / 100f }, //<float>Progress. From 0.0 to 1.0. { "Progress_Reverse", false }, //<bool>Progress reverse. A value of false means that the progress will increase. Used if the bar type is TimeProgress or TimeProgressCounter. { "Progress_Color", "#89B840" }, //<string>Progress color. { "Progress_Transparency", 1f }, //<float>Progress transparency. { "Progress_OffsetMin", "25 2.5" }, //<string>Progress OffsetMin: "*left* *bottom*". { "Progress_OffsetMax", "-3.5 -3.5" }, //<string>Progress OffsetMax: "*right* *top*". { "Command", "kit" } //<string>If the field is not empty, the bar becomes clickable, and the specified command is executed upon clicking. Note: the command must be covalence. }; AdvancedStatus?.Call("CreateBar", player.userID.Get(), parameters); //Calling the CreateBar method with the passing of BasePlayer/playerID and a dictionary containing the required parameters. UpdateContent: Used to update only the content of an existing status bar. To call the UpdateContent method, you need to pass 2 parameters. The first one is BasePlayer or <ulong>playerID. The second one is a dictionary with the parameters you need. In the UpdateBar method, all parameters are optional, except for two: Id; Plugin. var parameters = new Dictionary<string, object> { { "Id", "MyID" }, //<string>Unique identifier for the bar in your plugin. ***This is a required field. { "Plugin", Name }, //<string>Name of your plugin. ***This is a required field. { "Text", "MyText" }, //<string>Main text. { "SubText", "MyText" }, //<string>Sub text. { "Progress", (float)amount / 100f }, //<float>Progress. From 0.0 to 1.0. }; AdvancedStatus?.Call("UpdateContent", player.userID.Get(), parameters); //Calling the UpdateContent method with the passing of BasePlayer/playerID and a dictionary containing the required parameters. DeleteBar: Used to remove the bar for a player. There are two methods for removing a bar by ID: with specifying a particular player; To call this method, you need to pass 3 parameters. The first one is BasePlayer or <ulong>playerID. The second one is Id of your bar and the third one is name of your plugin. without specifying a particular player (which removes it for all players) To call this method, you need to pass 2 parameters. The first one is Id of your bar and the second one is name of your plugin. AdvancedStatus?.Call("DeleteBar", player.userID.Get(), barID, Name); //Calling the DeleteBar method with the passing of BasePlayer/playerID, ID of the bar and the name of your plugin. AdvancedStatus?.Call("DeleteBar", barID, Name); //Calling the DeleteBar method with the passing of ID of the bar and the name of your plugin. If you try to delete a bar that doesn't exist, nothing bad will happen. So feel free to delete the bar without checking its existence. P.S. When unloading your plugin, there is no need to manually delete bars for players, AdvancedStatus will handle it automatically. DeleteCategory: Used to remove all bars associated with the plugin's category. To call the DeleteCategory method, you need to pass 2 parameters. The first one is category and the second one is name of your plugin. AdvancedStatus?.Call("DeleteCategory", "Default", Name);//Calling the DeleteCategory method by passing the category and name of your plugin DeleteAllBars: Used to remove all bars associated with the plugin. To call the DeleteAllBars method, you need to pass only 1 parameter. It is name of your plugin. AdvancedStatus?.Call("DeleteAllBars", Name);//Calling the DeleteAllBars method, passing the name of your plugin GetTotalClientBars: Used to get the number of client bars for the player. To call the GetTotalClientBars method, you need to pass only 1 parameter. It is BasePlayer or <ulong>playerID. (int)AdvancedStatus?.Call("GetTotalClientBars", player.userID.Get());//Calling the GetTotalClientBars method, passing the name of BasePlayer/playerID GetTotalPlayerBars: Used to get the number of active custom bars for the player. To call the GetTotalPlayerBars method, you need to pass only 1 parameter. It is BasePlayer or <ulong>playerID. (int)AdvancedStatus?.Call("GetTotalPlayerBars", player.userID.Get());//Calling the GetTotalPlayerBars method, passing the name of BasePlayer/playerID LoadImages: Used to check if the local images specified in the list are loaded. If any of the images are not loaded but their files exist in the images folder, the plugin will load them. To call the LoadImages method, you need to pass only 2 parameters. The first one is the <List<string>>list of image's name and the second one(optional) is <bool>force, which, if set to true, will force reload the image even if it already exists. AdvancedStatus?.Call("LoadImages", list, false);//Calling the LoadImages method, passing a list of image names LoadImage: Used to check if the local image is loaded. If the file is not loaded and exists in the images folder, the plugin will load it. To call the LoadImage method, you need to pass 2 parameters. The first one is the <string>image's name and the second one(optional) is <bool>force, which, if set to true, will force reload the image even if it already exists. AdvancedStatus?.Call("LoadImage", imgName, false);//Calling the LoadImage method, passing an image's name CopyImage: Used to create and load a copy of an existing image. To call the CopyImage method, you need to pass 3 parameters. The first parameter is the <string>source image's name, the second parameter is the <string>new image's name and the third one(optional) is <bool>force, which, if set to true, will force copy and reload the image even if it already exists. AdvancedStatus?.Call("CopyImage", "ZoneStatus_Default", "ZoneStatus_NewZone", false);//Calling CopyImage, passing the source image name and the new image name. DeleteImages: Used to delete a list of images and their files. To call the DeleteImages method, you need to pass 2 parameters. The first one is the <List<string>>list of image's name and the second one(optional) parameter is <bool>deleteFile, which, if set to true, will delete image's file too. AdvancedStatus?.Call("DeleteImages", list, true);//Calling DeleteImages, passing a list of image names. DeleteImage: Used for removing the image and the image file. To call the DeleteImage method, you need to pass 2 parameters. The first parameter is the <string>image's name and the second one(optional) parameter is <bool>deleteFile, which, if set to true, will delete image's file too. AdvancedStatus?.Call("DeleteImage", "ZoneStatus_NewZone", true);//Calling DeleteImage, passing the image name. BarExists: Used to check if the specified bar exists. To call the BarExists method, you need to pass 3 parameters. The first one is BasePlayer or <ulong>playerID. The second one is Id of your bar. And the third one is name of your plugin. (bool)AdvancedStatus?.Call("BarExists", player.userID.Get(), barID, Name);//Calling the BarExists method with the passing of BasePlayer/playerID, ID of the bar and name of your plugin. InBuildingPrivilege: Used to check if the player has authorized building privileges. To call the InBuildingPrivilege method, you need to pass BasePlayer or <ulong>playerID. (bool)AdvancedStatus?.Call("InBuildingPrivilege", player.userID.Get());//Checking if the player has Building Privilege.$1.99 -
Version 0.1.14
836 downloads
Plugin for Real PvE servers, featuring damage prevention, anti-griefing measures, customizable PvP zones, an automatic loot queue in radtowns and raid zones, and much more. P.S. Since the previous implementation with DynamicPVP was not correct and had some issues, I have added universal hooks(Developer API section) for general access from all PvP plugins, which are currently missing in DynamicPVP. I have requested the author to add them(3 lines), but for now, you will need to use the modified version of DynamicPVP.cs The ability to set "server.pve" to "true", which allows the server to have a "PvE" flag; Damage from NPC's are enabled when server.pve is true; The ability to inflict damage to one's own structures with "server.pve true"; The ability to destroy(including external walls) or rotate one's structures without any time constraints; The ability to force the decay of building blocks with Twigs grade, even if there is wood in the Tool Cupboard; The ability to toggle the gather resource restriction in someone else's Building Privileges; No one, except the owner or their friends, will be able to open their loot containers (chests, storages, bodies, etc.); Administrators can bypass loot restrictions; The ability to schedule the killing of players if they disconnect within someone else's Building Privilege; Disabling backpack and active item drop upon death, even if backpack is full; The ability to disable 'Give' messages; The ability to modify the items given at spawn on the beach; The ability to create an unlimited number of custom permissions; The ability to allow players to bypass the queue; The ability to set limits on sleeping bags, shelters and auto turrets for each permission; The ability to set a multiplier for the prices of monuments and events for each permission; The ability to customize the price and amount of vehicles for each of your custom permissions; The ability to assign vehicles to each player; The ability to customize the assigned price and available amount of vehicles for each of your custom permissions; An assigned vehicle can't be damaged, looted or pushed by other players, but it can be pushed if it is within someone else's Building Privilege; The ability to loot monuments through a queue system; The ability to configure monuments, setting their looting price and time, and adjusting status bars for each monument; The ability to acquire the privilege to loot events (helicopters, bradleys, and raidable bases) through a purchase; The ability to customize the price of each event types and loot attempts (lives); NPCs only aggress against players who are looting monuments, events or raidable bases; Only players who are looting monuments, events or raidable bases can inflict damage to NPCs; RaidableBases are protected from griefing(no damage, no loot and etc). Only the owner can interact with the raid; Neutral RaidableBases can be purchased; Prices for purchasing neutral raids are configurable for each difficulty level; Configurable raid limits (currently available) along with discount multipliers for purchases, for each permission. File location: *SERVER*\oxide\data\RealPVE\PermissionConfig.json Default: https://pastebin.com/5VtWZZVr All permissions are created and configured in the config file under the "List of permissions" section. You can create as many permissions as needed and customize them flexibly. It is recommended to use the prefix "realpve" in the permission's name, for example: "realpve.vip". NOTE: The first permission will serve as the default permission for those who do not have any permissions. { "List of permissions. NOTE: The first permission will be used by default for those who do not have any permissions.": [ { "Permission Name": "realpve.default", "Bypass Queue": false, "Limit of beds": 15, "Limit of shelters": 1, "Limit of auto turrets": 12, "Seconds that will be skipped when opening HackableLockedCrate": 0.0, "Monuments price multiplier": 1.0, "Events price multiplier": 1.0, "Limit of RaidableBases(at the time)": 1, "RaidableBases price multiplier": 1.0, "Vehicles settings": { "Horse": { "Limit": 1, "Price": 10.0 }, "Bike": { "Limit": 1, "Price": 5.0 }, "MotorBike": { "Limit": 1, "Price": 20.0 }, "Car": { "Limit": 1, "Price": 25.0 }, ... } }, { "Permission Name": "realpve.vip", "Bypass Queue": true, "Limit of beds": 20, "Limit of shelters": 2, "Limit of auto turrets": 15, "Seconds that will be skipped when opening HackableLockedCrate": 450.0, "Monuments price multiplier": 0.9, "Events price multiplier": 0.9, "Limit of RaidableBases(at the time)": 2, "RaidableBases price multiplier": 0.9, "Vehicles settings": { "Horse": { "Limit": 5, "Price": 9.0 }, "Bike": { "Limit": 5, "Price": 4.5 }, "MotorBike": { "Limit": 5, "Price": 18.0 }, "Car": { "Limit": 5, "Price": 22.5 }, ... } } ], "Version": { "Major": 0, "Minor": 1, "Patch": 1 } } An example of a monument/event/rb multipliers using default permissions. For example, if you set the price for the Harbor at $1000, a player with the default permission(1.0) will pay $1000 * 1 = $1000. Meanwhile, a player with a VIP permission(0.9) will pay $1000 * 0.9 = $900. However, if a player possesses a misbehaving permission with a value of 1.1, they will need to pay $1000 * 1.1 = $1100. { "Chat command": "realpve", "Chat admin command": "adminpve", "Is it worth forcibly implementing PvE for a server?": true, "Is it worth enabling GameTips for messages?": true, "Is it worth preventing the sending of 'Give' messages?": true, "Is it worth preventing resource gathering in someone else's building privilege area?": false, "Is it worth preventing the pickup of plants spawned by the server in someone else's building privilege zone?": false, "Is it worth forcibly blocking damage from the patrol helicopter to building blocks and deployables?": false, "Is it worth preventing players from handcuffing others?": true, "Is it worth assigning portals(Halloween and Christmas) to the first player?": true, "Is it worth preventing a backpack from dropping upon player death?": true, "Is it worth preventing damage to the laptop of the Hackable Crate?": true, "Is it worth removing the penalties for recyclers in safe zones?": true, "Is it worth allowing all players to pick up items dropped by others? If enabled, personal settings will be ignored": false, "The format that will be used for prices": "${0}", "Vehicles - Time in seconds to display the marker when searching for a vehicle. A value of 0 disables the marker": 15.0, "Anti-Sleeper - Time in seconds after which a player will be killed if they disconnect while inside someone else's Building Privilege. Set to 0 to disable": 1200.0, "Is it worth enabling support for the 'Npc Random Raids' plugin?": true, "Is friendly fire enabled by default when creating a new team?": false, "PvP - Is it worth adding map markers for PvP zones?": true, "PvP - Name of the map maker": "PvP Zone!", "PvP - Settings for the status bar": { "Order": 9, "Height": 26, "Main_Color(Hex or RGBA)": "1 0.39 0.28 0.7", "Main_Transparency": 0.8, "Main_Material": "", "Image_Url": "https://i.imgur.com/oi5vIkk.png", "Image_Local(Leave empty to use Image_Url)": "RealPVE_PvP", "Image_Sprite(Leave empty to use Image_Local or Image_Url)": "", "Image_IsRawImage": false, "Image_Color(Hex or RGBA)": "1 0.39 0.28 1", "Image_Transparency": 1.0, "Is it worth enabling an outline for the image?": false, "Image_Outline_Color(Hex or RGBA)": "0.1 0.3 0.8 0.9", "Image_Outline_Transparency": 0.0, "Image_Outline_Distance": "0.75 0.75", "Text_Size": 12, "Text_Color(Hex or RGBA)": "1 1 1 1", "Text_Font(https://umod.org/guides/rust/basic-concepts-of-gui#fonts)": "RobotoCondensed-Bold.ttf", "Is it worth enabling an outline for the text?": false, "Text_Outline_Color(Hex or RGBA)": "#000000", "Text_Outline_Transparency": 1.0, "Text_Outline_Distance": "0.75 0.75", "SubText_Size": 12, "SubText_Color(Hex or RGBA)": "1 1 1 1", "SubText_Font": "RobotoCondensed-Bold.ttf", "Is it worth enabling an outline for the sub text?": false, "SubText_Outline_Color(Hex or RGBA)": "0.5 0.6 0.7 0.5", "SubText_Outline_Transparency": 0.0, "SubText_Outline_Distance": "0.75 0.75" }, "PvP - Settings for the progress status bar": { "Main_Color(Hex or RGBA)": "1 1 1 0.15", "Main_Transparency": 0.15, "Progress_Reverse": true, "Progress_Color": "#FF6347", "Progress_Transparency": 0.7, "Progress_OffsetMin": "0 0", "Progress_OffsetMax": "0 0" }, "Wipe ID": null, "Version": { "Major": 0, "Minor": 1, "Patch": 14 } } ENG: https://pastebin.com/ZMUL6pYL RUS: https://pastebin.com/Mx8cbMts Main commands(/realpve ) : autobuy - Toggle autobuy for monuments, vanilla events and raid bases with a total price greater than 0; pickup - Toggle access to pick up your items from the ground for all players; share - Manage access to looting your entities by other players(outside of the team): status *entityID*(optional) - Display information about the settings of the entity you are looking at or the one you specified; add *nameOrID* *entityID*(optional) - Add the specified player to the entity list you are looking at or the one you specified; remove *nameOrID* *entityID*(optional) - Remove the specified player from the entity list you are looking at or the one you specified; toggle *entityID*(optional) - Toggle the entity list you are looking at or the one you specified; delete *entityID*(optional) - Delete the settings for the entity you are looking at or the one you specified; clear - Delete the settings for all your entities. team - Manage your team: ff - Toggle the ability to damage your teammates. vehicle - Manage your vehicles: list - List of IDs for all your vehicles; find *vehicleID*(optional) - Help finding the vehicle you are looking at or the one you specified; unlink *vehicleID*(optional) - Unlink the vehicle you are looking at or the one you specified; clear - Unlink all your vehicles. Admin commands(/adminpve). Permission "realpve.admin" required: autobuy - Manage autobuy for monuments, vanilla events and raid bases: *nameOrId* - Toggle autobuy for the specified player; force monument/event/rb - Toggle forced autobuy. If enabled, player settings will be ignored; clear - Disable autobuy for everyone. config - Manage settings for values in the configuration file: forcepve *boolValue*(optional) - Is it worth forcibly implementing PvE for a server? gametips *boolValue*(optional) - Is it worth enabling GameTips for messages? givemsg *boolValue*(optional) - Is it worth preventing the sending of 'Give' messages? resource_privilege *boolValue*(optional) - Is it worth preventing resource gathering in someone else's building privilege area? plant_privilege *boolValue*(optional) - Is it worth preventing the pickup of plants spawned by the server in someone else's building privilege zone? heli_damage *boolValue*(optional) - Is it worth forcibly blocking damage from the patrol helicopter to building blocks and deployables? handcuffs *boolValue*(optional) - Is it worth assigning portals(Halloween and Christmas) to the first player? portals *boolValue*(optional) - Is it worth preventing players from handcuffing others? backpack_drop *boolValue*(optional) - Is it worth preventing a backpack from dropping upon player death? laptop_damage *boolValue*(optional) - Is it worth preventing damage to the laptop of the Hackable Crate? recycler_safezone *boolValue*(optional) - Is it worth removing the penalties for recyclers in safe zones? item_pickup *boolValue*(optional) - Is it worth allowing all players to pick up items dropped by others? If enabled, personal settings will be ignored; priceformat *stringValue* - The format that will be used for prices; vehicle_marker_time *floatValue* - Vehicles - Time in seconds to display the marker when searching for a vehicle. A value of 0 disables the marker; antisleeper *floatValue* - Anti-Sleeper - Time in seconds after which a player will be killed if they disconnect while inside someone else's Building Privilege. Set to 0 to disable; randomraids *boolValue*(optional) - Is it worth enabling support for the 'Npc Random Raids' plugin? teamff *boolValue*(optional) - Is friendly fire enabled by default when creating a new team? pvpmarkers *boolValue*(optional) - PvP - Is it worth adding map markers for PvP zones? pvpmarkersname *stringValue* - PvP - Name of the map maker. loot - Manage player access to entities without restrictions: *nameOrId* - Toggle unrestricted access for the specified player; self - Toggle unrestricted access for yourself; clear - Revoke unrestricted access for all players. monument - Manage monuments: list - List of available monuments; *monumentID*/this - Instead of the monumentID, you can use the word "this", but you must be inside the monument: suffix *boolValue*(optional) - Toggle the suffix display in the monument's name; broadcast *boolValue*(optional) - Toggle notifications about monument occupancy/release; time *intValue* - Set the looting time limit for the monument in seconds; price *floatValue* - Set the cost for looting rights. A value of 0 makes the monument free; offer *floatValue* - Set the offer duration for purchasing the monument in seconds; map_mode *intValue* - Set the marker display mode on the map. 0 - disabled, 1 - enabled, 2 - enabled during PvP mode; map_circle *boolValue*(optional) - Toggle the display of the monument's circle marker on the map; pvp *boolValue*(optional) - Toggle PvP mode for the monument; pvp_delay *floatValue* - Set the PvP mode duration in seconds for players after leaving the PvP monument; bar_progress *boolValue*(optional) - Toggle between TimeProgressCounter and TimeCounter bars for the monument. perm - Manage permissions: add *permName* - Adds a new permission to the list by copying values from the first(default) permission in the list. If the permission name starts with 'realpve', it will also register a new permission; add *permName* *sourcePermName* - Adds a new permission to the list by copying values from an existing permission in the list; remove *permName* - Removes an existing permission from the list; edit *permName* - Edits a permission: queue - Toggle the permission to bypass the server queue; beds *intValue* - Restriction on the number of available beds; shelters *intValue* - Restriction on the number of available shelters; turrets *intValue* - Restriction on the number of available turrets; hackable *floatValue* - Number of seconds(0-900) to skip when opening a hackable crate; monuments *floatValue* - Price multiplier for monuments; events *floatValue* - Price multiplier for vanilla events; rb_limit *intValue* - Restriction on the number of raid bases available simultaneously; rb_mult *floatValue* - Price multiplier for raid bases; vehicles *vehType* - Vehicles settings: limit *intValue* - Limit on the number of available vehicles by type; price *floatValue* - Price for registering a vehicle by type. clear - Removes all permissions from the list except the first one. pickup - Manage access to picking up another player's items from the ground: *nameOrId* - Toggle access to picking up a specific player's items from the ground; clear - Revoke access for all players to pick up items from the ground. share - Manage access to looting entities by other players(outside of the team): status *entityID*(optional) - Display information about the settings of the entity you are looking at or the one you specified; add *nameOrID* *entityID*(optional) - Add the specified player to the entity list you are looking at or the one you specified; remove *nameOrID* *entityID*(optional) - Remove the specified player from the entity list you are looking at or the one you specified; toggle *entityID*(optional) - Toggle the entity list you are looking at or the one you specified; delete *entityID*(optional) - Delete the settings for the entity you are looking at or the one you specified; clear *nameOrID*(optional) - Delete the settings for all entities or all entities of the specified player. vehicle - List of all available vehicle types: types - List of available vehicle types. Example: /realpve pickup /realpve vehicle find *netID* /realpve team ff /adminpve perm add realpve.vip2 /adminpve perm add realpve.vip2 realpve.vip /adminpve perm edit realpve.vip2 queue true /adminpve perm edit realpve.vip2 vehicles horse limit 5 /adminpve monument list /adminpve monument *monumentID* pvp /adminpve monument *monumentID* price 7.5 /adminpve loot iiiaka /adminpve pickup iiiaka /adminpve vehicle types This plugin provides the ability to claim vehicles, thereby preventing theft and griefing from other players. In permissions, you can set the price and quantity restrictions for each type of vehicle, ensuring flexible customization according to your preferences. An assigned vehicle can't be damaged, looted or pushed by other players, but it can be pushed if it is within someone else's Building Privilege. File location: *SERVER*\oxide\data\RealPVE\MonumentConfig.json Default: https://pastebin.com/XY1d9YaM This plugin introduces queue system and loot purchases for monuments. You can customize the price and time for looting for each monument. Within monuments, only the "Looter" and his friends have the ability to loot, pick up items or damage entities. Additionally, NPCs and animals within monuments do not aggress against other players and do not receive damage from them. If a player dies within the monument, they will have a grace period to return. This allows players to safely loot monuments without fear of griefing. Example of monument configuration: "ferry_terminal_1": { "Type(This parameter is just a hint. Changes won’t have any effect)": "RadTown", "Is it worth displaying the suffix(if any) in the monument's name?": true, "Is it worth notifying all players about the occupation/release of the monument?": true, "The cost for the right to loot the monument. A value of 0 makes the monument free": 15.0, "The time in seconds(1-3600) given for looting the monument": 900, "The time in seconds(1-15) given to make a decision to purchase the monument": 5.0, "Map marker display mode: 0 - disabled, 1 - enabled, 2 - enabled during PvP mode": 1, "Is it worth creating a circle in the map marker?": true, "PvP - Is PvP enabled at this monument? If so, players will be able to kill each other and loot will be publicly accessible": false, "PvP - The time in seconds(0-60) during which the player retains PvP mode after leaving the PvP monument": 10.0, "Is it worth using a progress bar for bars with a counter?": true, "Settings for the status bar": { "Order": 10, "Height": 26, "Main_Color(Hex or RGBA)": "#FFBF99", "Main_Transparency": 0.8, "Main_Material": "", "Image_Url": "https://i.imgur.com/awUrIwA.png", "Image_Local(Leave empty to use Image_Url)": "RealPVE_ferry_terminal_1", "Image_Sprite(Leave empty to use Image_Local or Image_Url)": "", "Image_IsRawImage": false, "Image_Color(Hex or RGBA)": "#FFDCB6", "Image_Transparency": 1.0, "Is it worth enabling an outline for the image?": false, "Image_Outline_Color(Hex or RGBA)": "0.1 0.3 0.8 0.9", "Image_Outline_Transparency": 0.0, "Image_Outline_Distance": "0.75 0.75", "Text_Size": 12, "Text_Color(Hex or RGBA)": "1 1 1 1", "Text_Font(https://umod.org/guides/rust/basic-concepts-of-gui#fonts)": "RobotoCondensed-Bold.ttf", "Is it worth enabling an outline for the text?": false, "Text_Outline_Color(Hex or RGBA)": "#000000", "Text_Outline_Transparency": 1.0, "Text_Outline_Distance": "0.75 0.75", "SubText_Size": 12, "SubText_Color(Hex or RGBA)": "1 1 1 1", "SubText_Font": "RobotoCondensed-Bold.ttf", "Is it worth enabling an outline for the sub text?": false, "SubText_Outline_Color(Hex or RGBA)": "0.5 0.6 0.7 0.5", "SubText_Outline_Transparency": 0.0, "SubText_Outline_Distance": "0.75 0.75" }, "Settings for the progress status bar": { "Main_Color(Hex or RGBA)": "1 1 1 0.15", "Main_Transparency": 0.15, "Progress_Reverse": true, "Progress_Color": "#FFBF99", "Progress_Transparency": 0.7, "Progress_OffsetMin": "0 0", "Progress_OffsetMax": "0 0" } } Type - This field serves only as an indicator for you. The changes won't have any impact; ShowSuffix - Suffix display. Some monuments (for example Warehouses) have suffixes in the name, like "Warehouse #12"; Broadcast - Enabling or disabling broadcasts when a monument is occupied or vacated; LootingTime - Time allocated for looting the monument; Price - The price for which you can start looting the monument. 0 means looting is free; BarSettings - Settings for the Advanced Status Bar. You can also choose the types of monuments by specifying them under the "List of tracked types of monuments" section. A list of all available types can be viewed on the MonumentsWatcher's page in the "Developer API" section. "List of tracked types of monuments": [ "RadTown", "RadTownWater", "RadTownSmall", "TunnelStation", "Custom" ] Events, similar to monuments, offer the opportunity to claim events. All events are configured in the config file under the "Settings for the events" section. You can customize the price of looting and looting attempts(deaths, including friends). Just like in monuments, only the "Looter" and his friends have the ability to loot and damage entities. Additionally, in events, NPCs do not aggress against other players. If a player(including friends) exceeds the death limit, the event became free, thereby providing other players with the opportunity to claim the event. Example of event configuration: { "Is it worth enabling forced auto-buy for vanilla events where the final price is greater than 0?": false, "Settings for the PatrolHelicopter events": { "IsEnabled": true, "Time in seconds (1-15) given to respond for purchasing this event. Note: This is shown to everyone who deals damage, and the first person to buy it will claim it": 5.0, "Is it worth removing fire from crates?": true, "The price to claim the event. A value of 0 means it's free": 50.0, "The number of deaths after which the event becomes public. A value of 0 disables the limit": 5, "The time in seconds for which the event is locked to the player. A value of 0 disables the time limit": 1800.0 }, "Settings for the BradleyAPC events": { "IsEnabled": true, "Time in seconds (1-15) given to respond for purchasing this event. Note: This is shown to everyone who deals damage, and the first person to buy it will claim it": 5.0, "Is it worth removing fire from crates?": true, "The price to claim the event. A value of 0 means it's free": 50.0, "The number of deaths after which the event becomes public. A value of 0 disables the limit": 5, "The time in seconds for which the event is locked to the player. A value of 0 disables the time limit": 1800.0 }, "Version": { "Major": 0, "Minor": 1, "Patch": 0 } } Price - The price to claim the event. 0 means looting is free; DeathLimit - Limit of deaths after which the event becomes free. File location: *SERVER*\oxide\data\RealPVE\NewbieConfig.json Default: https://pastebin.com/QHZCqpji An example of an item list given for the main inventory: "List of items for the main inventory": [ { "ShortName": "note", "Slot": 0, "Amount": 1, "SkinID": 0, "Text": "MsgNoteText" } ] P.S. In the Text field, you need to specify the language key. Or, you can just write any text, but there won't be a translation of the text. File location: *SERVER*\oxide\data\RealPVE\RaidableBasesConfig.json Default: https://pastebin.com/rpDng7Fd Integration with the RaidableBases plugin does not restrict its functionality in any way. On the contrary, it adds an anti-grief system that protects bases from malicious players. In raid bases, NPCs and other entities can only receive damage from the raid owner or their friends; Turrets and traps do not aggress against outsiders; You can customize the price of claiming to each difficulty and set individual discounts for each permission. You can still purchase raid bases using the /buyraid command. Raid bases without owners(buyable, maintained, manual and scheduled) can be bought for a price set in the configuration file or assigned to the first player who enters its radius, if the final price(price * discount) less or equals to 0. Additionally, as a bonus, upon buying this plugin, you receive 5 free bases for 3 difficulty levels, along with configured loot for them. [PluginReference] private Plugin RealPVE; There are 6 universal hooks that the plugin is subscribed to, the use of which allows interaction with PVP in various PVE plugins: OnPlayerEnterPVP OnPlayerExitPVP OnEntityEnterPVP OnEntityExitPVP CreatePVPMapMarker DeletePVPMapMarker OnPlayerEnterPVP: Used to add a player to PVP mode/zone. To call the OnPlayerEnterPVP hook, you need to pass 2 parameters: <BasePlayer>player - The player to add to PVP; <string>zoneID - A unique identifier for your PVP zone. This parameter is very important because a player can be in multiple PVP zones at the same time and passing the zoneID in this case allows for correct processing of the player's location within them. Interface.CallHook("OnPlayerEnterPVP", player, "*Your unique zone identifier*");//Calling the OnPlayerEnterPVP hook to tell PVE plugins that the player needs to be added to the specified PVP zone. OnPlayerExitPVP: Used to remove a player from PVP mode/zone. Calling this hook guarantees the player’s removal from the specified PVP zone, but does not guarantee the removal from PVP mode, as there may be other zones in addition to yours. Also, when a player dies, they are automatically removed from all PVP zones. To call the OnPlayerExitPVP hook, you need to pass 3 parameters, 1 of which is optional: <BasePlayer>player - The player to remove from PVP; <string>zoneID - A unique identifier for your PVP zone; <float>pvpDelay - Optional. When the player exits your PVP zone, you can also pass the PVP delay time. However, if the player still has other active PVP zones, your PVP delay will not take effect. Interface.CallHook("OnPlayerExitPVP", player, "*Your unique zone identifier*", 10f);//Calling the OnPlayerExitPVP hook to tell PVE plugins that the player needs to be removed from the specified PVP zone, with the pvpDelay(10 seconds) specified if the player no longer has any active PVP zones. OnEntityEnterPVP: Used to add an entity to PVP mode/zone. In the case of RealPVE, this hook is only necessary to add entities with an owner(player) to a PVP, allowing other players to interact with them, such as a player's corpse after death(PlayerCorpse) or a backpack after the corpse disappears(DroppedItemContainer). To call the OnEntityEnterPVP hook, you need to pass 2 parameters: <BaseEntity>entity - The entity to add to PVP; <string>zoneID - A unique identifier for your PVP zone. Interface.CallHook("OnEntityEnterPVP", entity, "*Your unique zone identifier*");//Calling the OnEntityEnterPVP hook to tell PVE plugins that the entity needs to be added to the specified PVP zone. OnEntityExitPVP: Used to remove an entity from PVP mode/zone. When an entity dies, it is automatically removed from all PVP zones. To call the OnEntityExitPVP hook, you need to pass 3 parameters, 1 of which is optional: <BaseEntity>entity - The entity to remove from PVP; <string>zoneID - A unique identifier for your PVP zone; <float>pvpDelay - Optional. When the entity exits your PVP zone, you can also pass the PVP delay time. However, if the entity still has other active PVP zones, your PVP delay will not take effect. Interface.CallHook("OnEntityExitPVP", entity, "*Your unique zone identifier*", 10f);//Calling the OnEntityExitPVP hook to tell PVE plugins that the entity needs to be removed from the specified PVP zone, with the pvpDelay(10 seconds) specified if the entity no longer has any active PVP zones. CreatePVPMapMarker: Used to create a map marker for the PVP zone. To call the CreatePVPMapMarker hook, you need to pass 5 parameters, 2 of which is optional: <string>zoneID - A unique identifier for your PVP zone; <Vector3>pos - The position of your PVP zone; <float>radius - The radius of the circle for your PVP zone; <string>displayName - Optional. The display name for the map marker; <BaseEntity>entity - Optional. The entity to which the map marker should be attached. Interface.CallHook("CreatePVPMapMarker", "*Your unique zone identifier*", pos, 25f, "ATTENTION! This is a PVP zone!");//Calling the CreatePVPMapMarker hook to tell PVE plugins to create a map marker for the specified zone, at the specified position with the given radius, but without specifying a parent entity. DeletePVPMapMarker: Used to delete a map marker for the PVP zone. To call the DeletePVPMapMarker hook, you need to pass only 1 parameter: <string>zoneID - A unique identifier for your PVP zone. Interface.CallHook("DeletePVPMapMarker", "*Your unique zone identifier*");//Calling the DeletePVPMapMarker hook to tell PVE plugins to delete a map marker for the specified zone. There are 5 hooks that the plugin calls: OnPlayerPVPDelay OnPlayerPVPDelayed OnPlayerPVPDelayRemoved OnZoneStatusText CanRedeemKit OnPlayerPVPDelay: Called when a player exits the last active PVP zone, allowing other plugins to overwrite the value for pvpDelay. Returning a float value allows changing the pvpDelay for the player. A value less than zero disables the pvpDelay. When calling the OnPlayerPVPDelay hook, 3 parameters are passed: <BasePlayer>player - The player to whom the pvpDelay is applied; <float>pvpDelay - The initial value of pvpDelay; <string>zoneID - A unique identifier of PVP zone. object OnPlayerPVPDelay(BasePlayer player, float pvpDelay, string zoneID) { Puts($"Attempting to set a PvP delay of {pvpDelay} seconds for player {player.displayName} in zone {zoneID}!"); if (zoneID == "*Your unique zone identifier*") { return 15f;//Overriding the values for pvpDelay } return null;//Leave unchanged } OnPlayerPVPDelayed: Called after the PVP delay has been set for the player. When calling the OnPlayerPVPDelayed hook, 3 parameters are passed: <BasePlayer>player - The player to whom the pvpDelay is applied; <float>pvpDelay - The value of pvpDelay; <string>zoneID - A unique identifier of PVP zone. void OnPlayerPVPDelayed(BasePlayer player, float pvpDelay, string zoneID) { Puts($"A PvP delay of {pvpDelay} seconds has been set for player {player.displayName} in zone {zoneID}!"); } OnPlayerPVPDelayRemoved: Called when the PVP delay is removed from the player after they enter a PVP zone with an active PVP delay. When calling the OnPlayerPVPDelayRemoved hook, only 1 parameter is passed: <BasePlayer>player - The player from whom the PVP delay has been removed. void OnPlayerPVPDelayRemoved(BasePlayer player) { Puts($"PVP delay has been removed for player {player.displayName} as they entered a PVP zone!"); } OnZoneStatusText: Called when the text with the nice name for the specified zone is needed, to be displayed in the status bar. When calling the OnZoneStatusText hook, 2 parameters are passed: <BasePlayer>player - The player for whom the nice name for the zone is being requested; <string>zoneID - A unique identifier of PVP zone. object OnZoneStatusText(BasePlayer player, string zoneID) { Puts($"Text for the status bar is required for zone {zoneID}"); if (zoneID == "*Your unique zone identifier*") { return lang.GetMessage("*langKey*", this, player.UserIDString);//<string>Overriding the value for the status bar text } return null;//Leave unchanged } CanRedeemKit: Called before giving the starter kit, in the OnDefaultItemsReceive hook. A non-zero value cancels this action. When calling the CanRedeemKit hook, only 1 parameter is passed: <BasePlayer>player - The player to whom the kit is being attempted to be given. object CanRedeemKit(BasePlayer player) { Puts($"Attempting to give the kit to player {player.displayName}!"); if (player.IsAdmin) { return false;//Cancel the action } return null;//Leave unchanged }$39.99 -
Version 1.0.6
237 downloads
The plugin adds a dungeon event to your server. Dungeons are bases with puzzles, NPC defenders, turrets and more. You can create your own dungeons of varying difficulty You can build your own bases or modify existing ones: There are moving NPC guardians in the dungeons: There are puzzles with protective doors in the dungeons: In the dungeons there are secret notes with codes in boxes or on NPCs: Commands: dungbase_start - force start event dungbase_stop - force stop event Hooks: void DungeonBasesEventStarted() - // called when event starts void DungeonBasesEventEnded() - // called when event ends Configuration: { "Allow only the event owner (the one who entered the dungeon first) into the dungeon": true, "Allow owner's teammates to enter the dungeon": true, "Message that you cannot enter the dungeon without being the owner of the event or its teammate": "You cannot enter the dungeon without being the owner of the event or its teammate", "Event marker on the map": true, "Event marker name": "Dungeon Base", "Event marker transparency(0-1)": 0.55, "Event marker radius": 0.5, "Event marker color.R(0-1)": 1.0, "Event marker color.G(0-1)": 0.0, "Event marker color.B(0-1)": 0.0, "Display event owner name on marker": true, "Display the time remaining until the end of the event on the marker": true, "Autostart event(disable if you want to trigger the event only manually)": false, "Minimum time to event start(in seconds)": 3600, "Maximum time to event start(in seconds)": 7200, "Minimum event duration(in seconds)": 2000, "Maximum event duration(in seconds)": 3000, "Minimum number of online players to trigger an event": 1, "Event message": "The dungeon bases event has started, find the entrance to the base and get the loot", "End event message": "The dungeon bases event has ended", "Dungeons list": [ "#dung#base1", "#dung#base2", "#dung#base3", "#dung#base4" ], "Entrances list": [ "#dung#entrance1", "#dung#entrance2", "#dung#entrance3", "#dung#entrance4" ], "Random order of choosing a dungeon from the list (if false, will be selected in turn)": false, "Random order of choosing the entrance to the dungeon from the list (if false, will be selected in turn)": false, "Change the time of day when entering the dungeon(from 0 to 23, if -1 - do not change the time)": 0.0, "How long before the end of the event does radiation start to affect players inside the dungeon": 180, "How long after the event ends should the entrance be destroyed": 60, "Close the entrance and exit to the dungeon when the event time is over": true, "Message about closing the entrance and exit": "Time is up, the entrance and exit to the dungeon are closed forever!" } Note: The plugin is guaranteed to work correctly with bases enabled. NPCs will not behave as standard, as they use different algorithms. Only one dungeon can spawn on the map at a time.$19.99 -

Version 1.0.6
531 downloads
This plugin will add multiple extended magazines to your server Description Facepunch just released the extended magazine into the game, which adds 25% to the capacity of ammo that it can originally hold With Custom Magazine's, you can now add several types of extended magazines! By default, you can now also add 50%, 75%, and even 100% capacity increases! At 100%, this will double any weapons capacity! You can change those capacity increase percentages in the configuration, remove them, or even add your own! You can configure spawning of these items in standard Rust crates! Console commands (RCON only) givemagazine {skinid} {steamid} - This is the console command to give an extended magazine from the plugin configuration with a Steam Workshop SkinID ({skinid}) to a player using their SteamID ({steamid}) Plugin Config en - example of plugin configuration in English ru - example of plugin configuration in Russian My Discord: KpucTaJl#8923 Join the Mad Mappers Discord here! Check out more of my work here!$10.00 -
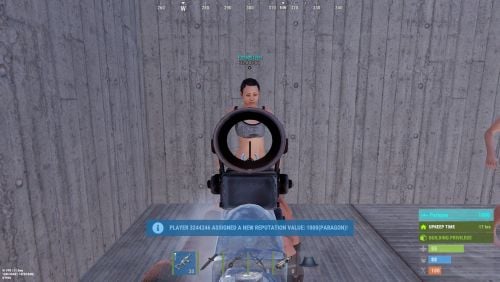
Version 0.1.4
66 downloads
Adds a reputation system, similar to the well-known Infestation Survivor Stories(The WarZ). More information on how the plugin works can be found at the bottom in the "Principle of work" section. The ability to create an unlimited number of reputations. The only condition is that their value ranges must not overlap; The ability to flexibly customize the bar for each reputation; The ability to automatically reset reputations upon detecting a wipe; The ability to set a prefix for reputations; The ability to show your reputation by waving to players; The ability to see a player's reputation when aiming at them with scope items. Unfortunately, the reputation will also be displayed if a player is in certain bushes; The ability to see the reputation of all players in the bandit zone; The ability to prohibit players with a certain reputation from entering safe zones (except for the bandit zone). Also, notifying players about it; The ability to set fake reputations to confuse players. reputationmaster.vip - Provides the ability to set a fake rank value. reputationmaster.admin - Provides the ability to set or reset reputation value to other players. { "Chat command": "rep", "Is it worth enabling GameTips for messages?": true, "Is it worth using the AdvancedStatus plugin?": true, "Is it worth using ddraw to display reputation? NOTE: To use, an administrator flag is required, which is granted before rendering and revoked immediately after issuing the command": true, "Is it worth displaying reputation when aiming at a player with a scope(ddraw should be enabled)? NOTE: The player's reputation may be displayed in certain bushes": true, "Is it worth resetting reputations upon detecting a wipe?": true, "Is it worth forbidding bandits from visiting safe zones(except for Banditcamp)?": true, "The time in seconds during which a bandit can stay in the safe zone(except for Banditcamp) before being killed, making their loot available to everyone": 10.0, "The prefab name for the effect when a bandit is killed in the safe zone. An empty string disables the effect": "assets/prefabs/misc/xmas/advent_calendar/effects/open_advent.prefab", "The time in seconds during which self-defense will be active for a lawman after being attacked by another lawman": 900, "The minimum value limit for fake reputation": -10000.0, "The maximum value limit for fake reputation": 10000.0, "UI. Position - Left to Right": true, "UI. Position - AnchorMin": "1 0.9", "UI. Position - AnchorMax": "1 0.9", "UI. Position - OffsetMin": "-208 -15", "UI. Position - OffsetMax": "-16 15", "UI. Reputation Positive Value Image - URL": "https://i.imgur.com/HKqyHO8.png", "UI. Reputation Negative Value Image - URL": "https://i.imgur.com/mMdm55h.png", "UI. Added Value Sound - Prefab Name. An empty string disables the effect": "assets/bundled/prefabs/fx/notice/item.select.fx.prefab", "Wipe ID": null, "Version": { "Major": 0, "Minor": 1, "Patch": 4 } } Note: To use ddraw, an administrator flag is required, which is granted before rendering and revoked immediately after issuing the command. The player's reputation may be displayed in certain bushes. [ { "Name": "Assassin", "Prefix": "⁎✧⁎ ", "MinValue": -3.40282347E+38, "MaxValue": -1000.0, "Reward": 20.0, "LawmanPenalty": 0.0, "AllowSafeZone": false, "BarSettings": { "Order": 20, "Height": 26, "Main_Color(Hex or RGBA)": "#FF341E", "Main_Transparency": 0.6, "Main_Material": "", "Image_Url": "https://i.imgur.com/CdDKpwv.png", "Image_Local(Leave empty to use Image_Url)": "", "Image_Sprite(Leave empty to use Image_Local or Image_Url)": "", "Image_IsRawImage": false, "Image_Color(Hex or RGBA)": "#FF341E", "Image_Transparency": 1.0, "Is it worth enabling an outline for the image?": false, "Image_Outline_Color(Hex or RGBA)": "0.1 0.3 0.8 0.9", "Image_Outline_Transparency": 0.0, "Image_Outline_Distance": "0.75 0.75", "Text_Size": 14, "Text_Color(Hex or RGBA)": "#FF341E", "Text_Font(https://umod.org/guides/rust/basic-concepts-of-gui#fonts)": "RobotoCondensed-Bold.ttf", "Is it worth enabling an outline for the text?": false, "Text_Outline_Color(Hex or RGBA)": "#000000", "Text_Outline_Transparency": 1.0, "Text_Outline_Distance": "0.75 0.75", "SubText_Size": 12, "SubText_Color(Hex or RGBA)": "#FF341E", "SubText_Font": "RobotoCondensed-Bold.ttf", "Is it worth enabling an outline for the sub text?": false, "SubText_Outline_Color(Hex or RGBA)": "0.5 0.6 0.7 0.5", "SubText_Outline_Transparency": 0.0, "SubText_Outline_Distance": "0.75 0.75" } }, ... { "Name": "Civilian", "Prefix": "", "MinValue": -4.99, "MaxValue": 9.99, "Reward": 1.0, "LawmanPenalty": -1.0, "AllowSafeZone": true, "BarSettings": { "Order": 20, "Height": 26, "Main_Color(Hex or RGBA)": "#5EC0CA", "Main_Transparency": 0.6, "Main_Material": "", "Image_Url": "https://i.imgur.com/cgi9T1D.png", "Image_Local(Leave empty to use Image_Url)": "", "Image_Sprite(Leave empty to use Image_Local or Image_Url)": "", "Image_IsRawImage": false, "Image_Color(Hex or RGBA)": "#5EC0CA", "Image_Transparency": 1.0, "Is it worth enabling an outline for the image?": false, "Image_Outline_Color(Hex or RGBA)": "0.1 0.3 0.8 0.9", "Image_Outline_Transparency": 0.0, "Image_Outline_Distance": "0.75 0.75", "Text_Size": 14, "Text_Color(Hex or RGBA)": "#5EC0CA", "Text_Font(https://umod.org/guides/rust/basic-concepts-of-gui#fonts)": "RobotoCondensed-Bold.ttf", "Is it worth enabling an outline for the text?": false, "Text_Outline_Color(Hex or RGBA)": "#000000", "Text_Outline_Transparency": 1.0, "Text_Outline_Distance": "0.75 0.75", "SubText_Size": 12, "SubText_Color(Hex or RGBA)": "#5EC0CA", "SubText_Font": "RobotoCondensed-Bold.ttf", "Is it worth enabling an outline for the sub text?": false, "SubText_Outline_Color(Hex or RGBA)": "0.5 0.6 0.7 0.5", "SubText_Outline_Transparency": 0.0, "SubText_Outline_Distance": "0.75 0.75" } }, ... { "Name": "Paragon", "Prefix": "⋆☆⋆ ", "MinValue": 1000.0, "MaxValue": 3.40282347E+38, "Reward": 20.0, "LawmanPenalty": -125.0, "AllowSafeZone": true, "BarSettings": { "Order": 20, "Height": 26, "Main_Color(Hex or RGBA)": "#0AFBFB", "Main_Transparency": 0.6, "Main_Material": "", "Image_Url": "https://i.imgur.com/6yzrXE0.png", "Image_Local(Leave empty to use Image_Url)": "", "Image_Sprite(Leave empty to use Image_Local or Image_Url)": "", "Image_IsRawImage": false, "Image_Color(Hex or RGBA)": "#0AFBFB", "Image_Transparency": 1.0, "Is it worth enabling an outline for the image?": false, "Image_Outline_Color(Hex or RGBA)": "0.1 0.3 0.8 0.9", "Image_Outline_Transparency": 0.0, "Image_Outline_Distance": "0.75 0.75", "Text_Size": 14, "Text_Color(Hex or RGBA)": "#0AFBFB", "Text_Font(https://umod.org/guides/rust/basic-concepts-of-gui#fonts)": "RobotoCondensed-Bold.ttf", "Is it worth enabling an outline for the text?": false, "Text_Outline_Color(Hex or RGBA)": "#000000", "Text_Outline_Transparency": 1.0, "Text_Outline_Distance": "0.75 0.75", "SubText_Size": 12, "SubText_Color(Hex or RGBA)": "#0AFBFB", "SubText_Font": "RobotoCondensed-Bold.ttf", "Is it worth enabling an outline for the sub text?": false, "SubText_Outline_Color(Hex or RGBA)": "0.5 0.6 0.7 0.5", "SubText_Outline_Transparency": 0.0, "SubText_Outline_Distance": "0.75 0.75" } } ] MinRange, MaxRange - Range of values for the group rank; Name - Name of the rank; Reward - Reward for killing or reviving(divided by 2) a player in this rank. If the initiating player has IsLawman = true, the value will be positive, otherwise, it will be negative; LawmanPenalty - Penalty for a peaceful player of this rank, for killing another peaceful player. If the target did not initiate this pvp first; AllowSafeZone - Is this rank allowed to visit Safe Zones (except Bandit Camp)? The "Forbid bandits from visiting the SafeZone (except for Banditcamp)" config should be set to true. Path: *SERVER*\oxide\data\ReputationMaster\ReputationRanks.json EN: { "CmdNotAllowed": "You do not have permissions to use this command!", "CmdPlayerNotFound": "Player '{0}' not found! You must provide the player's name or ID.", "CmdMultiplePlayers": "Multiple players found: {0}", "CmdAdmin": "Available admin commands:\n\n<color=#D1CBCB>/rep</color> <color=#D1AB9A>fake *floatValue* *nameOrId*(optional)</color> - Set a fake reputation for yourself or the specified player\n<color=#D1CBCB>/rep</color> <color=#D1AB9A>set *floatValue* *nameOrId*(optional)</color> - Set a reputation value for yourself or the specified player\n<color=#D1CBCB>/rep</color> <color=#D1AB9A>info *nameOrId*(optional)</color> - Get full information about your reputation or the reputation of the specified player\n<color=#D1CBCB>/rep</color> <color=#D1AB9A>reset all/*nameOrId*</color> - Reset the reputation of all players or the specified player\n\n--------------------------------------------------", "CmdMain": "Available commands:\n\n<color=#D1CBCB>/rep</color> <color=#D1AB9A>fake *floatValue*</color> - Set a fake reputation\n\n--------------------------------------------------", "CmdFakePlayer": "Player '{0}' has been assigned a new fake reputation value: {1}({2})!", "CmdFakeNPC": "NPC '{0}' has been assigned a new fake reputation value: {1}({2})!", "CmdFakeSelf": "A new fake reputation value has been successfully set: {0}({1})!", "CmdSetPlayer": "Player '{0}' has been assigned a new reputation value: {1}({2})!", "CmdSetNPC": "NPC '{0}' has been assigned a new reputation value: {1}({2})!", "CmdInfoPlayer": "Player '{0}' reputation:\n<color=#D1AB9A>Reputation</color> - {1} ({2})\n<color=#D1AB9A>Fake Reputation</color> - {3} ({4})\n<color=#D1AB9A>Last Helper</color> - {5}\n\n--------------------------------------------------", "CmdInfoNPC": "NPC '{0}' reputation:\n<color=#D1AB9A>Reputation</color> - {1}({2})\n<color=#D1AB9A>Fake Reputation</color> - {3}({4})\n<color=#D1AB9A>Last Helper</color> - {5}\n\n--------------------------------------------------", "CmdResetAll": "{0} reputations have been successfully reset!", "CmdResetPlayer": "Player '{0}' reputation has been successfully reset!", "MsgReputation": "Reputation", "MsgShowPlayerReputation": "Player '{0}' reputation: {1}({2})", "MsgNewReputation": "Congratulations! You have received the reputation '{0}'!", "MsgSelfDefense": "You attacked a peaceful player '{0}'({1}) first. If they kill you within {2} minutes, they will not receive a penalty", "MsgSelfDefenseNoPenalty": "You killed a peaceful player '{0}'({1}). However, since they attacked you first, you will not be penalized", "MsgLawmanEnterBanditZone": "You have entered the Bandit Camp! Stay vigilant, this place is full of thugs!", "MsgLawmanLeaveBanditZone": "You have left the Bandit Camp! We recommend avoiding this area!", "MsgBanditEnterBanditZone": "Welcome to the Bandit Camp! We are glad to have you back!", "MsgBanditLeaveBanditZone": "You have left the Bandit Camp! We hope to see you again soon!", "MsgBanditEnterSafeZone": "You are not welcome here! If you do not leave this place, you will be killed in {0} seconds!", "MsgBanditLeaveSafeZone": "Do not come back here! People like you belong in the Bandit Camp!" } RU: { "CmdNotAllowed": "У вас недостаточно прав для использования этой команды!", "CmdPlayerNotFound": "Игрок '{0}' не найден! Вы должны указать имя или ID игрока.", "CmdMultiplePlayers": "Найдено несколько игроков: {0}", "CmdAdmin": "Доступные админ команды:\n\n<color=#D1CBCB>/rep</color> <color=#D1AB9A>fake *дробноеЗначение* *имяИлиАйди*(опционально)</color> - Установить ложную репутацию себе или указанному игроку\n<color=#D1CBCB>/rep</color> <color=#D1AB9A>set *дробноеЗначение* *имяИлиАйди*(опционально)</color> - Установить репутацию себе или указанному игроку\n<color=#D1CBCB>/rep</color> <color=#D1AB9A>info *имяИлиАйди*(опционально)</color> - Получить всю информацию о своей репутации или репутации указанного игрока\n<color=#D1CBCB>/rep</color> <color=#D1AB9A>reset all/*имяИлиАйди*</color> - Сбросить репутацию всем игрокам или указанному игроку\n\n--------------------------------------------------", "CmdMain": "Доступные команды:\n\n<color=#D1CBCB>/rep</color> <color=#D1AB9A>fake *дробноеЗначение*</color> - Установить ложную репутацию\n\n--------------------------------------------------", "CmdFakePlayer": "Игроку '{0}' установлено новое ложное значение репутации: {1}({2})!", "CmdFakeNPC": "Боту '{0}' установлено новое ложное значение репутации: {1}({2})!", "CmdFakeSelf": "Новое значение ложной репутации успешно установлено: {0}({1})!", "CmdSetPlayer": "Игроку '{0}' установлено новое значение репутации: {1}({2})!", "CmdSetNPC": "Боту '{0}' установлено новое значение репутации: {1}({2})!", "CmdInfoPlayer": "Репутация игрока '{0}':\n<color=#D1AB9A>Репутация</color> - {1}({2})\n<color=#D1AB9A>Ложная репутация</color> - {3}({4})\n<color=#D1AB9A>Последний помощник</color> - {5}\n\n--------------------------------------------------", "CmdInfoNPC": "Репутация бота '{0}':\n<color=#D1AB9A>Репутация</color> - {1}({2})\n<color=#D1AB9A>Ложная репутация</color> - {3}({4})\n<color=#D1AB9A>Последний помощник</color> - {5}\n\n--------------------------------------------------", "CmdResetAll": "Успешно сброшено {0} репутаций!", "CmdResetPlayer": "Репутация игрока '{0}' успешно сброшена!", "MsgReputation": "Репутация", "MsgShowPlayerReputation": "Репутация игрока '{0}': {1}({2})", "MsgNewReputation": "Поздравляем! Вы получили репутацию '{0}'!", "MsgSelfDefense": "Вы первым атаковали мирного игрока '{0}'({1}). Если он вас убьет в течении {2} минут, то не получит штрафа", "MsgSelfDefenseNoPenalty": "Вы убили мирного игрока '{0}'({1}). Но так как он первым вас атаковал, вас не накажут", "MsgLawmanEnterBanditZone": "Вы пришли в Лагерь Бандитов! Будьте бдительны, здесь полно разных отморозков!", "MsgLawmanLeaveBanditZone": "Вы покинули Лагерь Бандитов! Советуем обходить это место!", "MsgBanditEnterBanditZone": "Добро пожаловать в Лагерь Бандитов! Мы рады вашему возвращению!", "MsgBanditLeaveBanditZone": "Вы покинули Лагерь Бандитов! Надеемся на скорое ваше возвращение!", "MsgBanditEnterSafeZone": "Вам здесь не рады! Если вы не покинете это место, то вас убьет через {0} секунд!", "MsgBanditLeaveSafeZone": "Больше сюда не возвращайтесь! Таким как вы место в Лагере Бандитов!" } fake *floatValue* - Set a fake reputation for yourself or the specified player. Permission "reputationmaster.vip" or "reputationmaster.admin" required fake *floatValue* *nameOrId*(optional) - Set a fake reputation for yourself or the specified player. Permission "reputationmaster.admin" required; set *floatValue* *nameOrId*(optional) - Set a reputation value for yourself or the specified player. Permission "reputationmaster.admin" required; info *nameOrId*(optional) - Get full information about your reputation or the reputation of the specified player. Permission "reputationmaster.admin" required; reset all/*nameOrId* - Reset the reputation of all players or the specified player. Permission "reputationmaster.admin" required. Example: /rep fake 150 /rep fake -40 iiiaka /rep set 23 iiiaka ReputationValueUpdated: Called after the player's reputation value has changed. Works only for players that are not NPCs. void ReputationValueUpdated(ulong userID, string repName, float repValue) { Puts($"{userID} updated a reputation value to {repValue}. Current reputation rank is {repName}."); } ReputationUpdated: Called after the player receives a new reputation rank. Works only for players that are not NPCs. void ReputationUpdated(ulong userID, string oldRep, string newRep, bool isLawman, bool allowSafeZone, float repValue) { Puts($"{userID} has updated their rank from {oldRep} to {newRep}. Is peaceful: {isLawman}\nSafe Zones: {allowSafeZone}\nReputation Value: {repValue}"); } [PluginReference] private Plugin ReputationMaster; There are 4 api methods: GetReputationValue: Used to retrieve the reputation value, real or fake. Returns null on failure. To call the GetReputationValue method, you need to pass 2 parameters: userID as a ulong; realRep as a bool. What reputation value to get, real or fake? This parameter is optional. (float)(ReputationMaster?.Call("GetReputationValue", player.userID, true) ?? 0f); GetReputationName: Used to retrieve the reputation name, real or fake. Returns an empty string on failure. To call the GetReputationName method, you need to pass 2 parameters: userID as a ulong; realRep as a bool. What reputation name to get, real or fake? This parameter is optional. (string)(ReputationMaster?.Call("GetReputationName", player.userID, true) ?? string.Empty); SetReputationValue: Used to retrieve the reputation name, real or fake. Returns a false on failure. To call the SetReputationValue method, you need to pass 3 parameters: Available options: userID as a ulong or a string; player as a BasePlayer. newValue as float; realRep as a bool. What reputation value to get, real or fake? This parameter is optional. (bool)(ReputationMaster?.Call("SetReputationValue", player.UserIDString, 150f, true) ?? false);//(string)userID (bool)(ReputationMaster?.Call("SetReputationValue", player.userID, 150f, true) ?? false);//(ulong)userID (bool)(ReputationMaster?.Call("SetReputationValue", player, 150f, true) ?? false);//(BasePlayer)player ***recommended option*** SetReputationValues: Used to retrieve the reputation name, real or fake. Returns a false on failure. To call the SetReputationValues method, you need to pass 3 parameters: Available options: userID as a ulong or a string; player as a BasePlayer. value as float; fakeValue as a float. (bool)(ReputationMaster?.Call("SetReputationValues", player.UserIDString, 150f, 50f) ?? false);//(string)userID (bool)(ReputationMaster?.Call("SetReputationValues", player.userID, 150f, 50f) ?? false);//(ulong)userID (bool)(ReputationMaster?.Call("SetReputationValues", player, 150f, 50f) ?? false);//(BasePlayer)player ***recommended option*** You can create as many reputation ranks as you want, but there are only two main groups: Lawmen(peaceful or civilians); Outlaws(bandits). Each kill has a different scores depending of the reputation rank of the victim and attacker. For exampe, if you are a Civilian, you will receive: Paragon: -20 Vigilant: -15 Guardian: -10 Lawman: -4 Deputy: -3 Constable: -2 Civillian: -1 Thug: +2 Outlaw: +3 Bandit: +4 Hitman: +10 Villain: +15 Assassin: +20 Reviving: For reviving a player, you will receive a reward divided by 2. If the target is a lawman, the reward will be positive, else if a target is a bandit, it will be negative. Also, this is the only way out of bandit rank for bandits. Outlaw: When you reach the outlaw reputation, you have no more back! Except for reviving a peaceful player. You can kill other bandits but still counting as negative reputation! So, after you reach the outlaw reputation rank, scores by killing a player of a certain reputation will be as follows(negative reward value) : Paragon: -20 Vigilant: -15 Guardian: -10 Lawman: -4 Deputy: -3 Constable: -2 Civillian: -1 Thug: -2 Outlaw: -3 Bandit: -4 Hitman: -10 Villain: -15 Assassin: -20 Lawman: The scores will be as follows for each kill a outlaw reputation ranks(positive reward value) : Assassin: +20 Villain: +15 Hitman: +10 Bandit: +4 Outlaw: +3 Thug: +2 But for killing a peaceful player, you will receive penalties based on your rank. A list of penalties for each reputation rank: Paragon: -125 Vigilante: -60 Guardian: -40 Lawman: -15 Deputy: -2 Constable: -1 Civilian: -1 There is also a self-defense system that works as follows: If a peaceful player initiates an attack on another peaceful player, a timer of 15 minutes(sets from config) is activated, during which the victim can kill the attacker without penalties. So, it's very hard to become a lawman, and it's very easy to get out from lawman.$4.99- 6 comments
-
- 1
-

-
- #rust
- #reputation
- (and 25 more)
-
Version 1.2.7
1,842 downloads
This plugin adds a new dynamic zombie event to your server, the appearance of which you can customize in the configuration for any standard and custom monuments Description The event begins with a message in chat that the evacuation of the general from the island will begin soon. At the end of the configured timer, a military checkpoint randomly appears on the map and it is said in the chat that the general's guard was killed, and the general himself was seriously wounded The player and his friends (if you have any) need to arrive at the military checkpoint and call for help for the general with the laptop located at the checkpoint control center After the player calls for help, waves of zombies will attack the base. During the preparation phase, players can upgrade the base with turrets, purchase ammunition for them, or place it from their inventory through the checkpoint control center. In the doorways, players can install barricades of different types (5 types of barricades, which differ in the amount of Hit Points) to contain the incoming waves of zombies. The player can also use a hammer to repair the barricades. During the attack phase, waves of zombies will be directed at you. You cannot allow zombies to kill the general, otherwise, the event will end. There are several zombie types (in future updates it is planned to add to the list of zombie types). Each type of zombie has its own tasks. After the end of each wave, a room with crates opens, where there will be a reward for you At the end of the event, a helicopter arrives for the general and picks him up, and you are notified in chat that the event has been successfully completed. When the general dies, the event ends, as will the attack wave, the event, and all hope is lost! All the necessary settings of zombies, timers, items in crates for each wave, as well as settings for each wave (the number of zombies of each type, the time of the preparation phase and the attack wave, etc.), settings of the military checkpoint (the price of buying something or improving the base, used ammo in turrets, etc.), the price of repairs, barricade options, and many other settings are available in the plugin configuration Also in the event there are additional missions during the waves of attack, during which you will receive an additional reward (in future updates it is planned to add to the list of additional missions). You can set up additional missions in the settings of each attack wave The event provides the use of several military base designs. The Mad Mappers team will add to the list of constructions for the event in the future. When an event appears, the plugin randomly selects the construction of the base from those that you have in the data folder, and also randomly selects a place to appear from all those that have been set in the plugin configuration Also, the Mad Mappers team will begin to offer support in our custom maps for this event and contain files for the appearance of bases in custom monuments and locations on our maps Constructions of other bases Defendable Bases (Bundle-1) Defendable Bases (Bundle-2) Custom Map Maps that have a configuration for the appearance of bases on their custom monuments You can also download all these files for all maps here Deathland Badlands Destroyed World Detroit: Irreparable Damage Oregon 2: Last Hope Oregon: Land of Dead Pandora All files for custom maps are stored in the folder oxide/data/DefendableBases/CustomMap. You don't have to delete files from there, the plugin will understand by itself which map is currently installed on the server and will download only the necessary file if there is one in this folder. The plugin will tell you about this process in the console during the plugin loading. It will write in the console what file works on the current map, and what ones don’t work If you want to create a custom place for the base to appear on your custom map or on a map that is not in this list, you have to create the ID of this custom map. After that you need to place an item such as a RAND Switch on your map. It must be placed randomly, where it will not be visible to other players. You will get the identifier, if you add up the three coordinates of the position of this object from RustEdit (x, y and z) and write the resulting value in the parameter of your file (an example file can be taken from ready-made files) - ID As an example, let's take the coordinates (26.896, -456.158, 527.258), then our identifier is 26.896 - 456.158 + 527.258 = 97.996 Then you need to indicate a list of bases that will appear on your map. You need to copy the configuration data block for each base construction. In the database parameters you will specify the name of the base construction and a list of positions where it can appear The list of positions consists of several parameters. First you need to specify the position and rotation of the appearance of the base on your map, then you can get these values using RustEdit. You need to choose the place for the appearance of the event on the custom monument, where the player has a ban on construction You have such a parameter as the pursuit radius for such a type of zombie as Blazer. These zombies run around the base along this radius and shoot at the players. Please note! Some object sometimes may be on your map in this radius, for example a fence, and they will not be able to overcome it, because they cannot run inside this circle, and they haven’t a way out for them so you need to leave them a way or adjust it by increasing or decreasing the radius You have a list of coordinates for the points of appearance of all zombies. It is necessary to indicate these coordinates evenly around the base so that the zombies run from different sides and attack all sides of the base, not just a few ones. So it will be more interesting to play this event. Also note the fact that you can indicate the coordinate where a player can create his house, so it is advisable to specify all the coordinates that are in the construction ban zone, they are in the zone of your custom monument. You can also get the coordinates of the appearance of zombies using RustEdit Images You may want to change some parameters during the plugin installation or the base configuration In the plugin configuration these parameters are: Custom Barricades => Price for repairs (per hammer hit) => List of items, 3 maximum (if the economy method is 3) In the base configuration, these parameters are: List of turrets => Price to unlock => List of items, 3 maximum (if the economy method is 3) List of turrets => List of ammo => Price => List of items, 3 maximum (if the economy method is 3) List of barricades to buy => Price => List of items, 3 maximum (if the economy method is 3) A list of items that are in the laptop inventory when the base appears List of attack waves => Additional missions => Reward for completing the mission => List of items If you change items in the current configuration items, you need to upload the image for this item to the oxide/data/Images folder. In order for the plugin to load this image and can use it for display in the player's GUI. If it is a standard Rust item, you need to name this image file by its ShortName. If it is a custom item, you need to name the image file by the SkinID of the item Then you need to make a few changes to the plugin configuration in the List of paths to GUI images item. You need to add a new image to this list. The name is the ShortName or SkinID of the item. The path to the image will look something like this: Images/{ShortName or SkinID}.png If you use the economy of some following points on your server as prices, you can change the image with the name Economic to your own with the same name All images must be used square. Attention! The lower size of the image file will be displayed to the player faster Dependencies Required NpcSpawn Dependencies (optional, not required) True PVE PveMode GUI Announcements Notify Discord Messages AlphaLoot CustomLoot NTeleportation Economics Server Rewards IQEconomic Chat commands (only for administrators) /warstart {name} – start the event ({name} – name of the base) /warstop - end the event Console commands (RCON only) warstart {name} – start the event ({name} – name of the base) warstop - end the event givebarricade {steamid} {level} {amount} - a player with a SteamID ({steamid}) is given a certain number of barricades ({amount}) of a certain level ({level}) Plugin Config en - example of plugin configuration in English ru - example of plugin configuration in Russian Base Config en - example of base configuration in English ru - example of base configuration in Russian Custom Map Config en - example of custom map configuration in English ru - example of custom map configuration in Russian My Discord: KpucTaJl#8923 Join the Mad Mappers Discord here! Check out more of my work here! Creator of the default configuration and the bases – jtedal Help in creating a plugin description – Jbird#2022$45.00- 97 comments
- 8 reviews
-
- 9
-

-
-

-
- #barricade
- #ch47
- (and 26 more)
-

Version 1.1.1
4,297 downloads
Checks for updates for all Codefling plugins, and prints to console and, optionally, discord. Reports to console "Codefling has updates for the following plugins.", then lists the names. Config Authors - Each author name has a true/false option to enable/disable checking their plugins. CheckIntervalMinutes - How often the plugin requests updated information from Codefling. DiscordWebhookAddres - Address for your discord server's webhook, for posting updates. Ignore - String array for plugin names to ignore. eg ["one plugin"] or ["multiple", "plugins"]Free- 50 comments
- 3 reviews
-
- 17
-
-
-
- #updates
- #steenamaroo
- (and 5 more)
-

Version 0.1.9
437 downloads
Allows automating the entire manure collection process and adds other useful features in this area, by adding Industial Adapters and BoxStorage to the HitchTrough and Composter. Also auto spliting dungs in the Composter container. Note: During plugin unloading, modified entities are not removed, to prevent the removal of pipes every time the plugin/server is restarted. To remove modifications from entities, you should use the "idung unload" command. industrialdung.admin - Provides unrestricted access to the plugin's functionality. This includes the ability to add/remove or clear modificated entities from other players. Note: In the configuration file, within the "Max ammount of modified entites per group" section, you can specify limits for any existing permission by simply listing its name. "Max amount of modified entites for each permission. Leave null or empty to recreate the default": { "industrialdung.default": { "HitchTroughs": 5, "Composters": 2 }, ... }, ... If you want to create a new permission, you can also include it in the list, but the name must begin with "industrialdung". { "Chat command": "idung", "Is it worth enabling GameTips for messages?": true, "Use auto-splitting in the Composter?": true, "Item's short name for auto-splitting in the Composter. Leave the field empty to use the default": "horsedung", "AutoModify - Default value for new players": true, "Wood Storage Box Workshop Skin ID": 2911301119, "The list of items(short name) available for the composter. Leave empty to use vanilla": [ "horsedung", "fertilizer", "plantfiber" ], "Popup - Duration": 6.0, "Popup - Position AnchorMin": "0 0.9", "Popup - Position AnchorMax": "0.25 1", "Popup - Position OffsetMin": "20 0", "Popup - Position OffsetMax": "0 -30", "Popup - Icon Url": "https://i.imgur.com/4Adzkb8.png", "Popup - Icon Color(Hex or RGBA)": "#CCE699", "Popup - Icon Transparency": 0.8, "Popup - Text Font(https://umod.org/guides/rust/basic-concepts-of-gui#fonts)": "RobotoCondensed-Bold.ttf", "Popup - Text Font Size": 14, "Popup - Text Font Color(Hex or RGBA)": "#FFFFFF", "Popup - Description Font": "RobotoCondensed-Regular.ttf", "Popup - Description Font Size": 12, "Popup - Description Font Color(Hex or RGBA)": "#FFFFFF", "Popup - Text FadeIn": 1.0, "Popup - Sound Prefab Name": "assets/bundled/prefabs/fx/invite_notice.prefab", "Max amount of modified entites for each permission. Leave null or empty to recreate the default": { "industrialdung.default": { "HitchTroughs": 5, "Composters": 2 }, "industrialdung.vip": { "HitchTroughs": 10, "Composters": 4 }, "realpve.vip": { "HitchTroughs": 15, "Composters": 6 } }, "Version": { "Major": 0, "Minor": 1, "Patch": 9 } } EN: { "PopupTitleHitch": "Modify this hitch trough?", "PopupTitileComposter": "Modify this composter?", "PopupDescription": "Click on the notification to confirm", "CmdNotAllowed": "You do not have permission to use this command!", "CmdPlayerNotFound": "Player '{0}' not found! You must provide the player's name or ID.", "CmdMultiplePlayers": "Multiple players found: {0}", "CmdEntityNotFound": "Entity not found! You must specify the entity ID or look directly at it.", "CmdEntityNotOwned": "This entity has no owner!", "CmdEntityNotOwner": "You are not the owner of this entity!", "CmdEntityNotModified": "This entity has no modifications!", "CmdAdmin": "Available admin commands:\n\n<color=#D1CBCB>/idung</color> <color=#D1AB9A>auto</color> - Toggle automatic modification of HitchTroughs and Composters\n<color=#D1CBCB>/idung</color> <color=#D1AB9A>add *entityID*(optional)</color> - Add modifications to HitchTroughs or Composters you are looking at or specified\n<color=#D1CBCB>/idung</color> <color=#D1AB9A>remove *entityID*(optional)</color> - Remove modifications from HitchTroughs or Composters you are looking at or specified\n<color=#D1CBCB>/idung</color> <color=#D1AB9A>clear</color> - Remove all modifications from your HitchTroughs and Composters\n<color=#D1CBCB>/idung</color> <color=#D1AB9A>clear *nameOrId*</color> - Remove all modifications from HitchTroughs and Composters of the specified player\n<color=#D1CBCB>/idung</color> <color=#D1AB9A>clear all</color> - Remove all modifications from HitchTroughs and Composters, from all players\n<color=#D1CBCB>/idung</color> <color=#D1AB9A>aclear</color> - Remove all modifications from HitchTroughs and Composters that were not saved in the data file for some reason\n<color=#D1CBCB>/idung</color> <color=#D1AB9A>unload</color> - Unload the plugin and removing all modifications from HitchTroughs and Composters without deleting them from the data file\n\n--------------------------------------------------", "CmdAdminClearTarget": "Successfully removed {1} modifications from HitchTroughs and Composters for player '{0}'!", "CmdAdminClear": "Successfully removed all modifications from HitchTroughs and Composters for all players!", "CmdAdminAclear": "Successfully removed all modifications from HitchTroughs and Composters that were not in the data file!", "CmdAdminUnload": "Plugin '{0}' has been successfully unloaded with the removal of all modifications from HitchTroughs and Composters, but without deleting from the data file!", "CmdMain": "Available commands:\n\n<color=#D1CBCB>/idung</color> <color=#D1AB9A>auto</color> - Toggle automatic modification of HitchTroughs and Composters\n<color=#D1CBCB>/idung</color> <color=#D1AB9A>add *entityID*(optional)</color> - Add modifications to HitchTroughs or Composters you are looking at or specified\n<color=#D1CBCB>/idung</color> <color=#D1AB9A>remove *entityID*(optional)</color> - Remove modifications from HitchTroughs or Composters you are looking at or specified\n<color=#D1CBCB>/idung</color> <color=#D1AB9A>clear</color> - Remove all modifications from your HitchTroughs and Composters\n\n--------------------------------------------------", "CmdAutoModifyEnabled": "Automatic entity modification is enabled!", "CmdAutoModifyDisabled": "Automatic entity modification is disabled!", "CmdLimitReached": "You cannot to modify this entity as you have reached your limit of {0}!", "CmdHitchTroughModified": "The hitch trough has been successfully modified!", "CmdComposterModified": "The composter has been successfully modified!", "CmdEntityRemoved": "Entity modifications have been successfully removed!", "CmdEntityClear": "All modifications of your entities have been successfully removed!" } RU: { "PopupTitleHitch": "Модифицировать данную кормушку?", "PopupTitileComposter": "Модифицировать данный компостер?", "PopupDescription": "Нажмите на уведомление для подтверждения", "CmdNotAllowed": "У вас недостаточно прав для использования этой команды!", "CmdPlayerNotFound": "Игрок '{0}' не найден! Вы должны указать имя или ID игрока.", "CmdMultiplePlayers": "Найдено несколько игроков: {0}", "CmdEntityNotFound": "Сущность не найдена! Вы должны указать ID сущности или смотреть прямо на нее.", "CmdEntityNotOwned": "У этой сущности нет владельца!", "CmdEntityNotOwner": "Вы не являетесь владельцем этой сущности!", "CmdEntityNotModified": "Данная сущность не имеет модификаций!", "CmdAdmin": "Доступные админ команды:\n\n<color=#D1CBCB>/idung</color> <color=#D1AB9A>auto</color> - Переключение автоматической модификации кормушек и компостеров\n<color=#D1CBCB>/idung</color> <color=#D1AB9A>add *айдиСущности*(опционально)</color> - Добавить модификации к кормушке или компостеру, на который вы смотрите или указали\n<color=#D1CBCB>/idung</color> <color=#D1AB9A>remove *айдиСущности*(опционально)</color> - Удалить модификации у кормушки или компостера, на который вы смотрите или указали\n<color=#D1CBCB>/idung</color> <color=#D1AB9A>clear</color> - Удалить все модификации у ваших кормушек и компостеров\n<color=#D1CBCB>/idung</color> <color=#D1AB9A>clear *имяИлиАйди*</color> - Удалить все модификации у кормушек и компостеров, указанного игрока\n<color=#D1CBCB>/idung</color> <color=#D1AB9A>clear all</color> - Удалить все модификации у кормушек и компостеров, всех игроков\n<color=#D1CBCB>/idung</color> <color=#D1AB9A>aclear</color> - Удалить все модификации у кормушек и компостеров, которые по некоторым причинам не попали в дата файл\n<color=#D1CBCB>/idung</color> <color=#D1AB9A>unload</color> - Выгрузить плагин с удалением модификаций у всех кормушек и комспостеров, без удаления из даты файла\n\n--------------------------------------------------", "CmdAdminClearTarget": "Успешно удалено {1} модификации у кормушек и компостеров, игрока '{0}'!", "CmdAdminClear": "Успешно удалены все модификации у кормушек и компостеров, всех игроков!", "CmdAdminAclear": "Успешно удалены все модификации у кормушек и компостеров, которых не было в дата файле!", "CmdAdminUnload": "Плагин '{0}' был успешно выгружен с удалением всех модификации у кормушек и компостеров, но без удаления из дата файла!", "CmdMain": "Доступные команды:\n\n<color=#D1CBCB>/idung</color> <color=#D1AB9A>auto</color> - Переключение автоматической модификации кормушек и компостеров\n<color=#D1CBCB>/idung</color> <color=#D1AB9A>add *айдиСущности*(опционально)</color> - Добавить модификации к кормушке или компостеру, на который вы смотрите или указали\n<color=#D1CBCB>/idung</color> <color=#D1AB9A>remove *айдиСущности*(опционально)</color> - Удалить модификации у кормушки или компостера, на который вы смотрите или указали\n<color=#D1CBCB>/idung</color> <color=#D1AB9A>clear</color> - Удалить все модификации у ваших кормушек и компостеров\n\n--------------------------------------------------", "CmdAutoModifyEnabled": "Автоматическая модификация сущностей включена!", "CmdAutoModifyDisabled": "Автоматическая модификация сущностей выключена!", "CmdLimitReached": "Вы не можете модифицировать данную сущность, так как вы превысили свой лимит в {0}!", "CmdHitchTroughModified": "Кормушка успешно модифицирована!", "CmdComposterModified": "Компостер успешно модифицирован!", "CmdEntityRemoved": "Модификации сущности успешно удалены!", "CmdEntityClear": "Все модификации ваших сущностей успешно удалены!" } auto - Toggle automatic modification of HitchTroughs and Composters; add *entityID*(optional) - Add modifications to HitchTroughs or Composters you are looking at or specified; remove *entityID*(optional) - Remove modifications from HitchTroughs or Composters you are looking at or specified; clear - Remove all modifications from your HitchTroughs and Composters; clear *nameOrId* - Remove all modifications from HitchTroughs and Composters of the specified player. Permission "industrialdung.admin" required; clear all - Remove all modifications from HitchTroughs and Composters, from all players. Permission "industrialdung.admin" required; aclear - Remove all modifications from HitchTroughs and Composters that were not saved in the data file for some reason. Permission "industrialdung.admin" required; unload - Unload the plugin and removing all modifications from HitchTroughs and Composters without deleting them from the data file. Permission "industrialdung.admin" required. Example: /idung auto /idung add /idung add *netID* /idung clear all$9.99- 62 comments
- 2 reviews
-
- 1
-
-
- #rust
- #industrial
- (and 25 more)
-

Version 1.17.29
448 downloads
IQTurrets is a plugin that adds turrets to your server without electricity! There will be an additional "switch" on the turrets, which will start and turn it off without electricity. It also supports the ability to connect electricity to the turret without electricity, the plugin is synchronized and everything will work according to the mechanics of the game Opportunities : - Support SAM-Site - There are limits on the cabinet and specifically for the player - It is possible to set limits on privileges - IQChat support is available - There are console and chat commands for controlling turrets with the ability to bind them - The ability to use 2 types of switches: Buttons and tublers API : Object OnSetupTurret(BaseEntity entityTurret) /// - return null to ignore and continue the installation, otherwise nothing will be installed on the turret$12.99 -
Version 2.1.6
3,873 downloads
Skinner! The unrivaled no.1 performance skinning plugin. Skin any item in the game with a unique skinbox giving you live skinning, auto skinning and skin sets. Live Skinning - Skin items in place without moving them Auto import - Automatically import and use all game approved skins Skin Sets - Create a variety of different skin sets for any item Skin Requests - Allows players to request and Admins to accept new skins in game Auto Skins - Automatically apply selected skins to every item that enters your inventory Skinner 2.0 offeres unrivaled performance in plugin efficiency. Our standard testing shows runtime results were 60x faster and memory usage was 200x more efficient than the closest peforming plugin. SkinMenu Commands: /Skin or /S - Live skin any item in your inventory by selecting a skin you wish to apply /SkinCraft or /Sc - Create multiple skin sets for use in other functions such as skinauto or skinteam /Skinitem or /Si - Skin a deployable item you are looking at ingame. Args - Spectify 1, 2 or 3 to automatically use a skin set. Automatic Commands: /Skincon or /scon - sets all items in a container you are looking at to your default craft set Args - Optional, spectify 1, 2 or 3 to automatically use a skin set. /Skininv or /sinv - sets all items in your inventory to your default craft set Args - Optional, spectify 1, 2 or 3 to automatically use a skin set. /Skinauto or /Sauto - Automatically apply selected skins to every item that enters your inventory based off your skin sets. Args - Optional, spectify 1, 2 or 3 to automatically use a skin set. /Skinteam or /st - sets all items in your inventory and your teams to your default craft set Args - Optional, spectify 1, 2 or 3 to automatically use a skin set. Toggle - Use /skinteam toggle to opt in or out of the team skin set /SkinBase - Allows you to skin all deployables in your base to your default skincraft skins. Args - Optional, specify item name to filter items being skinned example: /Skinbase sleepingbag to only skin sleeping bags. /SkinAll Command - Skin all the items in all the containers in your base. Args - Optional, specify item by shortname example: /SkinAll rifle.ak to only skin ak47's. Skin Import Commands: /Skinimport or /sip - Import custom workshop skins Args - WorkshopID example: /Skinimport 2397648701 /Colimport or /cip - Import custom workshop collection using /skinimport collectionID Args - Collection ID example: /Colimport 2921147807 /Skinrequest or /Sr - Request a skin to be added to skinner, requested skins will show in the /Skinrequests UI for approval Args - WorkshopID example: /Skinrequest 2397648701 /Skinrequests or /Srs - Opens the the skinner menu with a box of skins awating approval Button Usage - Select an option and remove the skin to enact the process Try - Recieve a copy of an item with that skin Approve - Adds the skin from the menu to the imported skins list Deny - Removes the skin Note: All chat commands are universal meaning they can be used via the console, rcon(for import commands) and can be customized via the configuration. Player Permissions: Skinner.default - enables /skin command Skinner.items - enables /skinitem command Skinner.craft - enables /skincraft command Skinner.skinauto - enables /skinauto command Skinner.skincon - enables /skincon command Skinner.skininv - enables /skininv command Skinner.skinbase - for use of the /skinbase command Skinner.skinteam - Allows the use of the /skinteam command Skinner.skinall - for the use of the /skinall command Skinner.skinrequest - enables /skinrequest Cooldowns Permissions: Cooldown settins can be adjusted via the plugin config. Applying the cooldown permission example skinner.default30 will enforce cooldowns on those with the permission. If no cooldown permission is applied no cooldowns will be enforced. If multiple cooldown perms are assigned to a single player they fastest cooldown will be used. "Command based cooldowns ('permission' : 'command' seconds": { "Default30CD": { "skin": 30.0, "skinitem": 30.0, "skincraft": 30.0, "skincon": 30.0, "skininv": 30.0, "skinteam": 30.0, "skinbase": 60.0, "skinall": 60.0 } Admin Permissions: Skinner.import – enables /Skinimport, /Colimport and /Skinrequests Skinner.bypassauth - bypasses the building auth requirement when using /Skinitem Skinner.permskintry - enables try feature when using /Skinrequests Warning: trying a skin will make a copy of that item. Only give this perm to admins who are allowed to spawn items. Other Permissions: Skinner.skinautotoggled - applied when a player disables skinauto Skinner.skinteamblock - applied when a player disables team skins Skinner offers multiple ways of importing skins including via the config and through commands: Importing via the config: To import skins via the config insert workshopIDs into the imported skins list as per the code snippet below, once finished reload skinner and the shortname and displayname fields will be automatically populated. You can add extra skins at any stage using this method. "Imported Skins List": { "861142659": {}, "2617744110": {} }, Optionally entire workshop skin collections can be added to conifg, each item skin is automatically imported to your imported skins list on plugin load. "Import Skin collections (steam workshop ID)": [496517795,2921147807], Importing via commands: Commands can be used to edit the config options for imported skins and collections via RCON, chat commands and the f1 console. Commands include: /Skinimport WorkshopID /Colimport CollectionID Importing via Skin Requests: Players can requests skins to be added to the game using the skinrequests feature. By using the command /skinrequest WorkshoID a skin gets automatically uploaded to the skin requests box. Admins with the skinner.import permission can open the requests box with the /skinrequests command. Skins from the request box can then be "tried" approved or denied. Each skin requested can be logged to discord using the webhook in the config. Importing from other plugins: Skinner now has a tool for windows to import data from skinbox, xskins and skincontroller. Simply select your json data file with imported skins into the tool and copy the new imported skins list into the skinner config. https://github.com/Whispers88/SkinDataConverter/releases/tag/Main Note: The "Imported Skins (skinid : 'shortnamestring', skinid2 : 'shortnamestring2'": {}" is now redundant and automatically converted to imported skins list. { "Skin Commands (skin items in you inventory": [ "skin", "s", "skinbox", "sb" ], "Skin Items Commands (skin items you have already placed": [ "skinitem", "si", "skindeployed", "sd" ], "Set default items to be skinned": [ "skincraft", "sc" ], "Automatically set all items in you inventory to your default skins": [ "skininv", "sinv" ], "Automatically set all items a container to your default skins": [ "skincon", "scon" ], "Automatically skin all deployables in your base": [ "skinbase", "skinbuilding" ], "Automatically skin all items in your base": [ "skinall", "sa" ], "Automatically skin all items that are moved into you inventory": [ "skinauto", "sauto" ], "Skin your teams inventories with your skin set": [ "skinteam", "st" ], "Request workshop skins via workshop ID": [ "skinrequest", "sr" ], "Approve workshop skin requests": [ "skinrequests", "srs" ], "Set your selected skin set": [ "skinset", "ss" ], "Import Custom Skins": [ "skinimport", "sip" ], "Import Workshop Collection Command": [ "colimport", "cip" ], "Skin Request Notification Discord Webhook": "", "Custom Page Change UI Positon anchor/offset 'min x, min y', 'max x', max y'": [ "0.5 0.0", "0.5 0.0", "198 60", "400 97" ], "Custom Searchbar UI Positon anchor/offset 'min x, min y', 'max x', max y'": [ "0.5 0.0", "0.5 0.0", "410 635", "572 660" ], "Custom Set Selection UI Positon anchor/offset 'min x, min y', 'max x', max y'": [ "0.5 0.0", "0.5 0.0", "250 610", "573 633" ], "Auto import approved skins": true, "Remove player data after inactivity (days)": 14, "Apply names of skins to skinned items": true, "Add Search Bar UI": true, "Use on itemcraft hook (skin items after crafting - not required when using skinauto)": false, "Override spraycan behaviour": false, "Use spraycan effect when holding spraycan and skinning deployables": true, "Blacklisted Skins (skinID)": [], "Blacklisted Itemms (itemID)": [], "Import Skin collections (steam workshop ID)": [], "Command based cooldowns ('permission' : 'command' seconds": { "Default30CD": { "skin": 30.0, "skinitem": 30.0, "skincraft": 30.0, "skincon": 30.0, "skininv": 30.0, "skinteam": 30.0, "skinbase": 60.0, "skinall": 60.0 } }, "Imported Skins List": {} } //Get all Cached skins public Dictionary<int, List<ulong>> GetAllCachedSkins() { return _cachedSkins; } //Check if skin is a Redirect item public bool IsRedirectID(ulong uID) { return HasMask(uID); } //Convert Redirect ID to item ID public int RedirectIDtoItemID(ulong uID) { return (int)UnsetMask(uID); } //Get a list of skins for a particular item public List<ulong>? GetSkinsItemList(int itemid) { _cachedSkins.TryGetValue(itemid, out List<ulong>? cachedSkins); return cachedSkins; }$24.99 -
Version 2.3.5
6,174 downloads
Creates a unique event at the Harbor monument for players to participate in for rewards. Players must battle numerous NPCs and APCs to access the puzzle to open the loot room! Description This event started off as a warning on the chatbox about the ships coming soon to dock in Port, loaded with precious cargo. After the period has passed, a ship appears in one of the locations at Harbour that are accessible from the map, where the crane loads the container. The loading area is protected by one Tank and 7 NPCs by default. The container door is locked, you must push a button from inside the cranes cockpit to open the door. Inside the container, there is a default security camera, locked box, 2 DMS, 2 Elite, and 2 Military boxes. The locations and loot from all crates/NPCs can be configured within configurations, and unwanted crates/NPCs added or removed. Also, ships will generate the default ship loot, e.g. The config file allows to modify tank as well as loot inside of the ship. When the event occurs, the map displays the markers (configured in the config file). All players that are inside the event area will have a timer counting down the amount of time until the event ends. Dependencies Required NpcSpawn Dependencies (optional, not required) True PVE PveMode GUI Announcements Notify Discord Messages AlphaLoot CustomLoot NTeleportation HeliControl Economics Server Rewards IQEconomic Kits Chat commands (only for administrators) /harborstart – starting of the event /harborstop – ending of the event /harborpos – determining the position and rotation coordinates for changing the location of NPCs and crates.It should write in the configuration (Attention! The event must be started, the current position of the administrator in relation to the cargoship is read) Console commands (RCON only) harborstart – starting of the event harborstop – ending of the event Plugin Config en - example of plugin configuration in English ru - example of plugin configuration in Russian Hooks void OnHarborEventStart() – called when the event starts void OnHarborEventEnd() – called when the event ends void OnHarborEventWinner(ulong winnerId) – called at the end of the event, where the winnerId is the player who did more actions to complete the event My Discord: KpucTaJl#8923 Join the Mad Mappers Discord here! Check out more of my work here!$35.00 -
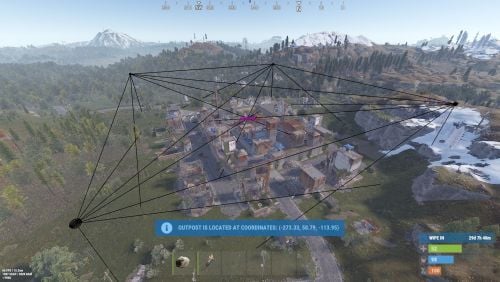
Version 0.1.6
635 downloads
A plugin that allows other plugins to interact with players and entities in monuments via API. The list of all monuments can be viewed in the: Default(Source of monument boundaries when changing the map or recreating boundaries) - *SERVER*\oxide\data\MonumentsWatcher\DefaultBounds.json Vanilla - *SERVER*\oxide\data\MonumentsWatcher\MonumentsBounds.json Custom - *SERVER*\oxide\data\MonumentsWatcher\CustomMonumentsBounds.json Note: MonumentsWatcher is utilized as an API for other plugins. You won't obtain any functionality beyond displaying monument boundaries without an additional plugin. The ability to automatically generate boundaries for vanilla and custom monuments; The ability to automatically regenerate boundaries for monuments on wipe; The ability to automatically adding languages for custom monuments; The ability to manually configure boundaries for monuments; The ability to track the entrance and exit of players, npcs and entities in a Monument and CargoShip; The ability to display boundaries. monumentswatcher.admin - Provides the capability to recreate or display monument boundaries. { "Chat command": "monument", "Is it worth enabling GameTips for messages?": true, "Is it worth recreating boundaries(excluding custom monuments) upon detecting a wipe?": true, "List of tracked categories of monuments. Leave blank to track all": [], "Wipe ID": null, "Version": { "Major": 0, "Minor": 1, "Patch": 7 } } Note: The list of available categories for monuments can be found in the Developer API section. ENG: https://pastebin.com/nsjBCqZe RUS: https://pastebin.com/ut2icv9T Note: After the plugin initialization, keys for custom monuments will be automatically added. show *monumentID*(optional) *floatValue*(optional) - Display the boundary of the monument you are in or specified. The display will last for the specified time or 30 seconds; list - List of available monuments; rotate *monumentID*(optional) *floatValue*(optional) - Rotate the monument you are in or specified, either in the direction you are looking or in the specified direction; recreate custom/all(optional) - Recreate the boundaries of vanilla/custom/all monuments. Note: Instead of a monumentID, you can leave it empty, but you must be inside a monument. You can also use the word 'closest' to select the nearest monument to you. Example: /monument show closest /monument show gas_station_1 /monument show gas_station_1_4 /monument rotation /monument rotation closest /monument rotation gas_station_1_0 256.5 /monument recreate void OnMonumentsWatcherLoaded() Called after the MonumentsWatcher plugin is fully loaded and ready. void OnCargoWatcherCreated(string monumentID, string type) Called when a watcher is created for a CargoShip. void OnCargoWatcherDeleted(string monumentID) Called when a watcher is removed for a CargoShip. void OnMonumentsWatcherLoaded() { Puts("MonumentsWatcher plugin is ready!"); } void OnCargoWatcherCreated(string monumentID, string type) { Puts($"Watcher for monument {monumentID}({type}) has been created!"); } void OnCargoWatcherDeleted(string monumentID) { Puts($"Watcher for monument {monumentID} has been deleted!"); } Entered hooks: void OnPlayerEnteredMonument(string monumentID, BasePlayer player, string type, string oldMonumentID) Called when a player enters any monument. void OnNpcEnteredMonument(string monumentID, BasePlayer npcPlayer, string type, string oldMonumentID) Called when an NPC player enters any monument. void OnEntityEnteredMonument(string monumentID, BaseEntity entity, string type, string oldMonumentID) Called when any other BaseEntity enters any monument. void OnPlayerEnteredMonument(string monumentID, BasePlayer player, string type, string oldMonumentID) { Puts($"{player.displayName} entered to {monumentID}({type}). His previous monument was {oldMonumentID}"); } void OnNpcEnteredMonument(string monumentID, BasePlayer npcPlayer, string type, string oldMonumentID) { Puts($"Npc({npcPlayer.displayName}) entered to {monumentID}({type}). Previous monument was {oldMonumentID}"); } void OnEntityEnteredMonument(string monumentID, BaseEntity entity, string type, string oldMonumentID) { Puts($"Entity({entity.net.ID}) entered to {monumentID}({type}). Previous monument was {oldMonumentID}"); } Exited hooks: void OnPlayerExitedMonument(string monumentID, BasePlayer player, string type, string reason, string newMonumentID) Called when a player exits any monument. void OnNpcExitedMonument(string monumentID, BasePlayer npcPlayer, string type, string reason, string newMonumentID) Called when an NPC player exits any monument. void OnEntityExitedMonument(string monumentID, BaseEntity entity, string type, string reason, string newMonumentID) Called when any other BaseEntity exits any monument. void OnPlayerExitedMonument(string monumentID, BasePlayer player, string type, string reason, string newMonumentID) { Puts($"{player.displayName} left from {monumentID}({type}). Reason: {reason}. They are now at '{newMonumentID}'."); } void OnNpcExitedMonument(string monumentID, BasePlayer npcPlayer, string type, string reason, string newMonumentID) { Puts($"Npc({npcPlayer.displayName}) left from {monumentID}({type}). Reason: {reason}. They are now in {newMonumentID}"); } void OnEntityExitedMonument(string monumentID, BaseEntity entity, string type, string reason, string newMonumentID) { Puts($"Entity({entity.net.ID}) left from {monumentID}({type}). Reason: {reason}. They are now in {newMonumentID}"); } [PluginReference] private Plugin MonumentsWatcher; There are 13 types of monuments: SafeZone(0): Bandit Camp, Outpost, Fishing Village, Ranch and Large Barn. RadTown(1): Airfield, Arctic Research Base, Abandoned Military Base, Giant Excavator Pit, Ferry Terminal, Harbor, Junkyard, Launch Site; Military Tunnel, Missile Silo, Power Plant, Sewer Branch, Satellite Dish, The Dome, Toxic Village(Legacy Radtown), Train Yard, Water Treatment Plant. RadTownWater(2): Oil Rigs, Underwater Labs and CargoShip. RadTownSmall(3): Lighthouse, Oxum's Gas Station, Abandoned Supermarket and Mining Outpost. TunnelStation(4) MiningQuarry(5): Sulfur Quarry, Stone Quarry and HQM Quarry. BunkerEntrance(6) Cave(7) Swamp(8) IceLake(9) PowerSubstation(10) WaterWell(11) Custom(12) There are 25 api methods: GetAllMonuments: Used to retrieve an array of IDs for all available monuments. (string[])(MonumentsWatcher?.Call("GetAllMonuments") ?? Array.Empty<string>()); GetAllMonumentsCategories: Used to retrieve a dictionary of IDs and categories for all available monuments. (Dictionary<string, string>)(MonumentsWatcher?.Call("GetAllMonumentsCategories") ?? new Dictionary<string, string>()); GetMonumentsByCategory: Used to retrieve all available monuments by category. To call the GetMonumentsByCategory method, you need to pass 1 parameter: monument category as a string. (string[])(MonumentsWatcher?.Call("GetMonumentsByCategory", "SafeZone") ?? Array.Empty<string>()); GetMonumentCategory: Used to retrieve the category of the specified monument. Returns an empty string on failure. To call the GetMonumentCategory method, you need to pass 1 parameter: monumentID as a string. (string)(MonumentsWatcher?.Call("GetMonumentCategory", monumentID) ?? string.Empty); GetMonumentDisplayName: Used to retrieve the nicename of a monument in the player's language. Returns an empty string on failure. To call the GetMonumentDisplayName method, you need to pass 3 parameters: monumentID as a string; Available options: userID as a ulong or a string; player as a BasePlayer or an IPlayer. displaySuffix as a bool. Should the suffix be displayed in the name if there are multiple such monuments? This parameter is optional. (string)(MonumentsWatcher?.Call("GetMonumentDisplayName", monumentID, player.userID, true) ?? string.Empty);//(ulong)userID (string)(MonumentsWatcher?.Call("GetMonumentDisplayName", monumentID, player, true) ?? string.Empty);//(BasePlayer/IPlayer)player (string)(MonumentsWatcher?.Call("GetMonumentDisplayName", monumentID, player.UserIDString, true) ?? string.Empty);//(string)userID ***recommended option*** GetMonumentDisplayNameByLang: Used to retrieve the nicename of a monument in the specified language. Returns an empty string on failure. To call the GetMonumentDisplayNameByLang method, you need to pass 3 parameters: monumentID as a string; two-char language as a string; displaySuffix as a bool. Should the suffix be displayed in the name if there are multiple such monuments? This parameter is optional. (string)(MonumentsWatcher?.Call("GetMonumentDisplayNameByLang", monumentID, "en", true) ?? string.Empty); GetMonumentPosition: Used to retrieve the Vector3 position of the specified monument. Returns Vector3.zero on failure. To call the GetMonumentPosition method, you need to pass 1 parameter: monumentID as a string. (Vector3)(MonumentsWatcher?.Call("GetMonumentPosition", monumentID) ?? Vector3.zero); GetMonumentByPos: Used to retrieve the monument at the specified position. Returns an empty string on failure. To call the GetMonumentByPos method, you need to pass 1 parameter: position as a Vector3. (string)(MonumentsWatcher?.Call("GetMonumentByPos", pos) ?? string.Empty); Note: This method returns the first encountered monument. Occasionally, there may be multiple monuments at a single point. Therefore, it is recommended to use the GetMonumentsByPos method. GetMonumentsByPos: Used to retrieve all monuments at the specified position. Returns null on failure. To call the GetMonumentsByPos method, you need to pass 1 parameter: position as a Vector3. (string[])(MonumentsWatcher?.Call("GetMonumentsByPos", pos) ?? Array.Empty<string>()); GetClosestMonument: Used to retrieve the nearest monument to the specified position. Returns an empty string on failure. To call the GetClosestMonument method, you need to pass 1 parameter: position as a Vector3. (string)(MonumentsWatcher?.Call("GetClosestMonument", pos) ?? string.Empty); IsPosInMonument: Used to check whether the specified position is within the specified monument. Returns a false on failure. To call the IsPosInMonument method, you need to pass 2 parameters: monumentID as a string; position as a Vector3. (bool)(MonumentsWatcher?.Call("IsPosInMonument", monumentID, pos) ?? false); ShowBounds: Used to display the boundaries of the specified monument to the specified player. To call the ShowBounds method, you need to pass 3 parameters: monumentID as a string; player as a BasePlayer; displayDuration as a float. Duration of displaying the monument boundaries in seconds. This parameter is optional. MonumentsWatcher?.Call("ShowBounds", monumentID, player, 20f); Note: Since an Admin flag is required for rendering, players without it will be temporarily granted an Admin flag and promptly revoked. PLAYERS API GetMonumentPlayers: Used to retrieve an array of all players located in the specified monument. Returns null on failure. To call the GetMonumentPlayers method, you need to pass 1 parameter: monumentID as a string. (BasePlayer[])(MonumentsWatcher?.Call("GetMonumentPlayers", monumentID) ?? Array.Empty<BasePlayer>()); GetPlayerMonument: Used to retrieve the monument in which the specified player is located. Returns an empty string on failure. To call the GetPlayerMonument method, you need to pass 1 parameter: Available options: player as a BasePlayer; userID as a ulong or a string. (string)(MonumentsWatcher?.Call("GetPlayerMonument", player.UserIDString) ?? string.Empty);//(string)userID (string)(MonumentsWatcher?.Call("GetPlayerMonument", player) ?? string.Empty);//(BasePlayer)player (string)(MonumentsWatcher?.Call("GetPlayerMonument", player.userID) ?? string.Empty);//(ulong)userID ***recommended option*** GetPlayerMonuments: Used to retrieve all monuments in which the specified player is located. Returns null on failure. To call the GetPlayerMonuments method, you need to pass 1 parameter: Available options: player as a BasePlayer; userID as a ulong or a string. (string[])(MonumentsWatcher?.Call("GetPlayerMonuments", player.UserIDString) ?? Array.Empty<string>());//(string)userID (string[])(MonumentsWatcher?.Call("GetPlayerMonuments", player) ?? Array.Empty<string>());//(BasePlayer)player (string[])(MonumentsWatcher?.Call("GetPlayerMonuments", player.userID) ?? Array.Empty<string>());//(ulong)userID ***recommended option*** GetPlayerClosestMonument: Used to retrieve the nearest monument to the specified player. Returns an empty string on failure. To call the GetPlayerClosestMonument method, you need to pass 1 parameter: Available options: player as a BasePlayer; userID as a ulong or a string. (string)(MonumentsWatcher?.Call("GetPlayerClosestMonument", player.UserIDString) ?? string.Empty);//(string)userID (string)(MonumentsWatcher?.Call("GetPlayerClosestMonument", player.userID) ?? string.Empty);//(ulong)userID (string)(MonumentsWatcher?.Call("GetPlayerClosestMonument", player) ?? string.Empty);//(BasePlayer)player ***recommended option*** IsPlayerInMonument: Used to check whether the specified player is in the specified monument. Returns a false on failure. To call the IsPlayerInMonument method, you need to pass 2 parameters: monumentID as a string; Available options: player as a BasePlayer; userID as a ulong or a string. (bool)(MonumentsWatcher?.Call("IsPlayerInMonument", monumentID, player.UserIDString) ?? false);//(string)userID (bool)(MonumentsWatcher?.Call("IsPlayerInMonument", monumentID, player) ?? false);//(BasePlayer)player (bool)(MonumentsWatcher?.Call("IsPlayerInMonument", monumentID, player.userID) ?? false);//(ulong)userID ***recommended option*** NPCS API GetMonumentNpcs: Used to retrieve an array of all npcs located in the specified monument. Returns null on failure. To call the GetMonumentNpcs method, you need to pass 1 parameter: monumentID as a string. (BasePlayer[])(MonumentsWatcher?.Call("GetMonumentNpcs", monumentID) ?? Array.Empty<BasePlayer>()); GetNpcMonument: Used to retrieve the monument in which the specified npc is located. Returns an empty string on failure. To call the GetNpcMonument method, you need to pass 1 parameter: Available options: npcPlayer as a BasePlayer; netID as a NetworkableId. (string)(MonumentsWatcher?.Call("GetNpcMonument", npcPlayer) ?? string.Empty);//(BasePlayer)npcPlayer (string)(MonumentsWatcher?.Call("GetNpcMonument", npcPlayer.net.ID) ?? string.Empty);//(NetworkableId)netID ***recommended option*** GetNpcMonuments: Used to retrieve all monuments in which the specified npc is located. Returns null on failure. To call the GetNpcMonuments method, you need to pass 1 parameter: Available options: npcPlayer as a BasePlayer; netID as a NetworkableId. (string[])(MonumentsWatcher?.Call("GetNpcMonuments", npcPlayer) ?? Array.Empty<string>());//(BasePlayer)npcPlayer (string[])(MonumentsWatcher?.Call("GetNpcMonuments", npcPlayer.net.ID) ?? Array.Empty<string>());//(NetworkableId)netID ***recommended option*** IsNpcInMonument: Used to check whether the specified npc is in the specified monument. Returns a false on failure. To call the IsNpcInMonument method, you need to pass 2 parameters: monumentID as a string; Available options: npcPlayer as a BasePlayer; netID as a NetworkableId. (bool)(MonumentsWatcher?.Call("IsNpcInMonument", monumentID, npcPlayer.net.ID) ?? false);//(NetworkableId)netID (bool)(MonumentsWatcher?.Call("IsNpcInMonument", monumentID, npcPlayer) ?? false);//(BasePlayer)npcPlayer ***recommended option*** ENTITIES API GetMonumentEntities: Used to retrieve an array of all entities located in the specified monument. Returns null on failure. To call the GetMonumentEntities method, you need to pass 1 parameter: monumentID as a string. (BaseEntity[])(MonumentsWatcher?.Call("GetMonumentEntities", monumentID) ?? Array.Empty<BaseEntity>()); GetEntityMonument: Used to retrieve the monument in which the specified entity is located. Returns an empty string on failure. To call the GetEntityMonument method, you need to pass 1 parameter: Available options: entity as a BaseEntity; netID as a NetworkableId. (string)(MonumentsWatcher?.Call("GetEntityMonument", entity) ?? string.Empty);//(BaseEntity)entity (string)(MonumentsWatcher?.Call("GetEntityMonument", entity.net.ID) ?? string.Empty);//(NetworkableId)netID ***recommended option*** GetEntityMonuments: Used to retrieve all monuments in which the specified entity is located. Returns null on failure. To call the GetEntityMonuments method, you need to pass 1 parameter: Available options: entity as a BaseEntity; netID as a NetworkableId. (string[])(MonumentsWatcher?.Call("GetEntityMonuments", entity) ?? Array.Empty<string>());//(BaseEntity)entity (string[])(MonumentsWatcher?.Call("GetEntityMonuments", entity.net.ID) ?? Array.Empty<string>());//(NetworkableId)netID ***recommended option*** IsEntityInMonument: Used to check whether the specified entity is in the specified monument. Returns a false on failure. To call the IsEntityInMonument method, you need to pass 2 parameters: monumentID as a string; Available options: entity as a BaseEntity; netID as a NetworkableId. (bool)(MonumentsWatcher?.Call("IsEntityInMonument", monumentID, entity.net.ID) ?? false);//(NetworkableId)netID (bool)(MonumentsWatcher?.Call("IsEntityInMonument", monumentID, entity) ?? false);//(BaseEntity)entity ***recommended option***Free -

Version 1.0.0
210 downloads
Introducing the AutoBan plugin for Rust servers - a powerful and efficient tool for managing and controlling player behavior on your server. This plugin is designed to help server owners and administrators keep their servers running smoothly and free from rule-breaking players. AutoBan's key features include: Automatic banning of players based on the number of reports they have received: If a player exceeds a certain number of reports (configurable by the server owner), they will be automatically banned with a customizable reason message. Mass Reporting Protection: Prevents players from abusing the report system by implementing safeguards against mass reporting, including cooldown periods, limits on the number of reports a player can submit or receive within a specific time frame, and ensuring only unique reports are counted. Processing F7 (In-Game) Reports: Fully integrates with Rust's F7 report system, capturing and processing reports submitted through the in-game interface, ensuring they are counted towards a player's total reports, and sent to Discord if configured. Player-Friendly Reporting System: Allows players to choose from a list of available report reasons when reporting another player, making the reporting process more user-friendly and consistent. Customizable reason messages for bans: Server owners can customize the message shown to players when they are banned. Valid report reasons that can be set by the server owner: Define which reasons are considered valid for triggering automatic bans. Option to broadcast ban messages to the chat: Choose whether to publicly announce when a player has been banned. Ignored players list: Allows certain players (e.g., admins) to be excluded from automatic banning. Timer for broadcasting bans to administrators and console: Set a timer to periodically broadcast current bans to admins and console. Chat commands and console commands for managing reports and bans: Provides a suite of commands for administrators to manage the plugin's functionality. Permissions system for controlling who can access the plugin's features: Granular permissions allow precise control over who can report, view reports, ban, unban, etc. Detailed logging of all bans and reports: Keeps comprehensive records of all actions taken by the plugin. Discord Alerts: Sends notifications of reports and bans to specified Discord channels via webhooks. Option to send reports to a URL: Integrate with external systems by sending report data to a specified URL. Timed bans: Allows for bans to be temporary, based on a configurable time period. Usage: CHAT COMMANDS: /report <username> Initiate a report against a player. If no reason is specified, a list of valid reasons will be presented for selection. /report <username> <reason> Report a player with a specified reason. /reportreason <number> After initiating a report without a reason, use this command to select a reason from the presented list. /AB.viewreports View all current reports (requires permission). /AB.ban <user> <reason> Manually ban a player with a specified reason (requires permission). /AB.unban <user> Unban a player (requires permission). /AB.showbans View all current bans (requires permission). /AB.resetreports <userid> Reset the reports for a specific player (requires permission). CONSOLE COMMANDS: AB.getreports Display all current reports in the console. AB.getbans Display all current bans in the console. AB.resetreportsConsole <userid> Reset the reports for a specific player via console. AB.ban <userid> <reason> Manually ban a player via console. AB.unban <userid> Unban a player via console. OXIDE PERMISSIONS: AutoBan.report Allows a player to report others via the F7 menu (in-game reports). AutoBan.chatreport Allows a player to report others via chat commands. AutoBan.viewreports Allows viewing of all reports. AutoBan.ignore Excludes a player from being automatically banned (e.g., for admins). AutoBan.ban Allows a player to manually ban others. AutoBan.unban Allows a player to unban others. AutoBan.viewbans Allows viewing of all bans. AutoBan.resetreports Allows resetting reports for a player. AutoBan.tester Special permission that allows a player to report the same player multiple times (useful for testing). CONFIG: { "Max reports till user gets banned": 5, "Reason given to banned user": "You have been reported too many times, and have been banned for precautionary measures. An admin will review this suspension soon.", "Valid reasons *searches subject title and message of the report* (To make sure report is scanned, add different variations of reason; like cheat, cheater, cheating, cheats, etc.)": [ "cheating", "cheats", "hacks", "aimbot", "hacking", "esp", "teaming", "racism", "griefing", "walling", "doorcamping", "spawn killing" ], "Valid report types": [ "cheat", "abusive", "name", "spam" ], "Scan type of F7 reports": true, "Broadcast ban to chat": true, "Ignored Players *Steam ID's Only*": { "76561198000000000": "Admin" }, "Timer for broadcasting bans to admins and console": 820, "Send bans to users with the AutoBan.viewbans permission based on timer (In-Game)": false, "Send reports to URL": false, "URL to send reports to": "http://example.com", "Send reports to Discord": false, "Send bans to Discord": false, "Discord Reports Webhook URL": "http://example.com", "Discord Bans Webhook URL": "http://example.com", "Ban Timer (In hours or 'permanent')": "72", "Max reports a player can submit per hour": 3, "Max reports a player can receive per hour": 5, "Cooldown between reports from the same player in minutes": 10 }$24.99 -

Version 0.1.4
281 downloads
Plugin rewarding players for their in-game activity. The ability to receive rewards for gathering resources; The ability to receive rewards for: killing players and NPCs; destroying barrels, road signs and dead logs; The ability to receive rewards for the first opening of loot crates; The ability to receive rewards for collecting resources; The ability to receive rewards for planting plants; The ability to receive rewards for catching fishes; The ability to reward with in-game items; The ability to use AdvancedStatus to display a status bar with highly flexible settings. { "Is it worth using the AdvancedStatus plugin?": true, "Is it worth enabling the Gather Rewards?": true, "Is it worth enabling the Kill Rewards?": true, "Is it worth enabling the Loot Open Rewards?": true, "Is it worth enabling the Pickup Rewards?": true, "Is it worth enabling the Planting Rewards?": true, "Is it worth enabling the Fishing Rewards?": true, "List of reward multipliers for each permission": { "realpve.default": 1.0, "realpve.vip": 1.1 }, "The list of economy plugins for rewards": { "Economics": { "Is it worth enabling the plugin for rewards?": true, "Reward Type: true - int, false - double": false, "Language key for the text": "MsgEconomics", "API method name for deposit": "Deposit", "API method name for withdraw": "Withdraw", "BarSettings": { "Order": 20, "Height": 26, "Main_Color(Hex or RGBA)": "#84AB49", "Main_Transparency": 0.8, "Main_Material(empty to disable)": "", "Image_Url": "https://i.imgur.com/k8jq7yY.png", "Image_Local(Leave empty to use Image_Url)": "ActivityRewards_Default", "Image_Sprite(Leave empty to use Image_Local or Image_Url)": "", "Image_IsRawImage": false, "Image_Color(Hex or RGBA)": "#B9D134", "Image_Transparency": 1.0, "Is it worth enabling an outline for the image?": false, "Image_Outline_Color(Hex or RGBA)": "0.1 0.3 0.8 0.9", "Image_Outline_Transparency": 1.0, "Image_Outline_Distance": "0.75 0.75", "Text_Size": 12, "Text_Color(Hex or RGBA)": "#DAEBAD", "Text_Font(https://umod.org/guides/rust/basic-concepts-of-gui#fonts)": "RobotoCondensed-Bold.ttf", "Text_Offset_Horizontal": 0, "Is it worth enabling an outline for the text?": false, "Text_Outline_Color(Hex or RGBA)": "#000000", "Text_Outline_Transparency": 1.0, "Text_Outline_Distance": "0.75 0.75", "SubText_Size": 12, "SubText_Color(Hex or RGBA)": "#DAEBAD", "SubText_Font": "RobotoCondensed-Bold.ttf", "Is it worth enabling an outline for the sub text?": false, "SubText_Outline_Color(Hex or RGBA)": "0.5 0.6 0.7 0.5", "SubText_Outline_Transparency": 1.0, "SubText_Outline_Distance": "0.75 0.75" } }, "ServerRewards": { "Is it worth enabling the plugin for rewards?": true, "Reward Type: true - int, false - double": true, "Language key for the text": "MsgServerRewards", "API method name for deposit": "AddPoints", "API method name for withdraw": "TakePoints", "BarSettings": { "Order": 20, "Height": 26, "Main_Color(Hex or RGBA)": "#84AB49", "Main_Transparency": 0.8, "Main_Material(empty to disable)": "", "Image_Url": "https://i.imgur.com/k8jq7yY.png", "Image_Local(Leave empty to use Image_Url)": "ActivityRewards_Default", "Image_Sprite(Leave empty to use Image_Local or Image_Url)": "", "Image_IsRawImage": false, "Image_Color(Hex or RGBA)": "#B9D134", "Image_Transparency": 1.0, "Is it worth enabling an outline for the image?": false, "Image_Outline_Color(Hex or RGBA)": "0.1 0.3 0.8 0.9", "Image_Outline_Transparency": 1.0, "Image_Outline_Distance": "0.75 0.75", "Text_Size": 12, "Text_Color(Hex or RGBA)": "#DAEBAD", "Text_Font(https://umod.org/guides/rust/basic-concepts-of-gui#fonts)": "RobotoCondensed-Bold.ttf", "Text_Offset_Horizontal": 0, "Is it worth enabling an outline for the text?": false, "Text_Outline_Color(Hex or RGBA)": "#000000", "Text_Outline_Transparency": 1.0, "Text_Outline_Distance": "0.75 0.75", "SubText_Size": 12, "SubText_Color(Hex or RGBA)": "#DAEBAD", "SubText_Font": "RobotoCondensed-Bold.ttf", "Is it worth enabling an outline for the sub text?": false, "SubText_Outline_Color(Hex or RGBA)": "0.5 0.6 0.7 0.5", "SubText_Outline_Transparency": 1.0, "SubText_Outline_Distance": "0.75 0.75" } }, "BankSystem": { "Is it worth enabling the plugin for rewards?": true, "Reward Type: true - int, false - double": true, "Language key for the text": "MsgBankSystem", "API method name for deposit": "Deposit", "API method name for withdraw": "Withdraw", "BarSettings": { "Order": 20, "Height": 26, "Main_Color(Hex or RGBA)": "#84AB49", "Main_Transparency": 0.8, "Main_Material(empty to disable)": "", "Image_Url": "https://i.imgur.com/k8jq7yY.png", "Image_Local(Leave empty to use Image_Url)": "ActivityRewards_Default", "Image_Sprite(Leave empty to use Image_Local or Image_Url)": "", "Image_IsRawImage": false, "Image_Color(Hex or RGBA)": "#B9D134", "Image_Transparency": 1.0, "Is it worth enabling an outline for the image?": false, "Image_Outline_Color(Hex or RGBA)": "0.1 0.3 0.8 0.9", "Image_Outline_Transparency": 1.0, "Image_Outline_Distance": "0.75 0.75", "Text_Size": 12, "Text_Color(Hex or RGBA)": "#DAEBAD", "Text_Font(https://umod.org/guides/rust/basic-concepts-of-gui#fonts)": "RobotoCondensed-Bold.ttf", "Text_Offset_Horizontal": 0, "Is it worth enabling an outline for the text?": false, "Text_Outline_Color(Hex or RGBA)": "#000000", "Text_Outline_Transparency": 1.0, "Text_Outline_Distance": "0.75 0.75", "SubText_Size": 12, "SubText_Color(Hex or RGBA)": "#DAEBAD", "SubText_Font": "RobotoCondensed-Bold.ttf", "Is it worth enabling an outline for the sub text?": false, "SubText_Outline_Color(Hex or RGBA)": "0.5 0.6 0.7 0.5", "SubText_Outline_Transparency": 1.0, "SubText_Outline_Distance": "0.75 0.75" } } }, "Version": { "Major": 0, "Minor": 1, "Patch": 4 } } Setting up rewards for each action occurs in the respective files within this folder *SERVER*\oxide\data\ActivityRewards PluginInt for: BankSystem and ServerRewards; PluginDouble for: Economics. You can also set the reward to 0 to disable the reward. "fish.smallshark": { "PluginInt": 50, "PluginDouble": 5.0, "ItemsList": [ { "ShortName": "scrap", "Amount": 10, "SkinId": 0 } ] } EN: { "MsgEconomics": "Bonus", "MsgServerRewards": "Bonus", "MsgBankSystem": "Bonus" } RU: { "MsgEconomics": "Бонус", "MsgServerRewards": "Бонус", "MsgBankSystem": "Бонус" }$3.99 -

Version 1.7.0
1,543 downloads
Never worry about your players fighting over a monument, make them compete for ownership! With this plugin you can configure several parameters then players can compete to claim a monument for a set time. There is enough configuration and options that this would work well for any server, whether PvE or PvP. Video Description This plugin will automatically find Facepunch standard monuments, including Cargo Ship and Oil Rigs that are on the map, and which can be specified in the configuration. This will create a zone around each monument in which customizable rules apply for anyone coming to the monument, whether they become owner or not. You can also create a zone using coordinates anywhere on the map, and assign certain rules to it. Chat Command (For all players) mocd - Displays all cooldowns for the player Chat Command (For Admins) mocreatecustomzone {name} - Creates a file for a custom zone in the Data/MM_Data/MonumentOwner/Custom Zones folder with the administrator position at the time of file creation moshowid - Creates a mark for the administrator that displays the ID of each zone on the map modrawedges - Shows the administrator the boundaries of each square zone on the map (used to set up such zones) Console Command (RCON only) mocdreset {SteamID64} - Resets all cooldowns for the player mogetcd {SteamID64} - Outputs information to the console with all the cooldowns of the player Plugin Config example of a configuration for monuments sample configuration for the plugin HOOKS void OnPlayerEnteredMonument(BasePlayer playerEntered, Vector3 zonePos, float zoneRadius) - called when the player has entered the zone after all checks void OnPlayerExitedMonument(BasePlayer playerEntered, Vector3 zonePos, float zoneRadius) - called when the player is exited of the zone API The answer true or false will tell whether there is a zone in this coordinate private bool HasZone(Vector3 posMonument) The answer true or false will tell whether the zone belongs to someone private bool HasOwner(Vector3 posMonument) The answer BasePlayer will tell who the zone belongs to private BasePlayer GetOwner(Vector3 posMonument) The answer true or false will tell whether the player can become the owner private bool CanPlayerBecomeOwner(Vector3 posMonument, BasePlayer player) Forcibly establishes the owner of the zone, bypassing checks on his ability to become the owner. The answer true or false will tell whether he was able to become one or the zone is occupied by another player private bool SetOwner(Vector3 posMonument, BasePlayer player) Deletes a zone. The answer true or false will tell whether he was able to do it private bool RemoveZone(MonumentInfo monument) Creates a zone for the desired monument. The answer true or false will tell whether he was able to do it private bool CreateZone(MonumentInfo monument) Translation assistance by Jbird. Check out more of my work here JTedal's library. Come see our whole teams work Mad Mapper Library. Come by the Mad Mapper Discord for support, feedback, or suggestions!$26.99- 156 comments
- 7 reviews
-
- 9
-

-
-
-

-
- #jtedal
- #mad mappers
- (and 7 more)
-
Version 1.1.1
120 downloads
Adds a marketplace terminal to each tool cupboard. This way, players can buy items without leaving home. The plugin is easy to install on your server; no additional settings are needed. You can also change the delivery fee (but the player must still have an additional 20 scrap in their inventory) This plugin uses the permission system Permissions: homeMarketplace.use - required to be able to use the marketplace To assign a permission, use: oxide.grant <user or group> <name or steam id> homeMarketplace.use To remove a permission, use: oxide.revoke <user or group> <name or steam id> homeMarketplace.use Config: { "Terminal offset": { "x": 0.42, "y": 0.68, "z": 0.3 }, "Delivery fee": 20 }$9.99 -

Version 1.0.5
41 downloads
Allows you to place explosives inside the drone, this makes it a kamikaze drone. Just put a regular drone on the ground, you will see a small stash attached to it. Put explosives inside the small stash. Control it like a regular drone using a computer station and attack your enemies. Almost all types of explosives are supported, the plugin is ready to work right away. The plugin is also easy to configure. Config: { "Explosive list(short names of explosive items that can be placed in a drone)": [ "ammo.grenadelauncher.he", "ammo.grenadelauncher.smoke", "supply.signal", "ammo.rocket.mlrs", "explosive.timed", "ammo.rocket.basic", "ammo.rocket.hv", "ammo.rocket.fire", "grenade.smoke", "grenade.beancan", "explosive.satchel", "grenade.f1", "grenade.flashbang", "grenade.molotov", "surveycharge", "ammo.rocket.sam" ], "Sensitivity(if the drone is damaged by this amount, detonation will occur)": 5, "Prohibitory message": "You can't put this item here" }$9.99-
- 1
-
-
- #oxide
- #oxiderust
- (and 15 more)
-
Version 1.0.2
46 downloads
Adds an exciting event for players to your server. Once the event starts, players will be able to get more loot by mining ore and finding small stashes with loot underneath it. The event has an interface with a table. The event is easily configured and can be triggered automatically or by command. You can reward the winners with special prizes, for example, an item with a unique name and skin (only for items with stacks of size 1). Commands (admin only): /mie_start - starts an event /mie_stop - starts an event /mie_forcestart - force the event to start Config: { "Autostart event(disable if you want to trigger the event only manually)": true, "Minimum time to event start(in seconds)": 900, "Maximum time to event start(in seconds)": 10800, "Minimum event duration(in seconds)": 300, "Maximum event duration(in seconds)": 900, "Minimum number of online players to trigger an event": 1, "Pre-event message": "Mining event will start in a minute", "Pre-event message time(in seconds)": 60, "Event message": "Mining event has started, go and get all the ore!", "End event message": "Mining event ended", "Display a table with player names": true, "Resource multiplier during the event": 2.0, "Spawn a small stash under the ore": true, "Small stash items list": [ { "prefabName": "scrap", "dropChance": 100, "min": 4, "max": 8, "skinID": 0, "displayName": "" }, { "prefabName": "metal.fragments", "dropChance": 100, "min": 100, "max": 200, "skinID": 0, "displayName": "" } ], "Small stash removal time(in seconds)": 60, "First place prize(items list)": [ { "prefabName": "scrap", "dropChance": 100, "min": 200, "max": 400, "skinID": 0, "displayName": "" }, { "prefabName": "metal.fragments", "dropChance": 100, "min": 1000, "max": 2000, "skinID": 0, "displayName": "" }, { "prefabName": "rifle.ak", "dropChance": 10, "min": 1, "max": 1, "skinID": 809190373, "displayName": "AK" } ], "Second place prize(items list)": [ { "prefabName": "scrap", "dropChance": 100, "min": 100, "max": 200, "skinID": 0, "displayName": "" }, { "prefabName": "metal.fragments", "dropChance": 100, "min": 500, "max": 1000, "skinID": 0, "displayName": "" } ], "Third place prize(items list)": [ { "prefabName": "scrap", "dropChance": 100, "min": 50, "max": 100, "skinID": 0, "displayName": "" }, { "prefabName": "metal.fragments", "dropChance": 100, "min": 250, "max": 500, "skinID": 0, "displayName": "" } ] }$9.99 -

Version 1.0.2
63 downloads
Displays the name of the zone the player is in. You can customize text, text color, background color, etc. This plugin takes information about zones from zonemanager, all information is saved in a config file, after which you can customize information about these zones, which will be displayed Commands: /rzinfo - update zone information Config file: { "Settings outside the zone": { "Id": "0", "Name": "Outside", "AnchorMin": "0.649 0.041", "AnchorMax": "0.695 0.081", "Color_Background": "0.1 0.1 0.8 0.8", "Color_Text": "1 1 1 1", "TextSize": "16", "TextPlaceHolder": "Outside" }, "Default settings for the new zone": { "Id": "0", "Name": "Default", "AnchorMin": "0.649 0.041", "AnchorMax": "0.695 0.081", "Color_Background": "0.1 0.8 0.1 0.8", "Color_Text": "1 1 1 1", "TextSize": "16", "TextPlaceHolder": "Default" }, "Zones list": [] }$4.99 -

Version 1.0.3
44 downloads
Adds hacker kit to the server. Just pick up a geiger counter and use it to hack. Just get close to the crate and hold the left mouse button. This plugin uses a geiger counter. Since this is not an item that players can usually get through loot, it is perfect for this purpose. Just use a plugin like BetterLoot to insert a geiger counter into your loot tables and then any geiger counter picked up by the player can be used as a hacker kit. Permissions: hackerkit.use - required to use hacker kit To assign a permission, use: oxide.grant <user or group> <name or steam id> hackerkit.use To remove a permission, use: oxide.revoke <user or group> <name or steam id> hackerkit.use (or just use the permission manager plugin) Config file: { "Hack speed": 10, "Prohibition message": "You don't have permission to use hackerkit", "SFX prefab": "assets/prefabs/gamemodes/objects/capturepoint/effects/capturepoint_progress_beep.prefab" }$9.99 -

Version 2.0.170
7,644 downloads
Carbon is a self-updating, lightweight framework for Rust offering the best performance and stability possible. It's backwards compatibility Oxide data files and plugins make it the ultimate replacement for those wanting more from their plugins with less headache and performance overhead. Why use Carbon Carbon manages hooks in memory, instead of having to physically patch server files like Oxide does. This allows you to freely update the server without having to update Carbon, and the convenient fact that a Carbon update is rarely required, even if a new server update is released. It has much better performance thanks to dynamic hooks, which allows Carbon to dynamically load and unload hooks depending on the plugins you're running, instead of having over 800 hooks invoking that aren't being used. In addition to our full-time development team, we're able to hyper-optimize everything to ensure the best performance possible. Switching from Oxide This process is very simple thanks to our backwards compatibility and automatic migration when you boot the server with Carbon for the first time. It automatically copies all of your Oxide user and user data files, plugins, plugin configs, plugin data files, extensions and Harmony patches over to the managed Carbon directory. It's as easy as installing Carbon and letting it work! Automatic migration to Carbon Manual migration to Carbon More Reasons to Switch Carbon is free and will always be free Extremely lightweight Seamless migration from Oxide MySQL and SQLite user permission and data support Built-in modules maintained by the Carbon team to ensure essentials plugins are always ready for the big update Accurate and detailed error logging (No more incorrect stack traces. Find the issue quickly.) Native profiler to quickly identify performance issues with an intuitive in-game interface Plugin metrics to also identify performance issues at a glance that offers detailed print outs of plugin and hook usage Carbon is updated hours in advanced to force updates so you're never worrying if you can update your servers on-time Carbon updates itself when your server boots. No more auto update scripts or manual updates needed! Install, update and configure plugins all from our panel in-game without ever having to touch files again! Carbon offers a staging build that's updated all month to enable you to run modded staging servers and test your plugins well in advance to the big update Documentation Installing Carbon - https://docs.carbonmod.gg/docs/readme/installing-carbon Configuring Carbon - https://docs.carbonmod.gg/docs/readme/configuring-carbon Staging Builds Would you like to run Carbon on staging or aux branches of Rust throughout the month? Our staging and aux branches are always up-to-date, so you can properly test plugins prior to a major update or provide a modded server for players to try out new Rust updates before they're live! Staging - https://github.com/CarbonCommunity/Carbon.Core/releases/tag/rustbeta_staging_build Aux01 - https://github.com/CarbonCommunity/Carbon.Core/releases/tag/rustbeta_aux01_build Aux02 - https://github.com/CarbonCommunity/Carbon.Core/releases/tag/rustbeta_aux02_build For Developers If you're a developer, you can enjoy all of the latest improvements of C# 10 as well as the ability to add your own methods anywhere in the assembly without being locked down to pre-existing hooks. All of your existing Oxide plugins will be compatible, though we recommend making a Carbon-specific version available to utilize Carbon to its fullest. Check out Creating your First Plugin to get started!Free -
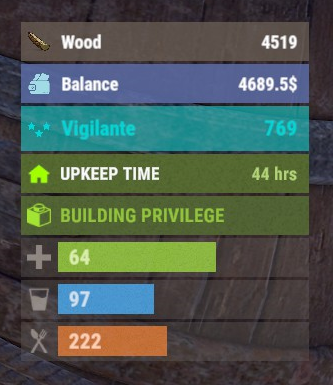
Version 0.1.6
179 downloads
The plugin displays the player's balance in the status bar. Depends on BankSystem/ServerRewards/Economics and AdvancedStatus plugins. P.S. I've asked the author of the ServerRewards plugin to add a new hook called OnPointsUpdated to track points updates. Until they decide to add the new hook, if you want point updates, you'll need to manually add 2 lines to the ServerRewards plugin. On lines 1822 and 1847, you need to add the code(below) before "return true;" Interface.CallHook("OnPointsUpdated", ID, playerRP[ID]); The ability to always display the player's balance, or only when they are in a safe zone or building privilege zone; The ability to display all or part of the bars simultaneously; The ability to customize the bar for each plugin; The ability to specify the currency symbol; The ability to specify the display side of the currency symbol; The ability to display text if the balance exceeds a specified value(useful for very large balances) ; The ability to specify the order of the bar; The ability to change the height of the bar; The abillity to customize the color and transparency of the background; The ability to set a material for the background; The ability to switch between CuiRawImageComponent and CuiImageComponent for the image; The ability to get images from the local folder(*SERVER*\oxide\data\AdvancedStatus\Images); The abillity to set own image and customize the color, transparency and outline of the image; The abillity to set sprite instead of the image; The ability to customize the color, size, font and outline of the text. { "Display the balance only when players are in the safe zone or have building privilege?": true, "Value after which text will be displayed instead of balance": 1000000000.0, "List of plugins for displaying the balance bar. Leave null or empty to use the default list": [ "BankSystem", "ServerRewards", "Economics" ], "List of status bar settings for each plugin. Leave null or empty to recreate the list": [ { "BarID. Do not touch this parameter": "BalanceBar_BankSystem", "Order": 20, "Height": 26, "Main_Color(Hex or RGBA)": "#6375B3", "Main_Transparency": 0.8, "Main_Material": "", "Image_Url": "https://i.imgur.com/jKeUqSD.png", "Image_Local(Leave empty to use Image_Url)": "BalanceBar_BankSystem", "Image_Sprite(Leave empty to use Image_Local or Image_Url)": "", "Image_IsRawImage": false, "Image_Color(Hex or RGBA)": "#A1DBE6", "Image_Transparency": 1.0, "Is it worth enabling an outline for the image?": false, "Image_Outline_Color(Hex or RGBA)": "0.1 0.3 0.8 0.9", "Image_Outline_Transparency": 0.0, "Image_Outline_Distance": "0.75 0.75", "Text_Key": "MsgBankSystem", "Text_Size": 12, "Text_Color(Hex or RGBA)": "#FFFFFF", "Text_Font(https://umod.org/guides/rust/basic-concepts-of-gui#fonts)": "RobotoCondensed-Bold.ttf", "Is it worth enabling an outline for the text?": false, "Text_Outline_Color(Hex or RGBA)": "#000000", "Text_Outline_Transparency": 1.0, "Text_Outline_Distance": "0.75 0.75", "SubText_Format": "${0}", "SubText_OverLimit": "MsgBankSystemOverLimit", "SubText_Size": 12, "SubText_Color(Hex or RGBA)": "#FFFFFF", "SubText_Font": "RobotoCondensed-Bold.ttf", "Is it worth enabling an outline for the sub text?": false, "SubText_Outline_Color(Hex or RGBA)": "0.5 0.6 0.7 0.5", "SubText_Outline_Transparency": 0.0, "SubText_Outline_Distance": "0.75 0.75" }, { "BarID. Do not touch this parameter": "BalanceBar_ServerRewards", "Order": 20, "Height": 26, "Main_Color(Hex or RGBA)": "#6375B3", "Main_Transparency": 0.8, "Main_Material": "", "Image_Url": "https://i.imgur.com/jKeUqSD.png", "Image_Local(Leave empty to use Image_Url)": "BalanceBar_ServerRewards", "Image_Sprite(Leave empty to use Image_Local or Image_Url)": "", "Image_IsRawImage": false, "Image_Color(Hex or RGBA)": "#A1DBE6", "Image_Transparency": 1.0, "Is it worth enabling an outline for the image?": false, "Image_Outline_Color(Hex or RGBA)": "0.1 0.3 0.8 0.9", "Image_Outline_Transparency": 0.0, "Image_Outline_Distance": "0.75 0.75", "Text_Key": "MsgServerRewards", "Text_Size": 12, "Text_Color(Hex or RGBA)": "#FFFFFF", "Text_Font(https://umod.org/guides/rust/basic-concepts-of-gui#fonts)": "RobotoCondensed-Bold.ttf", "Is it worth enabling an outline for the text?": false, "Text_Outline_Color(Hex or RGBA)": "#000000", "Text_Outline_Transparency": 1.0, "Text_Outline_Distance": "0.75 0.75", "SubText_Format": "{0}RP", "SubText_OverLimit": "MsgServerRewardsOverLimit", "SubText_Size": 12, "SubText_Color(Hex or RGBA)": "#FFFFFF", "SubText_Font": "RobotoCondensed-Bold.ttf", "Is it worth enabling an outline for the sub text?": false, "SubText_Outline_Color(Hex or RGBA)": "0.5 0.6 0.7 0.5", "SubText_Outline_Transparency": 0.0, "SubText_Outline_Distance": "0.75 0.75" }, { "BarID. Do not touch this parameter": "BalanceBar_Economics", "Order": 20, "Height": 26, "Main_Color(Hex or RGBA)": "#6375B3", "Main_Transparency": 0.8, "Main_Material": "", "Image_Url": "https://i.imgur.com/jKeUqSD.png", "Image_Local(Leave empty to use Image_Url)": "BalanceBar_Economics", "Image_Sprite(Leave empty to use Image_Local or Image_Url)": "", "Image_IsRawImage": false, "Image_Color(Hex or RGBA)": "#A1DBE6", "Image_Transparency": 1.0, "Is it worth enabling an outline for the image?": false, "Image_Outline_Color(Hex or RGBA)": "0.1 0.3 0.8 0.9", "Image_Outline_Transparency": 0.0, "Image_Outline_Distance": "0.75 0.75", "Text_Key": "MsgEconomics", "Text_Size": 12, "Text_Color(Hex or RGBA)": "#FFFFFF", "Text_Font(https://umod.org/guides/rust/basic-concepts-of-gui#fonts)": "RobotoCondensed-Bold.ttf", "Is it worth enabling an outline for the text?": false, "Text_Outline_Color(Hex or RGBA)": "#000000", "Text_Outline_Transparency": 1.0, "Text_Outline_Distance": "0.75 0.75", "SubText_Format": "${0}", "SubText_OverLimit": "MsgEconomicsOverLimit", "SubText_Size": 12, "SubText_Color(Hex or RGBA)": "#FFFFFF", "SubText_Font": "RobotoCondensed-Bold.ttf", "Is it worth enabling an outline for the sub text?": false, "SubText_Outline_Color(Hex or RGBA)": "0.5 0.6 0.7 0.5", "SubText_Outline_Transparency": 0.0, "SubText_Outline_Distance": "0.75 0.75" } ], "Version": { "Major": 0, "Minor": 1, "Patch": 6 } } EN: { "MsgBankSystem": "Balance", "MsgBankSystemOverLimit": "> $1kkk", "MsgServerRewards": "Points", "MsgServerRewardsOverLimit": "> 1kkk RP", "MsgEconomics": "Balance", "MsgEconomicsOverLimit": "> $1kkk" } RU: { "MsgBankSystem": "Баланс", "MsgBankSystemOverLimit": "> $1 млрд", "MsgServerRewards": "Очки", "MsgServerRewardsOverLimit": "> 1 млрд RP", "MsgEconomics": "Баланс", "MsgEconomicsOverLimit": "> $1 млрд" }$3.99 -

Version 0.1.3
402 downloads
Useful plugin for managing temporary permissions, temporary groups and temporary permissions for groups. This is done through chat commands, built-in Oxide commands, and API methods. This is an alternative to the well-known TimedPermissions plugin, which was abandoned about three years ago, and it offers more advanced features. Note: The dates is in UTC format. The ability to grant players temporary permissions by specifying either the number of seconds, an exact expiration date or until the wipe occurs; The ability to add players to temporary groups by specifying either the number of seconds, an exact expiration date or until the wipe occurs; The ability to grant groups temporary permissions by specifying either the number of seconds, an exact expiration date or until the wipe occurs; The ability to revoke temporary permissions from players and groups prematurely; The ability to remove players from groups prematurely; The ability to perform all the above actions using existing and familiar console commands(e.g., o.grant), simply by adding the number of seconds, the expiration date or the word "wipe" at the end; The ability to perform all the above actions using a chat command (by default /tperm); The ability to perform all the above actions using API methods; The ability to remove all temporary permissions and groups upon wipe detection. temporarypermissions.admin - Grants access to the chat command(by default /tperm). { "Chat command": "tperm", "Is it worth saving logs to a file?": true, "Is it worth using console logging?": true, "Interval in seconds for expiration check": 1.0, "Interval in seconds for checking the presence of temporary permissions and temporary groups. A value of 0 disables the check": 600.0, "Is it worth restoring removed temporary permissions and temporary groups if the timer hasn't expired? There are cases where removal cannot be tracked in the usual way": true, "Is it worth revoking temporary permissions and temporary groups when unloading the plugin, without removing them from the data file?": true, "Is it worth revoking temporary permissions and temporary groups that haven't expired yet upon detecting a wipe?": false, "Wipe ID": null, "Version": { "Major": 0, "Minor": 1, "Patch": 3 } } EN: { "MsgPermissionNotFound": "Permission not found!", "MsgPlayerNotFound": "Player not found!", "MsgGroupNotFound": "Group not found!", "MsgGrantWrongFormat": "Invalid command format! Example: /tperm grant user/group *NameOrId* realpve.vip *secondsOrDateTime*", "MsgRevokeWrongFormat": "Invalid command format! Example: /tperm revoke user/group *NameOrId* realpve.vip", "MsgUserGroupWrongFormat": "Invalid command format! Example: /tperm group add/remove *NameOrId* *groupName*", "MsgUserGranted": "Permission {0} granted to player {1}", "MsgGroupGranted": "Permission {0} granted to group {1}", "MsgUserGroupAdded": "Player {0} has been added to group {1}", "MsgUserRevoked": "Permission {0} has been removed for player {1}", "MsgGroupRevoked": "Permission {0} has been removed for group {1}", "MsgUserGroupRemoved": "Player {0} has been removed from group {1}" } RU: { "MsgPermissionNotFound": "Пермишен не найден!", "MsgPlayerNotFound": "Игрок не найден!", "MsgGroupNotFound": "Группа не найдена!", "MsgGrantWrongFormat": "Не верный формат команды! Пример: /tperm grant user/group *NameOrId* realpve.vip *secondsOrDateTime*", "MsgRevokeWrongFormat": "Не верный формат команды! Пример: /tperm revoke user/group *NameOrId* realpve.vip", "MsgUserGroupWrongFormat": "Не верный формат команды! Пример: /tperm group add/remove *NameOrId* *groupName*", "MsgUserGranted": "Пермишен {0} выдан игроку {1}", "MsgGroupGranted": "Пермишен {0} выдан группе {1}", "MsgUserGroupAdded": "Игрок {0} был добавлен в группу {1}", "MsgUserRevoked": "Пермишен {0} был удален для игрока {1}", "MsgGroupRevoked": "Пермишен {0} был удален для группы {1}", "MsgUserGroupRemoved": "Игрок {0} был удален из группы {1}" } grant - Grants a temporary permission to a player or group. user *NameOrId* realpve.vip wipe - Grants a temporary permission to a player until the next wipe by specifying the player's name or Id, the permission name and the word "wipe"; *NameOrId* realpve.vip 3600 true/false - Grants a temporary permission to a player by specifying the player's name or Id, the permission name, the number of seconds and true/false(optional). If true, the specified seconds will count from the current moment, otherwise(default), they will be added to the existing time; *NameOrId* realpve.vip "2024-08-19 17:57" "2024-08-19 16:57" - Grants a temporary permission to a player by specifying the player's name or Id, the permission name, the expiration date and the assigned date(optional). If not specified, the assigned date will default to the current date, otherwise, it will be set to the provided date. group *GroupName* realpve.vip wipe - Grants a temporary permission to a group until the next wipe by specifying the group's name, the permission name and the word "wipe"; *GroupName* realpve.vip 3600 true/false - Grants a temporary permission to a group by specifying the group's name, the permission name, the number of seconds, and true/false(optional). If true, the specified seconds will count from the current moment, otherwise(default), they will be added to the existing time; *GroupName* realpve.vip "2024-08-19 17:57" "2024-08-19 16:57" - Grants a temporary permission to a group by specifying the group's name, the permission name, the expiration date and the assigned date(optional). If not specified, the assigned date will default to the current date, otherwise, it will be set to the provided date. revoke - Revokes a temporary permission from a player or group. user *NameOrId* realpve.vip - Revokes a temporary permission from a player by specifying the player's name or Id and the permission name; group *GroupName* realpve.vip - Revokes a temporary permission from a group by specifying the group's name and the permission name. add - Temporary addition of a player to a group. *NameOrId* *GroupName* wipe - Temporary addition of a player to a group until the next wipe by specifying the player's name or Id, the group name and the word "wipe"; *NameOrId* *GroupName* 3600 true/false - Temporary addition of a player to a group by specifying the player's name or Id, the group name, the number of seconds, and true/false(optional). If true, the specified seconds will count from the current moment, otherwise(default), they will be added to the existing time; *NameOrId* *GroupName* "2024-08-19 17:57" "2024-08-19 16:57" - Temporary addition of a player to a group by specifying the player's name or Id, the group name, the expiration date and the assigned date(optional). If not specified, the assigned date will default to the current date, otherwise, it will be set to the provided date. remove *NameOrId* *GroupName* - Removal of a player from a temporary group by specifying the player's name or Id and the group name. Example: /tperm grant user iiiaka realpve.vip wipe /tperm grant user iiiaka realpve.vip 3600 true /tperm grant user iiiaka realpve.vip "2024-08-19 17:57" "2024-08-19 16:57" Note: To access the commands, the player must be an admin(console or owner) or have the temporarypermissions.admin permission. P.S. Templates for the commands above can also be used with existing console commands. For example: o.grant user iiiaka realpve.vip 3600 true OnTemporaryPermissionsLoaded: Called after the TemporaryPermissions plugin is fully loaded and ready. OnTemporaryPermissionGranted: Called after the player has been granted a temporary permission. OnTemporaryPermissionUpdated: Called after the player's temporary permission has been updated. OnTemporaryPermissionRevoked: Called after the player's temporary permission has expired or been revoked. OnTemporaryGroupAdded: Called after the player has been temporarily added to the group. OnTemporaryGroupUpdated: Called after the player's temporary group has been updated. OnTemporaryGroupRemoved: Called after the player's temporary group has expired or been removed. OnGroupTemporaryPermissionGranted: Called after the group has been granted a temporary permission. OnGroupTemporaryPermissionUpdated: Called after the group's temporary permission has been updated. OnGroupTemporaryPermissionRevoked: alled after the group's temporary permission has expired or been revoked. void OnTemporaryPermissionsLoaded(VersionNumber version = default) { Puts("The TemporaryPermissions plugin is loaded and ready to go!"); } void OnTemporaryPermissionGranted(string userID, string perm, DateTime expireDate, DateTime assignedDate) { Puts($"Player {userID} has been granted the temporary permission {perm} from {assignedDate} until {expireDate}."); } void OnTemporaryPermissionUpdated(string userID, string perm, DateTime expireDate, DateTime assignedDate) { Puts($"Player {userID}'s temporary permission {perm} has been updated. New expiration date: {expireDate}. Assigned date: {assignedDate}."); } void OnTemporaryPermissionRevoked(string userID, string perm, bool isExpired) { Puts($"Player {userID} has had the temporary permission {perm} revoked. Permission expired: {isExpired}."); } void OnTemporaryGroupAdded(string userID, string groupName, DateTime expireDate, DateTime assignedDate) { Puts($"Player {userID} has been added to the temporary group {groupName} from {assignedDate} until {expireDate}."); } void OnTemporaryGroupUpdated(string userID, string groupName, DateTime expireDate, DateTime assignedDate) { Puts($"Player {userID}'s temporary group {groupName} has been updated. New expiration date: {expireDate}. Assigned date: {assignedDate}."); } void OnTemporaryGroupRemoved(string userID, string groupName, bool isExpired) { Puts($"Player {userID} has had the temporary group {groupName} revoked. Group expired: {isExpired}."); } void OnGroupTemporaryPermissionGranted(string groupName, string perm, DateTime expireDate, DateTime assignedDate) { Puts($"Group {groupName} has been granted the temporary permission {perm}, valid from {assignedDate} until {expireDate}."); } void OnGroupTemporaryPermissionUpdated(string groupName, string perm, DateTime expireDate, DateTime assignedDate) { Puts($"Group {groupName}'s temporary permission {perm} has been updated. New expiration date: {expireDate}. Assigned date: {assignedDate}."); } void OnGroupTemporaryPermissionRevoked(string groupName, string perm, bool isExpired) { Puts($"Group {groupName} has had the temporary permission {perm} revoked. Permission expired: {isExpired}."); } [PluginReference] private Plugin TemporaryPermissions; There are 28 methods: IsReady User's Permissions: GrantUserPermission RevokeUserPermission UserHasPermission GrantActiveUsersPermission GrantAllUsersPermission RevokeActiveUsersPermission RevokeAllUsersPermission UserGetAllPermissions ActiveUsersGetAllPermissions AllUsersGetAllPermissions User's Groups: AddUserGroup RemoveUserGroup UserHasGroup AddActiveUsersGroup AddAllUsersGroup RemoveActiveUsersGroup RemoveAllUsersGroup UserGetAllGroups ActiveUsersGetAllGroups AllUsersGetAllGroups Group's Permissions: GrantGroupPermission RevokeGroupPermission GroupHasPermission GrantAllGroupsPermission RevokeAllGroupsPermission GroupGetAllPermissions AllGroupsGetAllPermissions IsReady: Used to check if the TemporaryPermissions plugin is loaded and ready to work. The IsReady method returns true if it is ready, or null if it is not. (bool)TemporaryPermissions?.Call("IsReady");//Calling the IsReady method. If the result is not null(bool true), the plugin is ready. GrantUserPermission: Used to grant a temporary permission to a player. Returns true if the grant was successful. To call the GrantUserPermission method, you need to pass 5 parameters, 3 of which are optional: IPlayer or BasePlayer or <string>playerID - The player object or their Id; <string>permName - The name of the permission; <int>secondsToAdd or <DateTime>expireDate - Optional. The time in seconds to add, or the end date. If a number less than 1 is specified, or if this parameter is not specified, the permission will be valid until the wipe; <bool>fromNow or <DateTime>assignedDate - Optional. true/false to specify whether the seconds should be added to the current date or to the existing time, or an exact assignment date. Defaults to the current date; <bool>checkExistence - Optional. Whether to check for the existence of the permission. (bool)TemporaryPermissions?.Call("GrantUserPermission", player.UserIDString, "realpve.vip");//Calling the GrantUserPermission method without specifying the third parameter, to grant temporary permission until the wipe. (bool)TemporaryPermissions?.Call("GrantUserPermission", player.UserIDString, "realpve.vip", 0);//Calling the GrantUserPermission method with the specified number less than 1, to grant temporary permission until the wipe. (bool)TemporaryPermissions?.Call("GrantUserPermission", player.UserIDString, "realpve.vip", 3600, true, true);//Calling the GrantUserPermission method with the specified number of seconds to add. (bool)TemporaryPermissions?.Call("GrantUserPermission", player.UserIDString, "realpve.vip", expireDate, assignedDate, true);//Calling the GrantUserPermission method with the specified DateTime for the end and start of the temporary permission. RevokeUserPermission: Used to revoke a temporary permission from a player. Returns true if the revoke was successful. To call the RevokeUserPermission method, you need to pass 2 parameters: IPlayer or BasePlayer or <string>playerID - The player object or their Id; <string>permName - The name of the permission. (bool)TemporaryPermissions?.Call("RevokeUserPermission", player.UserIDString, "realpve.vip"); UserHasPermission: Used to check if a player has a temporary permission. Returns true if the player has the specified temporary permission. To call the UserHasPermission method, you need to pass 2 parameters: IPlayer or BasePlayer or <string>playerID - The player object or their Id; <string>permName - The name of the permission. (bool)TemporaryPermissions?.Call("UserHasPermission", player.UserIDString, "realpve.vip"); GrantActiveUsersPermission: Used to temporarily grant a permission to all online players. Returns the <int>number of successful grants of temporary permissions to players. To call the GrantActiveUsersPermission method, you need to pass 3 parameters, 2 of which is optional: <string>permName - The name of the permission; <int>secondsToAdd or <DateTime>expireDate - Optional. The time in seconds to add, or the end date. If a number less than 1 is specified, or if this parameter is not specified, the permission will be valid until the wipe; <bool>fromNow or <DateTime>assignedDate - Optional. true/false to specify whether the seconds should be added to the current date or to the existing time, or an exact assignment date. Defaults to the current date. (int)TemporaryPermissions?.Call("GrantActiveUsersPermission", "realpve.vip");// Calling the GrantActiveUsersPermission method without specifying the second parameter, to grant all online players temporary permission until the wipe. (int)TemporaryPermissions?.Call("GrantActiveUsersPermission", "realpve.vip", 0);//Calling the GrantActiveUsersPermission method with the specified number less than 1, to grant all online players temporary permission until the wipe. (int)TemporaryPermissions?.Call("GrantActiveUsersPermission", "realpve.vip", 3600, true);//Calling the GrantActiveUsersPermission method with the specified number of seconds to add. (int)TemporaryPermissions?.Call("GrantActiveUsersPermission", "realpve.vip", expireDate, assignedDate);//Calling the GrantActiveUsersPermission method with the specified DateTime for the end and start of the temporary permission. GrantAllUsersPermission: Used to grant a temporary permission to all players. Returns the <int>number of successful grants of temporary permissions to players. To call the GrantAllUsersPermission method, you need to pass 3 parameters, 2 of which is optional: <string>permName - The name of the permission; <int>secondsToAdd or <DateTime>expireDate - Optional. The time in seconds to add, or the end date. If a number less than 1 is specified, or if this parameter is not specified, the permission will be valid until the wipe; <bool>fromNow or <DateTime>assignedDate - Optional. true/false to specify whether the seconds should be added to the current date or to the existing time, or an exact assignment date. Defaults to the current date. (int)TemporaryPermissions?.Call("GrantAllUsersPermission", "realpve.vip");//Calling the GrantAllUsersPermission method without specifying the second parameter, to grant all players temporary permission until the wipe. (int)TemporaryPermissions?.Call("GrantAllUsersPermission", "realpve.vip", 0);//Calling the GrantAllUsersPermission method with the specified number less than 1, to grant all players temporary permission until the wipe. (int)TemporaryPermissions?.Call("GrantAllUsersPermission", "realpve.vip", 3600, true);//Calling the GrantAllUsersPermission method with the specified number of seconds to add. (int)TemporaryPermissions?.Call("GrantAllUsersPermission", "realpve.vip", expireDate, assignedDate);//Calling the GrantAllUsersPermission method with the specified DateTime for the end and start of the temporary permission. RevokeActiveUsersPermission: Used to revoke a temporary permission from all online players. Returns the <int>number of successful revokes of temporary permissions to players. To call the RevokeActiveUsersPermission method, you need to pass 1 parameter: <string>permName - The name of the permission. (int)TemporaryPermissions?.Call("RevokeActiveUsersPermission", "realpve.vip"); RevokeAllUsersPermission: Used to revoke a temporary permission from all players. Returns the <int>number of successful revokes of temporary permissions to players. To call the RevokeAllUsersPermission method, you need to pass 1 parameter: <string>permName - The name of the permission. (int)TemporaryPermissions?.Call("RevokeAllUsersPermission", "realpve.vip"); UserGetAllPermissions: Used to retrieve all temporary permissions of a player. Returns a Dictionary<string, DateTime[]> where the key is the permission name and the value is an array of 2 DateTimes: the first date is the assignment date and the second date is the expiration date of the permission. If the expiration date is set to default, it means the permission is valid until the wipe. To call the UserGetAllPermissions method, you need to pass 1 parameter: <string>playerID - The player's Id. (Dictionary<string, DateTime[]>)TemporaryPermissions?.Call("UserGetAllPermissions", player.UserIDString); ActiveUsersGetAllPermissions: Used to retrieve all temporary permissions of all online players who have temporary permissions. Returns a Dictionary<string, Dictionary<string, DateTime[]>> where the key is userID and the value is another Dictionary<string, DateTime[]>, where the key is the permission name and the value is an array of 2 DateTimes: the first date is the assignment date and the second date is the expiration date of the permission. If the expiration date is set to default, it means the permission is valid until the wipe. (Dictionary<string, Dictionary<string, DateTime[]>>)TemporaryPermissions?.Call("ActiveUsersGetAllPermissions"); AllUsersGetAllPermissions: Used to retrieve all temporary permissions of all players who have temporary permissions. Returns a Dictionary<string, Dictionary<string, DateTime[]>> where the key is userID and the value is another Dictionary<string, DateTime[]>, where the key is the permission name and the value is an array of 2 DateTimes: the first date is the assignment date and the second date is the expiration date of the permission. If the expiration date is set to default, it means the permission is valid until the wipe. (Dictionary<string, Dictionary<string, DateTime[]>>)TemporaryPermissions?.Call("AllUsersGetAllPermissions"); AddUserGroup: Used to temporarily add a player to a group. Returns true if the addition was successful. To call the AddUserGroup method, you need to pass 5 parameters, 3 of which are optional: IPlayer or BasePlayer or <string>playerID - The player object or their Id; <string>groupName - The name of the group; <int>secondsToAdd or <DateTime>expireDate - Optional. The time in seconds to add, or the end date. If a number less than 1 is specified, or if this parameter is not specified, the group will be valid until the wipe; <bool>fromNow or <DateTime>assignedDate - Optional. true/false to specify whether the seconds should be added to the current date or to the existing time, or an exact assignment date. Defaults to the current date; <bool>checkExistence - Optional. Whether to check for the existence of the group. (bool)TemporaryPermissions?.Call("AddUserGroup", player.UserIDString, "vip");//Calling the AddUserGroup method without specifying the third parameter to temporarily add a player, to a group until the wipe. (bool)TemporaryPermissions?.Call("AddUserGroup", player.UserIDString, "vip", 0);//Calling the AddUserGroup method with the specified number less than 1, to temporarily add a player to a group until the wipe. (bool)TemporaryPermissions?.Call("AddUserGroup", player.UserIDString, "vip", 3600, true, true);//Calling the AddUserGroup method with the specified number of seconds to add. (bool)TemporaryPermissions?.Call("AddUserGroup", player.UserIDString, "vip", expireDate, assignedDate, true);//Calling the AddUserGroup method with the specified DateTime for the end and start of the temporary permission. RemoveUserGroup: Used to remove a temporary group from a player. Returns true if the removal was successful. To call the RemoveUserGroup method, you need to pass 2 parameters: IPlayer or BasePlayer or <string>playerID - The player object or their Id; <string>groupName - The name of the group. (bool)TemporaryPermissions?.Call("RemoveUserGroup", player.UserIDString, "vip"); UserHasGroup: Used to check if a player has a temporary group. Returns true if the player has the specified temporary group. To call the UserHasGroup method, you need to pass 2 parameters: IPlayer or BasePlayer or <string>playerID - The player object or their Id; <string>groupName - The name of the group. (bool)TemporaryPermissions?.Call("UserHasGroup", player.UserIDString, "vip"); AddActiveUsersGroup: Used to temporarily add a group to all online players. Returns the <int>number of successful additions of the temporary group to players. To call the AddActiveUsersGroup method, you need to pass 3 parameters, 2 of which is optional: <string>groupName - The name of the group; <int>secondsToAdd or <DateTime>expireDate - Optional. The time in seconds to add, or the end date. If a number less than 1 is specified, or if this parameter is not specified, the group will be valid until the wipe; <bool>fromNow or <DateTime>assignedDate - Optional. true/false to specify whether the seconds should be added to the current date or to the existing time, or an exact assignment date. Defaults to the current date. (int)TemporaryPermissions?.Call("AddActiveUsersGroup", "vip");//Calling the AddActiveUsersGroup method without specifying the second parameter to temporarily add all online players to a group until the wipe. (int)TemporaryPermissions?.Call("AddActiveUsersGroup", "vip", 0);//Calling the AddActiveUsersGroup method with the specified number less than 1, to temporarily add all online players to a group until the wipe. (int)TemporaryPermissions?.Call("AddActiveUsersGroup", "vip", 3600, true);//Calling the AddActiveUsersGroup method with the specified number of seconds to add. (int)TemporaryPermissions?.Call("AddActiveUsersGroup", "vip", expireDate, assignedDate);//Calling the AddActiveUsersGroup method with the specified DateTime for the end and start of the temporary permission. AddAllUsersGroup: Used to temporarily add a group to all players. Returns the <int>number of successful additions of the temporary group to players. To call the AddAllUsersGroup method, you need to pass 3 parameters, 2 of which is optional: <string>groupName - The name of the group; <int>secondsToAdd or <DateTime>expireDate - Optional. The time in seconds to add, or the end date. If a number less than 1 is specified, or if this parameter is not specified, the group will be valid until the wipe; <bool>fromNow or <DateTime>assignedDate - Optional. true/false to specify whether the seconds should be added to the current date or to the existing time, or an exact assignment date. Defaults to the current date. (int)TemporaryPermissions?.Call("AddAllUsersGroup", "vip");//Calling the AddAllUsersGroup method without specifying the second parameter to temporarily add all players to a group until the wipe. (int)TemporaryPermissions?.Call("AddAllUsersGroup", "vip", 0);//Calling the AddAllUsersGroup method with the specified number less than 1, to temporarily add all players to a group until the wipe. (int)TemporaryPermissions?.Call("AddAllUsersGroup", "vip", 3600, true);//Calling the AddAllUsersGroup method with the specified number of seconds to add. (int)TemporaryPermissions?.Call("AddAllUsersGroup", "vip", expireDate, assignedDate);//Calling the AddAllUsersGroup method with the specified DateTime for the end and start of the temporary permission. RemoveActiveUsersGroup: Used to remove a temporary group from all online players. Returns the <int>number of successful removals of temporary groups from players. To call the RemoveActiveUsersGroup method, you need to pass 1 parameter: <string>groupName - The name of the group. (int)TemporaryPermissions?.Call("RemoveActiveUsersGroup", "vip"); RemoveAllUsersGroup: Used to remove a temporary group from all players. Returns the <int>number of successful removals of temporary groups from players. To call the RemoveAllUsersGroup method, you need to pass 1 parameter: <string>permName - The name of the permission. (int)TemporaryPermissions?.Call("RemoveAllUsersGroup", "vip"); UserGetAllGroups: Used to retrieve all temporary groups of a player. Returns a Dictionary<string, DateTime[]> where the key is the group name and the value is an array of 2 DateTimes: the first date is the assignment date and the second date is the expiration date of the group. If the expiration date is set to default, it means the group is valid until the wipe. To call the UserGetAllGroups method, you need to pass 1 parameter: <string>permName - The name of the permission. (Dictionary<string, DateTime[]>)TemporaryPermissions?.Call("UserGetAllGroups", player.UserIDString); ActiveUsersGetAllGroups: Used to retrieve all temporary groups of all online players who have temporary groups. Returns a Dictionary<string, Dictionary<string, DateTime[]>> where the key is userID and the value is another Dictionary<string, DateTime[]>, where the key is the group name and the value is an array of 2 DateTimes: the first date is the assignment date and the second date is the expiration date of the group. If the expiration date is set to default, it means the group is valid until the wipe. (Dictionary<string, Dictionary<string, DateTime[]>>)TemporaryPermissions?.Call("ActiveUsersGetAllGroups"); AllUsersGetAllGroups: Used to retrieve all temporary groups of all players who have temporary groups. Returns a Dictionary<string, Dictionary<string, DateTime[]>> where the key is userID and the value is another Dictionary<string, DateTime[]>, where the key is the group name and the value is an array of 2 DateTimes: the first date is the assignment date and the second date is the expiration date of the group. If the expiration date is set to default, it means the group is valid until the wipe. (Dictionary<string, Dictionary<string, DateTime[]>>)TemporaryPermissions?.Call("AllUsersGetAllGroups"); GrantGroupPermission: Used to grant a temporary permission to a group. Returns true if the grant was successful. To call the GrantGroupPermission method, you need to pass 5 parameters, 3 of which are optional: <string>groupName - The name of the group; <string>permName - The name of the permission; <int>secondsToAdd or <DateTime>expireDate - Optional. The time in seconds to add, or the end date. If a number less than 1 is specified, or if this parameter is not specified, the permission will be valid until the wipe; <bool>fromNow or <DateTime>assignedDate - Optional. true/false to specify whether the seconds should be added to the current date or to the existing time, or an exact assignment date. Defaults to the current date; <bool>checkExistence - Optional. Whether to check for the existence of the permission. (bool)TemporaryPermissions?.Call("GrantGroupPermission", "vip", "realpve.vip");//Calling the GrantGroupPermission method without specifying the third parameter, to grant temporary permission until the wipe. (bool)TemporaryPermissions?.Call("GrantGroupPermission", "vip", "realpve.vip", 0);//Calling the GrantGroupPermission method with the specified number less than 1, to grant temporary permission until the wipe. (bool)TemporaryPermissions?.Call("GrantGroupPermission", "vip", "realpve.vip", 3600, true, true);//Calling the GrantGroupPermission method with the specified number of seconds to add. (bool)TemporaryPermissions?.Call("GrantGroupPermission", "vip", "realpve.vip", expireDate, assignedDate, true);//Calling the GrantGroupPermission method with the specified DateTime for the end and start of the temporary permission. RevokeGroupPermission: Used to revoke a temporary permission from a group. Returns true if the revoke was successful. To call the RevokeGroupPermission method, you need to pass 2 parameters: <string>groupName - The name of the group; <string>permName - The name of the permission. (bool)TemporaryPermissions?.Call("RevokeGroupPermission", "vip", "realpve.vip"); GroupHasPermission: Used to check if a group has a temporary permission. Returns true if the group has the specified temporary permission. To call the GroupHasPermission method, you need to pass 2 parameters: <string>groupName - The name of the group; <string>permName - The name of the permission. (bool)TemporaryPermissions?.Call("GroupHasPermission", "vip", "realpve.vip"); GrantAllGroupsPermission: Used to temporarily grant a permission to all groups. Returns the <int>number of successful grants of temporary permissions to groups. To call the GrantAllGroupsPermission method, you need to pass 3 parameters, 2 of which is optional: <string>permName - The name of the permission; <int>secondsToAdd or <DateTime>expireDate - Optional. The time in seconds to add, or the end date. If a number less than 1 is specified, or if this parameter is not specified, the permission will be valid until the wipe; <bool>fromNow or <DateTime>assignedDate - Optional. true/false to specify whether the seconds should be added to the current date or to the existing time, or an exact assignment date. Defaults to the current date. (int)TemporaryPermissions?.Call("GrantAllGroupsPermission", "realpve.vip");//Calling the GrantAllGroupsPermission method without specifying the second parameter, to grant all groups temporary permission until the wipe. (int)TemporaryPermissions?.Call("GrantAllGroupsPermission", "realpve.vip", 0);//Calling the GrantAllGroupsPermission method with the specified number less than 1, to grant all groups temporary permission until the wipe. (int)TemporaryPermissions?.Call("GrantAllGroupsPermission", "realpve.vip", 3600, true);//Calling the GrantAllGroupsPermission method with the specified number of seconds to add. (int)TemporaryPermissions?.Call("GrantAllGroupsPermission", "realpve.vip", expireDate, assignedDate);//Calling the GrantAllGroupsPermission method with the specified DateTime for the end and start of the temporary permission. RevokeAllGroupsPermission: Used to revoke a temporary permission from all groups. Returns the <int>number of successful revokes of temporary permissions to groups. To call the RevokeAllGroupsPermission method, you need to pass 1 parameter: <string>permName - The name of the permission. (int)TemporaryPermissions?.Call("RevokeAllGroupsPermission", "realpve.vip"); GroupGetAllPermissions: Used to retrieve all temporary permissions of a group. Returns a Dictionary<string, DateTime[]> where the key is the permission name and the value is an array of 2 DateTimes: the first date is the assignment date and the second date is the expiration date of the permission. If the expiration date is set to default, it means the permission is valid until the wipe. To call the GroupGetAllPermissions method, you need to pass 1 parameter: <string>groupName - The name of the group. (Dictionary<string, DateTime[]>)TemporaryPermissions?.Call("GroupGetAllPermissions", "vip"); AllGroupsGetAllPermissions: Used to retrieve all temporary permissions of all groups that have temporary permissions. Returns a Dictionary<string, Dictionary<string, DateTime[]>> where the key is the group name and the value is another Dictionary<string, DateTime[]>, where the key is the permission name and the value is an array of 2 DateTimes: the first date is the assignment date and the second date is the expiration date of the permission. If the expiration date is set to default, it means the permission is valid until the wipe. (Dictionary<string, Dictionary<string, DateTime[]>>)TemporaryPermissions?.Call("AllGroupsGetAllPermissions");Free