Wrecks's Wishlist
-
.thumb.png.d84157463dc9d701982f177c805df0b5.png)
$20.00
Building Symmetry
This plugin introduces symmetry features to streamline construction and upgrade processes. Choose from various symmetry shapes, including Square, Triangle, and Hexagon, and select symmetry types such as Normal2Sided, Normal3Sided, Normal4Sided, and Normal6Sided. Automatically mirror building actions across symmetrical axes for efficient base design and upgrades, including automatic building shape detection for Square, Triangular or Hexagonal bases, it has a user-friendly interface to enhance your building experience in Rust. Seamlessly toggle between symmetry shapes and types with the intuitive UI, providing precise control over your construction projects.
Symmetry Features:
* Support for Square, Triangle, and Hexagon symmetry shapes.
* Choose between Normal2Sided, Normal3Sided, Normal4Sided and Normal6Sided symmetry types.
* Mirror building and upgrade actions across symmetrical axes.
* "R" Key + Hammer in hand -> removal tool. (Remove the entity/structure you're looking at).
UI Features:
* Shape Selection: Easily switch between Square, Triangle, and Hexagon symmetry shapes.
* Type Selection: Choose from Normal2Sided, Normal3Sided, Normal4Sided and Normal6Sided symmetry types. (Depends on the symmetry shape.)
* Enable and Disable symmetry
* Reset Symmetry: Reset the symmetry information (shape, type, position)
* Show center: Display the symmetry center.
Chat Commands:
* /sym_ui: Enable/Disable symmetry UI (Enabled by default).
Console Commands:
* sym_reset: Reset the symmetry information.
* sym_shape: Change the symmetry shape.
* sym_type: Change the symmetry type.
* sym_displaycenter: Display the symmetry center position.
* sym_status: Enable or Disable symmetry.
* sym_ui_pos: Allow players to move the UI position freely.
* sym_ui_reset: Reset the UI position to default position.
Permissions:
symmetry.use Oxide: o.grant <user/group> <name/id> symmetry.use Carbon: c.grant <user/group> <name/id> symmetry.use
Config:
{ "Removal Tool (Def: true)": true, "Open Symmetry UI on Connect (Def: true)": true, "Symmetrical Upgrade (Def: true)": true, "UI Menu X Position (def: 0)": 0.0, "UI Menu Y Position (def: 0)": 0.0, "Check Building cost (def: false)": false, "Check for Deployables before placing (def: false)": false, "Display center functions (def: false)": false, "Symmetry UI Command": "sym_ui", "Symmetry UI X/Y Position command": "sym_ui_pos", "Symmetry UI Position reset command": "sym_ui_reset" }
Showcase videos:
-

$7.99
Drone Event
Adds drones to your server. Drones can attack with grenades and shoot at players, you can destroy drones, they have loot. Drones spawn near monuments, also you can add custom spawn points.
Features:
Easy to set up. Excellent customization options in the config. You can customize the monuments where the drones will spawn.
You can customize the contents of the drone in the config file:
you can set up a list of items that will be inside you can choose drop chance (1 - 100%) you can choose skins for items You can also customize the health and respawn time of the drones.
Commands(admin only):
dreshowpoints - displays all spawn points on the map dreshowdrones - displays all drones on the map dreshowzone - displays nearby areas with drones drerespawndrones - respawn all drones on the map forcibly dreremovedrones - removes all drones from the map dre_removepoint - removes custom spawn point (you need to be close to it) dre_addpoint - adds a custom spawn point (at the place where you are). You can also enter the command with arguments: /dre_addpoint "name" "flightRadius" "use"
Config file:
{ "Minimum respawn time(in minutes)": 15, "Maximum respawn time(in minutes)": 30, "Drone health (hits amount)": 2, "Drone speed(0.5 - 1 recommended)": 0.7, "Grenade damage scale": 1.0, "Attack range": 40, "Drone aggressiveness, from 0 to 100 (the more, the more often the drone attacks)": 10, "Adds a searchlight for drones": false, "Adds a turret for drones": false, "Turret damage scale": 1.0, "Turret weapon short name": "pistol.revolver", "The drone will throw grenades at players": true, "Do not calculate collisions while the drone is just flying (set to true if you have problems with your server performance)": false, "Monument settings": [ { "name": "gas_station", "flightRadius": 15, "offset": { "x": 17.0, "y": 30.0, "z": 0.0 }, "use": true }, { "name": "supermarket", "flightRadius": 15, "offset": { "x": 0.0, "y": 15.0, "z": 0.0 }, "use": true }, { "name": "warehouse", "flightRadius": 15, "offset": { "x": -5.0, "y": 15.0, "z": 0.0 }, "use": true }, { "name": "water_treatment", "flightRadius": 15, "offset": { "x": -60.0, "y": 20.0, "z": 0.0 }, "use": true }, { "name": "junkyard", "flightRadius": 15, "offset": { "x": 0.0, "y": 15.0, "z": 0.0 }, "use": true }, { "name": "lighthouse", "flightRadius": 15, "offset": { "x": 0.0, "y": 35.0, "z": 40.0 }, "use": true }, { "name": "sphere_tank", "flightRadius": 15, "offset": { "x": 60.0, "y": 30.0, "z": 40.0 }, "use": true }, { "name": "harbor_1", "flightRadius": 15, "offset": { "x": 20.0, "y": 15.0, "z": 90.0 }, "use": true }, { "name": "harbor_2", "flightRadius": 15, "offset": { "x": -100.0, "y": 20.0, "z": -20.0 }, "use": true }, { "name": "desert_military_base", "flightRadius": 15, "offset": { "x": -15.0, "y": 20.0, "z": -5.0 }, "use": true }, { "name": "excavator", "flightRadius": 15, "offset": { "x": 65.0, "y": 20.0, "z": -10.0 }, "use": true }, { "name": "swamp", "flightRadius": 15, "offset": { "x": -10.0, "y": 30.0, "z": -15.0 }, "use": false }, { "name": "radtown_small", "flightRadius": 15, "offset": { "x": -5.0, "y": 30.0, "z": -5.0 }, "use": true }, { "name": "water_well", "flightRadius": 15, "offset": { "x": 0.0, "y": 30.0, "z": 0.0 }, "use": true }, { "name": "mining_quarry", "flightRadius": 15, "offset": { "x": 0.0, "y": 25.0, "z": 0.0 }, "use": false }, { "name": "satellite_dish", "flightRadius": 15, "offset": { "x": -40.0, "y": 25.0, "z": -20.0 }, "use": false }, { "name": "cave_small", "flightRadius": 15, "offset": { "x": 0.0, "y": 30.0, "z": 0.0 }, "use": false }, { "name": "cave_medium", "flightRadius": 15, "offset": { "x": 0.0, "y": 30.0, "z": 0.0 }, "use": false }, { "name": "cave_large", "flightRadius": 30, "offset": { "x": 0.0, "y": 35.0, "z": 0.0 }, "use": false }, { "name": "airfield", "flightRadius": 25, "offset": { "x": -75.0, "y": 20.0, "z": 0.0 }, "use": false }, { "name": "launch_site", "flightRadius": 15, "offset": { "x": 0.0, "y": 20.0, "z": 130.0 }, "use": false }, { "name": "powerplant", "flightRadius": 25, "offset": { "x": -75.0, "y": 20.0, "z": -40.0 }, "use": false }, { "name": "trainyard", "flightRadius": 15, "offset": { "x": -70.0, "y": 20.0, "z": 0.0 }, "use": false }, { "name": "arctic_research_base", "flightRadius": 25, "offset": { "x": 10.0, "y": 15.0, "z": -25.0 }, "use": true }, { "name": "ice_lake", "flightRadius": 15, "offset": { "x": 0.0, "y": 20.0, "z": 0.0 }, "use": false }, { "name": "military_tunnel", "flightRadius": 15, "offset": { "x": 20.0, "y": 25.0, "z": -15.0 }, "use": false }, { "name": "power_sub_big", "flightRadius": 10, "offset": { "x": 0.0, "y": 20.0, "z": 0.0 }, "use": false } ], "Custom spawn points settings": [ { "name": "point1", "flightRadius": 15, "position": { "x": 0.0, "y": 100.0, "z": 0.0 }, "use": false }, { "name": "point2", "flightRadius": 15, "position": { "x": 0.0, "y": 200.0, "z": 0.0 }, "use": false } ], "Drop items list": [ { "name": "metal.fragments", "dropChance": 100, "minAmount": 50.0, "maxAmount": 300, "skinID": 0 }, { "name": "metal.refined", "dropChance": 100, "minAmount": 5.0, "maxAmount": 10, "skinID": 0 }, { "name": "scrap", "dropChance": 100, "minAmount": 10.0, "maxAmount": 20, "skinID": 0 }, { "name": "techparts", "dropChance": 50, "minAmount": 1.0, "maxAmount": 2, "skinID": 0 } ] }
-
$19.99
Raffles
By imthenewguy in Plugins
Raffles is a plugin that allows servers to create and host raffles.
These raffles are a fun way to give players an outlet to dispose of excess resources, and a great way for server owners to hand out rare and valuable items!
Raffles features full language support and can be translated into other languages with oxides lang system.
This plugin allows for the following reward types:
Item rewards: Whether it be vanilla or custom items, Raffles will support it. Economics: Reward your players with an injection of economic dollars, straight into their account. Server Rewards: The same as Economics, but for the Server Rewards plugin! Commands: You can run as many commands as you like, and have them listed in the raffle with a custom name. For example, you could have a command that gives the player a random S tier Epic Loot item for winning. It allows for the userid and name to be substituted with {id} and {name}, so will support most command types.
The raffles are broken down into 2 types.
Daily raffles are the primary raffle structure in the plugin. They allow you to set item currencies (yes, it supports custom items), which the player will use to purchase raffle tickets.
Some features it includes:
Custom ticket items. Variable duration, allowing you to have the raffle run for as long as you want. Scheduled start date/time, allowing for you to create the raffle in the config, and have it automatically start when its date/time values are met. Ticket limits, allowing you to set a maximum number of tickets, which will conclude the raffle once met. Item, economics, server rewards and command prizes.
Raffles that are in the config and set for a future date, will appear under the "Future Raffles" category. This allows users to see what raffles are coming up and when.
This can be disabled by setting the visible flag to false.
Future raffles can be force started by admins via this menu or command.
Wipe Raffles contain the same prize structure as regular raffles, allowing for economics, server rewards, items and commands to be awarded to the winners, but their participation works a little differently.
Rather than having players purchase a ticket for the raffle directly, it will count any raffle tickets that the player purchases from a daily raffle as an entry. This means that if a player purchases 60 raffle tickets between 3 different daily raffles over the course of the wipe, they will have 60 entries into the wipe raffle.
The wipe raffle will roll when the server wipes and will allow you to award players with prizes that are redeemable AFTER the server wipes.
This can be as simple as a pickaxe and hatchet that can be redeemed when they login, or as advanced as S tier Epic Loot items, the choice is yours.
The plugin allows for multiple wipe raffles, so you can have multiple winners!
The plugin has 2 permissions:
raffles.allow - required to use the raffles plugin. raffles.admin - required to use admin commands and see admin elements.
Commands:
Command: forcestartraffle
Parameters: <partial raffle name>
Description: forces the specified raffle to start, even if the raffle has already run its course. The start date of the raffle will be modified to time the command is run.
-

$19.98
Augmented Reality Glasses V1
With AR Glasses V1, you can now make the boring old Sunglasses play a vital role in information when your players roam your Server.
REQUIRES IMAGE LIBRARY TO LOAD IMAGES
When equipped, the AR Glasses can trigger Preset Commands, and even Custom Commands, for example, set a custom image and command to a button, and have it run whatever you like.
Preset commands are able to be set on Cooldown.
When a Preset command is ran, it can send crucial data such as existing loot crates in the configurable range, but to combat this being OP, we introduce reducing the items condition and range, This is also configurable.
LIST OF COMMANDS / PRESET BUTTONS
Commands can be ran via chat or via AR Panel Button
/arn - Shows NPCs within a specified range.
/arl - Marks all loot containers within a specified range.
/arp - Displays nearby online players.
/arore - Highlights ore nodes within a specified range.
/ara - Detects animals within a specified range.
/ArServer - Shows current server statistics.
/arglasses - Grants the player a pair of AR glasses. - IF PLAYER HAS PERMISSION
/arinfo - Displays information about available AR commands and functionalities.
For Suggestions Send a PM or contact me at
{ "AR Glasses Shortname": "sunglasses", "AR Glasses SkinID": 3145620332, "AR Panel Transparency": 0.0, "AR Text Size": 40.0, "AR Text Position": { "x": 0.0, "y": 2.0, "z": 0.8 }, "AR Command Cooldown": 120.0, "Decrease Ar Glasses Durability By This Much Per AR Command Use": 15, "Ore Detection Range": 30.0, "NPC Detection Range": 30.0, "Animal Detection Range": 30.0, "Loot Container Detection Range": 30.0, "Online Player Detection Range": 10.0, "Custom Button 1 Enabled?": true, "Custom Button 1 Command": "chat.say /info", "Custom Button 1 Image": "https://cdn.discordapp.com/attachments/1198548433649287259/1224475937530183751/Jouw_alineatekst_14.png?ex=661da115&is=660b2c15&hm=7d278da07c2e3bed85f4c3172f942eb85e759cb309dd472f17fc3bd79e8e04fb&", "Custom Button 2 Enabled?": true, "Custom Button 2 Command": "chat.say /st", "Custom Button 2 Image": "https://cdn.discordapp.com/attachments/1198548433649287259/1224476670136946688/Jouw_alineatekst_15.png?ex=661da1c3&is=660b2cc3&hm=5664716444936c762dece32ae0a8e3902250ab42f8bef2cee836e1d91af4f1b8&", "Custom Button 3 Enabled?": true, "Custom Button 3 Command": "chat.say /buyraid", "Custom Button 3 Image": "https://cdn.discordapp.com/attachments/1198548433649287259/1224480121956728882/Jouw_alineatekst_19.png?ex=661da4fa&is=660b2ffa&hm=8193fc1c3288220dc0bb4bf8ea03d2df299568d67f8ea2f44886efb8be907165&", "Custom Button 4 Enabled?": true, "Custom Button 4 Command": "chat.say /menu", "Custom Button 4 Image": "https://cdn.discordapp.com/attachments/1198548433649287259/1224481208247914546/Jouw_alineatekst_20.png?ex=661da5fd&is=660b30fd&hm=8c29e316b1309ac13872e1ed243f5141ac6aa5111fd97fc40364fd5c7bfb7d1b&", "Custom Button 5 Enabled?": true, "Custom Button 5 Command": "chat.say /shop", "Custom Button 5 Image": "https://cdn.discordapp.com/attachments/1198548433649287259/1224479261323300894/Jouw_alineatekst_17.png?ex=661da42d&is=660b2f2d&hm=e525724e01e3ceae7397dacccda8216bc8fe9b90bec367ebd5e531e9020ea28d&", "Custom Button 6 Enabled?": true, "Custom Button 6 Command": "chat.say /Kit.vip", "Custom Button 6 Image": "https://cdn.discordapp.com/attachments/1198548433649287259/1224478466909405184/Jouw_alineatekst_16.png?ex=661da370&is=660b2e70&hm=952ec4c24ae853b1d0a458c978c578e69a23741f220e0698d78a6326e9a68d21&", "Custom Button 7 Enabled?": true, "Custom Button 7 Command": "chat.say /info", "Custom Button 7 Image": "https://cdn.discordapp.com/attachments/1198548433649287259/1224482144185749564/Jouw_alineatekst_21.png?ex=661da6dc&is=660b31dc&hm=e39b2888809fcb174d29e46eb2f039a201b63cdf53a86845307b491c3fa27760&"
}
-
$24.99
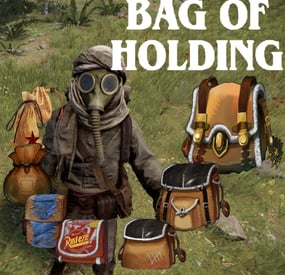
Bag of Holding
By BlackLightning in Plugins
Features
Allows players to store items in portable bags Allows limiting the number of bags players can use at once Allows placing bags into storage containers, with limits Allows placing bags inside other bags, with limits Allows restricting which items can go inside bags Allows players to upgrade bags linearly Allows using Economics and Server Rewards for purchasing bag upgrades Allows players to recycle bags Allows items to be pulled into bags automatically Allows unlimited types of bags to be defined, each with different appearance, capacity and rules Allows players to open and switch bags quickly via a UI Allows players to create custom key binds to open and close bags Allows creating bags that are preloaded with items from Kits Allows bags to be placed in wearable slots, including the backpack slot Allows a visual backpack to be displayed while the player is wearing a bag Quick start
Give yourself a bag
Grant the bagofholding.givebag permission to an administrator role. For example, run the command o.grant group admin bagofholding.givebag. Give yourself a bag with the command boh.givebag <player> generic.small (replace <player> with your in-game name). By default, this bag has 18 slots, and can hold any type of item, but it cannot hold other bags (unless those other bags are empty). Click on the bag in your inventory and click the "Open Bag" button. This will display the bag container in the loot panel, allowing you to place items into the bag. Upgrade the bag
Grant the bagofholding.upgrade.generic.small permission to an appropriate role. For example, run the command o.grant group default bagofholding.upgrade.generic.small. Open the bag. Click the "Upgrade" button. Click the "Purchase upgrade" button (costs 300 scrap by default). This will upgrade the bag capacity to 24 slots, and it will change the bag's appearance. Note: Every bag has a separate permission which determines whether players can upgrade that specific type of bag. If you intend to allow players to upgrade bags, you will have to grant quite a few different permissions. We suggest using a permissions manager UI plugin for this.
Enable gather mode
Set Gather mode -> Enabled to true in the config. Reload the plugin. Open the bag. Click the "Gather: Off" button so that it changes to "Gather: On". This will show a flame icon on the bag, indicating that it is in gather mode. Drop and pick up an item. You will see the item get pulled into the bag automatically. Add bags to loot tables
Note: If you are using a dedicated loot plugin to add bags to loot tables, this built-in feature might not work. For best results, configure your dedicated loot plugin to spawn bags instead.
Set Loot spawns -> Enabled to true in the config. For testing, set the spawn chance for one type of bag to 100.0 for the assets/bundled/prefabs/radtown/crate_normal.prefab container prefab. Reload the plugin. Spawn some containers to confirm that they can spawn bags in them. For example, run the command spawn crate_normal in the client F1 console while aiming at the ground, and look for a bag in the container. If none of the loot containers are spawning with a bag in them, then you are probably using a loot plugin which is conflicting, in which case you may need to configure loot spawns in your dedicated loot plugin. Once you have confirmed that this feature is working on your server, configure the spawn chances to your liking. Once you have configured the spawn chances to your liking, you can use the bagofholding.spawnloot command to spawn bags into existing loot containers according to the config. You can also remove all bags from loot containers using the bagofholding.clearloot command if you accidentally added too many. Realistic backpacks
If you want to allow backpacks to be usable only in the backpack slot, along with a 3D visual backpack model, proceed with the following steps.
Set Wearable bags -> Allow wearing bags in the backpack slot to true in the config. This allows players to equip a bag in the backpack slot. Set Visual backpack -> Display while a bag is worn in the backpack slot to true in the config. This causes the visual backpack model to appear when the player is wearing a bag in the backpack slot. Set Player wearable bag limits -> Enabled to true in the config. This causes the player wearable inventory to have different bag limits than the rest of the player inventory. Set Player wearable bag limits -> Default limits -> Max total bags to 1 in the config. This allows players to wear at most one non-empty bag. Technically, this number could be set higher and it wouldn't matter, as long as you don't permit bags to be worn in other slots, since there is only one backpack slot. Set Player bag limits -> Default limits -> Max total bags to 0 in the config. This prevents players from placing non-empty bags in their main/belt inventory. Reload the plugin. Change bag theme
By default, bags use fantasy-themed skins. Alternatively, you may choose leather-themed or tactical-themed skins. You may also choose between colored chevron icons (default) and colored circle icons which are larger and therefore easier to see. Bag skins can be directly changed in the config, but for first time users, this plugin provides multiple commands to help you edit the config in bulk.
To change the bag theme, run the command boh.settheme <theme>. For example, boh.settheme tactical_chevrons. This command will update the skin IDs in the config and update existing bags in your server to the appropriate theme. Available themes are: fantasy_chevrons, fantasy_circles,leather_chevrons,leather_circles, tactical_chevrons, tactical_circles. This command works best when using a freshly generated config. If you have significantly altered the config (i.e., changed the number of bags per category), then you may have to use a lower level command such as boh.setskins, or manually update the config.
In addition to the skins assigned to the preset themes which include 6 variations (no icon, light blue, green, yellow, orange, blue), there are 5 additional colors available (gray, white, black, red, pink). See the "Alternative bag skins" section for a list of all 400+ skins. Additionally, you can create your own skins and add them to the configuration.
Some servers provide multiple themes at once, allowing players to use whichever style they prefer. To do this, you first need to define the alternative themes in the config. To add alternative themes, you can run the command boh.addtheme <theme>. Note: The fantasy_chevrons, leather_chevrons and tactical_chevrons themes are already included in the default config (as of v1.9.0), so you don't need to run this command if those are the only themes you care about, unless you are using a config from a prior version. Once the config is updated, you will then have to provide the alternative skins to your players somehow, such as via kits, vending machines, shop plugins, crafting plugins, loot plugins, etc. The boh.givebag command has an optional parameter to designate which skin to apply, which some servers use for integration with custom shops.
In addition to changing bag skins, you may also want to change the skin displayed on the belt icon via UI settings -> Belt button -> Display skin ID in the configuration. For reference, the default generic.small bag skins are 2824115881 (fantasy), 2831029422 (leather), and 2828573095 (tactical).
How it works
How players obtain bags
Bags are simply skinned large halloween loot bags (short name: halloween.lootbag.large, item ID: 479292118). Any plugin that can create skinned items can be used to make bags available on your server. For example, bags can be distributed via kits, vending machines (via Custom Vending Setup), shop plugins, crafting plugins, loot plugins (e.g., Alpha Loot), and more. The plugin also has native support for adding bags to loot containers, and provides the command boh.givebag <player> <profile> <amount> for use by admins or plugins.
How players open bags
Players can open bags multiple ways.
"Open Bag" button: When a player clicks on a bag item, they will see the "Open Bag" button appear next to the "Drop" button. Clicking the "Open Bag" button will open the bag container on the right side of the inventory, the same as opening a storage container.
Extra belt button: Players with a bag in their inventory will see a bag button next to their belt. Clicking that button will open the first bag in their inventory (via the bag.open command). Requires "UI settings" -> "Belt button" -> "Enabled": true in the config. This is enabled by default. Subsequent presses of that button will cycle through the remaining bags in the player's inventory.
Custom key binds: Players may bind commands such as bag.open, bag.next, and bag.prev to keys for quick access. See the "Commands" section for a complete list of available commands and how they function.
Tip: Players can also move items into a bag without even opening it, by simply dragging and dropping items directly onto the bag.
Bag limits
As a balancing mechanism, you can limit how many bags a given player or container can use at once. Empty bags can be placed almost anywhere, but bags with contents will count toward a limit. When that limit is reached, empty bags in the same container will become locked and unable to receive items. The default configuration of the plugin allows players to use up to 3 bags at a time in their inventory, with 0 bags in their backpack (Backpacks plugin on uMod), and 0 bags in storage containers.
To configure bag limits for player inventories, see Player bag limits in the config. To configure bag limits for Backpacks, see Backpack bag limits in the config. To configure bag limits for storage containers, see Default container bag limits and Container bag limits by prefab in the config. If desired, you can assign bag limits according to player permission.
Bag upgrades
Each bag profile may define an upgrade target, dictating which bag profile it can be upgraded to. While a player is looting a bag, if they have permission to upgrade that bag, they will see an "Upgrade" button. Clicking that button will display the cost, as well as what the bag will be upgraded to, allowing the player to confirm the purchase if they have sufficient funds.
Tip: One immersive upgrade technique is to set the upgrade cost to another instance of the same bag, to make it so players have to combine bags together to produce a better bag.
Bag recycling
Each bag profile may define a set of ingredients that it will recycle into when processed by a recycler. Each bag can recycle into as many ingredients as you want, each with an optional skin ID.
Tip: One immersive recycling technique is to configure larger bags to recycle into smaller bags (possibly multiple). This technique can be used to allow players to effectively reverse bag upgrades, as well as to split larger bags into smaller bags that the player can then upgrade independently.
Wearable bags
To free up main inventory space, you can enable players to carry bags in their wearable inventory slots. To enable, see Wearable bags in the config. Note: Wearing a bag will only display the visual backpack if the visual backpack is also enabled.
Visual backpack
To increase immersion, you can display a visual backpack while a player is wearing a bag. To enable, see Visual backpack in the config.
Gather mode
To optimize player looting, players can enable gather mode for each bag. While gather mode is enabled, any item that gets added to the bag's parent container will automatically be moved into the bag if possible. For example, if you have a Food & Medical bag in your inventory, and that bag is in gather mode, picking up a food or medical item (or moving such an item from a container to your inventory) will automatically move that item into the bag if there is space.
Notes:
Gather mode can be enabled by setting Gather mode -> Enabled to true in the config Bags which have gather mode enabled will display a flame icon to easily identify them Throwing a bag onto the ground will automatically toggle off gather mode Gather mode only moves newly added item stacks, so existing item stacks will be ignored, even when replenished When multiple bags are in gather mode, the plugin will attempt to add items to bags according to their order in the container When nesting bags and enabling gather mode at multiple levels, new items will recursively be moved to child bags until they cannot be moved further Kit bags
A kit bag is a type of bag that only allows players to remove items from the bag, but not add items. Kit bags are intended to be used as a mechanism to give players multiple items at once, without requiring that the player initially have the inventory space to hold all the items, since the player only needs to be able to hold the bag itself. Also, for convenience, once a kit bag has been emptied, the bag will automatically delete itself since it is no longer useful at that point (since players cannot place items in it).
How to redeem a kit as a bag:
If you have already created a kit via the Rust Kits plugin on uMod, you can give that kit to a player as a bag. That means the player will receive a bag item that is filled with the contents of that kit. To give a player a kit as a bag, simply run the command boh.givekitbag <player> kitbag.red.locked <kit>, where <player> should be replaced with a player name or steam ID, and <kit> should be replaced with the name of the kit. You may replace kitbag.red.locked with the name of a different locked kit bag if you want. Note: If running this command as a player (as opposed to in the server console or via another plugin), ensure you first have the bagofholding.givekitbag permission (caution: only grant that permission to trusted administrators).
Tip: If you want to allow players to store items in a bag that is redeemed this way, then simply use a bag profile which has the "Allow player item input" config option set to true.
How to add a kit bag to a kit:
The Rust Kits plugin on uMod supports bags with items in them. If you want to allow players to redeem kits that contain bags with items in them, simply create a bag, add the items you want, then create a kit from your inventory. Note: Players will not be able to see the contents of the bag from the Kits UI, so it will be a mystery to the player until they have redeemed the kit, though the Kits plugin might be updated in the future to allow inspecting bag contents.
If you want to add a bag to a kit, but don't want to allow players to use the bag as storage, follow the below steps create a kit bag.
Give yourself an unlocked kit bag with the command boh.givebag <player> kitbag.red.unlocked, where <player> should be replaced with your user name or steam ID. Place items in the bag. Ensure you have the bagofholding.upgrade.kitbag.red.unlocked permission. Note: If you gave yourself a different color bag, the permission you must grant will be different. Caution: Only grant that permission to administrators who will be creating kits. Use the "Upgrade" feature to transform the bag into a kitbag.red.locked bag, which makes it so players can no longer add items to the bag. Use the Kits plugin to create or update the kit from your inventory. If you want to edit the bag contents, but don't want to do it from scratch, follow the below steps.
Redeem the kit. Ensure you have the bagofholding.upgrade.kitbag.red.locked permission. Note: If this is a different color bag, the permission you must grant will be different. Caution: Only grant that permission to administrators who will be creating kits. Use the "Upgrade" feature to transform the bag into a kitbag.red.unlocked bag. Update the items in the bag. Use the "Upgrade" feature to transform the bag back into a kitbag.red.locked bag, which makes it so players can no longer add items to the bag. Use the Kits plugin to update the kit from your inventory. Permissions
Admin permissions
bagofholding.manageloot -- Allows running the commands boh.spawnloot and boh.clearloot. bagofholding.stats -- Allows running the command boh.stats. bagofholding.listbags -- Allows running the command boh.listbags. bagofholding.listcontainers -- Allows running the command boh.listcontainers. bagofholding.config -- Allows running the commands boh.setskins, boh.addskins, boh.settheme and boh.addtheme. bagofholding.givebag -- Allows running the command boh.givebag <player> <bag profile> <amount>. bagofholding.givekitbag -- Allows running the command boh.givekitbag <player> <bag profile> <kit name>. Limit permissions
Depending on how you have configured the plugin, there will be additional permissions following the pattern bagofholding.limit.<type>.<suffix>, one for each limit permission profile. The plugin comes with the following limit profiles by default.
bagofholding.limit.player.unlimited -- Allows the player to store unlimited bags in their inventory. bagofholding.limit.wearable.unlimited -- Allows the player to wear unlimited bags. This permission, and other bagofholding.limit.wearable.* permissions won't exist unless you enable Player wearable bag limits in the config. Otherwise, the wearable container will share bag limits with the rest of the player inventory. bagofholding.limit.backpack.unlimited -- Allows the player to store unlimited bags in their backpack (Backpacks plugin on uMod). bagofholding.limit.container.unlimited -- Allows the player to store unlimited bags in storage containers that they deploy. You can define additional limit profiles in the Player bag limits, Player wearable bag limits, Backpack bag limits, Default container bag limits and Container bag limits by prefab sections of the config.
Note: When adding container bag limits by prefab, the permission will look like bagofholding.limit.container.<short_prefab_name>.<suffix>.
Upgrade permissions
Each bag profile that is configured with a valid upgrade target will generate a permission following the pattern bagofholding.upgrade.<profile>. Granting that permission allows players to upgrade that type of bag. For example, the bagofholding.upgrade.generic.small permission allows players to upgrade generic.small bags to generic.medium bags. We suggest using a permissions manager UI plugin to discover and grant bag upgrade permissions.
Commands
This plugin provides both chat and console commands using the same syntax. When using a command in chat, prefix it with a forward slash: /.
Admin / server commands
boh.spawnloot -- Spawns loot in loot containers throughout the map. Intended for first-time setup, since enabling loot spawns in the config will only add bags to loot containers that spawn while the plugin is loaded. boh.clearloot -- Removes bags from all loot containers. Intended for first-time setup in conjunction with the boh.spawnloot command. boh.stats -- Prints an overview of how many bags are present on the server. Note: Some bags may not show up in the results if another plugin has deleted them and backed up their data on disk (for example, bags inside player Backpacks if the player is not connected or has not opened their Backpack during this play session). boh.listbags <filter> -- Prints a table view in console, showing all of the bag profiles defined in the config, matching the keyword filter if provided. Requires the bagofholding.listbags permission. boh.listcontainers -- Prints all container prefabs in the game. Requires the bagofholding.listcontainers permission. boh.setskins <category> <skin1> <skin2> <skin3> <skin4> <skin5> <skin6> <skin7> -- Updates the primary skin of all bag profiles in the specified category. The exact number of skins you supply must match the number of bags in the specified category. For example, if there are 7 bag profiles in the generic category (one for each size), then you can use this command with 7 distinct skins to update the config for all of those bag profiles at once. The first bag profile will be given the first skin, the second bag profile will be given the second skin, and so on. In addition to updating the config for you, this will change all the currently known bags on the server, which have the affected bag profiles, to use the specified skins, saving you the trouble of having to recreate the bags. This command will ensure that the specified skins are made the primary skins of the affected bag profiles. boh.addskins <category> <skin1> <skin2> <skin3> <skin4> <skin5> <skin6> <skin7> -- Adds the specified skins as secondary skins to all bag profiles in the specified category. The first bag profile will be given the first skin, the second profile will be given the second skin, and so on. Similar to the boh.setskins command, this will update the config, but will not update the skins of existing bags on your server. boh.settheme <theme> -- Updates the primary skin of the preset bag categories (bagofholding, generic, armor_clothing, food_medical, items_construction, resources_components, weapons_tools) to the specified theme. Valid themes: fantasy_chevrons, fantasy_circles,leather_chevrons,leather_circles, tactical_chevrons, tactical_circles. Note: If the config has significantly changed (i.e., if any of the preset bag categories no longer have exactly 7 bag profiles), this command will not work, but you can alternatively use boh.setskins or manually update the config. boh.addtheme -- Like boh.settheme, but instead of changing the primary skin of the affected bag profiles, this will only add the specified theme as secondary skins. boh.givebag <player> <bag profile> <amount> <skin index> -- Creates a stack of bags and gives it to the specified player. Requires the bagofholding.givebag permission. If the bag has multiple skins defined, you can specify which one via the skin-index argument. For example, boh.givebag Somebody generic.small 1 3 to give one bag with the 3rd skin applied. The amount and skin index parameters are optional, both defaulting to 1. boh.givekitbag <player> <bag profile> <kit name> -- Creates a bag, populates it with the specified kit (from the Kits plugin on uMod), then gives it to the specified player. Requires the bagofholding.givekitbag permission. Player commands
bag.open -- Depending on the context, this command will either open the first unlocked bag in your inventory, open the next bag in your inventory, or close your inventory if no more bags are found. bag.next -- Like bag.open, but will continuously cycle bags rather than closing your inventory when no more bags are found. bag.prev -- Like bag.next, but will start at the end of your inventory, and will cycle bags in reverse order. Configuration
The settings and options can be configured in the BagOfHolding file under the config directory. The use of an editor and validator is recommended to avoid formatting issues and syntax errors.
General settings
Wearable bags -- Determines whether players can place bags in their wearable inventory slots. Disabled by default. Enabling this will incur a very minor performance cost. Allow wearing bags in the backpack slot (true or false) -- Determines whether players can wear bags in the backpack/parachute slot. Default: false. Allow wearing bags in non-backpack slots (true or false) -- Determines whether players can wear bags in non-backpack slots. Default: false. Visual backpack -- Determines whether the visual backpack will be displayed on players while wearing a bag. Enabling this will incur a minor performance cost. Display while a bag is worn in the backpack slot (true or false) -- Determines whether the visual backpack will be enabled while the player is wearing a bag in their backpack slot. Default: false. You should set Wearable bags -> Allow wearing bags in the backpack slot to the same value that you set here. Display while a bag is worn in a non-backpack slot (true or false) -- Determines whether the visual backpack will be enabled while the player is wearing a bag in a non-backpack slot. Default: false. You should set Wearable bags -> Allow wearing bags in non-backpack slots to the same value that you set here. Gather mode Enabled (true or false) -- Determines whether players can toggle gather mode on bags. While gather mode is enabled for a given bag, any item that gets added to the bag's parent container will automatically be moved into the bag if possible. Default: false. Enable stack improvements (true or false) -- Determines whether the plugin will attempt to auto stack bags when dropping them onto each other in the player inventory (as long as the destination bag is not currently open). Default: true. Setting to false will improve performance. Note that dropping a bag with contents onto an empty bag will never stack them; the empty bag must be dropped onto the bag that has contents. Dropped bag item settings
Dropped bag item settings -- Determines the behavior of dropped bag items. Enable dropped bag buoyancy (true or false) -- Determines whether dropped bag items will float in water. Default: true. Enable opening dropped bags while at bag limit (true or false) -- Determines whether attempting to pick up a bag will actually open the bag instead, if the player cannot carry the bag due to their current bag limits. Default: true. Auto equip dropped bags while at bag limit (true or false) -- Determines whether attempting to pick up a bag will attempt to equip it in a wearable slot instead, if the player cannot carry the bag in their main inventory due to their current bag limits. Default true. This feature only applies while bags are configured to be wearable. Minimum despawn time (seconds) -- Determines the minimum time (in seconds) before a dropped bag item will despawn. This option also affects the despawn time of dropped backpacks that contain bag items. Note: The despawn time of bags will also take into account the despawn time of items within them. Default: 1800 (30 minutes). UI settings
UI settings Belt button -- Determines the display of the button next to the player's belt. By default, the button appears on the right side of the belt. The button will only appear if you have at least one bag in your inventory. Clicking the button will open the first bag in your inventory via the bag.open command. Enabled (true or false) -- Determines whether the belt button is displayed. Default: true. Only show while bags are worn (true or false) -- Determines whether bags must be worn in order to display the belt button. OffsetX -- Determines where the belt button is displayed, relative to the bottom center of the screen. Set to 185.0 to place the button on the right side of the belt. Set to -263.0 to place the button on the left side of the belt. Default: 185.0. Display skin ID -- Determines the skin ID displayed on the belt button. Default: 2824115881 (the fantasy style generic.small bag). Loot interface -- Determines the display of the loot panel while the player has a bag open. Enable back button (true or false) -- Determines whether a back button is displayed when the player is looting a bag that is inside another container. Clicking the back button will switch the loot interface to the bag's parent container. Default: true. Bag selector -- Determines the display of the bag selector. While looting a bag, the bag selector will display an icon for each lootable bag in the bag's parent container, allowing for 1-click access to other bags. The bag selector also displays a vertical progress bar to indicate how full each bag is. The bag selector automatically resizes depending on how many bags need to be displayed. The default settings allow a maximum of 10 bags to be displayed. Enabled (true or false) -- Determines whether the bag selector is displayed. Default: true. Max width -- Determines how much space the bag selector can use. By default, it can take up to 5 inventory slots worth of space, but that may cause the "LOOT" text to overlap the bag selector for players using non-English languages. If your players are seeing overlap, consider reducing this value. Default: 310.0. Min bag size -- Determines the minimum size (height and width) of each bag displayed in the bag selector. When many bags are displayed, each bag icon will be no smaller than this value. Default: 29.0. Max bag size -- Determines the maximum size (height and width) of each bag displayed in the bag selector. When few bags are displayed, each bag icon will be no larger than this value. Default: 58.0. Effects
Effects Open effect -- Determines the effect played when a player opens a bag. Only the player that opens the bag will witness this effect, so it will not give away their location. Default: "assets/prefabs/deployable/small stash/effects/small-stash-deploy.prefab". Set to "" to disable the effect. Disabling effects will improve performance. Upgrade effect -- Determines the effect played when a player upgrades a bag. Only the player that upgrades the bag will witness this effect, so it will not give away their location. Default: "assets/prefabs/misc/halloween/lootbag/effects/silver_open.prefab". Set to "" to disable the effect. Disabling effects will improve performance. Loot spawns
Loot spawns -- Determines which loot containers bags may spawn in. This feature is disabled by default. As an alternative to using this feature, you might want to use a dedicated loot plugin to spawn bags, by designating that the loot plugin should spawn a large halloween loot bag (short name: halloween.lootbag.large, item ID: 479292118) with an appropriate skin ID from the Bag profiles section of the config. Enabled (true or false) -- Determines whether this plugin will attempt to add bags to loot containers. Default: false. Bag spawn chance percent by prefab -- Determines the probability (0.0 to 100.0 percent) of bags spawning in loot containers, according to the prefab of the loot container. For each type of loot container, you may define the spawn chance for each bag profile. To see which container prefabs this can accept, run the command boh.listcontainers (requires the bagofholding.listcontainers permission). Bag limits
Player bag limits -- Determines how many non-empty bags that players can hold in their inventory at once. This applies to the entire player inventory, including the wearable container, unless Player wearable bag limits is enabled, in which case limits for the wearable container is configured separately. Default limits -- These limits apply to all players, except those who have been granted a permission from Bag limits by permission. Max total bags -- See below. Max bags by category name -- See below. Bag limits by permission -- List of bag limits which override the defaults. Permission suffix -- Determines the permission generated, following the pattern bagofholding.limit.player.<suffix>. For example: bagofholding.limit.player.unlimited. You may define unlimited bag limit profiles, but at most one will be assigned to each player. Limit profiles toward the end of the list have highest priority. Max total bags -- See below. Max bags by category name -- See below. Player wearable bag limits -- Determines how many non-empty bags that players can wear. Enabled -- Determines whether wearable limits are separate from Player bag limits. While true, limits defined in this section apply to the wearable container, and limits defined in Player bag limits apply only to the rest of the player inventory. While false, limits defined in this section have no effect. Default limits -- These limits apply to all players, except those who have been granted a permission from Bag limits by permission. Max total bags -- See below. Max bags by category name -- See below. Bag limits by permission -- List of bag limits which override the defaults. Permission suffix -- Determines the permission generated, following the pattern bagofholding.limit.wearable.<suffix>. For example: bagofholding.limit.wearable.unlimited. You may define unlimited bag limit profiles, but at most one will be assigned to each player. Limit profiles toward the end of the list have highest priority. Max total bags -- See below. Max bags by category name -- See below. Vanilla backpack bag limits -- Determines how many non-empty bags that vanilla backpacks can hold (while equipped or while dropped on the ground). Enabled -- Determines whether vanilla backpack bag limits are determined by this section or by Default container bag limits -> Default limits. While true, limits defined in this section apply to vanilla backpacks. While false, limits defined in this section have no effect, and vanilla backpacks will follow the rules defined for default container limits. Default limits -- These limits apply to all backpacks. There is not currently a way to override this for players with permission. Max total bags -- See below. Max bags by category name -- See below. Backpack bag limits -- Determines how many non-empty bags that players can hold in their backpack at once (Backpacks plugin on uMod). Default limits -- These limits apply to all players, except those who have been granted a permission from Bag limits by permission. Max total bags -- See below. Max bags by category name -- See below. Bag limits by permission -- List of bag limits which override the defaults. Permission suffix -- Determines the permission generated, following the pattern bagofholding.limit.backpack.<suffix>. For example: bagofholding.limit.backpack.unlimited. You may define unlimited bag limit profiles, but at most one will be assigned to each player. Limit profiles toward the end of the list have highest priority. Max total bags -- See below. Max bags by category name -- See below. Default container bag limits -- Determines how many non-empty bags can be placed into storage containers. Can be overriden for specific container prefabs via Container bag limits by prefab. Default limits -- These limits apply to all storage containers, except those owned by players who have been granted a permission from Bag limits by permission. Max total bags -- See below. Max bags by category name -- See below. Bag limits by permission -- List of bag limits which override the defaults. Permission suffix -- Determines the permission generated, following the pattern bagofholding.limit.container.<suffix>. For example: bagofholding.limit.container.unlimited. You may define unlimited bag limit profiles, but at most one will be assigned to each player. Limit profiles toward the end of the list have highest priority. Max total bags -- See below. Max bags by category name -- See below. Container bag limits by prefab -- Determines how many non-empty bags can be placed into storage containers, by container prefab, superseding Default container bag limits. See below for an example. [full_prefab_path] -- For each prefab you want to define limits, you will need to define a new subsection with the full prefab path, then declare the bag limit definition under that section. Default limits -- These limits apply to all storage containers with this prefab, except for those owned by players who have been granted a permission from Bag limits by permission. Max total bags -- See below. Max bags by category name -- See below. Bag limits by permission -- List of bag limits which override the defaults for this prefab. Permission suffix -- Determines the permission generated, following the pattern bagofholding.limit.container.<short_prefab_name>.<suffix>. For example: bagofholding.limit.container.locker.deployed.unlimited. You may define unlimited bag limit profiles, but at most one will be assigned to each player. Limit profiles toward the end of the list have highest priority. Max total bags -- See below. Max bags by category name -- See below. Every bag limit profile has the following options.
Max total bags -- Determines how many total non-empty bags (of any category) are allowed. Max bags by category name -- Determines how many non-empty bags of each category are allowed. This references the optional Category name property of each bag profile. For example, if you set this to { "resources_components": 2 }, players will be able to hold at most 2 Resources & Components bags. Example Container bag limits by prefab:
"Container bag limits by prefab": { "assets/prefabs/deployable/locker/locker.deployed.prefab": { "Default limits": { "Max total bags": 0, "Max bags by category name": {} }, "Bag limits by permission": [ { "Permission suffix": "unlimited", "Max total bags": -1, "Max bags by category name": {} } ] } }, Bag content rulesets
Bag content rulesets -- This section allows you to determine which items can be placed inside bags. It also allows you to define limits for bags inside bags. Each bag profile can refer to a content ruleset that you define in this section, to determine what is allowed in that type of bag. This design allows you to define a ruleset once, and reference it in many bag profiles. Name -- The name of the ruleset. Once you have defined this ruleset, you can assign it a specific bag profile by going to the Bag profiles section of the config and setting the Contents ruleset option to this ruleset name. Allowed item categories -- Determines which categories of items are allowed to be placed into bags that use this ruleset. Allowed values: All, Ammunition, Attire, Common, Component, Construction, Electrical, Favourite, Food, Fun, Items, Medical, Misc, Resources, Search, Tool, Traps, Weapon. Any item within allowed categories may be forcibly disallowed by specifying its short name in Disallowed item short names, or by specifying its skin ID in Disallowed skin IDs. Disallowed item categories -- Determines which categories of items are disallowed from being placed into bags that use this ruleset. This option is useful if you want to allow most categories, with explicit denial of specific categories. Note: For this option to work, you'll also need to set Allowed item categories to ["All"]. Any item disallowed this way can be forcibly allowed by specifying its short name in Allowed item short names, or by specifying its skin ID in Allowed skin IDs. Allowed item short names -- Determines which items are allowed to be placed into bags that use this ruleset, in addition to the categories specified in Allowed item categories. Any item allowed this way can be forcibly allowed by specifying its skin ID in Disallowed skin IDs. Disallowed item short names -- Determines which item short names are disallowed from being placed into bags that use this ruleset. Any item disallowed this way can be forcibly allowed if its skin ID is specified in Allowed skin IDs. Allowed skin IDs -- Determines which skin IDs are allowed to be placed into bags that use this ruleset. By default, all skin IDs are allowed, as long as the item is allowed via Allowed item categories or Allowed item short names. This option is useful for allowing specific skins of specific items that are not otherwise allowed. For example, if you want a specific bag to only be able to hold other bags (and no other items), simply set this option to the list of bag skin IDs, and leave all of the other options blank. Disallowed skin IDs -- Determines which skin IDs are disallowed from being placed into bags that use this ruleset. This option is useful for disallowing specific skins of specific items that are otherwise allowed via Allowed item categories or Allowed item short names. Bag limits -- Determines how many non-empty bags can fit inside this bag. Max total bags -- See the section on bag limits. Max bags by category name -- See the section on bag limits. Order of precedence: Disallowed skin IDs > Allowed skin IDs > Disallowed item short names > Allowed item short names > Disallowed item categories > Allowed item categories.
Bag profiles
Bag profiles -- This section defines every type of bag. For an item to function as a bag, it must be a large halloween loot bag (short name: halloween.lootbag.large, item ID: 479292118) with a skin ID from this section. Name -- The short name of the bag. This must be unique. The bag profile name is used by various features of the plugin, including bag limits, bag upgrades, upgrade permissions, loot spawns, the bagofholding.givebag command, developer hooks, and the developer API. Skin IDs -- Determines the skin IDs associated with this bag profile. Any halloween.lootbag.large item that has one of these skin IDs will be considered a bag controlled by this plugin and will use this profile. You can associate as many skin IDs per bag profile as you want. By default, most bag profiles will have three skins in the config, for fantasy, leather and tactical themes, in that order. Defining multiple skin IDs allows you to provide multiple themes of bags to players, letting them choose which they prefer, as long as you provide players with a means to get the alternative skins. The first skin ID is considered the primary skin ID, and will be used when creating a bag for loot spawns, when giving a bag via the boh.givebag command (unless the skin index parameter is supplied), and when other plugins create bags via API methods. When a bag is upgraded, if the target bag profile has multiple skin IDs defined, the new skin ID will be selected according to the order in the list of skin IDs. For example, if the bag's current profile lists three skin IDs, and the current skin is second, then the upgraded bag will use the second skin ID in the target profile. If there is no corresponding skin in the same position in the target profile (e.g., 3rd skin on current profile, but the target has only 2 skins), then the first skin will be selected. Capacity -- Determines how many container slots this bag will have. Maximum: 48. Display name -- Determines the display name of the bag item. This shows at the top of the screen when a bag item is selected in your inventory. Category name -- Determines the bag category. Other sections of the config will refer to this name to define bag limits. This should not be confused with item categories, which are used to define content rulesets. Contents ruleset -- Determines which items are allowed inside this bag. This must refer to the name of a ruleset defined in the Bag content rulesets section of the config. Allow player item input (true or false) -- Determines whether players can place items into this bag. Setting to false is useful if you want to provide a player with a bag full of items, as a sort of temporary container. This feature is intended primarily for "kit bags". Upgrade -- Determines which bag profile this bag can be upgraded to, as well as the items required to purchase the upgrade. To -- The name of the target bag profile. Cost -- The cost to purchase the upgrade. Item short name -- The short name of the currency item. Default: "scrap". Item skin ID -- The skin ID of the currency item. Set to 0 to accept any skin. Default: 0. Amount -- The amount of currency required to purchase the upgrade. Use Economics (true or false) -- Set to true to require Economics currency instead of item currency. Default: false. Use Server Rewards (true or false) -- Set to true to require Server Rewards currency instead of item currency. Default: false. Recyclable -- Determines whether the bag can be recycled, as well as which items it will recycle into. Enabled (true or false) -- Determines whether the bag can be recycled. Default: false. Setting to false for every bag will improve performance by disabling recycling hooks. Ingredients -- List of items that will be produced by recycling the bag. Item short name -- The short name of the ingredient item. Default: "scrap". Item skin ID -- The skin ID of the ingredient item. Default: 0. Amount -- The amount of the ingredient item to produce. Item display name -- The display name of the ingredient item. Localization
The default messages are in the BagOfHolding file under the lang/en directory. To add support for another language, create a new language folder (e.g. de for German) if not already created, copy the default language file to the new folder and then customize the messages.
Frequently asked questions (FAQ)
Q: How do I configure this plugin with Alpha Loot?
The built-in Loot spawns feature of this plugin is compatible with popular loot plugins such as Better Loot and Alpha Loot. Alpha Loot users also have the option of spawning bags directly via the Alpha Loot plugin. To do so, use the Alpha Loot Editor to add skinned large halloween loot bags to the loot table (short name: halloween.lootbag.large, item ID: 479292118).
Tutorial: https://www.youtube.com/watch?v=54A77rQ0Ld8.
Caution: Make sure that the bag skin IDs you configure to spawn via Alpha Loot are assigned to bag profiles in the Bag of Holding config. If you configure a particular skin ID in the loot table that does not correspond to a bag profile, then those bags will function as just normal halloween loot bags.
Q: How do I make players spawn with bags?
One way is via the Auto Kits feature of the Rust Kits plugin on uMod. Other plugins that allow you to manage default loadouts for players should also work, as long as they support skinned items.
Q: Can bags be placed inside other bags?
Yes, but by default, only the bagofholding bag profile can contain other bags, and it cannot contain other bagofholding bags. You can fine tune this behavior in the configuration.
Q: Can this plugin replace Backpack plugins?
Yes, for the majority of use cases. If you are using a Backpack plugin for the sole purpose of allowing players to carry more items (with backpacks dropping on death), then you can simply switch to using bags instead. The main difference is that Backpacks allow players to spawn with additional storage, which players cannot lose, whereas players must acquire bags to use additional storage, and players can lose or trade that storage capacity.
If you are currently allowing players to keep their Backpack items on death, bags cannot replace that use case, but bags can enhance that use case since you can configure certain bags to be allowed in Backpacks to effectively increase the Backpack storage capacity.
Q: Is this plugin compatible with Backpack plugins?
Yes, this plugin has native support for the Backpacks plugin on uMod. By default, only empty bags can be placed inside Backpacks, but you can configure that behavior under the Backpack bag limits.
Q: Can bags have more than 7 upgrade stages?
Yes, you can have as many upgrade stages as you want. By default, each bag category has 7 stages (one for each row of capacity), but it's possible to have 48 bag stages per bag category (one for each slot of capacity). The simplest way to add more stages is to create additional bag profiles that reuse the existing skins but have different capacity. For example, you can define "Small Bag (13)" with 13 capacity and "Small Bag (14)" with 14 capacity, both with skin ID 2824115881.
Q: How can I change bag icons?
See the Default bags section below for instructions on changing the bag icons to other presets created by our development team.
If you want to create your own bag icons, simply upload them to the Steam workshop as you would any Rust skin, then assign the corresponding workshop/skin ID to a bag profile in the Bag Profiles section of the config.
Q: Can I configure bag upgrades to require multiple items?
No. Currently, bag upgrades can only be configured to require a single type of item.
Q: Where is this plugin's data file?
This plugin doesn't use nor need a data file in its current design. This plugin utilizes a vanilla Rust capability to store items inside other items, similar to how attachments are placed inside weapons.
Plugin compatibility / troubleshooting
During initial development of this plugin, many plugin compatibility issues were identified and fixed. Some themes of compatibility issues were systematically eliminated, never to be seen again. However, some conflicts may remain undiscovered. If you encounter a new compatibility issue, please report it to the maintainers of both plugins so that we can work out a solution.
This section also provides tips on how you can mitigate various plugin conflicts.
Hook conflict with OnItemSplit
The simplest way to mitigate this issue is by disabling stacking of the halloween.lootbag.large item. You can also avoid this issue by ensuring each bag profile uses a unique skin ID.
Hook conflict with CanStackItem
The simplest way to mitigate this issue is by disabling stacking of the halloween.lootbag.large item.
Tips for maintainers of other plugins:
Don't allow stacking when the item being moved is not empty Don't allow stacking two items whose containers have different capacity Hook conflict with CanCombineDroppedItem
The simplest way to mitigate this issue is by disabling stacking of the halloween.lootbag.large item.
Hook conflict with CanMoveItem
This can happen in two possible situations:
When quick-looting an item from a bag into your inventory. If this is when you see the conflict, you will have to contact us to troubleshoot further. When dropping a bag onto another bag. If this is when you see the conflict, the simplest way to mitigate this issue is by disabling stacking of the halloween.lootbag.large item. You can also mitigate this issue by setting Enable stack improvements to false in the config. Hook conflict with CanBeRecycled or OnItemRecycle
The simplest way to mitigate this issue is by disabling recycling on all bag profiles.
The belt icon overlaps with other plugin icons
To mitigate this issue, you can either disable the belt icon or reposition it in the config.
Opening a bag spawns loot
There are two likely possibilities.
The bag had a skin ID that is not configured in the plugin. One way this can happen is if you use another plugin to acquire bags, and the skin ID you configured in that plugin isn't assigned to any bag profiles in the Bag of Holding config. If this is the case, please reconfigure either plugin so that they refer to the same skin ID. You have a loot plugin which is using the OnItemAction hook to override the behavior of opening halloween.lootbag.large items. There is little that you can do to mitigate this. Please suggest to the maintainer of the loot plugin that they add a check to ignore halloween loot bags that are skinned. Opening a bag inside a special container just closes the container
This probably means that the plugin that controls the special container immediately deleted the container when it was closed. In this case, the plugin that manages that container will need to implement changes to allow that container to persist after closed.
Pressing the back button inside a bag just closes the bag
This probably means that the bag has been placed inside a special container which the plugin doesn't know how to open. It could be due to a miss in this plugin, but more likely, that container is a special type of container controlled by another plugin (such as a Backpack or Bank). In this case, we will have to develop a solution to enable compatibility.
Quick Sort UI overlaps bag selector UI
The simplest way to mitigate this issue is by reducing the max bag size to 6 rows (36 slots). Alternatively, you can update the Quick Sort plugin's configuration to reposition or resize the UI.
We are also planning to introduce an option to reposition the bag selector to the right side of the loot panel in a future update.
Weapons/deployables placed in bags eventually become unusable
This may happen if you are using an incompatible item cleaner or entity cleaner plugin. Most likely, the cleaner plugin doesn't know to account for situations where items are deeply nested. It should be easy for the cleaner plugin's maintainer to fix this issue.
After attending an event, items inside bags are missing or changed
This can happen if the plugin which manages the event temporarily replaces the player's items and restores the items when the player leaves the event. This issue usually manifests as items losing their skins and contents (e.g., weapons losing attachments, water jugs losing water). To resolve, the maintainer of the event plugin will need to update that plugin to recursively save items to infinite depth. If the developer needs help, they can look at the code of other plugins such as Backpacks, Kits, and Restore Upon Death.
After placing a bag inside a special container, items inside the bag are missing or changed
This may happen if the plugin which manages the special container tries to save the items in a custom way, such as via a data file. This issue usually manifests as items losing their skins and losing contents (e.g., weapons losing attachments, water jugs losing water). To resolve, the maintainer of the container plugin (e.g., Bank, Backpacks, Extra Pockets feature of Skill Tree) will need to update that plugin to recursively save items to infinite depth. If the developer needs help, they can look at the code of other plugins such as Backpacks, Kits, and Restore Upon Death.
Default bags
The default configuration provides many bag profiles, detailed below.
See this workshop collection to find hundreds of bag skins created specifically for this plugin.
Armor & Clothing Bags
Name Skin ID Capacity Display Name Upgrades to Upgrade cost Recycle output armor_clothing.xxsmall 2824111863 6 XXSmall Armor & Clothing Bag armor_clothing.xsmall 100 Scrap 100 Scrap armor_clothing.xsmall 2824114542 12 XSmall Armor & Clothing Bag armor_clothing.small 200 Scrap 200 Scrap armor_clothing.small 2824116781 18 Small Armor & Clothing Bag armor_clothing.medium 300 Scrap 300 Scrap armor_clothing.medium 2824118678 24 Medium Armor & Clothing Bag armor_clothing.large 400 Scrap 400 Scrap armor_clothing.large 2824120619 30 Large Armor & Clothing Bag armor_clothing.xlarge 500 Scrap 500 Scrap armor_clothing.xlarge 2824122747 36 XLarge Armor & Clothing Bag armor_clothing.xxlarge 600 Scrap 600 Scrap armor_clothing.xxlarge 2824124690 42 XXLarge Armor & Clothing Bag generic.xxlarge 900 Scrap 900 Scrap Food & Medical Bags
Name Skin ID Capacity Display Name Upgrades to Upgrade cost Recycle output food_medical.xxsmall 2824111462 6 XXSmall Food & Medical Bag food_medical.xsmall 100 Scrap 100 Scrap food_medical.xsmall 2824114220 12 XSmall Food & Medical Bag food_medical.small 200 Scrap 200 Scrap food_medical.small 2824116431 18 Small Food & Medical Bag food_medical.medium 300 Scrap 300 Scrap food_medical.medium 2824118433 24 Medium Food & Medical Bag food_medical.large 400 Scrap 400 Scrap food_medical.large 2824120423 30 Large Food & Medical Bag food_medical.xlarge 500 Scrap 500 Scrap food_medical.xlarge 2824122439 36 XLarge Food & Medical Bag food_medical.xxlarge 600 Scrap 600 Scrap food_medical.xxlarge 2824124459 42 XXLarge Food & Medical Bag generic.xxlarge 900 Scrap 900 Scrap Items & Construction Bags
Name Skin ID Capacity Display Name Upgrades to Upgrade cost Recycle output items_construction.xxsmall 2824113019 6 XXSmall Items & Construction Bag items_construction.xsmall 100 Scrap 100 Scrap items_construction.xsmall 2824115483 12 XSmall Items & Construction Bag items_construction.small 200 Scrap 200 Scrap items_construction.small 2824117546 18 Small Items & Construction Bag items_construction.medium 300 Scrap 300 Scrap items_construction.medium 2824119338 24 Medium Items & Construction Bag items_construction.large 400 Scrap 400 Scrap items_construction.large 2824121607 30 Large Items & Construction Bag items_construction.xlarge 500 Scrap 500 Scrap items_construction.xlarge 2824123520 36 XLarge Items & Construction Bag items_construction.xxlarge 600 Scrap 600 Scrap items_construction.xxlarge 2824125425 42 XXLarge Items & Construction Bag generic.xxlarge 900 Scrap 900 Scrap Resources & Components Bags
Name Skin ID Capacity Display Name Upgrades to Upgrade cost Recycle output resources_components.xxsmall 2824112139 6 XXSmall Resources & Components Bag resources_components.xsmall 100 Scrap 100 Scrap resources_components.xsmall 2824114807 12 XSmall Resources & Components Bag resources_components.small 200 Scrap 200 Scrap resources_components.small 2824117061 18 Small Resources & Components Bag resources_components.medium 300 Scrap 300 Scrap resources_components.medium 2824118878 24 Medium Resources & Components Bag resources_components.large 400 Scrap 400 Scrap resources_components.large 2824121055 30 Large Resources & Components Bag resources_components.xlarge 500 Scrap 500 Scrap resources_components.xlarge 2824123001 36 XLarge Resources & Components Bag resources_components.xxlarge 600 Scrap 600 Scrap resources_components.xxlarge 2824124960 42 XXLarge Resources & Components Bag generic.xxlarge 900 Scrap 900 Scrap Weapons & Tools Bags
Name Skin ID Capacity Display Name Upgrades to Upgrade cost Recycle output weapons_tools.xxsmall 2824110902 6 XXSmall Weapons & Tools Bag weapons_tools.xsmall 100 Scrap 100 Scrap weapons_tools.xsmall 2824113791 12 XSmall Weapons & Tools Bag weapons_tools.small 200 Scrap 200 Scrap weapons_tools.small 2824116147 18 Small Weapons & Tools Bag weapons_tools.medium 300 Scrap 300 Scrap weapons_tools.medium 2824118115 24 Medium Weapons & Tools Bag weapons_tools.large 400 Scrap 400 Scrap weapons_tools.large 2824120210 30 Large Weapons & Tools Bag weapons_tools.xlarge 500 Scrap 500 Scrap weapons_tools.xlarge 2824122197 36 XLarge Weapons & Tools Bag weapons_tools.xxlarge 600 Scrap 600 Scrap weapons_tools.xxlarge 2824124162 42 XXLarge Weapons & Tools Bag generic.xxlarge 900 Scrap 900 Scrap Generic Bags
Name Skin ID Capacity Display Name Upgrades to Upgrade cost Recycle output generic.xxsmall 2824110403 6 XXSmall Bag generic.xsmall 100 Scrap 100 Scrap generic.xsmall 2824113497 12 XSmall Bag generic.small 200 Scrap 200 Scrap generic.small 2824115881 18 Small Bag generic.medium 300 Scrap 300 Scrap generic.medium 2824117824 24 Medium Bag generic.large 400 Scrap 400 Scrap generic.large 2824119889 30 Large Bag generic.xlarge 500 Scrap 500 Scrap generic.xlarge 2824121905 36 XLarge Bag generic.xxlarge 600 Scrap 600 Scrap generic.xxlarge 2824123811 42 XXLarge Bag bagofholding 3000 Scrap 1500 Scrap Bag Of Holding
The Bag of Holding is the ultimate bag. It can hold all items, including 6 other bags.
Name Skin ID Capacity Display Name Recycle output bagofholding 2824136143 48 Bag of Holding 1500 Scrap Kit bags
All kits bags accept all items and have 42 capacity. Kit bags also upgrade in a circular fashion, making it easy for admins to edit them.
Name Skin ID Display Name Upgrades to kitbag.red.unlocked 2830974120 Kit Bag (Editable) kitbag.red.locked kitbag.red.locked 2830952942 Kit Bag kitbag.red.unlocked kitbag.orange.unlocked 2830974662 Kit Bag (Editable) kitbag.orange.locked kitbag.orange.locked 2830963984 Kit Bag kitbag.orange.unlocked kitbag.yellow.unlocked 2830975150 Kit Bag (Editable) kitbag.yellow.locked kitbag.yellow.locked 2830964495 Kit Bag kitbag.yellow.unlocked kitbag.green.unlocked 2830975690 Kit Bag (Editable) kitbag.green.locked kitbag.green.locked 2830965006 Kit Bag kitbag.green.unlocked kitbag.cyan.unlocked 2830976173 Kit Bag (Editable) kitbag.cyan.locked kitbag.cyan.locked 2830965451 Kit Bag kitbag.cyan.unlocked kitbag.blue.unlocked 2830976481 Kit Bag (Editable) kitbag.blue.locked kitbag.blue.locked 2830965789 Kit Bag kitbag.blue.unlocked Alternative bag skins
By default, the bag profiles in the config use the fantasy style skins. If you want to change them to the leather or tactical style skins, you can use the boh.setskins command to edit the config in bulk. For example, to change the generic bag set to use tactical style skins, run the command boh.setskins generic 2828559961 2828562701 2828573095 2828576548 2828579661 2828582369 2828585532.
Fantasy bag skins
As of v1.9.0, you can apply the fantasy theme by running the command boh.settheme fantasy_chevrons. The old way is to run all of the following commands.
boh.setskins bagofholding 2824136143 boh.setskins generic 2824110403 2824113497 2824115881 2824117824 2824119889 2824121905 2824123811 boh.setskins armor_clothing 2824111863 2824114542 2824116781 2824118678 2824120619 2824122747 2824124690 boh.setskins food_medical 2824111462 2824114220 2824116431 2824118433 2824120423 2824122439 2824124459 boh.setskins items_construction 2824113019 2824115483 2824117546 2824119338 2824121607 2824123520 2824125425 boh.setskins resources_components 2824112139 2824114807 2824117061 2824118878 2824121055 2824123001 2824124960 boh.setskins weapons_tools 2824110902 2824113791 2824116147 2824118115 2824120210 2824122197 2824124162 Additionally, you should set UI settings -> Belt button -> Display skin ID to one of the fantasy skins such as 2824115881.
Here are all the fantasy skin sequences, in case you want to use other icons or colors.
Fantasy plain: 2824110403 2824113497 2824115881 2824117824 2824119889 2824121905 2824123811 Fantasy gray chevrons: 2828128662 2828134240 2828137909 2828146246 2828148357 2828150051 2828152784 Fantasy white chevrons: 2828128323 2828133931 2828137681 2828146038 2828148160 2828149845 2828152530 Fantasy black chevrons: 2828128041 2828133673 2828137257 2828145823 2828148006 2828149681 2828152306 Fantasy red chevrons: 2828127703 2828133308 2828136874 2828145607 2828147808 2828149504 2828152062 Fantasy yellow chevrons: 2824113019 2824115483 2824117546 2824119338 2824121607 2824123520 2824125425 Fantasy pink chevrons: 2824112653 2824115134 2824117246 2824119088 2824121332 2824123291 2824125171 Fantasy orange chevrons: 2824112139 2824114807 2824117061 2824118878 2824121055 2824123001 2824124960 Fantasy light blue chevrons: 2824111863 2824114542 2824116781 2824118678 2824120619 2824122747 2824124690 Fantasy green chevrons: 2824111462 2824114220 2824116431 2824118433 2824120423 2824122439 2824124459 Fantasy blue chevrons: 2824110902 2824113791 2824116147 2824118115 2824120210 2824122197 2824124162 Fantasy gray circles: 2828493103 2828497364 2828501735 2828506499 2828509849 2828514060 2828517736 Fantasy white circles: 2828493673 2828498179 2828502089 2828506819 2828510161 2828514392 2828518167 Fantasy black circles: 2828494015 2828498546 2828502435 2828507169 2828510478 2828514709 2828518812 Fantasy red circles: 2828494496 2828498987 2828502735 2828507528 2828510830 2828515098 2828515098 Fantasy yellow circles: 2828494894 2828499337 2828503050 2828507851 2828511170 2828515395 2828519489 Fantasy pink circles: 2828495354 2828499673 2828503432 2828508323 2828511498 2828515725 2828519798 Fantasy orange circles: 2828495777 2828500070 2828503778 2828508555 2828511912 2828516131 2828520212 Fantasy light blue circles: 2828496161 2828500606 2828504060 2828508821 2828512403 2828516540 2828520492 Fantasy green circles: 2828496570 2828500962 2828504356 2828509103 2828512690 2828516933 2828520819 Fantasy blue circles: 2828496949 2828501318 2828504627 2828509404 2828513595 2828517346 2828521099 Leather bag skins
As of v1.9.0, you can apply the leather theme by running the command boh.settheme leather_chevrons. The old way is to run all of the following commands.
boh.setskins bagofholding 2860178102 boh.setskins generic 2831018252 2831025047 2831029422 2831036209 2831041769 2831047418 2831052354 boh.setskins armor_clothing 2831016990 2831023499 2831028259 2831032725 2831040190 2831046214 2831050372 boh.setskins food_medical 2831017392 2831023974 2831028588 2831033068 2831040759 2831046638 2831050826 boh.setskins items_construction 2831015836 2831021553 2831027189 2831031578 2831038734 2831044485 2831049142 boh.setskins resources_components 2831016651 2831023019 2831027874 2831032305 2831039657 2831045812 2831049942 boh.setskins weapons_tools 2831017759 2831024390 2831028922 2831033383 2831041231 2831047014 2831051442 Additionally, you should set UI settings -> Belt button -> Display skin ID to one of the leather skins such as 2831029422.
Here are all the leather style skin sequences, in case you want to use other icons or colors.
Leather plain: 2831018252 2831025047 2831029422 2831036209 2831041769 2831047418 2831052354 Leather gray chevrons: 2831013773 2831019060 2831025741 2831029969 2831036925 2831042295 2831047827 Leather white chevrons: 2831014482 2831019741 2831026169 2831030357 2831037360 2831042761 2831048137 Leather black chevrons: 2831015051 2831020041 2831026487 2831030777 2831037873 2831043219 2831048450 Leather red chevrons: 2831015444 2831020436 2831026854 2831031160 2831038330 2831043696 2831048702 Leather yellow chevrons: 2831015836 2831021553 2831027189 2831031578 2831038734 2831044485 2831049142 Leather pink chevrons: 2831016234 2831022032 2831027551 2831031924 2831039240 2831045338 2831049495 Leather orange chevrons: 2831016651 2831023019 2831027874 2831032305 2831039657 2831045812 2831049942 Leather light blue chevrons: 2831016990 2831023499 2831028259 2831032725 2831040190 2831046214 2831050372 Leather green chevrons: 2831017392 2831023974 2831028588 2831033068 2831040759 2831046638 2831050826 Leather blue chevrons: 2831017759 2831024390 2831028922 2831033383 2831041231 2831047014 2831051442 Leather gray circles: 2831053189 2831057140 2831060554 2831063925 2831066897 2831070017 2831082280 Leather white circles: 2831053670 2831057586 2831060848 2831064201 2831067178 2831071006 2831082963 Leather black circles: 2831054069 2831057911 2831061109 2831064444 2831067379 2831072147 2831084280 Leather red circles: 2831054490 2831058281 2831061382 2831064726 2831067561 2831073121 2831084887 Leather yellow circles: 2831054841 2831058559 2831061614 2831065014 2831067781 2831073592 2831085402 Leather pink circles: 2831055215 2831058892 2831061919 2831065349 2831068032 2831073925 2831085778 Leather orange circles: 2831055582 2831059194 2831062274 2831065681 2831068304 2831074420 2831087653 Leather light blue circles: 2831055919 2831059491 2831062555 2831066018 2831068615 2831076575 2831088591 Leather green circles: 2831056306 2831059795 2831062808 2831066320 2831068905 2831078713 2831088956 Leather blue circles: 2831056740 2831060200 2831063168 2831066588 2831069218 2831079950 2831089185 Tactical bag skins
As of v1.9.0, you can apply the tactical theme by running the command boh.settheme tactical_chevrons. The old way is to run all of the following commands.
boh.setskins bagofholding 2828612528 boh.setskins generic 2828559961 2828562701 2828573095 2828576548 2828579661 2828582369 2828585532 boh.setskins armor_clothing 2828558763 2828562098 2828571752 2828575986 2828579117 2828581616 2828584535 boh.setskins food_medical 2828559062 2828562247 2828572006 2828576133 2828579288 2828581907 2828584822 boh.setskins items_construction 2828557975 2828561492 2828570571 2828574809 2828578159 2828580887 2828583748 boh.setskins resources_components 2828558453 2828561930 2828571212 2828575734 2828578707 2828581409 2828584212 boh.setskins weapons_tools 2828559313 2828562454 2828572778 2828576369 2828579499 2828582142 2828585357 Additionally, you should set UI settings -> Belt button -> Display skin ID to one of the tactical skins such as 2828573095.
Here are all the tactical style skin sequences, in case you want to use other icons or colors.
Tactical plain: 2828559961 2828562701 2828573095 2828576548 2828579661 2828582369 2828585532 Tactical gray chevrons: 2828556434 2828560310 2828563014 2828573659 2828577253 2828580012 2828582671 Tactical white chevrons: 2828557125 2828560646 2828563283 2828573927 2828577583 2828580260 2828582975 Tactical black chevrons: 2828557433 2828560923 2828563544 2828574322 2828577810 2828580491 2828583268 Tactical red chevrons: 2828557692 2828561221 2828570104 2828574605 2828578000 2828580701 2828583514 Tactical yellow chevrons: 2828557975 2828561492 2828570571 2828574809 2828578159 2828580887 2828583748 Tactical pink chevrons: 2828558240 2828561757 2828570867 2828575078 2828578530 2828581157 2828583990 Tactical orange chevrons: 2828558453 2828561930 2828571212 2828575734 2828578707 2828581409 2828584212 Tactical light blue chevrons: 2828558763 2828562098 2828571752 2828575986 2828579117 2828581616 2828584535 Tactical green chevrons: 2828559062 2828562247 2828572006 2828576133 2828579288 2828581907 2828584822 Tactical blue chevrons: 2828559313 2828562454 2828572778 2828576369 2828579499 2828582142 2828585357 Tactical gray circles: 2828590059 2828592435 2828596053 2828598607 2828600574 2828602840 2828605402 Tactical white circles: 2828590364 2828592713 2828596309 2828598848 2828600805 2828603043 2828605787 Tactical black circles: 2828590658 2828592930 2828596615 2828599070 2828601043 2828603298 2828605999 Tactical red circles: 2828590870 2828593147 2828596818 2828599291 2828601240 2828603494 2828606193 Tactical yellow circles: 2828591083 2828593355 2828597034 2828599512 2828601444 2828603677 2828606367 Tactical pink circles: 2828591226 2828593626 2828597285 2828599643 2828601590 2828603900 2828606490 Tactical orange circles: 2828591389 2828594143 2828597493 2828599829 2828601859 2828604283 2828606662 Tactical light blue circles: 2828591603 2828594846 2828597739 2828600017 2828602079 2828604553 2828606893 Tactical green circles: 2828591817 2828595022 2828598019 2828600169 2828602304 2828604782 2828607054 Tactical blue circles: 2828592115 2828595430 2828598248 2828600324 2828602571 2828605041 2828607208 Developer API
API_GetApi
Dictionary<string, object> API_GetApi() Returns a dictionary where each key is a delegate for an API method. The purpose of this API is for high-performance scenarios where you don't want the overhead of calling the Bag of Holding via Oxide. Instead, your plugin should call Bag of Holding once (when Bag of Holding loads), cache the API, and invoke specific API methods via delegates whenever needed.
Example:
// Get the API. Ideally you should cache this. You should also re-cache this when Bag of Holding reloads. var api = BagOfHolding.Call("API_GetApi") as Dictionary<string, object>; // Get the API function you want. Ideally you should cache this too. The names are the same as documented below, but without the "API_" prefix. var isBagFunction = api["IsBag"] as Func<Item, bool>; // Call the API function. This call doesn't go through Oxide, so it saves CPU cycles, and allows you to avoid heap allocations when passing value types (e.g., when passing numbers). var isBag = isBagFunction(item); API_IsBag
bool API_IsBag(Item item) Returns true if the item is a bag, else returns false.
API_IsLootingBag
bool API_IsLootingBag(BasePlayer player) Returns true if the player is looting a bag, else returns false.
Note: If you call this immediately after the OnLootEntity Oxide hook is called, this will return false, because the plugin has to inspect the ItemContainers that the player is looting (basePlayer.inventory.loot.containers) which are populated after the OnLootEntity hook call has finished (that is where the Oxide hook is placed, and the plugin follows that pattern when explicitly calling OnLootEntity). Therefore, if you wish to detect whether a player has just opened a bag via the OnLootEntity hook, you should run your logic on the next frame (e.g., using NextTick).
You may avoid calling this API entirely by simply verifying that the basePlayer.inventory.loot.containers list has only one container, and that it has a parentItem. If both of those criteria are met, the player is looting some sort of item, not necessary from this plugin, but that should be close enough. Note that this logic still needs to be in NextTick for the aforementioned reason.
API_GetBagProfileName
string API_GetBagProfileName(Item item) Returns the profile name of the bag (not the display name), else returns null if the item is not a bag. If you want the display name, simply read item.name.
API_OpenBag
bool API_OpenBag(BasePlayer player, Item item) Attempts to make the player open the bag Returns true if the item is a valid lootable bag (not a locked bag), and if not blocked by a plugin via the OnBagOpen hook Returns false if the item was not a valid lootable bag, or if blocked by a plugin via the OnBagOpen hook API_CreateBag
Item API_CreateBag(string profileName, int amount = 1) Creates a bag using the specified profile name, with specified stack amount Returns the bag Item if successful Returns null if the specified profile name or stack amount is invalid Note: Bags can also be created using ItemManager.CreateByName("halloween.lootbag.large", amount, skinId) if the skin ID is known API_CreateKitBag
Item API_CreateKitBag(string profileName, string kitName, BasePlayer initiator = null) Creates a bag using the specified profile name, and populates it with the specified kit Returns the bag Item if successful Returns null if the specified profile name or kit name is invalid If any kit items do not fit in the bag, they will be given to the BasePlayer initiator if provided, else deleted.
API_ChangeBagProfile
bool API_ChangeBagProfile(Item item, string profileName, BasePlayer initiator = null) Updates the bag item to the specified profile Returns true if the item is a valid bag, and if the specified profile name is valid Returns false if the item is not a valid bag, or if specified profile name is invalid If the target profile has less capacity than the current profile... Overflowing items will attempt to be compacted into the bag by moving them to earlier slots If compaction fails, the remaining items will be given to the BasePlayer initiator if provided If the BasePlayer initiator is not provided, the bag capacity will be increased to fit the overflowing items Caution: If the item is a stack of bags, it will change the profile for all of the bags in the stack Caution: Changing the profile of a bag that is already inside a container may cause the container to exceed configured bag limits API_UpgradeBag
bool API_UpgradeBag(Item item, BasePlayer initiator = null) Updates the bag item to the profile designated as the upgrade target in the config Returns true if the item is a valid bag, and if the bag profile has a valid upgrade target in the config Returns false if the item is not a valid bag, or if the bag profile does not have a valid upgrade target in the config If the target profile has less capacity than the current profile... Overflowing items will attempt to be compacted into the bag by moving them to earlier slots If compaction fails, the remaining items will be given to the BasePlayer initiator if provided If the BasePlayer initiator is not provided, the bag capacity will be increased to fit the overflowing items Caution: If the item is a stack of bags, it will upgrade all of the bags in the stack Caution: Upgrading a bag that is already inside a container may cause the container to exceed configured bag limits Developer hooks
OnBagOpen
object OnBagOpen(Item item, BasePlayer player) Called when a player attempts to open a bag Returning false will prevent the bag from being opened Returning null will result in the default behavior OnBagOpened
void OnBagOpened(Item item, BasePlayer player) Called after a player has started looting a bag No return behavior OnBagClosed
void OnBagClosed(Item item, BasePlayer player) Called after a player has stopped looting a bag No return behavior OnBagUpgrade
object OnBagUpgrade(Item item, string newProfileName, BasePlayer initiator) Called when a player or a plugin attempts to upgrade a bag Returning false will prevent the bag from being upgraded Returning null will result in the default behavior Note: The BasePlayer argument will be null if the upgrade was not initiated by a player.
OnBagUpgraded
void OnBagUpgraded(Item item, string newProfileName, BasePlayer initiator) Called after a bag has been upgraded to the profile designated in the config No return behavior Note: The BasePlayer argument will be null if the upgrade was not initiated by a player
OnBagProfileChanged
void OnBagProfileChanged(Item item, string newProfileName) Called after a bag's profile has been changed No return behavior -
$27.50
Sky Base
Sky Base is a plugin that allows your players to get away from standard houses and build themselves a real base in the sky. The plugin is perfect for any server, both PvE and PvP.
Video
Description
The plugin uses a standard construction system, which makes it easier to use and configure the plugin. To start building an air base, the player needs to craft the desired object using the /craftdrone command.
1 sky ceiling equals 1 foundation.
In order to make the ceiling airy, just hit the ceiling with a mallet. To improve the ceiling, a drone of the same range as the roof is required.
The plugin has a fully customizable crafting system where you can determine for yourself what resources are required to craft all drones.
Video Tutorial
Chat Commands
/craftdrone - Allows you to open the drone crafting system (Permission: "skybase.use")
Plugin Config
Example of plugin configuration in English Example of plugin configuration in Russian
Ideas for updates that may be implemented in the future
Current ideas for the future of this plugin. These are things that I want to implement possibly. You can also write to us in Discord to suggest ideas or to vote for any that I share here.
Add plugin support for notifications and also add notifications via the built-in gui rust</li> Creating ready-made building patterns
Check out more of my work here CASHR's library.
Come see our whole teams work Mad Mapper Library.
Come by the Mad Mapper Discord for support, feedback, or suggestions!
- #sky bases
- #oxide
- (and 10 more)
-
$28.99
Train Homes
Live in one place? It's not interesting. Live in a camping car module? Too small. Have a full-fledged mobile home? That's what you need!
Video
Description
With this plugin, your players will be able to build their own small base on the wagon and wander around the server with it. Or you can even assemble a whole train of such wagons.
Chat Command (For admins)
/showfreewagons - Writes the number of available wagons to the console, and also shows their location on the server. (Permission is required for use)
/givewagon <amount> <SteamID or Name> - gives the specified player an item for the spawn of the wagon in the amount that you specify (Permission is required for use)
Chat Command (For Player)
/thinstruction - instructions on some features of the plugin
/removewagon - take a hammer in your hands, write a command and hit the wagon
Console Command (RCON only)
clearallwagons - clears the server of all custom wagons. Be careful! The action is irreversible and players will lose all their items and resources. It should be used only before you want to turn off the plugin from the server, because after unloading, custom wagons can be created on the server.
givewagon <amount> <SteamID or Name> - gives the specified player an item for the spawn of the wagon in the amount that you specify
Plugin Config
https://pastebin.com/jbsateCv Permissions
trainhomes.givewagon - gives permission to use the chat command /givewagon
trainhomes.showfreewagons - gives permission to view the location of free wagons
Hooks
private bool OnWagonSpawn(BasePlayer player) API
private bool IsEntityFromBaseWagon(ulong netIdValue) Returns true if the netId of the object belongs to the wagon
private bool IsBaseWagon(ulong netIdValue) Returns true if the netId belongs to a wagon on the base
private bool IsTrainHomes(ulong netIdValue) Returns true if the netId belongs to a wagon on the track
private bool IsFreeWagon(ulong netIdValue) Returns true if the netId belongs to a free wagon on the track
Check out more of my work here JTedal's library.
Come see our whole teams work Mad Mapper Library.
- #jtedal
- #mad mappers
- (and 9 more)
-
$20.00
TC Levels
TCLevels is a plugin that will make your server more fun and have more things to do!
FEATURES ★
• Reduce the decay damage by tick;
• Upgrade the authorizations limit;
• Upgrade the building grade limit;
• Upgrade the storage capacity of the cupboard;
• Upgrade the stack size limit of the cupboard;
• Unlock some deployable items;
• Set a default building grade for the server;
• Modify the default decay;
• Keep the cupboard attributes when remove;
Make your server fun ^u^
PERMISSIONS
The plugin has a unique permission, which allows the player to use the cupboard upgrade: tclevels.use
F.A.Q
1. How many items can be blocked? and which?
You can block unlimited items and all items must be deployable or they will not be blocked.
2. Which area will be checked when i place my cupboard?
The entire privilege area will be checked. But you can also disable checks in the configuration file.
3. Could it cause conflict with any plugin?
Yes, but i am providing an API for the plugin so that other developers can integrate with it, so if there is a conflict, just go to the developer's plugin support and ask them to integrate it. Also if it is possible for me to integrate it from my plugin, i will do so without any problem.
API </>
// Gets the current cupboard allowed building grade limit // If the cupboard isn't provided, it will return the default building grade limit of the config; private BuildingGrade.Enum GetBuildingGradeLimit(BuildingPrivlidge? cupboard); // Gets the current cupboard decay multiplier // If the cupboard isn't provided, it will return the default decay multiplier of the config; private float GetDecayMultiplier(BuildingPrivlidge? cupboard); // Gets the current cupboard authorization limit // If the cupboard isn't provided, it will return the default auth limit of the config; private int GetAuthLimit(BuildingPrivlidge? cupboard); // Gets the current cupboard storage capacity // If the cupboard isn't provided it will throw an exception; private int GetCapacity(BuildingPrivlidge cupboard); // Gets a list of the cupboard blocked items // If the cupboard isn't provided it will return all locked items listed in the config; private List<string> GetLockedItems(BuildingPrivlidge? cupboard);
CONFIGURATION
TCLevels.json
-
.thumb.gif.fd4f63b3cef239560c00f8feab94f845.gif)
$39.90
Frontier - American Old West
It’s time for the wild west. This time I will send you far into the past to the real wild west, where everything was solved with the help of weapons and horses were the main means of transportation. This map will completely immerse you in the atmosphere of those times, it is very different from other maps, since there are no Facepunch monuments here, it consists entirely of custom monuments. So this is a closed type of map, that is, there is no ocean here, the game area is located in the grand canyon and you will not get to the surface. This map is a kind of experiment and my long-standing idea is to implement it. Also on the map you will find several familiar monuments made in the style of the wild West. And where is it without a railway, it stretches all over the map and has several branches. Custom garbage cans for loot extraction are located near the roads. Also, there are custom NPCs – traders, and horse traders-near the roads and on the monuments. Recyclers are made in the style of those times. Good luck in surviving in the wild west!
Featured:
The full atmosphere of the Wild West is transmitted (My personal opinion) Map Size – 4000 (Game space 3200-3400) Prefab Count – 98к Very stable FPS despite the number of prefabs Attention:
Please read the full description of the map There is a required plugin included with the download Be sure to add the vending profiles to the editor if you plan to edit the map This map is constantly supported and updated for the current version of the game with all updates! The map’s performance has been tested on a Windows system, problems may arise with the Linux system. Join the Mad Mapper Discord and you can create a ticket to request a preview of the map To expedite the process share your Steam ID when you make the request so that you can be whitelisted You will be granted admin privileges on the server and be able to take a look at the map freely
Custom monuments:
Husky Farm Coal Mining Kennekott (Mini City) George Town (City) Outpost (Safezone City) Train Yard (Large Monument) Oil Wells (Large Monument) Special Purpose Prison (City, Prison) JunkYard (Medium Monument) Rebel Checkpoint (Medium Monument) Thorhill (MiniCity) Coal Mining Plant Ghost Town (City Zombi) Big Joe HomeStead (Manor) Reservation (Indian settlement) Governors Ranch Mansion Warehouse Old Supermarket Station (Several types) Railways Repair Fishing Village A lot of custom garbage cans near roads and ruins with loot Monuments FP:
Cave Quarry Plugins in the archive:
The map comes with 1 plugins (developed by KpucTaJI), which must be installed on the server.
– WildWestCore-this plugin removes the modern from the map, and also interacts with other plugins to fully convey the atmosphere of the Wild West (pictures, etc.).
-

$30.00
Military Airfield Event
Description
As soon as the event starts, several troops (NPCs) are spawned to defend an hackable crate that will be delivered by the CH47. This crate may contain a lot of loot, so the troops have the duty to defend it. For this purpose, there is a variety of troops such as snipers, close-range shooters, and long-range shooters.
If a player manages to initiate the hacking of the crate, all the airfield troops will be relocated to a combat position. In other words, all troops that you haven't seen yet or that are hidden will be moved to the center of the airfield to defend the crate. After a few minutes, a plane will be sent with supply drops containing weapons to assist the troops in defense. However, airborne troops will also be dispatched from the plane to parachute down and aid in defending the crate.
If the crate is looted, all troops will be destroyed, leaving only the crates, supply drops, and bodies to be looted by intruders.
Commands
Note: The command can be changed in the config file.
/ma start - to start the event
/ma stop - to stop the event
/ma position - to get the current position based in the airfield monument (used to config)
Console commands
ma start - to start the event
ma stop - to stop the event
Permission
militaryairfield.admin - to access all commands
Configuration
MilitaryAirfield.json
API for Developers
// Called when the event starts private void OnMilitaryAirfieldEventStarted(); // Called when the event ends private void OnMilitaryAirfieldEventEnded(BasePlayer? lootedBy); -
$20.00
Furnace Upgrades
FEATURES
Upgrade each attribute of your furnace; Supports different oven types; It is possible to define default attributes for all ovens on the server; You can set a default value for all base ovens (replacing quicksmelt); You can enable/disable any features you want; Option to keep attributes when removing the furnace; Option to auto split ores; Automatic fuel calc based on the upraded oven attributes; Now BBQ and Campfire can also be improved; Option so that only the furnace owner can upgrade it; A new completely redesigned UI;
PERMISSIONS
furnaceupgrades.use - This is the unique permission. required for all players to upgrade furnaces
CONFIGURATION
FurnaceUpgrades.json
-
.thumb.gif.7af9331c9b6fe2a38b07cef9d66379e1.gif)
$39.90
Boston: New Land
In the near future, the planet decided to rid itself of a large population, a factory and other infrastructure that poses a danger to its environment. Gravity, water level and climate have changed. An epidemic broke out, which took the lives of the remnants of the population and turned them into mutants (NpcHorde plugin). Those who survived went into habitation under the water, sometimes swimming out for a breath of fresh air (the UnderwaterGuard plugin), they guard the flooded monuments very much, which contain excellent loot, but to get to it, you need to make great efforts. On this map you will find many beautiful monuments, in the air, on the ground, under water. Also on the map there are several custom places to build your base in the form of unusual rocks, terrain terrain, icebergs and caves, they are marked X. And now several decades have passed since the latest events on this island and it has become a New Land for new settlers in the form of players on your server, I hope everyone will survive, good luck playing on this map.
Features:
Prefab Count: ~50к prefabs Size: 4000 A lot of interesting locations to explore Marketplaces and recycler have been added to fishing villages Railway Optimal FPS A large number of places for the construction of foundations in the form of unusual rocks, caves, landscape and icebergs Custom plugin for mutants, powered by a heartbeat sensor (by KpucTaJL) Custom plugin UnderwaterGuard (by Adem) This map is constantly supported and updated for the current version of the game with all updates! How can I view the map?
You can do this in our Discord server by submitting a request for an invitation to our servers. There you will be given the rights of an “administrator” and without any difficulties you will be able to fly around the map and fully familiarize yourself with it.
Custom Monuments:
Boston City Valley of Bridges Quarantine Zone Frozen Research Base Buttsville City Falcom Prisone The ISS Crash International Space Station Bills Farm Hydroelectric Power Station Graveyard of Ships Sunken Oil Rig Roadside Market Ore Deposits Bridge Many interesting places to build a base marked X Monument Facepunch:
Launch Site Missile Silo Junkyard Harbor 1 and 2 Arctic Research Base Satellite Dish Airfield Bandit Camp Outpost Giant Excavator Pit Train Yard Water Treatment Power Plant Military Tunnel The Dome Sewer Branch Ranch Fishing Village 1,2,3 (Modified version) Lighthouse Underwater Lab Railway HQM, Sulfur, Stone Quarry Roadside Monument -
$25.00
Admin Menu
Manage your Rust server easier and more efficiently with the AdminMenu plugin. Track players, interact with them, edit their data and permissions, as well as change server convars and manage plugins.
Features:
Menu retains its state after closing, you won't lose everything you did before. Ability to fully translate the menu into any language. Large range of permissions for each action, will allow you to flexibly customize the admin menu for each group of administrators. Quick menu that allows you to perform quick actions Full list of players with the ability to filter by online, offline, admins and moderators. Also has a frame of different colors depending on the level of authorization. Wide range of information and actions for the selected player. Editing convars with search. Has a complete list of editable convars with descriptions for some of them. Extensive issue menu by category, with easy management of name, skin and amount (manual, +1, +100, +1000, +10000). Plugin management menu. It is possible to reload, unload or load a plugin easily and quickly. Updates occur in real time. Ability to create your own custom buttons that execute several commands Quick Start:
You install the plugin in the plugins folder. Give yourself the adminmenu.fullaccess permission.
Commands, use one of your choice, one for the player and one for the admin group: o.grant user {name/steamid} adminmenu.fullaccess o.grant group admin adminmenu.fullaccess Press the X button (swap seat button) or type adminmenu in the console. Enjoy
Useful stuff:
You can quickly open a player in the admin menu. To do this, point at the player and press X.
You don't have to hover over the player exactly, you will be able to open players within a certain radius of the place you are looking at.
CUSTOM BUTTONS
Custom buttons are buttons that when pressed will execute commands on behalf of the administrator, commands can be several, below will be the details.
At the moment, custom buttons can be created in two places: in the quick menu and in the menu when selecting a player. These places are separated in the config.
Button Fields:
"Label" - Text that will be on the button, for each such inscription creates a field in the lang file, accordingly you can translate this text into several languages. "Commands" - Array of commands that will be executed on behalf of the administrator. Chat commands require a special entry, see examples.
Available self-replaceable tags for commands targeting the player: {steamid}, {steamID}, {userID}, {STEAMID}, {USERID} - mean the same thing, namely the id of the selected player. {adminUID} - administrator's id. "Permission"- permission to display and use the button. You need to write the permission that will be after "adminmenu.".
Example: if you enter the permission "test" the permission will be adminmenu.test "Position" - The location for the button, the first number is responsible for the row number, the second for the position within the row, starts from 0.There are limits of locations, if you have gone beyond the limit - the button will not be displayed. Example of commands:
chat.say \"/{chat command}\" vanish ban {steamID} teleport {steamID} {adminUID}
More information about the grant menu:
The grant menu includes the full list of items including hidden items as well as custom items created by the CustomItemDefinitions library.
The menu can be accessed from the navigation or from the menu of the selected player. When issuing itself has categories.
Search works in any registry by any part of the name or short name.
Has a page system at any stage.
More information about the buttons in the Quick Menu:
[Teleport to 0 0 0] - Teleport to coordinates 0 0 0.
Requires adminmenu.quickmenu.teleportto000 permission [Teleport to Deathpoint] - Teleport to your deathpoint.
Requires adminmenu.quickmenu.teleporttodeath permission [Teleport to Spawn point] - Teleport to a random spawn point.
Requires adminmenu.quickmenu.teleporttospawnpoint permission [Kill Self] - Kill Self, kills even when immortal.
Does not require permission. [Heal Self] - Fully heal yourself.
Requires adminmenu.quickmenu.healself permission [Call Heli] - Call Helicopter to yourself (arrives in time).
Requires adminmenu.quickmenu.helicall permission [Spawn Bradley] - Spawn bradley on yourself.
Requires adminmenu.quickmenu.spawnbradley permission More information about the buttons in the menu of the selected player:
[Teleport Self To] - Teleport yourself to the selected player.
Requires adminmenu.userinfo.teleportselfto permission [Teleport To Self] - Teleport the selected player to yourself.
Requires adminmenu.userinfo.teleporttoself permission [Teleport To Auth] - Teleportation to random authorization (TC).
Requires adminmenu.userinfo.teleporttoauth permission [Teleport to Deathpoint] - Teleportation to a player's deathpoint. Requires adminmenu.userinfo.teleporttodeath permission [Heal] - Full healing, including metabolism.
Requires adminmenu.userinfo.fullheal permission [Heal 50%] - Half healing.
Requires adminmenu.userinfo.halfheal permission. [View Inventory] - View and edit player's inventory.
Requires adminmenu.userinfo.viewinv permission [Strip Inventory] - Clear player's inventory.
Requires adminmenu.userinfo.stripinventory permission [Unlock Blueprints] - Unlock all Blueprints.
Requires adminmenu.userinfo.unlockblueprints permission [Revoke Blueprints] - Reset all Blueprints.
Requires adminmenu.userinfo.revokeblueprints permission. [Kill] - Kill a player.
Requires adminmenu.userinfo.kill permission [Kick] - Kick a player.
Requires adminmenu.userinfo.kick permission [Ban] - Ban a player.
Requires adminmenu.userinfo.ban permission More information about the buttons in the menu of the selected group:
[Remove Group] - Remove group, has confirmation.
Requires adminmenu.groupinfo.removegroup permission [Clone Group] - Clone group with the ability to copy users.
Requires adminmenu.groupinfo.clonegroup permission Permissions:
adminmenu.use - Ability to use admin menu with basic set. Open tab quick menu (each button has its own permission, without permissions is present only kill yourself button) and the list of players. adminmenu.fullaccess - Full access to all functions without the need for each permission, includes also adminmenu.use. It is recommended to give only to the main administrators. adminmenu.quickmenu.teleportto000 - Access to the button in the quick menu, teleportation to coordinates 0 0 0 0. adminmenu.quickmenu.teleporttodeath - Access to the button in the quick menu, teleportation to the point of your death. adminmenu.quickmenu.teleporttospawnpoint - Access to the button in the quick menu, teleportation to a random spawn point. adminmenu.quickmenu.healself - Access button in quickmenu, heal yourself completely. adminmenu.quickmenu.helicall - Access to the button in the quick menu, call a helicopter to yourself (arrives in time). adminmenu.quickmenu.spawnbradley - Access button in quickmenu, spawn bradley. adminmenu.userinfo.teleportselfto - Access to the button in the menu of the selected player, teleportation to the selected player. adminmenu.userinfo.teleporttoself - Access to the button in the menu of the selected player, teleport the selected player to himself. adminmenu.userinfo.teleporttoauth - Access to the button in the menu of the selected player, teleportation to random authorization (TC). adminmenu.userinfo.teleporttodeath - Access to the button in the menu of the selected player, teleportation to the place of death of the player. adminmenu.userinfo.fullheal - Access to the button in the menu of the selected player, full healing, including metabolism. adminmenu.userinfo.halfheal - Access to the button in the menu of the selected player, half healing. adminmenu.userinfo.viewinv - Access to the button in the selected player's menu, view and edit the player's inventory. adminmenu.userinfo.stripinventory - Access to the button in the menu of the selected player, clear the player's inventory. adminmenu.userinfo.unlockblueprints - Access the button in the menu of the selected player, unlock all drafts. adminmenu.userinfo.revokeblueprints - Access to the button in the menu of the selected player, reset all drafts. adminmenu.userinfo.kill - Access the button in the selected player's menu to kill the player. adminmenu.userinfo.kick - Access the button in the selected player's menu to kick the player. adminmenu.userinfo.ban - Access to the button in the menu of the selected player, ban the player. adminmenu.groupinfo.removegroup - Access to the button in the menu of the selected group, the ability to remove the group. adminmenu.groupinfo.clonegroup - Access to the button in the menu of the selected group, the ability to clone the group. adminmenu.convars - View and edit convars. adminmenu.permissionmanager - View and edit permissions in groups, player groups, create, delete and clone groups (requires additional permissions from these buttons). adminmenu.pluginmanager - Access to plugin management, reloading, unloading, loading plugins. adminmenu.give - Access to give resources, as well as yourself and the selected player. -
$24.99
Ultimate RCON+
By Amino in Discord Bots
The aim for this file is to remove the need for some of your Discord plugins and move it externally from your server so you do not have any server impact from those plugins. This offers you a TON of features all ran externally from your server, so no lag! No more dookie Discord extension
Ultimate RCON+ is a more advanced version of Ultimate RCON
ULTIMATE RCON+ ONLY FEATURES
+ Advanced kill logging + Logging for heli, cargo, cargo plane, ch47, and brad + Multi reason auto mute system + Option plugin integration for more logging features + Permission loggers for group and permission changes + You can now have a player leaderboard for all your servers as-well as a global leaderboard! (Image below) + Server stat display that actively updates with how many players on your server, last wipe, etc* + The bot now saves a database on all players! (Kills, deaths, connections, chat messages, f7 reports, etc) + F7 Reports report counter + Set it to ignore people who are getting F7 reported or sending in F7 reports. + Add players to a watchlist that pings staff when they join. + Player profiler that tracks a lot of information on players (Get data VIA command) + Advanced kill feed. Now logs all sorts of kills and deaths + The bot no longer sometimes misses people joining the server. + Player counts are now tracked for each server, it will save all your peak player counts for all of your servers. (This information can be shown in a stats board) + Those stats for your server can also track the number of messages, connections, kills, and deaths that have been recorded on the server. + Rcon commands no longer need to be sent VIA a slash command + Discord to rust chat no longer needs to be sent through a command + Server offline and online messages + ETC* ULTIMATE RCON+ & ULTIMATE RCON FEATURES
- Bot status = Player count on server (Can change status if the server has recently wipe and include just wiped in the status) - Global status bot = all your servers player counts combined into one - Dynamic server cap changer (Changes the max amount of players allowed on the server depending on the amount of players currently online and or the queue size) - Auto discord wipe announcements - Check players for private profiles - Check players for VAC, EAC, and Temp rust bans - Team and global chat logs - 2 Way chat (Send messages in game through discord) - Leave and join logs - Kill logs - Private message logs - Auto muting players VIA triggered key words - Manual staff muting through discord - RCON Console in Discord with message filtering - Send rcon commands through Discord - F7 report logs - F1 spawn logs - (SERVER) message logs
Plugin info
Permission: ultimaterconplus.admin
Command: /urplus
The bot is very simple to install.
The file includes a setup guide within it. All quite simple.
Need support or want updates about what is coming to the bot? Join the support discord here https://discord.gg/RVePam7pd7
INSTALLATION VIDEO
- #ultimatercon
- #amino
- (and 4 more)
-
.thumb.jpg.d6ff358c0e6d4188630b3cd14bc4737b.jpg)
$14.99
Friday House Pack
This is a simple RPG wooden house pack with two detailed RPG homes for any roleplay rust servers.
This pack has a leather shop and a house for those who need a rest.
1000+ prefabs per building.
No complex instructions, place and play.
You may also purchase a license to resell these prefabs on your own maps maps below.
As always, please enjoy!
Special Thanks to Raul Sorban!
-
$7.99
SkillTree: XP Event
By imthenewguy in Plugins
Skill Tree: XP Event is a plugin that creates an event that will randomly select a task, providing players with bonus XP for performing the task while the event is running.
Events are started automatically on interval (default every 30 minutes), and will select 1 of 38 tasks for the event. This could be chopping down trees, skinning animals, killing scientists or looting crates.
The plugin will also roll a random duration for the event to run for, and a random bonus to the XP (all of which is configurable).
Additional XP gained with this plugin will stack with xp bonuses from Skill Tree. The stacking works in the following order:
Default xp value is calculated. Skill Tree will check if Skill Tree: XP Event is loaded, and will ask for any bonuses if applicable Skill Tree continues on with its additional modifiers (other plugins, permission overrides, rested xp etc) This event will provide an incentive for players to engage with content on your server that they might otherwise avoid.
SkillTreeXPEvent.use - required for players to participate in the events.
SkillTreeXPEvent.admin - required to use the below commands if running them from player console.
Console command: startxpevent <optional: task>
Description: This command will manually start an XP event. If the task is not specified, it will roll the event randomly. Running this command resets the interval timer.
Console command: stopxpevent
Description: This command ends the current xp event.
Chat command: stemoveui
Description: Brings up an interface to reposition the UI.
NodeHitFinal TreeHitFinal SkinHitFinal CollectWildEntities CollectWildBerries CollectWildHemp CollectWildPumpkin CollectWildPotato CollectWildCorn CollectMushrooms CollectOreNodes CollectGrownEntities CollectGrownBerries CollectGrownHemp CollectGrownCorn CollectGrownPotato CollectGrownPumpkin SkinWolfFinal SkinBearFinal SkinChickenFinal SkinBoarFinal SkinStagFinal SkinPolarBearFinal CatchAnyFish KillScientist KillTunnelDweller KillUnderwaterDweller KillAnyAnimal KillBear KillStag KillBoar KillChicken KillWolf KillPolarBear LootCrate BreakBarrel BreakRoadSign SwipeCard All
- #skilltree
- #event
- (and 4 more)
-
.thumb.png.7b6c879ec331c1dc375cabe1ff8040c9.png)
$35.00
Raidable Shelters 50+ |
Raidable base shelters the perfect solution for an fast exciting and dynamic raiding experience! These compact bases are designed to be blown up and enjoyed, offering endless fun and tactical opportunities for players.
Total 40 Bases
10 easy
10 medium
10 hard
5 Expert
5 Nightmare
The bases are good for adding to your rotation something different ! players will love to see them spawn .
Bases include:
Strange placements of boxes, traps,tc
Traps
NO hidden loot or TC
Lockers
Furnace
Fridge
Large box
Small box
Teslacoil
Flame trowers
Neartraps
Mines
( everything you need in a raidable bases )
Include Readme
Base names for easy start up
-
$13.00
Raidable halloween Bases
Raidable Hallween bases !
These raidable bases are perfect for those who want to celebrate Halloween in style. So why not try out raidable Halloween bases this year and see just how spooky things can get in Rust?
Total: 10
easy: 3
medium: 2
hard: 2
expert: 2
Nightmare: 1
include read me
For Questions Join Our Raidable Base Discord
discord.gg/2fNBhfqtzz
- #raidable
- #halloween
- (and 3 more)
-
$22.00
Jet Event
Random jets that fly around the map shooting off nukes and crash with some loot.
Permissions
jetevent.admin
Commands
jet - Displays command usage
You can use Custom Loot from here to populate the heli_crates
-
$15.00
Deployable Nature
By imthenewguy in Plugins
Adds 53 new deployable items to your server!. Custom item collection system. Players can obtain these items while cutting trees, mining rocks and collecting plants. Includes a built in market that can be accessed via a chat command or a HumanNPC. Each base item can be configured to allow for a wide variety of placement options/restrictions. A large amount of configuration options are available for each item. Adjustable placement options while holding shift. Items can be picked up by holding a hammer, looking at the deployed entity and pressing your mouse3 button (scroll wheel button).
deployablenature.admin - Required to use the giveprefab command.
deployablenature.market.chat - Required to use the market chat command.
deployablenature.ignore.restrictions - Allows a player to deploy items without restriction (TC etc).
deployablenature.gather - Required for players to obtain drops while gathering.
deployablenature.use - Required to deploy nature items.
deployablenature.free - allows access to the nature market for free.
There is also the option to create groups via the config, which will receive discounts in the market based on the value assigned to them.
Example:
"Permissions that will receive a discount on the store cost when purchasing [1.0 is full price]. Prefix with deployablenature.": { "deployablenature.vip": 0.5 }, This would give players with the deployablenature.vip permission a discount of 50% off of the market price.
Command: giveprefab
Parameters: <skin id> <quantity>
Example: /giveprefab 2609145017 100 - spawns the user 100x medium clutter rocks"
Permission: deployablenature.admin
Command: naturemarket
Permission: deployablenature.market.chat
Command: dnpickup
Permission: None
Command: giveprefab (console)
Parameters: <player id/name> <skin id> <quantity>
Example: /giveprefab "new guy" 2609145017 100 - spawns the user 100x medium clutter rocks for new guy"
Permission: deployablenature.admin
Console Command: dnkillentities - wipes all nature entities from the map.
Parameters: <optional parameter: true> - this wipes the data after the command executes. If not used, the nature items will respawn on plugin reload.
Example: dnkillentities or dnkillentities true.
Permission: deployablenature.admin if running from player console.
Console Command: dnkillentitiesforplayer - wipes all nature entities from the map for the specified player
Parameters: <player name/id>
Example: dnkillentitiesforplayer "new guy" - would delete all entities for the player whose name contained "new guy".
Permission: deployablenature.admin if running from player console.
Console Command: dnpurge - enables purge mode, wiping all entities from the map (does not delete data), and preventing them from spawning on server start/being deployed by players while active. Automatically resets to false on server wipe.
Parameters: <true/false>
Example: dnpurge true - would enable purge mode.
Permission: deployablenature.admin if running from player console.
You most likely won't need the below information, but it is here for more advanced users.
Prefab Types
0: Rock 1: Tree 2: Bush 3: Animal
Tree Types
0: None 1: Palm 2: Oak 3: Swamp 4: Birch 5: Beech 6: Pine 7: Cacti 8: Snow
Bush Types
0: None 1: Willow 2: Willow_snow 3: Spice 4: Spice_snow 5: Creosote 6: Berries 7: Mushrooms
Example config
https://pastebin.com/E5duDqtf
API
public bool IsDeployableNature(BaseEntity entity) Returns if an entity is a DeployableNature entity that has the prevent_gather attribute.
-
$30.00
Personal Builder
The plugin adds personal builder bots to your server that can build any base saved through the CopyPaste plugin.
How it works: spawn the personal builder with the /pbuilder command, select a point for construction with the middle mouse button - the bot checks the area and begins construction. It is recommended to choose places with a flat landscape, especially for large buildings.
You can configure:
Controls Button to assign build position (MIDDLE_MOUSE, SECOND_MOUSE, E, RELOAD, SPRINT) Range of the task assignment button Display 3D arrows over a build position? Arrow display duration Bot settings The name of the bot to be selected through the command when spawning Bot spawn delay CopyPaste file name (oxide/data/copypaste) Player Bot display name Health Make bot immortal? Resources Require resources for construction? Drop bot's resources on death? Speed Bot speed multiplier Build speed multiplier Time to check 1 foundation Time to check 1 building block Checks Check is close to road? Check is building blocked by other cupboards? Check for Prevent Building triggers (restrict building on monuments) Prevent Building check radius Effects Enable effect when bot appears/disappears Enable building block upgrade effects? Clothes Video demonstration:
By default, the plugin has 2 localization files, for Russian and English
Commands:
/pbuilder - spawn or despawn bot /pbuilder [bot name] - spawn a specific bot The middle mouse button (or another button specified in the config) assigns the point where you need to build a base Configuration:
To make the default config work, you need to download the build file (link below) and place it in this directory "/oxide/data/copypaste". Link: https://drive.google.com/file/d/11nMTecwn2pZyiaECeRSPqDXacYq2a6iv/view?usp=sharing How to add your buildings: - Open the config, duplicate the standard bot setup - Change the permission to spawn - Change the short name of bot - Change the name of the build file - find the one you need in "/oxide/data/copypaste" directory and enter it without the file EXTENSION { "Controls": { "Button to assign build position (MIDDLE_MOUSE, SECOND_MOUSE, E, RELOAD, SPRINT)": "MIDDLE_MOUSE", "Range of the task assignment button": 25.0, "Display 3D arrows over a build position?": true, "Arrow display duration": 2 }, "Permissions": { "personalbuilder.bot1": { "The name of the bot to be selected through the command when spawning": "bot1", "Bot spawn delay": 300.0, "CopyPaste file name": "pbuilder_test", "Player (bot)": { "Bot display name": "Personal Builder", "Bot health": 1000.0, "Make bot immortal?": false }, "Resources": { "Require resources?": true, "Drop bot's resources on death?": true }, "Speed": { "Bot speed multiplier": 1.0, "Build speed multiplier": 1.0, "Time to check 1 foundation": 0.15, "Time to check 1 building block": 0.15 }, "Build": { "Checks": { "Check is close to road?": true, "Check is building blocked?": true, "Check for Prevent Building triggers": true, "Prevent Building check radius": 10.0 } }, "Effects": { "Enable effects on appear & disappear?": true, "Enable building block upgrade effects?": true }, "Clothes": [ { "Item name": "", "Item shortname": "shoes.boots", "Item skin": 0, "Item amount": 1 }, { "Item name": "", "Item shortname": "pants", "Item skin": 0, "Item amount": 1 }, { "Item name": "", "Item shortname": "hoodie", "Item skin": 0, "Item amount": 1 }, { "Item name": "", "Item shortname": "mask.bandana", "Item skin": 0, "Item amount": 1 }, { "Item name": "", "Item shortname": "hat.boonie", "Item skin": 0, "Item amount": 1 }, { "Item name": "", "Item shortname": "sunglasses", "Item skin": 0, "Item amount": 1 } ] } } }
-
$16.00
Craft Menu
Custom crafting panel at player's workbenches.
Craft custom or non-craftable items, create your own blueprints.
No chat commands required!
oxide permission - craftmenu.use
• How to create default blueprint.
Simply leave ResearchCost as 0.
• Crafting Recycler.
Plugins for placing entities usually utilizes specific item together with skin id.
Here you can find list of examples PlaceableEntities.txt
• Adding same shortname multiple times.
When you using same shortname for more than one blueprint you have add {number} at
the end of it to prevent duplicates. Ex.: "box.wooden.large{1}"
• Item is name too long.
Inside lang file you can create replacements for default item names.
• Wiping blueprints manualy.
There are two admin console commands.
"craftmenu_admin wipe" will wipe blueprints for all players
"craftmenu_admin wipe <steamID>" wipes blueprints only for certain player.
Premade blueprints from screenshots Blueprints.json
-

$39.99
Simple Symmetry
Introducing the Simple Symmetry plugin that makes it effortless to create symmetrical base designs! All features can be done with or without the UI.
Demo Video
Permission:
simplesymmetry.use - Grant players with the ability to construct symmetrical bases
Commands:
/sym ui – Toggle UI on or off /sym toggle – Enable or disable symmetry /sym show – Display the current Symmetry Center /sym set – Define the Symmetry Center /sym delete – Remove the Symmetry Center /sym {type} – Select the Symmetry Type (options listed below)
Symmetry Types:
N2S - Normal 2-sided N3S - Normal 3-sided N4S - Normal 4-sided N6S - Normal 6-sided M2S - Mirrored 2-sided M4S - Mirrored 4-sided
Special Thanks:
Thanks to Mr. David for the help, push, emotional support, and for making the Demo Video! You should check out his premium server templates!
Thanks to Lord Jamie for finding the bugs I missed!
Discord: Shady14u
https://discord.gg/8mvvBrrw4Y
-
.thumb.gif.f4e1cfb8956877cc822b8b498b670282.gif)
Free
Chat Triggers
This is based on the BM trigger pack made by Lone just as a plugin. Find all of his triggers here BattleMetrics Trigger Pack
Default Triggers:
"admin", "help" - Server Reply: Need an admin? Open up a ticket on our Discord: discord.gg/invitelink "group", "limit" - Server Reply: This server is grouplimited "Cheating", "Hacking", "Hacks", "AimBot" - Server Reply: If you think someone is cheating F7 report them and open a ticket up in our discord. "!pop" Server Reply: Players online: {onlinmembers} You can add unlimited triggers if you want to just copy and paste. Discord Support:
All triggers can be sent to discord as well if any channel just create a webhook place in the config and reload the plugin and test the output. Future Plans:
-Bans posted to discord -F7 reports to discord -Update the look of the Embed. -More coming soon- If you want something adding just leave it on the plugin page.
-
$6.97
BarrelBash Event
Challenge players to destroy barrels and compete for the highest score.
Configurable options include: Leaderboard, Rewards, Announcements and more.
BarrelBash Config:
{ "Only Command Start Event": false, "Minimum Players To Start Event": 1, "Show Leaderboard": true, "Leaderboard Location (top right, top center, top left | left center, right center)": "top right", "How long will Event last (seconds)": 180.0, "How often will the event be launched(Seconds)": 1200.0, "Show Event GameTip Notifications": true, "Shown GameTip Duration (seconds)": 7.0, "Show Event Chat Notifications": true, "Notification of Event Start(Chat and GameTip)": "<color=orange>Barrel</color><color=red>Bash</color> event has started! Destroy <color=orange>barrels</color> to gain points!", "Notification When nobody participates in the event": "No one participated in <color=orange>Barrel</color><color=red>Bash</color>", "Notification Sound of Event Start": true, "Winner Multiple Announcements Delay(seconds)": 3.0, "Winner Rewards, make sure to change each value to your liking(1-6)": { "1": { "Reward Enabled": true, "Reward Type (1 = Item, 2 = Command, 3 = Economics(Plugin REQ), 4 = ServerRewards(Plugin REQ)": 1, "Reward Item": "scrap", "Reward Item Amount": 420, "Reward Item Custom Name": "", "Reward Item Skin ID": 0, "Reward Command": "oxide.usergroup add {player.id} vip", "Reward Command Display Name (Chat and GameTip)": "VIP", "Reward Economics Display Name (Chat and GameTip)": "Balance", "Reward ServerRewards Display Name (Chat and GameTip)": "RP", "Reward Economics Plugin Amount": 420.0, "Reward ServerRewards Plugin Amount": 420, "Notification of Who Won (supports {player_name}, {reward_display_name}, {barrels_destroyed})": "<color=yellow>{player_name}</color> has won 1. place in <color=orange>Barrel</color><color=red>Bash</color> event and received a prize of <color=red>{reward_display_name}</color>!" }, "2": { "Reward Enabled": false, "Reward Type (1 = Item, 2 = Command, 3 = Economics(Plugin REQ), 4 = ServerRewards(Plugin REQ)": 1, "Reward Item": "scrap", "Reward Item Amount": 420, "Reward Item Custom Name": "", "Reward Item Skin ID": 0, "Reward Command": "oxide.usergroup add {player.id} vip", "Reward Command Display Name (Chat and GameTip)": "VIP", "Reward Economics Display Name (Chat and GameTip)": "Balance", "Reward ServerRewards Display Name (Chat and GameTip)": "RP", "Reward Economics Plugin Amount": 420.0, "Reward ServerRewards Plugin Amount": 420, "Notification of Who Won (supports {player_name}, {reward_display_name}, {barrels_destroyed})": "<color=yellow>{player_name}</color> has won 1. place in <color=orange>Barrel</color><color=red>Bash</color> event and received a prize of <color=red>{reward_display_name}</color>!" }, "3": { "Reward Enabled": false, "Reward Type (1 = Item, 2 = Command, 3 = Economics(Plugin REQ), 4 = ServerRewards(Plugin REQ)": 1, "Reward Item": "scrap", "Reward Item Amount": 420, "Reward Item Custom Name": "", "Reward Item Skin ID": 0, "Reward Command": "oxide.usergroup add {player.id} vip", "Reward Command Display Name (Chat and GameTip)": "VIP", "Reward Economics Display Name (Chat and GameTip)": "Balance", "Reward ServerRewards Display Name (Chat and GameTip)": "RP", "Reward Economics Plugin Amount": 420.0, "Reward ServerRewards Plugin Amount": 420, "Notification of Who Won (supports {player_name}, {reward_display_name}, {barrels_destroyed})": "<color=yellow>{player_name}</color> has won 1. place in <color=orange>Barrel</color><color=red>Bash</color> event and received a prize of <color=red>{reward_display_name}</color>!" }, "4": { "Reward Enabled": false, "Reward Type (1 = Item, 2 = Command, 3 = Economics(Plugin REQ), 4 = ServerRewards(Plugin REQ)": 1, "Reward Item": "scrap", "Reward Item Amount": 420, "Reward Item Custom Name": "", "Reward Item Skin ID": 0, "Reward Command": "oxide.usergroup add {player.id} vip", "Reward Command Display Name (Chat and GameTip)": "VIP", "Reward Economics Display Name (Chat and GameTip)": "Balance", "Reward ServerRewards Display Name (Chat and GameTip)": "RP", "Reward Economics Plugin Amount": 420.0, "Reward ServerRewards Plugin Amount": 420, "Notification of Who Won (supports {player_name}, {reward_display_name}, {barrels_destroyed})": "<color=yellow>{player_name}</color> has won 1. place in <color=orange>Barrel</color><color=red>Bash</color> event and received a prize of <color=red>{reward_display_name}</color>!" }, "5": { "Reward Enabled": false, "Reward Type (1 = Item, 2 = Command, 3 = Economics(Plugin REQ), 4 = ServerRewards(Plugin REQ)": 1, "Reward Item": "scrap", "Reward Item Amount": 420, "Reward Item Custom Name": "", "Reward Item Skin ID": 0, "Reward Command": "oxide.usergroup add {player.id} vip", "Reward Command Display Name (Chat and GameTip)": "VIP", "Reward Economics Display Name (Chat and GameTip)": "Balance", "Reward ServerRewards Display Name (Chat and GameTip)": "RP", "Reward Economics Plugin Amount": 420.0, "Reward ServerRewards Plugin Amount": 420, "Notification of Who Won (supports {player_name}, {reward_display_name}, {barrels_destroyed})": "<color=yellow>{player_name}</color> has won 1. place in <color=orange>Barrel</color><color=red>Bash</color> event and received a prize of <color=red>{reward_display_name}</color>!" }, "6": { "Reward Enabled": false, "Reward Type (1 = Item, 2 = Command, 3 = Economics(Plugin REQ), 4 = ServerRewards(Plugin REQ)": 1, "Reward Item": "scrap", "Reward Item Amount": 420, "Reward Item Custom Name": "", "Reward Item Skin ID": 0, "Reward Command": "oxide.usergroup add {player.id} vip", "Reward Command Display Name (Chat and GameTip)": "VIP", "Reward Economics Display Name (Chat and GameTip)": "Balance", "Reward ServerRewards Display Name (Chat and GameTip)": "RP", "Reward Economics Plugin Amount": 420.0, "Reward ServerRewards Plugin Amount": 420, "Notification of Who Won (supports {player_name}, {reward_display_name}, {barrels_destroyed})": "<color=yellow>{player_name}</color> has won 1. place in <color=orange>Barrel</color><color=red>Bash</color> event and received a prize of <color=red>{reward_display_name}</color>!" } } } Commands:
Console and /Chat = StartBarrelBash - barrelbash.start
Winner Logs:
oxide/logs/BarrelBashWinners.log
- #event
- #barrelbash
- (and 4 more)