Search the Community
Showing results for tags 'umod'.
-
Version 1.5.4
778 downloads
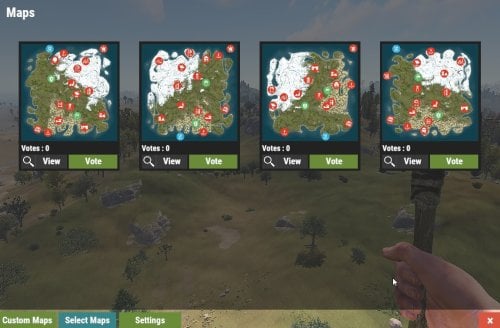
This plugin makes the admin’s life easier by automatically generating maps, initiating a vote that lets users choose which map they would like to play in during the next wipe and auto wiping the server. Depends on: Image Library Wipe Info API (If your server in country that have forced wipe at Friday please use WipeInfoApi file in MapVoter/WipeInfoApi/WipeInfoApi .cs) Discord extension Update 1.5.00: Unified Plugin Types Merged all different types of the plugin into a single, unified version. Server Wipe Fix Fixed an issue where the plugin did not wipe the server after a restart. General Improvements Resolved various other issues to enhance performance and stability. Added server identity to the configuration file. If you load the plugin while the server is running, it will automatically set to the current identity. Alternatively, you can find the server identity by: - Checking the startup command for +server.identity. - Inspecting the server.cfg path: You can locate the server identity in /server/{server.identity}/cfg/. Logging Enhancements Added logging files to track auto-wipe progress. To enable this feature, set Enable Debug Mode to true in the configuration file. Update 1.4.67: Added: Single Discord message now supports up to 4 maps. Wipe countdown in Embed. Fixed: Magnify icon not showing. New config options: You must set the Embed URL if you want to use the Single Discord embed message. "Embed Url": "https://codefling.com" "Single Embed?": false Note: The single message will only display 4 maps, but you can add more. Update 1.4.64: Server administrators can list data files to be deleted after the wipe "Plugins Data wipe": { "Enable plugins data wipe on forced wipe day": true, "Enable plugins data wipe on map wipe day": true, "File names to be deleted on forced wipe day": [ "wipeinfo", "WipeInfoApi" ], "File names to be deleted on map wipe day": [ "wipeinfo", "WipeInfoApi" ] } If you utilize a game hosting service, please ensure that your host permits the modification of the startup command. Update 1.3.26 : Auto wipe now works for non Dedicated (game server or host) servers but you'll have to disable sandbox and you won't be able to auto update the server. Requirements Rust Server(s) setup in a standard way on a Windows ,Pterodactyl Panel , Open Game Panel, Ubuntu dedicated server or game/host server (Doesn't work on LinuxGSM). Administrator privileges on said dedicated server. All of your server settings in \server\my_server_identity\cfg \server.cfg except rcon.port ,rcon.web rcon.password which will be added to batch script later. Auto Wipe will launch the server without start.bat. Features: Automatically restart and update the server every first Thursday of the month. Automatically generate or select random maps from rustmaps.com filter maps on wipe day or x days before wipe using https://rustmaps.com/ & wipe-info-api and start the vote. Allows players to vote on maps through an in-game UI or Discord (if you use any plugin that links a player and a Discord user, enable “only authenticated users can vote” in the config file to avoid duplicate votes). Automatically checks if it’s wipe day using wipe-info-api and the plugin’s config. Automatically update Oxide and the server and wipes it on forced wipe. Configure the plugin through a GUI (not all settings are available on the GUI). Select maps from rustmaps.com through a GUI via a RustMaps share code. Added Custom maps via GUI (to delete map you have to delete it from data file in MapVoter/Custommapdata.json). The vote will start automatically on custom maps in data folder if custom maps usage is enabled in config. Fun kit. Automatically generates custom maps every wipe, utilizing RustMaps.com. Please note that to use this feature, a subscription to RustMaps.com is required. Update 1.4.61 In this update you can generate a custom maps every time map vote starts with same config you provided. Update 1.3.40 New UI Update 1.3.35 1- Added Fun kit. Fun kit is kit that will be enabeled before every wipe, players can redeem it using /kit <kit name> or when respawning. Players wont be able to learn BPs and unloack workbench tree nodes. How to add fun kit? 1 - create kit using kits plugin with permission example : 2 - In map voter config file edit : "Fun Kit": { "Fun kit enabled": false, "Enable Fun kit x minutes before wipe": 0, "Kit name": null, "Permission": null }, 3 - save and reload MapVoter. 2 - Map Voter will print future wipes in console when loaded How to add Custom maps : Video Permissions: MapVoter.use only allows an admin to generate maps and start a vote. MapVoter.Manager allows an admin to use all the features. MapVoter.Vote allows player to vote(you can enable or disable this in configuration). Commands /mvote : Opens the plugin’s main GUI. /startvote After selecting which maps will appear on the vote, starts the vote. MapVoter.generate <Number of maps to generate> <seed> <voting duration in minutes>. voteresult : Shows which map had won the vote. Mapvoter.reload reload the plugin. MapVoter.mapwipe <delay in seconds> <Map size > will generate a map and change startup parameters in server.cfg. MapVoter.mapwipe <delay in seconds> <Custom map url > will wipe the server with a given custom map url and change startup parameters in server.cfg MapVoter.bpwipe <delay in seconds> <Map size > will generate map and delete *.db, *.db-journal and *.sav files and changes startup parameters in server.cfg MapVoter.bpwipe <delay in seconds> <Custom map url > will delete *.db, *.db-journal and *.sav files and change startup parameters MapVoter.cancelwipe : cancels ongoing wipe. MapVoter.stopvoting : stops ongoing voting. MapVoter.update <Delay in seconds> initiates restart and updates the server & oxide. Mapvoter.CancelUpdate : Cancels restart and update. Discord commands !vote !generate <Number of maps to generate> <seed> <voting duration in minutes>. !mapwipe <delay in seconds> <Map size > !bpwipe <delay in seconds> <Map size > bpwipe <delay in seconds> <Custom map url > !cancelwipe !stopvoting !update <Delay in seconds> !cancelupdate Configuration { "Commands": { "Open MapVoter UI": "mvote", "Generate Mpas": "MapVoter.generate", "vote result": "voteresult" }, "Options": { "Map size": 3500, "Select random maps from rustmaps filter id instead of generating random maps on wipe day (true/false)": false, "How many pages the plugin looks up per search request(every page has 30 maps": 10, "Enable Discord bot (true/false)": true, "Only players with permission MapVoter.Vote can vote (true/false)": false, "Log to Discord (true/false)": true, "Discord Logs Channel Id": "", "Disable UI": false, "RustMaps API key": "https://rustmaps.com/user/profile", "staging": false, "barren": false, "Stop voting after (minutes)": 60, "avatar url": "", "Discord footer": "", "filter Id": "Visit https://rustmaps.com/ and adjust your map requirements. In the red box above the settings hit the Share button,the string at the end of the URL is the filterId.Example URL: https://rustmaps.com/?share=gEU5W6BUuUG5FpPlyv2nhQ the string at the end in this case {gEU5W6BUuUG5FpPlyv2nhQ} is the filterId." }, "Discord Settings": { "Vote Channel id": "", "Discord Apikey": "BotToken", "Discord Command Prefix": "!", "Discord Channels": [ { "Discord Channel ID": "", "Commands": [ "generate", "vote", "mapwipe", "bpwipe", "cancelwipe", "stopvoting", "update", "cancelupdate" ] } ], "Discord Command Role Assignment (Empty = All roles can use command.)": { "generate": [ "DiscordRoleName", "DiscordRoleName2" ], "vote": [ "DiscordRoleName", "DiscordRoleName2" ], "mapwipe": [ "DiscordRoleName", "DiscordRoleName2" ], "bpwipe": [ "DiscordRoleName", "DiscordRoleName2" ], "cancelwipe": [ "DiscordRoleName", "DiscordRoleName2" ], "stopvoting": [ "DiscordRoleName", "DiscordRoleName2" ], "update": [ "DiscordRoleName", "DiscordRoleName2" ], "cancelupdate": [ "DiscordRoleName", "DiscordRoleName2" ] } }, "Auto Vote": { "Auto start vote": true, "Only Authenticated users can vote through discord": true, "Start voting x days before wipe": 0, "Start voting at (HH:mm) 24-hour clock": "17:00", "Number of maps to generate": 4 }, "Auto Wipe": { "Custom Map": { "Custom map": false, "Map URL": "" }, "Map Wipe schedule": [ 7, 14, 21, 28 ], "BP Wipe schedule": [ 0 ], "Enable Auto wipe": true, "Wipe BPs at forced wipe day": true, "Forced Wipe time (HH:mm) 24-hour clock": "19:00", "Wipe time (HH:mm) 24-hour clock": "19:00" } } MapVoter.cs, which will handle wipe schedule and automatically generate maps, start voting and restart the server. How to Install 1 - Upload Mapvoter.cs. 2 - all your server configuration must be in /server/{server.identity}/cfg/server.cfg or you can change the path in config if your host use different path (/server/{server.identity}) 3- Upload Discord extension to /RustDedicated_Data/Managed. 4- change the startup command if possible to ./RustDedicated -batchmode +server.identity "rust" +rcon.port {{RCON_PORT}} +rcon.web true +rcon.password \"{{RCON_PASS}}\" or leave all the map seed, size and level URL empty. 5-create server.cfg file in server/{server.identity}/cfg/ example : server.port 28000 server.seed server.worldsize //server.levelurl server.maxplayers 100 server.gamemode vanilla server.hostname " Vanilla" server.tags vanilla,weekly server.level "Procedural Map" server.radiation true server.saveinterval 600 server.tickrate 30 server.headerImage "" server.url "" server.secure 1 server.salt 50 Perform a Dry-Run Whilst your server is online with no players, test some commands like Mapvote.bpwipe, server.cfg, and make sure that server.seed and server.worldsize has changed and all your selected files have been deleted. Contact kaysharp#2008$45.00- 54 comments
- 8 reviews
-
- 4
-

-

-
- #admin tools
- #admintool
- (and 9 more)
-
Version 0.1.14
837 downloads
Plugin for Real PvE servers, featuring damage prevention, anti-griefing measures, customizable PvP zones, an automatic loot queue in radtowns and raid zones, and much more. P.S. Since the previous implementation with DynamicPVP was not correct and had some issues, I have added universal hooks(Developer API section) for general access from all PvP plugins, which are currently missing in DynamicPVP. I have requested the author to add them(3 lines), but for now, you will need to use the modified version of DynamicPVP.cs The ability to set "server.pve" to "true", which allows the server to have a "PvE" flag; Damage from NPC's are enabled when server.pve is true; The ability to inflict damage to one's own structures with "server.pve true"; The ability to destroy(including external walls) or rotate one's structures without any time constraints; The ability to force the decay of building blocks with Twigs grade, even if there is wood in the Tool Cupboard; The ability to toggle the gather resource restriction in someone else's Building Privileges; No one, except the owner or their friends, will be able to open their loot containers (chests, storages, bodies, etc.); Administrators can bypass loot restrictions; The ability to schedule the killing of players if they disconnect within someone else's Building Privilege; Disabling backpack and active item drop upon death, even if backpack is full; The ability to disable 'Give' messages; The ability to modify the items given at spawn on the beach; The ability to create an unlimited number of custom permissions; The ability to allow players to bypass the queue; The ability to set limits on sleeping bags, shelters and auto turrets for each permission; The ability to set a multiplier for the prices of monuments and events for each permission; The ability to customize the price and amount of vehicles for each of your custom permissions; The ability to assign vehicles to each player; The ability to customize the assigned price and available amount of vehicles for each of your custom permissions; An assigned vehicle can't be damaged, looted or pushed by other players, but it can be pushed if it is within someone else's Building Privilege; The ability to loot monuments through a queue system; The ability to configure monuments, setting their looting price and time, and adjusting status bars for each monument; The ability to acquire the privilege to loot events (helicopters, bradleys, and raidable bases) through a purchase; The ability to customize the price of each event types and loot attempts (lives); NPCs only aggress against players who are looting monuments, events or raidable bases; Only players who are looting monuments, events or raidable bases can inflict damage to NPCs; RaidableBases are protected from griefing(no damage, no loot and etc). Only the owner can interact with the raid; Neutral RaidableBases can be purchased; Prices for purchasing neutral raids are configurable for each difficulty level; Configurable raid limits (currently available) along with discount multipliers for purchases, for each permission. File location: *SERVER*\oxide\data\RealPVE\PermissionConfig.json Default: https://pastebin.com/5VtWZZVr All permissions are created and configured in the config file under the "List of permissions" section. You can create as many permissions as needed and customize them flexibly. It is recommended to use the prefix "realpve" in the permission's name, for example: "realpve.vip". NOTE: The first permission will serve as the default permission for those who do not have any permissions. { "List of permissions. NOTE: The first permission will be used by default for those who do not have any permissions.": [ { "Permission Name": "realpve.default", "Bypass Queue": false, "Limit of beds": 15, "Limit of shelters": 1, "Limit of auto turrets": 12, "Seconds that will be skipped when opening HackableLockedCrate": 0.0, "Monuments price multiplier": 1.0, "Events price multiplier": 1.0, "Limit of RaidableBases(at the time)": 1, "RaidableBases price multiplier": 1.0, "Vehicles settings": { "Horse": { "Limit": 1, "Price": 10.0 }, "Bike": { "Limit": 1, "Price": 5.0 }, "MotorBike": { "Limit": 1, "Price": 20.0 }, "Car": { "Limit": 1, "Price": 25.0 }, ... } }, { "Permission Name": "realpve.vip", "Bypass Queue": true, "Limit of beds": 20, "Limit of shelters": 2, "Limit of auto turrets": 15, "Seconds that will be skipped when opening HackableLockedCrate": 450.0, "Monuments price multiplier": 0.9, "Events price multiplier": 0.9, "Limit of RaidableBases(at the time)": 2, "RaidableBases price multiplier": 0.9, "Vehicles settings": { "Horse": { "Limit": 5, "Price": 9.0 }, "Bike": { "Limit": 5, "Price": 4.5 }, "MotorBike": { "Limit": 5, "Price": 18.0 }, "Car": { "Limit": 5, "Price": 22.5 }, ... } } ], "Version": { "Major": 0, "Minor": 1, "Patch": 1 } } An example of a monument/event/rb multipliers using default permissions. For example, if you set the price for the Harbor at $1000, a player with the default permission(1.0) will pay $1000 * 1 = $1000. Meanwhile, a player with a VIP permission(0.9) will pay $1000 * 0.9 = $900. However, if a player possesses a misbehaving permission with a value of 1.1, they will need to pay $1000 * 1.1 = $1100. { "Chat command": "realpve", "Chat admin command": "adminpve", "Is it worth forcibly implementing PvE for a server?": true, "Is it worth enabling GameTips for messages?": true, "Is it worth preventing the sending of 'Give' messages?": true, "Is it worth preventing resource gathering in someone else's building privilege area?": false, "Is it worth preventing the pickup of plants spawned by the server in someone else's building privilege zone?": false, "Is it worth forcibly blocking damage from the patrol helicopter to building blocks and deployables?": false, "Is it worth preventing players from handcuffing others?": true, "Is it worth assigning portals(Halloween and Christmas) to the first player?": true, "Is it worth preventing a backpack from dropping upon player death?": true, "Is it worth preventing damage to the laptop of the Hackable Crate?": true, "Is it worth removing the penalties for recyclers in safe zones?": true, "Is it worth allowing all players to pick up items dropped by others? If enabled, personal settings will be ignored": false, "The format that will be used for prices": "${0}", "Vehicles - Time in seconds to display the marker when searching for a vehicle. A value of 0 disables the marker": 15.0, "Anti-Sleeper - Time in seconds after which a player will be killed if they disconnect while inside someone else's Building Privilege. Set to 0 to disable": 1200.0, "Is it worth enabling support for the 'Npc Random Raids' plugin?": true, "Is friendly fire enabled by default when creating a new team?": false, "PvP - Is it worth adding map markers for PvP zones?": true, "PvP - Name of the map maker": "PvP Zone!", "PvP - Settings for the status bar": { "Order": 9, "Height": 26, "Main_Color(Hex or RGBA)": "1 0.39 0.28 0.7", "Main_Transparency": 0.8, "Main_Material": "", "Image_Url": "https://i.imgur.com/oi5vIkk.png", "Image_Local(Leave empty to use Image_Url)": "RealPVE_PvP", "Image_Sprite(Leave empty to use Image_Local or Image_Url)": "", "Image_IsRawImage": false, "Image_Color(Hex or RGBA)": "1 0.39 0.28 1", "Image_Transparency": 1.0, "Is it worth enabling an outline for the image?": false, "Image_Outline_Color(Hex or RGBA)": "0.1 0.3 0.8 0.9", "Image_Outline_Transparency": 0.0, "Image_Outline_Distance": "0.75 0.75", "Text_Size": 12, "Text_Color(Hex or RGBA)": "1 1 1 1", "Text_Font(https://umod.org/guides/rust/basic-concepts-of-gui#fonts)": "RobotoCondensed-Bold.ttf", "Is it worth enabling an outline for the text?": false, "Text_Outline_Color(Hex or RGBA)": "#000000", "Text_Outline_Transparency": 1.0, "Text_Outline_Distance": "0.75 0.75", "SubText_Size": 12, "SubText_Color(Hex or RGBA)": "1 1 1 1", "SubText_Font": "RobotoCondensed-Bold.ttf", "Is it worth enabling an outline for the sub text?": false, "SubText_Outline_Color(Hex or RGBA)": "0.5 0.6 0.7 0.5", "SubText_Outline_Transparency": 0.0, "SubText_Outline_Distance": "0.75 0.75" }, "PvP - Settings for the progress status bar": { "Main_Color(Hex or RGBA)": "1 1 1 0.15", "Main_Transparency": 0.15, "Progress_Reverse": true, "Progress_Color": "#FF6347", "Progress_Transparency": 0.7, "Progress_OffsetMin": "0 0", "Progress_OffsetMax": "0 0" }, "Wipe ID": null, "Version": { "Major": 0, "Minor": 1, "Patch": 14 } } ENG: https://pastebin.com/ZMUL6pYL RUS: https://pastebin.com/Mx8cbMts Main commands(/realpve ) : autobuy - Toggle autobuy for monuments, vanilla events and raid bases with a total price greater than 0; pickup - Toggle access to pick up your items from the ground for all players; share - Manage access to looting your entities by other players(outside of the team): status *entityID*(optional) - Display information about the settings of the entity you are looking at or the one you specified; add *nameOrID* *entityID*(optional) - Add the specified player to the entity list you are looking at or the one you specified; remove *nameOrID* *entityID*(optional) - Remove the specified player from the entity list you are looking at or the one you specified; toggle *entityID*(optional) - Toggle the entity list you are looking at or the one you specified; delete *entityID*(optional) - Delete the settings for the entity you are looking at or the one you specified; clear - Delete the settings for all your entities. team - Manage your team: ff - Toggle the ability to damage your teammates. vehicle - Manage your vehicles: list - List of IDs for all your vehicles; find *vehicleID*(optional) - Help finding the vehicle you are looking at or the one you specified; unlink *vehicleID*(optional) - Unlink the vehicle you are looking at or the one you specified; clear - Unlink all your vehicles. Admin commands(/adminpve). Permission "realpve.admin" required: autobuy - Manage autobuy for monuments, vanilla events and raid bases: *nameOrId* - Toggle autobuy for the specified player; force monument/event/rb - Toggle forced autobuy. If enabled, player settings will be ignored; clear - Disable autobuy for everyone. config - Manage settings for values in the configuration file: forcepve *boolValue*(optional) - Is it worth forcibly implementing PvE for a server? gametips *boolValue*(optional) - Is it worth enabling GameTips for messages? givemsg *boolValue*(optional) - Is it worth preventing the sending of 'Give' messages? resource_privilege *boolValue*(optional) - Is it worth preventing resource gathering in someone else's building privilege area? plant_privilege *boolValue*(optional) - Is it worth preventing the pickup of plants spawned by the server in someone else's building privilege zone? heli_damage *boolValue*(optional) - Is it worth forcibly blocking damage from the patrol helicopter to building blocks and deployables? handcuffs *boolValue*(optional) - Is it worth assigning portals(Halloween and Christmas) to the first player? portals *boolValue*(optional) - Is it worth preventing players from handcuffing others? backpack_drop *boolValue*(optional) - Is it worth preventing a backpack from dropping upon player death? laptop_damage *boolValue*(optional) - Is it worth preventing damage to the laptop of the Hackable Crate? recycler_safezone *boolValue*(optional) - Is it worth removing the penalties for recyclers in safe zones? item_pickup *boolValue*(optional) - Is it worth allowing all players to pick up items dropped by others? If enabled, personal settings will be ignored; priceformat *stringValue* - The format that will be used for prices; vehicle_marker_time *floatValue* - Vehicles - Time in seconds to display the marker when searching for a vehicle. A value of 0 disables the marker; antisleeper *floatValue* - Anti-Sleeper - Time in seconds after which a player will be killed if they disconnect while inside someone else's Building Privilege. Set to 0 to disable; randomraids *boolValue*(optional) - Is it worth enabling support for the 'Npc Random Raids' plugin? teamff *boolValue*(optional) - Is friendly fire enabled by default when creating a new team? pvpmarkers *boolValue*(optional) - PvP - Is it worth adding map markers for PvP zones? pvpmarkersname *stringValue* - PvP - Name of the map maker. loot - Manage player access to entities without restrictions: *nameOrId* - Toggle unrestricted access for the specified player; self - Toggle unrestricted access for yourself; clear - Revoke unrestricted access for all players. monument - Manage monuments: list - List of available monuments; *monumentID*/this - Instead of the monumentID, you can use the word "this", but you must be inside the monument: suffix *boolValue*(optional) - Toggle the suffix display in the monument's name; broadcast *boolValue*(optional) - Toggle notifications about monument occupancy/release; time *intValue* - Set the looting time limit for the monument in seconds; price *floatValue* - Set the cost for looting rights. A value of 0 makes the monument free; offer *floatValue* - Set the offer duration for purchasing the monument in seconds; map_mode *intValue* - Set the marker display mode on the map. 0 - disabled, 1 - enabled, 2 - enabled during PvP mode; map_circle *boolValue*(optional) - Toggle the display of the monument's circle marker on the map; pvp *boolValue*(optional) - Toggle PvP mode for the monument; pvp_delay *floatValue* - Set the PvP mode duration in seconds for players after leaving the PvP monument; bar_progress *boolValue*(optional) - Toggle between TimeProgressCounter and TimeCounter bars for the monument. perm - Manage permissions: add *permName* - Adds a new permission to the list by copying values from the first(default) permission in the list. If the permission name starts with 'realpve', it will also register a new permission; add *permName* *sourcePermName* - Adds a new permission to the list by copying values from an existing permission in the list; remove *permName* - Removes an existing permission from the list; edit *permName* - Edits a permission: queue - Toggle the permission to bypass the server queue; beds *intValue* - Restriction on the number of available beds; shelters *intValue* - Restriction on the number of available shelters; turrets *intValue* - Restriction on the number of available turrets; hackable *floatValue* - Number of seconds(0-900) to skip when opening a hackable crate; monuments *floatValue* - Price multiplier for monuments; events *floatValue* - Price multiplier for vanilla events; rb_limit *intValue* - Restriction on the number of raid bases available simultaneously; rb_mult *floatValue* - Price multiplier for raid bases; vehicles *vehType* - Vehicles settings: limit *intValue* - Limit on the number of available vehicles by type; price *floatValue* - Price for registering a vehicle by type. clear - Removes all permissions from the list except the first one. pickup - Manage access to picking up another player's items from the ground: *nameOrId* - Toggle access to picking up a specific player's items from the ground; clear - Revoke access for all players to pick up items from the ground. share - Manage access to looting entities by other players(outside of the team): status *entityID*(optional) - Display information about the settings of the entity you are looking at or the one you specified; add *nameOrID* *entityID*(optional) - Add the specified player to the entity list you are looking at or the one you specified; remove *nameOrID* *entityID*(optional) - Remove the specified player from the entity list you are looking at or the one you specified; toggle *entityID*(optional) - Toggle the entity list you are looking at or the one you specified; delete *entityID*(optional) - Delete the settings for the entity you are looking at or the one you specified; clear *nameOrID*(optional) - Delete the settings for all entities or all entities of the specified player. tc - Manage building privilege: add self/*entityID* *nameOrID*(optional) - Add yourself or a specified player to the building privilege of the area you or the specified entity are in; remove self/*entityID* *nameOrID*(optional) - Remove yourself or a specified player from the building privilege of the area you or the specified entity are in; clear self/*entityID* - Clear the list of authorized players in the building privilege of the area you or the specified entity are in; info self/*entityID* - Get information about the building privilege of the area you or the specified entity are in. vehicle - List of all available vehicle types: types - List of available vehicle types. Example: /realpve pickup /realpve vehicle find *netID* /realpve team ff /adminpve perm add realpve.vip2 /adminpve perm add realpve.vip2 realpve.vip /adminpve perm edit realpve.vip2 queue true /adminpve perm edit realpve.vip2 vehicles horse limit 5 /adminpve monument list /adminpve monument *monumentID* pvp /adminpve monument *monumentID* price 7.5 /adminpve loot iiiaka /adminpve pickup iiiaka /adminpve tc info self /adminpve tc info 6959689 /adminpve vehicle types This plugin provides the ability to claim vehicles, thereby preventing theft and griefing from other players. In permissions, you can set the price and quantity restrictions for each type of vehicle, ensuring flexible customization according to your preferences. An assigned vehicle can't be damaged, looted or pushed by other players, but it can be pushed if it is within someone else's Building Privilege. File location: *SERVER*\oxide\data\RealPVE\MonumentConfig.json Default: https://pastebin.com/XY1d9YaM This plugin introduces queue system and loot purchases for monuments. You can customize the price and time for looting for each monument. Within monuments, only the "Looter" and his friends have the ability to loot, pick up items or damage entities. Additionally, NPCs and animals within monuments do not aggress against other players and do not receive damage from them. If a player dies within the monument, they will have a grace period to return. This allows players to safely loot monuments without fear of griefing. Example of monument configuration: "ferry_terminal_1": { "Type(This parameter is just a hint. Changes won’t have any effect)": "RadTown", "Is it worth displaying the suffix(if any) in the monument's name?": true, "Is it worth notifying all players about the occupation/release of the monument?": true, "The cost for the right to loot the monument. A value of 0 makes the monument free": 15.0, "The time in seconds(1-3600) given for looting the monument": 900, "The time in seconds(1-15) given to make a decision to purchase the monument": 5.0, "Map marker display mode: 0 - disabled, 1 - enabled, 2 - enabled during PvP mode": 1, "Is it worth creating a circle in the map marker?": true, "PvP - Is PvP enabled at this monument? If so, players will be able to kill each other and loot will be publicly accessible": false, "PvP - The time in seconds(0-60) during which the player retains PvP mode after leaving the PvP monument": 10.0, "Is it worth using a progress bar for bars with a counter?": true, "Settings for the status bar": { "Order": 10, "Height": 26, "Main_Color(Hex or RGBA)": "#FFBF99", "Main_Transparency": 0.8, "Main_Material": "", "Image_Url": "https://i.imgur.com/awUrIwA.png", "Image_Local(Leave empty to use Image_Url)": "RealPVE_ferry_terminal_1", "Image_Sprite(Leave empty to use Image_Local or Image_Url)": "", "Image_IsRawImage": false, "Image_Color(Hex or RGBA)": "#FFDCB6", "Image_Transparency": 1.0, "Is it worth enabling an outline for the image?": false, "Image_Outline_Color(Hex or RGBA)": "0.1 0.3 0.8 0.9", "Image_Outline_Transparency": 0.0, "Image_Outline_Distance": "0.75 0.75", "Text_Size": 12, "Text_Color(Hex or RGBA)": "1 1 1 1", "Text_Font(https://umod.org/guides/rust/basic-concepts-of-gui#fonts)": "RobotoCondensed-Bold.ttf", "Is it worth enabling an outline for the text?": false, "Text_Outline_Color(Hex or RGBA)": "#000000", "Text_Outline_Transparency": 1.0, "Text_Outline_Distance": "0.75 0.75", "SubText_Size": 12, "SubText_Color(Hex or RGBA)": "1 1 1 1", "SubText_Font": "RobotoCondensed-Bold.ttf", "Is it worth enabling an outline for the sub text?": false, "SubText_Outline_Color(Hex or RGBA)": "0.5 0.6 0.7 0.5", "SubText_Outline_Transparency": 0.0, "SubText_Outline_Distance": "0.75 0.75" }, "Settings for the progress status bar": { "Main_Color(Hex or RGBA)": "1 1 1 0.15", "Main_Transparency": 0.15, "Progress_Reverse": true, "Progress_Color": "#FFBF99", "Progress_Transparency": 0.7, "Progress_OffsetMin": "0 0", "Progress_OffsetMax": "0 0" } } Type - This field serves only as an indicator for you. The changes won't have any impact; ShowSuffix - Suffix display. Some monuments (for example Warehouses) have suffixes in the name, like "Warehouse #12"; Broadcast - Enabling or disabling broadcasts when a monument is occupied or vacated; LootingTime - Time allocated for looting the monument; Price - The price for which you can start looting the monument. 0 means looting is free; BarSettings - Settings for the Advanced Status Bar. You can also choose the types of monuments by specifying them under the "List of tracked types of monuments" section. A list of all available types can be viewed on the MonumentsWatcher's page in the "Developer API" section. "List of tracked types of monuments": [ "RadTown", "RadTownWater", "RadTownSmall", "TunnelStation", "Custom" ] Events, similar to monuments, offer the opportunity to claim events. All events are configured in the config file under the "Settings for the events" section. You can customize the price of looting and looting attempts(deaths, including friends). Just like in monuments, only the "Looter" and his friends have the ability to loot and damage entities. Additionally, in events, NPCs do not aggress against other players. If a player(including friends) exceeds the death limit, the event became free, thereby providing other players with the opportunity to claim the event. Example of event configuration: { "Is it worth enabling forced auto-buy for vanilla events where the final price is greater than 0?": false, "Settings for the PatrolHelicopter events": { "IsEnabled": true, "Time in seconds (1-15) given to respond for purchasing this event. Note: This is shown to everyone who deals damage, and the first person to buy it will claim it": 5.0, "Is it worth removing fire from crates?": true, "The price to claim the event. A value of 0 means it's free": 50.0, "The number of deaths after which the event becomes public. A value of 0 disables the limit": 5, "The time in seconds for which the event is locked to the player. A value of 0 disables the time limit": 1800.0 }, "Settings for the BradleyAPC events": { "IsEnabled": true, "Time in seconds (1-15) given to respond for purchasing this event. Note: This is shown to everyone who deals damage, and the first person to buy it will claim it": 5.0, "Is it worth removing fire from crates?": true, "The price to claim the event. A value of 0 means it's free": 50.0, "The number of deaths after which the event becomes public. A value of 0 disables the limit": 5, "The time in seconds for which the event is locked to the player. A value of 0 disables the time limit": 1800.0 }, "Version": { "Major": 0, "Minor": 1, "Patch": 0 } } Price - The price to claim the event. 0 means looting is free; DeathLimit - Limit of deaths after which the event becomes free. File location: *SERVER*\oxide\data\RealPVE\NewbieConfig.json Default: https://pastebin.com/QHZCqpji An example of an item list given for the main inventory: "List of items for the main inventory": [ { "ShortName": "note", "Slot": 0, "Amount": 1, "SkinID": 0, "Text": "MsgNoteText" } ] P.S. In the Text field, you need to specify the language key. Or, you can just write any text, but there won't be a translation of the text. File location: *SERVER*\oxide\data\RealPVE\RaidableBasesConfig.json Default: https://pastebin.com/rpDng7Fd Integration with the RaidableBases plugin does not restrict its functionality in any way. On the contrary, it adds an anti-grief system that protects bases from malicious players. In raid bases, NPCs and other entities can only receive damage from the raid owner or their friends; Turrets and traps do not aggress against outsiders; You can customize the price of claiming to each difficulty and set individual discounts for each permission. You can still purchase raid bases using the /buyraid command. Raid bases without owners(buyable, maintained, manual and scheduled) can be bought for a price set in the configuration file or assigned to the first player who enters its radius, if the final price(price * discount) less or equals to 0. Additionally, as a bonus, upon buying this plugin, you receive 5 free bases for 3 difficulty levels, along with configured loot for them. [PluginReference] private Plugin RealPVE; There are 6 universal hooks that the plugin is subscribed to, the use of which allows interaction with PVP in various PVE plugins: OnPlayerEnterPVP OnPlayerExitPVP OnEntityEnterPVP OnEntityExitPVP CreatePVPMapMarker DeletePVPMapMarker OnPlayerEnterPVP: Used to add a player to PVP mode/zone. To call the OnPlayerEnterPVP hook, you need to pass 2 parameters: <BasePlayer>player - The player to add to PVP; <string>zoneID - A unique identifier for your PVP zone. This parameter is very important because a player can be in multiple PVP zones at the same time and passing the zoneID in this case allows for correct processing of the player's location within them. Interface.CallHook("OnPlayerEnterPVP", player, "*Your unique zone identifier*");//Calling the OnPlayerEnterPVP hook to tell PVE plugins that the player needs to be added to the specified PVP zone. OnPlayerExitPVP: Used to remove a player from PVP mode/zone. Calling this hook guarantees the player’s removal from the specified PVP zone, but does not guarantee the removal from PVP mode, as there may be other zones in addition to yours. Also, when a player dies, they are automatically removed from all PVP zones. To call the OnPlayerExitPVP hook, you need to pass 3 parameters, 1 of which is optional: <BasePlayer>player - The player to remove from PVP; <string>zoneID - A unique identifier for your PVP zone; <float>pvpDelay - Optional. When the player exits your PVP zone, you can also pass the PVP delay time. However, if the player still has other active PVP zones, your PVP delay will not take effect. Interface.CallHook("OnPlayerExitPVP", player, "*Your unique zone identifier*", 10f);//Calling the OnPlayerExitPVP hook to tell PVE plugins that the player needs to be removed from the specified PVP zone, with the pvpDelay(10 seconds) specified if the player no longer has any active PVP zones. OnEntityEnterPVP: Used to add an entity to PVP mode/zone. In the case of RealPVE, this hook is only necessary to add entities with an owner(player) to a PVP, allowing other players to interact with them, such as a player's corpse after death(PlayerCorpse) or a backpack after the corpse disappears(DroppedItemContainer). To call the OnEntityEnterPVP hook, you need to pass 2 parameters: <BaseEntity>entity - The entity to add to PVP; <string>zoneID - A unique identifier for your PVP zone. Interface.CallHook("OnEntityEnterPVP", entity, "*Your unique zone identifier*");//Calling the OnEntityEnterPVP hook to tell PVE plugins that the entity needs to be added to the specified PVP zone. OnEntityExitPVP: Used to remove an entity from PVP mode/zone. When an entity dies, it is automatically removed from all PVP zones. To call the OnEntityExitPVP hook, you need to pass 3 parameters, 1 of which is optional: <BaseEntity>entity - The entity to remove from PVP; <string>zoneID - A unique identifier for your PVP zone; <float>pvpDelay - Optional. When the entity exits your PVP zone, you can also pass the PVP delay time. However, if the entity still has other active PVP zones, your PVP delay will not take effect. Interface.CallHook("OnEntityExitPVP", entity, "*Your unique zone identifier*", 10f);//Calling the OnEntityExitPVP hook to tell PVE plugins that the entity needs to be removed from the specified PVP zone, with the pvpDelay(10 seconds) specified if the entity no longer has any active PVP zones. CreatePVPMapMarker: Used to create a map marker for the PVP zone. To call the CreatePVPMapMarker hook, you need to pass 5 parameters, 2 of which is optional: <string>zoneID - A unique identifier for your PVP zone; <Vector3>pos - The position of your PVP zone; <float>radius - The radius of the circle for your PVP zone; <string>displayName - Optional. The display name for the map marker; <BaseEntity>entity - Optional. The entity to which the map marker should be attached. Interface.CallHook("CreatePVPMapMarker", "*Your unique zone identifier*", pos, 25f, "ATTENTION! This is a PVP zone!");//Calling the CreatePVPMapMarker hook to tell PVE plugins to create a map marker for the specified zone, at the specified position with the given radius, but without specifying a parent entity. DeletePVPMapMarker: Used to delete a map marker for the PVP zone. To call the DeletePVPMapMarker hook, you need to pass only 1 parameter: <string>zoneID - A unique identifier for your PVP zone. Interface.CallHook("DeletePVPMapMarker", "*Your unique zone identifier*");//Calling the DeletePVPMapMarker hook to tell PVE plugins to delete a map marker for the specified zone. There are 5 hooks that the plugin calls: OnPlayerPVPDelay OnPlayerPVPDelayed OnPlayerPVPDelayRemoved OnZoneStatusText CanRedeemKit OnPlayerPVPDelay: Called when a player exits the last active PVP zone, allowing other plugins to overwrite the value for pvpDelay. Returning a float value allows changing the pvpDelay for the player. A value less than zero disables the pvpDelay. When calling the OnPlayerPVPDelay hook, 3 parameters are passed: <BasePlayer>player - The player to whom the pvpDelay is applied; <float>pvpDelay - The initial value of pvpDelay; <string>zoneID - A unique identifier of PVP zone. object OnPlayerPVPDelay(BasePlayer player, float pvpDelay, string zoneID) { Puts($"Attempting to set a PvP delay of {pvpDelay} seconds for player {player.displayName} in zone {zoneID}!"); if (zoneID == "*Your unique zone identifier*") { return 15f;//Overriding the values for pvpDelay } return null;//Leave unchanged } OnPlayerPVPDelayed: Called after the PVP delay has been set for the player. When calling the OnPlayerPVPDelayed hook, 3 parameters are passed: <BasePlayer>player - The player to whom the pvpDelay is applied; <float>pvpDelay - The value of pvpDelay; <string>zoneID - A unique identifier of PVP zone. void OnPlayerPVPDelayed(BasePlayer player, float pvpDelay, string zoneID) { Puts($"A PvP delay of {pvpDelay} seconds has been set for player {player.displayName} in zone {zoneID}!"); } OnPlayerPVPDelayRemoved: Called when the PVP delay is removed from the player after they enter a PVP zone with an active PVP delay. When calling the OnPlayerPVPDelayRemoved hook, only 1 parameter is passed: <BasePlayer>player - The player from whom the PVP delay has been removed. void OnPlayerPVPDelayRemoved(BasePlayer player) { Puts($"PVP delay has been removed for player {player.displayName} as they entered a PVP zone!"); } OnZoneStatusText: Called when the text with the nice name for the specified zone is needed, to be displayed in the status bar. When calling the OnZoneStatusText hook, 2 parameters are passed: <BasePlayer>player - The player for whom the nice name for the zone is being requested; <string>zoneID - A unique identifier of PVP zone. object OnZoneStatusText(BasePlayer player, string zoneID) { Puts($"Text for the status bar is required for zone {zoneID}"); if (zoneID == "*Your unique zone identifier*") { return lang.GetMessage("*langKey*", this, player.UserIDString);//<string>Overriding the value for the status bar text } return null;//Leave unchanged } CanRedeemKit: Called before giving the starter kit, in the OnDefaultItemsReceive hook. A non-zero value cancels this action. When calling the CanRedeemKit hook, only 1 parameter is passed: <BasePlayer>player - The player to whom the kit is being attempted to be given. object CanRedeemKit(BasePlayer player) { Puts($"Attempting to give the kit to player {player.displayName}!"); if (player.IsAdmin) { return false;//Cancel the action } return null;//Leave unchanged }$39.99 -
Version 1.0.13
1,756 downloads
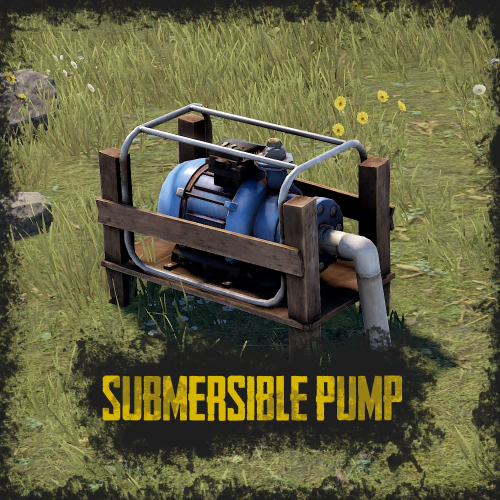
RUST Plugin Test Server TEST MY PLUGINS THERE! connect play.thepitereq.ovh:28050 Submersible Pump plugin helps manage river resources on your server. It allows players to place a water pump with fresh water anywhere on the map. The water output can be adjusted using the WaterWorks plugin by nivex. You can build your farm anywhere on the map. Customizable pump crafting and allows you to place pumps on foundations. Configurable height limits. Can be set to work on WaterBases. /pump - Plugin help command. /pump craft - Crafting submersible pump. givepump - Gives submersible pump to your inventory. (Console Command) submersiblepump.use – Allows you to craft and place submersible pump. (Needs to be enabled in config) submersiblepump.give – Allows you using givepump command. { "Misc - Require Permission": false, "Misc - Pump Item Name": "Submersible Pump", "Misc - Pump Ground Check": true, "Misc - Allow Placing On Water Level": false, "Misc - Allow Hammer Hit Pickup": true, "Limit - Default Pump Limit (0, to disable)": 0, "Limit - Permission Limits": { "submersiblepump.admin": 100, "submersiblepump.vip": 5 }, "Craft - Enable Pump Craft": true, "Craft - Chat Command": "pump", "Craft - Require Blueprint For Pump": true, "Craft - Required Workbench Level (0-3)": 2, "Craft - Pump Craft Cost": [ { "Item Shortname": "metal.fragments", "Item Amount": 1000, "Item Skin": 0 }, { "Item Shortname": "gears", "Item Amount": 10, "Item Skin": 0 }, { "Item Shortname": "metalpipe", "Item Amount": 20, "Item Skin": 0 } ] }$5.00 -

Version 3.2.1
10,228 downloads
Gives reward payments to players for performing various in-game actions. Uses Economics, Server Rewards, or Scrap. **Although V3 is a rewrite, the original plugin was written and maintained by MalS** Thank you to MalS for the original submission and continued support. Chat Commands. /rr – Opens RustRewards UI. UI allows players to customise their notification preferences. It also allows viewing of reward and multiplier values, if that option is enabled in config. Holders of rustrewads.admin permission can use the same UI to adjust reward and multiplier values. See images. Permissions. rustrewards.adminui Enables adjustment buttons for values in UI. Players with the following permissions can earn rewards for that category. rustrewards.harvest rustrewards.kill rustrewards.open rustrewards.pickup rustrewards.activity rustrewards.welcome All reward values are 0.0 by default. All multipliers have basic default values. Reward categories. Kill Harvest Open Pickup Activity Welcome Harvesting and looting containers must be carried out to completion in order to receive the reward. Multipliers. Group Permission Weapon used Happy hour (optional) Day of the week RaidableBases (action within RB area) Zone (action within specific zone) Distance (for kill rewards) Group and permission multipliers apply to players in X group or players holding X permission. Adding group or permission names to their lists in config will automatically create that group or permission. Permissions from other plugins can also be added here, in full, without issue – eg “kits.vip” "Group_Multipliers": { "Regulars": 1.0 }, "Permission_Multipliers": { "loyalty": 10.0 }, This, for example, will register the permission 'rustrewards.loyalty', and create the group “Regulars”. General Settings UseServerDayNightHours = true UseRealTime = false UTCHourOffset = -1 DayStartHour = 8 NightStartHour = 20 Reset_Activity_Reward_At_Wipe = false Disable_All_Notifications = false, TakeMoneyfromVictim: false, LogToFile = false, LogToConsole = false HappyHour_BeginHour: 17, HappyHour_EndHour: 21, Player_Kill_Reward_CoolDown_Seconds: 0, View_Reward_Values": true - Enables UI access to reward and multiplier values for players. Default_Notification_Type - 0/1/2/3 : The numbers correspond to Chat/Banner/Icon/Off Chaticon: 0 Only_Reward_Growables_From_Planters: false, Use_Harvesting_Cooldown = true, Add_Multipliers = false, Use_Highest_Multiplier_Only = false, Delete_Player_Prefs_After_Days = 100, RewardCurrency UseScrap: true, UseEconomics: false, UseServerRewards: false Chosen currency for rewards. Only one can be used at any one time. Allies UseFriendsPlugin: true, UseClansPlugin: true, UseRustTeams: true Prevent rewards for killing friends/clan mates/team mates. Plugins UseGUIAnnouncementsPlugin: false, - Enables 'banner' notification option UseZoneManagerPlugin: false, - Allows for zone specific multipliers UseNoEscape: false - Prevents rewards when NoEscape-blocked Data file. 'Friendly names' for items and entities can be customised in the data file. Each item or entity has a pair listed – Edit the right hand value. Example : "vehicle_parts": “vehicle parts, "loot_barrel_2": “barrel”, "loot_barrel_1": “barrel”, "crate_tools": “tool crate", Notes. Npcs. An extensive list of npcs types has been added for 'Kill' and 'Harvest' (flesh) rewards, including entries for BotSpawn and Zombiehorde. Item Actions 'Open' rewards are now given for items with “Unwrap” or “Gut” actions, including all recently added fish. AI vehicle kills. Rewards are given to the player who caused the most damage to APC / Patrol Heli / CH47. UI Amount adjust increments. As different servers will have different base units of currency, you can change how much the + and – buttons in UI adjust the amounts. Reward_Small_Increment: 1.0, Reward_Large_Increment: 10.0, Multiplier_Increment: 0.1, API OnRustReward(BasePlayer player, string category)Free -
Version 1.3.9
722 downloads
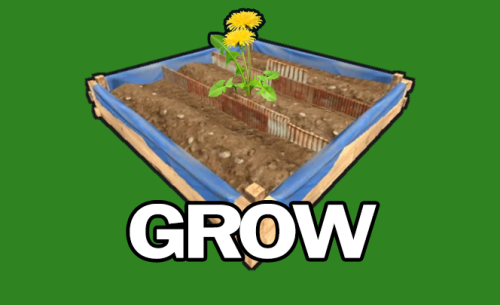
Grow Makes plants Grow in plant boxes within a small radius around the player (about 3-4 large plant boxes) by one growth stage when entering the command /grow. Multiple entries possible. Available currencies: Server Rewards, Economics, Scrap, or none. Installation: Simply drag grow.cs into the oxide/plugins directory. Set permission grow.use. Set settings under oxide/config/Grow.json. Set language file under: oxide/lang/en/Grow.json and oxide/lang/de/Grow.json. Permission: grow.use - Allows the use of the grow plugin. Configuration options: currency active? - Turn currency on / off. if currency true = ServerRewards - Set currency to Server Rewards. if currency true = Economics - Set currency to Economics. if currency true = Scrap - Set currency to Scrap. cost - How much should it cost. Language: This plugin allows you to customize the language of in-game messages for the "Grow" plugin. It includes both English and German language files, and you can easily switch between them as needed. To set the language file, navigate to the following paths in your server directory: For English: oxide/lang/en/Grow.json For German: oxide/lang/de/Grow.json Simply edit the appropriate file with the desired language and save your changes. The plugin will then display messages in the selected language. Support in German and English. P.S.: new version fixes the "G-Point"Free -
Version 1.0.1
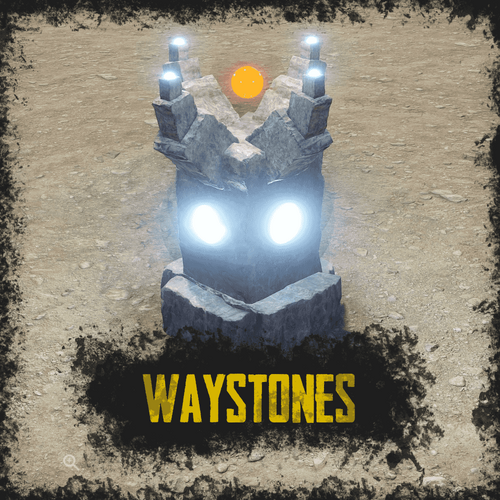
14 downloads
RUST Plugin Test Server TEST MY PLUGINS THERE! connect play.thepitereq.ovh:28050 Waystones plugin gives you the ability to quickly move from one position to another. It creates a waystone on desired monuments that can be used by players for quick movement around the map. It also allows players for creating their own waystones in their homes. Automatically place waystones on monuments for player teleportation. Supports waystones in player bases with ground, wall and empty space checks. Custom monument support. Configurable marker on map. Easy command waystone placement. Optional command for waystone crafting. RUST-like UI design. A lot of VIP permission options. (points gather, max points, max waystones saved) Auto data clear on map wipe. NoEscape PvP support. Pre-configured default RUST monuments. waystones.admin - Gives access to /placeway, tppoints and givewaystone commands. waystones.craft - Gives ability to craft waystone. (Configurable) Any other permission added in config file. /waystone - Command to craft waystone. (Configurable) /placeway [Optional: MonumentName] - Sets new position for nearest [set] monument waystone. tppoints - Command for giving teleport points to players. (Console Command) givewaystone [Optional: userId] - Gives you [user] an waystone for placement. (Console Command) { "PopUpAPI Preset Name": "Inventory", "Waystone Craft Command": "waystone", "Waystone Placeable Shortname": "composter", "Waystone Placeable Display Name": "Waystone", "Waystone Marker - Enabled": true, "Waystone Marker - Marker Alpha": 0.7, "Waystone Marker - Marker Radius": 0.05, "Waystone Marker - Marker Color #1": "#ffd342", "Waystone Marker - Marker Color #2": "#a38729", "Waystone Marker - Enable On Monuments": true, "Waystone Marker - Show Player Waystones By Default": false, "Waystone Marker - Lock Player Waystone Visibility Change": false, "Waystone Crafting - Enable Crafting": true, "Waystone Crafting - Require Permission": true, "Waystone Crafting - Required Workbench Level": 2, "Waystone Crafting - Craft Cost": [ { "Shortname": "stones", "Amount": 5000, "Skin": 0 }, { "Shortname": "targeting.computer", "Amount": 10, "Skin": 0 }, { "Shortname": "industrial.wall.light", "Amount": 4, "Skin": 0 }, { "Shortname": "industrial.wall.light.red", "Amount": 1, "Skin": 0 } ], "NoEscape - Lock Teleporting When PvP Blocked": true, "NoEscape - Lock Teleporting When Raid Blocked": true, "Teleport Cost Per Kilometer": 25.0, "Initial Point Amount": 100, "Initial Point Amount Permissions": { "waystones.admin": 1000, "waystones.svip": 500, "waystones.vip": 250 }, "Teleport Points Default Cap": 1000, "Teleport Points Cap Permissions": { "waystones.admin": 100000, "waystones.svip": 5000, "waystones.vip": 2500 }, "Teleport Points Refill Interval (in seconds, 0 to disable)": 60.0, "Teleport Points Refill Amount": 2, "Teleport Points Refill Amount Permissions": { "waystones.admin": 20, "waystones.svip": 5, "waystones.vip": 3 }, "Max Waystones Saved Default Cap": 6, "Max Waystones Saved Permissions": { "waystones.admin": 100, "waystones.svip": 18, "waystones.vip": 12 }, "God Mode After Teleport (in seconds, 0 to disable)": 0.0, "Waystone Destroy Entity Names": [ "rocket_basic", "explosive.timed.deployed" ], "Generate New Map Market Config Sections": true, "Map Marker Waystones": { "arctic_research_base_a": { "Enabled": true, "Offset": { "x": -34.46, "y": 0.0, "z": -54.53 }, "Rotation": { "x": 0.0, "y": 24.0, "z": 0.0 }, "Teleport Price Multiplier": 1.0 }, "fishing_village_a": { "Enabled": true, "Offset": { "x": 19.59, "y": 1.99, "z": -10.79 }, "Rotation": { "x": 0.0, "y": 0.33, "z": 0.0 }, "Teleport Price Multiplier": 0.3 }, "fishing_village_b": { "Enabled": true, "Offset": { "x": -6.4, "y": 2.0, "z": 15.36 }, "Rotation": { "x": 0.0, "y": 180.4, "z": 0.0 }, "Teleport Price Multiplier": 0.3 }, "fishing_village_c": { "Enabled": true, "Offset": { "x": -7.62, "y": 2.02, "z": 16.37 }, "Rotation": { "x": 0.0, "y": 178.85, "z": 0.0 }, "Teleport Price Multiplier": 0.3 }, "ferry_terminal_1": { "Enabled": true, "Offset": { "x": 11.35, "y": 5.19, "z": 7.14 }, "Rotation": { "x": 0.0, "y": 86.81, "z": 0.0 }, "Teleport Price Multiplier": 1.0 }, "harbor_1": { "Enabled": true, "Offset": { "x": 100.56, "y": 4.28, "z": -59.3 }, "Rotation": { "x": 0.0, "y": 273.79, "z": 0.0 }, "Teleport Price Multiplier": 1.0 }, "harbor_2": { "Enabled": true, "Offset": { "x": -54.15, "y": 4.02, "z": -0.02 }, "Rotation": { "x": 0.0, "y": 88.02, "z": 0.0 }, "Teleport Price Multiplier": 1.0 }, "airfield_1": { "Enabled": true, "Offset": { "x": -163.78, "y": 0.26, "z": -104.47 }, "Rotation": { "x": 0.0, "y": 3.34, "z": 0.0 }, "Teleport Price Multiplier": 1.0 }, "excavator_1": { "Enabled": true, "Offset": { "x": -94.42, "y": 0.61, "z": -57.44 }, "Rotation": { "x": 0.0, "y": 138.7, "z": 0.0 }, "Teleport Price Multiplier": 1.0 }, "military_tunnel_1": { "Enabled": true, "Offset": { "x": -76.77, "y": 19.47, "z": 63.1 }, "Rotation": { "x": 0.0, "y": 91.46, "z": 0.0 }, "Teleport Price Multiplier": 1.0 }, "powerplant_1": { "Enabled": true, "Offset": { "x": -40.84, "y": 0.29, "z": -89.01 }, "Rotation": { "x": 0.0, "y": 90.4, "z": 0.0 }, "Teleport Price Multiplier": 1.0 }, "trainyard_1": { "Enabled": true, "Offset": { "x": -82.86, "y": 0.28, "z": 15.5 }, "Rotation": { "x": 0.0, "y": 91.62, "z": 0.0 }, "Teleport Price Multiplier": 1.0 }, "water_treatment_plant_1": { "Enabled": true, "Offset": { "x": -5.19, "y": 0.28, "z": -152.01 }, "Rotation": { "x": 0.0, "y": 0.08, "z": 0.0 }, "Teleport Price Multiplier": 1.0 }, "lighthouse": { "Enabled": true, "Offset": { "x": 2.3, "y": 5.96, "z": 13.91 }, "Rotation": { "x": 0.0, "y": 84.95, "z": 0.0 }, "Teleport Price Multiplier": 1.0 }, "bandit_town": { "Enabled": true, "Offset": { "x": 27.92, "y": 1.76, "z": -21.08 }, "Rotation": { "x": 0.0, "y": 20.9, "z": 0.0 }, "Teleport Price Multiplier": 0.1 }, "compound": { "Enabled": true, "Offset": { "x": 14.35, "y": 0.19, "z": 32.57 }, "Rotation": { "x": 0.0, "y": 92.0, "z": 0.0 }, "Teleport Price Multiplier": 0.1 }, "junkyard_1": { "Enabled": true, "Offset": { "x": 48.98, "y": 0.07, "z": 46.16 }, "Rotation": { "x": 0.0, "y": 190.78, "z": 0.0 }, "Teleport Price Multiplier": 1.0 }, "nuclear_missile_silo": { "Enabled": true, "Offset": { "x": 41.7, "y": -5.91, "z": -58.81 }, "Rotation": { "x": 0.0, "y": 322.75, "z": 0.0 }, "Teleport Price Multiplier": 1.0 }, "radtown_small_3": { "Enabled": true, "Offset": { "x": -46.11, "y": 19.79, "z": -48.73 }, "Rotation": { "x": 0.0, "y": 82.24, "z": 0.0 }, "Teleport Price Multiplier": 1.0 }, "desert_military_base_a": { "Enabled": true, "Offset": { "x": 26.62, "y": 0.0, "z": -41.89 }, "Rotation": { "x": 0.0, "y": 359.57, "z": 0.0 }, "Teleport Price Multiplier": 1.0 }, "desert_military_base_b": { "Enabled": true, "Offset": { "x": -45.48, "y": 0.0, "z": -21.53 }, "Rotation": { "x": 0.0, "y": 80.83, "z": 0.0 }, "Teleport Price Multiplier": 1.0 }, "desert_military_base_c": { "Enabled": true, "Offset": { "x": -44.95, "y": 0.0, "z": 9.5 }, "Rotation": { "x": 0.0, "y": 89.92, "z": 0.0 }, "Teleport Price Multiplier": 1.0 }, "desert_military_base_d": { "Enabled": true, "Offset": { "x": -63.3, "y": 0.0, "z": 2.77 }, "Rotation": { "x": 0.0, "y": 89.52, "z": 0.0 }, "Teleport Price Multiplier": 1.0 }, "gas_station_1": { "Enabled": true, "Offset": { "x": 6.77, "y": 3.03, "z": -10.93 }, "Rotation": { "x": 0.0, "y": -180.04, "z": 0.0 }, "Teleport Price Multiplier": 1.0 }, "radtown_1": { "Enabled": true, "Offset": { "x": 49.19, "y": 0.24, "z": 10.03 }, "Rotation": { "x": 0.0, "y": 180.21, "z": 0.0 }, "Teleport Price Multiplier": 1.0 }, "supermarket_1": { "Enabled": true, "Offset": { "x": -1.26, "y": 0.0, "z": -18.49 }, "Rotation": { "x": 0.0, "y": 0.29, "z": 0.0 }, "Teleport Price Multiplier": 1.0 }, "warehouse": { "Enabled": true, "Offset": { "x": -18.34, "y": 0.03, "z": -8.99 }, "Rotation": { "x": 0.0, "y": 90.56, "z": 0.0 }, "Teleport Price Multiplier": 1.0 }, "mining_quarry_a": { "Enabled": true, "Offset": { "x": 10.34, "y": 3.6, "z": 24.88 }, "Rotation": { "x": 0.0, "y": 81.5, "z": 0.0 }, "Teleport Price Multiplier": 1.0 }, "mining_quarry_b": { "Enabled": true, "Offset": { "x": 0.8, "y": 0.0, "z": 12.63 }, "Rotation": { "x": 0.0, "y": 159.67, "z": 0.0 }, "Teleport Price Multiplier": 1.0 }, "mining_quarry_c": { "Enabled": true, "Offset": { "x": -11.03, "y": 2.99, "z": 32.86 }, "Rotation": { "x": 0.0, "y": 171.85, "z": 0.0 }, "Teleport Price Multiplier": 1.0 }, "satellite_dish": { "Enabled": true, "Offset": { "x": -0.94, "y": 6.05, "z": -1.25 }, "Rotation": { "x": 0.0, "y": 187.49, "z": 0.0 }, "Teleport Price Multiplier": 1.0 }, "sphere_tank": { "Enabled": true, "Offset": { "x": -33.94, "y": 5.76, "z": -12.03 }, "Rotation": { "x": 0.0, "y": 78.7, "z": 0.0 }, "Teleport Price Multiplier": 1.0 }, "stables_a": { "Enabled": true, "Offset": { "x": 19.44, "y": 3.05, "z": -2.58 }, "Rotation": { "x": 0.0, "y": 271.67, "z": 0.0 }, "Teleport Price Multiplier": 0.5 }, "stables_b": { "Enabled": true, "Offset": { "x": 16.64, "y": 2.99, "z": 2.14 }, "Rotation": { "x": 0.0, "y": 271.24, "z": 0.0 }, "Teleport Price Multiplier": 0.5 }, "launch_site_1": { "Enabled": true, "Offset": { "x": 208.42, "y": 3.25, "z": 54.73 }, "Rotation": { "x": 0.0, "y": 181.44, "z": 0.0 }, "Teleport Price Multiplier": 1.0 } } }$15.00- 13 comments
- 2 reviews
-
- 2
-
-
- #teleport
- #teleporting
- (and 13 more)
-
Version 1.32.11
2,107 downloads
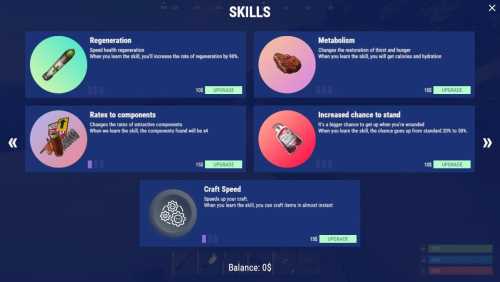
Plugin adds a system of 18+ different skills Features: Beautiful user interface Universality (plugin working with different economic plugins) Customization (all interface you can set up in configuration) Performance Commands skills - open interface giveallskills name/steamid - give the player every skills at the maximum stage giveskill name/steamid [SkillType] [Stage] [ID - for None] - give the player the skill with the stage skills.convert.olddata - convert from old data skills.wipe - wipe skills removeskill name/steamid [SkillType] [ID - for None] - remove a player's skill skills.permissions.wipe – use it to manually remove permissions from player data Permissions skills.bypass - bypass for skills skills.wipe - using the command "skills.wipe" Skills Types Wood Stones Metal Sulfur Attack Secure Regeneration Metabolism ComponentsRates StandUpChance CraftSpeed FastOven Kits (works only with the Kits by Mevent plugin) None Cloth Butcher Scrap RecyclerSpeed TransferWipe MixingTableSpeed Gather CraftRates FAQ Where can I see an example of a config? Config How do I set an image to the background? 1. Enter a link to the image in the "Image" field 2. Set "Save Image Color" to true 3. Reload Image Library (oxide.reload ImageLibrary) 4. Reload Skills (oxide.reload Skills) !ATTENTION: The image must not exceed 3 MB Example: https://pastebin.com/cDxiBVrh How to use BankSystem to store the economy "Economy": { "Balance add hook": "Deposit", "Balance remove hook": "Withdraw", "Balance show hook": "Balance", "Plugin name": "BankSystem" }, How to use ServerRewards to store the economy "Economy": { "Balance add hook": "AddPoints", "Balance remove hook": "TakePoints", "Balance show hook": "CheckPoints", "Plugin name": "ServerRewards" }, How to use "Required skills stages"? Config example: "Required skill stages": [ { "Type": "CraftSpeed", "ID": 0, "Stage": 1, "Require the presence of this skill? (otherwise only the stage will be checked)": true } ] Hooks CanSkillLearn(BasePlayer player, string skillType, int skillID, int stage) OnSkillLearned(BasePlayer player, string skillType, int skillID, int stage)$24.95 -
Version 1.4.1
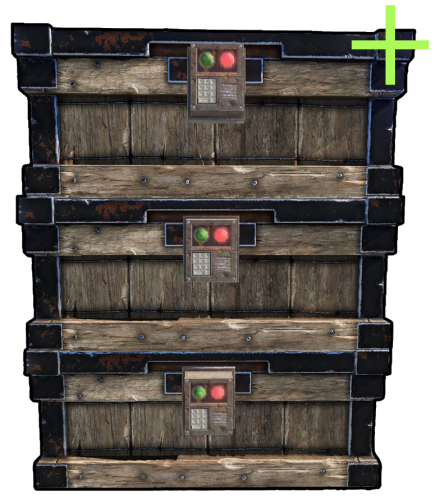
3,278 downloads
Chest Stacks is a Rust plugin that allows players to stack chests on top of each other! Configuration: { "Building privilege required": true, "Blacklisted Skins": [ 2618923347 ], "Permissions & their amount of stacked chests lmits": { "cheststacks.use": { "Chest type limits": { "SmallBox": 3, "LargeBox": 5 } }, "cheststacks.vip": { "Chest type limits": { "SmallBox": 5, "LargeBox": 10 } } } } Language: { "MaxStackAmount": "You are trying to stack more than {0} boxes!", "OnlyStackSameType": "You can only stack the same type of chests!", "CeilingBlock": "A ceiling is blocking you from stacking this chest!", "BuildingBlock": "You need to be Building Privileged in order to stack chests!" } Permissions: cheststacks.use (Always grant this permission for usage, grant additional permissions for different maximum stack amounts) In order to stack the chests you have to press RIGHT CLICK while looking at the placed chest and being near it! Supports: Small Boxes, Large Boxes$10.00- 69 comments
- 11 reviews
-
- 9
-
-
-
- #rust
- #rust plugin
- (and 9 more)
-
Version 0.1.1
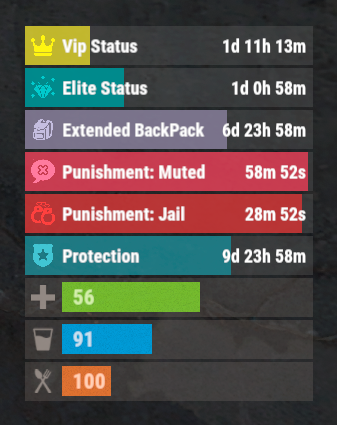
78 downloads
The plugin that displays temporary permissions and groups in the status bar. Depends on TemporaryPermissions and AdvancedStatus plugins. The ability to choose between bar types(TimeCounter and TimeProgressCounter); The ability to specify the order of the bar; The ability to change the height of the bar; The abillity to customize the color and transparency of the background; The ability to set a material for the background; The ability to switch between CuiRawImageComponent and CuiImageComponent for the image; The ability to get images from the local folder(*SERVER*\oxide\data\AdvancedStatus\Images); The abillity to set own image and customize the color and transparency of the image; The abillity to set sprite instead of the image; The ability to customize the color, size and font of the text; The ability to customize the bar for each permission and group; The ability to generate language keys for each permission and group; The ability to specify additional languages for generation. { "Chat command": "pstatus", "Is it worth enabling GameTips for messages?": true, "Is it worth clearing saved settings for permissions and groups upon detecting a wipe?": false, "Is it worth copying local images for new permissions or groups? Note: If set to true, it may create a lot of unnecessary images": false, "Is it worth enabling the bar display for new permissions?": true, "Is it worth enabling the bar display for new groups?": true, "Language - Addition languages (except en and ru)": [ "" ], "Type of status bar for permissions. Note: You can only choose between TimeProgressCounter and TimeCounter": "TimeProgressCounter", "Type of status bar for groups. Note: You can only choose between TimeProgressCounter and TimeCounter": "TimeProgressCounter", "Default status bar settings for new permissions and groups": { "BarType - You can choose only between TimeProgressCounter and TimeCounter": "TimeProgressCounter", "Order": 20, "Height": 26, "Main_Color(Hex or RGBA)": "#FFFFFF", "Main_Transparency": 0.15, "Main_Material": "", "Image_Url": "https://i.imgur.com/BtK7YHa.png", "Image_Local(Leave empty to use Image_Url)": "PermissionsStatus_Default", "Image_Sprite(Leave empty to use Image_Local or Image_Url)": "", "Image_IsRawImage": false, "Image_Color(Hex or RGBA)": "#FFF53D", "Image_Transparency": 1.0, "Is it worth enabling an outline for the image?": false, "Image_Outline_Color(Hex or RGBA)": "0.1 0.3 0.8 0.9", "Image_Outline_Transparency": 1.0, "Image_Outline_Distance": "0.75 0.75", "Text_Size": 12, "Text_Color(Hex or RGBA)": "1 1 1 1", "Text_Font(https://umod.org/guides/rust/basic-concepts-of-gui#fonts)": "RobotoCondensed-Bold.ttf", "Text_Offset_Horizontal": 0, "Is it worth enabling an outline for the text?": false, "Text_Outline_Color(Hex or RGBA)": "#000000", "Text_Outline_Transparency": 1.0, "Text_Outline_Distance": "0.75 0.75", "SubText_Size": 12, "SubText_Color(Hex or RGBA)": "1 1 1 1", "SubText_Font": "RobotoCondensed-Bold.ttf", "Is it worth enabling an outline for the sub text?": false, "SubText_Outline_Color(Hex or RGBA)": "0.5 0.6 0.7 0.5", "SubText_Outline_Transparency": 1.0, "SubText_Outline_Distance": "0.75 0.75", "Progress_Reverse": true, "Progress_Color(Hex or RGBA)": "#FFD700", "Progress_Transparency": 0.7, "Progress_OffsetMin": "0 0", "Progress_OffsetMax": "0 0" }, "Wipe ID": null, "Version": { "Major": 0, "Minor": 1, "Patch": 1 } } EN: { "MsgDisplayEnabled": "Displaying the bar is enabled!", "MsgDisplayDisabled": "Displaying the bar is disabled!", "MsgUntilWipe": "Until wipe" } RU: { "MsgDisplayEnabled": "Отображение бара включено!", "MsgDisplayDisabled": "Отображение бара выключено!", "MsgUntilWipe": "До вайпа" } The language file is generated during the plugin initialization process. Additionally, when creating a new permission or group, a key for it will be automatically added. Note: You can also specify in the configuration file the generation of language files for other languages besides en and ru.$9.99 -
Version 2.7.5
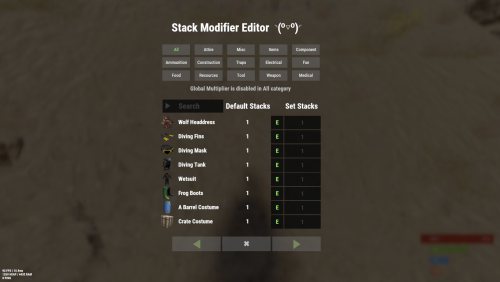
10,189 downloads
This plugin will seamlessly handle all of the ugly side effects and glitches. Thanks to Stack-modifier's feature additions, it makes it feel just like Rusts default behavior, but better! Features Has a GUI Editor Patches Industrial Conveyor stack issues! Blocks Player movements while using GUI Editor Including Keybinds! This plugin has 2 commands and no Lang file Supports stacking of liquids Supports Stacking of Fuel Containers (hats, tools, etc.) Supports Stacking of Guns Supports Weapon Attachments Supports Stacking of Skins Works with SkinBox plugins Supports Stacking of Custom Items Supports Stacking of Custom Items with Custom Display Names Supports Stacking of Key Cards without losing the stack when swiping Supports Stacking Candy Cane Club without losing the stack while lick Support for modified presents for unwrapping The largest possible value in C# is 2,147,483,647 Which means anything over this stack-size will break the plugin Limits wearable clothing items to stack sizes of 1! ( on the player wear container only ) Limits weapon attachments to stack sizes of 1! ( On the weapon its self! so you can have bigger stacks! ) Known Conflicts RoadBradley & HeliSignals Are doing item creations wrong and setting the item.name field as vanilla item display names thus breaking stack support. ( don't set a vanilla display name only set them if its custom names as the fix ) Davids Shop UI ( recently changed how his default data files are createdfor items ) ( you need to generate a new Items.json file and re-do custom items / pricing inside it to fix stack bugs with old data files ) Magic Coin uses some of the same hooks set up config in it correctly to not conflict Custom Skin Stack Fix not needed this handles it properly Stack Size Controller cannot have 2 of the same plugins basically Extra Loot causes a stacking bug when a reboot occurs with skinned items preventing old skinned items from stacking with new skinned items IndustrialCustomSkinsFix not needed stack-modifier has the same patch in it. IQAlcoholFarm by BadMandarin/Mercury is not supported & will cause stack bugs / problems ( could be supported with an author update, but current version is not supported ) ItemPerks by imthenewguy Causes stack bugs/problems just by having this plugin on your server due to harmony patching done inside it + repair logic is bugged. Item creation is also not handled properly resulting in duplication issues with Conveyor movements nothing can be done about that. ( plugin requires a full rewrite for proper support & repairs. ) Plugins that do not handle Item Creation Correctly: ( Which break stacks ) Custom Item Drops by Machine ( Always sets the vanilla display name when its supposed to be null for vanilla items ) XP System by fastburst ( Always sets the vanilla display name when its supposed to be null for vanilla items ) Copy Paste ( Items created by copy paste its self will not stack since item creation is not handled properly ) This list will be constantly updated as devs fix their code accordingly & new ones are discovered to be flawed. Getting Started - Click Either Link to play video Video One Video Two Permissions stackmodifier.admin - Allows players access to the UI Editor. Chat Commands /stackmodifier -- Opens Editor UI, Must enable config option "Enable UI Editor": true /stackmodifier.reset ( is also console cmd ) -- Requires stackmodifier.admin perm ( resets stack-sizes ) /resetvenders -- Requires being an admin, only resets facepunches messed-up vendors, not all /stackmodifiercolor <inputpanel|inputtext|text|transparent> <color> <alpha|ex, 0.98> Example /stackmodifiercolor inputpanel #207086 0.25 UI Editor Commands set 8 -- Inside a categories Search Bar, type set and a value and it will apply it to the whole category, reset -- Inside a categories Search Bar type reset hit the enter key or click out of the field and it resets it. multiply -- Inside a categorie use the Search Bar & type multiply and a value and it will apply it to the whole category. if you reset or set, re-click the Category Tab to refresh it before making more changes! Otherwise you will have to do your first edit twice for it to start working again UI Editor Without Images? * At the top of the config you will see the following setting set to true save and reload. "Disable Images for UI Editor": false, < Disables images and allows full use Having Problems? * Warning this plugin is not compatible with custom-skins-stacks-fix plugin since this already handles everything. * If you already have a plugin that modifies the rust stack sizes you will first need to remove that plugin. * Then you simply load Stack Modifier onto your server open the config and start editing the Modified values to your new stack-size amounts! * When you are done simply save and reload the plugin! ( oxide. reload StackModifier ) * Alternatively you can utilize the built-in UI Editor and not ever need to touch the config! * Admins - Auth level 2 will always be ignored. * This plugin is not compatible with BetterVanish, I only support Vanish from umod. How to revert to vanilla? * Run the reset command while having the stackmodifier.admin perm or Unload Stack Modifier, delete the config, and restart your server. * It will reset the config back to vanilla settings allowing you to start over. API Hooks Interface.CallHook("OnStackSizeUpdated"); //called after the plugin updates the stack sizes on server reboots & when reloading the plugin. //It's also still called right after the UI editor is closed from modifying. //Inside the oxide hook I use called OnItemAddedToContainer theirs a hook of mine, if called mine will not touch it or fix the stacks. if (Interface.CallHook("OnIgnoreStackSize", player, item) != null) return; ## Configuration { "Disable Industrial Conveyor Patch (true = disabled)": false, "Industrial Conveyor Max Stack Size Per Move Default = 60": 130, "Industrial Conveyor Move Frequency Default = 5 (Lower = faster moving)": 3, "Disable Weapon Attachment stack fix (Unsubscribes from both OnWeaponModChange & CanMoveItem)": false, "Disable Wearable Clothes fix (Unsubscribes from OnItemAddedToContainer)": false, "Disable Ammo/Fuel duplication fix (Recommended false)": false, "Disable Candy Cane Club Lick fix & unwrap fix (Unsubscribes from OnItemAction)": false, "Disable OnCardSwipe fix (Unsubscribes from OnCardSwipe)": false, "Enable VendingMachine Ammo Fix (Recommended)": true, "Enable UI Editor": true, "Disable Images / Toggles off Images for UI Editor": false, "Sets editor command": "stackmodifier", "Sets reset command for both console & chat": "stackmodifier.reset", "Sets editor color command": "stackmodifiercolor", "Sets Default Category to open": "All", "Stack Modifier UI Title": "Stack Modifier Editor ◝(⁰▿⁰)◜", "UI - Stack Size Label": "Default Stacks", "UI - Set Stack Label": "Set Stacks", "UI - Search Bar Label": "Search", "UI - Back Button Text": "◀", "UI - Forward Button Text": "▶", "UI - Close Label": "✖", "Colors": { "InputPanel": { "Hex": "#0E0E10", "Rgb": "0.0549019607843137 0.0549019607843137 0.0627450980392157 0.98" }, "InputText": { "Hex": "#FFE24B", "Rgb": "1 0.886274509803922 0.294117647058824 0.15" }, "TextColor": { "Hex": "#FFFFFF", "Rgb": "1 1 1 1" }, "Transparency": { "Hex": "#", "Rgb": "0 0 0 0.95" } }, "Category Stack Multipliers": { "Attire": 1, "Misc": 1, "Items": 1, "Ammunition": 1, "Construction": 1, "Component": 1, "Traps": 1, "Electrical": 1, "Fun": 1, "Food": 1, "Resources": 1, "Tool": 1, "Weapon": 1, "Medical": 1 }, "Stack Categories": { "Attire": { "hat.wolf": { "DisplayName": "Wolf Headdress", "Modified": 10 }, "horse.shoes.basic": { "DisplayName": "Basic Horse Shoes", "Modified": 10 } }, "Misc": { "fogmachine": { "DisplayName": "Fogger-3000", "Modified": 10 }, "sickle": { "DisplayName": "Sickle", "Modified": 10 } }, "Items": { "kayak": { "DisplayName": "Kayak", "Modified": 10 }, "map": { "DisplayName": "Paper Map", "Modified": 10 } }, "Ammunition": { "ammo.grenadelauncher.buckshot": { "DisplayName": "40mm Shotgun Round", "Modified": 20 }, "ammo.rocket.sam": { "DisplayName": "SAM Ammo", "Modified": 10 } }, "Construction": { "door.double.hinged.metal": { "DisplayName": "Sheet Metal Double Door", "Modified": 10 }, "building.planner": { "DisplayName": "Building Plan", "Modified": 10 } }, "Component": { "bleach": { "DisplayName": "Bleach", "Modified": 2 }, "vehicle.module": { "DisplayName": "Generic vehicle module", "Modified": 10 } }, "Traps": { "trap.bear": { "DisplayName": "Snap Trap", "Modified": 30 }, "samsite": { "DisplayName": "SAM Site", "Modified": 10 } }, "Electrical": { "ceilinglight": { "DisplayName": "Ceiling Light", "Modified": 10 }, "wiretool": { "DisplayName": "Wire Tool", "Modified": 100 } }, "Fun": { "firework.boomer.blue": { "DisplayName": "Blue Boomer", "Modified": 200 }, "telephone": { "DisplayName": "Telephone", "Modified": 10 } }, "Food": { "apple": { "DisplayName": "Apple", "Modified": 100 }, "woodtea.pure": { "DisplayName": "Pure Wood Tea", "Modified": 100 } }, "Resources": { "skull.human": { "DisplayName": "Human Skull", "Modified": 10 }, "wood": { "DisplayName": "Wood", "Modified": 10 } }, "Tool": { "tool.instant_camera": { "DisplayName": "Instant Camera", "Modified": 10 }, "bucket.water": { "DisplayName": "Water Bucket", "Modified": 10 } }, "Weapon": { "gun.water": { "DisplayName": "Water Gun", "Modified": 10 }, "spear.wooden": { "DisplayName": "Wooden Spear", "Modified": 10 } }, "Medical": { "blood": { "DisplayName": "Blood", "Modified": 100 }, "bandage": { "DisplayName": "Bandage", "Modified": 30 } } } }$24.99- 176 comments
- 18 reviews
-
- 19
-
-

-
-

-
- #stacks
- #rust stacks
- (and 19 more)
-
Version 0.1.18
2,189 downloads
A useful API plugin that mimics in-game status bars and allows the addition of custom ones. Note: AdvancedStatus does not display any bars on its own. This is done by other plugins that work with it. An example plugin demonstrating interaction with AdvancedStatus. The ability to specify the frequency of calculating the number of bars; The ability to specify the order of the bar; The ability to change the height of the bar; The abillity to customize the color and transparency of the background; The ability to set a material for the background; The ability to switch between CuiRawImageComponent and CuiImageComponent for the image; The ability to get images from the local folder(*SERVER*\oxide\data\AdvancedStatus\Images); The abillity to set own image and customize the color and transparency of the image; The abillity to set sprite instead of the image; The ability to specify custom text; The ability to customize the color, size and font of the text; No need to pass all parameters; No need to manually delete your bar when unloading your plugin. advancedstatus.admin - Grants access to the chat command(by default /bar). { "Chat command": "bar", "Is it worth enabling console notifications for the successful loading of local images?": false, "Interval(in seconds) for counting in-game status bars": 0.5, "Interval(in seconds) for counting Building Privilege status bars. Note: Calculating Building Privilege is significantly more resource-intensive than other counts": 1.0, "Bar - Display Layer. If you have button bars, it's advisable to use Hud(https://umod.org/guides/rust/basic-concepts-of-gui#layers)": "Under", "Bar - Left to Right": true, "Bar - Offset between status bars": 2, "Bar - Default Height": 26, "Main - Default Color": "#505F75", "Main - Default Transparency": 0.7, "Main - Default Material(empty to disable)": "", "Image - Default Image": "AdvancedBar_Image", "Image - Default Color": "#6B7E95", "Image - Default Transparency": 1.0, "Image - Outline Default Color": "#000000", "Image - Outline Default Transparency": 1.0, "Image - Outline Default Distance": "0.75 0.75", "Text - Default Size": 12, "Text - Default Color": "#FFFFFF", "Text - Default Transparency": 1.0, "Text - Default Font(https://umod.org/guides/rust/basic-concepts-of-gui#fonts)": "RobotoCondensed-Bold.ttf", "Text - Default Offset Horizontal": 0, "Text - Outline Default Color": "#000000", "Text - Outline Default Transparency": 1.0, "Text - Outline Default Distance": "0.75 0.75", "SubText - Default Size": 12, "SubText - Default Color": "#FFFFFF", "SubText - Default Transparency": 1.0, "SubText - Default Font": "RobotoCondensed-Bold.ttf", "SubText - Outline Default Color": "#000000", "SubText - Outline Default Transparency": 1.0, "SubText - Outline Default Distance": "0.75 0.75", "Progress - Default Color": "#89B840", "Progress - Default Transparency": 0.7, "Progress - Default OffsetMin": "25 2.5", "Progress - Default OffsetMax": "-3.5 -3.5", "Version": { "Major": 0, "Minor": 1, "Patch": 18 } } EN: { "MsgDays": "d", "MsgHours": "h", "MsgMinutes": "m", "MsgSeconds": "s" } RU: { "MsgDays": "д", "MsgHours": "ч", "MsgMinutes": "м", "MsgSeconds": "с" } images reload *ImageName* - Reloads the specified image from the image folder; all - Reloads all local images from the image folder. Example: /bar images reload all Note: To access the commands, the player must be an admin(console or owner) or have the advancedstatus.admin permission. OnAdvancedStatusLoaded: Called after the AdvancedStatus plugin is fully loaded and ready. OnPlayerGainedBuildingPrivilege: Called after the player enters their building privilege. OnPlayerLostBuildingPrivilege: Called after the player exits their building privilege. void OnAdvancedStatusLoaded() { Puts("The AdvancedStatus plugin is loaded and ready to go!"); } void OnPlayerGainedBuildingPrivilege(BasePlayer player) { Puts($"{player.displayName} entered the authorized building privilege zone."); } void OnPlayerLostBuildingPrivilege(BasePlayer player) { Puts($"{player.displayName} exited the authorized building privilege zone."); } [PluginReference] private Plugin AdvancedStatus; There are 15 methods: IsReady CreateBar UpdateContent DeleteBar DeleteCategory DeleteAllBars GetTotalClientBars GetTotalPlayerBars LoadImages LoadImage CopyImage DeleteImages DeleteImage BarExists InBuildingPrivilege There are 5 types of bar: Default - A simple bar that displays the provided information. Does not update the value of SubText by itself; Timed - Similar to the default bar, but it automatically disappears after the specified time in the TimeStamp parameter; TimeCounter - The SubText shows the remaining time until TimeStamp. Also automatically removed upon expiration of the TimeStamp; TimeProgress - Similar to the Timed bar, but additionally features an automatically filling progress bar; TimeProgressCounter - Similar to the TimeCounter bar, but additionally features an automatically filling progress bar. IsReady: Used to check if the AdvancedStatus plugin is loaded and ready to work. The IsReady method returns true if it is ready, or null if it is not. (bool)AdvancedStatus?.Call("IsReady");//Calling the IsReady method. If the result is not null(bool true), the plugin is ready. CreateBar: Used to create a bar or update bar values for a player. To call the CreateBar method, you need to pass 2 parameters. The first one is BasePlayer or <ulong>playerID. The second one is a dictionary with the parameters you need. In the CreateBar method, all parameters are optional, except for two: Id; Plugin. Parameters not specified when creating a new bar will use the values set in the AdvancedStatus plugin's configuration file. Parameters not specified during bar update will retain the values they had before the update. Note: The plugin does not update values automatically, you need to manually send new values. Dictionary<string, object> parameters = new Dictionary<string, object> { { "Id", "AdvancedStatusDemo_1" }, //<string>Unique identifier for the bar in your plugin. ***This is a required field. { "BarType", "Default" }, //<string>Type of the bar. There are 4 types: Default, Timed, TimeCounter and TimeProgress. { "Plugin", "AdvancedStatusDemo" }, //<string>Name of your plugin. ***This is a required field. { "Category", "Default" }, //<string>Internal plugin category of the bar. { "Order", 10 }, //<int>The position of your bar relative to others. Order is determined by increasing values(ASC). { "Height", 26 }, //<int>The height of your bar. A standard bar is 26 pixels. { "Main_Color", "#505F75" }, //<string>HTML Hex color of the bar background. { "Main_Transparency", 0.7f }, //<float>Transparency of the bar background. { "Main_Material", "assets/content/ui/uibackgroundblur.mat" }, //<string>Material of the bar background(empty to disable). { "Image", "scrap" }, //<string>Name of the image saved in the ImageLibrary or a direct link to the image if ImageLibrary is not used. { "Image_Local", "AdvancedStatusDemo_Scrap" }, //<string>The name of the image file(without its extension) located in *SERVER*\data\AdvancedStatus\Images. Leave empty to use Image. { "Image_Sprite", "" }, //<string>Sprite image of the bar. Leave empty to use Image_Local or Image. { "Is_RawImage", true }, //<bool>Which type of image will be used? True - CuiRawImageComponent. False - CuiImageComponent. { "Image_Color", "#6B7E95" }, //<string>HTML Hex color of the bar image. { "Image_Transparency", 1.0f }, //<float>Transparency of the image. { "Text", "Scrap" }, //<string>Main text. { "Text_Size", 12 }, //<int>Size of the main text. { "Text_Color", "#FFFFFF" }, //<string>HTML Hex color of the main text. { "Text_Font", "RobotoCondensed-Bold.ttf" }, //<string>Font of the main text. { "Text_Offset_Horizontal", 0 }, //<int>Horizontal offset for the main text. { "SubText", "35" }, //<string>Sub text. { "SubText_Size", 12 }, //<int>Size of the sub text. { "SubText_Color", "#FFFFFF" }, //<string>HTML Hex color of the sub text. { "SubText_Font", "RobotoCondensed-Bold.ttf" }, //<string>Font of the sub text. { "TimeStampStart", Network.TimeEx.currentTimestamp }, //<double>Responsible for specifying the start point of the time reference and 0% for TimeProgress and TimeProgressCounter bars. Used if the bar type is Timed, TimeCounter, TimeProgress or TimeProgressCounter. { "TimeStamp", Network.TimeEx.currentTimestamp + 6 }, //<double>Specifies the end time point after which the bar will be destroyed and 100% for TimeProgress and TimeProgressCounter bars. Used if the bar type is Timed, TimeCounter, TimeProgress or TimeProgressCounter. { "TimeStampDestroy", Network.TimeEx.currentTimestamp + 3 }, //<double>If TimeStampDestroy is specified and it is less than TimeStamp, the bar will be destroyed by TimeStampDestroy. Used if the bar type is Timed, TimeCounter, TimeProgress or TimeProgressCounter. { "Progress", (float)35 / 100f }, //<float>Progress. From 0.0 to 1.0. { "Progress_Reverse", false }, //<bool>Progress reverse. A value of false means that the progress will increase. Used if the bar type is TimeProgress or TimeProgressCounter. { "Progress_Color", "#89B840" }, //<string>Progress color. { "Progress_Transparency", 1f }, //<float>Progress transparency. { "Progress_OffsetMin", "25 2.5" }, //<string>Progress OffsetMin: "*left* *bottom*". { "Progress_OffsetMax", "-3.5 -3.5" }, //<string>Progress OffsetMax: "*right* *top*". { "Command", "kit" } //<string>If the field is not empty, the bar becomes clickable, and the specified command is executed upon clicking. Note: the command must be covalence. }; AdvancedStatus?.Call("CreateBar", player.userID.Get(), parameters); //Calling the CreateBar method with the passing of BasePlayer/playerID and a dictionary containing the required parameters. UpdateContent: Used to update only the content of an existing status bar. To call the UpdateContent method, you need to pass 2 parameters. The first one is BasePlayer or <ulong>playerID. The second one is a dictionary with the parameters you need. In the UpdateBar method, all parameters are optional, except for two: Id; Plugin. var parameters = new Dictionary<string, object> { { "Id", "MyID" }, //<string>Unique identifier for the bar in your plugin. ***This is a required field. { "Plugin", Name }, //<string>Name of your plugin. ***This is a required field. { "Text", "MyText" }, //<string>Main text. { "SubText", "MyText" }, //<string>Sub text. { "Progress", (float)amount / 100f }, //<float>Progress. From 0.0 to 1.0. }; AdvancedStatus?.Call("UpdateContent", player.userID.Get(), parameters); //Calling the UpdateContent method with the passing of BasePlayer/playerID and a dictionary containing the required parameters. DeleteBar: Used to remove the bar for a player. There are two methods for removing a bar by ID: with specifying a particular player; To call this method, you need to pass 3 parameters. The first one is BasePlayer or <ulong>playerID. The second one is Id of your bar and the third one is name of your plugin. without specifying a particular player (which removes it for all players) To call this method, you need to pass 2 parameters. The first one is Id of your bar and the second one is name of your plugin. AdvancedStatus?.Call("DeleteBar", player.userID.Get(), barID, Name); //Calling the DeleteBar method with the passing of BasePlayer/playerID, ID of the bar and the name of your plugin. AdvancedStatus?.Call("DeleteBar", barID, Name); //Calling the DeleteBar method with the passing of ID of the bar and the name of your plugin. If you try to delete a bar that doesn't exist, nothing bad will happen. So feel free to delete the bar without checking its existence. P.S. When unloading your plugin, there is no need to manually delete bars for players, AdvancedStatus will handle it automatically. DeleteCategory: Used to remove all bars associated with the plugin's category. To call the DeleteCategory method, you need to pass 2 parameters. The first one is category and the second one is name of your plugin. AdvancedStatus?.Call("DeleteCategory", "Default", Name);//Calling the DeleteCategory method by passing the category and name of your plugin DeleteAllBars: Used to remove all bars associated with the plugin. To call the DeleteAllBars method, you need to pass only 1 parameter. It is name of your plugin. AdvancedStatus?.Call("DeleteAllBars", Name);//Calling the DeleteAllBars method, passing the name of your plugin GetTotalClientBars: Used to get the number of client bars for the player. To call the GetTotalClientBars method, you need to pass only 1 parameter. It is BasePlayer or <ulong>playerID. (int)AdvancedStatus?.Call("GetTotalClientBars", player.userID.Get());//Calling the GetTotalClientBars method, passing the name of BasePlayer/playerID GetTotalPlayerBars: Used to get the number of active custom bars for the player. To call the GetTotalPlayerBars method, you need to pass only 1 parameter. It is BasePlayer or <ulong>playerID. (int)AdvancedStatus?.Call("GetTotalPlayerBars", player.userID.Get());//Calling the GetTotalPlayerBars method, passing the name of BasePlayer/playerID LoadImages: Used to check if the local images specified in the list are loaded. If any of the images are not loaded but their files exist in the images folder, the plugin will load them. To call the LoadImages method, you need to pass only 2 parameters. The first one is the <List<string>>list of image's name and the second one(optional) is <bool>force, which, if set to true, will force reload the image even if it already exists. AdvancedStatus?.Call("LoadImages", list, false);//Calling the LoadImages method, passing a list of image names LoadImage: Used to check if the local image is loaded. If the file is not loaded and exists in the images folder, the plugin will load it. To call the LoadImage method, you need to pass 2 parameters. The first one is the <string>image's name and the second one(optional) is <bool>force, which, if set to true, will force reload the image even if it already exists. AdvancedStatus?.Call("LoadImage", imgName, false);//Calling the LoadImage method, passing an image's name CopyImage: Used to create and load a copy of an existing image. To call the CopyImage method, you need to pass 3 parameters. The first parameter is the <string>source image's name, the second parameter is the <string>new image's name and the third one(optional) is <bool>force, which, if set to true, will force copy and reload the image even if it already exists. AdvancedStatus?.Call("CopyImage", "ZoneStatus_Default", "ZoneStatus_NewZone", false);//Calling CopyImage, passing the source image name and the new image name. DeleteImages: Used to delete a list of images and their files. To call the DeleteImages method, you need to pass 2 parameters. The first one is the <List<string>>list of image's name and the second one(optional) parameter is <bool>deleteFile, which, if set to true, will delete image's file too. AdvancedStatus?.Call("DeleteImages", list, true);//Calling DeleteImages, passing a list of image names. DeleteImage: Used for removing the image and the image file. To call the DeleteImage method, you need to pass 2 parameters. The first parameter is the <string>image's name and the second one(optional) parameter is <bool>deleteFile, which, if set to true, will delete image's file too. AdvancedStatus?.Call("DeleteImage", "ZoneStatus_NewZone", true);//Calling DeleteImage, passing the image name. BarExists: Used to check if the specified bar exists. To call the BarExists method, you need to pass 3 parameters. The first one is BasePlayer or <ulong>playerID. The second one is Id of your bar. And the third one is name of your plugin. (bool)AdvancedStatus?.Call("BarExists", player.userID.Get(), barID, Name);//Calling the BarExists method with the passing of BasePlayer/playerID, ID of the bar and name of your plugin. InBuildingPrivilege: Used to check if the player has authorized building privileges. To call the InBuildingPrivilege method, you need to pass BasePlayer or <ulong>playerID. (bool)AdvancedStatus?.Call("InBuildingPrivilege", player.userID.Get());//Checking if the player has Building Privilege.$1.99 -
Version 1.2.10
307 downloads
This plugin provides a beautiful and convenient crafting panel for your server. Its design and mechanics are as similar as possible to the in-game Rust crafting panel. Add crafting of any custom items, commands, permissions and anything else you like. Features The design is ~90% similar to the design of Rust's in-game crafting panel. Support for any custom items and commands. Ability to unlock all DLC items in the in-game crafting menu. The plugin only registers permissions for items that you have specified to it. Thus, preventing the creation of a large number of permissions. Customizable sound effects, notifications in the status bar on the right, and text notifications in popular plugins. The plugin can take and give out items from inventory, game backpack and Backpacks plugin, depending on the fullness of any of them. Ability to add item variations (just look at the screenshots). Supports work with skill plugins. Supports work with economy plugins. The player can choose whether to craft or buy an item. Add items to favorites, built-in search, fully functional queue and more. Scrollbar support. Supported plugins: SkillTree - allows you to use bonuses such as: Craft_Speed, Craft_Refund, Craft_Duplicate. Also allows you to give bonuses when crafting and take away when crafting is canceled. Backpacks - plugin can take and give items in an additional backpack. ItemRetriever - plugin can take crafting ingredients from all containers that are connected to the player (including inventory, game backpack, Backpacks plugin, and any other plugin that uses ItemRetriever as Suppliers). ZLevelsRemastered - allows you to use the craft speed bonus. Economics, ServerRewards, IQEconomic - these plugins are used to purchase items with the currency of these plugins. Notify, GUIAnnouncements - these plugins are used to display notifications. SimpleStatus, AdvancedStatus - these plugins are used to display notifications in the status bar at the bottom right of the screen. Permissions The plugin has immutable and generated permissions. The immutable ones include: craftingpanel._use – is responsible for opening the panel. If there is no permission, the panel will not open. craftingpanel._admin – give this permission only to administrators. It adds an additional "Give yourself" button to get items from the panel for free. This permission is also needed to use the givecraft command (about it below). craftingpanel._instant – all player crafts will be instant. craftingpanel._death – crafting queue will not be reset when the player dies. craftingpanel._disconnect – when a player leaves the server, the craft queue will not be reset. craftingpanel._economics – allows you to purchase items for the currency of the selected economy plugin. If the player does not have permission, the cost panel will still be displayed, but the player will not be able to make a purchase. craftingpanel._workbench - allows you to reduce crafting time by having a workbench of a higher level than necessary for crafting. craftingpanel._bonuses – allows the player to access the crafting bonuses from the "Crafting bonuses" section. craftingpanel._unlockdlc - if a player has this permission, he can craft all DLC items in the in-game crafting menu. If you revoke this permission, all DLC items will become unavailable again. The generated permissions are created by the plugin itself, here's how it works: craftingpanel.section.vehicles- this is permission for the "vehicles" section. craftingpanel.vehicles.minicopter - this is permission for the item "minicopter" in the "vehicles" section. craftingpanel.vehicles.snowmobile.tomaha - this is permission for the item "snowmobile" in the "vehicles" section and in "tomaha" variation. Commands Only one command is present in the plugin: givecraft steamid/nickname section item 5 skin steamid/nickname – steamid or nickname of your choice. section – section name from the Section permission [required] field. item – item name from the Item permission [required] field. 5 – how much of the current item to give out (craft multiplier). skin - name of the item from the Ingredients section, Item permission [required] fields. All arguments of this command are required. If your item has an empty "Variations" section or you want a default item, specify "default" in place of skin. General settings Allow panel scaling when the interface is scaled? - if this setting is enabled, the craft panel will be resized depending on the game interface scale (setting "user interface scale"). If the setting is disabled, the panel will always be the same size, regardless of the player interface scale. Remember the last selected section and item? - plugin will remember the last selected section, item and variation the next time the panel is opened by the player. Enable multilingual mode? – if your server has players from different countries, this mode allows you to customize translation for other languages. When you enable this mode, the plugin will write all the data that needs to be translated to the lang - file. These include: section names, item names, item descriptions, item properties, item variation names, and ingredient names. The lang - file consists of a pair: key - value. The key is a unique name, with the help of which the plugin understands what phrase to use. Section translation: section.*section permission* – key template for section name translation. For example: "section.favorite": "Favorite" – Favorite section. Translation of item information: *section permission*.*item permission*.name – key template for item name translation. For example: "sunburn.innertube.name": "Inner Tube" – item name. *section permission*.*item permission*.description – key template for item description translation. For example: "sunburn.innertube.description": " Inflatable lap for water fun." – item description. *section permission*.*item permission*.properties – key template for item properties translation. For example: "sunburn.innertube.properties ": "Any properties ..." – item properties. *section permission*.*item permission*.variations.*variation permission* – key template for variation name translation. For example: "sunburn.innertube.variations.zebra": "ZEBRA" – variation name. Translation of ingredient names: *ingredient shortname *.*ingredient skinId* - key template for ingredient name translation. For example: "wood.0": "Wood" – ingredient name. Allow work with the Backpacks plugin? – plugin can take and give items in an additional backpack (Backpacks by WhiteThunder). Allow work with the ItemRetriever plugin? – this plugin provides advanced functionality for interacting with player containers: If the ItemRetriever plugin is enabled, the CraftingPanel will take crafting ingredients from all containers that are connected to the player (including inventory, game backpack, Backpacks plugin, and any other plugin that uses ItemRetriever as Suppliers). If the ItemRetriever plugin is disabled, the CraftingPanel will take items with the next priority (if the item is not found, it goes to the next container): Backpacks plugin (if enabled) -> game backpack -> inventory. The CraftingPanel plugin is fully in charge of giving out items (since ItemRetriever only allows you to take items from the player), it gives out items with the next priority (if the container is full, it moves on to the next one): inventory -> game backpack -> Backpacks plugin (if enabled) -> drop item. Delete player data from the Data file if they have not logged into the server for so many days – this setting is added to prevent the plugin from keeping in memory the settings of all players who have ever visited your server. Effect at the start/end/canceling – game effects that will be played at the start of crafting/completion of crafting/cancellation of crafting (effects list, plugin for playing effects). Specify a plugin to work with the economy – specify one plugin from the list or leave the field empty to disable work with economy. Crafting bonuses This section allows you to customize crafting bonuses when using one of the supported plugins. Each of these plugins has its own settings. Amount of experience will depend on crafting time? – if this setting is disabled, then the given/taken experience will be the same (which are specified in the settings above). If this setting is enabled, the experience will be calculated using the following formula: calculated experience = crafting time * experience from the settings above. It should be taken into account that to calculate the experience for a crafted item, the full crafting time is taken (which is specified in the item's setting), and to calculate the experience for crafting cancellation, the time left to create the item is taken. The ZLevelsRemastered plugin does not have a full-fledged api for interaction with crafting bonuses, so the work with it is not fully implemented (no rewards are given in economy plugins, permission of this plugin is not taken into account, etc.). Notification settings Notification type (Chat, GameTips, Notify, GUIAnnouncements) – if this section is enabled, you must specify the type/plugin to notify the player of different warnings. Chat – notification to regular chat. GameTips – notification in the in-game Rust tooltips (blue or red at the bottom of the screen). Notify – notification in the Notify plugin by Mevent. GUIAnnouncements – notification in the GUIAnnouncements plugin by JoeSheep. Just below that are the customization fields for the specific type of notification. Game Status Settings Game status is a notification that is shown at the bottom right of the screen (like in-game crafting). The plugin can show 3 types of game status: Current craft – it's the blue panel with the gear. It is displayed while the crafting process is in progress. Giving item – it's the green panel with the down arrow. It is displayed when a player is given a craft item. Dropping item – it's the red panel with the cross. It is displayed when the items given by the plugin do not fit in the inventory and drop out near the player. Crafting Panel working with Rust's in-game status and two plugins (SimpleStatus, AdvancedStatus) that have slightly advanced features. Rust – is the in-game status built into the game. It does not require any additional plugins, but it cannot show the Current craft (blue panel with a gear). SimpleStatus – this plugin displays customizable statuses. It can show Current craft and Giving item. But cannot display Dropping item due to limitations in its operation. AdvancedStatus - this plugin displays customizable statuses. It works with all of the above status types. Section settings Section name – the displayed section name on the menu button. Section permission [required] – be sure to fill in these fields and make sure they are all unique. Because it is by this field that the plugin understands which section it is currently working with. If you specify "favorite" here, the plugin will use this section to display the player's favorite items (don't add items to it, the plugin will delete them anyway). Register this permission? – if enabled, the plugin will register a permission with the above name. In this case this section will be shown only to those players who have this permission. Section item settings Item name [required] – required field. The name of the item is displayed only in this plugin. If you need to create an item with the same name, you will find this setting below. Item permission [required] – required field. Make sure that each item in the section has a unique field. Because by this field the plugin understands which item in the current section it is currently working with. Register this permission? - if enabled, the plugin will register permission with the above name. Keep in mind that the current item will still be shown to all players, but they will not be able to craft it (this is also notified by the icon on the top left of the information section). Item description – item description, is not passed to the item when crafting, only displayed in the panel of this plugin. Item properties – if the item has some characteristics (e.g., damage, radiation protection, etc.) you can specify them here. This data is displayed in a separate panel in the information section of the item. Item shortname – if you are using the command as a craft result, leave this field empty. Create an item with the default name (true) or the above name (false)? – if true, the plugin will create an item with the default game name (which refers to the current shortname), otherwise it will set the name from the Item name field. Item skinId – if the item is custom, specify the required skinId, otherwise set it to 0. Item image [optional] – if as a result of craft, you have to execute some command, you can specify a link to a picture related to this command. Console commands executed after crafting (%steamid%, %username%, %amount%) [optional] – if you need to execute some commands as a result of crafting, you can list them with commas in this field. In the command you can specify %steamid% and %username%, the plugin will replace them with the data of the current player. The plugin can also replace %amount% with the amount per craft (next setting). If the command gives some custom game item and you know its shortname and skinid you can specify them in the fields above. This way you don't need to additionally save the image of this item to the hosting and specify its link. Amount per craft – number of items given out per craft. Max craft multiplier - maximum allowable craft multiplier. The craft multiplier (selected by the player in the Ingredients section) is how many times an item will be dispensed or how many times commands will be executed. If Amount per craft = 3, and the player chose multiplier = 2, he will receive 2 * 3 = 6 items. Crafting time [sec] – time to craft the item. It can be set to 0, then the item will be crafted instantly. Show notification in game status (if they are enabled)? – if a command from another plugin is used to give a custom item and that plugin displays game status, duplication of game statuses may occur. Therefore, it is possible to disable the display of game status for a particular item. Keep in mind that this only disables the Giving item status. Apply craft bonuses (if they are enabled)? – allows you to apply craft bonuses (from the "Crafting bonuses" section) to this item. Crafting cost in the economy plugin [0 - disable] – the value of the current item in your economy server currency. The customization works if you specified one of the supported economy plugins at the beginning. Item Variation settings In the in-game Rust crafting panel this section is called Skins, here it is called Variations. This is done because here it can include not only skins, but any items or commands related to the parent item. For example, you have several modular car presets, with different types of modules, but they are all related to modular cars. Therefore, you can specify them in one item - "Modular car". The settings in this section are similar to the parent item, except for the crafting ingredients. They will be the same as the parent item. Item Ingredient settings Resource name [required] – required field. Is used to display the name of the ingredient in the plugin panel (it is not taken into account when taking ingredients from the player). When canceling the craft, the plugin can set this ingredient to the specified name, you will find this setting below. Use this resource in ingredients? – enables or disables this resource for use in ingredients. Resource shortname [required] – required field. Shortname of the item that the plugin will look for from the player for crafting. Resource skinId – if it's a custom item, give its skinId, otherwise set it to 0. Return an item with the default name (true) or the above name (false)? – when the craft is canceled, if true, the plugin will create an ingredient with the default game name (which refers to the current shortname), otherwise it will set the name from the Resource name field. Plugin Config Example of plugin configuration in English: Example of plugin configuration in Russian. If you need Russian config, open it (CraftingPanel.cs) before loading the plugin, and at the top set the variable "isRus = true". Then save and upload this file to your server.$30.00- 122 comments
- 2 reviews
-
- 7
-
-
-
- #craft
- #craft menu
- (and 17 more)
-

Version 1.2.3
8,050 downloads
Formerly NPCLoot. Populate npc corpses, containers, and barrels with custom loot. General info. Users can create as many loottables as required, and assign them to npc/container types by name. To create a new loot table, simply set the "lootTable" entry for some container type in config to a new made up name. This will create a new /data file of that name, which you can customise. The same loot table can be used for multiple corpse or container types. New categories and items are added automatically so, hopefully, data should never need to be wiped. Default loottable has all probabilities set to zero ( no loot) and will require customisation. I intend to provide some sample loottables for free download in the near future. Item choice is done by two-tier probability. For each spawned item a category is chosen first, based on your category probabilities, then an item is chosen from that category, based on your item probabilities for that category. See notes at bottom for further info on probabilities. Dec '23 1.2.2 update. Customloot now supports treating specific skinned items as if they are unique items. For example you could create skinned paper as ‘Money’, and it will be treated as unique, with totally separate settings and options from regular paper. The format for creating items is that you hold your skinned item and type /CustomLoot ExistingLootTable Category CustomName so, for example, if you want to skin paper with skin 012345 and use it as ‘Money’ in a loottable called ‘AirdropTable’, hold some paper with that money skin and type /CustomLoot AirdropTable Resources Money You can also specify “All” instead of a specific loottable /CustomLoot All Resources Money Optional dependencies - BotReSpawn Configuration. Global. corpseTypePerBotReSpawnProfile - true/false allowDuplicates - true/false Include_DM_Crates - true/false AllowSkinsFor - { "add", "items", "like", this" } NPC types. OilRig Excavator CompoundScientist BanditTown MountedScientist JunkPileScientist DungeonScarecrow ScareCrow MilitaryTunnelScientist CargoShip HeavyScientist TunnelDweller UnderwaterDweller Trainyard Airfield DesertScientist ArcticResearchBase LaunchSite Gingerbread ZombieHorde *if Global option 1 is true, this entry is replaced with one entry per existing BotReSpawn profile, by name. Eg, The Dome 0, Airfield 0, LaunchSite 0, etc. Container Types bradley_crate heli_crate supply_drop dm ammo dm c4 dm construction resources dm construction tools dm food dm medical dm res dm tier1 lootbox dm tier2 lootbox dm tier3 lootbox loot_barrel_1 loot_barrel_2 loot-barrel-1 loot-barrel-2 oil_barrel codelockedhackablecrate crate_basic crate_elite crate_mine crate_normal crate_normal_2 crate_normal_2_food crate_normal_2_medical crate_tools crate_underwater_advanced crate_underwater_basic foodbox minecart trash-pile-1 ...There may be more, as the plugin automatically adds new ones as they appear in-game. Options per type: "enabled": true/false (governs corpse loot-giving) "lootTable": "default" "minItems": 6 "maxItems": 6 "gunsWithAmmo": true/false "noGuns": true/false "MaxBps": 3 "WaterPreFillPercent": 20 "ClearContainerFirst": true/false Data: By default there is one data file : /data/CustomLoot/default.json If you specify a unique lootTable name for any corpse or container type, a new file will be created in the same folder, by name. Eg /CustomLoot/JunkPileLootTable.json Each data file contains: Blacklist : [] - These items will never spawn, and are removed from loottable. Setting to [] will repopulate with default blacklist. AlwaysSpawnList : [] - These items will always spawn, regardless of probabilities. allowChristmas = false allowHalloween = false allowKeycards = false By default all Christmas, Halloween and Keycard items are disabled. Items, grouped by category. *Each item has:* "probability": 5 "minStack": 10 "maxStack": 50 "blueprintChancePerfect": 0 - where applicable "skins": [] - where applicable "IncludeAllApprovedSkins" - false "MinConditionPercent": 90 - where applicable "MaxConditionPercent": 100 - where applicable Categories: Ammunition Attire Component Construction Electrical Food Fun Items Medical Misc Tool Traps Resources Weapon ...There may be more, as the plugin automatically adds new ones as they appear in-game. Options per category: "probability": 5 "allowBlueprints": true API. If the called config profile doesn't exist CustomLoot will create it under 'API'. Example call. [PluginReference] private Plugin CustomLoot; List<Item> lootcall = CustomLoot?.Call("MakeLoot", "Profile_Name"; if (lootcall is string) PrintWarning(string)lootcall); Object hooks are provided to prevent this plugin giving loot to your spawned npcs, or containers. Return non-null for the following. OnCustomLootNPC(uint) OnCustomLootContainer(uint) Notes. *Probability, in both cases above, is relative; There is no scale. If there were two categories with probabilities of 9 and 1, the first would have a 9 out of 10 chance of being picked. Probability of zero effectively means the item, or category is disabled. Categories with no enabled items will never be chosen. Their probability is irrelevant. Disabled categories will never be chosen. Their probability is irrelevant. Users should never have to manually add, or remove, items in the /data files. New items in Rust should be added automatically. The blacklist can be used to remove entries from the data file, if that's preferred. Reloading is not required to catch up with profile changes made in BotReSpawn.Free -

Version 1.0.8
338 downloads
Your players have a great opportunity to spend time completing different missions to get rewards! The list of possibilities is incredible: In-game Events. Fights with players. Farming, Raidings, Crafting or taking action in Custom Events(The list of supported plugins will be below), and much more! Description: Welcome to a world of unforgettable adventures that BattlePass can provide your users! This plugin has 30 levels that will entertain players in different ways. Let us plunge you deeper into the great atmosphere we have prepared for you! How does it work? You will get XP for accomplishing different goals, such as destroying the helicopter, raiding, and killing players, bots, or animals. Leveling up is also possible in a more peaceful way, too. For example, you can craft items, open boxes, and farm barrels and collect farm resources. Also, don’t forget that you can easily change parameters in the config file. Feel free to change the amount of XP awarded for missions. What is the specialty of our BattlePass? Support for custom events. The plugin interface looks like it was made by the game developers. Better performance. Detailed configuration of all actions in the config. The plugin has a system of permissions that will allow your server to receive additional earnings. You can configure players' access to rewards. You can also add different multipliers of getting EXP for different privileges. The reward system supports custom items and teams. Level 1 can have multiple rewards. You can change all the texts in the Lang file. Dependencies (optional, not required) Arctic Base Event Satellite Dish Event Junkyard Event Plant Event Air Event Harbor Event Water Event Boss Monster Plugin Config en - example of plugin configuration in English ru - example of plugin configuration in Russian My Discord: CASHR#6906 Join the Mad Mappers Discord here! Check out more of my work here!$33.00 -
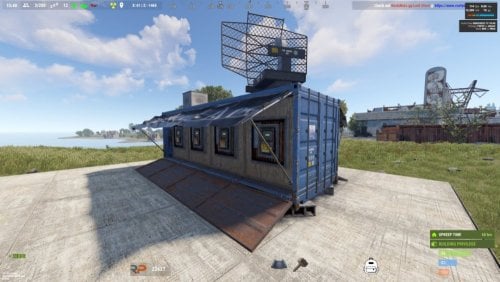
Version 1.2.4
1,143 downloads
Let your players shop from the safety of their own bases. Give them the ability to place & pickup their own drone Marketplaces, plus they look cool! With all the necessary configurable options, players will love this on any type of server, PvP or PvE. To add Marketplaces to server shops, I recommend adding the item rather than the command. You can do this with the following: Shortname: box.wooden.large SkinID: 2859284352 Features. Support for Friends, Clans, Teams Works with rewards shops like Server Rewards, Economics etc. Force on foundation (optional) Pickup by hitting a terminal with a hammer or chat command Allow multiple marketplaces (optional) Allow players to craft (optional) Configurable crafting cost More control with optional permissions Drop item if building underneath destroyed (optional) Lose condition on pickup (optional) Checks for space before placing (prevents clipping through structures) Config option to add vending machines to Marketplaces Option to block damage to attached vending machines Important Note: Rotate attached vending machines by hitting with a hammer. In-Game Commands (Remove / Prefix in F1 Console). /marketplace.give (give to self) /marketplace.give <PlayerName> or <SteamID> (give to player) /marketplace.craft /marketplace.pickup (Or hit a terminal with hammer) /marketplace.clear (Clear ALL stored marketplace data) /marketplace.clear <SteamID> (Remove marketplace data for player) Console/RCON Command. marketplace.give <PlayerName> or <SteamID> (give to player) marketplace.clear (Clear ALL stored marketplace data) marketplace.clear <SteamID> (Remove marketplace data for player) (Use console command in reward shops or give custom skinned item) Permissions (Optional). personalmarketplace.admin (Required for give & clear commands) personalmarketplace.deploy personalmarketplace.pickup personalmarketplace.craft API: Plugin devs can prevent conflict with this plugin by utilizing the following: Interface.CallHook("MarketplaceCheck", skinID) (where skinID = the skinID of the entity you are checking e.g. entity.skinID) Returns true if the given entity's skinID matches an item used by this plugin (deployable wooden box item, or Marketplace entity) or null if it is not. Plugin devs can use this to prevent conflict with their plugins if dealing with large wooden boxes or other items which maybe be Marketplace related, now or in the future. How to Place. As there is no deployable marketplace item in Rust, the plugin uses the large wooden box planner to help guide and align the Marketplace where you want to place it. Keep in mind the marketplace is a very large item, so it is only a guide to help align it. Make sure to place it far away from where you stand and from buildings, if there is not enough room you will not be able to place and you will get a chat message to tell you this. If you don’t get the position right first time, no worries, just pick it up and try again until happy with the placement. Use caution if marketplace condition is enabled, picking up the marketplace too many times will cause it to break and it is NOT repairable! Marketplaces are better placed in the middle of a 3x4 or larger foundation for best placement (see below image), but can be placed on open terrain or floors if allowed as such in the config: Inventory item: Custom Icon (to use in reward shops etc): https://rustynuts.gg/pmicon.png$12.99- 72 comments
- 5 reviews
-
- 3
-
-
-
- #rust
- #marketplace
- (and 7 more)
-

Version 1.0.6
531 downloads
This plugin will add multiple extended magazines to your server Description Facepunch just released the extended magazine into the game, which adds 25% to the capacity of ammo that it can originally hold With Custom Magazine's, you can now add several types of extended magazines! By default, you can now also add 50%, 75%, and even 100% capacity increases! At 100%, this will double any weapons capacity! You can change those capacity increase percentages in the configuration, remove them, or even add your own! You can configure spawning of these items in standard Rust crates! Console commands (RCON only) givemagazine {skinid} {steamid} - This is the console command to give an extended magazine from the plugin configuration with a Steam Workshop SkinID ({skinid}) to a player using their SteamID ({steamid}) Plugin Config en - example of plugin configuration in English ru - example of plugin configuration in Russian My Discord: KpucTaJl#8923 Join the Mad Mappers Discord here! Check out more of my work here!$10.00 -
Version 1.0.8
1,286 downloads
A plugin that spawns in NPC controlled RHIBS which act as stationary patrols in the ocean and along the coastline waiting and looking for players. Once engaged, players have the choice to attack them for loot or flee for their lives! Description This plugin will spawn RHIBs with NPCs on your server that will act as stationary patrols, they will remain in place and search for players that enter their sight, at which point they will pursue the player. The player has the option of escaping the patrol, or they can fight the NPCs and if successful and victorious, you can take the loot they hold in their boat! Should the player have a base on the beach, or decide to hide inside anywhere near the waters edge, the NPCs will not hesitate to pull out their rocket launchers and go to work trying to raid their defensive positions! In the configuration for the plugin you can create several patrol presets, each having their own population on the map. Adjust also the amount of NPCs in the boat, their clothing and weapons, all of their parameters for difficulty and challenge, as well as adjust and customize the loot table for each preset, including custom spawn locations for the stationary patrols. The best map for the plugin to work is a map with a lot of sea. I can recommend the maps of the Mad Mappers team developers.: Land Of Enmity Arhipelago Dependencies Required NpcSpawn Plugin Config en - example of plugin configuration in English ru - example of plugin configuration in Russian My Discord: KpucTaJl#8923 Join the Mad Mappers Discord here! Check out more of my work here!$30.00- 180 comments
- 4 reviews
-
- 6
-
-
-
-
- #boat
- #facepunch
- (and 15 more)
-
Version 1.1.5
365 downloads
NoEscape stands out as a robust solution to control rust players raiding & combat actions. As an innovative plugin for Rust, offering a range of unique features along with a visually appealing overlay. It provides 10 different colors for customization and a visible dome adjuster, enhancing user interaction. This plugin is designed to deliver optimal performance while maintaining backward compatibility with the free NoEscape from umod ensuring a smooth transition. Features Twig Building Ignorance: The plugin intelligently ignores twig buildings, preventing griefers from exploiting the raid/combat block system during simple base construction. Door Shooting Logic: Shooting a door outside the predefined radius won't trigger a raid block, even if the door is destroyed. Reliability and Compatibility Reload Behavior: Reloading NoEscape clears all existing raid/combat blocks. Team and Clan Support: Compatible with Teams & Clans, especially beneficial when used with the Auto Team plugin(umod clans). Removal Tools Support: Fully compatible with remove tools within the game or plugins. Command Blocking: Offers optional command blocking. Commands can be specified to block only for raids ("shop": 1) or combat ("shop": 2), or both ("shop": 3). Health/Regen Logic for Raids: Optional feature to manage health and regeneration of building blocks during raids / base building. Sound Effects: Option to include sound effects for enhanced user experience. UI System: Implements a user interface specifically for raid & combat scenarios that includes complete customization support. Hud Preset Positions: ( 0 Left Top | 1 Left Bottom | 2 Right Top | 3 Right Bottom | 4 Custom ) Combat-Blocking Logic: Combat-blocking is only active when not in a raid-blocked state. This not only saves on performance but also improves the gameplay experience. Raid-Block Self-Ignorance: Prevents raid-blocking on one's own buildings. MLRS Support: Yes, but only the vanilla ones launched by the vehicle on the map are supported, 3rd party plugins are not. Fire Damage Logic: If a wooden (but not twig) base takes fire damage, it triggers a raid. Damage Source Ignorance: Ignores non-player damage and buildings set to owner ID 0 by third-party plugins. Visual Enhancements: Color Support for Spheres: Adds color customization options for the visible spheres. Visualization Level Setter: Allows users to set the level of visualization for easier navigation and interaction. In conclusion, NoEscape provides a comprehensive and robust solution for Rust players, offering a blend of unique features, compatibility, and visual enhancements to elevate the gaming experience. Permissions noescape.admin Allows you to use the console / F1 command "newcolor" for changing the Raid overlay settings in game. Also allows you to use the console / F1 command "noescape" for allowing to raid your self or trigger combat block on npcs. Command newcolor <1-10> <0-8> -- first number is the color setting, second number is the sphere darkness level. noescape or noescape steamID Need to trigger raids on your self or combat block for NPCs? For testing! Use the new noescape command! Example: F1 menu Type "noescape" in game to toggle for your self. Example: F1 menu or server-console Type "noescape steamID" to toggle for someone else. Requires the noescape.admin perm to use in game. Configuration { "Specify commands to block ( 3 = Block Both | 1 = Block Raid | 2 = Block Combat )": { "shop": 3, "tp": 3 }, "User Interface": { "Switch to sprite instead of Icon?": false, "Sprite string Default: assets/icons/explosion.png": "assets/icons/explosion.png", "Sprite Color Default: 0.95 0 0.02 0.67": "0.95 0 0.02 0.67", "Enable Raid UI": true, "Raid Icon (Item ID Default: 1248356124) 0 = None": 1248356124, "Raid Skin ID (Skin ID Default: 0) 0 = None": 0, "Enable Combat UI": true, "Combat Icon (Item ID Default: 1545779598) 0 = None": 1545779598, "Combat Skin ID (Skin ID Default: 0) 0 = None": 0, "Hud Preset Positions: ( 0 Left Top | 1 Left Bottom | 2 Right Top | 3 Right Bottom | 4 Custom )": 0, "Hud Transparency Default: #, 0.1f": { "Hex": "#", "Rgb": "0 0 0 0.1" }, "Text Color Default: #09ff00": { "Hex": "#46ff36", "Rgb": "0.0352941176470588 1 0 1" }, "Text Font Size Default: 13": 13, "Hex or RGB toggle (Default is Hex)": false, "Custom UI POS: Key is anchorMin | Value is anchorMax": { "Hud": { "Key": "0.345 0.11", "Value": "0.465 0.14" }, "Icon": { "Key": "0 0", "Value": "0.13 1" }, "Text": { "Key": "0.15 0", "Value": "1 1" } } }, "Combat Block": { "Enable Combat Block?": true, "Block Time (Min)": 1, "Exclude Steam 64IDs": [] }, "Raid Block": { "Enable Raid Block?": true, "Raid Block player until death instead of distance checks or zones. + 'Optional' timer setting in seconds Default: 0.0 = disabled.": { "Die": false, "Time": 0.0 }, "Block Time (Sec)": 300.0, "Block Radius": 100.0, "Damaged Health Percentage on an entity to trigger a raid (0 = disabled)": 0, "Sphere Visibility (Recommend 3 or 5, 0 = disabled)": 3, "Sphere Color (0 = none, 1 = Blue, 2 = Cyan, 3 = Green, 4 = Pink, 5 = Purple, 6 = Red, 7 = White, 8 = Yellow, 9 = Turquoise, 10 = Brown)": 4, "Enable Random Sphere Colors? (Randomly selects a new color each time a raid block is triggered)": false, "Allow Upgrade or Block?": true, "Override facepunches default repair wait time after being attacked? Default: 30sec": 30, "Enable Base Building Block Features": true }, "Building (None = Doors, VendingMachine, ShopFront)": { "None": { "Raid Blocked Building Spawned Health Percentage": 35, "Health Regen Rate (Sets how fast it gens the health every x(Sec)": 1.0, "Regen Amount (0 = Disabled Sets how much to regen every x(Sec)": 20.0, "After Being Attacked Regen Time (Sec)": 30.0 }, "Twigs": { "Raid Blocked Building Spawned Health Percentage": 10, "Health Regen Rate (Sets how fast it gens the health every x(Sec)": 1.0, "Regen Amount (0 = Disabled Sets how much to regen every x(Sec)": 1.0, "After Being Attacked Regen Time (Sec)": 30.0 }, "Wood": { "Raid Blocked Building Spawned Health Percentage": 20, "Health Regen Rate (Sets how fast it gens the health every x(Sec)": 1.0, "Regen Amount (0 = Disabled Sets how much to regen every x(Sec)": 20.0, "After Being Attacked Regen Time (Sec)": 30.0 }, "Stone": { "Raid Blocked Building Spawned Health Percentage": 30, "Health Regen Rate (Sets how fast it gens the health every x(Sec)": 1.0, "Regen Amount (0 = Disabled Sets how much to regen every x(Sec)": 25.0, "After Being Attacked Regen Time (Sec)": 30.0 }, "Metal": { "Raid Blocked Building Spawned Health Percentage": 40, "Health Regen Rate (Sets how fast it gens the health every x(Sec)": 1.0, "Regen Amount (0 = Disabled Sets how much to regen every x(Sec)": 30.0, "After Being Attacked Regen Time (Sec)": 30.0 }, "TopTier": { "Raid Blocked Building Spawned Health Percentage": 50, "Health Regen Rate (Sets how fast it gens the health every x(Sec)": 1.0, "Regen Amount (0 = Disabled Sets how much to regen every x(Sec)": 40.0, "After Being Attacked Regen Time (Sec)": 30.0 } }, "Upgrading only works for BuildingBlocks": { "Twigs": { "Raid Blocked Upgrading Spawned Health Percentage": 10, "Health Regen Rate (Sets how fast it gens the health every x(Sec)": 1.0, "Regen Amount (0 = Disabled Sets how much to regen every x(Sec)": 1.0, "After Being Attacked Regen Time (Sec)": 30.0 }, "Wood": { "Raid Blocked Upgrading Spawned Health Percentage": 20, "Health Regen Rate (Sets how fast it gens the health every x(Sec)": 1.0, "Regen Amount (0 = Disabled Sets how much to regen every x(Sec)": 20.0, "After Being Attacked Regen Time (Sec)": 30.0 }, "Stone": { "Raid Blocked Upgrading Spawned Health Percentage": 30, "Health Regen Rate (Sets how fast it gens the health every x(Sec)": 1.0, "Regen Amount (0 = Disabled Sets how much to regen every x(Sec)": 25.0, "After Being Attacked Regen Time (Sec)": 30.0 }, "Metal": { "Raid Blocked Upgrading Spawned Health Percentage": 40, "Health Regen Rate (Sets how fast it gens the health every x(Sec)": 1.0, "Regen Amount (0 = Disabled Sets how much to regen every x(Sec)": 30.0, "After Being Attacked Regen Time (Sec)": 30.0 }, "TopTier": { "Raid Blocked Upgrading Spawned Health Percentage": 50, "Health Regen Rate (Sets how fast it gens the health every x(Sec)": 1.0, "Regen Amount (0 = Disabled Sets how much to regen every x(Sec)": 40.0, "After Being Attacked Regen Time (Sec)": 30.0 } }, "Sound Effects": { "RaidStart": "assets/bundled/prefabs/fx/takedamage_hit.prefab", "CombatSart": "assets/bundled/prefabs/fx/kill_notify.prefab", "RaidEnd": "assets/prefabs/building/door.hinged/effects/vault-metal-close-end.prefab", "CombatEnd": "assets/prefabs/building/door.hinged/effects/vault-metal-close-end.prefab", "Denied": "assets/prefabs/weapons/toolgun/effects/repairerror.prefab" }, "Message Responses": { "ChatIcon": 0, "RaidBlocked": "You are now <color=#00FF00>raid blocked</color>! For <color=#00FF00>{0}</color>!", "UnRaidBlocked": "You are <color=#00FF00>no longer</color> raid blocked.", "CombatBlocked": "You are <color=#00FF00>combat blocked</color> For <color=#00FF00>{0}</color>.", "UnCombatBlocked": "You are <color=#00FF00>no longer</color> combat blocked.", "CommandBlocked": "Access Denied: Cannot use <color=#FFA500>'{0}'</color> command during <color=#FFA500>{1}</color>: <color=#FFA500>{2}</color>", "ActionBlocked": "Denied: Cannot <color=#FFA500>{0}</color> while <color=#FFA500>raid blocked</color>", "RepairBlocked": "Unable to repair: Recently damaged. Repairable in: " } } API Hooks Useful to force quit 3rd party plugin actions when players trigger Combat/Raid Blocks. private void OnCombatBlock(BasePlayer player) private void OnRaidBlock(BasePlayer player) Useful for checking commands, etc, before allowing a player to do something private bool IsCombatBlocked(BasePlayer player) | IsCombatBlocked(string player) | IsCombatBlocked(ulong player) private bool IsRaidBlocked(BasePlayer player) | IsRaidBlocked(string player) | IsRaidBlocked(ulong player) private bool IsEscapeBlocked(BasePlayer player) | IsEscapeBlocked(string player) | IsEscapeBlocked(ulong player)$24.99 -
Version 1.5.1
755 downloads
BanScreen displays a screen overlay to lock out a player and force them to acknowledge that they are being banned or warned. Updating it 1.5.1 Back up Your Config Features Customiseable overlay that the player is greeted with when banning Chat and console command so that a player can be banned from in game or rcon Variables Background Color "255 0 0 1" << If Background image is false then you can select the color and transparency of the GUI in RGBA format (Examples at bottom) Enabled True/False << Sets a background or color screen ImageURL URL << Set Background Image Messages "BAN_MESSAGE": "Failed to follow rules" << Message that will be displayed after player is banned and when they attempt to join the server FontSize "22" << Size of text on overlay "BAN_MESSAGES" ["line one","line two","line three"] << Text that will be displayed on Ban Screen "LC_MESSAGES" ["line one","line two","line three"] << Text that will be displayed of Last Chance Ban Acknowledge Button Enabled True/False << Display button on Ban Screen Seconds till close if button is false: 10 << Amount of seconds the Ban screen is displayed before banning player if button is set to false Warn Acknowledge Button Enabled True/False << Display button on Warning Screen Seconds till close if button is false: 10 << Amount of seconds the Warning screen is displayed before closing if button is set to false Permissions BanScreen.usecmd Required to use /BanScreen & /LastChance command Chat Commands /BanScreen "Player/ID" Will display Ban Screen to player /LastChance "Player/ID" Will display Last Chance Screen to player Console Command BanScreen "PlayerName/ID" Will display Ban Screen to player LastChance "Player/ID" Will display Last Chance Screen to player Configuration The settings and options for this plugin can be configured in the BanScreen.json file under the oxide/config directory. The use of a JSON editor or validation site such as jsonlint.com is recommended to avoid formatting issues and syntax errors. { "Background": { "Color": "255 0 0 1", "Enabled": false, "ImageURL": "https://i.ytimg.com/vi/yaqe1qesQ8c/maxresdefault.jpg" }, "Ban Acknowledge Button": { "Enabled": true, "Seconds till close if button is false": 10 }, "Messages": { "BAN_MESSAGE": "Failed to follow rules", "BAN_MESSAGES": [ "<color=#000000>STOP!</color> <color=#FFFF00>You have not followed the rules of this server:</color>", "As a result,", "It is the opinion of the staff that you are issued with", "A SERVER BAN", "If you feel the ban is unfair, you may appeal the ban via the following methods", "Discord", "Website", "<color=#0000FF>Note that appeals are at the discretion of the server owner</color>", "<color=#0000FF>And may take up to 48 hours to complete </color>" ], "FontSize": "22" }, "Warn Acknowledge Button": { "Enabled": true, "Seconds till close if button is false": 10 }, "WarningMsgs": { "FontSize": "22", "LC_MESSAGES": [ "<color=#000000>STOP!</color>", "This is a warning.", "Continue to not follow the rules and we will issue you", "A SERVER BAN", "Your actions are in violation of the server rules", "If you need to be remided of the rules", "Use /Rules ", "<color=#0000FF>If you continue in this manner you will be removed from the server</color>", "<color=#0000FF>This is your final warning </color>" ] } } Color Examples blackSolid black. RGBA is (0 0 0 1). blueSolid blue. RGBA is (0 0 1 1). clearCompletely transparent. RGBA is (0 0 0 0). cyanCyan. RGBA is (0 1 1 1). grayGray. RGBA is (0.5 0.5 0.5 1). greenSolid green. RGBA is (0 1 0 1). greyEnglish spelling for gray. RGBA is the same (0.5 0.5 0.5 1). magentaMagenta. RGBA is (1 0 1 1). redSolid red. RGBA is (1 0 0 1). whiteSolid white. RGBA is (1 1 1 1). The Last digit dictates Alpha channel... so for an opaque appearance select a value below 1 E.g. 0.7 Thanks to my moderator and friend MrBytedk for being banned about a hundred times while testing functionality If you have any questions or problems, join my discord https://discord.gg/2ftdtaTQ6SFree- 4 comments
- 1 review
-
- 2
-
-
- #information
- #informational
- (and 5 more)
-
Version 1.3.0
505 downloads
RUST Plugin Test Server TEST MY PLUGINS THERE! connect play.thepitereq.ovh:28050 Custom Mixing plugin allows you to create an infinite number of custom recipes for the mixing table. It updates the mixing table, enabling you to customize, add, or remove recipes, change their craft times, ingredients, and much more! Create an infinite number of custom recipes with the Custom Mixing plugin. Edit or remove default recipes, supports custom item crafts with skins, display names, and blueprint requirements, and offers configurable mixing times. Full support of the item content, so you can work with liquids inside containers. Crafting times are cached through server restarts, and it includes crafting item search and paging features. Configurable hints appear when clicking on item icons, and admins can give items by clicking an icon with the SPRINT button pressed, provided they have permission. A RUST-themed UI. Optional statistics data file for admins. custommixing.give - Gives access for giving items by clicking icons with SPRINT button pressed. custommixing.instacraft - Makes every crafting an insta-craft. { "Enable Statistics": false, "PopUP API Preset Name": "Legacy", "Use Translated Item Names (will generate a lot of text in lang file)": false, "Required Amount Char": "x", "Craftings": [ { "Crafting Display Name": "Low Grade Fuel", "Item Shortname": "lowgradefuel", "Item Amount": 4, "Skin ID": 0, "Item Name": "", "Mixing Time": 1.0, "Default Display": true, "Require Shortname Blueprint": false, "Show Recipe Without Permission": true, "Required Permission": "", "Hide Recipe Anyway (not displayed, possible to craft)": false, "Mixing Time Permission Divider": {}, "Crafting Ingredients": [ { "Item Shortname": "cloth", "Item Amount": 1, "Skin ID": 0, "Content Item": null }, { "Item Shortname": "fat.animal", "Item Amount": 3, "Skin ID": 0, "Content Item": null } ] }, { "Crafting Display Name": "Gun Powder", "Item Shortname": "gunpowder", "Item Amount": 10, "Skin ID": 0, "Item Name": "", "Mixing Time": 1.0, "Default Display": true, "Require Shortname Blueprint": false, "Show Recipe Without Permission": true, "Required Permission": "", "Hide Recipe Anyway (not displayed, possible to craft)": false, "Mixing Time Permission Divider": {}, "Crafting Ingredients": [ { "Item Shortname": "sulfur", "Item Amount": 10, "Skin ID": 0, "Content Item": null }, { "Item Shortname": "charcoal", "Item Amount": 10, "Skin ID": 0, "Content Item": null }, { "Item Shortname": "sulfur", "Item Amount": 10, "Skin ID": 0, "Content Item": null }, { "Item Shortname": "charcoal", "Item Amount": 10, "Skin ID": 0, "Content Item": null } ] }, { "Crafting Display Name": "Explosives", "Item Shortname": "explosives", "Item Amount": 1, "Skin ID": 0, "Item Name": "", "Mixing Time": 4.0, "Default Display": true, "Require Shortname Blueprint": true, "Show Recipe Without Permission": true, "Required Permission": "", "Hide Recipe Anyway (not displayed, possible to craft)": false, "Mixing Time Permission Divider": { "custommixing.premium": 1.5, "custommixing.vip": 4.0 }, "Crafting Ingredients": [ { "Item Shortname": "gunpowder", "Item Amount": 50, "Skin ID": 0, "Content Item": null }, { "Item Shortname": "lowgradefuel", "Item Amount": 3, "Skin ID": 0, "Content Item": null }, { "Item Shortname": "sulfur", "Item Amount": 10, "Skin ID": 0, "Content Item": null }, { "Item Shortname": "metal.fragments", "Item Amount": 10, "Skin ID": 0, "Content Item": null } ] }, { "Crafting Display Name": "Pistol Bullet", "Item Shortname": "ammo.pistol", "Item Amount": 4, "Skin ID": 0, "Item Name": "", "Mixing Time": 1.0, "Default Display": true, "Require Shortname Blueprint": true, "Show Recipe Without Permission": true, "Required Permission": "", "Hide Recipe Anyway (not displayed, possible to craft)": false, "Mixing Time Permission Divider": {}, "Crafting Ingredients": [ { "Item Shortname": "gunpowder", "Item Amount": 5, "Skin ID": 0, "Content Item": null }, { "Item Shortname": "metal.fragments", "Item Amount": 10, "Skin ID": 0, "Content Item": null } ] }, { "Crafting Display Name": "5.56 Rifle Ammo", "Item Shortname": "ammo.rifle", "Item Amount": 3, "Skin ID": 0, "Item Name": "", "Mixing Time": 1.0, "Default Display": true, "Require Shortname Blueprint": true, "Show Recipe Without Permission": true, "Required Permission": "", "Hide Recipe Anyway (not displayed, possible to craft)": false, "Mixing Time Permission Divider": {}, "Crafting Ingredients": [ { "Item Shortname": "gunpowder", "Item Amount": 5, "Skin ID": 0, "Content Item": null }, { "Item Shortname": "metal.fragments", "Item Amount": 5, "Skin ID": 0, "Content Item": null }, { "Item Shortname": "metal.fragments", "Item Amount": 5, "Skin ID": 0, "Content Item": null } ] }, { "Crafting Display Name": "HV Pistol Bullet", "Item Shortname": "ammo.pistol.hv", "Item Amount": 4, "Skin ID": 0, "Item Name": "", "Mixing Time": 1.0, "Default Display": true, "Require Shortname Blueprint": true, "Show Recipe Without Permission": true, "Required Permission": "", "Hide Recipe Anyway (not displayed, possible to craft)": false, "Mixing Time Permission Divider": {}, "Crafting Ingredients": [ { "Item Shortname": "gunpowder", "Item Amount": 5, "Skin ID": 0, "Content Item": null }, { "Item Shortname": "gunpowder", "Item Amount": 5, "Skin ID": 0, "Content Item": null }, { "Item Shortname": "metal.fragments", "Item Amount": 10, "Skin ID": 0, "Content Item": null } ] }, { "Crafting Display Name": "HV 5.56 Rifle Ammo", "Item Shortname": "ammo.rifle.hv", "Item Amount": 3, "Skin ID": 0, "Item Name": "", "Mixing Time": 1.0, "Default Display": true, "Require Shortname Blueprint": true, "Show Recipe Without Permission": true, "Required Permission": "", "Hide Recipe Anyway (not displayed, possible to craft)": false, "Mixing Time Permission Divider": {}, "Crafting Ingredients": [ { "Item Shortname": "gunpowder", "Item Amount": 5, "Skin ID": 0, "Content Item": null }, { "Item Shortname": "gunpowder", "Item Amount": 5, "Skin ID": 0, "Content Item": null }, { "Item Shortname": "metal.fragments", "Item Amount": 5, "Skin ID": 0, "Content Item": null }, { "Item Shortname": "metal.fragments", "Item Amount": 5, "Skin ID": 0, "Content Item": null } ] }, { "Crafting Display Name": "Incendiary Pistol Bullet", "Item Shortname": "ammo.pistol.fire", "Item Amount": 4, "Skin ID": 0, "Item Name": "", "Mixing Time": 1.0, "Default Display": true, "Require Shortname Blueprint": true, "Show Recipe Without Permission": true, "Required Permission": "", "Hide Recipe Anyway (not displayed, possible to craft)": false, "Mixing Time Permission Divider": {}, "Crafting Ingredients": [ { "Item Shortname": "gunpowder", "Item Amount": 10, "Skin ID": 0, "Content Item": null }, { "Item Shortname": "metal.fragments", "Item Amount": 10, "Skin ID": 0, "Content Item": null }, { "Item Shortname": "sulfur", "Item Amount": 5, "Skin ID": 0, "Content Item": null } ] }, { "Crafting Display Name": "Incendiary 5.56 Rifle Ammo", "Item Shortname": "ammo.rifle.incendiary", "Item Amount": 3, "Skin ID": 0, "Item Name": "", "Mixing Time": 1.0, "Default Display": true, "Require Shortname Blueprint": true, "Show Recipe Without Permission": true, "Required Permission": "", "Hide Recipe Anyway (not displayed, possible to craft)": false, "Mixing Time Permission Divider": {}, "Crafting Ingredients": [ { "Item Shortname": "gunpowder", "Item Amount": 10, "Skin ID": 0, "Content Item": null }, { "Item Shortname": "metal.fragments", "Item Amount": 5, "Skin ID": 0, "Content Item": null }, { "Item Shortname": "metal.fragments", "Item Amount": 5, "Skin ID": 0, "Content Item": null }, { "Item Shortname": "sulfur", "Item Amount": 5, "Skin ID": 0, "Content Item": null } ] }, { "Crafting Display Name": "Basic Healing Tea", "Item Shortname": "healingtea", "Item Amount": 1, "Skin ID": 0, "Item Name": "", "Mixing Time": 5.0, "Default Display": true, "Require Shortname Blueprint": false, "Show Recipe Without Permission": true, "Required Permission": "", "Hide Recipe Anyway (not displayed, possible to craft)": false, "Mixing Time Permission Divider": {}, "Crafting Ingredients": [ { "Item Shortname": "red.berry", "Item Amount": 1, "Skin ID": 0, "Content Item": null }, { "Item Shortname": "red.berry", "Item Amount": 1, "Skin ID": 0, "Content Item": null }, { "Item Shortname": "red.berry", "Item Amount": 1, "Skin ID": 0, "Content Item": null }, { "Item Shortname": "red.berry", "Item Amount": 1, "Skin ID": 0, "Content Item": null } ] }, { "Crafting Display Name": "Advanced Healing Tea", "Item Shortname": "healingtea.advanced", "Item Amount": 1, "Skin ID": 0, "Item Name": "", "Mixing Time": 5.0, "Default Display": true, "Require Shortname Blueprint": false, "Show Recipe Without Permission": true, "Required Permission": "", "Hide Recipe Anyway (not displayed, possible to craft)": false, "Mixing Time Permission Divider": {}, "Crafting Ingredients": [ { "Item Shortname": "healingtea", "Item Amount": 1, "Skin ID": 0, "Content Item": null }, { "Item Shortname": "healingtea", "Item Amount": 1, "Skin ID": 0, "Content Item": null }, { "Item Shortname": "healingtea", "Item Amount": 1, "Skin ID": 0, "Content Item": null }, { "Item Shortname": "healingtea", "Item Amount": 1, "Skin ID": 0, "Content Item": null } ] }, { "Crafting Display Name": "Pure Healing Tea", "Item Shortname": "healingtea.pure", "Item Amount": 1, "Skin ID": 0, "Item Name": "", "Mixing Time": 5.0, "Default Display": true, "Require Shortname Blueprint": false, "Show Recipe Without Permission": true, "Required Permission": "", "Hide Recipe Anyway (not displayed, possible to craft)": false, "Mixing Time Permission Divider": {}, "Crafting Ingredients": [ { "Item Shortname": "healingtea.advanced", "Item Amount": 1, "Skin ID": 0, "Content Item": null }, { "Item Shortname": "healingtea.advanced", "Item Amount": 1, "Skin ID": 0, "Content Item": null }, { "Item Shortname": "healingtea.advanced", "Item Amount": 1, "Skin ID": 0, "Content Item": null }, { "Item Shortname": "healingtea.advanced", "Item Amount": 1, "Skin ID": 0, "Content Item": null } ] }, { "Crafting Display Name": "Basic Ore Tea", "Item Shortname": "oretea", "Item Amount": 1, "Skin ID": 0, "Item Name": "", "Mixing Time": 5.0, "Default Display": true, "Require Shortname Blueprint": false, "Show Recipe Without Permission": true, "Required Permission": "", "Hide Recipe Anyway (not displayed, possible to craft)": false, "Mixing Time Permission Divider": {}, "Crafting Ingredients": [ { "Item Shortname": "yellow.berry", "Item Amount": 1, "Skin ID": 0, "Content Item": null }, { "Item Shortname": "blue.berry", "Item Amount": 1, "Skin ID": 0, "Content Item": null }, { "Item Shortname": "yellow.berry", "Item Amount": 1, "Skin ID": 0, "Content Item": null }, { "Item Shortname": "blue.berry", "Item Amount": 1, "Skin ID": 0, "Content Item": null } ] }, { "Crafting Display Name": "Advanced Ore Tea", "Item Shortname": "oretea.advanced", "Item Amount": 1, "Skin ID": 0, "Item Name": "", "Mixing Time": 5.0, "Default Display": true, "Require Shortname Blueprint": false, "Show Recipe Without Permission": true, "Required Permission": "", "Hide Recipe Anyway (not displayed, possible to craft)": false, "Mixing Time Permission Divider": {}, "Crafting Ingredients": [ { "Item Shortname": "oretea", "Item Amount": 1, "Skin ID": 0, "Content Item": null }, { "Item Shortname": "oretea", "Item Amount": 1, "Skin ID": 0, "Content Item": null }, { "Item Shortname": "oretea", "Item Amount": 1, "Skin ID": 0, "Content Item": null }, { "Item Shortname": "oretea", "Item Amount": 1, "Skin ID": 0, "Content Item": null } ] }, { "Crafting Display Name": "Pure Ore Tea", "Item Shortname": "oretea.pure", "Item Amount": 1, "Skin ID": 0, "Item Name": "", "Mixing Time": 5.0, "Default Display": true, "Require Shortname Blueprint": false, "Show Recipe Without Permission": true, "Required Permission": "", "Hide Recipe Anyway (not displayed, possible to craft)": false, "Mixing Time Permission Divider": {}, "Crafting Ingredients": [ { "Item Shortname": "oretea.advanced", "Item Amount": 1, "Skin ID": 0, "Content Item": null }, { "Item Shortname": "oretea.advanced", "Item Amount": 1, "Skin ID": 0, "Content Item": null }, { "Item Shortname": "oretea.advanced", "Item Amount": 1, "Skin ID": 0, "Content Item": null }, { "Item Shortname": "oretea.advanced", "Item Amount": 1, "Skin ID": 0, "Content Item": null } ] }, { "Crafting Display Name": "Basic Anti-Rad Tea", "Item Shortname": "radiationresisttea", "Item Amount": 1, "Skin ID": 0, "Item Name": "", "Mixing Time": 5.0, "Default Display": true, "Require Shortname Blueprint": false, "Show Recipe Without Permission": true, "Required Permission": "", "Hide Recipe Anyway (not displayed, possible to craft)": false, "Mixing Time Permission Divider": {}, "Crafting Ingredients": [ { "Item Shortname": "red.berry", "Item Amount": 1, "Skin ID": 0, "Content Item": null }, { "Item Shortname": "red.berry", "Item Amount": 1, "Skin ID": 0, "Content Item": null }, { "Item Shortname": "green.berry", "Item Amount": 1, "Skin ID": 0, "Content Item": null }, { "Item Shortname": "green.berry", "Item Amount": 1, "Skin ID": 0, "Content Item": null } ] }, { "Crafting Display Name": "Advanced Anti-Rad Tea", "Item Shortname": "radiationresisttea.advanced", "Item Amount": 1, "Skin ID": 0, "Item Name": "", "Mixing Time": 5.0, "Default Display": true, "Require Shortname Blueprint": false, "Show Recipe Without Permission": true, "Required Permission": "", "Hide Recipe Anyway (not displayed, possible to craft)": false, "Mixing Time Permission Divider": {}, "Crafting Ingredients": [ { "Item Shortname": "radiationresisttea", "Item Amount": 1, "Skin ID": 0, "Content Item": null }, { "Item Shortname": "radiationresisttea", "Item Amount": 1, "Skin ID": 0, "Content Item": null }, { "Item Shortname": "radiationresisttea", "Item Amount": 1, "Skin ID": 0, "Content Item": null }, { "Item Shortname": "radiationresisttea", "Item Amount": 1, "Skin ID": 0, "Content Item": null } ] }, { "Crafting Display Name": "Pure Anti-Rad Tea", "Item Shortname": "radiationresisttea.pure", "Item Amount": 1, "Skin ID": 0, "Item Name": "", "Mixing Time": 5.0, "Default Display": true, "Require Shortname Blueprint": false, "Show Recipe Without Permission": true, "Required Permission": "", "Hide Recipe Anyway (not displayed, possible to craft)": false, "Mixing Time Permission Divider": {}, "Crafting Ingredients": [ { "Item Shortname": "radiationresisttea.advanced", "Item Amount": 1, "Skin ID": 0, "Content Item": null }, { "Item Shortname": "radiationresisttea.advanced", "Item Amount": 1, "Skin ID": 0, "Content Item": null }, { "Item Shortname": "radiationresisttea.advanced", "Item Amount": 1, "Skin ID": 0, "Content Item": null }, { "Item Shortname": "radiationresisttea.advanced", "Item Amount": 1, "Skin ID": 0, "Content Item": null } ] }, { "Crafting Display Name": "Basic Wood Tea", "Item Shortname": "woodtea", "Item Amount": 1, "Skin ID": 0, "Item Name": "", "Mixing Time": 5.0, "Default Display": true, "Require Shortname Blueprint": false, "Show Recipe Without Permission": true, "Required Permission": "", "Hide Recipe Anyway (not displayed, possible to craft)": false, "Mixing Time Permission Divider": {}, "Crafting Ingredients": [ { "Item Shortname": "red.berry", "Item Amount": 1, "Skin ID": 0, "Content Item": null }, { "Item Shortname": "blue.berry", "Item Amount": 1, "Skin ID": 0, "Content Item": null }, { "Item Shortname": "red.berry", "Item Amount": 1, "Skin ID": 0, "Content Item": null }, { "Item Shortname": "blue.berry", "Item Amount": 1, "Skin ID": 0, "Content Item": null } ] }, { "Crafting Display Name": "Advanced Wood Tea", "Item Shortname": "woodtea.advanced", "Item Amount": 1, "Skin ID": 0, "Item Name": "", "Mixing Time": 5.0, "Default Display": true, "Require Shortname Blueprint": false, "Show Recipe Without Permission": true, "Required Permission": "", "Hide Recipe Anyway (not displayed, possible to craft)": false, "Mixing Time Permission Divider": {}, "Crafting Ingredients": [ { "Item Shortname": "woodtea", "Item Amount": 1, "Skin ID": 0, "Content Item": null }, { "Item Shortname": "woodtea", "Item Amount": 1, "Skin ID": 0, "Content Item": null }, { "Item Shortname": "woodtea", "Item Amount": 1, "Skin ID": 0, "Content Item": null }, { "Item Shortname": "woodtea", "Item Amount": 1, "Skin ID": 0, "Content Item": null } ] }, { "Crafting Display Name": "Pure Wood Tea", "Item Shortname": "woodtea.pure", "Item Amount": 1, "Skin ID": 0, "Item Name": "", "Mixing Time": 5.0, "Default Display": true, "Require Shortname Blueprint": false, "Show Recipe Without Permission": true, "Required Permission": "", "Hide Recipe Anyway (not displayed, possible to craft)": false, "Mixing Time Permission Divider": {}, "Crafting Ingredients": [ { "Item Shortname": "woodtea.advanced", "Item Amount": 1, "Skin ID": 0, "Content Item": null }, { "Item Shortname": "woodtea.advanced", "Item Amount": 1, "Skin ID": 0, "Content Item": null }, { "Item Shortname": "woodtea.advanced", "Item Amount": 1, "Skin ID": 0, "Content Item": null }, { "Item Shortname": "woodtea.advanced", "Item Amount": 1, "Skin ID": 0, "Content Item": null } ] }, { "Crafting Display Name": "Basic Scrap Tea", "Item Shortname": "scraptea", "Item Amount": 1, "Skin ID": 0, "Item Name": "", "Mixing Time": 5.0, "Default Display": true, "Require Shortname Blueprint": false, "Show Recipe Without Permission": true, "Required Permission": "", "Hide Recipe Anyway (not displayed, possible to craft)": false, "Mixing Time Permission Divider": {}, "Crafting Ingredients": [ { "Item Shortname": "yellow.berry", "Item Amount": 1, "Skin ID": 0, "Content Item": null }, { "Item Shortname": "white.berry", "Item Amount": 1, "Skin ID": 0, "Content Item": null }, { "Item Shortname": "yellow.berry", "Item Amount": 1, "Skin ID": 0, "Content Item": null }, { "Item Shortname": "white.berry", "Item Amount": 1, "Skin ID": 0, "Content Item": null } ] }, { "Crafting Display Name": "Advanced Scrap Tea", "Item Shortname": "scraptea.advanced", "Item Amount": 1, "Skin ID": 0, "Item Name": "", "Mixing Time": 5.0, "Default Display": true, "Require Shortname Blueprint": false, "Show Recipe Without Permission": true, "Required Permission": "", "Hide Recipe Anyway (not displayed, possible to craft)": false, "Mixing Time Permission Divider": {}, "Crafting Ingredients": [ { "Item Shortname": "scraptea", "Item Amount": 1, "Skin ID": 0, "Content Item": null }, { "Item Shortname": "scraptea", "Item Amount": 1, "Skin ID": 0, "Content Item": null }, { "Item Shortname": "scraptea", "Item Amount": 1, "Skin ID": 0, "Content Item": null }, { "Item Shortname": "scraptea", "Item Amount": 1, "Skin ID": 0, "Content Item": null } ] }, { "Crafting Display Name": "Pure Scrap Tea", "Item Shortname": "scraptea.pure", "Item Amount": 1, "Skin ID": 0, "Item Name": "", "Mixing Time": 5.0, "Default Display": true, "Require Shortname Blueprint": false, "Show Recipe Without Permission": true, "Required Permission": "", "Hide Recipe Anyway (not displayed, possible to craft)": false, "Mixing Time Permission Divider": {}, "Crafting Ingredients": [ { "Item Shortname": "scraptea.advanced", "Item Amount": 1, "Skin ID": 0, "Content Item": null }, { "Item Shortname": "scraptea.advanced", "Item Amount": 1, "Skin ID": 0, "Content Item": null }, { "Item Shortname": "scraptea.advanced", "Item Amount": 1, "Skin ID": 0, "Content Item": null }, { "Item Shortname": "scraptea.advanced", "Item Amount": 1, "Skin ID": 0, "Content Item": null } ] }, { "Crafting Display Name": "Basic Max Health Tea", "Item Shortname": "maxhealthtea", "Item Amount": 1, "Skin ID": 0, "Item Name": "", "Mixing Time": 5.0, "Default Display": true, "Require Shortname Blueprint": false, "Show Recipe Without Permission": true, "Required Permission": "", "Hide Recipe Anyway (not displayed, possible to craft)": false, "Mixing Time Permission Divider": {}, "Crafting Ingredients": [ { "Item Shortname": "red.berry", "Item Amount": 1, "Skin ID": 0, "Content Item": null }, { "Item Shortname": "red.berry", "Item Amount": 1, "Skin ID": 0, "Content Item": null }, { "Item Shortname": "red.berry", "Item Amount": 1, "Skin ID": 0, "Content Item": null }, { "Item Shortname": "yellow.berry", "Item Amount": 1, "Skin ID": 0, "Content Item": null } ] }, { "Crafting Display Name": "Advanced Max Health Tea", "Item Shortname": "maxhealthtea.advanced", "Item Amount": 1, "Skin ID": 0, "Item Name": "", "Mixing Time": 5.0, "Default Display": true, "Require Shortname Blueprint": false, "Show Recipe Without Permission": true, "Required Permission": "", "Hide Recipe Anyway (not displayed, possible to craft)": false, "Mixing Time Permission Divider": {}, "Crafting Ingredients": [ { "Item Shortname": "maxhealthtea", "Item Amount": 1, "Skin ID": 0, "Content Item": null }, { "Item Shortname": "maxhealthtea", "Item Amount": 1, "Skin ID": 0, "Content Item": null }, { "Item Shortname": "maxhealthtea", "Item Amount": 1, "Skin ID": 0, "Content Item": null }, { "Item Shortname": "maxhealthtea", "Item Amount": 1, "Skin ID": 0, "Content Item": null } ] }, { "Crafting Display Name": "Pure Max Health Tea", "Item Shortname": "maxhealthtea.pure", "Item Amount": 1, "Skin ID": 0, "Item Name": "", "Mixing Time": 5.0, "Default Display": true, "Require Shortname Blueprint": false, "Show Recipe Without Permission": true, "Required Permission": "", "Hide Recipe Anyway (not displayed, possible to craft)": false, "Mixing Time Permission Divider": {}, "Crafting Ingredients": [ { "Item Shortname": "maxhealthtea.advanced", "Item Amount": 1, "Skin ID": 0, "Content Item": null }, { "Item Shortname": "maxhealthtea.advanced", "Item Amount": 1, "Skin ID": 0, "Content Item": null }, { "Item Shortname": "maxhealthtea.advanced", "Item Amount": 1, "Skin ID": 0, "Content Item": null }, { "Item Shortname": "maxhealthtea.advanced", "Item Amount": 1, "Skin ID": 0, "Content Item": null } ] }, { "Crafting Display Name": "Worm", "Item Shortname": "worm", "Item Amount": 1, "Skin ID": 0, "Item Name": "", "Mixing Time": 2.0, "Default Display": true, "Require Shortname Blueprint": false, "Show Recipe Without Permission": true, "Required Permission": "custommixing.worm", "Hide Recipe Anyway (not displayed, possible to craft)": false, "Mixing Time Permission Divider": {}, "Crafting Ingredients": [ { "Item Shortname": "horsedung", "Item Amount": 1, "Skin ID": 0, "Content Item": null }, { "Item Shortname": "waterjug", "Item Amount": 1, "Skin ID": 0, "Content Item": { "Item Shortname": "water", "Item Amount": 50, "Skin ID": 0, "Content Item": null } } ] } ] }$10.00 -
Version 1.3.0
367 downloads
Records players automatically that have been reported X amount of times, with the ability to automatically upload the combat logs & Demo files to a discord webhook. Disk usage whilst recording: +- 1MB per 1 minute. Discord has an 8mb upload limit and 100mb for nitro. Chat Commands: /record - Chat: This will initiate a self-recording. Console Commands autodemorecord.record [steam64id] [minutes] - Console: Usefull to record a player on demand, or a schedule from another plugin. autodemorecord.blacklist add [steam64id] [recordingMinutes] [intervalMinutes] - Console: Add a player to the blacklist, which will record them for [recordingMinutes] every [intervalMinutes] autodemorecord.blacklist remove [steam64id] - Console: Removes a player from the blacklist. Permissions: Permission autodemorecord.record is required for a player to initiate a recording of themselves. Useful for streamers, to provide them with footage at wipe end, or tournaments. The recording length will be "Auto record for X minutes" Config explanations: "Auto record after X reports": Will start recording the player when these many reports have been received. "Only record when reports within X seconds": Only record when the number of reports above, are received in this timeframe. 0 to record always when the above value is reached. "Save/Load reports to datafile on reload": Useful when you aren't using the above config, if you do it might not be necessary to save data overhead. "Auto record for X minutes": the number of minutes the player should be recorded for. "Discord MSG Color": Color for the embed message, see here https://gist.github.com/thomasbnt/b6f455e2c7d743b796917fa3c205f812 "Discord Webhook": You discord webhook all information should be sent to. "Discord: Notify if recording is started": Should a message be sent to the discord webhook when the recording starts? "Discord: Include report with start message?": Should the player's report be added to the recording start message? "Discord: Notify if recording is stopped": Should a message be sent to the discord webhook when the recording ends? "Discord: Include report with end message?": Should the player's report be added to the recording end message? "Upload Combat Log to discord webhook?": Should the player's combat log be upload to the above discord webhook as a txt file? "Upload DEMO file to discord webhook?": Should the player's demo file be uploaded to the above discord webhook? "Split DEMO files for non nitro discord (8mb chunks)?": This will split files and upload multiple files to discord for non-nitro discord servers. If you have nitro with an upload limit of 100mb, then you can turn this off. "Discord Webhook - Self Record" All self-initiated recordings will post to this webhook, if not set it will go to the main one. "Record if FlyHacked in last X seconds" This will initiate a recording when a player rejoins the server after kicked for flyhacking. "Save recording to server?" If set to false, it will not save to the HDD, to save space. Make sure you have a webhook setup, otherwise it will still save as to not lose any demos. API: If you want to trigger a recording from your plugin, you can do the following: AutoDemoRecord.Call("API_StartRecording", BasePlayer player, string Reason, int LengthInMin); All suggestions welcomed!$19.99 -
Version 0.1.4
66 downloads
Adds a reputation system, similar to the well-known Infestation Survivor Stories(The WarZ). More information on how the plugin works can be found at the bottom in the "Principle of work" section. The ability to create an unlimited number of reputations. The only condition is that their value ranges must not overlap; The ability to flexibly customize the bar for each reputation; The ability to automatically reset reputations upon detecting a wipe; The ability to set a prefix for reputations; The ability to show your reputation by waving to players; The ability to see a player's reputation when aiming at them with scope items. Unfortunately, the reputation will also be displayed if a player is in certain bushes; The ability to see the reputation of all players in the bandit zone; The ability to prohibit players with a certain reputation from entering safe zones (except for the bandit zone). Also, notifying players about it; The ability to set fake reputations to confuse players. reputationmaster.vip - Provides the ability to set a fake rank value. reputationmaster.admin - Provides the ability to set or reset reputation value to other players. { "Chat command": "rep", "Is it worth enabling GameTips for messages?": true, "Is it worth using the AdvancedStatus plugin?": true, "Is it worth using ddraw to display reputation? NOTE: To use, an administrator flag is required, which is granted before rendering and revoked immediately after issuing the command": true, "Is it worth displaying reputation when aiming at a player with a scope(ddraw should be enabled)? NOTE: The player's reputation may be displayed in certain bushes": true, "Is it worth resetting reputations upon detecting a wipe?": true, "Is it worth forbidding bandits from visiting safe zones(except for Banditcamp)?": true, "The time in seconds during which a bandit can stay in the safe zone(except for Banditcamp) before being killed, making their loot available to everyone": 10.0, "The prefab name for the effect when a bandit is killed in the safe zone. An empty string disables the effect": "assets/prefabs/misc/xmas/advent_calendar/effects/open_advent.prefab", "The time in seconds during which self-defense will be active for a lawman after being attacked by another lawman": 900, "The minimum value limit for fake reputation": -10000.0, "The maximum value limit for fake reputation": 10000.0, "UI. Position - Left to Right": true, "UI. Position - AnchorMin": "1 0.9", "UI. Position - AnchorMax": "1 0.9", "UI. Position - OffsetMin": "-208 -15", "UI. Position - OffsetMax": "-16 15", "UI. Reputation Positive Value Image - URL": "https://i.imgur.com/HKqyHO8.png", "UI. Reputation Negative Value Image - URL": "https://i.imgur.com/mMdm55h.png", "UI. Added Value Sound - Prefab Name. An empty string disables the effect": "assets/bundled/prefabs/fx/notice/item.select.fx.prefab", "Wipe ID": null, "Version": { "Major": 0, "Minor": 1, "Patch": 4 } } Note: To use ddraw, an administrator flag is required, which is granted before rendering and revoked immediately after issuing the command. The player's reputation may be displayed in certain bushes. [ { "Name": "Assassin", "Prefix": "⁎✧⁎ ", "MinValue": -3.40282347E+38, "MaxValue": -1000.0, "Reward": 20.0, "LawmanPenalty": 0.0, "AllowSafeZone": false, "BarSettings": { "Order": 20, "Height": 26, "Main_Color(Hex or RGBA)": "#FF341E", "Main_Transparency": 0.6, "Main_Material": "", "Image_Url": "https://i.imgur.com/CdDKpwv.png", "Image_Local(Leave empty to use Image_Url)": "", "Image_Sprite(Leave empty to use Image_Local or Image_Url)": "", "Image_IsRawImage": false, "Image_Color(Hex or RGBA)": "#FF341E", "Image_Transparency": 1.0, "Is it worth enabling an outline for the image?": false, "Image_Outline_Color(Hex or RGBA)": "0.1 0.3 0.8 0.9", "Image_Outline_Transparency": 0.0, "Image_Outline_Distance": "0.75 0.75", "Text_Size": 14, "Text_Color(Hex or RGBA)": "#FF341E", "Text_Font(https://umod.org/guides/rust/basic-concepts-of-gui#fonts)": "RobotoCondensed-Bold.ttf", "Is it worth enabling an outline for the text?": false, "Text_Outline_Color(Hex or RGBA)": "#000000", "Text_Outline_Transparency": 1.0, "Text_Outline_Distance": "0.75 0.75", "SubText_Size": 12, "SubText_Color(Hex or RGBA)": "#FF341E", "SubText_Font": "RobotoCondensed-Bold.ttf", "Is it worth enabling an outline for the sub text?": false, "SubText_Outline_Color(Hex or RGBA)": "0.5 0.6 0.7 0.5", "SubText_Outline_Transparency": 0.0, "SubText_Outline_Distance": "0.75 0.75" } }, ... { "Name": "Civilian", "Prefix": "", "MinValue": -4.99, "MaxValue": 9.99, "Reward": 1.0, "LawmanPenalty": -1.0, "AllowSafeZone": true, "BarSettings": { "Order": 20, "Height": 26, "Main_Color(Hex or RGBA)": "#5EC0CA", "Main_Transparency": 0.6, "Main_Material": "", "Image_Url": "https://i.imgur.com/cgi9T1D.png", "Image_Local(Leave empty to use Image_Url)": "", "Image_Sprite(Leave empty to use Image_Local or Image_Url)": "", "Image_IsRawImage": false, "Image_Color(Hex or RGBA)": "#5EC0CA", "Image_Transparency": 1.0, "Is it worth enabling an outline for the image?": false, "Image_Outline_Color(Hex or RGBA)": "0.1 0.3 0.8 0.9", "Image_Outline_Transparency": 0.0, "Image_Outline_Distance": "0.75 0.75", "Text_Size": 14, "Text_Color(Hex or RGBA)": "#5EC0CA", "Text_Font(https://umod.org/guides/rust/basic-concepts-of-gui#fonts)": "RobotoCondensed-Bold.ttf", "Is it worth enabling an outline for the text?": false, "Text_Outline_Color(Hex or RGBA)": "#000000", "Text_Outline_Transparency": 1.0, "Text_Outline_Distance": "0.75 0.75", "SubText_Size": 12, "SubText_Color(Hex or RGBA)": "#5EC0CA", "SubText_Font": "RobotoCondensed-Bold.ttf", "Is it worth enabling an outline for the sub text?": false, "SubText_Outline_Color(Hex or RGBA)": "0.5 0.6 0.7 0.5", "SubText_Outline_Transparency": 0.0, "SubText_Outline_Distance": "0.75 0.75" } }, ... { "Name": "Paragon", "Prefix": "⋆☆⋆ ", "MinValue": 1000.0, "MaxValue": 3.40282347E+38, "Reward": 20.0, "LawmanPenalty": -125.0, "AllowSafeZone": true, "BarSettings": { "Order": 20, "Height": 26, "Main_Color(Hex or RGBA)": "#0AFBFB", "Main_Transparency": 0.6, "Main_Material": "", "Image_Url": "https://i.imgur.com/6yzrXE0.png", "Image_Local(Leave empty to use Image_Url)": "", "Image_Sprite(Leave empty to use Image_Local or Image_Url)": "", "Image_IsRawImage": false, "Image_Color(Hex or RGBA)": "#0AFBFB", "Image_Transparency": 1.0, "Is it worth enabling an outline for the image?": false, "Image_Outline_Color(Hex or RGBA)": "0.1 0.3 0.8 0.9", "Image_Outline_Transparency": 0.0, "Image_Outline_Distance": "0.75 0.75", "Text_Size": 14, "Text_Color(Hex or RGBA)": "#0AFBFB", "Text_Font(https://umod.org/guides/rust/basic-concepts-of-gui#fonts)": "RobotoCondensed-Bold.ttf", "Is it worth enabling an outline for the text?": false, "Text_Outline_Color(Hex or RGBA)": "#000000", "Text_Outline_Transparency": 1.0, "Text_Outline_Distance": "0.75 0.75", "SubText_Size": 12, "SubText_Color(Hex or RGBA)": "#0AFBFB", "SubText_Font": "RobotoCondensed-Bold.ttf", "Is it worth enabling an outline for the sub text?": false, "SubText_Outline_Color(Hex or RGBA)": "0.5 0.6 0.7 0.5", "SubText_Outline_Transparency": 0.0, "SubText_Outline_Distance": "0.75 0.75" } } ] MinRange, MaxRange - Range of values for the group rank; Name - Name of the rank; Reward - Reward for killing or reviving(divided by 2) a player in this rank. If the initiating player has IsLawman = true, the value will be positive, otherwise, it will be negative; LawmanPenalty - Penalty for a peaceful player of this rank, for killing another peaceful player. If the target did not initiate this pvp first; AllowSafeZone - Is this rank allowed to visit Safe Zones (except Bandit Camp)? The "Forbid bandits from visiting the SafeZone (except for Banditcamp)" config should be set to true. Path: *SERVER*\oxide\data\ReputationMaster\ReputationRanks.json EN: { "CmdNotAllowed": "You do not have permissions to use this command!", "CmdPlayerNotFound": "Player '{0}' not found! You must provide the player's name or ID.", "CmdMultiplePlayers": "Multiple players found: {0}", "CmdAdmin": "Available admin commands:\n\n<color=#D1CBCB>/rep</color> <color=#D1AB9A>fake *floatValue* *nameOrId*(optional)</color> - Set a fake reputation for yourself or the specified player\n<color=#D1CBCB>/rep</color> <color=#D1AB9A>set *floatValue* *nameOrId*(optional)</color> - Set a reputation value for yourself or the specified player\n<color=#D1CBCB>/rep</color> <color=#D1AB9A>info *nameOrId*(optional)</color> - Get full information about your reputation or the reputation of the specified player\n<color=#D1CBCB>/rep</color> <color=#D1AB9A>reset all/*nameOrId*</color> - Reset the reputation of all players or the specified player\n\n--------------------------------------------------", "CmdMain": "Available commands:\n\n<color=#D1CBCB>/rep</color> <color=#D1AB9A>fake *floatValue*</color> - Set a fake reputation\n\n--------------------------------------------------", "CmdFakePlayer": "Player '{0}' has been assigned a new fake reputation value: {1}({2})!", "CmdFakeNPC": "NPC '{0}' has been assigned a new fake reputation value: {1}({2})!", "CmdFakeSelf": "A new fake reputation value has been successfully set: {0}({1})!", "CmdSetPlayer": "Player '{0}' has been assigned a new reputation value: {1}({2})!", "CmdSetNPC": "NPC '{0}' has been assigned a new reputation value: {1}({2})!", "CmdInfoPlayer": "Player '{0}' reputation:\n<color=#D1AB9A>Reputation</color> - {1} ({2})\n<color=#D1AB9A>Fake Reputation</color> - {3} ({4})\n<color=#D1AB9A>Last Helper</color> - {5}\n\n--------------------------------------------------", "CmdInfoNPC": "NPC '{0}' reputation:\n<color=#D1AB9A>Reputation</color> - {1}({2})\n<color=#D1AB9A>Fake Reputation</color> - {3}({4})\n<color=#D1AB9A>Last Helper</color> - {5}\n\n--------------------------------------------------", "CmdResetAll": "{0} reputations have been successfully reset!", "CmdResetPlayer": "Player '{0}' reputation has been successfully reset!", "MsgReputation": "Reputation", "MsgShowPlayerReputation": "Player '{0}' reputation: {1}({2})", "MsgNewReputation": "Congratulations! You have received the reputation '{0}'!", "MsgSelfDefense": "You attacked a peaceful player '{0}'({1}) first. If they kill you within {2} minutes, they will not receive a penalty", "MsgSelfDefenseNoPenalty": "You killed a peaceful player '{0}'({1}). However, since they attacked you first, you will not be penalized", "MsgLawmanEnterBanditZone": "You have entered the Bandit Camp! Stay vigilant, this place is full of thugs!", "MsgLawmanLeaveBanditZone": "You have left the Bandit Camp! We recommend avoiding this area!", "MsgBanditEnterBanditZone": "Welcome to the Bandit Camp! We are glad to have you back!", "MsgBanditLeaveBanditZone": "You have left the Bandit Camp! We hope to see you again soon!", "MsgBanditEnterSafeZone": "You are not welcome here! If you do not leave this place, you will be killed in {0} seconds!", "MsgBanditLeaveSafeZone": "Do not come back here! People like you belong in the Bandit Camp!" } RU: { "CmdNotAllowed": "У вас недостаточно прав для использования этой команды!", "CmdPlayerNotFound": "Игрок '{0}' не найден! Вы должны указать имя или ID игрока.", "CmdMultiplePlayers": "Найдено несколько игроков: {0}", "CmdAdmin": "Доступные админ команды:\n\n<color=#D1CBCB>/rep</color> <color=#D1AB9A>fake *дробноеЗначение* *имяИлиАйди*(опционально)</color> - Установить ложную репутацию себе или указанному игроку\n<color=#D1CBCB>/rep</color> <color=#D1AB9A>set *дробноеЗначение* *имяИлиАйди*(опционально)</color> - Установить репутацию себе или указанному игроку\n<color=#D1CBCB>/rep</color> <color=#D1AB9A>info *имяИлиАйди*(опционально)</color> - Получить всю информацию о своей репутации или репутации указанного игрока\n<color=#D1CBCB>/rep</color> <color=#D1AB9A>reset all/*имяИлиАйди*</color> - Сбросить репутацию всем игрокам или указанному игроку\n\n--------------------------------------------------", "CmdMain": "Доступные команды:\n\n<color=#D1CBCB>/rep</color> <color=#D1AB9A>fake *дробноеЗначение*</color> - Установить ложную репутацию\n\n--------------------------------------------------", "CmdFakePlayer": "Игроку '{0}' установлено новое ложное значение репутации: {1}({2})!", "CmdFakeNPC": "Боту '{0}' установлено новое ложное значение репутации: {1}({2})!", "CmdFakeSelf": "Новое значение ложной репутации успешно установлено: {0}({1})!", "CmdSetPlayer": "Игроку '{0}' установлено новое значение репутации: {1}({2})!", "CmdSetNPC": "Боту '{0}' установлено новое значение репутации: {1}({2})!", "CmdInfoPlayer": "Репутация игрока '{0}':\n<color=#D1AB9A>Репутация</color> - {1}({2})\n<color=#D1AB9A>Ложная репутация</color> - {3}({4})\n<color=#D1AB9A>Последний помощник</color> - {5}\n\n--------------------------------------------------", "CmdInfoNPC": "Репутация бота '{0}':\n<color=#D1AB9A>Репутация</color> - {1}({2})\n<color=#D1AB9A>Ложная репутация</color> - {3}({4})\n<color=#D1AB9A>Последний помощник</color> - {5}\n\n--------------------------------------------------", "CmdResetAll": "Успешно сброшено {0} репутаций!", "CmdResetPlayer": "Репутация игрока '{0}' успешно сброшена!", "MsgReputation": "Репутация", "MsgShowPlayerReputation": "Репутация игрока '{0}': {1}({2})", "MsgNewReputation": "Поздравляем! Вы получили репутацию '{0}'!", "MsgSelfDefense": "Вы первым атаковали мирного игрока '{0}'({1}). Если он вас убьет в течении {2} минут, то не получит штрафа", "MsgSelfDefenseNoPenalty": "Вы убили мирного игрока '{0}'({1}). Но так как он первым вас атаковал, вас не накажут", "MsgLawmanEnterBanditZone": "Вы пришли в Лагерь Бандитов! Будьте бдительны, здесь полно разных отморозков!", "MsgLawmanLeaveBanditZone": "Вы покинули Лагерь Бандитов! Советуем обходить это место!", "MsgBanditEnterBanditZone": "Добро пожаловать в Лагерь Бандитов! Мы рады вашему возвращению!", "MsgBanditLeaveBanditZone": "Вы покинули Лагерь Бандитов! Надеемся на скорое ваше возвращение!", "MsgBanditEnterSafeZone": "Вам здесь не рады! Если вы не покинете это место, то вас убьет через {0} секунд!", "MsgBanditLeaveSafeZone": "Больше сюда не возвращайтесь! Таким как вы место в Лагере Бандитов!" } fake *floatValue* - Set a fake reputation for yourself or the specified player. Permission "reputationmaster.vip" or "reputationmaster.admin" required fake *floatValue* *nameOrId*(optional) - Set a fake reputation for yourself or the specified player. Permission "reputationmaster.admin" required; set *floatValue* *nameOrId*(optional) - Set a reputation value for yourself or the specified player. Permission "reputationmaster.admin" required; info *nameOrId*(optional) - Get full information about your reputation or the reputation of the specified player. Permission "reputationmaster.admin" required; reset all/*nameOrId* - Reset the reputation of all players or the specified player. Permission "reputationmaster.admin" required. Example: /rep fake 150 /rep fake -40 iiiaka /rep set 23 iiiaka ReputationValueUpdated: Called after the player's reputation value has changed. Works only for players that are not NPCs. void ReputationValueUpdated(ulong userID, string repName, float repValue) { Puts($"{userID} updated a reputation value to {repValue}. Current reputation rank is {repName}."); } ReputationUpdated: Called after the player receives a new reputation rank. Works only for players that are not NPCs. void ReputationUpdated(ulong userID, string oldRep, string newRep, bool isLawman, bool allowSafeZone, float repValue) { Puts($"{userID} has updated their rank from {oldRep} to {newRep}. Is peaceful: {isLawman}\nSafe Zones: {allowSafeZone}\nReputation Value: {repValue}"); } [PluginReference] private Plugin ReputationMaster; There are 4 api methods: GetReputationValue: Used to retrieve the reputation value, real or fake. Returns null on failure. To call the GetReputationValue method, you need to pass 2 parameters: userID as a ulong; realRep as a bool. What reputation value to get, real or fake? This parameter is optional. (float)(ReputationMaster?.Call("GetReputationValue", player.userID, true) ?? 0f); GetReputationName: Used to retrieve the reputation name, real or fake. Returns an empty string on failure. To call the GetReputationName method, you need to pass 2 parameters: userID as a ulong; realRep as a bool. What reputation name to get, real or fake? This parameter is optional. (string)(ReputationMaster?.Call("GetReputationName", player.userID, true) ?? string.Empty); SetReputationValue: Used to retrieve the reputation name, real or fake. Returns a false on failure. To call the SetReputationValue method, you need to pass 3 parameters: Available options: userID as a ulong or a string; player as a BasePlayer. newValue as float; realRep as a bool. What reputation value to get, real or fake? This parameter is optional. (bool)(ReputationMaster?.Call("SetReputationValue", player.UserIDString, 150f, true) ?? false);//(string)userID (bool)(ReputationMaster?.Call("SetReputationValue", player.userID, 150f, true) ?? false);//(ulong)userID (bool)(ReputationMaster?.Call("SetReputationValue", player, 150f, true) ?? false);//(BasePlayer)player ***recommended option*** SetReputationValues: Used to retrieve the reputation name, real or fake. Returns a false on failure. To call the SetReputationValues method, you need to pass 3 parameters: Available options: userID as a ulong or a string; player as a BasePlayer. value as float; fakeValue as a float. (bool)(ReputationMaster?.Call("SetReputationValues", player.UserIDString, 150f, 50f) ?? false);//(string)userID (bool)(ReputationMaster?.Call("SetReputationValues", player.userID, 150f, 50f) ?? false);//(ulong)userID (bool)(ReputationMaster?.Call("SetReputationValues", player, 150f, 50f) ?? false);//(BasePlayer)player ***recommended option*** You can create as many reputation ranks as you want, but there are only two main groups: Lawmen(peaceful or civilians); Outlaws(bandits). Each kill has a different scores depending of the reputation rank of the victim and attacker. For exampe, if you are a Civilian, you will receive: Paragon: -20 Vigilant: -15 Guardian: -10 Lawman: -4 Deputy: -3 Constable: -2 Civillian: -1 Thug: +2 Outlaw: +3 Bandit: +4 Hitman: +10 Villain: +15 Assassin: +20 Reviving: For reviving a player, you will receive a reward divided by 2. If the target is a lawman, the reward will be positive, else if a target is a bandit, it will be negative. Also, this is the only way out of bandit rank for bandits. Outlaw: When you reach the outlaw reputation, you have no more back! Except for reviving a peaceful player. You can kill other bandits but still counting as negative reputation! So, after you reach the outlaw reputation rank, scores by killing a player of a certain reputation will be as follows(negative reward value) : Paragon: -20 Vigilant: -15 Guardian: -10 Lawman: -4 Deputy: -3 Constable: -2 Civillian: -1 Thug: -2 Outlaw: -3 Bandit: -4 Hitman: -10 Villain: -15 Assassin: -20 Lawman: The scores will be as follows for each kill a outlaw reputation ranks(positive reward value) : Assassin: +20 Villain: +15 Hitman: +10 Bandit: +4 Outlaw: +3 Thug: +2 But for killing a peaceful player, you will receive penalties based on your rank. A list of penalties for each reputation rank: Paragon: -125 Vigilante: -60 Guardian: -40 Lawman: -15 Deputy: -2 Constable: -1 Civilian: -1 There is also a self-defense system that works as follows: If a peaceful player initiates an attack on another peaceful player, a timer of 15 minutes(sets from config) is activated, during which the victim can kill the attacker without penalties. So, it's very hard to become a lawman, and it's very easy to get out from lawman.$4.99- 6 comments
-
- 1
-
-
- #rust
- #reputation
- (and 25 more)
-
Version 1.2.7
1,843 downloads
This plugin adds a new dynamic zombie event to your server, the appearance of which you can customize in the configuration for any standard and custom monuments Description The event begins with a message in chat that the evacuation of the general from the island will begin soon. At the end of the configured timer, a military checkpoint randomly appears on the map and it is said in the chat that the general's guard was killed, and the general himself was seriously wounded The player and his friends (if you have any) need to arrive at the military checkpoint and call for help for the general with the laptop located at the checkpoint control center After the player calls for help, waves of zombies will attack the base. During the preparation phase, players can upgrade the base with turrets, purchase ammunition for them, or place it from their inventory through the checkpoint control center. In the doorways, players can install barricades of different types (5 types of barricades, which differ in the amount of Hit Points) to contain the incoming waves of zombies. The player can also use a hammer to repair the barricades. During the attack phase, waves of zombies will be directed at you. You cannot allow zombies to kill the general, otherwise, the event will end. There are several zombie types (in future updates it is planned to add to the list of zombie types). Each type of zombie has its own tasks. After the end of each wave, a room with crates opens, where there will be a reward for you At the end of the event, a helicopter arrives for the general and picks him up, and you are notified in chat that the event has been successfully completed. When the general dies, the event ends, as will the attack wave, the event, and all hope is lost! All the necessary settings of zombies, timers, items in crates for each wave, as well as settings for each wave (the number of zombies of each type, the time of the preparation phase and the attack wave, etc.), settings of the military checkpoint (the price of buying something or improving the base, used ammo in turrets, etc.), the price of repairs, barricade options, and many other settings are available in the plugin configuration Also in the event there are additional missions during the waves of attack, during which you will receive an additional reward (in future updates it is planned to add to the list of additional missions). You can set up additional missions in the settings of each attack wave The event provides the use of several military base designs. The Mad Mappers team will add to the list of constructions for the event in the future. When an event appears, the plugin randomly selects the construction of the base from those that you have in the data folder, and also randomly selects a place to appear from all those that have been set in the plugin configuration Also, the Mad Mappers team will begin to offer support in our custom maps for this event and contain files for the appearance of bases in custom monuments and locations on our maps Constructions of other bases Defendable Bases (Bundle-1) Defendable Bases (Bundle-2) Custom Map Maps that have a configuration for the appearance of bases on their custom monuments You can also download all these files for all maps here Deathland Badlands Destroyed World Detroit: Irreparable Damage Oregon 2: Last Hope Oregon: Land of Dead Pandora All files for custom maps are stored in the folder oxide/data/DefendableBases/CustomMap. You don't have to delete files from there, the plugin will understand by itself which map is currently installed on the server and will download only the necessary file if there is one in this folder. The plugin will tell you about this process in the console during the plugin loading. It will write in the console what file works on the current map, and what ones don’t work If you want to create a custom place for the base to appear on your custom map or on a map that is not in this list, you have to create the ID of this custom map. After that you need to place an item such as a RAND Switch on your map. It must be placed randomly, where it will not be visible to other players. You will get the identifier, if you add up the three coordinates of the position of this object from RustEdit (x, y and z) and write the resulting value in the parameter of your file (an example file can be taken from ready-made files) - ID As an example, let's take the coordinates (26.896, -456.158, 527.258), then our identifier is 26.896 - 456.158 + 527.258 = 97.996 Then you need to indicate a list of bases that will appear on your map. You need to copy the configuration data block for each base construction. In the database parameters you will specify the name of the base construction and a list of positions where it can appear The list of positions consists of several parameters. First you need to specify the position and rotation of the appearance of the base on your map, then you can get these values using RustEdit. You need to choose the place for the appearance of the event on the custom monument, where the player has a ban on construction You have such a parameter as the pursuit radius for such a type of zombie as Blazer. These zombies run around the base along this radius and shoot at the players. Please note! Some object sometimes may be on your map in this radius, for example a fence, and they will not be able to overcome it, because they cannot run inside this circle, and they haven’t a way out for them so you need to leave them a way or adjust it by increasing or decreasing the radius You have a list of coordinates for the points of appearance of all zombies. It is necessary to indicate these coordinates evenly around the base so that the zombies run from different sides and attack all sides of the base, not just a few ones. So it will be more interesting to play this event. Also note the fact that you can indicate the coordinate where a player can create his house, so it is advisable to specify all the coordinates that are in the construction ban zone, they are in the zone of your custom monument. You can also get the coordinates of the appearance of zombies using RustEdit Images You may want to change some parameters during the plugin installation or the base configuration In the plugin configuration these parameters are: Custom Barricades => Price for repairs (per hammer hit) => List of items, 3 maximum (if the economy method is 3) In the base configuration, these parameters are: List of turrets => Price to unlock => List of items, 3 maximum (if the economy method is 3) List of turrets => List of ammo => Price => List of items, 3 maximum (if the economy method is 3) List of barricades to buy => Price => List of items, 3 maximum (if the economy method is 3) A list of items that are in the laptop inventory when the base appears List of attack waves => Additional missions => Reward for completing the mission => List of items If you change items in the current configuration items, you need to upload the image for this item to the oxide/data/Images folder. In order for the plugin to load this image and can use it for display in the player's GUI. If it is a standard Rust item, you need to name this image file by its ShortName. If it is a custom item, you need to name the image file by the SkinID of the item Then you need to make a few changes to the plugin configuration in the List of paths to GUI images item. You need to add a new image to this list. The name is the ShortName or SkinID of the item. The path to the image will look something like this: Images/{ShortName or SkinID}.png If you use the economy of some following points on your server as prices, you can change the image with the name Economic to your own with the same name All images must be used square. Attention! The lower size of the image file will be displayed to the player faster Dependencies Required NpcSpawn Dependencies (optional, not required) True PVE PveMode GUI Announcements Notify Discord Messages AlphaLoot CustomLoot NTeleportation Economics Server Rewards IQEconomic Chat commands (only for administrators) /warstart {name} – start the event ({name} – name of the base) /warstop - end the event Console commands (RCON only) warstart {name} – start the event ({name} – name of the base) warstop - end the event givebarricade {steamid} {level} {amount} - a player with a SteamID ({steamid}) is given a certain number of barricades ({amount}) of a certain level ({level}) Plugin Config en - example of plugin configuration in English ru - example of plugin configuration in Russian Base Config en - example of base configuration in English ru - example of base configuration in Russian Custom Map Config en - example of custom map configuration in English ru - example of custom map configuration in Russian My Discord: KpucTaJl#8923 Join the Mad Mappers Discord here! Check out more of my work here! Creator of the default configuration and the bases – jtedal Help in creating a plugin description – Jbird#2022$45.00- 97 comments
- 8 reviews
-
- 9
-
-
-

-
- #barricade
- #ch47
- (and 26 more)
-

Version 1.1.1
4,314 downloads
Checks for updates for all Codefling plugins, and prints to console and, optionally, discord. Reports to console "Codefling has updates for the following plugins.", then lists the names. Config Authors - Each author name has a true/false option to enable/disable checking their plugins. CheckIntervalMinutes - How often the plugin requests updated information from Codefling. DiscordWebhookAddres - Address for your discord server's webhook, for posting updates. Ignore - String array for plugin names to ignore. eg ["one plugin"] or ["multiple", "plugins"]Free- 50 comments
- 3 reviews
-
- 17
-
-
-
- #updates
- #steenamaroo
- (and 5 more)
-
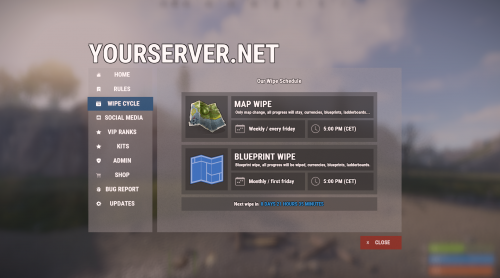
Version 1.3.21
8,930 downloads
Bundle of four addons made for Welcome Panel UI. All four addons including preset default config files as you see them on screenshots.$14.99