Search the Community
Showing results for tags 'pvp'.
-
Version 1.3.7
553 downloads
Allows both PVE and PVP players to exist on a server at the same time. PVE players will have certain configurable protections and restrictions. You can have players use a command to flag themselves as PVP/PVE or you can assign it to them when they first spawn. If you have ZoneManager you can also designate specific zones to force player's to be PVE or PVP. Plugin is also compatible with SimpleStatus. Note: Video is outdated, see documentation for a full list of new features! Documentation: A full readme including permissions, commands, and config options is available in this google doc link. Disclaimer: Like all of my plugins - this plugin is sold as is. I will be happy to take feature requests into consideration but make no guarantees about which ones get implemented. Please refer to the feature list before you make your purchase! Developer API: API Methods // Returns the mode of the given entity. Also takes into account if the entity is in a forced mode zone. string GetEntityMode(BaseEntity entity); // Returns the group name for the given mode. For example if given 'pve' will return 'warmodepve' string GetModeGroup(string modeId); // Returns the target type for a given entity. Target types are the category that an entity falls into. // For example, if given a BasePlayer entity, it will return 'players'. If given a horse entity is will // return 'horses'. string GetEntityTargetType(BaseEntity entity); Hooks - place these in your plugin and WarMode will call them. // Called when a player's mode has been updated or config changes have ocurred that may affect the mode. private void WarMode_PlayerModeUpdated(string userid, string modeId) // Used to override WarMode logic for taking damage. // If true/false is returned then WarMode logic will be skipped. Return null to continue WarMode logic. private object CanEntityTakeDamage(BaseCombatEntity target, HitInfo info) // Used to override WarMode logic for targeting. // If true/false is returned then WarMode logic will be skipped. Return null to continue WarMode logic. private object CanEntityBeTargeted(BasePlayer target, BaseEntity attacker, bool skipVendingCheck) // Used to override WarMode logic for triggering a trap. // If true/false is returned then WarMode logic will be skipped. Return null to continue WarMode logic. private object CanEntityTrapTrigger(BaseTrap trap, BasePlayer basePlayer) // Used to override WarMode logic for looting an entity. // If true/false is returned then WarMode logic will be skipped. Return null to continue WarMode logic. private object CanEntityLoot(BasePlayer looter, BaseEntity target, bool skipVendingCheck) FREE Extension Plugins: War Mode Admin Panel Use the /warmode.config or /wmc command to open a panel that allows admins to update mode rules in game without having to reload the pluign. Requires the warmode.admin permission to use. I HIGHLY recommend you use this extension! WarModeAdminPanel.cs War Mode Spawn UI Provides a UI that is shown to players when they first spawn that prompts them to choose whether they want to be PVP or PVE. Also supports custom modes. Localization and config options available. This can also be configured to appear when players use the /flag command. WarModeSpawnUI.cs War Mode Rules UI Using the /rules command (which is configurable) players can see a list of what restrictions they have for their current mode. These ruling will update dynamically based on your config settings. WarModeRulesUI.cs War Mode Badges Customizable UI elements that will appear on the player's HUD to indicate what their current mode is. WarModeBadges.cs$24.99 -
Version 0.1.14
837 downloads
Plugin for Real PvE servers, featuring damage prevention, anti-griefing measures, customizable PvP zones, an automatic loot queue in radtowns and raid zones, and much more. P.S. Since the previous implementation with DynamicPVP was not correct and had some issues, I have added universal hooks(Developer API section) for general access from all PvP plugins, which are currently missing in DynamicPVP. I have requested the author to add them(3 lines), but for now, you will need to use the modified version of DynamicPVP.cs The ability to set "server.pve" to "true", which allows the server to have a "PvE" flag; Damage from NPC's are enabled when server.pve is true; The ability to inflict damage to one's own structures with "server.pve true"; The ability to destroy(including external walls) or rotate one's structures without any time constraints; The ability to force the decay of building blocks with Twigs grade, even if there is wood in the Tool Cupboard; The ability to toggle the gather resource restriction in someone else's Building Privileges; No one, except the owner or their friends, will be able to open their loot containers (chests, storages, bodies, etc.); Administrators can bypass loot restrictions; The ability to schedule the killing of players if they disconnect within someone else's Building Privilege; Disabling backpack and active item drop upon death, even if backpack is full; The ability to disable 'Give' messages; The ability to modify the items given at spawn on the beach; The ability to create an unlimited number of custom permissions; The ability to allow players to bypass the queue; The ability to set limits on sleeping bags, shelters and auto turrets for each permission; The ability to set a multiplier for the prices of monuments and events for each permission; The ability to customize the price and amount of vehicles for each of your custom permissions; The ability to assign vehicles to each player; The ability to customize the assigned price and available amount of vehicles for each of your custom permissions; An assigned vehicle can't be damaged, looted or pushed by other players, but it can be pushed if it is within someone else's Building Privilege; The ability to loot monuments through a queue system; The ability to configure monuments, setting their looting price and time, and adjusting status bars for each monument; The ability to acquire the privilege to loot events (helicopters, bradleys, and raidable bases) through a purchase; The ability to customize the price of each event types and loot attempts (lives); NPCs only aggress against players who are looting monuments, events or raidable bases; Only players who are looting monuments, events or raidable bases can inflict damage to NPCs; RaidableBases are protected from griefing(no damage, no loot and etc). Only the owner can interact with the raid; Neutral RaidableBases can be purchased; Prices for purchasing neutral raids are configurable for each difficulty level; Configurable raid limits (currently available) along with discount multipliers for purchases, for each permission. File location: *SERVER*\oxide\data\RealPVE\PermissionConfig.json Default: https://pastebin.com/5VtWZZVr All permissions are created and configured in the config file under the "List of permissions" section. You can create as many permissions as needed and customize them flexibly. It is recommended to use the prefix "realpve" in the permission's name, for example: "realpve.vip". NOTE: The first permission will serve as the default permission for those who do not have any permissions. { "List of permissions. NOTE: The first permission will be used by default for those who do not have any permissions.": [ { "Permission Name": "realpve.default", "Bypass Queue": false, "Limit of beds": 15, "Limit of shelters": 1, "Limit of auto turrets": 12, "Seconds that will be skipped when opening HackableLockedCrate": 0.0, "Monuments price multiplier": 1.0, "Events price multiplier": 1.0, "Limit of RaidableBases(at the time)": 1, "RaidableBases price multiplier": 1.0, "Vehicles settings": { "Horse": { "Limit": 1, "Price": 10.0 }, "Bike": { "Limit": 1, "Price": 5.0 }, "MotorBike": { "Limit": 1, "Price": 20.0 }, "Car": { "Limit": 1, "Price": 25.0 }, ... } }, { "Permission Name": "realpve.vip", "Bypass Queue": true, "Limit of beds": 20, "Limit of shelters": 2, "Limit of auto turrets": 15, "Seconds that will be skipped when opening HackableLockedCrate": 450.0, "Monuments price multiplier": 0.9, "Events price multiplier": 0.9, "Limit of RaidableBases(at the time)": 2, "RaidableBases price multiplier": 0.9, "Vehicles settings": { "Horse": { "Limit": 5, "Price": 9.0 }, "Bike": { "Limit": 5, "Price": 4.5 }, "MotorBike": { "Limit": 5, "Price": 18.0 }, "Car": { "Limit": 5, "Price": 22.5 }, ... } } ], "Version": { "Major": 0, "Minor": 1, "Patch": 1 } } An example of a monument/event/rb multipliers using default permissions. For example, if you set the price for the Harbor at $1000, a player with the default permission(1.0) will pay $1000 * 1 = $1000. Meanwhile, a player with a VIP permission(0.9) will pay $1000 * 0.9 = $900. However, if a player possesses a misbehaving permission with a value of 1.1, they will need to pay $1000 * 1.1 = $1100. { "Chat command": "realpve", "Chat admin command": "adminpve", "Is it worth forcibly implementing PvE for a server?": true, "Is it worth enabling GameTips for messages?": true, "Is it worth preventing the sending of 'Give' messages?": true, "Is it worth preventing resource gathering in someone else's building privilege area?": false, "Is it worth preventing the pickup of plants spawned by the server in someone else's building privilege zone?": false, "Is it worth forcibly blocking damage from the patrol helicopter to building blocks and deployables?": false, "Is it worth preventing players from handcuffing others?": true, "Is it worth assigning portals(Halloween and Christmas) to the first player?": true, "Is it worth preventing a backpack from dropping upon player death?": true, "Is it worth preventing damage to the laptop of the Hackable Crate?": true, "Is it worth removing the penalties for recyclers in safe zones?": true, "Is it worth allowing all players to pick up items dropped by others? If enabled, personal settings will be ignored": false, "The format that will be used for prices": "${0}", "Vehicles - Time in seconds to display the marker when searching for a vehicle. A value of 0 disables the marker": 15.0, "Anti-Sleeper - Time in seconds after which a player will be killed if they disconnect while inside someone else's Building Privilege. Set to 0 to disable": 1200.0, "Is it worth enabling support for the 'Npc Random Raids' plugin?": true, "Is friendly fire enabled by default when creating a new team?": false, "PvP - Is it worth adding map markers for PvP zones?": true, "PvP - Name of the map maker": "PvP Zone!", "PvP - Settings for the status bar": { "Order": 9, "Height": 26, "Main_Color(Hex or RGBA)": "1 0.39 0.28 0.7", "Main_Transparency": 0.8, "Main_Material": "", "Image_Url": "https://i.imgur.com/oi5vIkk.png", "Image_Local(Leave empty to use Image_Url)": "RealPVE_PvP", "Image_Sprite(Leave empty to use Image_Local or Image_Url)": "", "Image_IsRawImage": false, "Image_Color(Hex or RGBA)": "1 0.39 0.28 1", "Image_Transparency": 1.0, "Is it worth enabling an outline for the image?": false, "Image_Outline_Color(Hex or RGBA)": "0.1 0.3 0.8 0.9", "Image_Outline_Transparency": 0.0, "Image_Outline_Distance": "0.75 0.75", "Text_Size": 12, "Text_Color(Hex or RGBA)": "1 1 1 1", "Text_Font(https://umod.org/guides/rust/basic-concepts-of-gui#fonts)": "RobotoCondensed-Bold.ttf", "Is it worth enabling an outline for the text?": false, "Text_Outline_Color(Hex or RGBA)": "#000000", "Text_Outline_Transparency": 1.0, "Text_Outline_Distance": "0.75 0.75", "SubText_Size": 12, "SubText_Color(Hex or RGBA)": "1 1 1 1", "SubText_Font": "RobotoCondensed-Bold.ttf", "Is it worth enabling an outline for the sub text?": false, "SubText_Outline_Color(Hex or RGBA)": "0.5 0.6 0.7 0.5", "SubText_Outline_Transparency": 0.0, "SubText_Outline_Distance": "0.75 0.75" }, "PvP - Settings for the progress status bar": { "Main_Color(Hex or RGBA)": "1 1 1 0.15", "Main_Transparency": 0.15, "Progress_Reverse": true, "Progress_Color": "#FF6347", "Progress_Transparency": 0.7, "Progress_OffsetMin": "0 0", "Progress_OffsetMax": "0 0" }, "Wipe ID": null, "Version": { "Major": 0, "Minor": 1, "Patch": 14 } } ENG: https://pastebin.com/ZMUL6pYL RUS: https://pastebin.com/Mx8cbMts Main commands(/realpve ) : autobuy - Toggle autobuy for monuments, vanilla events and raid bases with a total price greater than 0; pickup - Toggle access to pick up your items from the ground for all players; share - Manage access to looting your entities by other players(outside of the team): status *entityID*(optional) - Display information about the settings of the entity you are looking at or the one you specified; add *nameOrID* *entityID*(optional) - Add the specified player to the entity list you are looking at or the one you specified; remove *nameOrID* *entityID*(optional) - Remove the specified player from the entity list you are looking at or the one you specified; toggle *entityID*(optional) - Toggle the entity list you are looking at or the one you specified; delete *entityID*(optional) - Delete the settings for the entity you are looking at or the one you specified; clear - Delete the settings for all your entities. team - Manage your team: ff - Toggle the ability to damage your teammates. vehicle - Manage your vehicles: list - List of IDs for all your vehicles; find *vehicleID*(optional) - Help finding the vehicle you are looking at or the one you specified; unlink *vehicleID*(optional) - Unlink the vehicle you are looking at or the one you specified; clear - Unlink all your vehicles. Admin commands(/adminpve). Permission "realpve.admin" required: autobuy - Manage autobuy for monuments, vanilla events and raid bases: *nameOrId* - Toggle autobuy for the specified player; force monument/event/rb - Toggle forced autobuy. If enabled, player settings will be ignored; clear - Disable autobuy for everyone. config - Manage settings for values in the configuration file: forcepve *boolValue*(optional) - Is it worth forcibly implementing PvE for a server? gametips *boolValue*(optional) - Is it worth enabling GameTips for messages? givemsg *boolValue*(optional) - Is it worth preventing the sending of 'Give' messages? resource_privilege *boolValue*(optional) - Is it worth preventing resource gathering in someone else's building privilege area? plant_privilege *boolValue*(optional) - Is it worth preventing the pickup of plants spawned by the server in someone else's building privilege zone? heli_damage *boolValue*(optional) - Is it worth forcibly blocking damage from the patrol helicopter to building blocks and deployables? handcuffs *boolValue*(optional) - Is it worth assigning portals(Halloween and Christmas) to the first player? portals *boolValue*(optional) - Is it worth preventing players from handcuffing others? backpack_drop *boolValue*(optional) - Is it worth preventing a backpack from dropping upon player death? laptop_damage *boolValue*(optional) - Is it worth preventing damage to the laptop of the Hackable Crate? recycler_safezone *boolValue*(optional) - Is it worth removing the penalties for recyclers in safe zones? item_pickup *boolValue*(optional) - Is it worth allowing all players to pick up items dropped by others? If enabled, personal settings will be ignored; priceformat *stringValue* - The format that will be used for prices; vehicle_marker_time *floatValue* - Vehicles - Time in seconds to display the marker when searching for a vehicle. A value of 0 disables the marker; antisleeper *floatValue* - Anti-Sleeper - Time in seconds after which a player will be killed if they disconnect while inside someone else's Building Privilege. Set to 0 to disable; randomraids *boolValue*(optional) - Is it worth enabling support for the 'Npc Random Raids' plugin? teamff *boolValue*(optional) - Is friendly fire enabled by default when creating a new team? pvpmarkers *boolValue*(optional) - PvP - Is it worth adding map markers for PvP zones? pvpmarkersname *stringValue* - PvP - Name of the map maker. loot - Manage player access to entities without restrictions: *nameOrId* - Toggle unrestricted access for the specified player; self - Toggle unrestricted access for yourself; clear - Revoke unrestricted access for all players. monument - Manage monuments: list - List of available monuments; *monumentID*/this - Instead of the monumentID, you can use the word "this", but you must be inside the monument: suffix *boolValue*(optional) - Toggle the suffix display in the monument's name; broadcast *boolValue*(optional) - Toggle notifications about monument occupancy/release; time *intValue* - Set the looting time limit for the monument in seconds; price *floatValue* - Set the cost for looting rights. A value of 0 makes the monument free; offer *floatValue* - Set the offer duration for purchasing the monument in seconds; map_mode *intValue* - Set the marker display mode on the map. 0 - disabled, 1 - enabled, 2 - enabled during PvP mode; map_circle *boolValue*(optional) - Toggle the display of the monument's circle marker on the map; pvp *boolValue*(optional) - Toggle PvP mode for the monument; pvp_delay *floatValue* - Set the PvP mode duration in seconds for players after leaving the PvP monument; bar_progress *boolValue*(optional) - Toggle between TimeProgressCounter and TimeCounter bars for the monument. perm - Manage permissions: add *permName* - Adds a new permission to the list by copying values from the first(default) permission in the list. If the permission name starts with 'realpve', it will also register a new permission; add *permName* *sourcePermName* - Adds a new permission to the list by copying values from an existing permission in the list; remove *permName* - Removes an existing permission from the list; edit *permName* - Edits a permission: queue - Toggle the permission to bypass the server queue; beds *intValue* - Restriction on the number of available beds; shelters *intValue* - Restriction on the number of available shelters; turrets *intValue* - Restriction on the number of available turrets; hackable *floatValue* - Number of seconds(0-900) to skip when opening a hackable crate; monuments *floatValue* - Price multiplier for monuments; events *floatValue* - Price multiplier for vanilla events; rb_limit *intValue* - Restriction on the number of raid bases available simultaneously; rb_mult *floatValue* - Price multiplier for raid bases; vehicles *vehType* - Vehicles settings: limit *intValue* - Limit on the number of available vehicles by type; price *floatValue* - Price for registering a vehicle by type. clear - Removes all permissions from the list except the first one. pickup - Manage access to picking up another player's items from the ground: *nameOrId* - Toggle access to picking up a specific player's items from the ground; clear - Revoke access for all players to pick up items from the ground. share - Manage access to looting entities by other players(outside of the team): status *entityID*(optional) - Display information about the settings of the entity you are looking at or the one you specified; add *nameOrID* *entityID*(optional) - Add the specified player to the entity list you are looking at or the one you specified; remove *nameOrID* *entityID*(optional) - Remove the specified player from the entity list you are looking at or the one you specified; toggle *entityID*(optional) - Toggle the entity list you are looking at or the one you specified; delete *entityID*(optional) - Delete the settings for the entity you are looking at or the one you specified; clear *nameOrID*(optional) - Delete the settings for all entities or all entities of the specified player. tc - Manage building privilege: add self/*entityID* *nameOrID*(optional) - Add yourself or a specified player to the building privilege of the area you or the specified entity are in; remove self/*entityID* *nameOrID*(optional) - Remove yourself or a specified player from the building privilege of the area you or the specified entity are in; clear self/*entityID* - Clear the list of authorized players in the building privilege of the area you or the specified entity are in; info self/*entityID* - Get information about the building privilege of the area you or the specified entity are in. vehicle - List of all available vehicle types: types - List of available vehicle types. Example: /realpve pickup /realpve vehicle find *netID* /realpve team ff /adminpve perm add realpve.vip2 /adminpve perm add realpve.vip2 realpve.vip /adminpve perm edit realpve.vip2 queue true /adminpve perm edit realpve.vip2 vehicles horse limit 5 /adminpve monument list /adminpve monument *monumentID* pvp /adminpve monument *monumentID* price 7.5 /adminpve loot iiiaka /adminpve pickup iiiaka /adminpve tc info self /adminpve tc info 6959689 /adminpve vehicle types This plugin provides the ability to claim vehicles, thereby preventing theft and griefing from other players. In permissions, you can set the price and quantity restrictions for each type of vehicle, ensuring flexible customization according to your preferences. An assigned vehicle can't be damaged, looted or pushed by other players, but it can be pushed if it is within someone else's Building Privilege. File location: *SERVER*\oxide\data\RealPVE\MonumentConfig.json Default: https://pastebin.com/XY1d9YaM This plugin introduces queue system and loot purchases for monuments. You can customize the price and time for looting for each monument. Within monuments, only the "Looter" and his friends have the ability to loot, pick up items or damage entities. Additionally, NPCs and animals within monuments do not aggress against other players and do not receive damage from them. If a player dies within the monument, they will have a grace period to return. This allows players to safely loot monuments without fear of griefing. Example of monument configuration: "ferry_terminal_1": { "Type(This parameter is just a hint. Changes won’t have any effect)": "RadTown", "Is it worth displaying the suffix(if any) in the monument's name?": true, "Is it worth notifying all players about the occupation/release of the monument?": true, "The cost for the right to loot the monument. A value of 0 makes the monument free": 15.0, "The time in seconds(1-3600) given for looting the monument": 900, "The time in seconds(1-15) given to make a decision to purchase the monument": 5.0, "Map marker display mode: 0 - disabled, 1 - enabled, 2 - enabled during PvP mode": 1, "Is it worth creating a circle in the map marker?": true, "PvP - Is PvP enabled at this monument? If so, players will be able to kill each other and loot will be publicly accessible": false, "PvP - The time in seconds(0-60) during which the player retains PvP mode after leaving the PvP monument": 10.0, "Is it worth using a progress bar for bars with a counter?": true, "Settings for the status bar": { "Order": 10, "Height": 26, "Main_Color(Hex or RGBA)": "#FFBF99", "Main_Transparency": 0.8, "Main_Material": "", "Image_Url": "https://i.imgur.com/awUrIwA.png", "Image_Local(Leave empty to use Image_Url)": "RealPVE_ferry_terminal_1", "Image_Sprite(Leave empty to use Image_Local or Image_Url)": "", "Image_IsRawImage": false, "Image_Color(Hex or RGBA)": "#FFDCB6", "Image_Transparency": 1.0, "Is it worth enabling an outline for the image?": false, "Image_Outline_Color(Hex or RGBA)": "0.1 0.3 0.8 0.9", "Image_Outline_Transparency": 0.0, "Image_Outline_Distance": "0.75 0.75", "Text_Size": 12, "Text_Color(Hex or RGBA)": "1 1 1 1", "Text_Font(https://umod.org/guides/rust/basic-concepts-of-gui#fonts)": "RobotoCondensed-Bold.ttf", "Is it worth enabling an outline for the text?": false, "Text_Outline_Color(Hex or RGBA)": "#000000", "Text_Outline_Transparency": 1.0, "Text_Outline_Distance": "0.75 0.75", "SubText_Size": 12, "SubText_Color(Hex or RGBA)": "1 1 1 1", "SubText_Font": "RobotoCondensed-Bold.ttf", "Is it worth enabling an outline for the sub text?": false, "SubText_Outline_Color(Hex or RGBA)": "0.5 0.6 0.7 0.5", "SubText_Outline_Transparency": 0.0, "SubText_Outline_Distance": "0.75 0.75" }, "Settings for the progress status bar": { "Main_Color(Hex or RGBA)": "1 1 1 0.15", "Main_Transparency": 0.15, "Progress_Reverse": true, "Progress_Color": "#FFBF99", "Progress_Transparency": 0.7, "Progress_OffsetMin": "0 0", "Progress_OffsetMax": "0 0" } } Type - This field serves only as an indicator for you. The changes won't have any impact; ShowSuffix - Suffix display. Some monuments (for example Warehouses) have suffixes in the name, like "Warehouse #12"; Broadcast - Enabling or disabling broadcasts when a monument is occupied or vacated; LootingTime - Time allocated for looting the monument; Price - The price for which you can start looting the monument. 0 means looting is free; BarSettings - Settings for the Advanced Status Bar. You can also choose the types of monuments by specifying them under the "List of tracked types of monuments" section. A list of all available types can be viewed on the MonumentsWatcher's page in the "Developer API" section. "List of tracked types of monuments": [ "RadTown", "RadTownWater", "RadTownSmall", "TunnelStation", "Custom" ] Events, similar to monuments, offer the opportunity to claim events. All events are configured in the config file under the "Settings for the events" section. You can customize the price of looting and looting attempts(deaths, including friends). Just like in monuments, only the "Looter" and his friends have the ability to loot and damage entities. Additionally, in events, NPCs do not aggress against other players. If a player(including friends) exceeds the death limit, the event became free, thereby providing other players with the opportunity to claim the event. Example of event configuration: { "Is it worth enabling forced auto-buy for vanilla events where the final price is greater than 0?": false, "Settings for the PatrolHelicopter events": { "IsEnabled": true, "Time in seconds (1-15) given to respond for purchasing this event. Note: This is shown to everyone who deals damage, and the first person to buy it will claim it": 5.0, "Is it worth removing fire from crates?": true, "The price to claim the event. A value of 0 means it's free": 50.0, "The number of deaths after which the event becomes public. A value of 0 disables the limit": 5, "The time in seconds for which the event is locked to the player. A value of 0 disables the time limit": 1800.0 }, "Settings for the BradleyAPC events": { "IsEnabled": true, "Time in seconds (1-15) given to respond for purchasing this event. Note: This is shown to everyone who deals damage, and the first person to buy it will claim it": 5.0, "Is it worth removing fire from crates?": true, "The price to claim the event. A value of 0 means it's free": 50.0, "The number of deaths after which the event becomes public. A value of 0 disables the limit": 5, "The time in seconds for which the event is locked to the player. A value of 0 disables the time limit": 1800.0 }, "Version": { "Major": 0, "Minor": 1, "Patch": 0 } } Price - The price to claim the event. 0 means looting is free; DeathLimit - Limit of deaths after which the event becomes free. File location: *SERVER*\oxide\data\RealPVE\NewbieConfig.json Default: https://pastebin.com/QHZCqpji An example of an item list given for the main inventory: "List of items for the main inventory": [ { "ShortName": "note", "Slot": 0, "Amount": 1, "SkinID": 0, "Text": "MsgNoteText" } ] P.S. In the Text field, you need to specify the language key. Or, you can just write any text, but there won't be a translation of the text. File location: *SERVER*\oxide\data\RealPVE\RaidableBasesConfig.json Default: https://pastebin.com/rpDng7Fd Integration with the RaidableBases plugin does not restrict its functionality in any way. On the contrary, it adds an anti-grief system that protects bases from malicious players. In raid bases, NPCs and other entities can only receive damage from the raid owner or their friends; Turrets and traps do not aggress against outsiders; You can customize the price of claiming to each difficulty and set individual discounts for each permission. You can still purchase raid bases using the /buyraid command. Raid bases without owners(buyable, maintained, manual and scheduled) can be bought for a price set in the configuration file or assigned to the first player who enters its radius, if the final price(price * discount) less or equals to 0. Additionally, as a bonus, upon buying this plugin, you receive 5 free bases for 3 difficulty levels, along with configured loot for them. [PluginReference] private Plugin RealPVE; There are 6 universal hooks that the plugin is subscribed to, the use of which allows interaction with PVP in various PVE plugins: OnPlayerEnterPVP OnPlayerExitPVP OnEntityEnterPVP OnEntityExitPVP CreatePVPMapMarker DeletePVPMapMarker OnPlayerEnterPVP: Used to add a player to PVP mode/zone. To call the OnPlayerEnterPVP hook, you need to pass 2 parameters: <BasePlayer>player - The player to add to PVP; <string>zoneID - A unique identifier for your PVP zone. This parameter is very important because a player can be in multiple PVP zones at the same time and passing the zoneID in this case allows for correct processing of the player's location within them. Interface.CallHook("OnPlayerEnterPVP", player, "*Your unique zone identifier*");//Calling the OnPlayerEnterPVP hook to tell PVE plugins that the player needs to be added to the specified PVP zone. OnPlayerExitPVP: Used to remove a player from PVP mode/zone. Calling this hook guarantees the player’s removal from the specified PVP zone, but does not guarantee the removal from PVP mode, as there may be other zones in addition to yours. Also, when a player dies, they are automatically removed from all PVP zones. To call the OnPlayerExitPVP hook, you need to pass 3 parameters, 1 of which is optional: <BasePlayer>player - The player to remove from PVP; <string>zoneID - A unique identifier for your PVP zone; <float>pvpDelay - Optional. When the player exits your PVP zone, you can also pass the PVP delay time. However, if the player still has other active PVP zones, your PVP delay will not take effect. Interface.CallHook("OnPlayerExitPVP", player, "*Your unique zone identifier*", 10f);//Calling the OnPlayerExitPVP hook to tell PVE plugins that the player needs to be removed from the specified PVP zone, with the pvpDelay(10 seconds) specified if the player no longer has any active PVP zones. OnEntityEnterPVP: Used to add an entity to PVP mode/zone. In the case of RealPVE, this hook is only necessary to add entities with an owner(player) to a PVP, allowing other players to interact with them, such as a player's corpse after death(PlayerCorpse) or a backpack after the corpse disappears(DroppedItemContainer). To call the OnEntityEnterPVP hook, you need to pass 2 parameters: <BaseEntity>entity - The entity to add to PVP; <string>zoneID - A unique identifier for your PVP zone. Interface.CallHook("OnEntityEnterPVP", entity, "*Your unique zone identifier*");//Calling the OnEntityEnterPVP hook to tell PVE plugins that the entity needs to be added to the specified PVP zone. OnEntityExitPVP: Used to remove an entity from PVP mode/zone. When an entity dies, it is automatically removed from all PVP zones. To call the OnEntityExitPVP hook, you need to pass 3 parameters, 1 of which is optional: <BaseEntity>entity - The entity to remove from PVP; <string>zoneID - A unique identifier for your PVP zone; <float>pvpDelay - Optional. When the entity exits your PVP zone, you can also pass the PVP delay time. However, if the entity still has other active PVP zones, your PVP delay will not take effect. Interface.CallHook("OnEntityExitPVP", entity, "*Your unique zone identifier*", 10f);//Calling the OnEntityExitPVP hook to tell PVE plugins that the entity needs to be removed from the specified PVP zone, with the pvpDelay(10 seconds) specified if the entity no longer has any active PVP zones. CreatePVPMapMarker: Used to create a map marker for the PVP zone. To call the CreatePVPMapMarker hook, you need to pass 5 parameters, 2 of which is optional: <string>zoneID - A unique identifier for your PVP zone; <Vector3>pos - The position of your PVP zone; <float>radius - The radius of the circle for your PVP zone; <string>displayName - Optional. The display name for the map marker; <BaseEntity>entity - Optional. The entity to which the map marker should be attached. Interface.CallHook("CreatePVPMapMarker", "*Your unique zone identifier*", pos, 25f, "ATTENTION! This is a PVP zone!");//Calling the CreatePVPMapMarker hook to tell PVE plugins to create a map marker for the specified zone, at the specified position with the given radius, but without specifying a parent entity. DeletePVPMapMarker: Used to delete a map marker for the PVP zone. To call the DeletePVPMapMarker hook, you need to pass only 1 parameter: <string>zoneID - A unique identifier for your PVP zone. Interface.CallHook("DeletePVPMapMarker", "*Your unique zone identifier*");//Calling the DeletePVPMapMarker hook to tell PVE plugins to delete a map marker for the specified zone. There are 5 hooks that the plugin calls: OnPlayerPVPDelay OnPlayerPVPDelayed OnPlayerPVPDelayRemoved OnZoneStatusText CanRedeemKit OnPlayerPVPDelay: Called when a player exits the last active PVP zone, allowing other plugins to overwrite the value for pvpDelay. Returning a float value allows changing the pvpDelay for the player. A value less than zero disables the pvpDelay. When calling the OnPlayerPVPDelay hook, 3 parameters are passed: <BasePlayer>player - The player to whom the pvpDelay is applied; <float>pvpDelay - The initial value of pvpDelay; <string>zoneID - A unique identifier of PVP zone. object OnPlayerPVPDelay(BasePlayer player, float pvpDelay, string zoneID) { Puts($"Attempting to set a PvP delay of {pvpDelay} seconds for player {player.displayName} in zone {zoneID}!"); if (zoneID == "*Your unique zone identifier*") { return 15f;//Overriding the values for pvpDelay } return null;//Leave unchanged } OnPlayerPVPDelayed: Called after the PVP delay has been set for the player. When calling the OnPlayerPVPDelayed hook, 3 parameters are passed: <BasePlayer>player - The player to whom the pvpDelay is applied; <float>pvpDelay - The value of pvpDelay; <string>zoneID - A unique identifier of PVP zone. void OnPlayerPVPDelayed(BasePlayer player, float pvpDelay, string zoneID) { Puts($"A PvP delay of {pvpDelay} seconds has been set for player {player.displayName} in zone {zoneID}!"); } OnPlayerPVPDelayRemoved: Called when the PVP delay is removed from the player after they enter a PVP zone with an active PVP delay. When calling the OnPlayerPVPDelayRemoved hook, only 1 parameter is passed: <BasePlayer>player - The player from whom the PVP delay has been removed. void OnPlayerPVPDelayRemoved(BasePlayer player) { Puts($"PVP delay has been removed for player {player.displayName} as they entered a PVP zone!"); } OnZoneStatusText: Called when the text with the nice name for the specified zone is needed, to be displayed in the status bar. When calling the OnZoneStatusText hook, 2 parameters are passed: <BasePlayer>player - The player for whom the nice name for the zone is being requested; <string>zoneID - A unique identifier of PVP zone. object OnZoneStatusText(BasePlayer player, string zoneID) { Puts($"Text for the status bar is required for zone {zoneID}"); if (zoneID == "*Your unique zone identifier*") { return lang.GetMessage("*langKey*", this, player.UserIDString);//<string>Overriding the value for the status bar text } return null;//Leave unchanged } CanRedeemKit: Called before giving the starter kit, in the OnDefaultItemsReceive hook. A non-zero value cancels this action. When calling the CanRedeemKit hook, only 1 parameter is passed: <BasePlayer>player - The player to whom the kit is being attempted to be given. object CanRedeemKit(BasePlayer player) { Puts($"Attempting to give the kit to player {player.displayName}!"); if (player.IsAdmin) { return false;//Cancel the action } return null;//Leave unchanged }$39.99 -

Version 1.0.4
22 downloads
Compliment your in game economy system by allowing players to repair items using their currency. Economy Repair offers a solution that lets players repair their damaged items using in-game currency of your choice. With this plugin, your worn-out AKs, tools, and gear can be repaired through a simple new option in the repair bench, making sure you're always prepared for the next battle! Key Features: Multiple Currency Support: Use popular Rust plugins like Economics or ServerRewards to pay for repairs using your in-game currency. You can even set up custom item-based currencies for repairs! Condition Loss: Condition loss can be disabled, or the scale of it modified. VIP Discounts: Offer VIP players reduced repair costs, providing an extra incentive for premium members of your community. Customizable Repair Costs: Tailor the repair prices for different items, ensuring fair costs for everything from weapons to tools. Repair cost can be set globally, and per item. Clean UI: Enjoy a sleek almost vanilla like repair button that appears when interacting with a repair bench. Instantly know the cost to restore your item and confirm the repair with just a click. Repair Blacklist: Administrators can blacklist certain items from being repaired, maintaining control over game balance and preventing unintended item restorations. How It Works: 1. Interact with a repair bench. 2. Insert item normally into the repair bench 3. See the cost, click the repair button! Economy Repair is your perfect choice for expanding the usefulness of economy on your server. Keep your equipment in top shape without the hassle of searching through boxes to try and find the correct components. PERMISSIONS: economyrepair.use - Required to see and use the economy repair option economyrepair.VIP - Required for VIP discount feature CONFIG EXAMPLE: { "Default Max Repair Cost": 100.0, // default repair cost for all items "Reduce Durability On Repair": true, // should the item lose durability if repaired with currency? "Durability Loss Scaling Factor": 1.0, // play with this to increase/reduce how much durability is lost "Currency System (Economics, ServerRewards, Item)": "Economics", //which currency system to use "VIP Discount Percentage": 0.0, // percentage discount for players with VIP permission "Currency Item": { // If using "Item" as currency, specify item details here "ItemID": 0, "SkinID": 0, "Display Name": "Currency" }, "Custom Repair Costs": { // customize repair cost for individual items "hatchet": 50.0, "pickaxe": 75.0 }, "Repair Blacklist": [ // list of items which cannot be repaired using currency "minigun", "fuse" ], "Blacklisted SkinIDs": [ 3380502905, 987654321 ], "Debug Messages Enabled": false } LANG EXAMPLE: { "RepairCostLabel": "Economy Repair: {0} {1}", "CurrencyLabel": "$", "RepairButtonLabel": "Repair", "NoValidItem": "No valid item to repair.", "MaxDurability": "This item is already at full durability.", "NotEnoughCurrency": "You do not have enough {0} to repair this item.", "RepairSuccess": "Item successfully repaired.", "RepairFailed": "Failed to repair the item. Please try again.", "ItemBlacklisted": "This item cannot be repaired." }$9.98 -
Version 3.0.1
34,061 downloads
Create fully automated raidable bases with NPCs in Rust This is the premium version of Raidable Bases. The differences between this and the free version are too many to list. A few key differences are: five (5) difficulties and associated loot table functionality instead of one (1), buyable events, lockouts for players. Requires latest version of CopyPaste or bases to work. It also requires that you have copypaste files already made. Raidable bases will be spawned using the CopyPaste plugin. This plugin does NOT come with any bases. Packages are sold separately that include bases. Check out my packages for this plugin for tier1, tier2, and tier3 which contain everything you need to get the plugin working in minutes with all bases and loot already configured for you! Packages are sold separately. RBE DEBUG This command exists to aid with issues regarding your configuration, profiles and/or map by displaying information, both good and bad, related to finding spawn points and spawning of bases. It is your responsibility to use this command before asking for help. Loot Table Editor by @beee https://codefling.com/tools/raidable-bases-loot-table-editor There are just a few steps required to get bases spawn on your server within minutes. You must have the CopyPaste plugin installed. (Disclaimer: Configuring this to your servers specific needs will require a lot of time and effort) Step 1: Obtain Your Bases You can get bases by: Downloading them from Fortify Purchasing a tier package from me Buying a base package from third-party sellers (be wary that some sellers include items in their CopyPaste files!) Creating your own bases Step 2: Set Up Profiles Profiles are located in: oxide/data/RaidableBases/Profiles/ carbon/data/RaidableBases/Profiles/ There are five different profiles. You can add the filenames of your CopyPaste bases manually, or by using the command: For example (You must use straight double quotes. Curly double quotes are not supported!): Step 3: Edit the Configuration The configuration file is located in: oxide/config/RaidableBases.json carbon/configs/RaidableBases.json Make the following changes: Always Maintain Max Events: Set this to true. Max Maintained Events: Set this to the number of bases you want to spawn. Minimum Required Players Online: If you want bases to spawn even when no players are online, set this to 0. Step 4: Save and Reload After making your changes: Save your files. Reload the plugin. The bases will now start spawning automatically. They will use the Default Loot table, located in: oxide/data/RaidableBases/Default_Loot.json carbon/data/RaidableBases/Default_Loot.json Step 5: Customize Loot Tables Refer to the documentation to learn how to set up your own custom loot tables. Additional Information If you want buyable events using the /buyraid command, you can set a cost under the Buyable Event Costs section. This includes: Economics Buy Raid Costs ServerRewards Buy Raid Costs Custom Buy Raid Costs Tips for Customizing Your Setup The plugin has many settings to customize. No guide can cover everything, so you will need to go through each setting and adjust it to meet your server’s needs. Important: Make backups as you configure the settings. Don’t rush—take it one step at a time. Dynamic difficulties (added in 3.0.0): Easily add or remove your own difficulties. You should reload the plugin whenever you make changes! Add a difficulty: rb.difficulty add "Sky" This will create the profile "Sky Bases.json" and set the difficulty to "Sky" rb.config add "Sky Bases" sky1 sky2 sky3 sky4 sky5 Reload the plugin! This will create language messages in the EN and RU language files which you can copy to other language files. If your messages do not update after a reload then you must restart your Rust server to reset Oxide cache. This will create all relevant settings for "Sky" within the config file where you must set them all as desired You need your own copypaste files and loot tables using their new respective names. Base Loot folder - add a loot table with the filename "Sky Bases.json" to match the profile name. Difficulty Loot folder - add a loot table with the filename "Sky.json" to match the difficulty name. Remove a difficulty: rb.difficulty remove "Sky" This will remove all settings for this difficulty from the config file - and disable the profile - only. No files are deleted! Edit or change a difficulty name: This is not supported and will not be - some hosts restrict System.File.IO namespace Please avoid trying to do this unless you are an expert user - you must rename EVERYTHING yourself Configuration errors are shown in rcon when the plugin loads If you make a mistake, you can use the add command a second time which will re-add any missing settings. If you feel overwhelmed or frustrated, take a break and return to it later. I am always here to answer your questions and help you (even if it takes some hours for me to respond). Tutorial This is not your run-of-the-mill plugin. DO NOT INSTALL WITHOUT READING THIS DOCUMENTATION FIRST. This plugin is extremely advanced and requires utmost attention to detail to configure properly. Jumping around in the configuration file or profiles will lead to more problems than it's worth. Take your time to understand each option before enabling or disabling its functionality. Raidable Bases is an independent expansion of Dangerous Treasures. You may learn how to enable the expansion mode below. It does not require Dangerous Treasures for any other purpose. Configuration Loot Tables The plugin comes with some very basic items (Default_Loot.json) that only serve as a demo loot list for you to either delete or expand upon. In order to make any use of the plugin (beyond demonstration) you will have to create your own loot lists instead. It will take a very long time to configure your loot tables, and fine-tune each to your specific needs. To start, I recommend that you use the rb.populate all command. This creates files in the Editable_Lists folder for each difficulty that contain every item in the game. Edit each file and set the amounts for the items that you want to spawn, and remove those that you do not want to spawn. It may look intimidating editing a list of 660 items, but don't underestimate how easy it is to delete items from a list compared to adding each one manually. Items that have their amount AND amountMin set to 0 will not spawn. So you may either delete these items from the list, or come back to them later. If you set amountMin to 0 then chance will determine if the item spawns or not, and another item will not replace it unless there are extra items available (as of 1.7.3). You can set the item skin that you want to use, but I suggest using the Skins settings in the configuration file to use random skins, or none at all. The rb.populate command which populates the Editable_Lists folder also includes items already inside of your Difficulty_Loot folder. This allows you to easily repopulate lists in order to re-evaluate which items spawn at a later date. Files inside of the Editable_Lists folder must be copied into an existing loot file in order to use the loot table. As the name implies, it is for editing only. - If you want to use Editable_Lists/Easy.json for your Easy bases then copy the contents of the file into the Difficulty_Loot/Easy.json file. - If you want to use Editable_Lists/Expert.json for the Expert Bases.json profile, then you must copy the contents of the Expert.json file into the Bases_Loot/Expert Bases.json file probability - the chance that the item can spawn. value must be between 0.0 and 1.0 where 1.0 is 100% chance Loot Priority Loot is pulled from all datafiles within the oxide/data/RaidableBases/ folder with the exception of the Profiles folder which is used to configure bases. oxide/data/RaidableBases/Base Loot - If a loot table exists in this folder with the same name as a profile then all of the bases in that profile will use this loot table. If you want items in this loot table to always spawn then you must enable Always Spawn Base Loot Table in the respective profile. oxide/data/RaidableBases/Difficulty Loot - Items will be chosen from these files based on the difficulty of each profile. If Use Day Of Week Loot is enabled then it will choose the loot table for that specific day. Otherwise, it will pick from Default_Loot.json. This is the default list, and is only used when all other loot tables do not have a sufficient amount of loot to spawn based on the Amount Of Items To Spawn setting. Loot Settings Allow Duplicate Items - This is useful when you do not have enough items in your loot tables , and you want to spawn Amount Of Items To Spawn by using the same items more than once. Amount Of Items To Spawn - This is the number of items that you want to spawn. If you do not have enough items in your loot tables then it will only spawn the amount that you have available. It will not spawn items if the container does not have enough space. Drop Tool Cupboard Loot After Raid Is Completed (false) Divide Loot Into All Containers - This allows you to divide loot evenly from all of your loot lists into all containers when enabled. You MUST increase or decrease Amount Of Items To Spawn respective to how many items you want in each container. This includes large boxes, small boxes, coffins and storage barrels. Optional settings include (in order of priority) cupboard, bbq, oven, fridge and lockers. Allow Players To Pickup Deployables (false) - As name implies, overridden by Entities Not Allowed To Be Picked Up Allow Players To Deploy A Cupboard (true) - Block players from placing a TC after destroying the TC in the base. Drop Container Loot X Seconds After It Is Looted (false) - Prevent players from cherry picking items and leaving the rest, in order to despawn the raid quicker. Drop Container Loot Applies Only To Boxes And Cupboards (true) - As name implies Empty All Containers Before Spawning Loot (true) - Useful if using CopyPaste files that contain loot already - I suggest leaving this true as it can complicate how many items spawn if there are too few inventory slots remaining. Ignore Containers That Spawn With Loot Already (false) - Useful if you want specific loot to spawn from a copypaste file. Require Cupboard Access To Loot (false) - Prevent all players from looting until they reach the TC, or destroy it. Skip Treasure Loot And Use Loot In Base Only (false)" - Useful if you want all loot to spawn from a copypaste file - not recommended - will allow players to memorize which boxes to raid and ignore the rest. Always Spawn Base Loot Table (false) - Very useful if you want items in the Base_Loot file to always spawn (such as C4, rockets, ammo, etc) Settings Blacklisted Commands (none) - prevents players from using these commands inside of a raid base Automatically Teleport Admins To Their Map Marker Positions (true) - right-click map to teleport (requires raidablebases.mapteleport permission) Block Wizardry Plugin At Events (false) - Block players from using wands Chat Steam64ID (0) - The steam profile icon to show in chat messages Expansion Mode (Dangerous Treasures) (false) - Allow Dangerous Treasures to take over a random box for its event Remove Admins From Raiders List (false) - Allows admins to help players without receiving any rewards Show X Z Coordinates (false) - Show X Z coordinates alongside grid location Buy Raid Command (buyraid) - Opens the buyable UI to purchase raids for each difficulty Event Command (rbe) - Specify command name Hunter Command (rb) - Specify command name Server Console Command (rbevent) - Specify command name Raid Management Allow Teleport (false) - Allow/prevent players from teleporting Allow Cupboard Loot To Drop (true) - Allows loot to drop when TC is destroyed by a player Allow Players To Build (true) Allow Players To Use Ladders (true) Allow Players To Deploy Barricades (true) Allow Players To Upgrade Event Buildings (false) - Prevent players from upgrading buildings with no TC to prevent this otherwise Allow Player Bags To Be Lootable At PVP Bases (true) - Bypasses Prevent Looting plugin Allow Player Bags To Be Lootable At PVE Bases (true) - Bypasses Prevent Looting plugin Allow Traps To Drop Loot (false) - Allow traps such as guntraps and turrets to drop loot on death Allow Players To Loot Traps (false) - Allows players to loot traps such as guntrap and turrets with TC access Allow Raid Bases On Roads (true) Allow Raid Bases On Rivers (true) Allow Raid Bases On Building Topology (true) - Specifically added for custom map makers Allow Vending Machines To Broadcast (false) - Prevents vending machines from showing on the map Allow Bases To Float Above Water (false) - Keyword: FLOAT Allow Bases To Spawn On The Seabed (false) Prevent Bases From Floating Above Water By Also Checking Surrounding Area (false) - Keyword: FLOAT Maximum Water Depth Level Used For Float Above Water Option (1.0) - Keyword: FLOAT, but allows you to prevent on water if the value is low enough Backpacks Can Be Opened At PVE Bases (true) Backpacks Can Be Opened At PVP Bases (true) Backpacks Drop At PVE Bases (false) - Will drop a backpack on death, even if explicity disabled in Backpack configuration (requires Backpacks 3.4.0 ) Backpacks Drop At PVP Bases (false) Block Mounted Damage To Bases And Players (false) - Prevent players from dealing damage while on mini, scrap heli, etc Block RestoreUponDeath Plugin For PVP Bases (false) Block RestoreUponDeath Plugin For PVE Bases (false) Bypass Lock Treasure To First Attacker For PVE Bases (false) - Do not set an owner for PVE bases Bypass Lock Treasure To First Attacker For PVP Bases (false) - Do not set an owner for PVP bases Despawn Spawned Mounts (true) - Allows mounts such as mini or scrap heli to remain if not abandoned when raid despawns Do Not Destroy Player Built Deployables (true) - Loot is not lost if the plugin destroys a player's box with this option - it is dropped on the ground in a grey loot container just as if they destroyed the box themselves Do Not Destroy Player Built Structures (true) Divide Rewards Among All Raiders (true) Draw Corpse Time (Seconds) (300.0) - The amount of time the players corpse location is drawn on their screen Eject Sleepers Before Spawning Base (true) Extra Distance To Spawn From Monuments (0.0) Flame Turrets Ignore NPCs (false) - Can help with performance on some servers Maximum Land Level (2.5) - The allowed height of the surrounding terrain for spawning bases (this should never be changed) Move Cookables Into Ovens (true) Move Food Into BBQ Or Fridge (true) Move Resources Into Tool Cupboard (true) Move Items Into Lockers (true) Lock Treasure To First Attacker (true) - Sets the first attacker as the owner of a raid. You must set eject enemies settings in each profile if you do not want players entering private raids Lock Treasure Max Inactive Time (Minutes) (20.0) - Resets the raid as public after this time Assign Lockout When Lock Treasure Max Inactive Time Expires (false) - useful those who partially raid bases in order to avoid the lockout timer Lock Players To Raid Base After Entering Zone (false) - Forces players to be locked to a raid once they enter it, even on accident Only Award First Attacker and Allies (false) Minutes Until Despawn After Looting (min 1) (15) - The time until the base despawns after being raided Minutes Until Despawn After Inactive (0 = disabled) (45) - The time until the base despawns after being inactive Minutes Until Despawn After Inactive Resets When Damaged (true) - Resets the time until the base despawns when it is damaged by a player Mounts Can Take Damage From Players (false) Mounts Can Take Damage From SamSites (true) Player Cupboard Detection Radius (100.0) - Extra layer of protection to prevent raid bases from spawning too closely to player bases (this should never be under 100 and never too high either, 100-200 at most) Players With PVP Delay Can Damage Anything Inside Zone (false) - Applies specifically to PVP raid bases Players With PVP Delay Can Damage Other Players With PVP Delay Anywhere (false) PVP Delay Between Zone Hopping (10.0) - The amount of time players can take damage while on a PVE server after stepping outside of a PVP zone - prevents exploiting - recommended value: 120 Prevent Fire From Spreading (true) - Helps with server performance by preventing forest fires, err, fire from spreading after initial spawn Prevent Players From Hogging Raids (true) - Prevents players from tagging multiple raids at once Require Cupboard To Be Looted Before Despawning (false) Destroying The Cupboard Completes The Raid (false) Require All Bases To Spawn Before Respawning An Existing Base (false) - Rotate through all bases specific to each difficulty before reusing an existing base Turn Lights On At Night (true) Turn Lights On Indefinitely (false) Traps And Turrets Ignore Users Using NOCLIP (false) Use Random Codes On Code Locks (true) Wait To Start Despawn Timer When Base Takes Damage From Player (false) - Prevents the inactive despawn timer from starting until it is damaged by a player. Combos well when inactive resets is disabled by giving players a limited time to finish a raid once they start it Additional Containers To Include As Boxes (none) - example: vendingmachine Eject Mounts Boats (false) - Set any true to prevent them from entering a raid base Cars (Basic) (false) Cars (Modular) (false) Campers (true) Chinook (false) Flying Carpet (false) Horses (false) HotAirBalloon (true) MiniCopters (false) Pianos (true) Scrap Transport Helicopters (false) All Other Mounts (false) All Controlled Mounts (false) - Mounts controlled via another plugin Max Amount Of Players Allowed To Enter Each Difficulty (0 = infinite, -1 = none) (infinite) Easy Difficulty => Amount (0) Medium Difficulty => Amount (0) Hard Difficulty => Amount (0) Expert Difficulty => Amount (0) Nightmare Difficulty => Amount (0) Max Amount Allowed To Automatically Spawn Per Difficulty (0 = infinite) -1 = disabled) Easy (0) - Specifies how many of each difficulty can be spawned at any given time Medium (0) Hard (0) Expert (0) Nightmare (0) Player Lockouts (0 = ignore) - this is for PUBLIC raids where buyable events use the Buyable Cooldowns and these are not shared - players may still do 1 public and 1 buyable event if these are both enabled Time Between Raids In Minutes (Easy) (0.0) - Set a cooldown before the player can enter another raid base Time Between Raids In Minutes (Medium) (0.0) Time Between Raids In Minutes (Hard) (0.0) Time Between Raids In Minutes (Expert) (0.0) Time Between Raids In Minutes (Nightmare) (0.0) Block Clans From Owning More Than One Raid (false) - Prevent clans from hogging multiple raid bases Block Friends From Owning More Than One Raid (false) Block Teams From Owning More Than One Raid (false) Easy|Medium|Hard|Expert|Nightmare Raids Can Spawn On Monday (true) Tuesday (true) Wednesday (true) Thursday (true) Friday (true) Saturday (true) Sunday (true) Difficulty Colors (Border) Easy (000000) Medium (000000) Hard (000000) Expert (000000) Nightmare (000000) Difficulty Colors (Inner) Easy (00FF00) Medium (FFEB04) Hard (FF0000) Expert (0000FF) Nightmare (000000) Map Markers Marker Name (Raidable Base Event) Radius (0.25) Use Vending Map Marker (true) Show Owners Name on Map Marker (true) Use Explosion Map Marker (false) Create Markers For Buyable Events (true) Create Markers For Maintained Events (true) Create Markers For Scheduled Events (true) Create Markers For Manual Events (true) Buyable Events Do Not Reward Buyable Events (false) Refunds > Refund Despawned Bases (false) Refunds > Refund Percentage (100.0) Refunds > Refund Resets Cooldown Timer (false) Refunds > Block Refund If Base Is Damaged (true) Cooldowns (0 = No Cooldown) VIP Permission (raidablebases.vipcooldown (300.0) Admin Permission (raidablebases.allow (0.0) Server Admins (0.0) Normal Users (600.0) Allow Players To Buy PVP Raids (false) - If all of your profiles have PVP enabled then players will NOT be able to buy any raids! Convert PVE To PVP (false) Convert PVP To PVE (false) Distance To Spawn Bought Raids From Player (500.0) Lock Raid To Buyer And Friends (true) Ignore Player Entities At Custom Spawn Locations (false) Ignore Safe Checks (false) - if enabled will prevent the plugin from checking the area for a TC, buildings, or deployables Max Buyable Events (1) Reset Purchased Owner After X Minutes Offline (10.0) Spawn Bases X Distance Apart (100.0) - most maps cannot support this being above 200 ! Spawns Database File (Optional) (none) - Useful if you want buyable raids to spawn in specific locations using spawn files from the Spawns Database plugin Maintained Events Always Maintain Max Events (false) - Spawn another raid soon after one despawns Ignore Player Entities At Custom Spawn Locations (false) - spawn regardless of what player entities are built in the area Chance To Randomly Spawn PVP Bases (0 = Ignore Setting) (0.0) - Overrides all PVP Allow profile settings for a chance to make the raid PVE or PVP Convert PVE To PVP (false) Convert PVP To PVE (false) Include PVE Bases (true) Include PVP Bases (true) Ignore Safe Checks (false) - Bypass checks that ensure no buildings or other objects are blocking the spawn Minimum Required Players Online (1) - Max Maintained Events (1) - How many bases you want available at any given time Spawn Bases X Distance Apart (100.0) - most maps cannot support this being above 200 ! Spawns Database File (Optional) (none) - Useful if you want maintained raids to spawn in specific locations using spawn files from the Spawns Database plugin Time To Wait Between Spawns (15.0) - Wait a specific time frame between each paste (can be set to 0) Manual Events Convert PVE To PVP (false) Convert PVP To PVE (false) Max Manual Events (1) Spawn Bases X Distance Apart (100.0) Spawns Database File (Optional) (none) - Useful if you want manually spawned raids to spawn in specific locations using spawn files from the Spawns Database plugin Scheduled Events Enabled (false) - Spawn raids on a timer specific to random amount of time between Every Min and Every Max Seconds Ignore Player Entities At Custom Spawn Locations (false) - spawn regardless of what player entities are built in the area Chance To Randomly Spawn PVP Bases (0 = Ignore Setting) (0.0) - Overrides all PVP Allow profile settings for a chance to make the raid PVE or PVP Convert PVE To PVP (false) Convert PVP To PVE (false) Every Min Seconds (3600.0) Every Max Seconds (7200.0) Include PVE Bases (true) Include PVP Bases (true) Ignore Safe Checks (false) - Bypass checks that ensure no buildings or other objects are blocking the spawn Max Scheduled Events (1) Max To Spawn At Once (0 = Use Max Scheduled Events Amount) (0) Minimum Required Players Online (1) Spawn Bases X Distance Apart (100.0) - most maps cannot support this being above 200 ! Spawns Database File (Optional) (none) - Useful if you want scheduled raids to spawn in specific locations using spawn files from the Spawns Database plugin Time To Wait Between Spawns (15.0) - Wait a specific time frame between each paste (can be set to 0) Economics Buy Raid Costs (0 = disabled) - if you do not configure at least one cost for Buyable Events then players will not be able to buy any raids Easy (0.0) - How much each raid costs, use the /buyraid command to see the UI Medium (0.0) Hard (0.0) Expert (0.0) Nightmare (0.0) ServerRewards Buy Raid Costs (0 = disabled) - if you do not configure at least one cost for Buyable Events then players will not be able to buy any raids Easy (0) - How much each raid costs, use the /buyraid command to see the UI Medium (0) Hard (0) Expert (0) Nightmare (0) Custom Buy Raid Costs (false = disabled) - if you do not configure at least one cost for Buyable Events then players will not be able to buy any raids Easy (50 scrap) - How much each raid costs, use the /buyraid command to see the UI Medium (100 scrap) Hard (150 scrap) Expert (200 scrap) Nightmare (250 scrap) All are disabled by default. All can require its own specific item. Allowed Zone Manager Zones List: pvp, 99999999 - the list of zones where raid bases may spawn at - Zone Manager is not required to use this plugin. Use Grid Locations In Allowed Zone Manager Zones Only - forces all spawns into zones by Zone Manager. Adding flags to your zones may conflict with this plugin. Use of Spawns Database plugin is advised instead Event Messages Notify Plugin (-1 = disabled) Notification Interval (1 second) Announce Raid Unlocked (false) Announce Buy Base Messages (false) Announce Thief Message (true) Announce PVE/PVP Enter/Exit Messages (true) Show Destroy Warning (true) Show Opened Message (true) Show Opened Message For Paid Bases (true) Show Prefix (true) Show Messages To Player (true) - set false if you do not want players to receive CHAT messages, other messages from notifications will still show GUIAnnouncements and Advanced Alerts plugins can be used instead of CHAT messages Advanced Alerts Enabled (true) Anchor Min and Max Time Shown (5) Panel Alpha (0.98) Background Color Title Background Color GUIAnnouncements Enabled (false) Banner Tint Color (Grey) Maximum Distance (300.0) Text Color (White) Lusty Map Enabled (false) Icon File (http://i.imgur.com/XoEMTJj.png) Icon Name (rbevent) Icon Rotation (0.0) Ranked Ladder (based on points system) Award Top X Players On Wipe (3) - Set 0 to disable permissions and groups from being created. Every wipe the top 3 players are awarded the raidablebases.th permission and raidhunter group. Used with plugins that give titles based on permissions/groups, such as BetterChat Enabled (true) Difficulty Points (for each difficulty) Assign To Owner Of Raid Only (false) Assign Rank After X Completions - Players that complete the required amount of completions will receive the relevant above permission and group automatically - Set value above 0 to enable this feature for any given difficulty as it is disabled for all difficulties by default Permissions and groups are given to players for being top 3 in each difficulty at the end of a wipe Set Award Top X Playrs On Wipe to 0 to disable these permissions and groups from being created. permissions: raidablebases.ladder.easy, raidablebases.ladder.medium, raidablebases.ladder.hard, raidablebases.ladder.expert, raidablebases.ladder.nightmare, raidablebases.th groups: raideasy, raidmedium, raidhard, raidexpert, raidnightmare, raidhunter Skins (Boxes, Loot Items, Npcs all have there own settings) (skin settings revamped in 2.7.4) Use Identical Skins Include Workshop Skins (true) Use Random Skin (true) Use Imported Workshop Skins File (true) - copy existing Imported Workshop Skins section from Skinbox to the Imported Workshop Skins json file to apply. Boxes (including above Skins options) Preset Skins - you can add any box skin here and it will randomly apply to any relevant box this skin can be used with Loot Items (including above Skins options) Use Identical Skins For Stackable Items Use Identical Skins For Non-Stackable Items Deployables (including above Skins options) List: Partial Names (door, barricade, chair, fridge, furnace, locker, reactivetarget, rug, sleepingbag, table, vendingmachine, waterpurifier, skullspikes, skulltrophy, summer_dlc, sled) Skin Everything (true) - if true then the Partial Names list will not be used Preset Door Skins - you can add any door skin here and it will randomly apply to any relevant door this skin can be used with Ignore If Skinned Already (false) Treasure Resources Not Moved To Cupboards (skull.human, battery.small, bone.fragments, can.beans.empty, can.tuna.empty, water.salt, water, skull.wolf) Use Day Of Week Loot (false) Do Not Duplicate Base Loot (false) Do Not Duplicate Difficulty Loot (false) Do Not Duplicate Default Loot (false) Use Stack Size Limit For Spawning Items (false) Status UI - Shows PVE/PVP, time left, amount of loot left and the status of owner Details UI - Shows owner and active status Delay UI - Shows UI for PVP delay Buyable Cooldowns UI - Shows UI for the Buyable Cooldowns option Buyable Events UI - Shows players a UI for buying events including the primary cost Lockouts UI - Shows UI for the Player Lockouts option Enabled Offset Min Offset Max Panel Alpha Font Size Background Color Title Background Color etc Weapons Fog Machine Allows Motion Toggle (true) Fog Machine Requires A Power Source (true) SamSite Repairs Every X Minutes (0.0 = disabled) (5.0) SamSite Range (350.0 = Rust default) (75.0) Test Generator Power (100.0) Tesla Coil settings in profiles Infinite Ammo AutoTurret (true) FlameTurret (true) FogMachine (true) GunTrap (true) SamSite (true) Ammo AutoTurret (256) FlameTurret (256) FogMachine (5) GunTrap (128) SamSite (24) Tesla Coil (profiles) Requires A Power Source (true) Max Discharge Self Damage Seconds (0 = None) 120 = Rust default) (0.0) Max Damage Output (35.0) Profiles Difficulty - very first setting. If your raids show as NORMAL then you're using the free plugin. If all bases show as EASY then this setting is not configured. Entities Not Allowed To Be Picked Up (List: generator.small, generator.static autoturret_deployed - overrides Allow Players To Pickup Deployables) Additional Bases For This Difficulty (default) - A list of bases to use within this profile Paste Options (default) - Paste options specific to the profiles filename if it is also a base Profile Enabled (true)- Useful for disabling a profile instead of deleting it Add Code Lock To Unlocked Or KeyLocked Doors (true) Add Code Lock To Boxes (false) Add Code Lock To Tool Cupboards (false) Close Open Doors With No Door Controller Installed (true) Allow Duplicate Items (false) - [Explained above] Allow Players To Pickup Deployables (false) - [Explained above] Allow Players To Deploy A Cupboard (true)- [Explained above] Allow PVP (true) Allow Friendly Fire (Teams) (true) Amount Of Items To Spawn (30) - [Explained above] Minimum Amount Of Items To Spawn (0 = Use Max Value) (0) Flame Turret Health (300.0) Block Plugins Which Prevent Item Durability Loss (false) - Force items to take condition losses Block Damage Outside Of The Dome To Players Inside (false) - Prevent damage from outside of the dome to players inside of the dome Block Damage Outside Of The Dome To Bases Inside (false) - Prevent damage from outside of the dome to the base inside Block Damage Inside From Npcs To Players Outside (false) Building Blocks Are Immune To Damage (false) Boxes Are Invulnerable (false) Spawn Silently (No Notifcation, No Dome, No Map Marker) (false) Divide Loot Into All Containers (true) - [Explained above] Drop Container Loot X Seconds After It Is Looted (0.0) - [Explained above] Drop Container Loot Applies Only To Boxes And Cupboards (true) - [Explained above] Create Dome Around Event Using Spheres (0 = disabled, recommended = 5) (5) - A visible dome for players to distinguish raid bases from player bases Empty All Containers Before Spawning Loot (true) - [Explained above] Eject Corpses From Enemy Raids (Advanced Users Only) (true) - Prevents corpses from remaining inside of a raid when it becomes private and prevents the user from looting it Eject Enemies From Purchased PVE Raids (true) - Useful when Lock Raid To Buyer And Friends is enabled Eject Enemies From Purchased PVP Raids (false) Eject Enemies From Locked PVE Raids (true) - Useful when Lock Treasure To First Attacker is enabled Eject Enemies From Locked PVP Raids (false) Explosion Damage Modifier (0-999) (100.0) - Modify the damage of all explosives Force All Boxes To Have Same Skin (true) Ignore Containers That Spawn With Loot Already (false) - [Explained above] Penalize Players On Death In PVE (ZLevels) (true) Penalize Players On Death In PVP (ZLevels) (true) Loot Amount Multiplier (1.0) - useful to scale loot amounts without having to adjust them all individually Protection Radius (50.0) - This options controls every single option and feature that relies explicity on distance or radius in one regard or another. Setting an incorrect value, either too low, or too high, will break the functionality of the plugin. It's best to leave it alone. Require Cupboard Access To Loot (false) - [Explained above] Minimum Respawn Npc X Seconds After Death (0.0) - Useful in simulating a real raid where players respawn Maximum Respawn Npc X Seconds After Death (0.0) Skip Treasure Loot And Use Loot In Base Only (false) - [Explained above] Always Spawn Base Loot Table (false) - [Explained above] - Arena Walls Enabled (true) Extra Stacks (1) - How many times you want walls to stack on top of one another Use Stone Walls (true) - set false to use wooden walls instead Use Iced Walls (false) - not advised to use this as it can cause client lag (not a plugin issue) Use Least Amount Of Walls (true) Use UFO Walls (false) - Walls spawn horizontally instead of vertically Radius (25.0) NPC Levels Level 2 - Final Death (false) - Respawns all npcs when raid is completed NPCs Enabled (true) Spawn Inside Bases (Options: Spawn On Floors, Spawn On Rugs, Spawn On Beds) Murderer Items Dropped On Death (none) Scientist Items Dropped On Death (none) Murderer (Items) (metal.facemask, metal.plate.torso, pants, tactical.gloves, boots.frog, tshirt, machete) Scientist (Items) (hazmatsuit_scientist, rifle.ak) Murderer Kits (murderer_kit_1, murderer_kit_2) - Kits have priority over these lists of items Scientist Kits (scientist_kit_1, scientist_kit_2) Random Names (none) - Spawn with a custom random name instead of a provided random name Amount To Spawn (3) Aggression Range (70.0) - Aggression range is increased by 250 meters when engaged Despawn Inventory On Death (true) Health For Murderers (100 min, 5000 max) (150.0) Health For Scientists (100 min, 5000 max) (150.0) Minimum Amount To Spawn (1) Use Dangerous Treasures NPCs (false) - Tells Dangerous Treasures to control and outfit the NPCs instead Spawn Murderers And Scientists (true) Scientist Weapon Accuracy (0 - 100) (30.0) - These bots are meant to be savages. 30% is average for highly skilled players, while the average player has 10-20% accuracy Spawn Murderers (false) Spawn Random Amount (false) Spawn Scientists Only (false) Rewards Economics Money (0.0) - How much is rewarded after a raid. Overridden by Divide Rewards Among All Raiders ServerRewards Points (0) Change Building Material Tier To Wooden (false) - Useful for upgrading or downgrading buildings automatically Stone (false) Metal (false) HQM (false) Change Door Type To Wooden (false) - Useful for upgrading or downgrading doors automatically Metal HQM Player Building Restrictions Wooden (false) Stone (false) Metal (false) HQM (false) Auto Turrets Aim Cone (5.0) - shots fired will spread into a cone pattern based on this radius. Lowering this value will group the shots closer together. Minimum Damage Modifier (1.0) Maximum Damage Modifier (1.0) Start Health (1000.0) Sight Range (30.0) Set Hostile (False = Do Not Set Any Mode) (true) Requires Power Source (false) Remove Equipped Weapon (false) Weapon To Equip When Unequipped (null = Do Not Equip) (rifle.ak) Permissions raidablebases.allow -- Allows player to use the available ADMIN commands. This is NOT recommended as players can use the commands 'buyraid' and 'rb' already. raidablebases.canbypass permission (or to be flying) to bypass dome restrictions (this previously worked for admins, but now requires the permission instead) raidablebases.blockbypass permission to bypass Owning More Than One Raid settings for Clans/Friends/Teams raidablebases.mapteleport Teleporting to map marker now simply requires this permission and to be enabled in config raidablebases.ddraw allows support for FauxAdmin users raidablebases.config allows use of the rb.config command in-game (server console does not require this permission) raidablebases.banned bans the user from entering any raids - DO NOT GIVE THIS TO THE DEFAULT GROUP LOL raidablebases.durabilitybypass to bypass `Block Plugins Which Prevent Item Durability Loss` raidablebases.notitle permission to exclude users from ranked title rewards See other permissions using Permissions Manager Players do not require any permissions by default. Grid This plugin creates it's own spawn points automatically, which cover the entirety of your server's map when the plugin is loaded. This is created one-time when the plugin loads. The grid maintains itself without requiring any input. You may view the grid by typing /rb grid in-game to view detailed drawings of all locations on the grid. X - green - possible spawn point X - Red - currently in use C - Cyan - construction detected nearby TC - yellow - TC detected nearby W - blue - water depth is too high - refreshes on ocean level change Each location on the grid is checked a second time before spawning a base to insure it does not spawn the base on players or their buildings. You can disable using the grid by providing a valid spawn file for each raid type (buyable, maintained, scheduled and manual). Commands buyraid - buys a raid, eg: buyraid easy, buyraid easy steamid, buyraid 0, buyraid 0 steamid. I suggest typing the command and using the UI to buy bases. rb - for players to see the ladder (also for admins to see the status of each raid going on, which includes showing the allies and owners of each raid) rb ui [lockouts|status] - COMMAND REMOVED rbe despawn - despawns a players purchased base if they have raidablebases.despawn.buyraid permission For admins, or players with the admin permission raidablebases.allow: rb.config stability true/false - sets stability in every profile rbe debug - toggles debug messages shown every second to server console for maintained and scheduled warning messages rb grid - see the grid and all monument names rb resettime - reset the time for the next scheduled event rb savefix - to cancel a server save that has become stuck - requires authlevel 2 rb prod - to gather information from a raid base entity for debugging purposes - requires admin or raidablebases.allow rbe - spawns a base at the position you are looking at. You cannot spawn a base on a player (including yourself) rbe draw - draw the raids radius rbe despawn - despawn a base near you (can be used by players with raidablebases.despawn.buyraid permission to despawn a base they purchased) rbe despawnall - despawn all bases rbe [basename] [difficulty] - spawn a raid at the location you are looking at rbe expire steamid|playername - removes a lockout for a specific player rbe expireall rbe active - shows status for each event rbevent [basename] [difficulty] - spawn a raid randomly on the map - and teleport to it if using the command in-game rb.reloadconfig - allows you to reload the config without needing to reload the plugin. Some changes are not applied immediately, and no changes are retroactive to bases that are already spawned. rb.config - allows you to edit the config by adding, removing, and listing bases. Requires the permission raidablebases.config when not being used from the server console. rb.toggle - toggles Maintained Events and Scheduled Events on/off, if enabled in the config, until plugin reloads rbe setowner name - Sets the player as the owner of the raid rbe clearowner - Clears the owner of the raid Additional Bases allows you to add additional files to an existing base so that all bases in that list share the same configuration as the primary base/profile. This is great for setting up a list of bases for easy, medium, hard, expert and nightmare. Command rb.populate will populate specific loot tables with every item in the game (items are disabled by default as their amounts are set to 0) Arguments: rb.populate easy medium hard expert nightmare loot all Arguments: rb.populate 0 1 2 3 4 loot all easy - Populates oxide/data/RaidableBases/Editable_Lists/Easy.json medium - Populates oxide/data/RaidableBases/Editable_Lists/Medium.json hard - Populates oxide/data/RaidableBases/Editable_Lists/Hard.json expert - Populates oxide/data/RaidableBases/Editable_Lists/Expert.json nightmare - Populates oxide/data/RaidableBases/Editable_Lists/Nightmare.json loot - Populates oxide/data/RaidableBases/Editable_Lists/Default_Loot.json all - Populates ALL above loot tables Configure the items to your liking then copy the files contents into a loot table that you would like to use (for example Difficulty Loot/Easy.json) You cannot use loot tables in the config file anymore. Use the data directory (oxide/data/RaidableBases) API No return behavior: void OnRaidableBaseStarted(Vector3 raidPos, int mode, bool allowPVP) void OnRaidableBaseEnded(Vector3 raidPos, int mode, bool allowPVP) void OnPlayerEnteredRaidableBase(BasePlayer player, Vector3 raidPos, bool allowPVP, int mode) void OnPlayerExitedRaidableBase(BasePlayer player, Vector3 raidPos, bool allowPVP, int mode) OnRaidableBaseDespawn, OnRaidableBaseDespawned, OnRaidableBasePrivilegeDestroyed, OnRaidableBaseCompleted find more hooks and arguments by searching for CallHook in the plugin file Tips Players will be considered raiders after looting, killing an npc, using explosives, eco raiding, destroying a building block/high wall/door or dealing damage from INSIDE of the dome You must change easybase1, mediumbase2, expertbase3, etc to the name of your CopyPaste files, or vis-versa. This plugin doesn't create bases for you. You can use the rb.config command (rb.config add "easy bases" easybase1 easybase2 0) in the server console to make this process easier. You can rename all profiles or additional base filenames. When copying a base with CopyPaste, make certain that you copy the base from eye level of the CENTER foundation within the base, or slightly clipped into this foundation with noclip. Whichever provides better results for you. You must verify that the base pastes down correctly (with /paste command) after you've copied it. I would not change autoheight from false to true. height is the distance the base is spawned off of the ground. elevation determines how flat the surrounding terrain must be in order for bases to spawn on it Scheduled Events is how often you want a random base to spawn on the map. This is disabled by default. This randomness comes from Every Min Seconds and Every Max Seconds Maintain Events will always spawn the Max Events amount of bases on your map. This is disabled by default. When one despawns, another will take its place shortly after. Allow Teleport will prevent players from teleporting when disabled. Compatible with NTeleportation or any plugin that uses the CanTeleport hook. Help This plugin does NOT use Zone Manager - it creates and manages everything on its own. If you are having issues with too few locations on the grid, or each attempt to spawn a base returns a manual spawn was already requested then it is likely because of how you have setup Zone Manager. You either have far too many zones, or you have zones which are far too large. Raidable Bases will not spawn in these zones unless the ZoneID is added to Allowed Zone Manager Zones in the config file. Do not put this plugin in your store/shop. It simply is not designed to work with it. There are far too many cooldowns to make this idea plausible, and the plugin cannot function properly without them. Using /buyraid will open a UI designed specifically for this issue. This plugin requires CopyPaste plugin to work. It also requires that you have copypaste files already made. Raidable bases will be spawned using the CopyPaste plugin. This plugin does NOT come with any bases. PvE server friendly with TruePVE and other plugins that support the hooks CanEntityTakeDamage, CanEntityBeTargeted, and CanEntityTrapTrigger. Bases can have 5 difficulty settings: 0 for easy, 1 for medium, 2 for hard, 3 for expert, and 4 for nightmare. This is configurable per profile. Bases can spawn on roads and other areas that do not allow building by Rust. Building ladders in these areas is allowed by the plugin. I will add support for building twig later. My bases often spawn in the same biome If you're having issues with spawn points being repeatedly used, or with a biome being favored consistently over other biomes then this is an elevation issue with the terrain on your map. You can fix this by increasing the Elevation in the configuration. For example, if your Elevation is 1.0 then set it to 1.5 and try again. This will also increase the height the base is allowed to spawn off of the ground. With certain maps you'll just have to make do with this issue. Corpses appear outside of the dome as backpacks This is intended, and it is optional. The location is drawn on the players screen to notify them that their corpse moved. This allows players to retrieve their backpack in the event that the raid becomes locked privately to another player, and prevents them from entering. Players do not drop their active item when they die. Bases Stop Spawning On Linux Machine [Error] Exception while calling NextTick callback (DllNotFoundException: libgdiplus.so.0) If you see this error after bases spawn then you need to install libgdiplus on your machine. This will mimic the below issue but it is NOT a bug like the below issue is. A quick google search shows the install command is: sudo apt-get install -y libgdiplus This happens when images in the CopyPaste file are being rendered by converting the byte array to bitmap.$40.00 -

Version 3.4.13
3,422 downloads
The ultimate base protection plugin that allows players to pay a resource in exchange for configurable protection for their base or tugboat. This plugin has been rewritten from the ground up for performance, quality, and integrating community suggested features. Features There are many different ways you can configure this plugin to fit the needs of your server. Many features can be modified or disabled entirely through the plugin configuration file. These include: Both online and/or offline base protection Trade currency for protection or provide it for free Players can turn on/off protection Permission based protection tiers Configure what gets protected and who it is protected from Set limits on how long protection lasts Indicator(s) for displaying base protection Option for allowing raiders to bypass protection if they can drain the protection balance with damage Options for making protection more expensive for larger bases/clans and cheaper for small groups. UI that blends in seamlessly with vanilla Rust. Disclaimer This plugin will be updated at the owners discretion. Before purchasing any plugin, I recommend checking the date of the last update and refer to support tickets to see if there might be any issues with the latest Rust game version. If a game update breaks this plugin, please open a support ticket (if it doesn't already exist) and direct message me on Discord (link found below). How to Use Configure the plugin and load it Once loaded, assign yourself (or your group) one of the protection level permissions. Place a new tool cupboard, or find one that YOU have previously placed. Open the tool cupboard inventory, at the top you should see two tabs: "Upkeep" and "Protection". Select the protection tab to view the raid protection info. On this screen, you will be able to spend the configured currency in order to purchase hours of protection. By default, this currency is scrap. Use the buttons on the right to add some hours of protection, you should see that status change to show the time you are protected. Your base will now be protected for the amount of time specified. Notes You can use the Clear button to withdraw all balance, and stop protection The Pause/Resume button can be used to start/stop protection without changing the balance. The Info button will reveal a panel which displays additional information on protection. The +Max button will deposit the maximum amount of time that you can afford Quick Start Presets There is a lot of documentation for this plugin because there is a lot you can do with it! However, it doesn't have to be complicated. If you have a simple use case in mind, you can use one of these preset configurations to get what you need or use as a starting point without having to figure it out yourself! Important: You will want to assign your default permission group the raidprotection.level.1 permission for any of these configurations. Always Free Provides free raid protection for all players with the level 1 permission Protection for tugboat bases Recommended for PvE or light PvP servers Offline Only Same as the default config, but only offers offline protection Has a limit of 48 hours of protection for level 1 Includes a level 2 permission with unlimited hours of protection (VIP) Protection for tugboat bases Recommended for PvP servers Hardcore Offline only protection Two protection levels, one with a 48 hour limit and one with no limit Additional costs that scale with number of owners and building size Raiders can damage a structure and cause it to "bleed" protection balance to attempt to disable the protection with enough damage Significant delay for activating protection No protection for tugboat bases Recommended for hardcore PvP servers Upgrading Versions When a new version is released, you may need delete your config and lang files and reload them to accommodate the new changes. You do NOT need to delete the data file, unless specifically instructed. As long as you do not delete the data file, then all of your protection balances will persist, even between versions. Not all updates will require this process, but if it does, you will be notified with a message like this: To resolve this, simply delete the config and lang files and reload the plugin. You will need to manually update these files to align with what you want. As of v3.4.0 you no longer need to delete your config files when upgrading from a previous version. However, you still should check the config after the update is installed to verify no unintended changes have occurred. Protection Levels Protection levels are how you assign a particular set of rules to a player. These protection levels are added in the configuration file, and are then assigned to an auto-generated permission. Each protection level needs a unique Rank property, this rank determines the order of precedence when a player is assigned multiple protection levels. In this event, a player's protection level will always be the highest ranked protection level they are granted. Protection levels are managed in the configuration file, here is some information on some of the properties: Cost per damage protected - This amount will be deducted from the protection balance for each point of damage that was protected. So if this value is set to 1 and someone attempts to deal 100 damage to a protected structure, and that structure has 100% protection, then 100 balance will be deducted. If in that same example it was only 50% protection, then only 50 balance would be deducted. Entity resistances are taken into account as well (twig will take more damage than metal, ect). Hourly base cost - This is a fixed cost that is charged per hour of protection. Hourly cost per authorized player - This amount will be charged for each owner every hour. Can be used to charge players more if they have a larger clan. Hourly cost per floor - This amount will be charged for each floor every hour. Can be used to charge players more for protecting a larger base. Max protection time - The max number of hours protection can be applied for. If set to null, then there will be no limit. Offline protection percent - The percent of protection a structure will receive when all the owners are offline. A value of 0 will be unprotected, and a value of 100 will be fully protected. Online protection percent - The percent of protection a structure will receive when at least one owner is online. A value of 0 will be unprotected, and a value of 100 will be fully protected. Rank - A number value indicating the order of importance when a player is assigned multiple protection ranks. Higher values indicate a greater importance. For example, if a player is assigned both protection rank 1 and protection rank 2, then tool cupboards they place will be of protection rank 2 instead of 1. These ranks must be unique DO NOT create protection levels with the same rank. This value needs to be 1 or higher, it cannot be 0. Delay after taking damage - The number of seconds before protection may begin after a structure has taken unprotected damage. It is recommended to set this to a higher amount on PvP servers. Delay for offline protection - The number of seconds before offline protection kicks in after the last owner has gone offline. It is recommended to set this to a higher amount on PvP servers. Damage resets timer when owner is offline - If this is set to true, then if a raid has already started on a structure that has offline only protection, but the protection hasn't kicked in yet (due to a delay timer) then the attackers can continue to raid indefinitely as long as they continue to do damage while the owner(s) are offline. If this is set to false, then the attackers will only have a certain amount of time to continue their raid if the owner(s) are offline. Allow tugboat protection - If this is set to true, then players with this protection level may receive protection for tugboat bases. For these tugboat bases the protection panel can be accessed in the fuel inventory of the boat. The founder of a tugboat base is whomever is the FIRST player to authorize on a tugboat. Founder Limit - The number of tool cupboards that a player can be a Founder of and receive raid protection. If a player exceeds this limit, then future tool cupboards will not receive protection until enough previously placed ones have been destroyed in order to be within the limit. If a player places a tool cupboard, and they have exceeded the limit, once they are no longer exceeding the limit they can "activate" that tool cupboard in the info panel to have it gain raid protection. If this value is set to null then there is no limit. Founders and Owners When a tool cupboard is placed, the player who places it is permanently labeled as the "Founder" of that tool cupboard and building privilege. The protection level of that building privilege is derived soley from the founder's protection level, and therefore won't change unless the founder's protection level changes. Whenever a player is authorized on a tool cupboard, they will be permanently branded as an "Owner" of that tool cupboard. Owners are all the players, including the founder, who have EVER been authorized on the tool cupboard. This means that players will still be listed as an owner even if they deauthorize themselves. Owners are important because they affect how Online/Offline protection will be triggered. A base will only be granted offline protection if ALL the owners are offline, otherwise online protection (if available) will be granted if at least one owner is online. For tugboat bases, the founder is whomever is the first player to authorize themselves on the tugboat. Permissions raidprotection.admin raidprotection.level.x - these permissions are autogenerated based on your protection level settings in the config, they will show up in the server console when the plugin is loaded (unless you have Enable Console Messages set to false) raidprotection.ignore - raid protection will not count any player with this permission towards being an owner. They will not show up in the owner list and will not count toward team member count for offline protection. They also will not receive protection on bases they build even if they have a protection level assigned. This is useful for admin groups so that you don't have to remember to deauth on tool cupboards. However, if this permission is ever revoked, that player will be retroactively counted as an owner on ALL tool cupboards they are currently authed on. Commands Player Commands These commands require no permissions and can be used by any player. /pro - displays the raid protection information panel, requires authorization on the tool cupboard in the current area. /lev - displays a screen that tells the player their personal assigned protection level and explains the benefits that comes with it. Admin Commands These commands require the raidprotection.admin permission to use. /tc - displays a screen with all the available admin commands /tc help - same as /tc Use the above commands to see a full command list in game. Configuration The default config file: Here is an explanation for some of the fields: Enable Logging - Set to true to keep logs of tool cupboards protection activity. Logs will be saved to the oxide/logs/RaidProtection folder. It is recommended only to enable this only for debugging purposes, as it will take a significant amount of storage space if you have a larger server. Enable Ledger - Set to true to keep track of protection balance changes for tool cupboard. These ledger files are stored in oxide/data/RaidProtection/Ledgers. It is recommended to keep this enabled, as it will help you roll back balances if a player has an issue. This does not take up as much storage space as logging does as it only keeps track of balances. Enable Console Messages - Set to false to disable the info messages upon plugin reload. Commands - You can change the prefix for the commands this plugin uses here. Chat Message Icon ID - A steam id for the portrait of chat messages. Protection Tabs Offset - This value will adjust the vertical placement of the Protection Tabs in the tool cupboard menu. Positive values will move it up, negative values will move it down. Useful for making it so those tabs don't conflict with other UI plugins that use that area. Image Settings - Links for the images the plugin uses. Indicator Settings - Settings for the indicator that (by default) appears in the top right when you attack a protected structure. You can change its size and position or disable it. Plugin Integration - Set any of these to true if you want this plugin to take advantage of the features of another supported plugin. Custom Status Framework Settings (Ignore if you do not have Custom Status Framework integration enabled) Popup Attack Indicator - If set to true, a status will briefly appear when a player attacks a protected structure. Persistent Status For Owners - If set to true, a status will appear while a player is in a protected area that they are an owner for. Slight performance cost when enabled. Persistent Status For Non Owners - If set to true, a status will appear while a player is in a protected area that they are NOT an owner for. Slight performance cost when enabled. Popup Status When Hammer Equipped - If set to true, a status indicating the protection level of the area they are in will appear while they are holding a hammer. This will appear regardless of if you are an owner of that area or not. Protection Settings Admin owners removed when deauthorized - Normally, you cannot remove an owner even if they deauthorize. But if this setting is enabled, it allows admins to remove themselves as owners when they deauthorize from a tool cupboard. They can also achieve this with commands. Allow balance withdraw - If set to true, then players will see a "Clear" button in the tool cupboard panel that allows them to withdraw any protection balance. Allow max deposit - If set to true, there will be a "+Max" button that will purchase the maximum number of protection hours a player can afford. Award remaining balance when cupboard is destroyed - If set to true, whomever destroys a tool cupboard will be awarded whatever amount was in the protection balance. Currency item - The item that will be used as currency for protection, this will only be overridden if you are using Server Rewards or Economics for your currency. If you want it to be a custom item that has a skin, you can put # followed by the skin id after the item name. For example "scrap#12345" would only accept scrap items with the skin 12345. Protected entities - If any of these are set to true, then that type of entity will be covered under Raid Protection. If you are using other protection plugins like TruePvE, then you will want to configure these to not overlap with what other plugins are protecting. Protected from - If these are set to true, then damage from that type of source will be protected. By default Authed Players is set to false, which means that players will be able to damage their own structures, but enemy players cannot. Protection levels - See the section about protection levels for information. Protect twig - If set to true, then twig building blocks will receive raid protection. If set to false, then twig building blocks will not receive raid protection, even if placed by an owner of the base. Ledgers As of Raid Protection v3.2.0, you can optionally configure ledgers to be enabled. When enabled, the plugin will keep logs protection balance changes for all tool cupboards. These logs will be saved to oxide/data/RaidProtection/Ledgers. There is a ledger file for each tool cupboard, and it's filename will make the entity ID of that tool cupboard. You can use the /tc id command to see what the ID of a tool cupboard is (see commands section). The benefit of ledgers is that each balance change has a specific GUID identifier attached to it that can be used to restore a tool cupboard's balance to that exact state in the event that a player has an issue. An example of a ledger file might look like this: Ledger file for tool cupboard with ID 2250729 [ "05/26/2023 16:17:56,ad87f16e-52eb-4689-887f-ecc53cd3ff13,0,Withdraw", "05/26/2023 16:18:20,108e54c0-98c4-46df-9eb3-e17192c37bb3,0,CollectionStopped", "05/26/2023 16:18:23,a2f03162-200c-47ce-948e-b0c703435e51,0,CollectionStarted", "05/26/2023 16:18:28,5c83390e-bbd2-4049-8ec9-8f2951746159,0,Withdraw", "05/26/2023 16:19:29,cd892a3f-249b-4cad-8949-abf904656288,20,Added", "05/26/2023 16:19:31,6e710dfc-23c2-4375-8c4f-07017d4d44c6,40,Added", "05/26/2023 16:19:31,bc51f8c7-3f3a-4abc-8fd2-8bb4c47fe454,60,Added", "05/26/2023 16:20:25,f08cfa34-a623-4de3-9027-7c3acb3e3ec3,60,CollectionStarted", "05/26/2023 16:20:52,a849be59-899c-4779-bba6-2f5f1b0ffb8d,59.93055,CollectionStopped" ] The format of each row goes as follows, from left to right separated by commands. Date and Time of balance activity GUID identifier, used by the /tc restore command to roll back a balance The protection balance of the tool cupboard at that given time A brief descriptive reason as to what changed about that balance For example, using the ledger file listed above, if we wanted to rollback the tool cupboard to before the collection started (the last "Added" one), we could run the following command. /tc restore 2250729 bc51f8c7-3f3a-4abc-8fd2-8bb4c47fe454 Running this command will set the balance of the tool cupboard with ID 2250729 back to its balance of 60. As of v3.2.3 you can also mass restore all tool cupboards to a specific time or date. For example, using the ledger file listed above, if we wanted to rollback the tool cupboard to the time 16:19:00. We could run the following command. /tc ledger rollback 16:19 This will rollback ALL TOOL CUPBOARDS to the first ledger entry that comes BEFORE the given time. In this case that entry would be GUID=5c83390e-bbd2-4049-8ec9-8f2951746159 at time 16:18:28 because that is the latest entry before 16:19:00. Thus the balance will be 0. Rollbacks can also accept a date in addition to a time. For example, if you wanted to rollback to noon the following day you could run the following command. /tc ledger rollback "5/25/2023 12:00" Notice that there is no ledger entry for this tool cupboard that goes back that far. In this case, the balance of the cupboard will be set to ZERO. Please note that if you include a date and time the value MUST be enclosed in quotes (see the example above). Tugboat Bases As of v3.3.0, Raid Protection can optionally be allowed for tugboat bases. This is configurable per protection level. Tugboat bases can utilize all the features of a normal tool cupboard base. You can access the protection panel for tugboat bases in the fuel inventory in the drivers seat. For tugboat bases, the founder of the base is considered to be the FIRST player to authorize on the tugboat. Plugin Integration Clans This plugin provides built-in support for Clans. If a player is in a Clan, it will automatically treat all clan members as owners. This of course means that the owners will not be removed even when a member is kicked from a clan. True PVE This plugin is compatible with True PVE as long as both plugins are configured in a non-conflicting way. For example, if you use True PVE to provide protection to players, then in your Raid Protection config file under the Protected entities section you should set Authed Players and Unauthed Players both to false to avoid hook conflict errors. If you do see hook conflicts, see the section of this documentation about how to resolve hook conflict errors. Zone Manager This plugin is compatible with ZoneManager without any extra configuration. ZoneManager will take priority if the zone has the "undestr" flag. Custom Status Framework If you have CustomStatusFramework installed and want to take advantage of the status indicators (that appear in the bottom right) in your Raid Protection config file under the Plugin Integration section set Custom Status Framework to true. Simple Status Simple Status is a plugin that is still being developed, and will be an alternative, more performance friendly option to Custom Status Framework. This plugin is not yet available, but as of v3.4.0, configuration options have been added to support this plugin when it releases. Preview of indicators: Economics and Server Rewards If you wish to use economics balance or server rewards points as a currency instead of an item, you can set ONE of these to true in the plugin integration section of the config. It is important to set ONLY ONE of these to true, or else both will be disabled and you will get a warning in the console. Protection panel with Economics: NoDecay This plugin is compatible with NoDecay without any extra configuration. Notify If you want to use Notify as your source of indicators you can enable the flag for it in the Raid Protection config. Abandoned Bases If you enable Abandoned Bases in the integration config, then bases that are labeled as Abandoned will not receive raid protection. Raidable Bases Bases spawned by Raidable Bases will be ignored by Raid Protection. They should not show up in ledgers and players cannot add balance to them. Skill Tree If Skill Tree is enabled in the integration config then it will prevent players with the lockpicking skill from picking locks in raid protected areas. Other Plugins Should be compatible with most other plugins given they don't use the onEntityTakeDamage hook. If they do use this hook, it just means you have to change your configuration settings, see the hook conflicts section for more info. Images If you experience any issues with the default images provided by this plugin I recommend hosting them yourself. The urls can be changed in the config. Here is a zip file containing all the images. icons.zip Carbon As of 8/19/2023 I can confirm that this plugin is compatible with Carbon. Please open a support ticket if you experience any Carbon related issues. Hook Conflicts If you're getting messages in the server console that looks similar to this: OnEntityTakeDamage resulted in a conflict between the following plugins: NoDecay - True (Boolean), RaidProtection (False (Boolean)) That means that another plugin is conflicting with Raid Protection. In most cases this is an easy fix, and it just means that you need to update your Raid Protection config file to not protect the same entities that another plugin is already protecting. So for example, if you have a plugin already that makes it so player's cannot attack each other, then there is no need for Raid Protection to do that job, and therefore in the Protected entities section of the config you should set Authed players and Unauthed players to false to avoid conflicts. Previous Versions You may have seen the free version of this plugin available on uMod. That version (2.X.X) will stay available for free on umod, but is no longer supported. If you are upgrading from the free version, you must first delete the config/lang/data files before installing v3.0.0 and above. If you do not delete these files, you will likely run into issues, as despite having the same name, the plugin has been completely rewritten, and therefore is completely incompatible with the free version. Developer API /* * Returns 0 if entity unprotected and 100 if entity fully protected */ private float GetProtectionPercent(BaseEntity entity) /* * Returns a list of the owners of the structure associated with the given entity */ private List<BasePlayer> GetOwners(BaseEntity entity) /* * Returns the player who is the founder of the structure associated with the given entity. Can be null. */ private BasePlayer GetFounder(BaseEntity entity) /* * Returns the protection balance of the structure associated with the given entity */ private float GetProtectionBalance(BaseEntity entity) /* * Returns the hours of protection remaining of the structure associated with the given entity */ private float GetProtectionHours(BaseEntity entity) Discord If you want to report a bug, require support, have a suggestion or want to be notified when I release an update you can join my plugin development discord with this link: Plugin Development Discord Link Donate Writing and maintaining these plugins takes a tremendous amount of work. Donating is one way to give some positive feedback which helps me continue making them! Buy me a coffee here! FAQ Please check out this section before opening a support ticket, it may save us both some time! Q: I don't see the status indicators in the bottom right. A: The status indicators come from another plugin called CustomStatusFramework, you must install it and enable it in the config file to get the indicators. Q: I have protection time, but I am able to damage my own structure. By default "Authed players" are able to damage their own structures. You can change this in the config file. Q: The add hours buttons aren't showing for me in the tool cupboard panel. A: The hours buttons will not show if the protection has 0 cost. Q: I have a max protection time set, but it says "protected for forever" A: If the protection cost is 0, then there cannot be a max protection time. Q: I deauthorized myself from the tool cupboard, but I am still listed as an owner. A: Owners are not removed after deauthorization. Only admins can remove owners. Q: How are overlapping tool cupboards handled? A: If a player has a base with overlapping tool cupboards, then each cupboard will need its own protection. Which entities are protected depend upon which tool cupboard governs that entity. Q: Can player's exploit offline only protection by deauthorizing? A:Deauthorizing will not help players looking to exploit offline only protection because they will still be considered an Owner even if they deauthorize. Q: Can a player exploit offline only protection by never authorizing? A: If a player is never authorized on a cupboard, then they will not count toward being online, and therefore offline protection can occur. However, players cannot add or manage protection balance unless they are authorized, and therefore the protection balance will run out, especially if a max protection time is set. Q: I have protection for horses on, but now the horses never poop A: If horses don't lose health, they will never eat and therefore never poop, this is a side effect of protection for horses. Q: Why does protection say "pending" in the bottom right? A: Pending either means that you have offline only protection or your structure has recently taken damage and therefore protection is delayed. See the tool cupboard protection panel for more info. Q: I'm seeing conflict warnings in my console between Raid Protection and True PvE A: Please refer to the sections of documentation for TruePvE and Hook Conflicts Q: I'm seeing Image failed to download! Error: HTTP/1.1 429 Too Many Requests A: Refer to the Images section of the documentation.$29.99- 257 comments
- 15 reviews
-
- 16
-

-

-
- #protection
- #base
- (and 5 more)
-
Version 1.0.15
529 downloads
Introducing portable 3 x 3 bases in a box - that you can carry in your inventory! Deploy them and open them to go inside - to store, craft, smelt, grow, party... live. Expand and maintain the upkeep to protect from raiders. Pick them up and deploy somewhere else. Think outside of the box... and inside too! Questions? Support? Join the discord: https://discord.nikhub.dev WATCH THE TUTORIAL BY SRTBULL! AS FEATURED BY SHADOWFRAX! (around 0:55 mark) Just like the TARDIS from Doctor Who, they're bigger on the inside! In the "real" Rust world, an entire 9x9x9 metre large (over 25000 cubic foot) Pocket Dimension fits neatly inside of a Small Wooden Box. You can skin that box any way you like to camouflage or disguise it - whatever the player's Workshop Skins / server skin plugins allow. Players can convert existing buildings into Pocket Dimensions easily with one button in the Tool Cupboard's UI. Or if that's too much of an effort, entire, fresh, ready-to-be-moved-in Copy Paste files can be sold as boxes with your own, custom defined skin - this is entirely optional and requires Copy Paste, more on that in the dedicated section below. Whether to allow either approach is entirely up to your configuration. By default, the configuration allows raiding the Pocket Dimensions in several different ways - but if you're planning on running this plugin on a PVE server and you don't want any of that, there's many configuration options that can be adjusted to enhance your server experience. Both styles of servers have their own dedicated sections on this page - just read below. Make sure you maintain the integrity of your Pocket Dimension! If any of the external structures (wall/doorway) of the Pocket Dimension building either 1) decays 2) is raided 3) is removed by an admin/plugin, or 4) the box housing the dimension itself gets destroyed, the Dimension will Collapse, teleporting all players inside of it, and dropping all contents of storage containers, turrets, the Tool Cupboard, and anything else that can store any items, to the location where the box is/was last deployed. Easy come, easy go! You can pick the Pocket Dimension boxes up and move them somewhere else at any time, and everything will still be there. You can even deploy Pocket Dimensions inside Pocket Dimensions inside Pocket Dimensions... a box-ception! By default, the configuration does not allow picking up boxes with players inside of them, but you can toggle this setting. Quick Start As an admin: make sure you grant your groups/players appropriate permissions from the list below. Make sure Copy Paste, No Escape and Server Rewards / Economics are loaded in and configured properly, if you're planning on utilising any of the extended capabilities. More on the support for those plugins below. That also goes for any potentially compatible plugins that dispense/support skinned box templates from the config, like Kits or Shop by Mevent, or Copy Paste - based plugins, like Raidable Bases. As a player: make a 3 x 3 x 3 cube that meets the validity requirements (more on that below) - if you have the proper permission and the appropriate amount of required currency, open the Tool Cupboard and press the pink "Convert to Pocket Dimension" button. If built correctly, you will now receive a box containing that entire cube inside. Alternatively, deploy a new Small Wooden Box skinned with a skin ID mentioned in the config that references a valid Copy Paste template - no construction by players necessary, but still possible. This plugin comes with several pre-built, already known to be valid Pocket Dimensions, ready to be enjoyed by your players. Permissions (Oxide.Grant user YourName [permission name starting with pocketdimensions.]) This plugin utilises the plain Oxide permission system. For a quick setup on a typical server, grant yourself the pocketdimensions.admin permission, and grant the default group in Oxide the pocketdimensions.player.all permission. pocketdimensions.admin - this permission is required to execute the admin commands mentioned in the section Admin Commands just below this section. pocketdimensions.player.all - this permission is the quick-start equivalent of giving all 4 permissions mentioned below. Don't grant this if you want a more customised permission setup. For example, if you don't want to allow respawning inside and converting by players, and you only want to allow deployment/pickup and entering/exiting, use the combination of the 4 permissions below. pocketdimensions.deploy.pickup - holders of this permission can deploy and pick up Pocket Dimension boxes, be it already existing ones and fresh ones based on skin ID/Copy Paste file combo in your config. Of course, this takes into account building block/other conditions, too. pocketdimensions.player.enter.exit - holders of this permission can enter Pocket Dimensions by opening their boxes, and exit them by interacting with their portals. If a player doesn't have that permission, they will be informed upon opening/interaction, and barred from traversing in/out. pocketdimensions.player.convert - holders of this permission can create new Pocket Dimensions by converting an existing building from its Tool Cupboard's UI - as long as they have the required amount of currency (certain required item / Server Rewards / Economics), and the building itself meets the structural requirements. Players without this permission won't even see the conversion button in the UI. pocketdimensions.player.respawn - holders of this permission can respawn on bags, beds and towels deployed inside Pocket Dimensions. If a player doesn't have that permission, and a bag is deployed by them (or someone else bags them in) inside a Pocket Dimension, the players will not see that bag on their Death Screen as a possible respawn location. Admin Commands (require the pocketdimensions.admin permission) These commands can be executed both from console and the chat - in case of chat, they must be prefixed with a forward slash ( / ), and in case of console, no forward slash. /pd.check Come close to a TC and look directly at it, then issue this command from the chat or F1 console. It will perform the validity check without actually converting anything. If any problems are found, it will tell you exactly what's wrong. Useful for making your own Copy Paste templates. /pd.convert Come close to a TC and look directly at it, then issue this command from the chat or F1 console. It will first perform the validity check. If any problems are found, it will tell you exactly what's wrong. Then, if no problems are found, it will convert the building into a Pocket Dimension and you will receive it as a deployable Small Wooden Box item. /pd.lostnfound When a Pocket Dimension Item despawns, is recycled, is placed in a container that gets destroyed, or is otherwise removed from the world, the Dimension that it represents will be marked as "lost". This special marking will NOT happen as long as the Item still exists in a container (including players' inventories) somewhere in the World. Pocket Dimensions marked as "lost" can then be reclaimed as a newly created Item tied to the building by an admin, deployed and inspected, and given back to the rightful owner... or Collapsed by the admin, if the admin has a hunch that the player "lost" their dimension on purpose so nobody would be able to access anything while the player was offline. Using this command will either give you ALL newly reclaimed box items (so make sure you have room in your inventory), or it will tell you there's nothing in the lost-and-found to be reclaimed. /pd.givebox [skin ID or Copy Paste filename] [optionally: player partial name / full steam ID] Use this command to create a Small Wooden Box item, skinned with a special skin mentioned in your config, and then given to a player. A new Pocket Dimension based on the Copy Paste template will be created inside of that box the first time it's deployed somewhere. This command requires Copy Paste to be installed to work properly, and a properly set up Skin ID - to - Copy Paste filename entries in your config. The filenames mentioned must exist in your Copy Paste data folder, too. Use the first parameter to identify the template mentioned in your Copy Paste section of the config either by its skin ID or its Copy Paste file name. Multiple skin IDs can lead to the same Copy Paste filename, so if you're identifying the template by filename, the skin ID of the first entry in your config that leads to this file name will be picked as the skin of the newly created and given box. If the optional second parameter is not provided, it will be assumed a freshly skinned box should be given to the player executing this command - typically an admin. This command can be used by plugins that support executing commands with the STEAM ID or player name parameter. /pd.emergencycleanup Use this as a last resort to completely get rid of ALL Pocket Dimensions entities on the server for whatever reason. This is a very experimental plugin after all and things COULD go wrong... This includes all the Pocket Dimension buildings, their contents, loot inside of them, and the boxes containing Pocket Dimensions deployed in the world. If a dimension was not deployed as a box, but held as an Item in a container, those items will NOT be removed, but when deployed, the player will be informed that its associated Pocket Dimension was raided or decayed away. USE WITH CAUTION, THIS COMMAND CANNOT BE UNDONE. Those are all the admin commands so far. There's no player commands, as I consider them to be the last resort option when there's just no other elegant way of player input/interaction. What makes buildings "valid" candidates to be used as a Pocket Dimension? Not every building is viable to be converted. Generally speaking, a 3 x 3 x 3 cube with exactly 1 external single doorway anywhere on the side must be constructed - and nothing else on the outside (apart from the potential exception for Solar Panels / Wind Turbines on the roof, if your config allows them). The building blocks can be of any tier or a mix of tiers - from Twig to Armoured. It doesn't matter what's inside of the cube, only the outer "shell" matters. Once converted into a Pocket Dimension, players can build/expand/demolish inside just like they would with regular bases. To be more specific, when a check for the validity of a building is made, the following criteria are tested for, and the answer to each consecutive question must be "yes" before the test proceeds to the next question - if the answer is "no", the player will be informed of the reason: Does the building have exactly 9 square foundations overall? Does the building have exactly 9 square floors overall (presumably, for the ceilings)? Does the building have at least 1 single doorway overall? Does the building have at least 35 normal walls overall? Are the 9 square foundations all at the same level? For each of the 9 square foundations, does it have a matching square floor for ceiling, exactly 9 metres above it? Is the building's middle foundation NOT marked as belonging to a Pocket Dimension already? Does the building have either a normal wall (or a single doorway, but only one) all 4 sides, and not a wall frame, window frame, or a missing building block, to make the shell "air-tight" and prevent players from falling out of the Dimension into the void? Does the building have exactly 1 single doorway - no more, no less - on the external shell? Is the only external doorway currently "empty", i.e. no doors / vending machines are deployed there at this moment? If the config doesn't allow Solar Panels / Wind Turbines placed on the ceiling, is the building free of those potentially forbidden structures? Are all the electrical/water entities inside of the 3 x 3 x 3 cube free of any wire/hose connections to entities outside of that cube? (if Solar Panels / Wind Turbines are allowed in your config, those entities get a special pass at this stage of the check) Is the building free of ANY entities "sticking out" from the 3 x 3 x 3 cube - for instance roofs, honeycombs, porches, SAM sites, stairs etc, or Solar Panels / Windmills if your config does not allow them? If the answer to all those questions is a resounding "yes" - don't worry, it's the plugin's job to ask and answer those, not you! - the building is considered valid and as such can be converted into a Pocket Dimension! You will be informed of the result, whether it was successful or not. Raiding Pocket Dimensions (only applies to the default PVP-enabled settings) This is the default behaviour on a fresh configuration. If you're planning on running this plugin on a PVE server (player vs. environment, i.e. no raiding/hurting between human players themselves), you can skip this section and go straight to the Recommended PVE Settings section below. There are two main ways of raiding a Pocket Dimension: From the inside, by damaging the building structures belonging to the external shell - either the wall or the doorway housing the exit portal From the outside, by damaging the deployed Pocket Dimension box. By default, no locks can be placed on boxes containing Pocket Dimensions, to allow players raiding from the inside, too - but this setting can be toggled if you only want players to raid the boxes in the boring way. Of course, anything INSIDE of the Pocket Dimension can - and should - be locked! When raiding from the outside, on default configuration, the dimensional box will take 2% (1/50) of the damage it would normally take if it were just a regular Small Wooden Box. In other words, on default configuration, it takes about 7-8 C4 charges to make the dimension inside of it Collapse (so more or less as much as an Armoured-tier foundation). Just like with regular vanilla building raids, the same strategies (or combinations of those) can be applied here, too: The Deep - get in, take the goods, get out, leave, say GG to the building owner, who gets to keep their Pocket Dimension. The quintessence of sportsmanship in Rust raiding. The Grief - get in, take the goods (or not), make the building unusable till it eventually decays (and the dimension Collapses), leave. Highly malicious, but sometimes the only option... The Yoink - get in, take the goods, re-seal the entrance, and claim the dimension as now yours. You might want to move its box to another location though. The End - get in, and immediately start damaging one of the external blocks of the shell (typically the doorway housing the exit portal, or a wall next to it - or even both!). As soon as one of the external shell elements is gone (or is "ent killed" by an admin, or removed with a plugin), the entire dimension Collapses. More on dimensional Collapses in the section below. Recommended PVE Settings (only applies to default PVE-enabled settings) This will require adjusting some config settings and reloading the plugin. If you're planning on running this plugin on a PVP server (player vs. player, i.e. raiding/hurting between human players allowed), go back to the Raiding Pocket Dimensions section above - most default settings should work fine in the majority of scenarios. To find out what each of these recommended settings does, check out the Configuration section below for details. "DimensionalBoxesSubtractItemConditionWhenPickingUp": 0.0, "DimensionalBoxesAllowLockingWithLocks": true, "DimensionalBoxesAllowDamage": false, "DimensionaBoxesDamageResistanceDivisor": 50.0, "DimensionalBoxesAlwaysHaveStability": true, "DimensionalBoxesCheckForPlayersInsideWhenPickingUp": false, "DimensionalBoxesCheckBuildingBlockOutsideWhenEnteringDimension": true, "DimensionalBoxesCheckTCAuthInsideWhenEnteringDimension": false, "DimensionalBoxesCheckTCAuthInsideWhenPickingUp": false, "DimensionalPocketsAllowSolarAndWindmill": true, "DimensionalPocketsTrapImmunityAfterTeleport": 5.0, "DimensionalPocketsExteriorBlocksAllowNonDecayDamage": false, "DimensionalPocketsActualAltitudeMin": 3200.0, "DimensionalPocketsActualAltitudeMax": 3900.0, "DimensionaPocketsAllowVendingMachineBroadcast": true, "EffectPlayerTeleportAppear": "assets/prefabs/missions/portal/proceduraldungeon/effects/appear.prefab", "EffectPlayerTeleportDisappear": "assets/prefabs/missions/portal/proceduraldungeon/effects/disappear.prefab", "EffectsPlayerTeleportEnable": true, Collapse of a Pocket Dimension All good things eventually come to an end. "Collapse" in this context means that a certain Pocket Dimension and all its associated entities get destroyed and in the end, it's as if the Pocket Dimension never existed at all - save for all the juicy loot dropped from it. This can happen when... The box containing a Pocket Dimension gets "ent killed" by an admin/plugin, or gets damaged to the point of destruction One of the external shell structures inside of the Pocket Dimension (wall/external doorway) gets "ent killed" by an admin plugin, or decays/gets damaged to the point of destruction The exit portal housed in the external doorway gets "ent killed" by an admin/plugin Under normal circumstances, on a typical PVP server, you only expect the Pocket Dimensions to Collapse when they decay away, are raided, or purposefully removed by an admin (by "ent killing" the box or the external shell structure). If the Dimensions suddenly disappear with no apparent reason, it probably comes from another plugin's functionality, for example Abandoned Bases - but that's a completely expected outcome in this case: the Pocket Dimensions should behave as much as normal bases on the server as possible! On the topic of Abandoned Bases, if you use that plugin, you should definitely NOT allow locks on boxes containing Pocket Dimensions - otherwise the now-unlocked abandoned Pocket Dimension won't be accessible, as the box itself will not count as a base, and it will stay locked! During the Collapse, the last known position of the box associated with the Dimension will serve as the nexus point, where... All players inside of the dimension, asleep or online, alive or as dead bodies or bodybags, will be teleported to the nexus point, unharmed All entities that have an inventory, i.e. something stored inside of them - TC, boxes, turrets, traps, lockers etc - will drop their grey loot bags at the nexus points, as if all those entities were raided at the same time All building blocks and other structures will die, crumbling with gibs at the nexus point If the collapsing Dimension also contains Pocket Dimensions inside of it, and so on (A.K.A. box-ception), the entire "tree" collapses as well, at the root. That way, the best way to raid is always at the Dimension deployed directly in the world (the first one in the "box-ception" sequence), because it involved the least materials and effort. Works great with CopyPaste (and any plugin utilising it, like Raidable Bases) This plugin is fully compatible with Copy Paste and includes it as an optional dependency: i.e. Copy Paste is not needed for Pocket Dimensions to operate, but can potentially enhance the player's experience with extra capabilities. It's strongly recommended. Both the uMod version and the custom patched version distributed to work with Raidable Bases will work. As an admin, you can /copy and /paste a building and either convert it straight away (either with a command or in the Tool Cupboard UI), or just check if it's a valid candidate to be converted - more on validity below. You can also define some Skin IDs as special in the plugin configuration: when boxes with those particular skins are spawned for the first time (either being deployed by players, spawned/pasted by other plugins - Copy Paste itself or plugins utilising it, like Raidable Bases, or entirely separate plugins ), whatever Copy Paste filename you define, this box will be instantly made into a Pocket Dimension containing everything from the building that was copied under that name. And after that, the box can be re-skinned without any issues, too. You can also use the /pd.give command to give individual fresh Pocket Dimensions to players, by name or steam ID (look in the section Admin Commands above) from the server / F1 console or the chat - it's made in a way that shop/kit plugins relying on custom commands can utilise those easily. Useful if you don't want your players to convert their own buildings. Pocket Dimensions plugin even comes with a few predefined templates for those, so you can see how to set up your own. Just issue the /pd.give command without any arguments to get the list. If you want them to work properly, make sure you install the latest version of Copy Paste, and also upload the included Copy Paste files to the proper folder on your server. Compatible with Server Rewards / Economics Converting a valid building to a pocket dimension should NOT be free - and it isn't. By default, players need to deposit 500 Scrap into the TC - or have that amount ready in their inventory, both will work. You can adjust the amount and the shortname of the currency item in your config to your liking. You can even make it so that not only the shortname of this currency item is checked, but also its skin - useful if you have plugins that come with custom items. But you can also use Server Rewards or Economics as potential currencies, too! Check out the Configuration section above for more details. For this, either Server Rewards or Economics must be installed, depending on which one you want to use. Additionally, boxes with skin IDs mentioned in your config (leading to Copy Paste templates) can be sold in the Server Rewards shop, so it works both ways. Compatibility with No Escape If you don't use the No Escape plugin on your server, you can skip this section. Pocket Dimensions are just regular bases in many regards, so damaging any entities belonging to them will impose a Raid Block, and attacking any players inside will impose a Combat Block. Both of these count as an Escape Block. If this plugin detects that a player is Escape Blocked, several optional restrictions can be enabled/disabled in the Pocket Dimension config, to change how this Escape Block affects the gameplay for affected players: Entering Pocket Dimensions Exiting Pocket Dimensions Deploying Pocket Dimension Items into Boxes Picking up Pocket Dimension Boxes into Items Compatibility with other plugins Any plugin capable of issuing /utilising skinned items / spawning skinned Small Wooden Boxes, should work with Pocket Dimensions right out of the box (pun not intended). If there are any that have issues, please don't hesitate to let me know. Configuration (oxide/config/PocketDimensions.json) Below is a rundown of all the config values (and their defaults) that, combined with player permissions, will affect the gameplay on your server. Everything apart from the advanced stuff (like positioning/styling of the TC UI Button, or the CopyPaste templates) is explained in this section: "DimensionalBoxesSubtractItemConditionWhenPickingUp": 0.0, It would be highly inconvenient to be forced to constantly fix your Pocket Dimension box pretty much every time you pick it up, so this value will determine how much condition (in the range of 0.0 to 1.0, representing 0% to 100%) will be lost - and by default, it's 0.0, so the box will only lose condition when damaged. Set it to higher values (but never more than 1.0) to discourage players from moving their boxes too much, too effortlessly. "DimensionalBoxesAllowLockingWithLocks": false, Self-explanatory. By default, if a Key Lock or a Code Lock is placed on a Pocket Dimension box (be it automatically, with plugins, or manually, by players), the lock will just fall to the ground. It's to give the raiding players an opportunity to do the arguably HARDER option for raiding (statistically speaking) a dimension - from the inside. Set this to true to disable this behaviour and allow locks. "DimensionalBoxesAllowDamage": true, By default, boxes containing Pocket Dimensions will take damage - this enables the arguably easier raiding option, to raid from the outside, by destroying the box. How much damage is taken depends on the ResistanceDivisor value defined below. Set this to false if you want to make deployed Pocket Dimensions indestructible from the outside, by not letting players damage the box that contains it. "DimensionaBoxesDamageResistanceDivisor": 50.0, This value will determine how much stronger a Dimensional box is compared to its regular Small Wooden Box counterpart. For example, the default value of 50 means that it takes 50 times less damage, i.e 2% (1 divided over 50). Increase and decrease this value to make raiding from the outside harder or easier, accordingly. "DimensionalBoxesAlwaysHaveStability": true, This setting is true by default and it means that if a floor/foundation that the Dimensional box is placed on is suddenly destroyed, the box itself will remain floating in the air, instead of being destroyed along with it. It basically treats all boxes with Pocket Dimensions as if they were always placed directly on indestructible terrain. Of course, this never applies to Dimensions that are collapsing - no child Dimension in a "box-ception" sequence will ever remain floating "in Narnia". Set this to false if you want to make raiding the Dimensions from the outside easier if a box is not placed directly on actual terrain. "DimensionalBoxesCheckForPlayersInsideWhenPickingUp": true, If a player is inside of a Pocket Dimension and its box was just picked up, the player inside is now stuck, until the box gets re-deployed somewhere else. On the other hand... entire 30-man teams could be "smuggled" this way, all tucked quietly inside! Thus, by default, you cannot pick up pocket dimensions with players inside, and it's also not recommended to allow players to respawn inside, either, for the same reason. Set this to false if you really know what you're doing. "DimensionalBoxesCheckBuildingBlockOutsideWhenEnteringDimension": false, In vanilla Rust, if a box is unlocked, it can be opened, even if the player attempting it is not authorised on the TC. As such, this value is set to false, so that even if you're not authorised on the TC, you can still enter inside of a Dimensional Box. Set this value to true if you want that extra layer of security, in lieu of having a lock on the box that contains a Dimension. "DimensionalBoxesCheckTCAuthInsideWhenEnteringDimension": false, This setting, on the other hand, makes sure that an authorization on the TC is needed INSIDE of the pocket dimension itself (if there's one present at that point). For the same reason as above, it's set to false, but if you're feeling extra EXTRA paranoid, feel free to set it to false, and the only players that will be able to enter a Pocket Dimension were those originally authed on the TC before it as converted - and others bagged in later, but this requires the pocketdimensions.player.respawn permission, too. "DimensionalBoxesCheckTCAuthInsideWhenPickingUp": false, Similar to above, but related to picking up the Dimensional Box - of course, all the other checks for picking up are tested for, too (like building block outside). By default, this value is set to false, but if you want, you can toggle it to true, so that the only way to pick up a pocket dimension is to be authorised on its TC inside. "DimensionalPocketsAllowSolarAndWindmill": false, Allowing pretty much unlimited AND unchallenged electrical power inside of a Pocket Dimension can have several consequences for gameplay - and as such the default is false. Also, when the wires connection to the Solar/Wind generators on the roof are severed, the only way to restore them is with an intervention of an admin using "noclip". If you don't want your players to rely on fuel generators when inside of a Pocket Dimension, set this to true. "DimensionalPocketsAllowTestGenerators": true, Similar to the setting above, just dealing with Test Generators (either the static one, static invisible one, or deployable one). Normally those cannot be obtained by regular players (unless admins/plugins are involveds), and as such, this setting is true. If you have plugins/kits that make it possible for players to get them/spawn them, you should set it to false. "DimensionalPocketsTrapImmunityAfterTeleport": 1.5, When you enter an unknown Pocket Dimension, you never know if a shotgun trap or a turret are placed aiming right at the entry portal. Similarly, when you're inside of a Pocket Dimension, you don't know what's going on outside, so you can never be sure if somebody hasn't placed a trap aiming at the box containing the Dimension. Because of that, the default cooldown to be targeted by auto-traps right after a player enters/exits a pocket dimension is set to 1.5 seconds. Make it longer or shorter as you please, just not negative, and preferably no longer than 60 seconds. "DimensionalPocketsExteriorBlocksAllowNonDecayDamage": true, This effectively enables Collapsing an entire Pocket Dimension by attacking one of its external shell blocks (wall/doorway) from the inside - and as such, it's set to true. If you want to make the entire external shell impervious to damage (other than decay damage), set this to false. "DimensionalPocketsActualAltitudeMin": 3200.0, So here's the trick: in reality, the actual Pocket Dimension buildings exist at a randomly picked position on the map, but high up in the sky, and players are physically teleported to and from them - so it creates an illusion of being in a completely secluded place outside of "normal reality", where you can't even hear anything happening on the actual map. Similar to how Halloween Portals work. This setting defines the minimum random altitude at which Pocket Dimensions will physically reside for the duration of the wipe - by default, 3200 metres (3.2 kilometres, or roughly 2 miles). Adjust it if you have any other plugins that spawn things high up in the sky. IT'S NOT RECOMMENDED TO SET IT TO LOWER THAN 1000 - PLAYERS INSIDE MIGHT THEN HEAR THINGS HAPPENING ON THE ACTUAL MAP, LIKE C4, SUPPLY PLANES, HELI ETC. "DimensionalPocketsActualAltitudeMax": 3900.0, Similar to the setting above, this defines the maximum altitude. Both settings, together, effectively create a cuboid space high up in the sky, where Pocket Dimensions are expected to actually physically reside, at randomly picked locations. By default, this value is set to 3900.0, and there's a very good reason for that: AT EXACTLY 4000 METRES OF ALTITUDE, ALL PLAYERS WILL INSTANTLY DIE, INCLUDING ADMINS IN GOD MODE, AND THIS IS VANILLA RUST BEHAVIOUR. AS SUCH, IT IS NOT RECOMMENDED TO SET THIS VALUE TO HIGHER THAN DEFAULT. "DimensionaPocketsAllowVendingMachineBroadcast": false, While on the topic of maintaining an illusion - allowing players to effectively broadcast the location of their Pocket Dimension on the map would definitely break that illusion, so this value is false by default. Players who try to enable broadcasting in the Vending Machines deployed inside Pocket Dimensions will receive a warning instead, and the broadcast won't be enabled. Set this to true if you honestly couldn't care less about a visual detail like that. "DimensionalPocketsRespawningInsideRequiresDeployment": true, A safeguard against players trying to respawn inside bags/beds/towelrs in dimensions that are not currently deployed, to prevent the players from being effectively stuck inside (until they respawn somewhere else, at least, or until the box is re-deployed on the outside). "DimensionalPocketsTeleportingInsideRequiresDeployment": true, Similar to the setting above, but rather than dealing with respawning inside sleeping bags, this will prevent players from teleporting into a pocket dimension that is currently not deployed (works for any type of warp/teleport plugin). NOTE: Admins who are currently in noclip are allowed to teleport as they please, this is only checked for regular players. "DimensionalPocketsMaxInceptionDepth": 10, If you want to limit the amount of dimensions inside of dimensions inside of dimensions etc, this is the setting for you. If you change this value mid-wipe, only newly deployed boxes will be checked to see if they stay within the limit, and it won't affect already existing dimension trees. "DimensionalPocketsLocationMinTemperature": 15.0, When a new random location for a pocket dimension is checked, this setting will ensure that the biome-based temperature at 12PM (noon) will always be larger than this value. Decrease this value if you want a cooler climate. "DimensionalPocketsLocationMaxTemperature": 32.0, Similar to the setting above, this will put the upper limit on the biome-based temperature at 12PM (noon) when a new random location for a Pocket Dimension is considered. Increase this value if you don't mind a hotter climate. "EffectPlayerTeleportAppear": "assets/prefabs/missions/portal/proceduraldungeon/effects/appear.prefab", This is a purely cosmetic setting. When a player enters or exits a Pocket Dimension, it counts as a teleport. An audio-visual effect of your choosing will be played at the player's new location when that happens. By default, it's the same one used for the Halloween Dungeon. You can use most prefab effect on this list, just filter by "effect" in the "Search" box. "EffectPlayerTeleportDisappear": "assets/prefabs/missions/portal/proceduraldungeon/effects/disappear.prefab", The counterpart of the setting above - it just creates an effect at the old position of the player that's being teleported. And similarly, it's an effect from the Halloween Dungeon. Check out the prefab list I linked above if you want to use a different effect. You can use the Play FX plugin to test all the ones you can find in-game first, before you commit. "EffectsPlayerTeleportEnable": true, Effects can be loud and attract attention. Maybe you don't want. By default, the teleport effects are enabled, but if you set this setting's value to false, no special effects will be played while players are entering or exiting. "CheckEscapeBlockWhenEnteringDimensions": true, If you have No Escape installed, this will prevent players that are Escape Blocked from entering Pocket dimensions, like the name suggests. By default it's true. Feel free to change it to false if you believe that players raiding from the outside should still be able to enter inside. "CheckEscapeBlockWhenExitingDimensions": true, Again, if you don't have No Escape installed, ignore this setting and the next two after that. Similar to above, just when exiting the dimensions. Players will be informed that they cannot exit or enter dimensions for the reason of being Escape Blocked. Change the default value to false if you feel like the Escape Block should not matter for exiting. "CheckEscapeBlockWhenDeployingDimensions": true, No Escape specific setting number 3. You get it by now: if this setting is true (and it IS by default), Escape Blocked players won't be able to deploy any Pocket Dimension Items into their Box form that can be entered. Change the default "true" value to false if you consider this restriction to be too tight. "CheckEscapeBlockWhenPickingUpDimensions": true, And the last setting that's applicable to No Escape - it's the reverse of the one above. By default, players with an Escape Block imposed on them cannot pick up boxes with Pocket Dimensions inside. Change this to false if you beg to differ. "ForbiddenCommandsInsideDimensions": ["tp","warp","back","home","tpr","tpa","kit"], This blacklist contains the default chat and console commands that players without the admin permission will NOT be able run, while they themselves are within the Pocket Dimension layer altitude range. You can add or remove your own sets of commands (do not include the forward slash). "ForbiddenCommandsCheckingEnabled": true, If you set this to false, this will disable relying on the blacklist above, and any command will be permitted inside a Pocket Dimension to be executed by any player. "ConversionCostCurrencyUsed": "CustomItemAmount", By default, conversion from a normal base to a Pocket Dimension costs a certain physical Item that exists in Rust, and that setting is reflected by the value of "CustomItemAmount". If you instead prefer Server Rewards / Economics to be used to pay for conversion, set this value to "ServerRewards" or "Economics", respectively. You can even set this to "NoCost" - and the conversion will be free for the player (but the base will still need to be built correctly and maintained). "ConversionCostAmount": 500, 500 scrap to convert sounds like a moderate amount. 500 RP, or ¤500 however, do not - so you can adjust this amount to be higher or lower however you like,depending on your currency used. Only integers larger than 0 are accepted. "ConversionCostCustomItemShortname": "scrap", What else but "scrap" by default - the universal currency. Of course, if you picked Server Rewards or Economics instead, this setting won't matter in the slightest. Whatever valid item shortname from the approved list you pick, this is what players will be charged for conversion. Since not everything can be put in the TC, it will also check the player's inventory for that item. "ConversionCostCustomItemOverrideName": null, Again, this only applies to the "CustomItemAmount" option. If you want to use a completely custom item, for example, one registered by another plugin, that has a different icon/behaviour, those items often have a custom name. If this value is null (with no quotes) or empty (just the "" quotes), the Item's definition name translated to the client's language will be used. "ConversionCostCustomItemSkinID": 0, And finally: if you only want to accept certain skinned variants of an item - again, useful for plugins with custom items like Water Bases - set the default value of 0 to any valid item ID available on the Steam Workshop. This setting will also be ignored if your currency is not set to "CustomItemAmount". There's a few more settings, but these are all the most important ones that will shape your unique server experience. Translation support (oxide/lang/en/PocketDimensions.json) Almost every string the players see, including the text displaying in the chat and the GUI, can be edited. Just load the plugin and let it generate the file - after you edit it, reload the plugin. Hooks/API (for plugin developers) You can call these through Interface.CallHook() as well, if you don't want to add a [PluginReference] //get an array of BasePortal entities that are assigned to Dimensional Pockets // - or null if none are present var portalArray = PocketDimensions?.CallHook("GetDimensionalPortals") as BasePortal[]; //get an array of BuildingManager.Building instances that are assigned to Dimensional Pockets // - or null if none are present var pocketArray = PocketDimensions?.CallHook("GetDimensionalPockets") as BuildingManager.Building[]; //get an array of StorageContainer entities that are assigned to Dimensional Pockets // - or null if none are present var boxArray = PocketDimensions?.CallHook("GetDimensionalBoxes") as StorageContainer[]; //pass a BasePortal entity and get a boolean true if it's assigned to a Dimensional Pocket // - or false if it's not var isDimensionalPortal = PocketDimensions?.CallHook("CheckIsDimensionalBox", basePortal).Equals(true); //pass a BuildingManager.Building instance and get a boolean true if it's assigned to a Dimensional Pocket // - or false if it's not var isDimensionalPocket = PocketDimensions?.CallHook("CheckIsDimensionalPocket", building).Equals(true); //pass a StorageContainer entity and get a boolean true if it's assigned to a Dimensional Pocket //- or false if it's not var isDimensionalBox = PocketDimensions?.CallHook("CheckIsDimensionalBox", storageContainer).Equals(true); //pass a BuildingBlock entity and get a boolean true if it's assigned to a Dimensional Pocket SPECIFICALLY as a Shell Block // - or false if it's not var isDimensionalShellBlock = PocketDimensions?.CallHook("CheckIsDimensionalShellBlock", buildingBlock).Equals(true); //pass a DecayEntity entity and get a boolean true if inside a DimensionalPocket Building // - or false if it's not var doesBelongToDimensionalPocket = PocketDimensions?.CallHook("CheckBelongsToDimensionalPocket", decayEntity).Equals(true); //pass a global::Item instance and get a boolean true if it's assigned to a Dimensional Pocket // - or false if it's not. //You must also specify whether you're looking for "fresh", unopened dimensions in that item OR an already existing dimensions. //If you want to check both cases, you must do two separate checks, passing a different boolean (true when looking for fresh, //false when not) as the second (counting from 0th) argument. var isDimensionalItem = PocketDimensions?.CallHook("CheckIsDimensionalItem", item, lookingForFresh).Equals(true);$24.99- 19 comments
- 7 reviews
-
- 6
-
-
-
- #dimensions
- (and 11 more)
-
Version 1.6.2
14,419 downloads
This plugin adds a character progression system to your server in the form of a leveling and skill tree system. Players gain xp by cutting trees, mining rocks, killing NPCs etc, and are rewarded with skill points when they level up. These points can be used to unlock perks and buffs across a number of different skill trees. The plugin is extremely customizable and server owners can change, move, scale or disable any perk to tailor the setup to their server. It features: 116 unique buff types across 130 skill nodes. 13 unique skill trees. 67+ sources of xp, along with custom xp settings for BotRespawn and NpcSpawn. An extremely large amount of xp options to really tweak the plugin for your server. A functional tree system that prevents unlocking/upgrading of nodes if the player has not invested enough skill points into a tree. Fun & unique ultimate abilities across most trees. Global yield settings for servers that want to run 2x/3x etc. Ability to create custom skill trees and nodes using permissions from other plugins. Considerable amount of options for persistent data through server wipes. A prestige system to reward your most hardcore players. SkillTree allows users to focus on multiple skill trees and unlock nodes in each tree as they level, to make their characters more powerful and unique. Plugins that work well with Skill Tree RaidableBases - SkillTree integrates with RaidableBases by rewarding raiders with xp (either handled via SkillTree directly or via RaidableBases directly). The raiding tree can also exclusively work with RaidableBases if servers don't allow raiding. Economics & ServerRewards - integrated as a way to pay for the respec cost. SurvivalArena - Rewards the winner of the event with xp. Cooking - adds new skills to the Cooking tree as well as xp rewards when successfully cooking meals. BotRespawn - Adds additional xp sources for each NPC profile. NpcSpawn - Adds additional xp sources for each NPC profile. UINotify - Shows notifications relevant to leveling etc. ZombieHorde - Provides xp for killing zombies generated by this plugin. LootDefender - Provides the ability for shared xp when killing BradleyAPC. Configured through LootDefender. EpicLoot - Adds a skill to the Scavenging tree FishingHotspots - Allows for modified XP gain while fishing in a hotspot. ZoneManager - Allows you to disable buffs while in a zone. skilltree.chat - required to use the chat commands to access the skill tree menu. skilltree.xp - required to obtain xp from xp sources. skilltree.tree - required to access and use the skill tree. skilltree.admin - required to use the admin commands. skilltree.all - allows user access to all trees. skilltree.Mining - allows the user to access the mining tree. skilltree.Woodcutting - allows the user to access the woodcutting tree. skilltree.Skinning - allows the user to access the skinning tree. skilltree.Harvesting - allows the user to access the harvesting tree. skilltree.Combat - allows the user to access the combat tree. skilltree.Medical - allows the user to access the medical tree. skilltree.Build_Craft - allows the user to access the build craft tree. skilltree.Scavenging - allows the user to access the scavenging tree. skilltree.Vehicles - allows the user to access the vehicles tree. skilltree.Cooking - allows the user to access the cooking tree. skilltree.bag.keepondeath - prevents the ExtraPockets bag from dropping on death. skilltree.notitles - Removes the level title from the player (Requires BetterChat) skilltree.noxploss - Prevents xp loss. skilltree.roguelike - If enabled via the config, will be required to participate in the Roguelike system. skilltree.teabonus - Ignores the config option preventing the yield increases from working with mining and woodcutting teas. skilltree.noscoreboard - Prevents players with this permission from being added to the scoreboard. skilltree.respec.bypass - removes the cost for respeccing skilltree.togglebc - required to toggle BetterChat titles on/off //Custom permission settings "Modified max skill points based on permissions [must be higher than default]": { "vip": 120 }, "Cost per point to respec based on permissions [must be lower than default]": { "vip": 10.0 }, "Maximum amount of xp a player can lose when they die based on permissions [must be less than default]": { "vip": 500.0 }, "Permissions to adjust xp gain modifiers (skilltree.<perm>) [1.0 is default modifier]": { "vip": 1.2 }, The permission for "vip" would be skilltree.vip Assigning this perm to players would override the default values for the respective settings (max skill points, respec cost, xp gain and xp loss). Command: st Description: Opens the skill tree menu. Requires skilltree.chat permissions. Command: updatexptable Description: Recalculates the xp table based on the config values. Requires Command: togglexpdrops Description: Toggles the xp popup when obtaining xp. Command: togglexphud Description: Toggles the xp hud on the players screen. Command: givexp Parameters: <name> <amount> <optional: Ignore modifiers true/false> Description: Gives the player matching the name parameter, xp equal to the amount parameter. Ignore modifiers will ignore all forms of xp boosts such as rested xp. Command: givesp Parameters: <name> <amount> Description: Gives the player matching the name parameter, skill points equal to the amount parameter. Command: resetdata Parameters: <name> Description: Resets the target players data. Command: turbo Description: Toggles the turbo on the boat if the player has the relevant perk. Command: togglebc Description: Toggles the BetterChat title on/off for the user. Command: movebar Description: brings up a ui that can be used to relocate the xp bar on the players screen. Command: stresetalldata Description: Resets all players data. Command: sb or score or scoreboard Description: Chat and console command that brings up the scoreboard, showing who has the most xp. Command: sttogglenotifications Description: Toggle notifications from buff triggers. Command: stgiveitem Parameters: <id> <shortname> <quantity> <skin ID> <optional: displayName> Description: gives an item to the target ID that matches the parameters. Console Command: strespecallplayers Description: Resets skills for all online and offline players. Console Command: strespecplayer Parameters: <target name/userID> Description: Resets the target online/offline players skills. Console Command: givexptoall Parameters: <amount> <online only: true/false> Description: Will give the amount of xp to all players. If online only is true, it will only give it to those that are online. Console Command: givesptoall Parameters: <amount> <online only: true/false> Description: Will give the amount of skill points to all players. If online only is true, it will only give it to those that are online. Console Command: stremoveplayerdata Parameters: <userid> Description: Will remove the player data file for the specified userid. Console Command: sttogglebuffs Parameters: <true/false> Description: Disables/enableds buffs globally for all players. Experience can be gained from a number of different sources. The value for each source can be adjusted via the config. NodeHit - Hitting a stone, metal or sulfur mining node. NodeHitFinal - Finishing a stone, metal or sulfur mining node. TreeHit - Hitting a tree. TreeHitFinal - Knocking down a tree. SkinHit - Hitting an animal with a skinning tool. SkinHitFinal - Finishing off an animal with a skinning tool. CollectWildPlant - Collecting any map generated collectible, such as hemp, corn, pumpkin, stone, sulfur or metal. CollectGrownPlant - Collecting any player grown produce. BuildingBlockDeployed - Placing down a twig building block. FishCaught - Catching a fish. Crafting - Whenever a craft is successfully completed. XP is calculated based on the duration of the craft. ScientistNormal - Killing a blue scientist. ScientistHeavy - Killing a heavy scientists. SmallAnimal - Killing a small animal such as a chicken. MediumAnimal - Killing a medium animal such as a boar, wolf or stag. LargeAnimal - Killing a large animal such as a horse, shark or bear. Barrel - Destroying barrels. RoadSign - Destroying road signs. Scarecrow - Killing scarecrows or a zombie in ZombieHorde. Mission - Completing a mission in rust. BradleyAPC - Getting the last hit on Bradley. LootHackedCrate - First player to loot a locked crate. LootHeliCrate - First player to loot a heli crate. LootBradleyCrate - First player to loot a bradley crate. CookingMealXP - (Requires cooking plugin) XP is calculated per ingredient used. Example 2 tomatos and 8 bear meat would yield 100xp. RaidableBaseCompletion - Awards raiders of a RaidableBase xp upon the completion of the raid. Win_HungerGames - Awards xp to the winner of the Hunger Games arena. Win_ScubaArena - Awards xp to the winner of the Scuba arena. Win_Skirmish - Awards xp to the winner of the Skirmish arena. Gut_Fish - Awards xp when gutting a fish. default_botrespawn - default amount xp given when killing a bot made using botrespawn. Overriding values can be added to the config based on the bot group. crate_basic - when opening crates crate_elite - when opening crates crate_mine - when opening crates crate_normal - when opening crates carte_normal_2 - when opening crates crate_normal_2_food - when opening crates crate_normal_2_medical - when opening crates crate_tools - when opening crates crate_underwater_advanced - when opening crates crate_underwater_basic - when opening crates crate_ammunition - when opening crates crate_food_1 - when opening crates crate_food_2 - when opening crates crate_fuel - when opening crates crate_medical - when opening crates Harbor_Event_Winner - Winner of the Harbor event plugin Junkyard_Event_Winner - winner of the Junkyard event plugin PowerPlant_Event_Winner - winner of the Power plant event plugin Satellite_Event_Winner - winner of the Satellite event plugin Water_Event_Winner - winner of the Water event plugin Air_Event_Winner - winner of the Air event plugin. Armored_Train_Winner - winner of the Armored train plugin Convoy_Winner - winner of the Convoy event plugin. Supply_drop - first player that opens a supply drop. SurvivalArena_Winner - winning the SurvivalArena event. swipe_card_level_1 - using a green swipe card reader swipe_card_level_2 - using a blue swipe card reader swipe_card_level_3 - using a red swipe card reader boss_monster - killing an NPC from boss monster Zombie - Killing a ZombieHorde zombie UnderwaterDweller NPCs - NPCs in underwater labs JetPilot - JetPilot plugin ArcticBaseEvent_Winner - winner of the Arctic Base Event GasStationEvent_Winner - winner of the Gas Station Event SputnikEvent_Winner - winner of the Sputnik Event detect_diggable - triggered when a metal detector site is dig up. ShipWreckEvent_Winner - winner of the Ship Wreck Event pvp - when a player kills another player (default: off). Triangulation_Winner - winner of the triangulation event Caravan_Winner - winner of the Caravan event SupermarketEvent_Winner - winner of the Supermarket event Name: Mining Yield Description: Increases the amount of resources gained while mining. Name: Instant Mine Description: Gives the user a chance to instantly mine out a stone, sulfur or metal node. Name: Smelt On Mine Description: Gives the user a chance to smelt some of the ore as its mined from sulfur and metal nodes. Name: Mining Luck Description: Gives the user a chance to obtain items from the Mining luck loot table when they finish mining a node. Name: Mining Tool Durability Description: Decreses the durability loss of mining tools. Name: Woodcutting Yield Description: Increases the amount of resources gained while woodcutting. Name: Instant Chop Description: Gives the user a chance to instantly chop down a tree. Name: Woodcutting Coal Description: Gives the user a chance to obtain some charcoal while woodcutting. Name: Woodcutting Luck Description: Gives the user a chance to obtain items from the Woodcutting luck loot table when they finish cutting down a tree. Name: Woodcutting Tool Durability Description: Decreses the durability loss of woodcutting tools. Name: Skinning Yield Description: Increases the amount of resources gained while skinning. Name: Instant Skin Description: Gives the user a chance to instantly cut up an animal. Name: Skinning Tool Durability Description: Decreases the durability loss of skinning tools. Name: Skinning Cook Description: Gives the user a chance to received cooked meat, instead of raw meat, while skinning an animal. Name: Harvest Wild Yield Description: Increases the yield when harvesting map generated collectibles, such as berries, hemp, stone, sulfur and mushrooms. Name: Harvest Grown Yield Description: Increases the yield when harvesting player grown produce. Name: Extra Fish Description: Gives the user a chance of receiving an extra fish while fishing. Name: Double Bandage Heal Description: Doubles the healing power of cloth bandages. Name: Radiation Reduction Description: Reduces the amount of radiation damage taken by the player. Name: Extra Food Description: Increases the amount of calories the player receives when consuming food. Name: Fire Damage Reduction Description: Reduces the amount of fire damage received. Name: Fall Damage Reduction Description: Reduces the amount of fall damage received. Name: No Cold Damage Description: Removes all cold damage from the player. Name: Wounded Resist Description: Gives the player a chance to get straight back on their feet after entering the wounded state. Name: Animal Damage Resist Description: Reduces the damage taken by animals. Name: Riding Speed Description: Increases the speed of a horse while riding it. Name: Free Bullet Chance Description: Gives the player a chance to not expend a bullet when firing a gun. Name: Primitive Expert Description: Removes durability loss for primitive weapons. Name: Upgrade Refund Description: Gives the player a chance to receive their resources back when upgrading a building block. Name: Craft Speed Description: Increases the crafting speed of a player. Name: Research Refund Description: Gives the player a chance to receive their scrap back when researching an item on the research bench. Name: Craft Refund Description: Gives the player a chance to receive their crafting materials back when crafting an item. Name: Extra Scrap Barrel Description: Gives the player a chance to receive additional scrap when destroying a barrel. Name: Barrel Smasher Description: Allows the player to instantly smash a barrel with any weapon. Name: Extra Scrap Crate Description: Gives the player a chance to obtain extra scrap when looting a crate for the first time. Name: Component Chest Description: Gives the player a chance to obtain additional components when looting a crate for the first time. Name: Electronic Chest Description: Gives the player a chance to obtain additional electronics when looting a crate for the first time. Name: Component Barrel Description: Gives the player a chance to obtain additional components when smashing a barrel. Name: Electronic Barrel Description: Gives the player a chance to obtain additional electronics when smashing a barrel. Name: Melee Resist Description: Reduces the damage taken by melee weapons. Name: Iron Stomach Description: Allows the player to eat spoiled and raw food without being poisoned. Name: Boat Speed Description: Allows the user to activate a turbo boost while on a boat, increasing the boats speed. Name: Recycler Speed Description: Increases the speed of recycling for the player. Name: Smelt_Speed Description: Adds a chance for ore to smelt whenever wood is consumed, in addition to the standard smelt rate. Name: Heli_Fuel_Rate Description: Reduces the fuel consumption for your helicopters. Name: Boat_Fuel_Rate Description: Reduces the fuel consumption for your boats. Name: Vehicle_Mechanic Description: Allows the user to repair a vehicle at no cost. Name: Reviver Description: Brings a wounded player up with additional health if the reviving player has the buff. Name: Rationer Description: Provides the consumer a chance to receive their food/tea back once consumed. Name: PVP_Critical Description: Gives the attacker a chance to critically damage the target in PVP. Name: PVP_Damage Description: Increases the damage of all PVP attacks. Name: PVP_Shield Description: Reduces the damage of all incoming PVP attacks. Name: Metabolism_boost Description: Increases your calories and hydration above the maximum. Name: LootPickup Description: Chance to have the loot from destroyed barrels given moved directly to their inventory. Name: Node_Spawn_Chance Description: Chance to spawn a new node when a new one is mined out. Name: HealthRegen Description: Passively regenerates x health per second Name: AnimalTracker Description: Allows the user to use the /track command to find the direction of the closest animal. Name: ExtraPockets Description: Creates a backpack style storage system, providing players the ability to access the storage using a chat command (/pouch). Slots are given based on points spent. Name: Human_NPC_Damage Description: Increases damages against scientists. Name: Animal_NPC_Damage Description: Increases damages against animals. Name: Human_NPC_Defence Description: Decrease damage from scientist. Name: Craft_Duplicate Description: Chance to duplicate an item while crafting. Name: WaterBreathing Description: Breath underwater. Name: SharkResistance Description: Reduce damage taken from sharks. Name: SharkSkinner Description: Chance to receive random items while skinning sharks. Name: DeepSeaLooter Description: Chance to receive additional items while looting sunken crates. Name: InstantUntie Description: Instantly untie sunken crates. Name: UnderwaterDamageBonus Description: Increase damage to all living things while underwater (including underwater labs). Name: Permission Description: Used for permission based skills. Name: MaxRepair Description: Resets the max condition for any items that are repaired. Name: Durability Description: Reduces condition loss for all items that the player is using. Name: Regrowth Description: Provides a chance for a tree to respawn when cut down. Name: Skinning_Luck Description: Provides a chance to receive an item when skinning an animal. Name: Fishing_Luck Description: Provides a chance to receive an item when catching a fish. Name: Trap_Damage_Reduction Description: Reduces the damage received from traps. Name: Trap_Damage_Increase Description: Increases the damage done to traps. Name: Personal_Explosive_Reduction Description: Reduces the damage received from your own explosives. Name: Double_Explosion_Chance Description: Provides a chance for your explosives to trigger twice. Name: Lock_Picker Description: Provides a chance to open a locked entity that you do not have access to. Name: Explosion_Radius Description: Increases the explosion radius of your explosives. Name: Dudless_Explosive Description: Reduces the chance of your satchels and beancans being duds. Name: Woodcutting_Hotspot Description: Treats each hit on a tree as though you hit the hotspot. Name: Mining_Hotspot Description: Treats each hit on a node as though you hit the hotspot. Name: Extended_Tea_Duration Description: Increases the duration of tea buffs by x% per level. Name: Extended_Mag Description: Increases the magazine capacity of weapons by x% per level. Name: Tea_Looter Description: Provides you with a x% chance per level to find tea in certain containers. Name: Bite_Speed Description: Decreases the time it takes to hook a fish by x% per level. Name: Heli_Speed Description: Increases the max thrust speed of the heli by x% per level. Name: Sonar Description: Allows the user to run a command to find all nearby submerged objects (dive sites, sharks, scientists etc). Name: Comfort Description: Provides the player and all nearby team mates with a % of comfort per level. Name:Heal_Share Description: Provides surrounding team mates with a % of health received per level. Name:XP_Share Description: Provides surrounding team mates with a % of the xp you gain per level. Name: Tea_Share Description: Provides surrounding team mates with a % of tea buffs when you consume tea per level. Name: Metabolism_Share Description: Provides surrounding team mates with a % of hydration and calories received per level. Name: Human_Workbench Description: Creates a workbench aura on the player. The player and nearby team mates can use them as a workbench (the level of which is based on the skill level). Name: Recycler_Efficiency Description: Increases the recycler efficiency by x%. Name: Metal_Detector_Luck Description: Provides the player with a chance per level to obtain an additional item when they excavate metal detection sites. Name: Efficient_Digger Description: Provides the player with a chance per level to automatically dig up metal detection sites when they are flagged. Name: Magnetic_Digger Description: Provides the player with a chance per level to automatically collect dug up items. Name: RadiationBaseValue Description: Provides you with a base radiation resistance of % per level, even when naked. Name: RadiationResistModifier Description: Increases the effectiveness of your clothings radiation resistance by % per level. Name: BikeEnginePower Description: Increases the engine power of all bikes (peddal and motor) by x % per level. Name: DriverCollisionResistance Description: Decreases the damage taken from collisions while driving a vehicle by x% per level. Name: Harvesting_Luck Description: Provides a drop table when a player collects harvesting materials. Grown and wild collectibles have their own loot tables. Name: Awareness Description: This skill will show the nearby location of (configurable): npcs, animals, dropped items, droppted item containers, corpses within x meters. Name: Woodcutting_Ultimate Description: Harvests the surrounding trees when cutting down a tree. Name: Mining_Ultimate Description: Provides access to a chat command to see all surrounding node locations. Name: Combat_Ultimate Description: Heals the player for a percentage of the damage that they deal to all sources. Name: Vehicle_Ultimate Description: Reduces damage dealt to the players mounted vehicle (default 100% deduction). Name: Harvester_Ultimate Description: Allows the player to set the genetic composition of plants. Name: Medical_Ultimate Description: Gives the player a chance to resurrect at their point of death if they choose to. Name: Skinning_Ultimate Description: Killing an animal with this buff active will provide the player with an enhanced ability for a period of time, depending on the animal killed. - Chicken: No fall damage. - Boar: Chance to find components while harvesting mushrooms and berries. - Wolf: Increased healing while near team mates. - Stag: Notification when a neutral player is nearby, and their last known location (configurable). - Bear: Scientists will not attack the player unless attacked. - Polarbear: Overshield. Name: Build_Craft_Ultimate Description: Use any coloured swipe cards in any reader. Name: Scavengers_Ultimate Description: Will automatically recycle components from barrels when they are broken. The xp table uses a common equation to calculate its levels and xp requirements. You can read more about the method here: https://blog.jakelee.co.uk/converting-levels-into-xp-vice-versa/ There is also a spreadsheet you can make a copy of and adjust the x value at the top of. Increasing the number minimizes the xp between levels. Find a good value, then put it in the "x" value under the "Leveling information" section in the config. It is recommended that you leave the y value at 2 or 3, and adjust the x value only. Rule of thumb: - 0.07: default - 0.04: grindy. API object STCanGainXP(BasePlayer player, BaseEntity source, double value, string source_string) object STCanGainXP(BasePlayer player, string plugin, double value) Returning a non-null value will cancel the xp gain. Source can return null so be sure to check that. string[] ST_GetPlayerLevel(BasePlayer player) // Example [ChatCommand("testapi")] void TestAPI(BasePlayer player) { var data = (string[])SkillTree.Call("ST_GetPlayerLevel", player); Puts($"Level: {data.First()}. XP: {data.Last()}"); } Returns the players level [0] and xp [1] values as a string[] object STCanReceiveYield(BasePlayer player, BaseEntity entity) Returning a non-null value will cancel the yield gain. object STOnLoseXP(BasePlayer player) Returning a non null value prevents the xp loss. double GetExcessXP(BasePlayer player) Gets the excess xp over the players current level as a double. RemoveXP(BasePlayer player, double value) Removes xp from the player equal to the value. Will not reduce the value below the start of their current level. void STOnPlayerLevel(BasePlayer player, int oldLevel, int newLevel); Triggers when a player levels up. No return value. void STOnPouchOpened(BasePlayer player, StorageContainer pouch) Triggers when a player opens the ExtraPockets storage. object STCanModifyHorse(BasePlayer player, RidableHorse horse, float modifier) Returning a non-null value will prevent the horse from being modified by the Riding_Speed buff. public void AddNode(string tree, string node, bool enabled, int max_Level, int tier, float value_Per_Buff, string _buff, string _buffType, string icon_url, object[] _perms = null) object[] perms { string perms_description, Dictionary<int, List<string>> tiers_and_perms } void AddCookingNodeToSkillTree() { if (SkillTree != null && SkillTree.IsLoaded) { Dictionary<int, Dictionary<string, string>> _perms = new Dictionary<int, Dictionary<string, string>>() { [1] = new Dictionary<string, string>() { ["cooking.instant"] = "Instant Cook" } }; string Description = "Cooking food with the Cooking plugin will be instant."; object[] perms = new object[] { Description, _perms }; string Tree = "Cooking"; string Node = "Instant Chef"; bool StartOn = true; int Max_Level = 1; int Tier = 2; float Value_per_Level = 1; string Buff = "Permission"; string BuffType = "Permission"; string URL = "https://i.imgur.com/3TMqFKG.png"; SkillTree.Call("AddNode", Tree, Node, StartOn, Max_Level, Tier, Value_per_Level, Buff, BuffType, URL, perms); } } Allows plugins to add custom nodes to trees. [HookMethod("IsExtraPocketsContainer")] public object IsExtraPocketsContainer(uint uid) { if (containers.ContainsKey(uid)) return True; return False; } [HookMethod("GetExtraPocketsContainerProvider")] public Func<uint, bool> GetExtraPocketsContainerProvider() { return new Func<uint, bool>(uid => { if (containers.ContainsKey(uid)) return true; return false; }); } [HookMethod("GetExtraPocketsOwnerIdProvider")] public Func<uint, string> GetExtraPocketsOwnerIdProvider() { return new Func<uint, string>(uid => { Containers data; if (containers.TryGetValue(uid, out data)) return data.userIDString; return null; }); } API for extra pockets. object STCanReceiveBonusLootFromContainer(BasePlayer player, LootContainer container) Prevents buffs from adding loot to containers if returning a non-null value. object STOnItemRepairWithMaxRepair(Item item) Returning non-null prevents the item bring repaired to max. object[] GetXPStats(ulong id) Returns object[]: int level, double xp, double current level start xp, double next level start xp. float GetBuffValue(BasePlayer player, string skill) Returns the current modifier for the specified buff. void AwardXP(ulong userid, double value, string plugin, bool noMod = false) Provides the player with the specified amount of xp public void DisableBuffs(ulong id) Disables buffs for a player public void EnableBuffs(ulong id) Enables buffs for a player$29.99- 1,231 comments
- 41 reviews
-
- 33
-
-
-

-
- #leveling
- #progression
- (and 13 more)
-
Version 1.0.1
14 downloads
RUST Plugin Test Server TEST MY PLUGINS THERE! connect play.thepitereq.ovh:28050 Waystones plugin gives you the ability to quickly move from one position to another. It creates a waystone on desired monuments that can be used by players for quick movement around the map. It also allows players for creating their own waystones in their homes. Automatically place waystones on monuments for player teleportation. Supports waystones in player bases with ground, wall and empty space checks. Custom monument support. Configurable marker on map. Easy command waystone placement. Optional command for waystone crafting. RUST-like UI design. A lot of VIP permission options. (points gather, max points, max waystones saved) Auto data clear on map wipe. NoEscape PvP support. Pre-configured default RUST monuments. waystones.admin - Gives access to /placeway, tppoints and givewaystone commands. waystones.craft - Gives ability to craft waystone. (Configurable) Any other permission added in config file. /waystone - Command to craft waystone. (Configurable) /placeway [Optional: MonumentName] - Sets new position for nearest [set] monument waystone. tppoints - Command for giving teleport points to players. (Console Command) givewaystone [Optional: userId] - Gives you [user] an waystone for placement. (Console Command) { "PopUpAPI Preset Name": "Inventory", "Waystone Craft Command": "waystone", "Waystone Placeable Shortname": "composter", "Waystone Placeable Display Name": "Waystone", "Waystone Marker - Enabled": true, "Waystone Marker - Marker Alpha": 0.7, "Waystone Marker - Marker Radius": 0.05, "Waystone Marker - Marker Color #1": "#ffd342", "Waystone Marker - Marker Color #2": "#a38729", "Waystone Marker - Enable On Monuments": true, "Waystone Marker - Show Player Waystones By Default": false, "Waystone Marker - Lock Player Waystone Visibility Change": false, "Waystone Crafting - Enable Crafting": true, "Waystone Crafting - Require Permission": true, "Waystone Crafting - Required Workbench Level": 2, "Waystone Crafting - Craft Cost": [ { "Shortname": "stones", "Amount": 5000, "Skin": 0 }, { "Shortname": "targeting.computer", "Amount": 10, "Skin": 0 }, { "Shortname": "industrial.wall.light", "Amount": 4, "Skin": 0 }, { "Shortname": "industrial.wall.light.red", "Amount": 1, "Skin": 0 } ], "NoEscape - Lock Teleporting When PvP Blocked": true, "NoEscape - Lock Teleporting When Raid Blocked": true, "Teleport Cost Per Kilometer": 25.0, "Initial Point Amount": 100, "Initial Point Amount Permissions": { "waystones.admin": 1000, "waystones.svip": 500, "waystones.vip": 250 }, "Teleport Points Default Cap": 1000, "Teleport Points Cap Permissions": { "waystones.admin": 100000, "waystones.svip": 5000, "waystones.vip": 2500 }, "Teleport Points Refill Interval (in seconds, 0 to disable)": 60.0, "Teleport Points Refill Amount": 2, "Teleport Points Refill Amount Permissions": { "waystones.admin": 20, "waystones.svip": 5, "waystones.vip": 3 }, "Max Waystones Saved Default Cap": 6, "Max Waystones Saved Permissions": { "waystones.admin": 100, "waystones.svip": 18, "waystones.vip": 12 }, "God Mode After Teleport (in seconds, 0 to disable)": 0.0, "Waystone Destroy Entity Names": [ "rocket_basic", "explosive.timed.deployed" ], "Generate New Map Market Config Sections": true, "Map Marker Waystones": { "arctic_research_base_a": { "Enabled": true, "Offset": { "x": -34.46, "y": 0.0, "z": -54.53 }, "Rotation": { "x": 0.0, "y": 24.0, "z": 0.0 }, "Teleport Price Multiplier": 1.0 }, "fishing_village_a": { "Enabled": true, "Offset": { "x": 19.59, "y": 1.99, "z": -10.79 }, "Rotation": { "x": 0.0, "y": 0.33, "z": 0.0 }, "Teleport Price Multiplier": 0.3 }, "fishing_village_b": { "Enabled": true, "Offset": { "x": -6.4, "y": 2.0, "z": 15.36 }, "Rotation": { "x": 0.0, "y": 180.4, "z": 0.0 }, "Teleport Price Multiplier": 0.3 }, "fishing_village_c": { "Enabled": true, "Offset": { "x": -7.62, "y": 2.02, "z": 16.37 }, "Rotation": { "x": 0.0, "y": 178.85, "z": 0.0 }, "Teleport Price Multiplier": 0.3 }, "ferry_terminal_1": { "Enabled": true, "Offset": { "x": 11.35, "y": 5.19, "z": 7.14 }, "Rotation": { "x": 0.0, "y": 86.81, "z": 0.0 }, "Teleport Price Multiplier": 1.0 }, "harbor_1": { "Enabled": true, "Offset": { "x": 100.56, "y": 4.28, "z": -59.3 }, "Rotation": { "x": 0.0, "y": 273.79, "z": 0.0 }, "Teleport Price Multiplier": 1.0 }, "harbor_2": { "Enabled": true, "Offset": { "x": -54.15, "y": 4.02, "z": -0.02 }, "Rotation": { "x": 0.0, "y": 88.02, "z": 0.0 }, "Teleport Price Multiplier": 1.0 }, "airfield_1": { "Enabled": true, "Offset": { "x": -163.78, "y": 0.26, "z": -104.47 }, "Rotation": { "x": 0.0, "y": 3.34, "z": 0.0 }, "Teleport Price Multiplier": 1.0 }, "excavator_1": { "Enabled": true, "Offset": { "x": -94.42, "y": 0.61, "z": -57.44 }, "Rotation": { "x": 0.0, "y": 138.7, "z": 0.0 }, "Teleport Price Multiplier": 1.0 }, "military_tunnel_1": { "Enabled": true, "Offset": { "x": -76.77, "y": 19.47, "z": 63.1 }, "Rotation": { "x": 0.0, "y": 91.46, "z": 0.0 }, "Teleport Price Multiplier": 1.0 }, "powerplant_1": { "Enabled": true, "Offset": { "x": -40.84, "y": 0.29, "z": -89.01 }, "Rotation": { "x": 0.0, "y": 90.4, "z": 0.0 }, "Teleport Price Multiplier": 1.0 }, "trainyard_1": { "Enabled": true, "Offset": { "x": -82.86, "y": 0.28, "z": 15.5 }, "Rotation": { "x": 0.0, "y": 91.62, "z": 0.0 }, "Teleport Price Multiplier": 1.0 }, "water_treatment_plant_1": { "Enabled": true, "Offset": { "x": -5.19, "y": 0.28, "z": -152.01 }, "Rotation": { "x": 0.0, "y": 0.08, "z": 0.0 }, "Teleport Price Multiplier": 1.0 }, "lighthouse": { "Enabled": true, "Offset": { "x": 2.3, "y": 5.96, "z": 13.91 }, "Rotation": { "x": 0.0, "y": 84.95, "z": 0.0 }, "Teleport Price Multiplier": 1.0 }, "bandit_town": { "Enabled": true, "Offset": { "x": 27.92, "y": 1.76, "z": -21.08 }, "Rotation": { "x": 0.0, "y": 20.9, "z": 0.0 }, "Teleport Price Multiplier": 0.1 }, "compound": { "Enabled": true, "Offset": { "x": 14.35, "y": 0.19, "z": 32.57 }, "Rotation": { "x": 0.0, "y": 92.0, "z": 0.0 }, "Teleport Price Multiplier": 0.1 }, "junkyard_1": { "Enabled": true, "Offset": { "x": 48.98, "y": 0.07, "z": 46.16 }, "Rotation": { "x": 0.0, "y": 190.78, "z": 0.0 }, "Teleport Price Multiplier": 1.0 }, "nuclear_missile_silo": { "Enabled": true, "Offset": { "x": 41.7, "y": -5.91, "z": -58.81 }, "Rotation": { "x": 0.0, "y": 322.75, "z": 0.0 }, "Teleport Price Multiplier": 1.0 }, "radtown_small_3": { "Enabled": true, "Offset": { "x": -46.11, "y": 19.79, "z": -48.73 }, "Rotation": { "x": 0.0, "y": 82.24, "z": 0.0 }, "Teleport Price Multiplier": 1.0 }, "desert_military_base_a": { "Enabled": true, "Offset": { "x": 26.62, "y": 0.0, "z": -41.89 }, "Rotation": { "x": 0.0, "y": 359.57, "z": 0.0 }, "Teleport Price Multiplier": 1.0 }, "desert_military_base_b": { "Enabled": true, "Offset": { "x": -45.48, "y": 0.0, "z": -21.53 }, "Rotation": { "x": 0.0, "y": 80.83, "z": 0.0 }, "Teleport Price Multiplier": 1.0 }, "desert_military_base_c": { "Enabled": true, "Offset": { "x": -44.95, "y": 0.0, "z": 9.5 }, "Rotation": { "x": 0.0, "y": 89.92, "z": 0.0 }, "Teleport Price Multiplier": 1.0 }, "desert_military_base_d": { "Enabled": true, "Offset": { "x": -63.3, "y": 0.0, "z": 2.77 }, "Rotation": { "x": 0.0, "y": 89.52, "z": 0.0 }, "Teleport Price Multiplier": 1.0 }, "gas_station_1": { "Enabled": true, "Offset": { "x": 6.77, "y": 3.03, "z": -10.93 }, "Rotation": { "x": 0.0, "y": -180.04, "z": 0.0 }, "Teleport Price Multiplier": 1.0 }, "radtown_1": { "Enabled": true, "Offset": { "x": 49.19, "y": 0.24, "z": 10.03 }, "Rotation": { "x": 0.0, "y": 180.21, "z": 0.0 }, "Teleport Price Multiplier": 1.0 }, "supermarket_1": { "Enabled": true, "Offset": { "x": -1.26, "y": 0.0, "z": -18.49 }, "Rotation": { "x": 0.0, "y": 0.29, "z": 0.0 }, "Teleport Price Multiplier": 1.0 }, "warehouse": { "Enabled": true, "Offset": { "x": -18.34, "y": 0.03, "z": -8.99 }, "Rotation": { "x": 0.0, "y": 90.56, "z": 0.0 }, "Teleport Price Multiplier": 1.0 }, "mining_quarry_a": { "Enabled": true, "Offset": { "x": 10.34, "y": 3.6, "z": 24.88 }, "Rotation": { "x": 0.0, "y": 81.5, "z": 0.0 }, "Teleport Price Multiplier": 1.0 }, "mining_quarry_b": { "Enabled": true, "Offset": { "x": 0.8, "y": 0.0, "z": 12.63 }, "Rotation": { "x": 0.0, "y": 159.67, "z": 0.0 }, "Teleport Price Multiplier": 1.0 }, "mining_quarry_c": { "Enabled": true, "Offset": { "x": -11.03, "y": 2.99, "z": 32.86 }, "Rotation": { "x": 0.0, "y": 171.85, "z": 0.0 }, "Teleport Price Multiplier": 1.0 }, "satellite_dish": { "Enabled": true, "Offset": { "x": -0.94, "y": 6.05, "z": -1.25 }, "Rotation": { "x": 0.0, "y": 187.49, "z": 0.0 }, "Teleport Price Multiplier": 1.0 }, "sphere_tank": { "Enabled": true, "Offset": { "x": -33.94, "y": 5.76, "z": -12.03 }, "Rotation": { "x": 0.0, "y": 78.7, "z": 0.0 }, "Teleport Price Multiplier": 1.0 }, "stables_a": { "Enabled": true, "Offset": { "x": 19.44, "y": 3.05, "z": -2.58 }, "Rotation": { "x": 0.0, "y": 271.67, "z": 0.0 }, "Teleport Price Multiplier": 0.5 }, "stables_b": { "Enabled": true, "Offset": { "x": 16.64, "y": 2.99, "z": 2.14 }, "Rotation": { "x": 0.0, "y": 271.24, "z": 0.0 }, "Teleport Price Multiplier": 0.5 }, "launch_site_1": { "Enabled": true, "Offset": { "x": 208.42, "y": 3.25, "z": 54.73 }, "Rotation": { "x": 0.0, "y": 181.44, "z": 0.0 }, "Teleport Price Multiplier": 1.0 } } }$15.00- 13 comments
- 2 reviews
-
- 2
-
-
- #teleport
- #teleporting
- (and 13 more)
-
Version 2.0.1
33 downloads
Dust 2 CSGO’s custom Rust (prefab) Dust II, also known as file de_dust2, is a video game map featured in the Counter-Strike first-person shooter series. Dust II is now fully reworked for use in Rust, and I hope your players enjoy it. also when buying, I can put it on your card for free, for this, write to me in Discord$10.00 -
Version 1.0.0
20 downloads
WindyCleft (OneGrid) A small map in the (OneGrid) style with unique monuments featuring intriguing puzzles and a fully customized underwater monument. Specially designed for OneGrid servers and servers with up to 150 players online. Custom Monuments: Fuel processing plant – a semi-ruined factory with two floors. Two Tower – Two towers connected high in the mountains with military crates. Mysterious house – at first glance, it’s just an ordinary wooden house in the forest under the mountain, but it’s only at first glance. The house hides a secret military bunker with a puzzle and security. You’ll find many interesting things there. Angar – it used to be used to unload military trains, but after the war in 2050, the island’s new residents started using the hangar to repair their cars. However, from the past, there is one room that no one has been able to open yet; they say there is something very valuable inside. Zavod – an old factory that once supplied the island with fuel; now only one external fuel processor remains. Post – a small roadside monument. Puzzle – a monument from the Hapis map slightly modernized. ??? – During a rescue operation with a sunken ship, Captain Morrison discovered an unusual underwater signal. He reported this information to the Cobalt Corporation, and since then, no one has seen them. Old residents say there was once an island there, but it sank after a volcano eruption. FacePunch Monuments: Fishing village Oil Rig SuperMarket Gas Station HQM Quarry Sewer Branch The map will be constantly supported and updated. If you have any questions, feel free to message me on Discord.$19.00 -
Version 1.0.0
9 downloads
I present to you the Arena for your server! A compact arena with interesting hideouts and passages that will give your players a taste of true hardcore. Specifically for battlefield servers and training servers. Perfectly balanced, this arena is exactly what you’ve been looking for on your server! Number of prefabs: 200~$9.00 -
Version 1.4.3
3,211 downloads
The plugin allows players to visit a cold atmospheric Space void of gravity and oxygen, and visit an International Space Station! A Space Station appears high in the sky, and is surrounded by Meteorites, Spaceships, and Balloons. There is no gravity in Space, the temperature is very low and there is no oxygen. You can get to Space by a Spaceship or by a Balloon which also spawn near roads or in loot tables. The Space Station is guarded by customizable NPCs and a Space Bradley. Outer Space Meteorites, Crates, NPCs, Balloons and Spaceships will spawn in Outer Space near the Space Station, the number of each can be configured and customized. In order to survive in Outer Space, the player will need a Spacesuit. A Spacesuit can be customized to be any piece of clothing. In the config you can customize items that will perform the functions of the Spacesuit in whole or in part. To make space dark for players at any time of the day, use the NightVision plugin Space Station The Space Station consists of several compartments that are separated from each other by doors. Optionally, the doors can be locked and they will need to be raided. Inside the station there are crates with loot, NPCs, turrets, and fire turrets. At the end of the corridor there are two doors that open with blue cards and one door that opens with red. The spawn of the space station can be disabled. All objects on the space station are configured in the Data file of this station Spaceship The plugin includes spaceships that can spawn near roads, in Space, or can be added to loot tables. The ship has separate settings for flying in the normal atmosphere and in zero gravity in Space. It can shoot torpedoes, which will help the player in capturing the space station. There are two seats in each spaceship. Shuttle Control Guide: Balloon A balloon is an ordinary balloon with which you can ride into outer space. The balloon can spawn near roads, in Space, or can be added to loot tables. Also, this function can be applied to all balloons on the server. If the balloon is in zero gravity, it can be used as an escape capsule! If necessary, the player can enter, press a button, and be taken out of Space into the normal atmosphere. Dependencies Required NpcSpawn Chat commands (only for administrators) /spacestart – launches the event in a random configuration /spacestart <eventPresetName> – launches the event in the <eventPresetName> configuration /spacestop – stops the event /spawnshuttle – spawn the shuttle in your position /spawnaerostat – spawn the aerostat in your position /spacepoint – creates a custom spawn point of the event in your position (after that, you need to enable custom spawn points in the config) Console commands (RCON only) spacestart – launches the event in a random configuration spacestart <eventPresetName> – launches the event in the <eventPresetName> configuration spacestop – stops the event givepurplecard <userId> <amount> – gives a space card to a player giveshuttle <userId> <amount> – gives a shuttle to a player giveaerostat <userId> <amount> – gives a shuttle to a player givespacesuit <space_suit_preset> <userId> <amount> – gives <space_suit_preset> to a player Config plugin_en – example of plugin configuration in English station_en – example of station configuration in English plugin_ru – example of plugin configuration in Russian station_ru – example of station configuration in Russian Dependencies (optional, not required) True PVE PveMode GUI Announcements Notify DiscordMessages AlphaLoot CustomLoot Economics Server Rewards IQEconomic Hooks void OnSpaceEventStop() void OnSpaceEventStart() API bool IsPositionInSpace(Vector3 position) float GetMinSpaceAltitude() bool IsEventActive() My Discord: adem9554 Join the Mad Mappers Discord here! Check out more of my work here!$49.99 -
Version 2.0.1
140 downloads
This is a configuration file designed by us, featuring 110 custom bases and a specialized base loot setup for five different difficulty levels, ranging from Easy to Nightmare. Warning: The Raidable Bases plugin requires the Copy Paste plugin to function. You must install both for this bases pack to work. Raidable Bases (Paid): https://codefling.com/plugins/raidable-bases Copy Paste (Free): https://umod.org/plugins/copy-paste This Raidable Bases Pack & Loot Tables package includes: - 30 Easy Bases (Easy Bases Base_Loot "Vanilla" and "Enhanced" tables included) - 30 Medium Bases (Medium Bases Base_Loot "Vanilla" and "Enhanced" tables included) - 30 Hard Bases (Hard Bases Base_Loot "Vanilla" and "Enhanced" tables included) - 10 Expert Bases (Expert Bases Base_Loot "Vanilla" and "Enhanced" tables included) - 10 Nightmare Bases (Nightmare Bases Base_Loot "Vanilla" and "Enhanced" tables included) Beware: Our loot table package includes only the 5-tier loot tables within the Base_loot folder, ranging from easy to nightmare. It does not include the loot tables from the Difficulty_Loot or Weekday_Loot folders. With a total of 110 bases, this package focuses on simplicity and optimization. Most bases are protected by turrets and traps, and each base is designed with player PC performance and server stability in mind. VANILLA AND ENHANCED LOOT TABLES FOR RAIDABLE BASES This package includes 10 different base loot table files, ensuring a well-structured and advanced configuration for every difficulty level, from Easy to Nightmare. 5 loot files for the Vanilla setup (Easy, Medium, Hard, Expert, Nightmare), offering a balanced loot experience with some junk items, staying close to a 1x rate. 5 loot files for the Enhanced setup (Easy, Medium, Hard, Expert, Nightmare), designed for modded servers with 2x, 3x, or higher gather rates, featuring cleaner loot tables with minimal junk and more valuable rewards. Installation Path: All loot table files are intended for the /oxide/data/RaidableBases/Base_Loot directory. Setup Requirement: You must choose and install only one loot table setup at a time—either Vanilla or Enhanced. If you want to switch, you can replace the current files with the other set, but both cannot be active simultaneously. For those exclusively seeking the loot table, we offer it as a standalone product: https://codefling.com/customizations/raidable-bases-loot-tables-pack (Note: If you've purchased our Raidable Bases Pack & Loot Tables (110 Bases) package, there is no need to buy this separately.) WARNING: TWO DIFFERENT INSTALLATION METHODS (PLEASE READ BOTH AND APPLY ONLY THE ONE THAT FITS YOUR NEEDS) INSTALLATION GUIDE 1: (If you do not have a custom configuration and are not a professional in server configurations, choose this option. However, if you already have your own configuration and profile settings and do not wish to use the optional configs we provide—in other words, if you only need the bases and loot tables—use the second installation guide instead.) Step 1: Place the Config File From the extracted ZIP files, locate the config folder and find the RaidableBases.json file. Move it to the following directory: /serverfiles/oxide/config Step 2: Place the Bases From the extracted ZIP files, locate the copypaste folder and move it to the following directory: /serverfiles/oxide/data Step 3: Place the Base_Loot Tables From the extracted ZIP files, locate the Base_Loot folder and move it to the following directory: /serverfiles/oxide/data/RaidableBases Important: If there are any existing JSON files inside this folder that are not part of our loot tables, delete them to ensure proper functionality. Choose between Vanilla or Enhanced loot tables based on your preference. If the folder is named "Base_Loot (Enhanced loot)", remove the text in parentheses so that the correct folder name is simply: "Base_Loot" (Otherwise, the loot tables will not work properly.) Step 4: Place the Profiles Folder From the extracted ZIP files, locate the profiles folder and move it to the following directory: /serverfiles/oxide/data/RaidableBases Why Are Profiles Important? The profiles folder contains crucial settings that allow you to: ✔ Enable/disable the dome ✔ Enable/disable NPCs ✔ Adjust the number of lootable items These are just a few examples—there are dozens of important settings that directly affect how raid bases function. The config file alone is not enough—these files play a major role in customizing your raid bases. ⚠ I strongly recommend reviewing each difficulty setting (Easy to Nightmare) inside the profiles folder and adjusting them based on your needs. Step 5: Restart the plugin via RCON: o.reload RaidableBases INSTALLATION GUIDE 2: (Use this installation method if you do not want to use our configurations and instead prefer to use your own config files and your own /oxide/data/RaidableBases/Profiles configurations.) In this case, you only need to add the bases. To do this, use the following commands in RCON: Step 1: You can add bases one by one or in bulk. After executing the commands in RCON, the bases will be registered inside the Profiles configuration. If you do not want to deal with these adjustments, it is recommended to use Installation Guide 1 instead. A- Example RCON commands: rb.config add "Easy Bases" fullwipedeasy1 rb.config add "Hard Bases" fullwipedhard1 B- Commands to Integrate Raid Bases in Bulk via RCON: rb.config add "Easy Bases" fullwipedeasy1 fullwipedeasy2 fullwipedeasy3 fullwipedeasy4 fullwipedeasy5 fullwipedeasy6 fullwipedeasy7 fullwipedeasy8 fullwipedeasy9 fullwipedeasy10 fullwipedeasy11 fullwipedeasy12 fullwipedeasy13 fullwipedeasy14 fullwipedeasy15 fullwipedeasy16 fullwipedeasy17 fullwipedeasy18 fullwipedeasy19 fullwipedeasy20 fullwipedeasy21 fullwipedeasy22 fullwipedeasy23 fullwipedeasy24 fullwipedeasy25 fullwipedeasy26 fullwipedeasy27 fullwipedeasy28 fullwipedeasy29 fullwipedeasy30 rb.config add "Medium Bases" fullwipedmed1 fullwipedmed2 fullwipedmed3 fullwipedmed4 fullwipedmed5 fullwipedmed6 fullwipedmed7 fullwipedmed8 fullwipedmed9 fullwipedmed10 fullwipedmed11 fullwipedmed12 fullwipedmed13 fullwipedmed14 fullwipedmed15 fullwipedmed16 fullwipedmed17 fullwipedmed18 fullwipedmed19 fullwipedmed20 fullwipedmed21 fullwipedmed22 fullwipedmed23 fullwipedmed24 fullwipedmed25 fullwipedmed26 fullwipedmed27 fullwipedmed28 fullwipedmed29 fullwipedmed30 rb.config add "Hard Bases" fullwipedhard1 fullwipedhard2 fullwipedhard3 fullwipedhard4 fullwipedhard5 fullwipedhard6 fullwipedhard7 fullwipedhard8 fullwipedhard9 fullwipedhard10 fullwipedhard11 fullwipedhard12 fullwipedhard13 fullwipedhard14 fullwipedhard15 fullwipedhard16 fullwipedhard17 fullwipedhard18 fullwipedhard19 fullwipedhard20 fullwipedhard21 fullwipedhard22 fullwipedhard23 fullwipedhard24 fullwipedhard25 fullwipedhard26 fullwipedhard27 fullwipedhard28 fullwipedhard29 fullwipedhard30 rb.config add "Expert Bases" fullwipedexp1 fullwipedexp2 fullwipedexp3 fullwipedexp4 fullwipedexp5 fullwipedexp6 fullwipedexp7 fullwipedexp8 fullwipedexp9 fullwipedexp10 rb.config add "Nightmare Bases" fullwipednight1 fullwipednight2 fullwipednight3 fullwipednight4 fullwipednight5 fullwipednight6 fullwipednight7 fullwipednight8 fullwipednight9 fullwipednight10 Step 2: Place the Base_Loot Tables From the extracted ZIP files, locate the Base_Loot folder and move it to the following directory: /serverfiles/oxide/data/RaidableBases Important: If there are any existing JSON files inside this folder that are not part of our loot tables, delete them to ensure proper functionality. Choose between Vanilla or Enhanced loot tables based on your preference. If the folder is named "Base_Loot (Enhanced loot)", remove the text in parentheses so that the correct folder name is simply: "Base_Loot" (Otherwise, the loot tables will not work properly.) Step 3: Restart the plugin via RCON: o.reload RaidableBases EXTRA IMPORTANT INFORMATIONS: We do not use a dome, NPCs, or arena walls around raid bases on our servers, and in the ZIP file we provided, these features are also disabled by default. If you want to enable them, you will need to adjust the settings accordingly. For example, to enable the dome, follow the steps below: Navigate to: /oxide/data/RaidableBases/Profiles Open the files inside the Profiles folder with a text editor. Locate the following settings: (This is already set to false because it is required for markers to appear on the map.) "Spawn Silently (No Notification, No Dome, No Map Marker)": false, "Create Dome Around Event Using Spheres (0 = disabled, recommended = 5)": 0, Change the value from 0 to 5 as shown below: "Create Dome Around Event Using Spheres (0 = disabled, recommended = 5)": 5, Additionally, the loot amount for bases varies depending on the difficulty level (easy, medium, hard, expert, and nightmare). You can adjust this setting in the same Profiles location according to your needs: "Amount Of Items To Spawn": 210, For example, in medium bases, this value is set to 210, which determines the total number of items that will appear in crates, furnaces, and the cupboard. Our current configuration is specifically adjusted to prevent players from feeling overwhelmed by massive buildings right after a wipe. We have configured Maintained Events accordingly to ensure a balanced experience. In our setup: - Timed events and purchasable events are disabled. - After a wipe, easy bases will start spawning 30 minutes later. - Nightmare bases will begin spawning 48 hours (2 days) later. Imagine starting the game with just a torch in hand and immediately encountering a nightmare base on the shore. You’d likely quit the game right away—this setting is crucial for us to avoid such scenarios. Configuration Example: serverfiles/oxide/config "Maintained Events": { "Always Maintain Max Events": true, "Max Maintained Events": 30, "Enable X Hours After Wipe (0 = immediately)": { "Easy": 0.5, "Medium": 1.0, "Hard": 3.0, "Expert": 24.0, "Nightmare": 48.0 If you are satisfied with this package, you can support us by leaving a 5-star review on the site where you purchased it. Your feedback motivates us to continue improving and providing even better configurations for dedicated server owners like you. Please leave a review here: https://codefling.com/bases/raidable-bases-pack-loot-tables-110-bases?tab=reviews Thank you! Support: FULLWIPED DISCORD$69.99 -
.thumb.png.913d4ec299161acf94081154072ade61.png)
Version 1.8.0
12,262 downloads
New Year Update The New Year is coming and I have prepared for you a new preset customization for the train!After installing the update, customization will be automatically applied to all cars in the configuration of the armored train. To disable this, make the "Customization preset" parameter empty in the config. You can also disable the customization of certain wagons or change the customization of the NPCs in the file oxide/data/ArmoredTrain/NewYear New Year's map from the video: Halloween Update Have you already prepared your server for Halloween? On the eve of the Halloween Rust update, I have prepared for customization of all armored train cars. After installing the update, customization will be automatically applied to all cars in the configuration of the armored train. To disable this, make the "Customization preset" parameter empty in the config. This plugin will add an armored train to your server, which can travel both in the subway and by rail. It can consist of any number of wagons. A helicopter can accompany it. Bradley, npc, turrets, simsites can be installed on the train. The plugin allows you to create any number of train presets, for which the order of wagons, the helicopter preset, the probability of spawn and the duration of patrolling can be specified. Each wagon or locomotive can be configured separately. Any speed can be set by the locomotive.If there is no spawn of trains on the surface on your custom map, read the section “Custom spawn points” Custom spawn points If you are using a custom map in which there are no spawn trains on the surface, but there is a railway, then for the train to work on the surface, you need to add custom spawn points of the train. Instruction: Stand at the point where you want the train to spawn Enter the command /atrainpoint If you receive a message that a point has been created, enable “Use custom spawn coordinates [true/false]” in config For correct operation, it is recommended to create several spawn points of the train Chat commands (only for administrators) /atrainstart– launches the event in a random configuration /atrainstartunderground - forcibly launches an event underground /atrainstartaboveground - forcibly launches an event aboveground /atrainstart <trainPresetName> – launches the event in the <trainPresetName> configuration /atrainstartunderground <trainPresetName> /atrainstartaboveground <trainPresetName> /atrainstop– stops the event /atrainpoint– creates a custom spawn point of the train in your position Console commands (RCON only) atrainstart– launches the event in a random configuration atrainstartunderground - forcibly launches an event underground atrainstartaboveground - forcibly launches an event aboveground atrainstart <trainPresetName> – launches the event in the <trainPresetName> configuration atrainstartunderground <trainPresetName> atrainstartaboveground <trainPresetName> atrainstop – stops the event Config en – example of plugin configuration in English ru – example of plugin configuration in Russian Dependencies (optional, not required) True PVE PveMode GUI Announcements Notify DiscordMessages AlphaLoot CustomLoot Economics Server Rewards IQEconomic Api bool IsArmoredTrainActive() bool StopArmoredTrain() bool StartArmoredTrainEvent() bool EndArmoredTrainEvent() bool IsTrainBradley(uint netID) bool IsTrainHeli(uint netID) bool IsTrainCrate(uint netID) bool IsTrainSamSite(uint netID) bool IsTrainWagon(uint netID) bool IsTrainTurret(uint netID) Vector3 ArmoredTrainLocomotivePosition() Hooks OnArmoredTrainEventStart OnArmoredTrainEventStop Contact me in Discord: Adem#955$29.99 -
Version 1.7.1
196 downloads
During the Unlimited Sulfur Event, a large sulfur node appears at a set location(s) and is marked on the map, drawing attention to all players. This node provides unlimited sulfur, giving players a chance to collect a significant amount of sulfur within a limited time. This event can add an extra layer of competition and cooperation among your players as they rush to take advantage of these lucrative opportunities. Features Spawns an unlimited sulfur node/ore for a limited time. Ability to start the SulfurEvent manually or automatically at minimum and maximum intervals. Configuration options for SulfurEvent duration, minimum player count, UI location, and more. Customizable event start and end messages. Option to play a sound and visual effect when the event starts. Map markers and UI elements to indicate the active event and provide information to players. Game tips and chat messages to inform players about the event. Ability to set and manage sulfur node spawn positions. Commands to manage the SulfurEvent, including starting and stopping the event, setting spawn positions, listing positions, deleting positions, and viewing available commands. Event Overlap Prevention: Prevents the SulfurEvent from overlapping with the Stone/Metal Event. If overlap occurs, the plugin will retry starting the event after a configurable interval. User Interface: UI customization options include setting the UI location with X and Y coordinates. Enable proximity UI visibility mode and/or a "Players Here: X" Proximity UI. Gather Amounts: Set minimum and maximum gather amounts for sulfur ore and charcoal to control player rewards. Lightning Effects: Enable lightning effects during the event with customizable minimum and maximum intervals. Monument Spawn Locations: Added monument spawn locations that can be individually enabled or disabled. Customize spawns at specific monuments while excluding others (e.g., enable spawns at "xlarge/launch_site_1.prefab" and "medium/nuclear_missile_silo.prefab," but disable spawns at "OilrigAI" and "OilrigAI2"). Monument Spawn Limits: Set a limit for the number of spawns at each monument. For example, limit "roadside/gas_station_1.prefab" to 2 spawns, choosing from 3 Gas Stations if available. Monument Spawn Location Offsets: Customize the offsets for monument spawn locations to fine-tune the exact spawn positions at each monument. Commands /sulfurevent start - Start SulfurEvent /sulfurevent stop - Stop SulfurEvent /sulfurevent add <name> - Set new SulfurEvent spawn position /sulfurevent list - List all spawn positions /sulfurevent clear - Clear all spawn positions /sulfurevent delete <name> - Delete a spawn position /sulfurevent - View all commands Console Commands - SulfurStart, SulfurStop, SulfurList, SulfurListClear Permissions sulfurevent.admin - Allows the use of SulfurEvent commands. Possibly Incompatible plugins: "AlwaysHotSpot" , "InstantGather" Default Config { "Only Command Start Event": false, "Minimum Players to Start Event": 1, "Prevent Overlap with Metal/Stone Event": true, "Prevent Overlap Retry Timer (seconds)": 180.0, "Event Minimum Interval (seconds)": 3600, "Event Maximum Interval (seconds)": 7200, "Event Duration Seconds": 1230, "Event Start Notification Sound": true, "Event Start Explosion Effects": true, "Event Chat Messages": true, "Event GameTip Messages": true, "Event GameTip Duration (seconds)": 7.0, "Event Start Message": "<color=yellow>Sulfur Event</color> <color=white>Has Started! Check The Map!</color>", "Event End Message": "<color=yellow>Sulfur Event</color> <color=white>Has Ended!</color>", "UI Enabled": true, "UI Location X": 0.38, "UI Location Y": 0.8, "UI Handwriting Font": true, "UI Style (1 = With UI Msg, 2 = No UI Msg)": 1, "UI Message": "Unlimited sulfur node marked on map!", "Proximity UI Visibility Mode": false, "Proximity UI Visibility Range": 350, "Proximity UI 'Players Here: X'": true, "Proximity UI 'Players Here' Visibility Range": 70, "MapMarker Enabled": true, "MapMarker Colour": "#050505", "MapMarker Colour2": "#e5ff00", "MapMarker Radius": 0.25, "MapMarker Alpha": 0.7, "MapMarker Name/Message": "UNLIMITED SULFUR NODE", "Sulfur Ore Minimum Gather Amount": 1, "Sulfur Ore Maximum Gather Amount": 5, "Charcoal Minimum Gather Amount": 1, "Charcoal Maximum Gather Amount": 2, "Delete SulfurNode at Event End": true, "SulfurNode is Gatherable": true, "SulfurNode Size 1-100": 30, "SulfurNode Size Radius": 0.1, "Lightning during Event": true, "Lightning Min Interval (seconds)": 1.0, "Lightning Max Interval (seconds)": 60.0, "SulfurNode Spawnmodes ('All' or 'Random')": "Random", "SulfurNode Spawnmode 'Random' Amount": 2, "Monument Spawn Locations": { "xlarge/launch_site_1.prefab": true, "medium/nuclear_missile_silo.prefab": true, "large/military_tunnel_1.prefab": true, "large/airfield_1.prefab": true, "small/sphere_tank.prefab": true, "large/water_treatment_plant_1.prefab": true, "railside/trainyard_1.prefab": true, "medium/radtown_small_3.prefab": true, "roadside/gas_station_1.prefab": true, "roadside/supermarket_1.prefab": true, "large/powerplant_1.prefab": true, "lighthouse/lighthouse.prefab": true, "roadside/warehouse.prefab": true, "medium/junkyard_1.prefab": true, "small/satellite_dish.prefab": true, "harbor/harbor_1.prefab": true, "harbor/harbor_2.prefab": true, "arctic_bases/arctic_research_base_a.prefab": true, "military_bases/desert_military_base_a.prefab": false, "military_bases/desert_military_base_b.prefab": false, "military_bases/desert_military_base_c.prefab": false, "military_bases/desert_military_base_d.prefab": false, "OilrigAI": false, "OilrigAI2": false, "ferry_terminal_1": false }, "Monument Spawn Limits": { "xlarge/launch_site_1.prefab": 1, "medium/nuclear_missile_silo.prefab": 1, "large/military_tunnel_1.prefab": 1, "large/airfield_1.prefab": 1, "small/sphere_tank.prefab": 1, "large/water_treatment_plant_1.prefab": 1, "railside/trainyard_1.prefab": 1, "medium/radtown_small_3.prefab": 1, "roadside/gas_station_1.prefab": 3, "roadside/supermarket_1.prefab": 3, "large/powerplant_1.prefab": 1, "lighthouse/lighthouse.prefab": 2, "roadside/warehouse.prefab": 3, "medium/junkyard_1.prefab": 1, "small/satellite_dish.prefab": 1, "harbor/harbor_1.prefab": 1, "harbor/harbor_2.prefab": 1, "arctic_bases/arctic_research_base_a.prefab": 1, "military_bases/desert_military_base_a.prefab": 1, "military_bases/desert_military_base_b.prefab": 1, "military_bases/desert_military_base_c.prefab": 1, "military_bases/desert_military_base_d.prefab": 1, "OilrigAI": 1, "OilrigAI2": 1, "ferry_terminal_1": 1 }, "Monument Spawn Location Offsets": { "xlarge/launch_site_1.prefab": { "x": 105.0, "y": 3.5, "z": 7.5 }, "medium/nuclear_missile_silo.prefab": { "x": 36.3, "y": -33.2, "z": -1.8 }, "large/military_tunnel_1.prefab": { "x": -13.5, "y": 13.75, "z": 35.0 }, "large/airfield_1.prefab": { "x": 0.0, "y": 0.5, "z": -27.5 }, "small/sphere_tank.prefab": { "x": 1.6, "y": 57.0, "z": 8.0 }, "large/water_treatment_plant_1.prefab": { "x": -51.7, "y": 1.5, "z": -64.8 }, "railside/trainyard_1.prefab": { "x": -41.8, "y": 39.4, "z": -40.8 }, "medium/radtown_small_3.prefab": { "x": -3.5, "y": -2.6, "z": -4.5 }, "roadside/gas_station_1.prefab": { "x": 0.8, "y": 9.5, "z": -6.0 }, "roadside/supermarket_1.prefab": { "x": -4.0, "y": 6.0, "z": -3.5 }, "large/powerplant_1.prefab": { "x": 2.3, "y": 9.65, "z": 32.85 }, "lighthouse/lighthouse.prefab": { "x": 0.0, "y": 60.7, "z": 0.36 }, "roadside/warehouse.prefab": { "x": 0.0, "y": 6.6, "z": -7.7 }, "medium/junkyard_1.prefab": { "x": -3.0, "y": 0.3, "z": -13.0 }, "small/satellite_dish.prefab": { "x": -5.0, "y": 9.5, "z": -10.7 }, "harbor/harbor_1.prefab": { "x": 44.0, "y": 22.0, "z": -0.5 }, "harbor/harbor_2.prefab": { "x": 41.5, "y": 5.3, "z": -5.0 }, "arctic_bases/arctic_research_base_a.prefab": { "x": -24.5, "y": 0.5, "z": 13.0 }, "military_bases/desert_military_base_a.prefab": { "x": 0.0, "y": 0.0, "z": 0.0 }, "military_bases/desert_military_base_b.prefab": { "x": 0.0, "y": 0.0, "z": 0.0 }, "military_bases/desert_military_base_c.prefab": { "x": 0.0, "y": 0.0, "z": 0.0 }, "military_bases/desert_military_base_d.prefab": { "x": 0.0, "y": 0.0, "z": 0.0 }, "OilrigAI": { "x": -13.5, "y": 23.35, "z": -13.7 }, "OilrigAI2": { "x": -33.0, "y": 32.55, "z": 13.0 }, "ferry_terminal_1": { "x": 0.0, "y": 0.0, "z": 0.0 } } }$7.47 -

Version 1.0.4
10 downloads
Overview The Quarry Notification plugin for Rust is a plugin designed to enhance the gameplay experience by providing detailed notifications and map markers for specific quarry activities. This plugin is ideal for server administrators looking to keep players informed about quarry statuses and activities in real-time. Features Real-Time Notifications Activation Alerts: Receive notifications when a quarry is activated. Player Identification: Identify the last player who toggled the quarry. Grid Positioning: Get precise grid positions of activated quarries. Customizable Markers Individual Quarry Settings: Configure markers for Sulfur, Stone, and High-Quality Metal quarries independently. Marker Attributes: Adjust alpha, radius, center color, ring color, and duration for each quarry type. Configurable Advice Messages Interval Settings: Set the interval for periodic advice messages. Custom Message Formats: Personalize the format of notification messages. Configurable Options General Settings Permission for Chat Commands: Control access to chat commands (quarrynotification.use). Permission for Admin Commands: Restrict access to admin commands (quarrynotification.admin). SteamID Icon: Set the SteamID icon for chat messages. Enable Advice Messages: Toggle periodic advice messages. Advice Timer: Configure the interval for advice messages (in seconds). Notification Format: Customize the format of activation notification messages. Quarry-Specific Marker Configurations Sulfur Quarry Enable Markers: Toggle markers for Sulfur quarries. Alpha: Set marker transparency (0.0 - 1.0). Radius: Define marker radius. Center Color: Choose the center color of the marker (hex code). Ring Color: Set the ring color of the marker (hex code). Duration: Determine how long the marker stays on the map (in seconds). Stone Quarry Enable Markers: Toggle markers for Stone quarries. Alpha: Set marker transparency (0.0 - 1.0). Radius: Define marker radius. Center Color: Choose the center color of the marker (hex code). Ring Color: Set the ring color of the marker (hex code). Duration: Determine how long the marker stays on the map (in seconds). High-Quality Metal Quarry Enable Markers: Toggle markers for HQM quarries. Alpha: Set marker transparency (0.0 - 1.0). Radius: Define marker radius. Center Color: Choose the center color of the marker (hex code). Ring Color: Set the ring color of the marker (hex code). Duration: Determine how long the marker stays on the map (in seconds). What's New and Improved New Features Spam Prevention: Added protections to avoid chat spam, including limits on how often notifications can be sent and cooldown periods. Quarry Status Tracking: The plugin now tracks whether a quarry is active or inactive, with notifications for when a quarry is turned on or off. You can also check the status using commands. Discord Notifications: You can now send notifications to a Discord channel with detailed quarry activity updates, including visually enhanced messages with color coding. General Enhancements Better Notifications: Cleaner and more informative messages for users, with improved formatting. Easier Configuration: Simplified settings with more options for customizing marker visuals and notification behaviors. Improved Performance: The plugin runs smoother and uses less memory, making it more efficient on your server. Enhanced Stability: Reduced errors and crashes by improving how the plugin handles unexpected situations and invalid inputs. Quality of Life Improvements More Control for Admins: Improved permissions for commands and more detailed logs to help admins monitor quarry usage. Customizable Settings: Added new options for adjusting how notifications and markers work to better suit your needs. Better Cleanup: Ensures that resources like markers are removed properly when not needed, keeping the server clean. Summary The Quarry Notification plugin is now more reliable, user-friendly, and packed with features to help you monitor quarry activity efficiently while preventing unnecessary spam. Discord integration and better customization options make it a powerful tool for managing your server. Sample Configuration { "Permission required to use chat commands": "quarrynotification.use", "Permission required for admin commands": "quarrynotification.admin", "SteamID icon for chat messages": 0, "Enable advice messages": true, "Interval for advice messages in seconds": 1800, "Notification message format": "{0} has activated a {1} Quarry at {2}!", "Anti-spam cooldown in seconds": 30.0, "Maximum toggles per minute before spam protection": 3, "Spam protection duration in minutes": 5, "Quarry marker configurations": { "SulfurQuarry": { "Enabled": true, "Alpha": 0.5, "Radius": 0.6, "Center Color": "#FF0000", "Ring Color": "#FFFFFF", "Duration": 30.0 }, "StoneQuarry": { "Enabled": true, "Alpha": 0.5, "Radius": 0.6, "Center Color": "#FFA07A", "Ring Color": "#20B2AA", "Duration": 30.0 }, "HQMQuarry": { "Enabled": true, "Alpha": 0.5, "Radius": 0.6, "Center Color": "#9370DB", "Ring Color": "#FF69B4", "Duration": 30.0 } }, "Enable Discord notifications": false, "Discord webhook URL": "" } Language Customization Easily customize the in-game messages to suit your server's style and language preferences. Default Messages { "QuarryStatusHeader": "<size=18><color=#4A90E2>Quarry Status Monitor</color></size>", "QuarryNameFormat": "<color=#F6C177>{0}</color>", "QuarryActivatedFormat": "<color=#4A90E2>│</color> Status: {0}", "QuarryLastPlayerFormat": "<color=#4A90E2>│</color> Last User: <color=#9ECBFF>{0}</color>", "QuarryGridPositionFormat": "<color=#4A90E2>│</color> Location: <color=#9ECBFF>{0}</color>", "QuarryNoActivationInfo": "<color=#4A90E2>│</color> <color=#E06C75>No activity recorded</color>", "QuarryLastActivated": "<color=#4A90E2>│</color> Last active: <color=#98C379>{0} {1}</color> ago at <color=#9ECBFF>{2}</color>", "QuarryOn": "<color=#98C379>✓</color> <color=#9ECBFF>{0}</color> activated the <color=#F6C177>{1}</color> quarry at <color=#9ECBFF>{2}</color>", "QuarryOff": "<color=#E06C75></color> <color=#9ECBFF>{0}</color> deactivated the <color=#F6C177>{1}</color> quarry at <color=#9ECBFF>{2}</color>", "PermissionError": "<color=#E06C75>Access denied: Insufficient permissions</color>", "QuarryAdded": "<color=#98C379>✓ Added {0} quarry at {1}</color>", "QuarryRemoved": "<color=#E06C75>Removed {0} quarry</color>", "NoQuarriesFound": "<color=#E06C75>No quarries found in the system</color>", "Minutes": "minutes", "Minute": "minute", "Seconds": "seconds", "Second": "second", "Hours": "hours", "Hour": "hour", "Days": "days", "Day": "day", "SulfurQuarry": "Sulfur", "StoneQuarry": "Stone", "HQMQuarry": "HQM", "QuarryNotFound": "<color=#E06C75>Quarry not found at specified location</color>", "InvalidCoordinates": "<color=#E06C75>Invalid coordinates format. Use: <x> <y> <z></color>", "InvalidType": "<color=#E06C75>Invalid quarry type. Available: SulfurQuarry, StoneQuarry, HQMQuarry</color>", "AddQuarryUsage": "<color=#4A90E2>Usage: /addquarry <type> <x> <y> <z></color>", "RemoveQuarryUsage": "<color=#4A90E2>Usage: /removequarry <type></color>", "NotificationHeader": "<size=18><color=#4A90E2>Quarry Activity Report</color></size>", "NotificationQuarryName": "<color=#F6C177>{0} Quarry</color>", "NotificationActivated": "<color=#4A90E2>│</color> Active: <color=#98C379>{0}</color> ago", "NotificationLastPlayer": "<color=#4A90E2>│</color> Operator: <color=#9ECBFF>{0}</color>", "NotificationGridPosition": "<color=#4A90E2>│</color> Grid: <color=#9ECBFF>{0}</color>", "NotificationSeparator": "<color=#4A90E2>└────────────────</color>", "InvalidPermissions": "<color=#E06C75>Access denied: Insufficient permissions</color>", "QuarryClearSuccess": "<color=#98C379>✓ All quarries cleared successfully</color>", "QuarryUpdateSuccess": "<color=#98C379>✓ Quarry information updated</color>", "SpamProtection": "<color=#E06C75>Anti-spam protection active. Please wait...</color>", "QuarryStatus": "<color=#4A90E2>│</color> Status: {0}", "StatusActive": "<color=#98C379>Active</color>", "StatusInactive": "<color=#E06C75>Inactive</color>" } Commands /quarry: Displays the current status of all quarries. /addquarry <type> <x> <y> <z>: Adds a new quarry at the specified coordinates. /removequarry <type>: Removes the specified type of quarry. /listquarries: Lists all configured quarries. /clearquarries: Clears all quarries from the configuration.$8.00 -
.thumb.jpg.4d4104cb1162e8596dbfb89d7235b858.jpg)
Version 1.1.2
868 downloads
Discover the beauty of the open sea, with versatile barges perfect for transforming into your floating abode. Glide across the water effortlessly, by attaching a Tugboat, a Submarine, a RHIB, and more! You can traverse the waters of your Rust server with a custom Barge motor as well. Elevate your gaming experience, go on a wet and wild adventure with Barges, take the fight into the waves and beyond! The plugin includes 7 configurable platform shapes, each of which has it's own customization options in the config file. Note that the modules are configured within the config file, not in game. With proper TC authorization teammates can also access the Barge and it's modules. In the config file you can also adjust the maximum building height, movement speed, and several other parameters. Modules Barges each come with a variety of modules that you can enable, disable, or swap out for alternate modules, all within the config file. Regarding access to the modules in the game, this is restricted to players who have TC authorization. Connector Connector module allows attaching to a tugboat, a RHIB, or another barge. To allow attachment, press the button on the connector. You cannot install more than one Connector module on each Barge. Dock Dock module allows attaching boats and submarines to the Barge. Just approach it with your vehicle to activate and attach it. Mutliple Dock modules can be added to any Barge with available slots. Cabin Cabin module is used to drive the Barge. If this module is installed, the Barge can be driven with the help of an engine. To get into the Cabin, use the button on the door. To start the engine, fuel must be placed in the fuel tank behind the cabin. You can only connect one Cabin module on each Barge. Ramp Ramp module is used for loading and unloading vehicles, like motorcycles, cars, or minis! To open cor close the gate, use the button on the post. Multiple Ramp modules can be installed to each Barge. Anchor Anchor module will be the most used module for many who brave the sea on a Barge! Press the button to drop the Anchor, and stop movement so that you can build, or if you get a little seasick. Press the button again to go with the flow! Features and limitations • By default the construction on any Barge is restricted to either wood or metal. Stone and high quality are not currently an option. Those building parts will automatically receive the Legacy and Container skins. You can disable the restriction in the config, but this will negatively impact the performance on some servers and appear to have rougher movement of build parts with a large number of barges on the server • These actions are available only while the Barge is Anchored, not while moving - Base construction - Use of chairs and sofas - Installation of objects - Interact with wires pipes or conveyors • For optimization installing Wallpaper on Barges is not allowed • Building parts can not exceed the boundaries of the Barge itself • Frankenstein tables are not able to be installed on any Barge • By default you are not able to approach Fishing Village by Barge Please consider this plugin in BETA testing. The plugin is functional but I cannot make it compatible with the many plugins out there without your help. Please feel free to reach out with ideas but be patient with new ideas, as many common functions of a base are not so easy to do on a constantly moving rocking and rolling unique water base. Please give feedback and make tickets for support. Please be patient as all support requests are always going to be answered. If you are willing to join the Mad Mapper Discord this is a great resource for creating tickets for suggestions feedback and support. Chat commands (admin only) /spawnbarge PresetName - spawn the barge in your position /killbarge - destroys the barge you're looking at /killallbarges - destroys all barges on the server /givebarge PresetName - give the barge to yourself Console commands (RCON only) givebarge PresetName userID - give the barge to the player Plugin Config en – example of plugin configuration in English ru – example of plugin configuration in Russian Check out the rest of my work: Adem's Codefling Library You can reach out to me in Discord: Adem's Discord Profile Join the Mad Mappers Discord!$29.99 -
Version 1.0.6
237 downloads
The plugin adds a dungeon event to your server. Dungeons are bases with puzzles, NPC defenders, turrets and more. You can create your own dungeons of varying difficulty You can build your own bases or modify existing ones: There are moving NPC guardians in the dungeons: There are puzzles with protective doors in the dungeons: In the dungeons there are secret notes with codes in boxes or on NPCs: Commands: dungbase_start - force start event dungbase_stop - force stop event Hooks: void DungeonBasesEventStarted() - // called when event starts void DungeonBasesEventEnded() - // called when event ends Configuration: { "Allow only the event owner (the one who entered the dungeon first) into the dungeon": true, "Allow owner's teammates to enter the dungeon": true, "Message that you cannot enter the dungeon without being the owner of the event or its teammate": "You cannot enter the dungeon without being the owner of the event or its teammate", "Event marker on the map": true, "Event marker name": "Dungeon Base", "Event marker transparency(0-1)": 0.55, "Event marker radius": 0.5, "Event marker color.R(0-1)": 1.0, "Event marker color.G(0-1)": 0.0, "Event marker color.B(0-1)": 0.0, "Display event owner name on marker": true, "Display the time remaining until the end of the event on the marker": true, "Autostart event(disable if you want to trigger the event only manually)": false, "Minimum time to event start(in seconds)": 3600, "Maximum time to event start(in seconds)": 7200, "Minimum event duration(in seconds)": 2000, "Maximum event duration(in seconds)": 3000, "Minimum number of online players to trigger an event": 1, "Event message": "The dungeon bases event has started, find the entrance to the base and get the loot", "End event message": "The dungeon bases event has ended", "Dungeons list": [ "#dung#base1", "#dung#base2", "#dung#base3", "#dung#base4" ], "Entrances list": [ "#dung#entrance1", "#dung#entrance2", "#dung#entrance3", "#dung#entrance4" ], "Random order of choosing a dungeon from the list (if false, will be selected in turn)": false, "Random order of choosing the entrance to the dungeon from the list (if false, will be selected in turn)": false, "Change the time of day when entering the dungeon(from 0 to 23, if -1 - do not change the time)": 0.0, "How long before the end of the event does radiation start to affect players inside the dungeon": 180, "How long after the event ends should the entrance be destroyed": 60, "Close the entrance and exit to the dungeon when the event time is over": true, "Message about closing the entrance and exit": "Time is up, the entrance and exit to the dungeon are closed forever!" } Note: The plugin is guaranteed to work correctly with bases enabled. NPCs will not behave as standard, as they use different algorithms. Only one dungeon can spawn on the map at a time.$19.99 -
Version 1.0.0
5 downloads
surrounding islands and a highly valuable central island, resource management, and monument control are key. This keeps players constantly moving, building alliances, and fighting for supremacy. Large Oil Rig: Head to the central island to find the Large Oil Rig, where high-tier loot and challenging NPC scientists await. It's not just a monument; it's a battleground for the brave, offering exclusive rewards such as the Blue Keycard, found on the dock, which unlocks further high-tier loot locations. Water Treatment Plant: One of the game’s most iconic monuments, the Water Treatment Plant offers mid-tier loot and plenty of strategic hiding spots. Perfect for early-game runs to gather essentials and dominate other players. Military Tunnels: For experienced players, this underground maze houses military-grade gear, guarded by radiation and heavily armed NPCs. Control this key location, and you'll have a distinct advantage over your enemies. The Black Market: Take your loot game to the next level! Here, you can trade valuable resources or get ambushed by rival players. It’s a high-risk, high-reward location that adds a whole new dynamic to the map. Stone Quarry: Control this resource hotspot to gather building materials like stone and metal. Ideal for large groups looking to establish long-term dominance on the map. Blue Keycard on Oil Rig Dock: Secure this crucial item early at the Oil Rig, unlocking further access to monuments like Military Tunnels and Water Treatment. This adds a strategic layer to early exploration and competition between players. Bradley APC Spawn via Admin Command: For those looking to spice things up, admins can easily spawn the Bradley APC anywhere on the map, creating a new challenge for players brave enough to take it on. The valid command allows for quick customization and dynamic server events that keep gameplay fresh. Hope you all enjoy!!!!!$1.00 -
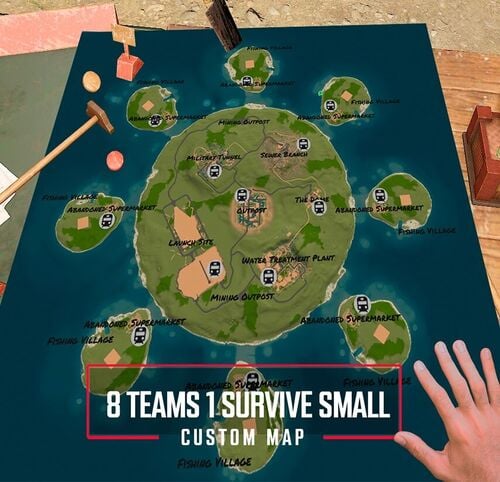
Version 1.12.0
199 downloads
I present to you 8 Team 1 Survies is a different map than usual, it is a main island and 8 mini-islands for the teams, each island contains 1 supermarket, 21x21 area to build the base, ziplines to get to the other side and a system of tunnels that connects the entire map. Remember that only one can survive! Good luck !! Feautures: Map size is 3000 Underground Rail tunnels Ziplines Monuments: Launchsite Military tunnel Custom Outpost Sewer Branch Dome Road Monuments Train subway system Islands: Train entrance Fishing Village Supermarket ziplines conected to main island Space for built a base My Discord: Nachito#8030 A password is attached to the map. You can edit it.$15.00 -
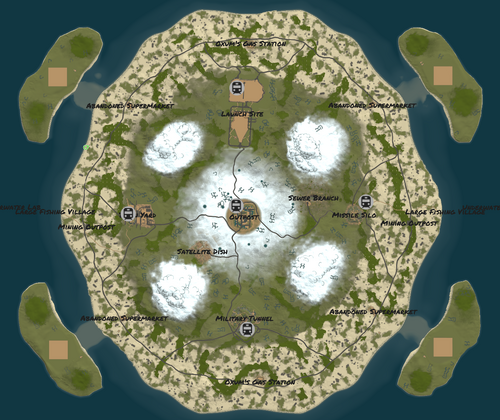
Version 3.0.0
17 downloads
This is 4 teams 1 survive, We see that rust is doing a lot of events, different game modes, etc. This map is effective for you to hold an event or a competition with your players or friends. As the title says, 4 teams: Only 1 can survive. Map Size: 3900 This Map contains: Launch Site Military tunnel Sewer branch Satellite Dish Missile Silo Trainyard 4 supermarkets 2 Gas Station 2 MIining Outpost 2 Fishing Villages 2 Uderwater labs The Islands contains: Base build zone (49x49 You can edit in Rustedit) and ziplines to supermarket, Map is editable and the password is provided in the file. Discord: https://discord.gg/Mg8jrFGK7N$10.00 -

Version 1.2.7
2,019 downloads
SimplePVE is exactly what it says. An easy simple PVE plugin for your server to modify or change PVE rules individually & now also have a Simple Cui to control PVE rules and Create or edit Schedules. Control PVE Rules from in-game or in the config Easy to understand each individual Rules Create PVP Schedules Discord Embed Messages on PurgeStart or End Many more features are added every update /simplepve - Use to enable or disable pve toggle (Chat & Console command) /simplepve on or off - Use to enable disable pve (Chat & Console command) /sprules - Use to Open a Cui to control PVE Rules & Creating Schedules (Chat command) simplepve.admin - Required to enable or disable SimplePVE simplepve.adminloot - Required to view Loots simplepve.admindamage - Required for Admin damages to any entity void OnSPVEPurgeStarted() void OnSPVEPurgeEnded() TimeSpan GetPVPStartTimeRemaining() TimeSpan GetPVPEndTimeRemaining() Check Out My Other plugins as Well$14.99 -
.thumb.gif.68ffab52af1abab7e94468c2da1efee4.gif)
Version 1.1.5
319 downloads
"RoamTasks transforms Rust activities into competitive challenges with rewarding outcomes. All players face the same task." Usage Plug n' play. 50+ preconfigured Tasks. Tasks automatically start based on Min-Max time interval. Start Tasks with console commands ("RoamTask"). Edit/Add/Remove Tasks and Rewards. Useful console commands = "RoamTask List" and "RoamTask Rewards". Recommended to use along with free plugin "Simple Events", useful for starting tasks in specific order. Console Commands (use console command "RoamTask" for same info) !requires admin Usage: RoamTask <command> [options] Start (Hook) (TaskID) - Start random Task - Optionally, specify the Hook and TaskID. Stop - Stop active RoamTask. List - List all available Tasks with their Hooks and TaskIDs. Stats - Display statistics such as most completed tasks. StatsClear - Clear all recorded RoamTask statistics. Rewards - List all reward tiers and their reward options. Tasks one Task is chosen at Random (use free plugin ''simpleevents'' for specific order of tasks) 50+ unique Tasks (each Task can be made into multiple Tasks with different configurations) + Category(Hook): OnEntityMounted - Fly Attackheli - Use Parachutes - Ride Pedal Bikes - Ride Motor Bikes + Category(Hook): OnBigWheelWin - Win Gambling Wheel Rewards System RoamTasks has a reward system called RewardPool. RewardPool has different tiers, and each tier has a list of rewards. The rewards in each list have different probabilities of being chosen. When you complete a task, you are randomly assigned a reward from the tier that the task is aligned with. This ensures that the rewards are suited to the difficulty of the task, while also adding an element of luck. (Economics and ServerRewards supported) + Extra rewards for fastest players who complete a task, default rewards for 1. 2. and 3. players. Task System One task is chosen at random from list of tasks. Each task has its own, requirements, time, player limit, rewards, etc. Player is rewarded when task requirements are met. Config { "GeneralConfig": { "Log Task Completion": false, "Automatically Add Latest Tasks": true, "Only Command Start Tasks": false, "Next Task Minimum(seconds)": 600, "Next Task Maximum(seconds)": 1800, "Start Sound": true, "Start Sound Vibration": true, "GameTip Notifications": true, "GameTip Reward Message": "<color=#8cc83c>You received: {rewardDisplayName}</color>", "GameTip Start Message": "Roam Available", "Chat Notifications": true, "Chat Announce Task Complete": true, "Chat Announce Task Complete - Message ": "{config.General.scientistName}Participant <color=#55aaff>{playerName}</color> has completed the roam.{RankReward}", "Chat Announce Task Complete - Max Players": 3, "Chat Player Limit Messages": [ "\nLimited to {selectedMaxComplete} participants!", "\nMaximum {selectedMaxComplete} participants allowed!", "\nOnly {selectedMaxComplete} participants allowed!", "\nMaximum {selectedMaxComplete} participants!" ], "Chat Icon | 0 = Disabled": 76561199350559937, "Chat Name": "<color=#aaff55>Scientist</color>: ", "Chat Reward Message": "{scientistName}You received {rewardDisplayName}.", "Chat Next Roam Notification": true, "Chat Next Roam Message": "{scientistName}Next roam in {NextRoamTime}.", "{RankReward} Text ": "\n+ {playerRank}{playerRankSuffix} participant bonus.", "Chat Start Messages": [ "Attention. Roam available.", "Alert. Roam initiated.", "Attention. Roam authorized.", "Warning. Roam initiated. Proceed with caution.", "Attention. Roam accessible.", "Alert. Roam authorized." ], "UI Location X": 0.5, "UI Location Y": 0.0, "Position Bonus Rewards": true }, "Position Bonus Rewards List": { "1": { "Enabled": true, "Types - ( Items = 1, Command = 2, Eco = 3, SR = 4 ) - Usage - 1, 2, 3, 4": [ 1 ], "Items": [ { "Item Type": "xmas.present.large", "Item Amount": 1, "Item Custom Name": "", "Item Skin ID": 0 } ], "Command": "oxide.usergroup add {player.id} vip", "Command Custom Name": "VIP", "Command Reward Msg": "<color=#ffbf00>{customName}</color>", "Economics Amount (Plugin)": 420.0, "Economics Custom Name (Plugin)": "$", "Economics Reward Msg": "<color=#3e9c35>{customName}</color>{amount}", "ServerRewards Amount (Plugin)": 420, "ServerRewards Custom Name (Plugin)": "RP", "ServerRewards Reward Msg": "{amount}<color=#cd4632>{customName}</color>" }, "2": { "Enabled": true, "Types - ( Items = 1, Command = 2, Eco = 3, SR = 4 ) - Usage - 1, 2, 3, 4": [ 1 ], "Items": [ { "Item Type": "xmas.present.medium", "Item Amount": 1, "Item Custom Name": "", "Item Skin ID": 0 } ], "Command": "oxide.usergroup add {player.id} vip", "Command Custom Name": "VIP", "Command Reward Msg": "<color=#ffbf00>{customName}</color>", "Economics Amount (Plugin)": 420.0, "Economics Custom Name (Plugin)": "$", "Economics Reward Msg": "<color=#3e9c35>{customName}</color>{amount}", "ServerRewards Amount (Plugin)": 420, "ServerRewards Custom Name (Plugin)": "RP", "ServerRewards Reward Msg": "{amount}<color=#cd4632>{customName}</color>" }, "3": { "Enabled": true, "Types - ( Items = 1, Command = 2, Eco = 3, SR = 4 ) - Usage - 1, 2, 3, 4": [ 1 ], "Items": [ { "Item Type": "xmas.present.small", "Item Amount": 3, "Item Custom Name": "", "Item Skin ID": 0 } ], "Command": "oxide.usergroup add {player.id} vip", "Command Custom Name": "VIP", "Command Reward Msg": "<color=#ffbf00>{customName}</color>", "Economics Amount (Plugin)": 420.0, "Economics Custom Name (Plugin)": "$", "Economics Reward Msg": "<color=#3e9c35>{customName}</color>{amount}", "ServerRewards Amount (Plugin)": 420, "ServerRewards Custom Name (Plugin)": "RP", "ServerRewards Reward Msg": "{amount}<color=#cd4632>{customName}</color>" } }, "RewardPool Configuration - Tiers and Rewards: Each Tier has a List of Rewards. Each Reward has multiple Types. One reward from set Tier's Rewards List is randomly selected based on configured Chance. (Add as many Tiers/Rewards as needed)": { "Tier1": { " -- Rewards List -- ": [ { " -- Reward": { "Enabled": true, "Types - ( Items = 1, Command = 2, Eco = 3, SR = 4 ) - Usage - 1, 2, 3, 4": [ 1 ], "Items": [ { "Item Type": "pistol.semiauto", "Item Amount": 1, "Item Custom Name": "", "Item Skin ID": 830255284 }, { "Item Type": "ammo.pistol", "Item Amount": 32, "Item Custom Name": "", "Item Skin ID": 0 }, { "Item Type": "bandage", "Item Amount": 3, "Item Custom Name": "", "Item Skin ID": 0 } ], "Command": "oxide.usergroup add {player.id} vip", "Command Custom Name": "VIP", "Command Reward Msg": "<color=#ffbf00>{customName}</color>", "Economics Amount (Plugin)": 420.0, "Economics Custom Name (Plugin)": "$", "Economics Reward Msg": "<color=#3e9c35>{customName}</color>{amount}", "ServerRewards Amount (Plugin)": 420, "ServerRewards Custom Name (Plugin)": "RP", "ServerRewards Reward Msg": "{amount}<color=#cd4632>{customName}</color>" }, " -- Reward Select Chance % (0.0 - 1.0)": 0.5 }, { " -- Reward": { "Enabled": true, "Types - ( Items = 1, Command = 2, Eco = 3, SR = 4 ) - Usage - 1, 2, 3, 4": [ 1 ], "Items": [ { "Item Type": "pistol.revolver", "Item Amount": 1, "Item Custom Name": "", "Item Skin ID": 0 }, { "Item Type": "ammo.pistol", "Item Amount": 64, "Item Custom Name": "", "Item Skin ID": 0 }, { "Item Type": "cloth", "Item Amount": 50, "Item Custom Name": "", "Item Skin ID": 0 } ], "Command": "oxide.usergroup add {player.id} vip", "Command Custom Name": "VIP", "Command Reward Msg": "<color=#ffbf00>{customName}</color>", "Economics Amount (Plugin)": 420.0, "Economics Custom Name (Plugin)": "$", "Economics Reward Msg": "<color=#3e9c35>{customName}</color>{amount}", "ServerRewards Amount (Plugin)": 420, "ServerRewards Custom Name (Plugin)": "RP", "ServerRewards Reward Msg": "{amount}<color=#cd4632>{customName}</color>" }, " -- Reward Select Chance % (0.0 - 1.0)": 0.35 }, { " -- Reward": { "Enabled": true, "Types - ( Items = 1, Command = 2, Eco = 3, SR = 4 ) - Usage - 1, 2, 3, 4": [ 1 ], "Items": [ { "Item Type": "explosive.satchel", "Item Amount": 2, "Item Custom Name": "", "Item Skin ID": 0 }, { "Item Type": "grenade.f1", "Item Amount": 2, "Item Custom Name": "", "Item Skin ID": 0 }, { "Item Type": "metal.fragments", "Item Amount": 100, "Item Custom Name": "", "Item Skin ID": 0 } ], "Command": "oxide.usergroup add {player.id} vip", "Command Custom Name": "VIP", "Command Reward Msg": "<color=#ffbf00>{customName}</color>", "Economics Amount (Plugin)": 420.0, "Economics Custom Name (Plugin)": "$", "Economics Reward Msg": "<color=#3e9c35>{customName}</color>{amount}", "ServerRewards Amount (Plugin)": 420, "ServerRewards Custom Name (Plugin)": "RP", "ServerRewards Reward Msg": "{amount}<color=#cd4632>{customName}</color>" }, " -- Reward Select Chance % (0.0 - 1.0)": 0.15 } ] }, "Tier2": { " -- Rewards List -- ": [ { " -- Reward": { "Enabled": true, "Types - ( Items = 1, Command = 2, Eco = 3, SR = 4 ) - Usage - 1, 2, 3, 4": [ 1 ], "Items": [ { "Item Type": "rifle.semiauto", "Item Amount": 1, "Item Custom Name": "", "Item Skin ID": 0 }, { "Item Type": "ammo.rifle", "Item Amount": 64, "Item Custom Name": "", "Item Skin ID": 0 }, { "Item Type": "syringe.medical", "Item Amount": 5, "Item Custom Name": "", "Item Skin ID": 0 } ], "Command": "oxide.usergroup add {player.id} vip", "Command Custom Name": "VIP", "Command Reward Msg": "<color=#ffbf00>{customName}</color>", "Economics Amount (Plugin)": 420.0, "Economics Custom Name (Plugin)": "$", "Economics Reward Msg": "<color=#3e9c35>{customName}</color>{amount}", "ServerRewards Amount (Plugin)": 420, "ServerRewards Custom Name (Plugin)": "RP", "ServerRewards Reward Msg": "{amount}<color=#cd4632>{customName}</color>" }, " -- Reward Select Chance % (0.0 - 1.0)": 0.5 }, { " -- Reward": { "Enabled": true, "Types - ( Items = 1, Command = 2, Eco = 3, SR = 4 ) - Usage - 1, 2, 3, 4": [ 1 ], "Items": [ { "Item Type": "smg.2", "Item Amount": 1, "Item Custom Name": "", "Item Skin ID": 0 }, { "Item Type": "ammo.pistol", "Item Amount": 64, "Item Custom Name": "", "Item Skin ID": 0 }, { "Item Type": "lowgradefuel", "Item Amount": 30, "Item Custom Name": "", "Item Skin ID": 0 } ], "Command": "oxide.usergroup add {player.id} vip", "Command Custom Name": "VIP", "Command Reward Msg": "<color=#ffbf00>{customName}</color>", "Economics Amount (Plugin)": 420.0, "Economics Custom Name (Plugin)": "$", "Economics Reward Msg": "<color=#3e9c35>{customName}</color>{amount}", "ServerRewards Amount (Plugin)": 420, "ServerRewards Custom Name (Plugin)": "RP", "ServerRewards Reward Msg": "{amount}<color=#cd4632>{customName}</color>" }, " -- Reward Select Chance % (0.0 - 1.0)": 0.35 }, { " -- Reward": { "Enabled": true, "Types - ( Items = 1, Command = 2, Eco = 3, SR = 4 ) - Usage - 1, 2, 3, 4": [ 1 ], "Items": [ { "Item Type": "ammo.rifle.explosive", "Item Amount": 64, "Item Custom Name": "", "Item Skin ID": 0 }, { "Item Type": "hq.metal.ore", "Item Amount": 50, "Item Custom Name": "", "Item Skin ID": 0 } ], "Command": "oxide.usergroup add {player.id} vip", "Command Custom Name": "VIP", "Command Reward Msg": "<color=#ffbf00>{customName}</color>", "Economics Amount (Plugin)": 420.0, "Economics Custom Name (Plugin)": "$", "Economics Reward Msg": "<color=#3e9c35>{customName}</color>{amount}", "ServerRewards Amount (Plugin)": 420, "ServerRewards Custom Name (Plugin)": "RP", "ServerRewards Reward Msg": "{amount}<color=#cd4632>{customName}</color>" }, " -- Reward Select Chance % (0.0 - 1.0)": 0.15 } ] }, "Tier3": { " -- Rewards List -- ": [ { " -- Reward": { "Enabled": true, "Types - ( Items = 1, Command = 2, Eco = 3, SR = 4 ) - Usage - 1, 2, 3, 4": [ 1 ], "Items": [ { "Item Type": "rifle.lr300", "Item Amount": 1, "Item Custom Name": "", "Item Skin ID": 0 }, { "Item Type": "ammo.rifle", "Item Amount": 128, "Item Custom Name": "", "Item Skin ID": 0 }, { "Item Type": "largemedkit", "Item Amount": 3, "Item Custom Name": "", "Item Skin ID": 0 } ], "Command": "oxide.usergroup add {player.id} vip", "Command Custom Name": "VIP", "Command Reward Msg": "<color=#ffbf00>{customName}</color>", "Economics Amount (Plugin)": 420.0, "Economics Custom Name (Plugin)": "$", "Economics Reward Msg": "<color=#3e9c35>{customName}</color>{amount}", "ServerRewards Amount (Plugin)": 420, "ServerRewards Custom Name (Plugin)": "RP", "ServerRewards Reward Msg": "{amount}<color=#cd4632>{customName}</color>" }, " -- Reward Select Chance % (0.0 - 1.0)": 0.5 }, { " -- Reward": { "Enabled": true, "Types - ( Items = 1, Command = 2, Eco = 3, SR = 4 ) - Usage - 1, 2, 3, 4": [ 1 ], "Items": [ { "Item Type": "rifle.bolt", "Item Amount": 1, "Item Custom Name": "", "Item Skin ID": 0 }, { "Item Type": "ammo.rifle.hv", "Item Amount": 64, "Item Custom Name": "", "Item Skin ID": 0 }, { "Item Type": "hq.metal.ore", "Item Amount": 100, "Item Custom Name": "", "Item Skin ID": 0 } ], "Command": "oxide.usergroup add {player.id} vip", "Command Custom Name": "VIP", "Command Reward Msg": "<color=#ffbf00>{customName}</color>", "Economics Amount (Plugin)": 420.0, "Economics Custom Name (Plugin)": "$", "Economics Reward Msg": "<color=#3e9c35>{customName}</color>{amount}", "ServerRewards Amount (Plugin)": 420, "ServerRewards Custom Name (Plugin)": "RP", "ServerRewards Reward Msg": "{amount}<color=#cd4632>{customName}</color>" }, " -- Reward Select Chance % (0.0 - 1.0)": 0.35 }, { " -- Reward": { "Enabled": true, "Types - ( Items = 1, Command = 2, Eco = 3, SR = 4 ) - Usage - 1, 2, 3, 4": [ 1 ], "Items": [ { "Item Type": "ammo.rifle.explosive", "Item Amount": 128, "Item Custom Name": "", "Item Skin ID": 0 }, { "Item Type": "explosive.timed", "Item Amount": 1, "Item Custom Name": "", "Item Skin ID": 0 } ], "Command": "oxide.usergroup add {player.id} vip", "Command Custom Name": "VIP", "Command Reward Msg": "<color=#ffbf00>{customName}</color>", "Economics Amount (Plugin)": 420.0, "Economics Custom Name (Plugin)": "$", "Economics Reward Msg": "<color=#3e9c35>{customName}</color>{amount}", "ServerRewards Amount (Plugin)": 420, "ServerRewards Custom Name (Plugin)": "RP", "ServerRewards Reward Msg": "{amount}<color=#cd4632>{customName}</color>" }, " -- Reward Select Chance % (0.0 - 1.0)": 0.15 } ] } }, "Tasks Configuration: Tasks are categorized by Hooks. First Task = TaskID 1, increments per task. MaxComplete 0 = no players complete limit | (Tip) - useful console commands 'RoamTask List' & 'RoamTask Start (Hook) (TaskID)' ": { "OnEntityDeath": [ { "Name": "Destroy Barrels", "Enabled": true, "MaxComplete": 12, "RoamDuration": 600, "RewardPool": "Tier1", "RequiredAmount": 5, "ShortName": [ "loot-barrel-1", "loot-barrel-2", "loot_barrel_1", "loot_barrel_2", "oil_barrel" ] }, { "Name": "Destroy Barrels", "Enabled": true, "MaxComplete": 6, "RoamDuration": 800, "RewardPool": "Tier2", "RequiredAmount": 15, "ShortName": [ "loot-barrel-1", "loot-barrel-2", "loot_barrel_1", "loot_barrel_2", "oil_barrel" ] }, { "Name": "Destroy Barrels", "Enabled": true, "MaxComplete": 3, "RoamDuration": 1200, "RewardPool": "Tier3", "RequiredAmount": 30, "ShortName": [ "loot-barrel-1", "loot-barrel-2", "loot_barrel_1", "loot_barrel_2", "oil_barrel" ] }, { "Name": "Destroy Roadsigns", "Enabled": true, "MaxComplete": 12, "RoamDuration": 600, "RewardPool": "Tier1", "RequiredAmount": 4, "ShortName": [ "roadsign1", "roadsign2", "roadsign3", "roadsign4", "roadsign5", "roadsign6", "roadsign7", "roadsign8", "roadsign9" ] }, { "Name": "Destroy Roadsigns", "Enabled": true, "MaxComplete": 6, "RoamDuration": 800, "RewardPool": "Tier2", "RequiredAmount": 9, "ShortName": [ "roadsign1", "roadsign2", "roadsign3", "roadsign4", "roadsign5", "roadsign6", "roadsign7", "roadsign8", "roadsign9" ] }, { "Name": "Hunt for Boars", "Enabled": true, "MaxComplete": 5, "RoamDuration": 600, "RewardPool": "Tier1", "RequiredAmount": 3, "ShortName": [ "boar" ] }, { "Name": "Hunt for Bears", "Enabled": true, "MaxComplete": 5, "RoamDuration": 600, "RewardPool": "Tier1", "RequiredAmount": 3, "ShortName": [ "bear", "polarbear" ] }, { "Name": "Hunt for Deer", "Enabled": true, "MaxComplete": 5, "RoamDuration": 600, "RewardPool": "Tier1", "RequiredAmount": 3, "ShortName": [ "stag" ] }, { "Name": "Hunt for Wolves", "Enabled": true, "MaxComplete": 5, "RoamDuration": 600, "RewardPool": "Tier1", "RequiredAmount": 3, "ShortName": [ "wolf" ] }, { "Name": "Kill Scientists", "Enabled": true, "MaxComplete": 3, "RoamDuration": 800, "RewardPool": "Tier2", "RequiredAmount": 3, "ShortName": [ "scientistnpc_cargo", "scientistnpc_cargo_turret_any", "scientistnpc_cargo_turret_lr300", "scientistnpc_excavator", "scientistnpc_heavy", "scientistnpc_junkpile_pistol", "scientistnpc_oilrig", "scientistnpc_patrol", "scientistnpc_roam", "scientistnpc_roam_nvg_variant", "scientistnpc_full_any", "scientistnpc_full_lr300", "scientistnpc_full_mp5", "scientistnpc_full_pistol", "scientistnpc_full_shotgun", "scientistnpc_arena" ] } ], "OnEntityTakeDamage": [ { "Name": "Damage Patrol Heli", "Enabled": false, "MaxComplete": 0, "RoamDuration": 1200, "RewardPool": "Tier3", "RequiredAmount": 1000, "ShortName": [ "patrolhelicopter" ] }, { "Name": "Damage Bradley APC", "Enabled": false, "MaxComplete": 0, "RoamDuration": 1200, "RewardPool": "Tier3", "RequiredAmount": 1000, "ShortName": [ "bradleyapc" ] }, { "Name": "Damage Tugboats", "Enabled": false, "MaxComplete": 0, "RoamDuration": 1200, "RewardPool": "Tier3", "RequiredAmount": 300, "ShortName": [ "tugboat" ] } ], "OnDispenserGather": [ { "Name": "Gather Wood", "Enabled": true, "MaxComplete": 12, "RoamDuration": 600, "RewardPool": "Tier1", "RequiredAmount": 1000, "ShortName": [ "wood" ] }, { "Name": "Gather Stone", "Enabled": true, "MaxComplete": 12, "RoamDuration": 600, "RewardPool": "Tier1", "RequiredAmount": 1000, "ShortName": [ "stones" ] }, { "Name": "Gather Sulfur Ore", "Enabled": true, "MaxComplete": 12, "RoamDuration": 600, "RewardPool": "Tier1", "RequiredAmount": 1000, "ShortName": [ "sulfur.ore" ] }, { "Name": "Gather Metal Ore", "Enabled": true, "MaxComplete": 12, "RoamDuration": 600, "RewardPool": "Tier1", "RequiredAmount": 1000, "ShortName": [ "metal.ore" ] }, { "Name": "Gather Wood", "Enabled": true, "MaxComplete": 6, "RoamDuration": 800, "RewardPool": "Tier2", "RequiredAmount": 4500, "ShortName": [ "wood" ] }, { "Name": "Gather Stone", "Enabled": true, "MaxComplete": 6, "RoamDuration": 800, "RewardPool": "Tier2", "RequiredAmount": 4500, "ShortName": [ "stones" ] }, { "Name": "Gather Sulfur Ore", "Enabled": true, "MaxComplete": 6, "RoamDuration": 800, "RewardPool": "Tier2", "RequiredAmount": 4000, "ShortName": [ "sulfur.ore" ] }, { "Name": "Gather Metal Ore", "Enabled": true, "MaxComplete": 6, "RoamDuration": 800, "RewardPool": "Tier2", "RequiredAmount": 4000, "ShortName": [ "metal.ore" ] }, { "Name": "Gather Wood", "Enabled": true, "MaxComplete": 3, "RoamDuration": 1200, "RewardPool": "Tier3", "RequiredAmount": 10000, "ShortName": [ "wood" ] }, { "Name": "Gather Stone", "Enabled": true, "MaxComplete": 3, "RoamDuration": 1200, "RewardPool": "Tier3", "RequiredAmount": 10000, "ShortName": [ "stones" ] }, { "Name": "Gather Sulfur Ore", "Enabled": true, "MaxComplete": 3, "RoamDuration": 1200, "RewardPool": "Tier3", "RequiredAmount": 10000, "ShortName": [ "sulfur.ore" ] }, { "Name": "Gather Metal Ore", "Enabled": true, "MaxComplete": 3, "RoamDuration": 1200, "RewardPool": "Tier3", "RequiredAmount": 10000, "ShortName": [ "metal.ore" ] } ], "OnCollectiblePickup": [ { "Name": "Pickup Wood", "Enabled": true, "MaxComplete": 5, "RoamDuration": 600, "RewardPool": "Tier1", "RequiredAmount": 400, "ShortName": [ "wood" ] }, { "Name": "Pickup Stone", "Enabled": true, "MaxComplete": 5, "RoamDuration": 600, "RewardPool": "Tier1", "RequiredAmount": 400, "ShortName": [ "stones" ] }, { "Name": "Pickup Metal Ore", "Enabled": true, "MaxComplete": 5, "RoamDuration": 600, "RewardPool": "Tier1", "RequiredAmount": 400, "ShortName": [ "metal.ore" ] }, { "Name": "Pickup Sulfur Ore", "Enabled": true, "MaxComplete": 5, "RoamDuration": 600, "RewardPool": "Tier1", "RequiredAmount": 400, "ShortName": [ "sulfur.ore" ] }, { "Name": "Pickup Hemp", "Enabled": true, "MaxComplete": 5, "RoamDuration": 600, "RewardPool": "Tier1", "RequiredAmount": 50, "ShortName": [ "cloth" ] }, { "Name": "Pickup Mushrooms", "Enabled": true, "MaxComplete": 5, "RoamDuration": 600, "RewardPool": "Tier1", "RequiredAmount": 5, "ShortName": [ "mushroom" ] }, { "Name": "Pickup Berries", "Enabled": true, "MaxComplete": 5, "RoamDuration": 600, "RewardPool": "Tier1", "RequiredAmount": 3, "ShortName": [ "black.berry", "blue.berry", "green.berry", "red.berry", "white.berry", "yellow.berry" ] } ], "OnLootEntity": [ { "Name": "Open Normal Crates", "Enabled": true, "MaxComplete": 8, "RoamDuration": 600, "RewardPool": "Tier1", "RequiredAmount": 5, "ShortName": [ "crate_normal_2", "crate_normal_2_food", "crate_normal_2_medical", "crate_normal_2", "crate_tools" ] }, { "Name": "Open Foodboxes", "Enabled": true, "MaxComplete": 6, "RoamDuration": 600, "RewardPool": "Tier1", "RequiredAmount": 3, "ShortName": [ "foodbox" ] }, { "Name": "Open Military Crates", "Enabled": true, "MaxComplete": 5, "RoamDuration": 800, "RewardPool": "Tier2", "RequiredAmount": 2, "ShortName": [ "crate_normal" ] }, { "Name": "Open Military Crates", "Enabled": true, "MaxComplete": 3, "RoamDuration": 1200, "RewardPool": "Tier3", "RequiredAmount": 4, "ShortName": [ "crate_normal" ] }, { "Name": "Open Elite Crates", "Enabled": true, "MaxComplete": 0, "RoamDuration": 1200, "RewardPool": "Tier3", "RequiredAmount": 2, "ShortName": [ "crate_elite" ] }, { "Name": "Open Supply Drops", "Enabled": false, "MaxComplete": 0, "RoamDuration": 1200, "RewardPool": "Tier3", "RequiredAmount": 1, "ShortName": [ "supply_drop" ] }, { "Name": "Open Locked Crates", "Enabled": false, "MaxComplete": 0, "RoamDuration": 1200, "RewardPool": "Tier3", "RequiredAmount": 1, "ShortName": [ "codelockedhackablecrate" ] } ], "OnFishCatch": [ { "Name": "Catch Fish", "Enabled": true, "MaxComplete": 0, "RoamDuration": 800, "RewardPool": "Tier2", "RequiredAmount": 5, "ShortName": [ "fish.anchovy", "fish.catfish", "fish.herring", "fish.minnows", "fish.orangeroughy", "fish.salmon", "fish.sardine", "fish.smallshark", "fish.troutsmall", "fish.yellowperch" ] } ], "OnItemCraftFinished": [ { "Name": "Craft Eokas", "Enabled": false, "MaxComplete": 0, "RoamDuration": 600, "RewardPool": "Tier1", "RequiredAmount": 5, "ShortName": [ "pistol.eoka" ] } ], "OnCardSwipe": [ { "Name": "Swipe Green Keycards", "Enabled": true, "MaxComplete": 0, "RoamDuration": 600, "RewardPool": "Tier1", "RequiredAmount": 1, "ShortName": [ "keycard_green" ] }, { "Name": "Swipe Green Keycards", "Enabled": true, "MaxComplete": 6, "RoamDuration": 800, "RewardPool": "Tier2", "RequiredAmount": 3, "ShortName": [ "keycard_green" ] }, { "Name": "Swipe Blue Keycards", "Enabled": true, "MaxComplete": 6, "RoamDuration": 800, "RewardPool": "Tier2", "RequiredAmount": 1, "ShortName": [ "keycard_blue" ] }, { "Name": "Swipe Blue Keycards", "Enabled": true, "MaxComplete": 4, "RoamDuration": 1200, "RewardPool": "Tier3", "RequiredAmount": 3, "ShortName": [ "keycard_blue" ] }, { "Name": "Swipe Red Keycards", "Enabled": true, "MaxComplete": 4, "RoamDuration": 1200, "RewardPool": "Tier3", "RequiredAmount": 1, "ShortName": [ "keycard_red" ] } ], "OnEntityMounted": [ { "Name": "Drive Modular Cars", "Enabled": true, "MaxComplete": 6, "RoamDuration": 800, "RewardPool": "Tier2", "RequiredAmount": 3000, "ShortName": [ "modularcardriverseat" ] }, { "Name": "Fly Minicopters", "Enabled": true, "MaxComplete": 6, "RoamDuration": 800, "RewardPool": "Tier2", "RequiredAmount": 3000, "ShortName": [ "miniheliseat" ] }, { "Name": "Fly Scrapheli", "Enabled": true, "MaxComplete": 4, "RoamDuration": 1200, "RewardPool": "Tier3", "RequiredAmount": 5000, "ShortName": [ "transporthelipilot" ] }, { "Name": "Drive Submarines", "Enabled": true, "MaxComplete": 4, "RoamDuration": 1200, "RewardPool": "Tier3", "RequiredAmount": 3200, "ShortName": [ "submarinesolodriverstanding", "submarineduodriverseat" ] }, { "Name": "Sail Tugboats", "Enabled": true, "MaxComplete": 4, "RoamDuration": 1200, "RewardPool": "Tier3", "RequiredAmount": 3200, "ShortName": [ "tugboatdriver" ] }, { "Name": "Sail Normal Boats", "Enabled": true, "MaxComplete": 6, "RoamDuration": 800, "RewardPool": "Tier2", "RequiredAmount": 2600, "ShortName": [ "smallboatdriver", "rhibdriver" ] }, { "Name": "Sail Kayaks", "Enabled": true, "MaxComplete": 12, "RoamDuration": 600, "RewardPool": "Tier1", "RequiredAmount": 800, "ShortName": [ "kayakseat" ] }, { "Name": "Drive Trains", "Enabled": true, "MaxComplete": 6, "RoamDuration": 800, "RewardPool": "Tier2", "RequiredAmount": 3200, "ShortName": [ "workcartdriver" ] }, { "Name": "Ride Horses", "Enabled": true, "MaxComplete": 0, "RoamDuration": 600, "RewardPool": "Tier1", "RequiredAmount": 1200, "ShortName": [ "saddletest" ] }, { "Name": "Use Ziplines", "Enabled": true, "MaxComplete": 0, "RoamDuration": 600, "RewardPool": "Tier1", "RequiredAmount": 600, "ShortName": [ "ziplinemountable" ] }, { "Name": "Fly Attackheli", "Enabled": true, "MaxComplete": 6, "RoamDuration": 800, "RewardPool": "Tier3", "RequiredAmount": 5000, "ShortName": [ "attackhelidriver" ] }, { "Name": "Use Parachutes", "Enabled": true, "MaxComplete": 6, "RoamDuration": 1200, "RewardPool": "Tier3", "RequiredAmount": 1500, "ShortName": [ "parachuteseat" ] }, { "Name": "Ride Pedal Bikes", "Enabled": true, "MaxComplete": 0, "RoamDuration": 600, "RewardPool": "Tier1", "RequiredAmount": 1200, "ShortName": [ "bikedriverseat" ] }, { "Name": "Ride Motor Bikes", "Enabled": true, "MaxComplete": 0, "RoamDuration": 800, "RewardPool": "Tier2", "RequiredAmount": 3000, "ShortName": [ "motorbikedriverseat" ] } ], "OnBigWheelWin": [ { "Name": "Win Gambling Wheel", "Enabled": true, "MaxComplete": 0, "RoamDuration": 600, "RewardPool": "Tier1", "RequiredAmount": 50, "ShortName": [ "scrap" ] }, { "Name": "Win Gambling Wheel", "Enabled": true, "MaxComplete": 0, "RoamDuration": 800, "RewardPool": "Tier2", "RequiredAmount": 150, "ShortName": [ "scrap" ] }, { "Name": "Win Gambling Wheel", "Enabled": true, "MaxComplete": 0, "RoamDuration": 1200, "RewardPool": "Tier3", "RequiredAmount": 250, "ShortName": [ "scrap" ] } ] } }$29.99- 36 comments
- 3 reviews
-
- 3
-
-
-
- #roamtasks
- #roam
- (and 12 more)
-
Version 1.3.7
282 downloads
Introducing Total Control, a comprehensive admin tool designed for Rust game servers. This plugin is built with a full GUI, providing an intuitive and user-friendly interface for server administrators. With Total Control, you can customize every aspect of your Rust server to create a unique gaming experience for your players. Here are some of the features that set Total Control apart: Settings Page (New!): The latest addition to Total Control, the Settings page introduces powerful options for customizing server-wide gameplay systems: Skip Night: Automatically skip night cycles or use a voting system where players can vote to skip night. Time Freeze: Freeze time to any time of the day you choose. Day and Night Settings: Configure the start and end of the day, set the percentage of votes required to pass a day skip, and adjust the delay for voting messages. You can also limit the number of nights players can skip before requiring a full night cycle. Custom Vote Command: Define the vote day command, with /day as the default. PvE/PvP Mode: Set basic PvE or PvP modes, which can be toggled on a timer, or be set to stay permanently on. PvE or PvP mode can be displayed on the player HUD. Raid Protection: Implement raid protection with the same flexible settings as the PvE/PvP modes, including timers and toggles. StackSize Page: A new addition to Total Control, the StackSize page allows you to set up multipliers for individual items or entire categories, offering greater control over item stacking in your server. Item Gather Rate Control: Customize the gather rate for every item in the game to balance resource acquisition and gameplay progression. Smelting and Cooking Control: Adjust the smelting speeds for furnaces, mixing tables, campfires, and oil refineries. You can also control the charcoal output amount, the cooked output amount, and the amount of fuel used. Reward System: Set up rewards for various in-game actions such as killing scientists, and players, or picking up or mining different items. Rewards can be given in the form of economics (if the Economics plugin is installed) or server rewards (if the ServerRewards plugin is installed) or even scrap. Bradley APC and Patrol Heli Rewards: Players can be rewarded for dealing damage to or destroying the Bradley APC and Patrol Heli. There’s also a setting to divide the loot among all players who dealt damage or give all the loot to the player who deals the final blow. Total Control allows you to create a Rust server tailored to your community’s playstyle. Whether you’re looking to create a hardcore survival experience or a more casual, resource-rich environment, Total Control gives you the tools to make it happen. Accessible In-Game: One of the key features of Total Control is its accessibility. Any admin with the correct permissions can alter any settings directly in the game, even if they don’t have access to server files. Simply open the UI using the /tc command and change any settings as needed. Permissions: TotalControl.OpenGui To allow access to the Ui for admin. Chat Commands: /tc To Open the Ui for any player with the correct permission Feel free to join my Discord! Stay up to date with the latest updates, report bugs, share suggestions, and get support for my plugins. You can also promote your Rust server or just hang out and chat! Join here: https://discord.gg/AkwHUs8Qma$20.00 -
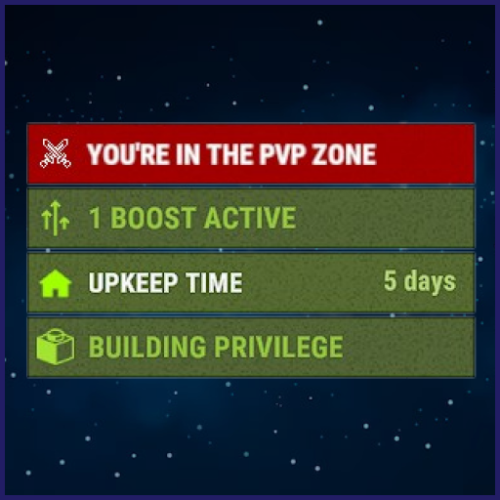
Version 1.0.1
170 downloads
The plugin displays the status when the player is in the PvP zone. Features: Comprehensive setup of all aspects Option to tailor text for different languages to reach players from various countries Lang files for all languages are auto-generated, so you only need to write your text. Default Config: { "Icon Url": "default", "Colors": { "Color": "0.65 0 0 1", "Icon Color": "1 1 1 1", "Text Color": "1 1 1 1", "Subtext Color": "1 1 1 1" } } Default Lang: { "Text": "You're in the PVP zone", "Subtext": "" }$5.00


.thumb.gif.f0b0245e9c54ffe33eb112bfd730b972.gif)
.thumb.jpg.4abde6ce06035db4993ba98aa473b214.jpg)