Search the Community
Showing results for tags 'ui'.
-
Version 1.0.12
519 downloads
Blocking items after wipe Features Beautiful user interface Performance Interface customization Setting up items by category Support for blocking items by SkinID On-screen alert Ignore blocking by permission Commands block (open interface) wb.indent [seconds] (to slide the blocks) Permissions wipeblock.ignore (ignore blocking) Hooks void OnWipeBlockEnded() API bool AnyBlocked() int SecondsFromWipe() bool IsBlocked(ItemDefinition def) bool IsBlocked(string shortName, ulong skin) bool IsBlocked(ItemConf item) bool IsBlocked(int cooldown) int LeftTime(ItemConf item) int LeftTime(int cooldown) Config Examples Config$21.95- 26 comments
-
- 3
-

-

-
- #wipeblock
- #auto wipe
-
(and 7 more)
Tagged with:
-
Version 1.0.0
8 downloads
This is a simple, lightweight and easy to use plugin that allows you to grant permissions and groups for a specific amount of time. It also supports the creation of permission packs, which makes it easy to grant a large number of permissions at a time. Features Information panel with current user privileges. Customize notification in all popular notification plugins. Full-featured API for plugin developers (ability to create your own interface or integrate display of privileges into your game menu plugin). Ability to create privilege packs. Supported plugins: Notify, GUIAnnouncements - these plugins are used to display notifications. Permissions expiringpermissions.admin - to use commands to grant and revoke privileges. expiringpermissions.gui - to show a panel with the player's current privileges. Commands Commands can be entered from wherever you want: via chat, game console (F1) or server console. eperms (configurable) – shows a panel with the current privileges of the current player. setpack steamid/nickname packname time – to temporarily grant a pack of privileges to a player. revokepack steamid/nickname packname – forcibly revoke a pack of privileges from a player. grantperm steamid/nickname permission time title – temporarily grant a player a permission. revokeperm steamid/nickname permission – forcibly revoke a player's permission. addgroup steamid/nickname group time title – temporarily add a player to the group. removegroup steamid/nickname group – forcibly remove a player from a group. Description of command arguments: steamid/nickname - steamid or nickname of your choice. permission/group - plugin permission/oxide group. packname - package name from the Package name field in the config. time - duration of privileges, in the format 7d10h20m (e.g. 14d, 1d5h, 10m and etc.). title (optional) - name that will be displayed in the panel and indicated in messages to the player. If it is not specified, the plugin will write *title not specified*. General settings Check interval [sec] – interval for checking expiring player privileges. Show the start and end date of the permission in the panel (depends on the time on the physical server)? – in addition to the privilege name (if specified), the panel will display the privilege activation date and expiration date. Keep in mind that the plugin works with the time of the server machine (physical server). If the time and date are not configured there, they will be displayed incorrectly in the plugin. Type of notifications when permission are granted (none, title - only with name, all) none – the player will not be notified when a privilege is granted to him. title – the player will be notified about those privileges that have the name specified. all – the player will be notified when all privileges have been granted. If the privilege does not have a name set, *title not specified* will be displayed. Type of notifications when permission expire (none, title - only with name, all) – similar to the setting above, only when the privilege is revoked/expired. Show a notification if the permission is manually revoked? – show a notification to the player when an administrator manually removes a privilege. Notification settings Notification type (Chat, GameTips, Notify, GUIAnnouncements) – if this section is enabled, you must specify the type/plugin to notify the player of different warnings. Chat – notification to regular chat. GameTips – notification in the in-game Rust tooltips (blue or red at the bottom of the screen). Notify – notification in the Notify plugin by Mevent. GUIAnnouncements – notification in the GUIAnnouncements plugin by JoeSheep. Just below that are the customization fields for the specific type of notification. Setting permission packages To display privileges correctly in the panel, you can create packs. They allow you to collect several privileges or groups together. In this way you reduce the number of commands and assign a name to this pack, which will be displayed in the panel and when the player is notified. This is actually very convenient and saves problems and confusion. Display name – package name, it is displayed in the panel and in notifications. Package name – package short name, it is used when using commands. Permissions – list of permissions that will be included in the package. Groups – list of groups that will be included in the package. Then you just use the setpack command where you specify the name of the pack. Then everything in the pack (permissions and groups) will be given to the player. Plugin Api object ExpPermCanSetPackage(BasePlayer target, TimeSpan timeSpan, string packageName) { return null; } // before the pack is issued void ExpPermOnPackageSet(BasePlayer target, TimeSpan timeSpan, string packageName) // after issuing the pack object ExpPermCanRevokePackage(BasePlayer target, string packageName) { return null; } // before the pack is revoked void ExpPermOnPackageRevoked(BasePlayer target, string packageName) // after the pack is revoked object ExpPermCanGrantPermission(BasePlayer target, string permission, TimeSpan timeSpan, string title) { return null; } // before the permission is granted void ExpPermOnPermissionGranted(BasePlayer target, string permission, TimeSpan timeSpan, string title) // after the permission is granted object ExpPermCanRevokePermission(BasePlayer target, string permission) { return null; } // before the permission is revoked void ExpPermOnPermissionRevoked(BasePlayer target, string permission) // after the permission is revoked object ExpPermCanAddToGroup(BasePlayer target, string group, TimeSpan timeSpan, string title) { return null; } // before adding a player to the group void ExpPermOnAddedToGroup(BasePlayer target, string permission, TimeSpan timeSpan, string title) // after adding a player to the group object ExpPermCanRemoveFromGroup(BasePlayer target, string group) { return null; } // before a player is removed from the group void ExpPermOnRemovedFromGroup(BasePlayer target, string group) // after a player is removed from the group void ExpPermOnPackageExpired(string userId, string title, string packName) // when the privilege pack expired void ExpPermOnPermissionExpired(string userId, string title, string permName) // when the permission expired void ExpPermonGroupExpired(string userId, string title, string groupName) // when the group expired // *use the title to display the name of the privileges in your plugin ExpiringPermissions.Call<bool>("HasActivePermissions", string userID); ExpiringPermissions.Call<bool>("TryGetPlayerData", out List<Dictionary<string, object>> packages, out List<Dictionary<string, object>> permissions, out List<Dictionary<string, object>> groups); /* packages/permissions/groups Dictionary contains: ["value"] = string ["title"] = string ["startDate"] = DateTime ["expireDate"] = DateTime */ Plugin Config Example of plugin configuration in English: Example of plugin configuration in Russian. If you need Russian config, open it (ExpiringPermissions.cs) before loading the plugin, and at the top set the variable "isRus = true". Then save and upload this file to your server.$5.00 -
Version 0.1.1
69 downloads
The plugin that displays temporary permissions and groups in the status bar. Depends on TemporaryPermissions and AdvancedStatus plugins. The ability to choose between bar types(TimeCounter and TimeProgressCounter); The ability to specify the order of the bar; The ability to change the height of the bar; The abillity to customize the color and transparency of the background; The ability to set a material for the background; The ability to switch between CuiRawImageComponent and CuiImageComponent for the image; The ability to get images from the local folder(*SERVER*\oxide\data\AdvancedStatus\Images); The abillity to set own image and customize the color and transparency of the image; The abillity to set sprite instead of the image; The ability to customize the color, size and font of the text; The ability to customize the bar for each permission and group; The ability to generate language keys for each permission and group; The ability to specify additional languages for generation. { "Chat command": "pstatus", "Is it worth enabling GameTips for messages?": true, "Is it worth clearing saved settings for permissions and groups upon detecting a wipe?": false, "Is it worth copying local images for new permissions or groups? Note: If set to true, it may create a lot of unnecessary images": false, "Is it worth enabling the bar display for new permissions?": true, "Is it worth enabling the bar display for new groups?": true, "Language - Addition languages (except en and ru)": [ "" ], "Type of status bar for permissions. Note: You can only choose between TimeProgressCounter and TimeCounter": "TimeProgressCounter", "Type of status bar for groups. Note: You can only choose between TimeProgressCounter and TimeCounter": "TimeProgressCounter", "Default status bar settings for new permissions and groups": { "BarType - You can choose only between TimeProgressCounter and TimeCounter": "TimeProgressCounter", "Order": 20, "Height": 26, "Main_Color(Hex or RGBA)": "#FFFFFF", "Main_Transparency": 0.15, "Main_Material": "", "Image_Url": "https://i.imgur.com/BtK7YHa.png", "Image_Local(Leave empty to use Image_Url)": "PermissionsStatus_Default", "Image_Sprite(Leave empty to use Image_Local or Image_Url)": "", "Image_IsRawImage": false, "Image_Color(Hex or RGBA)": "#FFF53D", "Image_Transparency": 1.0, "Is it worth enabling an outline for the image?": false, "Image_Outline_Color(Hex or RGBA)": "0.1 0.3 0.8 0.9", "Image_Outline_Transparency": 1.0, "Image_Outline_Distance": "0.75 0.75", "Text_Size": 12, "Text_Color(Hex or RGBA)": "1 1 1 1", "Text_Font(https://umod.org/guides/rust/basic-concepts-of-gui#fonts)": "RobotoCondensed-Bold.ttf", "Text_Offset_Horizontal": 0, "Is it worth enabling an outline for the text?": false, "Text_Outline_Color(Hex or RGBA)": "#000000", "Text_Outline_Transparency": 1.0, "Text_Outline_Distance": "0.75 0.75", "SubText_Size": 12, "SubText_Color(Hex or RGBA)": "1 1 1 1", "SubText_Font": "RobotoCondensed-Bold.ttf", "Is it worth enabling an outline for the sub text?": false, "SubText_Outline_Color(Hex or RGBA)": "0.5 0.6 0.7 0.5", "SubText_Outline_Transparency": 1.0, "SubText_Outline_Distance": "0.75 0.75", "Progress_Reverse": true, "Progress_Color(Hex or RGBA)": "#FFD700", "Progress_Transparency": 0.7, "Progress_OffsetMin": "0 0", "Progress_OffsetMax": "0 0" }, "Wipe ID": null, "Version": { "Major": 0, "Minor": 1, "Patch": 1 } } EN: { "MsgDisplayEnabled": "Displaying the bar is enabled!", "MsgDisplayDisabled": "Displaying the bar is disabled!", "MsgUntilWipe": "Until wipe" } RU: { "MsgDisplayEnabled": "Отображение бара включено!", "MsgDisplayDisabled": "Отображение бара выключено!", "MsgUntilWipe": "До вайпа" } The language file is generated during the plugin initialization process. Additionally, when creating a new permission or group, a key for it will be automatically added. Note: You can also specify in the configuration file the generation of language files for other languages besides en and ru.$9.99 -
Version 2.2.0
335 downloads
VIP Status is a powerful plugin that shows custom status messages for VIP players (3 different groups) on your Rust server. With the user-friendly configuration options, you can customise the colours, icons and text of the VIP status message of all 3 VIP groups to suit your individual needs. Plus, the plugin comes with a fully customizable language file, so you can translate the status message and other plugin texts into your preferred language. But that's not all: VIP Status is designed to be stable and reliable. Unlike other plugins that use countdown timers to display the remaining time of a VIP status, VIP Status simply shows the expiration date and checks it against the player's permissions file at fixed intervals. This approach ensures that the plugin operates smoothly without causing any lags or performance issues. Many other plugins that constantly perform countdown calculations can be processor-intensive and lead to performance drops. That's why we opt for static end times, eliminating the need for resource-heavy calculations every minute. If you want to enhance the VIP experience on your Rust server and offer your players a premium status that stands out, VIP Status is the plugin for you. Try it out today and see how it can elevate your server to the next level! Please note that VIP Status requires the Free TimedPermissions plugin to function, as it relies on TimedPermissions to set and track the VIP expiration time. If a player is a member of the VIP group but not listed in the TimedPermission file, the VIP status is now displayed without an expiry date. vip groups now possible for a maximum of 3 groups with different settings (pictures, colour etc.) as well as long file for all 3 groups Toggle the visibility of your VIP status. Added new configuration option to display a custom status when the player does not belong to any group, as an example: no vip Commands: /vip - List of Commands /vt - Toggle the visibility of your VIP status. /vi - Shows how long you have left on your VIP status Config: { "VIPGroups": [ { "Color": "0.66 0.66 0.66 0.8", "IconColor": "1.5 0.8 0.0 0.9", "ImageUrl": "https://i.ibb.co/hmC7s0y/vip1.png", "SubTextColor": "1 1 1 0.7", "TextColor": "1.5 0.8 0.0 0.8", "VipStatusId": "vip1" ///name of the vip group 1 }, { "Color": "0.30 0.66 0.66 0.8", "IconColor": "1.5 0.8 0.0 0.9", "ImageUrl": "https://i.ibb.co/yN18d6h/vip2.png", "SubTextColor": "1 1 1 0.7", "TextColor": "1.5 0.8 0.0 0.8", "VipStatusId": "vip2" ///name of the vip group 2 }, { "Color": "1.0 0.0 0.0 0.4", "IconColor": "1.5 0.0 0.0 0.9", "ImageUrl": "https://i.ibb.co/py0GJpj/vip3.png", "SubTextColor": "1 1 1 0.7", "TextColor": "1.5 0.8 0.0 0.8", "VipStatusId": "vip3" ///name of the vip group 3 } ], "ShowCustomStatusWhenNoGroup": false, ///set true to display a custom status when the player does not belong to any group. "NoGroupConfig": { "Color": "1.0 0.0 0.0 0.4", "TextColor": "1.5 0.8 0.0 0.8", "SubTextColor": "1 1 1 0.7", "IconColor": "1.5 0.8 0.0 0.8", "ImageUrl": "https://i.ibb.co/hmC7s0y/vip1.png" } } Lang: { "VIPStatusText_group1": "GROUP1", ///visible name of the vip group 1 "UntilText_group1": "until {0}", ///subtext for Group 1 with expire time "NoExpireText_group1": "Unlimited", ///subtext for Group 1 without an expiry date. "VIPStatusText_group2": "GROUP2", ///visible name of the vip group 2 "UntilText_group2": "until {0}", ///subtext for Group 2 with expire time "NoExpireText_group2": "Unlimited",///subtext for Group 2 without an expiry date. "VIPStatusText_group3": "GROUP3", ///visible name of the vip group 3 "UntilText_group3": "until {0}",///subtext for Group 3 with expire time "NoExpireText_group3": "Unlimited", ///subtext for Group 3 without an expiry date. "VIPStatusOn": "VIP status display turned on.", "VIPStatusOff": "VIP status display turned off.", "VIPStatusExpiration": "{0} expires on: {1}", "VIPStatusUnlimited": "{0} has unlimited VIP status.", "MessageCommandsListTitle": "List of Commands:", "MessageCommandVT": "/vt - Toggle the visibility of your VIP status.", "MessageCommandVIPInfo": "/vi - Shows how long you have left on your VIP status.", "NoGroupStatus": "No VIPs" /// text for the custom status when the player does not belong to any group. }$15.00 -
Version 1.1.2
1,189 downloads
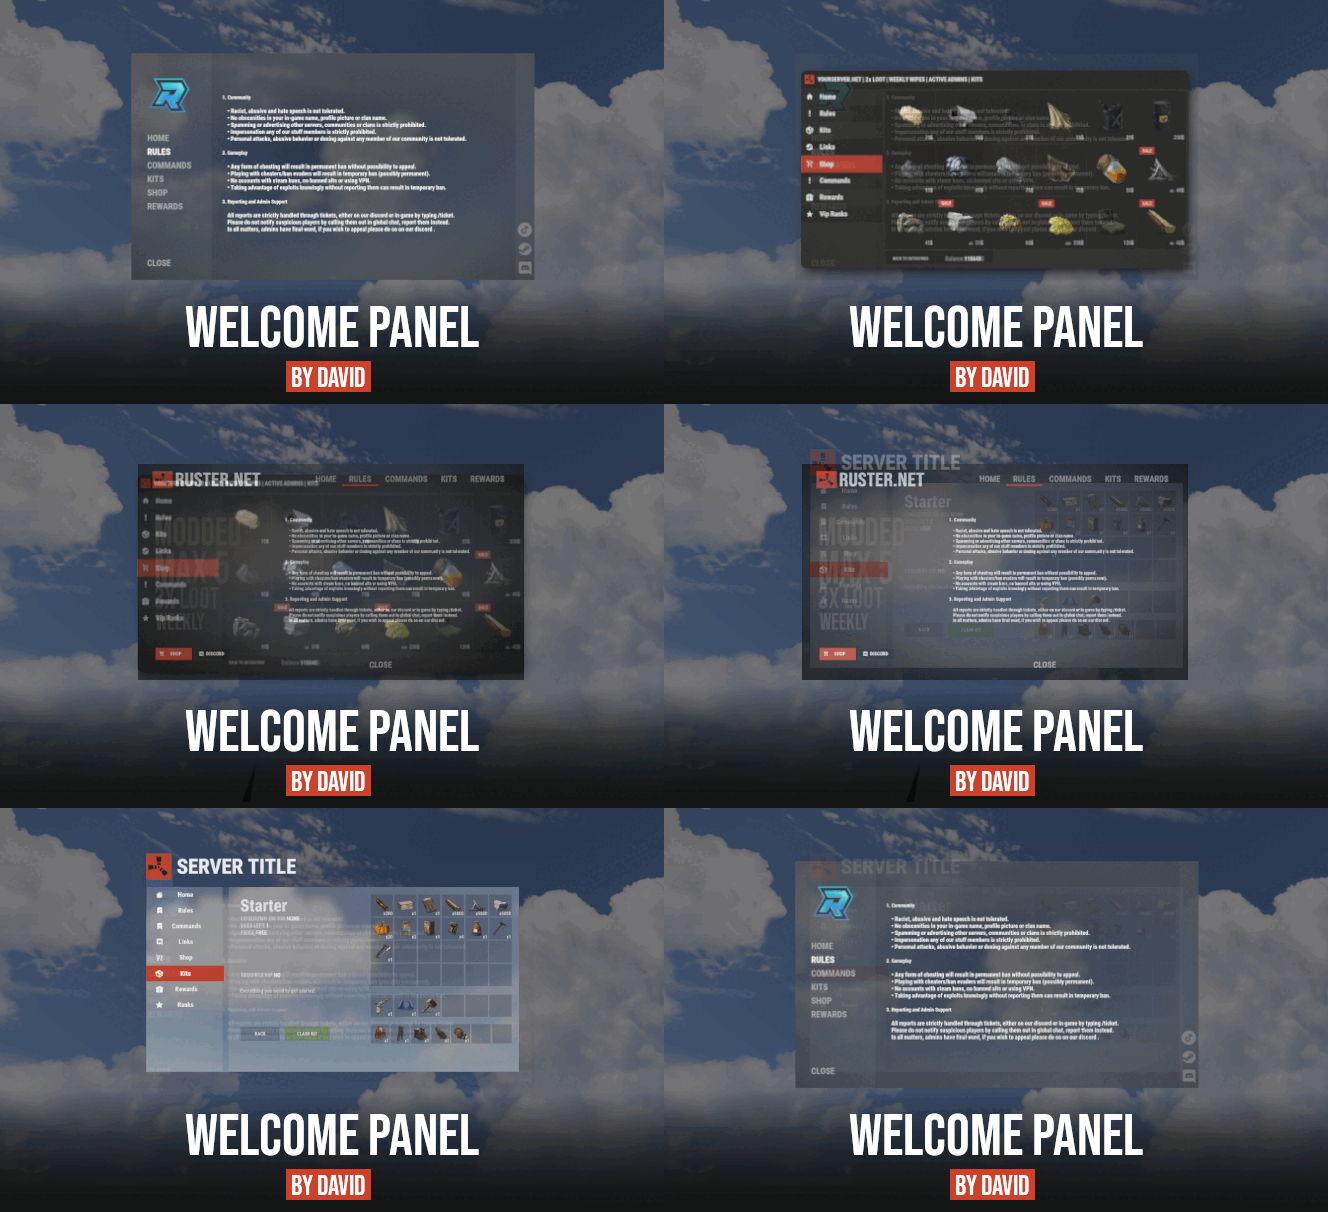
ServerPanel adds a player information menu to your server, where you can both share important and useful information with your players and integrate your plugins into it! Features User-Friendly Interface: Intuitive GUI for easy navigation and interaction. Economy Integration: Supports various economy plugins for seamless financial management. Dynamic Menu Categories: Organize functionalities into customizable categories for better user experience. Extensive Configuration Options: Almost every aspect of the plugin can be customized, including messages, colors, sizes, fonts, tion. Auto-Open Menu: Automatically displays the menu upon player connection, configurable per server settings. Block Settings: Control access to the menu during building, raiding, or combat situations to enhance gameplay balance. Multiple Economy Head Fields: Display various economic metrics such as balance, server rewards, and bank information. Permission Management: Fine-tune permissions for different user roles to control access to features. Localization Support: Easily translate and customize all messages for different languages. Performance Optimized: Designed to minimize server lag while providing rich functionality. Customizable Hooks: Integrate with existing economy systems using customizable hooks for adding, removing, and displaying balances. Editor Position Change: Admins can now change editor positions with a simple click, choosing between left, center, or right alignments. Command Enhancements: Commands are now processed with multiple arguments separated by "|", enabling bulk command processing. Commands /info – open menu /sp.install (or) /welcome.install – open installer menu Permissions serverpanel.edit – allows players to edit the plugin settings and open the edit menu serverpanelinstaller.admin - required to access the plugin installation functions Video Showcase Templates Template V1 Template V2 Template V3 Template V5 Editor Installer TEST SERVER Join our test server to view and experience all our unique features yourself! Copy the IP Address below to start playing! connect 194.147.90.147:28015 FAQ Q: Why can't I open the menu? A: Make sure that the plugin is installed and activated on your server. If the problem persists, contact the server administrator. Q: How do I enable Expert Mode? (disables automatic template updates) A: In the data file "Template.json", turn on the "Use an expert mod?" option: "Use an expert mod?": true, P.S. “Template.json” is located in the "oxide/data/ServerPanel" directory (if you use Oxide) or in the "carbon/data/ServerPanel" directory (if you use Carbon)$40.00- 46 comments
- 22 reviews
-
- 13
-

-

-

-
- #serverpanel
- #info
-
(and 32 more)
Tagged with:
- #serverpanel
- #info
- #panel
- #ui
- #server
- #serverinfo
- #welcome
- #welcomeui
- #infopanel
- #server gui
- #welcome controller
- #welcome video
- #infopanel mevent
- #welcome panel
- #welcome mevent panel
- #welcome info
- #multi-function info panel
- #server panel
- #menu by mevent
- #menu with info
- #menu gui
- #menu rust
- #rust menu
- #info hud
- #infomenu
- #information
- #best welcome plugin
- #rust welcome
- #welcomer
- #welcome menu
- #welcome ui
- #welcome gui
- #welcome plugin
- #welcome hud
-
Version 1.2.7
1,931 downloads
SimplePVE is exactly what it says. An easy simple PVE plugin for your server to modify or change PVE rules individually & now also have a Simple Cui to control PVE rules and Create or edit Schedules. Control PVE Rules from in-game or in the config Easy to understand each individual Rules Create PVP Schedules Discord Embed Messages on PurgeStart or End Many more features are added every update /simplepve - Use to enable or disable pve toggle (Chat & Console command) /simplepve on or off - Use to enable disable pve (Chat & Console command) /sprules - Use to Open a Cui to control PVE Rules & Creating Schedules (Chat command) simplepve.admin - Required to enable or disable SimplePVE simplepve.adminloot - Required to view Loots simplepve.admindamage - Required for Admin damages to any entity void OnSPVEPurgeStarted() void OnSPVEPurgeEnded() TimeSpan GetPVPStartTimeRemaining() TimeSpan GetPVPEndTimeRemaining() Check Out My Other plugins as Well$14.99 -
Version 1.0.1
119 downloads
Easily display all your servers within a very clean a simple UI. Even put a quick connect button for people to instantly connect to the server! FEATURES - Simple setup - Very clean UI - Auto receives server info to display to your players - Instant connect buttons - Little to no performance impact - Easy integration with Welcome Controller To get your battlemetrics server ID, all you need to do is view your server on Battlemetrics, and it's the little number at the end of the URL. https://www.battlemetrics.com/servers/rust/6803740 Support? Questions? Comments? Concerns? Message me in my Discord! https://discord.gg/RVePam7pd7 { "Servers Commands": [ "servers", "sv" ], "Servers": [ { "Server ID's (BattleMetrics Id's)": "6803740", "PlaceholderBanner": "https://i.ibb.co/c6Y58gQ/Placeholder-Banner.png" }, { "Server ID's (BattleMetrics Id's)": "12747928", "PlaceholderBanner": "https://i.ibb.co/c6Y58gQ/Placeholder-Banner.png" }, { "Server ID's (BattleMetrics Id's)": "7482472", "PlaceholderBanner": "https://i.ibb.co/c6Y58gQ/Placeholder-Banner.png" }, { "Server ID's (BattleMetrics Id's)": "10519728", "PlaceholderBanner": "https://i.ibb.co/c6Y58gQ/Placeholder-Banner.png" }, { "Server ID's (BattleMetrics Id's)": "16741517", "PlaceholderBanner": "https://i.ibb.co/c6Y58gQ/Placeholder-Banner.png" }, { "Server ID's (BattleMetrics Id's)": "15532055", "PlaceholderBanner": "https://i.ibb.co/c6Y58gQ/Placeholder-Banner.png" }, { "Server ID's (BattleMetrics Id's)": "8113880", "PlaceholderBanner": "https://i.ibb.co/c6Y58gQ/Placeholder-Banner.png" }, { "Server ID's (BattleMetrics Id's)": "9929204", "PlaceholderBanner": "https://i.ibb.co/c6Y58gQ/Placeholder-Banner.png" } ], "UI Colors": { "BlurBackgroundColor": "0 0 0 .4", "MainUIColor": "0 0 0 .4", "MultiMainPanelColor": "0 0 0 .5", "MultiServerTitlePanelColor": "0 0 0 .4", "MultiServerTitleTextColor": "1 1 1 1", "MultiPlayerPanelColor": "0 0 0 .5", "MultiPlayerPanelFillColor": "0.17 0.68 1 .5", "MultiPlayerPanelTextColor": "1 1 1 .6", "MultiPlayerConnectPanelColor": ".25 .31 .16 .8", "MultiPlayerConnectTextColor": ".66 .86 .30 .8", "SingleMainBlurColor": "0 0 0 .4", "SingleMainPanelColor": ".17 .17 .17 1", "SingleServerTitlePanelColor": "1 1 1 .1", "SingleServerTitleTextColor": "1 1 1 1", "SinglePlayerPanelColor": "1 1 1 .1", "SinglePlayerPanelFillColor": "0.17 0.68 1 .7", "SinglePlayerPanelTextColor": "1 1 1 .7", "SinglePlayerConfirmPanelColor": ".25 .31 .16 1", "SinglePlayerConfirmTextColor": ".66 .86 .30 1", "SinglePlayerCancelPanelColor": "0.76 0.14 0.14 .4", "SinglePlayerCancelTextColor": "0.93 0.18 0.18 .75", "SingleDescPanelColor": "1 1 1 .1", "SingleDescTextColor": "1 1 1 .7" } }$14.99 -
Version 2.5.4
1,023 downloads
Upgrades your furnaces, ovens, refinery, mixing table & etc to beyond. Upgrade each attribute of your furnace; Supports different oven types; It is possible to define default attributes for all ovens on the server; You can set a default value for all base ovens (replacing quicksmelt); You can enable/disable any features you want; Option to keep attributes when removing the furnace; Option to auto split ores; Automatic fuel calc based on the upraded oven attributes; Now BBQ and Campfire can also be improved; Option so that only the furnace owner can upgrade it; Option so that only owner's teammates can upgrade it; A new completely redesigned UI; NEW Supports Mixing Table furnaceupgrades.use - This is the unique permission. required for all players to upgrade furnaces$15.99 -
Version 1.0.6
162 downloads
Adds an exciting event to your server: a box appears at a random location on the map. Players must find it using a special compass. Whoever finds this box first will get all the loot. The plugin is easy to set up and has great customization. For the plugin to work, plugins such as ImageLibrary and SimpleLootTable are required! Commands (admin only): /sch_start - starts an event /sch_stop - ends an event Hooks: void ScavengerHuntStarted() // called when the event starts void ScavengerHuntEnded() // called when the event ends Config: { "Autostart event": true, "Minimum time to event start(in seconds)": 3000, "Maximum time to event start(in seconds)": 5000, "Minimum amount of online players to trigger the event": 1, "Crate prefab": "assets/prefabs/deployable/large wood storage/box.wooden.large.prefab", "Crate skin": 0, "Event duration": 600, "Minimum number of items in a crate": 6, "Maximum number of items in a crate": 12, "Simple loot table name": "exampleTable", "Pre-event message": "Scavenger hunt event will start in a minute", "Pre-event message time(in seconds)": 60, "Event message": "The scavenger hunt event has begun, follow the compass and find the crate first", "Find message(message when someone found the crate)": "Someone found the crate", "Not find message(event if no one found the box)": "Nobody found the box crate", "End event message": "Scavenger hunt event ended", "Icon AnchorMin": "0.02 0.92", "Icon AnchorMax": "0.07 0.994", "North icon": "https://i.imgur.com/myBNiHd.png", "South icon": "https://i.imgur.com/UsUrH80.png", "West icon": "https://i.imgur.com/QiSH0Xx.png", "East icon": "https://i.imgur.com/10RljdU.png", "NorthWest icon": "https://i.imgur.com/RC9W0rV.png", "NorthEast icon": "https://i.imgur.com/Nh6wmlo.png", "SouthWest icon": "https://i.imgur.com/KJ8YiU5.png", "SouthEast icon": "https://i.imgur.com/l6HDfzQ.png" }$9.99 -
Version 1.3.11
1,133 downloads
This plugin adds custom portals, which could be deployed on players' bases, vanilla and custom monuments. Custom maps To use Custom Portals on your map you need to place any prefab and create a custom prefab from it. Name it CustomPortals.<portal name> 2 portals with the same name will link. ! Make sure not to break the prefab and not to add them as part of other prefabs ! Commands Player Chat Commands /buyportal - buy portal (requires customportals.buy permission) /spawnportal - spawns portal (requires customportals.spawn permission) Admin Chat Commands All of the commands that are mentioned below require customportals.admin permission! /customportals add <portal name> - spawns portal on the monument you stand on /customportals remove - removes portal from the monument /customportals reset - removes all portals from the monument /changeportal - setup any portal Admin Console Commands giveportal <amount> <player name> - gives portal(s) to the specified player Permissions customportals.use - required to use portals customportals.admin - allows usage of /customportals and giveportal commands customportals.buy - allows players to buy portal, using /buyportal command customportals.free - allows players to get portal for free, using /buyportal command (buy permission is still required) customportals.freeuse - allows players to use the portal for free (if the use price is set) customportals.bypasslimit - allows players to place infinite amount of portals customportals.bypasslinkinglimits - allows players to link any portals customportals.spawn - alllows players to spawn portals using a command, instead of placing them manually If you are an admin, you can specify individual portal permissions. They are saved as customportals.portal.<portal permission name> Localization This plugin has built-in support for the following languages - English Russian API BasePortal SpawnPortal(Vector3 position, Quaternion rotation, string name) // spawns portal Item CreatePortalItem() // returns portal item$9.99- 127 comments
- 8 reviews
-
- 7
-

-

-
Version 2.0.8
1,274 downloads
Welcome "UI" controller is a multi-function info panel! - Supports multiple plugins to be directly integrated. Linked in the optional dependencies! - Add permissions to access different pages - Optionally, you can set a page that has a permission to not show on the button list at all or you can set it to show a no permission page (You can make it say whatever you want) - Change the layout of the buttons - Add images to each button - Add multiple commands to access each page - Edit, add, and delete your info panels and or integrated plugins directly from the editor UI. - Apply a color theme INSTANTLY to ALL your integrated plugins with one simple click! - Running a command auto loads you into the correct page on the info panel, even if it's an addon. - Create infinite tabs for different pages. - You can do really anything you can think of! - In game editor for all your UI needs. - Add new panels - Clone panels - Change load orders of panels - Change the look in every way of a panel - Add an image and or text to ANY panel you want to - Easily move the UI with buttons or input numbers within the UI - When you're reading this, there might be even more themes available! - Images are pictures of the "Original" theme and show some of the optional addons and built in editor. ADMIN PERMISSION: welcomecontroller.admin Editor page: /welcomeedit Theme Selector: /welcomethemes Support? Questions? Comments? Concerns? Message me in my Discord! https://discord.gg/RVePam7pd7 DEVELOPER API's AND HOOKS API -> bool IsUsingPlugin(string pluginName) HOOKS -> void OnWCRequestedUIPanel(BasePlayer player, string panelName, string neededPlugin) - This is called when an addon is trying to be accessed for WelcomeController. - Make sure you do a simple check that the needed plugin is the plugin you're working in. - I recommend making the plugin name that you check for, the name of the CS file. - If neededPlugin == yourPlugin, open your UI, attach it to "panelName".$29.99 -
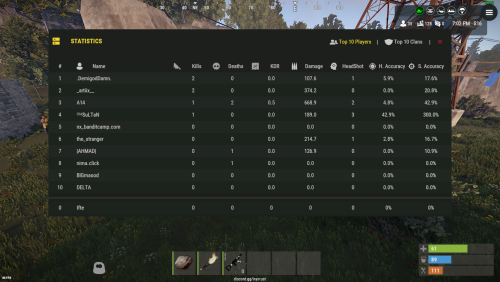
I need a UI hud with information: Headshots, Shots, Accuracy, Headshot accuracy, Ammo cap, as well as reset information for the Targets mode of my server, make a full copy like on Perfect Aim Train
-
Version 2.0.10
2,699 downloads
Skin Controller is meant to bring together a ton of skinning options for your player all in one place! Easy for the player, easy for the server owner. FEATURES - Supports backpacks - Saving of outfits (A list of skins for doors, weapons, clothing, etc*) - Add infinite items in an outfit - Skin stacks of items - Skin your whole inventory with one click - Skin items in containers that you're looking at with one command - Skin all the deployed items in your base with one command - Search items in the skin list to easily find the skin you're looking for - Auto skin items when crafted and picked up - Auto imports all accepted workshop skins - Manual imports of non-accepted workshop skins and collections - Infinite outfit saves, you can limit the amount of outfit saves someone has via perms. - Server owners can toggle whether they want players to be able to skin items on pickup and craft - If server owners allow skinning on craft and pickup, players can toggle that on and off for themselves - Set your own custom commands for all available types of commands - Blacklist skins COMMANDS /skin or /sb (Configurable) - Opens the skin menu /skinc (Configurable) - Skins the items in the container that you're looking at /skinbase (Configurable) - Skins all the deployed items in your base /skinitem (Configurable) - Skins the item you're looking at /addskin - Command for admins to add workshop skins to the skinbox /addcollection - Command for admins to add collections of workshop skins to the skinbox PERMISSIONS skincontroller.addskins skincontroller.use skincontroller.skinoncraft skincontroller.skinonpickup skincontroller.skinbase skincontroller.skinitem skincontroller.skincontainer To set the amount of outfits someone can save, go into the config, there will be a setting where you can set custom permission and how many outfits each outfit can save Need support or want updates about what is coming to the plugin? Join the support discord here https://discord.gg/RVePam7pd7$39.99 -
Version 2.1.2
255 downloads
"Clan Cores" is a simple "stat tracker" (if you will) for clans to compete to become #1! Create some rivalry between the teams on your server using this! Clans can compete to become the #1 Clans can lose points for getting raided But can gain points for killing or raiding other clans Clans can only start earning points once they have an established TC FEATURES - Automatic ranks for the winners at the end of wipe - Track kills, deaths, tcs, crates, etc* - Amazing UI - Welcome Controller integration - Individual clan stats page - Last wipe winner and current leader page - Configurable UI colors - Configurable UI images - Configurable messages - ETC* /points - (Configurable) Need support or want updates about what is coming to the plugin? Join the support discord here https://discord.gg/RVePam7pd7$24.99 -
I need a plugin that will display the player’s Clan Tag exactly as it is implemented on the Rustinity servers, need to connect the plugin with these clans - https://codefling.com/plugins/clans
-
Version 1.0.4
228 downloads
Loading Messages is a high-performance plugin that features customizable loading panel messages with adjustable display times and icons. Custom Messages for Queued and Loading Players Language Support - Display messages in local languages Loading Messages on Respawn and Teleport Loading Screens Configurable Display Time per Message High Performance Plugin! Loading Messages has three main message types: Queued - When a player is in the server queue Joining - When a player is joining the server Loading - The loading screen displayed when a player is teleporting or in a pending gamemode state Each custom type allows for options including icon ID, next message display time & message content. Loading Messages can use the following rich text tags - color, b, u, and i To display local languages set: "Use Language Support": true in you configuration. Custom languages will only be displayed after the first time a user connects to the server. Add multiple languages in the configuration listing: "Lang Messages": { "es-ES": { "Queue Messages": [ { "iconID": "0", "NextMessageTime": 5.0, "Message": "Estás en la cola" }, { "iconID": "0", "NextMessageTime": 5.0, "Message": "Por favor espera" }, { "iconID": "0", "NextMessageTime": 5.0, "Message": "Reporta tramposos usando f7" } ] } } You can see a list of most of the icons by going to https://fontawesome.com/icons.$9.99- 36 comments
- 2 reviews
-
- 2
-

-

-
- #loading messages
- #loading
- (and 15 more)
-
Version 0.1.4
36 downloads
What is it? A nice user-friendly warning system Usage When someone is breaking rules or trolling others just warn them, you can also set a command that will be executed through server console that will get executed upon reachin certain amount of warnings (can be configured in cfg) Permissions warnmenu.use -- Gives you full control to operate the WarnMenu Chat command /warn -- Opens the WarnMenu /warn "Name/SteamID" "Warning reason" -- Warns the specified player with your reason /warnmenu.save -- Force the plugin to write the data from memory to the data file /wmessage <NameOrID | * > <message> - Shows a gametip message (Doesn't count as a warning) to specific player or to all players when you put * instead of the name Data files All Data files can be located at: \oxide\data\WarnMenu\warns There you can find all the warnings for each player Features WarnMenu features * Online Tab - In this tab you can easily select any online player that you want to warn * Search All Tab - Once you open this tab, there you can see all the players and browse in them * Find player Tab - When you click on the button you will be able to search for a specific player using his Name or SteamID Warn Types * CUI-Based - A CUI warning message will pop-up on player's screen when he gets warned * Chat-Based - A chat message will pop-up in player's chat when he gets warned Executable commands * On reaching certain amount of warnings, you can make the server execute a command on a player(configurable in cfg) F.e.: "1": "say {0} just reached 1 warning! SHAME on him!", "3": "kick {0} Kicked for reaching 3 warnings", Localization { "Syntax": "Commands:\n/report (Opens Reporter GUI)", "CUI Online": "Online Players", "CUI Player": "Player: {0}", "CUI SteamID": "SteamID64: {0}", "CUI Warnings": "Warnings: <color=#8f1919>{0}</color>", "CUI NewWarn": "New\nWarning", "CUI WarningID": "Warning ID: {0}", "CUI WarnedBy": "Warned by: {0}", "CUI Date": "Date: {0}", "CUI Reason": "Reason: \n{0}", "CUI Remove": "Remove", "CUI Close": "close", "CUI Warn": "Warn", "CUI WarnAddMenuPlayer": "Warning for\n<color=#d43939>{0}</color>", "CUI SearchAll": "Search All", "CUI SelectPlayer": "Select a player to warn:", "CUI Find": "Find player", "CUI Find2": "Select", "CUI Find3": "Find player:\n(steamID/Name)", "CUI CantFindPlayer": "Couldn't find the player\nsearching argument: {0}", "CUI FoundPlayer": "Found player: {0}", "CUI Refresh": "Refresh", "CantFindPlayer": "Couldn't find that player", "WarnMessage": "Warned: <color=#8f1919>{0}</color>\nReason: {1}", "JoinMessage": "{0} has joined with <color=#8f1919>{1}</color> warnings", "WarnReceive": "You have received a <color=#8f1919>warning</color>\nBy: {0}\nReason: {1}", "CUI WarnReceive": "<color=#8f1919>Warning</color>\nreceived", "CUI WarnReceive2": "By: {0}\nReason: {1}" } Configuration { "Announce on join with warnings?(to admins)": true, "Execute commands on reaching count:": { "Enabled?": true, "(Format: 5 : mute {0}) where 5 is number of warns and {0} is player's id": { "5": "say {0} just reached 5 warnings! SHAME on him!", "7": "example.command {0}", "10": "example.command {0}" } }, "Warn message settings": { "Text-based warn message?": true, "CUI-based warn message?": true, "How long until CUI message gets removed (secs)": 5.0 } }$10.00 -
Version 2.1.2
1,430 downloads
Discord Link is a very simple, performant, and feature-rich Discord and Rust linking system. 2 Simple steps and a player can link to Discord! NO DISCORD.DLL!! FEATURES - NO DISCORD.DLL REQUIRED!!! - Link Rust and Discord accounts - Grant a role in discord and group in game for linked players - Soft unlinking (All past data on a user's account links will be forever stored) - 2 Way role syncing between rust to discord and discord to rust - Supports multi server linking - Booster perks for linked players boosting your discord - Steam to discord name syncing (Auto renames users in discord to their steam name) - Admin perms to unlink players - Search link commands in discord and in game to get who a player is linked to - Logs to discord when players link and unlink - Auto remove players from being linked when they leave the Discord - Syncing your old database files from steamcord, discord auth, or discord core PERMISSIONS discordlinkbot.search - ability to search players and use the UI The Plugin and Discord Bot both have very simple installations. We have included a readme.md file to make it even easier to setup! Need support or want updates about what is coming to the bot? Join the support discord here https://discord.gg/RVePam7pd7 This will require bot hosting to run the bot 24/7 since we do not use the Discord DLL therefore the server cannot host the bot. Thanks to @shady14u for co-developing!!$19.99 -
Version 1.5.37
3,356 downloads
Introducing a feature-rich plugin that will take your in-game building experience to new heights - Build Tools! This plugin is not just a tool, it is the key to creating incredible builds and will make the processes of upgrading, removing and even downgrading buildings easy and fun! !ATTENTION! After the last update of the game, the additional slot does not work ️ Features of Build Tools Beautiful user interface: Our plugin has a lovely and easy-to-use interface that makes building tasks smooth and functional; Bar progress display: Keep track of your building progress with a clear progress bar, so you can see your upgrades easily; Upgrade of the entire building at once: You can make them stronger and more secure quickly; Interface customization: Personalize the user interface to match your preferences and workflow. Returning an item to remove: Don't worry about losing items when removing structures; our plugin ensures you get them back; Returning items with condition as in the game: Items are returned to the same condition as in the game, with the option to set their condition as a percentage; Blocked list items for remove: You can specify which items should not be removed for precise construction control. Ability to use icons both from the game and your own Work with Clans/Friends/NoEscape Building Skins (+ automatic parsing command) Downgrade: Make structure downgrades simple and adapt your base to changing needs with just a few clicks Edit config via in-game interface (no JSON editing required) Commands /up [1-4] - enable upgrading mode /up all - allows you to upgrade the entire building at once /remove - enable removing mode /remove all - allows you to remove the building at once /down - enable downgrading mode /down all - allows you to downgrade building at once buildtools.parse.skins – allows parsing new building skins from the game + images to them /bskin – open settings menu Permissions buildtools.all – allows you to upgrade/remove the entire building at once buildtools.free – allows you to upgrade buildings for free buildtools.edit – allows you to enable edit mode buildtools.vision – allows you to toggle the remove mode on in the vision mode Video Hooks object canDowngrade(BasePlayer player, BaseEntity entity) object canRemove(BasePlayer player, BaseEntity entity) object CanBuildToolsGiveRefund(BasePlayer player, BaseEntity entity) FAQ Q: Where can I see an example of a config? A: Config$21.95- 294 comments
- 14 reviews
-
- 7
-

-

-
- #building
- #foundation
-
(and 27 more)
Tagged with:
- #building
- #foundation
- #tool
- #tools
- #ui
- #upgrading
- #remove
- #upgrade
- #blocks
- #clans
- #friends
- #noescape
- #interface
- #hud
- #build skins
- #grade
- #gredable bases
- #grade rust bases
- #build system
- #upgrade buildings
- #remove structures
- #downgrade structures
- #base customization
- #best grade plugin
- #build plugin by mevent
- #reskin
- #bgrade
- #skins
- #building skins
-
Version 2.10.21
1,351 downloads
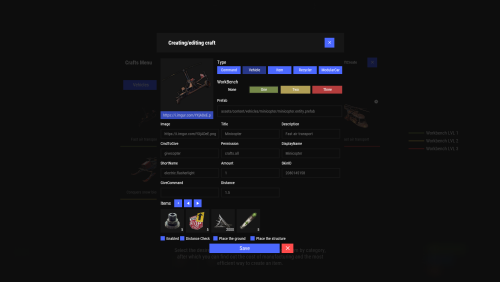
Crafting system that allows you to create items, cars, vehicles, recyclers, etc! Commands craft open interface crafts.setwb [categories: cat1 cat2 ...] set new custom workbench Permissions You can set permission in config, for example: "Permission (ex: crafts.use)": "crafts.use", crafts.setworkbench - allows you to use the "crafts.setwb" command (set custom workbenches) Craft Types Command Vehicle Item Recycler ModularCar How to install a custom workbench 1. Spawn the workbench (for example, in RustEdit or a plugin) 2. In the game, go to him and use the command "crafts.setwb" and specify the necessary categories. Example: /crafts.setwb Misc 3. Go to config (oxide/config/Crafts.json) and configure this workbench (use SafeZone, workbench level, etc.) VIDEO FAQ Q: Where can I see an example of a config? A: Config$19.95 -
Version 4.3.6
12,908 downloads
Site In case you having issues with plugin feel free to open support ticket on site here. I will usually respond within 24 hours not including weekends. Discord I'm also available at my discord server where I provide support for my customers. You can also find small community here and get answers for your questions. Invite link here. Documentation To find out what can be customized within config file please refer to full plugin documentation here. Any questions prior to purchasing forward into DM here or into ticket at my discord. Default configs available as template with plugin. Screenshots bellow showcasing configurations created by customers. These are not available with the plugin but I decided to post them here since it's good demonstration of how customizable this plugin is. BOOBLEJ Tide Neighigh Paul Leunal17 BOOBLEJ How to start using plugin? Simply drop WelcomePanelLite.cs file into your plugin folder. After successfully loading plugin you can use default command /info in game. Configuration is handled in config file (oxide/config/WelcomePanelLite.json). How hard is to get this plugin all set up? It's fairly simple. Plugin comes with default configuration which showcases everything you need to know regarding text, styling and changing images. How hard it is to customize your own layout? When it comes to changing color or images it's simple, any inexperienced user can do it however if you want to customize positions of UI or add extra tab buttons, it requires understanding of "ui anchors". Anchors are not that complicated but it takes hour or two to fully understand it. For more info check documentation. Can I add multiple pages into WelcomePanel? Yes, you can add unlimited amount of pages. Can I add images into WelcomePanel? Yes, you can add image to any panel and you can set background for each tab What image sizes I should use? This is different for each panel across different templates. Basically images parented to any panel are stretched to its size. Best approach is to take screenshot of the panel and try to fit image size into that prior to uploading it. How to add addons? Each text tab has addon option at bottom, just type in plugin name. List of available addons can be found at the top of the plugin description, listed as "Works with".$16.99 -
Version 1.3.1
473 downloads
Enhances team gameplay by offering features like a team HUD, automatic authorization, team-specific skins, easy markers, and a dedicated team voice chat, with customizable permissions for monetization and performance optimization. Features: This plugin will give your players a better experience when playing in a team. Team Hud - shows the health, condition(wounded, sleep, offline, etc), active item and square (player location on the map) of your allies Automatic authorization - adds automatic authorization in turrets, tc's, code locks and sam sites. The team leader can enable/disable authorization for each allie, so that the team can safely accept new players! Team skins - ability to choose skins for the team, when an item goes into inventory, it is automatically reskin into the team skin Easy team marker - allow players to use the marker without binoculars Team voice chat - allows players to switch voice chat to team voice chat. When enabled, the player will only be heard by his allies, works on any distance. A good way to playe with new allies that you don't want to add in discord. Any function in the plugin can be disabled in the config, so you will not lose performance from unnecessary functions. Any of the listed functions can be bound to permission in the config, so you can easily monitize, for example, skins. Commands: /bt - open better team menu or Click open team menu button in team Hud Config: { "Team Setting Command": "bt", "Enabled functions": { "Enable Team Hud": true, "Enable global team voice chat": true, "Enable team skins": true, "Enable easy team markers": true, "Enable team auto authorization": { "TC Authorization": true, "Codelocks authorization": true, "AutoTurrets authorization": true, "SAMSite authorization": true }, "Easy team markers": { "Max distance": 50.0, "Search radius": 1.0, "Duration [seconds]": 5, "Cooldown [seconds]": 10 } }, "Permissions": { "Need permission for Team Hud?(true - will work only for players with permission / false - work for all players)": true, "Need permission for Team Voice?(true - will work only for players with permission / false - work for all players)": true, "Need permission for Team Skins?(Need at least one player with this permission in team to set skins in menu)(true - will work only for players with permission / false - work for all players)": true, "Need permission for Team marker?(true - will work only for players with permission / false - work for all players)": true, "Team hud using permission": "betterteams.hud", "Team Voice using permission": "betterteams.voice", "Team Skins using permission(only for setting skins. it's mean that only team leader will need this permission)": "betterteams.skins", "Team marker using permission": "betterteams.marker" }, "Hud Settings": { "UI Scale": 1.0, "Left Offset": 5, "Top Offset": 200, "Player grid refresh rate": 5, "Lines margin": 5, "Collums margin": 5, "Max amount of player displays in line": 8 } } Lang File: { "UI_CHANGE": "Change", "UI_CHOOSE": "Select", "UI_BETTERTEAMS": "BETTER TEAMS", "UI_BETTERTEAMSDESCRIPTION": "This modification will allow you to get a better experience playing with friends. Some things have been changed, and new ones have been added, so that you get the better experience playing with your friends!", "UI_CHANGES": "CHANGES:", "UI_CHANGEHUD": "• Team Hud - allows you to see status of your mates", "UI_CHANGETeamVoice": "• Team Voice - allows you to use in-game voice chat to communicate only with your mates(works at any distance). Other players will not hear you. Can be enable in settings", "UI_CHANGESkins": "• Team Skins - allows you to choose skins for your team. Items you pick up will automatically receive your team's skin", "UI_CHANGEEasyTeamMabrkers": "• Easy Team Marker - allows you to use fast marker to your team without using binoculars", "UI_CHANGEAutoAuthTC": "• AutoAuthorization TC - adds automatic authorization of allies in TC", "UI_CHANGEAutoAuthCodeLocks": "• AutoAuthorization CodeLocks - adds automatic authorization of allies in Code Locks", "UI_CHANGEAutoAuthTurrets": "• AutoAuthorization Auto Turrets - adds automatic authorization of allies in Auto Turrets", "UI_CHANGESamSiteAuthorization": "• AutoAuthorization SamSite - adds automatic authorization of allies in Sam Sites", "UI_CHANGEAuthorizationManager": "• Team Managment - allows the team leader to manage auto authorization for allies.", "UI_SETTINGSNAME": "PERSONAL SETTINGS", "UI_S_ENABLE_TEAM_VOICE": "USE TEAM VOICE CHAT ", "UI_S_ENABLE_TEAM_VOICE_DES": "Yes - Replace vanilla voice to to team chat. Only your allies will hear you. Works at any distance (on the entire map)", "UI_S_ENABLE_TEAM_SKINS": "USE TEAM SKINS", "UI_S_ENABLE_TEAM_SKIN_DES": "Yes - all items you pick up will automatically receive your team's skin.", "UI_S_ENABLE_MARKERS": "USE EASY TEAM MARKERS", "UI_S_ENABLE_MARKERS_DES": "Yes - will give you the ability to place quick time markers in the world at the location you are looking at. Markers are placed using a key combination and do not require binoculars.", "UI_S_MARKER_BUTTON": "EASY TEAM MARKER BIND", "UI_S_MARKER_BUTTON_DES": "Bind your easy team marker command. Just copy command, replace BUTTON to the button you need and enter in console!\nExample: bind BUTTON ftmark -> binb v ftmark", "UI_S_YES": "YES", "UI_S_NO": "NO", "UI_M_MEMBERS": "TEAM MANAGMENT", "UI_M_ONLY_LEADER": "Available only to the team leader", "UI_M_AA_H1": "AUTO AUTHORIZATION", "UI_M_AA_INFO_DES": "All authorization places (tcs, codelocks, auto turrets, etc) add up to a single authorization list for the entire team. If you block any ally from accessing the authorization list, he will lose access to all authorization places, except for those that he installed personally (set codelock or tc himself), while your team will not lose access to his authorization places. Good if you accept new random player in your team.", "UI_M_SELECT_MATE": "Select one of your allies", "UI_M_AA_TC": "Tool Cupboard Auto Authorization", "UI_M_AA_CL": "CodeLocks Auto Authorization", "UI_M_AA_AT": "Auto Turrets Auto Authorization", "UI_M_AA_SAMSITE": "Sam Sites Auto Authorization", "UI_M_KICK": "Kick from team", "UI_M_KICK_B": "KICK", "UI_S_TEAM_SKINS": "TEAM SKINS", "CM_MARKER_COOLDOWN": "Your team ping is on cooldown: {0} seconds left", "UI_H_INFO_TEXT": "OPEN TEAM MENU", "UI_S_PERM": "Your team must have at least 1 player with privilege that have access to skins", "CM_DONT_HAVE_PERM": "You do not have permission to use this command", "UI_IS_DISABLED": "This function is disabled by admin" }$14.99 -
Version 0.1.13
787 downloads
Plugin for Real PvE servers, featuring damage prevention, anti-griefing measures, customizable PvP zones, an automatic loot queue in radtowns and raid zones, and much more. P.S. Since the previous implementation with DynamicPVP was not correct and had some issues, I have added universal hooks(Developer API section) for general access from all PvP plugins, which are currently missing in DynamicPVP. I have requested the author to add them(3 lines), but for now, you will need to use the modified version of DynamicPVP.cs The ability to set "server.pve" to "true", which allows the server to have a "PvE" flag; Damage from NPC's are enabled when server.pve is true; The ability to inflict damage to one's own structures with "server.pve true"; The ability to destroy(including external walls) or rotate one's structures without any time constraints; The ability to force the decay of building blocks with Twigs grade, even if there is wood in the Tool Cupboard; The ability to toggle the gather resource restriction in someone else's Building Privileges; No one, except the owner or their friends, will be able to open their loot containers (chests, storages, bodies, etc.); Administrators can bypass loot restrictions; The ability to schedule the killing of players if they disconnect within someone else's Building Privilege; Disabling backpack and active item drop upon death, even if backpack is full; The ability to disable 'Give' messages; The ability to modify the items given at spawn on the beach; The ability to create an unlimited number of custom permissions; The ability to allow players to bypass the queue; The ability to set limits on sleeping bags, shelters and auto turrets for each permission; The ability to set a multiplier for the prices of monuments and events for each permission; The ability to customize the price and amount of vehicles for each of your custom permissions; The ability to assign vehicles to each player; The ability to customize the assigned price and available amount of vehicles for each of your custom permissions; An assigned vehicle can't be damaged, looted or pushed by other players, but it can be pushed if it is within someone else's Building Privilege; The ability to loot monuments through a queue system; The ability to configure monuments, setting their looting price and time, and adjusting status bars for each monument; The ability to acquire the privilege to loot events (helicopters, bradleys, and raidable bases) through a purchase; The ability to customize the price of each event types and loot attempts (lives); NPCs only aggress against players who are looting monuments, events or raidable bases; Only players who are looting monuments, events or raidable bases can inflict damage to NPCs; RaidableBases are protected from griefing(no damage, no loot and etc). Only the owner can interact with the raid; Neutral RaidableBases can be purchased; Prices for purchasing neutral raids are configurable for each difficulty level; Configurable raid limits (currently available) along with discount multipliers for purchases, for each permission. File location: *SERVER*\oxide\data\RealPVE\PermissionConfig.json Default: https://pastebin.com/5VtWZZVr All permissions are created and configured in the config file under the "List of permissions" section. You can create as many permissions as needed and customize them flexibly. It is recommended to use the prefix "realpve" in the permission's name, for example: "realpve.vip". NOTE: The first permission will serve as the default permission for those who do not have any permissions. { "List of permissions. NOTE: The first permission will be used by default for those who do not have any permissions.": [ { "Permission Name": "realpve.default", "Bypass Queue": false, "Limit of beds": 15, "Limit of shelters": 1, "Limit of auto turrets": 12, "Seconds that will be skipped when opening HackableLockedCrate. Range from 0 to 900": 0.0, "Monuments price multiplier": 1.0, "Events price multiplier": 1.0, "Limit of RaidableBases(at the time)": 1, "RaidableBases price multiplier": 1.0, "Vehicles settings": { "Horse": { "Limit": 1, "Price": 10.0 }, "Bike": { "Limit": 1, "Price": 5.0 }, "MotorBike": { "Limit": 1, "Price": 20.0 }, "Car": { "Limit": 1, "Price": 25.0 }, ... } }, { "Permission Name": "realpve.vip", "Bypass Queue": true, "Limit of beds": 20, "Limit of shelters": 2, "Limit of auto turrets": 15, "Seconds that will be skipped when opening HackableLockedCrate. Range from 0 to 900": 450.0, "Monuments price multiplier": 0.9, "Events price multiplier": 0.9, "Limit of RaidableBases(at the time)": 2, "RaidableBases price multiplier": 0.9, "Vehicles settings": { "Horse": { "Limit": 5, "Price": 9.0 }, "Bike": { "Limit": 5, "Price": 4.5 }, "MotorBike": { "Limit": 5, "Price": 18.0 }, "Car": { "Limit": 5, "Price": 22.5 }, ... } } ], "Version": { "Major": 0, "Minor": 1, "Patch": 1 } } An example of a monument/event/rb multipliers using default permissions. For example, if you set the price for the Harbor at $1000, a player with the default permission(1.0) will pay $1000 * 1 = $1000. Meanwhile, a player with a VIP permission(0.9) will pay $1000 * 0.9 = $900. However, if a player possesses a misbehaving permission with a value of 1.1, they will need to pay $1000 * 1.1 = $1100. { "Chat admin command": "adminpve", "Chat command": "realpve", "Is it worth forcibly implementing PvE for a server?": true, "Is it worth enabling GameTips for messages?": true, "Is it worth preventing the sending of 'Give' messages?": true, "Is it worth preventing resource gathering in someone else's building privilege area?": false, "Is it worth preventing the pickup of plants spawned by the server in someone else's building privilege zone?": false, "Is it worth assigning portals(Halloween and Christmas) to the first player?": true, "Is it worth preventing players from handcuffing others?": true, "Is it worth preventing a backpack from dropping upon player death?": true, "Is it worth preventing damage to the laptop of the Hackable Crate?": true, "Is it worth removing the penalties for recyclers in safe zones?": true, "Which currency symbol and format will be utilized?": "${0}", "Vehicles - Time(in seconds) to display the marker when searching for a vehicle. A value of 0 disables the marker": 15.0, "Anti-Sleeper - Time in seconds after which a player will be killed if they disconnect while inside someone else's Building Privilege. Set to 0 to disable": 1200.0, "PatrolHelicopterAI - Monument Crash. If set to true, the helicopter will attempt to crash into the monument": false, "PatrolHelicopterAI - Use Danger Zones. If set to false, the helicopter will function as it did before the April update": false, "PatrolHelicopterAI - Flee Damage Percentage. A value of 1 or above will make the helicopter behave as it did before the April update": 1.0, "Is Npc Random Raids enabled?": true, "PvP - Is friendly fire enabled by default when creating a team?": false, "PvP - Is it worth adding map markers for PvP zones?": true, "PvP - Name of the map maker": "PvP Zone!", "PvP - Settings for the status bar": { "Order": 9, "Height": 26, "Main_Color(Hex or RGBA)": "1 0.39 0.28 0.7", "Main_Transparency": 0.8, "Main_Material": "", "Image_Url": "https://i.imgur.com/oi5vIkk.png", "Image_Local(Leave empty to use Image_Url)": "RealPVE_PvP", "Image_Sprite(Leave empty to use Image_Local or Image_Url)": "", "Image_IsRawImage": false, "Image_Color(Hex or RGBA)": "1 0.39 0.28 1", "Image_Transparency": 1.0, "Is it worth enabling an outline for the image?": false, "Image_Outline_Color(Hex or RGBA)": "0.1 0.3 0.8 0.9", "Image_Outline_Transparency": 0.0, "Image_Outline_Distance": "0.75 0.75", "Text_Size": 12, "Text_Color(Hex or RGBA)": "1 1 1 1", "Text_Font(https://umod.org/guides/rust/basic-concepts-of-gui#fonts)": "RobotoCondensed-Bold.ttf", "Is it worth enabling an outline for the text?": false, "Text_Outline_Color(Hex or RGBA)": "#000000", "Text_Outline_Transparency": 1.0, "Text_Outline_Distance": "0.75 0.75", "SubText_Size": 12, "SubText_Color(Hex or RGBA)": "1 1 1 1", "SubText_Font": "RobotoCondensed-Bold.ttf", "Is it worth enabling an outline for the sub text?": false, "SubText_Outline_Color(Hex or RGBA)": "0.5 0.6 0.7 0.5", "SubText_Outline_Transparency": 0.0, "SubText_Outline_Distance": "0.75 0.75" }, "PvP - Settings for the progress status bar": { "Main_Color(Hex or RGBA)": "1 1 1 0.15", "Main_Transparency": 0.15, "Progress_Reverse": true, "Progress_Color": "#FF6347", "Progress_Transparency": 0.7, "Progress_OffsetMin": "0 0", "Progress_OffsetMax": "0 0" }, "Wipe ID": null, "Version": { "Major": 0, "Minor": 1, "Patch": 13 } } ENG: https://pastebin.com/ZMUL6pYL RUS: https://pastebin.com/Mx8cbMts Main commands(/realpve ) : autobuy - Toggle autobuy for monuments, vanilla events and raid bases with a total price greater than 0; pickup - Toggle access to pick up your items from the ground for all players; share - Manage access to looting your entities by other players(outside of the team): status *entityID*(optional) - Display information about the settings of the entity you are looking at or the one you specified; add *nameOrID* *entityID*(optional) - Add the specified player to the entity list you are looking at or the one you specified; remove *nameOrID* *entityID*(optional) - Remove the specified player from the entity list you are looking at or the one you specified; toggle *entityID*(optional) - Toggle the entity list you are looking at or the one you specified; delete *entityID*(optional) - Delete the settings for the entity you are looking at or the one you specified; clear - Delete the settings for all your entities. team - Manage your team: ff - Toggle the ability to damage your teammates. vehicle - Manage your vehicles: list - List of IDs for all your vehicles; find *vehicleID*(optional) - Help finding the vehicle you are looking at or the one you specified; unlink *vehicleID*(optional) - Unlink the vehicle you are looking at or the one you specified; clear - Unlink all your vehicles. Admin commands(/adminpve). Permission "realpve.admin" required: autobuy - Manage autobuy for monuments, vanilla events and raid bases: *nameOrId* - Toggle autobuy for the specified player; force monument/event/rb - Toggle forced autobuy. If enabled, player settings will be ignored; clear - Disable autobuy for everyone. config - Manage settings for values in the configuration file: forcepve *boolValue*(optional) - Is it worth forcibly implementing PvE for a server? gametips *boolValue*(optional) - Is it worth enabling GameTips for messages? givemsg *boolValue*(optional) - Is it worth preventing the sending of 'Give' messages? resource_privilege *boolValue*(optional) - Is it worth preventing resource gathering in someone else's building privilege area? plant_privilege *boolValue*(optional) - Is it worth preventing the pickup of plants spawned by the server in someone else's building privilege zone? heli_damage *boolValue*(optional) - Is it worth forcibly blocking damage from the patrol helicopter to building blocks and deployables? handcuffs *boolValue*(optional) - Is it worth assigning portals(Halloween and Christmas) to the first player? portals *boolValue*(optional) - Is it worth preventing players from handcuffing others? backpack_drop *boolValue*(optional) - Is it worth preventing a backpack from dropping upon player death? laptop_damage *boolValue*(optional) - Is it worth preventing damage to the laptop of the Hackable Crate? recycler_safezone *boolValue*(optional) - Is it worth removing the penalties for recyclers in safe zones? item_pickup *boolValue*(optional) - Is it worth allowing all players to pick up items dropped by others? If enabled, personal settings will be ignored; priceformat *stringValue* - The format that will be used for prices; vehicle_marker_time *floatValue* - Vehicles - Time in seconds to display the marker when searching for a vehicle. A value of 0 disables the marker; antisleeper *floatValue* - Anti-Sleeper - Time in seconds after which a player will be killed if they disconnect while inside someone else's Building Privilege. Set to 0 to disable; randomraids *boolValue*(optional) - Is it worth enabling support for the 'Npc Random Raids' plugin? teamff *boolValue*(optional) - Is friendly fire enabled by default when creating a new team? pvpmarkers *boolValue*(optional) - PvP - Is it worth adding map markers for PvP zones? pvpmarkersname *stringValue* - PvP - Name of the map maker. loot - Manage player access to entities without restrictions: *nameOrId* - Toggle unrestricted access for the specified player; self - Toggle unrestricted access for yourself; clear - Revoke unrestricted access for all players. monument - Manage monuments: list - List of available monuments; *monumentID*/this - Instead of the monumentID, you can use the word "this", but you must be inside the monument: suffix *boolValue*(optional) - Toggle the suffix display in the monument's name; broadcast *boolValue*(optional) - Toggle notifications about monument occupancy/release; time *intValue* - Set the looting time limit for the monument in seconds; price *floatValue* - Set the cost for looting rights. A value of 0 makes the monument free; offer *floatValue* - Set the offer duration for purchasing the monument in seconds; map_mode *intValue* - Set the marker display mode on the map. 0 - disabled, 1 - enabled, 2 - enabled during PvP mode; map_circle *boolValue*(optional) - Toggle the display of the monument's circle marker on the map; pvp *boolValue*(optional) - Toggle PvP mode for the monument; pvp_delay *floatValue* - Set the PvP mode duration in seconds for players after leaving the PvP monument; bar_progress *boolValue*(optional) - Toggle between TimeProgressCounter and TimeCounter bars for the monument. perm - Manage permissions: add *permName* - Adds a new permission to the list by copying values from the first(default) permission in the list. If the permission name starts with 'realpve', it will also register a new permission; add *permName* *sourcePermName* - Adds a new permission to the list by copying values from an existing permission in the list; remove *permName* - Removes an existing permission from the list; edit *permName* - Edits a permission: queue - Toggle the permission to bypass the server queue; beds *intValue* - Restriction on the number of available beds; shelters *intValue* - Restriction on the number of available shelters; turrets *intValue* - Restriction on the number of available turrets; hackable *floatValue* - Number of seconds(0-900) to skip when opening a hackable crate; monuments *floatValue* - Price multiplier for monuments; events *floatValue* - Price multiplier for vanilla events; rb_limit *intValue* - Restriction on the number of raid bases available simultaneously; rb_mult *floatValue* - Price multiplier for raid bases; vehicles *vehType* - Vehicles settings: limit *intValue* - Limit on the number of available vehicles by type; price *floatValue* - Price for registering a vehicle by type. clear - Removes all permissions from the list except the first one. pickup - Manage access to picking up another player's items from the ground: *nameOrId* - Toggle access to picking up a specific player's items from the ground; clear - Revoke access for all players to pick up items from the ground. share - Manage access to looting entities by other players(outside of the team): status *entityID*(optional) - Display information about the settings of the entity you are looking at or the one you specified; add *nameOrID* *entityID*(optional) - Add the specified player to the entity list you are looking at or the one you specified; remove *nameOrID* *entityID*(optional) - Remove the specified player from the entity list you are looking at or the one you specified; toggle *entityID*(optional) - Toggle the entity list you are looking at or the one you specified; delete *entityID*(optional) - Delete the settings for the entity you are looking at or the one you specified; clear *nameOrID*(optional) - Delete the settings for all entities or all entities of the specified player. vehicle - List of all available vehicle types: types - List of available vehicle types. Example: /realpve pickup /realpve vehicle find *netID* /realpve team ff /adminpve perm add realpve.vip2 /adminpve perm add realpve.vip2 realpve.vip /adminpve perm edit realpve.vip2 queue true /adminpve perm edit realpve.vip2 vehicles horse limit 5 /adminpve monument list /adminpve monument *monumentID* pvp /adminpve monument *monumentID* price 7.5 /adminpve loot iiiaka /adminpve pickup iiiaka /adminpve vehicle types This plugin provides the ability to claim vehicles, thereby preventing theft and griefing from other players. In permissions, you can set the price and quantity restrictions for each type of vehicle, ensuring flexible customization according to your preferences. An assigned vehicle can't be damaged, looted or pushed by other players, but it can be pushed if it is within someone else's Building Privilege. File location: *SERVER*\oxide\data\RealPVE\MonumentConfig.json Default: https://pastebin.com/XY1d9YaM This plugin introduces queue system and loot purchases for monuments. You can customize the price and time for looting for each monument. Within monuments, only the "Looter" and his friends have the ability to loot, pick up items or damage entities. Additionally, NPCs and animals within monuments do not aggress against other players and do not receive damage from them. If a player dies within the monument, they will have a grace period to return. This allows players to safely loot monuments without fear of griefing. Example of monument configuration: "ferry_terminal_1": { "Type(This parameter is just a hint. Changes won’t have any effect)": "RadTown", "Time in seconds(1-15) given to respond for purchasing monument looting": 5.0, "ShowSuffix": true, "Broadcast": true, "PvP - Is PvP enabled at this monument? If so, players will be able to kill each other, and loot will be publicly accessible": false, "PvP - Sets the delay in seconds that a player remains in PvP mode after leaving a PvP monument. 0 disables the delay": 10.0, "PvP - Is it worth adding map markers for monuments if they are PvP zones?": true, "LootingTime": 900, "Price": 15.0, "Is it worth using a progress bar for bars with a counter?": true, "Settings for the status bar": { "Order": 10, "Height": 26, "Main_Color(Hex or RGBA)": "#FFBF99", "Main_Transparency": 0.8, "Main_Material": "", "Image_Url": "https://i.imgur.com/awUrIwA.png", "Image_Local(Leave empty to use Image_Url)": "RealPVE_ferry_terminal_1", "Image_Sprite(Leave empty to use Image_Local or Image_Url)": "", "Image_IsRawImage": false, "Image_Color(Hex or RGBA)": "#FFDCB6", "Image_Transparency": 1.0, "Is it worth enabling an outline for the image?": false, "Image_Outline_Color(Hex or RGBA)": "0.1 0.3 0.8 0.9", "Image_Outline_Transparency": 0.0, "Image_Outline_Distance": "0.75 0.75", "Text_Size": 12, "Text_Color(Hex or RGBA)": "1 1 1 1", "Text_Font(https://umod.org/guides/rust/basic-concepts-of-gui#fonts)": "RobotoCondensed-Bold.ttf", "Is it worth enabling an outline for the text?": false, "Text_Outline_Color(Hex or RGBA)": "#000000", "Text_Outline_Transparency": 1.0, "Text_Outline_Distance": "0.75 0.75", "SubText_Size": 12, "SubText_Color(Hex or RGBA)": "1 1 1 1", "SubText_Font": "RobotoCondensed-Bold.ttf", "Is it worth enabling an outline for the sub text?": false, "SubText_Outline_Color(Hex or RGBA)": "0.5 0.6 0.7 0.5", "SubText_Outline_Transparency": 0.0, "SubText_Outline_Distance": "0.75 0.75" }, "Settings for the progress status bar": { "Main_Color(Hex or RGBA)": "1 1 1 0.15", "Main_Transparency": 0.15, "Progress_Reverse": true, "Progress_Color": "#FFBF99", "Progress_Transparency": 0.7, "Progress_OffsetMin": "0 0", "Progress_OffsetMax": "0 0" } } Type - This field serves only as an indicator for you. The changes won't have any impact; ShowSuffix - Suffix display. Some monuments (for example Warehouses) have suffixes in the name, like "Warehouse #12"; Broadcast - Enabling or disabling broadcasts when a monument is occupied or vacated; LootingTime - Time allocated for looting the monument; Price - The price for which you can start looting the monument. 0 means looting is free; BarSettings - Settings for the Advanced Status Bar. You can also choose the types of monuments by specifying them under the "List of tracked types of monuments" section. A list of all available types can be viewed on the MonumentsWatcher's page in the "Developer API" section. "List of tracked types of monuments": [ "RadTown", "RadTownWater", "RadTownSmall", "TunnelStation", "Custom" ] Events, similar to monuments, offer the opportunity to claim events. All events are configured in the config file under the "Settings for the events" section. You can customize the price of looting and looting attempts(deaths, including friends). Just like in monuments, only the "Looter" and his friends have the ability to loot and damage entities. Additionally, in events, NPCs do not aggress against other players. If a player(including friends) exceeds the death limit, the event became free, thereby providing other players with the opportunity to claim the event. Example of event configuration: { "Settings for the PatrolHelicopter events": { "IsEnabled": true, "Time in seconds (1-15) given to respond for purchasing this event. Note: This is shown to everyone who deals damage, and the first person to buy it will claim it": 5.0, "Is it worth removing fire from crates?": true, "The price to capture the event. 0 means the event is free": 50.0, "The number of deaths after which the event becomes public": 5 }, "Settings for the BradleyAPC events": { "IsEnabled": true, "Time in seconds (1-15) given to respond for purchasing this event. Note: This is shown to everyone who deals damage, and the first person to buy it will claim it": 5.0, "Is it worth removing fire from crates?": true, "The price to capture the event. 0 means the event is free": 50.0, "The number of deaths after which the event becomes public": 5 }, "Version": { "Major": 0, "Minor": 1, "Patch": 0 } } Price - The price to claim the event. 0 means looting is free; DeathLimit - Limit of deaths after which the event becomes free. File location: *SERVER*\oxide\data\RealPVE\NewbieConfig.json Default: https://pastebin.com/QHZCqpji An example of an item list given for the main inventory: "List of items for the main inventory": [ { "ShortName": "note", "Slot": 0, "Amount": 1, "SkinID": 0, "Text": "MsgNoteText" } ] P.S. In the Text field, you need to specify the language key. Or, you can just write any text, but there won't be a translation of the text. File location: *SERVER*\oxide\data\RealPVE\RaidableBasesConfig.json Default: https://pastebin.com/rpDng7Fd Integration with the RaidableBases plugin does not restrict its functionality in any way. On the contrary, it adds an anti-grief system that protects bases from malicious players. In raid bases, NPCs and other entities can only receive damage from the raid owner or their friends; Turrets and traps do not aggress against outsiders; You can customize the price of claiming to each difficulty and set individual discounts for each permission. You can still purchase raid bases using the /buyraid command. Raid bases without owners(buyable, maintained, manual and scheduled) can be bought for a price set in the configuration file or assigned to the first player who enters its radius, if the final price(price * discount) less or equals to 0. Additionally, as a bonus, upon buying this plugin, you receive 5 free bases for 3 difficulty levels, along with configured loot for them. [PluginReference] private Plugin RealPVE; There are 6 universal hooks that the plugin is subscribed to, the use of which allows interaction with PVP in various PVE plugins: OnPlayerEnterPVP OnPlayerExitPVP OnEntityEnterPVP OnEntityExitPVP CreatePVPMapMarker DeletePVPMapMarker OnPlayerEnterPVP: Used to add a player to PVP mode/zone. To call the OnPlayerEnterPVP hook, you need to pass 2 parameters: <BasePlayer>player - The player to add to PVP; <string>zoneID - A unique identifier for your PVP zone. This parameter is very important because a player can be in multiple PVP zones at the same time and passing the zoneID in this case allows for correct processing of the player's location within them. Interface.CallHook("OnPlayerEnterPVP", player, "*Your unique zone identifier*");//Calling the OnPlayerEnterPVP hook to tell PVE plugins that the player needs to be added to the specified PVP zone. OnPlayerExitPVP: Used to remove a player from PVP mode/zone. Calling this hook guarantees the player’s removal from the specified PVP zone, but does not guarantee the removal from PVP mode, as there may be other zones in addition to yours. Also, when a player dies, they are automatically removed from all PVP zones. To call the OnPlayerExitPVP hook, you need to pass 3 parameters, 1 of which is optional: <BasePlayer>player - The player to remove from PVP; <string>zoneID - A unique identifier for your PVP zone; <float>pvpDelay - Optional. When the player exits your PVP zone, you can also pass the PVP delay time. However, if the player still has other active PVP zones, your PVP delay will not take effect. Interface.CallHook("OnPlayerExitPVP", player, "*Your unique zone identifier*", 10f);//Calling the OnPlayerExitPVP hook to tell PVE plugins that the player needs to be removed from the specified PVP zone, with the pvpDelay(10 seconds) specified if the player no longer has any active PVP zones. OnEntityEnterPVP: Used to add an entity to PVP mode/zone. In the case of RealPVE, this hook is only necessary to add entities with an owner(player) to a PVP, allowing other players to interact with them, such as a player's corpse after death(PlayerCorpse) or a backpack after the corpse disappears(DroppedItemContainer). To call the OnEntityEnterPVP hook, you need to pass 2 parameters: <BaseEntity>entity - The entity to add to PVP; <string>zoneID - A unique identifier for your PVP zone. Interface.CallHook("OnEntityEnterPVP", entity, "*Your unique zone identifier*");//Calling the OnEntityEnterPVP hook to tell PVE plugins that the entity needs to be added to the specified PVP zone. OnEntityExitPVP: Used to remove an entity from PVP mode/zone. When an entity dies, it is automatically removed from all PVP zones. To call the OnEntityExitPVP hook, you need to pass 3 parameters, 1 of which is optional: <BaseEntity>entity - The entity to remove from PVP; <string>zoneID - A unique identifier for your PVP zone; <float>pvpDelay - Optional. When the entity exits your PVP zone, you can also pass the PVP delay time. However, if the entity still has other active PVP zones, your PVP delay will not take effect. Interface.CallHook("OnEntityExitPVP", entity, "*Your unique zone identifier*", 10f);//Calling the OnEntityExitPVP hook to tell PVE plugins that the entity needs to be removed from the specified PVP zone, with the pvpDelay(10 seconds) specified if the entity no longer has any active PVP zones. CreatePVPMapMarker: Used to create a map marker for the PVP zone. To call the CreatePVPMapMarker hook, you need to pass 5 parameters, 2 of which is optional: <string>zoneID - A unique identifier for your PVP zone; <Vector3>pos - The position of your PVP zone; <float>radius - The radius of the circle for your PVP zone; <string>displayName - Optional. The display name for the map marker; <BaseEntity>entity - Optional. The entity to which the map marker should be attached. Interface.CallHook("CreatePVPMapMarker", "*Your unique zone identifier*", pos, 25f, "ATTENTION! This is a PVP zone!");//Calling the CreatePVPMapMarker hook to tell PVE plugins to create a map marker for the specified zone, at the specified position with the given radius, but without specifying a parent entity. DeletePVPMapMarker: Used to delete a map marker for the PVP zone. To call the DeletePVPMapMarker hook, you need to pass only 1 parameter: <string>zoneID - A unique identifier for your PVP zone. Interface.CallHook("DeletePVPMapMarker", "*Your unique zone identifier*");//Calling the DeletePVPMapMarker hook to tell PVE plugins to delete a map marker for the specified zone. There are 5 hooks that the plugin calls: OnPlayerPVPDelay OnPlayerPVPDelayed OnPlayerPVPDelayRemoved OnZoneStatusText CanRedeemKit OnPlayerPVPDelay: Called when a player exits the last active PVP zone, allowing other plugins to overwrite the value for pvpDelay. Returning a float value allows changing the pvpDelay for the player. A value less than zero disables the pvpDelay. When calling the OnPlayerPVPDelay hook, 3 parameters are passed: <BasePlayer>player - The player to whom the pvpDelay is applied; <float>pvpDelay - The initial value of pvpDelay; <string>zoneID - A unique identifier of PVP zone. object OnPlayerPVPDelay(BasePlayer player, float pvpDelay, string zoneID) { Puts($"Attempting to set a PvP delay of {pvpDelay} seconds for player {player.displayName} in zone {zoneID}!"); if (zoneID == "*Your unique zone identifier*") { return 15f;//Overriding the values for pvpDelay } return null;//Leave unchanged } OnPlayerPVPDelayed: Called after the PVP delay has been set for the player. When calling the OnPlayerPVPDelayed hook, 3 parameters are passed: <BasePlayer>player - The player to whom the pvpDelay is applied; <float>pvpDelay - The value of pvpDelay; <string>zoneID - A unique identifier of PVP zone. void OnPlayerPVPDelayed(BasePlayer player, float pvpDelay, string zoneID) { Puts($"A PvP delay of {pvpDelay} seconds has been set for player {player.displayName} in zone {zoneID}!"); } OnPlayerPVPDelayRemoved: Called when the PVP delay is removed from the player after they enter a PVP zone with an active PVP delay. When calling the OnPlayerPVPDelayRemoved hook, only 1 parameter is passed: <BasePlayer>player - The player from whom the PVP delay has been removed. void OnPlayerPVPDelayRemoved(BasePlayer player) { Puts($"PVP delay has been removed for player {player.displayName} as they entered a PVP zone!"); } OnZoneStatusText: Called when the text with the nice name for the specified zone is needed, to be displayed in the status bar. When calling the OnZoneStatusText hook, 2 parameters are passed: <BasePlayer>player - The player for whom the nice name for the zone is being requested; <string>zoneID - A unique identifier of PVP zone. object OnZoneStatusText(BasePlayer player, string zoneID) { Puts($"Text for the status bar is required for zone {zoneID}"); if (zoneID == "*Your unique zone identifier*") { return lang.GetMessage("*langKey*", this, player.UserIDString);//<string>Overriding the value for the status bar text } return null;//Leave unchanged } CanRedeemKit: Called before giving the starter kit, in the OnDefaultItemsReceive hook. A non-zero value cancels this action. When calling the CanRedeemKit hook, only 1 parameter is passed: <BasePlayer>player - The player to whom the kit is being attempted to be given. object CanRedeemKit(BasePlayer player) { Puts($"Attempting to give the kit to player {player.displayName}!"); if (player.IsAdmin) { return false;//Cancel the action } return null;//Leave unchanged }$39.99- 32 comments
- 1 review
-
- 3
-

-
- #rust
- #real
-
(and 56 more)
Tagged with:
- #rust
- #real
- #pve
- #pvp
- #solo
- #build
- #friendly
- #raid
- #npc
- #monument
- #monuments
- #loot
- #looting
- #farm
- #newbie
- #custom
- #bar
- #ui
- #cui
- #panel
- #vehicle
- #claim
- #limit
- #limits
- #sleeping
- #bag
- #sleeping bag
- #bed
- #shelter
- #permission
- #permissions
- #vip
- #economy
- #economics
- #rad
- #town
- #radtown
- #queue
- #bypass
- #vehicles
- #raidable
- #base
- #bases
- #raidablebases
- #raider
- #raiders
- #humannpc
- #event
- #events
- #copy
- #paste
- #copypaste
- #plugin
- #plugins
- #umod
- #oxide
- #carbon
- #iiiaka
-
Version 1.2.0
344 downloads
Very simple, extremely dynamic stats plugin with an amazing UI! Offers tons of customizability, change UI colors, and select between 2 pre-made UI options. Support's Welcome Controller UI so you can have your stats cleanly integrated into your info menu. Enable and disable stats from showing on whatever you want. Category filters that also show you what place you are within each category! FEATURES - Supports Welcome UI Controller by Amino - Includes new scrolling UI! - Select what stats you want to show on the main screen - Select what stats you want to show on the personal screen - Disable and enable whatever stats you want - Display user currency and playtime - Kills - Deaths - KDR - Suicides - Headshots - Bullets hit - Animals killed - PVE Stats - Raid Stats - ETC* CONFIG SNIPPET FOR STAT OPTIONS "PlayerKills": { "Enabled": true, "DisplayOnMainUI": true, "DisplayOnPersonalUI": true, "IsMainPersonalStat": true, "PointsChange": 1.0, "ItemID for stat image": 0, "IMG Link for stat image (takes priority over ItemID)": "", "Category (PVP, PVE, RAID)": "PVP" }, Need support or want updates about what is coming to the plugin? Join the support discord here https://discord.gg/RVePam7pd7$19.99- 5 comments
- 2 reviews
-
- #stats
- #statistics
- (and 9 more)
-
Version 1.0.5
194 downloads
SimpleStatsUI is a sleek and user-friendly statistics interface designed to enhance the gaming experience by providing comprehensive insights into player and clan performance. Beautiful User-Interface Shows leaderboards of TOP 10 Players in the server & TOP 10 Clans Counts Player Kills, Deaths, KDR, HeadShots, HeadShot.Accuracy, Shooting Accuracy /stats - Opens UI interface Leaderboard (For Players) /show_kdr - Enable or disable KDR UI (For Players) /enable_kdr - Enable or disable KDR UI for the server (For Admin) /reset_players - Reset all player stats (For Admin) /reset_clans - Reset all clan stats (For Admin) simplestatsui.admin - Requires admin permission to reset stats { "Settings": { "Count NPC": true, "Count Suicides": true, "Reset Player Stats On Wipe": true, "Reset Clan Stats On Wipe": true }, "KDR UI Setting": { "Enable KDR UI": true, "Anchor Min": "0.5 0", "Anchor Max": "0.5 0", "Offset Min": "-305.2 17.999", "Offset Max": "-205.2 77.98", "Kills UI": { "Text": "{kills} Kills", "BackGround Color": { "Hexa Color(#FFFFFF,100)": "#3D4B27,100" }, "Icon ImageURL": "https://i.postimg.cc/nLj1yJ0L/target.png", "Icon Color": { "Hexa Color(#FFFFFF,100)": "#A6CD63,100" }, "Text Color": { "Hexa Color(#FFFFFF,100)": "#A6CD63,100" } }, "Deaths UI": { "Text": "{deaths} Deaths", "BackGround Color": { "Hexa Color(#FFFFFF,100)": "#962F20,100" }, "Icon ImageURL": "https://i.postimg.cc/s2CkmnwL/skull.png", "Icon Color": { "Hexa Color(#FFFFFF,100)": "#C79897,100" }, "Text Color": { "Hexa Color(#FFFFFF,100)": "#C79897,100" } }, "KDR UI": { "Text": "{kdr} KDR", "BackGround Color": { "Hexa Color(#FFFFFF,100)": "#1D425F,100" }, "Icon ImageURL": "https://i.postimg.cc/d14y9dWg/market.png", "Icon Color": { "Hexa Color(#FFFFFF,100)": "#489AD4,100" }, "Text Color": { "Hexa Color(#FFFFFF,100)": "#489AD4,100" } } } }$9.99- 18 comments
- 2 reviews
-
- 1
-


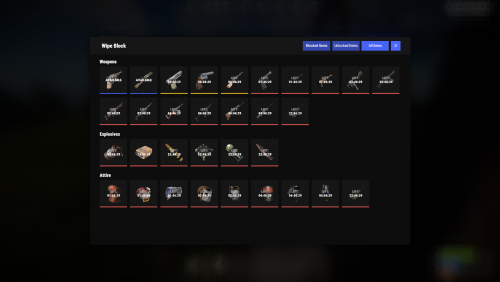

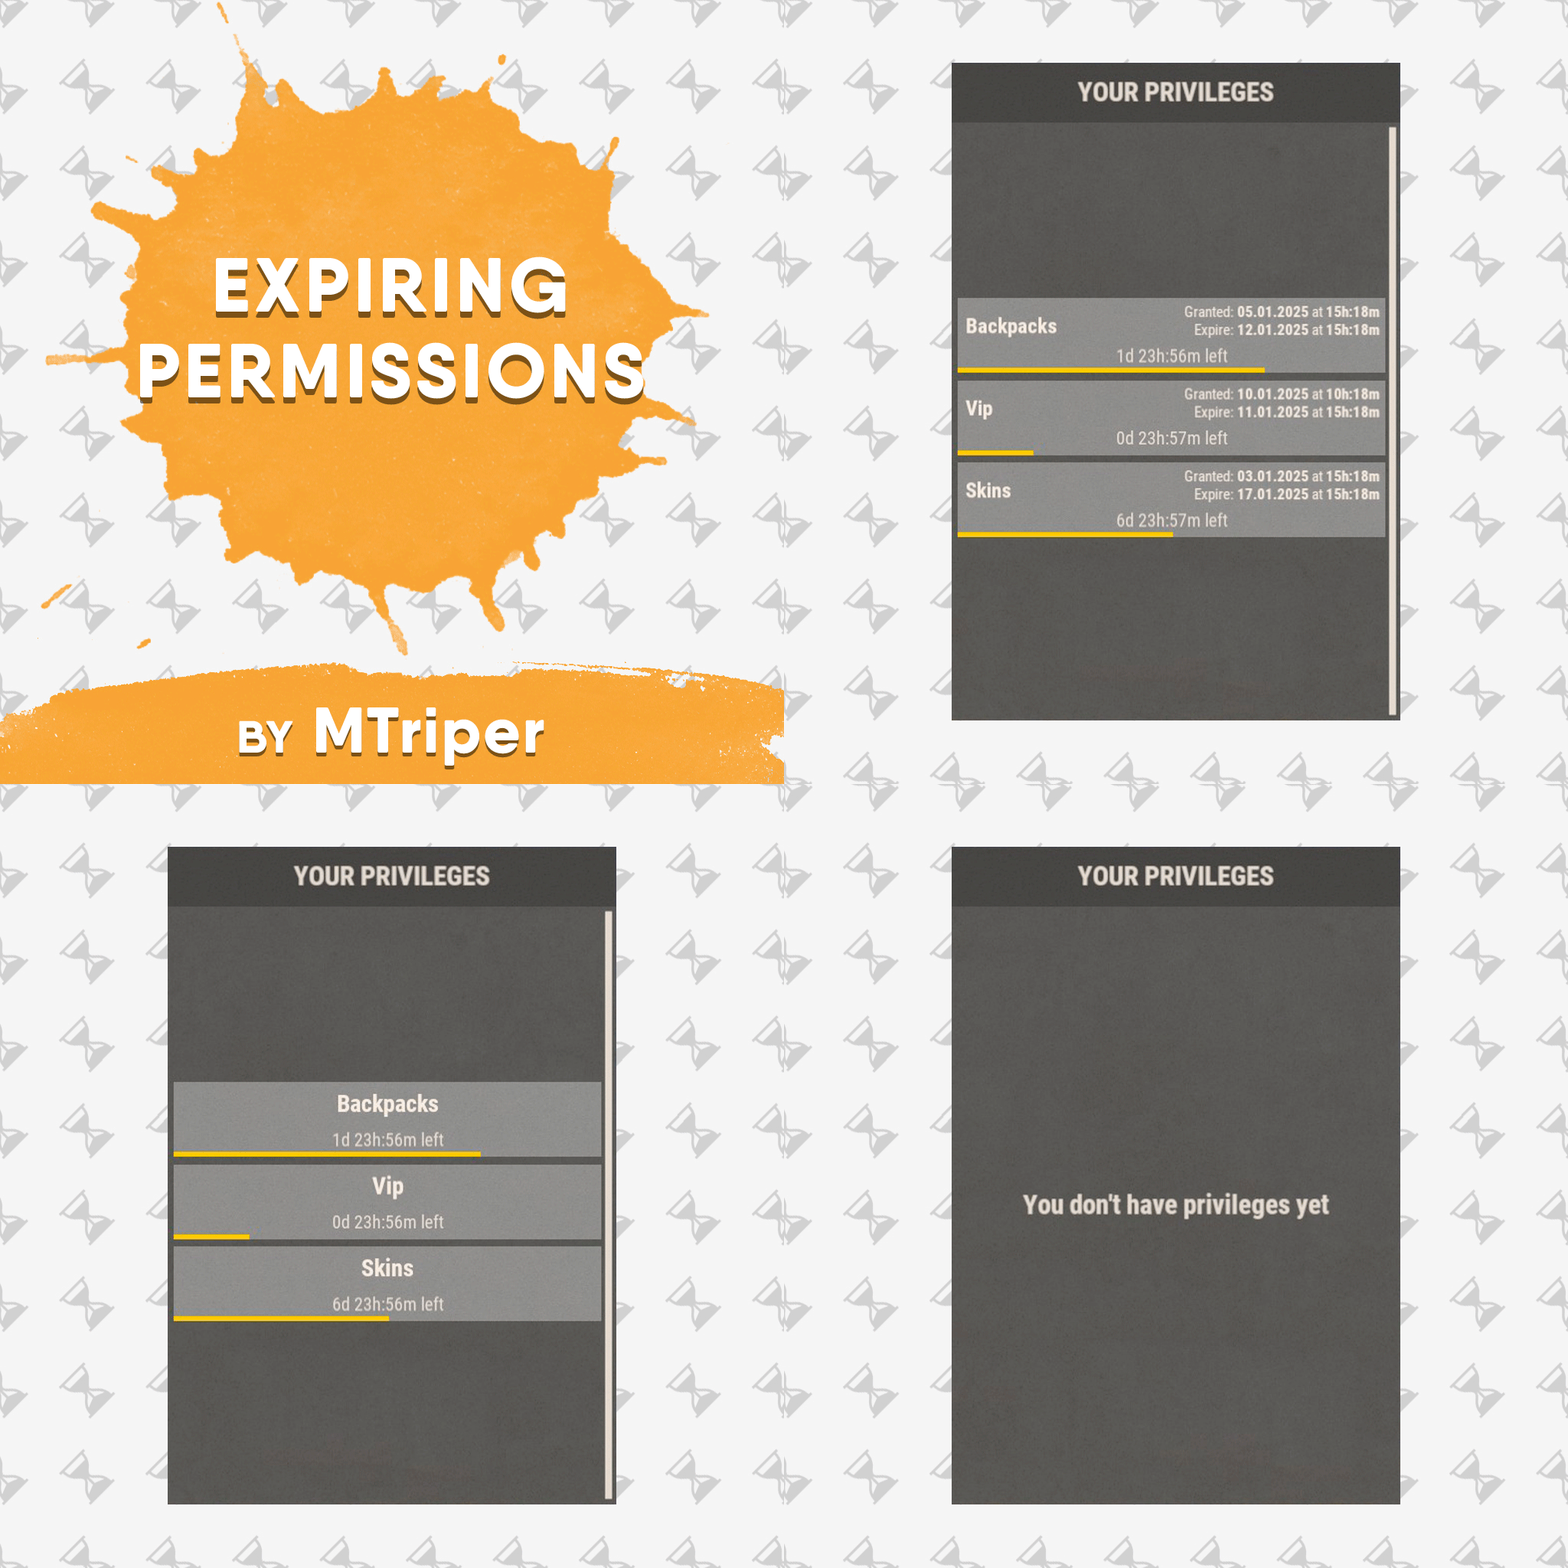

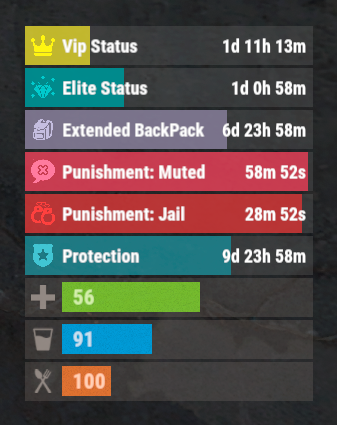




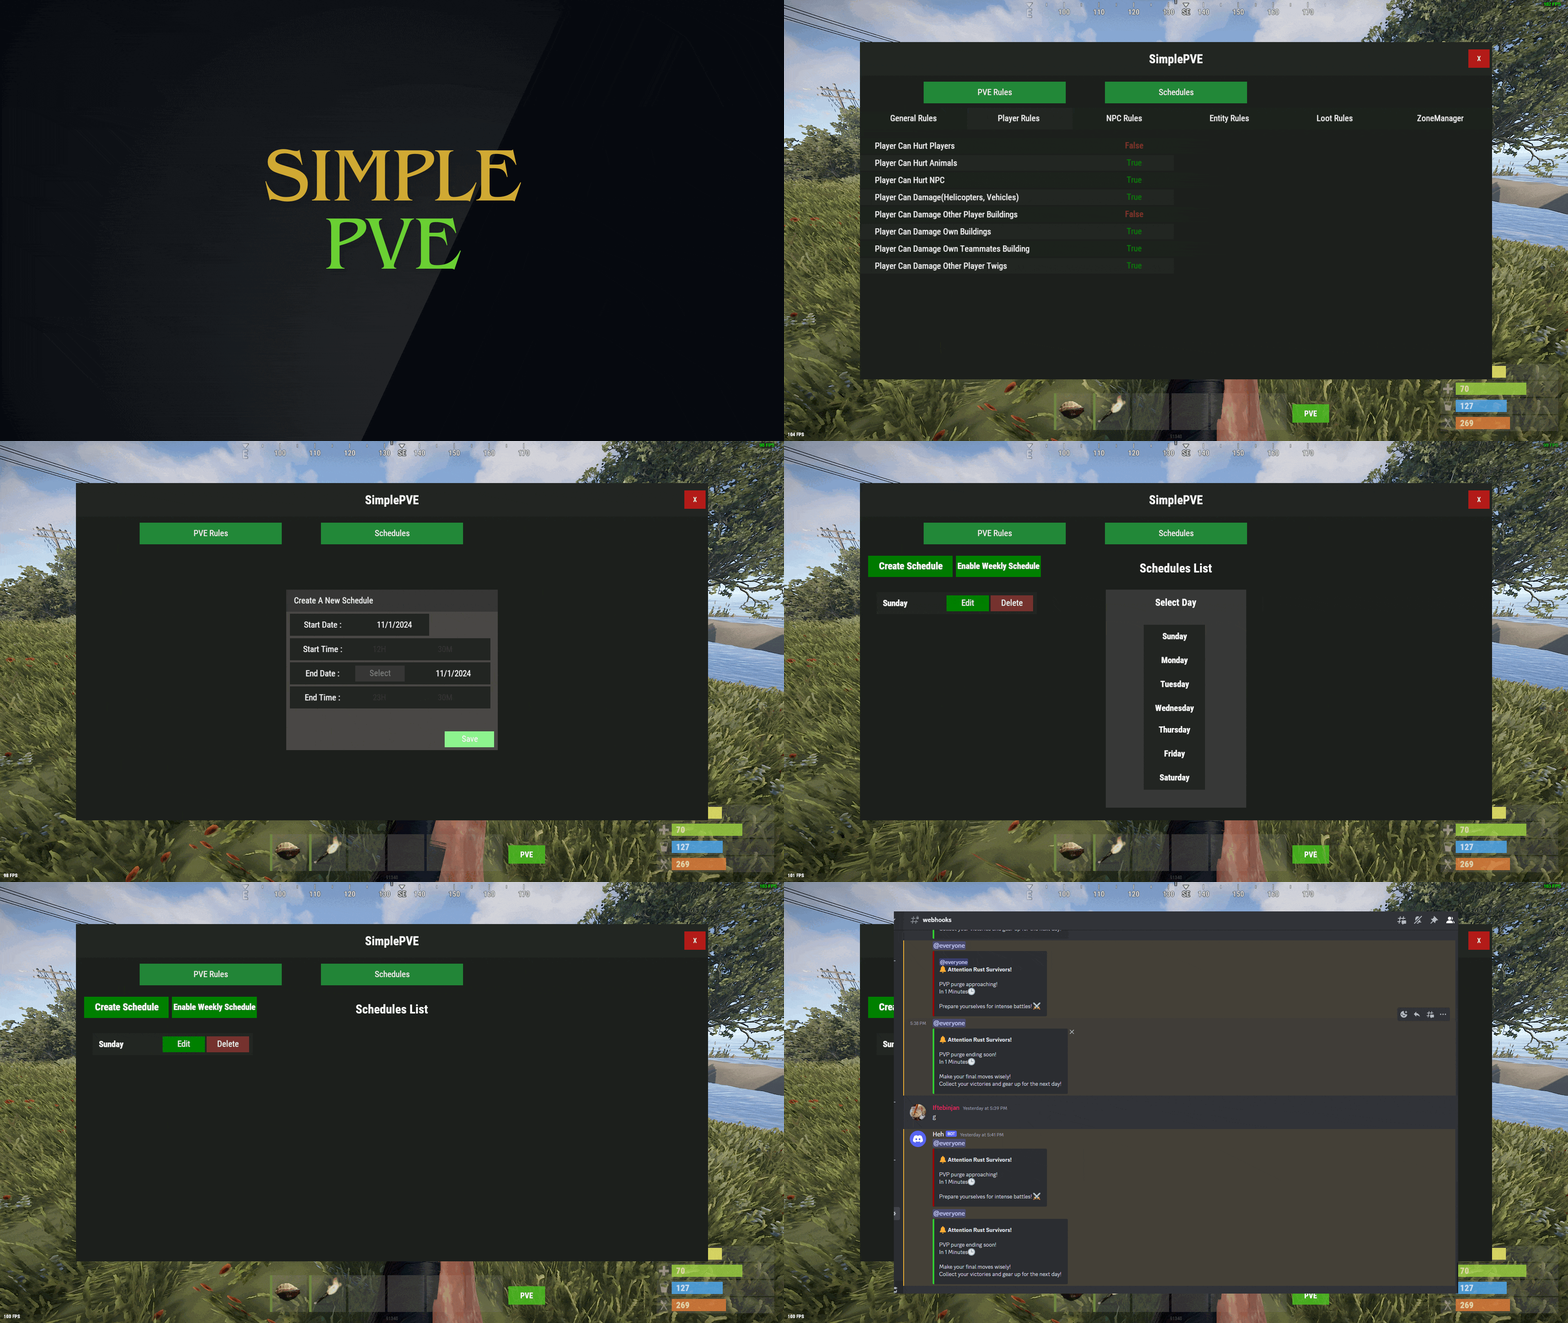

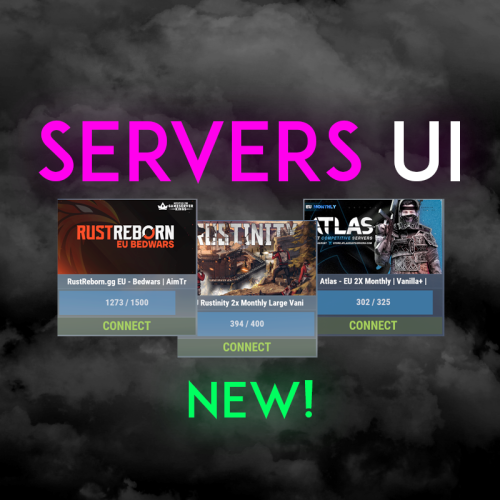

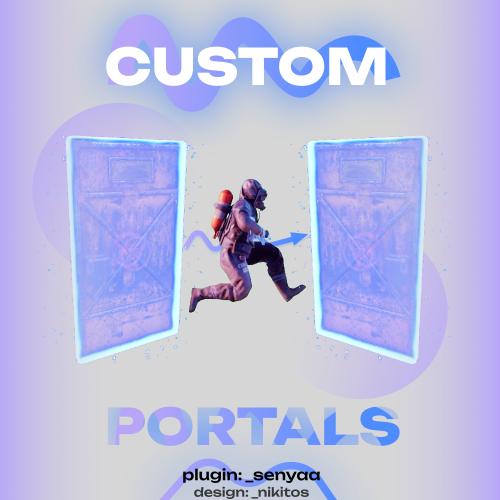
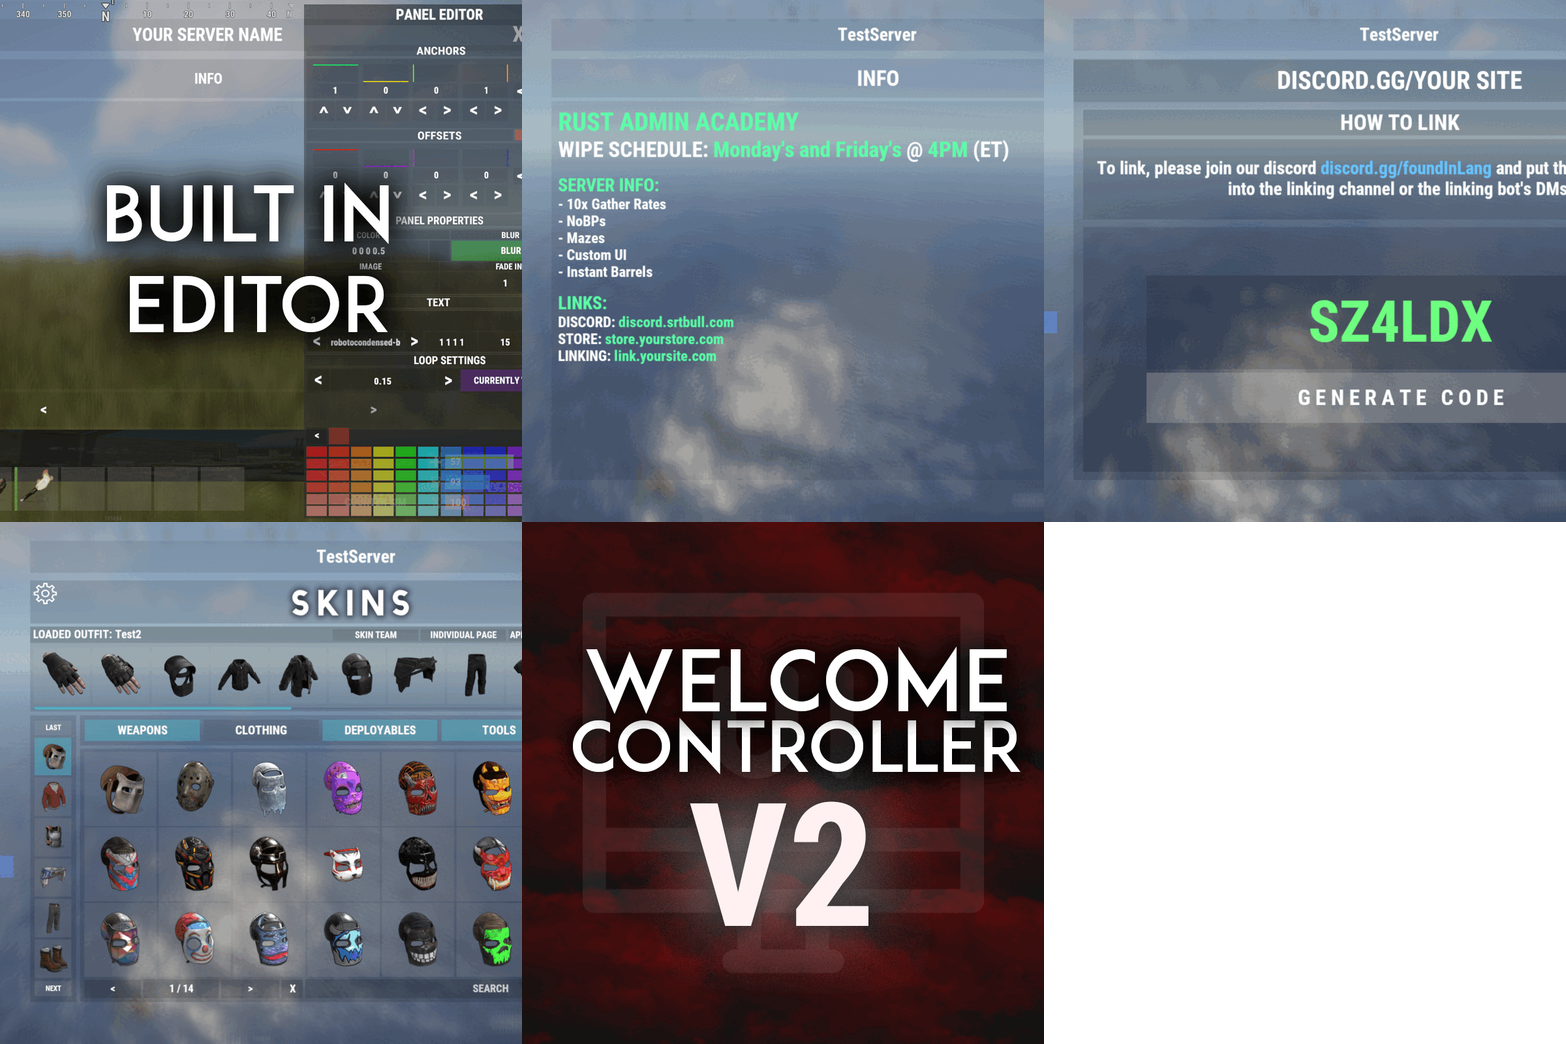
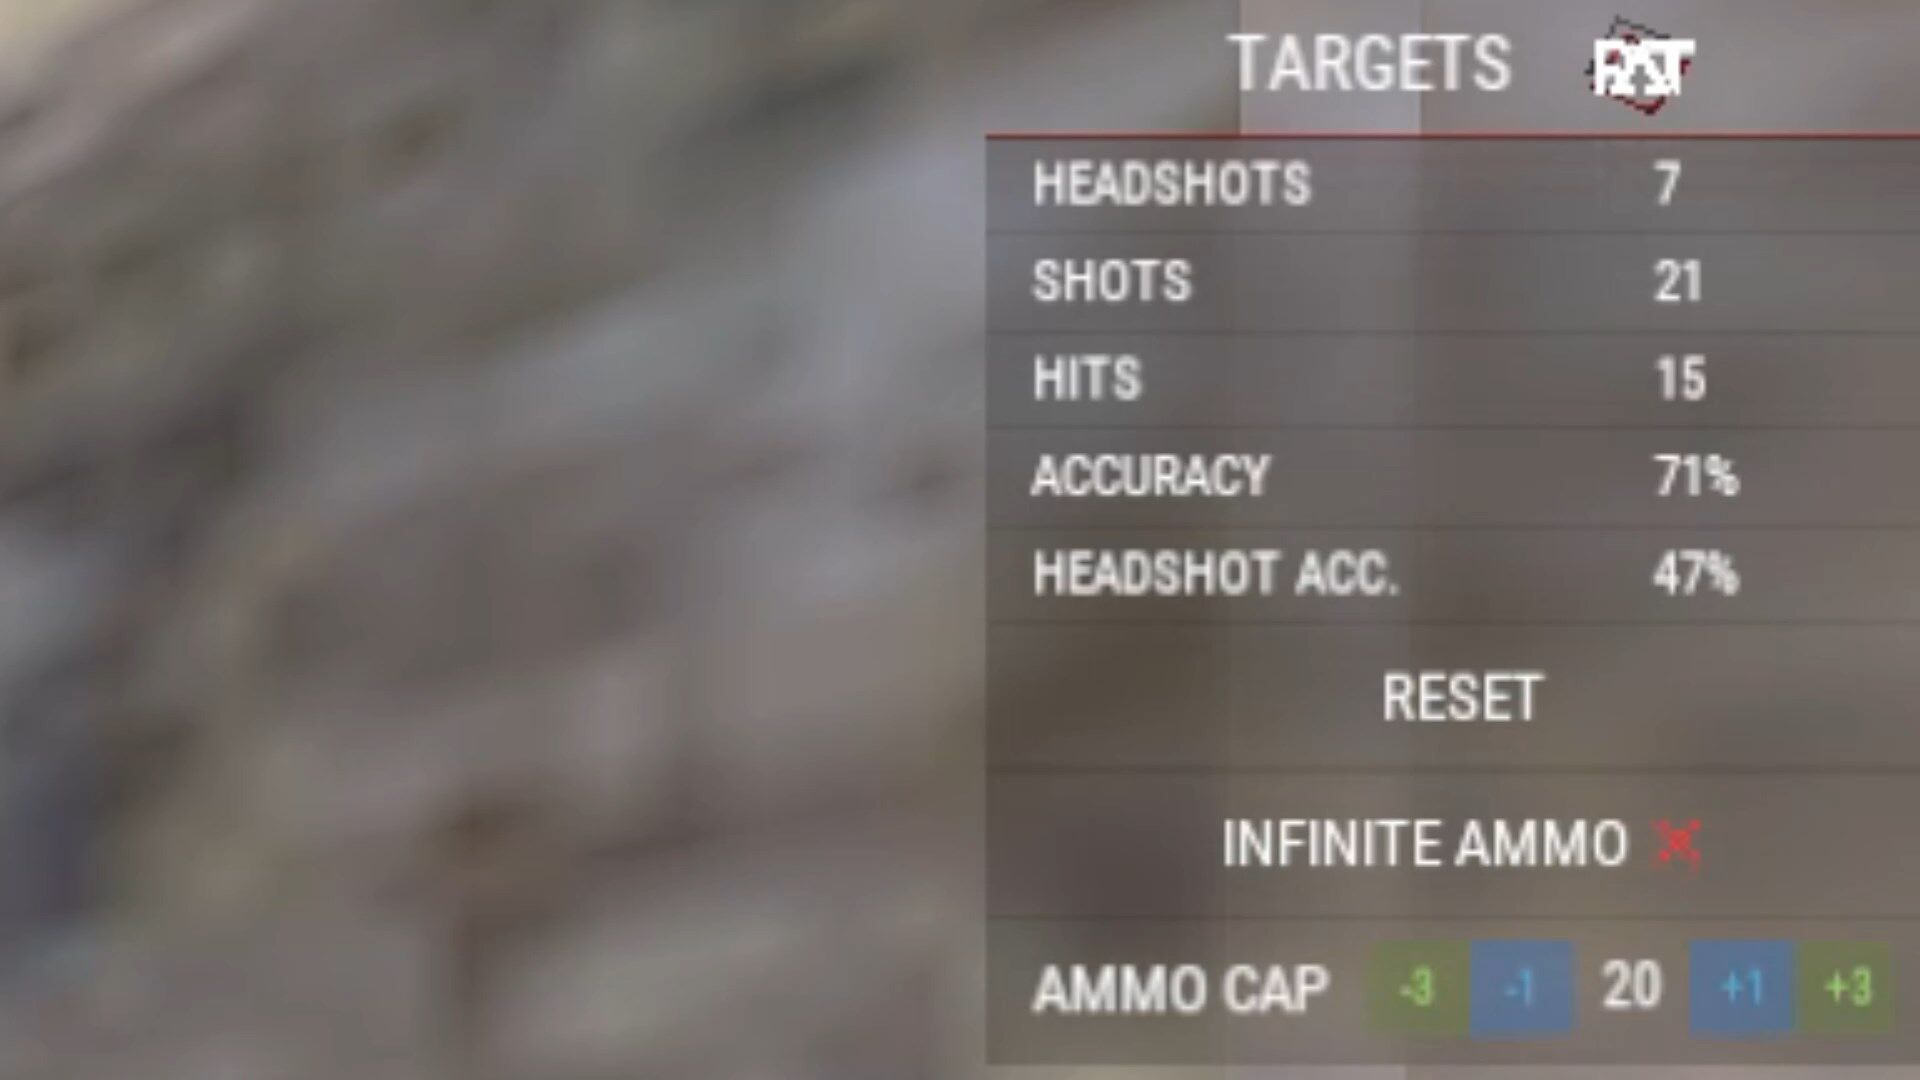


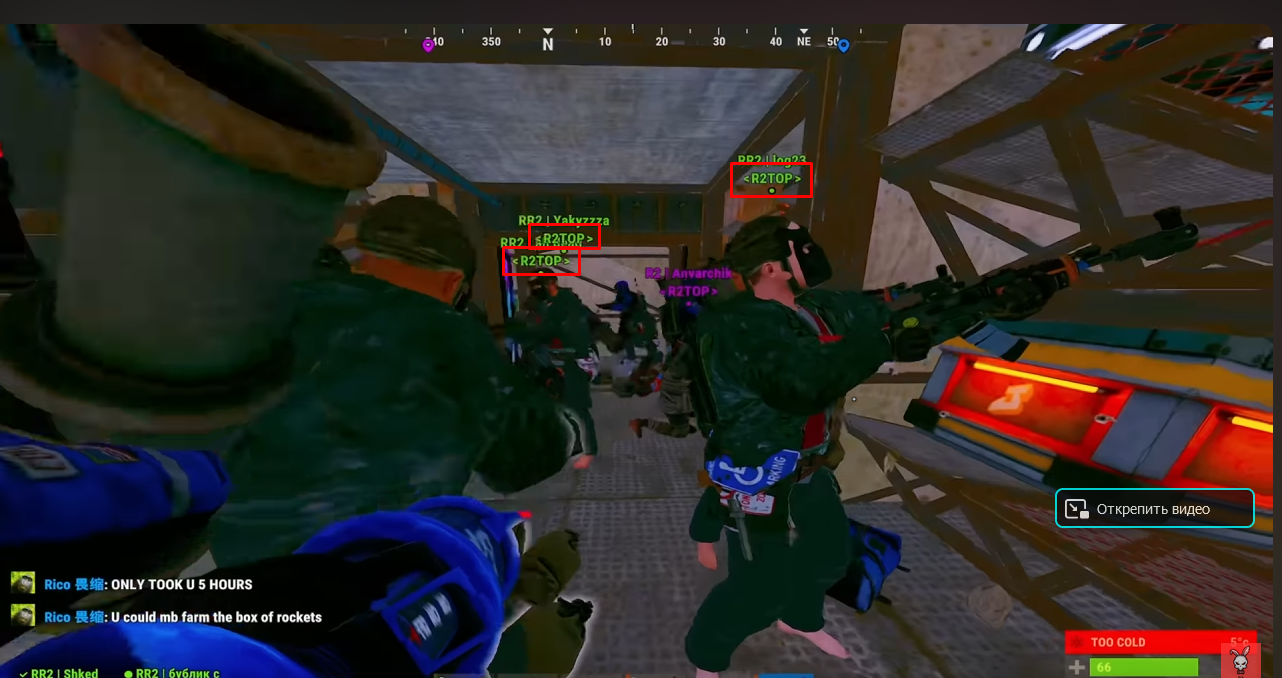




![More information about "Build Tools [grade/remove/skins]"](https://codefling.com/uploads/monthly_2024_02/v4final.thumb.gif.47c01c6bcae439a1dad6cea581e5ec41.gif)
