Search the Community
Showing results for tags 'spawn'.
-
Version 1.0.61
1,841 downloads
Having trouble fitting larger entities into your compound? By combining PlaceAnything with EntityScaleManager you can downsize big entities. Vehicles can be directly added to the player's inventory, allowing them to deploy the vehicles whenever needed. Vehicles can be picked up by players (optional). Deployable trees and bushes, perfect for pve servers! pre-configured data file with some trees and bushes Entities.json With the help of the CopyPaste plugin, you can sell pre-built bases for players to deploy. • How can I pick up items? Deployed structures can be picked up by hitting it with hammer. Items can be picked up only by owner. • How to upload custom icons? Custom icons can be uploaded with Steam workshop uploader. WorkshopUploader.zip original repository • How to use CopyPaste plugin with PlaceAnyting? In data file Entities.json, put 'copypaste/buildingName' instead of prefab path. • Where I can find list of all prefabs? Here is full updated list but not every prefab can be spawned from there and some of them you might not be able to destroy, I do not recommend testing this on live server. Commands (admin only) CHAT /gimme CONSOLE placeanything <steamid> "<item display name>" • Known issues and limitations - some prefabs cannot be damaged thus can be used to grief players. (recycler, slotmachine, test generator...etc) - hitting gambling wheel with hammer will make wheel disappear, game issue cant be fixed Please note that PlaceAnything is a simple plugin that only spawns entities, similar to using the 'spawn' command in the console. It does not manage the behavior of entities after they are spawned. If you are unsure about the functionality of a specific entity, spawn it in-game as an admin and test it yourself before making purchase Plugin comes with 19 pre-configured items. Use /gimme chat command in game to get those items for testing.$5.50 -
Version 2.1.0
19 downloads
LootSpawnerPlus is an advanced, performance-optimized Rust plugin designed to make loot spawning more dynamic and customizable. With this plugin, server admins can easily create and manage loot spawn points directly through a clean and intuitive user interface (UI). Whether you need random quantities, random intervals, or a combination of both, LootSpawnerPlus gives you full control with zero memory leaks and excellent performance. Key Features • Full UI Management: Manage all loot spawn configurations directly from the in-game UI. No need for complex commands or editing files manually! • Random Quantity & Interval: Choose whether your loot spawns at random quantities, random intervals, or both. Customize the behavior to suit your server's needs. • Easy Configuration: Spawn loot at specific locations and set timers and quantities, all with just a few clicks. • Performance Optimized: LootSpawnerPlus is designed with efficiency in mind, ensuring your server stays lag-free even with numerous spawn points. • Memory Leak-Free: Enjoy a smooth, stable experience with zero memory leaks. • Simple Command: Use the command /lootspawnerplus to access to the UI and manage all spawn settings. How It Works Once installed, admins can configure loot spawns using a highly intuitive UI system. Adjust settings like: • Spawn Name • Item Name • Position (X, Y, Z) • Quantity: Set a fixed amount or enable random quantities for a more dynamic loot experience. • Interval: Set a fixed spawn interval or enable random intervals for unpredictability. Why LootSpawnerPlus? • Flexibility: Control over both random intervals and quantities means you can fine-tune loot spawning to create the perfect gameplay experience. • Performance: The plugin is crafted with high performance in mind, ensuring that even with many loot spawns, server performance is never compromised. • No Memory Leaks: Say goodbye to memory leaks! LootSpawnerPlus ensures your server runs smoothly over time. Command /lootspawnerplus - Open the loot spawn UI and manage spawn points. Make loot management on your Rust server easier, more dynamic, and more efficient with LootSpawnerPlus! Example Config: { "Spawn1": { "Interval": 30.0, "IsEnabled": true, "IsRandomInterval": true, "IsRandomQuantity": false, "ItemName": "ammo.rifle", "Position": { "x": 0.0, "y": 0.0, "z": 0.0 }, "Quantity": 16, "RandomIntervalMax": 60.0, "RandomIntervalMin": 30.0, "RandomQuantityMax": 60, "RandomQuantityMin": 10, "SpawnName": "Spawn1" } }$14.99 -
Version 1.0.3
23 downloads
1: If the Where is my horse plugin is broken, you can now use the new Spawn Bike plugin instead 2: The plugin supports configuring via CONFIG and LANG 3: This plugin was written with the help of artificial intelligence. COMMAND /bike - Spawn Bike /motorbike - Spawn Motor Bike /motorbikesidecar - Spawn Motor Bike Side Car CONFIG { "Spawn": { "Distance": 3.0, "DisableDespawnTimer": false, "VehicleDespawnTimes": { "bike": 300, "motorbike": 600, "motorbike_sidecar": 900 } }, "Restrictions": { "AllowInsideBuilding": false }, "Vehicles": { "Types": { "bike": { "Command": "bike", "MaxVehicles": 10, "UnlimitedVehicles": false }, "motorbike": { "Command": "motorbike", "MaxVehicles": 5, "UnlimitedVehicles": false }, "motorbike_sidecar": { "Command": "motorbikesidecar", "MaxVehicles": 3, "UnlimitedVehicles": false } }, "ShowRemainingCount": true }, "Cooldown": { "Disabled": false, "VehicleCooldowns": { "bike": 30.0, "motorbike": 45.0, "motorbike_sidecar": 60.0 } }, "VehicleHealth": { "EnableCustomHealth": false, "VehicleHealthValues": { "bike": 250.0, "motorbike": 500.0, "motorbike_sidecar": 750.0 } } } LANG { "NoPermission": "<color=#FF4C4C>Error:</color> You don't have permission to spawn {0}!", "InsideBuilding": "<color=#FF4C4C>Warning:</color> You can't spawn a vehicle inside a building!", "Cooldown": "<color=#FFA500>Wait:</color> Please wait <color=#32CD32>({0})</color> seconds before spawning another {1}!", "MaxVehiclesReached": "<color=#FF4C4C>Limit Reached:</color> You have reached the maximum number of {0} allowed!", "RemainingVehicles": "<color=#32CD32>Remaining {0}:</color> You can spawn ({1}) more!", "DespawnTimer": "<color=#FFD700>Notice:</color> This {0} will despawn in <color=#FF6347>({1})</color> minutes!", "VehicleHealthSet": "<color=#32CD32>Health Set:</color> {0} spawned with ({1}) health points!" }$6.99 -
Version 1.0.6
531 downloads
This plugin will add multiple extended magazines to your server Description Facepunch just released the extended magazine into the game, which adds 25% to the capacity of ammo that it can originally hold With Custom Magazine's, you can now add several types of extended magazines! By default, you can now also add 50%, 75%, and even 100% capacity increases! At 100%, this will double any weapons capacity! You can change those capacity increase percentages in the configuration, remove them, or even add your own! You can configure spawning of these items in standard Rust crates! Console commands (RCON only) givemagazine {skinid} {steamid} - This is the console command to give an extended magazine from the plugin configuration with a Steam Workshop SkinID ({skinid}) to a player using their SteamID ({steamid}) Plugin Config en - example of plugin configuration in English ru - example of plugin configuration in Russian My Discord: KpucTaJl#8923 Join the Mad Mappers Discord here! Check out more of my work here!$10.00 -
Version 1.0.8
1,286 downloads
A plugin that spawns in NPC controlled RHIBS which act as stationary patrols in the ocean and along the coastline waiting and looking for players. Once engaged, players have the choice to attack them for loot or flee for their lives! Description This plugin will spawn RHIBs with NPCs on your server that will act as stationary patrols, they will remain in place and search for players that enter their sight, at which point they will pursue the player. The player has the option of escaping the patrol, or they can fight the NPCs and if successful and victorious, you can take the loot they hold in their boat! Should the player have a base on the beach, or decide to hide inside anywhere near the waters edge, the NPCs will not hesitate to pull out their rocket launchers and go to work trying to raid their defensive positions! In the configuration for the plugin you can create several patrol presets, each having their own population on the map. Adjust also the amount of NPCs in the boat, their clothing and weapons, all of their parameters for difficulty and challenge, as well as adjust and customize the loot table for each preset, including custom spawn locations for the stationary patrols. The best map for the plugin to work is a map with a lot of sea. I can recommend the maps of the Mad Mappers team developers.: Land Of Enmity Arhipelago Dependencies Required NpcSpawn Plugin Config en - example of plugin configuration in English ru - example of plugin configuration in Russian My Discord: KpucTaJl#8923 Join the Mad Mappers Discord here! Check out more of my work here!$30.00- 180 comments
- 4 reviews
-
- 6
-

-

-

-
- #boat
- #facepunch
- (and 15 more)
-
Version 1.0.6
26 downloads
Ready to elevate your modded Rust server by allowing players to spawn a variety of vehicles through chat commands? With this plugin, players gain the ability to spawn vehicles, you can use any vehicle prefab in the game that you want making exploration and transportation within the game effortlessly convenient. The plugin comes with optional restrictions to balance gameplay, including limits on the number of vehicles a player can have and cooldown timers and blocks to prevent spamming at certain timers or certain areas. Customization options are extensive, allowing server admins to adjust spawning methods and spawn distances, fuel amounts, and even specific permissions for different vehicles. Additionally, the plugin supports UI customization for a seamless integration with your server's interface. Whether for rapid movement across the map or just adding fun elements to your server, Vehicle Spawner ensures that your adventures in Rust are never a dull moment. Key Features Spawn any vehicle prefab in the game you can add or remove any that you want to the config. Limit the number of vehicles per player to maintain server balance. Customizable vehicle spawn settings, spawn method options, cooldowns and permissions. UI support for easy vehicle management for players, no commands needed. Special conditions for vehicle spawning, including safe zone, authorized, raid and combat block checks. Permissions vehiclespawner.use vehiclespawner.ui Key bind input BUTTON.FIRE_THIRD ( Middle mouse button ) Press/click it to toggle the Vehicle Menu UI on screen. Hold it down while menu is minimized to fully open it. Commands /vehiclemenu Allows players to toggle UI. /no <Config Chat Command> Allows players to remove a vehicle type by placing /no before the chat command from the config. /destroyall Allows player to remove all there vehicles at once. Default Configuration: Note: you can add as many vehicles as you want using the prefab path. { "MsgSettings": { "Message Icon SteamID": "76561197960839785", "Message Prefix": "[VehicleSpawner]", "Message Prefix Color": "#5af" }, "Prefabs": { "Attack Helicopter": { "AutoMount": false, "BlockButAllowInBuildingAuthorized": false, "BlockButAllowInSafeZone": false, "BlockInAuthorizedArea": true, "BlockInBuildingBlocked": true, "BlockInSafeZone": true, "BlockOnLand": false, "ChatCommands": [ "attack", "myattack", "attackheli", "myattackheli", "attackhelicopter", "myattackhelicopter", "atkheli", "atk", "myatk", "myatkheli" ], "CooldownTimer": 180.0, "DisableUIButton": false, "FuelAmount": 0, "LockFuel": false, "Permission": "vehiclespawner.attackhelicopter", "PrefabPath": "assets/content/vehicles/attackhelicopter/attackhelicopter.entity.prefab", "Rotation": { "x": 0.0, "y": 90.0, "z": 0.0 }, "SkySpawn": false, "SkySpawnHeight": 50.0, "SpawnDelay": 10.0, "SpawnDistance": 8.0, "SpawnHeight": 3.0, "SpawnOption": 1, "UseTracks": false }, "Balloon": { "AutoMount": false, "BlockButAllowInBuildingAuthorized": false, "BlockButAllowInSafeZone": false, "BlockInAuthorizedArea": true, "BlockInBuildingBlocked": true, "BlockInSafeZone": true, "BlockOnLand": false, "ChatCommands": [ "balloon", "myballoon", "hotairballoon", "myhotairballoon", "myhab", "hab" ], "CooldownTimer": 120.0, "DisableUIButton": false, "FuelAmount": 0, "LockFuel": false, "Permission": "vehiclespawner.balloon", "PrefabPath": "assets/prefabs/deployable/hot air balloon/hotairballoon.prefab", "Rotation": { "x": 0.0, "y": 90.0, "z": 0.0 }, "SkySpawn": false, "SkySpawnHeight": 50.0, "SpawnDelay": 10.0, "SpawnDistance": 12.0, "SpawnHeight": 3.0, "SpawnOption": 1, "UseTracks": false }, "Car": { "AutoMount": false, "BlockButAllowInBuildingAuthorized": false, "BlockButAllowInSafeZone": false, "BlockInAuthorizedArea": true, "BlockInBuildingBlocked": true, "BlockInSafeZone": true, "BlockOnLand": false, "ChatCommands": [ "sedan", "mysedan", "car", "mycar" ], "CooldownTimer": 180.0, "DisableUIButton": false, "FuelAmount": 0, "LockFuel": false, "Permission": "vehiclespawner.car", "PrefabPath": "assets/content/vehicles/sedan_a/sedantest.entity.prefab", "Rotation": { "x": 0.0, "y": 0.0, "z": 0.0 }, "SkySpawn": false, "SkySpawnHeight": 50.0, "SpawnDelay": 10.0, "SpawnDistance": 6.0, "SpawnHeight": 3.0, "SpawnOption": 1, "UseTracks": false }, "Chinook": { "AutoMount": false, "BlockButAllowInBuildingAuthorized": false, "BlockButAllowInSafeZone": false, "BlockInAuthorizedArea": true, "BlockInBuildingBlocked": true, "BlockInSafeZone": true, "BlockOnLand": false, "ChatCommands": [ "chinook", "mychinook", "ch47", "mych47" ], "CooldownTimer": 180.0, "DisableUIButton": false, "FuelAmount": 0, "LockFuel": false, "Permission": "vehiclespawner.chinook", "PrefabPath": "assets/prefabs/npc/ch47/ch47.entity.prefab", "Rotation": { "x": 0.0, "y": 240.0, "z": 0.0 }, "SkySpawn": false, "SkySpawnHeight": 50.0, "SpawnDelay": 10.0, "SpawnDistance": 10.0, "SpawnHeight": 3.0, "SpawnOption": 1, "UseTracks": false }, "Horse": { "AutoMount": false, "BlockButAllowInBuildingAuthorized": false, "BlockButAllowInSafeZone": false, "BlockInAuthorizedArea": true, "BlockInBuildingBlocked": true, "BlockInSafeZone": true, "BlockOnLand": false, "ChatCommands": [ "horse", "myhorse" ], "CooldownTimer": 180.0, "DisableUIButton": false, "FuelAmount": 0, "LockFuel": false, "Permission": "vehiclespawner.horse", "PrefabPath": "assets/rust.ai/nextai/testridablehorse.prefab", "Rotation": { "x": 0.0, "y": 0.0, "z": 0.0 }, "SkySpawn": false, "SkySpawnHeight": 50.0, "SpawnDelay": 10.0, "SpawnDistance": 5.0, "SpawnHeight": 3.0, "SpawnOption": 1, "UseTracks": false }, "Minicopter": { "AutoMount": false, "BlockButAllowInBuildingAuthorized": false, "BlockButAllowInSafeZone": false, "BlockInAuthorizedArea": true, "BlockInBuildingBlocked": true, "BlockInSafeZone": true, "BlockOnLand": false, "ChatCommands": [ "mini", "mymini", "minicopter", "myminicopter" ], "CooldownTimer": 0.0, "DisableUIButton": false, "FuelAmount": 0, "LockFuel": false, "Permission": "vehiclespawner.minicopter", "PrefabPath": "assets/content/vehicles/minicopter/minicopter.entity.prefab", "Rotation": { "x": 0.0, "y": 90.0, "z": 0.0 }, "SkySpawn": false, "SkySpawnHeight": 50.0, "SpawnDelay": 0.0, "SpawnDistance": 5.0, "SpawnHeight": 3.0, "SpawnOption": 1, "UseTracks": false }, "RHIB": { "AutoMount": false, "BlockButAllowInBuildingAuthorized": false, "BlockButAllowInSafeZone": false, "BlockInAuthorizedArea": true, "BlockInBuildingBlocked": true, "BlockInSafeZone": true, "BlockOnLand": true, "ChatCommands": [ "rhib", "myrhib", "mybigboat", "bigboat" ], "CooldownTimer": 10.0, "DisableUIButton": false, "FuelAmount": 0, "LockFuel": false, "Permission": "vehiclespawner.rhib", "PrefabPath": "assets/content/vehicles/boats/rhib/rhib.prefab", "Rotation": { "x": 0.0, "y": 0.0, "z": 0.0 }, "SkySpawn": false, "SkySpawnHeight": 50.0, "SpawnDelay": 5.0, "SpawnDistance": 10.0, "SpawnHeight": 3.0, "SpawnOption": 1, "UseTracks": false }, "Row Boat": { "AutoMount": false, "BlockButAllowInBuildingAuthorized": false, "BlockButAllowInSafeZone": false, "BlockInAuthorizedArea": true, "BlockInBuildingBlocked": true, "BlockInSafeZone": true, "BlockOnLand": true, "ChatCommands": [ "rowboat", "row", "myrow", "myrowboat", "boat", "myboat" ], "CooldownTimer": 10.0, "DisableUIButton": false, "FuelAmount": 0, "LockFuel": false, "Permission": "vehiclespawner.rowboat", "PrefabPath": "assets/content/vehicles/boats/rowboat/rowboat.prefab", "Rotation": { "x": 0.0, "y": 0.0, "z": 0.0 }, "SkySpawn": false, "SkySpawnHeight": 50.0, "SpawnDelay": 3.0, "SpawnDistance": 9.0, "SpawnHeight": 3.0, "SpawnOption": 1, "UseTracks": false }, "Scrap Transport Helicopter": { "AutoMount": false, "BlockButAllowInBuildingAuthorized": false, "BlockButAllowInSafeZone": false, "BlockInAuthorizedArea": true, "BlockInBuildingBlocked": true, "BlockInSafeZone": true, "BlockOnLand": false, "ChatCommands": [ "scrap", "myscrap", "heli", "myheli", "helicopter", "myhelicopter", "scrappy", "myscrappy", "scraptransport" ], "CooldownTimer": 10.0, "DisableUIButton": false, "FuelAmount": 0, "LockFuel": false, "Permission": "vehiclespawner.scraptransporthelicopter", "PrefabPath": "assets/content/vehicles/scrap heli carrier/scraptransporthelicopter.prefab", "Rotation": { "x": 0.0, "y": 180.0, "z": 0.0 }, "SkySpawn": false, "SkySpawnHeight": 50.0, "SpawnDelay": 5.0, "SpawnDistance": 8.0, "SpawnHeight": 3.0, "SpawnOption": 1, "UseTracks": false } }, "Settings": { "AmountOfPrefabsAllowedAtOnce": 2, "BlockNearPlayer": { "IgnoreTeam": true, "PlayerDistance": 5.0, "UsePlayerDistance": true }, "DestroyOnDeath": true, "DestroyOnDisconnect": true, "GlobalSpawnCooldownTimer": 10.0, "UseCombatBlocked": true, "UseRaidBlocked": true }, "UiPermission": "vehiclespawner.ui", "UsePermission": "vehiclespawner.use" } PREVIEW / TUTORIAL VIDEOS COMING SOON!$5.00- 10 comments
-
- #vehicles
- #minicopter
-
(and 4 more)
Tagged with:
-
Version 1.1.7
242 downloads
Spawn Everything - Spawn Vehicle, Karuza Vehicle, Deployables, Bases, Item, Recycler, Crates, Custom entity, Execute Commands, Loots, Pickup Entity, Pickup Vehicles, and much more... Spawn Everything - Spawn all entity, Bases, Item, loot, Pickup Entity, Pickup Vehicles, allows you to spawn any entity or execute commands, all by using an item, pickup entity or vehicles, and much more. It is already configured to generate vehicles by default, including custom vehicles from Karuza, Crates, Locked Crate, Deployables, Casino items and much more. Through the configuration you can add other entities that can be generated, just enter a prefab name, or a command if you do not have a prefab name, and set the skin of the item that will be used. It also allows you to limit the spawn, for example if you do not have building permits, avoid spawning in water or allow it only in water, also being able to choose the minimum depth of the water, allow or not spawn inside buildings, monuments and more. It is also possible to pick up the generated entity/vehicles, using the hammer. You can add items to the in-game shop, loot, or wherever you want. Spawn Bases using copy paste or other plugin. Compatible with Oxide/Umod and Carbon. ALL AVAILABLE ENTITIES Here you can find a file with all the entities currently available and the various information on the item to create to spawn the entity ALL AVAILABLE ENTITIES PLAYLIST - VIDEO EXAMPLE Below you can see an example video on how to use the plugin. -------------------- SOME EXAMPLES OF USE: Some examples of how the plugin works and the entities that can be spawned by default. Vehicle Spawn Spawn Custom Vehicles by Karuza Pickup Entity Pickup Vehicle Pickup Karuza Vehicle Spawn Recycler Spawn NPC vehicles, such as Bradley, Patrol helicopter, CH47 (Chinook 47) Spawn loot boxes, such as the: Locked Crate, Oil Rig Locked Crate, Bradley APC Crate, Patrol Helicopter Crate, Elite Tier Crate, Elite Tier Crate - Underwater Labs. Crater for mines, to place mines where you want. Survey Crater - For Mining Quarry, Survey Crater Oil - For Pump Jack. Spawn Bases using copy paste or other plugin Spawn Casino entities Spawn custom entities And much more PERMISSIONS: spawneverything.admin – Allows the use of commands reserved for admins, such as giving items for entity spawning to players. spawneverything.fuel.unlimited – If the entity to be spawned is a vehicle, the vehicle will not need fuel to run. The same can be achieved via the configuration file, for each individual entity. spawneverything.spawn.not_enabled – Allows you to spawn entities that have not been enabled in the configuration file. spawneverything.spawn.bypass_building_privilege – Allows you to spawn entities even if you don't have building permissions, for entities that require building permissions to spawn. spawneverything.spawn.bypass_tc – Allows entities to be spawned, for entities that cannot be spawned near any Tool Cupboard (TC). spawneverything.spawn.bypass_monument – Allows entities to be spawned in monuments, for entities that cannot be spawned in monuments. spawneverything.spawn.bypass_road_rails – Allows entities to be spawned to the road/rails, for entities that cannot be spawned to the road/rails. spawneverything.spawn.bypass_only_outside – Allows entities to spawn inside buildings, for entities that cannot be spawned inside buildings. spawneverything.spawn.bypass_water – Allows entities to spawn in water, for entities that cannot be spawned in water. COMMANDS FOR ADMIN Commands can be typed in chat (by putting the / character in front of the command), from console or Rcon. To use these commands you must have the role: spawneverything.admin /se <skinID> <quantity> — Allows you to give the item to spawn the entity, to yourself. You need to pass these parameters: skinID of the configured entity The quantity of items. /se <skinID> <quantity> <steamID> — Allows you to give the item to spawn the entity, to a player. You need to pass these parameters: skinID of the configured entity The quantity of items. The SteamID of the player to give the items to Commands can be added or modified in the configuration file: /oxide/config/SpawnEverything.json ENTITY PICK UP (BETA VERSION) You can collect the generated entity using the hammer. By collecting the entity, you will be given back the item for the entity's spawn. To collect the entity you need to hold down the SHIFT key and hit the entity with the hammer. You can only collect entities that have been enabled for collection in the configuration file. NB: This is an early version of this feature and is still in beta. At the moment if you pick up the entity, you will lose any loot contained in it, so make sure to remove any loot before picking up the entity. With the next update, you will be able to leave the loot inside the entity and automatically find it with the next spawn of the entity. USE VIA SHOP, LOOT. VENDING MACHINE The plugin can use any item for entity spawning. You need to generate an item with a certain skin id, to get the item that allows the entity to spawn. The name of the item to use and the skin id are present in the configuration file: Item name (That will be used to spawn the entity. Default grenade.flashbang) SkinID You can add these items to the in-game Shop, to the loot, in the Vending Machine or wherever you want, very easily. For example, this item spawns a minicopter: Item: grenade.flashbang | SkinID: 3366887420 or ItemID: -936921910 | SkinID: 3366887420 CONFIGURATION The settings and options can be configured in the SpawnEverything.json under the config directory. The use of an editor and validator is recommended to avoid formatting issues and syntax errors. { "TimeZone": "Europe/London", "Chat Command": [ "se", "spawneverything", "spawner" ], "ChatPrefix": "SpawnEverything", "Add Karuza Custom Vehicles to your configuration. (Default: FALSE)": false, "Entity Drop Item": [ { "Enabled": false, "DisplayName": "Spawn Minicopter", "Description": "Spawn Minicopter", "Item name (That will be used to spawn the entity. Default grenade.flashbang)": "grenade.flashbang", "Spawn PrefabName": "assets/content/vehicles/minicopter/minicopter.entity.prefab", "SkinID": 3366887420, "Spawn Offset Y": 0.0, "Spawn Rotate Y": 0.0, "Entity Type. Default Rust": "Rust", "Can Pick Up Entity. Default false": true, "Custom Radius Check": 0.0, "Execute Commands": [], "Execute Commands As Admin": false, "Spawn Cooldown (seconds)": 0, "Requires Building Privilege to Spawn Entity. (Default: TRUE)": true, "Minimum spawn distance from any Tool Cupboard (TC). [0 = Disabled] (Default: 0)": 0, "Allow Spawn in Monuments. (Default: FALSE)": false, "Disable Spawn in Monuments and Monuments radius. (Default: FALSE)": false, "Disable Spawn On Road/Rails. (Default: FALSE)": false, "Minimum spawn distance from Road/Rails. (Default: 0)": 0, "Spawn Only Outside": true, "Dont Spawn In Water": true, "Requires Water": false, "Minimum Water Depth": 0.0, "Armored": false, "Unlimited Fuel": false, "Fuel Amount": 0 }, { "Enabled": false, "DisplayName": "Spawn Attack Helicopter", "Description": "Spawn Attack Helicopter", "Item name (That will be used to spawn the entity. Default grenade.flashbang)": "grenade.flashbang", "Spawn PrefabName": "assets/content/vehicles/attackhelicopter/attackhelicopter.entity.prefab", "SkinID": 3366893095, "Spawn Offset Y": 0.0, "Spawn Rotate Y": 0.0, "Entity Type. Default Rust": "Rust", "Can Pick Up Entity. Default false": true, "Custom Radius Check": 0.0, "Execute Commands": [], "Execute Commands As Admin": false, "Spawn Cooldown (seconds)": 0, "Requires Building Privilege to Spawn Entity. (Default: TRUE)": true, "Minimum spawn distance from any Tool Cupboard (TC). [0 = Disabled] (Default: 0)": 0, "Allow Spawn in Monuments. (Default: FALSE)": false, "Disable Spawn in Monuments and Monuments radius. (Default: FALSE)": false, "Disable Spawn On Road/Rails. (Default: FALSE)": false, "Minimum spawn distance from Road/Rails. (Default: 0)": 0, "Spawn Only Outside": true, "Dont Spawn In Water": true, "Requires Water": false, "Minimum Water Depth": 0.0, "Armored": false, "Unlimited Fuel": false, "Fuel Amount": 0 }, { "Enabled": false, "DisplayName": "Spawn Scrap Transport Helicopter", "Description": "Spawn Scrap Transport Helicopter", "Item name (That will be used to spawn the entity. Default grenade.flashbang)": "grenade.flashbang", "Spawn PrefabName": "assets/content/vehicles/scrap heli carrier/scraptransporthelicopter.prefab", "SkinID": 3366892516, "Spawn Offset Y": 0.0, "Spawn Rotate Y": 0.0, "Entity Type. Default Rust": "Rust", "Can Pick Up Entity. Default false": true, "Custom Radius Check": 0.0, "Execute Commands": [], "Execute Commands As Admin": false, "Spawn Cooldown (seconds)": 0, "Requires Building Privilege to Spawn Entity. (Default: TRUE)": true, "Minimum spawn distance from any Tool Cupboard (TC). [0 = Disabled] (Default: 0)": 0, "Allow Spawn in Monuments. (Default: FALSE)": false, "Disable Spawn in Monuments and Monuments radius. (Default: FALSE)": false, "Disable Spawn On Road/Rails. (Default: FALSE)": false, "Minimum spawn distance from Road/Rails. (Default: 0)": 0, "Spawn Only Outside": true, "Dont Spawn In Water": true, "Requires Water": false, "Minimum Water Depth": 0.0, "Armored": false, "Unlimited Fuel": false, "Fuel Amount": 0 }, { "Enabled": false, "DisplayName": "Spawn Hot Air Balloon", "Description": "Spawn Hot Air Balloon", "Item name (That will be used to spawn the entity. Default grenade.flashbang)": "grenade.flashbang", "Spawn PrefabName": "assets/prefabs/deployable/hot air balloon/hotairballoon.prefab", "SkinID": 3366893631, "Spawn Offset Y": 0.0, "Spawn Rotate Y": 0.0, "Entity Type. Default Rust": "Rust", "Can Pick Up Entity. Default false": true, "Custom Radius Check": 0.0, "Execute Commands": [], "Execute Commands As Admin": false, "Spawn Cooldown (seconds)": 0, "Requires Building Privilege to Spawn Entity. (Default: TRUE)": true, "Minimum spawn distance from any Tool Cupboard (TC). [0 = Disabled] (Default: 0)": 0, "Allow Spawn in Monuments. (Default: FALSE)": false, "Disable Spawn in Monuments and Monuments radius. (Default: FALSE)": false, "Disable Spawn On Road/Rails. (Default: FALSE)": false, "Minimum spawn distance from Road/Rails. (Default: 0)": 0, "Spawn Only Outside": true, "Dont Spawn In Water": true, "Requires Water": false, "Minimum Water Depth": 0.0, "Armored": false, "Unlimited Fuel": false, "Fuel Amount": 0 }, { "Enabled": false, "DisplayName": "Spawn Armored Hot Air Balloon", "Description": "Spawn Armored Hot Air Balloon", "Item name (That will be used to spawn the entity. Default grenade.flashbang)": "grenade.flashbang", "Spawn PrefabName": "assets/prefabs/deployable/hot air balloon/hotairballoon.prefab", "SkinID": 3366893925, "Spawn Offset Y": 0.0, "Spawn Rotate Y": 0.0, "Entity Type. Default Rust": "Rust", "Can Pick Up Entity. Default false": true, "Custom Radius Check": 0.0, "Execute Commands": [], "Execute Commands As Admin": false, "Spawn Cooldown (seconds)": 0, "Requires Building Privilege to Spawn Entity. (Default: TRUE)": true, "Minimum spawn distance from any Tool Cupboard (TC). [0 = Disabled] (Default: 0)": 0, "Allow Spawn in Monuments. (Default: FALSE)": false, "Disable Spawn in Monuments and Monuments radius. (Default: FALSE)": false, "Disable Spawn On Road/Rails. (Default: FALSE)": false, "Minimum spawn distance from Road/Rails. (Default: 0)": 0, "Spawn Only Outside": true, "Dont Spawn In Water": true, "Requires Water": false, "Minimum Water Depth": 0.0, "Armored": true, "Unlimited Fuel": false, "Fuel Amount": 0 }, { "Enabled": false, "DisplayName": "Spawn Kayak", "Description": "Spawn Kayak", "Item name (That will be used to spawn the entity. Default grenade.flashbang)": "grenade.flashbang", "Spawn PrefabName": "assets/content/vehicles/boats/kayak/kayak.prefab", "SkinID": 3366894316, "Spawn Offset Y": 0.0, "Spawn Rotate Y": 0.0, "Entity Type. Default Rust": "Rust", "Can Pick Up Entity. Default false": true, "Custom Radius Check": 0.0, "Execute Commands": [], "Execute Commands As Admin": false, "Spawn Cooldown (seconds)": 0, "Requires Building Privilege to Spawn Entity. (Default: TRUE)": true, "Minimum spawn distance from any Tool Cupboard (TC). [0 = Disabled] (Default: 0)": 0, "Allow Spawn in Monuments. (Default: FALSE)": false, "Disable Spawn in Monuments and Monuments radius. (Default: FALSE)": false, "Disable Spawn On Road/Rails. (Default: FALSE)": false, "Minimum spawn distance from Road/Rails. (Default: 0)": 0, "Spawn Only Outside": true, "Dont Spawn In Water": false, "Requires Water": true, "Minimum Water Depth": 0.5, "Armored": false, "Unlimited Fuel": false, "Fuel Amount": 0 }, ........................................ ], "VersionNumber": { "Major": 1, "Minor": 1, "Patch": 5 } } TimeZone: -- Default: Europe/London Chat Command: -- Here you can add, edit or delete Commands can be typed in chat (by putting the / character in front of the command), or from console. ChatPrefix: -- Chat message prefix. Show Pick Up Entity Confirm Dialog: — If enabled, show a confirmation dialog when you want to collect the entity for added security and to avoid unintentional errors. Default: TRUE Add Karuza Custom Vehicles to your configuration. (Default: FALSE): -- If set to TRUE, adds all Karuza custom vehicles to the configuration. Warning: once all vehicles are added to the configuration, they cannot be removed by setting the property to FALSE, in which case you will have to delete them manually. Default: FALSE SPAWNABLE ENTITY: ITEM CONFIGURATION Here you will insert all the items with their configurations for the spawn of any entity. Enabled: -- If set to FALSE, the entity cannot be spawned. You can bypass this check with the permission: spawneverything.spawn.not_enabled DisplayName: -- The name of the Item that the player will see when he clicks on it with the mouse. Description: -- A description of the entity that will be spawned. It has no effect on the player's Item, it is just for internal use to remind you what this Item does. Item name (That will be used to spawn the entity. Default grenade.flashbang): -- Here you need to specify the name of the item that will be used to spawn this entity. Spawn PrefabName: -- Here you enter the name of the Prefab that will be generated. It is not mandatory, you can not enter the Prefab Name and instead execute commands that you can define later in the configuration. SkinID: -- Here you enter the SkinID that will be applied to the item. Based on the SkinID, a different Item will be generated for the spawn of different entities. You can use existing SkinIDs on the Steam Workshop or create your own Skin. Entity Type -- This field is used by the plugin to understand if it is a Rust entity or an entity generated by another plugin. If you do not know what to enter, leave it as default: Rust Can Pick Up Entity. Default false -- Here you can decide whether the entity can be picked up with the hammer or not. It is recommended to disable picking for all items that generate Loot, to avoid abuse. Spawn Offset Y: -- Here you can specify a height to add relative to the entity's spawn point. For example, add the spawn higher than the ground or water. Spawn Rotate Y -- Here you can define the rotation to add to the spawned entity. Custom Radius Check -- Each spawn checks if there are entities that collide and the radius, within which to check, is automatically determined based on the size of the entity. But in some cases it is necessary to define a custom radius. Here you can decide the radius within which to check if there are entities that collide with the spawn. Execute Commands: -- Here you can enter 1 or more commands that will be executed when the Item is launched. You can use some placeholders that can be passed to the commands %%msg%%: This placeholder can be used to send a message to the player, here is an example command: "%%msg%% test command": This will send a message to the player with the text: "test command" "%%msg%% %%steamid%%": This will send a message to the player with the text: player steamID %%steamid%%: This placeholder is used to insert the player's steamID into the command. %%username%%: This placeholder is used to insert the player username into the command. %%displayName%%: This placeholder is used to insert the player display name (include clan tag) into the command. %%spawnCoordinateX%%: This placeholder is used to insert the spawn coordinate X into the command. %%spawnCoordinateY%%: This placeholder is used to insert the spawn coordinate Y into the command. %%spawnCoordinateZ%%: This placeholder is used to insert the spawn coordinate Z into the command. %%spawnRotationX%%: This placeholder is used to insert the spawn rotation X into the command. %%spawnRotationY%%: This placeholder is used to insert the spawn rotation Y into the command. %%spawnRotationZ%%: This placeholder is used to insert the spawn rotation Z into the command. %%mapGrid%%: This placeholder is used to insert the map grid into the command. %%mapGridLetter%%: This placeholder is used to insert the map grid letter into the command. %%mapGridNumber%%: This placeholder is used to insert the map grid number into the command. -------------------- Here are some possible command examples: "deposit %%steamid%% 1000": Will deposit 1000 RP into the player's account (Economics plugin) "inventory.giveto %%steamid%% "short name" "amount" ": This will send a certain amount of items to the player. Execute Commands As Admin: -- If set to TRUE, runs the command as Admin. Useful for running commands that require server-side Admin permissions. Default: FALSE Spawn Cooldown (seconds): -- Sets a wait time before the entity is spawned, once the item is thrown. Spawn Only Outside: -- If set to TRUE, the entity can only spawn outside of buildings or on the roof. It cannot spawn inside the building. Useful for vehicles or large entities, to avoid them getting stuck inside the base. Default: TRUE. You can bypass this check with the permission: spawneverything.spawn.bypass_only_outside Requires Building Privilege to Spawn Entity: -- If set to TRUE, building permissions will be required to spawn an entity. Default: TRUE. You can bypass this check with the permission: spawneverything.spawn.bypass_building_privilege Minimum spawn distance from any Tool Cupboard (TC). [0 = Disabled] -- Minimum spawn distance from any Tool Cupboard (TC). [0 = Disabled]. Default: 0. You can bypass this check with the permission: spawneverything.spawn.bypass_tc Allow Spawn in Monuments: -- If set to FALSE, the entity cannot be spawned inside the monument, but can be spawned outside the monument, within the radius of the monument (Radius means the red radius visible when for example trying to build near a monument). Default: FALSE. You can bypass this check with the permission: spawneverything.spawn.bypass_monument Disable Spawn in Monuments and Monuments radius: -- If set to true, the entity cannot be spawned inside the monument and outside the monument, within the radius of the monument (Radius means the red radius visible when for example trying to build near a monument). Default: FALSE. You can bypass this check with the permission: spawneverything.spawn.bypass_monument Disable Spawn On Road/Rails -- Disable entity spawn on the road/rails. Default: FALSE. You can bypass this check with the permission: spawneverything.spawn.bypass_road_rails Minimum spawn distance from Road/Rails -- Minimum distance from the road/rails for the entity to spawn. Default: 0. You can bypass this check with the permission: spawneverything.spawn.bypass_road_rails Dont Spawn In Water: -- If set to TRUE, the entity cannot be spawned in water. Useful for vehicles that cannot go in water. Warning: There is one exception. In very shallow water, entities can still be spawned, for example near the coast. The water must not be deeper than 0.5 meters. Default: FALSE. You can bypass this check with the permission: spawneverything.spawn.bypass_water Requires Water: -- If set to TRUE, the entity can only be spawned in water, useful for vehicles that can only operate in water, such as boats. Default: FALSE Minimum Water Depth: -- If the entity can only be spawned in water, you can decide the minimum depth of the water. Useful to avoid spawning large entities in very shallow water so they do not get stuck. Default: 0 Meters = Any depth. The value cannot be negative. Armored: -- There are entities that have the same Prefab Name, but 1 of the 2 can be generated with armor. In this case, you can decide which entity should have armor, For example Armored Hot Air Balloon. Unlimited Fuel: -- If the entity is a vehicle, you can choose to spawn the entity with unlimited fuel. This configuration does not apply to Karuza's custom vehicles. You can bypass this check with the permission: spawneverything.fuel.unlimited Fuel Amount: -- If the entity is a vehicle, you can decide how much fuel the entity will spawn with. Default: 0 fuel. You can bypass this check with the permission: spawneverything.fuel.unlimited NB: At least 1 of the 2 fields between Spawn PrefabName and Execute Commands is mandatory LOCALIZATION The plugin is translated into the following languages: English Italian Spanish French German Dutch Turkish Russian Ukrainian Chinese (Simplified - zh-CN) Translation files are located in the /oxide/lang folder,here is an example of a /oxide/lang/en/SpawnEverything.json translation file. You can add translations for other languages by adding them to the folder: /oxide/lang ALL AVAILABLE ENTITIES Here you can find a file with all the entities currently available and the various information on the item to create to spawn the entity ALL AVAILABLE ENTITIES ---------------------------------------- AVAILABLE ENTITIES By default the plugin is configured with these entities that can be generated: VEHICLES: Minicopter, Attack Helicopter, Scrap Transport Helicopter, Hot Air Balloon, Armored Hot Air Balloon, Kayak, Row Boat, RHIB, Tugboat, Submarine Solo, Submarine Duo, Horse, Snowmobile, Tomaha Snowmobile, Sedan, 2 Module Car, 3 Module Car, 4 Module Car, Motorbike, Motorbike With Sidecar, Pedal Bike, Pedal Trike. KARUZA CUSTOM VEHICLES: All Karuza special vehicles are included, you need to enable the property in the config file to use them. Requires Karuza Vehicles plugin. SPECIAL VEHICLES: Bradley APC, Patrol Helicopter, Chinook 47. SPECIAL ENTITIES: Train Casino - Lucky Caboose, Blackjack Machine (Caboose), Card Table (Caboose), Slot Machine (Caboose), Card Table - A, Card Table - B, Card Table - C, Card Table - D, Slot Machine, Recycler, Recycler Safe Zone CRATE: Locked Crate, Oil Rig Locked Crate, Bradley APC Crate, Patrol Helicopter Crate, Elite Tier Crate, Elite Tier Crate - Underwater Labs. CRATER: Survey Crater - For Mining Quarry, Survey Crater Oil - For Pump Jack. NEW ENTITIES You can add as many entities as you want via the configuration file. If you have any difficulties or need to add a particular entity, feel free to open a support request and it will be added to the plugin. New entities will be added with future releases of the plugin.$12.99- 14 comments
- 2 reviews
-
- 2
-

-
- #spawn everything
- #spawn
-
(and 25 more)
Tagged with:
- #spawn everything
- #spawn
- #spawn vehicle
- #vehicle
- #karuza vehicle
- #karuza
- #deployables
- #crates
- #custom entity
- #execute commands
- #casino
- #train casino
- #blackjack machine
- #card table
- #slot machine
- #base
- #bases
- #spawn bases
- #item
- #spawn item
- #pickup
- #pickup vehicle
- #pickup karuza
- #pickup karuza vehicle
- #pickup entity
- #recycler
- #recycler safezone
-
Version 1.0.8
512 downloads
Loading Messages is a high-performance plugin that features customizable loading panel messages with adjustable display times and icons. Custom Messages for Queued and Loading Players Language Support - Display messages in local languages Loading Messages on Respawn and Teleport Loading Screens Configurable Display Time per Message High Performance Plugin! Loading Messages has three main message types: Queued - When a player is in the server queue Joining - When a player is joining the server Loading - The loading screen displayed when a player is teleporting or in a pending gamemode state Each custom type allows for options including icon ID, next message display time & message content. Loading Messages can use the following rich text tags - color, b, u, and i To display local languages set: "Use Language Support": true in you configuration. Custom languages will only be displayed after the first time a user connects to the server. Add multiple languages in the configuration listing: "Lang Messages": { "es-ES": { "Queue Messages": [ { "iconID": "0", "NextMessageTime": 5.0, "Message": "Estás en la cola" }, { "iconID": "0", "NextMessageTime": 5.0, "Message": "Por favor espera" }, { "iconID": "0", "NextMessageTime": 5.0, "Message": "Reporta tramposos usando f7" } ] } } You can see a list of most of the icons by going to https://fontawesome.com/icons.$9.99- 39 comments
- 3 reviews
-
- 2
-

-

-
- #loading messages
- #loading
- (and 15 more)
-
Version 1.0.1
4 downloads
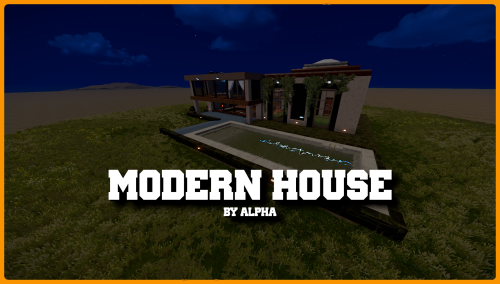
Small spawn point with a gambling area. I was inspired to make this build from a building in Apex. You can use it for a lot if different things. Personally i'm using it as a spawn point. I have a normal and a christmas edition. I'm willing to make other themes if requested. Alpha layer, topology, biome etc is included in the prefab so it's ready for use. Christmas edition has 737 prefabs Normal one has 716 prefabs$2.50 -
Version 1.1.1
49 downloads
Easily give access to Rusts F1 Spawn Menu! That's permission based with blacklisting support and customizable F1 Spawn button amounts! Features: * Ban whole categories or Items using their ShortName or ItemID's * Allow Admins or Developers to bypass F1 spawn * Control the amounts it gives on the 1k button & 100 buttons! * ItemID, Amount, SkinID, Conditions. * Shops & other 3rd party plugins. * TODO: Genetics & BPs. Perms: f1spawn.use | needed to use F1 Menu. f1spawn.bypass | needed to bypass blocked Items. Chat & Console Commands: /give itemID amount skin condition | everything past itemID are optional args /givearm itemID amount skin condition | everything past itemID are optional args give steamID-or-Name itemID amount skin condition | everything past itemID are optional args givearm steamID-or-Name itemID amount skin condition | everything past itemID are optional args Configuration File: { "Ignore: Disabled 0, Admin 2, Developer 3": 0, "Set F1 1000 button spawn amount": 1000, "Set F1 100 button spawn amount": 100, "Ban Categories: Weapon 0, Construction 1, Items 2, Resources 3, Attire 4, Tool 5, Medical 6, Food 7, Ammunition 8, Traps 9, Misc 10, Component 11, Electrical 12, Fun 13": [ 10 ], "Ban Items using: ShortNames (Easy to Read)": [ "explosive.timed", ], "Ban Items using: ItemIDs (Slightly Faster)": [ 143803535, ] }$9.99 -
Version 2.8.0
35,181 downloads
This plugin does not have its own functionality. This plugin is only used as an API for other plugins. Supported Plugins AirEvent HarborEvent WaterEvent Satellite Dish Event Power Plant Event Junkyard Event BossMonster BetterNpc Defendable Bases Defendable Homes Water Patrol Convoy Armored Train Sputnik Space Cobalt Laboratory XDChinookEvent IQSphereEvent IQBoss Christmas API ScientistNPC SpawnNpc(Vector3 position, JObject configJson) Creates an NPC position – NPC position on the map configJson - NPC parameters void AddTargetRaid(CustomScientistNpc npc, HashSet<BuildingBlock> foundations) Sets NPC targets for a raid npc - NPC for which you need to specify the target for the raid foundations - list of foundations, for the NPC raid void AddTargetGuard(CustomScientistNpc npc, BaseEntity target) Sets an NPC target to guard npc - NPC for whom you need to set a target that he will guard target - an entity that needs to be guarded by an NPC void ChangeHomePosition(CustomScientistNpc npc, Vector3 pos) Changes the NPC point of the home npc - NPC who needs to change the point of the home pos - new point of the home BasePlayer GetCurrentTarget(CustomScientistNpc npc) Gets the current target for the NPC npc - NPC who needs to get his current target If you need Npcs to be able to fight with other Npcs, then set the value of CanTargetOtherNpc inside the plugin to trueFree -
Version 1.2.0
121 downloads
The "MyVehicle" plugin introduces a vehicle management system that allows admins/players to spawn, de-spawn, and manage a variety of vehicles directly within the game. Leveraging a user-friendly interface, players can access this feature through permissions-based commands, ensuring control and customization. The plugin supports configuration for different vehicles, including aspects like spawn distance, fuel amount, and unique permissions for each vehicle type. It also incorporates a cool-down system to regulate vehicle spawning frequency, enhancing game-play balance. Additionally, the plugin tracks and saves data on player-spawned vehicles, ensuring a seamless gaming experience even across server restarts. The plugin is light weighted with a clean and user friendly graphical user interface (GUI). Commands: /myvehicle - Opens graphical user interface (GUI) of the vehicle spawner. /spawn <Vehicle> - (Admins only) Spawns desired vehicle /despawn - (Admins only) Despawn last spawned vehicle. mv.cspawn - Console command for shop integration. Permissions: MyVehicle Use - Permission to use/open the GUI. MyVehicle Despawn - If you already have a vehicle spawned and you want to spawn another one of the same type, the previous will disappear. You can set which vehicles are affected by this permission in the config. MyVehicle cooldown.1m - 1 minute cool-down between spawning vehicles of the same type. MyVehicle cooldown.1h - 1 hour cool-down between spawning vehicles of the same type. MyVehicle cooldown.1d - 1 day cool-down between spawning vehicles of the same type. MyVehicle cooldown.30d - 30 day cool-down between spawning vehicles of the same type. myvehicle minicopter - Allow spawning Mini(s). myvehicle attackhelicopter - Allow spawning Attack Heli(s). myvehicle scrapheli - Allow spawning Scrap Heli(s). myvehicle baloon - Allow spawning Balloon(s). myvehicle rhib - Allow spawning RHIB(s). myvehicle horse - Allow spawning Horse(s). myvehicle tugboat - Allow spawning Tugboat(s). myvehicle subsolo - Allow spawning Solo Sub(s). myvehicle subduo - Allow spawning Duo Sub(s). myvehicle rowboat - Allow spawning Rowboat(s). myvehicle kayak - Allow spawning Kayak(s). myvehicle snowmobile - Allow spawning Snowmobile(s) and Tomaha(s). myvehicle sedan - Allow spawning Sedan(s) and Sedan Rail(s). myvehicle car2modules - Allow spawning Car(s) with 2 modules. myvehicle car3modules - Allow spawning Car(s) with 3 modules. myvehicle car4modules - Allow spawning Car(s) with 4 modules. myvehicle pedalbike - Allow spawning Pedal Bike(s). myvehicle pedaltrike - Allow spawning Pedal Trike(s). myvehicle motorbike - Allow spawning Motorbike(s). myvehicle motorbikesidecar - Allow spawning Motorbikes with Sidecars. myvehicle train - Allow spawning Locomotive(s), Workcart(s) and Caboose(s). myvehicle siegetower - Allow spawning Siege Tower(s). myvehicle catapult - Allow spawning Catapults(s). myvehicle ballista - Allow spawning Ballista(s). myvehicle batteringram - Allow spawning Battering Ram(s). myvehicle magnetcrane - Allow spawning Magnetcrane(s). myvehicle chinook - Allow spawning Chinook(s). myvehicle patrolheli - Allow calling in the Patrol Heli. myvehicle bradley - Allow spawning Bradley(s). The "Despawn Last" button will remove all spawned vehicles one by one from last to first! !!! Magnetcrane, Patrol Heli and Bradley should only be used by admins !!! Magnetcrane will explode if spawned outside Junkyard! Patrol Heli will spawn in a random location outside the map and will fly in. Bradley will open fire at player as soon as it is spawned! These vehicles ( if spawned with MyVehicle ) can also be despawned with the "Despawn Last" button from the GUI. Cars can be customized through the config. The identifiers for the modules can be obtained on https://rusthelp.com/ or https://www.corrosionhour.com Cockpit With Engine Vehicle Module: 170758448 Cockpit Vehicle Module: -1501451746 Armored Cockpit Vehicle Module: 1874610722 Engine Vehicle Module: 1559779253 Camper Vehicle Module: -1040518150 Fuel Tank Vehicle Module: 1186655046 Storage Vehicle Module: 268565518 Flatbed Vehicle Module: -1880231361 Large Flatbed Vehicle Module: -1693832478 Taxi Vehicle Module: -626174997 Rear Seats Vehicle Module: 1376065505 Passenger Vehicle Module: 895374329 Armored Passenger Vehicle Module: -1615281216 The tier of the engine parts can be set in the config. Use 1 for low, 2 for medium or 3 for high quality parts. I want to thank M&B-Studios for assisting me in putting this plugin together. I appreciate his help and recommend his work and services! Config: { "Vehicles": { "assets/content/vehicles/minicopter/minicopter.entity.prefab": { "Despawn": true, "DisplayName": "Mini Copter", "Permission": "myvehicle.minicopter", "ButtonColor": "vlgreen", "FuelAmount": 100, "SpawnDistance": 5.0, "ModuleIDs": null, "EnginePartsTier": 0 }, "assets/content/vehicles/attackhelicopter/attackhelicopter.entity.prefab": { "Despawn": true, "DisplayName": "Attack Heli", "Permission": "myvehicle.attackhelicopter", "ButtonColor": "vlgreen", "FuelAmount": 100, "SpawnDistance": 5.0, "ModuleIDs": null, "EnginePartsTier": 0 }, "assets/content/vehicles/scrap heli carrier/scraptransporthelicopter.prefab": { "Despawn": true, "DisplayName": "Scrap Heli", "Permission": "myvehicle.scrapheli", "ButtonColor": "vlgreen", "FuelAmount": 100, "SpawnDistance": 5.0, "ModuleIDs": null, "EnginePartsTier": 0 }, "assets/content/vehicles/horse/ridablehorse2.prefab": { "Despawn": false, "DisplayName": "Horse", "Permission": "myvehicle.horse", "ButtonColor": "vlgreen", "FuelAmount": 0, "SpawnDistance": 5.0, "ModuleIDs": null, "EnginePartsTier": 0 }, "assets/content/vehicles/boats/rhib/rhib.prefab": { "Despawn": true, "DisplayName": "RHIB", "Permission": "myvehicle.rhib", "ButtonColor": "vlgreen", "FuelAmount": 100, "SpawnDistance": 5.0, "ModuleIDs": null, "EnginePartsTier": 0 }, "assets/content/vehicles/boats/tugboat/tugboat.prefab": { "Despawn": true, "DisplayName": "Tugboat", "Permission": "myvehicle.tugboat", "ButtonColor": "vlgreen", "FuelAmount": 100, "SpawnDistance": 15.0, "ModuleIDs": null, "EnginePartsTier": 0 }, "assets/content/vehicles/submarine/submarinesolo.entity.prefab": { "Despawn": true, "DisplayName": "Solo Sub", "Permission": "myvehicle.subsolo", "ButtonColor": "vlgreen", "FuelAmount": 100, "SpawnDistance": 5.0, "ModuleIDs": null, "EnginePartsTier": 0 }, "assets/content/vehicles/submarine/submarineduo.entity.prefab": { "Despawn": true, "DisplayName": "Duo Sub", "Permission": "myvehicle.subduo", "ButtonColor": "vlgreen", "FuelAmount": 100, "SpawnDistance": 5.0, "ModuleIDs": null, "EnginePartsTier": 0 }, "assets/content/vehicles/boats/rowboat/rowboat.prefab": { "Despawn": true, "DisplayName": "Rowboat", "Permission": "myvehicle.rowboat", "ButtonColor": "vlgreen", "FuelAmount": 100, "SpawnDistance": 5.0, "ModuleIDs": null, "EnginePartsTier": 0 }, "assets/content/vehicles/boats/kayak/kayak.prefab": { "Despawn": true, "DisplayName": "Kayak", "Permission": "myvehicle.kayak", "ButtonColor": "vlgreen", "FuelAmount": 0, "SpawnDistance": 5.0, "ModuleIDs": null, "EnginePartsTier": 0 }, "assets/content/vehicles/snowmobiles/snowmobile.prefab": { "Despawn": true, "DisplayName": "Snowmobile", "Permission": "myvehicle.snowmobile", "ButtonColor": "vlgreen", "FuelAmount": 100, "SpawnDistance": 5.0, "ModuleIDs": null, "EnginePartsTier": 0 }, "assets/content/vehicles/snowmobiles/tomahasnowmobile.prefab": { "Despawn": true, "DisplayName": "Tomaha", "Permission": "myvehicle.snowmobile", "ButtonColor": "vlgreen", "FuelAmount": 100, "SpawnDistance": 5.0, "ModuleIDs": null, "EnginePartsTier": 0 }, "assets/prefabs/deployable/hot air balloon/hotairballoon.prefab": { "Despawn": true, "DisplayName": "Balloon", "Permission": "myvehicle.baloon", "ButtonColor": "vlgreen", "FuelAmount": 100, "SpawnDistance": 10.0, "ModuleIDs": null, "EnginePartsTier": 0 }, "assets/content/vehicles/sedan_a/sedantest.entity.prefab": { "Despawn": true, "DisplayName": "Sedan", "Permission": "myvehicle.sedan", "ButtonColor": "vlgreen", "FuelAmount": 0, "SpawnDistance": 5.0, "ModuleIDs": null, "EnginePartsTier": 0 }, "assets/content/vehicles/sedan_a/sedanrail.entity.prefab": { "Despawn": true, "DisplayName": "Sedan Rail", "Permission": "myvehicle.sedan", "ButtonColor": "vlgreen", "FuelAmount": 100, "SpawnDistance": 5.0, "ModuleIDs": null, "EnginePartsTier": 0 }, "assets/content/vehicles/modularcar/car_chassis_2module.entity.prefab": { "Despawn": true, "DisplayName": "Car 2", "Permission": "myvehicle.car2modules", "ButtonColor": "vlgreen", "FuelAmount": 100, "SpawnDistance": 5.0, "ModuleIDs": [ 170758448, 268565518 ], "EnginePartsTier": 1 }, "assets/content/vehicles/modularcar/car_chassis_3module.entity.prefab": { "Despawn": true, "DisplayName": "Car 3", "Permission": "myvehicle.car3modules", "ButtonColor": "vlgreen", "FuelAmount": 100, "SpawnDistance": 5.0, "ModuleIDs": [ 170758448, -1040518150 ], "EnginePartsTier": 2 }, "assets/content/vehicles/modularcar/car_chassis_4module.entity.prefab": { "Despawn": true, "DisplayName": "Car 4", "Permission": "myvehicle.car4modules", "ButtonColor": "vlgreen", "FuelAmount": 100, "SpawnDistance": 5.0, "ModuleIDs": [ 1559779253, 170758448, 268565518, 268565518 ], "EnginePartsTier": 3 }, "assets/content/vehicles/bikes/pedalbike.prefab": { "Despawn": true, "DisplayName": "Pedal Bike", "Permission": "myvehicle.pedalbike", "ButtonColor": "vlgreen", "FuelAmount": 0, "SpawnDistance": 3.0, "ModuleIDs": null, "EnginePartsTier": 0 }, "assets/content/vehicles/bikes/pedaltrike.prefab": { "Despawn": true, "DisplayName": "Pedal Trike", "Permission": "myvehicle.pedaltrike", "ButtonColor": "vlgreen", "FuelAmount": 0, "SpawnDistance": 3.0, "ModuleIDs": null, "EnginePartsTier": 0 }, "assets/content/vehicles/bikes/motorbike.prefab": { "Despawn": true, "DisplayName": "Motorbike", "Permission": "myvehicle.motorbike", "ButtonColor": "vlgreen", "FuelAmount": 100, "SpawnDistance": 3.0, "ModuleIDs": null, "EnginePartsTier": 0 }, "assets/content/vehicles/bikes/motorbike_sidecar.prefab": { "Despawn": true, "DisplayName": "Motorbike with Sidecar", "Permission": "myvehicle.motorbikesidecar", "ButtonColor": "vlgreen", "FuelAmount": 100, "SpawnDistance": 3.0, "ModuleIDs": null, "EnginePartsTier": 0 }, "assets/content/vehicles/trains/locomotive/locomotive.entity.prefab": { "Despawn": true, "DisplayName": "Locomotive", "Permission": "myvehicle.train", "ButtonColor": "vlgreen", "FuelAmount": 100, "SpawnDistance": 15.0, "ModuleIDs": null, "EnginePartsTier": 0 }, "assets/content/vehicles/trains/workcart/workcart.entity.prefab": { "Despawn": true, "DisplayName": "Workcart", "Permission": "myvehicle.train", "ButtonColor": "vlgreen", "FuelAmount": 100, "SpawnDistance": 15.0, "ModuleIDs": null, "EnginePartsTier": 0 }, "assets/content/vehicles/trains/workcart/workcart_aboveground2.entity.prefab": { "Despawn": true, "DisplayName": "Workcart 2", "Permission": "myvehicle.train", "ButtonColor": "vlgreen", "FuelAmount": 100, "SpawnDistance": 15.0, "ModuleIDs": null, "EnginePartsTier": 0 }, "assets/content/vehicles/trains/workcart/workcart_aboveground.entity.prefab": { "Despawn": true, "DisplayName": "Workcart 3", "Permission": "myvehicle.train", "ButtonColor": "vlgreen", "FuelAmount": 100, "SpawnDistance": 15.0, "ModuleIDs": null, "EnginePartsTier": 0 }, "assets/content/vehicles/trains/caboose/traincaboose.entity.prefab": { "Despawn": true, "DisplayName": "Caboose", "Permission": "myvehicle.train", "ButtonColor": "vlgreen", "FuelAmount": 0, "SpawnDistance": 15.0, "ModuleIDs": null, "EnginePartsTier": 0 }, "assets/content/vehicles/trains/wagons/trainwagonc.entity.prefab": { "Despawn": true, "DisplayName": "Flatbed", "Permission": "myvehicle.train", "ButtonColor": "vlgreen", "FuelAmount": 0, "SpawnDistance": 15.0, "ModuleIDs": null, "EnginePartsTier": 0 }, "assets/content/vehicles/crane_magnet/magnetcrane.entity.prefab": { "Despawn": true, "DisplayName": "Magnetcrane", "Permission": "myvehicle.magnetcrane", "ButtonColor": "vlgreen", "FuelAmount": 100, "SpawnDistance": 5.0, "ModuleIDs": null, "EnginePartsTier": 0 }, "assets/content/vehicles/siegeweapons/siegetower/siegetower.entity.prefab": { "Despawn": true, "DisplayName": "Siege Tower", "Permission": "myvehicle.siegetower", "ButtonColor": "vlgreen", "FuelAmount": 0, "SpawnDistance": 10.0, "ModuleIDs": null, "EnginePartsTier": 0 }, "assets/content/vehicles/siegeweapons/catapult/catapult.entity.prefab": { "Despawn": true, "DisplayName": "Catapult", "Permission": "myvehicle.catapult", "ButtonColor": "vlgreen", "FuelAmount": 0, "SpawnDistance": 5.0, "ModuleIDs": null, "EnginePartsTier": 0 }, "assets/content/vehicles/siegeweapons/ballista/ballista.entity.prefab": { "Despawn": true, "DisplayName": "Ballista", "Permission": "myvehicle.ballista", "ButtonColor": "vlgreen", "FuelAmount": 0, "SpawnDistance": 5.0, "ModuleIDs": null, "EnginePartsTier": 0 }, "assets/content/vehicles/siegeweapons/batteringram/batteringram.entity.prefab": { "Despawn": true, "DisplayName": "Battering Ram", "Permission": "myvehicle.batteringram", "ButtonColor": "vlgreen", "FuelAmount": 100, "SpawnDistance": 10.0, "ModuleIDs": null, "EnginePartsTier": 0 }, "assets/prefabs/npc/ch47/ch47.entity.prefab": { "Despawn": true, "DisplayName": "Chinook", "Permission": "myvehicle.chinook", "ButtonColor": "vlblue", "FuelAmount": 0, "SpawnDistance": 15.0, "ModuleIDs": null, "EnginePartsTier": 0 }, "assets/prefabs/npc/patrol helicopter/patrolhelicopter.prefab": { "Despawn": true, "DisplayName": "Patrol Heli", "Permission": "myvehicle.patrolheli", "ButtonColor": "vlred", "FuelAmount": 0, "SpawnDistance": 15.0, "ModuleIDs": null, "EnginePartsTier": 0 }, "assets/prefabs/npc/m2bradley/bradleyapc.prefab": { "Despawn": true, "DisplayName": "Bradley", "Permission": "myvehicle.bradley", "ButtonColor": "vlred", "FuelAmount": 0, "SpawnDistance": 15.0, "ModuleIDs": null, "EnginePartsTier": 0 } }, "DefaultButtonColor": "vlgreen", "ScrollUPButtonColor": "yellow", "ScrollDownButtonColor": "yellow", "DespawnButtonColor": "vlorange", "CloseButtonColor": "vlred", "UIChatCommand": "myvehicle", "SpawnCommand": "spawn", "DespawnCommand": "despawn", "SpawnEffect": "assets/prefabs/missions/portal/proceduraldungeon/effects/appear.prefab", "DespawnEffect": "assets/prefabs/missions/portal/proceduraldungeon/effects/disappear.prefab", "ChatPrefix": "<color=green>[MyVehicle]</color>", "UITitle": "Vehicle Spawner" } Language EN: { "NoPermission": "You don't have permission to use this command.", "NoVehicles": "You have no spawned vehicles to despawn.", "Despawned": "Your last spawned vehicle has been despawned.", "CantFind": "Could not find your last spawned vehicle.", "NotFound": "Vehicle not found.", "Spawn": "Spawning {0}.", "WaterVehicle": "This vehicle can only be spawned in water.", "Usage": "Usage: /spawn <vehicleType>", "NoType": "Vehicle type '{0}' not found.", "NoPermissionToSpawn": "You don't have permission to spawn '{0}'.", "Cooldown": "You need to wait for {0} seconds to spawn your vehicle.", "AlreadyDestroyed": "Previously destroyed vehicle has been removed from your data." }$9.99- 19 comments
- 2 reviews
-
- 3
-

-
- #myvehicle
- #vehicle
- (and 5 more)
-
Version 1.1.0
76 downloads
The "F1 Item Menu" plugin allows players to open an interactive menu to select items in Rust and add them to their inventory using a simple command. The plugin provides a user-friendly interface with a search function and page navigation for convenient browsing of available items. Command: /f1menu - Opens the F1 item menu, allowing the player to select items and add them to their inventory. Permissions: f1itemmenu.f1 - This permission is required to use the /f1menu command. How to Use the Plugin: 1. To open the menu, the player enters the /f1menu command, provided they have the f1itemmenu.f1 permission. 2. In the menu, the player can search for items by entering a search term and clicking "Search." 3. The player can navigate through the available items by clicking the arrow buttons (< and >) to go to the previous or next page. 4. After selecting an item, the player is presented with another menu to specify the quantity of the chosen item. 5. The player can then choose the desired quantity (1, 10, 100, 1000, 10000) and click "Close" to exit the menu. 6. The selected item is automatically added to the player's inventory. { "Enable Discord Webhook": true, "Webhook URL": "", "Username": "Rust Server", "Avatar URL": "", "Discord Message Format": "Player **{playerName}** has taken **{quantity}** of **{itemName}**." }$15.95- 2 comments
- 2 reviews
-
- #spawnitems
- #f1console
-
(and 3 more)
Tagged with:
-
Version 1.2.3
75 downloads
Video : Showcase Video Features : - Randomized loot respawn intervals, configurable for each monument. Example: "launch site": "5-10" (in seconds) - Default respawn time is set between 30-60 minutes but can be fully adjusted through the configuration. - Automatically removes monuments that no longer exist after a server wipe, keeping the configuration clean and up-to-date. Supported Crates : Supported Monuments : All Game Monuments Additional Settings : "Direct container removal without dropping loot": false, "Enable When Player Dont Finish Looting Containers Will Drop Loot On Ground": true,$19.99 -
Version 1.0.0
121 downloads
OneTimeSpawn is a plugin for the game Rust that allows server administrators to set a one-time spawn location for players when they first join the server. After the initial spawn, players will respawn at the standard random locations on the map. Key Features: One-Time Spawn: Players will spawn at a specific location set by the administrator when they first join the server. Normal Respawn: After the first spawn, all subsequent respawns will occur at the usual random locations on the map. Setup Command: Administrators can set the spawn location using the command /spawnpos. Wipe Support: The plugin configuration allows for automatic resetting of the spawn position and clearing of spawned player data when the map is wiped. Wipe Spawn Position: If enabled, the spawn position will reset with each map wipe, allowing administrators to set a new spawn point for the new session. Wipe Spawned Players: If enabled, the list of players who have already spawned will be cleared upon a map wipe, ensuring all players spawn at the initial point again when they first join after the wipe. Usage: The OneTimeSpawn plugin is perfect for servers where administrators want to give all players an equal start, such as spawning them near a specific point of interest, a settlement, or a starting area. Configuration { "Spawn position": { "x": 0.0, "y": 0.0, "z": 0.0 }, "Wipe already spawned players on map wipe?": false, "Delete spawn position on map wipe?": false }Free- 3 comments
-
- 1
-

-
- #spawnpoint
- #spawn
-
(and 4 more)
Tagged with:
-
Version 1.3.1
6,769 downloads
This plugin adds variety of NPC sets with very high number of parameter sets on standard and custom monuments. Also it is added during dropping the server AirDrop, locked crate and destroying a tank or helicopter Dependencies (optional, not required) AlphaLoot CustomLoot True PVE Kits Economics Server Rewards IQEconomic PveMode Custom maps Maps that have default settings for their custom monuments. For these maps, you will not need to create places for the appearance of NPCs, they have already been created by the map developer and are located inside the archive when buying the map You can also download all these files for all maps here Detroit: Irreparable Damage Oregon 2: Last Hope Lostly Island Frontier – American Old West Oregon: Land of Dead Badlands Foreign Lands Namalsk Kong: Skull Island Destroyed World Deathland Dreamland Last Train Pandora Railway Island Wasteland Cataclysm: Fury of Nature Last Oasis Crazy Island Standard monuments This item of the plugin settings is used for appearing NPCs in all standard monuments. All these settings are located in the Monument folder (oxide/data/BetterNpc/Monument). Each file in this folder corresponds to a standard monument If there is no standard monument file in the folder, you can create it (you need to name the file the same way as the standard monuments on the map inside the game). You can copy the settings from any other standard monument Configuration parameters: Enabled? [true/false] – It allows to enable/disable the appearance of NPC on the monument. If you need NPCs appearing on the map and don’t need it on another map, you can use this option simply The size of the monument – this parameter contains two values. It is the length and width of the monument. This parameter is necessary for random appearance of NPC on the monument and indication of limits of removal of standard NPCs on the monument (if it is necessary) Remove other NPCs? [true/false] – It deletes the standard NPCs inside the limits of this monument Presets – It is a list of all the NPC presets to appear on the monument (the description of the NPC preset settings is located below) Custom monuments This item of the plugin settings is responsible for the appearance of NPCs on custom monuments. All these settings are located in the Custom folder (oxide/data/BetterNpc/Custom). Each file in this folder corresponds to a custom monument If you have bought a map with already configured NPC appearance files for custom monuments you will copy these files into the Custom folder. If you want to create and configure the appearance of NPC in your custom location on the map, you will use the command in the administrators’ chat /SpawnPointAdd {name} (see the description of this command below in the instruction) Configuration parameters: Enabled? [true/false] – It allows to enable/disable the appearance of NPC on the monument. If you need NPCs appearing on the map and don’t need it on another map, you can use this option simply Position – It is a position of the custom monument on the map Rotation – It is a rotation of the custom monument on the map (this parameter is necessary for using custom places to appear of NPC on the monument, if the monument is used on more than one map) Radius – It is the radius of the custom monument from the position on the map Remove other NPCs? [true/false] – It removes the standard NPCs inside the limits of this monument Presets – It is a list of all the NPC presets to appear on the monument (the description of the NPC preset settings is located below) Roads This item of the plugin settings is used to appear NPCs on all types of roads. All these settings are located in the Road folder (oxide/data/BetterNpc/Road). Each file in this folder corresponds to a particular road type ExtraNarrow – It is a narrow, unpaved walkway ExtraWide It is a wide, paved, two-lane, beltway road Standard – It is a regular, paved road Configuration parameters: Enabled? [true/false] – It allows to enable/disable the appearance of NPC on the road. If you need NPCs appearing on the map and don’t need it on another map, you can use this option simply Presets – It is a list of all the NPC presets to appear on the road (the description of the NPC preset settings is located below) Biomes This item of the plugin settings is used to appear NPCs on all types of biomes. All these settings are located in the Biome folder (oxide/data/BetterNpc/Biome). Each file in this folder corresponds to a particular biome type (Arctic, Arid, Temperate, Tundra) Configuration parameters: Enabled? [true/false] – It allows to enable/disable the appearance of NPC on the biome. If you need NPCs appearing on the map and don’t need it on another map, you can use this option simply Presets – It is a list of all the NPC presets to appear on the biome (the description of the NPC preset settings is located below) In-game events This item of the plugin settings is used to appear the NPCs in standard Rust events. All of these settings are located in the Event folder (oxide/data/BetterNpc/Event). Each file in this folder corresponds to its own type of event The supported events: When the plane drops the server AirDrop, it will be guarded by specific NPC presets CH47 – When the chinook drops a locked crate during patrolling the map, it will be guarded by specific NPC presets Bradley – When someone destroys a tank, its crates will be guarded by specific NPC presets Helicopter – When someone shoots down a patrol helicopter, its crates will be guarded by specific NPC presets Configuration parameters: Enabled? [true/false] – It allows to enable/disable the appearance of NPC on the event. If you need NPCs appearing on the map and don’t need it on another map, you can use this option simply Radius – NPC appearance radius Presets – It is a list of all the NPC presets to appear on the event (the description of the NPC preset settings is located below) The NPC preset parameters Enabled? [true/false] – It is enabling/disabling the preset Minimum numbers – Day – It is the minimum number of NPCs from the day preset Maximum numbers – Day – It is the maximum number of NPCs from the day preset Minimum numbers – Night – It is the minimum number of NPCs from the night preset Maximum numbers – Night – It is the maximum number of NPCs from the night preset NPCs setting – It is all NPC settings of this preset (see the description of NPC settings for details) Type of appearance (0 – random; 1 – own list) – It is a type of NPC appearance. You can create your own list of places of NPC appearance. The NPC will appear only randomly. This parameter is not used in Road appearance types Own list of locations – It is your own list of NPC appearances. You need to use the number of locations at least the maximum possible number of NPCs in this preset. This parameter is not used in Road appearance types The path to the crate that appears at the place of death – It is the full path to the crate prefab that appears at the place of death of an NPC. If you don’t need this parameter, you should leave this blank Which loot table should the plugin use (0 – default; 1 – own; 2 – AlphaLoot; 3 – CustomLoot; 4 – loot table of the Rust objects; 5 – combine the 1 and 4 methods) – It is the type of the NPC loot table in this preset. Type 5 includes two types (1 and 4) at the same time and locates items from both types Loot table from prefabs (if the loot table type is 4 or 5) – It is a setting of the loot tables from Rust objects. You can see the loot table of Rust objects description for more details Own loot table (if the loot table type is 1 or 5) – It’s NPC’s own loot table. You can see the description of your own loot table for more details The NPC settings description Names is a list of NPC names. It is selected from the list randomly Health – It’s the HP amount of the NPC Roam Range – It’s the patrolling area distance. It’s the distance that the NPC can move from the place of appearance during patrolling Chase Range – It’s the chase range of the target. It’s the distance that the NPC can chase his target from the place of appearance Attack Range Multiplier – It’s the attack range multiplier of the NPC’s weapon Sense Range – It’s a target detection radius Target Memory Duration [sec.] – It’s the time that the NPC can remember his target Scale damage – It’s the damage multiplier from NPC to the player Aim Cone Scale – It’s the spread of NPC shooting, the default value in Rust is 2. It doesn’t take negative values Detect the target only in the NPCs viewing vision cone? [true/false] – It’s the parameter that allows detecting the target only in a certain NPC viewing. If you want to detect the target in 360 degrees, you will set the parameter “False” Vision Cone – It’s the NPC viewing. The range of values is from 20 to 180 degrees. If the previous parameter is False, this parameter is not used Speed – It’s the NPC speed. The default value in Rust is 5 Minimum time of appearance after death [sec.] – It’s the minimum time of NPC appearance after the death. This parameter is not used in the NPC Event places Maximum time of appearance after death [sec.] – It’s the maximum time of NPC appearance after the death. This parameter is not used in the NPC Event places Disable radio effects? [true/false] – You can disable/enable radio effects Is this a stationary NPC? [true/false] – If this parameter is True, the NPC will not move or run Remove a corpse after death? [true/false] – This parameter can control the deleting of NPC corpses (only backpacks are left). This parameter improves efficiency if there are a lot of NPCs Wear items – It’s a list of NPCs’ clothes and armor Belt items – It’s a list of weapons and items NPCs’ fast slots. Medical syringes are used for healing. If you give grenades to an NPC, he will use them. Smoke grenades are used for creating smoke screens (if you don’t need them, you should remove them from your inventory). If you give a Rocket Launcher to an NPC, he will raid the target’s building (if the target is inside it) Kits – It gives a pack of Kits plugin. If you don’t need this parameter, you should leave this blank. I recommend using the previous 2 points to configure NPC items A description of the Rust loot table settings Minimum numbers of prefabs –It’s the minimum numbers of prefabs that are needed to appear in the NPC loot table Maximum numbers of prefabs –It’s the maximum numbers of prefabs that are needed to appear in the NPC loot table Use minimum and maximum values? [true/false] – this parameter specifies whether to use the minimum and maximum numbers to limit the number of items List of prefabs – It’s a list of prefabs that need to add in the loot table. It is necessary to indicate the full path to the prefab and the probability of falling out this prefab A description of the own loot table settings Minimum numbers of items – It’s the minimum number of items Maximum numbers of items – It’s the maximum number of items Use minimum and maximum values? [true/false] – this parameter specifies whether to use the minimum and maximum numbers to limit the number of items List of items – It’s a total list of all items that can fall out in the NPC loot table. You can specify any standard items, their blueprints and any skinned or custom items The commands in the chat (for admins only) /SpawnPointPos {name} – To show the local admin’s position coordinates relative to the place where the NPC {name} appears /SpawnPointAdd {name} – To create the NPC appearance point {name} in the Admin’s custom coordinates. A file with this name will be created in the folder Custom and you can configure it as you need /SpawnPointAddPos {number} {name} – To write the local admin’s coordinate into the preset with the positional number {number} (starting from 1) to the place where the NPC {name} appears /SpawnPointAddWear {number} {name} – To write all the admin’s dressed clothes into the preset with the positional number {number} (starting from 1) to the place where the NPC {name} appears /SpawnPointAddBelt {number} {name} – To write all the admins’ quick slots cells into a preset with the positional number {number} ( starting from 1) to the place where the NPC {name} appears /SpawnPointShowPos {number} {name} – To show to the Admin all the custom NPC appearance points in the preset with the positional number {number} ( starting from 1) in the place where the NPC {name} appears /SpawnPointReload {name} – Reload Spawn Point with the name {name} Console commands (RCON only) ShowAllNpc – Shows the number of all NPCs of the BetterNpc plugin on your server Hooks object CanAirDropSpawnNpc(SupplyDrop supplyDrop) – It is called before an NPC appearance to guard an AirDrop. The returning of a non-zero value stops an NPC appearance object CanCh47SpawnNpc(HackableLockedCrate crate) – It is called before an NPC appearance to guard a locked chinook crate. The returning of a non-zero value stops an NPC appearance object CanBradleySpawnNpc(BradleyAPC bradley) – It is called before an NPC appearance to guard the boxes from crushed Bradley. The returning of a non-zero value stops an NPC appearance object CanHelicopterSpawnNpc(BaseHelicopter helicopter) – It is called before an NPC appearance to guard the crates from crushed patrol helicopter. The returning of a non-zero value stops an NPC appearance API void DestroyController(string name) – It destroys the place of appearance NPC with the name {name} void CreateController(string name) – It creates the place of appearance NPC with the name {name} These APIs can be used with standard monuments, custom monuments (NPC locations) and roads. The name of this monument is in standard monuments {name}. It is the name of the file in the Custom and Road folder in custom monuments and roads My Discord: KpucTaJl#8923 Join the Mad Mappers Discord here! Check out more of my work here! Creator of the default configuration – jtedal$30.00 -
Version 1.0.0
1 download
Helldivers Spawn is a spawn area for players on your Rust server. Inspired by the popular Helldivers game, this monument contains a large Helldivers style decoration. CONTAINS: Eight spawn points. Pictures on the walls, use these pictures to put images. Large windows with views to the outside. Doors to go outside, press the buttons to open the doors. Automatic lighting, when the night comes the light turns on automatically. Helldivers logo.$12.90-
- #spawn
- #spawner
-
(and 38 more)
Tagged with:
- #spawn
- #spawner
- #spawning
- #spawnpoint
- #spawn point
- #helldivers
- #helldivers2
- #helldivers 2
- #helldiverslogo
- #helldivers logo
- #room
- #spawn point room
- #spawnpointroom
- #badgyver
- #oxide
- #carbon
- #steam
- #facepunch
- #rust
- #playrust
- #console
- #pvp
- #pve
- #rp
- #roleplay
- #role play
- #decor
- #decoration
- #picture
- #pictureframe
- #frame
- #solarpanel
- #skeleton
- #button
- #electric
- #electricity
- #automatic
- #light
- #glow
- #glass
-
Version 1.0.0
1 download
MODERN HOUSE "A sleek and stylish modern house, designed with a contemporary and minimalist aesthetic. This prefab features a harmonious structure with clean lines, large glass windows for abundant natural light, and a blend of concrete, wood, and metal materials for a refined and modern look. The design includes a spacious interior with well-defined areas, a terrace or panoramic balcony, and architectural details that make it stand out in any setting. Perfect for urban-themed maps, residential roleplay zones, or as a standout feature in Rust environments. This prefab is both functional and visually appealing, adaptable for various in-game uses." - Modern walls: Using concrete and wood. - Large Glass Windows: To allow natural light. - Internal garage: a garage in the living room, very elegant! - Two bedrooms with bathrooms, a kitchen and a fireplace, perfect for snowy environments! I hope you enjoy it! Discord support - DISCORD$10.99 -
Version 1.0.8
42 downloads
NEW PERFORMANCE UPDATE COMING SOON Add new respawn options for players on your Rust server with Helicopter Respawn. This plugin automatically deploys sleeping bags named "Minicopter", "Scrap Heli" and "Attack Heli" for players at randomized locations, when players respawn using the custom sleeping bag they are automatically mounted on a flying helicopter. Say goodbye to tedious respawn processes and hello to swift returns. Sweet revenge awaits, with Helicopter Respawn keeping players engaged in the game. Automatically places sleeping bags for players. Spawns a helicopter and mounts the player on it upon respawn. Randomly selects a location for sleeping bag placement. Customizable sleeping bag name and respawn time in config. Customizable sleeping bag height and randomize spawn kits in config. Permissions: helicopterrespawn.minicopter helicopterrespawn.scraphelicopter helicopterrespawn.attackhelicopter$5.00- 17 comments
- 2 reviews
-
- 1
-

-
- #minicopter
- #scrapheli
- (and 6 more)
-
Version 2.0.4
1,548 downloads
Spawn in a lift ,parts ,modules ,chassis or car with permissions and shared cooldown. They still need to be fixed before driven ! Features : Updating to v2.0.0 will reset the garage prices only (backup the cfg file) !!! Set kits and sell them through the shop Use of Economics or ServerRewards (combined to 1 button as of v2.0.0) Configurable colors/backgrounds/transparency/buttons This is a Garage so no complete vehicles incl parts attached are planned in the near future Logging of each sale or attempt to a misbuy is saved in the log folder Garage is now able to use HumanNPC vendors. Changes made in 2.0.0 Rewrite of the plugin (phase 1) Added additional kit checks and added a chat message if not. Currency will now be combined into 1 purchase button for Eco/SR Backup your config price settings (images colors remain) Naming of prices changed this will reset all prices to the ones set in the plugin. Relocated buttons and images accordingly Added the Armored Passenger Module Permissions : garage.use : for using the Plugin garage.usenpc : Grants permission to use HumanNPC shops (new) garage.nocost : for free purchases (Shows in the UI you have the Free perm) garage.nocooldown : to have no cooldown on spawning them in Commands : /garage ui or /garage : to open Garage Shop /garage info : to show the commands and info in chat Logfiles : Log files are found in the oxide.logs folder garage_kits : All actions by using Kits will be in this file saving purchases errors and/or if the player didnt had enough cash garage_sales : Will list all sales/errors and/or players didnt had enough cash regarding buying parts/cars/chassis/modules Configuration : For use with HumanNPC : you can add multiple npc id's to the configuration. Make sure the npc has a clear area to spawn the chassis and cars to make sure there is room for them. Place the npc outside would be highly recommended. You can also only give the Cars and Chassis a Shared cooldown to avoid spamming. What can you change in the cfg.json ? Can you spawn inside (false by default) Cooldown (only cars/chassis) Using ServerRewards Settings Using Economics Settings Background image Kit Images Modules images Parts Images Button colors (cars/chassis/modules/parts) , (lift) and (close button) each share their colors ( ). Button text colors (cars/chassis/modules/parts) , (lift) ,(close button) and kits each share their colors ( ). Can change the Garage Title text on topside and its color which is (Garage By Krungh Crow v1.0.8) by default. Prices for all the cars/chassis/mods/parts and kits For making kits u make a "KIT" you would normaly do then add just the kits name incl uppercases for example The kits can be configured like normal the cooldowns will be taken over from the kits plugin so if u set the cooldowns in the Kits.json config file it will use that cooldown same goes for the amount of times u can take it (kit Title) : To show a short description/name for the kit (Icon Url) : Link to the image used for the kit (Kit name ID) : full kit name (use the kitnameID from the kits plugin) (Price) : Price tag Set prices to 0 if you will be using the cooldowns from the kits plugin !!!!!! Example config below : { "Cooldown": 5, "BuildingSpawn": false, "NPC Vendor settings": { "Use NPC shop": true, "NPC Id's": [ "5769350144" ] }, "Use ServerRewards": true, "Use Economics": true, "Garage shop Title": "Midlands PVE Garage Shop", "Garage Text color (RGBA)": "1 1 1 1", "Button color (RGBA)": "0.05 0 0 0.80", "Button text color (RGBA)": "1 1 1 0.90", "Menu Button color (RGBA)": "0.0 0.0 0.0 0.0", "Close Button color (RGBA)": "0.0 0.0 0.0 0.0", "Close Button Text color (RGBA)": "1 1 1 0.90", "Button Lift color (RGBA)": "0.05 0 0 0.80", "Button Lift Text color (RGBA)": "1 1 1 0.90", "Use Background Image": false, "Garage shop Background Image Url": "https://cdn.discordapp.com/attachments/718923255574167665/768477956007526400/Garage-Poster.png", "Garage shop Background Transparancy (0-1)": 0.95, "Main page button icon Image Url": "https://i.ibb.co/pLdsMQV/Green.png", "Modules page button icon Image Url": "https://i.ibb.co/s1xqmTX/Purple.png", "Parts page button icon Image Url": "https://i.ibb.co/Cbtx3rc/Blue.png", "Close button icon Image Url": "https://i.ibb.co/84xBH5Y/Red.png", "Kits text color (RGBA)": "1 1 1 0.90", "Kit 1 (kit Title)": "HQ Engine Parts", "Kit 1 (Icon Url)": "https://i.ibb.co/2NpSvZX/parts.png", "Kit 1 (kit name ID)": "car1", "Kit 1 (Price)": 3999, "Kit 2 (kit Title)": "Mechanics Outfit", "Kit 2 (Icon Url)": "https://i.ibb.co/Vm5drNd/mechanics-outfit.png", "Kit 2 (kit name ID)": "mechanic", "Kit 2 (Price)": 500, "Kit 3 (kit Title)": "Refuell", "Kit 3 (Icon Url)": "https://vignette.wikia.nocookie.net/play-rust/images/2/26/Low_Grade_Fuel_icon.png/revision/latest?cb=20151110002210", "Kit 3 (kit name ID)": "fueling", "Kit 3 (Price)": 500, "Kit 4 (kit Title)": "Carkit 4 description", "Kit 4 (Icon Url)": "https://i.ibb.co/JBmNcC0/carkitpink.png", "Kit 4 (kit name ID)": "car4", "Kit 4 (Price)": 0, "Kit 5 (kit Title)": "Carkit 5 description", "Kit 5 (Icon Url)": "https://i.ibb.co/R3SXcvY/carkitred.png", "Kit 5 (kit name ID)": "car5", "Kit 5 (Price)": 0, "Kit 6 (kit Title)": "Carkit 6 description", "Kit 6 (Icon Url)": "https://i.ibb.co/Fs0VqDQ/carkitgreen.png", "Kit 6 (kit name ID)": "car6", "Kit 6 (Price)": 0, "Lift (Icon Url)": "https://i.ibb.co/Sfd2kxH/modularcarlift.png", "Lift (Button Text)": "Get A lift", "lift (Price)": 2500, "Simple Cockpit (Image Url)": "https://i.ibb.co/tcg16yg/vehicle-1mod-cockpit.png", "Simple Cockpit (Price)": 1000, "Armored Cockpit (Image Url)": "https://i.ibb.co/SPvDV9c/vehicle-1mod-cockpit-armored.png", "Armored Cockpit (Price)": 1500, "Cockpit+Engine (Image Url)": "https://i.ibb.co/TtLNz4G/vehicle-1mod-cockpit-with-engine.png", "Cockpit+Engine (Price)": 1250, "Large Fuell Tank (Image Url)": "https://i.ibb.co/2YSbbRD/vehicle-2mod-fuel-tank.png", "Large Fuelltank (Price)": 1000, "Engine (Image Url)": "https://i.ibb.co/1dzkVVV/vehicle-1mod-engine.png", "Engine (Price)": 1250, "Short Flatbed (Image Url)": "https://i.ibb.co/s62zLrg/vehicle-1mod-flatbed.png", "Short Flatbed (Price)": 1000, "Long Flatbed (Image Url)": "https://i.ibb.co/VNMpXtp/vehicle-2mod-flatbed.png", "Long Flatbed (Price)": 1250, "Passenger Module (Image Url)": "https://i.ibb.co/3cBtXSL/vehicle-2mod-passengers.png", "Passenger Module (Price)": 1500, "Rear Seat (Image Url)": "https://i.ibb.co/KLJsdXQ/vehicle-1mod-rear-seats.png", "Rear Seat (Price)": 1250, "Storage Module Image Url": "https://i.ibb.co/BN2qFzp/vehicle-1mod-storage.png", "Storage Module (Price RP": 1500, "Armored Passenger Module (Image Url)": "https://rustlabs.com/img/items180/vehicle.1mod.passengers.armored.png", "Armored Passenger Module (Price)": 1500, "Camper Module (Image Url)": "https://i.ibb.co/kQN6XQC/vehicle-2mod-camper.png", "Camper Module (Price)": 2000, "Taxi Module (Image Url)": "https://i.ibb.co/HCLzx2S/vehicle-1mod-taxi.png", "Taxi Module (Price)": 1500, "Pistons Icon Url": "https://i.ibb.co/2qh1Q0G/pistons.png", "LQ Piston (Price)": 500, "MQ Piston (Price)": 750, "HQ Piston (Price)": 1000, "Crankshafts Icon Url": "https://i.ibb.co/THY34QF/cranks.png", "LQ Crankshaft (Price)": 500, "MQ Crankshaft (Price)": 750, "HQ Crankshaft (Price)": 1000, "Sparkplugs Icon Url": "https://i.ibb.co/YQ3g4sf/plugs.png", "LQ Sparkplug (Price)": 500, "MQ Sparkplug (Price)": 750, "HQ Sparkplug (Price)": 1000, "Valves Icon Url": "https://i.ibb.co/qkYPV9R/valves.png", "LQ Valve (Price)": 500, "MQ Valve (Price)": 750, "HQ Valve (Price)": 1000, "Carburetor Icon Url": "https://i.ibb.co/Wk9yQqz/carbs.png", "LQ Carburetor (Price)": 500, "MQ Carburetor (Price)": 750, "HQ Carburetor (Price)": 1000, "Small Chassis (image Url)": "https://i.ibb.co/VMbLdzN/chas2.png", "Small Chassis (Price)": 2500, "Medium Chassis (image Url)": "https://i.ibb.co/q0QRcqn/chas3.png", "Medium Chassis (Price)": 3500, "Large Chassis (image Url)": "https://i.ibb.co/164Fxxs/chas4.png", "Large Chassis (Price)": 4500, "Small Car (image Url)": "https://i.ibb.co/Tk38DWd/howard-schechtman-car1.jpg", "Small Car (Price)": 5000, "Nedium Car (image Url)": "https://i.ibb.co/vJWGtcw/howard-schechtman-car2.jpg", "Medium Car (Price)": 7500, "Large Car (image Url)": "https://i.ibb.co/zXpDRht/howard-schechtman-car3.jpg", "Large Car (Price)": 10000 } Localization : English language file included to use a diffrent language just make a new file in the language folder. { "NoPermission": "You do not have permission to use that command!", "InvalidInput": "Please enter a valid command!", "IndoorsBlocked": "You cannot spawn indoors only outside!", "Info": "\n\n/garage ui : to open the Garage Shop.\n/givelift to buy a lift directly", "Cooldown": "You are still on a cooldown!", "Spawned": "You spawned a {0}!", "Prefix": "<color=yellow>[Garage]</color> ", "Lift": "You just recieved a lift!", "BoughtSmallCar": "You just Bought a Small Car, Have fun!", "BoughtMediumCar": "You just Bought a Medium Car, Have fun!", "BoughtlargeCar": "You just Bought a Large Car, Have fun!", "BoughtSmallChas": "You just Bought a Small Chassis, Have fun!", "BoughtMediumChas": "You just Bought a Medium Chassis, Have fun!", "BoughtlargeChas": "You just Bought a Large Chassis, Have fun!", "FreeCar": "You just Got a free Car, Have fun!", "FreeChas": "You just Got a free Chassis, Have fun!", "Nokit": "No kit has been assigned!", "ReceivedCockpit": "You just recieved a simple cockpit!", "ReceivedCockpitArmored": "You just recieved a Armored Cockpit!", "ReceivedCockpitEngine": "You just recieved a Cockpit with a Engine attached!", "ReceivedFuelltank": "You just recieved a empty Large Fuelltank!", "ReceivedEngine": "You just recieved a Engine Module!", "ReceivedSingleFlatbed": "You just recieved a short Flatbed Module!", "ReceivedDualFlatbed": "You just recieved a Long Flatbed Module!", "ReceivedPassengers": "You just recieved a Passenger Module!", "ReceivedRearseat": "You just recieved a Rear Seat Module!", "ReceivedStoragemodule": "You just recieved a Storage Module!", "ReceivedArmoredPasmodule": "You just recieved a Passengers Armored Module!", "ReceivedTaximodule": "You just recieved a Taxi Module!", "ReceivedLowPart": "You just recieved a Low quality engine part!", "ReceivedMedPart": "You just recieved a Medium quality engine part!", "ReceivedHighPart": "You just recieved a High quality engine part!", "NoBallance": "You Dont have enough points!", "NotSet": "This currency is not set to true or not installed on this server!", "OnlyNPC": "The garage is only available at the Garage NPC in Town", "ReceivedCamper": "You just recieved a Camper Module!", "UIFreeBanner": "<color=green>For having Permission ,You get Items for Free</color> " } Credits * Steenamaroo for help with the cooldowns and uiFree- 46 comments
- 2 reviews
-
- 7
-

-

-
- #spawn
- #modular vehicle
- (and 12 more)
-
Version 1.0.5
1,529 downloads
This plugin does not have its own functionality. This plugin is only used as an API for other plugins Supported Plugins Triangulation Plugin Config en - example of plugin configuration in English ru - example of plugin configuration in Russian API BaseAnimalNPC SpawnAnimal(Vector3 position, JObject configJson) Creates an animal position – animal position on the map configJson - animal parameters void SetHomePosition(CustomAnimalNpc animal, Vector3 pos) Changes the animal point of the home animal - animal who needs to change the point of the home pos - new point of the homeFree -
Version 2.1.4
44 downloads
Create custom backpacks with varying capacities and properties Save on Death - Allow players to keep backpacks on death Item blacklist - Blacklist items from being placed in the backpack Lootspawns - Add custom backpacks to any loot spawn Admin Commands: /cb.give 'Backpack-Name' 'Player-Name/ID' - With this command, administrators or players with the appropriate permission can give a specific backpack to another player. Admin Commands: cbackpacks.give - allows the use of the cb.give command { "RemoveDefaultBackpacks": true, "Backpacks": { "rucksack": { "Shortname": "largebackpack", "SaveContentsOnDeath": true, "Capacity": 8, "ItemBlackList": [ "rifle.ak", "sulfur.ore", "lmg.m249" ] } }, "Command Names": { "give": "cb.give" }, "LootSpawns": { "assets/bundled/prefabs/radtown/crate_basic.prefab": { "rucksack": 100.0 } } } Credit to M&B Studios the original author of this plugin.$9.99- 3 comments
-
- #backpacks
- #backpack
-
(and 3 more)
Tagged with:
-
-
- 1
-

-
- #roadrespawn
- #spawn
-
(and 3 more)
Tagged with:
-
Version 1.0.11
356 downloads
Random Trader is a plugin that spawns a random shop along the side of the road, and is loaded with a randomly chosen shop profile. When a player interacts with the vending machine they are presented with randomly selected items from the shop profile, which are given random stock amounts and a random scrap/econ/SRP price. The plugin allows for the minimum and maximum stock and price values to be set in the config, and allows for the number of items displayed to be adjusted. The plugin comes with 4 loot tables by default: Clothing Weapons Tools Random items The following shops are automatically added if you own the relevant plugins Cooking EpicLoot Installing the plugin is as simple as dropping some files inside of your oxide folders. Ensure CopyPaste and ImageLibrary are loaded on your server. The plugin will acquire the files from my dropbox and stores them in the appropriate folder. If you own Cooking and/or EpicLoot, both plugins will automatically create profiles for RandomTrader in your config. Command: spawntrader Usage: /spawntrader <profile name> Example: /spawntrader weapons - will spawn a random shop with the weapons profile loaded. Command: despawntrader Usage: /despawntrader <profile name> Example: /despawntrader weapons - will despawn the weapons shop if it is spawned. Command: rtremovestoredata Usage: /rtremovestoredata <profile name> Example: /rtremovestoredata cooking - deletes the data for cooking from your config. Command: rtfindnewshops Usage: /rtfindnewshops Example: /rtfindnewshops - Finds new shops that are not in the config and saves them to the config. Useful for forcing external plugins to load their shop profiles in (Cooking/EpicLoot). Command: rtcheckpoints Usage: /rtcheckpoints Example: /rtcheckpoints - shows you the potential spawn locations for the shops. randomtrader.use - required to access the shop. randomtrader.admin - required to manually spawn/despawn vending machines. Config example: https://pastebin.com/MvcdBtTb$15.00- 23 comments
- 1 review
-
- 4
-

-

-
- #vending
- #vending machine
-
(and 6 more)
Tagged with:
-
Version 1.0.0
99 downloads
The SetSpawn plugin for the game Rust allows you to set a spawn point, teleport to that point with a delay, and the ability to adjust the time of that delay. It works both with commands and when a player first enters the server. The plugin also supports the ability to reload settings and adjust the teleportation delay. Commands /setspawn: Sets the revival point to the player's current position. Uses permission “setspawn.admin” /spawn: Teleports the player to the revival point with a delay. Uses permission “setspawn.use” /setspawn-reload: Reloads the plugin, reloading the configuration. Uses permission “setspawn.admin” /setspawn-delay <Value>: Sets the teleportation delay time. Uses permission “setspawn.admin” Permission setspawn.admin setspawn.use Configuration file { "TeleportDelaySeconds": 10.0 } Lang { "NoPermission": "<color=#FF0000>You don't have permission to use this command.</color>", "SpawnSet": "<color=#00FF00>Spawn point set to {0}.</color>", "Teleporting": "<color=#00FFFF>Teleporting to spawn point in {0} seconds...</color>", "Teleported": "<color=#00FF00>You have been teleported to the spawn point.</color>", "NoSpawnSet": "<color=#FF0000>Spawn point has not been set.</color>", "TeleportCancelled": "<color=#FF0000>Teleport cancelled due to movement.</color>", "PluginReloaded": "<color=#00FF00>Plugin has been reloaded successfully.</color>", "ReloadFailed": "<color=#FF0000>Failed to reload the plugin.</color>", "DelaySet": "<color=#00FF00>Teleport delay has been set to {0} seconds.</color>", "InvalidDelay": "<color=#FF0000>Invalid delay value. Please enter a positive number.</color>" } The lang file supports Hex colors Data { "SpawnPoint": null }Free

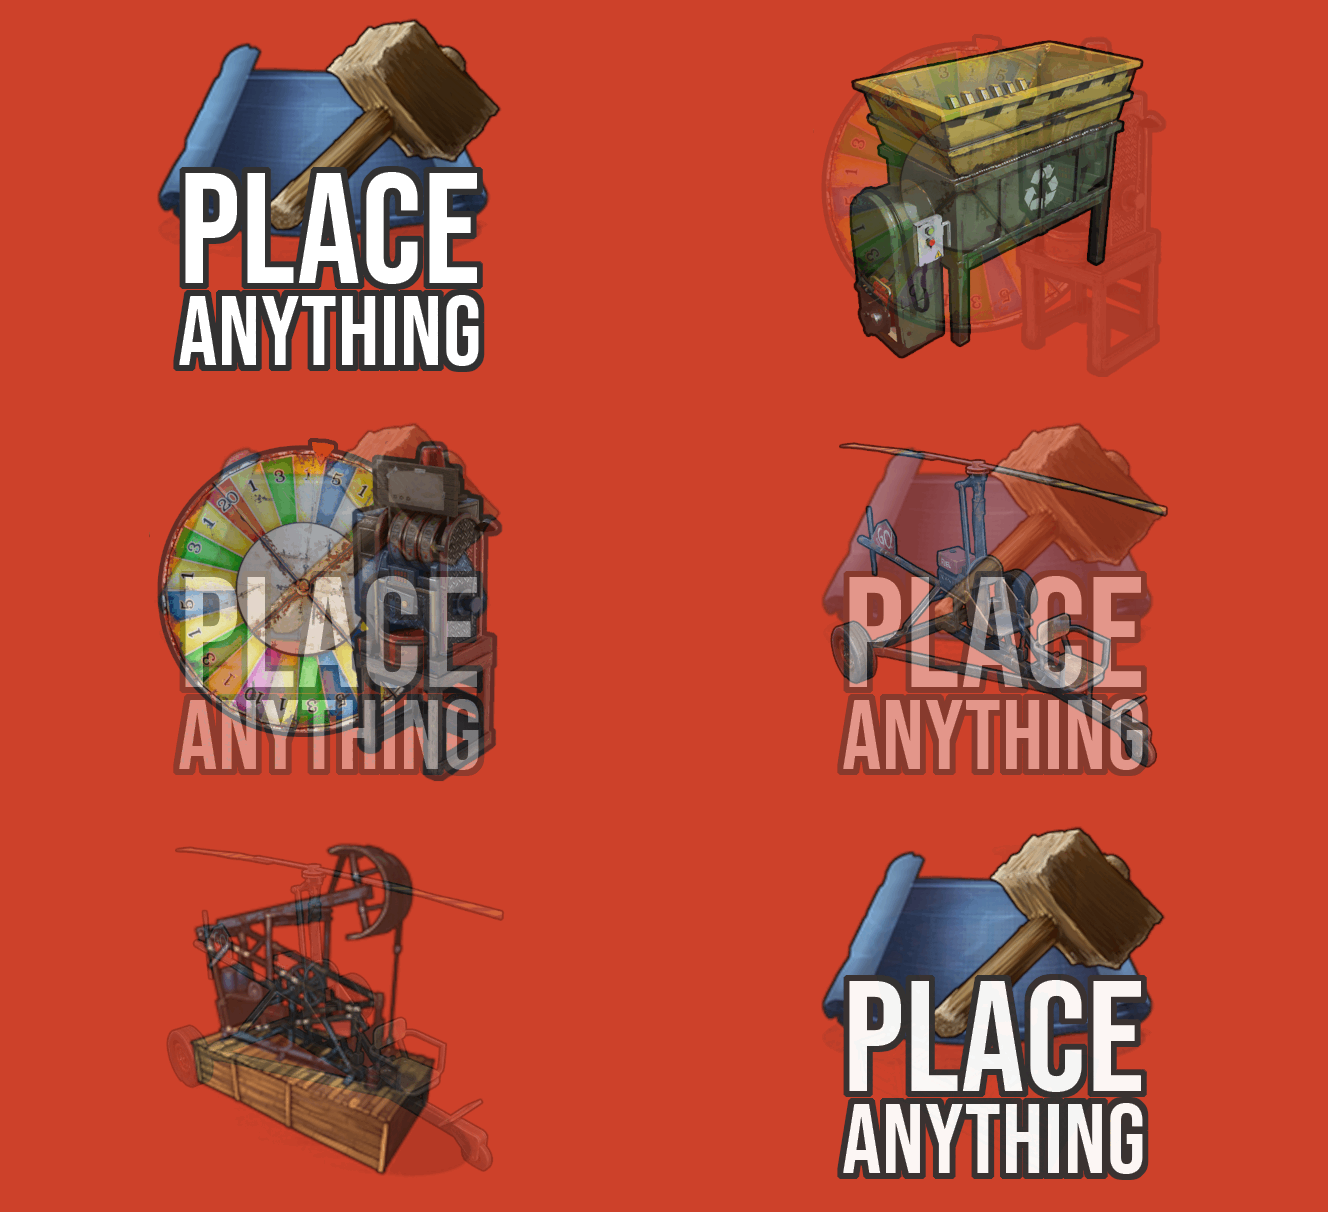


.thumb.png.d8730004887666a2775699ef18eb252c.png)


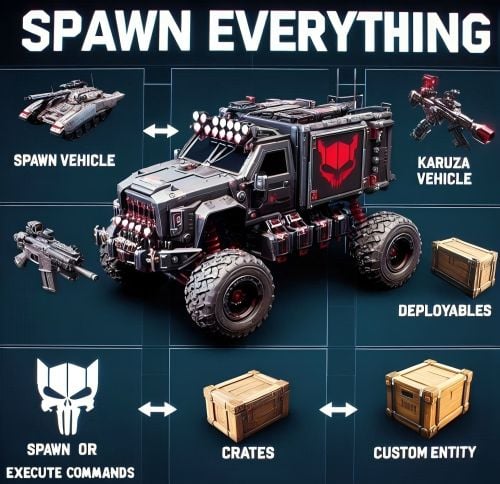

.thumb.png.110d6e8fdfe030b41bc98faec9c0bdee.png)
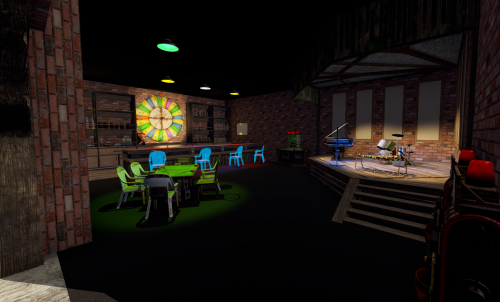

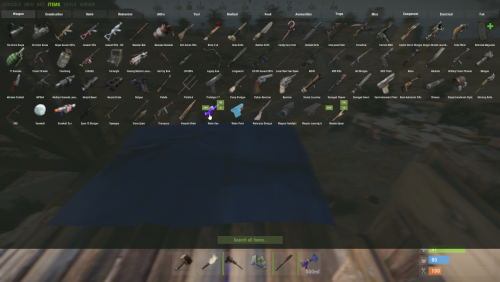

.thumb.webp.df16a3c608b3523db80a864e081ad5a5.webp)
