Search the Community
Showing results for tags 'base'.
-
.thumb.gif.3fa7fa618585d57d12659196895cd036.gif)
Version 2.0.1
62 downloads
This is a configuration file designed by us, featuring 110 custom bases across five different difficulty levels, ranging from Easy to Nightmare. (This package does not include loot tables. If you need bases + loot tables, you may want to check out the higher-tier package: 110 Raibable Bases + Loot Tables package) Warning: The Raidable Bases plugin requires the Copy Paste plugin to function. You must install both for this bases pack to work. Raidable Bases (Paid): https://codefling.com/plugins/raidable-bases Copy Paste (Free): https://umod.org/plugins/copy-paste This Raidable Bases package includes: (In addition to the bases, it includes a well-configured config file that can be uploaded to /serverfiles/oxide/config, but its usage is optional. It also contains 5 different profile configs that can be uploaded to /oxide/data/RaidableBases/Profiles. These are also well-configured and optional to use. The usage of both is entirely up to you.) - 30 Easy Bases - 30 Medium Bases - 30 Hard Bases - 10 Expert Bases - 10 Nightmare Bases WARNING: TWO DIFFERENT INSTALLATION METHODS (PLEASE READ BOTH AND APPLY ONLY THE ONE THAT FITS YOUR NEEDS) INSTALLATION GUIDE 1 (If you do not have a custom configuration and are not a professional in server configurations, choose this option. However, if you already have your own configuration and profile settings and do not wish to use the optional configs we provide—in other words, if you only need the bases—use the second installation guide instead.) Step 1: Place the Config File From the extracted ZIP files, locate the config folder and find the RaidableBases.json file. Move it to the following directory: /serverfiles/oxide/config Step 2: Place the Bases From the extracted ZIP files, locate the copypaste folder and move it to the following directory: /serverfiles/oxide/data Step 3: Place the Profiles Folder From the extracted ZIP files, locate the profiles folder and move it to the following directory: /serverfiles/oxide/data/RaidableBases Why Are Profiles Important? The profiles folder contains crucial settings that allow you to: ✔ Enable/disable the dome ✔ Enable/disable NPCs ✔ Adjust the number of lootable items These are just a few examples—there are dozens of important settings that directly affect how raid bases function. The config file alone is not enough—these files play a major role in customizing your raid bases. I strongly recommend reviewing each difficulty setting (Easy to Nightmare) inside the profiles folder and adjusting them based on your needs. Step 4: Restart the plugin via RCON: o.reload RaidableBases INSTALLATION GUIDE 2 (Use this installation method if you do not want to use our configurations and instead prefer to use your own config files and your own /oxide/data/RaidableBases/Profiles configurations.) In this case, you only need to add the bases. To do this, use the following commands in RCON: Step 1: You can add bases one by one or in bulk. After executing the commands in RCON, the bases will be registered inside the Profiles configuration. If you do not want to deal with these adjustments, it is recommended to use Installation Guide 1 instead. A- Example RCON commands: rb.config add "Easy Bases" fullwipedeasy1 rb.config add "Hard Bases" fullwipedhard1 B- Commands to Integrate Raid Bases in Bulk via RCON: rb.config add "Easy Bases" fullwipedeasy1 fullwipedeasy2 fullwipedeasy3 fullwipedeasy4 fullwipedeasy5 fullwipedeasy6 fullwipedeasy7 fullwipedeasy8 fullwipedeasy9 fullwipedeasy10 fullwipedeasy11 fullwipedeasy12 fullwipedeasy13 fullwipedeasy14 fullwipedeasy15 fullwipedeasy16 fullwipedeasy17 fullwipedeasy18 fullwipedeasy19 fullwipedeasy20 fullwipedeasy21 fullwipedeasy22 fullwipedeasy23 fullwipedeasy24 fullwipedeasy25 fullwipedeasy26 fullwipedeasy27 fullwipedeasy28 fullwipedeasy29 fullwipedeasy30 rb.config add "Medium Bases" fullwipedmed1 fullwipedmed2 fullwipedmed3 fullwipedmed4 fullwipedmed5 fullwipedmed6 fullwipedmed7 fullwipedmed8 fullwipedmed9 fullwipedmed10 fullwipedmed11 fullwipedmed12 fullwipedmed13 fullwipedmed14 fullwipedmed15 fullwipedmed16 fullwipedmed17 fullwipedmed18 fullwipedmed19 fullwipedmed20 fullwipedmed21 fullwipedmed22 fullwipedmed23 fullwipedmed24 fullwipedmed25 fullwipedmed26 fullwipedmed27 fullwipedmed28 fullwipedmed29 fullwipedmed30 rb.config add "Hard Bases" fullwipedhard1 fullwipedhard2 fullwipedhard3 fullwipedhard4 fullwipedhard5 fullwipedhard6 fullwipedhard7 fullwipedhard8 fullwipedhard9 fullwipedhard10 fullwipedhard11 fullwipedhard12 fullwipedhard13 fullwipedhard14 fullwipedhard15 fullwipedhard16 fullwipedhard17 fullwipedhard18 fullwipedhard19 fullwipedhard20 fullwipedhard21 fullwipedhard22 fullwipedhard23 fullwipedhard24 fullwipedhard25 fullwipedhard26 fullwipedhard27 fullwipedhard28 fullwipedhard29 fullwipedhard30 rb.config add "Expert Bases" fullwipedexp1 fullwipedexp2 fullwipedexp3 fullwipedexp4 fullwipedexp5 fullwipedexp6 fullwipedexp7 fullwipedexp8 fullwipedexp9 fullwipedexp10 rb.config add "Nightmare Bases" fullwipednight1 fullwipednight2 fullwipednight3 fullwipednight4 fullwipednight5 fullwipednight6 fullwipednight7 fullwipednight8 fullwipednight9 fullwipednight10 Step 3: Restart the plugin via RCON: o.reload RaidableBases EXTRA IMPORTANT INFORMATIONS: We do not use a dome, NPCs, or arena walls around raid bases on our servers, and in the ZIP file we provided, these features are also disabled by default. If you want to enable them, you will need to adjust the settings accordingly. For example, to enable the dome, follow the steps below: Navigate to: /oxide/data/RaidableBases/Profiles Open the files inside the Profiles folder with a text editor. Locate the following settings: (This is already set to false because it is required for markers to appear on the map.) "Spawn Silently (No Notification, No Dome, No Map Marker)": false, "Create Dome Around Event Using Spheres (0 = disabled, recommended = 5)": 0, Change the value from 0 to 5 as shown below: "Create Dome Around Event Using Spheres (0 = disabled, recommended = 5)": 5, In our setup: - Timed events and purchasable events are disabled. - After a wipe, easy bases will start spawning 30 minutes later. - Nightmare bases will begin spawning 48 hours (2 days) later. Imagine starting the game with just a torch in hand and immediately encountering a nightmare base on the shore. You’d likely quit the game right away—this setting is crucial for us to avoid such scenarios. Configuration Example: serverfiles/oxide/config "Maintained Events": { "Always Maintain Max Events": true, "Max Maintained Events": 30, "Enable X Hours After Wipe (0 = immediately)": { "Easy": 0.5, "Medium": 1.0, "Hard": 3.0, "Expert": 24.0, "Nightmare": 48.0 If you need not only these bases but also the loot tables for the items that will spawn inside them, check out our one-of-a-kind, exceptional Raidable Base Loot Tables at the link below: https://codefling.com/customizations/raidable-bases-loot-tables-pack (Our loot tables are designed to cater to different server types, including Vanilla (1x) servers as well as 2x, 3x, 5x, 10x, and higher multipliers to match various loot requirements.) If you are satisfied with this package, you can support us by leaving a 5-star review on the site where you purchased it. Your feedback motivates us to continue improving and providing even better configurations for dedicated server owners like you. Please leave a review here: https://codefling.com/bases/raidable-bases-pack-110-bases?tab=reviews Thank you! Support: FULLWIPED DISCORD$48.99 -

Version 3.4.13
3,421 downloads
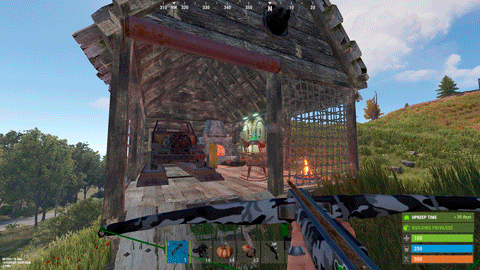
The ultimate base protection plugin that allows players to pay a resource in exchange for configurable protection for their base or tugboat. This plugin has been rewritten from the ground up for performance, quality, and integrating community suggested features. Features There are many different ways you can configure this plugin to fit the needs of your server. Many features can be modified or disabled entirely through the plugin configuration file. These include: Both online and/or offline base protection Trade currency for protection or provide it for free Players can turn on/off protection Permission based protection tiers Configure what gets protected and who it is protected from Set limits on how long protection lasts Indicator(s) for displaying base protection Option for allowing raiders to bypass protection if they can drain the protection balance with damage Options for making protection more expensive for larger bases/clans and cheaper for small groups. UI that blends in seamlessly with vanilla Rust. Disclaimer This plugin will be updated at the owners discretion. Before purchasing any plugin, I recommend checking the date of the last update and refer to support tickets to see if there might be any issues with the latest Rust game version. If a game update breaks this plugin, please open a support ticket (if it doesn't already exist) and direct message me on Discord (link found below). How to Use Configure the plugin and load it Once loaded, assign yourself (or your group) one of the protection level permissions. Place a new tool cupboard, or find one that YOU have previously placed. Open the tool cupboard inventory, at the top you should see two tabs: "Upkeep" and "Protection". Select the protection tab to view the raid protection info. On this screen, you will be able to spend the configured currency in order to purchase hours of protection. By default, this currency is scrap. Use the buttons on the right to add some hours of protection, you should see that status change to show the time you are protected. Your base will now be protected for the amount of time specified. Notes You can use the Clear button to withdraw all balance, and stop protection The Pause/Resume button can be used to start/stop protection without changing the balance. The Info button will reveal a panel which displays additional information on protection. The +Max button will deposit the maximum amount of time that you can afford Quick Start Presets There is a lot of documentation for this plugin because there is a lot you can do with it! However, it doesn't have to be complicated. If you have a simple use case in mind, you can use one of these preset configurations to get what you need or use as a starting point without having to figure it out yourself! Important: You will want to assign your default permission group the raidprotection.level.1 permission for any of these configurations. Always Free Provides free raid protection for all players with the level 1 permission Protection for tugboat bases Recommended for PvE or light PvP servers Offline Only Same as the default config, but only offers offline protection Has a limit of 48 hours of protection for level 1 Includes a level 2 permission with unlimited hours of protection (VIP) Protection for tugboat bases Recommended for PvP servers Hardcore Offline only protection Two protection levels, one with a 48 hour limit and one with no limit Additional costs that scale with number of owners and building size Raiders can damage a structure and cause it to "bleed" protection balance to attempt to disable the protection with enough damage Significant delay for activating protection No protection for tugboat bases Recommended for hardcore PvP servers Upgrading Versions When a new version is released, you may need delete your config and lang files and reload them to accommodate the new changes. You do NOT need to delete the data file, unless specifically instructed. As long as you do not delete the data file, then all of your protection balances will persist, even between versions. Not all updates will require this process, but if it does, you will be notified with a message like this: To resolve this, simply delete the config and lang files and reload the plugin. You will need to manually update these files to align with what you want. As of v3.4.0 you no longer need to delete your config files when upgrading from a previous version. However, you still should check the config after the update is installed to verify no unintended changes have occurred. Protection Levels Protection levels are how you assign a particular set of rules to a player. These protection levels are added in the configuration file, and are then assigned to an auto-generated permission. Each protection level needs a unique Rank property, this rank determines the order of precedence when a player is assigned multiple protection levels. In this event, a player's protection level will always be the highest ranked protection level they are granted. Protection levels are managed in the configuration file, here is some information on some of the properties: Cost per damage protected - This amount will be deducted from the protection balance for each point of damage that was protected. So if this value is set to 1 and someone attempts to deal 100 damage to a protected structure, and that structure has 100% protection, then 100 balance will be deducted. If in that same example it was only 50% protection, then only 50 balance would be deducted. Entity resistances are taken into account as well (twig will take more damage than metal, ect). Hourly base cost - This is a fixed cost that is charged per hour of protection. Hourly cost per authorized player - This amount will be charged for each owner every hour. Can be used to charge players more if they have a larger clan. Hourly cost per floor - This amount will be charged for each floor every hour. Can be used to charge players more for protecting a larger base. Max protection time - The max number of hours protection can be applied for. If set to null, then there will be no limit. Offline protection percent - The percent of protection a structure will receive when all the owners are offline. A value of 0 will be unprotected, and a value of 100 will be fully protected. Online protection percent - The percent of protection a structure will receive when at least one owner is online. A value of 0 will be unprotected, and a value of 100 will be fully protected. Rank - A number value indicating the order of importance when a player is assigned multiple protection ranks. Higher values indicate a greater importance. For example, if a player is assigned both protection rank 1 and protection rank 2, then tool cupboards they place will be of protection rank 2 instead of 1. These ranks must be unique DO NOT create protection levels with the same rank. This value needs to be 1 or higher, it cannot be 0. Delay after taking damage - The number of seconds before protection may begin after a structure has taken unprotected damage. It is recommended to set this to a higher amount on PvP servers. Delay for offline protection - The number of seconds before offline protection kicks in after the last owner has gone offline. It is recommended to set this to a higher amount on PvP servers. Damage resets timer when owner is offline - If this is set to true, then if a raid has already started on a structure that has offline only protection, but the protection hasn't kicked in yet (due to a delay timer) then the attackers can continue to raid indefinitely as long as they continue to do damage while the owner(s) are offline. If this is set to false, then the attackers will only have a certain amount of time to continue their raid if the owner(s) are offline. Allow tugboat protection - If this is set to true, then players with this protection level may receive protection for tugboat bases. For these tugboat bases the protection panel can be accessed in the fuel inventory of the boat. The founder of a tugboat base is whomever is the FIRST player to authorize on a tugboat. Founder Limit - The number of tool cupboards that a player can be a Founder of and receive raid protection. If a player exceeds this limit, then future tool cupboards will not receive protection until enough previously placed ones have been destroyed in order to be within the limit. If a player places a tool cupboard, and they have exceeded the limit, once they are no longer exceeding the limit they can "activate" that tool cupboard in the info panel to have it gain raid protection. If this value is set to null then there is no limit. Founders and Owners When a tool cupboard is placed, the player who places it is permanently labeled as the "Founder" of that tool cupboard and building privilege. The protection level of that building privilege is derived soley from the founder's protection level, and therefore won't change unless the founder's protection level changes. Whenever a player is authorized on a tool cupboard, they will be permanently branded as an "Owner" of that tool cupboard. Owners are all the players, including the founder, who have EVER been authorized on the tool cupboard. This means that players will still be listed as an owner even if they deauthorize themselves. Owners are important because they affect how Online/Offline protection will be triggered. A base will only be granted offline protection if ALL the owners are offline, otherwise online protection (if available) will be granted if at least one owner is online. For tugboat bases, the founder is whomever is the first player to authorize themselves on the tugboat. Permissions raidprotection.admin raidprotection.level.x - these permissions are autogenerated based on your protection level settings in the config, they will show up in the server console when the plugin is loaded (unless you have Enable Console Messages set to false) raidprotection.ignore - raid protection will not count any player with this permission towards being an owner. They will not show up in the owner list and will not count toward team member count for offline protection. They also will not receive protection on bases they build even if they have a protection level assigned. This is useful for admin groups so that you don't have to remember to deauth on tool cupboards. However, if this permission is ever revoked, that player will be retroactively counted as an owner on ALL tool cupboards they are currently authed on. Commands Player Commands These commands require no permissions and can be used by any player. /pro - displays the raid protection information panel, requires authorization on the tool cupboard in the current area. /lev - displays a screen that tells the player their personal assigned protection level and explains the benefits that comes with it. Admin Commands These commands require the raidprotection.admin permission to use. /tc - displays a screen with all the available admin commands /tc help - same as /tc Use the above commands to see a full command list in game. Configuration The default config file: Here is an explanation for some of the fields: Enable Logging - Set to true to keep logs of tool cupboards protection activity. Logs will be saved to the oxide/logs/RaidProtection folder. It is recommended only to enable this only for debugging purposes, as it will take a significant amount of storage space if you have a larger server. Enable Ledger - Set to true to keep track of protection balance changes for tool cupboard. These ledger files are stored in oxide/data/RaidProtection/Ledgers. It is recommended to keep this enabled, as it will help you roll back balances if a player has an issue. This does not take up as much storage space as logging does as it only keeps track of balances. Enable Console Messages - Set to false to disable the info messages upon plugin reload. Commands - You can change the prefix for the commands this plugin uses here. Chat Message Icon ID - A steam id for the portrait of chat messages. Protection Tabs Offset - This value will adjust the vertical placement of the Protection Tabs in the tool cupboard menu. Positive values will move it up, negative values will move it down. Useful for making it so those tabs don't conflict with other UI plugins that use that area. Image Settings - Links for the images the plugin uses. Indicator Settings - Settings for the indicator that (by default) appears in the top right when you attack a protected structure. You can change its size and position or disable it. Plugin Integration - Set any of these to true if you want this plugin to take advantage of the features of another supported plugin. Custom Status Framework Settings (Ignore if you do not have Custom Status Framework integration enabled) Popup Attack Indicator - If set to true, a status will briefly appear when a player attacks a protected structure. Persistent Status For Owners - If set to true, a status will appear while a player is in a protected area that they are an owner for. Slight performance cost when enabled. Persistent Status For Non Owners - If set to true, a status will appear while a player is in a protected area that they are NOT an owner for. Slight performance cost when enabled. Popup Status When Hammer Equipped - If set to true, a status indicating the protection level of the area they are in will appear while they are holding a hammer. This will appear regardless of if you are an owner of that area or not. Protection Settings Admin owners removed when deauthorized - Normally, you cannot remove an owner even if they deauthorize. But if this setting is enabled, it allows admins to remove themselves as owners when they deauthorize from a tool cupboard. They can also achieve this with commands. Allow balance withdraw - If set to true, then players will see a "Clear" button in the tool cupboard panel that allows them to withdraw any protection balance. Allow max deposit - If set to true, there will be a "+Max" button that will purchase the maximum number of protection hours a player can afford. Award remaining balance when cupboard is destroyed - If set to true, whomever destroys a tool cupboard will be awarded whatever amount was in the protection balance. Currency item - The item that will be used as currency for protection, this will only be overridden if you are using Server Rewards or Economics for your currency. If you want it to be a custom item that has a skin, you can put # followed by the skin id after the item name. For example "scrap#12345" would only accept scrap items with the skin 12345. Protected entities - If any of these are set to true, then that type of entity will be covered under Raid Protection. If you are using other protection plugins like TruePvE, then you will want to configure these to not overlap with what other plugins are protecting. Protected from - If these are set to true, then damage from that type of source will be protected. By default Authed Players is set to false, which means that players will be able to damage their own structures, but enemy players cannot. Protection levels - See the section about protection levels for information. Protect twig - If set to true, then twig building blocks will receive raid protection. If set to false, then twig building blocks will not receive raid protection, even if placed by an owner of the base. Ledgers As of Raid Protection v3.2.0, you can optionally configure ledgers to be enabled. When enabled, the plugin will keep logs protection balance changes for all tool cupboards. These logs will be saved to oxide/data/RaidProtection/Ledgers. There is a ledger file for each tool cupboard, and it's filename will make the entity ID of that tool cupboard. You can use the /tc id command to see what the ID of a tool cupboard is (see commands section). The benefit of ledgers is that each balance change has a specific GUID identifier attached to it that can be used to restore a tool cupboard's balance to that exact state in the event that a player has an issue. An example of a ledger file might look like this: Ledger file for tool cupboard with ID 2250729 [ "05/26/2023 16:17:56,ad87f16e-52eb-4689-887f-ecc53cd3ff13,0,Withdraw", "05/26/2023 16:18:20,108e54c0-98c4-46df-9eb3-e17192c37bb3,0,CollectionStopped", "05/26/2023 16:18:23,a2f03162-200c-47ce-948e-b0c703435e51,0,CollectionStarted", "05/26/2023 16:18:28,5c83390e-bbd2-4049-8ec9-8f2951746159,0,Withdraw", "05/26/2023 16:19:29,cd892a3f-249b-4cad-8949-abf904656288,20,Added", "05/26/2023 16:19:31,6e710dfc-23c2-4375-8c4f-07017d4d44c6,40,Added", "05/26/2023 16:19:31,bc51f8c7-3f3a-4abc-8fd2-8bb4c47fe454,60,Added", "05/26/2023 16:20:25,f08cfa34-a623-4de3-9027-7c3acb3e3ec3,60,CollectionStarted", "05/26/2023 16:20:52,a849be59-899c-4779-bba6-2f5f1b0ffb8d,59.93055,CollectionStopped" ] The format of each row goes as follows, from left to right separated by commands. Date and Time of balance activity GUID identifier, used by the /tc restore command to roll back a balance The protection balance of the tool cupboard at that given time A brief descriptive reason as to what changed about that balance For example, using the ledger file listed above, if we wanted to rollback the tool cupboard to before the collection started (the last "Added" one), we could run the following command. /tc restore 2250729 bc51f8c7-3f3a-4abc-8fd2-8bb4c47fe454 Running this command will set the balance of the tool cupboard with ID 2250729 back to its balance of 60. As of v3.2.3 you can also mass restore all tool cupboards to a specific time or date. For example, using the ledger file listed above, if we wanted to rollback the tool cupboard to the time 16:19:00. We could run the following command. /tc ledger rollback 16:19 This will rollback ALL TOOL CUPBOARDS to the first ledger entry that comes BEFORE the given time. In this case that entry would be GUID=5c83390e-bbd2-4049-8ec9-8f2951746159 at time 16:18:28 because that is the latest entry before 16:19:00. Thus the balance will be 0. Rollbacks can also accept a date in addition to a time. For example, if you wanted to rollback to noon the following day you could run the following command. /tc ledger rollback "5/25/2023 12:00" Notice that there is no ledger entry for this tool cupboard that goes back that far. In this case, the balance of the cupboard will be set to ZERO. Please note that if you include a date and time the value MUST be enclosed in quotes (see the example above). Tugboat Bases As of v3.3.0, Raid Protection can optionally be allowed for tugboat bases. This is configurable per protection level. Tugboat bases can utilize all the features of a normal tool cupboard base. You can access the protection panel for tugboat bases in the fuel inventory in the drivers seat. For tugboat bases, the founder of the base is considered to be the FIRST player to authorize on the tugboat. Plugin Integration Clans This plugin provides built-in support for Clans. If a player is in a Clan, it will automatically treat all clan members as owners. This of course means that the owners will not be removed even when a member is kicked from a clan. True PVE This plugin is compatible with True PVE as long as both plugins are configured in a non-conflicting way. For example, if you use True PVE to provide protection to players, then in your Raid Protection config file under the Protected entities section you should set Authed Players and Unauthed Players both to false to avoid hook conflict errors. If you do see hook conflicts, see the section of this documentation about how to resolve hook conflict errors. Zone Manager This plugin is compatible with ZoneManager without any extra configuration. ZoneManager will take priority if the zone has the "undestr" flag. Custom Status Framework If you have CustomStatusFramework installed and want to take advantage of the status indicators (that appear in the bottom right) in your Raid Protection config file under the Plugin Integration section set Custom Status Framework to true. Simple Status Simple Status is a plugin that is still being developed, and will be an alternative, more performance friendly option to Custom Status Framework. This plugin is not yet available, but as of v3.4.0, configuration options have been added to support this plugin when it releases. Preview of indicators: Economics and Server Rewards If you wish to use economics balance or server rewards points as a currency instead of an item, you can set ONE of these to true in the plugin integration section of the config. It is important to set ONLY ONE of these to true, or else both will be disabled and you will get a warning in the console. Protection panel with Economics: NoDecay This plugin is compatible with NoDecay without any extra configuration. Notify If you want to use Notify as your source of indicators you can enable the flag for it in the Raid Protection config. Abandoned Bases If you enable Abandoned Bases in the integration config, then bases that are labeled as Abandoned will not receive raid protection. Raidable Bases Bases spawned by Raidable Bases will be ignored by Raid Protection. They should not show up in ledgers and players cannot add balance to them. Skill Tree If Skill Tree is enabled in the integration config then it will prevent players with the lockpicking skill from picking locks in raid protected areas. Other Plugins Should be compatible with most other plugins given they don't use the onEntityTakeDamage hook. If they do use this hook, it just means you have to change your configuration settings, see the hook conflicts section for more info. Images If you experience any issues with the default images provided by this plugin I recommend hosting them yourself. The urls can be changed in the config. Here is a zip file containing all the images. icons.zip Carbon As of 8/19/2023 I can confirm that this plugin is compatible with Carbon. Please open a support ticket if you experience any Carbon related issues. Hook Conflicts If you're getting messages in the server console that looks similar to this: OnEntityTakeDamage resulted in a conflict between the following plugins: NoDecay - True (Boolean), RaidProtection (False (Boolean)) That means that another plugin is conflicting with Raid Protection. In most cases this is an easy fix, and it just means that you need to update your Raid Protection config file to not protect the same entities that another plugin is already protecting. So for example, if you have a plugin already that makes it so player's cannot attack each other, then there is no need for Raid Protection to do that job, and therefore in the Protected entities section of the config you should set Authed players and Unauthed players to false to avoid conflicts. Previous Versions You may have seen the free version of this plugin available on uMod. That version (2.X.X) will stay available for free on umod, but is no longer supported. If you are upgrading from the free version, you must first delete the config/lang/data files before installing v3.0.0 and above. If you do not delete these files, you will likely run into issues, as despite having the same name, the plugin has been completely rewritten, and therefore is completely incompatible with the free version. Developer API /* * Returns 0 if entity unprotected and 100 if entity fully protected */ private float GetProtectionPercent(BaseEntity entity) /* * Returns a list of the owners of the structure associated with the given entity */ private List<BasePlayer> GetOwners(BaseEntity entity) /* * Returns the player who is the founder of the structure associated with the given entity. Can be null. */ private BasePlayer GetFounder(BaseEntity entity) /* * Returns the protection balance of the structure associated with the given entity */ private float GetProtectionBalance(BaseEntity entity) /* * Returns the hours of protection remaining of the structure associated with the given entity */ private float GetProtectionHours(BaseEntity entity) Discord If you want to report a bug, require support, have a suggestion or want to be notified when I release an update you can join my plugin development discord with this link: Plugin Development Discord Link Donate Writing and maintaining these plugins takes a tremendous amount of work. Donating is one way to give some positive feedback which helps me continue making them! Buy me a coffee here! FAQ Please check out this section before opening a support ticket, it may save us both some time! Q: I don't see the status indicators in the bottom right. A: The status indicators come from another plugin called CustomStatusFramework, you must install it and enable it in the config file to get the indicators. Q: I have protection time, but I am able to damage my own structure. By default "Authed players" are able to damage their own structures. You can change this in the config file. Q: The add hours buttons aren't showing for me in the tool cupboard panel. A: The hours buttons will not show if the protection has 0 cost. Q: I have a max protection time set, but it says "protected for forever" A: If the protection cost is 0, then there cannot be a max protection time. Q: I deauthorized myself from the tool cupboard, but I am still listed as an owner. A: Owners are not removed after deauthorization. Only admins can remove owners. Q: How are overlapping tool cupboards handled? A: If a player has a base with overlapping tool cupboards, then each cupboard will need its own protection. Which entities are protected depend upon which tool cupboard governs that entity. Q: Can player's exploit offline only protection by deauthorizing? A:Deauthorizing will not help players looking to exploit offline only protection because they will still be considered an Owner even if they deauthorize. Q: Can a player exploit offline only protection by never authorizing? A: If a player is never authorized on a cupboard, then they will not count toward being online, and therefore offline protection can occur. However, players cannot add or manage protection balance unless they are authorized, and therefore the protection balance will run out, especially if a max protection time is set. Q: I have protection for horses on, but now the horses never poop A: If horses don't lose health, they will never eat and therefore never poop, this is a side effect of protection for horses. Q: Why does protection say "pending" in the bottom right? A: Pending either means that you have offline only protection or your structure has recently taken damage and therefore protection is delayed. See the tool cupboard protection panel for more info. Q: I'm seeing conflict warnings in my console between Raid Protection and True PvE A: Please refer to the sections of documentation for TruePvE and Hook Conflicts Q: I'm seeing Image failed to download! Error: HTTP/1.1 429 Too Many Requests A: Refer to the Images section of the documentation.$29.99- 255 comments
- 15 reviews
-
- 16
-

-

-
- #protection
- #base
- (and 5 more)
-
Version 1.0.1
123 downloads
In the "Bases" Folder you will find 60 bases total that you can add to your server. They are ranked easy, medium, hard, expert and nightmare. They are all Unique and fun to raid. There are simple raid bases like you would see on a normal rust server. But there are alot of maze / puzzle bases in there, with secret loot rooms and hidden tc's. Watch out for the special traps that are placed, on places you wouldn't care to look! Never a doll moment when you see one of my raidbases, they are all tested on an active server and everyone loves to see my raidbases. You can't go wrong with this pack! 6 Easy 9 Medium 18 Hard 16 Expert 11 Nightmare Loot Tables: As said on Raidable Bases plugin you need your own loot tables. The plugin comes with some very basic items (Default_Loot.json) that only serve as a demo loot list for you to either delete or expand upon. In order to make any use of the plugin (beyond demonstration) you will have to create your own loot lists instead. These are al made on Enchanted.gg server. Made with for pluggins: https://umod.org/plugins/copy-paste$65.00 -
Version 0.1.14
836 downloads
Plugin for Real PvE servers, featuring damage prevention, anti-griefing measures, customizable PvP zones, an automatic loot queue in radtowns and raid zones, and much more. P.S. Since the previous implementation with DynamicPVP was not correct and had some issues, I have added universal hooks(Developer API section) for general access from all PvP plugins, which are currently missing in DynamicPVP. I have requested the author to add them(3 lines), but for now, you will need to use the modified version of DynamicPVP.cs The ability to set "server.pve" to "true", which allows the server to have a "PvE" flag; Damage from NPC's are enabled when server.pve is true; The ability to inflict damage to one's own structures with "server.pve true"; The ability to destroy(including external walls) or rotate one's structures without any time constraints; The ability to force the decay of building blocks with Twigs grade, even if there is wood in the Tool Cupboard; The ability to toggle the gather resource restriction in someone else's Building Privileges; No one, except the owner or their friends, will be able to open their loot containers (chests, storages, bodies, etc.); Administrators can bypass loot restrictions; The ability to schedule the killing of players if they disconnect within someone else's Building Privilege; Disabling backpack and active item drop upon death, even if backpack is full; The ability to disable 'Give' messages; The ability to modify the items given at spawn on the beach; The ability to create an unlimited number of custom permissions; The ability to allow players to bypass the queue; The ability to set limits on sleeping bags, shelters and auto turrets for each permission; The ability to set a multiplier for the prices of monuments and events for each permission; The ability to customize the price and amount of vehicles for each of your custom permissions; The ability to assign vehicles to each player; The ability to customize the assigned price and available amount of vehicles for each of your custom permissions; An assigned vehicle can't be damaged, looted or pushed by other players, but it can be pushed if it is within someone else's Building Privilege; The ability to loot monuments through a queue system; The ability to configure monuments, setting their looting price and time, and adjusting status bars for each monument; The ability to acquire the privilege to loot events (helicopters, bradleys, and raidable bases) through a purchase; The ability to customize the price of each event types and loot attempts (lives); NPCs only aggress against players who are looting monuments, events or raidable bases; Only players who are looting monuments, events or raidable bases can inflict damage to NPCs; RaidableBases are protected from griefing(no damage, no loot and etc). Only the owner can interact with the raid; Neutral RaidableBases can be purchased; Prices for purchasing neutral raids are configurable for each difficulty level; Configurable raid limits (currently available) along with discount multipliers for purchases, for each permission. File location: *SERVER*\oxide\data\RealPVE\PermissionConfig.json Default: https://pastebin.com/5VtWZZVr All permissions are created and configured in the config file under the "List of permissions" section. You can create as many permissions as needed and customize them flexibly. It is recommended to use the prefix "realpve" in the permission's name, for example: "realpve.vip". NOTE: The first permission will serve as the default permission for those who do not have any permissions. { "List of permissions. NOTE: The first permission will be used by default for those who do not have any permissions.": [ { "Permission Name": "realpve.default", "Bypass Queue": false, "Limit of beds": 15, "Limit of shelters": 1, "Limit of auto turrets": 12, "Seconds that will be skipped when opening HackableLockedCrate": 0.0, "Monuments price multiplier": 1.0, "Events price multiplier": 1.0, "Limit of RaidableBases(at the time)": 1, "RaidableBases price multiplier": 1.0, "Vehicles settings": { "Horse": { "Limit": 1, "Price": 10.0 }, "Bike": { "Limit": 1, "Price": 5.0 }, "MotorBike": { "Limit": 1, "Price": 20.0 }, "Car": { "Limit": 1, "Price": 25.0 }, ... } }, { "Permission Name": "realpve.vip", "Bypass Queue": true, "Limit of beds": 20, "Limit of shelters": 2, "Limit of auto turrets": 15, "Seconds that will be skipped when opening HackableLockedCrate": 450.0, "Monuments price multiplier": 0.9, "Events price multiplier": 0.9, "Limit of RaidableBases(at the time)": 2, "RaidableBases price multiplier": 0.9, "Vehicles settings": { "Horse": { "Limit": 5, "Price": 9.0 }, "Bike": { "Limit": 5, "Price": 4.5 }, "MotorBike": { "Limit": 5, "Price": 18.0 }, "Car": { "Limit": 5, "Price": 22.5 }, ... } } ], "Version": { "Major": 0, "Minor": 1, "Patch": 1 } } An example of a monument/event/rb multipliers using default permissions. For example, if you set the price for the Harbor at $1000, a player with the default permission(1.0) will pay $1000 * 1 = $1000. Meanwhile, a player with a VIP permission(0.9) will pay $1000 * 0.9 = $900. However, if a player possesses a misbehaving permission with a value of 1.1, they will need to pay $1000 * 1.1 = $1100. { "Chat command": "realpve", "Chat admin command": "adminpve", "Is it worth forcibly implementing PvE for a server?": true, "Is it worth enabling GameTips for messages?": true, "Is it worth preventing the sending of 'Give' messages?": true, "Is it worth preventing resource gathering in someone else's building privilege area?": false, "Is it worth preventing the pickup of plants spawned by the server in someone else's building privilege zone?": false, "Is it worth forcibly blocking damage from the patrol helicopter to building blocks and deployables?": false, "Is it worth preventing players from handcuffing others?": true, "Is it worth assigning portals(Halloween and Christmas) to the first player?": true, "Is it worth preventing a backpack from dropping upon player death?": true, "Is it worth preventing damage to the laptop of the Hackable Crate?": true, "Is it worth removing the penalties for recyclers in safe zones?": true, "Is it worth allowing all players to pick up items dropped by others? If enabled, personal settings will be ignored": false, "The format that will be used for prices": "${0}", "Vehicles - Time in seconds to display the marker when searching for a vehicle. A value of 0 disables the marker": 15.0, "Anti-Sleeper - Time in seconds after which a player will be killed if they disconnect while inside someone else's Building Privilege. Set to 0 to disable": 1200.0, "Is it worth enabling support for the 'Npc Random Raids' plugin?": true, "Is friendly fire enabled by default when creating a new team?": false, "PvP - Is it worth adding map markers for PvP zones?": true, "PvP - Name of the map maker": "PvP Zone!", "PvP - Settings for the status bar": { "Order": 9, "Height": 26, "Main_Color(Hex or RGBA)": "1 0.39 0.28 0.7", "Main_Transparency": 0.8, "Main_Material": "", "Image_Url": "https://i.imgur.com/oi5vIkk.png", "Image_Local(Leave empty to use Image_Url)": "RealPVE_PvP", "Image_Sprite(Leave empty to use Image_Local or Image_Url)": "", "Image_IsRawImage": false, "Image_Color(Hex or RGBA)": "1 0.39 0.28 1", "Image_Transparency": 1.0, "Is it worth enabling an outline for the image?": false, "Image_Outline_Color(Hex or RGBA)": "0.1 0.3 0.8 0.9", "Image_Outline_Transparency": 0.0, "Image_Outline_Distance": "0.75 0.75", "Text_Size": 12, "Text_Color(Hex or RGBA)": "1 1 1 1", "Text_Font(https://umod.org/guides/rust/basic-concepts-of-gui#fonts)": "RobotoCondensed-Bold.ttf", "Is it worth enabling an outline for the text?": false, "Text_Outline_Color(Hex or RGBA)": "#000000", "Text_Outline_Transparency": 1.0, "Text_Outline_Distance": "0.75 0.75", "SubText_Size": 12, "SubText_Color(Hex or RGBA)": "1 1 1 1", "SubText_Font": "RobotoCondensed-Bold.ttf", "Is it worth enabling an outline for the sub text?": false, "SubText_Outline_Color(Hex or RGBA)": "0.5 0.6 0.7 0.5", "SubText_Outline_Transparency": 0.0, "SubText_Outline_Distance": "0.75 0.75" }, "PvP - Settings for the progress status bar": { "Main_Color(Hex or RGBA)": "1 1 1 0.15", "Main_Transparency": 0.15, "Progress_Reverse": true, "Progress_Color": "#FF6347", "Progress_Transparency": 0.7, "Progress_OffsetMin": "0 0", "Progress_OffsetMax": "0 0" }, "Wipe ID": null, "Version": { "Major": 0, "Minor": 1, "Patch": 14 } } ENG: https://pastebin.com/ZMUL6pYL RUS: https://pastebin.com/Mx8cbMts Main commands(/realpve ) : autobuy - Toggle autobuy for monuments, vanilla events and raid bases with a total price greater than 0; pickup - Toggle access to pick up your items from the ground for all players; share - Manage access to looting your entities by other players(outside of the team): status *entityID*(optional) - Display information about the settings of the entity you are looking at or the one you specified; add *nameOrID* *entityID*(optional) - Add the specified player to the entity list you are looking at or the one you specified; remove *nameOrID* *entityID*(optional) - Remove the specified player from the entity list you are looking at or the one you specified; toggle *entityID*(optional) - Toggle the entity list you are looking at or the one you specified; delete *entityID*(optional) - Delete the settings for the entity you are looking at or the one you specified; clear - Delete the settings for all your entities. team - Manage your team: ff - Toggle the ability to damage your teammates. vehicle - Manage your vehicles: list - List of IDs for all your vehicles; find *vehicleID*(optional) - Help finding the vehicle you are looking at or the one you specified; unlink *vehicleID*(optional) - Unlink the vehicle you are looking at or the one you specified; clear - Unlink all your vehicles. Admin commands(/adminpve). Permission "realpve.admin" required: autobuy - Manage autobuy for monuments, vanilla events and raid bases: *nameOrId* - Toggle autobuy for the specified player; force monument/event/rb - Toggle forced autobuy. If enabled, player settings will be ignored; clear - Disable autobuy for everyone. config - Manage settings for values in the configuration file: forcepve *boolValue*(optional) - Is it worth forcibly implementing PvE for a server? gametips *boolValue*(optional) - Is it worth enabling GameTips for messages? givemsg *boolValue*(optional) - Is it worth preventing the sending of 'Give' messages? resource_privilege *boolValue*(optional) - Is it worth preventing resource gathering in someone else's building privilege area? plant_privilege *boolValue*(optional) - Is it worth preventing the pickup of plants spawned by the server in someone else's building privilege zone? heli_damage *boolValue*(optional) - Is it worth forcibly blocking damage from the patrol helicopter to building blocks and deployables? handcuffs *boolValue*(optional) - Is it worth assigning portals(Halloween and Christmas) to the first player? portals *boolValue*(optional) - Is it worth preventing players from handcuffing others? backpack_drop *boolValue*(optional) - Is it worth preventing a backpack from dropping upon player death? laptop_damage *boolValue*(optional) - Is it worth preventing damage to the laptop of the Hackable Crate? recycler_safezone *boolValue*(optional) - Is it worth removing the penalties for recyclers in safe zones? item_pickup *boolValue*(optional) - Is it worth allowing all players to pick up items dropped by others? If enabled, personal settings will be ignored; priceformat *stringValue* - The format that will be used for prices; vehicle_marker_time *floatValue* - Vehicles - Time in seconds to display the marker when searching for a vehicle. A value of 0 disables the marker; antisleeper *floatValue* - Anti-Sleeper - Time in seconds after which a player will be killed if they disconnect while inside someone else's Building Privilege. Set to 0 to disable; randomraids *boolValue*(optional) - Is it worth enabling support for the 'Npc Random Raids' plugin? teamff *boolValue*(optional) - Is friendly fire enabled by default when creating a new team? pvpmarkers *boolValue*(optional) - PvP - Is it worth adding map markers for PvP zones? pvpmarkersname *stringValue* - PvP - Name of the map maker. loot - Manage player access to entities without restrictions: *nameOrId* - Toggle unrestricted access for the specified player; self - Toggle unrestricted access for yourself; clear - Revoke unrestricted access for all players. monument - Manage monuments: list - List of available monuments; *monumentID*/this - Instead of the monumentID, you can use the word "this", but you must be inside the monument: suffix *boolValue*(optional) - Toggle the suffix display in the monument's name; broadcast *boolValue*(optional) - Toggle notifications about monument occupancy/release; time *intValue* - Set the looting time limit for the monument in seconds; price *floatValue* - Set the cost for looting rights. A value of 0 makes the monument free; offer *floatValue* - Set the offer duration for purchasing the monument in seconds; map_mode *intValue* - Set the marker display mode on the map. 0 - disabled, 1 - enabled, 2 - enabled during PvP mode; map_circle *boolValue*(optional) - Toggle the display of the monument's circle marker on the map; pvp *boolValue*(optional) - Toggle PvP mode for the monument; pvp_delay *floatValue* - Set the PvP mode duration in seconds for players after leaving the PvP monument; bar_progress *boolValue*(optional) - Toggle between TimeProgressCounter and TimeCounter bars for the monument. perm - Manage permissions: add *permName* - Adds a new permission to the list by copying values from the first(default) permission in the list. If the permission name starts with 'realpve', it will also register a new permission; add *permName* *sourcePermName* - Adds a new permission to the list by copying values from an existing permission in the list; remove *permName* - Removes an existing permission from the list; edit *permName* - Edits a permission: queue - Toggle the permission to bypass the server queue; beds *intValue* - Restriction on the number of available beds; shelters *intValue* - Restriction on the number of available shelters; turrets *intValue* - Restriction on the number of available turrets; hackable *floatValue* - Number of seconds(0-900) to skip when opening a hackable crate; monuments *floatValue* - Price multiplier for monuments; events *floatValue* - Price multiplier for vanilla events; rb_limit *intValue* - Restriction on the number of raid bases available simultaneously; rb_mult *floatValue* - Price multiplier for raid bases; vehicles *vehType* - Vehicles settings: limit *intValue* - Limit on the number of available vehicles by type; price *floatValue* - Price for registering a vehicle by type. clear - Removes all permissions from the list except the first one. pickup - Manage access to picking up another player's items from the ground: *nameOrId* - Toggle access to picking up a specific player's items from the ground; clear - Revoke access for all players to pick up items from the ground. share - Manage access to looting entities by other players(outside of the team): status *entityID*(optional) - Display information about the settings of the entity you are looking at or the one you specified; add *nameOrID* *entityID*(optional) - Add the specified player to the entity list you are looking at or the one you specified; remove *nameOrID* *entityID*(optional) - Remove the specified player from the entity list you are looking at or the one you specified; toggle *entityID*(optional) - Toggle the entity list you are looking at or the one you specified; delete *entityID*(optional) - Delete the settings for the entity you are looking at or the one you specified; clear *nameOrID*(optional) - Delete the settings for all entities or all entities of the specified player. vehicle - List of all available vehicle types: types - List of available vehicle types. Example: /realpve pickup /realpve vehicle find *netID* /realpve team ff /adminpve perm add realpve.vip2 /adminpve perm add realpve.vip2 realpve.vip /adminpve perm edit realpve.vip2 queue true /adminpve perm edit realpve.vip2 vehicles horse limit 5 /adminpve monument list /adminpve monument *monumentID* pvp /adminpve monument *monumentID* price 7.5 /adminpve loot iiiaka /adminpve pickup iiiaka /adminpve vehicle types This plugin provides the ability to claim vehicles, thereby preventing theft and griefing from other players. In permissions, you can set the price and quantity restrictions for each type of vehicle, ensuring flexible customization according to your preferences. An assigned vehicle can't be damaged, looted or pushed by other players, but it can be pushed if it is within someone else's Building Privilege. File location: *SERVER*\oxide\data\RealPVE\MonumentConfig.json Default: https://pastebin.com/XY1d9YaM This plugin introduces queue system and loot purchases for monuments. You can customize the price and time for looting for each monument. Within monuments, only the "Looter" and his friends have the ability to loot, pick up items or damage entities. Additionally, NPCs and animals within monuments do not aggress against other players and do not receive damage from them. If a player dies within the monument, they will have a grace period to return. This allows players to safely loot monuments without fear of griefing. Example of monument configuration: "ferry_terminal_1": { "Type(This parameter is just a hint. Changes won’t have any effect)": "RadTown", "Is it worth displaying the suffix(if any) in the monument's name?": true, "Is it worth notifying all players about the occupation/release of the monument?": true, "The cost for the right to loot the monument. A value of 0 makes the monument free": 15.0, "The time in seconds(1-3600) given for looting the monument": 900, "The time in seconds(1-15) given to make a decision to purchase the monument": 5.0, "Map marker display mode: 0 - disabled, 1 - enabled, 2 - enabled during PvP mode": 1, "Is it worth creating a circle in the map marker?": true, "PvP - Is PvP enabled at this monument? If so, players will be able to kill each other and loot will be publicly accessible": false, "PvP - The time in seconds(0-60) during which the player retains PvP mode after leaving the PvP monument": 10.0, "Is it worth using a progress bar for bars with a counter?": true, "Settings for the status bar": { "Order": 10, "Height": 26, "Main_Color(Hex or RGBA)": "#FFBF99", "Main_Transparency": 0.8, "Main_Material": "", "Image_Url": "https://i.imgur.com/awUrIwA.png", "Image_Local(Leave empty to use Image_Url)": "RealPVE_ferry_terminal_1", "Image_Sprite(Leave empty to use Image_Local or Image_Url)": "", "Image_IsRawImage": false, "Image_Color(Hex or RGBA)": "#FFDCB6", "Image_Transparency": 1.0, "Is it worth enabling an outline for the image?": false, "Image_Outline_Color(Hex or RGBA)": "0.1 0.3 0.8 0.9", "Image_Outline_Transparency": 0.0, "Image_Outline_Distance": "0.75 0.75", "Text_Size": 12, "Text_Color(Hex or RGBA)": "1 1 1 1", "Text_Font(https://umod.org/guides/rust/basic-concepts-of-gui#fonts)": "RobotoCondensed-Bold.ttf", "Is it worth enabling an outline for the text?": false, "Text_Outline_Color(Hex or RGBA)": "#000000", "Text_Outline_Transparency": 1.0, "Text_Outline_Distance": "0.75 0.75", "SubText_Size": 12, "SubText_Color(Hex or RGBA)": "1 1 1 1", "SubText_Font": "RobotoCondensed-Bold.ttf", "Is it worth enabling an outline for the sub text?": false, "SubText_Outline_Color(Hex or RGBA)": "0.5 0.6 0.7 0.5", "SubText_Outline_Transparency": 0.0, "SubText_Outline_Distance": "0.75 0.75" }, "Settings for the progress status bar": { "Main_Color(Hex or RGBA)": "1 1 1 0.15", "Main_Transparency": 0.15, "Progress_Reverse": true, "Progress_Color": "#FFBF99", "Progress_Transparency": 0.7, "Progress_OffsetMin": "0 0", "Progress_OffsetMax": "0 0" } } Type - This field serves only as an indicator for you. The changes won't have any impact; ShowSuffix - Suffix display. Some monuments (for example Warehouses) have suffixes in the name, like "Warehouse #12"; Broadcast - Enabling or disabling broadcasts when a monument is occupied or vacated; LootingTime - Time allocated for looting the monument; Price - The price for which you can start looting the monument. 0 means looting is free; BarSettings - Settings for the Advanced Status Bar. You can also choose the types of monuments by specifying them under the "List of tracked types of monuments" section. A list of all available types can be viewed on the MonumentsWatcher's page in the "Developer API" section. "List of tracked types of monuments": [ "RadTown", "RadTownWater", "RadTownSmall", "TunnelStation", "Custom" ] Events, similar to monuments, offer the opportunity to claim events. All events are configured in the config file under the "Settings for the events" section. You can customize the price of looting and looting attempts(deaths, including friends). Just like in monuments, only the "Looter" and his friends have the ability to loot and damage entities. Additionally, in events, NPCs do not aggress against other players. If a player(including friends) exceeds the death limit, the event became free, thereby providing other players with the opportunity to claim the event. Example of event configuration: { "Is it worth enabling forced auto-buy for vanilla events where the final price is greater than 0?": false, "Settings for the PatrolHelicopter events": { "IsEnabled": true, "Time in seconds (1-15) given to respond for purchasing this event. Note: This is shown to everyone who deals damage, and the first person to buy it will claim it": 5.0, "Is it worth removing fire from crates?": true, "The price to claim the event. A value of 0 means it's free": 50.0, "The number of deaths after which the event becomes public. A value of 0 disables the limit": 5, "The time in seconds for which the event is locked to the player. A value of 0 disables the time limit": 1800.0 }, "Settings for the BradleyAPC events": { "IsEnabled": true, "Time in seconds (1-15) given to respond for purchasing this event. Note: This is shown to everyone who deals damage, and the first person to buy it will claim it": 5.0, "Is it worth removing fire from crates?": true, "The price to claim the event. A value of 0 means it's free": 50.0, "The number of deaths after which the event becomes public. A value of 0 disables the limit": 5, "The time in seconds for which the event is locked to the player. A value of 0 disables the time limit": 1800.0 }, "Version": { "Major": 0, "Minor": 1, "Patch": 0 } } Price - The price to claim the event. 0 means looting is free; DeathLimit - Limit of deaths after which the event becomes free. File location: *SERVER*\oxide\data\RealPVE\NewbieConfig.json Default: https://pastebin.com/QHZCqpji An example of an item list given for the main inventory: "List of items for the main inventory": [ { "ShortName": "note", "Slot": 0, "Amount": 1, "SkinID": 0, "Text": "MsgNoteText" } ] P.S. In the Text field, you need to specify the language key. Or, you can just write any text, but there won't be a translation of the text. File location: *SERVER*\oxide\data\RealPVE\RaidableBasesConfig.json Default: https://pastebin.com/rpDng7Fd Integration with the RaidableBases plugin does not restrict its functionality in any way. On the contrary, it adds an anti-grief system that protects bases from malicious players. In raid bases, NPCs and other entities can only receive damage from the raid owner or their friends; Turrets and traps do not aggress against outsiders; You can customize the price of claiming to each difficulty and set individual discounts for each permission. You can still purchase raid bases using the /buyraid command. Raid bases without owners(buyable, maintained, manual and scheduled) can be bought for a price set in the configuration file or assigned to the first player who enters its radius, if the final price(price * discount) less or equals to 0. Additionally, as a bonus, upon buying this plugin, you receive 5 free bases for 3 difficulty levels, along with configured loot for them. [PluginReference] private Plugin RealPVE; There are 6 universal hooks that the plugin is subscribed to, the use of which allows interaction with PVP in various PVE plugins: OnPlayerEnterPVP OnPlayerExitPVP OnEntityEnterPVP OnEntityExitPVP CreatePVPMapMarker DeletePVPMapMarker OnPlayerEnterPVP: Used to add a player to PVP mode/zone. To call the OnPlayerEnterPVP hook, you need to pass 2 parameters: <BasePlayer>player - The player to add to PVP; <string>zoneID - A unique identifier for your PVP zone. This parameter is very important because a player can be in multiple PVP zones at the same time and passing the zoneID in this case allows for correct processing of the player's location within them. Interface.CallHook("OnPlayerEnterPVP", player, "*Your unique zone identifier*");//Calling the OnPlayerEnterPVP hook to tell PVE plugins that the player needs to be added to the specified PVP zone. OnPlayerExitPVP: Used to remove a player from PVP mode/zone. Calling this hook guarantees the player’s removal from the specified PVP zone, but does not guarantee the removal from PVP mode, as there may be other zones in addition to yours. Also, when a player dies, they are automatically removed from all PVP zones. To call the OnPlayerExitPVP hook, you need to pass 3 parameters, 1 of which is optional: <BasePlayer>player - The player to remove from PVP; <string>zoneID - A unique identifier for your PVP zone; <float>pvpDelay - Optional. When the player exits your PVP zone, you can also pass the PVP delay time. However, if the player still has other active PVP zones, your PVP delay will not take effect. Interface.CallHook("OnPlayerExitPVP", player, "*Your unique zone identifier*", 10f);//Calling the OnPlayerExitPVP hook to tell PVE plugins that the player needs to be removed from the specified PVP zone, with the pvpDelay(10 seconds) specified if the player no longer has any active PVP zones. OnEntityEnterPVP: Used to add an entity to PVP mode/zone. In the case of RealPVE, this hook is only necessary to add entities with an owner(player) to a PVP, allowing other players to interact with them, such as a player's corpse after death(PlayerCorpse) or a backpack after the corpse disappears(DroppedItemContainer). To call the OnEntityEnterPVP hook, you need to pass 2 parameters: <BaseEntity>entity - The entity to add to PVP; <string>zoneID - A unique identifier for your PVP zone. Interface.CallHook("OnEntityEnterPVP", entity, "*Your unique zone identifier*");//Calling the OnEntityEnterPVP hook to tell PVE plugins that the entity needs to be added to the specified PVP zone. OnEntityExitPVP: Used to remove an entity from PVP mode/zone. When an entity dies, it is automatically removed from all PVP zones. To call the OnEntityExitPVP hook, you need to pass 3 parameters, 1 of which is optional: <BaseEntity>entity - The entity to remove from PVP; <string>zoneID - A unique identifier for your PVP zone; <float>pvpDelay - Optional. When the entity exits your PVP zone, you can also pass the PVP delay time. However, if the entity still has other active PVP zones, your PVP delay will not take effect. Interface.CallHook("OnEntityExitPVP", entity, "*Your unique zone identifier*", 10f);//Calling the OnEntityExitPVP hook to tell PVE plugins that the entity needs to be removed from the specified PVP zone, with the pvpDelay(10 seconds) specified if the entity no longer has any active PVP zones. CreatePVPMapMarker: Used to create a map marker for the PVP zone. To call the CreatePVPMapMarker hook, you need to pass 5 parameters, 2 of which is optional: <string>zoneID - A unique identifier for your PVP zone; <Vector3>pos - The position of your PVP zone; <float>radius - The radius of the circle for your PVP zone; <string>displayName - Optional. The display name for the map marker; <BaseEntity>entity - Optional. The entity to which the map marker should be attached. Interface.CallHook("CreatePVPMapMarker", "*Your unique zone identifier*", pos, 25f, "ATTENTION! This is a PVP zone!");//Calling the CreatePVPMapMarker hook to tell PVE plugins to create a map marker for the specified zone, at the specified position with the given radius, but without specifying a parent entity. DeletePVPMapMarker: Used to delete a map marker for the PVP zone. To call the DeletePVPMapMarker hook, you need to pass only 1 parameter: <string>zoneID - A unique identifier for your PVP zone. Interface.CallHook("DeletePVPMapMarker", "*Your unique zone identifier*");//Calling the DeletePVPMapMarker hook to tell PVE plugins to delete a map marker for the specified zone. There are 5 hooks that the plugin calls: OnPlayerPVPDelay OnPlayerPVPDelayed OnPlayerPVPDelayRemoved OnZoneStatusText CanRedeemKit OnPlayerPVPDelay: Called when a player exits the last active PVP zone, allowing other plugins to overwrite the value for pvpDelay. Returning a float value allows changing the pvpDelay for the player. A value less than zero disables the pvpDelay. When calling the OnPlayerPVPDelay hook, 3 parameters are passed: <BasePlayer>player - The player to whom the pvpDelay is applied; <float>pvpDelay - The initial value of pvpDelay; <string>zoneID - A unique identifier of PVP zone. object OnPlayerPVPDelay(BasePlayer player, float pvpDelay, string zoneID) { Puts($"Attempting to set a PvP delay of {pvpDelay} seconds for player {player.displayName} in zone {zoneID}!"); if (zoneID == "*Your unique zone identifier*") { return 15f;//Overriding the values for pvpDelay } return null;//Leave unchanged } OnPlayerPVPDelayed: Called after the PVP delay has been set for the player. When calling the OnPlayerPVPDelayed hook, 3 parameters are passed: <BasePlayer>player - The player to whom the pvpDelay is applied; <float>pvpDelay - The value of pvpDelay; <string>zoneID - A unique identifier of PVP zone. void OnPlayerPVPDelayed(BasePlayer player, float pvpDelay, string zoneID) { Puts($"A PvP delay of {pvpDelay} seconds has been set for player {player.displayName} in zone {zoneID}!"); } OnPlayerPVPDelayRemoved: Called when the PVP delay is removed from the player after they enter a PVP zone with an active PVP delay. When calling the OnPlayerPVPDelayRemoved hook, only 1 parameter is passed: <BasePlayer>player - The player from whom the PVP delay has been removed. void OnPlayerPVPDelayRemoved(BasePlayer player) { Puts($"PVP delay has been removed for player {player.displayName} as they entered a PVP zone!"); } OnZoneStatusText: Called when the text with the nice name for the specified zone is needed, to be displayed in the status bar. When calling the OnZoneStatusText hook, 2 parameters are passed: <BasePlayer>player - The player for whom the nice name for the zone is being requested; <string>zoneID - A unique identifier of PVP zone. object OnZoneStatusText(BasePlayer player, string zoneID) { Puts($"Text for the status bar is required for zone {zoneID}"); if (zoneID == "*Your unique zone identifier*") { return lang.GetMessage("*langKey*", this, player.UserIDString);//<string>Overriding the value for the status bar text } return null;//Leave unchanged } CanRedeemKit: Called before giving the starter kit, in the OnDefaultItemsReceive hook. A non-zero value cancels this action. When calling the CanRedeemKit hook, only 1 parameter is passed: <BasePlayer>player - The player to whom the kit is being attempted to be given. object CanRedeemKit(BasePlayer player) { Puts($"Attempting to give the kit to player {player.displayName}!"); if (player.IsAdmin) { return false;//Cancel the action } return null;//Leave unchanged }$39.99 -

Version 1.1.7
233 downloads
Spawn Everything - Spawn Vehicle, Karuza Vehicle, Deployables, Bases, Item, Recycler, Crates, Custom entity, Execute Commands, Loots, Pickup Entity, Pickup Vehicles, and much more... Spawn Everything - Spawn all entity, Bases, Item, loot, Pickup Entity, Pickup Vehicles, allows you to spawn any entity or execute commands, all by using an item, pickup entity or vehicles, and much more. It is already configured to generate vehicles by default, including custom vehicles from Karuza, Crates, Locked Crate, Deployables, Casino items and much more. Through the configuration you can add other entities that can be generated, just enter a prefab name, or a command if you do not have a prefab name, and set the skin of the item that will be used. It also allows you to limit the spawn, for example if you do not have building permits, avoid spawning in water or allow it only in water, also being able to choose the minimum depth of the water, allow or not spawn inside buildings, monuments and more. It is also possible to pick up the generated entity/vehicles, using the hammer. You can add items to the in-game shop, loot, or wherever you want. Spawn Bases using copy paste or other plugin. Compatible with Oxide/Umod and Carbon. ALL AVAILABLE ENTITIES Here you can find a file with all the entities currently available and the various information on the item to create to spawn the entity ALL AVAILABLE ENTITIES PLAYLIST - VIDEO EXAMPLE Below you can see an example video on how to use the plugin. -------------------- SOME EXAMPLES OF USE: Some examples of how the plugin works and the entities that can be spawned by default. Vehicle Spawn Spawn Custom Vehicles by Karuza Pickup Entity Pickup Vehicle Pickup Karuza Vehicle Spawn Recycler Spawn NPC vehicles, such as Bradley, Patrol helicopter, CH47 (Chinook 47) Spawn loot boxes, such as the: Locked Crate, Oil Rig Locked Crate, Bradley APC Crate, Patrol Helicopter Crate, Elite Tier Crate, Elite Tier Crate - Underwater Labs. Crater for mines, to place mines where you want. Survey Crater - For Mining Quarry, Survey Crater Oil - For Pump Jack. Spawn Bases using copy paste or other plugin Spawn Casino entities Spawn custom entities And much more PERMISSIONS: spawneverything.admin – Allows the use of commands reserved for admins, such as giving items for entity spawning to players. spawneverything.fuel.unlimited – If the entity to be spawned is a vehicle, the vehicle will not need fuel to run. The same can be achieved via the configuration file, for each individual entity. spawneverything.spawn.not_enabled – Allows you to spawn entities that have not been enabled in the configuration file. spawneverything.spawn.bypass_building_privilege – Allows you to spawn entities even if you don't have building permissions, for entities that require building permissions to spawn. spawneverything.spawn.bypass_tc – Allows entities to be spawned, for entities that cannot be spawned near any Tool Cupboard (TC). spawneverything.spawn.bypass_monument – Allows entities to be spawned in monuments, for entities that cannot be spawned in monuments. spawneverything.spawn.bypass_road_rails – Allows entities to be spawned to the road/rails, for entities that cannot be spawned to the road/rails. spawneverything.spawn.bypass_only_outside – Allows entities to spawn inside buildings, for entities that cannot be spawned inside buildings. spawneverything.spawn.bypass_water – Allows entities to spawn in water, for entities that cannot be spawned in water. COMMANDS FOR ADMIN Commands can be typed in chat (by putting the / character in front of the command), from console or Rcon. To use these commands you must have the role: spawneverything.admin /se <skinID> <quantity> — Allows you to give the item to spawn the entity, to yourself. You need to pass these parameters: skinID of the configured entity The quantity of items. /se <skinID> <quantity> <steamID> — Allows you to give the item to spawn the entity, to a player. You need to pass these parameters: skinID of the configured entity The quantity of items. The SteamID of the player to give the items to Commands can be added or modified in the configuration file: /oxide/config/SpawnEverything.json ENTITY PICK UP (BETA VERSION) You can collect the generated entity using the hammer. By collecting the entity, you will be given back the item for the entity's spawn. To collect the entity you need to hold down the SHIFT key and hit the entity with the hammer. You can only collect entities that have been enabled for collection in the configuration file. NB: This is an early version of this feature and is still in beta. At the moment if you pick up the entity, you will lose any loot contained in it, so make sure to remove any loot before picking up the entity. With the next update, you will be able to leave the loot inside the entity and automatically find it with the next spawn of the entity. USE VIA SHOP, LOOT. VENDING MACHINE The plugin can use any item for entity spawning. You need to generate an item with a certain skin id, to get the item that allows the entity to spawn. The name of the item to use and the skin id are present in the configuration file: Item name (That will be used to spawn the entity. Default grenade.flashbang) SkinID You can add these items to the in-game Shop, to the loot, in the Vending Machine or wherever you want, very easily. For example, this item spawns a minicopter: Item: grenade.flashbang | SkinID: 3366887420 or ItemID: -936921910 | SkinID: 3366887420 CONFIGURATION The settings and options can be configured in the SpawnEverything.json under the config directory. The use of an editor and validator is recommended to avoid formatting issues and syntax errors. { "TimeZone": "Europe/London", "Chat Command": [ "se", "spawneverything", "spawner" ], "ChatPrefix": "SpawnEverything", "Add Karuza Custom Vehicles to your configuration. (Default: FALSE)": false, "Entity Drop Item": [ { "Enabled": false, "DisplayName": "Spawn Minicopter", "Description": "Spawn Minicopter", "Item name (That will be used to spawn the entity. Default grenade.flashbang)": "grenade.flashbang", "Spawn PrefabName": "assets/content/vehicles/minicopter/minicopter.entity.prefab", "SkinID": 3366887420, "Spawn Offset Y": 0.0, "Spawn Rotate Y": 0.0, "Entity Type. Default Rust": "Rust", "Can Pick Up Entity. Default false": true, "Custom Radius Check": 0.0, "Execute Commands": [], "Execute Commands As Admin": false, "Spawn Cooldown (seconds)": 0, "Requires Building Privilege to Spawn Entity. (Default: TRUE)": true, "Minimum spawn distance from any Tool Cupboard (TC). [0 = Disabled] (Default: 0)": 0, "Allow Spawn in Monuments. (Default: FALSE)": false, "Disable Spawn in Monuments and Monuments radius. (Default: FALSE)": false, "Disable Spawn On Road/Rails. (Default: FALSE)": false, "Minimum spawn distance from Road/Rails. (Default: 0)": 0, "Spawn Only Outside": true, "Dont Spawn In Water": true, "Requires Water": false, "Minimum Water Depth": 0.0, "Armored": false, "Unlimited Fuel": false, "Fuel Amount": 0 }, { "Enabled": false, "DisplayName": "Spawn Attack Helicopter", "Description": "Spawn Attack Helicopter", "Item name (That will be used to spawn the entity. Default grenade.flashbang)": "grenade.flashbang", "Spawn PrefabName": "assets/content/vehicles/attackhelicopter/attackhelicopter.entity.prefab", "SkinID": 3366893095, "Spawn Offset Y": 0.0, "Spawn Rotate Y": 0.0, "Entity Type. Default Rust": "Rust", "Can Pick Up Entity. Default false": true, "Custom Radius Check": 0.0, "Execute Commands": [], "Execute Commands As Admin": false, "Spawn Cooldown (seconds)": 0, "Requires Building Privilege to Spawn Entity. (Default: TRUE)": true, "Minimum spawn distance from any Tool Cupboard (TC). [0 = Disabled] (Default: 0)": 0, "Allow Spawn in Monuments. (Default: FALSE)": false, "Disable Spawn in Monuments and Monuments radius. (Default: FALSE)": false, "Disable Spawn On Road/Rails. (Default: FALSE)": false, "Minimum spawn distance from Road/Rails. (Default: 0)": 0, "Spawn Only Outside": true, "Dont Spawn In Water": true, "Requires Water": false, "Minimum Water Depth": 0.0, "Armored": false, "Unlimited Fuel": false, "Fuel Amount": 0 }, { "Enabled": false, "DisplayName": "Spawn Scrap Transport Helicopter", "Description": "Spawn Scrap Transport Helicopter", "Item name (That will be used to spawn the entity. Default grenade.flashbang)": "grenade.flashbang", "Spawn PrefabName": "assets/content/vehicles/scrap heli carrier/scraptransporthelicopter.prefab", "SkinID": 3366892516, "Spawn Offset Y": 0.0, "Spawn Rotate Y": 0.0, "Entity Type. Default Rust": "Rust", "Can Pick Up Entity. Default false": true, "Custom Radius Check": 0.0, "Execute Commands": [], "Execute Commands As Admin": false, "Spawn Cooldown (seconds)": 0, "Requires Building Privilege to Spawn Entity. (Default: TRUE)": true, "Minimum spawn distance from any Tool Cupboard (TC). [0 = Disabled] (Default: 0)": 0, "Allow Spawn in Monuments. (Default: FALSE)": false, "Disable Spawn in Monuments and Monuments radius. (Default: FALSE)": false, "Disable Spawn On Road/Rails. (Default: FALSE)": false, "Minimum spawn distance from Road/Rails. (Default: 0)": 0, "Spawn Only Outside": true, "Dont Spawn In Water": true, "Requires Water": false, "Minimum Water Depth": 0.0, "Armored": false, "Unlimited Fuel": false, "Fuel Amount": 0 }, { "Enabled": false, "DisplayName": "Spawn Hot Air Balloon", "Description": "Spawn Hot Air Balloon", "Item name (That will be used to spawn the entity. Default grenade.flashbang)": "grenade.flashbang", "Spawn PrefabName": "assets/prefabs/deployable/hot air balloon/hotairballoon.prefab", "SkinID": 3366893631, "Spawn Offset Y": 0.0, "Spawn Rotate Y": 0.0, "Entity Type. Default Rust": "Rust", "Can Pick Up Entity. Default false": true, "Custom Radius Check": 0.0, "Execute Commands": [], "Execute Commands As Admin": false, "Spawn Cooldown (seconds)": 0, "Requires Building Privilege to Spawn Entity. (Default: TRUE)": true, "Minimum spawn distance from any Tool Cupboard (TC). [0 = Disabled] (Default: 0)": 0, "Allow Spawn in Monuments. (Default: FALSE)": false, "Disable Spawn in Monuments and Monuments radius. (Default: FALSE)": false, "Disable Spawn On Road/Rails. (Default: FALSE)": false, "Minimum spawn distance from Road/Rails. (Default: 0)": 0, "Spawn Only Outside": true, "Dont Spawn In Water": true, "Requires Water": false, "Minimum Water Depth": 0.0, "Armored": false, "Unlimited Fuel": false, "Fuel Amount": 0 }, { "Enabled": false, "DisplayName": "Spawn Armored Hot Air Balloon", "Description": "Spawn Armored Hot Air Balloon", "Item name (That will be used to spawn the entity. Default grenade.flashbang)": "grenade.flashbang", "Spawn PrefabName": "assets/prefabs/deployable/hot air balloon/hotairballoon.prefab", "SkinID": 3366893925, "Spawn Offset Y": 0.0, "Spawn Rotate Y": 0.0, "Entity Type. Default Rust": "Rust", "Can Pick Up Entity. Default false": true, "Custom Radius Check": 0.0, "Execute Commands": [], "Execute Commands As Admin": false, "Spawn Cooldown (seconds)": 0, "Requires Building Privilege to Spawn Entity. (Default: TRUE)": true, "Minimum spawn distance from any Tool Cupboard (TC). [0 = Disabled] (Default: 0)": 0, "Allow Spawn in Monuments. (Default: FALSE)": false, "Disable Spawn in Monuments and Monuments radius. (Default: FALSE)": false, "Disable Spawn On Road/Rails. (Default: FALSE)": false, "Minimum spawn distance from Road/Rails. (Default: 0)": 0, "Spawn Only Outside": true, "Dont Spawn In Water": true, "Requires Water": false, "Minimum Water Depth": 0.0, "Armored": true, "Unlimited Fuel": false, "Fuel Amount": 0 }, { "Enabled": false, "DisplayName": "Spawn Kayak", "Description": "Spawn Kayak", "Item name (That will be used to spawn the entity. Default grenade.flashbang)": "grenade.flashbang", "Spawn PrefabName": "assets/content/vehicles/boats/kayak/kayak.prefab", "SkinID": 3366894316, "Spawn Offset Y": 0.0, "Spawn Rotate Y": 0.0, "Entity Type. Default Rust": "Rust", "Can Pick Up Entity. Default false": true, "Custom Radius Check": 0.0, "Execute Commands": [], "Execute Commands As Admin": false, "Spawn Cooldown (seconds)": 0, "Requires Building Privilege to Spawn Entity. (Default: TRUE)": true, "Minimum spawn distance from any Tool Cupboard (TC). [0 = Disabled] (Default: 0)": 0, "Allow Spawn in Monuments. (Default: FALSE)": false, "Disable Spawn in Monuments and Monuments radius. (Default: FALSE)": false, "Disable Spawn On Road/Rails. (Default: FALSE)": false, "Minimum spawn distance from Road/Rails. (Default: 0)": 0, "Spawn Only Outside": true, "Dont Spawn In Water": false, "Requires Water": true, "Minimum Water Depth": 0.5, "Armored": false, "Unlimited Fuel": false, "Fuel Amount": 0 }, ........................................ ], "VersionNumber": { "Major": 1, "Minor": 1, "Patch": 5 } } TimeZone: -- Default: Europe/London Chat Command: -- Here you can add, edit or delete Commands can be typed in chat (by putting the / character in front of the command), or from console. ChatPrefix: -- Chat message prefix. Show Pick Up Entity Confirm Dialog: — If enabled, show a confirmation dialog when you want to collect the entity for added security and to avoid unintentional errors. Default: TRUE Add Karuza Custom Vehicles to your configuration. (Default: FALSE): -- If set to TRUE, adds all Karuza custom vehicles to the configuration. Warning: once all vehicles are added to the configuration, they cannot be removed by setting the property to FALSE, in which case you will have to delete them manually. Default: FALSE SPAWNABLE ENTITY: ITEM CONFIGURATION Here you will insert all the items with their configurations for the spawn of any entity. Enabled: -- If set to FALSE, the entity cannot be spawned. You can bypass this check with the permission: spawneverything.spawn.not_enabled DisplayName: -- The name of the Item that the player will see when he clicks on it with the mouse. Description: -- A description of the entity that will be spawned. It has no effect on the player's Item, it is just for internal use to remind you what this Item does. Item name (That will be used to spawn the entity. Default grenade.flashbang): -- Here you need to specify the name of the item that will be used to spawn this entity. Spawn PrefabName: -- Here you enter the name of the Prefab that will be generated. It is not mandatory, you can not enter the Prefab Name and instead execute commands that you can define later in the configuration. SkinID: -- Here you enter the SkinID that will be applied to the item. Based on the SkinID, a different Item will be generated for the spawn of different entities. You can use existing SkinIDs on the Steam Workshop or create your own Skin. Entity Type -- This field is used by the plugin to understand if it is a Rust entity or an entity generated by another plugin. If you do not know what to enter, leave it as default: Rust Can Pick Up Entity. Default false -- Here you can decide whether the entity can be picked up with the hammer or not. It is recommended to disable picking for all items that generate Loot, to avoid abuse. Spawn Offset Y: -- Here you can specify a height to add relative to the entity's spawn point. For example, add the spawn higher than the ground or water. Spawn Rotate Y -- Here you can define the rotation to add to the spawned entity. Custom Radius Check -- Each spawn checks if there are entities that collide and the radius, within which to check, is automatically determined based on the size of the entity. But in some cases it is necessary to define a custom radius. Here you can decide the radius within which to check if there are entities that collide with the spawn. Execute Commands: -- Here you can enter 1 or more commands that will be executed when the Item is launched. You can use some placeholders that can be passed to the commands %%msg%%: This placeholder can be used to send a message to the player, here is an example command: "%%msg%% test command": This will send a message to the player with the text: "test command" "%%msg%% %%steamid%%": This will send a message to the player with the text: player steamID %%steamid%%: This placeholder is used to insert the player's steamID into the command. %%username%%: This placeholder is used to insert the player username into the command. %%displayName%%: This placeholder is used to insert the player display name (include clan tag) into the command. %%spawnCoordinateX%%: This placeholder is used to insert the spawn coordinate X into the command. %%spawnCoordinateY%%: This placeholder is used to insert the spawn coordinate Y into the command. %%spawnCoordinateZ%%: This placeholder is used to insert the spawn coordinate Z into the command. %%spawnRotationX%%: This placeholder is used to insert the spawn rotation X into the command. %%spawnRotationY%%: This placeholder is used to insert the spawn rotation Y into the command. %%spawnRotationZ%%: This placeholder is used to insert the spawn rotation Z into the command. %%mapGrid%%: This placeholder is used to insert the map grid into the command. %%mapGridLetter%%: This placeholder is used to insert the map grid letter into the command. %%mapGridNumber%%: This placeholder is used to insert the map grid number into the command. -------------------- Here are some possible command examples: "deposit %%steamid%% 1000": Will deposit 1000 RP into the player's account (Economics plugin) "inventory.giveto %%steamid%% "short name" "amount" ": This will send a certain amount of items to the player. Execute Commands As Admin: -- If set to TRUE, runs the command as Admin. Useful for running commands that require server-side Admin permissions. Default: FALSE Spawn Cooldown (seconds): -- Sets a wait time before the entity is spawned, once the item is thrown. Spawn Only Outside: -- If set to TRUE, the entity can only spawn outside of buildings or on the roof. It cannot spawn inside the building. Useful for vehicles or large entities, to avoid them getting stuck inside the base. Default: TRUE. You can bypass this check with the permission: spawneverything.spawn.bypass_only_outside Requires Building Privilege to Spawn Entity: -- If set to TRUE, building permissions will be required to spawn an entity. Default: TRUE. You can bypass this check with the permission: spawneverything.spawn.bypass_building_privilege Minimum spawn distance from any Tool Cupboard (TC). [0 = Disabled] -- Minimum spawn distance from any Tool Cupboard (TC). [0 = Disabled]. Default: 0. You can bypass this check with the permission: spawneverything.spawn.bypass_tc Allow Spawn in Monuments: -- If set to FALSE, the entity cannot be spawned inside the monument, but can be spawned outside the monument, within the radius of the monument (Radius means the red radius visible when for example trying to build near a monument). Default: FALSE. You can bypass this check with the permission: spawneverything.spawn.bypass_monument Disable Spawn in Monuments and Monuments radius: -- If set to true, the entity cannot be spawned inside the monument and outside the monument, within the radius of the monument (Radius means the red radius visible when for example trying to build near a monument). Default: FALSE. You can bypass this check with the permission: spawneverything.spawn.bypass_monument Disable Spawn On Road/Rails -- Disable entity spawn on the road/rails. Default: FALSE. You can bypass this check with the permission: spawneverything.spawn.bypass_road_rails Minimum spawn distance from Road/Rails -- Minimum distance from the road/rails for the entity to spawn. Default: 0. You can bypass this check with the permission: spawneverything.spawn.bypass_road_rails Dont Spawn In Water: -- If set to TRUE, the entity cannot be spawned in water. Useful for vehicles that cannot go in water. Warning: There is one exception. In very shallow water, entities can still be spawned, for example near the coast. The water must not be deeper than 0.5 meters. Default: FALSE. You can bypass this check with the permission: spawneverything.spawn.bypass_water Requires Water: -- If set to TRUE, the entity can only be spawned in water, useful for vehicles that can only operate in water, such as boats. Default: FALSE Minimum Water Depth: -- If the entity can only be spawned in water, you can decide the minimum depth of the water. Useful to avoid spawning large entities in very shallow water so they do not get stuck. Default: 0 Meters = Any depth. The value cannot be negative. Armored: -- There are entities that have the same Prefab Name, but 1 of the 2 can be generated with armor. In this case, you can decide which entity should have armor, For example Armored Hot Air Balloon. Unlimited Fuel: -- If the entity is a vehicle, you can choose to spawn the entity with unlimited fuel. This configuration does not apply to Karuza's custom vehicles. You can bypass this check with the permission: spawneverything.fuel.unlimited Fuel Amount: -- If the entity is a vehicle, you can decide how much fuel the entity will spawn with. Default: 0 fuel. You can bypass this check with the permission: spawneverything.fuel.unlimited NB: At least 1 of the 2 fields between Spawn PrefabName and Execute Commands is mandatory LOCALIZATION The plugin is translated into the following languages: English Italian Spanish French German Dutch Turkish Russian Ukrainian Chinese (Simplified - zh-CN) Translation files are located in the /oxide/lang folder,here is an example of a /oxide/lang/en/SpawnEverything.json translation file. You can add translations for other languages by adding them to the folder: /oxide/lang ALL AVAILABLE ENTITIES Here you can find a file with all the entities currently available and the various information on the item to create to spawn the entity ALL AVAILABLE ENTITIES ---------------------------------------- AVAILABLE ENTITIES By default the plugin is configured with these entities that can be generated: VEHICLES: Minicopter, Attack Helicopter, Scrap Transport Helicopter, Hot Air Balloon, Armored Hot Air Balloon, Kayak, Row Boat, RHIB, Tugboat, Submarine Solo, Submarine Duo, Horse, Snowmobile, Tomaha Snowmobile, Sedan, 2 Module Car, 3 Module Car, 4 Module Car, Motorbike, Motorbike With Sidecar, Pedal Bike, Pedal Trike. KARUZA CUSTOM VEHICLES: All Karuza special vehicles are included, you need to enable the property in the config file to use them. Requires Karuza Vehicles plugin. SPECIAL VEHICLES: Bradley APC, Patrol Helicopter, Chinook 47. SPECIAL ENTITIES: Train Casino - Lucky Caboose, Blackjack Machine (Caboose), Card Table (Caboose), Slot Machine (Caboose), Card Table - A, Card Table - B, Card Table - C, Card Table - D, Slot Machine, Recycler, Recycler Safe Zone CRATE: Locked Crate, Oil Rig Locked Crate, Bradley APC Crate, Patrol Helicopter Crate, Elite Tier Crate, Elite Tier Crate - Underwater Labs. CRATER: Survey Crater - For Mining Quarry, Survey Crater Oil - For Pump Jack. NEW ENTITIES You can add as many entities as you want via the configuration file. If you have any difficulties or need to add a particular entity, feel free to open a support request and it will be added to the plugin. New entities will be added with future releases of the plugin.$12.99- 14 comments
- 2 reviews
-
- 2
-
-
- #spawn everything
- #spawn
- (and 25 more)
-
Version 2.2.1
3,884 downloads
Allows bases to become raidable when all players in a base become inactive. Compatible with TruePVE and NextGenPVE servers. This plugin is not compatible with servers that have server.pve set true. It is possible to implement this, but I see no reason to do so as TruePVE provides the same protection and more. Abandoned Bases checks each building on the server in order to determine which bases are inactive. Bases become inactive when all players authorized on the tool cupboard have been offline for the configured amount of days. When a base becomes inactive there are one of two outcomes. 1.) It will be immediately destroyed if it does not meet the configured minimum requirements. 2) It will become raidable for a configurable period of time, and when the time expires the base will be destroyed. Each zone has a map marker, allows PVP and is surrounded by a dome that protects it from being attacked from the outside. Players who zone hop will be flagged with a PVP delay where they can still be attacked for a configurable amount of time. Command /sar - requires abandonedbases.convert permission and converts a base into an abandoned base - this can be used on any base that you are authorized to and will cause the base to be destroyed when the timer expires Command /sab - starts a manual check for each building on the server in order to determine which bases are inactive (requires abandonedbases.admin permission) Command /sar radius - requires abandonedbases.convert permission and converts a base into an abandoned base and uses the specified radius for the dome / zone radius. Min and max radius are configurable. Command /sar cancel - requires abandonedbases.convert and abandonedbases.convert.cancel permissions - completely cancels an event (destroys map marker and dome, disables PVP and prevents base from being despawned) effectively allowing the base to be taken over Command /sar claim - requires abandonedbases.convert and abandonedbases.convert.claim permissions and converts a finished abandoned base into a claimed base that can be taken over by players Command /sar purge - converts all bases on the server into abandoned bases for purge day (requires abandonedbases.convert, abandonedbases.admin and abandonedbases.purgeday permissions) This is a two part command that requires you type /sab afterwards to begin. Requires abandonedbases.purgeday, abandonedbases.convert, and abandonedbases.admin permissions. Announcements are muted during purge to prevent spam. Time To Wait Between Spawns (15) will delay how quickly every base is converted Permissions (ADMINS REQUIRE PERMISSIONS TOO) abandonedbases.convert - required to use /sar command abandonedbases.convert.free - converting is free for users that have this permission abandonedbases.convert.claim - required to use /sar claim command abandonedbases.purgeday - required to use /sar purge command abandonedbases.admin - required to use /sab and purge commands abandonedbases.notices - users with this command can see event-opened notices from the plugin abandonedbases.attack - lets players hunt bases and convert them by attacking if they're abandoned abandonedbases.attack.time - shows players how much time is left before a base becomes abandoned when they attack it abandonedbases.attack.lastseen - required to see the last time the player was online when attacking a base Auto-add abandonedbases.immune to configuration if one does not exist already (lifetime set to "none") - abandonedbases.immune will not be automatically added if the configuration contains a different immunity permission already - abandonedbases.immune will give the user immunity to any base they've built at or are authed at from becoming abandoned - abandonedbases.exclude does not provide immunity and is explicitly intended for the plugin to ignore the player only - abandonedbases.exclude is intended for admins, mods, staff or helpers to be able to freely make repairs or auth at bases without interfering with the abandoned timer abandonedbases.exclude: excludes the user from being checked as an authorized user to a TC this permission should not be used to exempt users - exempt users with immunity by assigning them a permission from a role that has the lifetime set to "none" example roles that includes permission abandonedbases.immune and lifetime set to "none" to properly exempt a user or group by granting abandonedbases.immune to a user or group: "Purge Settings": [ { "Permission": "abandonedbases.immune", "Lifetime (Days)": "none" }, { "Permission": "abandonedbases.vip", "Lifetime (Days)": "7" }, { "Permission": "abandonedbases.veteran", "Lifetime (Days)": "5" }, { "Permission": "abandonedbases.basic", "Lifetime (Days)": "3" } ], Purge Settings Permission - The permission to use with this setting Lifetime (Days) - The amount of time in days before a base is considered abandoned. Set to none to not consider players with this permission as inactive. Conversions Before Destroying Base (1) - The amount of times a base can become abandoned before it is finally destroyed when the Despawn Timer expires. Comes with 3 configured permissions and lifetime days by default Abandoned Settings Blacklisted Commands (command1, command2, command3) - Commands players are not allowed using at a raid or marked with PVP delay Marker Name (Minutes) (Abandoned Player Base [{time}m]) - Text shown on map marker for minutes Marker Name (Seconds) (Abandoned Player Base [{time}s]) - Text shown on map marker for seconds Foundations Required (4) - Minimum amount of foundations required to become raidable Walls Required (3) - Minimum amount of walls required to become raidable Sphere Amount (10) - Increase to darken the dome, or decrease to brighten it Sphere Radius (50) - How big the dome is in meters Use Dynamic Sphere Radius (false) - Allow the dome to detect the best dome size Max Dynamic Radius (75.0) - How maximum size of the dynamic radius Min Custom Sphere Radius - The minimum radius allowed when using /sar <radius> Max Custom Sphere Radius - The maximum radius allowed when using /sar <radius> PVP Delay (15.0) - The amount of time in seconds that players can take damage after leaving the dome Despawn Timer (1800.0) - The amount of time in seconds that players have to finish the raid Reset Despawn Timer When Base Is Attacked (true) - When enabled this will reset the above despawn timer back to 1800 seconds by default Do Not Destroy Base When Despawn Timer Expires (false) - Use this to override and prevent a base from being destroyed when Despawn Timer expires Backpacks Can Be Opened (true) - When enabled players will be allowed to open their backpacks while inside of the dome Backpacks Can Be Looted By Anyone (false) - Bypass PreventLooting plugin and allow backpacks to be lootable if enabled Corpses Can Be Looted By Anyone (true) - Bypass PreventLooting plugin and allow backpacks to be lootable if enabled Allow PVP (true) - Allows PVP while inside of the dome, and when flagged with a PVP delay Seconds Until Despawn After Looting (600) Seconds Until Despawn After Looting Resets When Damaged (true) Cancel Automated Events If Abandoned Owner Comes Online (false) Message Raiders When Event Ends During Automated Cancellation (true) Change Marker Color On First Entity Destroyed (true) Cooldown Between Conversions (3600) - Time required between each manual conversion of a base using /sar Cooldown Between Events (3600) - Time between each event - prevents looting, damage and using /sar claim Cooldown Between Cancel (3600) - Time the player must wait to use /sar cancel Cooldown Between Conversions Ignored During Purge (true) Cooldown Between Cancel Ignored During Purge (true) Cooldown Between Events Ignored During Purge (true) Prevent Hogging Ignored During Purge (false) Run Once On Server Startup (false) - Check for abandoned bases immediately after server startup is complete Run Every X Seconds (0.0) - The time in seconds to check for each building on the server in order to determine which bases are inactive Kill Inactive Sleepers (false) - When enabled players with a permission from purge settings will be executed when they are offline for the configured amount of lifetime days Let Players Kill Abandoned Sleepers (false) - Allows players to kill anyone sleeping inside of an abandoned base rather than the server killing them automatically Economics/ServerRewards Cost To Manually Convert (0 = disabled) - Used with /sar command to convert any base into an abandoned base Use Map Marker (true) Require Event Be Finished Before It Can Be Canceled (true) Various auto turret settings Hooks (implemented in 2.1.4) participants - anyone that has actively participated (excludes admin if configured, and those in noclip or vanish) - this should not contain null elements participantIds - contains the userid of all participants - this list is better as anyone offline and dead will be included in this but not in the participants list because they would be null! intruders - anyone currently inside of the event (does not exclude anyone) - this should not contain null elements intruderIds - contains the userid of everyone inside of the event (does not exclude anyone) - this list is better as anyone offline and dead will be included in the list but not in the intruders list because they would be null! void OnPlayerPvpDelayStart(BasePlayer player, ulong userid, Vector3 eventPos, float radius, List<BasePlayer> intruders, List<ulong> intruderIds, List<BaseEntity> entities) void OnPlayerPvpDelayExpiredII(BasePlayer player, ulong userid, Vector3 eventPos, float radius, List<BasePlayer> intruders, List<ulong> intruderIds, List<BaseEntity> entities) void OnAbandonedBaseStarted(Vector3 eventPos, float radius, bool allowPVP, List<BasePlayer> participants, List<ulong> participantIds, List<BaseEntity> entities) void OnAbandonedBaseEnded(Vector3 eventPos, float radius, bool allowPVP, List<BasePlayer> participants, List<ulong> participantIds, List<BaseEntity> entities) void OnPlayerEnteredAbandonedBase(BasePlayer player, Vector3 eventPos, float radius, bool allowPVP, List<BasePlayer> intruders, List<ulong> intruderIds, List<BaseEntity> entities) void OnPlayerExitedAbandonedBase(BasePlayer player, Vector3 eventPos, float radius, bool allowPVP, List<BasePlayer> intruders, List<ulong> intruderIds, List<BaseEntity> entities) void OnAbandonedBaseDespawned(Vector3 eventPos, float radius, bool allowPVP, List<BasePlayer> intruders, List<ulong> intruderIds, List<BaseEntity> entities) Convert Bases and/or Claim Bases Credits: misticos for giving permission to use some of his code$30.00- 561 comments
- 9 reviews
-
- 19
-
-
-
- #rust
- #rust plugin
- (and 6 more)
-
Version 1.0.0
4 downloads
Control Center is designed to make managing your base easier and more efficient by providing you with a user-friendly interface for interacting with key base elements such as Tool Cupboards, Code Locks, and Auto Turrets. 1. Tool Cupboard Management: Authorize Players Easily: With Control Center, you can easily authorize or deauthorize players from Tool Cupboard. Simply use the GUI to manage access in a few clicks. View Owners and Resources: You can check who currently has access to your Tool Cupboard and even view a detailed breakdown of the upkeep costs for your base. This helps you stay on top of your resource needs and ensure that your base remains protected from decay. The Owner is the first person to gain auth on Tool Cupboard and will have control over who can have full access to control center for that TC area if players have limited access the can view Control Center but not make any changes. 2. Code Lock Management: Authorize Friends: No need to give your friends the code for your Code Locks and have them go all over to find every lock, just add them to the lock you want them to access from inside the GUI. Lock and Unlock with Ease: Players can lock or unlock any Code Locks directly through the Control Center interface, which makes it faster to manage secure doors and boxes in your base. Set Custom Names: You can set custom names for each Code Lock, making it easier to identify which lock belongs to which part of your base. 3. Auto Turret Management: Authorize Friends: Easily add your team to every Auto Turret inside your base without the need of shutting you turrets down and going around each one. Switch Modes Quickly: Control your Auto Turrets through the GUI. You can easily switch between hostile and passive modes. Assign Custom Names: Similar to Code Locks, you can assign custom names to your turrets for easier management and identification. Control Center adds an easy-to-use interface that allows you to manage all these elements from one central location. You can open the interface to see a clear overview of your Tool Cupboards, Code Locks, and Auto Turrets. The GUI also allows you to add or remove friends or other players from these entities with just a few clicks, instead of having to manually interact with each one. If enabled, the plugin integrates with Steam to display your friends directly in the management interface, making it simple to add them to your base’s Tool Cupboards, Code Locks, or Turrets. With Control Center players have a powerful tool at their fingertips to better manage base security, access, and upkeep—providing a smoother and more convenient Rust experience. Chat Commands: /cc Opens Control Center. /name Used near a Code Lock or Auto Turret to add a name. Permissions controlcenter.useGui To allow players to use /cc command. controlcenter.useName To allow players to use /name command. Supported Language: English, French, German, Polish, Russian and Spanish Feel free to join my Discord! Stay up to date with the latest updates, report bugs, share suggestions, and get support for my plugins. You can also promote your Rust server or just hang out and chat! Join here: https://discord.gg/AkwHUs8Qma ControlCenter.json$15.00 -
Version 3.7.3
806 downloads
Features: User-Friendly Interface: Manage all base upgrades, repairs, and skin applications directly through a convenient UI. No need for complicated commands. Comprehensive Skin Menu: Access a variety of built-in skins for different building grades directly through the UI. Easily apply skins to customize your base. Customizable Settings: Adjust settings like command cooldowns and upgrade delays to fit your playstyle. Tailor the experience to your server’s needs. Enhanced Tools: Use the powerful 'Remove Tool' with adjustable duration for quick and efficient block removal. Perfect for fine-tuning your base. Efficient Base Upgrades: Upgrade your entire base to a specific building grade with just a click. Supports Wood, Stone, Metal, and HQM upgrades. Repair System: Quickly repair your base using materials from the Tool Cupboard. No need to manually gather resources—just click and repair. /bup 1-4 Base Permissions o.grant group default <permission> or c.grant group default <permission> baseupgrade.up_wood baseupgrade.up_stone baseupgrade.up_metal baseupgrade.up_hqm baseupgrade.downgrade baseupgrade.remove baseupgrade.show baseupgrade.bupUse Default Configuration { "UpgradeDelay(0.0 = insta upgrade)": 0.5, "CommandCooldown(in secs)": 60.0, "Hammer Duration": 300.0, "DefaultHammerSkin": 1116103194, "CheckAndResumeUpgradeEnabled": false, "RefundOnDowngrade (true/fasle)": true, "RepairCosts": { "Wood": 50, "Stone": 100, "Metal": 70, "TopTier": 10 }, "UpgradeCosts": { "Wood": 150, "Stone": 300, "Metal": 200, "TopTier": 25 }, "UISettings": { "UpgradePanel": { "OffsetMin": "-303.1 7.5", "OffsetMax": "-73.37 106.795" } } }$15.99 -
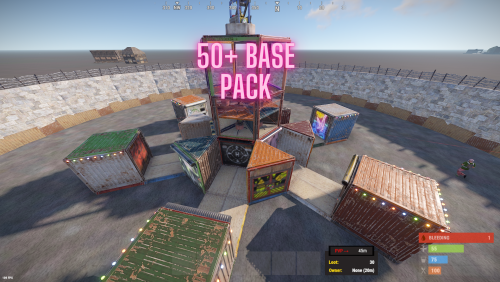
Version 1.0.1
55 downloads
Here is some bases i made that can be used in Raidable Bases.. Noob bases - 5 Easy bases - 7 Medium bases - 15 Hard bases - 15 Extreme bases - 10 Total - 52 Bases. OPS: This bundle contains https://codefling.com/bases/10-extreme-raidable-bases-pack-6 Need help ? Join the discord. - discord.gg/4j3FvSYAFd$16.00 -
Version 1.5.2
200 downloads
Quarries have evolved into personal computers that can be placed within player bases, providing full customization. Everything, from fuel types to unlimited upgrades, is configurable, including upgrade requirements, mined items, and fuel. Seamlessly integrating with the industrial system. FEATURES Intuitive UI: Simulates old DOS programs for easy use Full Customization: Item output, fuel, and upgrade requirements can be adjusted Unlimited Upgrades: Use items, Economics, and ServerRewards for upgrades Base Placement: Quarry Computers can be placed inside bases Industrial Automation-Ready: With permissions for seamless integration Screen Activation: Easily see if the computer is on, with percentage displays Multi-Language Support: Fully translatable Player Permissions: Control how many quarries a player can own and upgrade Persistent Data: Upgrades and item levels are saved across restarts VIDEO SHOWCASE Here’s how to add the recycler to your shop: Use the Command: gq %steamID% PERMISSIONS "quarrycomputer.give" Grants the player the ability to use the customizable command (/gq <User>) to give themselves or other players a Quarry Computer. "quarrycomputer.industrialinput" AND "quarrycomputer.industrialoutput" Allows players to connect industrial storage adaptors to their quarries, enabling automated resource handling. "quarrycomputer.vip" Provides players with additional benefits or features, such as having a higher limit on the number of quarries they can deploy. "quarrycomputer.norequirements" Allows players to upgrade their quarries without needing to meet the usual item or resource requirements. "quarrycomputer.admin" Provides administrative control over players' quarries, such as the ability to manage or interact with any quarry regardless of ownership. CONFIGURATION You can have as many upgrade levels as you want. Use Economics and ServerRewards on the item shortnames to use currency. Any in-game item can be used. Requirements can utilize Economics and ServerRewards based on the item shortname. Item shortnames are validated when the plugin loads, with a warning issued if they need to be fixed. { "Use LangAPI Plugin": true, "Use Notify Plugin": true, "RP Image URL": "https://i.ibb.co/C22VZDj/money.png", "Allow Team Access": true, "Allow Friends Access": true, "Give Quarry Command": [ "gq", "givequarry" ], "Drop Quarry Item on Destruction": true, "Fuel Configuration": { "Shortname": "diesel_barrel", "Resource Extraction Interval In Seconds": 3600, "Fuel Required Per Extraction": 1 }, "No Upgrades (Level 1)": { "Storage Slots": { "Fuel": 1, "Resources": 6 }, "Resources Output Per Extraction": [ { "Shortname": "lowgradefuel", "Amount": 1440 }, { "Shortname": "crude.oil", "Amount": 720 }, { "Shortname": "stones", "Amount": 7200 }, { "Shortname": "metal.ore", "Amount": 1440 }, { "Shortname": "hq.metal.ore", "Amount": 180 }, { "Shortname": "sulfur.ore", "Amount": 1440 } ] }, "Upgrades (Level 2+)": [ { "Storage Slots": { "Fuel": 2, "Resources": 8 }, "Resources Output Per Extraction": [ { "Shortname": "lowgradefuel", "Amount": 1620 }, { "Shortname": "crude.oil", "Amount": 900 }, { "Shortname": "stones", "Amount": 9000 }, { "Shortname": "metal.ore", "Amount": 1800 }, { "Shortname": "hq.metal.ore", "Amount": 270 }, { "Shortname": "sulfur.ore", "Amount": 1620 } ], "Required Items To Upgrade": [ { "Shortname": "wood", "Amount": 14000 }, { "Shortname": "stones", "Amount": 7000 }, { "Shortname": "metal.fragments", "Amount": 1000 }, { "Shortname": "metal.refined", "Amount": 20 }, { "Shortname": "carburetor1", "Amount": 1 }, { "Shortname": "crankshaft1", "Amount": 1 }, { "Shortname": "piston1", "Amount": 1 }, { "Shortname": "sparkplug1", "Amount": 1 }, { "Shortname": "valve1", "Amount": 1 }, { "Shortname": "scrap", "Amount": 650 }, { "Shortname": "sheetmetal", "Amount": 5 }, { "Shortname": "tarp", "Amount": 5 } ] }, { "Storage Slots": { "Fuel": 3, "Resources": 10 }, "Resources Output Per Extraction": [ { "Shortname": "lowgradefuel", "Amount": 1980 }, { "Shortname": "crude.oil", "Amount": 1080 }, { "Shortname": "stones", "Amount": 10800 }, { "Shortname": "metal.ore", "Amount": 2160 }, { "Shortname": "hq.metal.ore", "Amount": 360 }, { "Shortname": "sulfur.ore", "Amount": 1980 } ], "Required Items To Upgrade": [ { "Shortname": "wood", "Amount": 25000 }, { "Shortname": "stones", "Amount": 13000 }, { "Shortname": "metal.fragments", "Amount": 2000 }, { "Shortname": "metal.refined", "Amount": 40 }, { "Shortname": "carburetor1", "Amount": 1 }, { "Shortname": "crankshaft1", "Amount": 1 }, { "Shortname": "piston1", "Amount": 2 }, { "Shortname": "sparkplug1", "Amount": 2 }, { "Shortname": "valve1", "Amount": 2 }, { "Shortname": "scrap", "Amount": 1300 }, { "Shortname": "sheetmetal", "Amount": 5 }, { "Shortname": "tarp", "Amount": 5 } ] }, { "Storage Slots": { "Fuel": 4, "Resources": 12 }, "Resources Output Per Extraction": [ { "Shortname": "lowgradefuel", "Amount": 2160 }, { "Shortname": "crude.oil", "Amount": 1260 }, { "Shortname": "stones", "Amount": 16200 }, { "Shortname": "metal.ore", "Amount": 2520 }, { "Shortname": "hq.metal.ore", "Amount": 450 }, { "Shortname": "sulfur.ore", "Amount": 2160 } ], "Required Items To Upgrade": [ { "Shortname": "wood", "Amount": 50000 }, { "Shortname": "stones", "Amount": 25000 }, { "Shortname": "metal.fragments", "Amount": 4000 }, { "Shortname": "metal.refined", "Amount": 80 }, { "Shortname": "carburetor2", "Amount": 1 }, { "Shortname": "crankshaft2", "Amount": 1 }, { "Shortname": "piston2", "Amount": 2 }, { "Shortname": "sparkplug2", "Amount": 2 }, { "Shortname": "valve2", "Amount": 2 }, { "Shortname": "scrap", "Amount": 2600 }, { "Shortname": "sheetmetal", "Amount": 5 }, { "Shortname": "tarp", "Amount": 5 } ] }, { "Storage Slots": { "Fuel": 5, "Resources": 14 }, "Resources Output Per Extraction": [ { "Shortname": "lowgradefuel", "Amount": 2340 }, { "Shortname": "crude.oil", "Amount": 1440 }, { "Shortname": "stones", "Amount": 14400 }, { "Shortname": "metal.ore", "Amount": 2880 }, { "Shortname": "hq.metal.ore", "Amount": 540 }, { "Shortname": "sulfur.ore", "Amount": 2520 } ], "Required Items To Upgrade": [ { "Shortname": "wood", "Amount": 50000 }, { "Shortname": "stones", "Amount": 50000 }, { "Shortname": "metal.fragments", "Amount": 8000 }, { "Shortname": "metal.refined", "Amount": 200 }, { "Shortname": "carburetor3", "Amount": 1 }, { "Shortname": "crankshaft3", "Amount": 1 }, { "Shortname": "piston3", "Amount": 2 }, { "Shortname": "sparkplug3", "Amount": 2 }, { "Shortname": "valve3", "Amount": 2 }, { "Shortname": "scrap", "Amount": 6000 }, { "Shortname": "sheetmetal", "Amount": 5 }, { "Shortname": "tarp", "Amount": 5 } ] }, { "Storage Slots": { "Fuel": 6, "Resources": 16 }, "Resources Output Per Extraction": [ { "Shortname": "lowgradefuel", "Amount": 2520 }, { "Shortname": "crude.oil", "Amount": 2160 }, { "Shortname": "stones", "Amount": 16200 }, { "Shortname": "metal.ore", "Amount": 3240 }, { "Shortname": "hq.metal.ore", "Amount": 630 }, { "Shortname": "sulfur.ore", "Amount": 2880 }, { "Shortname": "gunpowder", "Amount": 4680 }, { "Shortname": "explosives", "Amount": 135 } ], "Required Items To Upgrade": [ { "Shortname": "mining.quarry", "Amount": 1 }, { "Shortname": "mining.pumpjack", "Amount": 1 } ] } ], "Keep Upgrades On Remove Quarry": true, "Profiles": { "Default (No Permission)": { "Quarry Limit": 1 }, "VIP (quarrycomputer.vip Permission)": { "Quarry Limit": 2 } }, "Item Name": "Quarry Computer", "UI Configuration": { "Font (DroidSansMono.ttf / PermanentMarker.ttf / RobotoCondensed-Bold.ttf / RobotoCondensed-Regular.ttf)": "DroidSansMono.ttf", "Header": { "Background Color": "0.4 0.4 0.4 0.95", "Font Color": "1 1 1 1", "Close Button": { "Background Color": "1 0 0 1", "Font Color": "1 1 1 0.5", "Font Size": 13 } }, "Background Color": "0.6 0.6 0.6 0.95", "Line Color": "1 1 1 1", "Left Panel": { "Shadow Color": "0 0 0 0.97", "Font Color": "1 1 1 1", "Background Color": "0 0 1 1", "Remove Button": { "Background Color": "0.6 0.6 0.6 0.95", "Font Color": "1 0 0 1", "Font Size": 14 }, "Start Stop Button": { "Background Color": "0.6 0.6 0.6 0.95", "Font Color": "0 1 0 1", "Font Size": 14 }, "Stop Stop Button": { "Background Color": "0.6 0.6 0.6 0.95", "Font Color": "1 0 0 1", "Font Size": 14 } }, "Right Panel": { "Shadow Color": "0 0 0 0.97", "Font Color": "1 1 1 1", "Background Color": "0.5 0 0 1", "Upgrade Button": { "Background Color": "0.6 0.6 0.6 0.95", "Font Color": "0 1 0 1", "Font Size": 14 } }, "Popup": { "Overlay Color": "0 0 0 0.9", "Shadow Color": "0 0 0 0.85", "Border Color": "1 1 1 1", "Background Color": "0 0 0 1", "Button Color": "0.6 0.6 0.6 0.95", "Confirm Button Color": "0 1 0 1", "Cancel Button Color": "1 0 0 1" } }, "Version": { "Major": 1, "Minor": 3, "Patch": 4 } } Alternative Configuration: { "Use LangAPI Plugin": true, "Use Notify Plugin": true, "Allow Team Access": true, "Allow Friends Access": true, "Give Quarry Command": [ "gq", "givequarry" ], "Drop Quarry Item on Destruction": true, "Fuel Configuration": { "Shortname": "charcoal", "Resource Extraction Interval In Seconds": 40, "Fuel Required Per Extraction": 100 }, "No Upgrades (Level 1)": { "Storage Slots": { "Fuel": 1, "Resources": 6 }, "Resources Output Per Extraction": [ { "Shortname": "crude.oil", "Amount": 4 }, { "Shortname": "stones", "Amount": 35 }, { "Shortname": "metal.ore", "Amount": 7 }, { "Shortname": "sulfur.ore", "Amount": 7 } ] }, "Upgrades (Level 2+)": [ { "Storage Slots": { "Fuel": 3, "Resources": 12 }, "Resources Output Per Extraction": [ { "Shortname": "crude.oil", "Amount": 6 }, { "Shortname": "stones", "Amount": 50 }, { "Shortname": "metal.ore", "Amount": 10 }, { "Shortname": "sulfur.ore", "Amount": 10 } ], "Required Items To Upgrade": [ { "Shortname": "Economics", "Amount": 25000 }, { "Shortname": "scrap", "Amount": 1000 }, { "Shortname": "pumpkin", "Amount": 100 } ] }, { "Storage Slots": { "Fuel": 6, "Resources": 24 }, "Resources Output Per Extraction": [ { "Shortname": "crude.oil", "Amount": 10 }, { "Shortname": "hq.metal.ore", "Amount": 10 }, { "Shortname": "metal.ore", "Amount": 30 }, { "Shortname": "stones", "Amount": 100 }, { "Shortname": "sulfur.ore", "Amount": 25 } ], "Required Items To Upgrade": [ { "Shortname": "scrap", "Amount": 5000 }, { "Shortname": "pumpkin", "Amount": 1000 }, { "Shortname": "cloth", "Amount": 10000 }, { "Shortname": "red.berry", "Amount": 1000 }, { "Shortname": "bone.fragments", "Amount": 1000 } ] } ], "Keep Upgrades On Remove Quarry": true, "Profiles": { "Default (No Permission)": { "Quarry Limit": 1 }, "VIP (quarrycomputer.vip Permission)": { "Quarry Limit": 1 } }, "Item Name": "Quarry Computer", "UI Configuration": { "Font (DroidSansMono.ttf / PermanentMarker.ttf / RobotoCondensed-Bold.ttf / RobotoCondensed-Regular.ttf)": "DroidSansMono.ttf", "Header": { "Background Color": "0.4 0.4 0.4 0.95", "Font Color": "1 1 1 1", "Close Button": { "Background Color": "1 0 0 1", "Font Color": "1 1 1 0.5", "Font Size": 13 } }, "Background Color": "0.02 0.31 0.49 0.95", "Line Color": "0.02 0.73 0.8 1", "Left Panel": { "Shadow Color": "0.02 0.15 0.2 0.97", "Font Color": "1 1 1 1", "Background Color": "0.2 0.26 0.36 1", "Remove Button": { "Background Color": "0.67 0.51 0.65 0.95", "Font Color": "0 0 0 1", "Font Size": 14 }, "Start Stop Button": { "Background Color": "0.44 0.62 0.79 0.95", "Font Color": "0 0 0 1", "Font Size": 14 }, "Stop Stop Button": { "Background Color": "0.96 0.72 0.82 0.95", "Font Color": "0 0 0 1", "Font Size": 14 } }, "Right Panel": { "Shadow Color": "0.02 0.27 0.33 0.97", "Font Color": "1 1 1 1", "Background Color": "0 0.07 0.2 1", "Upgrade Button": { "Background Color": "0.51 0.58 0.67 0.95", "Font Color": "0 0 0 1", "Font Size": 14 } }, "Popup": { "Overlay Color": "0.01 0.1 0.14 0.9", "Shadow Color": "0.02 0.11 0.13 0.85", "Border Color": "0.26 0.32 0.38 1", "Background Color": "0.15 0.24 0.37 1", "Button Color": "0.44 0.62 0.79 0.95", "Confirm Button Color": "0 1 0 1", "Cancel Button Color": "1 0 0 1" } }, "Version": { "Major": 1, "Minor": 3, "Patch": 0 } }$18.00 -
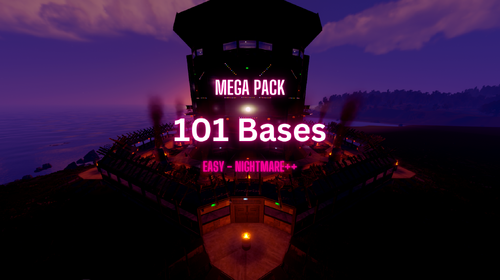
Version 1.0.0
12 downloads
Ultimate Raidable Bases Bundle Give your server an upgrade with this bundle, featuring five great raidable base packs! With 101 unique bases, this bundle has something for everyone—from easy beginner bases to tough challenges for experienced players. 100+ bases Bundle Contents: 51 Noob-Extreme bases RaidableBases Pack 1 A big pack with 52 bases of different difficulties, perfect for all types of players. https://codefling.com/bases/raidablebases-pack1 20 Easy Raidable Bases Pack 2 This pack has 20 simple bases, great for new players to practice raiding. https://codefling.com/bases/20-easy-raidable-bases-pack-2 4 Nightmare++ Bases Pack 3 These 4 huge and tricky bases are made for the best raiders. https://codefling.com/bases/4-ultimate-nightmare-bases-pack-3 10 Hard Raidable Bases Pack 4 With 10 strong bases, this pack is perfect for players who like a challenge. https://codefling.com/bases/10-hard-raidable-bases-pack-4 15 Medium Raidable Bases Pack 5 This pack has 15 balanced bases. https://codefling.com/bases/15-medium-raidable-bases-pack-5 As always if you have any problems, wanna chat or have suggestions join the discord here - discord.gg/4j3FvSYAFd$29.00 -
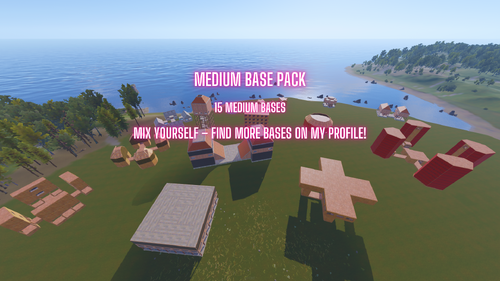
Version 1.0.0
3 downloads
This pack features 15 pre-built bases designed to deliver an exciting raiding experience. Perfect for all level of raiders looking to test their skills! Mix yourself – find more bases on my profile! A mix of challenging designs suitable for both new and advanced players. Ready to use and easy to import to your server. Need help or have suggestions? Join the community on Discord: discord.gg/4j3FvSYAFd$5.00 -
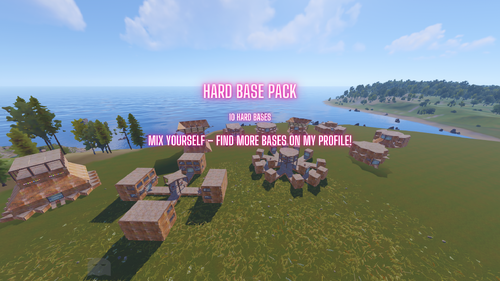
Version 1.0.0
4 downloads
This pack features 10 pre-built bases designed to deliver an exciting raiding experience. Perfect for more experienced raiders looking to test their skills! Mix yourself – find more bases on my profile! A mix of challenging designs suitable for both medium and advanced players. Ready to use and easy to import to your server. Need help or have suggestions? Join the community on Discord: discord.gg/4j3FvSYAFd$5.00 -
Version 1.1.5
1,539 downloads
Defend your home.. well.. defend what's left of it! Welcome to an epic new event where the players will defend their bases against waves of Frankenraiders! They will use any weapons they have available to try to raid your base. Some will come with whatever they can swing at you and your base, some will just try to defend their kin, some have found some heavy weaponry too! I think that one has a rocket launcher?! Description To launch the event first you must find a flare bright enough to attract their attention. You'll be able to find flares bright enough to attract an Easy Frankenraid in Bradley, Elite, Military, and Supply crates. When you've found a flare just toss it on or near the base within Tool Cupboard range. Once you successfully defend an Easy Frankenraiding party, you will be rewarded with a flare bright enough for a Medium party. Then upon defending successfully against a Medium raid, well if you really want to risk your wipe being wiped by a full Frankenraider party, then you will have earned a flare bright enough to attract a Hard Frankenraid! When you complete any difficulty level and are able to defend your base, a chinook will be sent to your location with rewards for your service to the island in clearing out the threat! If your base is destroyed, the event ends, chat notifications are sent, and there you stand in shame. Hopefully you're on a low pop server and not too many people noticed. It's okay champ, happens to the best of us some days! Just keep an eye on the in game UI like the timer and wave information to give yourself the best shot at keeping your base standing! There are various ways to configure this plugin to customize it for your server, for any level and number of players. The creativity is in your hands with the configuration file as well as your communities wants or needs. The loot table, the flare spawns, the different enemy types and their setups, everything is there for you to customize this if you so choose. Dependencies (optional, not required) True PVE GUI Announcements Notify AlphaLoot CustomLoot Base Repair Chat commands /defstop - in game command to end event in your current Tool Cupboard range (be near the event you are trying to end) - only for administrators! /checkfoundations - checks all the foundations of the house for the event (it is necessary to be inside the Cupboard area of the house) ⊘ - you or your friends are not the owner of the foundation ⊝ - the foundation does not match in height/depth ⊛ - the foundation does not match the topology (prohibited topologies: Cliff, Cliffside, Decor, Building, Monument, Clutter, Mountain) ◉ - the foundation is located within a radius of 40 meters from the custom monument Console commands (RCON only) giveflare {skinid} {steamid} - Console command to give a custom flare with a Steam Workshop SkinID ({skinid}) to a player using their SteamID ({steamid}) Plugin Config en - example of plugin configuration in English ru - example of plugin configuration in Russian My Discord: KpucTaJl#8923 Join the Mad Mappers Discord here! Check out more of my work here! Creator of the default configuration – jtedal Help in creating a plugin description – Jbird$40.00 -
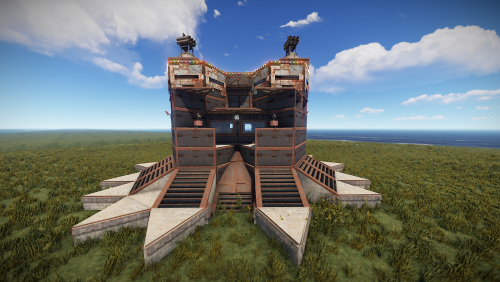
Version 1.0.0
1,319 downloads
Copypaste raid base usable via raidable bases plugins.Free- 1 comment
-
- 3
-
-
-
- #raidable base
- #raid
- (and 4 more)
-

Version 1.0.0
1 download
TR= Öncelikle Herkese Merhaba Bu bir Plugin değildir sadece dil paketidir bunu yüklemeniz için yapmanız gereken tek şey bu plugini satın alıp sunucunuzda 1 kez çalıştırın daha sonrasında /server/oxide/lang/en/Raidable Bases.json dosyasının yerine değiştirin bu kadar basit plugin sahibi her güncelleme yüklediğinde bende dil paketini güncelleyeceğim. plugin sahbinden izin aldım ilerde daha farklı dillere de çevirmeyi planlıyorum yapamadığınız çalışmayan ve ya herhangi bir sorunuz olduğunda bana yazabilirsiniz her zaman yardımcı olurum EU= "First of all, hello everyone. This is not a plugin; it is just a language pack. To install it, all you need to do is purchase the plugin and run it once on your server. After that: Replace the /server/oxide/lang/en/Raidable Bases.json file with this one. It’s that simple. Whenever the plugin owner releases an update, I will also update the language pack. I have obtained permission from the plugin owner, and I plan to translate it into other languages in the future. If you encounter any issues, such as something not working, or if you have any questions, feel free to contact me. I am always here to help.$3.00 -
Version 1.3.1
93 downloads
More Information: - Works with Tool Cupboards, Small Storage Boxes, Large Wood Box, Workbench (1,2,3), Repair Benches, and Mixing Tables - Default crafting range is set equal to the "no-building zone" range of a 1x1 base - Individual players can have extended or reduced range (use "sc.crafting_range" console command) Files produced: config/SuperCrafter.json - Default global settings for all players data/SuperCrafter/###.json - Individual player settings (Delete all files to reset players to default config file settings) plugins/SuperCrafter.cs - Code that makes SuperCrafter work Permissions: use - Allows user/group to use this plugin admin - Allows user/group to use plugin console commands Configuration: { "Should pull resources from FURNACES: (Default=false)": false, "Should pull resources from TC: (Default=true)": true, "Should pull resources from BOXES: (Default=true)": true, "Reloading pulls ammo from BASE: (Default=true)": true, "Repair pulls resources from BASE: (Default=true)": true, "Notify players of repair costs: (Default=true)": true, "Limit crafting queue for players: (Limits players from spam crafting) (Default=6, Infinite=0)": 6, "Range in \"Rust Meters\" a player can access their (closest TC) base loot. (Default=30, Infinite=0)": 30 } Console Commands: Description: Increases or decreases the range in which a specific player can access their base resources. Syntax: sc.crafting_range [Player ID/Name] [Range] Example #1: sc.crafting_range 72228723575847571 100 Example #2: sc.crafting_range Vergbergler 100$19.99 -
Version 1.0.20
386 downloads
Water Bases rust plugin enables players with permissions to construct and expand structures on and underwater without the need for pillars, incorporating vanilla-like mechanics, special features like underwater nettings, and customizable settings for different player tiers. Questions? Support? Join the discord: https://discord.nikhub.dev In short This Rust plugin enables players with the right permissions to construct structures on the water's surface and even extend them below water in a way that feels natural and in keeping with the game's original style. There's no need for tall, unstable pillars reaching down to the seabed; simply place your foundation on the water and use a building plan or hammer to expand it. These aquatic constructions adhere to the same principles of stability, upkeep, and decay as traditional bases on your server but also introduce unique elements like underwater nettings for gathering random items (with fully customizable loot tables) and innovative building techniques. The plugin accommodates various configuration profiles based on permissions, offering an excellent method to reward VIP players across different levels. It grants you control over who is allowed to build on the water, the size of their constructions, their proximity to the shore, and the highest tier of building blocks they can use, among other aspects. Additionally, the plugin is designed to alert players if their construction interferes with the Cargo Ship's route. With the Submarine update on the horizon, it's time to prepare your server for aquatic adventures with Water Bases! Watch the video below to see what water bases are all about. "What about Cargo Ship, will it destroy structures in the way?" By default, players will get a warning if they try to to build a water foundation in the path of the cargo ship, but their water foundation will stay. You can change this setting from "Warn" to "Prevent", and the player won't be able to build it in first place. Changing it to "None" will skip this check. Every ocean path node creates a "bubble" with a configurable radius. See Admin chat commands section below to visualise those bubbles and guide your players to areas where they will be able to build without issues. Quick start (for players and admins) Upload the WaterBases.cs file to your oxide/plugins folder and you should be good to go, it's all plug-and-play. No need to restart your server! Before you can build on water, you need some Water Foundations. Water foundations are re-skinned Inner Tube items (Shortname: innertube / Item ID: -697981032 ; mind the minus sign, it matters!) with a skin ID 2484982352 (https://steamcommunity.com/sharedfiles/filedetails/?id=2484982352) or 2485021365 (https://steamcommunity.com/sharedfiles/filedetails/?id=2485021365). That info is just in case you'd like to include those in your own Kits/Server Rewards shops/loot tables/custom crafting plugins. How to obtain those within the plugin? Crafting water base foundations (with Building Planner) By default, all players will be able to craft, deploy, expand and reinforce water foundations. More on the limits and how to change them (how far/close to the shore, min and max depth of the water, how many water foundations allowed per building etc) in the section Advanced Config. When a player equips a Building Plan, a small GUI will show in the bottom right (positions/colours etc can be changed in the config too). There, players will be able to craft deployable water foundations - both square and triangle. Those crafted items will also be consumed when players expand their already deployed foundations or reinforce them. The default permission profile requires a player to be close to a Level 2 Workbench - this requirement can be edited in the config to change the level needed, or you can turn off the need for a workbench altogether, per permission profile. If you don't want your players to be able to craft foundations - so they have to find them/buy them/earn them instead - you can disable it per-profile. In that case, they won't see the GUI. Giving with chat commands (admins only) Type /give_square [amount] or /give_triangle [amount] to give yourself some foundations of that type. If you don't specify an amount, you will only receive 1. Deploying a "starter" foundation on water Go out to the lake/ocean, select the water foundation as your active item and using the doughnut-shaped guide, deploy it on the water surface. After trying to deploy/expand upon an existing water foundation, a couple of checks will be performed according to global config and individual permission profile for that player: Does the player have permission to deploy the first foundation/expand existing one? Is the player building blocked? How far is the player trying to build from shore (based on the map topology)? Too close/too far? How deep is the water where the player is trying to build? Is it too deep/too shallow? Is the player trying to build too close to the path of cargo/Oil Rig? Is the player allowed to have this many water foundations in the building? If all the checks have been successful, a new twig floor, with a stability 100% (like normal foundations) will be built. It will have some indestructible floatation barrels attached to it, partially covering the water foundation's soft side (the bottom). Then, a water foundation can be expanded, upgraded, protected with a Tool Cupboard (like any other buildings, really), or reinforced. Expanding Once you've deployed your first "starter" water foundation, all the subsequent foundations will be placed using vanilla building mechanics - just take a building plan and build some floors neighbouring your water foundation on the sides! If you have enough water foundation items of the required kind in your inventory, those newly placed floors will also turn into water foundations. And they can call be demolished/upgraded, just like normal twig structures, as soon as you place a Tool Cupboard. Expanding a single-sided water foundation requires 1 proper water foundation item, expanding a double sided water foundation (reinforced one) requires two. Reinforcing Reinforcing a water foundation means making it double sided - so it fully covers the soft side AND gives you the ability to build from the surface down, to the seabed/lakebed! To reinforce, make sure a built water foundation is fully repaired, and them hit it with a hammer. If you have a required water foundation item in your inventory, it will be consumed and the foundation will be reinforced: you will see another floor with floatation barrels attached upside down. If you try to expand a reinforced foundation (by attaching a floor at the bottom, reinforced side) and there's no water foundation above it (normal orientation), it will try to create one, provided you have enough items in your inventory. Reinforcements (upside down water foundations) are always associated with the water foundation they're attached to and cannot exist on their own - if you destroy the water foundation, its reinforcement will be destroyed too. However, destroying the reinforcement will not destroy is water foundation. Upgrading Water base structures Building blocks inside your water bases have certain tier limits associated with them - it's to help balance things out. By default, non-VIP and non-admin players will be able to upgrade water foundations to sheet metal tier, floor frames and wall frames to stone tier, and everything else (including walls, floors and reinforcement foundations) to wood tier. You can easily decide which permission profile has which max tier (per type of building block) in the config. Water Base exclusive features Because water foundations are treated as floors with the stability of a foundation, you can place roofs at "ground level", which is not possible with normal foundations! Similarly, you can leave a "hole" where a water foundation would be and place a floor frame with a hatch instead - now you can enter your base from the bottom, underwater! Reinforcing a water foundation means you'll be able to build down from the surface to the bottom of the water to create extra layers of protection, or... Nettings deployed in wall frames underwater will collect random junk items with editable loot tables, including fish and diving equipment! This feature is heavily configurable and can even be disabled. But also Sharks! Read just below. NEW IN 1.0.5: Beware the Netting Sharks! If enabled, Sharks will randomly spawn around Nettings underwater. Especially ones that have accumulated a lot of items, but only if there's at least 1 player within the distance of 100 meters from the Netting. As soon as the first item is caught in an empty Netting, a random silent timer will be set. Every additional item spawning reduces the timer left by a certain percentage (default by 8%). When it hits 0, AND local/global Netting Shark population limits haven't yet been reached (all in the config), a Shark will spawn somewhere near that Netting. The sharks have a configurable aggro distance and multipliers for speed and health. They will linger around the position of the netting that attracted them and try to pursue anyone in sight. Harvesting a Netting Shark corpse with a proper tool will yield some free items from its entrails - by default 5 times more than you'd normally get from a netting full of items from the default loot tables. Of course the default Shark loot tables in the config are, just like the Netting loot tables, completely configurable - check the config section below. All in all, it's like any other base... just on water, without annoying seafloor supports. The stability of the water foundation is always 100% and goes down the higher you built. The stability of a reinforcement foundation also starts at 100% and goes down the deeper towards the seafloor you build. All the decaying things (walls, floors, doors etc) will require appropriate upkeep materials in the Tool Cupboard. Structures can be repaired, demolished, upgraded and removed using plugins. Bases can be raided, taken over or left to decay. Water Bases Permissions (Oxide.Grant user YourName [permission name starting with waterbases.]) By default, the plugin generates 3 permission profiles in the config - one for admins, one for normal players with no specific permissions (default) and one for VIP. More on permission profiles and config values they can handle can be found in the section Advanced Config. Unless you have added more permission profiles, only these two below are going to be used by your config: waterbases.admin Holders of the admin permission will also be able to run the /wb_cfg, /give_square and /give_triangle commands. Also, by default, they will be associated with the permission profile that has no limits on placing water foundations. waterbases.vip1 Holders of this permission will follow settings and limits associated with with that permission profile. The permissions below are also registered, but not used by default. To use them, just create some permission profiles with those permissions as the key. waterbases.vip2 waterbases.vip3 waterbases.vip4 waterbases.vip5 Admin chat commands (must have ownerid/moderatorid/waterbases.admin permission) /give_square [optional arg: amount of items to receive] Will give the player a given amount of square-shaped water foundations. If no amount is provided, only 1 will be received. /give_triangle [optional arg: amount of items to receive] Will give the player a given amount of triangle-shaped water foundations. If no amount is provided, only 1 will be received. /draw_cargo This will draw a "bubble" (only for you, not every player) around every path node, and the bubble's radius will be taken from your config. If a player tries building inside one of these bubbles, they might get a warning or get prevent from doing so (because cargo ship destroys all structures in its way). Useful to visualise where your players can and cannot build, based on the cargo ship path. /shore_distance This will show you the current distance from the shore, to help you decide how close to/far from the shore to allow players to build. The unit used by Rust to measure shore distance is not in meters, it's something roughly equivalent to 1/10th of a map grid length. Mind you though, it's based off of the map's topology, so it should be fine on procgens, but if you have a custom map without topology layers reflecting the actual shoreline, you might want to disable relying on shore distance in your config. Admin console / chat command This command will work both from the chat (in that case, prefix it with a forward slash / ) and the console, (F1 or server/RCON console). Running this command as a player will require the waterbases.admin permission for players that are not moderatorid/ownerid enabled. wb.give [square/triangle] [partial player name or full steam ID] If a player executes it in the chat or console in-game and they don't specify a recipient, it will be given to the player executing this command. Executing from the server console requires specifying the player. Configuration (oxide/config/WaterBases.json and /wb_cfg chat command) Vast majority of the settings can be configured with the /wb_cfg chat command. Typing it in the chat with no parameters should dump a rundown of config fields and their values. In order to run any of the config commands, you will need to have ownerid or moderatorid (or the waterbases.admin permission). /wb_cfg RelyOnShoreDistance [logical values (true or false)] /wb_cfg GlobalOceanLevelCheckBeforePlacing [logical values (true or false)] /wb_cfg GlobalOceanLevelBaseline [fractions (like 1.2345) between -1000.00 and 1000.00] /wb_cfg CargoShipPathHandling ["Warn", "Prevent" or "None"] /wb_cfg MinDistanceFromCargoShipNode [fractions (like 1.2345) between 0.00 and 10000.00] /wb_cfg UnderwaterNetsCollectJunk [logical values (true or false)] /wb_cfg UnderwaterNetsRandomTimerMin [fractions (like 1.2345) between 0.00 and 10000.00] /wb_cfg UnderwaterNetsRandomTimerMax [fractions (like 1.2345) between 0.00 and 10000.00] /wb_cfg UnderwaterNetsItemLimit [integers (like 12345) between 0 and 100] /wb_cfg UnderwaterNetsSpawnSharks [logical values (true or false)] /wb_cfg UnderwaterNetsSharkRandomTimerMin [fractions (like 1.2345) between 1.00 and 100000.0] /wb_cfg UnderwaterNetsSharkRandomTimerMax [fractions (like 1.2345) between 1.00 and 100000.0] /wb_cfg UnderwaterNetsSharkTimerShortenByPercent [fractions (like 1.2345) between 1.00 and 100000.0] /wb_cfg UnderwaterNetsSharkSpawningMinDistance [fractions (like 1.2345) between 2.00 and 100000.0] /wb_cfg UnderwaterNetsSharkSpawningMaxDistance [fractions (like 1.2345) between 2.00 and 100000.0] /wb_cfg UnderwaterNetsSharkPopulationLimitLocal [integers (like 12345) between 0 and 1000] /wb_cfg UnderwaterNetsSharkPopulationLimitGlobal [integers (like 12345) between 0 and 1000] /wb_cfg UnderwaterNetsSharkSleepDespawnTimer [fractions (like 1.2345) between 2.00 and 100000.0] /wb_cfg UnderwaterNetsSharkHealthMultiplier [fractions (like 1.2345) between 0.001 and 100.0] /wb_cfg UnderwaterNetsSharkSpeedMultiplier [fractions (like 1.2345) between 0.001 and 100.0] /wb_cfg UnderwaterNetsSharkAggroRange [fractions (like 1.2345) between 0.001 and 100.0] /wb_cfg SharkHarvestingLootEnabled [logical values (true or false)] /wb_cfg GuiNEW1AnchorMinX [fractions (like 1.2345) between 0.00 and 1.00] /wb_cfg GuiNEW2AnchorMinY [fractions (like 1.2345) between 0.00 and 1.00] /wb_cfg GuiNEW3AnchorMaxX [fractions (like 1.2345) between 0.00 and 1.00] /wb_cfg GuiNEW4AnchorMaxY [fractions (like 1.2345) between 0.00 and 1.00] /wb_cfg GuiNEW5OffsetMinX [fractions (like 1.2345) between 0.00 and 1.00] /wb_cfg GuiNEW6OffsetMinY [fractions (like 1.2345) between 0.00 and 1.00] /wb_cfg GuiNEW7OffsetMaxX [fractions (like 1.2345) between 0.00 and 1.00] /wb_cfg GuiNEW8OffsetMaxY [fractions (like 1.2345) between 0.00 and 1.00] /wb_cfg GuiTextSize [integers (like 12345) between 0 and 100] /wb_cfg GuiButtonColor [hexadecimal numbers WITHOUT preceding # (like 3db4b3)] /wb_cfg GuiTextColor [hexadecimal numbers WITHOUT preceding # (like 3db4b3)] /wb_cfg GuiButtonAlpha [fractions (like 1.2345) between 0.00 and 1.00] /wb_cfg GuiTextAlpha [fractions (like 1.2345) between 0.00 and 1.00] /wb_cfg EnableBarrelEntities [logical values (true or false)] Advanced config (only editable through oxide/config/WaterBases.json) Water foundation crafting cost Here you can adjust how much it costs to craft water foundations. Make it more expensive, less expensive, or add/remove required materials. The cost will stay the same for all permission profiles. A full list of short names for items can be found at https://www.corrosionhour.com/rust-item-list/ "CraftingCostSquare": [ { "Shortname": "wood", "Amount": 100 }, { "Shortname": "metal.fragments", "Amount": 200 } ], "CraftingCostTriangle": [ { "Shortname": "wood", "Amount": 50 }, { "Shortname": "metal.fragments", "Amount": 100 } ], Shortname should belong to one of the available items in-game. The amount should be a whole number larger than 0 and smaller than the limit of a signed 32-bit integer (2 147 483 647). Permission profiles Using profiles you can quickly create/edit different permissions for different players, for example, if you have more than 1 VIP tier on your server - just add some new profiles. Different players can have different limits and permissions associated with building water bases. To check which permission profile the player should fall under, the plugin goes through all permission profiles and checks whether the player has that permission granted. The permissions are checked in order, meaning that if the player doesn't have the first permission, it will try the next permission on the list, etc (similar to how Auto Kits checks which kit to give to a player based on their permissions in order). If the player doesn't have any permissions from the list granted, they will fall back to the "default" profile. That's the only one that you shouldn't remove! If you remove it, a new one with default values will be created. So if you don't want your default, non-VIP players to build water bases, don't remove the default profile, just take away privileges in that profile (like deploying/expanding/reinforcing). You don't have to use the built-in VIP permissions - any permission from any plugin will do just fine! By default, three permission profiles are generated in the config: default, waterbases.admin and waterbases.vip1. The default permission profile will apply to any player who doesn't have any permissions listed in the profile list - let's have a look at it: "PermissionProfiles": { "default": { "PermissionRequired": "default", "MaxBuildingGradeGeneric": "Wood", "MaxBuildingGradeFrames": "Stone", "MaxBuildingGradeWaterFoundations": "Metal", "WaterDepthMin": 2.0, "WaterDepthMax": 100.0, "MaxWaterFoundationsPerBuilding": 25, "MinDistanceFromOilrig": 200.0, "MinDistanceFromShore": 2.0, "MaxDistanceFromShore": 20.0, "CanDeployWaterFoundations": true, "CanReinforceWaterFoundations": true, "CanExpandWaterFoundations": true, "CanExpandReinforcedFoundations": true, "CanCraftWaterFoundations": true, "RequireMaterialsForCrafting": true, "WorkbenchLevelRequired": 2.0, "CanDeployUnderwaterNets": true, } PermissionRequired should contain an already existing permission registered by any plugin in the form of pluginname.permissionname MaxBuildingGradeGeneric, MaxBuildingGradeFrames andMaxBuildingGradeWaterFoundations define the highest allowed grade for a particular part of a water base. Generic means anything that's not a water foundation or a door/floor frame (that includes normal floors, walls, half walls, and inverse foundations). For those 3 settings, the accepted options are "Twigs", "Wood", "Stone", "Metal" or "TopTier". Set all of them to "TopTier" if you don't want any tier limits on water bases. WaterDepthMin and WaterDepthMax define the allowed range for water depth when placing water foundations - to make sure that certain players are not building in water that is too shallow/too deep. The unit meters. MaxWaterFoundationsPerBuilding is what it sounds like it will prevent a player under this permission profile from adding more water foundations to a water base, limiting their size. Set to a large value like 100000 for virtually no limits. MinDistanceFromOilrig will define the minimum distance from the closest oilrig (in meters) that has to be respected before placing a water foundation down. Decrease to let players build closer, increase to make them build farther away. MinDistanceFromShore and MaxDistanceFromShore both rely on your map topology. If you're sure that you're quite close to the shore, but the /shore_distance command shows you ridiculous values, it means your map does not have the topology map painted properly (contact the map dev and let them know!). In that case, you should set the RelyOnShoreDistance option in the config to false and instead rely on water depth (if shore distance is enabled, it will rely on both). The unit here is not a meter, but roughly 1/10th of a map grid (around 15 meters). CanDeployWaterFoundations if set to true, will allow players using this profile to deploy newly started foundations (using the doughnut guide, provided they have a properly shaped water foundation item to be consumed). CanReinforceWaterFoundations if set to true, will allow players using this profile to reinforce water foundations by hitting them with a hammer (provided they have a properly shaped water foundation item to be consumed). CanExpandWaterFoundations if set to true, will allow players using this profile to build more water foundations upon already existing ones by placing neighboring floors with their building plan (provided they have a properly shaped water foundation item to be consumed). CanExpandReinforcedFoundations if set to true, will allow players using this profile to attach a floor to the side of a reinforcement foundation - and as long as they have 2 water foundation items in their inventory, they will expand that reinforced foundation along with its water foundation. CanCraftWaterFoundations if set to true, will allow players using this profile to craft water foundations using a GUI in the bottom-right (showing while a Building Plan is equipped). Profiles with this setting set to false won't display those GUIs and players will have to find other ways of obtaining water foundations (loot, kits, server rewards etc). RequireMaterialsForCrafting if set to true, players using this profile will need to have required crafting materials in their inventory when trying to craft a Water Foundation. If set to false, the player will be able to craft an infinite amount of water foundations for free, so use them with caution. WorkbenchLevelRequired Set to 0.0 (no workbench nearby required), 1.0 (Level 1 required), 2.0 (Level 2 required) or 3.0 (Level 3 required) for crafting Water Foundations. CanDeployUnderwaterNets if set to true, players will be able to deploy nettings in underwater wall frames. Those settings will slowly accumulate underwater junk items if the feature is enabled on your server - look below for the loot table configuration. Underwater junk & Netting Shark loot tables If you have not disabled underwater nets collecting junk, this is where you can adjust the kind and rarity of certain items. You can even remove entries and add your own, including a custom skin and item name! A "loot table" is perhaps not the right term, as the list contains individual chances of a "caught" item being of a particular kind. There can be only 1 item caught at a time, and the table defines random weights for every possible entry. The larger the weight (compared to the sum of all weights), the bigger chance of encountering a particular item. So if you have 10 entries and each of them have a weight of 1, each item will have an equal 10% chance of being one of the random entries in the list (as the weights sum up to 10). Thus you can have some items really common, and some of them really rare. Here are 2 sample entries from the list: { "Shortname": "innertube", "CustomName": null, "SkinID": 2484982352, "RandomChanceWeight": 1.0, "MinRandomAmount": 1, "MaxRandomAmount": 1 }, { "Shortname": "innertube", "CustomName": null, "SkinID": 2485021365, "RandomChanceWeight": 1.0, "MinRandomAmount": 1, "MaxRandomAmount": 1 }, Shortname is the most important bit - make sure it's correct! You can find a link to a full list of those names above. CustomName lets you give items caught in the netting different names. You can leave that null to leave a default item name. In this example, the two items are water foundations - the proper name for those items will be applied automatically by the plugin anyway. Whatever you type there, make sure to encompass it in quotes, like "CustomName": "My Custom Item Name" if it's not null! SkinID is pretty self-explanatory - it's the long number in the URL of a Steam Workshop item. By default, it's 0 (no skin). RandomChanceWeight lets you decide the item's rarity when spawning - relative to the rarity of other items. Increase or decrease this number (it can be fractional) to make the item more or less rare. MinRandomAmount and MaxRandomAmount are what they sound like - they should both be larger than 0 (whole numbers) and when that particular item is caught, the stack will contain an amount between these two numbers. Translation support (oxide/lang/en/WaterBases.json) Almost every string the players see, including names for the water foundation items and messages displaying in the chat and the GUI, can be edited. Just load the plugin and let it generate the file - after you edit it, reload the plugin.$29.99 -
Version 1.2.1
124 downloads
XRaidProtection - night protection of buildings from raids. - Optimization of the interface for different monitor resolutions. - There is a lang ru/en/uk/es/fr/pt-PT/pt-BR. - Sound effects when interacting with protection. - Setting the protection time range. - Setting the protection percentage. - Customize GUI/chat messages. [ Custom setting for each type of protection ] - Setting up a list of protected prefabs in addition to building blocks, doors, large walls and gates (they are protected by default). - Support for the IQChat plugin. - Setting up protection in the first N days after the wipe. - Setting the protection percentage for privileges. [ The highest in the list of permissions is valid ] - Setting protection activity on certain days of the week. [ Example: weekdays only ] - Possibility to allow twigs to be broken during protection. - Notification of players in the chat about the activation and deactivation of protection. - The ability to always display the UI when protection is active/inactive. - The ability to include vehicle protection. - The ability to configure a different percentage of protection for each day after a wipe. -> Overview - YouTube <- Commands /protect - view protection status. Config { "Messages in chat and GUI": { "Interval between messages. Min - 10 sec": 30 }, "Setting the protection duration": { "Start protection | Hour": 22, "Start protection | Minute": 0, "End protection | Hour": 7, "End protection | Minute": 0, "Timezone - UTC+0:00": 0, "Protection activity check timer (.sec)": 120, "Use local computer/hosting time. [ Requests to an external time service and time zone will be disabled ]": true }, "General settings": { "Sound effect": "assets/bundled/prefabs/fx/invite_notice.prefab", "Protection percentage for all players. 1.0 - 100%": 0.5, "Protection percentage for all vehicles. 1.0 - 100%": 0.5, "Protected all vehicles": false, "Enable sound effect": true, "Protection activity only in the first days of the wipe": false, "How protection will work in the early days of the wipe - [ True - all day | False - only in the specified time range ]": false, "How many first days after the wipe will be active protection": 3, "Percentage of protection by day, only at ( Protection activity only in the first days of the wipe ). If the list is empty or no day is specified, the protection percentage will be taken from ( Protection percentage for all players. 1.0 - 100% )": { "1": 1.0, "2": 0.7, "3": 0.5 }, "Enable GUI message": true, "Enable chat message": false, "Allow breaking twigs during defense": true, "Enable protection for players with permission when the main protect is not active": false, "Enable protection against damage from helicopters, MLRS, submarines, etc. [ Excluding rot damage ]": true, "0 - Protection only for players with permission, 1 - Protection for all players, 2 - Protection for players with permission and for all players": 1, "What days of the week protection can be active - [ Does not apply to protection in the early days of the wipe ] - [ Sun - 1, Mon - 2, Tue - 3, Wed - 4, Thu - 5, Fri - 6, Sat - 7 ]": [ 1, 2, 3, 4, 5, 6, 7 ] }, "GUI settings": { "AnchorMin [ When damage is dealt ]": "0.5 0", "AnchorMax [ When damage is dealt ]": "0.5 0", "OffsetMin [ When damage is dealt ]": "-194.5 80", "OffsetMax [ When damage is dealt ]": "175.5 110", "Use icons [ When damage is dealt ]": true, "AnchorMin [ Status is always displayed ]": "0.5 0", "AnchorMax [ Status is always displayed ]": "0.5 0", "OffsetMin [ Status is always displayed ]": "-194.5 -6", "OffsetMax [ Status is always displayed ]": "175.5 24", "Use icons [ Status is always displayed ]": false, "Text color": "1 1 1 0.4", "Text size": 12, "Always display UI when protection is active": true, "Always display UI when protection is inactive": true }, "List of prefabs that will be protected": [ "cupboard.tool.deployed", "wall.frame.shopfront.metal" ], "Setting permissions - [ Permisssion | The percentage of protection by permission. 1.0 - 100% ]": { "xraidprotection.elite": 0.9, "xraidprotection.perm": 0.8, "xraidprotection.vip": 0.7 }, "Wipe date": "01/01/2023", "Time": "2023-01-01T00:00:00.00+00:00" }$10.99- 14 comments
-
- 1
-
-
- #raid
- #raid base
- (and 4 more)
-
.thumb.jpg.f561e3cb54c8fed203b80f6e5039dee7.jpg)
Version 1.0.1
14 downloads
This monument is designed to build a base inside it. The player can build anywhere, except for the roof of the monument and the entrance. The monument looks great at night. It will be fun to shoot back from the raiders from the roof of the monument. The entrance on the roof is illuminated by an ancient rune.$5.00 -
Version 1.2.2
2,026 downloads
The plugin allows players to automatically improve their buildings with just one button. Product Features Does not load your server Does not allow to improve the structure during the raid block Permission to use the plugin functions: Upgrade - “autobaseupgrade.upgrade” Repair - "“autobaseupgrade.repair" Plugin Config { "Upgrade cooldown (seconds)": { "autobaseugrade.default": 1.55, "autobaseugrade.vip": 0.55 }, "Cost Modifier for repairs": { "autobaseugrade.default": 1.5, "autobaseugrade.vip": 1.0 }, "Run upgrade effect": true, "AnchorMin": "0.56 0.8", "AnchorMax": "0.7 0.665", "OffsetMin": "293.746 57.215", "OffsetMax": "406.44 77.785" }$22.00 -
.thumb.jpg.0676c6b974581ac5572a7c81185420ec.jpg)
Version 2.0.0
6 downloads
This monument is designed to build a base inside it The monument looks great at night The player can only build a zone inside the cave There is a lock at the entrance to the cave The player will not be able to use the bug union and will not throw a sleeping bag inside the skull through the textures There is a forest topology around the cave, which means that players will be able to cut down the forest$5.00-
- 5
-
-
- #cave
- #avo_skorm
- (and 11 more)
-
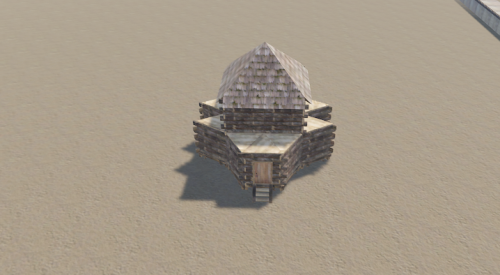
Version 1.0.0
9 downloads
40 Raidable Bases for the "Raidable Base" plugin. Info about the raidable bases: (10)Easy: Wood Various Shotgun Traps and Flame Turrets ~150 Loot Slots Largest JSON File - 120KB (10)Medium: Stone Various Shotgun Traps and Flame Turrets ~300 Loot Slots Largest JSON File - 137KB (10)Hard: Metal ~1 SAM, ~8-10 Auto Turrets, various shotgun traps ~400 Loot Slots Largest JSON File - 234KB (5)Expert: HQ Metal ~1-2 SAM, ~10-12 Auto Turrets, various Shotgun Traps ~500 Loot Slots Largest JSON File - 336KB (5)Nightmare: HQ Metal ~3-4 SAMS, ~12-15 Auto Turrets, various Shotgun Traps ~600 loot slots Largest JSON file - 837KB All bases have basic lights in place for QoL night raiding. No extra electricity components, no signage, no art, and limited extra BS to save resources. To Install these bases: Unzip the file and then place only the base files in your oxide/data/copypaste directory. Then, type this command in your console: rb.config add "Easy Bases" EASY1 EASY2 EASY3 EASY4 EASY5 EASY6 EASY7 EASY8 EASY9 EASY10 0 rb.config add "Medium Bases" MED1 MED2 MED3 MED4 MED5 MED6 MED7 MED8 MED9 MED10 1 rb.config add "Hard Bases" HARD1 HARD2 HARD3 HARD4 HARD5 HARD6 HARD7 HARD8 HARD9 HARD10 2 rb.config add "Expert Bases" EXPERT1 EXPERT2 EXPERT3 EXPERT4 EXPERT5 3 rb.config add "Nightmare Bases" NM1 NM2 NM3 NM4 NM5 4 Appreciate the support and I hope you enjoy!$15.00 -
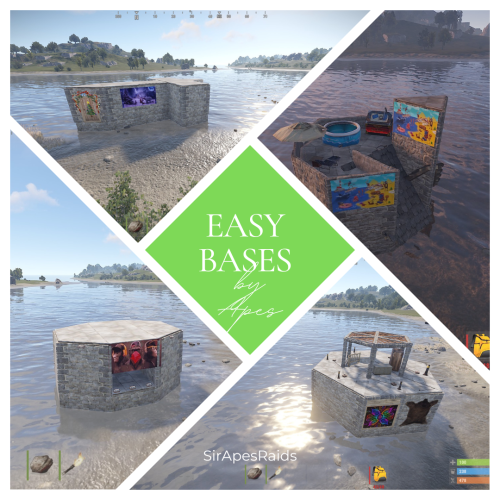
Version 1.0.5
130 downloads
Torture your players with these "Easy Bases" that aren't so easy! Tons of sneaky traps and layouts guaranteed to make your players hate you! Hand crafted by the great SirApesALot these bases will leave your players running back naked over and over again, definitely not beginner friendly raids. All of these easy raids are eco/flame raidable, but bring your skills! Because you will need every raiding trick in the book to conquer these. About Easy Bases by Apes (20 pack) In the "Bases" Folder you will find 20 easy bases total that you can add to your servers Raidable Bases by Nivex. Everyone of these torture chambers was created by me for my vanilla gather rate weekly server. These are best suited for servers that are more balanced loot wise, and a more advanced player base with experience raiding (beginners WILL rage quit). None of these are walk throughs, I have no mercy on my players....do you? Here is a video of us testing the decaying base themed easy in this pack on my friends server https://youtu.be/WTRZ7HQNdPg These are not simple raids for beginners, if they don't understand how to use twig and ladders to work around traps, or pay attention for eco raidable walls they will struggle. But, they will laugh and feel a sense of accomplishment after completing a raid, one even has fireworks that go off when you get to TC! Easy #14 of this pack is marked with an s in the file to remember to turn stability to "true" on that base if you have it false. It has a collapsing stairwell that requires it. Near everything is skinned, some just to look pretty, some themed. If upgrading or replacing doors be sure to check it a door controller is attached. The average raid cost in this pack is 5-8 molotov's + an eco raidable wall or two. Loot Tables: As said on Raidable Bases plugin you need your own loot tables. All raids are tested on Planet of the Apes PvE. The only auto turrets in these have trumpets equipped It is recommended you have a NPC inside and configured to "spawn on bags" Check out the other configuration and data settings below to get the most out of these bases. With Tesla coils, swinging doors, collapsing structures along with features like automatic lights, sprinklers and music to help distract the raider a lot can be done with these bases. Includes 5 additional raids in case you want to remove a few due to difficulty/raid cost (so 25 bases total), extra value for your money! If you have any questions feel free to stop in our discord (https://discord.gg/M228N2F79m), or if you would like to test our raids that can be arranged Helpful Configuration and Data Settings: The following settings will help you get the most from these bases Configuration: "Entities Allowed To Drop Loot": { "Auto Turrets": true, "Flame Turret": true, "Fog Machine": false, "Gun Trap": true, "SAM Site": true "Allow Players To Loot Traps": false, "Allow Npcs To Target Other Npcs": false, "Turn Lights On At Night": false, "Turn Lights On Indefinitely": false, "Skins": { "Boxes": { "Preset Skins": [], "Ignore If Skinned Already": false, "Use Identical Skins": false, "Use Random Skin": false, "Use Workshop Skins": false, "Use Imported Workshop Skins File": true, "Use Approved Workshop Skins Only": false }, "Npcs": { "Use Identical Skins": true, "Use Random Skin": true, "Use Workshop Skins": true, "Use Imported Workshop Skins File": true, "Use Approved Workshop Skins Only": false }, "Deployables": { "Partial Names": [ "door", "barricade", "chair", "fridge", "furnace", "locker", "reactivetarget", "rug", "sleepingbag", "table", "vendingmachine", "waterpurifier", "skullspikes", "skulltrophy", "summer_dlc", "sled" ], "Preset Door Skins": [], "Skin Everything": false, "Ignore If Skinned Already": false, "Use Identical Skins": false, "Use Random Skin": false, "Use Workshop Skins": false, "Use Imported Workshop Skins File": true, "Use Approved Workshop Skins Only": false } "Weapons": { "Infinite Ammo": { "AutoTurret": false, "FlameTurret": false, "FogMachine": false, "GunTrap": false, "SamSite": false }, "Ammo": { "AutoTurret": 90, "FlameTurret": 40, "FogMachine": 50, "GunTrap": 32, "SamSite": 24 }, "Fog Machine Allows Motion Toggle": true, "Fog Machine Requires A Power Source": true, "Spooky Speakers Requires Power Source": false, "Test Generator Power": 100.0, "SamSite Repairs Every X Minutes (0.0 = disabled)": 5.0, "SamSite Range (350.0 = Rust default)": 100.0, "SamSite Requires Power Source": false }, Profiles (Raidable Bases Data Folder): "Entities Not Allowed To Be Picked Up": [ "generator.small", "generator.static", "autoturret_deployed" ], "NPC Levels": { "Level 2 - Final Death": true }, "Spawn Inside Bases": { "Spawn On Floors": false, "Spawn On Beds": true, "Spawn On Rugs": false, "Spawn On Rugs With Skin Only": 1, "Bed Health Multiplier": 1.0, "Rug Health Multiplier": 1.0, "Spawn Murderers Outside": true, "Spawn Scientists Outside": true, "Minimum Inside (-1 = ignore)": 1, "Maximum Inside (-1 = ignore)": 1 }, "Event Traps And Turrets Ignore Npcs": true, "Auto Turrets": { "Aim Cone": 5.0, "Wait To Power On Until Event Starts": false, "Start Health": 1000.0, "Sight Range": 30.0, "Double Sight Range When Shot": false, "Set Hostile (False = Do Not Set Any Mode)": true, "Requires Power Source": false, "Sam Site": { "Repairs Every X Minutes (0.0 = disabled)": 5.0, "Range (350.0 = Rust default)": 100.0, "Requires Power Source": false, "Minimum Health": 1000.0, "Maximum Health": 1000.0 }, "Tesla Coil": { "Requires A Power Source": true, "Max Discharge Self Damage Seconds (0 = None, 120 = Rust default)": 0.0, "Max Damage Output": 35.0, "Health": 250.0 }, "Add Code Lock To Unlocked Or KeyLocked Doors": true, "Add Key Lock To Unlocked Or CodeLocked Doors": false, "Add Code Lock To Tool Cupboards": true, "Add Key Lock To Tool Cupboards": false, "Add Code Lock To Boxes": false, "Add Key Lock To Boxes": false, "Add Code Lock To Lockers": true, "Add Key Lock To Lockers": false, "Close Open Doors With No Door Controller Installed": true, "Allow Duplicate Items": false, "Allow Players To Pickup Deployables": true, "Allow Players To Deploy A Cupboard": true, "Allow Players To Deploy Barricades": true, "Divide Loot Into All Containers": true, "Empty All Containers Before Spawning Loot": true,$4.00- 3 comments
- 2 reviews
-
- 1
-
-
- #nivex
- #raidables
- (and 8 more)
-

Version 1.3.3
192 downloads
Reduce the decay damage by tick; Upgrade the authorizations limit; Upgrade the building grade limit; Upgrade the storage capacity of the cupboard; Unlock some deployable items; Upgrade the stack size limit of the cupboard; Set a default building grade for the server; Modify the default decay; Keep the cupboard attributes when remove; Make your server fun ^u^ The plugin has a unique permission, which allows the player to use the cupboard upgrade: tclevels.use F.A.Q How many items can be blocked? and which? You can block unlimited items and all items must be deployable or they will not be blocked. Which area will be checked when I place my cupboard? The entire privilege area will be checked. But you can also disable checks in the configuration file. Could it cause conflict with any plugin? Yes, but i am providing an API for the plugin so that other developers can integrate with it, so if there is a conflict, just go to the developer's plugin support and ask them to integrate it. Also if it is possible for me to integrate it from my plugin, i will do so without any problem.$20.00
.thumb.gif.f0b0245e9c54ffe33eb112bfd730b972.gif)