Search the Community
Showing results for tags 'item'.
-
Version 1.0.6
40 downloads
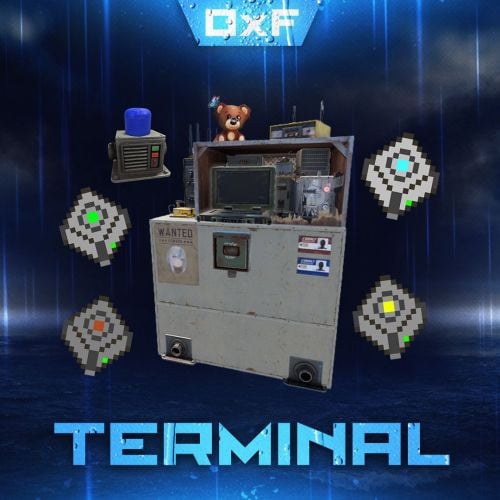
Terminal is an indispensable item that will allow players to manage the resources of the house in one place! Just as importantly, it is not just a conditional button on the screen or something similar, but a complete new item that is placed in the house, which gives a nice user experience to any player that likes interaction. Its multifunctionality will allow the player to use it for a variety of purposes, from simple resource management to building a terminal-only resource factory. Interested? Then let's get to the details. Examples of uses: Getting remote access to resources, the ability to take resources from several storages at once, as well as put them in them. The ability to use the terminal as one big chest thanks to the cells of different levels, available import and export pipes will allow to realize the delivery of resources to the production tools Building a plant powered by terminal alone Many other clever uses, like a chest in the buffer of the house connected to the terminal. Combining uses Features: Similar type items are displayed combined in one slot, where you can see the total quantity and take the required quantity. Two modes of operation: wireless and cellular. Full-featured new placeable item Works with industrial pipes Ability to create different cells (by standard there are 4 levels) Cells have their own stack size just for them. Intelligent movement that will not allow you to store more items in the boxes than allowed The terminal has a convenient search for items in the user's language, not only in English Demo Video: Installation instructions Installing dependencies CustomEntities. Go to Github, click Clone -> Download ZIP, then transfer CustomEntities.cs to the folder with plugins. CustomItemDefinitions. Go here, download and install in the plugins folder. Download purchased this plugin and install it in the plugins folder the same way. Done Quick Start: Prompt commands: give terminal give storage_cell.level1 give storageadaptor.wireless Place terminal, put the cell in the cell storage, install the adapter on the chest, enjoy. More about items: [Terminal] Terminal is a placeable item, with the ability to be placed both outside and in the house, serves for convenient management of all resources in the house. It has a certain amount of health (default 500), as well as the ability to pick up with a loss of strength. It has 2 modes of operation, wireless and cell, can work with industrial, by means of pipes to import and export items from cells. The server owner can decide where to get this item from, it has its own short name and can be used in all plugins, the best option is to craft it. The shortname of the item - terminal Command to give: give terminal How to pick up a terminal? For this we must have authorization in the cabinet. Holding a mallet in your hand, point at the part of the terminal where the inscription Authorize appears, press the R button and select Turn. How to switch modes of operation? It is possible to do this by pressing the switch on the left side of the laptop, it looks like this: What is needed to work in wireless mode? To start working you need the item “Wireless Storage Adapter”, this item is part of the plugin. Can be obtained by any method of the server owner's choice. The short name of the item - storageadapter.wireless. Command to give out: give storageadapter.wireless Next, install the wireless storage adapter on the storage item you need. Such as: chests, furnaces, refineries, etc. Next, select the wireless mode on the terminal by pressing the switch. After entering the laptop, it will display all the items that are connected to the adapter in the range of the wireless mode of the terminal (customizable). What is needed to work in the cell mode? The first thing you need are the cells themselves, they can be obtained in any way the server owner chooses. The short name of the item - storage_cell.{name from the config, by default it is level1-4} Command to give out: give storage_cell.level1 Cells should be put in the terminal cell storage, it looks like this: It is recommended to put any kind of lock on the cell storage, otherwise they can be stolen! Next, select the cell mode on the terminal by pressing the switch. After entering the laptop, where you can now see what is in the cells, how many slots are available and you can put things there. [Wireless Storage Adaptor] Used for the wireless mode of the terminal. Installed on all storage items for which a regular storage adapter is available. Does not require additional connection. The server owner can decide where to get this item from, it has its own short name and can be used in all plugins, the best option is to craft it. The short name of the item - storageadapter.wireless. Command to give out: give storageadapter.wireless [Storage Cells] Cells hold items, have a certain number of slots and a maximum stack in each slot. These are special slots and only in them items can be stacked to their maximum. The maximum stack works on the principle of 1 type - 1 slot. That is, if the maximum stack is 5000 and the player puts there 10 new machine guns, they will occupy 1 slot and such can be put another 4990, if he puts a slightly broken machine gun, it will take another slot and will store the same machine guns. This is how it works with all items. Another example; a level 1 cell has a maximum stack of 5000 and 8 slots, and if you store only sulfur in it, you can eventually store 40000 sulfur in it. Higher level cells have more stacks and slots. Don't worry, the configured max stack won't be knocked down, items will unstack when they are laid down and taken out of the cell. The server owner can decide where to get this item from, it has its own short name and can be used in all plugins, the best option is to craft it. The short name of the item - storage_cell.{name from the config, by default it is level1-4} Command to give out: give storage_cell.level1$40.00 -

Version 1.1.7
233 downloads
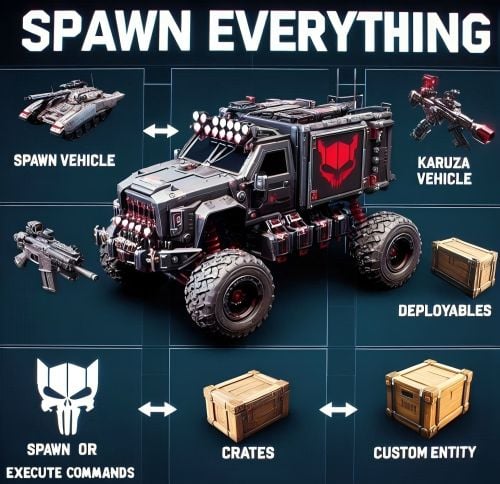
Spawn Everything - Spawn Vehicle, Karuza Vehicle, Deployables, Bases, Item, Recycler, Crates, Custom entity, Execute Commands, Loots, Pickup Entity, Pickup Vehicles, and much more... Spawn Everything - Spawn all entity, Bases, Item, loot, Pickup Entity, Pickup Vehicles, allows you to spawn any entity or execute commands, all by using an item, pickup entity or vehicles, and much more. It is already configured to generate vehicles by default, including custom vehicles from Karuza, Crates, Locked Crate, Deployables, Casino items and much more. Through the configuration you can add other entities that can be generated, just enter a prefab name, or a command if you do not have a prefab name, and set the skin of the item that will be used. It also allows you to limit the spawn, for example if you do not have building permits, avoid spawning in water or allow it only in water, also being able to choose the minimum depth of the water, allow or not spawn inside buildings, monuments and more. It is also possible to pick up the generated entity/vehicles, using the hammer. You can add items to the in-game shop, loot, or wherever you want. Spawn Bases using copy paste or other plugin. Compatible with Oxide/Umod and Carbon. ALL AVAILABLE ENTITIES Here you can find a file with all the entities currently available and the various information on the item to create to spawn the entity ALL AVAILABLE ENTITIES PLAYLIST - VIDEO EXAMPLE Below you can see an example video on how to use the plugin. -------------------- SOME EXAMPLES OF USE: Some examples of how the plugin works and the entities that can be spawned by default. Vehicle Spawn Spawn Custom Vehicles by Karuza Pickup Entity Pickup Vehicle Pickup Karuza Vehicle Spawn Recycler Spawn NPC vehicles, such as Bradley, Patrol helicopter, CH47 (Chinook 47) Spawn loot boxes, such as the: Locked Crate, Oil Rig Locked Crate, Bradley APC Crate, Patrol Helicopter Crate, Elite Tier Crate, Elite Tier Crate - Underwater Labs. Crater for mines, to place mines where you want. Survey Crater - For Mining Quarry, Survey Crater Oil - For Pump Jack. Spawn Bases using copy paste or other plugin Spawn Casino entities Spawn custom entities And much more PERMISSIONS: spawneverything.admin – Allows the use of commands reserved for admins, such as giving items for entity spawning to players. spawneverything.fuel.unlimited – If the entity to be spawned is a vehicle, the vehicle will not need fuel to run. The same can be achieved via the configuration file, for each individual entity. spawneverything.spawn.not_enabled – Allows you to spawn entities that have not been enabled in the configuration file. spawneverything.spawn.bypass_building_privilege – Allows you to spawn entities even if you don't have building permissions, for entities that require building permissions to spawn. spawneverything.spawn.bypass_tc – Allows entities to be spawned, for entities that cannot be spawned near any Tool Cupboard (TC). spawneverything.spawn.bypass_monument – Allows entities to be spawned in monuments, for entities that cannot be spawned in monuments. spawneverything.spawn.bypass_road_rails – Allows entities to be spawned to the road/rails, for entities that cannot be spawned to the road/rails. spawneverything.spawn.bypass_only_outside – Allows entities to spawn inside buildings, for entities that cannot be spawned inside buildings. spawneverything.spawn.bypass_water – Allows entities to spawn in water, for entities that cannot be spawned in water. COMMANDS FOR ADMIN Commands can be typed in chat (by putting the / character in front of the command), from console or Rcon. To use these commands you must have the role: spawneverything.admin /se <skinID> <quantity> — Allows you to give the item to spawn the entity, to yourself. You need to pass these parameters: skinID of the configured entity The quantity of items. /se <skinID> <quantity> <steamID> — Allows you to give the item to spawn the entity, to a player. You need to pass these parameters: skinID of the configured entity The quantity of items. The SteamID of the player to give the items to Commands can be added or modified in the configuration file: /oxide/config/SpawnEverything.json ENTITY PICK UP (BETA VERSION) You can collect the generated entity using the hammer. By collecting the entity, you will be given back the item for the entity's spawn. To collect the entity you need to hold down the SHIFT key and hit the entity with the hammer. You can only collect entities that have been enabled for collection in the configuration file. NB: This is an early version of this feature and is still in beta. At the moment if you pick up the entity, you will lose any loot contained in it, so make sure to remove any loot before picking up the entity. With the next update, you will be able to leave the loot inside the entity and automatically find it with the next spawn of the entity. USE VIA SHOP, LOOT. VENDING MACHINE The plugin can use any item for entity spawning. You need to generate an item with a certain skin id, to get the item that allows the entity to spawn. The name of the item to use and the skin id are present in the configuration file: Item name (That will be used to spawn the entity. Default grenade.flashbang) SkinID You can add these items to the in-game Shop, to the loot, in the Vending Machine or wherever you want, very easily. For example, this item spawns a minicopter: Item: grenade.flashbang | SkinID: 3366887420 or ItemID: -936921910 | SkinID: 3366887420 CONFIGURATION The settings and options can be configured in the SpawnEverything.json under the config directory. The use of an editor and validator is recommended to avoid formatting issues and syntax errors. { "TimeZone": "Europe/London", "Chat Command": [ "se", "spawneverything", "spawner" ], "ChatPrefix": "SpawnEverything", "Add Karuza Custom Vehicles to your configuration. (Default: FALSE)": false, "Entity Drop Item": [ { "Enabled": false, "DisplayName": "Spawn Minicopter", "Description": "Spawn Minicopter", "Item name (That will be used to spawn the entity. Default grenade.flashbang)": "grenade.flashbang", "Spawn PrefabName": "assets/content/vehicles/minicopter/minicopter.entity.prefab", "SkinID": 3366887420, "Spawn Offset Y": 0.0, "Spawn Rotate Y": 0.0, "Entity Type. Default Rust": "Rust", "Can Pick Up Entity. Default false": true, "Custom Radius Check": 0.0, "Execute Commands": [], "Execute Commands As Admin": false, "Spawn Cooldown (seconds)": 0, "Requires Building Privilege to Spawn Entity. (Default: TRUE)": true, "Minimum spawn distance from any Tool Cupboard (TC). [0 = Disabled] (Default: 0)": 0, "Allow Spawn in Monuments. (Default: FALSE)": false, "Disable Spawn in Monuments and Monuments radius. (Default: FALSE)": false, "Disable Spawn On Road/Rails. (Default: FALSE)": false, "Minimum spawn distance from Road/Rails. (Default: 0)": 0, "Spawn Only Outside": true, "Dont Spawn In Water": true, "Requires Water": false, "Minimum Water Depth": 0.0, "Armored": false, "Unlimited Fuel": false, "Fuel Amount": 0 }, { "Enabled": false, "DisplayName": "Spawn Attack Helicopter", "Description": "Spawn Attack Helicopter", "Item name (That will be used to spawn the entity. Default grenade.flashbang)": "grenade.flashbang", "Spawn PrefabName": "assets/content/vehicles/attackhelicopter/attackhelicopter.entity.prefab", "SkinID": 3366893095, "Spawn Offset Y": 0.0, "Spawn Rotate Y": 0.0, "Entity Type. Default Rust": "Rust", "Can Pick Up Entity. Default false": true, "Custom Radius Check": 0.0, "Execute Commands": [], "Execute Commands As Admin": false, "Spawn Cooldown (seconds)": 0, "Requires Building Privilege to Spawn Entity. (Default: TRUE)": true, "Minimum spawn distance from any Tool Cupboard (TC). [0 = Disabled] (Default: 0)": 0, "Allow Spawn in Monuments. (Default: FALSE)": false, "Disable Spawn in Monuments and Monuments radius. (Default: FALSE)": false, "Disable Spawn On Road/Rails. (Default: FALSE)": false, "Minimum spawn distance from Road/Rails. (Default: 0)": 0, "Spawn Only Outside": true, "Dont Spawn In Water": true, "Requires Water": false, "Minimum Water Depth": 0.0, "Armored": false, "Unlimited Fuel": false, "Fuel Amount": 0 }, { "Enabled": false, "DisplayName": "Spawn Scrap Transport Helicopter", "Description": "Spawn Scrap Transport Helicopter", "Item name (That will be used to spawn the entity. Default grenade.flashbang)": "grenade.flashbang", "Spawn PrefabName": "assets/content/vehicles/scrap heli carrier/scraptransporthelicopter.prefab", "SkinID": 3366892516, "Spawn Offset Y": 0.0, "Spawn Rotate Y": 0.0, "Entity Type. Default Rust": "Rust", "Can Pick Up Entity. Default false": true, "Custom Radius Check": 0.0, "Execute Commands": [], "Execute Commands As Admin": false, "Spawn Cooldown (seconds)": 0, "Requires Building Privilege to Spawn Entity. (Default: TRUE)": true, "Minimum spawn distance from any Tool Cupboard (TC). [0 = Disabled] (Default: 0)": 0, "Allow Spawn in Monuments. (Default: FALSE)": false, "Disable Spawn in Monuments and Monuments radius. (Default: FALSE)": false, "Disable Spawn On Road/Rails. (Default: FALSE)": false, "Minimum spawn distance from Road/Rails. (Default: 0)": 0, "Spawn Only Outside": true, "Dont Spawn In Water": true, "Requires Water": false, "Minimum Water Depth": 0.0, "Armored": false, "Unlimited Fuel": false, "Fuel Amount": 0 }, { "Enabled": false, "DisplayName": "Spawn Hot Air Balloon", "Description": "Spawn Hot Air Balloon", "Item name (That will be used to spawn the entity. Default grenade.flashbang)": "grenade.flashbang", "Spawn PrefabName": "assets/prefabs/deployable/hot air balloon/hotairballoon.prefab", "SkinID": 3366893631, "Spawn Offset Y": 0.0, "Spawn Rotate Y": 0.0, "Entity Type. Default Rust": "Rust", "Can Pick Up Entity. Default false": true, "Custom Radius Check": 0.0, "Execute Commands": [], "Execute Commands As Admin": false, "Spawn Cooldown (seconds)": 0, "Requires Building Privilege to Spawn Entity. (Default: TRUE)": true, "Minimum spawn distance from any Tool Cupboard (TC). [0 = Disabled] (Default: 0)": 0, "Allow Spawn in Monuments. (Default: FALSE)": false, "Disable Spawn in Monuments and Monuments radius. (Default: FALSE)": false, "Disable Spawn On Road/Rails. (Default: FALSE)": false, "Minimum spawn distance from Road/Rails. (Default: 0)": 0, "Spawn Only Outside": true, "Dont Spawn In Water": true, "Requires Water": false, "Minimum Water Depth": 0.0, "Armored": false, "Unlimited Fuel": false, "Fuel Amount": 0 }, { "Enabled": false, "DisplayName": "Spawn Armored Hot Air Balloon", "Description": "Spawn Armored Hot Air Balloon", "Item name (That will be used to spawn the entity. Default grenade.flashbang)": "grenade.flashbang", "Spawn PrefabName": "assets/prefabs/deployable/hot air balloon/hotairballoon.prefab", "SkinID": 3366893925, "Spawn Offset Y": 0.0, "Spawn Rotate Y": 0.0, "Entity Type. Default Rust": "Rust", "Can Pick Up Entity. Default false": true, "Custom Radius Check": 0.0, "Execute Commands": [], "Execute Commands As Admin": false, "Spawn Cooldown (seconds)": 0, "Requires Building Privilege to Spawn Entity. (Default: TRUE)": true, "Minimum spawn distance from any Tool Cupboard (TC). [0 = Disabled] (Default: 0)": 0, "Allow Spawn in Monuments. (Default: FALSE)": false, "Disable Spawn in Monuments and Monuments radius. (Default: FALSE)": false, "Disable Spawn On Road/Rails. (Default: FALSE)": false, "Minimum spawn distance from Road/Rails. (Default: 0)": 0, "Spawn Only Outside": true, "Dont Spawn In Water": true, "Requires Water": false, "Minimum Water Depth": 0.0, "Armored": true, "Unlimited Fuel": false, "Fuel Amount": 0 }, { "Enabled": false, "DisplayName": "Spawn Kayak", "Description": "Spawn Kayak", "Item name (That will be used to spawn the entity. Default grenade.flashbang)": "grenade.flashbang", "Spawn PrefabName": "assets/content/vehicles/boats/kayak/kayak.prefab", "SkinID": 3366894316, "Spawn Offset Y": 0.0, "Spawn Rotate Y": 0.0, "Entity Type. Default Rust": "Rust", "Can Pick Up Entity. Default false": true, "Custom Radius Check": 0.0, "Execute Commands": [], "Execute Commands As Admin": false, "Spawn Cooldown (seconds)": 0, "Requires Building Privilege to Spawn Entity. (Default: TRUE)": true, "Minimum spawn distance from any Tool Cupboard (TC). [0 = Disabled] (Default: 0)": 0, "Allow Spawn in Monuments. (Default: FALSE)": false, "Disable Spawn in Monuments and Monuments radius. (Default: FALSE)": false, "Disable Spawn On Road/Rails. (Default: FALSE)": false, "Minimum spawn distance from Road/Rails. (Default: 0)": 0, "Spawn Only Outside": true, "Dont Spawn In Water": false, "Requires Water": true, "Minimum Water Depth": 0.5, "Armored": false, "Unlimited Fuel": false, "Fuel Amount": 0 }, ........................................ ], "VersionNumber": { "Major": 1, "Minor": 1, "Patch": 5 } } TimeZone: -- Default: Europe/London Chat Command: -- Here you can add, edit or delete Commands can be typed in chat (by putting the / character in front of the command), or from console. ChatPrefix: -- Chat message prefix. Show Pick Up Entity Confirm Dialog: — If enabled, show a confirmation dialog when you want to collect the entity for added security and to avoid unintentional errors. Default: TRUE Add Karuza Custom Vehicles to your configuration. (Default: FALSE): -- If set to TRUE, adds all Karuza custom vehicles to the configuration. Warning: once all vehicles are added to the configuration, they cannot be removed by setting the property to FALSE, in which case you will have to delete them manually. Default: FALSE SPAWNABLE ENTITY: ITEM CONFIGURATION Here you will insert all the items with their configurations for the spawn of any entity. Enabled: -- If set to FALSE, the entity cannot be spawned. You can bypass this check with the permission: spawneverything.spawn.not_enabled DisplayName: -- The name of the Item that the player will see when he clicks on it with the mouse. Description: -- A description of the entity that will be spawned. It has no effect on the player's Item, it is just for internal use to remind you what this Item does. Item name (That will be used to spawn the entity. Default grenade.flashbang): -- Here you need to specify the name of the item that will be used to spawn this entity. Spawn PrefabName: -- Here you enter the name of the Prefab that will be generated. It is not mandatory, you can not enter the Prefab Name and instead execute commands that you can define later in the configuration. SkinID: -- Here you enter the SkinID that will be applied to the item. Based on the SkinID, a different Item will be generated for the spawn of different entities. You can use existing SkinIDs on the Steam Workshop or create your own Skin. Entity Type -- This field is used by the plugin to understand if it is a Rust entity or an entity generated by another plugin. If you do not know what to enter, leave it as default: Rust Can Pick Up Entity. Default false -- Here you can decide whether the entity can be picked up with the hammer or not. It is recommended to disable picking for all items that generate Loot, to avoid abuse. Spawn Offset Y: -- Here you can specify a height to add relative to the entity's spawn point. For example, add the spawn higher than the ground or water. Spawn Rotate Y -- Here you can define the rotation to add to the spawned entity. Custom Radius Check -- Each spawn checks if there are entities that collide and the radius, within which to check, is automatically determined based on the size of the entity. But in some cases it is necessary to define a custom radius. Here you can decide the radius within which to check if there are entities that collide with the spawn. Execute Commands: -- Here you can enter 1 or more commands that will be executed when the Item is launched. You can use some placeholders that can be passed to the commands %%msg%%: This placeholder can be used to send a message to the player, here is an example command: "%%msg%% test command": This will send a message to the player with the text: "test command" "%%msg%% %%steamid%%": This will send a message to the player with the text: player steamID %%steamid%%: This placeholder is used to insert the player's steamID into the command. %%username%%: This placeholder is used to insert the player username into the command. %%displayName%%: This placeholder is used to insert the player display name (include clan tag) into the command. %%spawnCoordinateX%%: This placeholder is used to insert the spawn coordinate X into the command. %%spawnCoordinateY%%: This placeholder is used to insert the spawn coordinate Y into the command. %%spawnCoordinateZ%%: This placeholder is used to insert the spawn coordinate Z into the command. %%spawnRotationX%%: This placeholder is used to insert the spawn rotation X into the command. %%spawnRotationY%%: This placeholder is used to insert the spawn rotation Y into the command. %%spawnRotationZ%%: This placeholder is used to insert the spawn rotation Z into the command. %%mapGrid%%: This placeholder is used to insert the map grid into the command. %%mapGridLetter%%: This placeholder is used to insert the map grid letter into the command. %%mapGridNumber%%: This placeholder is used to insert the map grid number into the command. -------------------- Here are some possible command examples: "deposit %%steamid%% 1000": Will deposit 1000 RP into the player's account (Economics plugin) "inventory.giveto %%steamid%% "short name" "amount" ": This will send a certain amount of items to the player. Execute Commands As Admin: -- If set to TRUE, runs the command as Admin. Useful for running commands that require server-side Admin permissions. Default: FALSE Spawn Cooldown (seconds): -- Sets a wait time before the entity is spawned, once the item is thrown. Spawn Only Outside: -- If set to TRUE, the entity can only spawn outside of buildings or on the roof. It cannot spawn inside the building. Useful for vehicles or large entities, to avoid them getting stuck inside the base. Default: TRUE. You can bypass this check with the permission: spawneverything.spawn.bypass_only_outside Requires Building Privilege to Spawn Entity: -- If set to TRUE, building permissions will be required to spawn an entity. Default: TRUE. You can bypass this check with the permission: spawneverything.spawn.bypass_building_privilege Minimum spawn distance from any Tool Cupboard (TC). [0 = Disabled] -- Minimum spawn distance from any Tool Cupboard (TC). [0 = Disabled]. Default: 0. You can bypass this check with the permission: spawneverything.spawn.bypass_tc Allow Spawn in Monuments: -- If set to FALSE, the entity cannot be spawned inside the monument, but can be spawned outside the monument, within the radius of the monument (Radius means the red radius visible when for example trying to build near a monument). Default: FALSE. You can bypass this check with the permission: spawneverything.spawn.bypass_monument Disable Spawn in Monuments and Monuments radius: -- If set to true, the entity cannot be spawned inside the monument and outside the monument, within the radius of the monument (Radius means the red radius visible when for example trying to build near a monument). Default: FALSE. You can bypass this check with the permission: spawneverything.spawn.bypass_monument Disable Spawn On Road/Rails -- Disable entity spawn on the road/rails. Default: FALSE. You can bypass this check with the permission: spawneverything.spawn.bypass_road_rails Minimum spawn distance from Road/Rails -- Minimum distance from the road/rails for the entity to spawn. Default: 0. You can bypass this check with the permission: spawneverything.spawn.bypass_road_rails Dont Spawn In Water: -- If set to TRUE, the entity cannot be spawned in water. Useful for vehicles that cannot go in water. Warning: There is one exception. In very shallow water, entities can still be spawned, for example near the coast. The water must not be deeper than 0.5 meters. Default: FALSE. You can bypass this check with the permission: spawneverything.spawn.bypass_water Requires Water: -- If set to TRUE, the entity can only be spawned in water, useful for vehicles that can only operate in water, such as boats. Default: FALSE Minimum Water Depth: -- If the entity can only be spawned in water, you can decide the minimum depth of the water. Useful to avoid spawning large entities in very shallow water so they do not get stuck. Default: 0 Meters = Any depth. The value cannot be negative. Armored: -- There are entities that have the same Prefab Name, but 1 of the 2 can be generated with armor. In this case, you can decide which entity should have armor, For example Armored Hot Air Balloon. Unlimited Fuel: -- If the entity is a vehicle, you can choose to spawn the entity with unlimited fuel. This configuration does not apply to Karuza's custom vehicles. You can bypass this check with the permission: spawneverything.fuel.unlimited Fuel Amount: -- If the entity is a vehicle, you can decide how much fuel the entity will spawn with. Default: 0 fuel. You can bypass this check with the permission: spawneverything.fuel.unlimited NB: At least 1 of the 2 fields between Spawn PrefabName and Execute Commands is mandatory LOCALIZATION The plugin is translated into the following languages: English Italian Spanish French German Dutch Turkish Russian Ukrainian Chinese (Simplified - zh-CN) Translation files are located in the /oxide/lang folder,here is an example of a /oxide/lang/en/SpawnEverything.json translation file. You can add translations for other languages by adding them to the folder: /oxide/lang ALL AVAILABLE ENTITIES Here you can find a file with all the entities currently available and the various information on the item to create to spawn the entity ALL AVAILABLE ENTITIES ---------------------------------------- AVAILABLE ENTITIES By default the plugin is configured with these entities that can be generated: VEHICLES: Minicopter, Attack Helicopter, Scrap Transport Helicopter, Hot Air Balloon, Armored Hot Air Balloon, Kayak, Row Boat, RHIB, Tugboat, Submarine Solo, Submarine Duo, Horse, Snowmobile, Tomaha Snowmobile, Sedan, 2 Module Car, 3 Module Car, 4 Module Car, Motorbike, Motorbike With Sidecar, Pedal Bike, Pedal Trike. KARUZA CUSTOM VEHICLES: All Karuza special vehicles are included, you need to enable the property in the config file to use them. Requires Karuza Vehicles plugin. SPECIAL VEHICLES: Bradley APC, Patrol Helicopter, Chinook 47. SPECIAL ENTITIES: Train Casino - Lucky Caboose, Blackjack Machine (Caboose), Card Table (Caboose), Slot Machine (Caboose), Card Table - A, Card Table - B, Card Table - C, Card Table - D, Slot Machine, Recycler, Recycler Safe Zone CRATE: Locked Crate, Oil Rig Locked Crate, Bradley APC Crate, Patrol Helicopter Crate, Elite Tier Crate, Elite Tier Crate - Underwater Labs. CRATER: Survey Crater - For Mining Quarry, Survey Crater Oil - For Pump Jack. NEW ENTITIES You can add as many entities as you want via the configuration file. If you have any difficulties or need to add a particular entity, feel free to open a support request and it will be added to the plugin. New entities will be added with future releases of the plugin.$12.99- 14 comments
- 2 reviews
-
- 2
-

-
- #spawn everything
- #spawn
- (and 25 more)
-
Version 1.5.20
1,359 downloads
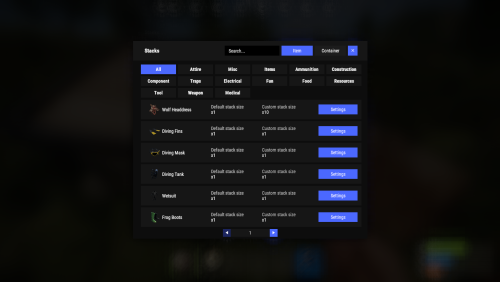
New plugin for changing item stacks and their multipliers in containers with convenient customization right in the game Commands stacks - open an UI stacks sethandstack [stack size] - set the stack size for the item in hand stacks setstack [short name] [stack size] - set the stack size for the item Permissions stacks.admin - using a plugin Config { "Commands": [ "stacks" ], "Work with Notify?": true, "Changing multiplies in containers using a hammer": false, "Default Multiplier for new containers": 1.0 } Containers Data { "assets/bundled/prefabs/static/bbq.static.prefab": { "Image": "https://i.imgur.com/L28375p.png", "Multiplier": 1.0 }, "assets/bundled/prefabs/static/hobobarrel_static.prefab": { "Image": "https://i.imgur.com/v8sDTaP.png", "Multiplier": 1.0 }, "assets/bundled/prefabs/static/recycler_static.prefab": { "Image": "https://i.imgur.com/V1smQYs.png", "Multiplier": 1.0 }, "assets/bundled/prefabs/static/repairbench_static.prefab": { "Image": "https://i.imgur.com/8qV6Z10.png", "Multiplier": 1.0 } ... Items Data [ { "ShortName": "hat.wolf", "Name": "Wolf Headdress", "Default Stack Size": 10, "Custom Stack Size": 0 }, { "ShortName": "fogmachine", "Name": "Fogger-3000", "Default Stack Size": 2, "Custom Stack Size": 0 }, { "ShortName": "strobelight", "Name": "Strobe Light", "Default Stack Size": 1, "Custom Stack Size": 0 }, { "ShortName": "kayak", "Name": "Kayak", "Default Stack Size": 1, "Custom Stack Size": 0 }, { "ShortName": "minihelicopter.repair", "Name": "MC repair", "Default Stack Size": 1, "Custom Stack Size": 0 }, { "ShortName": "scraptransportheli.repair", "Name": "ScrapTransportHeliRepair", "Default Stack Size": 1, "Custom Stack Size": 0 }, ...$19.95- 67 comments
- 9 reviews
-
- 6
-
-

-

-
- #stacks
- #chest stacks
- (and 9 more)
-
Version 3.0.3
2,361 downloads
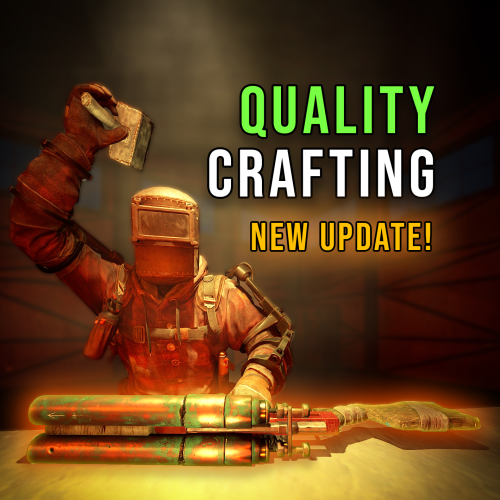
OVERVIEW: This plugin adds a crafting skill system and the ability to craft higher quality items that have special perks to enhance the item. IMPORTANT!!!: This plugin now requires the UiEngineFramework plugin. It has not been published yet, but is available temporarily right here: UiEngineFramework.cs HOW TO INSTALL: Download and install ImageLibrary Download and install UiEngineFramework (link posted above) If you have previously installed Quality Crafting, delete the config and lang files for the plugin before installing v3.0.0. If this is your first time installing this plugin you can skip this step! Download and install this plugin (Quality Crafting) Refer to the documentation for configuration options Enjoy the plugin DOCUMENTATION: Extensive documentation for this plugin can be found IN THIS GOOGLE DOC. I STRONGLY recommend reading it first before installing. LEGACY VERSION: If you don't want to use the latest version of quality crafting you can still download the old version (v2.1.4) here: Quality Crafting v2.1.4 The legacy version is available AS IS and will not receive additional updates.Free -
Version 1.3.12
1,077 downloads
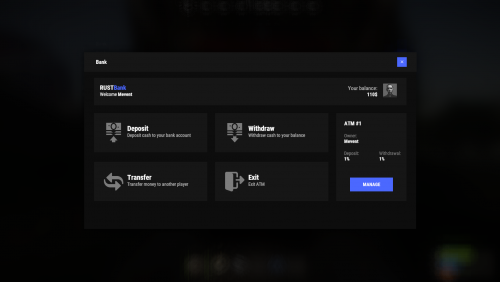
Adds a banking system to the game. It is an extended system of economics. Features ATM system (each player can install his own ATM and receive profit from it) ATMs can break ATMs can be repaired Money transfer system between players HumanNPC support Ability for players to earn money Adds a new item to the game (banknotes) Auto Wipe (each item can be customized) Working through third-party economy plugins (optional) Conversion from ServerRewards and Economics Commands bank - open the bank interface bank.givenote [target] [amount] - give banknotes to the player bank.giveatm [target] - give ATM to the player bank.setbalance [target] - set balance to the player bank.deposit [target] - deposit money to the player bank.withdraw [target] - withdraw money from a player bank.transfer [player] [target] - transferring money from a player to another player bank.wipe [type] (0 - all, 1 - players, 2 - logs, 3 - ATMs) - wipe data bank.convert.economics - convert from Economics bank.convert.serverrewards- convert from ServerRewards Hooks private object CanPlayerCreateCard(BasePlayer player) private void OnPlayerCreatedCard(BasePlayer player) private void OnBalanceChanged(ulong member, int amount) API private bool HasCard(BasePlayer player) private bool HasCard(ulong member) private int Balance(BasePlayer player) private int Balance(ulong member) private bool Deposit(BasePlayer player, int amount) private bool Deposit(string member, int amount) private bool Deposit(ulong member, int amount) private bool Withdraw(BasePlayer player, int amount) private bool Withdraw(string member, int amount) private bool Withdraw(ulong member, int amount) private bool Transfer(BasePlayer member, BasePlayer target, int amount) private bool Transfer(string member, string target, int amount) private bool Transfer(ulong member, ulong target, int amount) Permissions You can set permission in config, for example: "Permission (example: banksystem.use)": "banksystem.use", You can also configure permissions for ATM breakage % FAQ Q: Where can I see an example of a config? A: Config$29.95 -
Version 1.1.1
48 downloads
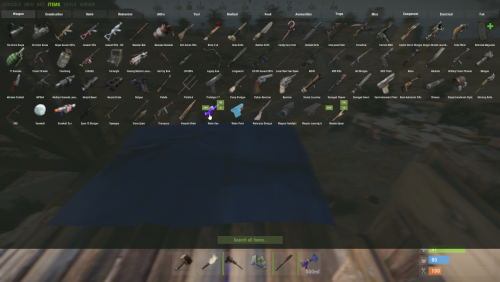
Easily give access to Rusts F1 Spawn Menu! That's permission based with blacklisting support and customizable F1 Spawn button amounts! Features: * Ban whole categories or Items using their ShortName or ItemID's * Allow Admins or Developers to bypass F1 spawn * Control the amounts it gives on the 1k button & 100 buttons! * ItemID, Amount, SkinID, Conditions. * Shops & other 3rd party plugins. * TODO: Genetics & BPs. Perms: f1spawn.use | needed to use F1 Menu. f1spawn.bypass | needed to bypass blocked Items. Chat & Console Commands: /give itemID amount skin condition | everything past itemID are optional args /givearm itemID amount skin condition | everything past itemID are optional args give steamID-or-Name itemID amount skin condition | everything past itemID are optional args givearm steamID-or-Name itemID amount skin condition | everything past itemID are optional args Configuration File: { "Ignore: Disabled 0, Admin 2, Developer 3": 0, "Set F1 1000 button spawn amount": 1000, "Set F1 100 button spawn amount": 100, "Ban Categories: Weapon 0, Construction 1, Items 2, Resources 3, Attire 4, Tool 5, Medical 6, Food 7, Ammunition 8, Traps 9, Misc 10, Component 11, Electrical 12, Fun 13": [ 10 ], "Ban Items using: ShortNames (Easy to Read)": [ "explosive.timed", ], "Ban Items using: ItemIDs (Slightly Faster)": [ 143803535, ] }$9.99 -
Version 1.2.0
241 downloads
This plugin give the possibility to modify the amount of the durability loss by percentage for weapons(include attachments with durability) and/or tools. 3 different permission related value can be set, to support other plugins or vip/rank systems. It also has the feature to exclude weapons or tools from the function, up to the need. The plugin can work 3 different mode. 1 - no permission used at all -> normal durability loss applied 2 - The player can have more then one permission, in this case always the HIGHER permission percentage value used. 3 - The player shall only have 1 permission, in this case i recommend to activate the "Permission check against multiple permission group" and optionally the "Warning agains multiple permission group (can flood the server console)" configuration, to set to True, and if a player by mistake got 2 different permission, the plugin feature will be skipped and a warning will be shown on the server console. Permissions itemdurability.profile1 itemdurability.profile2 itemdurability.profile3 Configuration "itemdurability.profile1 permission percentage scale range: 0-X, 0.1f mean 10% of the original durability": 1.0, "itemdurability.profile2 permission percentage scale range: 0-X, 0.1f mean 10% of the original durability": 1.0, "itemdurability.profile3 permission percentage scale range: 0-X, 0.1f mean 10% of the original durability": 1.0, "Permission check agains multiple permission group": false, "Warning against multiple permission group (can flood the server console)": false, "Exclude weapons": true, "Exclude items, what are not weapons": false "CleanPermission on Wipe": true$7.00 -

Version 1.0.2
14 downloads
If you have much custom items, and players always ask you "What is it?" or "What I can do with that?" - this plugin for you ! Features Scanning the player's inventory and the storage that the player loot Description, information about the item Tagging system Command to show all custom items from config Adding your containers for scanning (read the config carefully) Detailed configuration Command /items - show all custom items from config For admins /ii - get active item (name|skinId) and add to config Suggest your ideas for improving the plugin Video Config v1.0.0 { "Lootable containers for scaning, use only containers without block(grey) slots and and where the number of slots is a multiple of 6 (6, 12, 18, 24)": { "coffinstorage": 48, "box.wooden.large": 48, "woodbox_deployed": 18, "storage_barrel_b": 48, "storage_barrel_c": 48, "fridge.deployed": 48, "dropbox.deployed": 12, "small_stash_deployed": 6 }, "All items menu command": "items", "Items info settings (key - skinId)": { "2365330645": { "Item name": "Gather gloves", "Item description": [ "<size=18>Gloves up your gather</size>", "You need to put this on" ], "Item info": [ "<size=20>Bonus</size>", "• <color=#387338>Stones +50%</color>", "• <color=#387338>Metal +30%</color>", "• <color=#387338>Sulfur +20%</color>" ], "Item tags": [ 3, 4 ] }, "2852472024": { "Item name": "Ticket", "Item description": [ "<size=18>Ticket for take super loot</size>", "you can change it for some loot" ], "Item info": [ "<size=20>Commands</size>", "<color=#FFCC00>/ticket</color> - Server's shop" ], "Item tags": [ 1 ] }, "3000086667": { "Item name": "Kibble", "Item description": [ "<size=18>Kibble for animals</size>", "Find wild animal and drop near" ], "Item info": [ "<size=20>Effects</size>", "• Tame animal", "• Kill and gather x10" ], "Item tags": [ 1, 2 ] }, "2582315794": { "Item name": "Coin", "Item description": [ "<size=18>Coin is the server economy item</size>", "You can spend it on server" ], "Item info": [ "<size=20>Commands</size>", "<color=#FFCC00>/shop</color> - Server's shop", "<color=#FFCC00>/skill</color> - up your skills" ], "Item tags": [ 1, 2 ] }, "3306345630": { "Item name": "Poison ak-47", "Item description": [ "<size=18>Upgraded ak-47 with poison</size>", "Poisons players and NPCs" ], "Item info": [ "<size=20>Bonus</size>", "• <color=#387338>Poison duration 5 sec</color>", "• <color=#387338>Poison damage 5 per sec</color>", "• <color=#387338>Damage -2%</color>", "• <color=#387338>Magazine +10 bullets</color>" ], "Item tags": [ 3, 4 ] } }, "Tags settings": [ { "Tag size": 45.0, "Tag color": "#34753B", "Tag text": "Event", "Tag text color": "#6FAC76", "Tag id": 1 }, { "Tag size": 65.0, "Tag color": "#1C34AC", "Tag text": "Economy", "Tag text color": "#57A2F9", "Tag id": 2 }, { "Tag size": 55.0, "Tag color": "#932214", "Tag text": "Custom", "Tag text color": "#E44530", "Tag id": 3 }, { "Tag size": 110.0, "Tag color": "#9D9D9D", "Tag text": "Unbreakable", "Tag text color": "#FFF4F4", "Tag id": 4 } ], "UI settings": { "Inventory Image Icon": "https://i.ibb.co/TMxWBHJ2/scan.png", "Image for scan item": "https://i.ibb.co/zVwhtYGS/search.png", "Button ? settings": { "AnchorMin": "0.5 0", "AnchorMax": "0.5 0", "OffsetMin": "189 18", "OffsetMax": "249 78" } }, "Config version": { "Major": 1, "Minor": 0, "Patch": 0 } }$12.00 -

Version 1.1.4
356 downloads
Drop Bags tracks items dropped into the rust world. When there are high-volume drops, they are combined into a single “drop bag.” This method enhances performance by streamlining the handling of item drops and reducing item physics. Stop server stalls and freezing from item spam Works on craft spam, dropped item spam, gutted shark spam and horse dung! Light weight and easy to use Easy config DropBags uses one light weight hook to track dropped items. Dependent on how many items are dropped in a given radius those items get placed into a drop bag. This stops mass item spam effecting your server performance. { "Area Size - How far away items can be moved into a container": 7, "Max drops before moving items to container": 36, "Time to wait before moving items": 5.0, "Vischeck - checks items are visable before moving to container": true, "Calculate despawntime from drop bag items": true, "Reset dropbag despawn time on loot": false, "Override drop bag despawn time (seconds), 0 = false": 0.0 }$11.99- 8 comments
- 2 reviews
-
- 1
-
-
- #dropbags
- #drop bags
- (and 26 more)
-
Version 1.1.0
240 downloads
Maximum optimized solution without the possibility of duping. One backpack - one container. This is an important feature because it ensures that each backpack has its own unique container and eliminates the possibility of incorrectly duplicating items. No data files or similar things are used. Backpacks and items are saved in the original way of the game. This provides efficient management of backpacks and items in the game without the need for complex or additional file systems. Backpacks are physical items and there can be multiple pieces of them. This is essential for creating a realistic game experience where players can have multiple backpacks in their inventory. Backpacks can be of all capacities, types (item or liquid) and for different purposes. This enhances the gameplay experience by allowing players to choose backpacks based on their specific needs. Autoloot feature in backpacks is present (customizable for each backpack). Items will go straight into the backpack when picked up. This feature makes gameplay easier by allowing items to go straight into the backpack you are wearing without additional actions. Backpack cooking feature is present (customizable for each backpack). Melts and roasts items inside the backpack. The function matches the original mechanics of the stove. This feature adds an additional gameplay element by allowing players to cook food and recycle items directly inside the backpack. The backpack lies in the parachute slot and is displayed on the player. This feature allows the backpack to be worn on the back without taking up inventory space, as well as being visually displayed to players. The backpack has several ways to open. The first through a button in the interface when selecting an item, this allows you to effectively move between backpacks and inspect them even in the box. The second through a command if the player has the appropriate permission. The opening will be done for an equipped backpack. Each backpack has its own shortname and itemid. This helps in easy management and customization. Each backpack has a black sheet and a white sheet, allowing you to create a variety of backpacks for different scenarios as flexibly as possible. There is an option to return backpacks after death. This helps to save players' progress and prevents the loss of backpacks in case of unexpected situations. It is possible to limit the number of backpacks in the inventory, set the maximum stack in the container, as well as customize the maximum stack for items. These parameters allow you to carefully control the number of backpacks in the inventory and items in them, which is important for the balance of gameplay. Installation: The plugin necessarily needs the CustomItemDefinitions plugin, so the first thing we do is download and install it by throwing it into the oxide/plugins folder Link to the plugin: https://codefling.com/extensions/custom-item-definitions After purchase, download and install this plugin by dropping it into the oxide/plugins folder Quick Start: In the default configuration 7 different backpacks are available, their shortnames and itemid can be viewed in the config. Quick grant important permissions: Allow players to use the autoloot and furnace functions if they are present in a particular backpack o.grant group default betterbackpacks.autoloot.allow o.grant group default betterbackpacks.furnace.allow Allow players to open an equipped backpack on command o.grant group default betterbackpacks.commands.open.allow Permission to enable Sortify plugin functionality: betterbackpacks.sortify.use o.grant group default betterbackpacks.sortify.use The full version is available here: Permission to return all backpacks after death: betterbackpacks.always_reclaim o.grant group admin betterbackpacks.always_reclaim Permissions and their descriptions: betterbackpacks.commands.open.allow - Allows the use of a command to open an equipped backpack betterbackpacks.sortify.use - Use the functionality of the Sortify plugin, full version here betterbackpacks.backpackslimit.bypass - Bypass the maximum number of backpacks in inventory (for admins). betterbackpacks.autoloot.allow - Allow to use autoloot function if it is present in a particular backpack. betterbackpacks.autoloot.any - Adds autoloot feature for all backpacks. betterbackpacks.furnace.allow - Allow to use the furnace function if it is present in a specific backpack. betterbackpacks.furnace.any - Adds the furnace function to all backpacks. betterbackpacks.always_reclaim - Returns all backpacks on death Commands to open an equipped backpack: Console command - backpack.open (no delay) Chat command - /backpack (delay 0.2 seconds to wait for chat opening to close) More details about the functions and their customization: Control the number of max amount backpacks in player inventory. Control the ability to put backpacks in backpacks. Here you need to specify the shortname for a particular customized backpack, it will be used in the issue or specified in other plugins. Do not be afraid to specify it in other plugins, it will work. IMPORTANT: do not specify here shortnames of original items, this field is for a new shortname of a new item. Nothing bad will happen, it will report in the console and remove the backpack from the config. This field is not used for editing, it is an auto-generated field. This field is for copying and specifying in other plugins. Default name for the item. Further the name for different languages is customized in lang files. The skin that will be given to the new item, you can specify the same ones, the plugin does not use the SkinID for identification. The parameter of the capacity of the backpack. You can specify any, but within reasonable limits, do not specify billions or it may kill your server. Set this to true if you want the backpack to be returned to the player after death. Specify here true if you want the backpack to be returned only if equipped. Container type for the backpack, use 1 for general (default), 2 for liquid. Parameter to limit the maximum stack size for items in the container. This is not a hard limit, the minimum number for this parameter and the default stack is used. If you need to hard limit, add the items you want to "Max stacks by shortname" Selects a list to restrict items. Types: Blacklist allows all items except the specified items. White list allows only the specified items. A list of items for the specified item list in the "Use list (0 - None | 1 - Whitelist | 2 - Blacklist)" field. Example and description: "Item list to exclude (for whitelist/blacklist)." [ { "Shortname": "stones", // Item Shortname "SkinID (negative value = any)": -1 // If it is -1, then the item is with any skin, if a specific one is specified, then only with that skin. }, { }, { "shortname": "sulfur.ore", "SkinID (negative value = any)": -1 }, ], Parameter to enable the autoloot feature. To work the player must have the permission "betterbackpacks.autoloot.allow" or "betterbackpacks.autoloot.any". Once enabled, the player must wear the desired backpack and then all items that will fall into the player's inventory will be in the backpack. This works with mining and picking up items. Parameter to enable the furnace function. The player must have the "betterbackpacks.furnace.allow" or "betterbackpacks.furnace.any" permission present for it to work. For this to work, the player must have wood in his backpack. Works similarly to how a furnace works. It takes combustible material and melts what can melt, there is an opportunity to change the maximum number of simultaneously cooked items in the oven Max number of simultaneously cooked items in the furnace in the backpack. List for hard limit of stacks for an item by shortname in the format "shortname": stack size Example: { "shortname1": 1000, "shortname2": 1 } Default config: { "General": { "Max amount backpacks in player inventory (minimum 1)": 100, "Prohibit putting backpacks in backpacks?": true }, "Backpacks (Add new ones at the bottom)": [ { "Unique new item shortname": "backpack.admin", "ItemId (DO NOT MODIFY THIS FIELD!)": -1878567520, "Backpack Setting": { "Name": "Admin Backpack", "SkinID (you can use the same ones for several backpacks)": 3050740532, "Capacity": 1000, "Reclaim after death": true, "Reclaim only if equipped": false, "Contents Type (1 - General | 2 - Liquid)": 1, "Container Max Stack Size (0 = default)": 0, "Use list (0 - None | 1 - Whitelist | 2 - Blacklist)": 0, "Item list to exclude (for whitelist/blacklist)": [], "Components": { "Auto-Loot": true, "Furnace": true, "Max number of simultaneously cooked items in the furnace": 3 }, "Max stacks by shortname": {} } }, { "Unique new item shortname": "backpack.small", "ItemId (DO NOT MODIFY THIS FIELD!)": -1093698081, "Backpack Setting": { "Name": "Small Backpack", "SkinID (you can use the same ones for several backpacks)": 3032442379, "Capacity": 6, "Reclaim after death": false, "Reclaim only if equipped": false, "Contents Type (1 - General | 2 - Liquid)": 1, "Container Max Stack Size (0 = default)": 0, "Use list (0 - None | 1 - Whitelist | 2 - Blacklist)": 0, "Item list to exclude (for whitelist/blacklist)": [], "Components": { "Auto-Loot": true, "Furnace": false, "Max number of simultaneously cooked items in the furnace": 3 }, "Max stacks by shortname": {} } }, { "Unique new item shortname": "backpack.large", "ItemId (DO NOT MODIFY THIS FIELD!)": -717465782, "Backpack Setting": { "Name": "Large Backpack", "SkinID (you can use the same ones for several backpacks)": 3032442379, "Capacity": 48, "Reclaim after death": false, "Reclaim only if equipped": false, "Contents Type (1 - General | 2 - Liquid)": 1, "Container Max Stack Size (0 = default)": 0, "Use list (0 - None | 1 - Whitelist | 2 - Blacklist)": 0, "Item list to exclude (for whitelist/blacklist)": [], "Components": { "Auto-Loot": true, "Furnace": true, "Max number of simultaneously cooked items in the furnace": 3 }, "Max stacks by shortname": {} } }, { "Unique new item shortname": "backpack.liquid", "ItemId (DO NOT MODIFY THIS FIELD!)": -1863402244, "Backpack Setting": { "Name": "Liquid Backpack", "SkinID (you can use the same ones for several backpacks)": 3050741122, "Capacity": 1, "Reclaim after death": false, "Reclaim only if equipped": false, "Contents Type (1 - General | 2 - Liquid)": 2, "Container Max Stack Size (0 = default)": 10000, "Use list (0 - None | 1 - Whitelist | 2 - Blacklist)": 0, "Item list to exclude (for whitelist/blacklist)": [], "Components": { "Auto-Loot": false, "Furnace": false, "Max number of simultaneously cooked items in the furnace": 3 }, "Max stacks by shortname": {} } }, { "Unique new item shortname": "backpack.comp", "ItemId (DO NOT MODIFY THIS FIELD!)": -1167179500, "Backpack Setting": { "Name": "Component Backpack", "SkinID (you can use the same ones for several backpacks)": 3050740925, "Capacity": 12, "Reclaim after death": false, "Reclaim only if equipped": false, "Contents Type (1 - General | 2 - Liquid)": 1, "Container Max Stack Size (0 = default)": 0, "Use list (0 - None | 1 - Whitelist | 2 - Blacklist)": 1, "Item list to exclude (for whitelist/blacklist)": [ { "Shortname": "gears", "SkinID (negative value = any)": -1 }, { "Shortname": "scrap", "SkinID (negative value = any)": -1 }, { "Shortname": "fuse", "SkinID (negative value = any)": -1 }, { "Shortname": "tarp", "SkinID (negative value = any)": -1 }, { "Shortname": "rope", "SkinID (negative value = any)": -1 }, { "Shortname": "sewingkit", "SkinID (negative value = any)": -1 }, { "Shortname": "techparts", "SkinID (negative value = any)": -1 }, { "Shortname": "riflebody", "SkinID (negative value = any)": -1 }, { "Shortname": "smgbody", "SkinID (negative value = any)": -1 }, { "Shortname": "semibody", "SkinID (negative value = any)": -1 }, { "Shortname": "sheetmetal", "SkinID (negative value = any)": -1 }, { "Shortname": "roadsigns", "SkinID (negative value = any)": -1 }, { "Shortname": "metalpipe", "SkinID (negative value = any)": -1 }, { "Shortname": "metalspring", "SkinID (negative value = any)": -1 }, { "Shortname": "metalblade", "SkinID (negative value = any)": -1 }, { "Shortname": "propanetank", "SkinID (negative value = any)": -1 } ], "Components": { "Auto-Loot": true, "Furnace": false, "Max number of simultaneously cooked items in the furnace": 3 }, "Max stacks by shortname": {} } }, { "Unique new item shortname": "backpack.wood", "ItemId (DO NOT MODIFY THIS FIELD!)": -16063997, "Backpack Setting": { "Name": "Wood Backpack", "SkinID (you can use the same ones for several backpacks)": 3050741444, "Capacity": 16, "Reclaim after death": false, "Reclaim only if equipped": false, "Contents Type (1 - General | 2 - Liquid)": 1, "Container Max Stack Size (0 = default)": 0, "Use list (0 - None | 1 - Whitelist | 2 - Blacklist)": 1, "Item list to exclude (for whitelist/blacklist)": [ { "Shortname": "wood", "SkinID (negative value = any)": -1 } ], "Components": { "Auto-Loot": true, "Furnace": false, "Max number of simultaneously cooked items in the furnace": 3 }, "Max stacks by shortname": {} } }, { "Unique new item shortname": "backpack.ore", "ItemId (DO NOT MODIFY THIS FIELD!)": 1211853999, "Backpack Setting": { "Name": "Ore Backpack", "SkinID (you can use the same ones for several backpacks)": 3050741346, "Capacity": 32, "Reclaim after death": false, "Reclaim only if equipped": false, "Contents Type (1 - General | 2 - Liquid)": 1, "Container Max Stack Size (0 = default)": 0, "Use list (0 - None | 1 - Whitelist | 2 - Blacklist)": 1, "Item list to exclude (for whitelist/blacklist)": [ { "Shortname": "stones", "SkinID (negative value = any)": -1 }, { "Shortname": "sulfur.ore", "SkinID (negative value = any)": -1 }, { "Shortname": "hq.metal.ore", "SkinID (negative value = any)": -1 }, { "Shortname": "metal.ore", "SkinID (negative value = any)": -1 } ], "Components": { "Auto-Loot": true, "Furnace": true, "Max number of simultaneously cooked items in the furnace": 3 }, "Max stacks by shortname": {} } } ], "This is an example from which you can take parts and put them into the backpacks you want.": { "Unique new item shortname": "backpack.example", "ItemId (DO NOT MODIFY THIS FIELD!)": -1265413270, "Backpack Setting": { "Name": "Example backpack to copy-paste parts", "SkinID (you can use the same ones for several backpacks)": 3032442379, "Capacity": 777, "Reclaim after death": false, "Reclaim only if equipped": false, "Contents Type (1 - General | 2 - Liquid)": 1, "Container Max Stack Size (0 = default)": 0, "Use list (0 - None | 1 - Whitelist | 2 - Blacklist)": 1, "Item list to exclude (for whitelist/blacklist)": [ { "Shortname": "flower", "SkinID (negative value = any)": -1 }, { "Shortname": "pokemon", "SkinID (negative value = any)": -1 } ], "Components": { "Auto-Loot": true, "Furnace": false, "Max number of simultaneously cooked items in the furnace": 3 }, "Max stacks by shortname": { "shortname1": 1000, "shortname2": 1 } } } } Default lang file: { "NO_PERM_TO_USE_COMMAND": "You dont have permission to use this command.", "backpack.small": "Small Backpack", "backpack.large": "Large Backpack", "backpack.liquid": "Liquid Backpack", "backpack.admin": "Admin Backpack", "backpack.comp": "Component Backpack", "NEED_EQUIPED_BACKPACK": "An equipped backpack is required to use the command.", "backpack.wood": "Wood Backpack", "backpack.ore": "Ore Backpack", "AUTOLOOT_BUTTON": "AUTO-LOOT", "COOK_BUTTON": "COOK", "backpack.test": "Test Backpack" }$20.00 -
Version 2.1.6
3,873 downloads
Skinner! The unrivaled no.1 performance skinning plugin. Skin any item in the game with a unique skinbox giving you live skinning, auto skinning and skin sets. Live Skinning - Skin items in place without moving them Auto import - Automatically import and use all game approved skins Skin Sets - Create a variety of different skin sets for any item Skin Requests - Allows players to request and Admins to accept new skins in game Auto Skins - Automatically apply selected skins to every item that enters your inventory Skinner 2.0 offeres unrivaled performance in plugin efficiency. Our standard testing shows runtime results were 60x faster and memory usage was 200x more efficient than the closest peforming plugin. SkinMenu Commands: /Skin or /S - Live skin any item in your inventory by selecting a skin you wish to apply /SkinCraft or /Sc - Create multiple skin sets for use in other functions such as skinauto or skinteam /Skinitem or /Si - Skin a deployable item you are looking at ingame. Args - Spectify 1, 2 or 3 to automatically use a skin set. Automatic Commands: /Skincon or /scon - sets all items in a container you are looking at to your default craft set Args - Optional, spectify 1, 2 or 3 to automatically use a skin set. /Skininv or /sinv - sets all items in your inventory to your default craft set Args - Optional, spectify 1, 2 or 3 to automatically use a skin set. /Skinauto or /Sauto - Automatically apply selected skins to every item that enters your inventory based off your skin sets. Args - Optional, spectify 1, 2 or 3 to automatically use a skin set. /Skinteam or /st - sets all items in your inventory and your teams to your default craft set Args - Optional, spectify 1, 2 or 3 to automatically use a skin set. Toggle - Use /skinteam toggle to opt in or out of the team skin set /SkinBase - Allows you to skin all deployables in your base to your default skincraft skins. Args - Optional, specify item name to filter items being skinned example: /Skinbase sleepingbag to only skin sleeping bags. /SkinAll Command - Skin all the items in all the containers in your base. Args - Optional, specify item by shortname example: /SkinAll rifle.ak to only skin ak47's. Skin Import Commands: /Skinimport or /sip - Import custom workshop skins Args - WorkshopID example: /Skinimport 2397648701 /Colimport or /cip - Import custom workshop collection using /skinimport collectionID Args - Collection ID example: /Colimport 2921147807 /Skinrequest or /Sr - Request a skin to be added to skinner, requested skins will show in the /Skinrequests UI for approval Args - WorkshopID example: /Skinrequest 2397648701 /Skinrequests or /Srs - Opens the the skinner menu with a box of skins awating approval Button Usage - Select an option and remove the skin to enact the process Try - Recieve a copy of an item with that skin Approve - Adds the skin from the menu to the imported skins list Deny - Removes the skin Note: All chat commands are universal meaning they can be used via the console, rcon(for import commands) and can be customized via the configuration. Player Permissions: Skinner.default - enables /skin command Skinner.items - enables /skinitem command Skinner.craft - enables /skincraft command Skinner.skinauto - enables /skinauto command Skinner.skincon - enables /skincon command Skinner.skininv - enables /skininv command Skinner.skinbase - for use of the /skinbase command Skinner.skinteam - Allows the use of the /skinteam command Skinner.skinall - for the use of the /skinall command Skinner.skinrequest - enables /skinrequest Cooldowns Permissions: Cooldown settins can be adjusted via the plugin config. Applying the cooldown permission example skinner.default30 will enforce cooldowns on those with the permission. If no cooldown permission is applied no cooldowns will be enforced. If multiple cooldown perms are assigned to a single player they fastest cooldown will be used. "Command based cooldowns ('permission' : 'command' seconds": { "Default30CD": { "skin": 30.0, "skinitem": 30.0, "skincraft": 30.0, "skincon": 30.0, "skininv": 30.0, "skinteam": 30.0, "skinbase": 60.0, "skinall": 60.0 } Admin Permissions: Skinner.import – enables /Skinimport, /Colimport and /Skinrequests Skinner.bypassauth - bypasses the building auth requirement when using /Skinitem Skinner.permskintry - enables try feature when using /Skinrequests Warning: trying a skin will make a copy of that item. Only give this perm to admins who are allowed to spawn items. Other Permissions: Skinner.skinautotoggled - applied when a player disables skinauto Skinner.skinteamblock - applied when a player disables team skins Skinner offers multiple ways of importing skins including via the config and through commands: Importing via the config: To import skins via the config insert workshopIDs into the imported skins list as per the code snippet below, once finished reload skinner and the shortname and displayname fields will be automatically populated. You can add extra skins at any stage using this method. "Imported Skins List": { "861142659": {}, "2617744110": {} }, Optionally entire workshop skin collections can be added to conifg, each item skin is automatically imported to your imported skins list on plugin load. "Import Skin collections (steam workshop ID)": [496517795,2921147807], Importing via commands: Commands can be used to edit the config options for imported skins and collections via RCON, chat commands and the f1 console. Commands include: /Skinimport WorkshopID /Colimport CollectionID Importing via Skin Requests: Players can requests skins to be added to the game using the skinrequests feature. By using the command /skinrequest WorkshoID a skin gets automatically uploaded to the skin requests box. Admins with the skinner.import permission can open the requests box with the /skinrequests command. Skins from the request box can then be "tried" approved or denied. Each skin requested can be logged to discord using the webhook in the config. Importing from other plugins: Skinner now has a tool for windows to import data from skinbox, xskins and skincontroller. Simply select your json data file with imported skins into the tool and copy the new imported skins list into the skinner config. https://github.com/Whispers88/SkinDataConverter/releases/tag/Main Note: The "Imported Skins (skinid : 'shortnamestring', skinid2 : 'shortnamestring2'": {}" is now redundant and automatically converted to imported skins list. { "Skin Commands (skin items in you inventory": [ "skin", "s", "skinbox", "sb" ], "Skin Items Commands (skin items you have already placed": [ "skinitem", "si", "skindeployed", "sd" ], "Set default items to be skinned": [ "skincraft", "sc" ], "Automatically set all items in you inventory to your default skins": [ "skininv", "sinv" ], "Automatically set all items a container to your default skins": [ "skincon", "scon" ], "Automatically skin all deployables in your base": [ "skinbase", "skinbuilding" ], "Automatically skin all items in your base": [ "skinall", "sa" ], "Automatically skin all items that are moved into you inventory": [ "skinauto", "sauto" ], "Skin your teams inventories with your skin set": [ "skinteam", "st" ], "Request workshop skins via workshop ID": [ "skinrequest", "sr" ], "Approve workshop skin requests": [ "skinrequests", "srs" ], "Set your selected skin set": [ "skinset", "ss" ], "Import Custom Skins": [ "skinimport", "sip" ], "Import Workshop Collection Command": [ "colimport", "cip" ], "Skin Request Notification Discord Webhook": "", "Custom Page Change UI Positon anchor/offset 'min x, min y', 'max x', max y'": [ "0.5 0.0", "0.5 0.0", "198 60", "400 97" ], "Custom Searchbar UI Positon anchor/offset 'min x, min y', 'max x', max y'": [ "0.5 0.0", "0.5 0.0", "410 635", "572 660" ], "Custom Set Selection UI Positon anchor/offset 'min x, min y', 'max x', max y'": [ "0.5 0.0", "0.5 0.0", "250 610", "573 633" ], "Auto import approved skins": true, "Remove player data after inactivity (days)": 14, "Apply names of skins to skinned items": true, "Add Search Bar UI": true, "Use on itemcraft hook (skin items after crafting - not required when using skinauto)": false, "Override spraycan behaviour": false, "Use spraycan effect when holding spraycan and skinning deployables": true, "Blacklisted Skins (skinID)": [], "Blacklisted Itemms (itemID)": [], "Import Skin collections (steam workshop ID)": [], "Command based cooldowns ('permission' : 'command' seconds": { "Default30CD": { "skin": 30.0, "skinitem": 30.0, "skincraft": 30.0, "skincon": 30.0, "skininv": 30.0, "skinteam": 30.0, "skinbase": 60.0, "skinall": 60.0 } }, "Imported Skins List": {} } //Get all Cached skins public Dictionary<int, List<ulong>> GetAllCachedSkins() { return _cachedSkins; } //Check if skin is a Redirect item public bool IsRedirectID(ulong uID) { return HasMask(uID); } //Convert Redirect ID to item ID public int RedirectIDtoItemID(ulong uID) { return (int)UnsetMask(uID); } //Get a list of skins for a particular item public List<ulong>? GetSkinsItemList(int itemid) { _cachedSkins.TryGetValue(itemid, out List<ulong>? cachedSkins); return cachedSkins; }$24.99 -
Version 1.0.6
199 downloads
Adds a Genie Lamp to the game, which you can unwrap and receive an award. This will greatly diversify the game on your server. My advice is to add them to your underwater crates and use Dynamic Config to set up rewards over the course of the wipe Commands genie.give [targetId] (give a lamp) Permissions You can set permission in config, for example: "Permission to rub the lamp": "genie.use", Config { "Genie Image": "https://i.imgur.com/aNIcQzk.png", "Enable opening progress?": true, "Work with Notify?": true, "Delay to receive": 5.0, "Update Frequency": 0.1, "Opening effect (empty - disable)": "assets/bundled/prefabs/fx/gestures/lick.prefab", "Progress effect (empty - disable)": "assets/bundled/prefabs/fx/notice/item.select.fx.prefab", "Finish effect (empty - disable)": "assets/prefabs/misc/xmas/presents/effects/wrap.prefab", "Permission to rub the lamp": "", "Genie lamp Settings": { "Display Name": "Lamp", "ShortName": "xmas.present.small", "Skin": 2540200362 }, "Awards": [ { "Type": "Item", "ID": 1, "Image": "", "Title": "", "Command (%steamid%)": "", "Plugin": { "Hook": null, "Plugin name": null, "Amount": 0 }, "Display Name (empty - default)": "", "ShortName": "wood", "Skin": 0, "Amount": 3500, "Chance": 70.0 }, { "Type": "Item", "ID": 2, "Image": "", "Title": "", "Command (%steamid%)": "", "Plugin": { "Hook": null, "Plugin name": null, "Amount": 0 }, "Display Name (empty - default)": "", "ShortName": "stones", "Skin": 0, "Amount": 2500, "Chance": 70.0 }, { "Type": "Item", "ID": 3, "Image": "", "Title": "", "Command (%steamid%)": "", "Plugin": { "Hook": null, "Plugin name": null, "Amount": 0 }, "Display Name (empty - default)": "", "ShortName": "leather", "Skin": 0, "Amount": 1000, "Chance": 55.0 }, { "Type": "Item", "ID": 4, "Image": "", "Title": "", "Command (%steamid%)": "", "Plugin": { "Hook": null, "Plugin name": null, "Amount": 0 }, "Display Name (empty - default)": "", "ShortName": "cloth", "Skin": 0, "Amount": 1000, "Chance": 55.0 }, { "Type": "Item", "ID": 5, "Image": "", "Title": "", "Command (%steamid%)": "", "Plugin": { "Hook": null, "Plugin name": null, "Amount": 0 }, "Display Name (empty - default)": "", "ShortName": "lowgradefuel", "Skin": 0, "Amount": 500, "Chance": 50.0 }, { "Type": "Item", "ID": 6, "Image": "", "Title": "", "Command (%steamid%)": "", "Plugin": { "Hook": null, "Plugin name": null, "Amount": 0 }, "Display Name (empty - default)": "", "ShortName": "metal.fragments", "Skin": 0, "Amount": 1500, "Chance": 65.0 }, { "Type": "Item", "ID": 7, "Image": "", "Title": "", "Command (%steamid%)": "", "Plugin": { "Hook": null, "Plugin name": null, "Amount": 0 }, "Display Name (empty - default)": "", "ShortName": "metal.refined", "Skin": 0, "Amount": 150, "Chance": 65.0 } ], "Drop Settings": [ { "Prefab": "assets/bundled/prefabs/radtown/crate_normal.prefab", "Chance": 50 }, { "Prefab": "assets/bundled/prefabs/radtown/loot_barrel_2.prefab", "Chance": 5 }, { "Prefab": "assets/bundled/prefabs/radtown/loot_barrel_1.prefab", "Chance": 5 } ] } VIDEO$19.95- 27 comments
- 3 reviews
-
- 4
-
-
- #genie
- #genie lamp
- (and 9 more)
-
Version 1.0.12
194 downloads
A player puts all his blueprints in a book and then he can gift that book to another one who can unlock all of the blueprints the player had So it allows players to put all their blueprints in a book that can be unrwaped Features Beautiful user interface Performance Interface customization Access by permission (optional) Auto wipe (optional) Sound effect (optional) Commands necronomicon.give [name/userId] [all/itemIDs...] - give a book with a specific set of blueprints Config Examples { "Book Item Settings": { "Display Name": "Necromonicon", "ShortName": "xmas.present.small", "Skin": 2537078809 }, "Work with Notify?": true, "Cost": 100, "Permission": "", "Economy": { "Type (Plugin/Item)": "Plugin", "Plugin name": "Economics", "Balance add hook": "Deposit", "Balance remove hook": "Withdraw", "Balance show hook": "Balance", "ShortName": "scrap", "Display Name (empty - default)": "", "Skin": 0 }, "Active Color": { "HEX": "#74884A", "Opacity (0 - 100)": 95.0 }, "Disactive Color": { "HEX": "#595651", "Opacity (0 - 100)": 75.0 }, "Effect (empty - disable)": "assets/prefabs/deployable/research table/effects/research-success.prefab" } VIDEO$11.95- 34 comments
- 3 reviews
-
- 5
-
-
-
- #bps
- #blueprints
- (and 12 more)
-
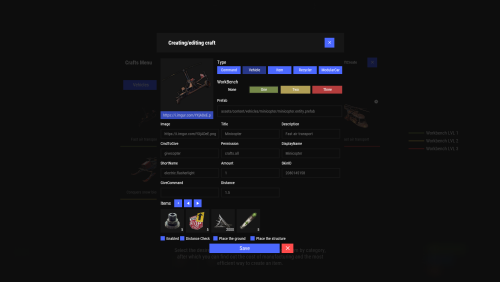
Version 2.10.21
1,368 downloads
Crafting system that allows you to create items, cars, vehicles, recyclers, etc! Commands craft open interface crafts.setwb [categories: cat1 cat2 ...] set new custom workbench Permissions You can set permission in config, for example: "Permission (ex: crafts.use)": "crafts.use", crafts.setworkbench - allows you to use the "crafts.setwb" command (set custom workbenches) Craft Types Command Vehicle Item Recycler ModularCar How to install a custom workbench 1. Spawn the workbench (for example, in RustEdit or a plugin) 2. In the game, go to him and use the command "crafts.setwb" and specify the necessary categories. Example: /crafts.setwb Misc 3. Go to config (oxide/config/Crafts.json) and configure this workbench (use SafeZone, workbench level, etc.) VIDEO FAQ Q: Where can I see an example of a config? A: Config$19.95 -
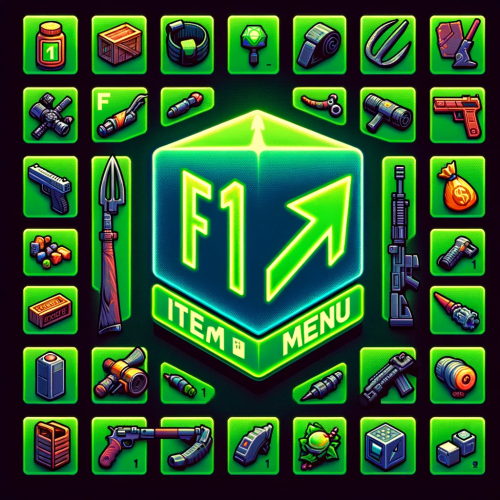
Version 1.1.0
75 downloads
The "F1 Item Menu" plugin allows players to open an interactive menu to select items in Rust and add them to their inventory using a simple command. The plugin provides a user-friendly interface with a search function and page navigation for convenient browsing of available items. Command: /f1menu - Opens the F1 item menu, allowing the player to select items and add them to their inventory. Permissions: f1itemmenu.f1 - This permission is required to use the /f1menu command. How to Use the Plugin: 1. To open the menu, the player enters the /f1menu command, provided they have the f1itemmenu.f1 permission. 2. In the menu, the player can search for items by entering a search term and clicking "Search." 3. The player can navigate through the available items by clicking the arrow buttons (< and >) to go to the previous or next page. 4. After selecting an item, the player is presented with another menu to specify the quantity of the chosen item. 5. The player can then choose the desired quantity (1, 10, 100, 1000, 10000) and click "Close" to exit the menu. 6. The selected item is automatically added to the player's inventory. { "Enable Discord Webhook": true, "Webhook URL": "", "Username": "Rust Server", "Avatar URL": "", "Discord Message Format": "Player **{playerName}** has taken **{quantity}** of **{itemName}**." }$15.95 -
Version 1.1.0
206 downloads
UItemSort UItemSort - this plugin allows the player to sort, and stack items in boxes and inventory. Plugin config variables "Use button images?": false, "Send plugin messages/reply?": true, "Sort button color.": "0.968627453 0.921568632 0.882352948 0.2", "Take similar button color.": "0.968627453 0.921568632 0.882352948 0.2", "Take all button color.": "0.968627453 0.921568632 0.882352948 0.2", "Sort image.": "https://i.imgur.com/uEiuf3N.png", "Similar image.": "https://i.imgur.com/3PkbAH8.png", "Take/Put all.": "https://i.imgur.com/beKBAl3.png", "Allow only containers with owners?": false, "All containers allowed?": false, "Black list if all allowed else this is white list.": [ "assets/prefabs/deployable/woodenbox/woodbox_deployed.prefab", "assets/prefabs/deployable/large wood storage/box.wooden.large.prefab", ] Plugin lang "UILootSimilar": "Same items, that you already own, were looted! (if exist)", "UILootAll": "You've looted everything you could!", "UISort": "Items were successfully sorted!", "UIPutSimilar": "You've put same items that are in a storage! (if exist)", "UIPutAll": "You've put all the items you could!", "UIBtnSort": "Sort", "UIBtnTakeSimilar": "Take Similar", "UIBtnTakeAll": "Take All", "UIBtnPutSimilar": "Put Similar", "UIBtnPutAll": "Put All" Permissions: uitemsort.use - allows to see and use sorting buttons. uitemsort.ignore - prevents from using sorting buttons if player has 'uitemsort.use' permission. Contacts: Need help or custom plugin for your server? Contact me using Discord: metangerine ---------------------------------------------------------------------- Video how plugin works:$9.99 -
Version 1.0.29
2,211 downloads
Adds 53 new deployable items to your server!. Custom item collection system. Players can obtain these items while cutting trees, mining rocks and collecting plants. Includes a built in market that can be accessed via a chat command or a HumanNPC. Each base item can be configured to allow for a wide variety of placement options/restrictions. A large amount of configuration options are available for each item. Adjustable placement options while holding shift. Items can be picked up by holding a hammer, looking at the deployed entity and pressing your mouse3 button (scroll wheel button). deployablenature.admin - Required to use the giveprefab command. deployablenature.market.chat - Required to use the market chat command. deployablenature.ignore.restrictions - Allows a player to deploy items without restriction (TC etc). deployablenature.gather - Required for players to obtain drops while gathering. deployablenature.use - Required to deploy nature items. deployablenature.free - allows access to the nature market for free. There is also the option to create groups via the config, which will receive discounts in the market based on the value assigned to them. Example: "Permissions that will receive a discount on the store cost when purchasing [1.0 is full price]. Prefix with deployablenature.": { "deployablenature.vip": 0.5 }, This would give players with the deployablenature.vip permission a discount of 50% off of the market price. Command: giveprefab Parameters: <skin id> <quantity> Example: /giveprefab 2609145017 100 - spawns the user 100x medium clutter rocks" Permission: deployablenature.admin Command: naturemarket Permission: deployablenature.market.chat Command: dnpickup Permission: None Command: giveprefab (console) Parameters: <player id/name> <skin id> <quantity> Example: /giveprefab "new guy" 2609145017 100 - spawns the user 100x medium clutter rocks for new guy" Permission: deployablenature.admin Console Command: dnkillentities - wipes all nature entities from the map. Parameters: <optional parameter: true> - this wipes the data after the command executes. If not used, the nature items will respawn on plugin reload. Example: dnkillentities or dnkillentities true. Permission: deployablenature.admin if running from player console. Console Command: dnkillentitiesforplayer - wipes all nature entities from the map for the specified player Parameters: <player name/id> Example: dnkillentitiesforplayer "new guy" - would delete all entities for the player whose name contained "new guy". Permission: deployablenature.admin if running from player console. Console Command: dnpurge - enables purge mode, wiping all entities from the map (does not delete data), and preventing them from spawning on server start/being deployed by players while active. Automatically resets to false on server wipe. Parameters: <true/false> Example: dnpurge true - would enable purge mode. Permission: deployablenature.admin if running from player console. You most likely won't need the below information, but it is here for more advanced users. Prefab Types 0: Rock 1: Tree 2: Bush 3: Animal Tree Types 0: None 1: Palm 2: Oak 3: Swamp 4: Birch 5: Beech 6: Pine 7: Cacti 8: Snow Bush Types 0: None 1: Willow 2: Willow_snow 3: Spice 4: Spice_snow 5: Creosote 6: Berries 7: Mushrooms Example config https://pastebin.com/E5duDqtf API public bool IsDeployableNature(BaseEntity entity) Returns if an entity is a DeployableNature entity that has the prevent_gather attribute.$15.00 -
Version 1.0.6
146 downloads
Collection Log is a plugin that will track items collected from multiple sources against multiple collection logs. When a player discovers a new item that is contained in one of the logs, it is marked as found. Once a log has been entirely collected, the player is rewarded with that logs prizes. The sources that players can obtain items from are completely customizable, allowing for some unique logs to be created. Fully customizable logs that also support custom items. 11 different sources that can be collected from (Crates, barrels, Farming, Fishing, Woodcutting etc). Support for item rewards and command rewards included. Supports UINotify for communicating newly collected items. Here is an example of 2 collection logs with different sources: The "Farming" collection log contains growable items such as cloth, corn and pumpkins, but the only valid source to obtain these items from is the Farming source. The "Resources" collection log contains many types of items, but has some overlap with the "Farming" log, which includes cloth, corn and pumpkins. The key difference is that this log supports multiple sources (Collecting, Crates, Barrels, and Woodcutting), but it does not contain the Farming source. In this situation: When a player collects a map generated hemp plant (hemp-collectible), it would register cloth under the "Resources" log as collected, but it will not do the same for the "Farming" log. The "Farming" log would only register if the cloth was obtained from a grown hemp plant (hemp.entity). This is an example of how you can differentiate the same items using different sources. The plugin allows for multiple sources per collection log. Barrel - Triggered when the player destroys a barrel or road sign Collecting - Triggered when the player picks up an entity (hemp-collectible, diesel_collectible etc). Crates - Triggered when the player opens a create (only the first player to open the crate will trigger it). Farming - Triggered when the player collects grown entities. Fishing, - Triggered when the player catches a fish. Mining - Triggered when the player mines ore. Woodcutting - Triggered when the player chops a tree. Skinning - Triggered when a player skins an animal/person. Crafting - Triggered when a craft completes. Unwrap - Triggered when a player uses the unwrap button on an item. Consume - Triggered when a player uses the eat/drink button on an item. Corpse - Triggered when a player loots the corpse of an NPC. The only permission in the plugin currently is collectionlog.use. This is required to use any feature of the plugin. Menu command (customizable via config): cl or collectionlog$14.99 -
Version 1.0.61
1,841 downloads
Having trouble fitting larger entities into your compound? By combining PlaceAnything with EntityScaleManager you can downsize big entities. Vehicles can be directly added to the player's inventory, allowing them to deploy the vehicles whenever needed. Vehicles can be picked up by players (optional). Deployable trees and bushes, perfect for pve servers! pre-configured data file with some trees and bushes Entities.json With the help of the CopyPaste plugin, you can sell pre-built bases for players to deploy. • How can I pick up items? Deployed structures can be picked up by hitting it with hammer. Items can be picked up only by owner. • How to upload custom icons? Custom icons can be uploaded with Steam workshop uploader. WorkshopUploader.zip original repository • How to use CopyPaste plugin with PlaceAnyting? In data file Entities.json, put 'copypaste/buildingName' instead of prefab path. • Where I can find list of all prefabs? Here is full updated list but not every prefab can be spawned from there and some of them you might not be able to destroy, I do not recommend testing this on live server. Commands (admin only) CHAT /gimme CONSOLE placeanything <steamid> "<item display name>" • Known issues and limitations - some prefabs cannot be damaged thus can be used to grief players. (recycler, slotmachine, test generator...etc) - hitting gambling wheel with hammer will make wheel disappear, game issue cant be fixed Please note that PlaceAnything is a simple plugin that only spawns entities, similar to using the 'spawn' command in the console. It does not manage the behavior of entities after they are spawned. If you are unsure about the functionality of a specific entity, spawn it in-game as an admin and test it yourself before making purchase Plugin comes with 19 pre-configured items. Use /gimme chat command in game to get those items for testing.$5.50 -

Version 1.2.0
43 downloads
About plugin The plugin allows you to conveniently change the stacks of items through the use of a graphical interface Chat Commands (can be changed in config) /stacks - opens the main menu /sethandstack - change item's stack you are holding in your hands Console Commands jstacks.setstack [item shortname] [new stack] - set stack size for item. Example: jstacks.setstack ammo.rifle 256 jstacks.restore - reset all stacks to default values (be careful: there is no confirmation) Permissions jstacks.use - using the plugin Features Changing stacks for the entire category by pressing two buttons Multiple choice option for quick stack change Config { "Can admins use command": true, "Command to open the menu": "stacks", "Command to set stack size of an item in your hands": "sethandstack", "Default icons for categories (in-game only)": { "Ammunition": "assets/icons/ammunition.png", "Attire": "assets/icons/community_servers.png", "Component": "assets/icons/open.png", "Construction": "assets/icons/construction.png", "Electrical": "assets/icons/electric.png", "Food": "assets/icons/food_cooked.png", "Fun": "assets/icons/fun_alt.png", "Items": "assets/icons/extinguish.png", "Medical": "assets/icons/medical.png", "Misc": "assets/icons/menu_dots.png", "Resources": "assets/icons/community_servers.png", "Tool": "assets/icons/tools.png", "Traps": "assets/icons/traps.png", "Weapon": "assets/icons/weapon.png" } }$2.99 -
Version 1.0.0
10 downloads
Create custom items like pouches, kits, medkits, and more—each filled with valuable gear. Customize everything from item names, blueprints, skins, to drop chances, giving you full control. Set permissions to open packages, and even open entire stacks at once for command-only items. Packages can be found in crates, barrels, or via metal detectors, and they stack, split, and drop seamlessly. Chat messages notify players when they open a package, but beware—these packs can't be recycled! Key Features There is a lang ru/en/uk/es. Customization of items (command(s), blueprint, item, custom item): shortname, amount, skinID, text(for note), custom name, blueprint, drop chance, water amount(for bottle, water jug, bota bag), command list) For commands: {0} is steamID | {1} is amount Various settings for the packages themselves. Setting the permission to open a package. Ability to open the entire stack at once. [ Useful for packages that only have command(s) ]. Ability to customize package stack. Chat messages after opening a package. Ability to find the package in crates/barrels. Ability to find the package with a metal detector. Stack, split, drop packages works correctly. Packs cannot be recycled. WORK WITH BetterLoot For the correct spawning of packages in the crate, in the BetterLoot plugin, remove/comment out the following line of code. 630 - container.inventory.capacity = container.inventory.itemList.Count; Permissions xpackage.admin - allow a player(administrator) to use the command to give packages. Commands give_package steamID packageSkinID amount - to give a package to a player. API bool IsItemPackage(Item item) - whether the item is a package. bool IsSkinPackage(ulong skinID) - whether the skin is a package. Config { "General settings": { "SteamID profile for custom avatar": 0, "Chat prefix": "<size=12><color=#FFFFFF50>[</color> <color=#00FF0050>XPackage</color> <color=#FFFFFF50>]</color></size>\n" }, "Package settings": { "0": { "Shortname": "halloween.lootbag.large", "Custom package name": "Medication kit", "Action at which the package will be opened": "unwrap", "Maximum stack - [ True - x1 | False - stack of original item ]": true, "Whole stack opens at once. [ Useful for packages that only have command(s) ]": false, "Permission to open a package": null, "Effect of opening the package": "assets/prefabs/misc/xmas/presents/effects/unwrap.prefab", "Enable the ability to find a package with a metal detector": false, "Chance of finding the package with a metal detector [ 0.0 - 100.0 ]": 0.0, "List of items in the package": [ { "Shortname": "largemedkit", "Amount": 1, "SkinID": 0, "Text": null, "CustomName": null, "BlueprintID": 0, "Drop chance [ 0.0 - 100.0 ]": 100.0, "WaterAmount": 0, "CommandsList - [ {0} is steamID | {1} is amount ]": null }, ... ], "Which crates/barrels will spawned a package": [ { "Name crate/barrel": "crate_normal", "Drop chance [ 0.0 - 100.0 ]": 20.0, "Min amount": 1, "Max amount": 1 }, ... ] }, ... } }$14.99 -
Version 1.1.0
59 downloads
In short, this plugin turns low grade, crude oil and diesel into a liquid, which forces players to use jugs, bota bags and bottles to interact with fuel. Based on this, we can introduce new features such as fuel splashing, refining crude oil in regular purifiers or building autonomous refining factories using powered water purifiers and pumps! Also players can get their fuel from Oxum's Gas Station. 1. Introducing Liquid Fuel This plugin introduces 3 new liquids: Low Grade, Crude Oil and Diesel. 1 ml of the liquid represents 1 respecting "vanilla" item. Vanilla fuel is completely replaced by its liquid form. All items, vehicles, weapons and deployables now use liquid fuel. Players need to use liquid containers in order to get and store fuel. 2. Getting fuel There are several ways players can get fuel From Oxum's Gas Station Gas pumps now contain a bit of low grade inside them. Players can come to gas station and loot them. You can modify behaviour of this in the configuration file. From Red Oil Barrels Just like the regular old red barrels, players can get fuel from them, but they need to have free liquid containers inside their inventory. But players should be careful, because this plugin introduces gas explosions. From Pump Jacks. Since pump jacks now only farm crude oil, this plugin adds an option to increase crude oil production rates, see [3. Looting] Aditional Crude Oil in pumpjack configuration option. All drop rates are configurable. 2.1 Commands There are several chat and console commands so players, admins and other plugins could give liquid fuel. Chat commands: /buylowgrade /buycrudeoil /buydiesel these chat commands require liquidfuel.buyfuel permission liquidfuel.freefuel permission gives fuel for free Admin console commands: givefuel <1 - LGF , 2 - Crude Oil l, 3 - Diesel > <amount> <player name> 3. Refining Crude Oil This plugin completely rethinks the way players refine their crude oil. Old oil refineries become non-existent the second you load the plugin, which makes players use purifiers. Players are able to refine the fuel at their base almost immediately after starting out. They use regular water purifiers, that run on campfires, these purifier are slower and refine at a slower pace. Mid-game way to get fuel is to place a powered water purifier. By default, it refines faster and more efficiently, producing more low grade. Also, all purifiers have a input/output slots for connecting them to barrels or other purifiers. This allows players to build complicated autonomous fuel refining factories, which I find very interesting. Remember, speed and refining rates are configurable, so you can balance it the way you see it! 4. Fuel Splashing Now players can splash and then ignite fuel anywhere and in any pattern they wish. This allows players to raid bases, use it in PvP, create interesting trap contraptions and much more! 5. XM42 Flamethrower It was removed from the plugin, since it was added in vanilla Rust. 6. Explosions Red fuel barrels now explode when they are ignited or shot. Players should carefully farm oil barrels using tools, because one shot can initiate a chain reaction of explosions of other neighbouring oil barrels and can easily kill them. Also, fuel wagons now have a chance of exploding when hit with something flammable. You can change the projectiles and the explosion chance in the configuration file. 7. Crafting Crafting with liquid fuel is quite easy - to craft low grade you just need to have a liquid container in your inventory to store the crafted fuel inside, to craft something with low grade, you need to have a liquid container with enough fuel inside it. 7.2 Crafting with mixing table mixing low grade is done as before, by placing cloth and fat, players can get fuel, it's just in liquid form mixing recipes that require low grade are done by placing a liquid container in place of low grade. 8. Localization Built-in localization: English Russian But you can always add your own or change existing ones by modifying files in /oxide/lang/{your_language}/LiquidFuel.json 9. Configuration LiquidFuel's configuration is quite easy to understand and work with. Here is the example of the configuration file. It is located in /oxide/config/LiquidFuel.json { "[1. Prices] Low Grade Fuel Amount": 300, "[1. Prices] Low Grade Fuel Price (set value to 0 to make it free, use ServerRewards or Economics as a shortname to use RP points or Economics balance respectively)\"": { "ShortName": "scrap", "Amount": 50, "SkinID": 0 }, "[1. Prices] Crude Oil Amount": 150, "[1. Prices] Crude Oil Price (set value to 0 to make it free, use ServerRewards or Economics as a shortname to use RP points or Economics balance respectively)\"": { "ShortName": "scrap", "Amount": 75, "SkinID": 0 }, "[1. Prices] Diesel Amount": 10, "[1. Prices] Diesel Price (set value to 0 to make it free, use ServerRewards or Economics as a shortname to use RP points or Economics balance respectively)\"": { "ShortName": "scrap", "Amount": 100, "SkinID": 0 }, "[2. Entity Fuel Tanks] Max interaction distance (m)": 4.0, "[2. Entity Fuel Tanks] Fuel tank stack limits": { "fuel_storage_scrapheli": 1000, "fuel_storage_attackheli": 1000, "fuel_storage": 500, "fuelstorage": 20, "engine": 20, "crudeoutput": 5000, "crate_fuel": 100, "modular_car_fuel_storage": 250, "snowmobilefuelstorage": 250, "submarinefuelstorage": 250, "tugboat fuel_storage": 250, "workcart_fuel_storage": 250, "locomotive_fuel_storage": 250, "wagon_storage_fuel": 2500, "coaling_tower_fuel_storage.entity": 5000, "flameturret.deployed": 250, "tunalight.deployed": 250, "lantern.deployed": 250, "carvable.pumpkin": 100, "jackolantern.happy": 100, "jackolantern.angry": 100, "chineselantern.deployed": 250, "skylantern.deployed": 250, "skylantern.skylantern.red": 250, "skylantern.skylantern.green": 250, "skylantern.skylantern.orange": 250, "skylantern.skylantern.purple": 250, "fogmachine": 500, "snowmachine": 500 }, "[3. Looting] Minumum of Low Grade Fuel in red barrel": 5, "[3. Looting] Maximum of Low Grade Fuel in red barrel": 9, "[3. Looting] Minumum of Crude Oil in red barrel": 15, "[3. Looting] Maximum of Crude Oil in red barrel": 19, "[3. Looting] Minumum of Diesel per diesel barrel": 1, "[3. Looting] Maximum of Diesel per diesel barrel": 1, "[3. Looting] Aditional Crude Oil in pumpjack": 3, "[3.1. Looting Oxum's Gas Station] Enable gas pumps in Oxum's Gas Station (true/false)": true, "[3.1. Looting Oxum's Gas Station] Max interaction distance": 2.0, "[3.1. Looting Oxum's Gas Station] Raycasting interval (higher number results in better performance, but slower UI)": 0.2, "[3.1. Looting Oxum's Gas Station] Minimum gas refill time (minutes)": 2.0, "[3.1. Looting Oxum's Gas Station] Maximum gas refill time (minutes)": 5.0, "[3.1. Looting Oxum's Gas Station] Minimum Low Grade Fuel": 15, "[3.1. Looting Oxum's Gas Station] Maximum Low Grade Fuel": 40, "[4. Refineries] Regular purifier purification ratio (per 1 crude oil)": 1, "[4. Refineries] Powered purifier purification ratio (per 1 crude oil)": 3, "[4. Refineries] Regular purifier purification speed (per minute)": 24, "[4. Refineries] Powered purifier purification speed (per minute)": 60, "[5. Fuel splashing] Enable fuel splashing (true/false)": true, "[5. Fuel splashing] Minimum burn time (seconds)": 20.0, "[5. Fuel splashing] Maximum burn time (seconds)": 25.0, "[5. Fuel splashing] Fire damage radius (m)": 0.2, "[5. Fuel splashing] Fire damage (per second)": 5.0, "[5. Fuel splashing] Delay between igniting next fuel path node (seconds)": 0.1, "[5. Fuel splashing] Fuel spent per second of splashing": 15, "[5. Fuel splashing] Fuel path decay time (seconds)": 180.0, "[6. XM42 Flamethrower] Price": { "ShortName": "scrap", "Amount": 500, "SkinID": 0 }, "[6. XM42 Flamethrower] Item Name": "XM42 Flamethrower", "[6. XM42 Flamethrower] Fuel capacity": 150, "[6. XM42 Flamethrower] Damage per second": 90, "[7. Explosions] Fuel wagon explosion chance": 0.2, "[7. Explosions] Projectiles that initiate fuel wagon explosion": [ "riflebullet_fire", "pistolbullet_fire", "riflebullet_explosive" ], "[7. Explosions] Red barrel explosion damage": 60, "[8. Misc] Fuel poisoning amount": 15.0 } 10. API This plugin exposes the following API methods: // Type: 1 - LGF; 2 - Crude Oil; 3 - Diesel Item CreateFuel(int type, int amount) -> Returns the stack of the requested fuel 11. Notes Because this plugin quite drastically changes Rust world and items, it is not recommended to install/uninstall this plugin mid-wipe. Even though it preserves its state after reloads, it's not recommended to unload the plugin for long periods of time. 12. Credits Thanks to @Nikita and @kyrich for helping me with testing and video production.$18.99 -

Version 1.1.1
7 downloads
Description. PlayerNoGunSales is a Rust plugin that prevents specified items (some firearms and explosives by default) from being sold by vending machines.Ideal for PvE servers, it prevents items specified by the plugin from being sold. Ideal for PvE servers, prevents items specified by the config file from being sold. If a player attempts to sell a banned item, it will be returned to their inventory with a notification. This plugin prevents players from selling guns and explosives early in the wipe, enhancing the server's game balance and improving player playtime. Features. Automatically prevents firearms and explosives specified by default or items specified from the config from being sold in vending machines. This feature is ideal for preventing players from selling guns cheaply on PvE servers. Attempts to sell will result in the banned item being returned to the player's inventory. The list of banned items can be customised by editing the config file. Notifies players when banned items are returned to their inventory. youtube How to use. Install the NoGunSales plugin in the oxide/plugins directory on the Rust server. Edit the configuration file and set the list of prohibited items. Set true for prohibited items and false for permitted items. After editing and saving, reload the plugin file to apply the changes. ------------------------------------------------------------------------------------- 説明: PlayerNoGunSalesは、指定されたアイテム(デフォルトでは一定の銃火器と爆発物)を自動販売機での販売を防止するためのRustプラグインです。 PvEサーバーに最適で、プラグインで指定しアイテムを販売できないようにします。 プレイヤーが禁止アイテムを販売しようとすると、そのアイテムはインベントリに戻され、通知が表示されます。 このプラグインは、プレイヤーがワイプ後の早い段階から銃や爆発物などを販売できないようにし、サーバーゲームバランスとプレイヤーのプレイ時間を向上させます。 特徴: 指定されたアイテムの自動販売機での販売を自動的に防止します。 PvEサーバーに最適で、プレイヤーが銃をワイプ直後などの早い段階で販売できないようにします。 禁止アイテムが販売されようとした場合、プレイヤーのインベントリに戻します。 コンフィグファイルを編集することで、禁止アイテムのリストをカスタマイズ可能です。 禁止アイテムがインベントリに戻されたときにプレイヤーに通知します。 ショートネームをコンフィグファイルに追加することで、他のアイテムも制限可能です。 使用方法: NoGunSalesプラグインをoxide/pluginsディレクトリに配置してRustサーバーにインストールします。 コンフィグファイルを編集して、禁止アイテムのリストを設定します。禁止するアイテムにはtrue、許可するアイテムにはfalseを設定します。 コンフィグファイルを編集保存してプラグインファイルをリロードすると、変更が自動的に適用されます。 インストール方法: NoGunSalesプラグインファイルをダウンロードします。 ファイルをサーバーのoxide/pluginsディレクトリにアップロードします。$8.00 -

Version 1.0.0
131 downloads
A small yet plugin that swiftly provides information about the item you're holding in your hand. #Features Once you have an item in your hand and want to get information about it, execute the command /iteminfo. The relevant information will then be displayed in the chat. ItemName ItemShortName ItemSkinId ItemID #Permission iteminfo.use - Grants the user permission to use the /iteminfo command. #Command /iteminfo - This command allows you to display information about the item. You need to execute the command while holding the item in your hand. #Localization The plugin currently supports English and German. English { "NoPermission": "You do not have permission to use this command!", "NoItemEquipped": "You have not equipped any item.", "PluginPrefix": "<size=16><color=#AE3624>ITEM</color> <color=#738D45>INFO</color></size>" } Deutsch { "NoPermission": "Du hast keine Berechtigung, diesen Befehl zu verwenden!", "NoItemEquipped": "Du hast kein Item ausgerüstet!", "PluginPrefix": "<size=16><color=#AE3624>ITEM</color> <color=#738D45>INFO</color></size>" } Ps: If you find the plugin useful, I would appreciate a thumbs up, as I'm fond of likes!Free -
Version 1.0.0
12 downloads
English Description (Deutsche Beschreibung weiter unten): With the ItemPost plugin for Rust, players can claim items sent to them by administrators via the console or RCON. The ItemPost plugin is a practical solution for Rust server administrators to send items to players that they can claim later. Integration with other plugins, such as Azuriom's Vote plugin, expands the possibilities and offers server operators additional incentives for their players. How it works: The plugin allows administrators to send items to players by using the givepost command in the console or via RCON. The command syntax is: givepost <playerID> <itemName> <amount> Once an item is sent to a player, it is stored in the plugin's internal list (_claimedItems), and the affected player is notified. Players can view and claim their claimable items by using the /claim chat command. When they have successfully claimed items, they will receive a confirmation message. Every 5 minutes, the plugin automatically checks if players have items to claim and notifies them accordingly. Language file: The plugin supports multiple languages and allows customizing messages. The following messages are available in the default settings: NoItemsToClaim: "You have no items to claim." ItemsAvailable: "You have items available to claim! Type /claim to claim your items." ClaimSuccess: "Claimed all your items!" ClaimFull: "Your inventory is full." Integration with Azuriom's Vote plugin: To combine the ItemPost plugin with Azuriom's Vote plugin, administrators can use the givepost command to send rewards for voting to players. For example, when a player votes for the server, the administrator can execute a command like givepost {steam_id} stones 150 to send a reward to the player. Deutsche Beschreibung: Mit dem ItemPost-Plugin für Rust können Spieler Gegenstände beanspruchen, die ihnen von Administratoren über die Konsole oder RCON gesendet wurden. Das ItemPost-Plugin ist eine praktische Lösung für Rust-Server-Administratoren, um Gegenstände an Spieler zu senden, die sie später beanspruchen können. Die Integration in andere Plugins wie das Vote-Plugin von Azuriom erweitert die Einsatzmöglichkeiten und bietet Serverbetreibern zusätzliche Anreize für ihre Spieler. Funktionsweise: Das Plugin ermöglicht es Administratoren, Gegenstände an Spieler zu senden, indem sie den Befehl givepost in der Konsole oder über RCON verwenden. Der Befehl hat die Syntax: givepost <playerID> <itemName> <amount> Sobald ein Gegenstand an einen Spieler gesendet wird, wird er in der internen Liste des Plugins (_claimedItems) gespeichert und der betroffene Spieler wird benachrichtigt. Spieler können ihre beanspruchbaren Gegenstände einsehen und beanspruchen, indem sie den Chat-Befehl /claim verwenden. Wenn sie erfolgreich Gegenstände beansprucht haben, erhalten sie eine Bestätigungsnachricht. Alle 5 Minuten überprüft das Plugin automatisch, ob Spieler Gegenstände zum Beanspruchen haben und benachrichtigt sie entsprechend. Sprachdatei: Das Plugin unterstützt mehrere Sprachen und ermöglicht es, Nachrichten anzupassen. In der Standardeinstellung sind folgende Nachrichten verfügbar: NoItemsToClaim: "You have no items to claim." ItemsAvailable: "You have items available to claim! Type /claim to claim your items." ClaimSuccess: "Claimed all your items!" ClaimFull: "Your inventory is full." Integration mit dem Vote-Plugin von Azuriom: Um das ItemPost-Plugin mit dem Vote-Plugin von Azuriom zu kombinieren, können Administratoren den Befehl givepost verwenden, um Belohnungen für das Abstimmen an Spieler zu senden. Zum Beispiel, wenn ein Spieler für den Server abstimmt, kann der Administrator einen Befehl wie givepost {steam_id} stones 150 ausführen, um dem Spieler eine Belohnung zu senden.$10.00


.thumb.png.8fb9cb5db33376288eba94beb961d0c6.png)