Search the Community
Showing results for tags 'custom item'.
Found 7 results
-
Version 1.2.13
3,837 downloads
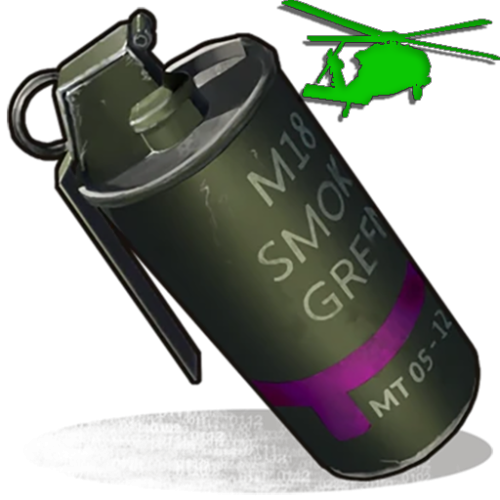
Heli Signals allows players with permission to call an Attack Helicopter to their location with a custom Supply Signal, where it will engage players and patrol, allowing players to fight it to win the valuable Heli crates. The plugin comes with 8 default heli profiles, Easy, Medium, Hard and Elite, with a duplicate profile of each set up for calling multiple helis at once for each tier. In addition there is also 2 Wave Heli profiles, which will call in a wave of different helis one after the other. Each default profile has it's own custom supply signal skin (below). Server owners can add as many profiles as they like in the config by copying and pasting an existing profile within the config and editing to suit. This may require the server owner to create their own custom skin for the inventory item. Please note: Wave Heli Signals currently only support single heli profiles. Multi heli profiles will only spawn one heli per wave. (This will be updated in future to call multi helis per wave). If you are setting up Multi heli signals, set the global and player limit in the config accordingly. There is also an option to have a BotReSpawn profile spawn at the crash site, just set the BRS profile name in the config. NOTE ABOUT SHOPS: The profile name in the config should match the Custom Supply Signal name which the shop gives the player. The Helicopter Name is separate and can be set independently from the Signal item. Also, when giving players items from shop plugins, if available, I always recommend adding the item to the shop using custom name, skinID etc, rather than the console command, but either will work. Plugin default Supply Signal Skin ID's to add items to various shops, loot plugins, kits etc are: Heli Signal (Easy) : 2920175997 Heli Signal (Medium) : 2920176079 Heli Signal (Hard) : 2920176050 Heli Signal (Elite) : 2920176024 Heli Signal (Expert) : 3099117081 Heli Signal (Nightmare) : 3099117372 Multi Heli (Easy) : 3083234542 Multi Heli (Medium) : 3083234833 Multi Heli (Hard) : 3083234755 Multi Heli (Elite) : 3083234647 Multi Heli (Expert) : 3099124338 Multi Heli (Nightmare) : 3099124426 Heli Wave Signal : 3099117224 Heli Wave Signal (Normal): 3104667036 Heli Wave Signal (Hard): 3104666951 Default Permissions: helisignals.admin (to use give|hsclearcd command) helisignals.buy (to use /hsbuy command) helisignals.bypasscooldown helisignals.easy helisignals.medium helisignals.hard helisignals.elite helisignals.easy_multi helisignals.medium_multi helisignals.hard_multi helisignals.elite_multi helisignals.wave_normal helisignals.wave_hard Please note: Permissions above are with default config, permission for each Heli profile can be customised in the config. Commands (Prefix with / to use in game): hsgive <Profile ShortName> <Steam64ID> <Amount> hsbuy list hsbuy <Profile Shortname> hsreport (Get details of all active helis) hsretire (Retire all a player or their teams called Helis, no refunds) hsclearcd (clear all cooldowns) hsclearcd <SteamID|Name> (clear cooldown for player) (Buy and Retire command customisable in config) Please note correct usage for Supply Signal name and Helicopter display name. These values CAN be different if you wish: Loot Options: Use the loot item example entries in the default config to create custom loot tables for crates. How to Add Loot Table Items (Example): Default Config: For Other Developers: The following hook is available to use in your plugins to check custom Supply Signals or Patrol Helicopters to avoid conflict with your plugins: object IsHeliSignalObject(ulong skinID) This will return true if the item is a Bradley Drop item/entity, or null if not. Call it directly without referencing the plugin: if (Interface.CallHook("IsHeliSignalObject", skinID) != null) return true; // IsHeliSignalObject Or reference my plugin and call like this: [PluginReference] Plugin HeliSignals; if (HeliSignals.CallHook("IsHeliSignalObject", skinID) != null) return true; // IsHeliSignalObject$13.99- 268 comments
- 11 reviews
-
- 4
-

-

-
- #helicopter
- #helicopters
- (and 14 more)
-
Version 1.0.5
150 downloads
Adds a Genie Lamp to the game, which you can unwrap and receive an award. This will greatly diversify the game on your server. My advice is to add them to your underwater crates and use Dynamic Config to set up rewards over the course of the wipe Commands genie.give [targetId] (give a lamp) Permissions You can set permission in config, for example: "Permission to rub the lamp": "genie.use", Config { "Genie Image": "https://i.imgur.com/aNIcQzk.png", "Enable opening progress?": true, "Work with Notify?": true, "Delay to receive": 5.0, "Update Frequency": 0.1, "Opening effect (empty - disable)": "assets/bundled/prefabs/fx/gestures/lick.prefab", "Progress effect (empty - disable)": "assets/bundled/prefabs/fx/notice/item.select.fx.prefab", "Finish effect (empty - disable)": "assets/prefabs/misc/xmas/presents/effects/wrap.prefab", "Permission to rub the lamp": "", "Genie lamp Settings": { "Display Name": "Lamp", "ShortName": "xmas.present.small", "Skin": 2540200362 }, "Awards": [ { "Type": "Item", "ID": 1, "Image": "", "Title": "", "Command (%steamid%)": "", "Plugin": { "Hook": null, "Plugin name": null, "Amount": 0 }, "Display Name (empty - default)": "", "ShortName": "wood", "Skin": 0, "Amount": 3500, "Chance": 70.0 }, { "Type": "Item", "ID": 2, "Image": "", "Title": "", "Command (%steamid%)": "", "Plugin": { "Hook": null, "Plugin name": null, "Amount": 0 }, "Display Name (empty - default)": "", "ShortName": "stones", "Skin": 0, "Amount": 2500, "Chance": 70.0 }, { "Type": "Item", "ID": 3, "Image": "", "Title": "", "Command (%steamid%)": "", "Plugin": { "Hook": null, "Plugin name": null, "Amount": 0 }, "Display Name (empty - default)": "", "ShortName": "leather", "Skin": 0, "Amount": 1000, "Chance": 55.0 }, { "Type": "Item", "ID": 4, "Image": "", "Title": "", "Command (%steamid%)": "", "Plugin": { "Hook": null, "Plugin name": null, "Amount": 0 }, "Display Name (empty - default)": "", "ShortName": "cloth", "Skin": 0, "Amount": 1000, "Chance": 55.0 }, { "Type": "Item", "ID": 5, "Image": "", "Title": "", "Command (%steamid%)": "", "Plugin": { "Hook": null, "Plugin name": null, "Amount": 0 }, "Display Name (empty - default)": "", "ShortName": "lowgradefuel", "Skin": 0, "Amount": 500, "Chance": 50.0 }, { "Type": "Item", "ID": 6, "Image": "", "Title": "", "Command (%steamid%)": "", "Plugin": { "Hook": null, "Plugin name": null, "Amount": 0 }, "Display Name (empty - default)": "", "ShortName": "metal.fragments", "Skin": 0, "Amount": 1500, "Chance": 65.0 }, { "Type": "Item", "ID": 7, "Image": "", "Title": "", "Command (%steamid%)": "", "Plugin": { "Hook": null, "Plugin name": null, "Amount": 0 }, "Display Name (empty - default)": "", "ShortName": "metal.refined", "Skin": 0, "Amount": 150, "Chance": 65.0 } ], "Drop Settings": [ { "Prefab": "assets/bundled/prefabs/radtown/crate_normal.prefab", "Chance": 50 }, { "Prefab": "assets/bundled/prefabs/radtown/loot_barrel_2.prefab", "Chance": 5 }, { "Prefab": "assets/bundled/prefabs/radtown/loot_barrel_1.prefab", "Chance": 5 } ] } VIDEO$19.95- 26 comments
- 2 reviews
-
- 2
-
-
- #genie
- #genie lamp
- (and 9 more)
-

Version 1.1.11
1,321 downloads
About Bradley Drops. Bradley Drops allows players with permission to call a Bradley APC to their location with a custom Supply Signal, where it will patrol a set distance for a set time, allowing players to fight it to win the valuable Bradley crates. A cargo plane will deliver and drop the APC via parachutes. The APC can be configured in different ways and there are many config options to suit all servers. The plugin comes with 4 default settings for Bradley Drops, Easy, Medium, Hard and Elite, each with their own custom supply signal skin. But server owners can add as many options as they like in the config by copying and pasting an existing profile within the config. This would however require the server owner to create their own custom skin for the inventory item. (I will add more custom skins in the near future for this.) BotReSpawn compatibility, with the option to specify a BRS spawn profile at the Bradley kill site. NOTE ABOUT SHOPS: The profile name in the config should match the Custom Supply Signal name which the shop gives the player. The Bradley Name is now separate and can be set independently. Plugin default Supply Signal Skin ID's to add items to various shops, loot plugins, kits etc are: Bradley Drop (Easy) : 2905355269 Bradley Drop (Medium) : 2905355312 Bradley Drop (Hard) : 2905355296 Bradley Drop (Elite) : 2911864795 Default Permissions: bradleydrops.admin (to use give|hsclearcd command) bradleydrops.buy (to use /bdbuy command) bradleydrops.bypasscooldown bradleydrops.easy bradleydrops.medium bradleydrops.hard bradleydrops.elite Commands (Prefix with / to use in game): bdgive <Profile ShortName> <Steam64ID> <Amount> bdbuy <Profile Shortname> bdbuy list bdreport (list all active Bradleys and their state) bddespawn (Despawn all Bradleys called by a player or their team, no refunds) bdclearcd (clear all cooldowns) bdclearcd <SteamID|Name> (clear cooldown for player) (Buy, Report and Despawn command can be customised in the config) Please note correct use in config file for supply signal name and Bradley APC display name. These values CAN be different if you wish: Custom Loot: Check out the example loot items in the default config below to see how to add custom loot items to crates. How to Add Custom Loot Table Item: Config: For Other Developers: The following hook is available to use in your plugins to check custom Supply Signals, Cargo Planes and Supply Drops to avoid conflict with your plugins: object IsBradleyDrop(ulong skinID) This will return true if the item is a Bradley Drop item/entity, or null if not. Call it directly without referencing the plugin: if (Interface.CallHook("IsBradleyDrop", skinID) != null) return true; // IsBradleyDrop Or reference my plugin and call like this: [PluginReference] Plugin BradleyDrops; if (BradleyDrops.CallHook("IsBradleyDrop", skinID) != null) return true; // IsBradleyDrop$13.99- 163 comments
- 7 reviews
-
- 2
-
-
-
- #bradley
- #bradleyapc
- (and 14 more)
-
Version 1.0.0
3 downloads
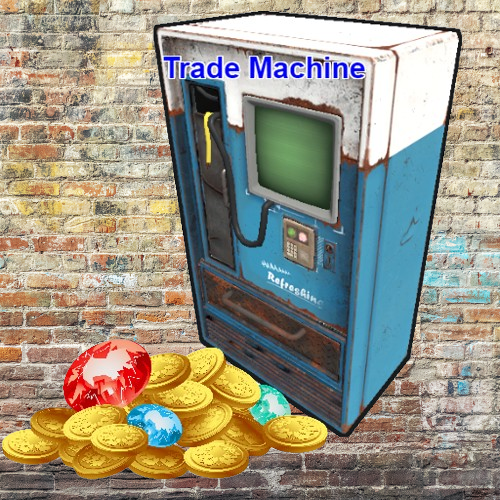
ABOUT TRADE MACHINE : Allows players to Sell/Buy - Custom/Default items. Players need to assign vending machine what will they use for trading items. One assigned machine per player ,can be placed anywhere in TC range . There are 2 ways to interact with trade machine ,with command and with button when player opens container of a vending machine. With command player can sell/buy items from anywhere ,with button option only when he have opened container of assigned vendingmachine. Players need to put items in container of assigned vending machine to be able to sell them. If they remove item from vending container ,item will not be on sell anymore. When buying item, player need to have cost for that item in his inventory . On succeed buying item ,item will be transferred to buyers assigned vending machine . SELL ITEM : Player can only sell items what he have in container of assigned vending machine. When player press in UI on item what he will sell ,he will see Description and Cost . In Description he can add what ever text ,confirm it , that text will buyer see when he is buying item . in Cost he can add cost items for that item ,up to 6 items . They can use custom and default items for cost . There are categories for cost items ,like "All" , "Custom" , "Weapons" ,and so on . When they chose cost item/items ,they will need to type cost amount of that item. After all that ,when player press Sell Item , buyers will be able to see it in and buy it. When seller sell item to buyer he will see in chat that he sold item. BUY ITEM : When seller added item for sell ,buyer will see item, amount, description ,and cost of that item . Items will be in categories "All" , "Custom" , "Weapons" and so on . He will pay cost from his inventory ,and he will get item in his assigned vending machine. CUSTOM /BLACKLISTED ITEMS : In config file you can add Custom and Blacklisted items ,by itemID and SkinID . For custom items ,if you add them in config ,players will be able to put that custom items for cost items, and they will be able to sell/buy those custom items. For blacklisted items ,if you add them in config, you will block that items , so players cant put those items for cost ,and they will not be able to sell/buy them . PERMISSION SYSTEM/COMMANDS : trademachine.button - players will be able to see trade button when they open container of vendingmachine . trademachine.command - players will be able to use /trade command . Command /myvm - to assign vending machine . Console command - cleartrade , This will wipe selling items and assigned machines . DATA : In data file you will see owners of assigned vending machine and what items are selling . When you wipe it with console command "cleartrade" , all will be wiped ... So no more assigned machines and no more selling items. TRADE INFO TEXT FIELD : When player open UI of trade machine he will see text on left side ,you can edit that text to your needs . In config file can be edited . CONFIG : { //// Here you can edit text field . "TradeInfo": [ "You need to assaign vending machine", "with /myvm.", "You can have only one", "assaigned vending machine", "", "In selling item you can chose:", "Description - just type it and confirm it.", "Cost - up to 6 items. ", "", "In buying items:", "You will see descripton what seller make.", "You will see cost for that item." ], "CustomItems": [ { "ItemId": -1707425764, "SkinId": 3122790562, "DisplayName": "" } ], "BlacklistedItems": [ { "ItemId": 550753330, "SkinId": 0 } ],$15.00 -
Version 1.0.0
16 downloads
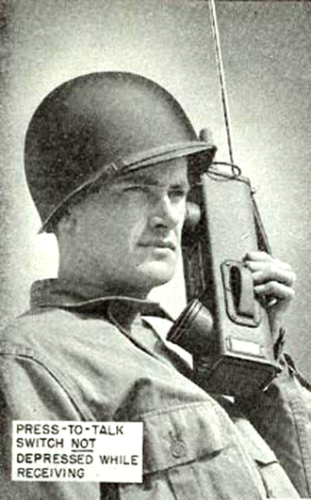
Introducing the Walkie-Talkie Plugin: Seamlessly integrate real-time communication into your gaming experience! Stay connected with your teammates, strategize on-the-go, and coordinate your moves effortlessly with this immersive in-game communication tool. Whether you're navigating treacherous terrains or planning tactical maneuvers, the Walkie-Talkie keeps you in sync, enhancing teamwork and elevating your gaming adventure to a whole new level! Features: Gives players the ability to commiserate with each other, come up with strategies, and ambush each other. It is possible to create different variations of walkie-talkies for different distances. By default, 5 variations of walkie-talkies are given ready-made. Walkie-talkies can be both automatic and manual (in manual mode it is necessary to press LMB to hold the walkie-talkie, in automatic mode it is not required). Installation: Before installing the plugin, make sure you have the CustomItemDefinitions library installed. It is necessary for the plugin to work. Download it here. Put this plugin in the plugins folder How does a walkie-talkie work? Several players must have a walkie-talkie tuned to the same frequency in their inventory. To start talking into the walkie-talkie you need to take it in your hand, then press LMB (in case of manual walkie-talkie, for automatic walkie-talkie it is not required) and then press V button (if the microphone mode is enabled), that's it, now you can start talking. How do I get a walkie-talkie? Since each walkie-talkie has its own unique shortname and ItemId you can receive it like any other item. That is, you can give it out via the give or giveto command, or add it to the loot table or other ways via plugins.$15.00- 1 review
-
- 2
-
-
-
- #custom item
- #walkie
- (and 4 more)
-
Version 1.6.1
22 downloads
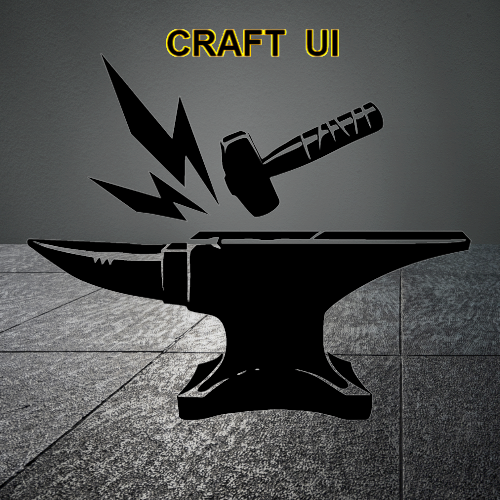
Plugin Features: Custom Crafting Recipes: Craft weapons, armor, tools, medic items, special items and vehicles with fully customizable recipes and ingredients. You chose what will be able to craft for how much ! Custom items or default items ,its about you ! This is great for giving player chance to upgrade items ,to get that Recycler or what ever . You have text fields : Server name , and short info where you chose your text in config. How to open Craft UI : command - /upgrades or/and in WorkBench custom button You can chose how players will open UI ,will you give them both ways ,or only one , its about you ! Permissions : "crafting.craft" - perm for crafting "crafting.upgrades" - perm for command /upgrades "crafting.button" - perm for WorkBench button How to use Plugin : This is very simple plugin with easy to understand UI. Most important thing is that for every item you need to put his : "Identifier": " " . You can add what ever item in what ever tab , based on shortname/skinID ,and cost for that item. You can give amount of item what will be crafted ,will it be 1 Ak or 10 ,hmm yea .. You can change names of items ,you have description for each item . You can put what ever number of items per tab ,there are pages . There is text field where you can put server name ,and some info text. Now you are able to change icons and text field of tabs ,and image of background/main image in config file. Everything is in config ... Vehicles : You can craft vehicles now ,and you can pick them up with hammer.. Vehicles are placed like innertube and large box . Spawn distance is how far will vehicle spawn . Identifier = 67, DisplayName = "Attack Helicopter", Shortname = "box.wooden.large", Amount = 1, SkinID = 3033643127, IsVehicle = true, VehiclePrefab = "assets/content/vehicles/attackhelicopter/attackhelicopter.entity.prefab", SpawnDistance = -0.5f, Description = "Attack Helicopter", Future Plans : Economic/ServerRewards Config Example : { "BackGroundIconUrl": "https://www.dropbox.com/scl/fi/oekoayvmkcc73b2ip77pv/Anvil.png?rlkey=cmrd35fxc2p7uk6ivtzb7v9h9&dl=1", "Panel1Text": "WEAPONS", "Panel1IconUrl": "https://www.dropbox.com/scl/fi/f1i0stpz9zz758i8azo0p/rifle.ak.png?rlkey=4w3ew16xrjcg81g6vxuhtl5gp&dl=1", "Panel2Text": "ARMOR", "Panel2IconUrl": "https://www.dropbox.com/scl/fi/0dmyzne2p3cv318337wf6/metal.facemask.png?rlkey=btxceyv5xnuc9yqlz7pj6s52a&dl=1", "Panel3Text": "TOOLS", "Panel3IconUrl": "https://www.dropbox.com/scl/fi/1grgskr9xhfdfoccytblv/icepick.salvaged.png?rlkey=8pased5k7rn4gtei0mjyx90sq&dl=1", "Panel4Text": "MEDIC", "Panel4IconUrl": "https://www.dropbox.com/scl/fi/zdhfaer2crjcqr907c7e9/largemedkit.png?rlkey=qedbem0v9pb43whx6gk6edzi2&dl=1", "Panel5Text": "SPECIALS", "Panel5IconUrl": "https://www.dropbox.com/scl/fi/pe2gw856tjn6kv8goq024/star.png?rlkey=9jnasfu3xa4ntzub24oxzja1b&dl=1", "Panel6Text": "VEHICLES", "Panel6IconUrl": "https://www.dropbox.com/scl/fi/u1sd8tthfvtvue9i37j6r/attackhelicopter.png?rlkey=olivi4ki0g3o5q2aay9hgm5yq&dl=1", "ServerName": [ "Welcome to My Server Name" ], "Info": [ "INFO:", "There are 6 tabs : Weapon, Armor, Tool, Medic, Special, Vehicle.", "", "You can upgrade level of item.", "", "You will need some items and resources for crafting.", "", "You can put what ever text here ,and add more text!" ], "WeaponCraftRecipes": [ { "Identifier": 1, "DisplayName": "Vamipre Ak Lv1", "Shortname": "rifle.ak", "Amount": 1, "SkinID": 3065510373, "Description": "5% lifesteal", "Ingredients": [ { "Shortname": "rifle.ak", "Amount": 1, "SkinID": 0, "DisplayName": "" }, { "Shortname": "scrap", "Amount": 100, "SkinID": 0, "DisplayName": "" } ] }, "ArmorCraftRecipes": "ToolCraftRecipes": "MedicCraftRecipes": "SpecialCraftRecipes": "VehicleCraftRecipes":$8.00 -
Version 0.0.1
8 downloads
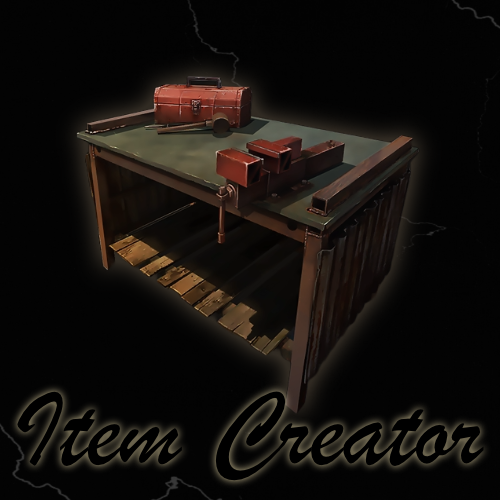
Create Custom Items on the fly via command, handy for testing and Debug if needing to test items with certain Skins. Also can be used for Giveaways, Personalize an item name for Players, and set it up with their favorite Skin. Requires itemcreator.use Permission Commands /Item itemShortName "custom name" skinID quantity ex - /item rifle.ak "Wrecks AR" 3023912444 1 Sends the item to your inventory /giveitem "playername" itemShortName "custom name" skinID quantity ex - /giveitem "Wrecks" rifle.ak "Wrecks AR" 3023912444 1 Sends To specific Player Using /item or /giveitem will send syntax Info.$5.00- 1 review
-
- 1
-
-
- #custom item
- #dev tool
- (and 2 more)