Search the Community
Showing results for tags 'fun'.
-
Version 1.1.3
699 downloads
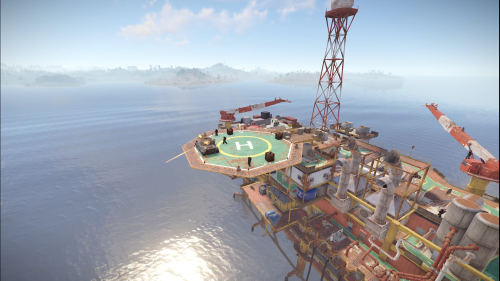
Heavy Oil Rig Event is a configurable plugin that allows for a new type of random event. Randomly a message will appear letting players know that there is a heavy oil rig being formed. The Oil Rig will then be equipped with extra scientists, auto turrets, and a Bradley. Players must try to clear the oil rig and find the scientist who drops the code to disable the auto turrets OR destroy all the turrets. If the code is found, it can be entered into the code lock on the second to highest floor to disable the turrets. Once the turrets and scientists are dealt with, players must defeat the Bradley which guards the hackable crates. Finally, once the Bradley is defeated, players can collect all the loot. That's if someone else doesn't get to it first! This is a great event to add to your server to give it a little more variety. It can be a fun PVP zone or a PVE event for non PVP servers. EASY OPTIONAL SETUP - NO SETUP REQUIRED You can simple drop the plugin in as-is and it will start the random event every 1 to 2 hours OR you can modify the config to your specific needs. Configuration Example - en Admin Only Commands /HeavyOilStart /HeavyOilStop Hooks void HeavyOilRigEventStarted() void HeavyOilRigEventStopped() Customization Spawn locations as well as the total number turrets, scientists, hackable crates, & APCbradleys can be modified. Simply go to the location in game you want to place the new item and use the command /HoPOS. It will message you the location. You can the add that location to the config in the appropriate section for want you want to modify. Reload the plugin and you're good to go! Discord: cahnu$19.99 -
Version 1.0.5
83 downloads
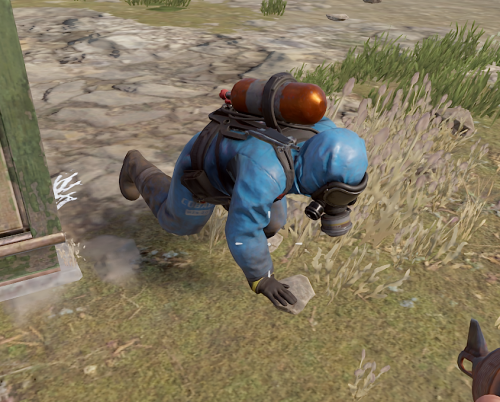
Introducing WoundedNPC — where NPCs don't just die; they make a scene! Watch in amusement as your NPCs go from tough guys to crybabies, collapsing and crying out in pain. They'll lie there, whining and wailing, giving you a show worth watching! Perfect for adding a touch of humor to your Rust world. Your NPCs will now collapse similar to players, with customizable scream (or other sound of your choice!) with a configurable chance to get back up for a second chance. Get ready for the most entertaining and theatrical NPC deaths ever with WoundedNPC! Features: NPCs will enter a wounded state Configurable % chance for them to get back up Configurable wounded timer for them Configurable scream sounds Lightweight format sounds stored in data for minimal delay Automatically checks if screams listed in config exist, if not, it's downloaded. Ability to exclude specific NPCs by either prefab path, or partial name matching (useful to exclude zombies or any other NPC which you wish to die immediately) Notes: Dependency plugin - TapeLibrary by Nikedemos - Included 5 scream sound files included Audio file format .ogg Mono channel (can convert mp3 to a mono .ogg here , then upload to a file host of your choice ensuring link leads directly to downloading the file) Sound Loops - worth ensuring your wounded timer is around the same length as sound files. Example config { "Enabled: ": true, // can disable the plugin features from the config if needed "Wounded timer: ": 20, // how long will the NPC stay in wounded state "Chance to die after wounded timer: ": 50, // percentage chance NPC will NOT get back up after being wounded "NPC Prefab paths to exclude: ": [], // can exclude an entire prefab path for an npc (eg for scarecrow) "Exclude NPC where their displayname contains: ": [ "Marauder", "Zombie" ], // can exclude NPCs by their full or partial display name. "Boombox Prefab Path: ": "assets/prefabs/voiceaudio/boombox/boombox.deployed.prefab", // don't need to touch unless boombox prefab path ever changes or there's a new boombox type item introduced. "Wounded Sounds URLs: ": [ "https://www.dropbox.com/scl/fi/vyhsne1efaictwl39oqgu/Scream-Medium-C1-www.fesliyanstudios.com.ogg?rlkey=7ae1rnbtwj662puo874t823y6&st=svp1qa0x&dl=1", "https://www.dropbox.com/scl/fi/j6zo85v7uuwje4scenmm3/longpain1.ogg?rlkey=7cmumo9z40no1xkdzkcwzxl36&st=gef2dhc7&dl=1", "https://www.dropbox.com/scl/fi/gb2jkxu1gxfsqjxmtum32/longpain2.ogg?rlkey=81iwgqqw9j26t7f7vfbzg1diw&st=f5s5k1to&dl=1", "https://www.dropbox.com/scl/fi/04o1ukje93tly4rjx9dvu/longpain3.ogg?rlkey=cjkv5ks97307yadnah0pvua8b&st=ns0tqygh&dl=1", "https://www.dropbox.com/scl/fi/e6ey5eqevqwey43b16xj2/longpain4.ogg?rlkey=28vksom5xd5o82rhvy5kmiaj7&st=wgo8v7ue&dl=1" ], // Direct URL to scream sound files "Enable Debug Messages: ": true // debug messages in console. Turn off to reduce spam. Turn on for troubleshooting }$16.98 -
Version 1.0.15
529 downloads
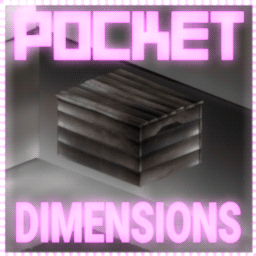
Introducing portable 3 x 3 bases in a box - that you can carry in your inventory! Deploy them and open them to go inside - to store, craft, smelt, grow, party... live. Expand and maintain the upkeep to protect from raiders. Pick them up and deploy somewhere else. Think outside of the box... and inside too! Questions? Support? Join the discord: https://discord.nikhub.dev WATCH THE TUTORIAL BY SRTBULL! AS FEATURED BY SHADOWFRAX! (around 0:55 mark) Just like the TARDIS from Doctor Who, they're bigger on the inside! In the "real" Rust world, an entire 9x9x9 metre large (over 25000 cubic foot) Pocket Dimension fits neatly inside of a Small Wooden Box. You can skin that box any way you like to camouflage or disguise it - whatever the player's Workshop Skins / server skin plugins allow. Players can convert existing buildings into Pocket Dimensions easily with one button in the Tool Cupboard's UI. Or if that's too much of an effort, entire, fresh, ready-to-be-moved-in Copy Paste files can be sold as boxes with your own, custom defined skin - this is entirely optional and requires Copy Paste, more on that in the dedicated section below. Whether to allow either approach is entirely up to your configuration. By default, the configuration allows raiding the Pocket Dimensions in several different ways - but if you're planning on running this plugin on a PVE server and you don't want any of that, there's many configuration options that can be adjusted to enhance your server experience. Both styles of servers have their own dedicated sections on this page - just read below. Make sure you maintain the integrity of your Pocket Dimension! If any of the external structures (wall/doorway) of the Pocket Dimension building either 1) decays 2) is raided 3) is removed by an admin/plugin, or 4) the box housing the dimension itself gets destroyed, the Dimension will Collapse, teleporting all players inside of it, and dropping all contents of storage containers, turrets, the Tool Cupboard, and anything else that can store any items, to the location where the box is/was last deployed. Easy come, easy go! You can pick the Pocket Dimension boxes up and move them somewhere else at any time, and everything will still be there. You can even deploy Pocket Dimensions inside Pocket Dimensions inside Pocket Dimensions... a box-ception! By default, the configuration does not allow picking up boxes with players inside of them, but you can toggle this setting. Quick Start As an admin: make sure you grant your groups/players appropriate permissions from the list below. Make sure Copy Paste, No Escape and Server Rewards / Economics are loaded in and configured properly, if you're planning on utilising any of the extended capabilities. More on the support for those plugins below. That also goes for any potentially compatible plugins that dispense/support skinned box templates from the config, like Kits or Shop by Mevent, or Copy Paste - based plugins, like Raidable Bases. As a player: make a 3 x 3 x 3 cube that meets the validity requirements (more on that below) - if you have the proper permission and the appropriate amount of required currency, open the Tool Cupboard and press the pink "Convert to Pocket Dimension" button. If built correctly, you will now receive a box containing that entire cube inside. Alternatively, deploy a new Small Wooden Box skinned with a skin ID mentioned in the config that references a valid Copy Paste template - no construction by players necessary, but still possible. This plugin comes with several pre-built, already known to be valid Pocket Dimensions, ready to be enjoyed by your players. Permissions (Oxide.Grant user YourName [permission name starting with pocketdimensions.]) This plugin utilises the plain Oxide permission system. For a quick setup on a typical server, grant yourself the pocketdimensions.admin permission, and grant the default group in Oxide the pocketdimensions.player.all permission. pocketdimensions.admin - this permission is required to execute the admin commands mentioned in the section Admin Commands just below this section. pocketdimensions.player.all - this permission is the quick-start equivalent of giving all 4 permissions mentioned below. Don't grant this if you want a more customised permission setup. For example, if you don't want to allow respawning inside and converting by players, and you only want to allow deployment/pickup and entering/exiting, use the combination of the 4 permissions below. pocketdimensions.deploy.pickup - holders of this permission can deploy and pick up Pocket Dimension boxes, be it already existing ones and fresh ones based on skin ID/Copy Paste file combo in your config. Of course, this takes into account building block/other conditions, too. pocketdimensions.player.enter.exit - holders of this permission can enter Pocket Dimensions by opening their boxes, and exit them by interacting with their portals. If a player doesn't have that permission, they will be informed upon opening/interaction, and barred from traversing in/out. pocketdimensions.player.convert - holders of this permission can create new Pocket Dimensions by converting an existing building from its Tool Cupboard's UI - as long as they have the required amount of currency (certain required item / Server Rewards / Economics), and the building itself meets the structural requirements. Players without this permission won't even see the conversion button in the UI. pocketdimensions.player.respawn - holders of this permission can respawn on bags, beds and towels deployed inside Pocket Dimensions. If a player doesn't have that permission, and a bag is deployed by them (or someone else bags them in) inside a Pocket Dimension, the players will not see that bag on their Death Screen as a possible respawn location. Admin Commands (require the pocketdimensions.admin permission) These commands can be executed both from console and the chat - in case of chat, they must be prefixed with a forward slash ( / ), and in case of console, no forward slash. /pd.check Come close to a TC and look directly at it, then issue this command from the chat or F1 console. It will perform the validity check without actually converting anything. If any problems are found, it will tell you exactly what's wrong. Useful for making your own Copy Paste templates. /pd.convert Come close to a TC and look directly at it, then issue this command from the chat or F1 console. It will first perform the validity check. If any problems are found, it will tell you exactly what's wrong. Then, if no problems are found, it will convert the building into a Pocket Dimension and you will receive it as a deployable Small Wooden Box item. /pd.lostnfound When a Pocket Dimension Item despawns, is recycled, is placed in a container that gets destroyed, or is otherwise removed from the world, the Dimension that it represents will be marked as "lost". This special marking will NOT happen as long as the Item still exists in a container (including players' inventories) somewhere in the World. Pocket Dimensions marked as "lost" can then be reclaimed as a newly created Item tied to the building by an admin, deployed and inspected, and given back to the rightful owner... or Collapsed by the admin, if the admin has a hunch that the player "lost" their dimension on purpose so nobody would be able to access anything while the player was offline. Using this command will either give you ALL newly reclaimed box items (so make sure you have room in your inventory), or it will tell you there's nothing in the lost-and-found to be reclaimed. /pd.givebox [skin ID or Copy Paste filename] [optionally: player partial name / full steam ID] Use this command to create a Small Wooden Box item, skinned with a special skin mentioned in your config, and then given to a player. A new Pocket Dimension based on the Copy Paste template will be created inside of that box the first time it's deployed somewhere. This command requires Copy Paste to be installed to work properly, and a properly set up Skin ID - to - Copy Paste filename entries in your config. The filenames mentioned must exist in your Copy Paste data folder, too. Use the first parameter to identify the template mentioned in your Copy Paste section of the config either by its skin ID or its Copy Paste file name. Multiple skin IDs can lead to the same Copy Paste filename, so if you're identifying the template by filename, the skin ID of the first entry in your config that leads to this file name will be picked as the skin of the newly created and given box. If the optional second parameter is not provided, it will be assumed a freshly skinned box should be given to the player executing this command - typically an admin. This command can be used by plugins that support executing commands with the STEAM ID or player name parameter. /pd.emergencycleanup Use this as a last resort to completely get rid of ALL Pocket Dimensions entities on the server for whatever reason. This is a very experimental plugin after all and things COULD go wrong... This includes all the Pocket Dimension buildings, their contents, loot inside of them, and the boxes containing Pocket Dimensions deployed in the world. If a dimension was not deployed as a box, but held as an Item in a container, those items will NOT be removed, but when deployed, the player will be informed that its associated Pocket Dimension was raided or decayed away. USE WITH CAUTION, THIS COMMAND CANNOT BE UNDONE. Those are all the admin commands so far. There's no player commands, as I consider them to be the last resort option when there's just no other elegant way of player input/interaction. What makes buildings "valid" candidates to be used as a Pocket Dimension? Not every building is viable to be converted. Generally speaking, a 3 x 3 x 3 cube with exactly 1 external single doorway anywhere on the side must be constructed - and nothing else on the outside (apart from the potential exception for Solar Panels / Wind Turbines on the roof, if your config allows them). The building blocks can be of any tier or a mix of tiers - from Twig to Armoured. It doesn't matter what's inside of the cube, only the outer "shell" matters. Once converted into a Pocket Dimension, players can build/expand/demolish inside just like they would with regular bases. To be more specific, when a check for the validity of a building is made, the following criteria are tested for, and the answer to each consecutive question must be "yes" before the test proceeds to the next question - if the answer is "no", the player will be informed of the reason: Does the building have exactly 9 square foundations overall? Does the building have exactly 9 square floors overall (presumably, for the ceilings)? Does the building have at least 1 single doorway overall? Does the building have at least 35 normal walls overall? Are the 9 square foundations all at the same level? For each of the 9 square foundations, does it have a matching square floor for ceiling, exactly 9 metres above it? Is the building's middle foundation NOT marked as belonging to a Pocket Dimension already? Does the building have either a normal wall (or a single doorway, but only one) all 4 sides, and not a wall frame, window frame, or a missing building block, to make the shell "air-tight" and prevent players from falling out of the Dimension into the void? Does the building have exactly 1 single doorway - no more, no less - on the external shell? Is the only external doorway currently "empty", i.e. no doors / vending machines are deployed there at this moment? If the config doesn't allow Solar Panels / Wind Turbines placed on the ceiling, is the building free of those potentially forbidden structures? Are all the electrical/water entities inside of the 3 x 3 x 3 cube free of any wire/hose connections to entities outside of that cube? (if Solar Panels / Wind Turbines are allowed in your config, those entities get a special pass at this stage of the check) Is the building free of ANY entities "sticking out" from the 3 x 3 x 3 cube - for instance roofs, honeycombs, porches, SAM sites, stairs etc, or Solar Panels / Windmills if your config does not allow them? If the answer to all those questions is a resounding "yes" - don't worry, it's the plugin's job to ask and answer those, not you! - the building is considered valid and as such can be converted into a Pocket Dimension! You will be informed of the result, whether it was successful or not. Raiding Pocket Dimensions (only applies to the default PVP-enabled settings) This is the default behaviour on a fresh configuration. If you're planning on running this plugin on a PVE server (player vs. environment, i.e. no raiding/hurting between human players themselves), you can skip this section and go straight to the Recommended PVE Settings section below. There are two main ways of raiding a Pocket Dimension: From the inside, by damaging the building structures belonging to the external shell - either the wall or the doorway housing the exit portal From the outside, by damaging the deployed Pocket Dimension box. By default, no locks can be placed on boxes containing Pocket Dimensions, to allow players raiding from the inside, too - but this setting can be toggled if you only want players to raid the boxes in the boring way. Of course, anything INSIDE of the Pocket Dimension can - and should - be locked! When raiding from the outside, on default configuration, the dimensional box will take 2% (1/50) of the damage it would normally take if it were just a regular Small Wooden Box. In other words, on default configuration, it takes about 7-8 C4 charges to make the dimension inside of it Collapse (so more or less as much as an Armoured-tier foundation). Just like with regular vanilla building raids, the same strategies (or combinations of those) can be applied here, too: The Deep - get in, take the goods, get out, leave, say GG to the building owner, who gets to keep their Pocket Dimension. The quintessence of sportsmanship in Rust raiding. The Grief - get in, take the goods (or not), make the building unusable till it eventually decays (and the dimension Collapses), leave. Highly malicious, but sometimes the only option... The Yoink - get in, take the goods, re-seal the entrance, and claim the dimension as now yours. You might want to move its box to another location though. The End - get in, and immediately start damaging one of the external blocks of the shell (typically the doorway housing the exit portal, or a wall next to it - or even both!). As soon as one of the external shell elements is gone (or is "ent killed" by an admin, or removed with a plugin), the entire dimension Collapses. More on dimensional Collapses in the section below. Recommended PVE Settings (only applies to default PVE-enabled settings) This will require adjusting some config settings and reloading the plugin. If you're planning on running this plugin on a PVP server (player vs. player, i.e. raiding/hurting between human players allowed), go back to the Raiding Pocket Dimensions section above - most default settings should work fine in the majority of scenarios. To find out what each of these recommended settings does, check out the Configuration section below for details. "DimensionalBoxesSubtractItemConditionWhenPickingUp": 0.0, "DimensionalBoxesAllowLockingWithLocks": true, "DimensionalBoxesAllowDamage": false, "DimensionaBoxesDamageResistanceDivisor": 50.0, "DimensionalBoxesAlwaysHaveStability": true, "DimensionalBoxesCheckForPlayersInsideWhenPickingUp": false, "DimensionalBoxesCheckBuildingBlockOutsideWhenEnteringDimension": true, "DimensionalBoxesCheckTCAuthInsideWhenEnteringDimension": false, "DimensionalBoxesCheckTCAuthInsideWhenPickingUp": false, "DimensionalPocketsAllowSolarAndWindmill": true, "DimensionalPocketsTrapImmunityAfterTeleport": 5.0, "DimensionalPocketsExteriorBlocksAllowNonDecayDamage": false, "DimensionalPocketsActualAltitudeMin": 3200.0, "DimensionalPocketsActualAltitudeMax": 3900.0, "DimensionaPocketsAllowVendingMachineBroadcast": true, "EffectPlayerTeleportAppear": "assets/prefabs/missions/portal/proceduraldungeon/effects/appear.prefab", "EffectPlayerTeleportDisappear": "assets/prefabs/missions/portal/proceduraldungeon/effects/disappear.prefab", "EffectsPlayerTeleportEnable": true, Collapse of a Pocket Dimension All good things eventually come to an end. "Collapse" in this context means that a certain Pocket Dimension and all its associated entities get destroyed and in the end, it's as if the Pocket Dimension never existed at all - save for all the juicy loot dropped from it. This can happen when... The box containing a Pocket Dimension gets "ent killed" by an admin/plugin, or gets damaged to the point of destruction One of the external shell structures inside of the Pocket Dimension (wall/external doorway) gets "ent killed" by an admin plugin, or decays/gets damaged to the point of destruction The exit portal housed in the external doorway gets "ent killed" by an admin/plugin Under normal circumstances, on a typical PVP server, you only expect the Pocket Dimensions to Collapse when they decay away, are raided, or purposefully removed by an admin (by "ent killing" the box or the external shell structure). If the Dimensions suddenly disappear with no apparent reason, it probably comes from another plugin's functionality, for example Abandoned Bases - but that's a completely expected outcome in this case: the Pocket Dimensions should behave as much as normal bases on the server as possible! On the topic of Abandoned Bases, if you use that plugin, you should definitely NOT allow locks on boxes containing Pocket Dimensions - otherwise the now-unlocked abandoned Pocket Dimension won't be accessible, as the box itself will not count as a base, and it will stay locked! During the Collapse, the last known position of the box associated with the Dimension will serve as the nexus point, where... All players inside of the dimension, asleep or online, alive or as dead bodies or bodybags, will be teleported to the nexus point, unharmed All entities that have an inventory, i.e. something stored inside of them - TC, boxes, turrets, traps, lockers etc - will drop their grey loot bags at the nexus points, as if all those entities were raided at the same time All building blocks and other structures will die, crumbling with gibs at the nexus point If the collapsing Dimension also contains Pocket Dimensions inside of it, and so on (A.K.A. box-ception), the entire "tree" collapses as well, at the root. That way, the best way to raid is always at the Dimension deployed directly in the world (the first one in the "box-ception" sequence), because it involved the least materials and effort. Works great with CopyPaste (and any plugin utilising it, like Raidable Bases) This plugin is fully compatible with Copy Paste and includes it as an optional dependency: i.e. Copy Paste is not needed for Pocket Dimensions to operate, but can potentially enhance the player's experience with extra capabilities. It's strongly recommended. Both the uMod version and the custom patched version distributed to work with Raidable Bases will work. As an admin, you can /copy and /paste a building and either convert it straight away (either with a command or in the Tool Cupboard UI), or just check if it's a valid candidate to be converted - more on validity below. You can also define some Skin IDs as special in the plugin configuration: when boxes with those particular skins are spawned for the first time (either being deployed by players, spawned/pasted by other plugins - Copy Paste itself or plugins utilising it, like Raidable Bases, or entirely separate plugins ), whatever Copy Paste filename you define, this box will be instantly made into a Pocket Dimension containing everything from the building that was copied under that name. And after that, the box can be re-skinned without any issues, too. You can also use the /pd.give command to give individual fresh Pocket Dimensions to players, by name or steam ID (look in the section Admin Commands above) from the server / F1 console or the chat - it's made in a way that shop/kit plugins relying on custom commands can utilise those easily. Useful if you don't want your players to convert their own buildings. Pocket Dimensions plugin even comes with a few predefined templates for those, so you can see how to set up your own. Just issue the /pd.give command without any arguments to get the list. If you want them to work properly, make sure you install the latest version of Copy Paste, and also upload the included Copy Paste files to the proper folder on your server. Compatible with Server Rewards / Economics Converting a valid building to a pocket dimension should NOT be free - and it isn't. By default, players need to deposit 500 Scrap into the TC - or have that amount ready in their inventory, both will work. You can adjust the amount and the shortname of the currency item in your config to your liking. You can even make it so that not only the shortname of this currency item is checked, but also its skin - useful if you have plugins that come with custom items. But you can also use Server Rewards or Economics as potential currencies, too! Check out the Configuration section above for more details. For this, either Server Rewards or Economics must be installed, depending on which one you want to use. Additionally, boxes with skin IDs mentioned in your config (leading to Copy Paste templates) can be sold in the Server Rewards shop, so it works both ways. Compatibility with No Escape If you don't use the No Escape plugin on your server, you can skip this section. Pocket Dimensions are just regular bases in many regards, so damaging any entities belonging to them will impose a Raid Block, and attacking any players inside will impose a Combat Block. Both of these count as an Escape Block. If this plugin detects that a player is Escape Blocked, several optional restrictions can be enabled/disabled in the Pocket Dimension config, to change how this Escape Block affects the gameplay for affected players: Entering Pocket Dimensions Exiting Pocket Dimensions Deploying Pocket Dimension Items into Boxes Picking up Pocket Dimension Boxes into Items Compatibility with other plugins Any plugin capable of issuing /utilising skinned items / spawning skinned Small Wooden Boxes, should work with Pocket Dimensions right out of the box (pun not intended). If there are any that have issues, please don't hesitate to let me know. Configuration (oxide/config/PocketDimensions.json) Below is a rundown of all the config values (and their defaults) that, combined with player permissions, will affect the gameplay on your server. Everything apart from the advanced stuff (like positioning/styling of the TC UI Button, or the CopyPaste templates) is explained in this section: "DimensionalBoxesSubtractItemConditionWhenPickingUp": 0.0, It would be highly inconvenient to be forced to constantly fix your Pocket Dimension box pretty much every time you pick it up, so this value will determine how much condition (in the range of 0.0 to 1.0, representing 0% to 100%) will be lost - and by default, it's 0.0, so the box will only lose condition when damaged. Set it to higher values (but never more than 1.0) to discourage players from moving their boxes too much, too effortlessly. "DimensionalBoxesAllowLockingWithLocks": false, Self-explanatory. By default, if a Key Lock or a Code Lock is placed on a Pocket Dimension box (be it automatically, with plugins, or manually, by players), the lock will just fall to the ground. It's to give the raiding players an opportunity to do the arguably HARDER option for raiding (statistically speaking) a dimension - from the inside. Set this to true to disable this behaviour and allow locks. "DimensionalBoxesAllowDamage": true, By default, boxes containing Pocket Dimensions will take damage - this enables the arguably easier raiding option, to raid from the outside, by destroying the box. How much damage is taken depends on the ResistanceDivisor value defined below. Set this to false if you want to make deployed Pocket Dimensions indestructible from the outside, by not letting players damage the box that contains it. "DimensionaBoxesDamageResistanceDivisor": 50.0, This value will determine how much stronger a Dimensional box is compared to its regular Small Wooden Box counterpart. For example, the default value of 50 means that it takes 50 times less damage, i.e 2% (1 divided over 50). Increase and decrease this value to make raiding from the outside harder or easier, accordingly. "DimensionalBoxesAlwaysHaveStability": true, This setting is true by default and it means that if a floor/foundation that the Dimensional box is placed on is suddenly destroyed, the box itself will remain floating in the air, instead of being destroyed along with it. It basically treats all boxes with Pocket Dimensions as if they were always placed directly on indestructible terrain. Of course, this never applies to Dimensions that are collapsing - no child Dimension in a "box-ception" sequence will ever remain floating "in Narnia". Set this to false if you want to make raiding the Dimensions from the outside easier if a box is not placed directly on actual terrain. "DimensionalBoxesCheckForPlayersInsideWhenPickingUp": true, If a player is inside of a Pocket Dimension and its box was just picked up, the player inside is now stuck, until the box gets re-deployed somewhere else. On the other hand... entire 30-man teams could be "smuggled" this way, all tucked quietly inside! Thus, by default, you cannot pick up pocket dimensions with players inside, and it's also not recommended to allow players to respawn inside, either, for the same reason. Set this to false if you really know what you're doing. "DimensionalBoxesCheckBuildingBlockOutsideWhenEnteringDimension": false, In vanilla Rust, if a box is unlocked, it can be opened, even if the player attempting it is not authorised on the TC. As such, this value is set to false, so that even if you're not authorised on the TC, you can still enter inside of a Dimensional Box. Set this value to true if you want that extra layer of security, in lieu of having a lock on the box that contains a Dimension. "DimensionalBoxesCheckTCAuthInsideWhenEnteringDimension": false, This setting, on the other hand, makes sure that an authorization on the TC is needed INSIDE of the pocket dimension itself (if there's one present at that point). For the same reason as above, it's set to false, but if you're feeling extra EXTRA paranoid, feel free to set it to false, and the only players that will be able to enter a Pocket Dimension were those originally authed on the TC before it as converted - and others bagged in later, but this requires the pocketdimensions.player.respawn permission, too. "DimensionalBoxesCheckTCAuthInsideWhenPickingUp": false, Similar to above, but related to picking up the Dimensional Box - of course, all the other checks for picking up are tested for, too (like building block outside). By default, this value is set to false, but if you want, you can toggle it to true, so that the only way to pick up a pocket dimension is to be authorised on its TC inside. "DimensionalPocketsAllowSolarAndWindmill": false, Allowing pretty much unlimited AND unchallenged electrical power inside of a Pocket Dimension can have several consequences for gameplay - and as such the default is false. Also, when the wires connection to the Solar/Wind generators on the roof are severed, the only way to restore them is with an intervention of an admin using "noclip". If you don't want your players to rely on fuel generators when inside of a Pocket Dimension, set this to true. "DimensionalPocketsAllowTestGenerators": true, Similar to the setting above, just dealing with Test Generators (either the static one, static invisible one, or deployable one). Normally those cannot be obtained by regular players (unless admins/plugins are involveds), and as such, this setting is true. If you have plugins/kits that make it possible for players to get them/spawn them, you should set it to false. "DimensionalPocketsTrapImmunityAfterTeleport": 1.5, When you enter an unknown Pocket Dimension, you never know if a shotgun trap or a turret are placed aiming right at the entry portal. Similarly, when you're inside of a Pocket Dimension, you don't know what's going on outside, so you can never be sure if somebody hasn't placed a trap aiming at the box containing the Dimension. Because of that, the default cooldown to be targeted by auto-traps right after a player enters/exits a pocket dimension is set to 1.5 seconds. Make it longer or shorter as you please, just not negative, and preferably no longer than 60 seconds. "DimensionalPocketsExteriorBlocksAllowNonDecayDamage": true, This effectively enables Collapsing an entire Pocket Dimension by attacking one of its external shell blocks (wall/doorway) from the inside - and as such, it's set to true. If you want to make the entire external shell impervious to damage (other than decay damage), set this to false. "DimensionalPocketsActualAltitudeMin": 3200.0, So here's the trick: in reality, the actual Pocket Dimension buildings exist at a randomly picked position on the map, but high up in the sky, and players are physically teleported to and from them - so it creates an illusion of being in a completely secluded place outside of "normal reality", where you can't even hear anything happening on the actual map. Similar to how Halloween Portals work. This setting defines the minimum random altitude at which Pocket Dimensions will physically reside for the duration of the wipe - by default, 3200 metres (3.2 kilometres, or roughly 2 miles). Adjust it if you have any other plugins that spawn things high up in the sky. IT'S NOT RECOMMENDED TO SET IT TO LOWER THAN 1000 - PLAYERS INSIDE MIGHT THEN HEAR THINGS HAPPENING ON THE ACTUAL MAP, LIKE C4, SUPPLY PLANES, HELI ETC. "DimensionalPocketsActualAltitudeMax": 3900.0, Similar to the setting above, this defines the maximum altitude. Both settings, together, effectively create a cuboid space high up in the sky, where Pocket Dimensions are expected to actually physically reside, at randomly picked locations. By default, this value is set to 3900.0, and there's a very good reason for that: AT EXACTLY 4000 METRES OF ALTITUDE, ALL PLAYERS WILL INSTANTLY DIE, INCLUDING ADMINS IN GOD MODE, AND THIS IS VANILLA RUST BEHAVIOUR. AS SUCH, IT IS NOT RECOMMENDED TO SET THIS VALUE TO HIGHER THAN DEFAULT. "DimensionaPocketsAllowVendingMachineBroadcast": false, While on the topic of maintaining an illusion - allowing players to effectively broadcast the location of their Pocket Dimension on the map would definitely break that illusion, so this value is false by default. Players who try to enable broadcasting in the Vending Machines deployed inside Pocket Dimensions will receive a warning instead, and the broadcast won't be enabled. Set this to true if you honestly couldn't care less about a visual detail like that. "DimensionalPocketsRespawningInsideRequiresDeployment": true, A safeguard against players trying to respawn inside bags/beds/towelrs in dimensions that are not currently deployed, to prevent the players from being effectively stuck inside (until they respawn somewhere else, at least, or until the box is re-deployed on the outside). "DimensionalPocketsTeleportingInsideRequiresDeployment": true, Similar to the setting above, but rather than dealing with respawning inside sleeping bags, this will prevent players from teleporting into a pocket dimension that is currently not deployed (works for any type of warp/teleport plugin). NOTE: Admins who are currently in noclip are allowed to teleport as they please, this is only checked for regular players. "DimensionalPocketsMaxInceptionDepth": 10, If you want to limit the amount of dimensions inside of dimensions inside of dimensions etc, this is the setting for you. If you change this value mid-wipe, only newly deployed boxes will be checked to see if they stay within the limit, and it won't affect already existing dimension trees. "DimensionalPocketsLocationMinTemperature": 15.0, When a new random location for a pocket dimension is checked, this setting will ensure that the biome-based temperature at 12PM (noon) will always be larger than this value. Decrease this value if you want a cooler climate. "DimensionalPocketsLocationMaxTemperature": 32.0, Similar to the setting above, this will put the upper limit on the biome-based temperature at 12PM (noon) when a new random location for a Pocket Dimension is considered. Increase this value if you don't mind a hotter climate. "EffectPlayerTeleportAppear": "assets/prefabs/missions/portal/proceduraldungeon/effects/appear.prefab", This is a purely cosmetic setting. When a player enters or exits a Pocket Dimension, it counts as a teleport. An audio-visual effect of your choosing will be played at the player's new location when that happens. By default, it's the same one used for the Halloween Dungeon. You can use most prefab effect on this list, just filter by "effect" in the "Search" box. "EffectPlayerTeleportDisappear": "assets/prefabs/missions/portal/proceduraldungeon/effects/disappear.prefab", The counterpart of the setting above - it just creates an effect at the old position of the player that's being teleported. And similarly, it's an effect from the Halloween Dungeon. Check out the prefab list I linked above if you want to use a different effect. You can use the Play FX plugin to test all the ones you can find in-game first, before you commit. "EffectsPlayerTeleportEnable": true, Effects can be loud and attract attention. Maybe you don't want. By default, the teleport effects are enabled, but if you set this setting's value to false, no special effects will be played while players are entering or exiting. "CheckEscapeBlockWhenEnteringDimensions": true, If you have No Escape installed, this will prevent players that are Escape Blocked from entering Pocket dimensions, like the name suggests. By default it's true. Feel free to change it to false if you believe that players raiding from the outside should still be able to enter inside. "CheckEscapeBlockWhenExitingDimensions": true, Again, if you don't have No Escape installed, ignore this setting and the next two after that. Similar to above, just when exiting the dimensions. Players will be informed that they cannot exit or enter dimensions for the reason of being Escape Blocked. Change the default value to false if you feel like the Escape Block should not matter for exiting. "CheckEscapeBlockWhenDeployingDimensions": true, No Escape specific setting number 3. You get it by now: if this setting is true (and it IS by default), Escape Blocked players won't be able to deploy any Pocket Dimension Items into their Box form that can be entered. Change the default "true" value to false if you consider this restriction to be too tight. "CheckEscapeBlockWhenPickingUpDimensions": true, And the last setting that's applicable to No Escape - it's the reverse of the one above. By default, players with an Escape Block imposed on them cannot pick up boxes with Pocket Dimensions inside. Change this to false if you beg to differ. "ForbiddenCommandsInsideDimensions": ["tp","warp","back","home","tpr","tpa","kit"], This blacklist contains the default chat and console commands that players without the admin permission will NOT be able run, while they themselves are within the Pocket Dimension layer altitude range. You can add or remove your own sets of commands (do not include the forward slash). "ForbiddenCommandsCheckingEnabled": true, If you set this to false, this will disable relying on the blacklist above, and any command will be permitted inside a Pocket Dimension to be executed by any player. "ConversionCostCurrencyUsed": "CustomItemAmount", By default, conversion from a normal base to a Pocket Dimension costs a certain physical Item that exists in Rust, and that setting is reflected by the value of "CustomItemAmount". If you instead prefer Server Rewards / Economics to be used to pay for conversion, set this value to "ServerRewards" or "Economics", respectively. You can even set this to "NoCost" - and the conversion will be free for the player (but the base will still need to be built correctly and maintained). "ConversionCostAmount": 500, 500 scrap to convert sounds like a moderate amount. 500 RP, or ¤500 however, do not - so you can adjust this amount to be higher or lower however you like,depending on your currency used. Only integers larger than 0 are accepted. "ConversionCostCustomItemShortname": "scrap", What else but "scrap" by default - the universal currency. Of course, if you picked Server Rewards or Economics instead, this setting won't matter in the slightest. Whatever valid item shortname from the approved list you pick, this is what players will be charged for conversion. Since not everything can be put in the TC, it will also check the player's inventory for that item. "ConversionCostCustomItemOverrideName": null, Again, this only applies to the "CustomItemAmount" option. If you want to use a completely custom item, for example, one registered by another plugin, that has a different icon/behaviour, those items often have a custom name. If this value is null (with no quotes) or empty (just the "" quotes), the Item's definition name translated to the client's language will be used. "ConversionCostCustomItemSkinID": 0, And finally: if you only want to accept certain skinned variants of an item - again, useful for plugins with custom items like Water Bases - set the default value of 0 to any valid item ID available on the Steam Workshop. This setting will also be ignored if your currency is not set to "CustomItemAmount". There's a few more settings, but these are all the most important ones that will shape your unique server experience. Translation support (oxide/lang/en/PocketDimensions.json) Almost every string the players see, including the text displaying in the chat and the GUI, can be edited. Just load the plugin and let it generate the file - after you edit it, reload the plugin. Hooks/API (for plugin developers) You can call these through Interface.CallHook() as well, if you don't want to add a [PluginReference] //get an array of BasePortal entities that are assigned to Dimensional Pockets // - or null if none are present var portalArray = PocketDimensions?.CallHook("GetDimensionalPortals") as BasePortal[]; //get an array of BuildingManager.Building instances that are assigned to Dimensional Pockets // - or null if none are present var pocketArray = PocketDimensions?.CallHook("GetDimensionalPockets") as BuildingManager.Building[]; //get an array of StorageContainer entities that are assigned to Dimensional Pockets // - or null if none are present var boxArray = PocketDimensions?.CallHook("GetDimensionalBoxes") as StorageContainer[]; //pass a BasePortal entity and get a boolean true if it's assigned to a Dimensional Pocket // - or false if it's not var isDimensionalPortal = PocketDimensions?.CallHook("CheckIsDimensionalBox", basePortal).Equals(true); //pass a BuildingManager.Building instance and get a boolean true if it's assigned to a Dimensional Pocket // - or false if it's not var isDimensionalPocket = PocketDimensions?.CallHook("CheckIsDimensionalPocket", building).Equals(true); //pass a StorageContainer entity and get a boolean true if it's assigned to a Dimensional Pocket //- or false if it's not var isDimensionalBox = PocketDimensions?.CallHook("CheckIsDimensionalBox", storageContainer).Equals(true); //pass a BuildingBlock entity and get a boolean true if it's assigned to a Dimensional Pocket SPECIFICALLY as a Shell Block // - or false if it's not var isDimensionalShellBlock = PocketDimensions?.CallHook("CheckIsDimensionalShellBlock", buildingBlock).Equals(true); //pass a DecayEntity entity and get a boolean true if inside a DimensionalPocket Building // - or false if it's not var doesBelongToDimensionalPocket = PocketDimensions?.CallHook("CheckBelongsToDimensionalPocket", decayEntity).Equals(true); //pass a global::Item instance and get a boolean true if it's assigned to a Dimensional Pocket // - or false if it's not. //You must also specify whether you're looking for "fresh", unopened dimensions in that item OR an already existing dimensions. //If you want to check both cases, you must do two separate checks, passing a different boolean (true when looking for fresh, //false when not) as the second (counting from 0th) argument. var isDimensionalItem = PocketDimensions?.CallHook("CheckIsDimensionalItem", item, lookingForFresh).Equals(true);$24.99- 19 comments
- 7 reviews
-
- 6
-

-

-
- #dimensions
- (and 11 more)
-
Version 1.0.0
20 downloads
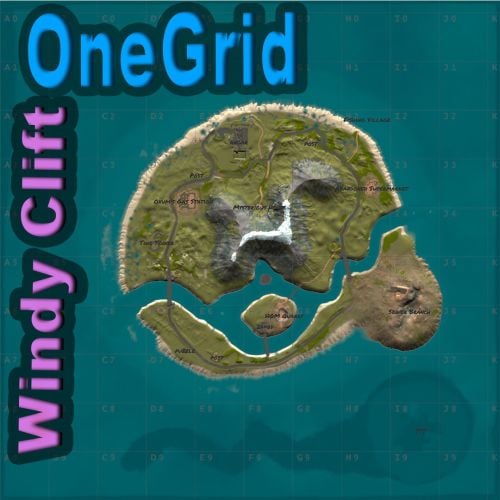
WindyCleft (OneGrid) A small map in the (OneGrid) style with unique monuments featuring intriguing puzzles and a fully customized underwater monument. Specially designed for OneGrid servers and servers with up to 150 players online. Custom Monuments: Fuel processing plant – a semi-ruined factory with two floors. Two Tower – Two towers connected high in the mountains with military crates. Mysterious house – at first glance, it’s just an ordinary wooden house in the forest under the mountain, but it’s only at first glance. The house hides a secret military bunker with a puzzle and security. You’ll find many interesting things there. Angar – it used to be used to unload military trains, but after the war in 2050, the island’s new residents started using the hangar to repair their cars. However, from the past, there is one room that no one has been able to open yet; they say there is something very valuable inside. Zavod – an old factory that once supplied the island with fuel; now only one external fuel processor remains. Post – a small roadside monument. Puzzle – a monument from the Hapis map slightly modernized. ??? – During a rescue operation with a sunken ship, Captain Morrison discovered an unusual underwater signal. He reported this information to the Cobalt Corporation, and since then, no one has seen them. Old residents say there was once an island there, but it sank after a volcano eruption. FacePunch Monuments: Fishing village Oil Rig SuperMarket Gas Station HQM Quarry Sewer Branch The map will be constantly supported and updated. If you have any questions, feel free to message me on Discord.$19.00 -
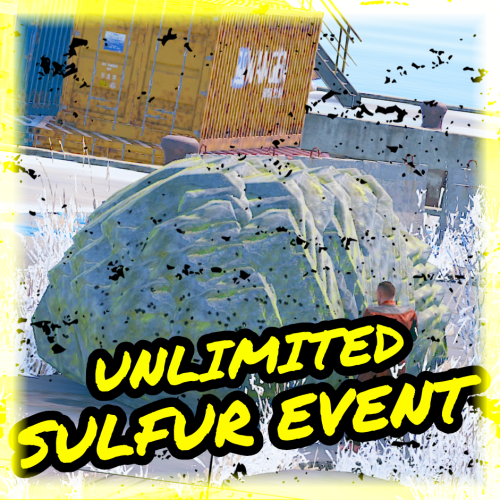
Version 1.7.1
197 downloads
During the Unlimited Sulfur Event, a large sulfur node appears at a set location(s) and is marked on the map, drawing attention to all players. This node provides unlimited sulfur, giving players a chance to collect a significant amount of sulfur within a limited time. This event can add an extra layer of competition and cooperation among your players as they rush to take advantage of these lucrative opportunities. Features Spawns an unlimited sulfur node/ore for a limited time. Ability to start the SulfurEvent manually or automatically at minimum and maximum intervals. Configuration options for SulfurEvent duration, minimum player count, UI location, and more. Customizable event start and end messages. Option to play a sound and visual effect when the event starts. Map markers and UI elements to indicate the active event and provide information to players. Game tips and chat messages to inform players about the event. Ability to set and manage sulfur node spawn positions. Commands to manage the SulfurEvent, including starting and stopping the event, setting spawn positions, listing positions, deleting positions, and viewing available commands. Event Overlap Prevention: Prevents the SulfurEvent from overlapping with the Stone/Metal Event. If overlap occurs, the plugin will retry starting the event after a configurable interval. User Interface: UI customization options include setting the UI location with X and Y coordinates. Enable proximity UI visibility mode and/or a "Players Here: X" Proximity UI. Gather Amounts: Set minimum and maximum gather amounts for sulfur ore and charcoal to control player rewards. Lightning Effects: Enable lightning effects during the event with customizable minimum and maximum intervals. Monument Spawn Locations: Added monument spawn locations that can be individually enabled or disabled. Customize spawns at specific monuments while excluding others (e.g., enable spawns at "xlarge/launch_site_1.prefab" and "medium/nuclear_missile_silo.prefab," but disable spawns at "OilrigAI" and "OilrigAI2"). Monument Spawn Limits: Set a limit for the number of spawns at each monument. For example, limit "roadside/gas_station_1.prefab" to 2 spawns, choosing from 3 Gas Stations if available. Monument Spawn Location Offsets: Customize the offsets for monument spawn locations to fine-tune the exact spawn positions at each monument. Commands /sulfurevent start - Start SulfurEvent /sulfurevent stop - Stop SulfurEvent /sulfurevent add <name> - Set new SulfurEvent spawn position /sulfurevent list - List all spawn positions /sulfurevent clear - Clear all spawn positions /sulfurevent delete <name> - Delete a spawn position /sulfurevent - View all commands Console Commands - SulfurStart, SulfurStop, SulfurList, SulfurListClear Permissions sulfurevent.admin - Allows the use of SulfurEvent commands. Possibly Incompatible plugins: "AlwaysHotSpot" , "InstantGather" Default Config { "Only Command Start Event": false, "Minimum Players to Start Event": 1, "Prevent Overlap with Metal/Stone Event": true, "Prevent Overlap Retry Timer (seconds)": 180.0, "Event Minimum Interval (seconds)": 3600, "Event Maximum Interval (seconds)": 7200, "Event Duration Seconds": 1230, "Event Start Notification Sound": true, "Event Start Explosion Effects": true, "Event Chat Messages": true, "Event GameTip Messages": true, "Event GameTip Duration (seconds)": 7.0, "Event Start Message": "<color=yellow>Sulfur Event</color> <color=white>Has Started! Check The Map!</color>", "Event End Message": "<color=yellow>Sulfur Event</color> <color=white>Has Ended!</color>", "UI Enabled": true, "UI Location X": 0.38, "UI Location Y": 0.8, "UI Handwriting Font": true, "UI Style (1 = With UI Msg, 2 = No UI Msg)": 1, "UI Message": "Unlimited sulfur node marked on map!", "Proximity UI Visibility Mode": false, "Proximity UI Visibility Range": 350, "Proximity UI 'Players Here: X'": true, "Proximity UI 'Players Here' Visibility Range": 70, "MapMarker Enabled": true, "MapMarker Colour": "#050505", "MapMarker Colour2": "#e5ff00", "MapMarker Radius": 0.25, "MapMarker Alpha": 0.7, "MapMarker Name/Message": "UNLIMITED SULFUR NODE", "Sulfur Ore Minimum Gather Amount": 1, "Sulfur Ore Maximum Gather Amount": 5, "Charcoal Minimum Gather Amount": 1, "Charcoal Maximum Gather Amount": 2, "Delete SulfurNode at Event End": true, "SulfurNode is Gatherable": true, "SulfurNode Size 1-100": 30, "SulfurNode Size Radius": 0.1, "Lightning during Event": true, "Lightning Min Interval (seconds)": 1.0, "Lightning Max Interval (seconds)": 60.0, "SulfurNode Spawnmodes ('All' or 'Random')": "Random", "SulfurNode Spawnmode 'Random' Amount": 2, "Monument Spawn Locations": { "xlarge/launch_site_1.prefab": true, "medium/nuclear_missile_silo.prefab": true, "large/military_tunnel_1.prefab": true, "large/airfield_1.prefab": true, "small/sphere_tank.prefab": true, "large/water_treatment_plant_1.prefab": true, "railside/trainyard_1.prefab": true, "medium/radtown_small_3.prefab": true, "roadside/gas_station_1.prefab": true, "roadside/supermarket_1.prefab": true, "large/powerplant_1.prefab": true, "lighthouse/lighthouse.prefab": true, "roadside/warehouse.prefab": true, "medium/junkyard_1.prefab": true, "small/satellite_dish.prefab": true, "harbor/harbor_1.prefab": true, "harbor/harbor_2.prefab": true, "arctic_bases/arctic_research_base_a.prefab": true, "military_bases/desert_military_base_a.prefab": false, "military_bases/desert_military_base_b.prefab": false, "military_bases/desert_military_base_c.prefab": false, "military_bases/desert_military_base_d.prefab": false, "OilrigAI": false, "OilrigAI2": false, "ferry_terminal_1": false }, "Monument Spawn Limits": { "xlarge/launch_site_1.prefab": 1, "medium/nuclear_missile_silo.prefab": 1, "large/military_tunnel_1.prefab": 1, "large/airfield_1.prefab": 1, "small/sphere_tank.prefab": 1, "large/water_treatment_plant_1.prefab": 1, "railside/trainyard_1.prefab": 1, "medium/radtown_small_3.prefab": 1, "roadside/gas_station_1.prefab": 3, "roadside/supermarket_1.prefab": 3, "large/powerplant_1.prefab": 1, "lighthouse/lighthouse.prefab": 2, "roadside/warehouse.prefab": 3, "medium/junkyard_1.prefab": 1, "small/satellite_dish.prefab": 1, "harbor/harbor_1.prefab": 1, "harbor/harbor_2.prefab": 1, "arctic_bases/arctic_research_base_a.prefab": 1, "military_bases/desert_military_base_a.prefab": 1, "military_bases/desert_military_base_b.prefab": 1, "military_bases/desert_military_base_c.prefab": 1, "military_bases/desert_military_base_d.prefab": 1, "OilrigAI": 1, "OilrigAI2": 1, "ferry_terminal_1": 1 }, "Monument Spawn Location Offsets": { "xlarge/launch_site_1.prefab": { "x": 105.0, "y": 3.5, "z": 7.5 }, "medium/nuclear_missile_silo.prefab": { "x": 36.3, "y": -33.2, "z": -1.8 }, "large/military_tunnel_1.prefab": { "x": -13.5, "y": 13.75, "z": 35.0 }, "large/airfield_1.prefab": { "x": 0.0, "y": 0.5, "z": -27.5 }, "small/sphere_tank.prefab": { "x": 1.6, "y": 57.0, "z": 8.0 }, "large/water_treatment_plant_1.prefab": { "x": -51.7, "y": 1.5, "z": -64.8 }, "railside/trainyard_1.prefab": { "x": -41.8, "y": 39.4, "z": -40.8 }, "medium/radtown_small_3.prefab": { "x": -3.5, "y": -2.6, "z": -4.5 }, "roadside/gas_station_1.prefab": { "x": 0.8, "y": 9.5, "z": -6.0 }, "roadside/supermarket_1.prefab": { "x": -4.0, "y": 6.0, "z": -3.5 }, "large/powerplant_1.prefab": { "x": 2.3, "y": 9.65, "z": 32.85 }, "lighthouse/lighthouse.prefab": { "x": 0.0, "y": 60.7, "z": 0.36 }, "roadside/warehouse.prefab": { "x": 0.0, "y": 6.6, "z": -7.7 }, "medium/junkyard_1.prefab": { "x": -3.0, "y": 0.3, "z": -13.0 }, "small/satellite_dish.prefab": { "x": -5.0, "y": 9.5, "z": -10.7 }, "harbor/harbor_1.prefab": { "x": 44.0, "y": 22.0, "z": -0.5 }, "harbor/harbor_2.prefab": { "x": 41.5, "y": 5.3, "z": -5.0 }, "arctic_bases/arctic_research_base_a.prefab": { "x": -24.5, "y": 0.5, "z": 13.0 }, "military_bases/desert_military_base_a.prefab": { "x": 0.0, "y": 0.0, "z": 0.0 }, "military_bases/desert_military_base_b.prefab": { "x": 0.0, "y": 0.0, "z": 0.0 }, "military_bases/desert_military_base_c.prefab": { "x": 0.0, "y": 0.0, "z": 0.0 }, "military_bases/desert_military_base_d.prefab": { "x": 0.0, "y": 0.0, "z": 0.0 }, "OilrigAI": { "x": -13.5, "y": 23.35, "z": -13.7 }, "OilrigAI2": { "x": -33.0, "y": 32.55, "z": 13.0 }, "ferry_terminal_1": { "x": 0.0, "y": 0.0, "z": 0.0 } } }$7.47 -
Version 1.1.6
336 downloads
Add some excitement to your Rust server with the Siren plugin! This plugin lets you play a loud siren sound that all players can hear, perfect for creating intense moments in the game. Key Features: Siren Command: Players with the appropriate permissions can activate the siren using a simple console or chat command. Customizable Siren Duration: Easily set the duration for how long the siren should play. Configurable Sound Path: Change the siren sound to fit the theme of your server by specifying a different sound path. Notification System: Enable or disable notifications that alert players when the siren is triggered. Permission-Based Usage: Ensure only authorized players can activate the siren using the siren.use permission. Commands: 1. Play Siren: Console: siren Chat: /siren 2. Set Siren Duration: Console: siren.setduration <duration> 3. Set Siren Sound Path: Console: siren.setsound <soundpath> 4. Set Notification Message: Console: siren.setnotification <message> 5. Enable/Disable Notification: Console: siren.enablenotification <true|false> Configuration: The plugin’s configuration is highly customizable, allowing you to tailor it to your server’s needs. The default configuration includes: Command to trigger the siren: "siren" Default siren duration: 15.0 seconds Default siren sound path: "assets/prefabs/io/electric/other/alarmsound.prefab" Default notification message: "The siren has been triggered!" Notifications enabled: true Debug mode: false Installation: Place the Siren plugin in your oxide/plugins directory. Start your Rust server to generate the default configuration file. Modify the configuration file located at oxide/config/Siren.json to suit your preferences. Reload the plugin to apply the new configuration. Permissions: siren.use: Grants permission to use the siren command.Free -
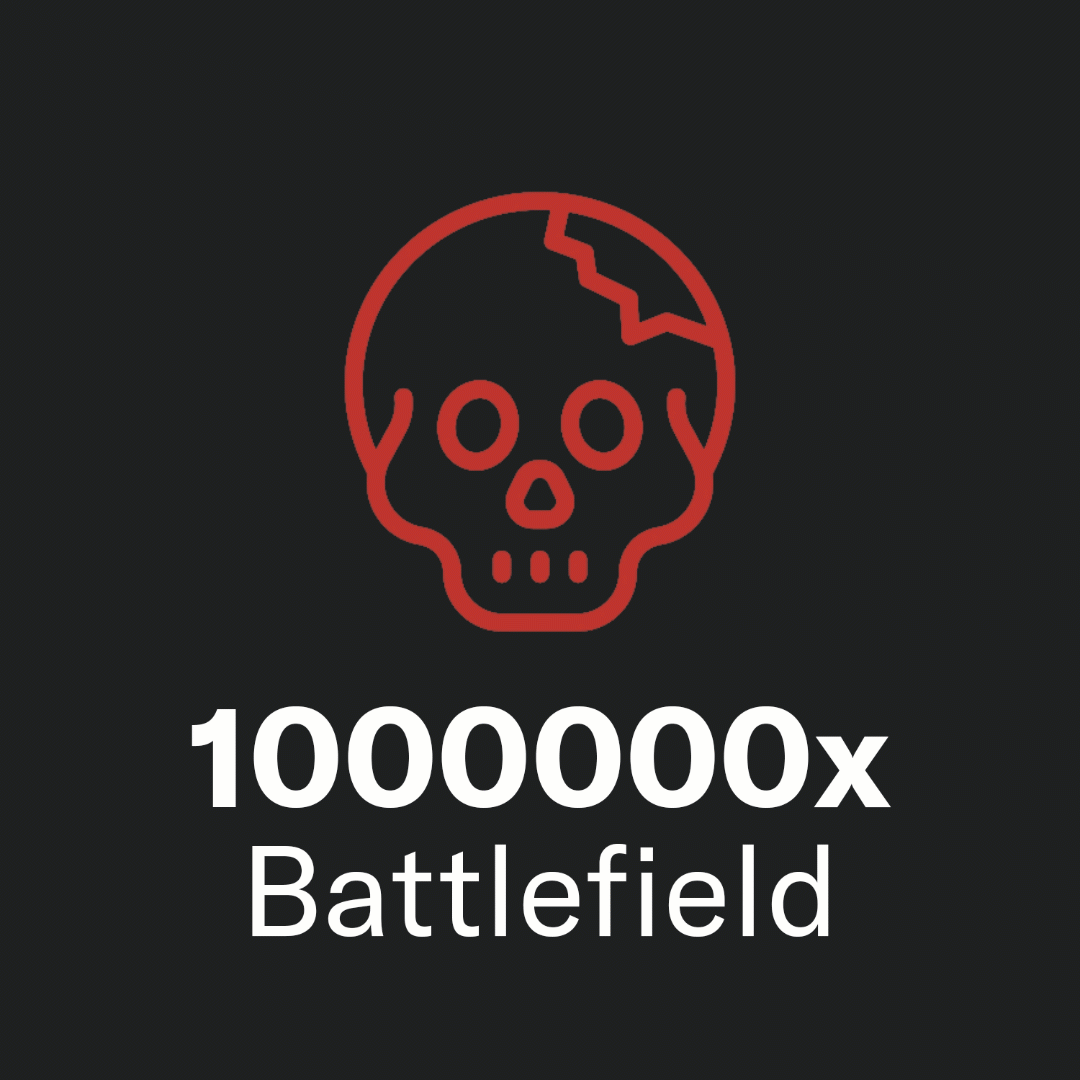
Version 1.4
72 downloads
For beginners and certified amateurs alike, setting up a Rust server can quickly become time-consuming. This is why we offer you our all-in-one server setup. With this, your server will be ready in 10 minutes. This server setup is a starting base for your future Battlefield server. Unlimited resources, armed from spawn, try to survive on the battlefield! Documentation detailing the installation process is provided. It also includes explanations of the plugins as well as the steps to take if you wish to make changes. (And we can be reached in case of problems) Server Features: 1000000x Gather Rates (It's ridiculous) No need for resources to build (secret inventory) 5 Preconfigured Kits (including a VIP) Custom WelcomePanel Shop UI Kill Rewards (the player earns money that he can spend in the shop) Playing Rewards (players earn $100 every 30 minutes) Always Day No BluePrint/All Unlock Permission Groups (default, VIP, Moderator & Admin) Inventory Save SkinBox BGrade InstantCraft on all items NoWorkbench No-Escape RemoverTool SpawnHeli + More! Plugins are not provided with this pack. You need to download them yourself. A document containing the main links is provided. For optimal operation, this setup requires the purchase of third-party paid plugins (notified under the "not required" plugins above). However, you don't have to use all the plugins if you don't want to. For more information, visit our website.$6.49- 4 comments
- 1 review
-
- 1
-

-
- #battlefield
- #1000000x
- (and 6 more)
-

Version 1.1.1
58 downloads
Forget about emoji, STICKERS are the next best thing to use in chat. This plugin gives you and your players the ability to unlock stickers that can be used to express yourself in chat. Besides that, it adds a sticker market: Here stickers can be traded, which adds a great way for your players to make some good money on rare stickers. Stickers are shown by using their :tag: in chat. By default, stickers are shown to every online player (players can turn them off individually by command). They popup on their screen and disappear in a few seconds. The possibilities are endless, and a lot of fun and interaction are guaranteed. You can add your own memes, cat pictures, word art or whatever image you can think of, tip: sneaky spiders give good results. Sticker Editor The main command for stickers is /sticker, but you will need some stickers first! Add any new stickers by using this command: /sticker add :stickername: https://imgur.com/yoursticker.png After adding a sticker, you can find it in the sticker browser. Open the UI by using: /sticker For admins (or people with the right permission) there is an in game sticker editor. From the browser, click the pencil icon on any sticker to start editing the sticker. The 3x3 grid sets your sticker’s start position, then you can align your sticker with the other values. A group can be entered or chosen by clicking the … icon. The 4 main tiers are only used for colors and not for real rarity, the only important tier here is the HIDE tier. Every sticker in this tier will not be available for players. Stickers are added in the hidden tier by default, so make sure to select another tier when you finish editing your sticker. The TOTAL field is the maximum amount of copies of this sticker to be owned by players in total *. The right field shows the current number of owners. * Stickers are limited! Every sticker added to the plugin requires you to set up a maximum number of ‘owners’ for that sticker. The sticker can only be unlocked this many times. Note that players can also have duplicate stickers. A sticker that has almost reached its max owners will be way harder to get when buying stickers. This rarity is useful in the sticker market and the recycler. In the config file are settings for inactive players. After a certain amount of inactive days, X stickers will be taken from the player and become available again in the market. Sticker Browser Browse your stickers and click any sticker for details. The sticker browser has handy filters to quickly find the sticker you are looking for. Use the lock icons to toggle (un)locked stickers. Sorting is possible by age, a-z, rarity, collections (groups) and availability. On the right side of the screen all sticker groups are shown. These are basically collections of stickers that can be used like sticker packs. Collect them all! Click any of the stickers to get more details, trade or recycle them. The eye icon on top of the sticker sends a chat message to show the sticker. Only visible for admins are the edit button (pencil) and lock/unlock button. The number on the top right shows the amount of this sticker you own. This sticker will be shown if a player who owns it uses :care: in global chat. Buy Stickers Players need sticker tokens to be able to unlock new random stickers. Different packs with tokens can be set up in the config file. The (token) price of a sticker can also be configured. At the moment only random stickers are available. You can unlock specific stickers for players by command. Tokens can also be given by (server) command, for example to be used as a vote or quest reward. Sticker Market In the sticker market, players can trade stickers they own. After setting a price, the sticker will be shown in the list of available trades. Other players can then buy the sticker and ownership will be transferred. Sellers get paid in the same currency as the one setup for buying sticker tokens. In case you use items as a currency, the seller has to be online to make a trade. Failed trades are being removed after a (configurable) amount of time. Sticker Recycler Besides trading your stickers, you can also decide to recycle them for sticker tokens. The reward for recycling depends on the rarity of the sticker at that moment and the amount of the same sticker being recycled. Recycling more of the same sticker results in higher rewards. Permissions zstickers.admin - needed for all sticker management zstickers.use - enables /sticker command zstickers.trade - allows to trade stickers zstickers.teamchat - allows players to use stickers in team chat (ninja mode) Commands /sticker - almost everything can be done inside the UI /sticker add :stickername: https://imgur.com/sticker.png - add stickers /sticker give <player name or id> <amount> - gives player x number of sticker tokens /sticker unlock <player name or id> :stickername: - unlocks a sticker for a player /sticker hide - hide all stickers /sticker show - show stickers again There are some debug commands in case something looks off (please report): /sticker list - prints your unlocked stickers to chat /sticker clearallmystickers - clears all your stickers /sticker valid - validates all stickers and their owners /sticker update - refresh all sticker stats / find missing stickers /sticker cleanuptrades - manually cleans up sticker trades /sticker debug - logs what's happening to console /sticker stats - shows totals of stickers and their availability Console commands These commands can be used by admins and other plugins. sticker givetokens <player name or id> <amount> - gives a player sticker tokens sticker unlock <player name or id> :stickername: - unlocks a sticker for a player sticker import <sticker pack name> - import sticker pack, see below for more info sticker import <sticker pack name> hidden - import a sticker pack but hide all stickers instead of using the sticker pack tiers Config & Data The config file is pretty straight forward. You can add or remove token packs. The currency is set by picking one of the numbers. If you want to use items as currency, make sure to setup the shortname of the item. Optionally you can add a skin ID too, so only items with a certain skin can be used to buy sticker tokens. The plugin will create 3 files in /oxide/data/ZStickers/: market_data.json - contains all trades, this data is automatically managed/wiped player_stickers.json - contains ownership data and token balance, you CAN wipe this, but this is not required: Players can keep their stickers forever, as long as they are active. stickers.json - contains all sticker data - don't wipe this if you want to keep your stickers. If you wipe this file, make sure to wipe the others too. New in version 1.1.0 is the ability to configure the buttons used to buy stickers. Check out the config below: The first item is the default buy-button (buy 1 sticker for 5 tokens). The 2nd item is a new custom buy button: Here you but 5 stickers at once for 22 tokens. Optionally you can also define what permission is needed to see the button and what collection (group) the sticker should be picked from. Import Sticker Packs Sticker packs are a way to easily add or share a bunch of stickers. They come with predefined settings, so it's basically plug and play. For sticker packs, a data folder called 'import' is created /oxide/data/ZStickers/import/ Sticker packs can be added here to easy import a list of stickers. If the import folder is not there, you can create it yourself. Add the sticker pack json file(s) to the folder and run the import command from your console. Results will be shown in your console. Stickers with the same :tag: can not be added this way. Make sure to remove other sticker first. If you don't want the stickers to be visible for everyone right away, add the parameter 'hidden' to the import command. This will put all stickers in the hidden tier. Console command for example: sticker import SuperCoolPack hidden Dependencies & Plugin support Required plugins: ImageLibrary Optional currency plugins: ServerRewards, ZCoins Economics plugin is added but untested, let me know if this works for you. This plugin will be fully supported. Note: You can use any item with any skin if you're not using any of these plugins on your server. Support / Contact me If you encounter any problems or if you have any suggestions, feature requests or questions, please message me on Discord (josh.z) for the fastest response. This plugin is made with love and I feel it's never really 'done'. I'd love to discuss your ideas for it on my Discord server here: https://discord.gg/KveEUQhGsZ There's also a cool dude there (Nexus) who always sees your questions quicker than I do. If my response takes too long, find Nexus!$25.00 -
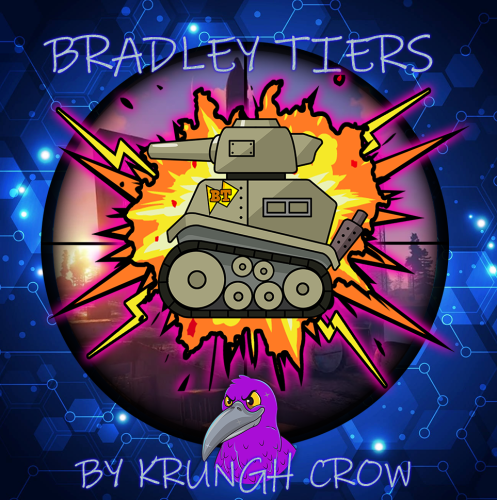
Version 1.3.2
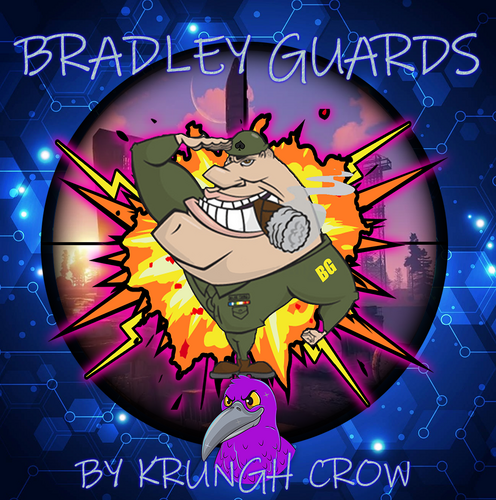
4,734 downloads
Bradleys now spawn in Tiers with small config and lootcrate spawn options. Features : Spawns as Easy,Medium,Hard or Nightmare Tiers Easy configuration and setup BradleyGuards and BradleyOptions will disable their HP and Cratedrop settings automaticly (Krungh Crow versions). Works on any Bradley no exceptions Spawn and Kill Messages Option to make a vanilla bradley spawn instead of a Tiered one at random. Set a extra reward in the form of Economics or ServerRewards Support for Tiered loot systems (using it set to false by default) v1.0.3 Showing Bradley tier on 1st damage then after each 2 minutes will show it again. API for other developers is made available Permissions : bradleytiers.use : To be able to use the /bt info chatcommand Commands : /bt info : Just prints plugin info version and author to chat Configuration : Want a certain item to spawn as a blue print just add .bp behind its shortname ! Example of custom items like the ExtendedRecycler plugins recycler item. { "probability": 0.6, "shortname": "box.repair.bench", "name": "Recycler", "skin": 1594245394, "amountMin": 1, "amount": 1 }, { "Main config": { "Debug": false, "Chat Prefix": "[<color=yellow>Bradley Tiers</color>] ", "Use GUIAnnouncement": false, "Reply to player in chat on attack": true, "Reply to player in chat on reward": true, "Show kills/spawns in Global chat": true, "Use Notify": false, "Notify profile ID": 0, "Include Vanilla Bradley": false, "Include ArmoredTrain Bradley": false, "Include Convoy Bradley": false, "Include SatDish/Harbor Event Bradley": false, "Bradley Tiers can interact with NPC": false }, "Tier Names": { "Vanilla": "Vanilla", "Easy": "Easy", "Medium": "Medium", "Hard": "Hard", "Nightmare": "Nightmare" }, "Kill Rewards": { "Use Economics?": true, "Use ServerRewards?": false, "Vanilla amount": 500, "Easy amount": 1000, "Medium amount": 1500, "Hard amount": 2000, "Nightmare amount": 2500 }, "Loot Tables": { "Use lootsystem": true, "Use Random Skins": false }, "Easy Bradley": { "Bradley Health": 1500, "Bradley Max Fire Range": 100, "Bradley Bulletdamage (15 is vanilla)": 15.0, "Bradley Throttle Responce": 1.0, "Bradley Accuracy (0-1)": 0.6, "Bradley Damage scale (0-1)": 0.6, "Add Custom Loot": true, "Bradley Max crates after kill": 4, "Spawn Min Amount Items": 2, "Spawn Max Amount Items": 6, "Loot Table": [ { "probability": 1.0, "shortname": "ammo.pistol", "name": "", "skin": 0, "amountMin": 5, "amount": 5 } ] }, "Medium Bradley": { "Bradley Health": 1800, "Bradley Max Fire Range": 100, "Bradley Bulletdamage (15 is vanilla)": 15.0, "Bradley Throttle Responce": 1.0, "Bradley Accuracy (0-1)": 0.75, "Bradley Damage scale (0-1)": 0.7, "Add Custom Loot": true, "Bradley Max crates after kill": 5, "Spawn Min Amount Items": 2, "Spawn Max Amount Items": 6, "Loot Table": [] }, "Hard Bradley": { "Bradley Health": 2000, "Bradley Max Fire Range": 100, "Bradley Bulletdamage (15 is vanilla)": 15.0, "Bradley Throttle Responce": 1.0, "Bradley Accuracy (0-1)": 0.8, "Bradley Damage scale (0-1)": 0.85, "Add Custom Loot": true, "Bradley Max crates after kill": 8, "Spawn Min Amount Items": 2, "Spawn Max Amount Items": 6, "Loot Table": [] }, "Nightmare Bradley": { "Bradley Health": 2500, "Bradley Max Fire Range": 100, "Bradley Bulletdamage (15 is vanilla)": 15.0, "Bradley Throttle Responce": 1.0, "Bradley Accuracy (0-1)": 0.85, "Bradley Damage scale (0-1)": 1.0, "Add Custom Loot": true, "Bradley Max crates after kill": 12, "Spawn Min Amount Items": 2, "Spawn Max Amount Items": 6, "Loot Table": [] } } Localisation : English language file included to use a different language just make a new file in the language folder. { "Bradley": "Bradley", "Destroyed": "finally destroyed the", "Info": "\n<color=green>Available Commands</color>\n<color=green>/bt info</color> : Shows info on version/author and commands", "InvalidInput": "<color=red>Please enter a valid command!</color>", "KillRewardMessage": "You recieved {0}$ for Destroying the {1} BradleyApc", "AttackMessage": "You are taking on a {0} Bradleyapc", "Version": "Version : V", "NoPermission": "<color=green>You do not have permission to use that command!</color>", "KillNotification": "<color=orange>{0}</color> Destroyed a {1} BradleyApc", "SpawnMessage": "A {0} Bradley has spawned around {1}" } API : When a Bradley has been updated to a Bradley Tier OnBradleyTiersVanillaSpawned(BradleyAPC bradley) OnBradleyTiersEasySpawned(BradleyAPC bradley) OnBradleyTiersMediumSpawned(BradleyAPC bradley) OnBradleyTiersHardSpawned(BradleyAPC bradley) OnBradleyTiersNightmareSpawned(BradleyAPC bradley) When a Bradley Tier has been destroyed OnDestroyBradleyTiersVanilla(BradleyAPC apc, HitInfo info) OnDestroyBradleyTiersEasy(BradleyAPC apc, HitInfo info) OnDestroyBradleyTiersMedium(BradleyAPC apc, HitInfo info) OnDestroyBradleyTiersHard(BradleyAPC apc, HitInfo info) OnDestroyBradleyTiersNightmare(BradleyAPC apc, HitInfo info) When a Bradley Tier is taking damage OnBradleyTiersHitVanilla(BradleyAPC bradley, HitInfo info) OnBradleyTiersHitEasy(BradleyAPC bradley, HitInfo info) OnBradleyTiersHitMedium(BradleyAPC bradley, HitInfo info) OnBradleyTiersHitHard(BradleyAPC bradley, HitInfo info) OnBradleyTiersHitNightmare(BradleyAPC bradley, HitInfo info)Free- 196 comments
- 12 reviews
-
- 12
-
-
-
- #bradley
- #krunghcrow
- (and 4 more)
-
Version 1.6.5
8,123 downloads
BradleyGuards minigame will make more fun of the boring Bradley. Spawning bombs molotovs and a Tank Crew Features : Minigame with Scientist NPC spawning after Bradley gets destroyed and various events during its attack phase It will throw random Bombs and Molotov when attacked. Hardmode will throw the Bombs and Molotov towards player instead around the Bradley When destroyed the Bradley does a close range Last Ditch Effort if the Driver is still alive and gets a last air support As of version 1.1.1 napalm support will be set to target player instead of Bradley position Give the NPC the choice of using some predefined outfits or use the vanilla Scientist Outfits Predefined weapon or a different weapon through config if using outfits Crew will be Despawned upon plugin unload or reload Compatible with NPCKITS Support for BetterNpcNames (v1.0.2 and higher) Support for Kits Permission system Warnings : backup your configs before plugin updates This is not compatible with BradleyControl Plugin !!!!! (since version 1.0.5) Version 1.4.0 has new options for MLRS and Convoy Bradleys "External Plugins": { "Armored Train : Can trigger Events": false, "Convoy : Can trigger Events": false, "SatDish/Harbor Event : Can trigger Events": false, "BradleyDrops : Can trigger Events": false, "BetterNpcNames : Driver Title": "Pilot", "BetterNpcNames : Guard Title": "Commander", "BetterNpcNames : Gunner Title": "Grunt" }, "Last Ditch Effort MLRS rocket Amount": 15 Permissions : BradleyGuards.ShowMessages (to show interaction messages) BradleyGuards.ShowKillMessages (to show messages after bradley is destroyed) Commands : (new in V1.0.5) /bginfo : Shows the available commands/version/author Logfiles : Log files are found in the oxide.logs folder Will log the Player and info regarding the spawns after destroying the Bradley Configuration : Example config below : { "Global NPC dont target": true, "External Plugins": { "Armored Train : Can trigger Events": false, "Convoy : Can trigger Events": false, "SatDish/Harbor Event : Can trigger Events": false, "BradleyDrops : Can trigger Events": false, "BetterNpcNames : Driver Title": "Pilot", "BetterNpcNames : Guard Title": "Commander", "BetterNpcNames : Gunner Title": "Grunt" }, "Bradley Settings": { "Change Values": true, "Bradley Health": 2222, "Bradley Max Fire Range": 100, "Bradley Throttle Responce": 1.0 }, "Bradley Loot": { "Change Values": true, "Bradley Max crates after kill": 4 }, "Bradley Canon": { "Change Values": true, "Bradley Canon Fire delay": 0.3, "Bradley Canon Firerate": 0.25 }, "Bradley Machinegun": { "Change Values": true, "Bradley Machinegun Bullet Damage": 15, "Bradley Machinegun Firerate": 0.06667 }, "Event Settings": { "Bradley Crew Max Spawn Distance": 10, "Bradley Crew Max Roam Distance": 20, "Bradley Crew Body to Bags": true, "Max throwing range of a Grenade": 25.0, "Max Grenades per trigger": 1, "Max throwing range of a Molotov": 25.0, "Max Molotovs per trigger": 1, "Use Firerockets (instead of Molotovs)": false, "Hard Mode : Throws towards player (Grenades)": true, "Hard Mode : Max Grenades per trigger": 1, "Hard Mode : Max radius of a Grenade on player": 15.0, "Hard Mode : Throws towards player (Molotovs)": true, "Hard Mode : Max Molotovs per trigger": 1, "Hard Mode : Max radius of a Molotov on player": 15.0, "Napalm Support": true, "Napalm Support Area Radius": 25.0, "Napalm Support Rocket Amount": 3, "Napalm Support Rocket Height": 150, "Last Ditch Effort Rocket Amount": 0, "Last Ditch Effort Grenade Amount": 5, "Last Ditch Effort MLRS rocket Radius": 15, "Last Ditch Effort MLRS rocket Amount": 15, "Last Ditch Effort Hard Mode : targets player location": true }, "Tank Crew Driver": { "Tank Driver Health": 450.0, "Tank Driver Lifetime (minutes)": 1.0, "Tank Driver Damage multiplier": 1.0, "Tank Driver Spawn Chance 0-1": 1.0, "Tank Driver Spawn Amount": 5, "Tank Driver Use Outfit": true, "Tank Driver Use other gun with outfit": false, "Tank Driver gun short prefabname": "smg.mp5", "Tank Driver gun skin id": 0, "Tank Driver Use kit (clothing)": false, "Tank Driver Kit ID": "" }, "Tank Crew Guards": { "Tank Guards Health": 800.0, "Tank Guards Lifetime (minutes)": 1.0, "Tank Guards Damage multiplier": 1.0, "Tank Guards Spawn Chance 0-1": 1.0, "Tank Guards Spawn Amount": 3, "Tank Guards Use Outfit": true, "Tank Guards Use other gun with outfit": false, "Tank Guards gun short prefabname": "smg.mp5", "Tank Guards gun skin id": 0, "Tank Guards Use kit (clothing)": false, "Tank Guards Kit ID": "" }, "Tank Crew Gunners": { "Tank Gunners Health": 600.0, "Tank Gunners Lifetime (minutes)": 1.0, "Tank Gunners Damage multiplier": 1.0, "Tank Gunners Spawn Chance 0-1": 1.0, "Tank Gunners Spawn Amount": 3, "Tank Gunners Use Outfit": true, "Tank Gunners Use other gun with outfit": false, "Tank Gunners gun short prefabname": "smg.mp5", "Tank Gunners gun skin id": 0, "Tank Gunners Use kit (clothing)": false, "Tank Gunners Kit ID": "" } } Localization : English language file included to use a diffrent language just make a new file in the language folder. { "BradleyDriver": "<color=yellow>Bradley Driver : </color>Damnit i just washed it!", "BradleyGuards": "<color=yellow>Bradley Guard : </color>Stay away from our Bradley!", "BradleyGunner": "<color=yellow>Bradley Gunner : </color>Prepare to die!", "BradleyDriverBomb": "<color=yellow>Bradley Driver : </color>Catch this!", "BradleyGunnerFire": "<color=yellow>Bradley Gunner : </color>Fire in the hooole!", "BradleyNapalmSupport": "<color=yellow>Bradley Operator : </color>Support incomming!" } API : bool IsBradleyNpc(global::HumanNPC npc) OnBradleyNPCGotHit(global::HumanNPC npc, HitInfo info) OnBradleyNPCDeath(global::HumanNPC npc, HitInfo info) example call : object OnEntityDeath(global::HumanNPC npc, HitInfo info) { if (npc == null) return null; if (BradleyGuards.Call<bool>("IsBradleyNpc", npc)) { Puts($"Target : {npc} net.ID : [{npc.net.ID}] Event : BradleyGuards NPC"); } return null; } private void OnBradleyNPCGotHit(global::HumanNPC npc, HitInfo info) { Debugmsg("OnBradleyNPCGotHit works!"); BasePlayer player = info.InitiatorPlayer; if (npc.health < (npc._maxHealth * 0.8) && npc.health > (npc._maxHealth * 0.72)) { if (!Burned) Player.Message(player , npcmsg(MSG) , Chaticon); return; } } private void OnBradleyNPCDeath(global::HumanNPC npc, HitInfo info) { Debugmsg("OnBradleyNPCDeath works!"); BasePlayer player = info.InitiatorPlayer; Debugmsg($"{player.displayName} killed {npc.displayName}"); } Changes made in 1.0.5 !!! Updated/Cleaned/Organized the Documentation. Added lifetime for each individual Crew Added use of kits + checks (if incorrect kit name Crew will spawn with default scientist or heavy scientist outfit). Changed the Npc Naming so they can be shown correctly with AdminRadar Added prefix and chaticon to chat messages (language file changed so delete it before updating to avoid weird chat messages). Added max roam range for the Bradley Crew Bradley Crew will now despawn when plugin gets unloaded/reloaded Removed the death sound when a npc dies. Fixed : Bradley will now ignore scientists from junkpiles added cfg : Tank Crew Lifetime (minutes) added cfg : Damage multiplier for each driver/guards/gunners added cfg : Napalm Support Rocket Height added cfg : Use kit (clothing) (for each driver/guards/gunners) added cfg : Kit ID (for each driver/guards/gunners) added cfg : Bradley Crew max roam rangeFree -

Version 1.0.25
246 downloads
Grid Power rust plugin allows players to harness electricity directly from the Power Grid on any map by climbing Power line Poles to upgrade Transformers with components and protect their grid section, while also enhancing vanilla visuals with realistic, adjustable slack on hanging wires and lights. Questions? Support? Join the discord: https://discord.nikhub.dev In short Draw electricity straight from the Power Grid in Rust - on any map, be it a procedurally generated or a custom one! Ladder up the Power line Poles to upgrade their Transformers with components like Root Combiners (to replace missing/stolen/destroyed outlets that you plug into) and Tech Trash (to permanently upgrade power output level, up to a configurable point). Maintain the service with long-lasting Fuses. But most importantly, protect your precious part of the grid from vandalism, theft and sabotage that will inevitably come from those jealous players! Whatever you do, just be careful up there... high voltage happens to be highly dangerous. Always wear protective gear (like a hazmat suit) and don't touch the wires while they're live! As a bonus, this plugin also improves vanilla visuals with realistically hanging wires / hoses / Xmas lights, the slack of which (how loose they appear to be hanging) can be adjusted while placing. And this feature is completely optional, too. Goodbye, straight lines that look like steel rods - hello, actual laws of physics! But don't take my word for it - let the video speak for itself: Still not convinced? Check out this in-depth, 20+ minutes long review and tutorial by srtbull! 1.0.2 UPDATE: Introducing working Street Lights for eligible poles! The lights go on between between 20:00 and 8:00 by default. Quick start (for admins) Upload the GridPower.cs file to your oxide/plugins folder and you should be good to go, it's all plug-and-play. No need to restart your server! If you're loading it for the first time or it's a new map wipe, the plugin will automatically locate all Power Line Prefabs on your map, randomly choose some of them (according to chances set in the default config) and attach extra electrical entities to them to make them functional. Those entities should persist throughout the wipe and will be replaced if missing, on every plugin reload/server restart. Each Power line Pole will be assigned a number and its position will be stored in the data. This will work on any map that contains at least one of the following prefabs: assets/bundled/prefabs/autospawn/decor/powerline-small/powerline_pole_a.prefab assets/content/props/powerline_poles/powerline_pole_a.prefab Quick start (for players) Locating functional Transformers Not all Power Line Poles were made equally. Only a percentage of them (by default, 33% on average) will be functional. How do you recognise a functional one? Look up - if you see a Button attached to the top of the Pole, and maybe even some pre-existing Root Combiner Outlets, that's it! [insert image here, maybe a player looking at a powerline pole with binoculars] Laddering Up Now that you have located a functional pole, you need to climb it. Normally you cannot deploy Ladders on Power Line Poles and many other places (but oddly enough, you CAN deploy them on the horizontal planks at the top of a Pole!). However, Grid Power re-implements all the client-sided deployment logic to allow bypassing of that arbitrary-seeming limitation. If you try to deploy a Ladder on a Power Line Pole, don't be discouraged by the fact that the "ghost guide" is red instead of blue/amber. Click anyway and it will force it through! Ignore the message in the chat saying that the deployment failed - just like the colour of the ghost guide, it's all client-sided and as such there's nothing the plugin can do about it, visually speaking. But trust me, everything works as intended, despite what the client messages are telling you. The Ladders can then be destroyed/picked up to be reused. Maintenance A Transformer can have up to 4 Outlets (Root Combiners). That's where the players draw the electricity from. Those Root Combiners can be damaged/destroyed/repaired/picked up with a hammer (if you have Building Privilege) any time. If there's less than 4 Outlets, right-click on a Root Combiner Item in your inventory or drag it into the Fuse Box of the Transformer. You will hear a deployment effect and the Root Combiner will be deployed on the pole. In order to be able to draw power from that Transformer, you need to put a Fuse inside. Right-click a Fuse in your inventory or drag it directly to the Fuse Box. Don't worry - inside of the Transformers, those Fuses will last for much, MUCH longer than inside regular monument Fuse Boxes. By default, a brand new Fuse inside of a Transformer Fuse Box will last you for 12000 seconds (= 200 minutes, = 3.33 hours). This value can be increased or decreased in the config. You can see how much time a fuse has left in the Transformer GUI. By default, the Power Grid will produce electricity between 8 AM and 8 PM. The power output will follow a smooth curve, being the lowest in the morning/evening, and peaking at 2 PM. Exactly how much RWs will be produced on each Outlet is determined by the Transformer's Tech Trash level. By default, each Tech Trash inserted increases the peak power output by 5 RWs (up until a certain point - by default, that level is capped at 50, which translates to 250 RWs per Outlet at peak hours). Upgrade the level by right-clicking the Tech Trash item in your inventory or dragging it directly into the Fuse Box. Inserting Root Combiners/Tech Trash is still possible even if there's already a Fuse inside of the Fuse Box. The Fuse won't be replaced as the sole Item in the slot, since Root Combiners/Tech Trash are consumed immediately. Hooking Up & Hanging Out Once there's at least 1 Outlet present, you have a Fuse at hand, and the Grid is currently producing power - you're all set. Take a Wire Tool, pick your favourite wire colour with the [RELOAD] button, typically R, and connect to the outputs of the Root Combiner Outlets to your own electrical devices, usually a Battery or another Root Combiner. You will notice the text on top of your screen telling you what the current Slack of your wire tool / hose tool is. You can increase it with the [DUCK] button, typically CTRL, and decrease it with the [SPRINT] button, typically SHIFT. Larger Slack value means that the wire/hose will appear to be hanging more loosely. Smaller values will make it look tighter. Values close to zero will make it look like they look in vanilla Rust - i.e. not so good in comparison The final Slack value will be applied the moment you finalise your wire/hose connection. This hanging improvement applies to anything you do with Wire Tools/Hose Tools, not just Transformer Outlet connections! For the Advanced Xmas Lights, it's even better: you can adjust the Slack of each segment individually! After you place the Advanced Xmas Lights segment down, and you're just about to place the next segment, adjust the Slack of the segment you have just placed down with [DUCK] and [SPRINT] buttons. You will see a preview of what it will make the segment look like. Placing the next segment down confirms the Slack for the segment before it. Danger! High Voltage! If the Grid is currently producing Power (by default, during daytime) AND a Fuse is inserted in the Transformer, all Root Combiner Outlets are considered live on that Transformer. You can tell whether a Transformer is live or not: first, check your electric devices plugged in directly to the Grid. If they're not currently receiving any charge, they're not live. Similarly, you can look at the diodes on the Root Combiner Outlets. If they're not on, the Transformer is not live either. Lastly, it's pretty clear from the Transformer GUI. If a player tries to connect/disconnect a wire to/from a live Outlet, or they're trying to pick up the Root Combiner Outlet with a hammer, and they're not wearing one of the items on a pre-approved list (see the Advanced Config section below), there is a 1.0 (100%) chance they will get electrocuted to death. Another way to guarantee electrocution is trying to clear connections named INTERNAL. Leave those alone! Wearing protective clothing reduces that chance to 1 in 10 (10%, according to the default permission profile - see below). You can set that chance to 0.0 (0%) if you want to give your players a peace of mind. Another way to guarantee 0% electrocution chance is making sure the Transformer is not live: either wait for the Grid to stop producing Power or take out the Fuse before doing anything else. Permissions (Oxide.Grant user YourName [permission name starting with gridpower.]) By default, the plugin generates 3 permission profiles in the config - one for admins, one for normal players with no specific permissions (default) and one for VIP. More on permission profiles and config values they can handle can be found in the section Advanced Config. Unless you have added more permission profiles, only these two below are going to be used by your config: gridpower.admin Holders of the admin permission will also be able to run the /gp_cfg and /gp_emergency_cleanup commands gridpower.vip1 Holders of this permission will follow settings and limits associated with with that permission profile. The permissions below are also registered, but not used by default. To use them, just create some permission profiles with those permissions as the key. gridpower.vip2 gridpower.vip3 gridpower.vip4 gridpower.vip5 Automatic street lights Depending on your map design, some power line poles might have lamps on them. All those lamps will now emit light, by default between 20:00 an 8:00, which just so happens to be the time when the grid production goes back to 0. You can also set the street lights to be always on, regardless of the time of day. The time settings for the street lights are independent of your power production time settings - they can overlap, one can start before midnight and end after midnight while the other one does not, etc. Those street lights will work even on non-functional power line poles, e.g those without a button on top of them. When on, the lights will flicker from time to time. How often they will flicker and how long individual flickers are going to be depends on your config - look below. Admin F1 console/chat commands (must have ownerid/moderatorid/gridpower.admin permission) If you're typing those commands from the F1 console or the server console, drop the preceding slash in the command name. /gp_cfg Will allow the admins to change non-permission profile related config values on the fly (see below) /gp_emergency_cleanup Instantly kills all the plugin-related entities: fuseboxes, admin generators, root combiners and buttons. It won't remove the power line entries in your data, however. All the killed entities will be re-generated according to your current generation settings in the config next time your server restarts or the plugin reloads. If you want to permanently get rid of them, unload the plugin, delete your oxide/data/GridPower.json, and load it back in. /gp_pole [add/remove] This command will allow admins to add or remove functional power line poles at any time. Just look directly at the pole you want to modify and type the command with an argument (either "add" or "remove", depending on what you want to achieve). If you want to add a pole and it already is functional, or if you want to remove a pole, but it isn't functional - you will get a warning. Same if you try to add a pole, but the pole you're looking at is building blocked by a nearby monument. "Ent killing" (or using a plugin like Remover) the power line fusebox is the equivalent of permanently removing it from the data and it won't be re-generated any more on next reload. Wiping your save file also automatically removes all the extra components and replaces them with new ones tailored to your map, in accordance to your generation settings. Configuration (oxide/config/GridPower.json and /gp_cfg console/chat command) Vast majority of the settings can be configured with the /gp_cfg chat command. Typing it in the chat/console with no parameters should dump a rundown of config fields and their values. In order to run any of the config commands, you will need to have ownerid or moderatorid (or the gridpower.admin permission). /gp_cfg GridConstantPower [logical values (true or false)] If set to true, the Grid will always produce electricity at its peak (100%), 24 hours a day (DEFAULT: false) /gp_cfg GridProductionStartAtHour [fractions (like 13.37) between 0.00 and 24.00] The hour of the day when the power production starts climbing up from 0 (DEFAULT: 8.0) /gp_cfg GridProductionEndAtHour [fractions (like 0.69, nice) between 0.00 and 24.00] The hour of the day when the power production settles back at 0 (DEFAULT: 20.0) /gp_cfg StreetlightsConstantPower [logical values (true or false)] If set to true, the Streetlights will be on 24 hours a day. (DEFAULT: FALSE) /gp_cfg StreetlightsTurnOnAtHour [fractions (like 20.4) between 0.00 and 24.00] The hour of the day when the street lights turn on (DEFAULT: 20.0) /gp_cfg StreetlightsTurnOffAtHour [fractions (like 8.2) between 0.00 and 24.00] The hour of the day when the street lights turn off (DEFAULT: 8.0) /gp_cfg StreetlightsReliability [fractions (like 0.5) between 0.00 and 1.00] The reliability of the streetlight. The less it is, the more often it will flicker. At 1, which represents 100%, it never flickers. (DEFAULT: 0.95) /gp_cfg StreetlightsFlickerLengthMin [fractions (like 1.2) between 0.00 and Positive Infinity] The minimum random length of the flicker, in seconds (DEFAULT: 0.1) /gp_cfg StreetlightsFlickerLengthMax [fractions (like 2.4) between 0.00 and Positive Infinity] The maximum random length of the flicker, in seconds (DEFAULT: 0.5) /gp_cfg GeneratorChancePowerlineFunctional [fractions (like 0.5) between 0.00 and 1.00] The chance that a valid Power Line Pole will be made functional during generation. (DEFAULT: 0.33) /gp_cfg FuseRequired [logical values (true or false)] If set to false, the Transformers won't need Fuses to produce power, just the right time of the day (if power is not 24/7) (DEFAULT: TRUE) /gp_cfg BuildingBlockPreventsButtonPress [logical values (true or false)] If set to true, if there's any Tool Cupboards in the range of the Transformer, you need to be authorised on all of them to open the Transformer GUI (DEFAULT: TRUE) /gp_cfg GeneratorInitialLevelMin [integers (like 7) between 0 and 1000] The lower limit for the random Tech Trash level of valid Power Line Poles during generation (DEFAULT: 1) /gp_cfg GeneratorInitialLevelMax [integers (like 7) between 0 and 1000] The upper limit for the random Tech Trash level of valid Power Line Poles during generation (DEFAULT: 5) /gp_cfg GeneratorInitialOutletsMin [integers (like 1) between 0 and 4] The lower limit for the random number of Outlets of valid Power Line Poles during generation (DEFAULT: 0) /gp_cfg GeneratorInitialOutletsMax [integers (like 3) between 0 and 4] The upper limit for the random number of Outlets of valid Power Line Poles during generation (DEFAULT: 4) /gp_cfg PowerlinePowerPerTechTrash [integers (like 7) between 0 and 1000] How much RWs at peak hours are provided per 1 Tech Trash Level upgrade (DEFAULT: 5) /gp_cfg PowerlineMaxTechTrashLevel [integers (like 7) between 0 and 1000] The maximum level that a Transformer can be upgraded to (DEFAULT: 50) /gp_cfg PowerlineFuseDurationSeconds [fractions (like 420.69, nice) between 0.0 and Infinity] How long (in seconds) a brand new Fuse inserted in the Transformer Fusebox will last (DEFAULT: 12000.0) /gp_cfg FuseItemShortname [strings (like "fuse")] The shortname of the item that acts as the Fuse for Transformer Fuseboxes, must be a valid Rust item shortname /gp_cfg FuseItemGuiName [strings (like "Transformer Fuse")] The custom GUI display name of the item that acts as the Fuse for Transformer Fuseboxes, can be anything, or left blank for default /gp_cfg FuseItemSkinID [positive long integers (like 2783151202)] The skin ID of the Fuse item if using custom, leave at 0 to accept any items of the shortname specified by FuseItemShortname Protective clothing (only editable through oxide/config/GridPower.json) "ProtectiveClothing": { "hazmatsuit": null, "scientistsuit_heavy": null, "hazmatsuit_scientist": null, "hazmatsuit_scientist_peacekeeper": null, "hazmatsuit.spacesuit": null, "boots.frog": null, "hazmatsuit.nomadsuit": null, "pants": [ 1581896222 ], "hoodie": [ 1581890527, 1582492745 ] }, Each entry has a key (the item shortname in quotes) and a value. If the value is null, it means all possible skins for that item shortname are accepted. In the example above, we're allowing all rubbery one-pieces (value is null, so any skin) and we're also allowing pants with 1 possible skin or a hoodie with 2 possible skins to be treated as protective clothing. You will see that there's no comma after the last entry on the list. BEFORE SAVING, ALWAYS VALIDATE YOUR JSON WITH A TOOL LIKE JSON LINT! Permission profiles Using profiles you can quickly create/edit different permissions for different players, for example, if you have more than 1 VIP tier on your server - just add some new profiles. Different players can have different limits and permissions associated with using the Power Grid. To check which permission profile the player should fall under, the plugin goes through all permission profiles and checks whether the player has that permission granted. The permissions are checked in order, meaning that if the player doesn't have the first permission, it will try the next permission on the list, etc (similar to how Auto Kits checks which kit to give to a player based on their permissions in order). If the player doesn't have any permissions from the list granted, they will fall back to the "default" profile. That's the only one that you shouldn't remove! If you remove it, a new one with default values will be created. So if you don't want your default, non-VIP players to use the power grid, don't remove the default profile, just take away privileges in that profile (like upgrading/deploying ladders/pressing the button). You don't have to use the built-in VIP permissions - any REGISTERED permission from any plugin will do just fine! By default, three permission profiles are generate in the config: default, gridpower.admin and gridpower.vip1. The default permission profile will apply to any player who doesn't have any permissions listed in the profile list - let's have a look at it: "PermissionProfiles": { "default": { "PermissionRequired": "default", "GridCanDeployLadder": true, "GridCanDeployRootCombiners": true, "GridCanConnectDisconnect": true, "GridCanPressButton": true, "GridCanUpgrade": true, "GridDangerousWireElectricutionChance": 0.1, "HangingXmasLights": false, "HangingWiresAndHoses": false, "SubdivisionsPreview": 10, "SubdivisionsFinal": 50, "SlackMax": 5.0 }, PermissionRequired should contain an already existing permission registered by any plugin in the form of pluginname.permissionname GridCanDeployLadder allows players to deploy ladders on Power Line Poles GridCanDeployRootCombiners allows players to deploy Root Combiners on Power Line Pole transformers by inserting them into the Fuse Box GridCanConnectDisconnect allows players to use a Wire Tool to connect their own electrical devices to the Grid GridCanPressButton allows players to access the Transformer GUI GridCanUpgrade allows the players to upgrade the Transformer peak output by inserting Tech Trash into the Fuse Box GridDangerousWireElectricutionChance defines how likely it is that a player will die from electrical accidents, even while wearing protective clothing HangingXmasLights allows the players more control over how much the Advanced Xmas Lights will be hanging (purely visual) HangingWiresAndHoses allows the players more control over how much the Wires/Hoses will be hanging (purely visual) SubdivisionsPreview is the number of intermediary points used while showing the hanging Xmas Lights preview catenary curve of the last placed segment. The more points, the smoother it looks. (purely visual) SubdivisionsFinal is it the number of intermediary points used for the final catenary curve of the hanging wires/hoses/xmas lights. The more points, the smoother it looks (purely visual) SlackMax sets the maximum "looseness" of the wire/hose/xmas lights that the player is allowed. The more the slack, the longer the wire appears overall. API hooks (for plugin developers) All methods utilise the [HookMethod] attribute, which means you don't call them through Interface.Call, you need to first create this field in your plugin's main class... [PluginReference] private Plugin GridPower; Then, call the hooks like so. It's pretty self-explanatory what information they will provide you with. bool isPowerConstant = (bool) GridPower.Call("GridPowerIsConstant"); bool isGridProducing = (bool) GridPower.Call("GridIsProducing"); float productionHourStart = (float) GridPower.Call("GridGetProductionHourStart"); float productionHourEnd = (float) GridPower.Call("GridGetProductionHourEnd"); float currentGridEfficiency = (float) GridPower.Call("GridGetEfficiency"); bool areStreetlightsAlwaysOn = (bool) GridPower.Call("StreetlightsPowerIsConstant"); bool areStreetlightsOn = (bool) GridPower.Call("StreetlightsAreOn"); float streetlightsHourStart = (float) GridPower.Call("StreetlightsGetTurnOnHour"); float streetlightsHourEnd = (float) GridPower.Call("StreetlightsGetTurnOffHour"); Translation support (oxide/lang/en/GridPower.json) Almost every string the players see, including the text displaying in the chat and the GUI, can be edited. Just load the plugin and let it generate the file - after you edit it, reload the plugin.$24.99 -
Version 1.0.6
851 downloads
Skill Tree: XP Event is a plugin that creates an event that will randomly select a task, providing players with bonus XP for performing the task while the event is running. Events are started automatically on interval (default every 30 minutes), and will select 1 of 38 tasks for the event. This could be chopping down trees, skinning animals, killing scientists or looting crates. The plugin will also roll a random duration for the event to run for, and a random bonus to the XP (all of which is configurable). Additional XP gained with this plugin will stack with xp bonuses from Skill Tree. The stacking works in the following order: Default xp value is calculated. Skill Tree will check if Skill Tree: XP Event is loaded, and will ask for any bonuses if applicable Skill Tree continues on with its additional modifiers (other plugins, permission overrides, rested xp etc) This event will provide an incentive for players to engage with content on your server that they might otherwise avoid. SkillTreeXPEvent.use - required for players to participate in the events. SkillTreeXPEvent.admin - required to use the below commands if running them from player console. Console command: startxpevent <optional: task> Description: This command will manually start an XP event. If the task is not specified, it will roll the event randomly. Running this command resets the interval timer. Console command: stopxpevent Description: This command ends the current xp event. Chat command: stemoveui Description: Brings up an interface to reposition the UI. NodeHit NodeHitFinal TreeHit TreeHitFinal SkinHit SkinHitFinal CollectWildEntities CollectWildBerries CollectWildHemp CollectWildPumpkin CollectWildPotato CollectWildCorn CollectMushrooms CollectOreNodes CollectGrownEntities CollectGrownBerries CollectGrownHemp CollectGrownCorn CollectGrownPotato CollectGrownPumpkin SkinWolfFinal SkinBearFinal SkinChickenFinal SkinBoarFinal SkinStagFinal SkinPolarBearFinal CatchAnyFish KillScientist KillTunnelDweller KillUnderwaterDweller KillAnyAnimal KillBear KillStag KillBoar KillChicken KillWolf KillPolarBear LootCrate BreakBarrel BreakRoadSign SwipeCard All$7.99- 30 comments
- 2 reviews
-
- 2
-
-
-
- #skilltree
- #event
- (and 4 more)
-
Version 1.0.29
2,212 downloads
Adds 53 new deployable items to your server!. Custom item collection system. Players can obtain these items while cutting trees, mining rocks and collecting plants. Includes a built in market that can be accessed via a chat command or a HumanNPC. Each base item can be configured to allow for a wide variety of placement options/restrictions. A large amount of configuration options are available for each item. Adjustable placement options while holding shift. Items can be picked up by holding a hammer, looking at the deployed entity and pressing your mouse3 button (scroll wheel button). deployablenature.admin - Required to use the giveprefab command. deployablenature.market.chat - Required to use the market chat command. deployablenature.ignore.restrictions - Allows a player to deploy items without restriction (TC etc). deployablenature.gather - Required for players to obtain drops while gathering. deployablenature.use - Required to deploy nature items. deployablenature.free - allows access to the nature market for free. There is also the option to create groups via the config, which will receive discounts in the market based on the value assigned to them. Example: "Permissions that will receive a discount on the store cost when purchasing [1.0 is full price]. Prefix with deployablenature.": { "deployablenature.vip": 0.5 }, This would give players with the deployablenature.vip permission a discount of 50% off of the market price. Command: giveprefab Parameters: <skin id> <quantity> Example: /giveprefab 2609145017 100 - spawns the user 100x medium clutter rocks" Permission: deployablenature.admin Command: naturemarket Permission: deployablenature.market.chat Command: dnpickup Permission: None Command: giveprefab (console) Parameters: <player id/name> <skin id> <quantity> Example: /giveprefab "new guy" 2609145017 100 - spawns the user 100x medium clutter rocks for new guy" Permission: deployablenature.admin Console Command: dnkillentities - wipes all nature entities from the map. Parameters: <optional parameter: true> - this wipes the data after the command executes. If not used, the nature items will respawn on plugin reload. Example: dnkillentities or dnkillentities true. Permission: deployablenature.admin if running from player console. Console Command: dnkillentitiesforplayer - wipes all nature entities from the map for the specified player Parameters: <player name/id> Example: dnkillentitiesforplayer "new guy" - would delete all entities for the player whose name contained "new guy". Permission: deployablenature.admin if running from player console. Console Command: dnpurge - enables purge mode, wiping all entities from the map (does not delete data), and preventing them from spawning on server start/being deployed by players while active. Automatically resets to false on server wipe. Parameters: <true/false> Example: dnpurge true - would enable purge mode. Permission: deployablenature.admin if running from player console. You most likely won't need the below information, but it is here for more advanced users. Prefab Types 0: Rock 1: Tree 2: Bush 3: Animal Tree Types 0: None 1: Palm 2: Oak 3: Swamp 4: Birch 5: Beech 6: Pine 7: Cacti 8: Snow Bush Types 0: None 1: Willow 2: Willow_snow 3: Spice 4: Spice_snow 5: Creosote 6: Berries 7: Mushrooms Example config https://pastebin.com/E5duDqtf API public bool IsDeployableNature(BaseEntity entity) Returns if an entity is a DeployableNature entity that has the prevent_gather attribute.$15.00 -
Version 1.0.13
965 downloads
Are your players tired of waiting for Airdrops? This little plugin makes them appear almost instantly, no cargo plane, no parachutes. Airdrop will spawn wherever the supply signal lands. The delay can be modified in the config file. The default is 5 seconds to allow the supply signal to land and smoke briefly. Config File { "Delay Before Spawn": 5.0, "Use Permission": false, "Prevent Deploying Inside (Players will only be able to deploy supply signals outside)": false, "Skin IDs To Ignore": [] } if "Use Permission" is set true then permission to be set is instantairdrop.use If "Prevent Deploying Inside" the Airdrop will be cancelled, the supply signal will be refunded to the player and a message will inform the player that supply signals can only be deployed outside. This is to prevent instant airdrops spawning inside of bases and is optional. Tested to work nicely along side other plugins such as: Heli Signals Bradley Drops Fancy Drop Loot Defender Signal Cooldown Helpful Supply Supply Lock Vehicle Airdrops Note: The plugin is designed to operate without causing issues when used with these plugins. However, it does not integrate or alter the functionality of these plugins.$3.99 -

Version 0.1.5
30 downloads
What is it? Transform your server into an unforgettable experience with this innovative plugin! Whether you want to host epic dance parties or add immersive NPC actions to your RPG adventures, this plugin is designed to bring life and fun to your community. Let your players team up with their new animated companions and turn mundane gameplay into extraordinary moments. Perfect for dance parties and roleplay events; there's no limit to the creativity this plugin enables! Usage Make yourself or let players make the BEST dance parties ever! Also can be used for various actions for example on RPG servers (You can make NPC keep pointing somewhere etc..) Commands Main command /npcd -- Opens the menu (user friendly, contains/has the same or even better abilities than all the other chat commands) Spawn options: /npcd spawn (id) -- Spawns certain group /npcd despawn (id) -- Despawns certain group Group options: /npcd create -- Creates certain group /npcd remove (id) -- Removes certain group /npcd manage (id) -- Start managing certain group /npcd list -- Displays all dance groups Group Manage options: /npcd dancer add -- Adds new dancer with your current position and rotation to the group /npcd dancer remove (id) -- Removes certain dancer /npcd dancer list -- Displays all the dancers from the managed group /npcd group name (name) -- Changes managed group's name to the new one --Dancer's settings-- /npcd dancer manage (id) name (New Dancer's name) -- Changes dancer's name /npcd dancer manage (id) random (true/false) -- Turn ON or OFF to make dancer use random dance /npcd dancer manage (id) dance (Dance Name) -- Set's dance for the dancer Available: The Twist, Cabbage Patch, Raise the Roof, Clap, Friendly, Hurry, Ok, Point, Shrug, ThumbsUp, ThumbsDown, Victory, Wave, Chicken, Drink, Push, Kick /npcd dancer manage (id) clothing add (clothing name) -- Adds new clothing for the dancer /npcd dancer manage (id) clothing remove -- Removes clothing from the dancer /npcd dancer manage (id) god (on/off) -- Turns ON or OFF god for the dancer /npcd dancer manage (id) hp (amount) -- Set's the spawn HP for the dancer Permissions npcdancers.use -- Gives player permission to use the plugin npcdancers.god -- Gives player permission to turn ON or OFF godmode for dancers npcdancers.hp -- Gives player permission to change dancer's spawn HP npcdancers.admin -- Has all permissions, bypasses all limits in config + can manipulate with other's dance groups UI Features Dance Groups Owner OwnerID Amount of Dancers Group name Add Dancer button Spawn/Despawn button Remove button Dancers Name HP God Random Dance Clothing Remove button Config { "Max groups per player": 3, "Max dancers per group": 5 } Localization { "Syntax": "----- Spawn Options -----\n/npcd spawn (id) -- Spawns the group\n/npcd despawn (id) -- Despawns the group\n----- Manage Options -----\n/npcd create -- Creates new group\n/npcd remove (id) -- Removes the group\n/npcd manage (id) -- Let's you manage the group\n/npcd list -- Displays all dance groups", "Created": "Successfully created dancers group: {0}", "Removed": "Successfully removed dancers group: {0}", "NotFound": "Couldn't find a dance group with this id.", "NoGroups": "There are not any groups yet.", "NoDancers": "There are not any dancers yet.", "GroupList": "ID:{1} {0} - {2} dancers", "Managing": "----- Managing {0}'s group -----\nID: {1}\nGroup name: {2}\nDancers: {3}\n----- Manage Group -----\n/npcd dancer add -- Adds new dancer\n/npcd dancer remove (id) -- Removes the dancer\n/npcd dancer list -- Shows current dancers for this group\n/npcd group name (name)\n----- Dancer's settings -----\n/npcd dancer manage (id) name (Set Dancers Name)\n/npcd dancer manage (id) random (true/false) -- Dancer will choose random dance\n/npcd dancer manage (id) dance (Dance Name) -- Available: The Twist, Cabbage Patch, Raise the Roof, Clap, Friendly, Hurry, Ok, Point, Shrug, ThumbsUp, ThumbsDown, Victory, Wave, Chicken, Drink, Push, Kick\n/npcd dancer manage (id) clothing add (clothing shortname) -- Add specific clothing to the dancer\n/npcd dancer manage (id) clothing remove -- Removes all clothes from dancer\n/npcd dancer manage (id) god (on/off)\n/npcd dancer manage (id) hp (amount)", "NoManaging": "You are not managing any group right now.", "DancerAdded": "Successfully added new dancer:\nName:{0}\nID:{1}\nDance name:{2}\nRandom dance? {3}\nPos: X:{4} Y:{5} Z:{6}", "DancerRemoved": "Successfully removed Dancer: {0}(ID:{1})", "DancerNotFound": "Couldn't find dancer with that id", "DancerRename": "Renamed dancer:{0} to {1}", "DancerChangeDance": "Changed {0}'s dance to: {1}", "InvalidDance": "Invalid dance name! Changed {0}'s dance to: {1}", "NoPerms": "You don't have permissions to manipulate with other's groups!", "NoGodPerms": "You don't have permissions to toggle dancer's godmode", "NoDancersSpawn": "There are no dancers to spawn!", "GroupNotSpawned": "This group is not spawned", "GroupDespawn": "Group despawned", "SpecifyClothing": "You must specify the clothing", "SpecifyGod": "You must specify on or off for god mode", "SpecifyHp": "You must specify the amount of hp", "ToggleGod": "Dancer's godmode: {0}", "NoHpPerms": "You don't have permissions to set dancer's hp!", "SetHp": "Dancer's hp set to: {0}", "AddedClothing": "{0} added to the dancer", "RemovedClothing": "Removed dancer's clothes", "ClothingList": "Dancer's clothes: {0}", "GroupLimit": "Cannot create new dancer group! (Group limit reached!)", "GroupName": "Group name changed to: {0}", "DancerLimit": "Cannot add new dancer! (Dancer per group limit reached!)", "CUI YourGroups": "Your\nGroups", "CUI AllGroups": "All\nGroups", "NotExistWear": "{0} is non existing or not wearable item!", "NoMoreClothing": "This dancer can't take any more clothing!", "CUI SelectDancer": "Select Dancer", "CUI SelectedDancer": "Selected Dancer:\nID: {0}\nName: {1}", "CUI Name": "Name:", "CUI Random": "Random:", "CUI Dance": "Dance:", "CUI HP": "HP:", "CUI God": "God:", "CUI Owner": "Owner:", "CUI OwnerId": "OwnerID:", "CUI DancersAmount": "Amount of Dancers: {0}", "CUI Add": "Add Dancer", "CUI Remove": "Remove", "CUI NoDancers": "There are not any dancers yet", "CUI Spawn": "Spawn", "CUI Despawn": "Despawn", "CUI Dances": "The Twist, Cabbage Patch, Raise the Roof, Clap, Friendly, Hurry, Ok, Point, Shrug, ThumbsUp, ThumbsDown, Victory, Wave, Chicken, Drink, Push, Kick", "CUI ClothingAdd": "Add clothing:", "CUI ClothingList": "Current clothing:", "CUI CreateGroup": "Create\nGroup" }$24.99 -

Version 1.1.0
339 downloads
This plugin may not work perfectly as you expect. Please read the Q/A at the bottom before making a purchase! Please have a hosting service ready for your MP3 files before making a purchase! Enhance your server's ambiance by welcoming players with delightful tunes as they join! Welcome Music feature lets you curate a musical experience for new players, complete with customizable playback delays and durations. Chat Command: /wm - Disable / Enable the Welcome Music. /musicto <Player> <MusicURL> <MusicDuration> - Play music for target player (Requires welcomemusic.toplayer permission). /musicall <MusicURL> <MusicDuration> - Play music for all player (Requires welcomemusic.toplayer permission). /testwm - Test Welcome Music (Not need to rejoin the server | only admin) . Console Command: musicto <Player> <MusicURL> <MusicDuration> - Play music for target player. musicall <MusicURL> <MusicDuration> - Play music for all player. Config { "Permission Name": "welcomemusic.use", "Need Permission": true, "Welcome Music List": [ { "Need Permission (Empty = none)": "", "Music URL": "https://github.com/blgarust/music/raw/main/WelcomeToOurServer.mp3", "Music Duration (sec)": 5.0, "Welcome Message (Empty = No Message)": "Welcome To Our Server, Now playing music for you~ (You can use command /wm to disable)" }, { "Need Permission (Empty = none)": "welcomemusic.vip", "Music URL": "https://github.com/blgarust/music/raw/main/NeverGonnaGiveYouUp.mp3", "Music Duration (sec)": 30.0, "Welcome Message (Empty = No Message)": "Never Gonna Give You Up ~" } ], "Only first-time join the server": false, "(First-time) Music URL (Empty = none)": "", "(First-time) Music Duration (sec)": 15.0, "Music Delay (sec)": 5.0, "Players can disable the WelcomeMusic (/wm)": false } Tips Ensure that your Music URL is a valid mp3 stream link. For optimal experience, keep the music duration under 30 seconds. Provide a hosting space for your .mp3 file (services like GitHub work well for many, but not for everyone). The Music Delay determines the seconds after player entry before the music starts. Q/A Why does playing music result in stuttering / loop? This is due to low FPS on the player's client side (Improved in the Rust December 2022 patch). Why does playing music result in white noise? This happens when the client fails to successfully retrieve the music from your provided MP3 URL. Please check your URL or consider switching hosting services. Are there requirements for the URL format? Yes, the URL must be a complete web address without ports or special characters. Why do certain players hear default music during playing? This occurs because some players have disabled the "INTERNET AUDIO STREAMS" option in their game settings. How to find free MP3 hosting services? You can try uploading to GitHub and copy the raw link, but GitHub may not work for everyone.. However, it's best to have your own web server to host your MP3 files. Or use Google to search for "free MP3 hosting" to find available free services.$9.90 -
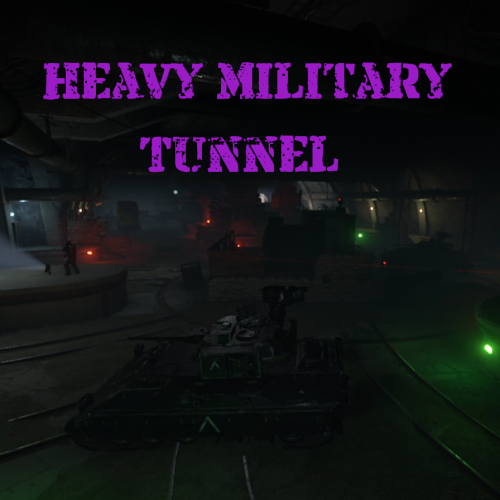
Version 1.0.3
227 downloads
Heavy Military Tunnel Event is a configurable plugin that allows for a new type of random event. Randomly a message will appear letting players know that a heavy unit is now guarding Military Tunnel The Military Tunnel will then be equipped with extra scientists both light and heavy, auto turrets, and Bradleys. Players must try to clear the military tunnel and find the scientist who drops the code to disable the auto turrets OR destroy all the turrets. If the code is found, it can be entered into the code lock hidden in a room to disable the turrets. Once the turrets and scientists are dealt with, players must defeat the Bradleys that guard the hackable crates. Finally, once the Bradleys are defeated, players can collect all the loot. That's if someone else doesn't get to it first! This is a great event to add to your server to give it a little more variety. It can be a fun PVP zone or a PVE event for non PVP servers. EASY OPTIONAL SETUP - NO SETUP REQUIRED You can simply drop the plugin in as-is and it will start the random event every 1 to 2 hours OR you can modify the config to your specific needs. Configuration Example - en Admin Only Commands /HmtStart /HmtStop /HmtPos Hooks void HeavyMilitaryTunnelEventStarted() void HeavyMilitaryTunnelEventStopped() Customization Spawn locations as well as the total number turrets, scientists, hackable crates, & APCbradleys can be modified. Simply go to the location in game you want to place the new item and use the command /HmtPos. It will message you the location. You can the add that location to the config in the appropriate section for want you want to modify. Reload the plugin and you're good to go! Support Create a support ticket here or message me on discord: cahnu$19.99 -
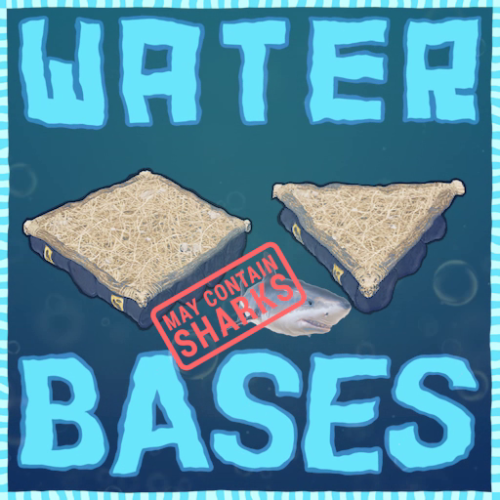
Version 1.0.20
386 downloads
Water Bases rust plugin enables players with permissions to construct and expand structures on and underwater without the need for pillars, incorporating vanilla-like mechanics, special features like underwater nettings, and customizable settings for different player tiers. Questions? Support? Join the discord: https://discord.nikhub.dev In short This Rust plugin enables players with the right permissions to construct structures on the water's surface and even extend them below water in a way that feels natural and in keeping with the game's original style. There's no need for tall, unstable pillars reaching down to the seabed; simply place your foundation on the water and use a building plan or hammer to expand it. These aquatic constructions adhere to the same principles of stability, upkeep, and decay as traditional bases on your server but also introduce unique elements like underwater nettings for gathering random items (with fully customizable loot tables) and innovative building techniques. The plugin accommodates various configuration profiles based on permissions, offering an excellent method to reward VIP players across different levels. It grants you control over who is allowed to build on the water, the size of their constructions, their proximity to the shore, and the highest tier of building blocks they can use, among other aspects. Additionally, the plugin is designed to alert players if their construction interferes with the Cargo Ship's route. With the Submarine update on the horizon, it's time to prepare your server for aquatic adventures with Water Bases! Watch the video below to see what water bases are all about. "What about Cargo Ship, will it destroy structures in the way?" By default, players will get a warning if they try to to build a water foundation in the path of the cargo ship, but their water foundation will stay. You can change this setting from "Warn" to "Prevent", and the player won't be able to build it in first place. Changing it to "None" will skip this check. Every ocean path node creates a "bubble" with a configurable radius. See Admin chat commands section below to visualise those bubbles and guide your players to areas where they will be able to build without issues. Quick start (for players and admins) Upload the WaterBases.cs file to your oxide/plugins folder and you should be good to go, it's all plug-and-play. No need to restart your server! Before you can build on water, you need some Water Foundations. Water foundations are re-skinned Inner Tube items (Shortname: innertube / Item ID: -697981032 ; mind the minus sign, it matters!) with a skin ID 2484982352 (https://steamcommunity.com/sharedfiles/filedetails/?id=2484982352) or 2485021365 (https://steamcommunity.com/sharedfiles/filedetails/?id=2485021365). That info is just in case you'd like to include those in your own Kits/Server Rewards shops/loot tables/custom crafting plugins. How to obtain those within the plugin? Crafting water base foundations (with Building Planner) By default, all players will be able to craft, deploy, expand and reinforce water foundations. More on the limits and how to change them (how far/close to the shore, min and max depth of the water, how many water foundations allowed per building etc) in the section Advanced Config. When a player equips a Building Plan, a small GUI will show in the bottom right (positions/colours etc can be changed in the config too). There, players will be able to craft deployable water foundations - both square and triangle. Those crafted items will also be consumed when players expand their already deployed foundations or reinforce them. The default permission profile requires a player to be close to a Level 2 Workbench - this requirement can be edited in the config to change the level needed, or you can turn off the need for a workbench altogether, per permission profile. If you don't want your players to be able to craft foundations - so they have to find them/buy them/earn them instead - you can disable it per-profile. In that case, they won't see the GUI. Giving with chat commands (admins only) Type /give_square [amount] or /give_triangle [amount] to give yourself some foundations of that type. If you don't specify an amount, you will only receive 1. Deploying a "starter" foundation on water Go out to the lake/ocean, select the water foundation as your active item and using the doughnut-shaped guide, deploy it on the water surface. After trying to deploy/expand upon an existing water foundation, a couple of checks will be performed according to global config and individual permission profile for that player: Does the player have permission to deploy the first foundation/expand existing one? Is the player building blocked? How far is the player trying to build from shore (based on the map topology)? Too close/too far? How deep is the water where the player is trying to build? Is it too deep/too shallow? Is the player trying to build too close to the path of cargo/Oil Rig? Is the player allowed to have this many water foundations in the building? If all the checks have been successful, a new twig floor, with a stability 100% (like normal foundations) will be built. It will have some indestructible floatation barrels attached to it, partially covering the water foundation's soft side (the bottom). Then, a water foundation can be expanded, upgraded, protected with a Tool Cupboard (like any other buildings, really), or reinforced. Expanding Once you've deployed your first "starter" water foundation, all the subsequent foundations will be placed using vanilla building mechanics - just take a building plan and build some floors neighbouring your water foundation on the sides! If you have enough water foundation items of the required kind in your inventory, those newly placed floors will also turn into water foundations. And they can call be demolished/upgraded, just like normal twig structures, as soon as you place a Tool Cupboard. Expanding a single-sided water foundation requires 1 proper water foundation item, expanding a double sided water foundation (reinforced one) requires two. Reinforcing Reinforcing a water foundation means making it double sided - so it fully covers the soft side AND gives you the ability to build from the surface down, to the seabed/lakebed! To reinforce, make sure a built water foundation is fully repaired, and them hit it with a hammer. If you have a required water foundation item in your inventory, it will be consumed and the foundation will be reinforced: you will see another floor with floatation barrels attached upside down. If you try to expand a reinforced foundation (by attaching a floor at the bottom, reinforced side) and there's no water foundation above it (normal orientation), it will try to create one, provided you have enough items in your inventory. Reinforcements (upside down water foundations) are always associated with the water foundation they're attached to and cannot exist on their own - if you destroy the water foundation, its reinforcement will be destroyed too. However, destroying the reinforcement will not destroy is water foundation. Upgrading Water base structures Building blocks inside your water bases have certain tier limits associated with them - it's to help balance things out. By default, non-VIP and non-admin players will be able to upgrade water foundations to sheet metal tier, floor frames and wall frames to stone tier, and everything else (including walls, floors and reinforcement foundations) to wood tier. You can easily decide which permission profile has which max tier (per type of building block) in the config. Water Base exclusive features Because water foundations are treated as floors with the stability of a foundation, you can place roofs at "ground level", which is not possible with normal foundations! Similarly, you can leave a "hole" where a water foundation would be and place a floor frame with a hatch instead - now you can enter your base from the bottom, underwater! Reinforcing a water foundation means you'll be able to build down from the surface to the bottom of the water to create extra layers of protection, or... Nettings deployed in wall frames underwater will collect random junk items with editable loot tables, including fish and diving equipment! This feature is heavily configurable and can even be disabled. But also Sharks! Read just below. NEW IN 1.0.5: Beware the Netting Sharks! If enabled, Sharks will randomly spawn around Nettings underwater. Especially ones that have accumulated a lot of items, but only if there's at least 1 player within the distance of 100 meters from the Netting. As soon as the first item is caught in an empty Netting, a random silent timer will be set. Every additional item spawning reduces the timer left by a certain percentage (default by 8%). When it hits 0, AND local/global Netting Shark population limits haven't yet been reached (all in the config), a Shark will spawn somewhere near that Netting. The sharks have a configurable aggro distance and multipliers for speed and health. They will linger around the position of the netting that attracted them and try to pursue anyone in sight. Harvesting a Netting Shark corpse with a proper tool will yield some free items from its entrails - by default 5 times more than you'd normally get from a netting full of items from the default loot tables. Of course the default Shark loot tables in the config are, just like the Netting loot tables, completely configurable - check the config section below. All in all, it's like any other base... just on water, without annoying seafloor supports. The stability of the water foundation is always 100% and goes down the higher you built. The stability of a reinforcement foundation also starts at 100% and goes down the deeper towards the seafloor you build. All the decaying things (walls, floors, doors etc) will require appropriate upkeep materials in the Tool Cupboard. Structures can be repaired, demolished, upgraded and removed using plugins. Bases can be raided, taken over or left to decay. Water Bases Permissions (Oxide.Grant user YourName [permission name starting with waterbases.]) By default, the plugin generates 3 permission profiles in the config - one for admins, one for normal players with no specific permissions (default) and one for VIP. More on permission profiles and config values they can handle can be found in the section Advanced Config. Unless you have added more permission profiles, only these two below are going to be used by your config: waterbases.admin Holders of the admin permission will also be able to run the /wb_cfg, /give_square and /give_triangle commands. Also, by default, they will be associated with the permission profile that has no limits on placing water foundations. waterbases.vip1 Holders of this permission will follow settings and limits associated with with that permission profile. The permissions below are also registered, but not used by default. To use them, just create some permission profiles with those permissions as the key. waterbases.vip2 waterbases.vip3 waterbases.vip4 waterbases.vip5 Admin chat commands (must have ownerid/moderatorid/waterbases.admin permission) /give_square [optional arg: amount of items to receive] Will give the player a given amount of square-shaped water foundations. If no amount is provided, only 1 will be received. /give_triangle [optional arg: amount of items to receive] Will give the player a given amount of triangle-shaped water foundations. If no amount is provided, only 1 will be received. /draw_cargo This will draw a "bubble" (only for you, not every player) around every path node, and the bubble's radius will be taken from your config. If a player tries building inside one of these bubbles, they might get a warning or get prevent from doing so (because cargo ship destroys all structures in its way). Useful to visualise where your players can and cannot build, based on the cargo ship path. /shore_distance This will show you the current distance from the shore, to help you decide how close to/far from the shore to allow players to build. The unit used by Rust to measure shore distance is not in meters, it's something roughly equivalent to 1/10th of a map grid length. Mind you though, it's based off of the map's topology, so it should be fine on procgens, but if you have a custom map without topology layers reflecting the actual shoreline, you might want to disable relying on shore distance in your config. Admin console / chat command This command will work both from the chat (in that case, prefix it with a forward slash / ) and the console, (F1 or server/RCON console). Running this command as a player will require the waterbases.admin permission for players that are not moderatorid/ownerid enabled. wb.give [square/triangle] [partial player name or full steam ID] If a player executes it in the chat or console in-game and they don't specify a recipient, it will be given to the player executing this command. Executing from the server console requires specifying the player. Configuration (oxide/config/WaterBases.json and /wb_cfg chat command) Vast majority of the settings can be configured with the /wb_cfg chat command. Typing it in the chat with no parameters should dump a rundown of config fields and their values. In order to run any of the config commands, you will need to have ownerid or moderatorid (or the waterbases.admin permission). /wb_cfg RelyOnShoreDistance [logical values (true or false)] /wb_cfg GlobalOceanLevelCheckBeforePlacing [logical values (true or false)] /wb_cfg GlobalOceanLevelBaseline [fractions (like 1.2345) between -1000.00 and 1000.00] /wb_cfg CargoShipPathHandling ["Warn", "Prevent" or "None"] /wb_cfg MinDistanceFromCargoShipNode [fractions (like 1.2345) between 0.00 and 10000.00] /wb_cfg UnderwaterNetsCollectJunk [logical values (true or false)] /wb_cfg UnderwaterNetsRandomTimerMin [fractions (like 1.2345) between 0.00 and 10000.00] /wb_cfg UnderwaterNetsRandomTimerMax [fractions (like 1.2345) between 0.00 and 10000.00] /wb_cfg UnderwaterNetsItemLimit [integers (like 12345) between 0 and 100] /wb_cfg UnderwaterNetsSpawnSharks [logical values (true or false)] /wb_cfg UnderwaterNetsSharkRandomTimerMin [fractions (like 1.2345) between 1.00 and 100000.0] /wb_cfg UnderwaterNetsSharkRandomTimerMax [fractions (like 1.2345) between 1.00 and 100000.0] /wb_cfg UnderwaterNetsSharkTimerShortenByPercent [fractions (like 1.2345) between 1.00 and 100000.0] /wb_cfg UnderwaterNetsSharkSpawningMinDistance [fractions (like 1.2345) between 2.00 and 100000.0] /wb_cfg UnderwaterNetsSharkSpawningMaxDistance [fractions (like 1.2345) between 2.00 and 100000.0] /wb_cfg UnderwaterNetsSharkPopulationLimitLocal [integers (like 12345) between 0 and 1000] /wb_cfg UnderwaterNetsSharkPopulationLimitGlobal [integers (like 12345) between 0 and 1000] /wb_cfg UnderwaterNetsSharkSleepDespawnTimer [fractions (like 1.2345) between 2.00 and 100000.0] /wb_cfg UnderwaterNetsSharkHealthMultiplier [fractions (like 1.2345) between 0.001 and 100.0] /wb_cfg UnderwaterNetsSharkSpeedMultiplier [fractions (like 1.2345) between 0.001 and 100.0] /wb_cfg UnderwaterNetsSharkAggroRange [fractions (like 1.2345) between 0.001 and 100.0] /wb_cfg SharkHarvestingLootEnabled [logical values (true or false)] /wb_cfg GuiNEW1AnchorMinX [fractions (like 1.2345) between 0.00 and 1.00] /wb_cfg GuiNEW2AnchorMinY [fractions (like 1.2345) between 0.00 and 1.00] /wb_cfg GuiNEW3AnchorMaxX [fractions (like 1.2345) between 0.00 and 1.00] /wb_cfg GuiNEW4AnchorMaxY [fractions (like 1.2345) between 0.00 and 1.00] /wb_cfg GuiNEW5OffsetMinX [fractions (like 1.2345) between 0.00 and 1.00] /wb_cfg GuiNEW6OffsetMinY [fractions (like 1.2345) between 0.00 and 1.00] /wb_cfg GuiNEW7OffsetMaxX [fractions (like 1.2345) between 0.00 and 1.00] /wb_cfg GuiNEW8OffsetMaxY [fractions (like 1.2345) between 0.00 and 1.00] /wb_cfg GuiTextSize [integers (like 12345) between 0 and 100] /wb_cfg GuiButtonColor [hexadecimal numbers WITHOUT preceding # (like 3db4b3)] /wb_cfg GuiTextColor [hexadecimal numbers WITHOUT preceding # (like 3db4b3)] /wb_cfg GuiButtonAlpha [fractions (like 1.2345) between 0.00 and 1.00] /wb_cfg GuiTextAlpha [fractions (like 1.2345) between 0.00 and 1.00] /wb_cfg EnableBarrelEntities [logical values (true or false)] Advanced config (only editable through oxide/config/WaterBases.json) Water foundation crafting cost Here you can adjust how much it costs to craft water foundations. Make it more expensive, less expensive, or add/remove required materials. The cost will stay the same for all permission profiles. A full list of short names for items can be found at https://www.corrosionhour.com/rust-item-list/ "CraftingCostSquare": [ { "Shortname": "wood", "Amount": 100 }, { "Shortname": "metal.fragments", "Amount": 200 } ], "CraftingCostTriangle": [ { "Shortname": "wood", "Amount": 50 }, { "Shortname": "metal.fragments", "Amount": 100 } ], Shortname should belong to one of the available items in-game. The amount should be a whole number larger than 0 and smaller than the limit of a signed 32-bit integer (2 147 483 647). Permission profiles Using profiles you can quickly create/edit different permissions for different players, for example, if you have more than 1 VIP tier on your server - just add some new profiles. Different players can have different limits and permissions associated with building water bases. To check which permission profile the player should fall under, the plugin goes through all permission profiles and checks whether the player has that permission granted. The permissions are checked in order, meaning that if the player doesn't have the first permission, it will try the next permission on the list, etc (similar to how Auto Kits checks which kit to give to a player based on their permissions in order). If the player doesn't have any permissions from the list granted, they will fall back to the "default" profile. That's the only one that you shouldn't remove! If you remove it, a new one with default values will be created. So if you don't want your default, non-VIP players to build water bases, don't remove the default profile, just take away privileges in that profile (like deploying/expanding/reinforcing). You don't have to use the built-in VIP permissions - any permission from any plugin will do just fine! By default, three permission profiles are generated in the config: default, waterbases.admin and waterbases.vip1. The default permission profile will apply to any player who doesn't have any permissions listed in the profile list - let's have a look at it: "PermissionProfiles": { "default": { "PermissionRequired": "default", "MaxBuildingGradeGeneric": "Wood", "MaxBuildingGradeFrames": "Stone", "MaxBuildingGradeWaterFoundations": "Metal", "WaterDepthMin": 2.0, "WaterDepthMax": 100.0, "MaxWaterFoundationsPerBuilding": 25, "MinDistanceFromOilrig": 200.0, "MinDistanceFromShore": 2.0, "MaxDistanceFromShore": 20.0, "CanDeployWaterFoundations": true, "CanReinforceWaterFoundations": true, "CanExpandWaterFoundations": true, "CanExpandReinforcedFoundations": true, "CanCraftWaterFoundations": true, "RequireMaterialsForCrafting": true, "WorkbenchLevelRequired": 2.0, "CanDeployUnderwaterNets": true, } PermissionRequired should contain an already existing permission registered by any plugin in the form of pluginname.permissionname MaxBuildingGradeGeneric, MaxBuildingGradeFrames andMaxBuildingGradeWaterFoundations define the highest allowed grade for a particular part of a water base. Generic means anything that's not a water foundation or a door/floor frame (that includes normal floors, walls, half walls, and inverse foundations). For those 3 settings, the accepted options are "Twigs", "Wood", "Stone", "Metal" or "TopTier". Set all of them to "TopTier" if you don't want any tier limits on water bases. WaterDepthMin and WaterDepthMax define the allowed range for water depth when placing water foundations - to make sure that certain players are not building in water that is too shallow/too deep. The unit meters. MaxWaterFoundationsPerBuilding is what it sounds like it will prevent a player under this permission profile from adding more water foundations to a water base, limiting their size. Set to a large value like 100000 for virtually no limits. MinDistanceFromOilrig will define the minimum distance from the closest oilrig (in meters) that has to be respected before placing a water foundation down. Decrease to let players build closer, increase to make them build farther away. MinDistanceFromShore and MaxDistanceFromShore both rely on your map topology. If you're sure that you're quite close to the shore, but the /shore_distance command shows you ridiculous values, it means your map does not have the topology map painted properly (contact the map dev and let them know!). In that case, you should set the RelyOnShoreDistance option in the config to false and instead rely on water depth (if shore distance is enabled, it will rely on both). The unit here is not a meter, but roughly 1/10th of a map grid (around 15 meters). CanDeployWaterFoundations if set to true, will allow players using this profile to deploy newly started foundations (using the doughnut guide, provided they have a properly shaped water foundation item to be consumed). CanReinforceWaterFoundations if set to true, will allow players using this profile to reinforce water foundations by hitting them with a hammer (provided they have a properly shaped water foundation item to be consumed). CanExpandWaterFoundations if set to true, will allow players using this profile to build more water foundations upon already existing ones by placing neighboring floors with their building plan (provided they have a properly shaped water foundation item to be consumed). CanExpandReinforcedFoundations if set to true, will allow players using this profile to attach a floor to the side of a reinforcement foundation - and as long as they have 2 water foundation items in their inventory, they will expand that reinforced foundation along with its water foundation. CanCraftWaterFoundations if set to true, will allow players using this profile to craft water foundations using a GUI in the bottom-right (showing while a Building Plan is equipped). Profiles with this setting set to false won't display those GUIs and players will have to find other ways of obtaining water foundations (loot, kits, server rewards etc). RequireMaterialsForCrafting if set to true, players using this profile will need to have required crafting materials in their inventory when trying to craft a Water Foundation. If set to false, the player will be able to craft an infinite amount of water foundations for free, so use them with caution. WorkbenchLevelRequired Set to 0.0 (no workbench nearby required), 1.0 (Level 1 required), 2.0 (Level 2 required) or 3.0 (Level 3 required) for crafting Water Foundations. CanDeployUnderwaterNets if set to true, players will be able to deploy nettings in underwater wall frames. Those settings will slowly accumulate underwater junk items if the feature is enabled on your server - look below for the loot table configuration. Underwater junk & Netting Shark loot tables If you have not disabled underwater nets collecting junk, this is where you can adjust the kind and rarity of certain items. You can even remove entries and add your own, including a custom skin and item name! A "loot table" is perhaps not the right term, as the list contains individual chances of a "caught" item being of a particular kind. There can be only 1 item caught at a time, and the table defines random weights for every possible entry. The larger the weight (compared to the sum of all weights), the bigger chance of encountering a particular item. So if you have 10 entries and each of them have a weight of 1, each item will have an equal 10% chance of being one of the random entries in the list (as the weights sum up to 10). Thus you can have some items really common, and some of them really rare. Here are 2 sample entries from the list: { "Shortname": "innertube", "CustomName": null, "SkinID": 2484982352, "RandomChanceWeight": 1.0, "MinRandomAmount": 1, "MaxRandomAmount": 1 }, { "Shortname": "innertube", "CustomName": null, "SkinID": 2485021365, "RandomChanceWeight": 1.0, "MinRandomAmount": 1, "MaxRandomAmount": 1 }, Shortname is the most important bit - make sure it's correct! You can find a link to a full list of those names above. CustomName lets you give items caught in the netting different names. You can leave that null to leave a default item name. In this example, the two items are water foundations - the proper name for those items will be applied automatically by the plugin anyway. Whatever you type there, make sure to encompass it in quotes, like "CustomName": "My Custom Item Name" if it's not null! SkinID is pretty self-explanatory - it's the long number in the URL of a Steam Workshop item. By default, it's 0 (no skin). RandomChanceWeight lets you decide the item's rarity when spawning - relative to the rarity of other items. Increase or decrease this number (it can be fractional) to make the item more or less rare. MinRandomAmount and MaxRandomAmount are what they sound like - they should both be larger than 0 (whole numbers) and when that particular item is caught, the stack will contain an amount between these two numbers. Translation support (oxide/lang/en/WaterBases.json) Almost every string the players see, including names for the water foundation items and messages displaying in the chat and the GUI, can be edited. Just load the plugin and let it generate the file - after you edit it, reload the plugin.$29.99 -
Version 1.0.2
545 downloads
Troll those cheaters in style with the Rocket Man ! After exploding up in the sky their loot will drop all over the place, just like a Piñata. Use the chat command /troll.rocketman <player> or the rcon command troll.rocketman <player>. The player argument will accept a partial player name or a full Steam ID. All users with the Oxide "admin" role will get access to the command, but you may grant per user/group access using the permission oxidationtrollrocketman.use.$1.99- 15 comments
- 5 reviews
-
- 1
-
-
- #admin
- #admintool
- (and 5 more)
-

Version 1.4.8
1,124 downloads
This plugin adds jet skis with customizable physics! Chat Commands /jetski - Spawns jet ski near player (requires jetski.spawn permission) /jetski remove - despawns player's jet ski (requires jetski.despawn permission) /buyjetski - allows player to buy jet ski item and deploy it later (requires jetski.buy permission) Console Commands givejetski <amount> <player name> - give specified amount of jet skis to specified player (can be run in the server console or by player with jetski.admin permission) Admin Chat Commands (requires jetski.admin permission) /jetski_debug - show buoyancy points Each buoyancy point has force and size parameters Permissions jetski.admin - admin permission jetski.spawn - allows players to spawn a jetski via /jetski jetski.buy - allows players to buy jet ski deployable via /buyjetski jetski.free - allows players to use /jetski for free (if price is not 0) jetski.despawn - allows players to despawn a jet ski via /jetski remove Localization English Russian Configuration Example of JetSki.json { "(1.1) Jet ski price (set value to 0 to make it free, use ServerRewards or Economics as a shortname to use RP points or Economics balance respectively)": { "ShortName": "scrap", "Amount": 75, "SkinID": 0 }, "(1.2) Spawn cooldown (in seconds)": 120, "(1.3) Allow only 1 jet ski per player": false, "(1.4) Allow spawning jet skis only on beaches": false, "(1.5) Amount of jet skis /buyjetski command gives": 1, "(1.6) Starting fuel": 0, "(2.1) Allow picking up the jet ski only in building privilege": false, "(2.2) How much HP is reduced when the jet ski is picked up (0-100)": 25.0, "(2.3) Jet ski item name": "Jet Ski", "(2.4) Jet ski item skin ID": 2935987835, "(2.5) Jet ski item ID": 794443127, "(3.1)Make all snowmobiles jet ski": true, "(3.2) Allow Jet ski to drive on land": true, "(4.1) Enable 'boost' button (Left Shift)": false, "(4.2) 'Boost' button thrust": 10000.0, "(4.3) 'Boost' duration (seconds)": 5.0, "(4.4) 'Boost' cooldown (seconds)": 30.0, "(5.1) Engine thrust": 5000, "(5.2) Engine thrust on land": 49, "(5.3) Move slowly on grass or roads": true, "(5.4) Steering scale": 0.05, "(5.5) Automatically flip jet skis": false, "(5.6) Off axis drag": 0.35, "(5.7) Buoyancy force": 730.0, "(6.1) Jet ski prefab": "assets/content/vehicles/snowmobiles/tomahasnowmobile.prefab", "(6.2) Thrust point position": { "x": -0.001150894, "y": 0.055, "z": -1.125 }, "(6.3) Buoyancy points": [ { "Position": { "x": -0.62, "y": 0.09, "z": -1.284 }, "Size": 1.3 }, ... } ] } API BaseEntity SpawnJetski(Vector3 position, Quaternion rotation) Item CreateJetskiItem()$16.99 -

Version 1.3.2
521 downloads
What kind of survival game doesn't let you break your leg? With this plugin, players can sustain injuries and become infected with diseases. Currently there are 6 status conditions, each fully customizable through the plugin's configuration file. Status Conditions /inflict <player> concussion /cure <player> concussion Periodically blurs the player's vision. Chance to occur when a player is headshot. More likely to occur with more powerful weapons. /inflict <player> foodpoisoning /cure <player> foodpoisoning Forces the player to vomit occasionally which damages their food and thirst levels. Caused by eating spoiled meat. Can be cured by drinking healing tea. /inflict <player> brokenleg /cure <player> brokenleg Prevents sprinting and causes damage when moving. Can happen when taking fall damage, chance increases the greater the height. Can also occur when being shot in the leg, this is more likely to happen the more powerful the weapon is. /inflict <player> rabies /cure <player> rabies Periodically deals damage to the victim and flashes their screen red. Can be rarely contracted from the bites of wild animals. There is no cure, it's best to put the victim out of their misery. /inflict <player> tapeworm /cure <player> tapeworm The effect of food and water consumption is greatly reduced. Can occur from consuming raw or uncooked meat. Easily treatable with anti-biotics (anti-rad pills). /inflict <player> z13virus /cure <player> z13virus Not much is known about this disease, however it is often mistaken for rabies. Something terrible occurs when the victim dies... Seems to occur when a player is bitten by a zombie (scarecrow). Customization Each status condition has properties that can be customized through the plugin config. Here is a quick description of each of the properties. Enabled - Set to false to disable this condition. Likeliness - The chance (0 - 1.0) of this condition occurring through any means. For some conditions, like concussion or broken leg, this will be the MINIMUM chance for this to occur, and it will become more likely depending on how much damage is taken. This is only relevant for some conditions, other conditions may use items/entities to inflict players. Icon - The url of the icon for this condition. From Legshots - (Broken Leg Only) Set to false to disable this from occurring when a player is shot in the leg. From Falling - (Broken Leg Only) Set to false to disable this from occurring when a player takes fall damage. Damage Scale - The damage effect multiplier for the status condition. This will modify the damage taken for all types (hunger, thirst, ect.) not just health. For example, a value of 0.5 will do half damage while a value of 2.0 will do double damage. Show Duration - Set to false if you do not want player's to see how many seconds are remaining for this condition. There is a slight performance cost for this being set to true. Show Indicator - Set to false if you do not want a custom status framework indicator to show up for this condition. Cure Items - Item short names with corresponding chances from 0-1.0. The items listed will have a chance to cure the condition when consumed/used by the player. An item skin can optionally be specified, see Item Skins section. Interval Min Seconds - The minimum amount of time in seconds between a condition's symptom from occurring. Only relevant for some conditions. Interval Max Seconds - The maximum amount of time in seconds between a condition's symptom from occurring. Only relevant for some conditions. Duration Min Seconds - The minimum number of seconds a condition will last for. Duration Max Seconds - The maximum number of seconds a condition will last for. Move Items to Zombie - (Z13 Virus Only) Set to false to disable moving items from a corpse to the newly spawned zombie. The items will instead be left in a backpack. Reanimation Seconds - (Z13 Virus Only) The number of seconds before an infected player's corpse is reanimated into a zombie. Infliction Entities - Entity short names with corresponding chance of inflictions from 0-1.0. The entities listed will have a chance to inflict the condition when dealing damage to a player. Infliction Items - Item short names with corresponding chance from 0-1.0. The items that are listed will have a chance to inflict the condition when consumed/used by the player. An item skin can optionally be specified, see Item Skins section. Infliction Damage Action - Determined the way that an infliction entity must deal damage in order to inflict a condition. The allowed values are "melee", "ranged" or "any". Item Skins You can optionally specify that only an item with a certain skin will count for Cure and Infliction items. To do so just append #<skin id here> to the end of the item shortname. If both a skinned item and a non skinned item definition are specified, then the skinned definition will take priority if applicable. For example if your config looks like this then... If Anti-Rad Pills with the Skin 12345 are consumed, then it has a 100% cure chance. Anti-Rad Pills with any other skin (including default) only have a 50% cure chance. Only Apples with the 67890 skin have a 100% cure chance. All other Apples have 0% cure chance (because they are not listed). "Cure Items": { "antiradpills": 0.5, "antiradpills#12345": 1.0, "apple#67890": 1.0 }, Creating Your Own Custom Status Conditions Please note, this is a WIP feature, there may be some bugs, please report them if you find them! As of v1.2.0 you can use the API method "CreateCondition" to create your own plugin that can register custom status conditions through Injuries and Diseases. But what if you're not a developer? No problem! I have created a plugin for you with a ton of configurable options for you to create your own status conditions. In either case, here are some guides for what you need to do to create your own status conditions. For Non-Developers If you are not a plugin developer and you would like to create your own custom status conditions then you can download this plugin file and edit the config that it generates to customize the status conditions how you like. Currently there is a limited amount of things you can do for a status condition. If there is a specific condition, trigger, or effect you would like included, please open a support ticket and make a suggestion! Or, if you want full freedom, you can see the developer section to create your own status condition plugin exactly how you would like. For Developers If you are a plugin developer and would like to create a plugin that adds some custom status conditions, then you can make use of the "CreateCondition" API method (see API section) to register any custom conditions you would like to add. To see a code example of how this will work you can refer to the plugin file download like mentioned in the "For Non-Developers" section above. That plugin contains some hints on how the plugin must operate to work with Injuries and Diseases. When creating a custom condition, there are certain aspects that Injuries and Diseases will handle, and others that your plugin will need to take care of. Here is a breakdown of some of those things: Injuries and Diseases will handle... Showing status indicators Status duration and countdowns Showing infliction, cure and diagnosis messages (they need to be in YOUR plugin's localization file though) The effect that occurs on intervals and when the condition is first inflicted (you pass these methods into the CreateCondition method) Whether your conditions duration/indicator is shown (pass this into the CreateCondition method) Your plugin should handle... Registering conditions using the API Means of inflicting your condition (entity attack, item consumed, ect) Means of curing your condition Localization (Injuries and Diseases will reference some of these) Adding images to image library Any configuration options pertaining to your custom conditions Permissions injuriesanddiseases.admin Required for admin commands injuriesanddiseases.doctor Designates a player as a doctor Required for doctor commands injuriesanddiseases.immune Player cannot be affected by any conditions Will also cure the player of any current conditions when granted Admin Commands /inflict <player> <condition> <revealed?> Inflicts the player with the specified condition (see status conditions section). Optionally, you can set if the status will be revealed or not. Default value is set in the config. /cure <player> <condition?> Cures the player from all conditions. If the condition is specified, the player will be cured of just that condition. /conditions <player> Returns a list of all the conditions a player is suffering from and includes the remaining duration. /reveal <player> <condition> Reveals the condition to the player if it has no already been revealed. Doctors (Optional) As an optional feature, you can assign a player as a doctor. Doctors can diagnose players, which will reveal to the player the condition that their are afflicted with. By default, this isn’t necessary, as players will automatically be notified of what their condition is. However, in the config, you can set it so that conditions are unknown to players until they get a doctor to diagnose them. Once they have diagnosed a player, the doctor will also be informed of how to cure the condition. Doctors can be assigned with the doctor perm, and have access to the following command: /diagnose Will diagnose any undiagnosed conditions of the player they are looking at. Will also recommend treatment if available. Supported Plugins Injuries and Diseases has built in support for the following plugins: ZombieHorde The default config values contain support for ZombieHorde zombies to inflict the Z13 Virus The keyword in the config for zombie horde entities is "zombie" WalkingDead The default config values contain support for Walking Dead zombies to inflict the Z13 Virus The Walking Dead plugin uses the "scarecrow" entity for their zombies, which is already included BotReSpawn If you want BotReSpawn entities to inflict a condition, use the keyword "botrespawn" in the infliction entities section of the condition config. Configuration Death Removes Conditions - Set to false if you want conditions to persist even when a player dies. Pause on Disconnect - Set to false if you want the condition timer to continue even when a player is sleeping. Set to true if you want it to pause when they are sleeping. Require Diagnosis - Set to false if you want conditions to be automatically revealed to player's when they are inflicted. Set to true if you want them to appear as unknown until a doctor diagnoses them. Show Doctor Indicator - Set to true if you want an indicator to appear for player's with the doctor permission. Messages Enabled - Set to false if you do not want messages to appear in the chat for player's when their conditions status is updated. Message Icon ID - The steam ID of the player portrait you want to appear for all chat messages from this plugin. Images - A list of image urls for various images used in this plugin. Status Conditions - Configuration for status conditions (see customization section). Version - Keeps track of what version your configuration was generated for, do not edit manually. Developer API With these developer API tools you can extend the functionality of existing conditions through code. You can add additional effects by making use of the various hooks for each condition. /* * Returns a list of all enabled conditions. */ List<string> GetConditions(); /* * Returns a list of conditions a player is inflicted with. */ List<string> GetPlayerConditions(ulong userId); /* * Returns true if the player has the specified condition. */ bool HasCondition(ulong userId, string conditionNameId); /* * Inflicts the player with the specified condition. */ void SetCondition(ulong userId, string conditionNameId, bool revealed); /* * Removes the condition for the player. */ void RemoveCondition(ulong userId, string conditionNameId, bool cured); /* * Removes all conditions for the player. */ void RemoveAllConditions(ulong userId, bool cured); /* * Reveals the condition to the player if it is not already revealed. */ void RevealCondition(ulong userId, string conditionNameId); /* * Create a custom condition. BETA */ void CreateCondition(Plugin plugin, string conditionNameId, string imageLibraryIconName, int minIntervalSeconds, int maxIntervalSeconds, int minDurationSeconds, int maxDurationSeconds, bool showDuration, bool showIndicator, Action<BasePlayer> beginEffect = null, Action<BasePlayer> intervalEffect = null);$19.99 -
Version 1.1.3
59 downloads
Perform flips, jumps, and even attempt to fly on your bike, all while collecting money or simply having fun. This plugin offers extensive customization options, allowing you to tweak various parameters to control the bike's behavior to suit your style. FEATURES: Change a couple of parameters to make the bike go the way you want it to Setup the Score System so players get RP points for what they do on the bike Allows you to do jumps on bikes (use duck button) Adds sprint boost for motorbikes Now the bike can do flips Driver can change view mode by pressing the reload button Players can disable or enable modifiers via command "bikemodifierswitch" Let me know if you want me to add something to this plugin { "Enable score system": true, "Score system [ServerRewards or Economics required]": { "stuntriding.base": { "1 RP per points [every N points player will get 1 RP]": 100, "Minimum seconds in the air to start gain points": 2, "Points for each N second in the air": 200, "Frequency of gaining points in the air": 0.75, "Points per flip": 900, "Delay before the points will convert to RP": 5.0, "Message after convert points to RP": "You gained {0} points. It converted to {1} RP" } }, "Bikes": { "pedalbike": { "Permission for use [if a rider doesn't have permission the bike behavoiur won't change]": "stuntriding.licence", "Enable boozy view for driver on a bike by default": true, "Swap to the third person viewmod by press reload button": true, "Engine power [39 for motor and 4 for pedal by default]": 9, "Mass [200 for motor and 60 for pedal by default]": 30, "Rotation speed in the air [right/left]": 0.1, "Sprint time [for pedal bikes | -1 = inifinity sprint time | 5 is default]": -1.0, "Sprint regen time [for pedal bikes | 10 is default]": -1.0, "Sprint speed multiplier [0.3 is default]": 0.5, "Use jumps": true }, "motorbike": { "Permission for use [if a rider doesn't have permission the bike behavoiur won't change]": "stuntriding.licence", "Enable boozy view for driver on a bike by default": true, "Swap to the third person viewmod by press reload button": true, "Engine power [39 for motor and 4 for pedal by default]": 60, "Mass [200 for motor and 60 for pedal by default]": 200, "Rotation speed in the air [right/left]": 0.1, "Sprint time [for pedal bikes | -1 = inifinity sprint time | 5 is default]": -1.0, "Sprint regen time [for pedal bikes | 10 is default]": -1.0, "Sprint speed multiplier [0.3 is default]": 0.5, "Use jumps": true }, "motorbike_sidecar": { "Permission for use [if a rider doesn't have permission the bike behavoiur won't change]": "stuntriding.licence", "Enable boozy view for driver on a bike by default": true, "Swap to the third person viewmod by press reload button": true, "Engine power [39 for motor and 4 for pedal by default]": 60, "Mass [200 for motor and 60 for pedal by default]": 200, "Rotation speed in the air [right/left]": 0.1, "Sprint time [for pedal bikes | -1 = inifinity sprint time | 5 is default]": -1.0, "Sprint regen time [for pedal bikes | 10 is default]": -1.0, "Sprint speed multiplier [0.3 is default]": 0.5, "Use jumps": false } } }$10.00- 14 comments
- 1 review
-
- 1
-
-
- #vehicles
- #server rewards
- (and 3 more)
-
Version 1.4.0a
89 downloads
This is a Racetrack monument. Great as a standalone monument, but even better as a racing event area. Build your favourite vehicle and line up against your rivals in a guaranteed action packed racing experience with your friends or server community Prefab count: 5321 Racetrack 1 contains the following: Pitlane Garage with 10 vehicle lifts Blue card puzzle (Vehicle themed loot table) Chinook Drop Zone Several Sewer access/escape points Day/Night sensor lighting CCTV Camera Coverage to view events from any 'Computer Station' 2 Vehicle Part Vending Machines 'Aged Robob Series 3' vending bot (Vehicle Parts 2) Oil Refinery, Tier 1 work bench, Repair bench Prefab Modifiers: Alpha Height Splat Topology Paths CCTV codes: RACETRACK0 RACETRACK1 RACETRACK2 RACETRACK3 RACETRACK4 RACETRACK5 RACETRACK6 Any issues? Give me a shout on my Discord Channel Note! You will need the latest versions of Oxide and Oxide.Ext.RustEdit.dll to use these on a map/server. Optional Plugins: RaceTrack$14.99- 9 comments
- 2 reviews
-
- 3
-
-
- #racetrack
- #racing
- (and 9 more)
-
Version 1.0.8
228 downloads
Zombie Infection is an arena style plugin that creates an arena high in the sky. It pits 2 teams against each other: Survivors and Zombies. All players spawn as Survivors when the game begins. The survivors must find weapons and ammunition to defend themselves from the oncoming Horde. After 45 seconds (configurable), a random player is selected to become the leader of the Zombies, otherwise known as Zombie Prime. They are re-equipped and are allocated a large amount of health When a zombie hits a survivor with a melee weapon, that player is infected and is re-spawned as a zombie. Regular zombies do not have as much health as Zombie Prime, but they will re-spawn an infinite amount of times when killed. The survivors win by surviving for the entire round (default 10 minutes), or by eliminating Zombie Prime. The Zombies win by infecting all of the survivors. It is worth mentioning that only Zombie Prime is rewarded for the zombie team win. Regular zombies are instead rewarded based on the number of survivors they infect. Each prize type can be changed via the config. zistart <arena name> - Manually starts the Zombie Infection game [requires zombieinfection.admin] ziend - Manually ends the game [requires zombieinfection.admin] zisetcentrepoint - Changes the spawn location of the arena [requires zombieinfection.admin] ziwipeoldarena - Manually wipes old arena data [requires zombieinfection.admin] zijoin - Joins an active lobby zileave - Leaves the game and returns the player to their last location with all of their equipment ziprize - Redeems outstanding prizes to the players inventory$19.99 -
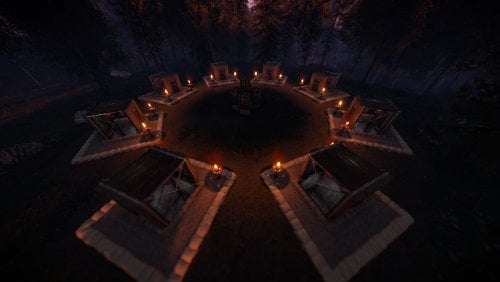
Version 1.1.18
270 downloads
This plugin and prefab combo adds a unique game arena to your map with very minimal effort. The plugin automates the game play entirely, and can be scheduled to run at an interval along side other plugins that use EventHelper. The game revolves around finding loot from crates (primitive by default), and killing each other while a radiation zone closes in around you. The zone is represented by a dome that will shrink in size at a configurable rate, as the game progresses. This will force players back to the centre for a final showdown. The winner will be awarded a prize (configurable). This package includes everything required to run the game manually or automatically, and features: Customizable weapon/armor lists (primitive and guns come default). A lobby with 8x elevators to bring contestants into the game. A configurable plugin to handle gameplay completely (more info below). Custom UI for the radiation zone. Running the game: The game will run automatically every hour (by default). It will give players 5 minutes to join (by default), or can be manually started by typing in /starthg <seconds>. Players join by typing in /hg (by default), which will strip and save all of their equipment, note down their metabolism stats (hunger, thirst, health etc) and teleport them into the lobby. The players will then be added to the "roster" and will be told to get into an elevator. A player cannot join if they have a car key in their inventory, or an active crafting que. Upon the game commencing, players will be taken to the surface via an elevator and the game will begin when the doors open. The dome spawns after 60 seconds (by default), and will start shrinking. Leaving the bounds of the dome will bring up a hud indicating that the player is in a radiation zone, and will start giving the player radiation stacks for as long as they are outside. Dying removes the player from the game, returning their equipment on respawn, and teleporting them back to the location that they were at originally. A player can also manually leave the game by typing in /leave (by default). The game ends when there is 1 player left standing. The player will be returned to their original location, with their original health and metabolism stats, and will have the ability to claim a prize by typing /claimprize. Commands: /starthg <seconds> - starts the game manually and resets the automatic start timer. Seconds = how many seconds before the game actually begins. /endhg - ends the current round of hungergames. /hg - joins the hungergames event. This command is configurable. /leave - leaves the hugnergames event. This command is configurable. /addfinalpoint - adds a potential end zone. /hgplayers - Lists all players who are still alive in the current event. Optional plugin - Night Vision You can the Nightvision plugin on Umod to allow for players to enjoy the event, even during pitch black nights. The plugin will enable/authorise a user to use nightvision when they join the event, and will then remove that privilege when they leave. Link: https://umod.org/plugins/night-vision Installation Follow the youtube guide for installation. The plugin will automatically acquire the button IDs when loaded for the first time. Be sure to delete the data file when you wipe the server so that it can acquire the new .net.IDs. Permissions "hungergames.admin" - Required to start/stop hungergames manually. "hungergames.list" - Required to use the /hgplayers command. See youtube video above for more information on adding this prefab to your map/server.$19.90


.thumb.jpg.4abde6ce06035db4993ba98aa473b214.jpg)
.thumb.png.67a98d42e59baa0ab131fc277054bd26.png)