DeutscherRitterPlatz's Wishlist
-
AdventureJournal
Adventure Journal
The "Adventure Journal" plugin is not a quest plugin per se, but rather a tool that allows Rust players to view specific information and messages based on their permissions. It provides an intuitive graphical interface for displaying these details. A complementary quest plugin, currently under development, will soon be integrated with Adventure Journal to offer an complete gaming experience.
Key Features:
Permission-Based Display : Displays information and messages customized according to players' permissions.
User-Friendly Interface : Ensures easy navigation through a well-designed graphical interface.
Extended Customization : Administrators can configure and add as many permission-based messages as they desire in the config file.
Integration with ImageLibrary : Incorporates ImageLibrary for an improved visual experience.
Commands:
/journal : Allows players to access their "Adventure Journal".
Interface Features:
Navigation Buttons : "Next" and "Previous" buttons are displayed based on the number of pages.
Visual Indicators : Buttons change color when selected, providing clear visual feedback.
Configuration Files :
{ "DefaultText": "This journal provides a detailed overview\nof your current quests...\n\nSimply select a quest using the buttons\nto view all its details and rewards.\n\nFor your reference, symbols appear\nabove Quest NPCs:\n\n- <color=yellow><size=14>!</size></color> for a new quest\n- <color=grey><size=14>!</size></color> for an ongoing quest\n- <color=yellow><size=14>?</size></color> for a quest to turn in.\n\nEmbark on your adventure!\nSelect a quest for more information.", "DefaultTitle": "<color=#E3BF4B>ADVENTURE JOURNAL</color>", "PanelWidth": 0.3, "PermissionMessages": [ { "ButtonTitle": "Blacksmith's Aid", "Message": "A skilled blacksmith in the village has recently discovered the remnants of an ancient artifact. This artifact, believed to have vast historical significance, requires a delicate touch to repair. The blacksmith is seeking someone with a steady hand and a keen eye to help restore it. Your assistance could unveil a piece of lost history.\n\n<color=#E3BF4B><size=14>Objective</size></color>\n\nLend your skills to repair an item at the blacksmith's workshop.", "Permission": "permadder.start", "QuestItem": null, "QuestItemSkin": null, "RewardText": "- €750 and 50 HQ Metal", "RewardTitle": "<color=#E3BF4B>REWARD</color>", "Title": "<color=#E3BF4B>Ancient Restoration</color>" }, { "ButtonTitle": "Sulfur Harvest", "Message": "The local alchemist, a man of mysterious concoctions and experiments, is running short on sulfur, a vital ingredient. He's put out a call to adventurers promising a handsome reward for a substantial contribution. The path to obtaining sulfur might be treacherous, but the rewards are enticing.\n\n<color=#E3BF4B><size=14>Objective</size></color>\n\nVenture out and collect 500 Sulfur for the alchemist's experiments.", "Permission": "permadder.second", "QuestItem": null, "QuestItemSkin": null, "RewardText": "- VIP status for 5 days", "RewardTitle": "<color=#E3BF4B>REWARD</color>", "Title": "<color=#E3BF4B>Alchemist's Request</color>" }, { "ButtonTitle": "Bear Hunt", "Message": "Recent sightings of aggressive bears have put the village on edge. These bears, bolder than usual, pose a threat to the villagers and their livestock. Brave souls are being sought to confront these bears and ensure the safety of the community.\n\n<color=#E3BF4B><size=14>Objective</size></color>\n\nTrack down and eliminate 5 menacing bears troubling the villagers.", "Permission": "permadder.third", "QuestItem": null, "QuestItemSkin": null, "RewardText": "- A rare weapon and survival supplies", "RewardTitle": "<color=#E3BF4B>REWARD</color>", "Title": "<color=#E3BF4B>Bear Threat</color>" }, { "ButtonTitle": "Forest Forager", "Message": "The village is abuzz with anticipation for the upcoming grand feast. The village cook, known for his culinary delights, needs a particular ingredient - wild mushrooms. These mushrooms add a unique flavor, and he's seeking skilled foragers to procure them.\n\n<color=#E3BF4B><size=14>Objective</size></color>\n\nDelve into the forest and gather 20 wild mushrooms for the grand feast.", "Permission": "permadder.forest", "QuestItem": null, "QuestItemSkin": null, "RewardText": "- Gourmet meal and 100 wood", "RewardTitle": "<color=#E3BF4B>REWARD</color>", "Title": "<color=#E3BF4B>Mushroom Hunt</color>" }, { "ButtonTitle": "Lost Relic", "Message": "In the heart of the forest, whispers speak of a lost family relic. An old hermit, the last of his lineage, is desperate to find this heirloom. It's believed to be hidden deep within the forest, waiting for a brave soul to retrieve it.\n\n<color=#E3BF4B><size=14>Objective</size></color>\n\nEmbark on a quest to find and return the precious lost relic to the old hermit.", "Permission": "permadder.relic", "QuestItem": null, "QuestItemSkin": null, "RewardText": "- €300 and a mystery item", "RewardTitle": "<color=#E3BF4B>REWARD</color>", "Title": "<color=#E3BF4B>Search for the Lost</color>" }, { "ButtonTitle": "Lumberjack's Challenge", "Message": "The sound of axes striking wood echoes as the village lumberjack announces a challenge. He believes no one can match his skill and speed in chopping trees. This friendly competition is an opportunity to prove your mettle and earn respect.\n\n<color=#E3BF4B><size=14>Objective</size></color>\n\nJoin the lumberjack's contest and chop down 15 trees to showcase your skills.", "Permission": "permadder.lumberjack", "QuestItem": null, "QuestItemSkin": null, "RewardText": "- €400 and a custom axe", "RewardTitle": "<color=#E3BF4B>REWARD</color>", "Title": "<color=#E3BF4B>Timber Trials</color>" }, { "ButtonTitle": "The Fisher's Favor", "Message": "As the cold season approaches, the village's eldest fisherman reminisces about bountiful catches of the past. He wishes to pass on his fishing knowledge and seeks help to gather a diverse range of fish for the village.\n\n<color=#E3BF4B><size=14>Objective</size></color>\n\nLearn from the master and catch 10 fish of any kind to stock up for the coming months.", "Permission": "permadder.fisher", "QuestItem": null, "QuestItemSkin": null, "RewardText": "- Fishing gear and €200", "RewardTitle": "<color=#E3BF4B>REWARD</color>", "Title": "<color=#E3BF4B>Fishing Expedition</color>" }, { "ButtonTitle": "Guardian of the Night", "Message": "Mysterious creatures have been spotted causing trouble under the cover of night. The village needs a brave soul to watch over it during these dark hours. This task will require vigilance, courage, and the ability to confront whatever lurks in the shadows.\n\n<color=#E3BF4B><size=14>Objective</size></color>\n\nPatrol the village for 5 nights, keeping it safe from nocturnal threats.", "Permission": "permadder.guardian", "QuestItem": null, "QuestItemSkin": null, "RewardText": "- Exclusive night vision gear and €500", "RewardTitle": "<color=#E3BF4B>REWARD</color>", "Title": "<color=#E3BF4B>Guardian of the Night</color>" } ], "TextColor": "1 1 1 1" }
The fonctionnality QUESTIEM AND QUESTITEMSKIN is for using with RepairProgress. For show % of repair spécific item :
Example: You set up a destroyfuse with skin 123456789. You can either use zoneperm and assign the repairprogress permission within the zone, so that the fuse with the skin is repaired only in that area. Alternatively, you can grant the permission to the player, and as soon as they have the item on them, it will start to repair. As the item repairs over time, the percentage of repair progress will increase directly in their journal.
-
AMAZON (custom map)
The map partially follows the landscape of the Amazon River. A new unusual gaming experience, since almost the entire central part of the map is forest and water. It’s easy to get lost in this forest, but it’s also easy to hide your base. The water that surrounds many islands allows you to use a boat as a means of quickly moving around the map. On the river, just like on the edges of the map, heaps of trash appear that can be looted. Also on the sides of the river there are large islands on which the main prefabs are located. The road and railway cross the river on bridges and run along the perimeter of the island. A zipline will help you quickly move from one bank to another if there is no transport. Ore stones spawn in the forest. Custom locations that help create a jungle atmosphere near the river.
Features:
Size: 4000 Prefab: ~13к All locations are connected with the road Ring railway Ring road Unique custom locations Magnificent and realistic landscape Lot of places to explore Subway and train are connected by tunnel Advanced subway network Custom Monuments:
Paradise Beach Fishermen`s House Abandoned village Radio tower Main Bridge Fallen rocket Monument Rust:
Harbor 1 and 2 Ferry Terminal Trainyard Abandoned MIlitary Base Launch Site Arctic Research Base Satellite Dish+ Airfield Bandit Camp Outpost Giant Excavator Pit Junkyard Military Tunnel The Dome Lighthouse Ranch Large Barn Water Treatment Fishing Village 1,2,3 Underwater Lab Oil rig and Large Oil Rig Railway Sewer Branch HQM, Sulfur, Stone Quarry Roadside Monument Mining Outpost Supermarket Gas Station Please rate ⭐⭐⭐⭐⭐ the map. Thank you!
The map is password protected, if you want to make changes or you have any questions please write to me in discord.
Litum on -
-
TC Authorized Setup
Open UI - /tssettings (use permission - tcauth.use)
FEATURES:
The maximum number of players that can authorize in a cupboard Only authorized players can open crates (on/off) Only authorized players can look inside and open Furnaces (on/off) Authorized players are automatically not attacked by turrets and SAM site (on/off) Authorized players no longer need codes and keys to open doors (on/off) Automatically if players are registered on the TC (remove building parts) (on/off) Automatically registered your teammates on the TC
PERMISSIONS:
"tcauth.use" - you can use UI (only for config setup)
"tcauth.bypass" - you can use all the functionality
"tcauth.ignore" - you ignore all the functionality
"tcauth.auth.use" - you are automatically authorizing in your teammates TC (AutoTurrets + SAM optional)
"tcauth.lock.use" - you can open what's under lock and key
"tcauth.chest.use" - you can open chests
"tcauth.turret.use" - you are automatically authorized in the turrets and SAM
"tcauth.furnace.use" - you can open the ovens
"tcauth.removebp.use" - you can destroy parts of the building at any time
P.s - (My Discord - tofurahie#4144)
- #tc
- #authorized
- (and 5 more)
-
Auto Recycler
By MuB-Studios in Plugins
Plugin Description
"Auto Recycler" is a Rust plugin that offers players advanced recycling features. It enables automatic item recycling, access to a virtual recycler, and special recycling crates. With admin permission, you can configure which items players are not allowed to automatically recycle.
Features
Automatic Recycling: Players can set specific items for automatic recycling. These items will be recycled automatically when they enter their inventory.
Virtual Recycler: Allows players to access a virtual recycler to recycle items directly from anywhere in the game.
Recycling Crate: A special item that functions as a portable recycler.
Customizable Configuration: The plugin configuration can be customized to exclude or allow specific items from recycling.
Permissions
autorecycler.admin: Grants access to all admin functions of the plugin.
autorecycler.autorec: Allows players to use automatic recycling.
autorecycler.recvirtual: Provides access to the virtual recycler.
autorecycler.characteristics: Allows modification of item characteristics related to recycling.
autorecycler.recboxbuy: Enables the purchase of the Recbox.
Chat Commands
/ar: Allows players to use the automatic recycler.
/vrec: Allows players to use a virtual recycler (configurable command).
/recbox: Displays information about the costs of purchasing a Recbox.
/recboxbuy: Allows players to buy a Recbox if they have the required resources.
NEW
/autorectoggle activate and deactivate the AutoRecycler
Additional Information
The plugin offers extensive UI integration to simplify interaction with its features. It stores player data to maintain automatic recycling settings between sessions. The configuration file allows admins to customize the plugin's behavior, including Recbox costs and adjustable recycling properties of items.
Note
Ensure that players have the appropriate permissions to fully utilize the plugin's features.
If you have any questions or problems, join my discord
https://discord.gg/D2zTWCEnrN
-
Hardy Planters
By imthenewguy in Plugins
Hardy Planters creates customizable planter boxes that do not require water, sunlight, fertilizer or temperature to grow.
The plugin allows server owners to create their own profiles for planter boxes, allowing for the modification of overall quality and growth gene multiplier, directly affecting how quickly all plants will grow.
This allows for some unnaturally fast plant growth, if set above the default value.
The plugin works by preventing the default logic on the planter boxes, and instead adds it's own behavior to control it.
It is compatible with servers that adjust the "planttick" and "planttickscale" convars as well.
The following video show cases and explains how the plugin's functionality.
Command (chat): giveplanters
Parameters: Nil
Description: Gives the user one of each planterbox from the config
Command (console): givehardyplanter
Parameters: <target player ID or name> <profile skin ID or display name>
Description: Gives the target player a planterbox that matches the specified profile. Useful in shops etc.
hardyplanters.admin - Required to use the commands. hardyplanters.use - Required to find the planter boxes in loot containers.
-
Fishing Hotspots
By imthenewguy in Plugins
Fishing Hot-spots is a plugin that creates hot-spots in random parts of the ocean. These hot-spots have a number of different modifiers to make fishing fast, easier and more enjoyable.
When the hot-spot spawns, it has 5 attributes it will roll:
Fishing yield = Increases how many fish the player catches. Catch time - Decreases the time it takes to hook a fish onto the lure. Rod tension - Increases the strength of the line, lowing the chance for your rod snapping. XP gain modifier - Increases the amount of XP you gain while fishing in the hot-spot [Requires SkillTree]. Casket modifier - Increases the chance of obtaining a fishing casket [Requires FishingTreasure].
These hot-spots have the option to create a platform in their center for players to fish off of. The default platform comes standard with 2 vending machines (the same ones that Fishing Village has), and 2 bbq's that do not require wood.
The plugin is full configurable, allowing the higher and lower values for each attribute to be set or disabled.
It also supports the application of a safe zone at the location, provided you have ZoneManager on your server.
Command (console): spawnhotspot
Description: Spawns a hot-spot randomly around the map.
fishinghotspots.admin fishinghotspots.use
-
Shop UI
Well rounded shop, with various features. It's standalone plugin which is compatible with WelcomePanel, HumanNpc.
This plugin also supports selling commands, wipe block, no escape, sales, permission access.
Multi-currency support
Use different currencies for different items. Economics and ServerRewards (RP) is supported as well as scrap or any other ingame item.
Restrictions
Combat, raid, spawn and building block supported alongside with basic cooldowns and wipe block. NoEscape is required for combat and raid block.
Appearance
Simple and clean design to ensure smooth user experience for your players. Additionally Shop can be inserted into WelcomePanel to achieve "all in" server panel.
Customization
Widely customizable and feature rich Shop which will fit all needs of your community.
Field Tested
Plugin made by experienced developer, tested by hundreds of server owners and used by some big organizations.
Discord
Customer support available on discord, Monday to Friday from 10AM to 8PM (CET). Also plenty of community members who are willing to answer basic questions.
Installation
- unzip downloaded package and place Shop.cs file into your plugin folder.
- after succesfuly loading the plugin, data folder oxide/data/Shop will be generated
- take data files provided in plugin package and drop them into your Shop data folder
After finishing these steps your shop is ready to used.
Server Currency
If you don't wish to use ingame items as currency make sure you use either Economics or ServerRewards as you currency management as only those two plugins are compatible with Shop. Default currency setting is Economics ("eco"), if you wish to change it navigate to "oxide/data/Shop/Items.json", open this file in some text editor (VSC recommended) and simply select "eco" and mass replace for desired value. (video here)
"eco" for Economics
"rp" for ServerRewards
"scrap" or any other ingame item
Shop Categories
To remove, change or add new categories open "oxide/data/Shop/Categories.json" file. There you will find all categories alongside with items lists. If you wish to remove certain items from category, just head over to item list and delete from there.
Items
Changing prices
In "oxide/data/Shop/Items.json" you will find every item with their properties, to quick search for specific items press "CTRL + F". By leaving BuyPrice or SellPrice at 0 you will disable selling or buying of said item. Due to multi-currency support prices can be set only in whole numbers, no decimals. To offset for this, you can set minimal amount requirement. For example instead of selling one piece of wood for 0.01$ you can set minimal amount of 100x wood for 1$.
Removing items
If you wish to remove some items from Shop, you can do that directly in "data/Shop/Categories.json" file. Removing items from "Items.json" is not needed as they have no effect unless they are listed in some category.
Adding new items
To add new item you must first head over to "Items.json" data file and create new entry by copy pasting some of the existing ones. Once done with that you can add the item into category. To add multiple versions of same item can be created by simply adding unique tag behind shortname, for example "rifle.ak{1}", "rifle.ak{2}", etc...
Commands
Adding new commands
Commands can be create at "data/Shop/Commands.json". Plugin can only run server side console commands and then parse steam id or player name with tags {steamid} and {playername}. There are two examples shown in default data file. Server side console commands are common thing and almost all plugins utilize them.
Listing commands in categories
Simply type in one of your command names into category item list like this "cmd/yourCommandName". Slash cmd in front of command name is there to make difference between ingame and command.
Cooldowns
These are very basic, cooldown is triggered when buy/sell action is triggered. By using minimal amount requirement for items you can manage how much player buy and how often. Cooldowns are managed in "data/Shop/Cooldowns.json". Default data file contains two example of cooldowns but it's simply shortname and amount of seconds.
Restrictions
Raid and Combat Block
Managed by NoEscape plugin, option to enable these two block can be found in config file.
Building Block
Prevents players from using shop while they are building block, option can be found in config file.
Spawn Block
Prevents players from using shop after they respawn, amount of seconds can be set in config file, 0 = disabled.
Wipe Block
Prevents players from buying specific items after wipe. Settings are located in "data/Shop/ItemsWipeBlock.json", similar as cooldowns.
Sales
By Permission (config file)
Discount on every item in the shop assigned by permission, multiple permission can be created with their own discount values.
By Category (categories data file)
Discount for every item within specified category.
By Item
Discount for specific item in the shop. If item is already in discounted category, higher discount will be applied.
WelcomePanel integration
To integrate this plugin into WelcomePanel simply use one of the four configs included in download package. These config were premade for each WelcomePanel template (goes from 1 to 4). In case you have own highly customized layout for WelcomePanel you will have to adjust "Layout Container" in Shop config file by yourself.
-
Discord Link
Discord Link is a very simple, performant, and feature-rich Discord and Rust linking system. 2 Simple steps and a player can link to Discord!
NO DISCORD.DLL!!
FEATURES
- NO DISCORD.DLL REQUIRED!!! - Link Rust and Discord accounts - Grant a role in discord and group in game for linked players - Soft unlinking (All past data on a user's account links will be forever stored) - 2 Way role syncing between rust to discord and discord to rust - Supports multi server linking - Booster perks for linked players boosting your discord - Steam to discord name syncing (Auto renames users in discord to their steam name) - Admin perms to unlink players - Search link commands in discord and in game to get who a player is linked to - Logs to discord when players link and unlink - Auto remove players from being linked when they leave the Discord - Syncing your old database files from steamcord, discord auth, or discord core PERMISSIONS
discordlinkbot.search - ability to search players and use the UI
The Plugin and Discord Bot both have very simple installations.
We have included a readme.md file to make it even easier to setup!
Need support or want updates about what is coming to the bot? Join the support discord here https://discord.gg/RVePam7pd7
This will require bot hosting to run the bot 24/7 since we do not use the Discord DLL therefore the server cannot host the bot.
Thanks to @shady14u for co-developing!!
-
Air Event
The event is an alternative to the usual cargoship, but it is only in the air
Description
The chat notification about the airship with scientists arrival to the island begins the event
A smoke screen appears in the air after the time is up (it is possible to deactivate the smoke screen in the configuration), then the airship with scientists appears
There are 2 locked, 2 elite, 2 military, 2 standard crates and 16 NPCs on the airship as the default
The location and loot of all the crates/NPCs can be changed in the configuration, you can add or remove unnecessary crates/NPCs
There are 2 CCTV cameras by which you can track the availabilities of locked crates on the airship (the name of the cameras can be changed in the configuration)
The looting of both locked crates is the condition for the completion of the event. After that the players have time to depart the airship. They can use the transport that they arrived on it or use hot air balloons on the airship (you need be inside the basket of the hot air balloon)
Dependencies Required
NpcSpawn
Dependencies (optional, not required)
True PVE PveMode GUI Announcements Notify Discord Messages AlphaLoot CustomLoot NTeleportation Economics Server Rewards IQEconomic Kits
Chat commands (only for administrators)
/airstart – starting of the event
/airstop – ending of the event
/airpos – determining the position and rotation coordinates for changing the location of NPCs and crates.It should write in the configuration (Attention! The event must be started, the current position of the administrator in relation to the cargoship is read)
Console commands (RCON only)
airstart – starting of the event
airstop – ending of the event
Plugin Config
en - example of plugin configuration in English ru - example of plugin configuration in Russian
Hooks
void OnAirEventStart(HashSet<BaseEntity> entities) – called when the event starts
void OnAirEventEnd() – called when the event ends
void OnAirEventWinner(ulong winnerId) – called at the end of the event, where the winnerId is the player who did more actions to complete the event
My Discord: KpucTaJl#8923
Join the Mad Mappers Discord here!
Check out more of my work here!
The airship is designed by Jtedal
-
Junkyard Event
This event automatically takes place in the Junkyard location if on the map
Finally, the crane in Junkyard will have a true meaning and be fun again!
Description
The event begins with a notification in the chat that soon scavengers will arrive at Junkyard, who will have a rest there. Next, NPCs appear in the location, whose presets you can configure in the plugin configuration. A message appears in the chat that the scavengers hid a signal grenade in one of the broken cars at the landfill to call for supplies. The player needs to kill all the NPCs and find the rusted car in which the grenade is hidden.
In order to find and activate the signal grenade, use a crane to load rusted cars into a shredder for recycling, it's bound to be in one of them! The number of rusted cars in the landfill is regulated by the value in the configuration. The required car is selected at random from the group. The player needs to recycle the rusted cars one by one until he finds the one in which the signal grenade is located in! After the player recycles the broken car, a plane will fly to the Junkyard location, on board of which there will be a truck with supplies. The plane will drop this truck and it will land in Junkyard via parachute. Once it lands, guards will come out of the truck and guard it. But the truck is closed, it cannot be opened. The player needs to kill these guards to get access to the truck. In order for the player to get access to the crates and the loot within, they need to recycle the truck by using the crane and placing it into the shredder! Next, the crates will travel along the conveyor belt of the shredder and the player will be able to open them. You can configure all the crates, their number and the loot in them, all in the plugin configuration.
Dependencies Required
NpcSpawn
Dependencies (optional, not required)
True PVE PveMode GUI Announcements Notify Discord Messages AlphaLoot CustomLoot NTeleportation Economics Server Rewards IQEconomic Kits
Chat commands (only for administrators)
/jstart - start the event
/jstop - end the event
/jpos - determining the position and rotation coordinates for changing the location of NPCs. It should write in the configuration (Attention! The event must be started, the current position of the administrator in relation to the Junkyard is read)
Console commands (RCON only)
jstart - start the event
jstop - end the event
Plugin Config
en - example of plugin configuration in English ru - example of plugin configuration in Russian
Hooks
void OnJunkyardEventStart() – called when the event starts
void OnJunkyardEventEnd() – called when the event ends
void OnJunkyardEventWinner(ulong winnerId) – called at the end of the event, where the winnerId is the player who did more actions to complete the event
My Discord: KpucTaJl#8923
Join the Mad Mappers Discord here!
Check out more of my work here!
- #broken cars
- #cargoplane
- (and 26 more)
-
TrainBuildPlugin
By LeroyJenkins420 in Plugins
This plugin allows players to claim their very own train, currently any train that spawns will have these items applied to it at a chance! To upgrade doors, workbenches, or boxes all the player will have to do is
Attempt to pickup the item with the appropriate amount of materials in their inventory, if they do not have enough the plugin will prompt them with the required amount. After attempting to pick up the item if the player does have enough materials the plugin will verify if they do/do not have the required blueprint (if any) If the player does have the blueprint (if any is required) & has the appropriate amount of materials the item will be upgraded.
Chances (Configurable):
Locomotive 0.9 //%90 chance Train WagonB 0.5 //%50 chance Work Cart Covered 0.9 //%90 chance Gambling Caboose 0.3 //%30 chance Car Wagon (flat) 0.5 //%50
Config:
"Locomotive Build Chance": 0.9, "Locomotive Build Enabled": true, "Train WagonB Build Chance": 0.5, "TrainWagonB Build Enabled": true, "Work Cart Build Chance": 0.9, "WorkCart Build Enabled": true, "Gambling Wagon Build Chance": 0.3, "Gambling Caboose Build Enabled": true, "Car Wagon Build Chance": 0.5, "Car Wagon Build Enabled": true, "Train Wagon Max Health": 5000.0, "Train WagonB Start Health": 5000.0, "Remove Locmotive Collision": true, "Remove Wagon Collision": true, "Remove Work Cart Collision": true, "Remove Car Wagon Collision": true, "Remove Gaming Caboose Collision": true, "Remove Other Train Collision (lootables)": true, "Remove Train Barricade Collision (underground tunnels)": true, "Max Car Speed": 25.0, "Max Train Engine Speed": 12.0, "Train Engine Force": 250000.0 "Despawn Time": 480
Commands:
Locomotive Admin Console Command: spawn locomotive.entity Features: 2 doors, 1 window shutter WagonB (Base Wagon) Admin Console Command: spawn wagonb Features: 4 small boxes, 1 public bed, 5 doors, 2 shelves, 1 T1, and 1 furnace. WorkCartCovered Admin Console Command: spawn workcart_aboveground2.entity Features: 3 doors, 1 shelve, 1 small box Gambling Caboose Admin Console Command: spawn caboose.entity Features: 2 doors Car Wagon Admin Console Command: spawn wagonc Features: has 2 different presets Preset 1: 1 Magnet Crane 1 Car Lift Preset 2: 2 Car Lifts
- #build on trains
- #trains
- (and 8 more)
-
TC Levels
TCLevels is a plugin that will make your server more fun and have more things to do!
FEATURES ★
• Reduce the decay damage by tick;
• Upgrade the authorizations limit;
• Upgrade the building grade limit;
• Upgrade the storage capacity of the cupboard;
• Upgrade the stack size limit of the cupboard;
• Unlock some deployable items;
• Set a default building grade for the server;
• Modify the default decay;
• Keep the cupboard attributes when remove;
Make your server fun ^u^
PERMISSIONS
The plugin has a unique permission, which allows the player to use the cupboard upgrade: tclevels.use
F.A.Q
1. How many items can be blocked? and which?
You can block unlimited items and all items must be deployable or they will not be blocked.
2. Which area will be checked when i place my cupboard?
The entire privilege area will be checked. But you can also disable checks in the configuration file.
3. Could it cause conflict with any plugin?
Yes, but i am providing an API for the plugin so that other developers can integrate with it, so if there is a conflict, just go to the developer's plugin support and ask them to integrate it. Also if it is possible for me to integrate it from my plugin, i will do so without any problem.
API </>
// Gets the current cupboard allowed building grade limit // If the cupboard isn't provided, it will return the default building grade limit of the config; private BuildingGrade.Enum GetBuildingGradeLimit(BuildingPrivlidge? cupboard); // Gets the current cupboard decay multiplier // If the cupboard isn't provided, it will return the default decay multiplier of the config; private float GetDecayMultiplier(BuildingPrivlidge? cupboard); // Gets the current cupboard authorization limit // If the cupboard isn't provided, it will return the default auth limit of the config; private int GetAuthLimit(BuildingPrivlidge? cupboard); // Gets the current cupboard storage capacity // If the cupboard isn't provided it will throw an exception; private int GetCapacity(BuildingPrivlidge cupboard); // Gets a list of the cupboard blocked items // If the cupboard isn't provided it will return all locked items listed in the config; private List<string> GetLockedItems(BuildingPrivlidge? cupboard);
CONFIGURATION
TCLevels.json
-
Tutorial Display
Tutorial Display
Designed to facilitate the delivery of specific tutorials to players based on their permission levels. This plugin ensures that each player receives instructions or information tailored to their role or experience level in the game.
IF YOU HAVE A VERSION BEFORE 2.0.4 DELETE ALL OF YOUR CONFIG AND DATA FILES FROM THE PLUGIN THEN RESTART YOUR SERVER BEFORE ANY CHANGE TO AVOID BACKUP CONFLICTS
Key Features
Compatibility with CARBON: Optimized to work seamlessly with the CARBON framework, ensuring stability and smooth integration.
Permission-Based Tutorial Customization: Dynamically adjusts tutorial content to align with each player's unique permissions and roles.
Dynamic Content Updates: Automatically updates tutorials to reflect changes in players' permissions, maintaining relevance and accuracy.
User-Friendly Commands: Allows players to easily toggle tutorial displays on or off as per their preference.
Configurable Tutorial Content: Offers administrators the flexibility to add, modify, or update tutorials through an intuitive configuration file.
Diverse Visual Options: Includes a variety of background options to enhance the visual appeal of tutorials.
Enhanced Functionalities
ZoneManager Integration: Manages zone-specific tutorials, triggering custom tutorials when players enter or exit designated areas.
Multi-Page Tutorials: Supports multiple pages within tutorials, complete with navigation buttons, enhancing the learning experience.
Advanced Permission Management: Efficiently handles player permissions to ensure the displayed tutorials are always relevant.
Automated Zone-Specific Commands: Executes predefined commands when players enter or exit specific zones, adding an interactive dimension.
Tutorial Data Management: Tracks which tutorials have been displayed to players for effective record-keeping, and provides a reset command for individual or all players' tutorial data.
Commands Overview
/tutorial on|off: Empowers players with the ability to control the display of tutorials, tailoring their learning experience.
/reset_tutorial [player_name]: An administrative command to reset tutorial data for a specific player or all players, ensuring flexibility and control.
How It Works:
TutorialDisplay identifies players’ permissions and displays corresponding tutorials in real time.
Administrators can customize the content of the tutorials to be specific to certain permissions and react to zone changes.
Usage Example:
A player with “admin” permission might receive a tutorial on specific admin commands, while a beginner might get helpful tips for getting started.
Configuration and Customization:
Easy configuration and customization through an intuitive config file. Changes are reflected in real-time in the displayed tutorials.
Config File :
{ "Tutorials": [ { "CharacterImageLevel": 1, "Effect": "assets/prefabs/misc/easter/painted eggs/effects/gold_open.prefab", "Permission": "tutorialdisplay.first", "Text": "You have just regained your senses, stay calm!\n\nFirst, leave the hospital and head to the town hall to register and obtain your ID card.\n\nADJUST THE TEXT LIKE YOU WANT", "Title": "WELCOME TO 'YOUR SERVER NAME'" }, { "CharacterImageLevel": 2, "Effect": "assets/prefabs/misc/easter/painted eggs/effects/gold_open.prefab", "Permission": "tutorialdisplay.second", "Text": "After getting your ID, open a bank account at\nthe local bank to manage your in-game finances.\n\nADJUST THE TEXT LIKE YOU WANT", "Title": "CREATE BANK ACCOUNT" }, { "CharacterImageLevel": 3, "Effect": "assets/prefabs/misc/easter/painted eggs/effects/gold_open.prefab", "Permission": "tutorialdisplay.third", "Text": "Visit the employment agency and choose a suitable\njob to start earning money and progressing.\n\nADJUST THE TEXT LIKE YOU WANT", "Title": "TAKE YOUR JOB" }, { "CharacterImageLevel": 4, "Effect": "assets/prefabs/misc/easter/painted eggs/effects/gold_open.prefab", "Permission": "tutorialdisplay.fourth", "Text": "Embark on an adventure by starting the main quest. Find the indicated starting point to uncover the server's story.\n\nADJUST THE TEXT LIKE YOU WANT", "Title": "START HISTORY QUEST" } ], "ZoneTutorials": { "64890463"(Change this with your ZONE): { "OnEnter": { "CharacterImageLevel": 1, "Commands": [ "say Welcome to the zone! {playername}", "othercommand" ], "Description": "Description when entering the zone", "Effect": "assets/prefabs/misc/easter/painted eggs/effects/gold_open.prefab", "MaxDisplays": 1, "Permission": null, "Timer": 10.0, "Title": "Enter Zone Title" }, "OnLeave": { "CharacterImageLevel": 2, "Commands": [ "say Goodbye from the zone!", "othercommand" ], "Description": "Description when leaving the zone", "Effect": "assets/prefabs/misc/easter/painted eggs/effects/gold_open.prefab", "MaxDisplays": 3, "Permission": "tutorialdisplay.onleaveville", "Timer": 10.0, "Title": "Leave Zone Title" } } } }
Lang file EN :
{ "Command.Usage": "Usage: /tutorial on|off", "Tutorial.On": "Tutorial display is now ON.", "Tutorial.Off": "Tutorial display is now OFF.", "Invalid.Argument": "Invalid argument. Use /tutorial on|off." }
Lang file FR :
{ "Command.Usage": "Utilisation : /tutorial on|off", "Tutorial.On": "L'affichage du tutoriel est maintenant ACTIVÉ.", "Tutorial.Off": "L'affichage du tutoriel est maintenant DÉSACTIVÉ.", "Invalid.Argument": "Argument invalide. Utilisez /tutorial on|off." } Data File :
{ "PlayerTutorialDisplays": { "IDPLAYER": { "OnEnter": { "64890463": 1 }, "OnLeave": { "64890463": 2 } } } }
Video in coming ...
-
XKamikazeFPVDrone
XKamikazeFPVDrone - kamikaze drone for your server.
- Optimization of the interface for different monitor resolutions.
- There is a lang ru/en/uk/es.
- Sound effects when interacting with the menu.
- The ability to craft a drone.
- The ability to give away a drone by command. [ Shop and other things. ]
- The ability to change the drone's camera speed.
- The ability to change the speed and manoeuvrability of the drone.
- The ability to customise the radius and scale of damage.
- The creator of the explosives is the player controlling the drone. [ Settings in the config. ]
- Instant drone detonation if the explosives took damage. [ Settings in the config. ]
- Automatically add the player drones ID to the computer station they are sitting at. [ Radius: 15 meters ]
Permissions
xkamikazefpvdrone.usecraft - access to the drone crafting. Commands
/craft.d - to open the crafting menu. give_drone steamID amount - to give the player a drone. API
bool API_IsFPVDrone(Drone drone) - returns True/False if it's a kamikaze drone. Hooks
void OnDroneExplode(Drone drone, Vector3 position) - is called when a kamikaze drone explodes. Config
{ "Drone settings": { "Drone skin": 0, "The speed at which the drone camera moves left and right. [ Default: 2.0 ]": 5.0, "The speed at which the drone camera moves up and down. [ Default: 2.0 ]": 5.0, "The speed of the drone moving left, right, forward and backward. [ Default: 10.0 ]": 50.0, "The speed of the drone moving up and down. [ Default: 10.0 ]": 50.0, "Automatically add the player drones ID to the computer station they are sitting at. [ Radius: 15 meters ]": false }, "Explosive settings": { "Explosion radius. [ Default: 3.8 ]": 5.0, "Damage scale. [ Default: 1.0 - 137 HP ]": 2.5, "The creator of the explosives is the player controlling the drone. [ Useful for killing players on your own behalf. Blocks damage in a safe zone. Supports many plugins - TruePVE, RaidProtection, etc. ]": true, "Instant drone detonation if the explosives took damage.": false }, "Craft settings": { "Crafting workbench level. [ 0 - workbench is not required ]": 2, "List of crafting resources": { "ammo.rocket.basic": 1, "techparts": 1, "battery.small": 1, "ducttape": 2, "wiretool": 1, "gunpowder": 25, "cloth": 10, "lowgradefuel": 5 } } } -
Daily Rewards
Daily Rewards is a strong tool for Rust admins who want to keep their players engaged until the end of the wipe. You can provide your gamers with distinct daily rewards for logging in with this plugin. This way, you not only liven up gameplay, but also encourage longer playtime. With Daily Rewards, don't lose the chance to draw in new players and keep returning ones! 🎁 🎮
🌟 Features
Beautiful and user-friendly interface Daily rewards for logging Motivating players to stay in the game longer Retention of players until the end of the wipe Compatibility with many plugins Edit rewards and config via in-game interface (no JSON editing required) By default, the plugin supports English, Russian, and Chinese languages Cooldown time before receiving an award Saving rewards in the plugin's inventory Do not receive rewards from inventory while in the build block, raid block, or combat block
🎮 Commands
daily – open daily rewards interface dailyrewards.wipe – wipe of player data dailyrewards.top [format: csv, empty (default)] [limit (10 is default)] – get a list of players with the day their award.
🛡️ Permissions
dailyrewards.use – allows you to open the DailyRewards menu dailyrewards.edit - allows you to enable edit mode
🎥 Video
📚 FAQ
Q: Where can I see an example of a config?
A: Config
-
Andromeda 3000
By Ionut Shiro in Maps
Andromeda is part of a 4 maps bundle done under a request from someone where we decided to make them all public after they are finished
It has an unique terrain and procedural monuments in unique locations and a procedural Outpost with an Airwolf Vendor and bandit camp vending machines + gambling wheel.
The aim for this is for pvp servers where action can happen between the monuments faster and more often .
Monuments:
Giant Excavator Pit
Train yard
Junkyard
Sewer Branch
Airfield
Military Tunnels
Abandoned Military Base
Outpost
Arctic Research Base
Harbor
Water Treatment Plant
The Dome
Launch Site
Sulf & HQM & Stone Quarries
2 Abandoned Supermarket
1 Gas Station
2 Mining Outposts
2 Lighthouses
1 Large Barn and Ranch
6 Underwater LabsnMap size is 3000
Entity Count : 3152
All maps are optimized and made to be used on any type of server and to ensure performance for every player
- #pvp rust map
- #3000 rust map
- (and 4 more)
-
Admin Map
Admin Map is an innovative plugin for the game of Rust, designed to make server administration easier and improve the quality of the gaming experience. Focused on optimization and functionality, this plugin provides admins with the tools to effectively control players, minimizing the negative impact on the server and other participants.
Main features:
Interactive map with players: Admin Map provides server admins with a detailed and user-friendly map showing the positions of all players. This allows admins to easily monitor player activity and movements, and quickly detect suspicious activity. Large variety of different admin maps:
- Marker player map,
- Text player map,
- Sleepersmap,
- Cupboard map,
- Stash map,
- Sleeping bag map Quick Commands on Players: The plugin allows admins to perform quick actions on players directly from the map. Send messages, punish or help players in real time, minimizing reaction time and increasing interaction efficiency. Minimal server load: One of the key features of Admin Map is its low server load. All processing takes place solely on the client side, which means that the plugin will not slow down the server or create additional delays for players. This makes it an ideal choice even for servers with high traffic. Ease of use: The plugin's intuitive user interface provides admins with easy access to functionality. Navigating the map, sending commands and monitoring players is done with minimal effort, making server administration easy. Customization: Admin Map provides admins with the option to customize the functionality to suit their needs. Scanning area, available commands, buttons, permissions and other options. Admin Map is an innovative solution that combines convenience, functionality and optimization. It provides administrators with tools to effectively manage players without negatively impacting gameplay and other server participants. The Admin Map plugin is an essential asset for any Rust server administrator looking to create a comfortable and safe gaming environment.
Permissions:
adminmap.allow - for use adminmap.<button perm> - any permissions specified in the button settings adminmap.playermarkers - map with markers for players, useful for pve server adminmap.playermarkers.wl - map with markers for players, useful for pve server, without nicknames adminmap.invis - hide player from the player map
Commands:
/amap - toggle admin map (also to enable marker map) /amap t - enable text admin map /amap s - enable sleepers admin map /amap с - enable cupboards admin map /amap stash - switch to stash admin map /amap d - switch to marker admin map /amap ss <part of nickname/steamid> - search query to maps (some maps only accept steamid) /amap ss - clear search queary /amap off - disable admin map with panel instantly
Color designations on the cupboards map:
Default Config:
{ "Scan Area Settings": { "Radius": 2.0, "Color": "0 0.7 0 0.6" }, "Text Map Settings": { "Font size": 16, "Use color generation for teams?": true, "Color for searches": "00ffff", "Color for teams": "ffaf4d", "Color for solo players": "9bd92f", "Color for sleepers": "404040" }, "Command Buttons": [ { "Permission (adminmap.<perm>)": "", "Label": "TP", "Command": "teleport {steamid}", "Color": "1 1 1 1" }, { "Permission (adminmap.<perm>)": "", "Label": "TP2ME", "Command": "teleport2me {steamid}", "Color": "1 1 1 1" }, { "Permission (adminmap.<perm>)": "", "Label": "INV", "Command": "/viewinv {username}", "Color": "1 1 1 1" }, { "Permission (adminmap.<perm>)": "", "Label": "SPECTATE", "Command": "spectate {steamid}", "Color": "1 1 1 1" }, { "Permission (adminmap.<perm>)": "", "Label": "KILL", "Command": "kill {steamid}", "Color": "1 0 0 1" }, { "Permission (adminmap.<perm>)": "", "Label": "KICK", "Command": "kick {steamid}", "Color": "1 0 0 1" } ] }
Button Library:
Give item to player for AdminMenu by k1lly0u | Minimum required version 1.0.1 { "Permission (adminmap.<perm>)": "", "Label": "GIVE", "Command": "adminmenu.callback {steamid}.4;adminmenu.callback {steamid}.4", "Color": "1 1 1 1" } Permanent ban
{ "Permission (adminmap.<perm>)": "", "Label": "BAN", "Command": "ban {steamid}", "Color": "1 0 0 1" } View backpack (for Backpack Pro)
{ "Permission (adminmap.<perm>)": "", "Label": "Backpack", "Command": "/b {steamid}", "Color": "1 1 1 1" } View backpack (for Backpacks plugin from uMod)
{ "Permission (adminmap.<perm>)": "", "Label": "Backpack", "Command": "viewbackpack {steamid}", "Color": "1 1 1 1" } Spectate
{ "Permission (adminmap.<perm>)": "", "Label": "SPECTATE", "Command": "spectate {steamid}", "Color": "1 1 1 1" }
If you want to add buttons here, message me on my discord server
-
Multiverse
By Raul-Sorin Sorban in Plugins
Connect multiple Rust servers together and have your players travel between them in fun ways using events!
This plugin allows you to synchronize player inventories and stats, event containers, and much more to come!
Please use the Discussions tab to recommend suggestions, as I am very open to implementing your great ideas for everyone to enjoy!
NOTICE: This plugin does not automatically reconnect you to other servers as Rust's Nexus system is not released yet.
You'll be notified that you must type in the connect command leading the IP and port of the server you've been transferred to.
Try before you buy it!
connect germany.mikehawke.co.uk:29015
[ ! ] PLEASE KEEP IN MIND THAT CERTAIN SERVER HOSTS DO NOT ALLOW YOU [ ! ]
[ ! ] TO IMPORT FILES/DLLS, WHICH THIS PLUGIN REQUIRES YOU TO [ ! ]
INCLUDED DLL EXTENSIONS REQUIRED
EVENTS
CH47 Transition Event
FRIENDLY & HOSTILE MODES
THIS EVENT REQUIRES BOTH INITIAL AND DESTINATION SERVERS TO HAVE AIRFIELD FOR IT TO WORK
The Chinook event carries you and another 12 participants over the seas. You'll be greeted by Jackie Chan and Jamie Lee, your border patrol officers which will assist you to have a save welcoming onto the server. Make sure you're not wearing any illegal items on you or you'll be marked hostile and will be immediately attacked.
The storage on the right in the picture can be used as luggage which can carry items that are coming with the Chinook onto the other server. On screen you'll find the directions on how to get yourself seated. Press [RELOAD] to open up the seating panel, and assign yourself onto whichever you're liking.
Cargo Ship Transition Event
FRIENDLY & HOSTILE MODES
The Cargo Ship event you're willing to infiltrate and use for transport is driven by scientists or has a peaceful visit in the server you're in, broadcasting its next travelling spot.
You got a luggage storage which can contain items you wanna carry from the other server in mass.
HOW TO INSTALL
Have at least 2 servers running so you can make sure the whole connection is valid. On both of your servers, make sure you've loaded the required dependencies for the plugin to work: ImageLibrary by k1lly0u from uMod Human NPC by Ts3hosting from uMod On the first server you consider the Main/Master, make sure you have MultiverseCore.cs and MultiverseMaster.cs. in the plugins folder. On the second server you consider Secondary/Slave, make sure you have MultiverseCore.cs and MultiverseSlave.cs in the plugins folder. After this is done, in the Master server, in oxide/config folder you should find MultiverseMaster.json. Opening it up, you should find a similar config to the one underneath this page, at the CONFIGURATION section. In the shared section, under the Servers property, you must define both your Main and Secondary servers in the list. Only one of the defined servers must have the IsMaster property set to true. Once that is done, make sure you reload the plugin (with o.reload MultiverseMaster) to apply the changes. Please make sure you provide the FirstSpawnServerId property and set it to the ID for the server defined in the Servers property in the config. When the server reloads, you should see what is in the image on both of your servers' windows. To validate that everything is connected, you can manually trigger events with the following command: spawnevent master slave01 2: This will create a Friendly CargoShip event on the Master server which when the timer runs out, it gets teleported to the other Slave server you're running. spawnevent slave01 0: This will create a Friendly CH47 event which comes from the Slave server to the Master. This only works if both servers have Airfield on the map. If you don't, you can use 2 or 3 for the event type value to spawn CargoShips and start events on both servers simultaneously. For more info, scroll lower and read through the CONFIGURATION and/or COMMANDS section if things aren't clear enough.
srvs 1/3 is the connected and total amount of servers that are connected with eachother.
evnts 0 are the currently locally running events on the server.
arriv 0 are the currently local locally running arrival events, events that come from other servers.
hnshk valid this must be valid at all times, if the master server goes offline, the handshake becomes invalidated.
NOTE: The handshake between the master server and all the sub-connected servers must be synchronized. If the Master server goes offline, the sub-servers will be locked until the Master server is up so it can dictate where the players should go and the their activity being communicated.
To set your events up and running, so it all comes to life, follow these instructions:
If you at any point struggle to understand where all this is referring to, please scroll lower and read through the CONFIGURATION section, every single property is explained. Within the Shared property, you'll find the Schedules array. Schedules currently consist in 4 different key elements to run. SourceServerId is the ID of the server the event is starting from. DestinationServerId is the ID of the server the event is going towards. EventType is the integer index of the event type / kind you want to be executed for that schedule. Cooldown in minutes the schedule will be postponed until it can be triggered again. (I highly recommend 30 minutes) After this property is done, make sure you reload the Master server plugin (o.reload MultiverseMaster) to apply all your changes.
NOTE #1: Scheduled events only get triggered if both the server an event is starting from and the server an event is going towards are valid and online / connected.
NOTE #2: Scheduled events are executed in random order.
CONFIGURATION
The entire plugin can be managed from one configuration file, which can be found in the config folder of the Master server when you've initially added the MultiverseMaster.cs script in the plugins folder (alongside the MultiverseCore.cs file). There can be defined only one server as being the master server. Highly advise to keep the ID of it to "master".
The MultiverseSlave.cs and MultiverseCore.cs both go in all the other servers' oxide/plugins folder.
This is a rundown on all the current settings you can have for the Master server:
"Sync": { "Interval": 120.0, "Time": true, "Weather": true } The sync property is used by the Master server to synchronize the time and weather across all the servers. The interval is set to 120 seconds by default, which is what it is recommended.
"ScheduleTickRate (in seconds)": 60.0 Scheduled events ticking rate in seconds. It basically checks every 60 seconds if there's anything available to be triggered onto the server based on the cooldowns of existent scheduled events.
"Legend": { "EventTypes": { "0": "CH47 Friendly", "1": "CH47 Hostile", "2": "CargoShip Friendly", "3": "CargoShip Hostile" } } The legend is read-only, is to help you to choose what events you'd like to use in your schedule list.
"Shared": { "FirstSpawnServerId": "master", "WipeDeadBody": true, "UI": { "ShowLogo": true, "ShowShadows": true, "Colors": { "ValueColor": "eee16f", "PassengersColor": "6faaee", "StatusColor": "ee6fbe" } }, "BorderPatrol": { "IllegalItems": [ { "ShortName": "bleach", "SkinId": 0, "MinAmount": -1 } ] }, "Schedules": [ { "SourceServerId": "myserver1", "DestinationServerId": "myserver2", "EventType": 0, "Cooldown": 30.0 }, { "SourceServerId": "master", "DestinationServerId": "myserver1", "EventType": 2, "Cooldown": 30.0 } ], "Servers": [ { "IsMaster": true, "Id": "master", "DisplayName": "Master", "Ip": "myip", "Port": 12345, "RconPort": 12346, "RconPassword": "legitpassword", "Settings": {}, "IsConnected": true }, { "IsMaster": false, "Id": "slave01", "DisplayName": "Slave #01", "Ip": "myip", "Port": 23456, "RconPort": 23457, "RconPassword": "legitpassword", "Settings": {}, "IsConnected": false }, { "IsMaster": false, "Id": "slave02", "DisplayName": "Slave #02", "Ip": "myip", "Port": 23456, "RconPort": 23457, "RconPassword": "legitpassword", "Settings": {}, "IsConnected": false }, { "IsMaster": false, "Id": "slave03", "DisplayName": "Slave #03", "Ip": "myip", "Port": 34567, "RconPort": 34568, "RconPassword": "legitpassword", "Settings": {}, "IsConnected": false } ] } This portion of the config is being shared across all servers, just to stay up to date so you don't have to manually do anything onto the other servers.
FirstSpawnServerId: Is the where all the newly spawned players that connect to your Multiverse get sent to. If it is one of your other servers, they'll be redirected to this one. WipeDeadBody: Will simply remove the player's info from the data file when a player is dead. This could be used to avoid keeping track of short-time visitors onto the server. UI: It's cosmetic changes to the UI that can be noticed most of the time on screen. BorderPatrol: You may configure what items are illegal to carry from a server to another. IllegalItems: ShortName: Is the short name of the item. SkinId: Used for specific skinned items to be considered contraband. MinAmount: Keep the minimum amount to -1 if you want the whole item to be considered as contraband. Raise it to any other number if a specific amount of items with the amount can be carried across. Schedules: SourceServerId: Is where the event starts. Use the ID predefined in the Servers property. DestinationServerId: Where the players are sent when they the event transitioned. Use the ID predefined in the Servers property. EventType: Is the preferred event ID showed in the Legend section of the config file. Use 0 for CH47 Friendly, 1 for CH47 Hostile, etc. Cooldown: In minutes, it's used whenever an event has started. Servers: IsMaster: This must be assigned to "true" only for one defined server in this array property. Id: Is the server ID that the Scheduled events will be using to initiate events from a server going to another. DisplayName: The in-game name of the servers which will be announced in chat and the UI whenever an event goes towards them. Ip: The IP of the server one can connect to (client & RCON). Port: The port of the server. RconPort: The RCON port of the server one can connect to. RconPassword: The password of the RCON connection one server can connect to. Settings: This will become more populated in future updates. IsConnected: This can be ignored. It's required to be displayed for serialization reasons.
COMMANDS
Admin Console Commands spawnevent [fromServerId] [toServerId] [eventType]: Manually starts an event. move [playerName/Id] [serverId]: Forcefully moves a player to another server. They'll respawn like a fresh spawn but with everything they have carried in their inventory from the server they came from. Admin Chat Commands /multiadmin: Opens the admin panel. ONLY ACCESSIBLE ON THE MASTER SERVER. Player Commands None. As of now.
PERMISSIONS
Multiverse.admin: Mainly used by administrator commands or behaviour change.
UPCOMING
Synchronize Teams Synchronize Blueprints Add plugin synchronisation support Add more events Add custom events Add passport system
(c) Raul-Sorin Sorban — 2022
All rights reserved
-
SvFastPanel
By Budapeshter in Plugins
Support for up to 18 command buttons, with standard configuration.
Change the button background color, button text, button color!
When adding or removing buttons, they are automatically positioned in the center of the screen!
Convenient configuration, you just need to add a new button, write the name and command!
Choose any color for the background of the button, change the color of the name to your taste!
You can also hide the panel for the player with the /FAST command and open it as well (everything is saved in the plugin's date file)
Permission SvFastMenu.use issue to a group or player to display the command bar
{ "AnchorMax_Main": "0.6125930 0.01822916", "AnchorMin_Main": "0.3696925 0.001302288", "Buttons": [ { "ButtonName": "UP", "ColorButton": "0.24 0.29 0.15 0.9", "ColorText": "1 1 1 0.89", "Command": "/up 4", "Permission": "" }, { "ButtonName": "TURRET", "ColorButton": "0.24 0.29 0.15 0.9", "ColorText": "1 1 1 0.89", "Command": "/turret", "Permission": "" }, { "ButtonName": "LSAVE", "ColorButton": "0.24 0.29 0.15 0.9", "ColorText": "1 1 1 0.89", "Command": "/load save", "Permission": "" }, { "ButtonName": "NOMINI", "ColorButton": "0.24 0.29 0.15 0.9", "ColorText": "1 1 1 0.89", "Command": "/nomini", "Permission": "SvFastMenu.default" }, { "ButtonName": "MINI", "ColorButton": "0.24 0.29 0.15 0.9", "ColorText": "1 1 1 0.89", "Command": "/mymini", "Permission": "" } ], "ChatTag": "SVFAST", "FontName": "robotocondensed-bold.ttf", "FontSize": 10, "Overlay": "Overlay" }
-
Discord Server Panel
By AimonMurasaki in Plugins
This plugin adds server related commands usable in a specific discord channel with a specific discord role,
that gives access to a server panel to do specific commands on the server.
Features :
Gives access to a permission manager on discord
Gives access to a plugin manager on discord
Gives access to a restart panel on discord
Able to make custom commands from config
Gives access to a wipe panel on discord (Only works with DSPWipe or WipeServer loaded)
Discord Commands:
!server : Shows a list of usable commands for the server
!plugins : Gives a plugin list on discord to manage plugins
Discord Interactions:
When using !server, a list of server commands to manage your server as interactive buttons.
Once you use one of the buttons, It will give you more interactive buttons to use different commands and manage your server.
Permissions Command shows entity then the command then the permission/group to use the command on after clicking on it :
Restart Command shows delay of restart and reasons to use the command after clicking on it :
Plugins Command shows the list of plugins you can interact with then shows the command that you can use on it :
Custom Command shows the list of commands in the configuration :
Configuration :
{ "LogFileName": "DiscordServerPanel", "Bot token": "", "Embed's color": "#ff0000", "Show Server FPS (Server command)": true, "Show Gamemode (Server command)": true, "Show Plugins Loaded (Server command)": true, "Custom": { "Use Custom (true/false)": false, "Use Confirmation (true/false)": false, "Custom Commands ('command name' 'command to send on console')": { "Restart": "restart 300 Maintenance", "SkipNight": "env.time 12" }, "Discord Role ID (Can be left empty to use the first role id)": "" }, "Restart": { "Use Restart (true/false)": true, "Restart Reasons (One Word)": [ "Maintenance", "Update", "Wipe", "None" ], "Time for command (Use 'h' for hours, 'm' for minutes)": [ "5m", "10m", "30m", "1h" ], "Discord Role ID (Can be left empty to use the first role id)": "" }, "Plugins": { "Use Plugins (true/false)": true, "Use Confirmation (true/false)": true, "Discord Role ID (Can be left empty to use the first role id)": "" }, "Permissions": { "Use Permissions (true/false)": true, "Discord Role ID (Can be left empty to use the first role id)": "" }, "Wipe": { "Use Wipe (true/false)": false, "Generate Random Seeds (How many options to choose from)": 4, "Map Size": 3500, "Backup Map Files (Backup in identity folder)": true, "Time for command (Use 'h' for hours, 'm' for minutes)": [ "5m", "10m", "30m", "1h" ], "Discord Role ID (Can be left empty to use the first role id)": "" }, "logs": { "Log to console (true/false)": true, "Log to discord (true/false)": false, "Discord Extension Log Level (Verbose/Debug/Info/Warning/Error/Exception/Off)": "Info", "Delete message after command": true, "Delete message after interaction": true, "Log Discord Channel ID": "" }, "Discord Guild ID (optional if the bot is in one guild)": "", "Discord Role ID": "", "Discord Channel ID where the command can be used": "" } Configure :
Set Bot Token, ChannelID and RoleID in config.
Reload Plugin.
(Optional) To use the wipe functionality :
Load DSPWipe.
Enable Wipe function in DiscordServerPanel config.
You can suggest new functionalities or plugin ideas on discord : Aimon#9899 .
- #discord
- #discordbot
-
(and 3 more)
Tagged with:
-
Discord Admin Panel
By AimonMurasaki in Plugins
This plugin adds extra useful commands usable in a specific discord channel with a specific discord role,
that gives access to an admin panel to do specific commands on players inside the server.
Features :
Gives access to a players list with a search interaction embedded in the buttons
Gives a list of certain commands that you can use on each player (Kick, Ban, Mute, Unban, Unmute)
Configurable to add each command's reason of command (If you're kicking a player you can put Toxicity or Warning as a reason for it)
With each command that allows timed punishments like ban and mute, you are given access to 5 durations depending on the command.
Adds a /auth command to DiscordCore that redirects to /dc join.
Gives access to a search command in-game that shows different information about players.
Optional :
Gives access to a deauth admin command to unlink players from discord.
Gives access to a link admin command to link players using their steamid and discordid.
Gives access to buttons like Economics and Timed Permissions (configurable)
Gives access to customizable buttons for commands on players (configurable)
Permissions:
DiscordAdminPanel.emberban allows player to use the /ember.ban command (Only functional with Ignore Ember set to false and Ember loaded)
DiscordAdminPanel.emberunban allows player to use the /ember.ban command (Only functional with Ignore Ember set to false and Ember loaded)
DiscordAdminPanel.auth allows player to use the /auth command
DiscordAdminPanel.deauth allows admins to use the /deauth command to unlink players (Only functional with changing certain settings in DiscordCore or using DiscordAuth)
DiscordAdminPanel.link allows admins to use the /link command to link players (Only functional with changing certain settings in DiscordCore or using DiscordAuth)
DiscordAdminPanel.search allows admins to search for players details (SteamID and DiscordID)
In-Game Commands:
/search <steamID/DiscordID> : Searches for player details like SteamID, DiscordID, and his discord name.
/auth : uses "/dc join" command from DiscordCore (Only usable if DiscordCore is loaded)
/deauth <steamID/DiscordID> : Unlinks a player from discord (Only functional with changing certain settings in DiscordCore or using DiscordAuth)
/link <steamID> <DiscordID> : Links a player with discord using their steamID and DiscordID (Only functional with changing certain settings in DiscordCore or using DiscordAuth)
Discord Commands:
!players : Shows a list of online players on the server
!search <steamID/DiscordID> : Gives an extended search on players details
!deauth <steamID/DiscordID> : Unlinks a player from discord (Only functional with changing certain settings in DiscordCore or using DiscordAuth)
!link <steamID> <DiscordID> : Links a player with discord using their steamID and DiscordID (Only functional with changing certain settings in DiscordCore or using DiscordAuth)
Discord Interactions:
When using !players, a list of online players will show up as interaction buttons.
Once you use one of the buttons, an extensive search will show up and will give you more interaction buttons to use different commands on the searched player.
Kick Command shows reasons after clicking on it :
Similarly Ban Command and Mute Command shows periods then reason : (Reasons are configurable)
Timed Permissions shows the roles then the period of time: (Both configurable)
Economics shows the available commands then the amount : (amount is configurable)
Configuration :
{ "LogFileName": "DiscordAdminPanel", "Bot token": "BOTTOKEN", "Discord Channel ID where the command can be used": [], "Embed's color": "#ff0000", "Show Clan Tag (Make sure clans is loaded)": false, "Show Oxide Groups": false, "Show Server Armour Profile (search)": false, "Show Team Info (search)": false, "Timed Permissions": { "Use Timed Permissions (true/false)": false, "Oxide Groups to give": [ "VIP", "Admin" ], "Time to give (Use 'd' for days, 'h' for hours, 'm' for minutes, 'wipe' for using wipe period)": [ "24h", "7d", "30d", "Wipe" ], "Discord Role ID (Can be left empty to use the first role id)": "" }, "Economics": { "Use Economics (true/false)": false, "Economy Amount (Use '.' for decimal)": [ "1500.5", "3000.3" ], "Discord Role ID (Can be left empty to use the first role id)": "" }, "Ban": { "Time to give (Use 'd' for days, 'h' for hours, 'm' for minutes, 'wipe' for using wipe period)": [ "24h", "7d", "30d", "Wipe" ], "Ban Reasons (One Word)": [ "Cheat", "Script", "OverToxicity", "Abuse" ], "Ignore Ember": true, "Ember Global (Only usable if ember is loaded)": false, "Discord Role ID (Can be left empty to use the first role id)": "" }, "Mute": { "Time to give (Use 'd' for days,'h' for hours, 'm' for minutes, 'wipe' for using wipe period)": [ "1h", "24h", "30d", "Wipe" ], "Mute Reasons (One Word)": [ "Toxicity", "Racism" ], "Discord Role ID (Can be left empty to use the first role id)": "" }, "Kick": { "Kick Reasons (One Word)": [ "Toxicity", "Warning" ], "Discord Role ID (Can be left empty to use the first role id)": "" }, "Custom": { "Use Custom (true/false)": false, "Use Confirmation (true/false)": false, "Custom Commands (Use '{player}' for player id, 'command name' 'command to send on console')": { "dogdoo": "dog {player}", "pacifism": "pf {player}" }, "Discord Role ID (Can be left empty to use the first role id)": "" }, "Link Commands": [ "link" ], "Auth Commands": [ "auth", "authenticate" ], "Deauth Commands": [ "dapdeauth", "deauthenticate" ], "Search Commands": [ "search", "look" ], "logs": { "Log to console (true/false)": true, "Log to discord (true/false)": false, "Log Data Type (Embed/Simple)": "Embed", "Discord Extension Log Level (Verbose/Debug/Info/Warning/Error/Exception/Off)": "Info", "Delete message after command": true, "Delete message after interaction": true, "Log Discord Channel ID": "" }, "Discord Guild ID (optional if the bot is in one guild)": "", "Discord Role ID": "" } How to install :
If you're using DiscordAuth as your link plugin, you can simply copy the plugin and use it as is.
If you're using DiscordCore as your link plugin, and you want to use /link and /deauth commands, Follow these steps:
1- Open DiscordCore in Notepad
2- Search and replace :
public void HandleLeave(IPlayer player, DiscordUser user, bool backup, bool message)
with
private void HandleLeave(IPlayer player, DiscordUser user, bool backup, bool message)
3- Search and replace :
public void CompletedLink(LinkActivation activation)
with
private void CompletedLink(LinkActivation activation)
4- Search and replace :
MJSU
with
Aimon
5- Save the file
You can also load the plugin without any link plugin.
Configure :
Set Bot Token, ChannelID and RoleID in config.
Reload Plugin.
To Do List :
Add logs to plugin.
Add customizable commands in config.
Add support for TimedPermissions.
Add support for Economics.
Make some infos in search command optional.
You can suggest new functionalities or plugin ideas on discord : Aimon#9899 .
-
BEDWARS | Minigame
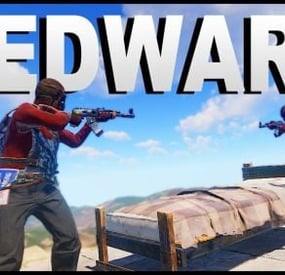
BedWars is a team-based multiplayer game where players work together in teams to protect their beds while attempting to destroy the beds of opposing teams. The primary objective is to be the last team standing.
/* THIS PLUGIN REQUIRE SQL DATABASE CONNECTION! */
/* THIS IS ONLY A PLUGIN, IT COMES WITH AN EXAMPLE MAP, YOU SHOULD CREATE YOUR OWN BEDWARS MAP. */
PERMISSIONS
FEATURES
COMMANDS
CONFIG
FILES ALREADY HAS 1/2 ARENAS FOR TESTING! YOU SHOULD DELETE ALL THE FILES TO CREATE NEW ONES.
Example videos (Demo / Not latest updated of the plugin. All bugs were fixed!)
Command example:
(
-
XLevels (BattlePass)
XLevels (BattlePass) - levels and awards for your server.
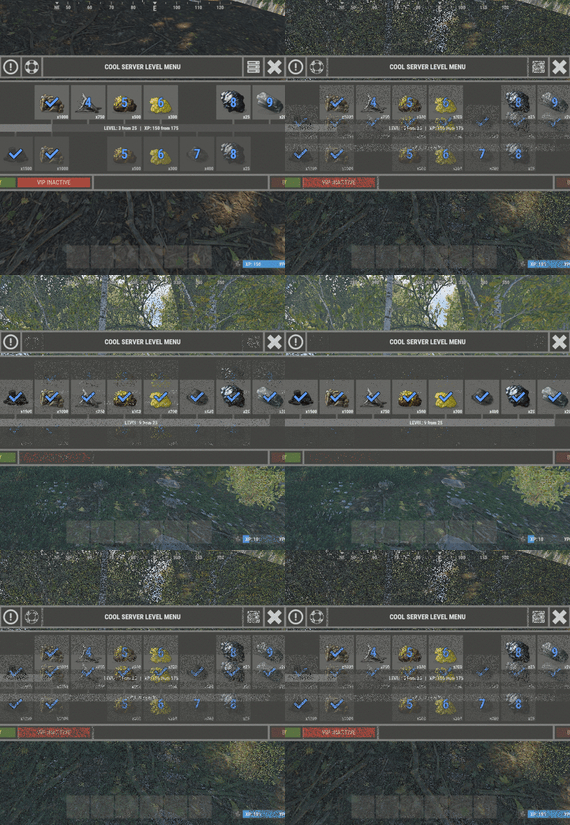
- Optimization of the interface for different monitor resolutions.
- Storing player data in - oxide/data/XDataSystem/XLevels
- There is a lang ru/en/uk/es.
- Sound effects when interacting with the menu.
- Setting the number of levels and XP to increase the level.
- Setting up the level reward. [ Item, Custom Item, Command ]
[ You can customize the rewards for a specific level. For example 5, 10, 20, 30. The rest will be without rewards ]
- Configuring the issuance of XP by permissions for online.
- Setting the XP multiplier by permissions.
- Setting up coupons. [ Exchange for XP ]
- Configuring boxes and the chance to spawn coupons.
- Configuring the issuance of XP. [ Loot, kill, break barrels, open boxes, pick from the ground, harvest ]
- Possibility to enable/disable the system of coupons.
- Possibility to enable/disable VIP levels.
- Chat prefix with player level.
- Mini-panel with pumping progress.
- Inventory with received awards.
- Two options to get into the level menu. [ Command | NPC shops/keepers ]
- Setting the increase in the amount of required XP with each pumped level.
- The ability to accumulate XP if the maximum level is reached. [ Useful for top players ]
- The ability to exchange coupons for XP if the maximum level is reached. [ Useful for top players ]
- Top players. [ Level | XP ]
- The ability to level up and receive rewards again after the maximum level has been reached.
[Level and XP reset to zero. ]
- Rank system. [ Setting in config. Display in the chat (prefix) and in the menu. ]
- Possibility to hide the reward. [ The reward will not be displayed until the player reaches the required level. ]
-> Overview - YouTube <-
Shortnames for config settings.
WORK WITH BetterLoot
For the correct spawning of coupons in the crate, in the BetterLoot plugin, remove/comment out the following line of code. 630 - container.inventory.capacity = container.inventory.itemList.Count; Permissions
xlevels.vip - access to VIP rewards. xlevels.top - access to the top players. Commands
Open the level menu - /level, /lvl, /pass Give XP - level_give_xp <SteamID> <Amount XP> API
int API_GetLevel(BasePlayer player) - returns the player's level. int API_GetLevel(ulong userID) - returns the player's level. void API_GiveXP(BasePlayer player, float XPAmount) - give the player XP. string API_GetPlayerPrefix(BasePlayer player) - get a ready-made player prefix with all the settings. string API_GetPlayerPrefix(ulong userID) - get a ready-made player prefix with all the settings. Config
{ "General settings": { "XP for the pickup of resources": true, "XP for harvest": true, "XP for bonus resources": true, "XP for kill": true, "XP for opening crates": true, "Include messages of received rewards in chat": true, "Include level up messages in chat": true, "Enable coupons": true, "Enable VIP rewards": true, "Get VIP reward - [ True - only with permission | False - without permission ]": true, "Take VIP Reward - [ True - take only with permission | False - take at any time without permission ]": true, "Add XP if the maximum level is already reached - [ Suitable for top players ]": false, "Exchange coupons if you have already reached the maximum level - [ Suitable for top players ]": false, "Reset the level and XP of the player after reaching the maximum level - [ Players will re-open levels and receive rewards ]": false, "There is a plugin for custom loot": false, "Profile SteamID for custom avatar": 0, "List of commands to open the menu": [ "level", "lvl", "pass" ], "Enable prefix in chat - [ Set to False if the prefix should be disabled or the prefix is used by a third party chat plugin ]": true, "Display the level in prefix": true, "Display the rank in prefix": true, "List of available ranks - [ Level - Rank ] ( If the list is empty, then the rank will not be displayed in the menu )": { "0": "CAP-Х", "1": "IRON-1", "2": "IRON-2", "3": "IRON-3", "4": "BRONZE-1", "5": "BRONZE-2", "6": "BRONZE-3", "7": "SILVER-1", "8": "SILVER-2", "9": "SILVER-3", "10": "GOLD-1", "11": "GOLD-2", "12": "GOLD-3", "13": "PLATINUM-1", "14": "PLATINUM-2", "15": "PLATINUM-3", "16": "DIAMOND-1", "17": "DIAMOND-2", "18": "DIAMOND-3", "19": "IMMORTAL-1", "20": "IMMORTAL-2", "21": "IMMORTAL-3", "22": "RADIANT-1", "23": "RADIANT-2", "24": "RADIANT-3", "25": "GOD" } }, "Vendings settings": { "Open the level menu. [ True - Immediately after the opening of the NPC shop | False - UI button ]": false, "Access to the level menu is only through the NPC shops. [ True - NPC shop | False - Command ]": false, "List of NPC shops in which you can open the level menu (shop name)": [ "Black Market" ] }, "XP multiplier": { "Enable XP multiplier when exchanging coupons - [ This parameter affects only the multipliers for the exchange of coupons ]": false, "Setting up permissions for XP multipliers for the exchange of coupons and other actions. [ Permission | XP multiplier ]": { "xlevels.125p": 2.25, "xlevels.75p": 1.75, "xlevels.10p": 1.1 } }, "Issuing XP for online": { "Enable issuing XP to online players": false, "XP issue interval (in sec.)": 15.0, "Setting up permissions. [ Permission | XP ]": { "xlevels.default": 5.0 } }, "Mini-bar location / Main menu settings": { "AnchorMin": "1 0", "AnchorMax": "1 0", "OffsetMin": "-403 16", "OffsetMax": "-210 42", "Show mini-bar": true, "Color background_1": "0.517 0.521 0.509 0.95", "Color background_2": "0.217 0.221 0.209 0.95", "Display reward container - [ True - Only when there is a reward in the level | False - Always ]": false, "Display required reward level": true, "Display required VIP reward level": true }, "Settings levels": { "Maximum level": 25, "Number of XP to upgrade one level": 100.0, "How much to increase the number of XP with each level": 25.0 }, "XP settings | Shortname : ValueXP": { "XP for the pickup of resources": { "stones": 10.0, "sulfur.ore": 15.0, "metal.ore": 12.5 }, "XP for harvest": { "potato.entity": 2.5, "corn.entity": 1.75, "hemp.emtity": 0.25 }, "XP for bonus resources": { "stones": 5.0, "sulfur.ore": 10.0, "metal.ore": 7.5 }, "XP for kill / destroy barrel": { "boar": 10.0, "loot-barrel-1": 7.5, "heavyscientist": 2.5 }, "XP for opening crates": { "crate_normal": 5.0, "crate_normal_2": 1.0, "crate_tools": 3.5 } }, "Coupons for XP": [ { "Coupon name": "Coupon 5ХР", "Coupon text": "Coupon for 5ХР\n\nExchange them and get XP to level up!\n\nCommand for exchange - /level", "Coupon skin": skinID, "XP amount": 5, "Setting the chance of falling out of crates/barrels": [ { "Name crate/barrel": "crate_normal_2", "Drop chance": 50.0, "Minimum amount of coupons": 1, "Maximum number of coupons": 3 } ] }, { "Coupon name": "Coupon 10ХР", "Coupon text": "Coupon for 10ХР\n\nExchange them and get XP to level up!\n\nCommand for exchange - /level", "Coupon skin": skinID, "XP amount": 10, "Setting the chance of falling out of crates/barrels": [ { "Name crate/barrel": "crate_normal_2", "Drop chance": 50.0, "Minimum amount of coupons": 1, "Maximum number of coupons": 3 } ] }, { "Coupon name": "Coupon 25ХР", "Coupon text": "Coupon for 25ХР\n\nExchange them and get XP to level up!\n\nCommand for exchange - /level", "Coupon skin": skinID, "XP amount": 25, "Setting the chance of falling out of crates/barrels": [ { "Name crate/barrel": "crate_normal_2", "Drop chance": 50.0, "Minimum amount of coupons": 1, "Maximum number of coupons": 2 } ] }, { "Coupon name": "Coupon 50ХР", "Coupon text": "Coupon for 50ХР\n\nExchange them and get XP to level up!\n\nCommand for exchange - /level", "Coupon skin": skinID, "XP amount": 50, "Setting the chance of falling out of crates/barrels": [ { "Name crate/barrel": "crate_normal_2", "Drop chance": 50.0, "Minimum amount of coupons": 1, "Maximum number of coupons": 2 } ] }, { "Coupon name": "Coupon 100ХР", "Coupon text": "Coupon for 100ХР\n\nExchange them and get XP to level up!\n\nCommand for exchange - /level", "Coupon skin": skinID, "XP amount": 100, "Setting the chance of falling out of crates/barrels": [ { "Name crate/barrel": "crate_normal_2", "Drop chance": 50.0, "Minimum amount of coupons": 1, "Maximum number of coupons": 1 } ] }, { "Coupon name": "Coupon 200ХР", "Coupon text": "Coupon for 200ХР\n\nExchange them and get XP to level up!\n\nCommand for exchange - /level", "Coupon skin": skinID, "XP amount": 200, "Setting the chance of falling out of crates/barrels": [ { "Name crate/barrel": "crate_normal_2", "Drop chance": 50.0, "Minimum amount of coupons": 1, "Maximum number of coupons": 1 } ] }, { "Coupon name": "Coupon 500ХР", "Coupon text": "Coupon for 500ХР\n\nExchange them and get XP to level up!\n\nCommand for exchange - /level", "Coupon skin": skinID, "XP amount": 500, "Setting the chance of falling out of crates/barrels": [ { "Name crate/barrel": "crate_normal_2", "Drop chance": 50.0, "Minimum amount of coupons": 1, "Maximum number of coupons": 1 } ] } ], "Level reward": { "1": { "Item shortname / custom reward name [ Must not be empty ]": "wood", "Reward display name": "Wood", "Item quantity": 1250, "Item skin": 0, "Command": "", "Link to custom image": "", "Hide reward - [ Reward will not be displayed until the player reaches this level ]": false }, "2": { "Item shortname / custom reward name [ Must not be empty ]": "charcoal", "Reward display name": "Charcoal", "Item quantity": 1500, "Item skin": 0, "Command": "", "Link to custom image": "", "Hide reward - [ Reward will not be displayed until the player reaches this level ]": false }, "3": { "Item shortname / custom reward name [ Must not be empty ]": "metal.ore", "Reward display name": "Metal ore", "Item quantity": 1000, "Item skin": 0, "Command": "", "Link to custom image": "", "Hide reward - [ Reward will not be displayed until the player reaches this level ]": false }, "4": { "Item shortname / custom reward name [ Must not be empty ]": "metal.fragments", "Reward display name": "Metal fragments", "Item quantity": 750, "Item skin": 0, "Command": "", "Link to custom image": "", "Hide reward - [ Reward will not be displayed until the player reaches this level ]": false }, "5": { "Item shortname / custom reward name [ Must not be empty ]": "sulfur.ore", "Reward display name": "Sulfur ore", "Item quantity": 500, "Item skin": 0, "Command": "", "Link to custom image": "", "Hide reward - [ Reward will not be displayed until the player reaches this level ]": false }, "6": { "Item shortname / custom reward name [ Must not be empty ]": "sulfur", "Reward display name": "Sulfur", "Item quantity": 300, "Item skin": 0, "Command": "", "Link to custom image": "", "Hide reward - [ Reward will not be displayed until the player reaches this level ]": false }, "7": { "Item shortname / custom reward name [ Must not be empty ]": "gunpowder", "Reward display name": "Gunpowder", "Item quantity": 400, "Item skin": 0, "Command": "", "Link to custom image": "", "Hide reward - [ Reward will not be displayed until the player reaches this level ]": false }, "8": { "Item shortname / custom reward name [ Must not be empty ]": "hq.metal.ore", "Reward display name": "HQM ore", "Item quantity": 25, "Item skin": 0, "Command": "", "Link to custom image": "", "Hide reward - [ Reward will not be displayed until the player reaches this level ]": false }, "9": { "Item shortname / custom reward name [ Must not be empty ]": "metal.refined", "Reward display name": "HQM", "Item quantity": 20, "Item skin": 0, "Command": "", "Link to custom image": "", "Hide reward - [ Reward will not be displayed until the player reaches this level ]": false }, "10": { "Item shortname / custom reward name [ Must not be empty ]": "scrap", "Reward display name": "Scrap", "Item quantity": 50, "Item skin": 0, "Command": "", "Link to custom image": "", "Hide reward - [ Reward will not be displayed until the player reaches this level ]": false } }, "VIP level reward": { "1": { "Item shortname / custom reward name [ Must not be empty ]": "wood", "Reward display name": "Wood", "Item quantity": 1250, "Item skin": 0, "Command": "", "Link to custom image": "", "Hide reward - [ Reward will not be displayed until the player reaches this level ]": false }, "2": { "Item shortname / custom reward name [ Must not be empty ]": "charcoal", "Reward display name": "Charcoal", "Item quantity": 1500, "Item skin": 0, "Command": "", "Link to custom image": "", "Hide reward - [ Reward will not be displayed until the player reaches this level ]": false }, "3": { "Item shortname / custom reward name [ Must not be empty ]": "metal.ore", "Reward display name": "Metal ore", "Item quantity": 1000, "Item skin": 0, "Command": "", "Link to custom image": "", "Hide reward - [ Reward will not be displayed until the player reaches this level ]": false }, "4": { "Item shortname / custom reward name [ Must not be empty ]": "metal.fragments", "Reward display name": "Metal fragments", "Item quantity": 750, "Item skin": 0, "Command": "", "Link to custom image": "", "Hide reward - [ Reward will not be displayed until the player reaches this level ]": false }, "5": { "Item shortname / custom reward name [ Must not be empty ]": "sulfur.ore", "Reward display name": "Sulfur ore", "Item quantity": 500, "Item skin": 0, "Command": "", "Link to custom image": "", "Hide reward - [ Reward will not be displayed until the player reaches this level ]": false }, "6": { "Item shortname / custom reward name [ Must not be empty ]": "sulfur", "Reward display name": "Sulfur", "Item quantity": 300, "Item skin": 0, "Command": "", "Link to custom image": "", "Hide reward - [ Reward will not be displayed until the player reaches this level ]": false }, "7": { "Item shortname / custom reward name [ Must not be empty ]": "gunpowder", "Reward display name": "Gunpowder", "Item quantity": 400, "Item skin": 0, "Command": "", "Link to custom image": "", "Hide reward - [ Reward will not be displayed until the player reaches this level ]": false }, "8": { "Item shortname / custom reward name [ Must not be empty ]": "hq.metal.ore", "Reward display name": "HQM ore", "Item quantity": 25, "Item skin": 0, "Command": "", "Link to custom image": "", "Hide reward - [ Reward will not be displayed until the player reaches this level ]": false }, "9": { "Item shortname / custom reward name [ Must not be empty ]": "metal.refined", "Reward display name": "HQM", "Item quantity": 20, "Item skin": 0, "Command": "", "Link to custom image": "", "Hide reward - [ Reward will not be displayed until the player reaches this level ]": false }, "10": { "Item shortname / custom reward name [ Must not be empty ]": "scrap", "Reward display name": "Scrap", "Item quantity": 50, "Item skin": 0, "Command": "", "Link to custom image": "", "Hide reward - [ Reward will not be displayed until the player reaches this level ]": false } } } -
Hotbars
Hotbars is a Rust plugin that lets users create multiple MMO-style hotbars they can switch between on the fly either with chat commands, key binds or a GUI interface. Users can configure up to 5 bars to switch between. If the items are lost, the items are removed from the hobar when the user switches or recalls the hotbar.
Permissions
hotbars.use - Required for use. hotbars.(1-5) - Limits the amount of hotbars a player/group can have. Example: hotbars.3
Commands
/hotbar - Will print a list of availible commands. /hotbar list - Alternative method to open GUI interface. /hotbar close - Alternative method to close GUI interface. /hotbar save - Alternative method to save a hotbar. /hotbar delete 1-5 - Alternative method to delete a saved hotbar. /hotbar 1-5 - Alternative method to switch between hotbars.
Config
OnlyUsableItems (Default: true) - Prevents un-usable items from being saved into a hotbar, like resources, etc.. RestoreHotbarOnDeath (Default: false) - Restores the hotbar on respawn after a player dies. ToggleButtonContainerBounds - Configure the placement of the GUI hotbar button. ToggleButtonImageBounds - Configure the placement of the GUI hotbar button icon. ToggleButtonBounds - Configure the placement of the GUI hotbar button texture layer. ToggleButtonColor - Configure the color of the GUI hotbar button. ToggleButtonBackgroundColor - Configure the background color of the GUI hotbar button. ToggleButtonOpacity - Configure the opacity of the GUI hotbar button. ToggleButtonBackgroundOpacity - Configure the background opacity of the GUI hotbar button. HotbarContainerBounds - Configure the placement of the hotbar menu.
Preview
-
Glass Bridge Event
Glass Bridge is an event inspired by the famous netflix series: Squid Game
• The event consists of creating a glass bridge where players must jump over them and reach the finish line to be the winner of the game;
• However, players will have some challenges for this. The event can have PVP combat during gameplay, as well as giving random weapons to players (set by config file) so they can kill each other;
• In addition, it is possible to disable the PVP or even make it more hardcore, activating the system of dying after the fall;
Features:
★ It is possible to add a different announcement for each weapon given to the user during the course of the event!
★ UI for event entry and exit fully customizable by configuration file.
★ Give customized prizes to users, in addition to executing commands on the server when a user is the winner of the event!
★ Manage the size of the arena and define the amount of glass that will be broken for each row!
Commands:
/gb start - To start a new event
/gb stop - To stop the current event
/gb join - To join the event
/gb leave - To leave the event
Demonstration video:
♯ API:
// Returns whether the event is currently active private bool IsActive(); // Returns whether a player is currently participating in the event. private bool IsPlaying(string playerId); private bool IsPlaying(ulong playerId); // Remove a player from the event private void RemovePlayer(string playerId); private void RemovePlayer(ulong playerId); // Get a list of event players private List<BasePlayer> PlayingList(); // Hook when the event is started private void OnGlassBridgeEventStarted(); // Hook when the event is finished private void OnGlassBridgeEventEnded(BasePlayer? winner);
Formatting:
{winner_id} - Event winner steam ID
{winner_name} - Event winner display name
Default configuration file:
{ "Commands": [ "glassbridge", "gb" ], "Permission name": "glassbridge.admin", "Allowed console commands ('*' to allow all commands)": [], "Blocked chat commands ('*' to block all commands)": [], "Event settings": { "Auto start cooldown in seconds (0 = disabled)": 3600, "Waiting duration (seconds)": 120, "Auto stop after seconds (0 = disabled)": 300, "Minimum players": 1, "Lose when fall": false, "PVP Enabled": true, "Rollback players to start point when die": true, "Spawn position": { "x": 300.0, "y": 800.0, "z": 300.0 }, "Give times": [ { "Tiem after the event started": 30.0, "Item shortname": "arrow.wooden", "Item amount": 3, "Item skin ID": 0, "Loaded ammo (0 = disabled)": 0, "Container to give (wear/belt/main)": "main", "Show warn for this item?": false, "Warn background color": "0 0.52 1 1", "Lang message key": "" }, { "Tiem after the event started": 30.0, "Item shortname": "bow.hunting", "Item amount": 1, "Item skin ID": 0, "Loaded ammo (0 = disabled)": 1, "Container to give (wear/belt/main)": "belt", "Show warn for this item?": true, "Warn background color": "0.12 0.46 0.21 1", "Lang message key": "ReceivedNewItem" }, { "Tiem after the event started": 120.0, "Item shortname": "pistol.revolver", "Item amount": 1, "Item skin ID": 0, "Loaded ammo (0 = disabled)": 4, "Container to give (wear/belt/main)": "belt", "Show warn for this item?": true, "Warn background color": "0 0.52 1 1", "Lang message key": "ReceivedNewItem" }, { "Tiem after the event started": 180.0, "Item shortname": "rifle.ak", "Item amount": 1, "Item skin ID": 0, "Loaded ammo (0 = disabled)": 12, "Container to give (wear/belt/main)": "belt", "Show warn for this item?": true, "Warn background color": "0.58 0.25 0.25 1", "Lang message key": "ReceivedNewItem" } ] }, "Glasses settings": { "columns": 18, "rows": 24, "Broken glasses by row (need to be less than columns)": 9 }, "Prize settings": { "Commands to execute on server": [ "oxide.usergroup add {winner_id} glassbridge_event_winner" ], "Items to give": [ { "Item shortname": "rifle.ak", "Item amount": 1, "Item skin ID": 1826520371, "Custom name (empty = disabled)": "Apocalyptic Knight AK" }, { "Item shortname": "ammo.rifle", "Item amount": 128, "Item skin ID": 0, "Custom name (empty = disabled)": "Ammo for your AK" } ] }, "UI settings": { "Join Leave UI": { "Anchor": "1 0.5 1 0.5", "Offset": "-146 -12 -12 138", "Background color": "0.18 0.17 0.18 1", "Join leave button": { "Join background color": "0.18 0.41 0.12 1", "Leave background color": "0.41 0.12 0.12 1" } }, "Event status UI": { "Anchor": "0.5 1 0.5 1", "Offset": "-48 -100 48 -36", "Remaining players": { "Background color": "1 1 1 0.5", "Anchor": "0 0 1 0", "Offset": "0 0 0 24", "Icon URL": "https://i.postimg.cc/HsfZffQb/HY9DNLr.png", "Icon anchor": "0 0 0 1", "Icon offset": "4 4 20 -4" }, "Remaining time": { "Background color": "1 1 1 0.5", "Anchor": "0 0 1 1", "Offset": "0 28 0 0" } } }, "Version": { "Major": 1, "Minor": 6, "Patch": 0 } }
GALLERY
- #event
- #glass bridge
- (and 5 more)

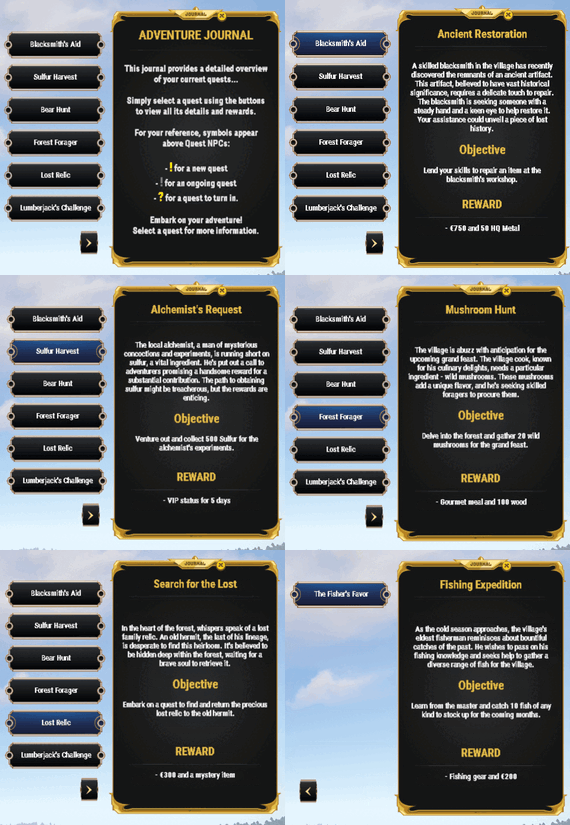
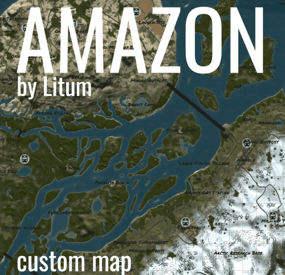

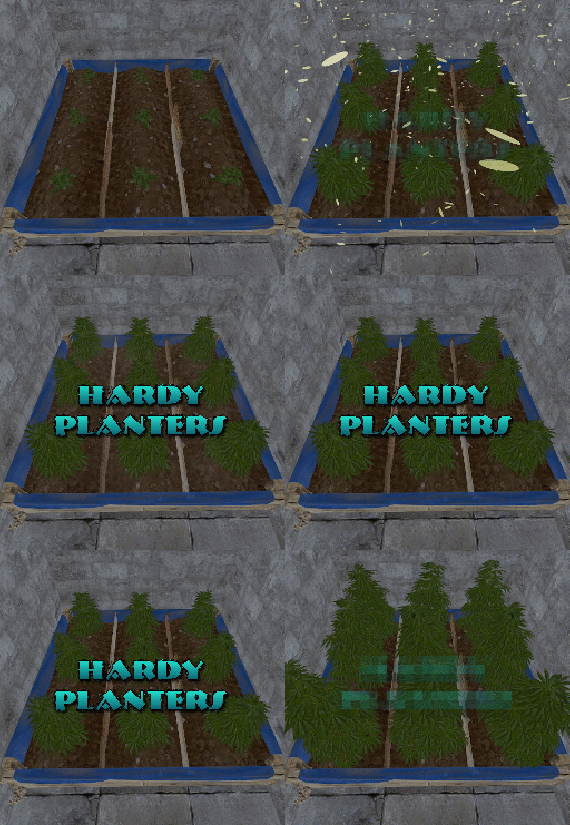
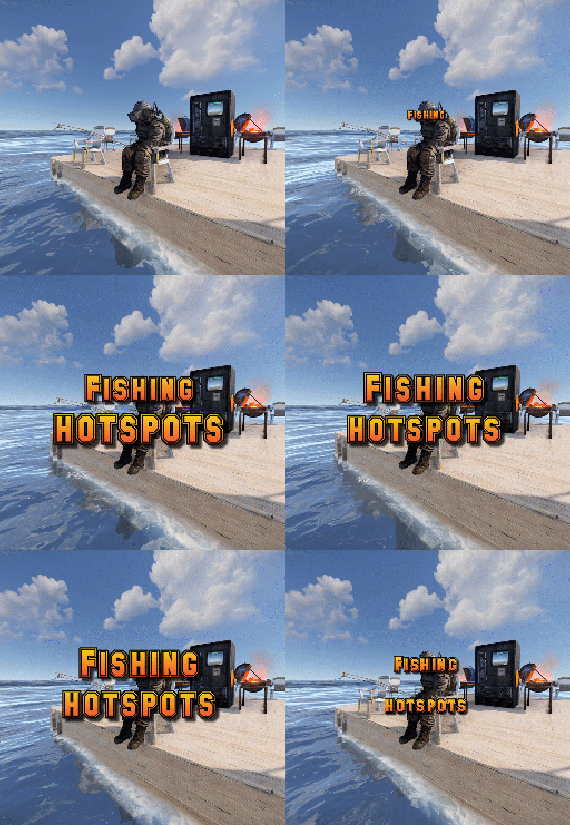
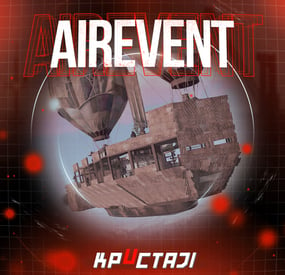

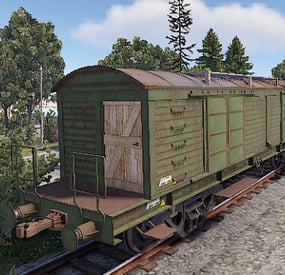
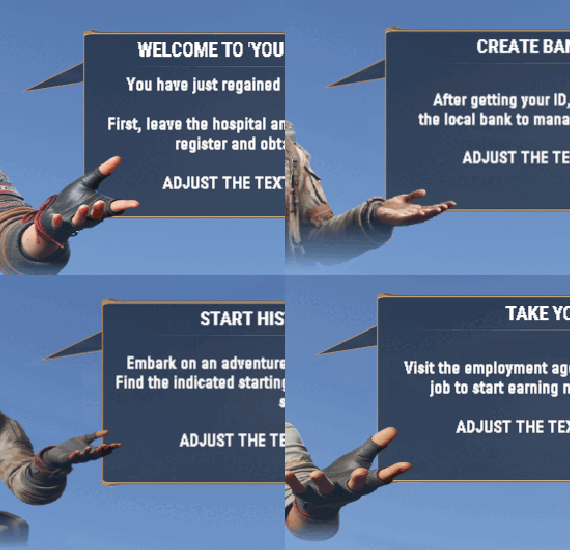
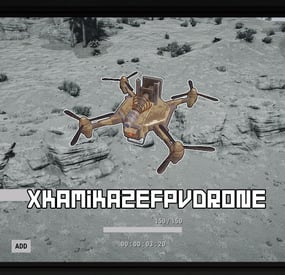
.thumb.gif.4707aef13cba7c3b9ad410f5f982b71c.gif)
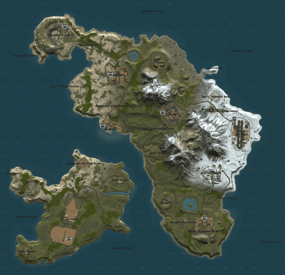
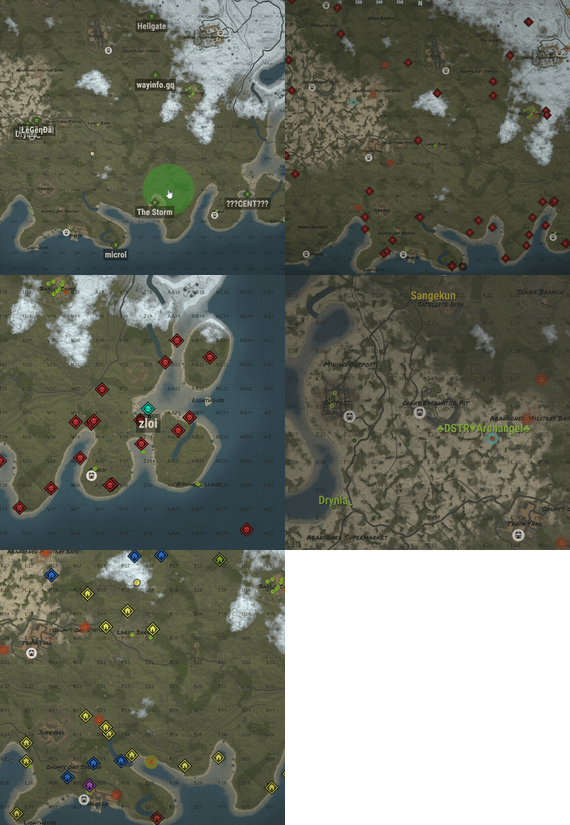
(1)(3).thumb.png.ae3f7cf4601f73b39edc85a84ad53ac9.png)
