Search the Community
Showing results for tags 'oxide'.
-
Version 2.1.2
3,502 downloads
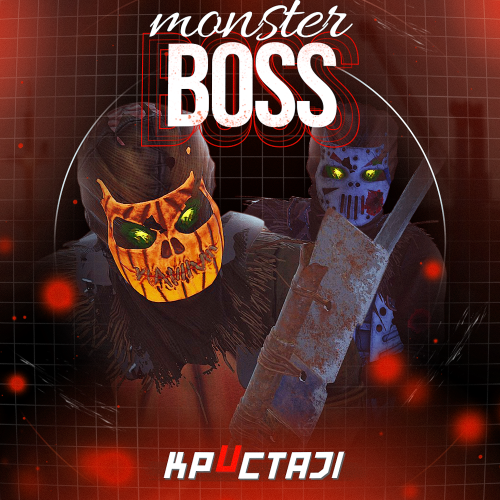
This plugin adds to the game a variety of NPC bosses with different abilities and a very adaptable configuration Description Using this plugin you can add NPC bosses to any point on the map. You can set up any ability with the plugin configuration. If it is necessary, you can add multiple abilities to one boss. Abilities are divided into two categories, ones take place in a certain radius from the NPC, and others are triggered by damaging from an NPC. The map also displays the location of the actual bosses (their name and amount of health). You can give any clothes and weapons for NPCs using the configuration. Custom Map Maps that have a configuration for the appearance of boss on their custom monuments You can also download all these files for all maps here Dark Ages Blue Tears All files for custom maps are stored in the folder oxide/data/BossMonster/CustomMap. You don't have to delete files from there, the plugin will understand by itself which map is currently installed on the server and will download only the necessary file if there is one in this folder. The plugin will tell you about this process in the console during the plugin loading. It will write in the console what file works on the current map, and what ones don’t work If you want to create a custom place for the boss to appear on your custom map or on a map that is not in this list, you have to create the ID of this custom map. After that you need to place an item such as a RAND Switch on your map. It must be placed randomly, where it will not be visible to other players. You will get the identifier, if you add up the three coordinates of the position of this object from RustEdit (x, y and z) and write the resulting value in the parameter of your file (an example file can be taken from ready-made files) - ID As an example, let's take the coordinates (26.896, -456.158, 527.258), then our identifier is 26.896 - 456.158 + 527.258 = 97.996 Then you need to indicate a list of bosses that will appear on your map. You need to copy the configuration data block for each boss. In the database parameters you will specify the name of the boss and a list of positions where it can appear Dependencies (optional, not required) GUI Announcements Notify Discord Messages AlphaLoot CustomLoot Economics Server Rewards IQEconomic PveMode Chat commands (only for administrators) /WorldPos - displays the actual player’s position on the map /SavePos <name> - saves a new position to the configuration file for the boss with the name - name, relative to the nearest monument /SpawnBoss <name> - spawn of the boss with the name - name in the coordinates of the administrator Console commands (RCON only) SpawnBoss <name> – spawn of the boss with the name – name KillBoss <name> – kill all bosses with the name – name Plugin Config en - example of plugin configuration in English ru - example of plugin configuration in Russian Boss Config en - example of plugin configuration in English ru - example of plugin configuration in Russian Custom Map Config en - example of plugin configuration in English ru - example of plugin configuration in Russian Hooks void OnBossSpawn(ScientistNPC boss) - сalled when a boss appears on the map void OnBossKilled(ScientistNPC boss, BasePlayer attacker) - сalled when a player kills a boss API ScientistNPC SpawnBoss(string name, Vector3 pos) - spawns a boss named name in position pos void DestroyBoss(ScientistNPC boss) - destroys the boss My Discord: KpucTaJl#8923 Join the Mad Mappers Discord here! Check out more of my work here!$37.00- 344 comments
- 12 reviews
-
- 20
-

-

-
- #abilities
- #boss
- (and 16 more)
-
Version 1.2.3
781 downloads
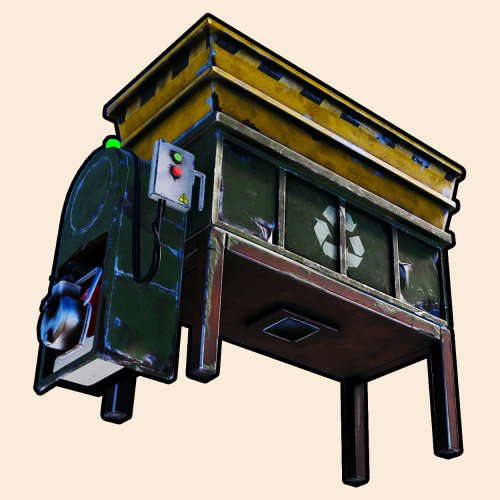
With Portable Recycler, you and your players will benefit exponentially in time saving for searching for Recyclers around monuments like never before. Access your own portable recycler anywhere you like! FEATURES Use /recycler (by default, can modify in the config) to open up your private recycler. Group-based cooldown support in the config. Friendly integration with NoEscape by Calytic with configurable rules of behavior. Chat message custom icon Steam ID. Phrase support. Group-based recycling quality. Group-based recycling rates. PERMISSIONS PortableRecycler.use: To allow anyone to open up their recycler. COMMANDS (CONFIGURABLE) Following commands are chat and console commands. recycler: Opens up your own personal portable recycler. CONFIG DISCLAIMER The yellow and green buttons while using the Recycler in the GIF, does not come with the plugin. That's another plugin called Quick Sort by MONaH.$4.99 -
Version 1.9.2
802 downloads
Features Allows players to store items in portable bags Allows limiting the number of bags players can use at once Allows placing bags into storage containers, with limits Allows placing bags inside other bags, with limits Allows restricting which items can go inside bags Allows players to upgrade bags linearly Allows using Economics and Server Rewards for purchasing bag upgrades Allows players to recycle bags Allows items to be pulled into bags automatically Allows unlimited types of bags to be defined, each with different appearance, capacity and rules Allows players to open and switch bags quickly via a UI Allows players to create custom key binds to open and close bags Allows creating bags that are preloaded with items from Kits Allows bags to be placed in wearable slots, including the backpack slot Allows a visual backpack to be displayed while the player is wearing a bag Quick start Give yourself a bag Grant the bagofholding.givebag permission to an administrator role. For example, run the command o.grant group admin bagofholding.givebag. Give yourself a bag with the command boh.givebag <player> generic.small (replace <player> with your in-game name). By default, this bag has 18 slots, and can hold any type of item, but it cannot hold other bags (unless those other bags are empty). Click on the bag in your inventory and click the "Open Bag" button. This will display the bag container in the loot panel, allowing you to place items into the bag. Upgrade the bag Grant the bagofholding.upgrade.generic.small permission to an appropriate role. For example, run the command o.grant group default bagofholding.upgrade.generic.small. Open the bag. Click the "Upgrade" button. Click the "Purchase upgrade" button (costs 300 scrap by default). This will upgrade the bag capacity to 24 slots, and it will change the bag's appearance. Note: Every bag has a separate permission which determines whether players can upgrade that specific type of bag. If you intend to allow players to upgrade bags, you will have to grant quite a few different permissions. We suggest using a permissions manager UI plugin for this. Enable gather mode Set Gather mode -> Enabled to true in the config. Reload the plugin. Open the bag. Click the "Gather: Off" button so that it changes to "Gather: On". This will show a flame icon on the bag, indicating that it is in gather mode. Drop and pick up an item. You will see the item get pulled into the bag automatically. Add bags to loot tables Note: If you are using a dedicated loot plugin to add bags to loot tables, this built-in feature might not work. For best results, configure your dedicated loot plugin to spawn bags instead. Set Loot spawns -> Enabled to true in the config. For testing, set the spawn chance for one type of bag to 100.0 for the assets/bundled/prefabs/radtown/crate_normal.prefab container prefab. Reload the plugin. Spawn some containers to confirm that they can spawn bags in them. For example, run the command spawn crate_normal in the client F1 console while aiming at the ground, and look for a bag in the container. If none of the loot containers are spawning with a bag in them, then you are probably using a loot plugin which is conflicting, in which case you may need to configure loot spawns in your dedicated loot plugin. Once you have confirmed that this feature is working on your server, configure the spawn chances to your liking. Once you have configured the spawn chances to your liking, you can use the bagofholding.spawnloot command to spawn bags into existing loot containers according to the config. You can also remove all bags from loot containers using the bagofholding.clearloot command if you accidentally added too many. Realistic backpacks If you want to allow backpacks to be usable only in the backpack slot, along with a 3D visual backpack model, proceed with the following steps. Set Wearable bags -> Allow wearing bags in the backpack slot to true in the config. This allows players to equip a bag in the backpack slot. Set Visual backpack -> Display while a bag is worn in the backpack slot to true in the config. This causes the visual backpack model to appear when the player is wearing a bag in the backpack slot. Set Player wearable bag limits -> Enabled to true in the config. This causes the player wearable inventory to have different bag limits than the rest of the player inventory. Set Player wearable bag limits -> Default limits -> Max total bags to 1 in the config. This allows players to wear at most one non-empty bag. Technically, this number could be set higher and it wouldn't matter, as long as you don't permit bags to be worn in other slots, since there is only one backpack slot. Set Player bag limits -> Default limits -> Max total bags to 0 in the config. This prevents players from placing non-empty bags in their main/belt inventory. Reload the plugin. Change bag theme By default, bags use fantasy-themed skins. Alternatively, you may choose leather-themed or tactical-themed skins. You may also choose between colored chevron icons (default) and colored circle icons which are larger and therefore easier to see. Bag skins can be directly changed in the config, but for first time users, this plugin provides multiple commands to help you edit the config in bulk. To change the bag theme, run the command boh.settheme <theme>. For example, boh.settheme tactical_chevrons. This command will update the skin IDs in the config and update existing bags in your server to the appropriate theme. Available themes are: fantasy_chevrons, fantasy_circles,leather_chevrons,leather_circles, tactical_chevrons, tactical_circles. This command works best when using a freshly generated config. If you have significantly altered the config (i.e., changed the number of bags per category), then you may have to use a lower level command such as boh.setskins, or manually update the config. In addition to the skins assigned to the preset themes which include 6 variations (no icon, light blue, green, yellow, orange, blue), there are 5 additional colors available (gray, white, black, red, pink). See the "Alternative bag skins" section for a list of all 400+ skins. Additionally, you can create your own skins and add them to the configuration. Some servers provide multiple themes at once, allowing players to use whichever style they prefer. To do this, you first need to define the alternative themes in the config. To add alternative themes, you can run the command boh.addtheme <theme>. Note: The fantasy_chevrons, leather_chevrons and tactical_chevrons themes are already included in the default config (as of v1.9.0), so you don't need to run this command if those are the only themes you care about, unless you are using a config from a prior version. Once the config is updated, you will then have to provide the alternative skins to your players somehow, such as via kits, vending machines, shop plugins, crafting plugins, loot plugins, etc. The boh.givebag command has an optional parameter to designate which skin to apply, which some servers use for integration with custom shops. In addition to changing bag skins, you may also want to change the skin displayed on the belt icon via UI settings -> Belt button -> Display skin ID in the configuration. For reference, the default generic.small bag skins are 2824115881 (fantasy), 2831029422 (leather), and 2828573095 (tactical). How it works How players obtain bags Bags are simply skinned large halloween loot bags (short name: halloween.lootbag.large, item ID: 479292118). Any plugin that can create skinned items can be used to make bags available on your server. For example, bags can be distributed via kits, vending machines (via Custom Vending Setup), shop plugins, crafting plugins, loot plugins (e.g., Alpha Loot), and more. The plugin also has native support for adding bags to loot containers, and provides the command boh.givebag <player> <profile> <amount> for use by admins or plugins. How players open bags Players can open bags multiple ways. "Open Bag" button: When a player clicks on a bag item, they will see the "Open Bag" button appear next to the "Drop" button. Clicking the "Open Bag" button will open the bag container on the right side of the inventory, the same as opening a storage container. Extra belt button: Players with a bag in their inventory will see a bag button next to their belt. Clicking that button will open the first bag in their inventory (via the bag.open command). Requires "UI settings" -> "Belt button" -> "Enabled": true in the config. This is enabled by default. Subsequent presses of that button will cycle through the remaining bags in the player's inventory. Custom key binds: Players may bind commands such as bag.open, bag.next, and bag.prev to keys for quick access. See the "Commands" section for a complete list of available commands and how they function. Tip: Players can also move items into a bag without even opening it, by simply dragging and dropping items directly onto the bag. Bag limits As a balancing mechanism, you can limit how many bags a given player or container can use at once. Empty bags can be placed almost anywhere, but bags with contents will count toward a limit. When that limit is reached, empty bags in the same container will become locked and unable to receive items. The default configuration of the plugin allows players to use up to 3 bags at a time in their inventory, with 0 bags in their backpack (Backpacks plugin on uMod), and 0 bags in storage containers. To configure bag limits for player inventories, see Player bag limits in the config. To configure bag limits for Backpacks, see Backpack bag limits in the config. To configure bag limits for storage containers, see Default container bag limits and Container bag limits by prefab in the config. If desired, you can assign bag limits according to player permission. Bag upgrades Each bag profile may define an upgrade target, dictating which bag profile it can be upgraded to. While a player is looting a bag, if they have permission to upgrade that bag, they will see an "Upgrade" button. Clicking that button will display the cost, as well as what the bag will be upgraded to, allowing the player to confirm the purchase if they have sufficient funds. Tip: One immersive upgrade technique is to set the upgrade cost to another instance of the same bag, to make it so players have to combine bags together to produce a better bag. Bag recycling Each bag profile may define a set of ingredients that it will recycle into when processed by a recycler. Each bag can recycle into as many ingredients as you want, each with an optional skin ID. Tip: One immersive recycling technique is to configure larger bags to recycle into smaller bags (possibly multiple). This technique can be used to allow players to effectively reverse bag upgrades, as well as to split larger bags into smaller bags that the player can then upgrade independently. Wearable bags To free up main inventory space, you can enable players to carry bags in their wearable inventory slots. To enable, see Wearable bags in the config. Note: Wearing a bag will only display the visual backpack if the visual backpack is also enabled. Visual backpack To increase immersion, you can display a visual backpack while a player is wearing a bag. To enable, see Visual backpack in the config. Gather mode To optimize player looting, players can enable gather mode for each bag. While gather mode is enabled, any item that gets added to the bag's parent container will automatically be moved into the bag if possible. For example, if you have a Food & Medical bag in your inventory, and that bag is in gather mode, picking up a food or medical item (or moving such an item from a container to your inventory) will automatically move that item into the bag if there is space. Notes: Gather mode can be enabled by setting Gather mode -> Enabled to true in the config Bags which have gather mode enabled will display a flame icon to easily identify them Throwing a bag onto the ground will automatically toggle off gather mode Gather mode only moves newly added item stacks, so existing item stacks will be ignored, even when replenished When multiple bags are in gather mode, the plugin will attempt to add items to bags according to their order in the container When nesting bags and enabling gather mode at multiple levels, new items will recursively be moved to child bags until they cannot be moved further Kit bags A kit bag is a type of bag that only allows players to remove items from the bag, but not add items. Kit bags are intended to be used as a mechanism to give players multiple items at once, without requiring that the player initially have the inventory space to hold all the items, since the player only needs to be able to hold the bag itself. Also, for convenience, once a kit bag has been emptied, the bag will automatically delete itself since it is no longer useful at that point (since players cannot place items in it). How to redeem a kit as a bag: If you have already created a kit via the Rust Kits plugin on uMod, you can give that kit to a player as a bag. That means the player will receive a bag item that is filled with the contents of that kit. To give a player a kit as a bag, simply run the command boh.givekitbag <player> kitbag.red.locked <kit>, where <player> should be replaced with a player name or steam ID, and <kit> should be replaced with the name of the kit. You may replace kitbag.red.locked with the name of a different locked kit bag if you want. Note: If running this command as a player (as opposed to in the server console or via another plugin), ensure you first have the bagofholding.givekitbag permission (caution: only grant that permission to trusted administrators). Tip: If you want to allow players to store items in a bag that is redeemed this way, then simply use a bag profile which has the "Allow player item input" config option set to true. How to add a kit bag to a kit: The Rust Kits plugin on uMod supports bags with items in them. If you want to allow players to redeem kits that contain bags with items in them, simply create a bag, add the items you want, then create a kit from your inventory. Note: Players will not be able to see the contents of the bag from the Kits UI, so it will be a mystery to the player until they have redeemed the kit, though the Kits plugin might be updated in the future to allow inspecting bag contents. If you want to add a bag to a kit, but don't want to allow players to use the bag as storage, follow the below steps create a kit bag. Give yourself an unlocked kit bag with the command boh.givebag <player> kitbag.red.unlocked, where <player> should be replaced with your user name or steam ID. Place items in the bag. Ensure you have the bagofholding.upgrade.kitbag.red.unlocked permission. Note: If you gave yourself a different color bag, the permission you must grant will be different. Caution: Only grant that permission to administrators who will be creating kits. Use the "Upgrade" feature to transform the bag into a kitbag.red.locked bag, which makes it so players can no longer add items to the bag. Use the Kits plugin to create or update the kit from your inventory. If you want to edit the bag contents, but don't want to do it from scratch, follow the below steps. Redeem the kit. Ensure you have the bagofholding.upgrade.kitbag.red.locked permission. Note: If this is a different color bag, the permission you must grant will be different. Caution: Only grant that permission to administrators who will be creating kits. Use the "Upgrade" feature to transform the bag into a kitbag.red.unlocked bag. Update the items in the bag. Use the "Upgrade" feature to transform the bag back into a kitbag.red.locked bag, which makes it so players can no longer add items to the bag. Use the Kits plugin to update the kit from your inventory. Permissions Admin permissions bagofholding.manageloot -- Allows running the commands boh.spawnloot and boh.clearloot. bagofholding.stats -- Allows running the command boh.stats. bagofholding.listbags -- Allows running the command boh.listbags. bagofholding.listcontainers -- Allows running the command boh.listcontainers. bagofholding.config -- Allows running the commands boh.setskins, boh.addskins, boh.settheme and boh.addtheme. bagofholding.givebag -- Allows running the command boh.givebag <player> <bag profile> <amount>. bagofholding.givekitbag -- Allows running the command boh.givekitbag <player> <bag profile> <kit name>. Limit permissions Depending on how you have configured the plugin, there will be additional permissions following the pattern bagofholding.limit.<type>.<suffix>, one for each limit permission profile. The plugin comes with the following limit profiles by default. bagofholding.limit.player.unlimited -- Allows the player to store unlimited bags in their inventory. bagofholding.limit.wearable.unlimited -- Allows the player to wear unlimited bags. This permission, and other bagofholding.limit.wearable.* permissions won't exist unless you enable Player wearable bag limits in the config. Otherwise, the wearable container will share bag limits with the rest of the player inventory. bagofholding.limit.backpack.unlimited -- Allows the player to store unlimited bags in their backpack (Backpacks plugin on uMod). bagofholding.limit.container.unlimited -- Allows the player to store unlimited bags in storage containers that they deploy. You can define additional limit profiles in the Player bag limits, Player wearable bag limits, Backpack bag limits, Default container bag limits and Container bag limits by prefab sections of the config. Note: When adding container bag limits by prefab, the permission will look like bagofholding.limit.container.<short_prefab_name>.<suffix>. Upgrade permissions Each bag profile that is configured with a valid upgrade target will generate a permission following the pattern bagofholding.upgrade.<profile>. Granting that permission allows players to upgrade that type of bag. For example, the bagofholding.upgrade.generic.small permission allows players to upgrade generic.small bags to generic.medium bags. We suggest using a permissions manager UI plugin to discover and grant bag upgrade permissions. Commands This plugin provides both chat and console commands using the same syntax. When using a command in chat, prefix it with a forward slash: /. Admin / server commands boh.spawnloot -- Spawns loot in loot containers throughout the map. Intended for first-time setup, since enabling loot spawns in the config will only add bags to loot containers that spawn while the plugin is loaded. boh.clearloot -- Removes bags from all loot containers. Intended for first-time setup in conjunction with the boh.spawnloot command. boh.stats -- Prints an overview of how many bags are present on the server. Note: Some bags may not show up in the results if another plugin has deleted them and backed up their data on disk (for example, bags inside player Backpacks if the player is not connected or has not opened their Backpack during this play session). boh.listbags <filter> -- Prints a table view in console, showing all of the bag profiles defined in the config, matching the keyword filter if provided. Requires the bagofholding.listbags permission. boh.listcontainers -- Prints all container prefabs in the game. Requires the bagofholding.listcontainers permission. boh.setskins <category> <skin1> <skin2> <skin3> <skin4> <skin5> <skin6> <skin7> -- Updates the primary skin of all bag profiles in the specified category. The exact number of skins you supply must match the number of bags in the specified category. For example, if there are 7 bag profiles in the generic category (one for each size), then you can use this command with 7 distinct skins to update the config for all of those bag profiles at once. The first bag profile will be given the first skin, the second bag profile will be given the second skin, and so on. In addition to updating the config for you, this will change all the currently known bags on the server, which have the affected bag profiles, to use the specified skins, saving you the trouble of having to recreate the bags. This command will ensure that the specified skins are made the primary skins of the affected bag profiles. boh.addskins <category> <skin1> <skin2> <skin3> <skin4> <skin5> <skin6> <skin7> -- Adds the specified skins as secondary skins to all bag profiles in the specified category. The first bag profile will be given the first skin, the second profile will be given the second skin, and so on. Similar to the boh.setskins command, this will update the config, but will not update the skins of existing bags on your server. boh.settheme <theme> -- Updates the primary skin of the preset bag categories (bagofholding, generic, armor_clothing, food_medical, items_construction, resources_components, weapons_tools) to the specified theme. Valid themes: fantasy_chevrons, fantasy_circles,leather_chevrons,leather_circles, tactical_chevrons, tactical_circles. Note: If the config has significantly changed (i.e., if any of the preset bag categories no longer have exactly 7 bag profiles), this command will not work, but you can alternatively use boh.setskins or manually update the config. boh.addtheme -- Like boh.settheme, but instead of changing the primary skin of the affected bag profiles, this will only add the specified theme as secondary skins. boh.givebag <player> <bag profile> <amount> <skin index> -- Creates a stack of bags and gives it to the specified player. Requires the bagofholding.givebag permission. If the bag has multiple skins defined, you can specify which one via the skin-index argument. For example, boh.givebag Somebody generic.small 1 3 to give one bag with the 3rd skin applied. The amount and skin index parameters are optional, both defaulting to 1. boh.givekitbag <player> <bag profile> <kit name> -- Creates a bag, populates it with the specified kit (from the Kits plugin on uMod), then gives it to the specified player. Requires the bagofholding.givekitbag permission. Player commands bag.open -- Depending on the context, this command will either open the first unlocked bag in your inventory, open the next bag in your inventory, or close your inventory if no more bags are found. bag.next -- Like bag.open, but will continuously cycle bags rather than closing your inventory when no more bags are found. bag.prev -- Like bag.next, but will start at the end of your inventory, and will cycle bags in reverse order. Configuration The settings and options can be configured in the BagOfHolding file under the config directory. The use of an editor and validator is recommended to avoid formatting issues and syntax errors. General settings Wearable bags -- Determines whether players can place bags in their wearable inventory slots. Disabled by default. Enabling this will incur a very minor performance cost. Allow wearing bags in the backpack slot (true or false) -- Determines whether players can wear bags in the backpack/parachute slot. Default: false. Allow wearing bags in non-backpack slots (true or false) -- Determines whether players can wear bags in non-backpack slots. Default: false. Visual backpack -- Determines whether the visual backpack will be displayed on players while wearing a bag. Enabling this will incur a minor performance cost. Display while a bag is worn in the backpack slot (true or false) -- Determines whether the visual backpack will be enabled while the player is wearing a bag in their backpack slot. Default: false. You should set Wearable bags -> Allow wearing bags in the backpack slot to the same value that you set here. Display while a bag is worn in a non-backpack slot (true or false) -- Determines whether the visual backpack will be enabled while the player is wearing a bag in a non-backpack slot. Default: false. You should set Wearable bags -> Allow wearing bags in non-backpack slots to the same value that you set here. Gather mode Enabled (true or false) -- Determines whether players can toggle gather mode on bags. While gather mode is enabled for a given bag, any item that gets added to the bag's parent container will automatically be moved into the bag if possible. Default: false. Enable stack improvements (true or false) -- Determines whether the plugin will attempt to auto stack bags when dropping them onto each other in the player inventory (as long as the destination bag is not currently open). Default: true. Setting to false will improve performance. Note that dropping a bag with contents onto an empty bag will never stack them; the empty bag must be dropped onto the bag that has contents. Dropped bag item settings Dropped bag item settings -- Determines the behavior of dropped bag items. Enable dropped bag buoyancy (true or false) -- Determines whether dropped bag items will float in water. Default: true. Enable opening dropped bags while at bag limit (true or false) -- Determines whether attempting to pick up a bag will actually open the bag instead, if the player cannot carry the bag due to their current bag limits. Default: true. Auto equip dropped bags while at bag limit (true or false) -- Determines whether attempting to pick up a bag will attempt to equip it in a wearable slot instead, if the player cannot carry the bag in their main inventory due to their current bag limits. Default true. This feature only applies while bags are configured to be wearable. Minimum despawn time (seconds) -- Determines the minimum time (in seconds) before a dropped bag item will despawn. This option also affects the despawn time of dropped backpacks that contain bag items. Note: The despawn time of bags will also take into account the despawn time of items within them. Default: 1800 (30 minutes). UI settings UI settings Belt button -- Determines the display of the button next to the player's belt. By default, the button appears on the right side of the belt. The button will only appear if you have at least one bag in your inventory. Clicking the button will open the first bag in your inventory via the bag.open command. Enabled (true or false) -- Determines whether the belt button is displayed. Default: true. Only show while bags are worn (true or false) -- Determines whether bags must be worn in order to display the belt button. OffsetX -- Determines where the belt button is displayed, relative to the bottom center of the screen. Set to 185.0 to place the button on the right side of the belt. Set to -263.0 to place the button on the left side of the belt. Default: 185.0. Display skin ID -- Determines the skin ID displayed on the belt button. Default: 2824115881 (the fantasy style generic.small bag). Loot interface -- Determines the display of the loot panel while the player has a bag open. Enable back button (true or false) -- Determines whether a back button is displayed when the player is looting a bag that is inside another container. Clicking the back button will switch the loot interface to the bag's parent container. Default: true. Bag selector -- Determines the display of the bag selector. While looting a bag, the bag selector will display an icon for each lootable bag in the bag's parent container, allowing for 1-click access to other bags. The bag selector also displays a vertical progress bar to indicate how full each bag is. The bag selector automatically resizes depending on how many bags need to be displayed. The default settings allow a maximum of 10 bags to be displayed. Enabled (true or false) -- Determines whether the bag selector is displayed. Default: true. Max width -- Determines how much space the bag selector can use. By default, it can take up to 5 inventory slots worth of space, but that may cause the "LOOT" text to overlap the bag selector for players using non-English languages. If your players are seeing overlap, consider reducing this value. Default: 310.0. Min bag size -- Determines the minimum size (height and width) of each bag displayed in the bag selector. When many bags are displayed, each bag icon will be no smaller than this value. Default: 29.0. Max bag size -- Determines the maximum size (height and width) of each bag displayed in the bag selector. When few bags are displayed, each bag icon will be no larger than this value. Default: 58.0. Effects Effects Open effect -- Determines the effect played when a player opens a bag. Only the player that opens the bag will witness this effect, so it will not give away their location. Default: "assets/prefabs/deployable/small stash/effects/small-stash-deploy.prefab". Set to "" to disable the effect. Disabling effects will improve performance. Upgrade effect -- Determines the effect played when a player upgrades a bag. Only the player that upgrades the bag will witness this effect, so it will not give away their location. Default: "assets/prefabs/misc/halloween/lootbag/effects/silver_open.prefab". Set to "" to disable the effect. Disabling effects will improve performance. Loot spawns Loot spawns -- Determines which loot containers bags may spawn in. This feature is disabled by default. As an alternative to using this feature, you might want to use a dedicated loot plugin to spawn bags, by designating that the loot plugin should spawn a large halloween loot bag (short name: halloween.lootbag.large, item ID: 479292118) with an appropriate skin ID from the Bag profiles section of the config. Enabled (true or false) -- Determines whether this plugin will attempt to add bags to loot containers. Default: false. Bag spawn chance percent by prefab -- Determines the probability (0.0 to 100.0 percent) of bags spawning in loot containers, according to the prefab of the loot container. For each type of loot container, you may define the spawn chance for each bag profile. To see which container prefabs this can accept, run the command boh.listcontainers (requires the bagofholding.listcontainers permission). Bag limits Player bag limits -- Determines how many non-empty bags that players can hold in their inventory at once. This applies to the entire player inventory, including the wearable container, unless Player wearable bag limits is enabled, in which case limits for the wearable container is configured separately. Default limits -- These limits apply to all players, except those who have been granted a permission from Bag limits by permission. Max total bags -- See below. Max bags by category name -- See below. Bag limits by permission -- List of bag limits which override the defaults. Permission suffix -- Determines the permission generated, following the pattern bagofholding.limit.player.<suffix>. For example: bagofholding.limit.player.unlimited. You may define unlimited bag limit profiles, but at most one will be assigned to each player. Limit profiles toward the end of the list have highest priority. Max total bags -- See below. Max bags by category name -- See below. Player wearable bag limits -- Determines how many non-empty bags that players can wear. Enabled -- Determines whether wearable limits are separate from Player bag limits. While true, limits defined in this section apply to the wearable container, and limits defined in Player bag limits apply only to the rest of the player inventory. While false, limits defined in this section have no effect. Default limits -- These limits apply to all players, except those who have been granted a permission from Bag limits by permission. Max total bags -- See below. Max bags by category name -- See below. Bag limits by permission -- List of bag limits which override the defaults. Permission suffix -- Determines the permission generated, following the pattern bagofholding.limit.wearable.<suffix>. For example: bagofholding.limit.wearable.unlimited. You may define unlimited bag limit profiles, but at most one will be assigned to each player. Limit profiles toward the end of the list have highest priority. Max total bags -- See below. Max bags by category name -- See below. Vanilla backpack bag limits -- Determines how many non-empty bags that vanilla backpacks can hold (while equipped or while dropped on the ground). Enabled -- Determines whether vanilla backpack bag limits are determined by this section or by Default container bag limits -> Default limits. While true, limits defined in this section apply to vanilla backpacks. While false, limits defined in this section have no effect, and vanilla backpacks will follow the rules defined for default container limits. Default limits -- These limits apply to all backpacks. There is not currently a way to override this for players with permission. Max total bags -- See below. Max bags by category name -- See below. Backpack bag limits -- Determines how many non-empty bags that players can hold in their backpack at once (Backpacks plugin on uMod). Default limits -- These limits apply to all players, except those who have been granted a permission from Bag limits by permission. Max total bags -- See below. Max bags by category name -- See below. Bag limits by permission -- List of bag limits which override the defaults. Permission suffix -- Determines the permission generated, following the pattern bagofholding.limit.backpack.<suffix>. For example: bagofholding.limit.backpack.unlimited. You may define unlimited bag limit profiles, but at most one will be assigned to each player. Limit profiles toward the end of the list have highest priority. Max total bags -- See below. Max bags by category name -- See below. Default container bag limits -- Determines how many non-empty bags can be placed into storage containers. Can be overriden for specific container prefabs via Container bag limits by prefab. Default limits -- These limits apply to all storage containers, except those owned by players who have been granted a permission from Bag limits by permission. Max total bags -- See below. Max bags by category name -- See below. Bag limits by permission -- List of bag limits which override the defaults. Permission suffix -- Determines the permission generated, following the pattern bagofholding.limit.container.<suffix>. For example: bagofholding.limit.container.unlimited. You may define unlimited bag limit profiles, but at most one will be assigned to each player. Limit profiles toward the end of the list have highest priority. Max total bags -- See below. Max bags by category name -- See below. Container bag limits by prefab -- Determines how many non-empty bags can be placed into storage containers, by container prefab, superseding Default container bag limits. See below for an example. [full_prefab_path] -- For each prefab you want to define limits, you will need to define a new subsection with the full prefab path, then declare the bag limit definition under that section. Default limits -- These limits apply to all storage containers with this prefab, except for those owned by players who have been granted a permission from Bag limits by permission. Max total bags -- See below. Max bags by category name -- See below. Bag limits by permission -- List of bag limits which override the defaults for this prefab. Permission suffix -- Determines the permission generated, following the pattern bagofholding.limit.container.<short_prefab_name>.<suffix>. For example: bagofholding.limit.container.locker.deployed.unlimited. You may define unlimited bag limit profiles, but at most one will be assigned to each player. Limit profiles toward the end of the list have highest priority. Max total bags -- See below. Max bags by category name -- See below. Every bag limit profile has the following options. Max total bags -- Determines how many total non-empty bags (of any category) are allowed. Max bags by category name -- Determines how many non-empty bags of each category are allowed. This references the optional Category name property of each bag profile. For example, if you set this to { "resources_components": 2 }, players will be able to hold at most 2 Resources & Components bags. Example Container bag limits by prefab: "Container bag limits by prefab": { "assets/prefabs/deployable/locker/locker.deployed.prefab": { "Default limits": { "Max total bags": 0, "Max bags by category name": {} }, "Bag limits by permission": [ { "Permission suffix": "unlimited", "Max total bags": -1, "Max bags by category name": {} } ] } }, Bag content rulesets Bag content rulesets -- This section allows you to determine which items can be placed inside bags. It also allows you to define limits for bags inside bags. Each bag profile can refer to a content ruleset that you define in this section, to determine what is allowed in that type of bag. This design allows you to define a ruleset once, and reference it in many bag profiles. Name -- The name of the ruleset. Once you have defined this ruleset, you can assign it a specific bag profile by going to the Bag profiles section of the config and setting the Contents ruleset option to this ruleset name. Allowed item categories -- Determines which categories of items are allowed to be placed into bags that use this ruleset. Allowed values: All, Ammunition, Attire, Common, Component, Construction, Electrical, Favourite, Food, Fun, Items, Medical, Misc, Resources, Search, Tool, Traps, Weapon. Any item within allowed categories may be forcibly disallowed by specifying its short name in Disallowed item short names, or by specifying its skin ID in Disallowed skin IDs. Disallowed item categories -- Determines which categories of items are disallowed from being placed into bags that use this ruleset. This option is useful if you want to allow most categories, with explicit denial of specific categories. Note: For this option to work, you'll also need to set Allowed item categories to ["All"]. Any item disallowed this way can be forcibly allowed by specifying its short name in Allowed item short names, or by specifying its skin ID in Allowed skin IDs. Allowed item short names -- Determines which items are allowed to be placed into bags that use this ruleset, in addition to the categories specified in Allowed item categories. Any item allowed this way can be forcibly allowed by specifying its skin ID in Disallowed skin IDs. Disallowed item short names -- Determines which item short names are disallowed from being placed into bags that use this ruleset. Any item disallowed this way can be forcibly allowed if its skin ID is specified in Allowed skin IDs. Allowed skin IDs -- Determines which skin IDs are allowed to be placed into bags that use this ruleset. By default, all skin IDs are allowed, as long as the item is allowed via Allowed item categories or Allowed item short names. This option is useful for allowing specific skins of specific items that are not otherwise allowed. For example, if you want a specific bag to only be able to hold other bags (and no other items), simply set this option to the list of bag skin IDs, and leave all of the other options blank. Disallowed skin IDs -- Determines which skin IDs are disallowed from being placed into bags that use this ruleset. This option is useful for disallowing specific skins of specific items that are otherwise allowed via Allowed item categories or Allowed item short names. Bag limits -- Determines how many non-empty bags can fit inside this bag. Max total bags -- See the section on bag limits. Max bags by category name -- See the section on bag limits. Order of precedence: Disallowed skin IDs > Allowed skin IDs > Disallowed item short names > Allowed item short names > Disallowed item categories > Allowed item categories. Bag profiles Bag profiles -- This section defines every type of bag. For an item to function as a bag, it must be a large halloween loot bag (short name: halloween.lootbag.large, item ID: 479292118) with a skin ID from this section. Name -- The short name of the bag. This must be unique. The bag profile name is used by various features of the plugin, including bag limits, bag upgrades, upgrade permissions, loot spawns, the bagofholding.givebag command, developer hooks, and the developer API. Skin IDs -- Determines the skin IDs associated with this bag profile. Any halloween.lootbag.large item that has one of these skin IDs will be considered a bag controlled by this plugin and will use this profile. You can associate as many skin IDs per bag profile as you want. By default, most bag profiles will have three skins in the config, for fantasy, leather and tactical themes, in that order. Defining multiple skin IDs allows you to provide multiple themes of bags to players, letting them choose which they prefer, as long as you provide players with a means to get the alternative skins. The first skin ID is considered the primary skin ID, and will be used when creating a bag for loot spawns, when giving a bag via the boh.givebag command (unless the skin index parameter is supplied), and when other plugins create bags via API methods. When a bag is upgraded, if the target bag profile has multiple skin IDs defined, the new skin ID will be selected according to the order in the list of skin IDs. For example, if the bag's current profile lists three skin IDs, and the current skin is second, then the upgraded bag will use the second skin ID in the target profile. If there is no corresponding skin in the same position in the target profile (e.g., 3rd skin on current profile, but the target has only 2 skins), then the first skin will be selected. Capacity -- Determines how many container slots this bag will have. Maximum: 48. Display name -- Determines the display name of the bag item. This shows at the top of the screen when a bag item is selected in your inventory. Category name -- Determines the bag category. Other sections of the config will refer to this name to define bag limits. This should not be confused with item categories, which are used to define content rulesets. Contents ruleset -- Determines which items are allowed inside this bag. This must refer to the name of a ruleset defined in the Bag content rulesets section of the config. Allow player item input (true or false) -- Determines whether players can place items into this bag. Setting to false is useful if you want to provide a player with a bag full of items, as a sort of temporary container. This feature is intended primarily for "kit bags". Upgrade -- Determines which bag profile this bag can be upgraded to, as well as the items required to purchase the upgrade. To -- The name of the target bag profile. Cost -- The cost to purchase the upgrade. Item short name -- The short name of the currency item. Default: "scrap". Item skin ID -- The skin ID of the currency item. Set to 0 to accept any skin. Default: 0. Amount -- The amount of currency required to purchase the upgrade. Use Economics (true or false) -- Set to true to require Economics currency instead of item currency. Default: false. Use Server Rewards (true or false) -- Set to true to require Server Rewards currency instead of item currency. Default: false. Recyclable -- Determines whether the bag can be recycled, as well as which items it will recycle into. Enabled (true or false) -- Determines whether the bag can be recycled. Default: false. Setting to false for every bag will improve performance by disabling recycling hooks. Ingredients -- List of items that will be produced by recycling the bag. Item short name -- The short name of the ingredient item. Default: "scrap". Item skin ID -- The skin ID of the ingredient item. Default: 0. Amount -- The amount of the ingredient item to produce. Item display name -- The display name of the ingredient item. Localization The default messages are in the BagOfHolding file under the lang/en directory. To add support for another language, create a new language folder (e.g. de for German) if not already created, copy the default language file to the new folder and then customize the messages. Frequently asked questions (FAQ) Q: How do I configure this plugin with Alpha Loot? The built-in Loot spawns feature of this plugin is compatible with popular loot plugins such as Better Loot and Alpha Loot. Alpha Loot users also have the option of spawning bags directly via the Alpha Loot plugin. To do so, use the Alpha Loot Editor to add skinned large halloween loot bags to the loot table (short name: halloween.lootbag.large, item ID: 479292118). Tutorial: https://www.youtube.com/watch?v=54A77rQ0Ld8. Caution: Make sure that the bag skin IDs you configure to spawn via Alpha Loot are assigned to bag profiles in the Bag of Holding config. If you configure a particular skin ID in the loot table that does not correspond to a bag profile, then those bags will function as just normal halloween loot bags. Q: How do I make players spawn with bags? One way is via the Auto Kits feature of the Rust Kits plugin on uMod. Other plugins that allow you to manage default loadouts for players should also work, as long as they support skinned items. Q: Can bags be placed inside other bags? Yes, but by default, only the bagofholding bag profile can contain other bags, and it cannot contain other bagofholding bags. You can fine tune this behavior in the configuration. Q: Can this plugin replace Backpack plugins? Yes, for the majority of use cases. If you are using a Backpack plugin for the sole purpose of allowing players to carry more items (with backpacks dropping on death), then you can simply switch to using bags instead. The main difference is that Backpacks allow players to spawn with additional storage, which players cannot lose, whereas players must acquire bags to use additional storage, and players can lose or trade that storage capacity. If you are currently allowing players to keep their Backpack items on death, bags cannot replace that use case, but bags can enhance that use case since you can configure certain bags to be allowed in Backpacks to effectively increase the Backpack storage capacity. Q: Is this plugin compatible with Backpack plugins? Yes, this plugin has native support for the Backpacks plugin on uMod. By default, only empty bags can be placed inside Backpacks, but you can configure that behavior under the Backpack bag limits. Q: Can bags have more than 7 upgrade stages? Yes, you can have as many upgrade stages as you want. By default, each bag category has 7 stages (one for each row of capacity), but it's possible to have 48 bag stages per bag category (one for each slot of capacity). The simplest way to add more stages is to create additional bag profiles that reuse the existing skins but have different capacity. For example, you can define "Small Bag (13)" with 13 capacity and "Small Bag (14)" with 14 capacity, both with skin ID 2824115881. Q: How can I change bag icons? See the Default bags section below for instructions on changing the bag icons to other presets created by our development team. If you want to create your own bag icons, simply upload them to the Steam workshop as you would any Rust skin, then assign the corresponding workshop/skin ID to a bag profile in the Bag Profiles section of the config. Q: Can I configure bag upgrades to require multiple items? No. Currently, bag upgrades can only be configured to require a single type of item. Q: Where is this plugin's data file? This plugin doesn't use nor need a data file in its current design. This plugin utilizes a vanilla Rust capability to store items inside other items, similar to how attachments are placed inside weapons. Plugin compatibility / troubleshooting During initial development of this plugin, many plugin compatibility issues were identified and fixed. Some themes of compatibility issues were systematically eliminated, never to be seen again. However, some conflicts may remain undiscovered. If you encounter a new compatibility issue, please report it to the maintainers of both plugins so that we can work out a solution. This section also provides tips on how you can mitigate various plugin conflicts. Hook conflict with OnItemSplit The simplest way to mitigate this issue is by disabling stacking of the halloween.lootbag.large item. You can also avoid this issue by ensuring each bag profile uses a unique skin ID. Hook conflict with CanStackItem The simplest way to mitigate this issue is by disabling stacking of the halloween.lootbag.large item. Tips for maintainers of other plugins: Don't allow stacking when the item being moved is not empty Don't allow stacking two items whose containers have different capacity Hook conflict with CanCombineDroppedItem The simplest way to mitigate this issue is by disabling stacking of the halloween.lootbag.large item. Hook conflict with CanMoveItem This can happen in two possible situations: When quick-looting an item from a bag into your inventory. If this is when you see the conflict, you will have to contact us to troubleshoot further. When dropping a bag onto another bag. If this is when you see the conflict, the simplest way to mitigate this issue is by disabling stacking of the halloween.lootbag.large item. You can also mitigate this issue by setting Enable stack improvements to false in the config. Hook conflict with CanBeRecycled or OnItemRecycle The simplest way to mitigate this issue is by disabling recycling on all bag profiles. The belt icon overlaps with other plugin icons To mitigate this issue, you can either disable the belt icon or reposition it in the config. Opening a bag spawns loot There are two likely possibilities. The bag had a skin ID that is not configured in the plugin. One way this can happen is if you use another plugin to acquire bags, and the skin ID you configured in that plugin isn't assigned to any bag profiles in the Bag of Holding config. If this is the case, please reconfigure either plugin so that they refer to the same skin ID. You have a loot plugin which is using the OnItemAction hook to override the behavior of opening halloween.lootbag.large items. There is little that you can do to mitigate this. Please suggest to the maintainer of the loot plugin that they add a check to ignore halloween loot bags that are skinned. Opening a bag inside a special container just closes the container This probably means that the plugin that controls the special container immediately deleted the container when it was closed. In this case, the plugin that manages that container will need to implement changes to allow that container to persist after closed. Pressing the back button inside a bag just closes the bag This probably means that the bag has been placed inside a special container which the plugin doesn't know how to open. It could be due to a miss in this plugin, but more likely, that container is a special type of container controlled by another plugin (such as a Backpack or Bank). In this case, we will have to develop a solution to enable compatibility. Quick Sort UI overlaps bag selector UI The simplest way to mitigate this issue is by reducing the max bag size to 6 rows (36 slots). Alternatively, you can update the Quick Sort plugin's configuration to reposition or resize the UI. We are also planning to introduce an option to reposition the bag selector to the right side of the loot panel in a future update. Weapons/deployables placed in bags eventually become unusable This may happen if you are using an incompatible item cleaner or entity cleaner plugin. Most likely, the cleaner plugin doesn't know to account for situations where items are deeply nested. It should be easy for the cleaner plugin's maintainer to fix this issue. After attending an event, items inside bags are missing or changed This can happen if the plugin which manages the event temporarily replaces the player's items and restores the items when the player leaves the event. This issue usually manifests as items losing their skins and contents (e.g., weapons losing attachments, water jugs losing water). To resolve, the maintainer of the event plugin will need to update that plugin to recursively save items to infinite depth. If the developer needs help, they can look at the code of other plugins such as Backpacks, Kits, and Restore Upon Death. After placing a bag inside a special container, items inside the bag are missing or changed This may happen if the plugin which manages the special container tries to save the items in a custom way, such as via a data file. This issue usually manifests as items losing their skins and losing contents (e.g., weapons losing attachments, water jugs losing water). To resolve, the maintainer of the container plugin (e.g., Bank, Backpacks, Extra Pockets feature of Skill Tree) will need to update that plugin to recursively save items to infinite depth. If the developer needs help, they can look at the code of other plugins such as Backpacks, Kits, and Restore Upon Death. Default bags The default configuration provides many bag profiles, detailed below. See this workshop collection to find hundreds of bag skins created specifically for this plugin. Armor & Clothing Bags Name Skin ID Capacity Display Name Upgrades to Upgrade cost Recycle output armor_clothing.xxsmall 2824111863 6 XXSmall Armor & Clothing Bag armor_clothing.xsmall 100 Scrap 100 Scrap armor_clothing.xsmall 2824114542 12 XSmall Armor & Clothing Bag armor_clothing.small 200 Scrap 200 Scrap armor_clothing.small 2824116781 18 Small Armor & Clothing Bag armor_clothing.medium 300 Scrap 300 Scrap armor_clothing.medium 2824118678 24 Medium Armor & Clothing Bag armor_clothing.large 400 Scrap 400 Scrap armor_clothing.large 2824120619 30 Large Armor & Clothing Bag armor_clothing.xlarge 500 Scrap 500 Scrap armor_clothing.xlarge 2824122747 36 XLarge Armor & Clothing Bag armor_clothing.xxlarge 600 Scrap 600 Scrap armor_clothing.xxlarge 2824124690 42 XXLarge Armor & Clothing Bag generic.xxlarge 900 Scrap 900 Scrap Food & Medical Bags Name Skin ID Capacity Display Name Upgrades to Upgrade cost Recycle output food_medical.xxsmall 2824111462 6 XXSmall Food & Medical Bag food_medical.xsmall 100 Scrap 100 Scrap food_medical.xsmall 2824114220 12 XSmall Food & Medical Bag food_medical.small 200 Scrap 200 Scrap food_medical.small 2824116431 18 Small Food & Medical Bag food_medical.medium 300 Scrap 300 Scrap food_medical.medium 2824118433 24 Medium Food & Medical Bag food_medical.large 400 Scrap 400 Scrap food_medical.large 2824120423 30 Large Food & Medical Bag food_medical.xlarge 500 Scrap 500 Scrap food_medical.xlarge 2824122439 36 XLarge Food & Medical Bag food_medical.xxlarge 600 Scrap 600 Scrap food_medical.xxlarge 2824124459 42 XXLarge Food & Medical Bag generic.xxlarge 900 Scrap 900 Scrap Items & Construction Bags Name Skin ID Capacity Display Name Upgrades to Upgrade cost Recycle output items_construction.xxsmall 2824113019 6 XXSmall Items & Construction Bag items_construction.xsmall 100 Scrap 100 Scrap items_construction.xsmall 2824115483 12 XSmall Items & Construction Bag items_construction.small 200 Scrap 200 Scrap items_construction.small 2824117546 18 Small Items & Construction Bag items_construction.medium 300 Scrap 300 Scrap items_construction.medium 2824119338 24 Medium Items & Construction Bag items_construction.large 400 Scrap 400 Scrap items_construction.large 2824121607 30 Large Items & Construction Bag items_construction.xlarge 500 Scrap 500 Scrap items_construction.xlarge 2824123520 36 XLarge Items & Construction Bag items_construction.xxlarge 600 Scrap 600 Scrap items_construction.xxlarge 2824125425 42 XXLarge Items & Construction Bag generic.xxlarge 900 Scrap 900 Scrap Resources & Components Bags Name Skin ID Capacity Display Name Upgrades to Upgrade cost Recycle output resources_components.xxsmall 2824112139 6 XXSmall Resources & Components Bag resources_components.xsmall 100 Scrap 100 Scrap resources_components.xsmall 2824114807 12 XSmall Resources & Components Bag resources_components.small 200 Scrap 200 Scrap resources_components.small 2824117061 18 Small Resources & Components Bag resources_components.medium 300 Scrap 300 Scrap resources_components.medium 2824118878 24 Medium Resources & Components Bag resources_components.large 400 Scrap 400 Scrap resources_components.large 2824121055 30 Large Resources & Components Bag resources_components.xlarge 500 Scrap 500 Scrap resources_components.xlarge 2824123001 36 XLarge Resources & Components Bag resources_components.xxlarge 600 Scrap 600 Scrap resources_components.xxlarge 2824124960 42 XXLarge Resources & Components Bag generic.xxlarge 900 Scrap 900 Scrap Weapons & Tools Bags Name Skin ID Capacity Display Name Upgrades to Upgrade cost Recycle output weapons_tools.xxsmall 2824110902 6 XXSmall Weapons & Tools Bag weapons_tools.xsmall 100 Scrap 100 Scrap weapons_tools.xsmall 2824113791 12 XSmall Weapons & Tools Bag weapons_tools.small 200 Scrap 200 Scrap weapons_tools.small 2824116147 18 Small Weapons & Tools Bag weapons_tools.medium 300 Scrap 300 Scrap weapons_tools.medium 2824118115 24 Medium Weapons & Tools Bag weapons_tools.large 400 Scrap 400 Scrap weapons_tools.large 2824120210 30 Large Weapons & Tools Bag weapons_tools.xlarge 500 Scrap 500 Scrap weapons_tools.xlarge 2824122197 36 XLarge Weapons & Tools Bag weapons_tools.xxlarge 600 Scrap 600 Scrap weapons_tools.xxlarge 2824124162 42 XXLarge Weapons & Tools Bag generic.xxlarge 900 Scrap 900 Scrap Generic Bags Name Skin ID Capacity Display Name Upgrades to Upgrade cost Recycle output generic.xxsmall 2824110403 6 XXSmall Bag generic.xsmall 100 Scrap 100 Scrap generic.xsmall 2824113497 12 XSmall Bag generic.small 200 Scrap 200 Scrap generic.small 2824115881 18 Small Bag generic.medium 300 Scrap 300 Scrap generic.medium 2824117824 24 Medium Bag generic.large 400 Scrap 400 Scrap generic.large 2824119889 30 Large Bag generic.xlarge 500 Scrap 500 Scrap generic.xlarge 2824121905 36 XLarge Bag generic.xxlarge 600 Scrap 600 Scrap generic.xxlarge 2824123811 42 XXLarge Bag bagofholding 3000 Scrap 1500 Scrap Bag Of Holding The Bag of Holding is the ultimate bag. It can hold all items, including 6 other bags. Name Skin ID Capacity Display Name Recycle output bagofholding 2824136143 48 Bag of Holding 1500 Scrap Kit bags All kits bags accept all items and have 42 capacity. Kit bags also upgrade in a circular fashion, making it easy for admins to edit them. Name Skin ID Display Name Upgrades to kitbag.red.unlocked 2830974120 Kit Bag (Editable) kitbag.red.locked kitbag.red.locked 2830952942 Kit Bag kitbag.red.unlocked kitbag.orange.unlocked 2830974662 Kit Bag (Editable) kitbag.orange.locked kitbag.orange.locked 2830963984 Kit Bag kitbag.orange.unlocked kitbag.yellow.unlocked 2830975150 Kit Bag (Editable) kitbag.yellow.locked kitbag.yellow.locked 2830964495 Kit Bag kitbag.yellow.unlocked kitbag.green.unlocked 2830975690 Kit Bag (Editable) kitbag.green.locked kitbag.green.locked 2830965006 Kit Bag kitbag.green.unlocked kitbag.cyan.unlocked 2830976173 Kit Bag (Editable) kitbag.cyan.locked kitbag.cyan.locked 2830965451 Kit Bag kitbag.cyan.unlocked kitbag.blue.unlocked 2830976481 Kit Bag (Editable) kitbag.blue.locked kitbag.blue.locked 2830965789 Kit Bag kitbag.blue.unlocked Alternative bag skins By default, the bag profiles in the config use the fantasy style skins. If you want to change them to the leather or tactical style skins, you can use the boh.setskins command to edit the config in bulk. For example, to change the generic bag set to use tactical style skins, run the command boh.setskins generic 2828559961 2828562701 2828573095 2828576548 2828579661 2828582369 2828585532. Fantasy bag skins As of v1.9.0, you can apply the fantasy theme by running the command boh.settheme fantasy_chevrons. The old way is to run all of the following commands. boh.setskins bagofholding 2824136143 boh.setskins generic 2824110403 2824113497 2824115881 2824117824 2824119889 2824121905 2824123811 boh.setskins armor_clothing 2824111863 2824114542 2824116781 2824118678 2824120619 2824122747 2824124690 boh.setskins food_medical 2824111462 2824114220 2824116431 2824118433 2824120423 2824122439 2824124459 boh.setskins items_construction 2824113019 2824115483 2824117546 2824119338 2824121607 2824123520 2824125425 boh.setskins resources_components 2824112139 2824114807 2824117061 2824118878 2824121055 2824123001 2824124960 boh.setskins weapons_tools 2824110902 2824113791 2824116147 2824118115 2824120210 2824122197 2824124162 Additionally, you should set UI settings -> Belt button -> Display skin ID to one of the fantasy skins such as 2824115881. Here are all the fantasy skin sequences, in case you want to use other icons or colors. Fantasy plain: 2824110403 2824113497 2824115881 2824117824 2824119889 2824121905 2824123811 Fantasy gray chevrons: 2828128662 2828134240 2828137909 2828146246 2828148357 2828150051 2828152784 Fantasy white chevrons: 2828128323 2828133931 2828137681 2828146038 2828148160 2828149845 2828152530 Fantasy black chevrons: 2828128041 2828133673 2828137257 2828145823 2828148006 2828149681 2828152306 Fantasy red chevrons: 2828127703 2828133308 2828136874 2828145607 2828147808 2828149504 2828152062 Fantasy yellow chevrons: 2824113019 2824115483 2824117546 2824119338 2824121607 2824123520 2824125425 Fantasy pink chevrons: 2824112653 2824115134 2824117246 2824119088 2824121332 2824123291 2824125171 Fantasy orange chevrons: 2824112139 2824114807 2824117061 2824118878 2824121055 2824123001 2824124960 Fantasy light blue chevrons: 2824111863 2824114542 2824116781 2824118678 2824120619 2824122747 2824124690 Fantasy green chevrons: 2824111462 2824114220 2824116431 2824118433 2824120423 2824122439 2824124459 Fantasy blue chevrons: 2824110902 2824113791 2824116147 2824118115 2824120210 2824122197 2824124162 Fantasy gray circles: 2828493103 2828497364 2828501735 2828506499 2828509849 2828514060 2828517736 Fantasy white circles: 2828493673 2828498179 2828502089 2828506819 2828510161 2828514392 2828518167 Fantasy black circles: 2828494015 2828498546 2828502435 2828507169 2828510478 2828514709 2828518812 Fantasy red circles: 2828494496 2828498987 2828502735 2828507528 2828510830 2828515098 2828515098 Fantasy yellow circles: 2828494894 2828499337 2828503050 2828507851 2828511170 2828515395 2828519489 Fantasy pink circles: 2828495354 2828499673 2828503432 2828508323 2828511498 2828515725 2828519798 Fantasy orange circles: 2828495777 2828500070 2828503778 2828508555 2828511912 2828516131 2828520212 Fantasy light blue circles: 2828496161 2828500606 2828504060 2828508821 2828512403 2828516540 2828520492 Fantasy green circles: 2828496570 2828500962 2828504356 2828509103 2828512690 2828516933 2828520819 Fantasy blue circles: 2828496949 2828501318 2828504627 2828509404 2828513595 2828517346 2828521099 Leather bag skins As of v1.9.0, you can apply the leather theme by running the command boh.settheme leather_chevrons. The old way is to run all of the following commands. boh.setskins bagofholding 2860178102 boh.setskins generic 2831018252 2831025047 2831029422 2831036209 2831041769 2831047418 2831052354 boh.setskins armor_clothing 2831016990 2831023499 2831028259 2831032725 2831040190 2831046214 2831050372 boh.setskins food_medical 2831017392 2831023974 2831028588 2831033068 2831040759 2831046638 2831050826 boh.setskins items_construction 2831015836 2831021553 2831027189 2831031578 2831038734 2831044485 2831049142 boh.setskins resources_components 2831016651 2831023019 2831027874 2831032305 2831039657 2831045812 2831049942 boh.setskins weapons_tools 2831017759 2831024390 2831028922 2831033383 2831041231 2831047014 2831051442 Additionally, you should set UI settings -> Belt button -> Display skin ID to one of the leather skins such as 2831029422. Here are all the leather style skin sequences, in case you want to use other icons or colors. Leather plain: 2831018252 2831025047 2831029422 2831036209 2831041769 2831047418 2831052354 Leather gray chevrons: 2831013773 2831019060 2831025741 2831029969 2831036925 2831042295 2831047827 Leather white chevrons: 2831014482 2831019741 2831026169 2831030357 2831037360 2831042761 2831048137 Leather black chevrons: 2831015051 2831020041 2831026487 2831030777 2831037873 2831043219 2831048450 Leather red chevrons: 2831015444 2831020436 2831026854 2831031160 2831038330 2831043696 2831048702 Leather yellow chevrons: 2831015836 2831021553 2831027189 2831031578 2831038734 2831044485 2831049142 Leather pink chevrons: 2831016234 2831022032 2831027551 2831031924 2831039240 2831045338 2831049495 Leather orange chevrons: 2831016651 2831023019 2831027874 2831032305 2831039657 2831045812 2831049942 Leather light blue chevrons: 2831016990 2831023499 2831028259 2831032725 2831040190 2831046214 2831050372 Leather green chevrons: 2831017392 2831023974 2831028588 2831033068 2831040759 2831046638 2831050826 Leather blue chevrons: 2831017759 2831024390 2831028922 2831033383 2831041231 2831047014 2831051442 Leather gray circles: 2831053189 2831057140 2831060554 2831063925 2831066897 2831070017 2831082280 Leather white circles: 2831053670 2831057586 2831060848 2831064201 2831067178 2831071006 2831082963 Leather black circles: 2831054069 2831057911 2831061109 2831064444 2831067379 2831072147 2831084280 Leather red circles: 2831054490 2831058281 2831061382 2831064726 2831067561 2831073121 2831084887 Leather yellow circles: 2831054841 2831058559 2831061614 2831065014 2831067781 2831073592 2831085402 Leather pink circles: 2831055215 2831058892 2831061919 2831065349 2831068032 2831073925 2831085778 Leather orange circles: 2831055582 2831059194 2831062274 2831065681 2831068304 2831074420 2831087653 Leather light blue circles: 2831055919 2831059491 2831062555 2831066018 2831068615 2831076575 2831088591 Leather green circles: 2831056306 2831059795 2831062808 2831066320 2831068905 2831078713 2831088956 Leather blue circles: 2831056740 2831060200 2831063168 2831066588 2831069218 2831079950 2831089185 Tactical bag skins As of v1.9.0, you can apply the tactical theme by running the command boh.settheme tactical_chevrons. The old way is to run all of the following commands. boh.setskins bagofholding 2828612528 boh.setskins generic 2828559961 2828562701 2828573095 2828576548 2828579661 2828582369 2828585532 boh.setskins armor_clothing 2828558763 2828562098 2828571752 2828575986 2828579117 2828581616 2828584535 boh.setskins food_medical 2828559062 2828562247 2828572006 2828576133 2828579288 2828581907 2828584822 boh.setskins items_construction 2828557975 2828561492 2828570571 2828574809 2828578159 2828580887 2828583748 boh.setskins resources_components 2828558453 2828561930 2828571212 2828575734 2828578707 2828581409 2828584212 boh.setskins weapons_tools 2828559313 2828562454 2828572778 2828576369 2828579499 2828582142 2828585357 Additionally, you should set UI settings -> Belt button -> Display skin ID to one of the tactical skins such as 2828573095. Here are all the tactical style skin sequences, in case you want to use other icons or colors. Tactical plain: 2828559961 2828562701 2828573095 2828576548 2828579661 2828582369 2828585532 Tactical gray chevrons: 2828556434 2828560310 2828563014 2828573659 2828577253 2828580012 2828582671 Tactical white chevrons: 2828557125 2828560646 2828563283 2828573927 2828577583 2828580260 2828582975 Tactical black chevrons: 2828557433 2828560923 2828563544 2828574322 2828577810 2828580491 2828583268 Tactical red chevrons: 2828557692 2828561221 2828570104 2828574605 2828578000 2828580701 2828583514 Tactical yellow chevrons: 2828557975 2828561492 2828570571 2828574809 2828578159 2828580887 2828583748 Tactical pink chevrons: 2828558240 2828561757 2828570867 2828575078 2828578530 2828581157 2828583990 Tactical orange chevrons: 2828558453 2828561930 2828571212 2828575734 2828578707 2828581409 2828584212 Tactical light blue chevrons: 2828558763 2828562098 2828571752 2828575986 2828579117 2828581616 2828584535 Tactical green chevrons: 2828559062 2828562247 2828572006 2828576133 2828579288 2828581907 2828584822 Tactical blue chevrons: 2828559313 2828562454 2828572778 2828576369 2828579499 2828582142 2828585357 Tactical gray circles: 2828590059 2828592435 2828596053 2828598607 2828600574 2828602840 2828605402 Tactical white circles: 2828590364 2828592713 2828596309 2828598848 2828600805 2828603043 2828605787 Tactical black circles: 2828590658 2828592930 2828596615 2828599070 2828601043 2828603298 2828605999 Tactical red circles: 2828590870 2828593147 2828596818 2828599291 2828601240 2828603494 2828606193 Tactical yellow circles: 2828591083 2828593355 2828597034 2828599512 2828601444 2828603677 2828606367 Tactical pink circles: 2828591226 2828593626 2828597285 2828599643 2828601590 2828603900 2828606490 Tactical orange circles: 2828591389 2828594143 2828597493 2828599829 2828601859 2828604283 2828606662 Tactical light blue circles: 2828591603 2828594846 2828597739 2828600017 2828602079 2828604553 2828606893 Tactical green circles: 2828591817 2828595022 2828598019 2828600169 2828602304 2828604782 2828607054 Tactical blue circles: 2828592115 2828595430 2828598248 2828600324 2828602571 2828605041 2828607208 Developer API API_GetApi Dictionary<string, object> API_GetApi() Returns a dictionary where each key is a delegate for an API method. The purpose of this API is for high-performance scenarios where you don't want the overhead of calling the Bag of Holding via Oxide. Instead, your plugin should call Bag of Holding once (when Bag of Holding loads), cache the API, and invoke specific API methods via delegates whenever needed. Example: // Get the API. Ideally you should cache this. You should also re-cache this when Bag of Holding reloads. var api = BagOfHolding.Call("API_GetApi") as Dictionary<string, object>; // Get the API function you want. Ideally you should cache this too. The names are the same as documented below, but without the "API_" prefix. var isBagFunction = api["IsBag"] as Func<Item, bool>; // Call the API function. This call doesn't go through Oxide, so it saves CPU cycles, and allows you to avoid heap allocations when passing value types (e.g., when passing numbers). var isBag = isBagFunction(item); API_IsBag bool API_IsBag(Item item) Returns true if the item is a bag, else returns false. API_IsLootingBag bool API_IsLootingBag(BasePlayer player) Returns true if the player is looting a bag, else returns false. Note: If you call this immediately after the OnLootEntity Oxide hook is called, this will return false, because the plugin has to inspect the ItemContainers that the player is looting (basePlayer.inventory.loot.containers) which are populated after the OnLootEntity hook call has finished (that is where the Oxide hook is placed, and the plugin follows that pattern when explicitly calling OnLootEntity). Therefore, if you wish to detect whether a player has just opened a bag via the OnLootEntity hook, you should run your logic on the next frame (e.g., using NextTick). You may avoid calling this API entirely by simply verifying that the basePlayer.inventory.loot.containers list has only one container, and that it has a parentItem. If both of those criteria are met, the player is looting some sort of item, not necessary from this plugin, but that should be close enough. Note that this logic still needs to be in NextTick for the aforementioned reason. API_GetBagProfileName string API_GetBagProfileName(Item item) Returns the profile name of the bag (not the display name), else returns null if the item is not a bag. If you want the display name, simply read item.name. API_OpenBag bool API_OpenBag(BasePlayer player, Item item) Attempts to make the player open the bag Returns true if the item is a valid lootable bag (not a locked bag), and if not blocked by a plugin via the OnBagOpen hook Returns false if the item was not a valid lootable bag, or if blocked by a plugin via the OnBagOpen hook API_CreateBag Item API_CreateBag(string profileName, int amount = 1) Creates a bag using the specified profile name, with specified stack amount Returns the bag Item if successful Returns null if the specified profile name or stack amount is invalid Note: Bags can also be created using ItemManager.CreateByName("halloween.lootbag.large", amount, skinId) if the skin ID is known API_CreateKitBag Item API_CreateKitBag(string profileName, string kitName, BasePlayer initiator = null) Creates a bag using the specified profile name, and populates it with the specified kit Returns the bag Item if successful Returns null if the specified profile name or kit name is invalid If any kit items do not fit in the bag, they will be given to the BasePlayer initiator if provided, else deleted. API_ChangeBagProfile bool API_ChangeBagProfile(Item item, string profileName, BasePlayer initiator = null) Updates the bag item to the specified profile Returns true if the item is a valid bag, and if the specified profile name is valid Returns false if the item is not a valid bag, or if specified profile name is invalid If the target profile has less capacity than the current profile... Overflowing items will attempt to be compacted into the bag by moving them to earlier slots If compaction fails, the remaining items will be given to the BasePlayer initiator if provided If the BasePlayer initiator is not provided, the bag capacity will be increased to fit the overflowing items Caution: If the item is a stack of bags, it will change the profile for all of the bags in the stack Caution: Changing the profile of a bag that is already inside a container may cause the container to exceed configured bag limits API_UpgradeBag bool API_UpgradeBag(Item item, BasePlayer initiator = null) Updates the bag item to the profile designated as the upgrade target in the config Returns true if the item is a valid bag, and if the bag profile has a valid upgrade target in the config Returns false if the item is not a valid bag, or if the bag profile does not have a valid upgrade target in the config If the target profile has less capacity than the current profile... Overflowing items will attempt to be compacted into the bag by moving them to earlier slots If compaction fails, the remaining items will be given to the BasePlayer initiator if provided If the BasePlayer initiator is not provided, the bag capacity will be increased to fit the overflowing items Caution: If the item is a stack of bags, it will upgrade all of the bags in the stack Caution: Upgrading a bag that is already inside a container may cause the container to exceed configured bag limits Developer hooks OnBagOpen object OnBagOpen(Item item, BasePlayer player) Called when a player attempts to open a bag Returning false will prevent the bag from being opened Returning null will result in the default behavior OnBagOpened void OnBagOpened(Item item, BasePlayer player) Called after a player has started looting a bag No return behavior OnBagClosed void OnBagClosed(Item item, BasePlayer player) Called after a player has stopped looting a bag No return behavior OnBagUpgrade object OnBagUpgrade(Item item, string newProfileName, BasePlayer initiator) Called when a player or a plugin attempts to upgrade a bag Returning false will prevent the bag from being upgraded Returning null will result in the default behavior Note: The BasePlayer argument will be null if the upgrade was not initiated by a player. OnBagUpgraded void OnBagUpgraded(Item item, string newProfileName, BasePlayer initiator) Called after a bag has been upgraded to the profile designated in the config No return behavior Note: The BasePlayer argument will be null if the upgrade was not initiated by a player OnBagProfileChanged void OnBagProfileChanged(Item item, string newProfileName) Called after a bag's profile has been changed No return behavior$24.99 -
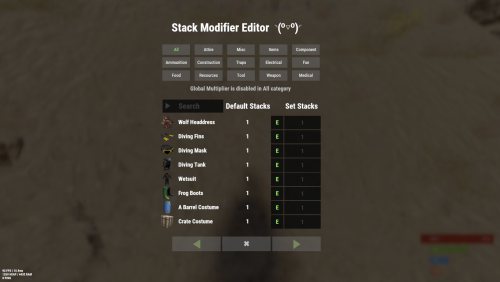
Version 2.4.3
5,890 downloads
This plugin will seamlessly handle all of the ugly side effects and glitches. Thanks to Stack-modifier's feature additions, it makes it feel just like Rusts default behavior, but better! Features Has a GUI Editor Blocks Player movements while using GUI Editor Including Keybinds! This plugin has 2 commands and no Lang file Supports stacking of liquids Supports Stacking of Fuel Containers (hats, tools, etc.) Supports Stacking of Guns Supports Weapon Attachments Supports Stacking of Skins Works with SkinBox plugins Supports Stacking of Custom Items Supports Stacking of Custom Items with Custom Display Names Supports Stacking of Key Cards without losing the stack when swiping Supports Stacking Candy Cane Club without losing the stack while lick Support for modified presents for unwrapping The largest possible value in C# is 2,147,483,647 Which means anything over this stack-size will break the plugin Limits wearable clothing items to stack sizes of 1! ( on the player wear container only ) Limits weapon attachments to stack sizes of 1! ( On the weapon its self! so you can have bigger stacks! ) Known Conflicts Magic Coin uses some of the same hooks set up config in it correctly to not conflict Custom Skin Stack Fix not needed this handles it properly Stack Size Controller cannot have 2 of the same plugins basically Extra Loot causes a stacking bug when a reboot occurs with skinned items preventing old skinned items from stacking with new skinned items Getting Started - Click Either Link to play video Video One Video Two Permissions stackmodifier.bypass - Allows players to ignore the blocked stack-able items list. stackmodifier.admin - Allows players access to the UI Editor. Chat Commands /stackmodifier -- Opens Editor UI, Must enable config option "Enable UI Editor": true /stackmodifier.reset ( is also console cmd ) -- Requires stackmodifier.admin perm ( resets stack-sizes ) /resetvenders -- Requires being an admin, only resets facepunches messed-up vendors, not all /stackmodifiercolor <inputpanel|inputtext|text|transparent> <color> <alpha|ex, 0.98> Example /stackmodifiercolor inputpanel #207086 0.25 UI Editor Commands set 8 -- Inside a categories Search Bar, type set and a value and it will apply it to the whole category, reset -- Inside a categories Search Bar type reset hit the enter key or click out of the field and it resets it. multiply -- Inside a categorie use the Search Bar & type multiply and a value and it will apply it to the whole category. if you reset or set, re-click the Category Tab to refresh it before making more changes! Otherwise you will have to do your first edit twice for it to start working again UI Editor Without Images? * At the top of the config you will see the following setting set to true save and reload. "Disable Images for UI Editor": false, < Disables images and allows full use Having Problems? * Warning this plugin is not compatible with custom-skins-stacks-fix plugin since this already handles everything. * If you already have a plugin that modifies the rust stack sizes you will first need to remove that plugin. * Then you simply load Stack Modifier onto your server open the config and start editing the Modified values to your new stack-size amounts! * When you are done simply save and reload the plugin! ( oxide. reload StackModifier ) * Alternatively you can utilize the built-in UI Editor and not ever need to touch the config! * Admins - Auth level 2 will always be ignored. How to revert to vanilla? * Run the reset command while having the stackmodifier.admin perm or Unload Stack Modifier, delete the config, and restart your server. * It will reset the config back to vanilla settings allowing you to start over. API Hooks Interface.CallHook("OnStackSizeUpdated"); //called after the plugin updates the stack sizes on server reboots & when reloading the plugin. //It's also still called right after the UI editor is closed from modifying. //Inside the oxide hook I use called OnItemAddedToContainer theirs a hook of mine, if called mine will not touch it or fix the stacks. if (Interface.CallHook("OnIgnoreStackSize", player, item) != null) return; ## Configuration { "Disable Weapon Attachment stack fix (Unsubscribes from both OnWeaponModChange & CanMoveItem)": false, "Disable Wearable Clothes fix (Unsubscribes from OnItemAddedToContainer)": false, "Disable Ammo/Fuel duplication fix (Recommended false)": false, "Disable Candy Cane Club Lick fix & unwrap fix (Unsubscribes from OnItemAction)": false, "Disable OnCardSwipe fix (Unsubscribes from OnCardSwipe)": false, "Enable VendingMachine Ammo Fix (Recommended)": true, "Enable UI Editor": true, "Disable Images / Toggles off Images for UI Editor": false, "Sets editor command": "stackmodifier", "Sets reset command for both console & chat": "stackmodifier.reset", "Sets editor color command": "stackmodifiercolor", "Sets Default Category to open": "All", "Stack Modifier UI Title": "Stack Modifier Editor ◝(⁰▿⁰)◜", "UI - Stack Size Label": "Default Stacks", "UI - Set Stack Label": "Set Stacks", "UI - Search Bar Label": "Search", "UI - Back Button Text": "◀", "UI - Forward Button Text": "▶", "UI - Close Label": "✖", "Colors": { "InputPanel": { "Hex": "#0E0E10", "Rgb": "0.0549019607843137 0.0549019607843137 0.0627450980392157 0.98" }, "InputText": { "Hex": "#FFE24B", "Rgb": "1 0.886274509803922 0.294117647058824 0.15" }, "TextColor": { "Hex": "#FFFFFF", "Rgb": "1 1 1 1" }, "Transparency": { "Hex": "#", "Rgb": "0 0 0 0.95" } }, "Category Stack Multipliers": { "Attire": 1, "Misc": 1, "Items": 1, "Ammunition": 1, "Construction": 1, "Component": 1, "Traps": 1, "Electrical": 1, "Fun": 1, "Food": 1, "Resources": 1, "Tool": 1, "Weapon": 1, "Medical": 1 }, "Stack Categories": { "Attire": { "hat.wolf": { "DisplayName": "Wolf Headdress", "Modified": 10 }, "horse.shoes.basic": { "DisplayName": "Basic Horse Shoes", "Modified": 10 } }, "Misc": { "fogmachine": { "DisplayName": "Fogger-3000", "Modified": 10 }, "sickle": { "DisplayName": "Sickle", "Modified": 10 } }, "Items": { "kayak": { "DisplayName": "Kayak", "Modified": 10 }, "map": { "DisplayName": "Paper Map", "Modified": 10 } }, "Ammunition": { "ammo.grenadelauncher.buckshot": { "DisplayName": "40mm Shotgun Round", "Modified": 20 }, "ammo.rocket.sam": { "DisplayName": "SAM Ammo", "Modified": 10 } }, "Construction": { "door.double.hinged.metal": { "DisplayName": "Sheet Metal Double Door", "Modified": 10 }, "building.planner": { "DisplayName": "Building Plan", "Modified": 10 } }, "Component": { "bleach": { "DisplayName": "Bleach", "Modified": 2 }, "vehicle.module": { "DisplayName": "Generic vehicle module", "Modified": 10 } }, "Traps": { "trap.bear": { "DisplayName": "Snap Trap", "Modified": 30 }, "samsite": { "DisplayName": "SAM Site", "Modified": 10 } }, "Electrical": { "ceilinglight": { "DisplayName": "Ceiling Light", "Modified": 10 }, "wiretool": { "DisplayName": "Wire Tool", "Modified": 100 } }, "Fun": { "firework.boomer.blue": { "DisplayName": "Blue Boomer", "Modified": 200 }, "telephone": { "DisplayName": "Telephone", "Modified": 10 } }, "Food": { "apple": { "DisplayName": "Apple", "Modified": 100 }, "woodtea.pure": { "DisplayName": "Pure Wood Tea", "Modified": 100 } }, "Resources": { "skull.human": { "DisplayName": "Human Skull", "Modified": 10 }, "wood": { "DisplayName": "Wood", "Modified": 10 } }, "Tool": { "tool.instant_camera": { "DisplayName": "Instant Camera", "Modified": 10 }, "bucket.water": { "DisplayName": "Water Bucket", "Modified": 10 } }, "Weapon": { "gun.water": { "DisplayName": "Water Gun", "Modified": 10 }, "spear.wooden": { "DisplayName": "Wooden Spear", "Modified": 10 } }, "Medical": { "blood": { "DisplayName": "Blood", "Modified": 100 }, "bandage": { "DisplayName": "Bandage", "Modified": 30 } } } }$23.99- 60 comments
- 10 reviews
-
- 19
-
-

-
-

-
- #stacks
- #rust stacks
- (and 15 more)
-
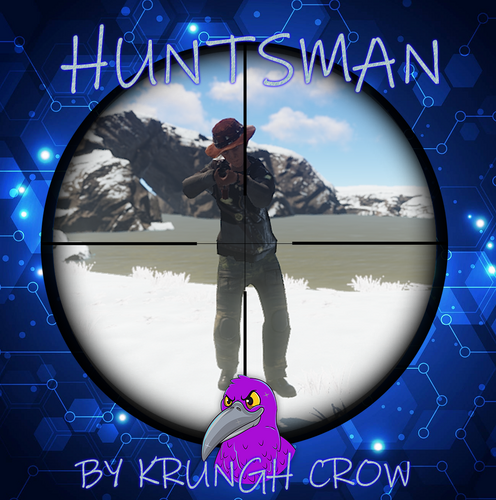
Version 1.4.1
2,695 downloads
When hunting and the Huntsman catches you killing Game outside hunting season it will come after you Optional dependencies : Rustkits BetterNpcNames BotReSpawn NEW Features : A set chance spawning a HuntsMan when hunting for Game (animals) (any value between 0-1) Can assign a kit or a hardcoded outfit. Compatible with NPCKits (NPCKits will not override Huntsman NPC outfits/kits) Setup roam/spawn/damage and health of the HuntsMan. Options to make the Hunter drop his backpack (loottable included) Compatible with the ChickenBow plugin to disable a huntsman spawning when killing those chickens(make sure to reload ChickenBow after updating HuntsMan) Edit each animal to be able to trigger the HuntsMan true/false Support for BasePet's like Frankenstein so they can trigger huntsman aswell for their backpack drops Support for BotReSpawn to use a custom made profile to spawn the HuntsMan (> v1.3.3) Permissions : no permissions Commands : /hminfo : Shows plugin info/version/author Configuration : To make a item spawn as a blueprint add .bp behind the shortname (for example ammo.pistol.bp) Probability from value 0 to 1 is the spawn chance of any item Usage of custom naming is now possible (> v1.4.0) Example of custom items like the ExtendedRecycler plugins recycler item. { "probability": 0.6, "shortname": "box.repair.bench", "name": "Recycler", "skin": 1594245394, "amountMin": 1, "amount": 1 }, When using BotReSpawn to spawn the Huntsman : It will use all settings from the custom profile that is made with BotReSpawn (Data Folder) spawn range , max roam ,HP etc. etc. In the BRS profile set the suicide timer high so that HuntsMan.cs can set the suicides (Lifetime) The name of the npc will be named by HuntsMan.cs so you can name it in BRS as a placeholder Profile name to be used is best to avoid spaces and Uppercase in the name { "Use Debug": true, "BotRespawn Settings": { "Use BotReSpawn": false, "BotReSpawn profile name": "huntsman" }, "Animals to trigger HuntsMan": { "Alpha Animal": true, "Omega Animal": true, "Bear": true, "Boar": true, "Chicken": true, "Horse": true, "Stag": true, "Wolf": true }, "Hunter Settings": { "Custom Hunter Name": "HuntsMan", "spawn chance (1-100%)": 10.0, "Spawn Amount": 1, "spawn radius": 15, "Health": 250, "Max Roam Distance": 20, "Damage multiplier": 0.6, "Lifetime (minutes)": 10.0, "Use kit (clothing)": false, "Kit ID": [], "Show messages": true, "Hunters drop a Backpack with loot": true, "Use Random Skins": false, "Spawn Min Amount Items": 6, "Spawn Max Amount Items": 8, "Loot Table": [ { "probability": 1.0, "shortname": "ammo.pistol", "name": "", "skin": 0, "amountMin": 128, "amount": 256 }, { "probability": 0.6, "shortname": "box.repair.bench", "name": "Recycler", "skin": 1594245394, "amountMin": 1, "amount": 1 }, { "probability": 0.6, "shortname": "hmlmg", "name": "", "skin": 0, "amountMin": 1, "amount": 1 }, { "probability": 0.6, "shortname": "supply.signal", "name": "", "skin": 0, "amountMin": 1, "amount": 1 } ] } } Localisation : English language file included to use a different language just make a new file in the language folder. { "Prefix": "[<color=green>HuntsMan</color>] : ", "info": "\nThe [HuntsMan] Gives u the luck (or not) to spawn a Hunter that wants to kill you for killing Wild Game during offseason", "Hunter_Spawned": "You killed the {0} now pay the price !!!!", "Hunter_Spawned_Backpack": "{0} Dropped his Backpack !" } API : bool IsHuntsmanNpc(global::HumanNPC npc) void OnHuntsmanSpawned(global::HumanNPC npc) void OnHuntsmanKilled(global::HumanNPC npc) Example call : object OnEntityDeath(global::HumanNPC npc, HitInfo info) { if (npc == null) return null; if (HuntsMan.Call<bool>("IsHuntsmanNpc", npc)) { Puts($"Target : {npc} net.ID : [{npc.net.ID}] Event : HuntsMan NPC"); } return null; } void OnHuntsmanSpawned(global::HumanNPC npc) { if (npc == null) return; timer.Once(1f, () => { Puts($"{npc} spawned (HuntsMan)"); });//delayed to make sure npc is fully initialised } void OnHuntsmanKilled(global::HumanNPC npc) { if (npc == null) return; Puts($"{npc} got killed (HuntsMan)"); }Free -
Version 1.0.8
179 downloads
Adds the ability to call an airstrike, the player throws a supply signal in the place where he wants to call an airstrike. This plugin uses the default supply signal, but the item skin must be 2982472774. Please use only default stack size for supply signal. This is the only way the plugin will work properly. Since this is not an item that players can usually get through loot, you can use a plugin like BetterLoot to insert a supply signal with skin 2982472774 into your loot tables, and then that player-picked item can be used as a signal to call an airstrike. There is also support for the plug-in HomingMissiles Commands (admin only): /GiveF15AirStrikeSignal <Player or steamID> <number of items> - give the player a supply airstrike signal /adminCallF15 - causes an airstrike to a point with the player's coordinates Developer API: (void) CallF15AirStrike(Vector3 pos, BasePlayer player) - launch an airstrike on a point with coordinates pos, player - airstrike initiator(null can be specified) Config: { "Rockets speed": 150, "Attack radius": 150, "Damage scale (1 = 100%)": 1.0, "Rate of fire(number of shots per second)": 2.5, "Time to trigger a signal grenade": 3.0, "Cooldown time": 1.0, "Cooldown message": "You can't call airstrike that often", "Grenade throw force scaling": 1.0, "Damage to buildings": false, "Attack the initiator": true, "Attack the players": true, "Attack NPCs": true, "Attack the place where the signal supply was thrown (attacks only in the area, not aiming at players and NPCs)": false, "F15 will only attack at right angles above the center of the impact area (only for area targeting)": false, "Attack accuracy (used only when attacking in an area)": 30, "Use homing missiles(need HomingMissiles plugin)": false }$11.99 -

Version 2.1.3
1,121 downloads
Auto plant and pick crops in planter. Also auto water or require a water hookup to water. When crops become ripe it will auto pick them if they have seeds in the box it will replant them in the open space. The plant and the checks are on timers it can take anywhere from 1 to 10 min before it gets picked / planted. There are 2 small stashes mounted to the box one will not accept items and that is where the picked items will go.. the other is to place your seeds in. Permission = "autofarm.allow" - Perm needed to place down a autofarm.$25.00- 139 comments
- 2 reviews
-
- 6
-
-
-
- #auto plant
- #auto farm
- (and 5 more)
-

Version 1.1.5
524 downloads
Shoppy Stock introduces a plethora of innovative features to the RUST server economy that were previously unavailable. This plugin enables the creation of multiple shops with diverse currencies, stock markets with item listing, a highly customizable server selling center, and numerous other functionalities. Video Preview (Version 1.0.0) Features Global Over 12 detailed RUST-Themed GUI windows. Wrote with performance in mind. All plugin actions are lightweight for server. Highly expandable plugin. All that limits you is your imagination! Fully customizable PopUp message through PopUp API. Command and API currency management. Full language support for any displayed message and item. NoEscape support. Full UI color change support. NPC interact shop and stock market support. Shops Create multiple shops with different currencies. Easily transfer your old currency to the plugin with other economy plugins support. Split your shop items into categories with custom icons for easier navigation. Search though all categories with one search bar. Buy exact amount of items that you need. Full custom item support. You can configure which currencies should be available to transfer. Transfer currency to online/offline players. When currency is an item, you can make it available for deposit into the shop as virtual currency. The page is saved when you close the shop, so you can get easily back where you were. Full permission system configurable for each action. Limits for daily/wipe purchases. Set cooldown to your purchases. Discount system. Stock Market Create multiple different markets with different currencies. Mark your favorite items and have them in Favorite tab. Automatically adds all vanilla RUST items with ability to blacklist unwanted. Few options to sort all listings for better economy management. Create sell and buy requests for the items. Configurable server sell price history. Permission based system on how many listings can one player create. Listings can be canceled and refunded or placed back to the market without any costs. Configurable tax on each market action. Additional info support for things such as durability and plant genes. Price rolls can be configured to run on specific hours. Demand system which will increase/decrease price of item on the market based on their demand. Messages requires DiscordCore. Selling center with the price calculator with over 15 variables based on amount sold, players online and more. Stock Market Broker. You can give permission for access to bank, where players can store and optionally refund items that are available in the server's sell list. You can also set the alert price and insta-sell price, which will execute an PopUp or will insta-sell your bank resources even if you are offline. Custom category and full custom item support. Configurable Web API for your server developers or for checking the item price if you are offline. Requires Web Server. Statistics module for server technicians for easier economy setup. Permissions The permissions listed below are static and cannot be altered. The configuration files offer hundreds of possible permissions. shoppystock.admin - Gives access to the currency management command. Commands All commands can be fully customized. Here is a list of the default commands. /market /shop /s /m - Opens Shoppy Stock UI. /list - Open's window to create Sell Request in RP stock market. /sell - Open's window to sell items in RP stock market. curr - Admin command. Full usage description is available when you run this command. (Chat and console command) updateprices <shopName> - Forcefully update stock prices of the shop. (Chat and console command) Optional Supported Currency Plugins Economics ServerRewards BankSystem IQEconomic Help Page Due to the extensive features offered by this plugin, it may be challenging for some users to configure certain aspects without guidance. Therefore, we have provided a brief walkthrough below. Configuration Files The plugin is extensive, resulting in the configuration files being split into three distinct ones, with two of them varying for each shop. Firstly, in your oxide/config folder, you will find the default configuration file, which contains all the fundamental configuration lines to add or remove more shops and stock markets. Secondly, in the oxide/data/ShoppyStock folder, you will find three folders. The first is Shops, which contains all the configurations for each shop created in the primary configuration file. The second is StockMarket, which includes several folders with all the stock-related content. More information on this is provided later. Lastly, UserData contains data on each shop player's currency, username, and daily/wipe purchases. StockMarket Folder In the StockMarket folder, you will find up to six folders, namely AlertData, Config, FavouriteData, PlayerData, PriceCache, and Statistics.\ The AlertData folder contains data on the alert and insta-sell prices set by players. The Config folder contains all the configuration files for each available stock market. The FavouriteData folder holds data on favorite items marked by players. The PlayerData folder includes data on all buy/sell requests and their banks. The PriceCache folder contains cache on all the necessary data of current item prices and their price/sell history for the graph to function. The size of this file depends on how long your timeline goes. Lastly, the Statistics folder includes all the statistics collected in the market by all players, split into global/player values, which are further divided into all time/daily actions. These values should help you understand how many resources are being sold on the server and justify your Default Sell Amount Calculation or Price Calculator. Server-Selling Items → Default Sell Amount Calculation (DSAC) The Default Sell Amount Calculation (DSAC) is a critical component that determines the amount of items sold during a given period. It serves as a reflection of the average item sales by all players during that period. For instance, in a PvE x10 server with an average of 20-30 players online, the wood amount sold could be set to 1800000. However, this value is only an example, and it is not recommended to base your configuration solely on it. A good stock market requires time and effort. Web API The plugin offers a Web API feature that enables you to check your market prices through your website. To activate this feature, you need website hosting with PHP support and to download the provided PHP file named apiupdate.php. CLICK HERE TO DOWNLOAD! It should be placed in the same directory as the "Web Price API - Link" points to. While experienced users can change the file name for security reasons, they should remember to modify the plugin code as well. Ensure the file has sufficient permissions to create an output api.html file (the file's directory can be altered in the PHP file). If configured correctly, the output should be available at <Web Price API - Link>/api.html. Always Run Timer on Hour Minute The Always Run Timer on Hour Minute feature sets the time when the timer will commence rolling the prices of your stock market. For example, if the values are set to 0, 30, and 60, the timer will start rolling prices on the hour or half-hour (x:00 or x:30). Similarly, if the values were 0, 20, 40, and 60, the timer would start rolling prices on the hour or at intervals of 20 minutes (x:00, x:20, or x:40). Stock Market - Default Categories The stock market contains 4 default categories. Sometimes you want to display them as first when opening the stock market. here are their codenames for config usage: my_listings bank_management favourites all_items Stock Market - Category Icons These options are formatted as follows: "config/rust default category name": "URL". Stock Market - Custom Item Info Lang Key For custom items, it's possible to create custom info tags in listings, similar to the tool condition or genetic information for clones. You can add your own tag for certain types of items, such as "Upgrade Ingredients". Stock Market - Refund Storage Name A storage with this name needs to be created in the RedeemStorageAPI. Otherwise, items from certain actions may disappear and the plugin will generate errors. Custom Item Listings All items configured in the stock market must have the exact format of the keys. The correct format is: <shortname>-<skinId>. For instance, the key for a Metal Chestplate with skinId 2497693972 will be "metal.plate.torso-2497693972". Generating Shop Config With All Vanilla Items Go to main plugin config in oxide/config/ folder and in the shop section you want to add all vanilla items search for Config Generation - Generate With All Default Items and set it to true. After all, go to oxide/data/ShoppyStock/Shops/ and delete your desired shop JSON file and reload the plugin. The plugin should generate a new config with all vanilla RUST items. Shop Items - Commands Commands support 2 types of variables. {userId} - Will be replaced with steamId of buyer. {userName} - Will be replaced with nickname of buyer. {userPosX} - Coordinate X of buyer. {userPosY} - Coordinate Y of buyer. {userPosZ} - Coordinate Z of buyer. Community Q&A Multiplier Events Q: How does the demand system work? How does weight come into play? A: Demands works based on "Multiplier Events" in the main config. Each event has its own "Weight" which represents their chance to be rolled on a demand roll. Values for how often demands should appear can be found in your stock market configuration in /data/ShoppyStock/StockMarket/Config/<shopName>.json. Names from the main configuration must be equal to these in the data file in order to make them work. Q: How do minimal and maximal work? A: It's a randomized value by which the price will be multiplied/divided. So if the price is 1.4 and the rolled demand is between 1.4 and 1.8, the random value would be, for example, 1.685, and the price would be 2.359. If the price is larger or less than the max value, it will get locked to the value near min/max. Stock Market - Timestamps Q: What is it used for? Is it a historical trend? A: If you run your stock market for a while, the plugin will store the price data, and it will be available in a chart for all players with permission. The amount of data saved is equivalent to the highest timestamp, so if you want to start collecting data, I recommend making this a real value even without giving permission to players for high timestamp values. Data Folder, Stock Market Config Q: Blocked Multiplier Listing Keys A: These are listings that shouldn't be multiplied with the price multiplier bonus, which is implemented, but the items that give the price bonus aren't available yet. Item Price Calculator Q: Price Change - Regular Curve A: It's a randomization value of the stock prices. Each time the price is rolled, it adds or subtracts a certain percentage from the price to make it more "realistic" and not stay in one place if none of the other events are run. Q: Price Change - Same Price Actions Min/Max A: Actions on the market aren't random if they go up or down every time. You can specify how long the price should go up or down (not including other events). You can make it so that prices will go up for five rolls in a row and then go down for the next two rolls. Q: Price Change - Chances to Increment A: It's the chance to run the action listed above. It's made in "<price percentage>": <price increase chance (percentage)> format. It's made to make prices go higher more easily when they are low and harder when they are high. As far as I remember, the basic configuration has a 2% price increase if the price is below 50%, 4% below 47%, etc. Q: Price Drop - Amount Sell Values Penalty Multiplier A: If any of the listed values are exceeded, the price roll is always negative, plus it's multiplied by the configured value to make prices go realistically lower faster when there are a lot of items sold on the market in a short period of time. Q: Price Drop - Amount Sold Max Price Penalty A: If your players sell too much of any item, you can set that price to be locked at a certain percentage for a certain period of time. If they sell, 10000% of DSAC of wood, the price is locked at a maximum of 25% for 24 price rolls. Q: Price Increase - Goal Not Achieved (Which goal is this referring to here?) A: If there is a low demand for some items and there is less than 100% of the DSAC amount sold, you can encourage players to farm and sell them by increasing the price by a certain multiplier every time the price is rolled. Like making the price increase x1.5 times faster when there are less than 10% of items sold. Q: Default Sell Amount Calculation - Players Online Multiplier (What does the set value with respect to players online do?) A: If your server population varies from 20 to 150, you can easily manage the DSAC values by just multiplying or dividing them based on the current player count. The player count is checked on every price roll. Q: Price Multipliers - Minimal Time Distance Between Events (The event here refers to what? (Is it a player buying or selling listings?) A: It refers to the price multipliers that I described above in Multiplier Events. Q: Price Multipliers - Chance Based On Sell Amount (0-100) (What does this configuration do?) A: You can make the price multipliers run more often if there are not enough or too many items sold. Q: Price multipliers [minimal actions vs. maximal actions] A: It's how long in price rolls the price increase or decrease event runs. Server Sell Items Q: How does price parent impact the server sell price? A: Parent items are useful when you want to add item like Metal Fragments and Metal Ore, but encourage players to smelt them, because Metal Fragments price will be always higher than Metal Ore by an certain amount configured there. API for Developers int GetCurrencyAmount(string shopName, BasePlayer player) - Returns player's balance. If not found returns 0. int GetCurrencyAmount(string shopName, ulong userId) - Returns player's balance. If not found returns 0. bool TakeCurrency(string shopName, BasePlayer player, int amount) - Takes player currency. Returns true if taken and false if not. bool TakeCurrency(string shopName, ulong userId, int amount) - Takes player currency. Returns true if taken and false if not. void GiveCurrency(string shopName, ulong sellerId, int amount) - Gives player currency. string FormatCurrency(string shopName, BasePlayer player) - Returns player's formatted balance. Example Files (Version 1.0.0) Contains all configuration files from the video, without most of the custom items. It's not recommended to run this files, CLICK HERE TO DOWNLOAD! Default Main Config (Version 1.0.6) CLICK HERE! Default Shop Config (Version 1.0.6) CLICK HERE! Default Stock Market Config (Version 1.0.6) CLICK HERE!$50.00 -
Version 1.6.6
841 downloads
Road Bradley plugin expands possibilities with APC fights. It spawns Bradleys with custom AI on selected roads and/or allow player to purchase their own Bradley for fights. The plugin is highly configurable, so you can set almost every variable by your own. This plugin also fully support custom map configuration. Video Preview (Version 1.1.0) Editor Preview (Version 1.3.0) Features You can set Bradley to spawn and patrol the roads. You can give players access to purchase their own Bradley, and lock damage/loot to only the owner, or his Friends/Clan (Required plugins) or Teams. Custom Bradley AI. (target distance, clothing check, tool check, view distance) (In my opinion better than the vanilla one) Currency plugin support. Custom markers on Bradleys. Rust-themed UI. Tank unstuck system. Fully customizable in config and help messages in console if tank is stuck for more than 30 seconds. Customizable routes for custom maps. Ability to route through more than 1 road and possibility to set route to the longest map road. Chances to spawn other tank profiles in timed spawns. Permission system for purchases unlock. Cooldowns and daily limits. Health, damage, napalm and debris configuration. Custom loot support. All Bradley routes available to display. You can reward players by percentage of damage dealt per Bradley. You can setup random road timed events. You can make your own roads and edit pre-generated ones in custom road editor. You can setup bradley fight bags to respawn players without losing the loot and come back to fight very fast. Command that you can use to spawn bradleys. You can customize bradley building damage and restrict fighters to fight only in owned buildings, or bradley will get despawned. Customizable main cannon damage and support for building damage modifier. Bradley can call MLRS Airstrike on fighters when their health will drop to configured level. You can configure new RF Explosives to automatically explode from radius or change their frequency. Config Informations The "Tank Routes - Spawns Per Maps" config part ins based on levelurl so if your map file is named CustomMapV1.3.3.map if you add CustomMap to config it will work. It might depend also on map host. Checked on DropBox and Discord. Tank Road IDs can be checked through /tankroute command. Permissions roadbradley.admin - Allows you to use /tankroute command. roadbradley.bypass - Bypass Bradley purchase cost. Commands /tankroute - Displays help about methods of route displays. /buytank - Opens the Bradley purchase UI. (Configurable) /spawnrbtank <profile> <userId> - Will spawn tank with profile for the userId player. (Chat and Console command) /spawnrbtank <profile> <route> - Will spawn tank with profile on configured route. (Chat and Console command) /tankcount - Shows active road bradley count. (Chat and Console command) For Developers void OnRoadBradleySpawned(BasePlayer owner, BradleyAPC apc, string profile, string targetRoad) - Called when someone succesfully purchased an road bradley. void OnRoadBradleyKilled(BradleyAPC apc, ulong bradleyOwnerId, string profile) - Called when road bradley gets killed. bool CanRoadBradleyTarget(BradleyAPC apc, BasePlayer player) - Override custom target method. Needs to be enabled in config. Default Config (Version 1.6.1) { "Tank Purchase - Commands": [ "buytank", "bt" ], "Tank Route - Use Asphalt Roads Only": false, "Tank Route - Check for Map Obstacles (recommended for custom maps with prefabs on roads": false, "Tank Route - Remove Roads With Obstacles From Pool": false, "Tank Route - Teleport Bradley To Random Road Position after X Stuck Errors (0, to disable)": 0, "Tank Route - Broadcast Stuck To Fighters": true, "Tank Route - Obstacle Keyword Whitelist": [ "roadsign", "train_track", "road_tunnel", "doorcloser" ], "Tank Route - Remove first and last checkpoints from all routes": 1, "Tank Route - Minimal Route Checkpoints To Use": 5, "Tank Route - Remove Timed-Event Roads From Purchasable Pool": false, "Tank Route - Randomize Spawn On Road": true, "Tank Route Editor - Height Offset": 0.1, "Targeting - Target NPC": false, "Targeting - Target Sleepers": false, "Loot & Damage Share - Check For Caller Building Damage": true, "Loot & Damage Share - Allow Damage For Caller Team Buildings": true, "Loot & Damage Share - Unowned Damage Entity Reminder": 50, "Loot & Damage Share - Unowned Damage Entity Bradley Kill": 200, "Loot & Damage Share - Ignore Crate Ownership Checks": false, "Loot & Damage Share - Use Friends": false, "Loot & Damage Share - Use Clans": false, "Loot & Damage Share - Use RUST Teams": true, "Loot & Damage Share - Limit Server Spawned Bradleys Loot To Top Damage Player": false, "Loot & Damage Share - Disable Unowned Tank Damage To Buildings": false, "Loot & Damage Share - Disable Tank Damage To TC And Sleeping Bags": false, "Purchases - Used Purchase System (0 - None, 1 - Economics, 2 - ServerRewards, 3 - ShoppyStock)": 3, "Purchases - Used Currency (If ShoppyStock Is Used)": "myCurrencyKey", "Purchases - Currency Symbol (used in display)": "$", "Purchases - Max Purchased Bradleys (0, to disable)": 3, "Limits - Daily Limit Type (true - calls, false - won fights)": true, "Tank Info - Display Timed Bradley Info": true, "Tank Info - Timed Bradley Shop Name Format": "<size=12>{0} BRADLEY\n[Health: {1}]</size>", "Tank Info - Display Purchased Bradley Info": true, "Tank Info - Purchased Bradley Shop Name Format": "<size=12><color=#5c81ed>{1}'s</color> {0} BRADLEY\n[Health: {2}]</size>", "Tank Health UI - X Anchor (0-1)": 0.5, "Tank Health UI - Y Anchor (0-1)": 0.0, "Bag Respawns - Enabled": true, "Bag Respawns - Max Bags Per Player": 4, "Bag Respawns - Max Bed Distance From Player": 100.0, "PopUpAPI - PopUp Profile Name": "Legacy", "Tank Disarm Frequency": 1470, "Enable CanRoadBradleyTarget Hook": false, "Custom Tank Death Properties": { "Show Road Bradley Death Locations On Map": true, "Fireball Count (0, to disable)": 0, "Use Fireballs As Chest Lock (not recommended, high performance impact, if false, uses custom method)": false, "Hide Gib Flying Spheres (used for their scaling, will make gibs 'jump' once)": true }, "Tank Unstuck - Killed Entity Names": [ "servergibs_bradley", "scraptransporthelicopter", "magnetcrane.entity", "minicopter.entity", "supply_drop" ], "Tank Routes - Spawns Per Maps": { "default": [ "default" ], "Detroit": [ "default", "custom" ], "HapisIsland": [ "hapis" ], "ParadiseIsland": [ "custom" ] }, "Tank Routes - Purchasable Road ID Blacklist Per Map": { "default": [ "Edited_756", "Edited_33" ], "Detroit": [ "Edited_4" ] }, "Tank Routes - Custom Purchasable Roads Per Map": { "default": [ "CustomRoad1", "CustomRoad2" ], "Detroit": [ "DetroitRoad1", "DetroitRoad2", "DetroitRoad3" ], "HapisIsland": [ "HapisRoad2", "HapisRoad3", "HapisRoad4" ] }, "Tank Routes - Spawn Configuration": { "custom": { "Tank Route - Road IDs (Random, if more than one)": [ [ "0", "1" ], [ "2", "3" ] ], "Tank Route - Use all default roads": false, "Tank Route - Use longest path": false, "Tank Route - Remove first and last checkpoints": 3, "Spawns - Announce Spawn": true, "Spawns - Announce Kill": true, "Spawns - Respawn Time (in seconds)": 1200, "Spawns - Respawn Time Randomize Value (goes +value and -value from option above)": 120, "Spawns - Min. Online Players For Each Tank Amount (Amount Of Tanks: Amount Of Players)": { "1": 4, "2": 12, "3": 20 }, "Spawns - Chance": { "Extreme": 1, "Hard": 3 } }, "default": { "Tank Route - Road IDs (Random, if more than one)": [], "Tank Route - Use all default roads": false, "Tank Route - Use longest path": true, "Tank Route - Remove first and last checkpoints": 3, "Spawns - Announce Spawn": true, "Spawns - Announce Kill": true, "Spawns - Respawn Time (in seconds)": 900, "Spawns - Respawn Time Randomize Value (goes +value and -value from option above)": 120, "Spawns - Min. Online Players For Each Tank Amount (Amount Of Tanks: Amount Of Players)": { "1": 4, "2": 8 }, "Spawns - Chance": { "Hard": 2, "Normal": 5 } }, "hapis": { "Tank Route - Road IDs (Random, if more than one)": [ [ "HapisRoad1" ] ], "Tank Route - Use all default roads": false, "Tank Route - Use longest path": false, "Tank Route - Remove first and last checkpoints": 3, "Spawns - Announce Spawn": true, "Spawns - Announce Kill": true, "Spawns - Respawn Time (in seconds)": 900, "Spawns - Respawn Time Randomize Value (goes +value and -value from option above)": 120, "Spawns - Min. Online Players For Each Tank Amount (Amount Of Tanks: Amount Of Players)": { "1": 4, "2": 8 }, "Spawns - Chance": { "Hard": 2, "Normal": 5 } } }, "Tank Routes - Purchasable": { "Extreme": { "Purchases - Required Permission (leave blank, to disable)": "roadbradley.extreme", "Purchases - Cooldown (in seconds, 0 to disable)": 7200, "Purchases - Max Daily (in seconds, 0 to disable)": 1, "Purchases - Max Purchased Bradley Permissions (from best to worse)": { "roadbradley.limit.premium": 3, "roadbradley.limit.vip": 2 }, "Purchases - Time To Kill (in seconds, 0 to disable)": 600, "Purchases - Time To Come To Bradley (Kill Time + Coming Time)": 600, "Purchases - Limit Loot To Team": true, "Purchases - Limit Target To Team": true, "Purchases - Limit Damage To Team": true, "Purchases - Kill Announce Enabled": true, "Purchases - Required Items": [ { "Shortname": "scrap", "Amount": 1000, "Skin": 0, "Custom Icon URL": "" }, { "Shortname": "currency", "Amount": 5000, "Skin": 0, "Custom Icon URL": "" }, { "Shortname": "metal.fragments", "Amount": 10000, "Skin": 0, "Custom Icon URL": "" } ] }, "Hard": { "Purchases - Required Permission (leave blank, to disable)": "", "Purchases - Cooldown (in seconds, 0 to disable)": 7200, "Purchases - Max Daily (in seconds, 0 to disable)": 1, "Purchases - Max Purchased Bradley Permissions (from best to worse)": {}, "Purchases - Time To Kill (in seconds, 0 to disable)": 600, "Purchases - Time To Come To Bradley (Kill Time + Coming Time)": 600, "Purchases - Limit Loot To Team": true, "Purchases - Limit Target To Team": true, "Purchases - Limit Damage To Team": true, "Purchases - Kill Announce Enabled": true, "Purchases - Required Items": [ { "Shortname": "scrap", "Amount": 1000, "Skin": 0, "Custom Icon URL": "" }, { "Shortname": "currency", "Amount": 1500, "Skin": 0, "Custom Icon URL": "" } ] }, "Normal": { "Purchases - Required Permission (leave blank, to disable)": "", "Purchases - Cooldown (in seconds, 0 to disable)": 3600, "Purchases - Max Daily (in seconds, 0 to disable)": 3, "Purchases - Max Purchased Bradley Permissions (from best to worse)": {}, "Purchases - Time To Kill (in seconds, 0 to disable)": 600, "Purchases - Time To Come To Bradley (Kill Time + Coming Time)": 600, "Purchases - Limit Loot To Team": true, "Purchases - Limit Target To Team": true, "Purchases - Limit Damage To Team": true, "Purchases - Kill Announce Enabled": true, "Purchases - Required Items": [ { "Shortname": "scrap", "Amount": 100, "Skin": 0, "Custom Icon URL": "" }, { "Shortname": "metal.fragments", "Amount": 1500, "Skin": 0, "Custom Icon URL": "" } ] } }, "Tank Routes - Configuration": { "Extreme": { "Tank Target - Max distance to target": 10.0, "Tank Target - Targeted items": [ "rocket.launcher", "explosive.timed", "explosive.satchel" ], "Tank Target - Lose Target Intrest After X Seconds": 10, "Tank Options - Model Scale": 0.7, "Tank Options - Map Marker Type (None/Crate/Chinook/Cargoship)": "Crate", "Tank Options - Move Speed (0-1)": 1.0, "Tank Options - Move Force": 2000.0, "Tank Options - Health": 5000.0, "Tank Options - View Range": 75.0, "Turret Options - Fire Rate": 0.06, "Turret Options - Burst Length": 15, "Turret Options - Aim Cone": 3.0, "Turret Options - Bullet Damage": 25.0, "Cannon Options - Explosion Radius": 8.0, "Cannon Options - Blunt Damage": 40.0, "Cannon Options - Explosion Damage": 0.0, "Custom Attack - Do Custom Attacks": true, "Custom Attack - Try Interval (in seconds)": 15.0, "Custom Attack - Try Interval Randomization (in seconds)": 5.0, "MLRS Options - Enabled": true, "MLRS Options - Amount Per Fighter": 4, "MLRS Options - Height Spawn": 450.0, "MLRS Options - Sound Alert Prefab Name": "assets/prefabs/tools/pager/effects/beep.prefab", "MLRS Options - Chat Message Alert": true, "MLRS Options - Position Randomization": 25.0, "MLRS Options - Health Level Spawns": [ 4500.0, 3000.0, 1000.0, 100.0 ], "MLRS Options - Explosion Radius": 15.0, "MLRS Options - Blunt Damage": 75.0, "MLRS Options - Explosion Damage": 350.0, "RF Disarm - Enabled": false, "RF Disarm - Type (false - Change Frequency, true - Explode)": true, "RF Disarm - Radius From Tank": 35.0, "Bradley Debris - Scale With Tank": true, "Bradley Debris - Health": 500.0, "Bradley Debris - Time To Cool Down": 60.0, "Loot - Crate Amount (If default loot preset)": 4, "Loot - Used Loot Preset (leave blank for default)": "custom", "Loot - Rewards For Damage Dealt": [ { "Command (if not empty, item is ignored)": "", "Shortname": "currency", "Amount": 2000, "Skin": 0, "Display Name": "" }, { "Command (if not empty, item is ignored)": "", "Shortname": "scrap", "Amount": 500, "Skin": 0, "Display Name": "" } ], "Loot - Fire Lock Time (in seconds)": 60 }, "Hard": { "Tank Target - Max distance to target": 10.0, "Tank Target - Targeted items": [ "rocket.launcher", "explosive.timed", "explosive.satchel" ], "Tank Target - Lose Target Intrest After X Seconds": 10, "Tank Options - Model Scale": 0.6, "Tank Options - Map Marker Type (None/Crate/Chinook/Cargoship)": "Crate", "Tank Options - Move Speed (0-1)": 1.0, "Tank Options - Move Force": 2000.0, "Tank Options - Health": 2500.0, "Tank Options - View Range": 50.0, "Turret Options - Fire Rate": 0.06, "Turret Options - Burst Length": 15, "Turret Options - Aim Cone": 3.0, "Turret Options - Bullet Damage": 20.0, "Cannon Options - Explosion Radius": 8.0, "Cannon Options - Blunt Damage": 40.0, "Cannon Options - Explosion Damage": 0.0, "Custom Attack - Do Custom Attacks": true, "Custom Attack - Try Interval (in seconds)": 15.0, "Custom Attack - Try Interval Randomization (in seconds)": 5.0, "MLRS Options - Enabled": true, "MLRS Options - Amount Per Fighter": 2, "MLRS Options - Height Spawn": 450.0, "MLRS Options - Sound Alert Prefab Name": "assets/prefabs/tools/pager/effects/beep.prefab", "MLRS Options - Chat Message Alert": true, "MLRS Options - Position Randomization": 25.0, "MLRS Options - Health Level Spawns": [ 2300.0, 1100.0 ], "MLRS Options - Explosion Radius": 15.0, "MLRS Options - Blunt Damage": 75.0, "MLRS Options - Explosion Damage": 350.0, "RF Disarm - Enabled": false, "RF Disarm - Type (false - Change Frequency, true - Explode)": true, "RF Disarm - Radius From Tank": 35.0, "Bradley Debris - Scale With Tank": true, "Bradley Debris - Health": 500.0, "Bradley Debris - Time To Cool Down": 60.0, "Loot - Crate Amount (If default loot preset)": 4, "Loot - Used Loot Preset (leave blank for default)": "", "Loot - Rewards For Damage Dealt": [ { "Command (if not empty, item is ignored)": "", "Shortname": "currency", "Amount": 2000, "Skin": 0, "Display Name": "" } ], "Loot - Fire Lock Time (in seconds)": 60 }, "Normal": { "Tank Target - Max distance to target": 10.0, "Tank Target - Targeted items": [ "rocket.launcher", "explosive.timed", "explosive.satchel" ], "Tank Target - Lose Target Intrest After X Seconds": 10, "Tank Options - Model Scale": 0.6, "Tank Options - Map Marker Type (None/Crate/Chinook/Cargoship)": "Crate", "Tank Options - Move Speed (0-1)": 1.0, "Tank Options - Move Force": 2000.0, "Tank Options - Health": 1000.0, "Tank Options - View Range": 50.0, "Turret Options - Fire Rate": 0.06, "Turret Options - Burst Length": 10, "Turret Options - Aim Cone": 3.0, "Turret Options - Bullet Damage": 15.0, "Cannon Options - Explosion Radius": 8.0, "Cannon Options - Blunt Damage": 40.0, "Cannon Options - Explosion Damage": 0.0, "Custom Attack - Do Custom Attacks": true, "Custom Attack - Try Interval (in seconds)": 15.0, "Custom Attack - Try Interval Randomization (in seconds)": 5.0, "MLRS Options - Enabled": false, "MLRS Options - Amount Per Fighter": 2, "MLRS Options - Height Spawn": 450.0, "MLRS Options - Sound Alert Prefab Name": "assets/prefabs/tools/pager/effects/beep.prefab", "MLRS Options - Chat Message Alert": true, "MLRS Options - Position Randomization": 25.0, "MLRS Options - Health Level Spawns": [], "MLRS Options - Explosion Radius": 15.0, "MLRS Options - Blunt Damage": 75.0, "MLRS Options - Explosion Damage": 350.0, "RF Disarm - Enabled": false, "RF Disarm - Type (false - Change Frequency, true - Explode)": true, "RF Disarm - Radius From Tank": 35.0, "Bradley Debris - Scale With Tank": true, "Bradley Debris - Health": 500.0, "Bradley Debris - Time To Cool Down": 60.0, "Loot - Crate Amount (If default loot preset)": 4, "Loot - Used Loot Preset (leave blank for default)": "", "Loot - Rewards For Damage Dealt": [], "Loot - Fire Lock Time (in seconds)": 60 } }, "Loot - Presets": { "custom": { "Loot - Min. Crates": 2, "Loot - Max. Crates": 4, "Loot - Min. Items Per Crate": 4, "Loot - Max. Items Per Crate": 5, "Loot - Loot Table": [ { "Shortname": "explosive.timed", "Amount": 1, "Amount Randomizer Amount (+ and -)": 0, "Always Include Chance (0-100)": 0.0, "Max Always Includes Per Loot (0 to disable)": 0, "Skin": 0, "Display Name": "", "Chance": 1, "Additional Items": [] }, { "Shortname": "metal.refined", "Amount": 1000, "Amount Randomizer Amount (+ and -)": 0, "Always Include Chance (0-100)": 0.0, "Max Always Includes Per Loot (0 to disable)": 0, "Skin": 0, "Display Name": "", "Chance": 2, "Additional Items": [] }, { "Shortname": "rifle.ak", "Amount": 1, "Amount Randomizer Amount (+ and -)": 0, "Always Include Chance (0-100)": 0.0, "Max Always Includes Per Loot (0 to disable)": 0, "Skin": 0, "Display Name": "", "Chance": 1, "Additional Items": [ { "Shortname": "ammo.rifle", "Amount": 20, "Skin": 0, "Display Name": "" } ] } ] } } }$35.00 -
Version 1.6.6.1
1,672 downloads
The plugin adds personal bots to your server, which players can spawn with a command and give them various instructions. At the moment, the bot can: Attack various targets (bots, players, various buildings, barrels and many other objects) Gather resources Stones, sulfur stones, metal stones Trees Gather and pickup resources in 50 meters from the start point (/pnpc auto-farm, /pnpc auto-pickup) Pickup resources Pickup dropped items Follow the player, stand in position Protect the owner or yourself if any of them is attacked Attack an object that is attacked by the owner (/pnpc combat) Loot crates Travel with the player on Minicopter Car Boat And other transport Recover the owner if he is in a wounded state Be an AI driver of helicopter (additional addon required, check out in the profile) Be an AI driver of car (additional addon required, check out in the profile) Raid with rocket/grenade launchers (additional addon required, check out in the profile) You can customize: Bot spawn delay Controls Choose which button will be assigned tasks to the bot Range of the task assignment button Display of 3D arrow and its duration GUI Interface Once in how many seconds the menu will be refreshed Adjust the panel layer (Hud, Overlay, etc.) Adjust menu position Customize colors Add or change shortcuts to the menu Set up bots by permission Select bot name Set max. health Choose a bot appearance Adjust bot speed Enable bot endless ammo Enable display of the bot on the map Make a start kit for the bot Customize capabilities Can a bot loot crates Can a bot gather trees and stones Can a bot pick up resources Should the bot protect the owner Should a bot defend itself Can a bot travel with a player in a transport? Can a bot pick up dropped items Recover the owner from a wounded state Can a bot recover its owner from a wounded state? Recover time Can a bot attack other people's buildings Can a bot attack its owner's buildings Can a bot collect resources within a radius of 50 meters (/ pnpc auto-pickup) Can a bot farm resources within a radius of 50 meters (/ pnpc auto-farm) Customize gather options Shortname of items that can gather trees Shortname of items that can gather stones and ore Customize gather rates for specific items Customize damage and interaction Adjust the bot damage rate Adjust the bot receive damage rate Can players damage the bot Can a bot damage players Can turrets target and kill a bot Can bot owner turrets target and kill bot Set up a black list of items that cannot be put into the inventory of the bot Video: Also there are available some cool addons for this plugin: By default, the plugin has 2 localization files, for Russian and English Commands: /pnpc - spawns or despawns the bot /pnpc where - displays in the chat where the bot is /pnpc health - displays the current health of the bot in the chat /pnpc follow - instructs the bot to follow the owner /pnpc combat - the bot begins to attack those who are attacked by the owner /pnpc ignore - the bot ignores those who attack it and the owner /pnpc auto-pickup - displays information about the auto-pickup function /pnpc auto-pickup (wood, metal, sulfur, stone, all) - selection of resources for pickup, if you need to remove a resource from the list, you need to re-enter it /pnpc auto-pickup enable - enable auto-pickup of resources /pnpc auto-pickup disable - disable auto-pickup of resources /pnpc auto-farm - displays information about the auto-farm function /pnpc auto-farm (wood, metal, sulfur, stone, all) - selection of resources for farm, if you need to remove a resource from the list, you need to re-enter it /pnpc auto-farm enable - enable auto-farm resources /pnpc auto-farm disable - disable auto-farm resources pnpc.item {STEAM_ID} {skin_id} - gives the player an item to install the bot Configuration: { "Control setup": { "Which button will assign tasks to the bot, kill/get/collect, etc. (MIDDLE_MOUSE, SECOND_MOUSE, E, RELOAD, SPRINT)": "MIDDLE_MOUSE", "Range of the task assignment button": 25.0, "Display 3D arrows over a target?": true, "Arrow display duration": 2 }, "GUI customization": { "How many seconds to update the GUI?": 6.0, "Panel layer (Hud, Overlay, Overall, Hud.Menu, Under)": "Overlay", "Panel position adjustment": { "type": "RectTransform", "anchormin": "1 1", "anchormax": "1 1", "offsetmin": "-170 -104", "offsetmax": "-10 -10" }, "1 panel color": "#7f8c8d", "2 panel color": "#bdc3c7", "Health bar color": "#2ecc71", "Shortcut buttons": [ { "Text on button": "Auto-Farm: Wood", "Executable chat commands": [ "pnpc auto-farm wood", "pnpc auto-farm enable" ] }, { "Text on button": "Auto-Farm: Stone", "Executable chat commands": [ "pnpc auto-farm stone", "pnpc auto-farm enable" ] }, { "Text on button": "Auto-Pickup: Wood", "Executable chat commands": [ "pnpc auto-pickup wood", "pnpc auto-pickup enable" ] }, { "Text on button": "Auto-Pickup: Stone", "Executable chat commands": [ "pnpc auto-pickup stone", "pnpc auto-pickup enable" ] } ] }, "Bot settings by permission": { "personalnpc.bot1": { "Bot spawn delay": 300.0, "The name of the bot to be selected through the command when spawning": "bot1", "Bot name": "Personal bot of player %OWNER_NAME%", "Bot appearance (0 - random)": 0, "Maximum health": 150.0, "Bot speed (slowest, slow, normal, fast)": "normal", "Enable infinite ammo for the bot?": true, "Enable display of the bot on the map? (frankenstein icon)": true, "Start kit": [ { "Item name": "", "Item shortname": "shoes.boots", "Item skin": 0, "Item amount": 1, "In which container to place? (belt, main, wear)": "wear" }, { "Item name": "", "Item shortname": "pants", "Item skin": 0, "Item amount": 1, "In which container to place? (belt, main, wear)": "wear" }, { "Item name": "", "Item shortname": "hoodie", "Item skin": 0, "Item amount": 1, "In which container to place? (belt, main, wear)": "wear" }, { "Item name": "", "Item shortname": "mask.bandana", "Item skin": 0, "Item amount": 1, "In which container to place? (belt, main, wear)": "wear" }, { "Item name": "", "Item shortname": "hat.boonie", "Item skin": 0, "Item amount": 1, "In which container to place? (belt, main, wear)": "wear" }, { "Item name": "", "Item shortname": "sunglasses", "Item skin": 0, "Item amount": 1, "In which container to place? (belt, main, wear)": "wear" } ], "Functions setup": { "Can a bot loot crates?": true, "Can the bot mine trees and stones?": true, "Can the bot pick up resources? (wood, sulfur and metal ore, stones)": true, "Should the bot protect the owner?": true, "Should the bot defend itself?": true, "Can the bot travel by car/copter and other vehicles?": true, "Can the bot pick up dropped items?": true, "Recover the owner from a wounded state": { "Can the bot recover the owner if he is in a wounded state?": true, "Recover time": 6.0 }, "Can the bot attack other people's buildings?": true, "Can a bot attack its owner's buildings?": false, "Can the bot collect resources within a radius of 50 meters? (/pnpc auto-pickup)": true, "Can the bot farm resources within a radius of 50 meters? (/pnpc auto-farm)": true }, "Gather setup": { "Shortname of items that can harvest trees": [ "hatchet", "chainsaw", "hammer.salvaged", "stonehatchet", "axe.salvaged" ], "Shortname of items that can mine stones and ore": [ "pickaxe", "stone.pickaxe", "hammer.salvaged", "jackhammer", "icepick.salvaged" ], "Setting up mining rates": { "stones": 2.0, "wood": 5.0 } }, "Damage and interactions setup": { "Bot damage rate": 2.0, "Bot recive damage rate": 0.5, "Can players damage the bot?": true, "Can the bot damage players?": true, "Can turrets target and kill a bot? (all turrets will not be able to damage the bot)": false, "Prevent bot owner turrets from aiming and killing the bot? (bot owner's turrets will not be able to damage the bot)": true, "Blacklist of objects that the bot will ignore when owner selecting a target (short prefab name)": [ "barricade.sandbags" ] }, "Black list of items that cannot be put into the inventory of the bot": [ "rocket.launcher" ] } }, "Bot install by item": [ { "Item name": "PersonalNPC", "Item shortname": "furnace", "Item skin": 2741314889, "Bot info": { "Bot spawn delay": 300.0, "The name of the bot to be selected through the command when spawning": "bot1", "Bot name": "Personal bot of player %OWNER_NAME%", "Bot appearance (0 - random)": 0, "Maximum health": 150.0, "Bot speed (slowest, slow, normal, fast)": "normal", "Enable infinite ammo for the bot?": true, "Enable display of the bot on the map? (frankenstein icon)": true, "Start kit": [ { "Item name": "", "Item shortname": "shoes.boots", "Item skin": 0, "Item amount": 1, "In which container to place? (belt, main, wear)": "wear" }, { "Item name": "", "Item shortname": "pants", "Item skin": 0, "Item amount": 1, "In which container to place? (belt, main, wear)": "wear" }, { "Item name": "", "Item shortname": "hoodie", "Item skin": 0, "Item amount": 1, "In which container to place? (belt, main, wear)": "wear" }, { "Item name": "", "Item shortname": "mask.bandana", "Item skin": 0, "Item amount": 1, "In which container to place? (belt, main, wear)": "wear" }, { "Item name": "", "Item shortname": "hat.boonie", "Item skin": 0, "Item amount": 1, "In which container to place? (belt, main, wear)": "wear" }, { "Item name": "", "Item shortname": "sunglasses", "Item skin": 0, "Item amount": 1, "In which container to place? (belt, main, wear)": "wear" } ], "Functions setup": { "Can a bot loot crates?": true, "Can the bot mine trees and stones?": true, "Can the bot pick up resources? (wood, sulfur and metal ore, stones)": true, "Should the bot protect the owner?": true, "Should the bot defend itself?": true, "Can the bot travel by car/copter and other vehicles?": true, "Can the bot pick up dropped items?": true, "Recover the owner from a wounded state": { "Can the bot recover the owner if he is in a wounded state?": true, "Recover time": 6.0 }, "Can the bot attack other people's buildings?": true, "Can a bot attack its owner's buildings?": false, "Can the bot collect resources within a radius of 50 meters? (/pnpc auto-pickup)": true, "Can the bot farm resources within a radius of 50 meters? (/pnpc auto-farm)": true }, "Gather setup": { "Shortname of items that can harvest trees": [ "hatchet", "chainsaw", "hammer.salvaged", "stonehatchet", "axe.salvaged" ], "Shortname of items that can mine stones and ore": [ "pickaxe", "stone.pickaxe", "hammer.salvaged", "jackhammer", "icepick.salvaged" ], "Setting up mining rates": { "stones": 2.0, "wood": 5.0 } }, "Damage and interactions setup": { "Bot damage rate": 2.0, "Bot recive damage rate": 0.5, "Can players damage the bot?": true, "Can the bot damage players?": true, "Can turrets target and kill a bot? (all turrets will not be able to damage the bot)": false, "Prevent bot owner turrets from aiming and killing the bot? (bot owner's turrets will not be able to damage the bot)": true, "Blacklist of objects that the bot will ignore when owner selecting a target (short prefab name)": [ "barricade.sandbags" ] }, "Black list of items that cannot be put into the inventory of the bot": [ "rocket.launcher" ] } } ], "How many seconds will the bot update the information? (affects the performance and operation of the bot)": 0.01, "Spawn a backpack with his items when a bot dies? (otherwise his corpse will spawn)": false, "List of prefabs that the bot can loot (useful if the bot attacks loot instead of looting it)": [ "vehicle_parts" ] }$45.00 -
Version 1.3.0
4,747 downloads
This plugin adds variety of NPC sets with very high number of parameter sets on standard and custom monuments. Also it is added during dropping the server AirDrop, locked crate and destroying a tank or helicopter Dependencies (optional, not required) AlphaLoot CustomLoot True PVE Kits Economics Server Rewards IQEconomic PveMode Custom maps Maps that have default settings for their custom monuments. For these maps, you will not need to create places for the appearance of NPCs, they have already been created by the map developer and are located inside the archive when buying the map You can also download all these files for all maps here Detroit: Irreparable Damage Oregon 2: Last Hope Lostly Island Frontier – American Old West Oregon: Land of Dead Badlands Foreign Lands Namalsk Kong: Skull Island Destroyed World Deathland Dreamland Last Train Pandora Railway Island Wasteland Cataclysm: Fury of Nature Last Oasis Crazy Island Standard monuments This item of the plugin settings is used for appearing NPCs in all standard monuments. All these settings are located in the Monument folder (oxide/data/BetterNpc/Monument). Each file in this folder corresponds to a standard monument If there is no standard monument file in the folder, you can create it (you need to name the file the same way as the standard monuments on the map inside the game). You can copy the settings from any other standard monument Configuration parameters: Enabled? [true/false] – It allows to enable/disable the appearance of NPC on the monument. If you need NPCs appearing on the map and don’t need it on another map, you can use this option simply The size of the monument – this parameter contains two values. It is the length and width of the monument. This parameter is necessary for random appearance of NPC on the monument and indication of limits of removal of standard NPCs on the monument (if it is necessary) Remove other NPCs? [true/false] – It deletes the standard NPCs inside the limits of this monument Presets – It is a list of all the NPC presets to appear on the monument (the description of the NPC preset settings is located below) Custom monuments This item of the plugin settings is responsible for the appearance of NPCs on custom monuments. All these settings are located in the Custom folder (oxide/data/BetterNpc/Custom). Each file in this folder corresponds to a custom monument If you have bought a map with already configured NPC appearance files for custom monuments you will copy these files into the Custom folder. If you want to create and configure the appearance of NPC in your custom location on the map, you will use the command in the administrators’ chat /SpawnPointAdd {name} (see the description of this command below in the instruction) Configuration parameters: Enabled? [true/false] – It allows to enable/disable the appearance of NPC on the monument. If you need NPCs appearing on the map and don’t need it on another map, you can use this option simply Position – It is a position of the custom monument on the map Rotation – It is a rotation of the custom monument on the map (this parameter is necessary for using custom places to appear of NPC on the monument, if the monument is used on more than one map) Radius – It is the radius of the custom monument from the position on the map Remove other NPCs? [true/false] – It removes the standard NPCs inside the limits of this monument Presets – It is a list of all the NPC presets to appear on the monument (the description of the NPC preset settings is located below) Roads This item of the plugin settings is used to appear NPCs on all types of roads. All these settings are located in the Road folder (oxide/data/BetterNpc/Road). Each file in this folder corresponds to a particular road type ExtraNarrow – It is a narrow, unpaved walkway ExtraWide It is a wide, paved, two-lane, beltway road Standard – It is a regular, paved road Configuration parameters: Enabled? [true/false] – It allows to enable/disable the appearance of NPC on the road. If you need NPCs appearing on the map and don’t need it on another map, you can use this option simply Presets – It is a list of all the NPC presets to appear on the road (the description of the NPC preset settings is located below) Biomes This item of the plugin settings is used to appear NPCs on all types of biomes. All these settings are located in the Biome folder (oxide/data/BetterNpc/Biome). Each file in this folder corresponds to a particular biome type (Arctic, Arid, Temperate, Tundra) Configuration parameters: Enabled? [true/false] – It allows to enable/disable the appearance of NPC on the biome. If you need NPCs appearing on the map and don’t need it on another map, you can use this option simply Presets – It is a list of all the NPC presets to appear on the biome (the description of the NPC preset settings is located below) In-game events This item of the plugin settings is used to appear the NPCs in standard Rust events. All of these settings are located in the Event folder (oxide/data/BetterNpc/Event). Each file in this folder corresponds to its own type of event The supported events: When the plane drops the server AirDrop, it will be guarded by specific NPC presets CH47 – When the chinook drops a locked crate during patrolling the map, it will be guarded by specific NPC presets Bradley – When someone destroys a tank, its crates will be guarded by specific NPC presets Helicopter – When someone shoots down a patrol helicopter, its crates will be guarded by specific NPC presets Configuration parameters: Enabled? [true/false] – It allows to enable/disable the appearance of NPC on the event. If you need NPCs appearing on the map and don’t need it on another map, you can use this option simply Radius – NPC appearance radius Presets – It is a list of all the NPC presets to appear on the event (the description of the NPC preset settings is located below) The NPC preset parameters Enabled? [true/false] – It is enabling/disabling the preset Minimum numbers – Day – It is the minimum number of NPCs from the day preset Maximum numbers – Day – It is the maximum number of NPCs from the day preset Minimum numbers – Night – It is the minimum number of NPCs from the night preset Maximum numbers – Night – It is the maximum number of NPCs from the night preset NPCs setting – It is all NPC settings of this preset (see the description of NPC settings for details) Type of appearance (0 – random; 1 – own list) – It is a type of NPC appearance. You can create your own list of places of NPC appearance. The NPC will appear only randomly. This parameter is not used in Road appearance types Own list of locations – It is your own list of NPC appearances. You need to use the number of locations at least the maximum possible number of NPCs in this preset. This parameter is not used in Road appearance types The path to the crate that appears at the place of death – It is the full path to the crate prefab that appears at the place of death of an NPC. If you don’t need this parameter, you should leave this blank Which loot table should the plugin use (0 – default; 1 – own; 2 – AlphaLoot; 3 – CustomLoot; 4 – loot table of the Rust objects; 5 – combine the 1 and 4 methods) – It is the type of the NPC loot table in this preset. Type 5 includes two types (1 and 4) at the same time and locates items from both types Loot table from prefabs (if the loot table type is 4 or 5) – It is a setting of the loot tables from Rust objects. You can see the loot table of Rust objects description for more details Own loot table (if the loot table type is 1 or 5) – It’s NPC’s own loot table. You can see the description of your own loot table for more details The NPC settings description Names is a list of NPC names. It is selected from the list randomly Health – It’s the HP amount of the NPC Roam Range – It’s the patrolling area distance. It’s the distance that the NPC can move from the place of appearance during patrolling Chase Range – It’s the chase range of the target. It’s the distance that the NPC can chase his target from the place of appearance Attack Range Multiplier – It’s the attack range multiplier of the NPC’s weapon Sense Range – It’s a target detection radius Target Memory Duration [sec.] – It’s the time that the NPC can remember his target Scale damage – It’s the damage multiplier from NPC to the player Aim Cone Scale – It’s the spread of NPC shooting, the default value in Rust is 2. It doesn’t take negative values Detect the target only in the NPCs viewing vision cone? [true/false] – It’s the parameter that allows detecting the target only in a certain NPC viewing. If you want to detect the target in 360 degrees, you will set the parameter “False” Vision Cone – It’s the NPC viewing. The range of values is from 20 to 180 degrees. If the previous parameter is False, this parameter is not used Speed – It’s the NPC speed. The default value in Rust is 5 Minimum time of appearance after death [sec.] – It’s the minimum time of NPC appearance after the death. This parameter is not used in the NPC Event places Maximum time of appearance after death [sec.] – It’s the maximum time of NPC appearance after the death. This parameter is not used in the NPC Event places Disable radio effects? [true/false] – You can disable/enable radio effects Is this a stationary NPC? [true/false] – If this parameter is True, the NPC will not move or run Remove a corpse after death? [true/false] – This parameter can control the deleting of NPC corpses (only backpacks are left). This parameter improves efficiency if there are a lot of NPCs Wear items – It’s a list of NPCs’ clothes and armor Belt items – It’s a list of weapons and items NPCs’ fast slots. Medical syringes are used for healing. If you give grenades to an NPC, he will use them. Smoke grenades are used for creating smoke screens (if you don’t need them, you should remove them from your inventory). If you give a Rocket Launcher to an NPC, he will raid the target’s building (if the target is inside it) Kits – It gives a pack of Kits plugin. If you don’t need this parameter, you should leave this blank. I recommend using the previous 2 points to configure NPC items A description of the Rust loot table settings Minimum numbers of prefabs –It’s the minimum numbers of prefabs that are needed to appear in the NPC loot table Maximum numbers of prefabs –It’s the maximum numbers of prefabs that are needed to appear in the NPC loot table Use minimum and maximum values? [true/false] – this parameter specifies whether to use the minimum and maximum numbers to limit the number of items List of prefabs – It’s a list of prefabs that need to add in the loot table. It is necessary to indicate the full path to the prefab and the probability of falling out this prefab A description of the own loot table settings Minimum numbers of items – It’s the minimum number of items Maximum numbers of items – It’s the maximum number of items Use minimum and maximum values? [true/false] – this parameter specifies whether to use the minimum and maximum numbers to limit the number of items List of items – It’s a total list of all items that can fall out in the NPC loot table. You can specify any standard items, their blueprints and any skinned or custom items The commands in the chat (for admins only) /SpawnPointPos {name} – To show the local admin’s position coordinates relative to the place where the NPC {name} appears /SpawnPointAdd {name} – To create the NPC appearance point {name} in the Admin’s custom coordinates. A file with this name will be created in the folder Custom and you can configure it as you need /SpawnPointAddPos {number} {name} – To write the local admin’s coordinate into the preset with the positional number {number} (starting from 1) to the place where the NPC {name} appears /SpawnPointAddWear {number} {name} – To write all the admin’s dressed clothes into the preset with the positional number {number} (starting from 1) to the place where the NPC {name} appears /SpawnPointAddBelt {number} {name} – To write all the admins’ quick slots cells into a preset with the positional number {number} ( starting from 1) to the place where the NPC {name} appears /SpawnPointShowPos {number} {name} – To show to the Admin all the custom NPC appearance points in the preset with the positional number {number} ( starting from 1) in the place where the NPC {name} appears /SpawnPointReload {name} – Reload Spawn Point with the name {name} Console commands (RCON only) ShowAllNpc – Shows the number of all NPCs of the BetterNpc plugin on your server Hooks object CanAirDropSpawnNpc(SupplyDrop supplyDrop) – It is called before an NPC appearance to guard an AirDrop. The returning of a non-zero value stops an NPC appearance object CanCh47SpawnNpc(HackableLockedCrate crate) – It is called before an NPC appearance to guard a locked chinook crate. The returning of a non-zero value stops an NPC appearance object CanBradleySpawnNpc(BradleyAPC bradley) – It is called before an NPC appearance to guard the boxes from crushed Bradley. The returning of a non-zero value stops an NPC appearance object CanHelicopterSpawnNpc(BaseHelicopter helicopter) – It is called before an NPC appearance to guard the crates from crushed patrol helicopter. The returning of a non-zero value stops an NPC appearance API void DestroyController(string name) – It destroys the place of appearance NPC with the name {name} void CreateController(string name) – It creates the place of appearance NPC with the name {name} These APIs can be used with standard monuments, custom monuments (NPC locations) and roads. The name of this monument is in standard monuments {name}. It is the name of the file in the Custom and Road folder in custom monuments and roads My Discord: KpucTaJl#8923 Join the Mad Mappers Discord here! Check out more of my work here! Creator of the default configuration – jtedal$31.00 -
Version 1.0.4
189 downloads
I introduce to you a brand new plugin to make custom and configurable use of the new addition of parachutes to the game of Rust! This plugin will add the ability for players on your server to use a Paraplane! Paragliders have the ability to gain altitude with the help of an engine on the player's back, as well as gain more speed in comparison with a parachute. You can create a great number of paraglider presets that can differ in HP, Speed, Drag, Fuel Consumption, and more! This plugin will give you the opportunity to create countless presets, your imagination is one of the only limitations! You can create parachute presets without an engine, where you can also configure and customize the default and additional parachutes that can appear in your loot tables. Paraplanes and Custom Parachutes can be given to yourself or players with the use of commands, or you can add them to any of your existing loot tables! The plugin comes with configuration options to place them in whatever loot tables you decide. Paraglider control The control of the paraglider completely coincides with the control of the parachute. To climb, hold down the [S] key and the engine key [SHIFT]. By default, to turn on the engine, the player needs to have fuel in the inventory. Chat commands (only for administrators) - /giveparaplane <paraplanePresetName> Console commands (RCON only) - giveparaplane <paraplanePresetName> <userid> <amount> Config - plugin_en – example of plugin configuration in English - plugin_ru – example of plugin configuration in Russian My Discord: Adem#9554 Join the Mad Mappers Discord here! Check out more of my work here!$14.99- 15 comments
- 3 reviews
-
- 3
-
-
-
- #parachute
- #vehicle
- (and 10 more)
-
-min.thumb.png.3e42e99afda25d83aa26d9af0644acba.png)
Version 1.0.4
705 downloads
I bring to you a new plugin that will add Pogo Sticks to your server! These Pogo Sticks will allow players to jump, somersault, and parkour in ways never seen before in the game. With default configuration, Pogo Sticks don't do as well on sand and snow, for obvious reasons right? But don't worry you can configure any of the pogo presets, such as the speed and height of jump for example. The Pogo Stick is an ordinary worn item with a skinID that can be given to the player by console command, or any of the other unique ways you might want to give them out in your servers. There are two activation modes for Pogo Sticks. With default configuration, the player has to put the item in a belt container. In this mode, the Pogo Stick is only used when it is selected as an active item. In the second mode, the Pogo Stick is activated when it is added to a clothing/armor container. In order to use the second mode, replace the shortnames of all Pogo Sticks with a clothing item. As an example "burlap.gloves.new" to replace a less noticable part of your wardrobe. In this second mode, players will be able to shoot and use items while on the Pogo Stick! The creativity is in your hands, have fun with it! Chat commands (only for administrators) /givepogo <pogoPresetName> - give the pogo stick to yourself Console commands (RCON only) givepogo <userID> <pogoPresetName> <amount> – give the pogo stick to player. Config plugin_en – example of plugin configuration in English plugin_ru – example of plugin configuration in Russian Dependencies (optional, not required) GUI Announcements Notify ZoneManager My Discord: Adem#9554 Join the Mad Mappers Discord here! Check out more of my work here!$9.99 -
Version 1.1.9
1,422 downloads
Take your players to new heights in the game of Rust, and get a few laughs watching people try to fly one for the first time! Introducing Jetpack! A plugin that allows your players to soar around like never before in the game of Rust. Grab this plugin and give your players something to talk about! Many functions have already been implemented like the ability to shoot while piloting a jetpack, and the plugin will continue to expand and grow with the community. You'll find the configuration covers almost anything you can think of, and you'll see a breakdown of the configuration file in the description below. By default you can simply press the middle mouse wheel to equip and remove the jetpack quickly, you can't run around once you've equipped it. You can customize loot crates the jetpack might appear in, and all of the stats from thrust to rotation and all of the other controls. Be sure to check the permission section and feel free to use the command creatively to give jetpacks as an award for completing other tasks on your server using the commands provided. Make sure you have some lowgrade handy, let's take to the skies! Сontrols Space bar - thrust W/S keys - pitch axis A/D keys - yaw axis Chat commands (check config for permissions) /jet - toggle jetpack on & off /givejetpack - give a jetpack to yourself Console commands (admin only) givejetpack - give a jetpack to yourself givejetpack SteamID - give a jetpack to player using their SteamID Plugin config en – example of plugin configuration in English ru – example of plugin configuration in Russian Check out the rest of my work: Adem's Codefling Library You can reach out to me in Discord: Adem's Discord Profile Thanks to Jbird for writing, translation, & support: Jbird's Discord Profile Join the Mad Mappers Discord!$19.99 -
.thumb.jpg.5f6a451303fd06910d93a91cc28828d2.jpg)
Version 1.1.9
959 downloads
Let your players use cars in a new way! The plugin will allow cars to float, driving underwater, use jet propulsion and become a mobile turret. You can configure any number of different modules. They can combine many functions, for example, a turret can be installed on a floating or underwater module. Modules are custom items that can be added to kits or loot tables of crates, sold in a server store, or may randomly appear on modular cars. Types of modules Buoyancy module. Adds a buoyancy point to the car. The modules should be placed symmetrically or in the center of the machine in order to allow it to float well. For this module, the buoyancy force, the turning speed and the speed of movement on the water can be configured. Turret module. The module works only if there is a driver in the cabin. It can contain any number of turrets. If the car is closed, then other players will not be able to authorize in its turrets. Jet module When the shift button is pressed, the car accelerates with the help of jet propulsion. For each module of this type, the thrust force and additional fuel consumption can be configured. Any number of fire rocket launchers can be placed on the module. Remote control module A camera is installed in this module, for which you can change the frequency. Knowing the frequency, you can connect to the car using a computer station and control it. Underwater module Allows the car to move underwater. Chat commands (For administrators!) /givemodule <Custom item shortname> – give the item to yourself. /customcarspawnpoint – adds a custom spawn point of a random custom car to the monument or to the map if the point is outside the monument /customcarspawnpoint <Custom car preset name> – adds a custom spawn point of <Custom car preset name> to the monument or to the map if the point is outside the monument Console commands (RCON) givemodule <userId> <Custom item shortname> <amount> – give the item to player. Config en – example of plugin configuration in English ru – example of plugin configuration in Russian$19.99- 15 comments
- 5 reviews
-
- 12
-
-
-
- #adem
- #autoturret
- (and 18 more)
-
Version 1.1.5
1,135 downloads
This plugin will allow players to visit the depths of the ocean to discover 3 new locations included in this plugin: a Sunken Cargo Ship, Submerged Ore Farm, and a Shipwrecked Barge. In the wreckage you will find a high concentration of loot. Just be careful! The COBALT group has already arrived and is exploring the site. They have submarines and divers already in the water! Patrol Submarines Subs do a LOT of damage, but they have low visibility and low accuracy. Very unreliable at Titanic depths. Subs are a serious threat if you arrive in a submarine yourself. Try to sneak up behind them and destroy them, you don't want to be the one to sink, trust me! Cobalt NPC Divers High accuracy, but not much armor and don't pack a huge punch. Almost harmless if you arrive in a submarine, but they are still a threat! Keep your eyes on these guys, it might just be you or them! Killer Sharks These sharks have smelled all the blood in the water, after being drawn to the area already by all of the disturbance. They are here, they are mad, and they are bloodthirsty and hungry! The plugin includes 3 locations: Shipwrecked Cargo Ship There are three rooms in the Sunken Cargo Ship location that are opened with a keycard. The map type can be selected within the configuration file. Sunken Barge A great place to find some Shipping Containers, as well as Killer Sharks! The Cobalt group has been busy in this area, they must have taken this Barge down recently as well. Submerged Ore Farm An ore rich location with multiple farmable ore nodes, as well as some other scattered loot including fuel barrels. Chat commands (only for administrators) /shipwreckstart – launches the event in a random configuration /shipwreckstart <shipwreckstart> – launches the event in the <eventPresetName> configuration /shipwreckstartmyloc – launches the event in a random configuration in your location /shipwreckstartmyloc<shipwreckstart> – launches the event in the <eventPresetName> configuration in your location /shipwreckstop – stops the event /screatepath– starts recording the route for the npc/shark/sub /ssavepath <npc/shark/subPresetName> – saves route for npcs/sharks/sub /scancelpath – cancels route recording Console commands (RCON only) shipwreckstart – launches the event in a random configuration shipwreckstart <shipwreckstart> – launches the event in the <eventPresetName> configuration shipwreckstop – stops the event Config plugin_en – example of plugin configuration in English location_en – example of location configuration in English plugin_ru – example of plugin configuration in Russian location_ru – example of location configuration in Russian Dependencies (optional, not required) True PVE PveMode GUI Announcements Notify DiscordMessages AlphaLoot CustomLoot Economics Server Rewards IQEconomic Hooks void OnShipwreckStart() void OnShipwreckStop() My Discord: adem9554 Join the Mad Mappers Discord here! Check out more of my work here!$34.99 -
Version 2.4.9
11,426 downloads
Set your server apart with a roaming mobile event that has nearly endless configuration options! Configure the loot truck as well as the Convoy of protection vehicles ranging from sedans, module cars, Bradley tanks, to a patrol helicopter! The plugin runs on custom and procedural generated maps, can use custom routes or let the plugin find a random route based on your configuration. You can make yours an aggressive or a peaceful Convoy, who shoots first? You can set all kinds of parameters regarding the many pieces of the event, how to beat it, whether destroying the loot truck destroys the loot or not for example. There are many compatible plugins like TruePVE, GUIAnnouncements, Notify, DiscordMessages, and RustCord to name a few. The plugin has a built in UI that will give you important information about the event as you are inside it's zone. Check the map to see the location of the event as a marker and even see the timer on the event! All of the ground vehicles are driven and filled with NPCs. Every vehicle, the NPCs, and the loot as well as all timers can be configured to suit your server. A PvP zone can be created within the event area for those of you who use TruePVE to control damage on your servers. The limits are nearly endless! If you have some players on your server that you want to really send everything you have at, this is the plugin for you. Watch players crap their pants when they first encounter a full Convoy with multiple tanks and a Patrol Heli all attacking at once. Sit back and delight in their fear as all of the vehicles empty their occupants and NPCs swarm them mercilessly! Required Dependency (must install this free plugin) NpcSpawn – link is included and can be found in the ReadMe file included with download Optional Dependency (add on of additional features in this paid plugin) PveMode – plugin by KpucTaJl that adds additional control of the event including locking aspects of event to one player or team Chat commands (admin only) /convoystart - launches the event using a random preset based on your configuration /convoystart PresetName - add the name of a preset from the configuration to launch a specific preset /convoystop - stops the event /convoyroadblock - the event will not be held on the road where you are standing (clear the Blocked roads section of config when you change maps) /convoyrootstart - stand at starting point and enter command to start recording a custom route /convoyrootsave RoutePresetName - to save a custom route (enter anything you'd like in place of RoutePresetName) multiple routes can be added to one route preset, one will be selected at random in this case /convoyrootstop - to reset the route Console commands (RCON only) convoystart - launches the event using a random preset based on your configuration convoystart PresetName - add the name of a preset from the configuration to launch a specific preset convoystop - stops the event Plugin Config en – example of plugin configuration in English ru – example of plugin configuration in Russian API bool IsConvoyVehicle(BaseEntity entity) bool IsConvoyCrate(HackableLockedCrate crate) bool IsConvoyHeli(BaseHelicopter baseHelicopter) Hooks OnConvoyStart - сalled when a convoy appears OnConvoyStop - сalled when a convoy disappears OnConvoyStartMoving(Vector 3 convoyPosition) OnConvoyStopMoving(Vector 3 convoyPosition) Check out the rest of my work: Adem's Codefling Library You can reach out to me in Discord: Adem's Discord Profile Thanks to Jbird for writing, translation, & support: Jbird's Discord Profile Join the Mad Mappers Discord!$35.00 -
Version 1.3.5
2,327 downloads
The plugin allows players to visit a cold atmospheric Space void of gravity and oxygen, and visit an International Space Station! A Space Station appears high in the sky, and is surrounded by Meteorites, Spaceships, and Balloons. There is no gravity in Space, the temperature is very low and there is no oxygen. You can get to Space by a Spaceship or by a Balloon which also spawn near roads or in loot tables. The Space Station is guarded by customizable NPCs and a Space Bradley. Outer Space Meteorites, Crates, NPCs, Balloons and Spaceships will spawn in Outer Space near the Space Station, the number of each can be configured and customized. In order to survive in Outer Space, the player will need a Spacesuit. A Spacesuit can be customized to be any piece of clothing. In the config you can customize items that will perform the functions of the Spacesuit in whole or in part. To make space dark for players at any time of the day, use the NightVision plugin Space Station The Space Station consists of several compartments that are separated from each other by doors. Optionally, the doors can be locked and they will need to be raided. Inside the station there are crates with loot, NPCs, turrets, and fire turrets. At the end of the corridor there are two doors that open with blue cards and one door that opens with red. The spawn of the space station can be disabled. All objects on the space station are configured in the Data file of this station Spaceship The plugin includes spaceships that can spawn near roads, in Space, or can be added to loot tables. The ship has separate settings for flying in the normal atmosphere and in zero gravity in Space. It can shoot torpedoes, which will help the player in capturing the space station. There are two seats in each spaceship. Shuttle Control Guide: Balloon A balloon is an ordinary balloon with which you can ride into outer space. The balloon can spawn near roads, in Space, or can be added to loot tables. Also, this function can be applied to all balloons on the server. If the balloon is in zero gravity, it can be used as an escape capsule! If necessary, the player can enter, press a button, and be taken out of Space into the normal atmosphere. Dependencies Required NpcSpawn Chat commands (only for administrators) /spacestart – launches the event in a random configuration /spacestart <eventPresetName> – launches the event in the <eventPresetName> configuration /spacestop – stops the event /spawnshuttle – spawn the shuttle in your position /spawnaerostat – spawn the aerostat in your position /spacepoint – creates a custom spawn point of the event in your position (after that, you need to enable custom spawn points in the config) Console commands (RCON only) spacestart – launches the event in a random configuration spacestart <eventPresetName> – launches the event in the <eventPresetName> configuration spacestop – stops the event givepurplecard <userId> <amount> – gives a space card to a player giveshuttle <userId> <amount> – gives a shuttle to a player giveaerostat <userId> <amount> – gives a shuttle to a player givespacesuit <space_suit_preset> <userId> <amount> – gives <space_suit_preset> to a player Config plugin_en – example of plugin configuration in English station_en – example of station configuration in English plugin_ru – example of plugin configuration in Russian station_ru – example of station configuration in Russian Dependencies (optional, not required) True PVE PveMode GUI Announcements Notify DiscordMessages AlphaLoot CustomLoot Economics Server Rewards IQEconomic Hooks void OnSpaceEventStop() void OnSpaceEventStart() API bool IsPositionInSpace(Vector3 position) float GetMinSpaceAltitude() bool IsEventActive() My Discord: adem9554 Join the Mad Mappers Discord here! Check out more of my work here!$49.99 -
Version 1.0.8
487 downloads
This plugin will add Caravans to your server that will attempt to transport valuable loot along the roads. Carriages are used to transport goods along the roads as configured, pulled by Horses. These convoys are accompanied by NPCs, Riders, and Balloons! By default, the plugin comes with 3 different caravan presets. The easiest caravan will be fun for early wipe and allows some basic loot for low effort Caravan raids. In order to rob the most difficult caravan, players will need to be tactical about their ambush and it will be much more challenging! The road selection system can make the Caravan less predictable as the NPCs try to find a safe route. The Caravan can traverse any road type, including good old country dirty roads. You can set up timers for each preset in the config file, to keep the more difficult Caravan from showing up until later in a wipe! Riders These can be very dangerous opponents! Unlike regular NPCs, they will quickly close the gap continually shooting at the players as they ride! Riders can be especially effective using short ranged weapons, they are deadly with a shotgun! Balloons These are mobile sniper towers on which several NPCs can be placed. In the config, armor can be added to the balloon, greatly increasing the protection for the Caravan snipers.When the caravan stops, Balloons will start moving around randomly, making it more difficult for players to hide! After defeating all of the snipers, Balloons will fall to the ground and explode. Required Dependency (must install this free plugin) NpcSpawn – link is included and can be found in the ReadMe file included with download Chat commands (admin only) /caravanstart - launches the event using a random preset based on your configuration /caravanstart PresetName - add the name of a preset from the configuration to launch a specific preset /caravanstop - stops the event /caravanroadblock - the event will not be held on the road where you are standing (clear the Blocked roads section of config when you change maps) /caravanpathstart - stand at starting point and enter command to start recording a custom route /caravanpathsave RoutePresetName - to save a custom route (enter anything you'd like in place of RoutePresetName) /caravanpathcancel - to reset the route Console commands (RCON only) caravanstart - launches the event using a random preset based on your configuration caravanstart PresetName - add the name of a preset from the configuration to launch a specific preset caravanstop - stops the event Plugin Config en – example of plugin configuration in English ru – example of plugin configuration in Russian Hooks void OnCaravanStart() - сalled when a caravan appears void OnCaravanStop() - сalled when a caravan disappears void OnCaravanEventWin(ulong userId) Check out the rest of my work: Adem's Codefling Library You can reach out to me in Discord: Adem's Discord Profile Thanks to Jbird for writing, translation, & support: Jbird's Discord Profile Join the Mad Mappers Discord!$29.99 -
-min.thumb.png.6de721e40451a11431a17c6abc3c6c05.png)
Version 1.1.4
797 downloads
Allow players to place ziplines! The plugin will add various types of ziplines to your server, for each of which you can adjust the speed, the maximum distance between points, the color of the cable and even the ability to go up! Just install two fasteners and they are automatically connected by a cable. To start moving, look at the rack and press E. f there is an obstacle on the way, the player will fall. The cable can be of various colors: red, black, blue, yellow or green! You can configure the spawn of different presets of ziplines in different crates or add items from the config to your server store! Permissions pocketzipline.give - allows you to give a zipline to yourself and other players Chat commands /givezipline <ZiplinePresetName> <amount> - give a zipline to yourself. Console commands givezipline <ZiplinePresetName> <amount> - give a zipline to yourself; givezipline <ZiplinePresetName> <amount> <userId> - give a zipline to player (Suitable for RCON); Config en - example of plugin configuration in English ru - example of plugin configuration in Russian$14.99 -
.thumb.png.913d4ec299161acf94081154072ade61.png)
Version 1.6.2
8,035 downloads
The New Year is coming and I have prepared for you a new preset customization for the train!After installing the update, customization will be automatically applied to all cars in the configuration of the armored train. To disable this, make the "Customization preset" parameter empty in the config. You can also disable the customization of certain wagons or change the customization of the NPCs in the file oxide/data/ArmoredTrain/NewYear New Year's map from the video: This plugin will add an armored train to your server, which can travel both in the subway and by rail. It can consist of any number of wagons. A helicopter can accompany it. Bradley, npc, turrets, simsites can be installed on the train. The plugin allows you to create any number of train presets, for which the order of wagons, the helicopter preset, the probability of spawn and the duration of patrolling can be specified. Each wagon or locomotive can be configured separately. Any speed can be set by the locomotive.If there is no spawn of trains on the surface on your custom map, read the section “Custom spawn points” Caboose By default, one of the presets of the train is a locomotive and a caboose. This train does not attack players first and there is no loot on it. It is intended only for players to travel around the map. You can add a caboose wagon to any other train, or create your own galley train with any number and any set of wagons. Halloween Update Have you already prepared your server for Halloween? On the eve of the Halloween Rust update, I have prepared for customization of all armored train cars. After installing the update, customization will be automatically applied to all cars in the configuration of the armored train. To disable this, make the "Customization preset" parameter empty in the config. Custom spawn points If you are using a custom map in which there are no spawn trains on the surface, but there is a railway, then for the train to work on the surface, you need to add custom spawn points of the train. Instruction: Stand at the point where you want the train to spawn Enter the command /atrainpoint If you receive a message that a point has been created, enable “Use custom spawn coordinates [true/false]” in config For correct operation, it is recommended to create several spawn points of the train Chat commands (only for administrators) /atrainstart– launches the event in a random configuration /atrainstartunderground - forcibly launches an event underground /atrainstartaboveground - forcibly launches an event aboveground /atrainstart <trainPresetName> – launches the event in the <trainPresetName> configuration /atrainstartunderground <trainPresetName> /atrainstartaboveground <trainPresetName> /atrainstop– stops the event /atrainpoint– creates a custom spawn point of the train in your position Console commands (RCON only) atrainstart– launches the event in a random configuration atrainstartunderground - forcibly launches an event underground atrainstartaboveground - forcibly launches an event aboveground atrainstart <trainPresetName> – launches the event in the <trainPresetName> configuration atrainstartunderground <trainPresetName> atrainstartaboveground <trainPresetName> atrainstop – stops the event Config en – example of plugin configuration in English ru – example of plugin configuration in Russian Dependencies (optional, not required) True PVE PveMode GUI Announcements Notify DiscordMessages AlphaLoot CustomLoot Economics Server Rewards IQEconomic Api bool IsArmoredTrainActive() bool StopArmoredTrain() bool StartArmoredTrainEvent() bool EndArmoredTrainEvent() bool IsTrainBradley(uint netID) bool IsTrainHeli(uint netID) bool IsTrainCrate(uint netID) bool IsTrainSamSite(uint netID) bool IsTrainWagon(uint netID) bool IsTrainTurret(uint netID) Vector3 ArmoredTrainLocomotivePosition() Hooks OnArmoredTrainEventStart OnArmoredTrainEventStop Contact me in Discord: Adem#955$29.99 -
Version 1.4.2
5,120 downloads
Sputnik is a server event that allows players to contest fallen sputnik satellite fragments that fall around the map. Players will need to battle their way past patrol helicopters, NPCs, turrets, and mines to gain access to loot locked behind keycards that require 'Space Cards,' which can be added to loot tables or sold in a shop! Alternatively, you can use standard keycards. Overview By default, there are five types of debris that can fall in any quantity and combination. The fragment can be guarded by a helicopter, NPCs, turrets, and mines. For each preset, you can configure the location and number of crates. A radiation zone can be created around the fragment. By default, there is a card reader in one of the locations that open a locked crate. It is activated using the “Space card.” For more information, see the “Space card” section. Space Card A card reader can be placed on any type of sputnik debris. By default, it is activated using a purple "Space Card." This card reader opens the crates specified in a special section of the config. A custom card can be added to the loot tables of standard crates and crates of this event. It can also be given with the help of a command or sold in the server store. If necessary, the card reader can be removed, and the card can be replaced with any type of standard card. Location presets The location preset is specified for each wreckage preset separately. By default, a data file with five types of prefabs is included: sputnik_1 debris_1 debris_2 debris_3 debris_4 They are shown in pictures 6 - 10. The first location includes a locked crate that opens with the help of a "Space Map." Chat commands (only for administrators) /sputnikstart– launches the event in a random configuration /sputnikstart <eventPresetName> – launches the event in the <eventPresetName> configuration /sputnikstop – stops the event /givespacecard – give yourself a "Space Card". Console commands (RCON only) sputnikstart– launches the event in a random configuration sputnikstart <eventPresetName> – launches the event in the <eventPresetName> configuration givespacecard <userID> – give a "Space Card" to player Config en – example of plugin configuration in English ru – example of plugin configuration in Russian Dependencies (optional, not required) True PVE PveMode GUI Announcements Notify DiscordMessages AlphaLoot CustomLoot Economics Server Rewards IQEconomic Hooks OnSputnikEventStart () OnSputnikEventStop () OnSputnikEventWin (ulong userID) My Discord: Adem#9554 Join the Mad Mappers Discord here! Check out more of my work here!$29.99 -
Version 1.4.5
975 downloads
Skin Controller is meant to bring together a ton of skinning options for your player all in one place! Easy for the player, easy for the server owner. FEATURES - Supports backpacks - Saving of outfits (A list of skins for doors, weapons, clothing, etc*) - Add infinite items in an outfit - Skin stacks of items - Skin your whole inventory with one click - Skin items in containers that you're looking at with one command - Skin all the deployed items in your base with one command - Search items in the skin list to easily find the skin you're looking for - Auto skin items when crafted and picked up - Auto imports all accepted workshop skins - Manual imports of non-accepted workshop skins and collections - Infinite outfit saves, you can limit the amount of outfit saves someone has via perms. - Server owners can toggle whether they want players to be able to skin items on pickup and craft - If server owners allow skinning on craft and pickup, players can toggle that on and off for themselves - Set your own custom commands for all available types of commands - Blacklist skins COMMANDS /skin or /sb (Configurable) - Opens the skin menu /skinc (Configurable) - Skins the items in the container that you're looking at /skinbase (Configurable) - Skins all the deployed items in your base /skinitem (Configurable) - Skins the item you're looking at /addskin - Command for admins to add workshop skins to the skinbox /addcollection - Command for admins to add collections of workshop skins to the skinbox PERMISSIONS skincontroller.addskins skincontroller.use skincontroller.skinoncraft skincontroller.skinonpickup skincontroller.skinbase skincontroller.skinitem skincontroller.skincontainer To set the amount of outfits someone can save, go into the config, there will be a setting where you can set custom permission and how many outfits each outfit can save Need support or want updates about what is coming to the plugin? Join the support discord here https://discord.gg/RVePam7pd7$39.99 -
Version 1.2.6
9,649 downloads
Spawns set numbers of customised npcs at monuments, various events, supply drops, biomes, custom locations, and 'toplayer'. Plugin Description. Highly customisable and intuitive npc plugin, setup almost exclusively in UI. See images for an overview of the available options globally, and per npc profile. Every option in the UI is clickable, showing a detailed description of its use. Optional dependencies - Kits (free at uMod.org) CustomLoot Permissions. botrespawn.allowed - Required for non-admin use Chat commands. /botrespawn - Opens UI. /botrespawn add *profilename* - Adds a custom profile then opens UI. (please don't use spaces or hyphens) /botrespawn remove *profilename* - Removes a custom profile. /botrespawn info - Tells you about the npc you're looking at. Console commands. bot.count - Gives total number of spawned npcs. bots.count - Gives a breakdown of spawned npcs per profile. botrespawn toplayer NameOrId ProfileName amount(optional) botrespawn enable/disable "Profile name here" botrespawn tempspawn "Profile name here" - Spawns npcs from a profile at random points around that profile's location addspawn - Enabled via UI, in Edit Spawnpoints menu - for keybinding. botrespawn showspawns - Added for binding convenience. botrespawn checknav - Added for binding convenience. * Note = addspawn and showspawns commands require the user to select "Edit with console commands" first, from a profile's spawnpoints menu. Default locations. All major monuments are automatically included, plus profiles for the four biomes. The following events also have default profiles Airdrop (supply grenade optional) Locked Crate Spawn Locked Crate Hack Start APC Kill PatrolHeli Kill CH47 Kill Configurable via json, per profile. BotNames BotNamePrefix Announcement_Text Instant_Death_From_Headshot_Allowed_Weapons (accepts item shortnames) See note at end for weapon list formatting. Everything else is configurable via UI - All options have a description in UI, accessible by clicking the name/label. Kits. Kits are managed, per profile, in UI. As with BotSpawn, kit probability can be balanced by assigning a number to a kit. When selecting multiple kits, increasing a kit's number increases its chances of being picked. Only kits with weapons in the belt are shown in UI. Please stick to normal bullet weapons and melee weapons for now, with your npcs. There are plans to support the more unusual weapons in future. Spawnpoints. Adding and managing spawnpoints is done, per profile, in UI, or by enabling 'add by command' in spawnpoints menu, then using 'addspawn' console command. You can bind this command for your convenience. When opting to use the 'addspawn' command, a button will show in UI main page, allowing you to quickly return to the profile you were editing. A new feature is that each spawn point can have overrides, forcing that specific npc to have different values to the rest of the profile's npcs. At present you can override Stationary Kits Health RoamRange If you choose to use Parent_Monument, you can select it via UI, but do so before you add custom spawn points (if applicable). Parent_Monument ensures that your profile and its spawn points will relocate after a map change, so that they are in the same place, relative to that chosen monument. If a profile uses custom spawn points, but does not have enough custom spawn points to cover the whole population, it will spawn randomly placed npcs to make up the numbers, in accordance with the profile "Radius" setting. EG : Day_Time_Spawn_Amount 10 Number of custom spawn points 5 Result : 5 npcs on custom spawn points, and 5 randomly placed around the area, within the specified radius. Murderer Murderer true/false is no longer an option. Instead, the AI will respond differently based on the weapons you give it. If you want the AI to run directly at victims and attack, give it melee weapons only. I believe you can still make murderer-style kits, although you also have Frankenstein clothing options built into the the UI options now. Peacekeeper Peacekeeper is now based on whether or not players are marked hostile. An additional option 'Peacekeeper_Uses_Damage' restores the old behaviour, where peacekeeper npcs will completely ignore players until attacked by them. Configuration. "DataPrefix": "default", (tells BotReSpawn which data files to load), "UseServerTime": Uses server IsNight check, instead of manual day/hour settings, "Show_Profiles_Seconds": 10, "DayStartHour": 8, "NightStartHour": 20, "SuicideBoom": true, (toggles explosion sound for suicide npcs), "APC_Safe": true, "Turret_Safe": true, "Animal_Safe": true, "Supply_Enabled": false, (spawn 'airdrop' bots for user-called supplys), "Ignore_Skinned_Supply_Grenades": true, "Remove_BackPacks_Percent": 100 is always : 0 is never, "Remove_KeyCard": true, (any keycards in bot default loot will be destroyed), "Remove_Frankenstein_Parts": true, (any frankenstein parts in bot default loot will be destroyed), "Ignore_Sleepers": true/false, "Pve_Safe": true, (bots will not be injured by fire/barbs, etc.), "Max_Chute_Fall_Speed": 100, "Staggered_Despawn": false, "Disable_Non_Parented_Custom_Profiles_After_Wipe": false "Announce_Toplayer": false "RustRewards_Whole_Numbers": true "XPerience_Whole_Numbers: true "NPCs_Damage_Armour": true "Limit_ShortRange_Weapon_Use": false "Allow_Ai_Dormant": false "Prevent_Biome_Ai_Dormant": false "Scale_Meds_To_Health": false (increases npc heal amount relative to npc's max health. "Ignore_Factions": false - Makes all profiles fight all profiles if true. "Reduce_Damage_Over_Distance: false "Deaggro_Memory_Duration: 20 - Number of seconds it takes an npc to forget you outside deaggro range/line of sight. "Ignore_HackableCrates_With_OwnerID" - Makes hackable crate profiles only respond to crates with OwnerID 0 (server spawned) "NPCs_Assist_NPCs" - true/false. When a botrespawn npc is attacked, nearby botrespawn npcs will also respond and defend. "Enable_Targeting_Hook": false "Allow_AlphaLoot": true Can be used to prevent AlphaLoot from giving loot to BotReSpawn npcs. "Parachute_From_Height": 200 "Smooth_Damage_Scale": false "Allow_Oilrigs": false - NPCs here must be custom spawn point and stationary true. These values are adjustable and described in detail in in-game UI, with the exception of DataPrefix. Profile values. Each profile value and description is not listed here, but all (apart from text strings) are now configurable via UI, and have sensible default values. Every option has a full in-game description, accessible by clicking an option's name/label. If any specific setting/value is unclear, please just ask in CF discord, my discord, or the support section here. Notes : Durations which used to be in seconds are now in minutes. "Type" is an internal use variable - Users should not change this option. Profile copy/paste does not include location, Parent_Monument, or custom spawnpoints. BotNames, and Headshot weapons should be formatted as follows: ["name1"], for single or ["name1", "name2", "name3"], for many. ["rifle.lr300"], for single or [ "rifle.lr300", "pistol.m92" ], for many. Faction and Subfaction of 0 means this profile will not fight any other, and will not be attacked by any other. Faction and Subfaction settings greater than 1 are used for configuring which profiles should be allies / enemies. API : string[] AddGroupSpawn(Vector3 location, string profileName, string group, int quantity) string[] RemoveGroupSpawn(string group) string NPCProfile(NPCPlayer npc) (returns "No Name" for non BotReSpawn npcs) object OnBotReSpawnNPCTarget(ScientistNPC npc, BasePlayer player) void OnBotReSpawnNPCSpawned(ScientistNPC npc, string profilename, string group) void OnBotReSpawnNPCKilled(ScientistNPC npc, string profilename, string group, HitInfo info) bool IsBotReSpawn(NPCPlayer npc) bool IsBotReSpawn(ulong id) For preventing BotReSpawn npc spawns for event profiles. object OnBotReSpawnCrateDropped(HackableLockedCrate crate) object OnBotReSpawnCrateHackBegin(HackableLockedCrate crate) object OnBotReSpawnAPCKill(BradleyAPC apc) object OnBotReSpawnPatrolHeliKill(PatrolHelicopterAI heli) object OnBotReSpawnCH47Kill(CH47HelicopterAIController ch) object OnBotReSpawnAirdrop(SupplyDrop drop) Example usage. [PluginReference] private Plugin BotReSpawn; Vector3 location = new Vector3(0,0,0); string[] Spawn = BotReSpawn?.Call("AddGroupSpawn", location, "The Dome 0", "MadeUpNameHere", 5) as string[]; Puts($"{Spawn[0]}"); Puts($"{Spawn[1]}"); Passing 0 for quantity will spawn the appropriate amount of npcs for the time of day, according to the profile. Method call OnBotReSpawnNPCSpawned(ScientistNPC npc, string profile, string group, notifies of spawned npcs. Example. void OnBotReSpawnNPCSpawned(ScientistNPC npc, string profile, string group) { if (String.IsNullOrEmpty(group)) Puts($"BotReSpawn spawned an npc from profile {profile}"); else Puts($"BotReSpawn spawned an npc from profile {profile} - API group name {group}"); } FAQ. Q: My npcs don't move and/or won't attack A: If you have any PVE plugins or settings please try disabling those temporarily to test. A: Make sure the server has the following settings. nav_wait true nav_disable false ai.think true A: If you use Rust Admin, please ensure that the animal AI option is enabled. A: If you have Vanish installed please try unloading it. If this worked, check you don't have the permission for permanent Vanish. Q: There's a million options. Where do I start? A: Open the UI with /botrespawn and set AutoSpawn to true for at least one monument, then click the button to reload that profile. A: Everything else is preference/user customisation. A: If the monument has a building/structure near the middle, like Dome, you may need to increase the spawn radius option to get going. Q: My bots won't die / my bots take damage when attacking people. A: Make sure Godmode permissions allow you to do damage. A: Same for vanish ^. A: Ensure you don't have a PVE plugin which is causing this damage behaviour. Q: I take damage when attacking my bots. A: This can also be caused by server, or plugin, PVE settings. Q: Will X kill my bots? A: Radiation, drowning, falling, and helicopters should not kill your bots. A: Turrets targeting bots can be toggled. Bradleys targeting bots can be toggled. A: Fire (campfires etc) will kill your bots. Damage from barbs, cacti etc will kill your bots, but can be prevented with the 'Pve_Safe' config option set to true. Q: What weapons can my bots use? A: As far as I know they should use all weapons except for throwable melee (eg. spears). A: Flamethrowers, nail guns, rocket launchers, bows, grenade launchers, etc were added in a recent update. A: Throwable explosives can be used as 'backup' weapons and are thrown when line-of-sight is temporarily broken. A: All npcs, even those with throwables, must have at least one valid held weapon to use. Q: Can I have custom profile locations? A: Yes. Your custom locations are stored in data with a filename of *YourPrefix*-CustomProfiles.json. Use chat command '/botrespawn add NewNameHere' to create a profile at your present location. A: Doing so will open the UI, at the page for your new profile's settings. Q: Can I spawn bots at events. A: Yes. There are event profiles for aidrop, hackable crate spawn and hack start, and the destruction of CH47, Patrol Heli, and APC. For the airdrop profile, spawn at user-supply call is an additional option, found in the global config. Q: Can I have specific custom spawn points? (underground, etc) A: Yes. Use the built in UI to create custom spawn points and set UseCustomSpawns to true, for some profile.. A: That BotReSpawn profile will now ignore radius settings and use the precise spawn points from your file. A: Event profiles which can occur underground should work automatically now (crate spawn/crate hack). A: Even if parachutes are enabled, these profiles should still work with underground-spawning npcs, if the event takes place under ground. Q: My bot kits aren't working. A: Kits which don't have a valid weapon in the belt will not be made available in the UI. A: Please redeem the kit yourself to an empty inventory, to ensure that the expected items are definitely in it. Q: How can I prove that bots have spawned? I can't find them. A: Type bot.count into console for a total number, or bots.count for a per-profile breakdown. A: Respawn timer is taken into account so if you spawn one and kill him, bot.count will show 0 until respawn. Q: bot.count console command shows that there are 0 bots. A: Double check that at least one monument is set "AutoSpawn": true in your config, and reload the plugin. A: Also, don't forget their respawn timer. If they're all dead when you do bot.count, it will show 0.$40.00 -
Version 1.0.5
257 downloads
Welcome to a new arctic event where players will need to brave the arctic biome to deal with packs of aggressive feral animals! Description The event begins with a chat warning explaining that scientists studying the arctic area of the island have been attacked by vicious animals and need to quickly be evacuated. Since leaving in such a hurry, they left their drilling rig behind, which extracts a lot of profitable resources, currently the location of the rig is not known. Players are able to find and use this rig, since it is left unguarded, but first they have to find it's location. The team left behind three signal receivers at different locations on the island. The player needs to scan each of them sequentially. This won't be as easy as it sounds, utilizing the signal receivers seems to be a big part of what is aggravating the packs of animals nearby that led to the attack. The animals seem so crazed by the signal receivers running that they will attack and try to destroy them when the players use them to triangulate the location of the drilling rig. Players should protect the receivers if they have any hopes to retrieve the location of the rig, they will need to use all three receivers to find it. The rig will need quite a few batteries to run, players should loot these after running each scan. To incentivize keeping these scanners running, loot is provided with each successful scan of the area. The more health each scanner has upon completing the scan the more batteries will be received as a reward. The more batteries are in the rig, the longer it will run and the richer the reward will be in the end. In the plugin configuration you can change almost anything you can think of, the loot in each location, the signal receivers and drillig rig parameters, timers, attack waves, animal configuration, and almost any customization you can think of will be found in the config file. Put on some warm clothing and head out to meet the new challenge! Dependencies Required AnimalSpawn Dependencies (optional, not required) TruePVE GUI Announcements Notify Discord Messages NTeleportation Economics Server Rewards IQEconomic XPerience Chat commands (only for administrators) /tstart - start the event /tstop - end the event Console commands (RCON only) tstart - start the event tstop - end the event Plugin Config en - example of plugin configuration in English ru - example of plugin configuration in Russian Hooks void OnTriangulationStart() – called when the event starts void OnTriangulationEnd() – called when the event ends void OnTriangulationWinner(ulong winnerId) – called at the end of the event, where the winnerId is the player who did more actions to complete the event void OnTriangulationReceiverSpawn(Vector3 pos, float radius) - called when the signal receiver spawn on the map void OnTriangulationDrillSpawn(Vector3 pos, float radius) - called when the drilling rig spawn on the map My Discord: kpuctajl Join the Mad Mappers Discord here! Check out more of my work here!$31.00- 15 comments
- 7 reviews
-
- 8
-
-
-
- #event
- #facepunch
- (and 17 more)