Search the Community
Showing results for tags 'gui'.
-

Version 2.0.9
71,013 downloads
Convenient GUI manager for player and group permissions. Allows assignment of player permissions. (online or sleeping) Allows assignment of group permissions. Allows one-click removal of all players from a group. (group page - "Remove All") Allows adding/removing a player from groups. Supports unlimited plugins/permissions/groups Up to 60 plugins per-page. Up to 40 permissions per-page. Up to 40 user groups per-page Allows for local and sql backup and recall of all permissions or groups. Permissions. permissionsmanager.allowed - Allows players to use GUI. Plugin can be used with this permission, or by any Admin : Auth Level 2. Chat commands. /perms data - Backup and restore permissions and/or groups - local data file and/or SQL. ** /perms OR /perms player - Opens GUI player list, allowing a player to be chosen. /perms group - Opens GUI group list, allowing a group to be chosen. /perms player <playername> - Opens permissions GUI for the specified player. /perms group <groupname> - Opens permissions GUI for the specified group. Console commands. EmptyGroup <groupname> - Removes all players from the specified group. Configuration. Global. Chat - Title colour Chat - Message colour GUI - Label colour GUI - On colour GUI - Off colour GUI - AllPerPage - Sets All/None option to per-page, or per plugin. Options - GUI Transparency 0-1 Options - Plugin BlockList - ex. "playerranks,botspawn" Block list must be lower case, comma separated, no spaces, and no final comma, as above. Useful tool for picking CUI colours - RGB Decimal - Take the RGB Normalized decimal output, and remove all commas. ** Please note that with data backups : SQL saving is accumulative - Saving adds current permissions/group data to whatever was already saved. Local data file saving is not accumulative. It overwrites any existing backup with the current server permissions/groups. FAQ. Q: I'm trying to revoke permission(Y) for a player, but it says "Inherited". A: The player is in a group(X) which is also granted permission(Y). Solution: Revoke permission (Y) from group(X) or remove the player from group(X). Q: I removed a player from group(X), but they still have permission(Y). A: This is the opposite of the above. This player must have been independently granted permission(Y) at some time. Solution: Revoke permission(Y) from the player.Free- 191 comments
- 34 reviews
-
- 38
-

-

-
- #permissions
- #admin
- (and 7 more)
-
Version 1.5.5
44 downloads
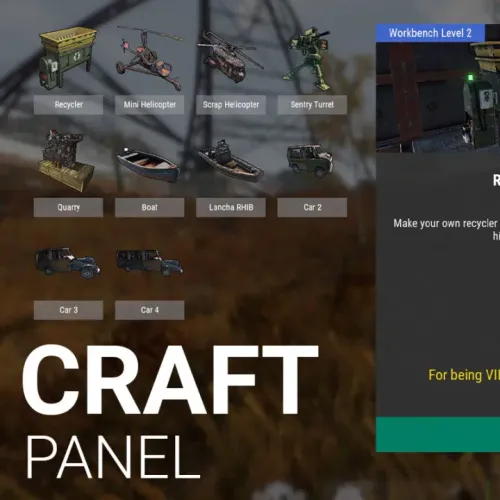
I present to you Craft Panel, an elegant and simple custom craft panel. Before starting: This mod works mainly with the help of other mods. Basically, the operation consists of configuring the necessary ingredients to obtain an item. Either by command of a third-party mod or a game item. Video The interface is based on three main blocks: List of items to craft. Currently, the maximum be recommended that it be 16 items available. Since there is currently no implemented page (it will come in the future). Central information panel. You can write a more complete title, assign a header image, set the Workbench requirement (whether it needs it or not), and set a description. Ingredients panel. Basically what players will need to craft each item. Complete Configuration: From the configuration, you can adjust the name of the Panel, as well as the colors of the buttons and text. Effect Sounds. We have 3 sounds for Crafting time, page change, etc. You can choose to disable all sounds or manually change it to another. Add new Items easily with the example structure, just duplicate and customize. (Requires a bit of knowledge in mod setup.) Discount for VIPS. Set a permission for VIPS to get a discount that you set. Permissions and Command: As a general rule, for players to have access to / craft, you must set the following permission: craftpanel.use Regardless of that general permission, you must assign the user permissions for each item. Example: craftpanel.rhib.use craftpanel.boat.use craftpanel.supercard.use ... Future improvements: Pagination of Items. (Ready) Make the interface modular, so that only one part is recharged. (Ready) Add Crafting time? Leave me your suggestion for improvement. Finally, as a detail, currently this mod does not use Data file, perhaps in the future with some new feature this will be implemented. Config Example: { "Custom": { "Title": "Craft Panel", "ID Item Default": 1, "Show even if you don't have permissions (you won't be able to craft)": true, "Show button when opening Workbench": true, "Sound Effects": true, "Sound Prefab 1": "assets/prefabs/tools/keycard/effects/swipe.prefab", "Sound Prefab 2": "assets/bundled/prefabs/fx/build/promote_toptier.prefab", "Sound Prefab 3": "assets/prefabs/misc/xmas/presents/effects/wrap.prefab", "Permission Use /craft": "craftpanel.use", "Permission to show the Button in the Workbench": "craftpanel.btnworkbench", "Color Title": "1.00 1.00 1.00 0.43", "Color Button List": "0.3 0.40 0.3 0.60", "Color Title Item": "0.2 0.30 0.2 0.60", "Color Scrollbar": "0.15 0.25 0.15 0.8", "Color Button Craft": "0.80 1.00 0.50 0.10", "Color Background Panel": "0.2 0.23 0.2 0.40", "Color Text VIP": "0.90 0.80 0.04 1.00", "Color Text Amount": "1.00 1.00 1.00 1.00", "Color Text Amount VIP": "0.90 0.80 0.04 1.00", "GUI Button Close - Color": "0.90 0.20 0.20 0.50", "GUI Button Close - Font Size": 20, "GUI Button Close - AnchorMin": "0.45 0.7", "GUI Button Close - AnchorMax": "0.55 0.725", "Img Block Item": "https://img.rustspain.com/craftpanel/block.png" }, "Craft": [ { "ID": 1, "Enabled": true, "Short Name": "Recycler", "Full Name": "Recycler at Home", "Img Full": "https://i.imgur.com/wdVWxDB.jpg", "Img Icon": "https://i.imgur.com/Vgcfs3n.png", "Description": "Make your own recycler to install it on your base. You can collect it by hitting with the hammer.", "Description Font Size": 13, "Craft Result": { "Command (keep empty to create item)": "recycler.give {steamID}", "Shortname": "", "Name Default": false, "Amount": 0, "Skin ID": 0 }, "Permission Use": "craftpanel.recycler.use", "Permission VIP": "craftpanel.recycler.vip", "Permission No Cost": "craftpanel.recycler.nocost", "VIP discount: 10 = 10%": 10, "Require Workbench? 0 = NOT, 1 = Level 1,...": 2, "Items": [ { "Item": "metal.fragments", "Amount": 50000, "Skin ID": 0 }, { "Item": "metal.refined", "Amount": 300, "Skin ID": 0 }, { "Item": "gears", "Amount": 50, "Skin ID": 0 }, { "Item": "fuse", "Amount": 10, "Skin ID": 0 }, { "Item": "techparts", "Amount": 15, "Skin ID": 0 } ] }, { "ID": 2, "Enabled": true, "Short Name": "Mini Helicopter", "Full Name": "Mini Helicopter", "Img Full": "https://i.imgur.com/vnZND1c.jpg", "Img Icon": "https://i.imgur.com/qg9aIGz.png", "Description": "Because having your own Helicopters whenever you want is cool too.nCraft your Helis, put them away and take them out when you need them.", "Description Font Size": 13, "Craft Result": { "Command (keep empty to create item)": "portablevehicles.give {steamID} minicopter", "Shortname": "", "Name Default": false, "Amount": 0, "Skin ID": 0 }, "Permission Use": "craftpanel.miniheli.use", "Permission VIP": "craftpanel.miniheli.vip", "Permission No Cost": "craftpanel.miniheli.nocost", "VIP discount: 10 = 10%": 25, "Require Workbench? 0 = NOT, 1 = Level 1,...": 0, "Items": [ { "Item": "metal.fragments", "Amount": 5000, "Skin ID": 0 }, { "Item": "propanetank", "Amount": 10, "Skin ID": 0 }, { "Item": "gears", "Amount": 10, "Skin ID": 0 }, { "Item": "roadsigns", "Amount": 5, "Skin ID": 0 }, { "Item": "sheetmetal", "Amount": 10, "Skin ID": 0 } ] }, ... ] }$15.00- 8 comments
- 1 review
-
- 2
-
-
- #craft
- #craft menu
- (and 4 more)
-
Version 2.0.1
52 downloads
Take your Rust server to the next level with Profiler! This powerful plugin allows players to track and view their own and others' stats in real-time. Whether you're analyzing your performance or getting a sense of another player's play style, Profiler offers valuable insights into their kills, deaths, resource gathering, playtime, and more. Use this data to make smarter decisions in the game, whether you're avoiding a high-skilled PvP player or teaming up with someone who specializes in gathering resources. Comprehensive Player Stats & Tracking Profiler tracks and displays detailed player statistics in real-time. Whether you're analyzing your performance or studying your enemies' play styles, Profiler provides a sleek and customizable UI for an enhanced experience. Interactive & Customizable UI Profiler features an easy-to-navigate GUI with six customizable panels: Kills Panel: Logs detailed kill counts for players, NPCs, animals, Bradley APC, and Attack Heli. Deaths Panel: Tracks how players die, whether from NPCs, animals, other players, Bradley APC, or Attack Heli. Harvesting Panel: Records gathered materials like stone, metal, sulfur, mushrooms, and more. Stats Panel: Displays personal performance stats, including accuracy, favorite weapon, and total playtime. Travel Panel: Tracks movement across different transportation types. Commands Panel: Admins can add up to 12 interactive buttons for players to run chat commands (e.g., open shop plugin, kits, vote day, etc.). Choose from 20 included profile pictures. Admins can change the default images directly from the config file. Players can personalize their profiles with a custom image using /img "URL" (with proper permissions). Customize the text and player name colors in the UI. Enable or disable specific panels to fit your server’s needs. Automatically remove inactive players after a set number of days (players with "VIP" permissions are exempt). Chat Commands /prof: Open the Profiler GUI (requires "use" permission). /Load: Reloads the Profiler plugin (requires "admin" permission). /deleteimg: Delete your profiler image (requires "use" permission). /img "URL": Upload a custom image (requires "imgUrl" permission). Permissions use: Access to the GUI and the /deleteimg command. imgUrl: Allows players to use /img "URL". admin: Grants access to the /load command for in-game plugin reloads (designed for admin use). vip: Prevents inactive player data from being automatically deleted. Feel free to join my Discord! Stay up to date with the latest updates, report bugs, share suggestions, and get support for my plugins. You can also promote your Rust server or just hang out and chat! Join here: https://discord.gg/AkwHUs8Qma$12.99 -
Version 1.2.10
307 downloads
This plugin provides a beautiful and convenient crafting panel for your server. Its design and mechanics are as similar as possible to the in-game Rust crafting panel. Add crafting of any custom items, commands, permissions and anything else you like. Features The design is ~90% similar to the design of Rust's in-game crafting panel. Support for any custom items and commands. Ability to unlock all DLC items in the in-game crafting menu. The plugin only registers permissions for items that you have specified to it. Thus, preventing the creation of a large number of permissions. Customizable sound effects, notifications in the status bar on the right, and text notifications in popular plugins. The plugin can take and give out items from inventory, game backpack and Backpacks plugin, depending on the fullness of any of them. Ability to add item variations (just look at the screenshots). Supports work with skill plugins. Supports work with economy plugins. The player can choose whether to craft or buy an item. Add items to favorites, built-in search, fully functional queue and more. Scrollbar support. Supported plugins: SkillTree - allows you to use bonuses such as: Craft_Speed, Craft_Refund, Craft_Duplicate. Also allows you to give bonuses when crafting and take away when crafting is canceled. Backpacks - plugin can take and give items in an additional backpack. ItemRetriever - plugin can take crafting ingredients from all containers that are connected to the player (including inventory, game backpack, Backpacks plugin, and any other plugin that uses ItemRetriever as Suppliers). ZLevelsRemastered - allows you to use the craft speed bonus. Economics, ServerRewards, IQEconomic - these plugins are used to purchase items with the currency of these plugins. Notify, GUIAnnouncements - these plugins are used to display notifications. SimpleStatus, AdvancedStatus - these plugins are used to display notifications in the status bar at the bottom right of the screen. Permissions The plugin has immutable and generated permissions. The immutable ones include: craftingpanel._use – is responsible for opening the panel. If there is no permission, the panel will not open. craftingpanel._admin – give this permission only to administrators. It adds an additional "Give yourself" button to get items from the panel for free. This permission is also needed to use the givecraft command (about it below). craftingpanel._instant – all player crafts will be instant. craftingpanel._death – crafting queue will not be reset when the player dies. craftingpanel._disconnect – when a player leaves the server, the craft queue will not be reset. craftingpanel._economics – allows you to purchase items for the currency of the selected economy plugin. If the player does not have permission, the cost panel will still be displayed, but the player will not be able to make a purchase. craftingpanel._workbench - allows you to reduce crafting time by having a workbench of a higher level than necessary for crafting. craftingpanel._bonuses – allows the player to access the crafting bonuses from the "Crafting bonuses" section. craftingpanel._unlockdlc - if a player has this permission, he can craft all DLC items in the in-game crafting menu. If you revoke this permission, all DLC items will become unavailable again. The generated permissions are created by the plugin itself, here's how it works: craftingpanel.section.vehicles- this is permission for the "vehicles" section. craftingpanel.vehicles.minicopter - this is permission for the item "minicopter" in the "vehicles" section. craftingpanel.vehicles.snowmobile.tomaha - this is permission for the item "snowmobile" in the "vehicles" section and in "tomaha" variation. Commands Only one command is present in the plugin: givecraft steamid/nickname section item 5 skin steamid/nickname – steamid or nickname of your choice. section – section name from the Section permission [required] field. item – item name from the Item permission [required] field. 5 – how much of the current item to give out (craft multiplier). skin - name of the item from the Ingredients section, Item permission [required] fields. All arguments of this command are required. If your item has an empty "Variations" section or you want a default item, specify "default" in place of skin. General settings Allow panel scaling when the interface is scaled? - if this setting is enabled, the craft panel will be resized depending on the game interface scale (setting "user interface scale"). If the setting is disabled, the panel will always be the same size, regardless of the player interface scale. Remember the last selected section and item? - plugin will remember the last selected section, item and variation the next time the panel is opened by the player. Enable multilingual mode? – if your server has players from different countries, this mode allows you to customize translation for other languages. When you enable this mode, the plugin will write all the data that needs to be translated to the lang - file. These include: section names, item names, item descriptions, item properties, item variation names, and ingredient names. The lang - file consists of a pair: key - value. The key is a unique name, with the help of which the plugin understands what phrase to use. Section translation: section.*section permission* – key template for section name translation. For example: "section.favorite": "Favorite" – Favorite section. Translation of item information: *section permission*.*item permission*.name – key template for item name translation. For example: "sunburn.innertube.name": "Inner Tube" – item name. *section permission*.*item permission*.description – key template for item description translation. For example: "sunburn.innertube.description": " Inflatable lap for water fun." – item description. *section permission*.*item permission*.properties – key template for item properties translation. For example: "sunburn.innertube.properties ": "Any properties ..." – item properties. *section permission*.*item permission*.variations.*variation permission* – key template for variation name translation. For example: "sunburn.innertube.variations.zebra": "ZEBRA" – variation name. Translation of ingredient names: *ingredient shortname *.*ingredient skinId* - key template for ingredient name translation. For example: "wood.0": "Wood" – ingredient name. Allow work with the Backpacks plugin? – plugin can take and give items in an additional backpack (Backpacks by WhiteThunder). Allow work with the ItemRetriever plugin? – this plugin provides advanced functionality for interacting with player containers: If the ItemRetriever plugin is enabled, the CraftingPanel will take crafting ingredients from all containers that are connected to the player (including inventory, game backpack, Backpacks plugin, and any other plugin that uses ItemRetriever as Suppliers). If the ItemRetriever plugin is disabled, the CraftingPanel will take items with the next priority (if the item is not found, it goes to the next container): Backpacks plugin (if enabled) -> game backpack -> inventory. The CraftingPanel plugin is fully in charge of giving out items (since ItemRetriever only allows you to take items from the player), it gives out items with the next priority (if the container is full, it moves on to the next one): inventory -> game backpack -> Backpacks plugin (if enabled) -> drop item. Delete player data from the Data file if they have not logged into the server for so many days – this setting is added to prevent the plugin from keeping in memory the settings of all players who have ever visited your server. Effect at the start/end/canceling – game effects that will be played at the start of crafting/completion of crafting/cancellation of crafting (effects list, plugin for playing effects). Specify a plugin to work with the economy – specify one plugin from the list or leave the field empty to disable work with economy. Crafting bonuses This section allows you to customize crafting bonuses when using one of the supported plugins. Each of these plugins has its own settings. Amount of experience will depend on crafting time? – if this setting is disabled, then the given/taken experience will be the same (which are specified in the settings above). If this setting is enabled, the experience will be calculated using the following formula: calculated experience = crafting time * experience from the settings above. It should be taken into account that to calculate the experience for a crafted item, the full crafting time is taken (which is specified in the item's setting), and to calculate the experience for crafting cancellation, the time left to create the item is taken. The ZLevelsRemastered plugin does not have a full-fledged api for interaction with crafting bonuses, so the work with it is not fully implemented (no rewards are given in economy plugins, permission of this plugin is not taken into account, etc.). Notification settings Notification type (Chat, GameTips, Notify, GUIAnnouncements) – if this section is enabled, you must specify the type/plugin to notify the player of different warnings. Chat – notification to regular chat. GameTips – notification in the in-game Rust tooltips (blue or red at the bottom of the screen). Notify – notification in the Notify plugin by Mevent. GUIAnnouncements – notification in the GUIAnnouncements plugin by JoeSheep. Just below that are the customization fields for the specific type of notification. Game Status Settings Game status is a notification that is shown at the bottom right of the screen (like in-game crafting). The plugin can show 3 types of game status: Current craft – it's the blue panel with the gear. It is displayed while the crafting process is in progress. Giving item – it's the green panel with the down arrow. It is displayed when a player is given a craft item. Dropping item – it's the red panel with the cross. It is displayed when the items given by the plugin do not fit in the inventory and drop out near the player. Crafting Panel working with Rust's in-game status and two plugins (SimpleStatus, AdvancedStatus) that have slightly advanced features. Rust – is the in-game status built into the game. It does not require any additional plugins, but it cannot show the Current craft (blue panel with a gear). SimpleStatus – this plugin displays customizable statuses. It can show Current craft and Giving item. But cannot display Dropping item due to limitations in its operation. AdvancedStatus - this plugin displays customizable statuses. It works with all of the above status types. Section settings Section name – the displayed section name on the menu button. Section permission [required] – be sure to fill in these fields and make sure they are all unique. Because it is by this field that the plugin understands which section it is currently working with. If you specify "favorite" here, the plugin will use this section to display the player's favorite items (don't add items to it, the plugin will delete them anyway). Register this permission? – if enabled, the plugin will register a permission with the above name. In this case this section will be shown only to those players who have this permission. Section item settings Item name [required] – required field. The name of the item is displayed only in this plugin. If you need to create an item with the same name, you will find this setting below. Item permission [required] – required field. Make sure that each item in the section has a unique field. Because by this field the plugin understands which item in the current section it is currently working with. Register this permission? - if enabled, the plugin will register permission with the above name. Keep in mind that the current item will still be shown to all players, but they will not be able to craft it (this is also notified by the icon on the top left of the information section). Item description – item description, is not passed to the item when crafting, only displayed in the panel of this plugin. Item properties – if the item has some characteristics (e.g., damage, radiation protection, etc.) you can specify them here. This data is displayed in a separate panel in the information section of the item. Item shortname – if you are using the command as a craft result, leave this field empty. Create an item with the default name (true) or the above name (false)? – if true, the plugin will create an item with the default game name (which refers to the current shortname), otherwise it will set the name from the Item name field. Item skinId – if the item is custom, specify the required skinId, otherwise set it to 0. Item image [optional] – if as a result of craft, you have to execute some command, you can specify a link to a picture related to this command. Console commands executed after crafting (%steamid%, %username%, %amount%) [optional] – if you need to execute some commands as a result of crafting, you can list them with commas in this field. In the command you can specify %steamid% and %username%, the plugin will replace them with the data of the current player. The plugin can also replace %amount% with the amount per craft (next setting). If the command gives some custom game item and you know its shortname and skinid you can specify them in the fields above. This way you don't need to additionally save the image of this item to the hosting and specify its link. Amount per craft – number of items given out per craft. Max craft multiplier - maximum allowable craft multiplier. The craft multiplier (selected by the player in the Ingredients section) is how many times an item will be dispensed or how many times commands will be executed. If Amount per craft = 3, and the player chose multiplier = 2, he will receive 2 * 3 = 6 items. Crafting time [sec] – time to craft the item. It can be set to 0, then the item will be crafted instantly. Show notification in game status (if they are enabled)? – if a command from another plugin is used to give a custom item and that plugin displays game status, duplication of game statuses may occur. Therefore, it is possible to disable the display of game status for a particular item. Keep in mind that this only disables the Giving item status. Apply craft bonuses (if they are enabled)? – allows you to apply craft bonuses (from the "Crafting bonuses" section) to this item. Crafting cost in the economy plugin [0 - disable] – the value of the current item in your economy server currency. The customization works if you specified one of the supported economy plugins at the beginning. Item Variation settings In the in-game Rust crafting panel this section is called Skins, here it is called Variations. This is done because here it can include not only skins, but any items or commands related to the parent item. For example, you have several modular car presets, with different types of modules, but they are all related to modular cars. Therefore, you can specify them in one item - "Modular car". The settings in this section are similar to the parent item, except for the crafting ingredients. They will be the same as the parent item. Item Ingredient settings Resource name [required] – required field. Is used to display the name of the ingredient in the plugin panel (it is not taken into account when taking ingredients from the player). When canceling the craft, the plugin can set this ingredient to the specified name, you will find this setting below. Use this resource in ingredients? – enables or disables this resource for use in ingredients. Resource shortname [required] – required field. Shortname of the item that the plugin will look for from the player for crafting. Resource skinId – if it's a custom item, give its skinId, otherwise set it to 0. Return an item with the default name (true) or the above name (false)? – when the craft is canceled, if true, the plugin will create an ingredient with the default game name (which refers to the current shortname), otherwise it will set the name from the Resource name field. Plugin Config Example of plugin configuration in English: Example of plugin configuration in Russian. If you need Russian config, open it (CraftingPanel.cs) before loading the plugin, and at the top set the variable "isRus = true". Then save and upload this file to your server.$30.00- 122 comments
- 2 reviews
-
- 7
-
-
-
- #craft
- #craft menu
- (and 17 more)
-

Version 1.0.0
69 downloads
Plugin Description: Our Rust Whitelist Plugin is the ultimate solution for maintaining control over your server. This plugin offers a user-friendly graphical user interface (GUI) that allows you to easily add or remove players from the whitelist, provided they've been on your server before. In addition, you can configure the plugin to send notifications to your Discord server when players are added to or removed from the whitelist. Key Features: - Intuitive GUI: Our plugin features a clear and visually appealing user interface. Here, you can add or remove players with a simple button press. - Whitelist by SteamID: You have the ability to directly add users to the whitelist via the GUI. - Toggle On/Off: With a straightforward click, you can enable or disable the whitelist. The user interface makes it exceptionally easy. - Automatic Activation/Deactivation: You can configure the whitelist to automatically activate or deactivate at specific times, based on your defined time intervals. - Discord Notifications: You can opt to receive notifications on your Discord server whenever a player is added to or removed from the whitelist. This feature can be easily enabled or disabled in the plugin's configuration. - Configurable Whitelist Messages: You can customize the whitelist messages in the plugin's configuration to provide your players with a personalized experience. Permissions: whitelist.add: Grants the ability to add players to the whitelist. whitelist.remove: Allows for the removal of players from the whitelist. whitelist.admin: Provides full access to whitelist management. whitelist.enable: Activates the whitelist. whitelist.disable: Deactivates the whitelist. whitelist.ui: Permits the use of the graphical user interface (UI). Commands: Chat Commands: /whitelist: Opens the graphical user interface (GUI). The whitelist.ui permission is required. With our Rust Whitelist Plugin, you'll maintain full control over your server and simplify whitelist management. Manage your player list, enable or disable the whitelist as needed, enjoy the user-friendly GUI, and opt for Discord notifications if you desire. Get our plugin now to enhance the security and manageability of your Rust server. { "Enable 'add' discord message?": true, "Enable 'remove' discord message?": true, "Discord webhook (for added to whitelist players)": "webhook", "Discord webhook (for removed from whitelist players)": "webhook", "Kick message": "You are not on this server's whitelist" }$21.95- 3 comments
- 3 reviews
-
- 1
-
-
- #whitelist
- #gui
- (and 1 more)
-
Version 2.1.4
851 downloads
VehicleBuy - The Ultimate Vehicle Plugin for Rust Immerse yourself in the world of Rust with the VehicleBuy plugin! This powerful tool allows authorized players to easily access the /vehiclebuy command, which opens an intuitive interface for purchasing a variety of vehicles. With multiple payment options, including Items, Economics, and Server Rewards, you can enjoy a smooth gaming experience. Additionally, the Buy Cooldown feature helps maintain balance in the game. Upon purchasing a vehicle, players receive a unique gift: a skinned crate for land vehicles or a lifebuoy for water vehicles, which can be conveniently stored in their inventory. Features of VehicleBuy User-Friendly Interface: Access vehicle purchases through an easy-to-navigate GUI. Flexible Payment Methods: Choose from various payment options to suit your preferences. Customizable Settings: Administrators can adjust prices and fees as needed. Convenient Vehicle Recall: Use the /callback command to quickly retrieve your vehicle. Easy Re-packaging: Re-package vehicles using the /pickup command or by hitting them with a hammer. Commands /vehiclebuy: Open the vehicle purchase interface (for players) /callback "VehicleName": Retrieve your purchased vehicle /pickup: Re-package your vehicle or hit it three times with a hammer Admin Command: (VehicleName.add SteamID): Spawn vehicles directly into players' inventories vehiclebuy.template [fullscreen/inmenu]: Customize your UI templates with options for fullscreen or in-menu displays (only server console) Permissions vehiclebuy.use: Allows players to use the /vehiclebuy command and access the vehicle purchase interface. vehiclebuy.free: Grants players the ability to acquire vehicles for free, bypassing the payment requirements. vehiclebuy.pickup: Permits players to use the /pickup command to re-package their vehicles. vehiclebuy.recall: Allows players to use the /callback command to retrieve their vehicles. Video Overview old overview: Test Server Join our test server to experience all our unique features firsthand! Copy the IP address below to start playing! connect 194.147.90.147:28015 FAQ Q: Where can I see an example of a config? A: Config$15.95 -
Version 1.3.7
282 downloads
Introducing Total Control, a comprehensive admin tool designed for Rust game servers. This plugin is built with a full GUI, providing an intuitive and user-friendly interface for server administrators. With Total Control, you can customize every aspect of your Rust server to create a unique gaming experience for your players. Here are some of the features that set Total Control apart: Settings Page (New!): The latest addition to Total Control, the Settings page introduces powerful options for customizing server-wide gameplay systems: Skip Night: Automatically skip night cycles or use a voting system where players can vote to skip night. Time Freeze: Freeze time to any time of the day you choose. Day and Night Settings: Configure the start and end of the day, set the percentage of votes required to pass a day skip, and adjust the delay for voting messages. You can also limit the number of nights players can skip before requiring a full night cycle. Custom Vote Command: Define the vote day command, with /day as the default. PvE/PvP Mode: Set basic PvE or PvP modes, which can be toggled on a timer, or be set to stay permanently on. PvE or PvP mode can be displayed on the player HUD. Raid Protection: Implement raid protection with the same flexible settings as the PvE/PvP modes, including timers and toggles. StackSize Page: A new addition to Total Control, the StackSize page allows you to set up multipliers for individual items or entire categories, offering greater control over item stacking in your server. Item Gather Rate Control: Customize the gather rate for every item in the game to balance resource acquisition and gameplay progression. Smelting and Cooking Control: Adjust the smelting speeds for furnaces, mixing tables, campfires, and oil refineries. You can also control the charcoal output amount, the cooked output amount, and the amount of fuel used. Reward System: Set up rewards for various in-game actions such as killing scientists, and players, or picking up or mining different items. Rewards can be given in the form of economics (if the Economics plugin is installed) or server rewards (if the ServerRewards plugin is installed) or even scrap. Bradley APC and Patrol Heli Rewards: Players can be rewarded for dealing damage to or destroying the Bradley APC and Patrol Heli. There’s also a setting to divide the loot among all players who dealt damage or give all the loot to the player who deals the final blow. Total Control allows you to create a Rust server tailored to your community’s playstyle. Whether you’re looking to create a hardcore survival experience or a more casual, resource-rich environment, Total Control gives you the tools to make it happen. Accessible In-Game: One of the key features of Total Control is its accessibility. Any admin with the correct permissions can alter any settings directly in the game, even if they don’t have access to server files. Simply open the UI using the /tc command and change any settings as needed. Permissions: TotalControl.OpenGui To allow access to the Ui for admin. Chat Commands: /tc To Open the Ui for any player with the correct permission Feel free to join my Discord! Stay up to date with the latest updates, report bugs, share suggestions, and get support for my plugins. You can also promote your Rust server or just hang out and chat! Join here: https://discord.gg/AkwHUs8Qma$20.00 -
Version 2.2.1
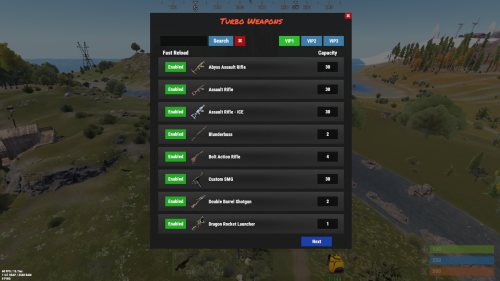
241 downloads
Transform your Rust server’s combat dynamics with TurboWeapons, a powerful plugin that allows you to customize firearm magazine capacities based on player VIP levels. Whether you want to reward your dedicated players with enhanced firepower or maintain balanced gameplay, TurboWeapons provides a flexible and intuitive system to achieve your goals. Key Features Three Distinct VIP Levels: Implement VIP1, VIP2, and VIP3 permissions (turboweapons.vip1, turboweapons.vip2, turboweapons.vip3), each offering unique magazine capacities for firearms. Tailor the firepower rewards to match your server’s progression and economy. Customizable Magazine Capacities: Assign separate MagazineCapacityVip1, MagazineCapacityVip2, and MagazineCapacityVip3 settings for each firearm in your configuration. Ensure that each VIP tier receives appropriate enhancements without affecting other levels. User-Friendly Configuration UI: Administrators can easily manage and adjust magazine capacities through an intuitive in-game UI. The updated interface replaces the old multiplier buttons with dedicated VIP selection buttons, allowing for seamless switching and editing of capacities for each VIP level. Fast Reload Support: Enhance gameplay with optional fast reload capabilities. Administrators can toggle fast reload settings per firearm, providing a tactical advantage to players who hold the necessary permissions. Dynamic Ammo Management: TurboWeapons intelligently handles ammo consumption and replenishment based on player permissions and VIP levels. It ensures that magazine capacities align with the configured settings, maintaining a balanced and engaging combat experience. Dependency Integration: Seamlessly integrates with popular plugins such as ImageLibrary, LangAPI, Notify, and SkillTree, allowing for extended functionality and customization. Configuration Flexibility: Customize each firearm’s magazine capacities independently for each VIP level. Adjust settings to fit your server’s unique balance requirements and player progression systems. Commands Admin Chat Commands: /turboweapons – Opens the TurboWeapons configuration UI. Permissions turboweapons.admin – Grants access to UI edit features. turboweapons.vip1 turboweapons.vip2 turboweapons.vip3 Dependencies ImageLibrary – Required for managing and displaying weapon icons in the UI. LangAPI – Optional, for enhanced language support and localization. Notify – Optional, for sending in-game notifications to players. Configuration TurboWeapons offers a comprehensive configuration system, allowing administrators to define default settings and customize each firearm’s capacities per VIP level. The configuration file includes: { "Use Notify Plugin": true, "Use LangAPI Plugin": true, "Weapon Configurations": [ { "Weapon Shortname": "blunderbuss", "Magazine Capacity (VIP1)": 2, "Magazine Capacity (VIP2)": 2, "Magazine Capacity (VIP3)": 2, "Fast Reload (VIP1)": false, "Fast Reload (VIP2)": true, "Fast Reload (VIP3)": true }, { "Weapon Shortname": "hmlmg", "Magazine Capacity (VIP1)": 60, "Magazine Capacity (VIP2)": 60, "Magazine Capacity (VIP3)": 60, "Fast Reload (VIP1)": false, "Fast Reload (VIP2)": true, "Fast Reload (VIP3)": true }, { "Weapon Shortname": "homingmissile.launcher", "Magazine Capacity (VIP1)": 1, "Magazine Capacity (VIP2)": 1, "Magazine Capacity (VIP3)": 1, "Fast Reload (VIP1)": false, "Fast Reload (VIP2)": true, "Fast Reload (VIP3)": true }, { "Weapon Shortname": "lmg.m249", "Magazine Capacity (VIP1)": 100, "Magazine Capacity (VIP2)": 100, "Magazine Capacity (VIP3)": 100, "Fast Reload (VIP1)": false, "Fast Reload (VIP2)": true, "Fast Reload (VIP3)": true }, { "Weapon Shortname": "minigun", "Magazine Capacity (VIP1)": 300, "Magazine Capacity (VIP2)": 300, "Magazine Capacity (VIP3)": 300, "Fast Reload (VIP1)": false, "Fast Reload (VIP2)": true, "Fast Reload (VIP3)": true }, { "Weapon Shortname": "multiplegrenadelauncher", "Magazine Capacity (VIP1)": 6, "Magazine Capacity (VIP2)": 6, "Magazine Capacity (VIP3)": 6, "Fast Reload (VIP1)": false, "Fast Reload (VIP2)": true, "Fast Reload (VIP3)": true }, { "Weapon Shortname": "pistol.eoka", "Magazine Capacity (VIP1)": 1, "Magazine Capacity (VIP2)": 1, "Magazine Capacity (VIP3)": 1, "Fast Reload (VIP1)": false, "Fast Reload (VIP2)": true, "Fast Reload (VIP3)": true }, { "Weapon Shortname": "pistol.m92", "Magazine Capacity (VIP1)": 15, "Magazine Capacity (VIP2)": 15, "Magazine Capacity (VIP3)": 15, "Fast Reload (VIP1)": false, "Fast Reload (VIP2)": true, "Fast Reload (VIP3)": true }, { "Weapon Shortname": "pistol.nailgun", "Magazine Capacity (VIP1)": 16, "Magazine Capacity (VIP2)": 16, "Magazine Capacity (VIP3)": 16, "Fast Reload (VIP1)": false, "Fast Reload (VIP2)": true, "Fast Reload (VIP3)": true }, { "Weapon Shortname": "pistol.prototype17", "Magazine Capacity (VIP1)": 18, "Magazine Capacity (VIP2)": 18, "Magazine Capacity (VIP3)": 18, "Fast Reload (VIP1)": false, "Fast Reload (VIP2)": true, "Fast Reload (VIP3)": true }, { "Weapon Shortname": "pistol.python", "Magazine Capacity (VIP1)": 6, "Magazine Capacity (VIP2)": 6, "Magazine Capacity (VIP3)": 6, "Fast Reload (VIP1)": false, "Fast Reload (VIP2)": true, "Fast Reload (VIP3)": true }, { "Weapon Shortname": "pistol.revolver", "Magazine Capacity (VIP1)": 8, "Magazine Capacity (VIP2)": 8, "Magazine Capacity (VIP3)": 8, "Fast Reload (VIP1)": false, "Fast Reload (VIP2)": true, "Fast Reload (VIP3)": true }, { "Weapon Shortname": "pistol.semiauto", "Magazine Capacity (VIP1)": 10, "Magazine Capacity (VIP2)": 10, "Magazine Capacity (VIP3)": 10, "Fast Reload (VIP1)": false, "Fast Reload (VIP2)": true, "Fast Reload (VIP3)": true }, { "Weapon Shortname": "revolver.hc", "Magazine Capacity (VIP1)": 6, "Magazine Capacity (VIP2)": 6, "Magazine Capacity (VIP3)": 6, "Fast Reload (VIP1)": false, "Fast Reload (VIP2)": true, "Fast Reload (VIP3)": true }, { "Weapon Shortname": "rifle.ak", "Magazine Capacity (VIP1)": 30, "Magazine Capacity (VIP2)": 30, "Magazine Capacity (VIP3)": 30, "Fast Reload (VIP1)": false, "Fast Reload (VIP2)": true, "Fast Reload (VIP3)": true }, { "Weapon Shortname": "rifle.ak.diver", "Magazine Capacity (VIP1)": 30, "Magazine Capacity (VIP2)": 100, "Magazine Capacity (VIP3)": 30, "Fast Reload (VIP1)": false, "Fast Reload (VIP2)": true, "Fast Reload (VIP3)": true }, { "Weapon Shortname": "rifle.ak.ice", "Magazine Capacity (VIP1)": 30, "Magazine Capacity (VIP2)": 30, "Magazine Capacity (VIP3)": 30, "Fast Reload (VIP1)": false, "Fast Reload (VIP2)": true, "Fast Reload (VIP3)": true }, { "Weapon Shortname": "rifle.bolt", "Magazine Capacity (VIP1)": 4, "Magazine Capacity (VIP2)": 4, "Magazine Capacity (VIP3)": 4, "Fast Reload (VIP1)": false, "Fast Reload (VIP2)": true, "Fast Reload (VIP3)": true }, { "Weapon Shortname": "rifle.l96", "Magazine Capacity (VIP1)": 5, "Magazine Capacity (VIP2)": 5, "Magazine Capacity (VIP3)": 5, "Fast Reload (VIP1)": false, "Fast Reload (VIP2)": true, "Fast Reload (VIP3)": true }, { "Weapon Shortname": "rifle.lr300", "Magazine Capacity (VIP1)": 30, "Magazine Capacity (VIP2)": 30, "Magazine Capacity (VIP3)": 30, "Fast Reload (VIP1)": false, "Fast Reload (VIP2)": true, "Fast Reload (VIP3)": true }, { "Weapon Shortname": "rifle.m39", "Magazine Capacity (VIP1)": 20, "Magazine Capacity (VIP2)": 20, "Magazine Capacity (VIP3)": 20, "Fast Reload (VIP1)": false, "Fast Reload (VIP2)": true, "Fast Reload (VIP3)": true }, { "Weapon Shortname": "rifle.semiauto", "Magazine Capacity (VIP1)": 16, "Magazine Capacity (VIP2)": 16, "Magazine Capacity (VIP3)": 16, "Fast Reload (VIP1)": false, "Fast Reload (VIP2)": true, "Fast Reload (VIP3)": true }, { "Weapon Shortname": "rifle.sks", "Magazine Capacity (VIP1)": 15, "Magazine Capacity (VIP2)": 15, "Magazine Capacity (VIP3)": 15, "Fast Reload (VIP1)": false, "Fast Reload (VIP2)": true, "Fast Reload (VIP3)": true }, { "Weapon Shortname": "rocket.launcher", "Magazine Capacity (VIP1)": 1, "Magazine Capacity (VIP2)": 1, "Magazine Capacity (VIP3)": 1, "Fast Reload (VIP1)": false, "Fast Reload (VIP2)": true, "Fast Reload (VIP3)": true }, { "Weapon Shortname": "rocket.launcher.dragon", "Magazine Capacity (VIP1)": 1, "Magazine Capacity (VIP2)": 10, "Magazine Capacity (VIP3)": 1, "Fast Reload (VIP1)": false, "Fast Reload (VIP2)": true, "Fast Reload (VIP3)": true }, { "Weapon Shortname": "shotgun.double", "Magazine Capacity (VIP1)": 2, "Magazine Capacity (VIP2)": 2, "Magazine Capacity (VIP3)": 2, "Fast Reload (VIP1)": false, "Fast Reload (VIP2)": true, "Fast Reload (VIP3)": true }, { "Weapon Shortname": "shotgun.m4", "Magazine Capacity (VIP1)": 6, "Magazine Capacity (VIP2)": 6, "Magazine Capacity (VIP3)": 6, "Fast Reload (VIP1)": false, "Fast Reload (VIP2)": true, "Fast Reload (VIP3)": true }, { "Weapon Shortname": "shotgun.pump", "Magazine Capacity (VIP1)": 6, "Magazine Capacity (VIP2)": 6, "Magazine Capacity (VIP3)": 6, "Fast Reload (VIP1)": false, "Fast Reload (VIP2)": true, "Fast Reload (VIP3)": true }, { "Weapon Shortname": "shotgun.spas12", "Magazine Capacity (VIP1)": 6, "Magazine Capacity (VIP2)": 6, "Magazine Capacity (VIP3)": 6, "Fast Reload (VIP1)": false, "Fast Reload (VIP2)": true, "Fast Reload (VIP3)": true }, { "Weapon Shortname": "shotgun.waterpipe", "Magazine Capacity (VIP1)": 1, "Magazine Capacity (VIP2)": 1, "Magazine Capacity (VIP3)": 1, "Fast Reload (VIP1)": false, "Fast Reload (VIP2)": true, "Fast Reload (VIP3)": true }, { "Weapon Shortname": "smg.2", "Magazine Capacity (VIP1)": 30, "Magazine Capacity (VIP2)": 30, "Magazine Capacity (VIP3)": 30, "Fast Reload (VIP1)": false, "Fast Reload (VIP2)": true, "Fast Reload (VIP3)": true }, { "Weapon Shortname": "smg.mp5", "Magazine Capacity (VIP1)": 30, "Magazine Capacity (VIP2)": 30, "Magazine Capacity (VIP3)": 30, "Fast Reload (VIP1)": false, "Fast Reload (VIP2)": true, "Fast Reload (VIP3)": true }, { "Weapon Shortname": "smg.thompson", "Magazine Capacity (VIP1)": 20, "Magazine Capacity (VIP2)": 20, "Magazine Capacity (VIP3)": 20, "Fast Reload (VIP1)": false, "Fast Reload (VIP2)": true, "Fast Reload (VIP3)": true }, { "Weapon Shortname": "snowballgun", "Magazine Capacity (VIP1)": 50, "Magazine Capacity (VIP2)": 50, "Magazine Capacity (VIP3)": 50, "Fast Reload (VIP1)": false, "Fast Reload (VIP2)": true, "Fast Reload (VIP3)": true }, { "Weapon Shortname": "speargun", "Magazine Capacity (VIP1)": 1, "Magazine Capacity (VIP2)": 1, "Magazine Capacity (VIP3)": 1, "Fast Reload (VIP1)": false, "Fast Reload (VIP2)": true, "Fast Reload (VIP3)": true }, { "Weapon Shortname": "t1_smg", "Magazine Capacity (VIP1)": 18, "Magazine Capacity (VIP2)": 18, "Magazine Capacity (VIP3)": 18, "Fast Reload (VIP1)": false, "Fast Reload (VIP2)": true, "Fast Reload (VIP3)": true } ], "Version": { "Major": 2, "Minor": 1, "Patch": 0 } } TurboWeapons empowers you to create a more engaging and customizable combat environment on your Rust server. Reward your VIP players with enhanced firepower, maintain game balance, and provide an enriched gameplay experience with this versatile plugin!$18.00 -
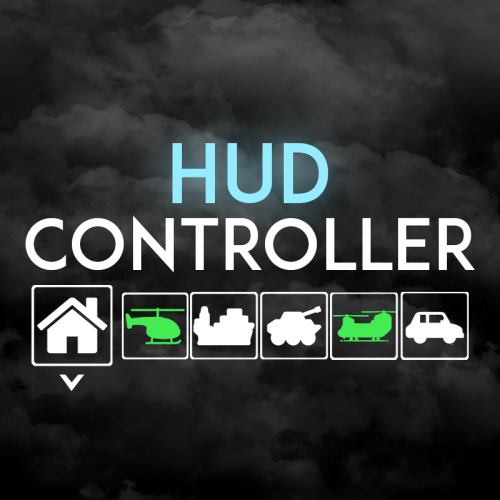
Version 1.0.3
125 downloads
Hud Controller is a very simple Hud system. It can do a ton of things, all listed below! Why should you choose Hud Controller? Having a unique server is very important when you choose to have a hud on your server, players see that 24/7. So, you want a good-looking, unique hud menu that stands out to players. With Hud Controller, you can do that, and much more, with ease. FEATURES - Built in UI editor - Add panels, change colors, change fonts, delete panels, change images, EVERYTHING IS EDITABLE! - Dynamic custom events - Normal rust events - Quick command buttons - Display RP or Economics - Display server time - Display player grid - Display players - ETC* Text fields can accept the following placeholders {serverName} {configServerName} {maxPlayers} {onlinePlayers} {joiningPlayers} {queuedPlayers} {totalPlayers} {playerGrid} {serverTime} {playerCurrency} Support? Questions? Comments? Concerns? Message me in my Discord! https://discord.gg/RVePam7pd7$19.99 -

Version 1.5.4
592 downloads
Open UI - /tssettings (use permission - tcauth.use) FEATURES: The maximum number of players that can authorize in a cupboard Only authorized players can open crates (on/off) Only authorized players can look inside and open Furnaces (on/off) Authorized players are automatically not attacked by turrets and SAM site (on/off) Authorized players no longer need codes and keys to open doors (on/off) Automatically if players are registered on the TC (remove building parts) (on/off) Automatically registered your teammates on the TC PERMISSIONS: "tcauth.use" - you can use UI (only for config setup) "tcauth.bypass" - you can use all the functionality "tcauth.ignore" - you ignore all the functionality "tcauth.auth.use" - you are automatically authorizing in your teammates TC (AutoTurrets + SAM optional) "tcauth.lock.use" - you can open what's under lock and key "tcauth.chest.use" - you can open chests "tcauth.turret.use" - you are automatically authorized in the turrets and SAM "tcauth.furnace.use" - you can open the ovens "tcauth.removebp.use" - you can destroy parts of the building at any time P.s - (My Discord - tofurahie#4144)$11.99 -
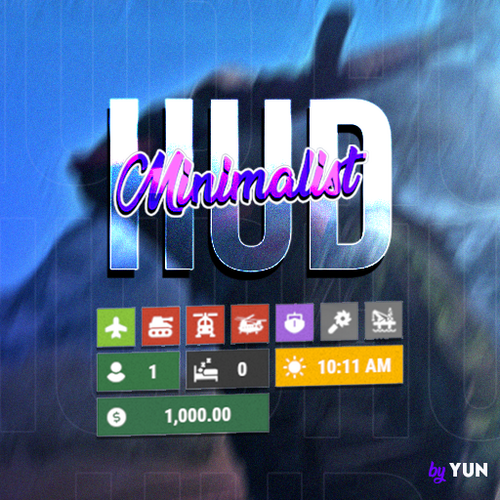
Version 1.2.3
330 downloads
A simple, minimalist, and modern hud with events, player counter, and other things for your server. Are you tired of using complex game panel plugins with an ugly interface? Now you can have a simple and minimalist interface on your server with just basic events and player counters, and you can configure it however you want. ★ Most native events. ★ Game time with overrides for day and night. ★ Simplified player counter. ★ Sleepers counter. ★ Excavator event. ★ Large Oil rig & Small Oil rig events. ★ Economics & IQEconomic integration. ★ Minimize & maximize button. /mhtoggle - Toggle between showing or hiding the UI (Needs admin perm or missionminimalisthud.toggle) GALLERY:$12.99- 44 comments
- 3 reviews
-
- 2
-
-
- #hud
- #minimalist
- (and 9 more)
-

Version 2.2.2
8,825 downloads
Enjoy a highly customizable Shop that can be configured in game! Use NPCs as shopkeepers, and set up a shop with ease using the game interface to add, edit, or remove items on the fly! ️ Features of Shop Beautiful user interface Discount system (by permissions) Automatic shop filling (+ the plugin has support for the ItemCostCalculator plugin) Selling items (players can sell items to the store and receive money for it) Performance Adding/editing/removing items IN GAME Supports NPC Supports Custom Vending Machines Supports NoEscape Convert from ServerRewards Favorite items By default, the plugin has English, Russian and Chinese translations Transfer money between players directly in the plugin! Shop allows you to use multiple economy plugins at once (players can choose what they want to pay with) For each item, you can choose which payment methods are available and how much they will cost, based on the selected method Commands shop - open shop interface shop.install – starts the shop installation process shop.refill <recovery_rate> - refill shop again recoveryRate: A value between 0 and 1 that determines the multiplier for the cost of selling items. For example, shop.refill 0.5 means that items will have a sale cost of 50% of their purchase cost. shop.convert.sr [clear] - convert items from ServerRewards to Shop. The option clear means clearing Shop items before convert shop.setvm [categories: cat1 cat2 ...] - add custom VM in config shop.setnpc [categories: cat1 cat2 ...] - add NPC in config shop.remove all - a console command to remove all items and categories from the plugin shop.remove item [category name/all] - a console command to remove an item (or all items) shop.remove category [category name/all] - a console command to remove a category (or all categories) shop.fill.icc [all/buy/sell] - a console command for updating prices of items in the store using ItemCostCalculator. all - updates both Price and SellPrice, buy - updates Price, sell - updates SellPrice shop.convert.from.1.2.26 – command to convert Shop plugin version 1.2.26 to version 1.3.0+ shop.reset – resets store data, including templates, configurations, and items. shop.reset template – resets the store interface template data. shop.reset config – resets store configuration data. shop.reset items – resets store items data. shop.reset full – completely resets all store data (templates, configurations and items). shop.manage – used to manage the Shop plugin. shop.manage economy list – displays a list of all available economic systems in the plugin. shop.manage economy set <economy_ID> <name> – ыets the selected economic system by plugin ID and name. The command updates the corresponding economic system on the server and saves the changes in the configuration. FOR EXAMPLE: shop.manage economy set 0 Economics – sets the main economy plugin to “Economics”. shop.manage economy set 1 ServerRewards – sets the additional economy system with ID 1 to “ServerRewards”. Permissions shop.setvm - for command "shop.setvm" shop.setnpc - for command "shop.setnpc" shop.free - for free item purchases shop.admin - admin permission Sort Types None Name Amount PriceDecrease PriceIncrease Category Types None – normal category for items Favorite – category for favorite items Hided – hidden category, available only in NPC stores or Vending Machines Video P.S. Video of the old version, video for the V2+ version is now in development Showcase Full screen Templates Template OLD STYLE Template NEW RUST In-Menu Templates Template V1 (V1.1) Template V1 (V1.1) with BASKET Template V2 Template V2 with BASKET Installer Editor TEST SERVER Join our test server to view and experience all our unique features yourself! Copy the IP Address below to start playing! connect 194.147.90.147:28015 FAQ Q: I get the message “The plugin does not work correctly, contact the administrator!”. What should I do? A: This means that your plugin is not installed. To install the plugin, use the command “/shop.install”. You need to have “shop.admin” permission to access this command. Q: Where can I see an example of a config? A: Config Q: How to use BankSystem to store the economy A: "Economy": { "Type (Plugin/Item)": "Plugin", "Plugin name": "BankSystem", "Balance add hook": "Deposit", "Balance remove hook": "Withdraw", "Balance show hook": "Balance", "ShortName": "", "Display Name (empty - default)": "", "Skin": 0, "Lang Key (for Title)": "LangTitle", "Lang Key (for Balance)": "BalanceTitle" }, Q: How to use ServerRewards to store the economy A: "Economy": { "Type (Plugin/Item)": "Plugin", "Plugin name": "ServerRewards", "Balance add hook": "AddPoints", "Balance remove hook": "TakePoints", "Balance show hook": "CheckPoints", "ShortName": "", "Display Name (empty - default)": "", "Skin": 0, "Lang Key (for Title)": "LangTitle", "Lang Key (for Balance)": "BalanceTitle" }, Q: How to use Economics to store the economy A: "Economy": { "Type (Plugin/Item)": "Plugin", "Plugin name": "Economics", "Balance add hook": "Deposit", "Balance remove hook": "Withdraw", "Balance show hook": "Balance", "ShortName": "", "Display Name (empty - default)": "", "Skin": 0, "Lang Key (for Title)": "LangTitle", "Lang Key (for Balance)": "BalanceTitle" }, Q: How to use IQEconomic to store the economy A: "Economy": { "Type (Plugin/Item)": "Plugin", "Plugin name": "IQEconomic", "Balance add hook": "API_SET_BALANCE", "Balance remove hook": "API_GET_BALANCE", "Balance show hook": "API_REMOVE_BALANCE", "ShortName": "", "Display Name (empty - default)": "", "Skin": 0, "Lang Key (for Title)": "LangTitle", "Lang Key (for Balance)": "BalanceTitle" }, Q: How to use scrap to pay for items A: "Economy": { "Type (Plugin/Item)": "Item", "Plugin name": "", "Balance add hook": "", "Balance remove hook": "", "Balance show hook": "", "ShortName": "scrap", "Display Name (empty - default)": "", "Skin": 0, "Lang Key (for Title)": "LangTitle", "Lang Key (for Balance)": "BalanceTitle" }, Q: How to add KIT as shop item A: https://pastebin.com/4szBQCgz Q: How to add Command as shop item A: https://pastebin.com/bcCkzBEL Q: How do I make a weapon spawn with ammo in it? A: You need to configure the "Weapon" section in the item config: "Weapon": { "Enabled": true, "Ammo Type": "ammo.rifle.explosive", "Ammo Amount": 128 } Q: How do I make items spawn some content (liquid, weapon modifications)? A: You need to configure the "Content" section in the item config: "Content": { "Enabled": true, "Contents": [ { "ShortName": "weapon.mod.lasersight", "Condition": 100.0, "Amount": 1, "Position": -1 } ] }, Q: How to turn off the sell feature? A: You need to turn off “Enable item selling” in the config, or do it in the item setting in the game. "Enable item selling?": false, Q: How to use the ItemCostCalculator with Shop? A: You need to use command "shop.refill" (command to refill the Shop) Q: What should be the size of images for item icons? A: Typically, the image dimensions for item icons are 512x512 pixels, but any square image can suffice.$29.95 -
Version 2.7.3
764 downloads
EATURES: Selling custom items with a modified skin and display name Commands for sale as an item, allows you to use the command whenever the player wants, can be changed to instant use after purchase Creating a trader with the right set of items Players can check item description before they buy it Refill system Players can see marker on the map to check what the bot can sell them Local positions for Monuments (after wipe you don't need to change positions anymore) [Dependent on MonumentFinder] Commands: permission for use commands and edit the npc shop - npcshop.admin /settrader (use for create new trader) /remtrader (use for remove trader by his name) /newtraderpos (look directyl at the bot) then /newtraderpos update (use on new position) or /newtraderpos cancel (if you unselect the bot) Hooks: void OnNPCShopItemBuy(BasePlayer buyer, Item saleItem, Item priceItem) - called when player buys an item Example of plugin config My Discord Profile$18.99 -

Version 3.1.19
1,375 downloads
Installation Place the AdminToggle.cs file in /oxide/plugins/ Place the XLIB.dll Dependency in /RustDedicated_Data/Managed/ Grant yourself the default permission o.grant user YOURNAME admintoggle.master the .master permission selector needs to be adapted to what you called the permission setting for the mode Information AdminToggle Allows admins with permission to toggle between player & admin mode Reset Command Open f1 console & write at.fix - Reverts you to player mode (the hard way) (Permission, Priority, Toggle Commands) - Must be unique Core Mode Featues Unlimited custom modes Customizable permission name Priority system for modes Master mode Oxide group toggling Custom commands to toggle Restriction system to specfic steam ids a certan mode Mode Settings (admin) Require a reason to toggle Autorun commands on toggle Separated inventories Teleport back to toggle location upon exiting Revert auth to 0 on disconnect Blocked commands Custom outfit while in mode Notifications (global-chat notification, local-chat notification, popup notification, sound perfab notification & Discord embed Notification) Interface toggle button, pulsing panel, action menu Blocked actions Blocked plugins hooks Mode Settings (player) Autorun commands on revert Notifications (global-chat notification, local-chat notification, popup notification, sound perfab notification & Discord embed Notification) Blocked commands Blocked plugins hooks API Hooks void admintoggle_onAdmin (BasePlayer player) { /*Do something epic*/ } void admintoggle_onPlayer (BasePlayer player) { /*Do something epic*/ } API Methods bool IsAdmin(BasePlayer player); object[] GetMode(BasePlayer player, bool TrueMode = false); /* IF player.userID IS ASSIGNED ANY MODE RETURNS TRUE IF player.userID IS NOT ASSIGNED ANY MODE RETURNS FALSE */ bool isAdmin = AdminToggle.Call<bool>("IsAdmin", player.userID); /* IF player IS NOT ASSIGNED MODE RETURNS NULL IF bool IS SET FALSE RETURNS CURRENT MODE -- object[0] permission (string), object[1] priority (int), object[2] isMaster (bool) IF bool IS SET TRUE RETURNS HIGHEST MODE -- object[0] permission (string), object[1] priority (int), object[2] isMaster (bool) */ object[] getMode = AdminToggle.Call<object[]>("GetMode", player, false); Default Configuration (1 mode) Known incompatible plugins Server Armour (Compatible with v2.29.44 and above)$8.99- 142 comments
- 11 reviews
-
- 2
-
-
- #admin
- #admintool
- (and 31 more)
-

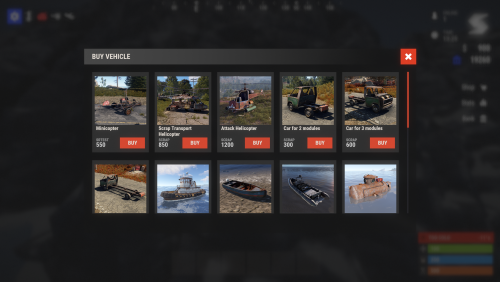
Version 1.2.0
121 downloads
The "MyVehicle" plugin introduces a vehicle management system that allows admins/players to spawn, de-spawn, and manage a variety of vehicles directly within the game. Leveraging a user-friendly interface, players can access this feature through permissions-based commands, ensuring control and customization. The plugin supports configuration for different vehicles, including aspects like spawn distance, fuel amount, and unique permissions for each vehicle type. It also incorporates a cool-down system to regulate vehicle spawning frequency, enhancing game-play balance. Additionally, the plugin tracks and saves data on player-spawned vehicles, ensuring a seamless gaming experience even across server restarts. The plugin is light weighted with a clean and user friendly graphical user interface (GUI). Commands: /myvehicle - Opens graphical user interface (GUI) of the vehicle spawner. /spawn <Vehicle> - (Admins only) Spawns desired vehicle /despawn - (Admins only) Despawn last spawned vehicle. mv.cspawn - Console command for shop integration. Permissions: MyVehicle Use - Permission to use/open the GUI. MyVehicle Despawn - If you already have a vehicle spawned and you want to spawn another one of the same type, the previous will disappear. You can set which vehicles are affected by this permission in the config. MyVehicle cooldown.1m - 1 minute cool-down between spawning vehicles of the same type. MyVehicle cooldown.1h - 1 hour cool-down between spawning vehicles of the same type. MyVehicle cooldown.1d - 1 day cool-down between spawning vehicles of the same type. MyVehicle cooldown.30d - 30 day cool-down between spawning vehicles of the same type. myvehicle minicopter - Allow spawning Mini(s). myvehicle attackhelicopter - Allow spawning Attack Heli(s). myvehicle scrapheli - Allow spawning Scrap Heli(s). myvehicle baloon - Allow spawning Balloon(s). myvehicle rhib - Allow spawning RHIB(s). myvehicle horse - Allow spawning Horse(s). myvehicle tugboat - Allow spawning Tugboat(s). myvehicle subsolo - Allow spawning Solo Sub(s). myvehicle subduo - Allow spawning Duo Sub(s). myvehicle rowboat - Allow spawning Rowboat(s). myvehicle kayak - Allow spawning Kayak(s). myvehicle snowmobile - Allow spawning Snowmobile(s) and Tomaha(s). myvehicle sedan - Allow spawning Sedan(s) and Sedan Rail(s). myvehicle car2modules - Allow spawning Car(s) with 2 modules. myvehicle car3modules - Allow spawning Car(s) with 3 modules. myvehicle car4modules - Allow spawning Car(s) with 4 modules. myvehicle pedalbike - Allow spawning Pedal Bike(s). myvehicle pedaltrike - Allow spawning Pedal Trike(s). myvehicle motorbike - Allow spawning Motorbike(s). myvehicle motorbikesidecar - Allow spawning Motorbikes with Sidecars. myvehicle train - Allow spawning Locomotive(s), Workcart(s) and Caboose(s). myvehicle siegetower - Allow spawning Siege Tower(s). myvehicle catapult - Allow spawning Catapults(s). myvehicle ballista - Allow spawning Ballista(s). myvehicle batteringram - Allow spawning Battering Ram(s). myvehicle magnetcrane - Allow spawning Magnetcrane(s). myvehicle chinook - Allow spawning Chinook(s). myvehicle patrolheli - Allow calling in the Patrol Heli. myvehicle bradley - Allow spawning Bradley(s). The "Despawn Last" button will remove all spawned vehicles one by one from last to first! !!! Magnetcrane, Patrol Heli and Bradley should only be used by admins !!! Magnetcrane will explode if spawned outside Junkyard! Patrol Heli will spawn in a random location outside the map and will fly in. Bradley will open fire at player as soon as it is spawned! These vehicles ( if spawned with MyVehicle ) can also be despawned with the "Despawn Last" button from the GUI. Cars can be customized through the config. The identifiers for the modules can be obtained on https://rusthelp.com/ or https://www.corrosionhour.com Cockpit With Engine Vehicle Module: 170758448 Cockpit Vehicle Module: -1501451746 Armored Cockpit Vehicle Module: 1874610722 Engine Vehicle Module: 1559779253 Camper Vehicle Module: -1040518150 Fuel Tank Vehicle Module: 1186655046 Storage Vehicle Module: 268565518 Flatbed Vehicle Module: -1880231361 Large Flatbed Vehicle Module: -1693832478 Taxi Vehicle Module: -626174997 Rear Seats Vehicle Module: 1376065505 Passenger Vehicle Module: 895374329 Armored Passenger Vehicle Module: -1615281216 The tier of the engine parts can be set in the config. Use 1 for low, 2 for medium or 3 for high quality parts. I want to thank M&B-Studios for assisting me in putting this plugin together. I appreciate his help and recommend his work and services! Config: { "Vehicles": { "assets/content/vehicles/minicopter/minicopter.entity.prefab": { "Despawn": true, "DisplayName": "Mini Copter", "Permission": "myvehicle.minicopter", "ButtonColor": "vlgreen", "FuelAmount": 100, "SpawnDistance": 5.0, "ModuleIDs": null, "EnginePartsTier": 0 }, "assets/content/vehicles/attackhelicopter/attackhelicopter.entity.prefab": { "Despawn": true, "DisplayName": "Attack Heli", "Permission": "myvehicle.attackhelicopter", "ButtonColor": "vlgreen", "FuelAmount": 100, "SpawnDistance": 5.0, "ModuleIDs": null, "EnginePartsTier": 0 }, "assets/content/vehicles/scrap heli carrier/scraptransporthelicopter.prefab": { "Despawn": true, "DisplayName": "Scrap Heli", "Permission": "myvehicle.scrapheli", "ButtonColor": "vlgreen", "FuelAmount": 100, "SpawnDistance": 5.0, "ModuleIDs": null, "EnginePartsTier": 0 }, "assets/content/vehicles/horse/ridablehorse2.prefab": { "Despawn": false, "DisplayName": "Horse", "Permission": "myvehicle.horse", "ButtonColor": "vlgreen", "FuelAmount": 0, "SpawnDistance": 5.0, "ModuleIDs": null, "EnginePartsTier": 0 }, "assets/content/vehicles/boats/rhib/rhib.prefab": { "Despawn": true, "DisplayName": "RHIB", "Permission": "myvehicle.rhib", "ButtonColor": "vlgreen", "FuelAmount": 100, "SpawnDistance": 5.0, "ModuleIDs": null, "EnginePartsTier": 0 }, "assets/content/vehicles/boats/tugboat/tugboat.prefab": { "Despawn": true, "DisplayName": "Tugboat", "Permission": "myvehicle.tugboat", "ButtonColor": "vlgreen", "FuelAmount": 100, "SpawnDistance": 15.0, "ModuleIDs": null, "EnginePartsTier": 0 }, "assets/content/vehicles/submarine/submarinesolo.entity.prefab": { "Despawn": true, "DisplayName": "Solo Sub", "Permission": "myvehicle.subsolo", "ButtonColor": "vlgreen", "FuelAmount": 100, "SpawnDistance": 5.0, "ModuleIDs": null, "EnginePartsTier": 0 }, "assets/content/vehicles/submarine/submarineduo.entity.prefab": { "Despawn": true, "DisplayName": "Duo Sub", "Permission": "myvehicle.subduo", "ButtonColor": "vlgreen", "FuelAmount": 100, "SpawnDistance": 5.0, "ModuleIDs": null, "EnginePartsTier": 0 }, "assets/content/vehicles/boats/rowboat/rowboat.prefab": { "Despawn": true, "DisplayName": "Rowboat", "Permission": "myvehicle.rowboat", "ButtonColor": "vlgreen", "FuelAmount": 100, "SpawnDistance": 5.0, "ModuleIDs": null, "EnginePartsTier": 0 }, "assets/content/vehicles/boats/kayak/kayak.prefab": { "Despawn": true, "DisplayName": "Kayak", "Permission": "myvehicle.kayak", "ButtonColor": "vlgreen", "FuelAmount": 0, "SpawnDistance": 5.0, "ModuleIDs": null, "EnginePartsTier": 0 }, "assets/content/vehicles/snowmobiles/snowmobile.prefab": { "Despawn": true, "DisplayName": "Snowmobile", "Permission": "myvehicle.snowmobile", "ButtonColor": "vlgreen", "FuelAmount": 100, "SpawnDistance": 5.0, "ModuleIDs": null, "EnginePartsTier": 0 }, "assets/content/vehicles/snowmobiles/tomahasnowmobile.prefab": { "Despawn": true, "DisplayName": "Tomaha", "Permission": "myvehicle.snowmobile", "ButtonColor": "vlgreen", "FuelAmount": 100, "SpawnDistance": 5.0, "ModuleIDs": null, "EnginePartsTier": 0 }, "assets/prefabs/deployable/hot air balloon/hotairballoon.prefab": { "Despawn": true, "DisplayName": "Balloon", "Permission": "myvehicle.baloon", "ButtonColor": "vlgreen", "FuelAmount": 100, "SpawnDistance": 10.0, "ModuleIDs": null, "EnginePartsTier": 0 }, "assets/content/vehicles/sedan_a/sedantest.entity.prefab": { "Despawn": true, "DisplayName": "Sedan", "Permission": "myvehicle.sedan", "ButtonColor": "vlgreen", "FuelAmount": 0, "SpawnDistance": 5.0, "ModuleIDs": null, "EnginePartsTier": 0 }, "assets/content/vehicles/sedan_a/sedanrail.entity.prefab": { "Despawn": true, "DisplayName": "Sedan Rail", "Permission": "myvehicle.sedan", "ButtonColor": "vlgreen", "FuelAmount": 100, "SpawnDistance": 5.0, "ModuleIDs": null, "EnginePartsTier": 0 }, "assets/content/vehicles/modularcar/car_chassis_2module.entity.prefab": { "Despawn": true, "DisplayName": "Car 2", "Permission": "myvehicle.car2modules", "ButtonColor": "vlgreen", "FuelAmount": 100, "SpawnDistance": 5.0, "ModuleIDs": [ 170758448, 268565518 ], "EnginePartsTier": 1 }, "assets/content/vehicles/modularcar/car_chassis_3module.entity.prefab": { "Despawn": true, "DisplayName": "Car 3", "Permission": "myvehicle.car3modules", "ButtonColor": "vlgreen", "FuelAmount": 100, "SpawnDistance": 5.0, "ModuleIDs": [ 170758448, -1040518150 ], "EnginePartsTier": 2 }, "assets/content/vehicles/modularcar/car_chassis_4module.entity.prefab": { "Despawn": true, "DisplayName": "Car 4", "Permission": "myvehicle.car4modules", "ButtonColor": "vlgreen", "FuelAmount": 100, "SpawnDistance": 5.0, "ModuleIDs": [ 1559779253, 170758448, 268565518, 268565518 ], "EnginePartsTier": 3 }, "assets/content/vehicles/bikes/pedalbike.prefab": { "Despawn": true, "DisplayName": "Pedal Bike", "Permission": "myvehicle.pedalbike", "ButtonColor": "vlgreen", "FuelAmount": 0, "SpawnDistance": 3.0, "ModuleIDs": null, "EnginePartsTier": 0 }, "assets/content/vehicles/bikes/pedaltrike.prefab": { "Despawn": true, "DisplayName": "Pedal Trike", "Permission": "myvehicle.pedaltrike", "ButtonColor": "vlgreen", "FuelAmount": 0, "SpawnDistance": 3.0, "ModuleIDs": null, "EnginePartsTier": 0 }, "assets/content/vehicles/bikes/motorbike.prefab": { "Despawn": true, "DisplayName": "Motorbike", "Permission": "myvehicle.motorbike", "ButtonColor": "vlgreen", "FuelAmount": 100, "SpawnDistance": 3.0, "ModuleIDs": null, "EnginePartsTier": 0 }, "assets/content/vehicles/bikes/motorbike_sidecar.prefab": { "Despawn": true, "DisplayName": "Motorbike with Sidecar", "Permission": "myvehicle.motorbikesidecar", "ButtonColor": "vlgreen", "FuelAmount": 100, "SpawnDistance": 3.0, "ModuleIDs": null, "EnginePartsTier": 0 }, "assets/content/vehicles/trains/locomotive/locomotive.entity.prefab": { "Despawn": true, "DisplayName": "Locomotive", "Permission": "myvehicle.train", "ButtonColor": "vlgreen", "FuelAmount": 100, "SpawnDistance": 15.0, "ModuleIDs": null, "EnginePartsTier": 0 }, "assets/content/vehicles/trains/workcart/workcart.entity.prefab": { "Despawn": true, "DisplayName": "Workcart", "Permission": "myvehicle.train", "ButtonColor": "vlgreen", "FuelAmount": 100, "SpawnDistance": 15.0, "ModuleIDs": null, "EnginePartsTier": 0 }, "assets/content/vehicles/trains/workcart/workcart_aboveground2.entity.prefab": { "Despawn": true, "DisplayName": "Workcart 2", "Permission": "myvehicle.train", "ButtonColor": "vlgreen", "FuelAmount": 100, "SpawnDistance": 15.0, "ModuleIDs": null, "EnginePartsTier": 0 }, "assets/content/vehicles/trains/workcart/workcart_aboveground.entity.prefab": { "Despawn": true, "DisplayName": "Workcart 3", "Permission": "myvehicle.train", "ButtonColor": "vlgreen", "FuelAmount": 100, "SpawnDistance": 15.0, "ModuleIDs": null, "EnginePartsTier": 0 }, "assets/content/vehicles/trains/caboose/traincaboose.entity.prefab": { "Despawn": true, "DisplayName": "Caboose", "Permission": "myvehicle.train", "ButtonColor": "vlgreen", "FuelAmount": 0, "SpawnDistance": 15.0, "ModuleIDs": null, "EnginePartsTier": 0 }, "assets/content/vehicles/trains/wagons/trainwagonc.entity.prefab": { "Despawn": true, "DisplayName": "Flatbed", "Permission": "myvehicle.train", "ButtonColor": "vlgreen", "FuelAmount": 0, "SpawnDistance": 15.0, "ModuleIDs": null, "EnginePartsTier": 0 }, "assets/content/vehicles/crane_magnet/magnetcrane.entity.prefab": { "Despawn": true, "DisplayName": "Magnetcrane", "Permission": "myvehicle.magnetcrane", "ButtonColor": "vlgreen", "FuelAmount": 100, "SpawnDistance": 5.0, "ModuleIDs": null, "EnginePartsTier": 0 }, "assets/content/vehicles/siegeweapons/siegetower/siegetower.entity.prefab": { "Despawn": true, "DisplayName": "Siege Tower", "Permission": "myvehicle.siegetower", "ButtonColor": "vlgreen", "FuelAmount": 0, "SpawnDistance": 10.0, "ModuleIDs": null, "EnginePartsTier": 0 }, "assets/content/vehicles/siegeweapons/catapult/catapult.entity.prefab": { "Despawn": true, "DisplayName": "Catapult", "Permission": "myvehicle.catapult", "ButtonColor": "vlgreen", "FuelAmount": 0, "SpawnDistance": 5.0, "ModuleIDs": null, "EnginePartsTier": 0 }, "assets/content/vehicles/siegeweapons/ballista/ballista.entity.prefab": { "Despawn": true, "DisplayName": "Ballista", "Permission": "myvehicle.ballista", "ButtonColor": "vlgreen", "FuelAmount": 0, "SpawnDistance": 5.0, "ModuleIDs": null, "EnginePartsTier": 0 }, "assets/content/vehicles/siegeweapons/batteringram/batteringram.entity.prefab": { "Despawn": true, "DisplayName": "Battering Ram", "Permission": "myvehicle.batteringram", "ButtonColor": "vlgreen", "FuelAmount": 100, "SpawnDistance": 10.0, "ModuleIDs": null, "EnginePartsTier": 0 }, "assets/prefabs/npc/ch47/ch47.entity.prefab": { "Despawn": true, "DisplayName": "Chinook", "Permission": "myvehicle.chinook", "ButtonColor": "vlblue", "FuelAmount": 0, "SpawnDistance": 15.0, "ModuleIDs": null, "EnginePartsTier": 0 }, "assets/prefabs/npc/patrol helicopter/patrolhelicopter.prefab": { "Despawn": true, "DisplayName": "Patrol Heli", "Permission": "myvehicle.patrolheli", "ButtonColor": "vlred", "FuelAmount": 0, "SpawnDistance": 15.0, "ModuleIDs": null, "EnginePartsTier": 0 }, "assets/prefabs/npc/m2bradley/bradleyapc.prefab": { "Despawn": true, "DisplayName": "Bradley", "Permission": "myvehicle.bradley", "ButtonColor": "vlred", "FuelAmount": 0, "SpawnDistance": 15.0, "ModuleIDs": null, "EnginePartsTier": 0 } }, "DefaultButtonColor": "vlgreen", "ScrollUPButtonColor": "yellow", "ScrollDownButtonColor": "yellow", "DespawnButtonColor": "vlorange", "CloseButtonColor": "vlred", "UIChatCommand": "myvehicle", "SpawnCommand": "spawn", "DespawnCommand": "despawn", "SpawnEffect": "assets/prefabs/missions/portal/proceduraldungeon/effects/appear.prefab", "DespawnEffect": "assets/prefabs/missions/portal/proceduraldungeon/effects/disappear.prefab", "ChatPrefix": "<color=green>[MyVehicle]</color>", "UITitle": "Vehicle Spawner" } Language EN: { "NoPermission": "You don't have permission to use this command.", "NoVehicles": "You have no spawned vehicles to despawn.", "Despawned": "Your last spawned vehicle has been despawned.", "CantFind": "Could not find your last spawned vehicle.", "NotFound": "Vehicle not found.", "Spawn": "Spawning {0}.", "WaterVehicle": "This vehicle can only be spawned in water.", "Usage": "Usage: /spawn <vehicleType>", "NoType": "Vehicle type '{0}' not found.", "NoPermissionToSpawn": "You don't have permission to spawn '{0}'.", "Cooldown": "You need to wait for {0} seconds to spawn your vehicle.", "AlreadyDestroyed": "Previously destroyed vehicle has been removed from your data." }$9.99- 19 comments
- 2 reviews
-
- 3
-
-
- #myvehicle
- #vehicle
- (and 5 more)
-

Version 1.1.11
1,007 downloads
HUD Panel System is the feature-packed HUD interface players can fully customize to their specific needs and play style. Display important server stats and ongoing events while enabling your players to create their own unique experience with the endless customization options this plugin provides! An API is included to make integration to other plugins seamless! Features: Beautiful HUD and other user interface Support for third-party plugins (you can modify your own and others' plugins) The player can customize the HUD (interface) Great customization options in the config All HUD titles can be changed Convoy plugin support Armored Train plugin support Showcase FAQ Q: How do I make the buttons hide when I click on the logo? A: In the logo settings, specify the command to hide the buttons (panelsystem.buttons). Example: https://pastebin.com/Ksggh718 Commands: /panel hide - hide panel /panel show - show panel API: private void OnEventChangeStatus(string key, bool spawned, bool ignorePlayers = false) Panel Anchors: UpperLeft UpperRight API Using Example: Plugin Code public class EmptyPlugin : RustPlugin { [PluginReference] private Plugin PanelSystem; private void OnServerInitialized() { EventChangeStatus("UserNotify", true); } private void Unload() { EventChangeStatus("UserNotify", false); } private void EventChangeStatus(string key, bool spawned) { PanelSystem.Call("OnEventChangeStatus", key, spawned); } } PanelSystem config { "Enabled": true, "Image": "https://i.imgur.com/asflpJe.png", "Permission": "", "Type": 7, "Panel Settings": { "Enabled": true, "Permission": "", "Switch": true, "Color": true, "Size": true }, "Size Settings": { "Sizes": [ { "Size": 25.0, "Lang Key": "sizeBig", "Permission": "" }, { "Size": 20.0, "Lang Key": "sizeMedium", "Permission": "" }, { "Size": 15.0, "Lang Key": "sizeSmall", "Permission": "" } ], "Default Size (index)": 0 }, "Color Settings": { "Default Active Color ID": 0, "Default Inactive Color ID": 2 }, "Key (MUST BE UNIQUE)": "UserNotify" } Config: { "Work with Notify?": true, "Display type (Overlay/Hud)": "Overlay", "Panel Anchor": "UpperRight", "Logotype": { "Enabled": true, "Permission": "", "Image": "https://i.imgur.com/eeuY1WI.png", "Command": "", "AnchorMin": "0 0", "AnchorMax": "1 1", "OffsetMin": "-100 -110", "OffsetMax": "-10 -20" }, "Players Settings": { "Enabled": true, "Permission": "", "Image": "https://i.imgur.com/Ik9YSZS.png", "Settings Image": "https://i.imgur.com/Ltn0Jr1.png", "Panel Settngs": { "Enabled": true, "Permission": "", "Switch": true, "Color": false, "Size": true }, "Size Settings": { "Sizes": [ { "Image Size": 35.0, "Title Font Size": 12, "Value Font Size": 16, "Up Indent": 40, "Side Indent": 145, "Lang Key": "sizeBig", "Permission": "" }, { "Image Size": 30.0, "Title Font Size": 10, "Value Font Size": 14, "Up Indent": 40, "Side Indent": 145, "Lang Key": "sizeMedium", "Permission": "" }, { "Image Size": 25.0, "Title Font Size": 8, "Value Font Size": 12, "Up Indent": 40, "Side Indent": 145, "Lang Key": "sizeSmall", "Permission": "" } ], "Default Size (index)": 0 } }, "Sleepers Settings": { "Enabled": false, "Permission": "", "Image": "https://i.imgur.com/J2QIswN.png", "Settings Image": "https://i.imgur.com/84eMeAq.png", "Panel Settngs": { "Enabled": true, "Permission": "", "Switch": true, "Color": false, "Size": true }, "Size Settings": { "Sizes": [ { "Image Size": 35.0, "Title Font Size": 12, "Value Font Size": 16, "Up Indent": 40, "Side Indent": 145, "Lang Key": "sizeBig", "Permission": "" }, { "Image Size": 30.0, "Title Font Size": 10, "Value Font Size": 14, "Up Indent": 40, "Side Indent": 145, "Lang Key": "sizeMedium", "Permission": "" }, { "Image Size": 25.0, "Title Font Size": 8, "Value Font Size": 12, "Up Indent": 40, "Side Indent": 145, "Lang Key": "sizeSmall", "Permission": "" } ], "Default Size (index)": 0 } }, "Time Settings": { "Updating the time every minute of game time (may cause performance issues)": false, "Enabled": true, "Permission": "", "Image": "https://i.imgur.com/ZI5vJk9.png", "Settings Image": "https://i.imgur.com/MhfhTLP.png", "Panel Settngs": { "Enabled": true, "Permission": "", "Switch": true, "Color": false, "Size": true }, "Size Settings": { "Sizes": [ { "Image Size": 35.0, "Title Font Size": 12, "Value Font Size": 16, "Up Indent": 50, "Side Indent": 145, "Lang Key": "sizeBig", "Permission": "" }, { "Image Size": 30.0, "Title Font Size": 10, "Value Font Size": 14, "Up Indent": 50, "Side Indent": 145, "Lang Key": "sizeMedium", "Permission": "" }, { "Image Size": 25.0, "Title Font Size": 8, "Value Font Size": 12, "Up Indent": 50, "Side Indent": 145, "Lang Key": "sizeSmall", "Permission": "" } ], "Default Size (index)": 0 } }, "Settings Button": { "Enabled": true, "Permission": "", "Image": "https://i.imgur.com/zrGBH8Q.png", "Color": { "HEX": "#4B68FF", "Opacity (0 - 100)": 100.0 }, "AnchorMin": "0 0", "AnchorMax": "1 1", "OffsetMin": "20 -60", "OffsetMax": "55 -25" }, "Buttons Setting": { "Enabled": true, "Permission": "", "Commands for hiding/unhiding buttons": [ "panelsystem.buttons" ], "Buttons": [ { "Enabled": true, "Image": "https://i.imgur.com/RScZfCg.png", "Permission": "", "Lang Key (oxide/lang/**/PanelSystem.json)": "BtnShop", "Command": "chat.say /shop" }, { "Enabled": true, "Image": "https://i.imgur.com/84ixNM9.png", "Permission": "", "Lang Key (oxide/lang/**/PanelSystem.json)": "BtnStats", "Command": "chat.say /stats" }, { "Enabled": true, "Image": "https://i.imgur.com/hIyouiW.png", "Permission": "", "Lang Key (oxide/lang/**/PanelSystem.json)": "BtnBank", "Command": "chat.say /bank" } ], "Settings Image": "https://i.imgur.com/mJih52U.png", "Panel Settngs": { "Enabled": true, "Permission": "", "Switch": true, "Color": false, "Size": true }, "Size Settings": { "Sizes": [ { "Image Size": 35.0, "Font Size": 16, "Up Indent": 205.0, "Side Indent": 25, "Margin": 5.0, "Lang Key": "sizeBig", "Permission": "" }, { "Image Size": 30.0, "Font Size": 14, "Up Indent": 205.0, "Side Indent": 25, "Margin": 2.5, "Lang Key": "sizeMedium", "Permission": "" }, { "Image Size": 25.0, "Font Size": 12, "Up Indent": 205.0, "Side Indent": 25, "Margin": 0.0, "Lang Key": "sizeSmall", "Permission": "" } ], "Default Size (index)": 0 } }, "Events": [ { "Enabled": true, "Permission": "", "Image": "https://i.imgur.com/kxeEFQG.png", "Type": 2, "Panel Settings": { "Enabled": true, "Permission": "", "Switch": true, "Color": true, "Size": true }, "Size Settings": { "Sizes": [ { "Size": 25.0, "Lang Key": "sizeBig", "Permission": "" }, { "Size": 20.0, "Lang Key": "sizeMedium", "Permission": "" }, { "Size": 15.0, "Lang Key": "sizeSmall", "Permission": "" } ], "Default Size (index)": 0 }, "Color Settings": { "Default Active Color ID": 0, "Default Inactive Color ID": 2 }, "Key (MUST BE UNIQUE)": "CH47" }, { "Enabled": true, "Permission": "", "Image": "https://i.imgur.com/zjzI25y.png", "Type": 4, "Panel Settings": { "Enabled": true, "Permission": "", "Switch": true, "Color": true, "Size": true }, "Size Settings": { "Sizes": [ { "Size": 25.0, "Lang Key": "sizeBig", "Permission": "" }, { "Size": 20.0, "Lang Key": "sizeMedium", "Permission": "" }, { "Size": 15.0, "Lang Key": "sizeSmall", "Permission": "" } ], "Default Size (index)": 0 }, "Color Settings": { "Default Active Color ID": 2, "Default Inactive Color ID": 3 }, "Key (MUST BE UNIQUE)": "Bradley" }, { "Enabled": true, "Permission": "", "Image": "https://i.imgur.com/PclffR9.png", "Type": 3, "Panel Settings": { "Enabled": true, "Permission": "", "Switch": true, "Color": true, "Size": true }, "Size Settings": { "Sizes": [ { "Size": 25.0, "Lang Key": "sizeBig", "Permission": "" }, { "Size": 20.0, "Lang Key": "sizeMedium", "Permission": "" }, { "Size": 15.0, "Lang Key": "sizeSmall", "Permission": "" } ], "Default Size (index)": 0 }, "Color Settings": { "Default Active Color ID": 3, "Default Inactive Color ID": 2 }, "Key (MUST BE UNIQUE)": "Helicopter" }, { "Enabled": true, "Permission": "", "Image": "https://i.imgur.com/NKNIqxz.png", "Type": 5, "Panel Settings": { "Enabled": true, "Permission": "", "Switch": true, "Color": true, "Size": true }, "Size Settings": { "Sizes": [ { "Size": 25.0, "Lang Key": "sizeBig", "Permission": "" }, { "Size": 20.0, "Lang Key": "sizeMedium", "Permission": "" }, { "Size": 15.0, "Lang Key": "sizeSmall", "Permission": "" } ], "Default Size (index)": 0 }, "Color Settings": { "Default Active Color ID": 0, "Default Inactive Color ID": 2 }, "Key (MUST BE UNIQUE)": "Airdrop" }, { "Enabled": false, "Permission": "", "Image": "https://i.imgur.com/lsEIGc5.png", "Type": 8, "Panel Settings": { "Enabled": true, "Permission": "", "Switch": true, "Color": true, "Size": true }, "Size Settings": { "Sizes": [ { "Size": 25.0, "Lang Key": "sizeBig", "Permission": "" }, { "Size": 20.0, "Lang Key": "sizeMedium", "Permission": "" }, { "Size": 15.0, "Lang Key": "sizeSmall", "Permission": "" } ], "Default Size (index)": 0 }, "Color Settings": { "Default Active Color ID": 0, "Default Inactive Color ID": 2 }, "Key (MUST BE UNIQUE)": "CargoShip" }, { "Enabled": false, "Permission": "", "Image": "https://i.imgur.com/Mkan1Ac.png", "Type": 10, "Panel Settings": { "Enabled": true, "Permission": "", "Switch": true, "Color": true, "Size": true }, "Size Settings": { "Sizes": [ { "Size": 25.0, "Lang Key": "sizeBig", "Permission": "" }, { "Size": 20.0, "Lang Key": "sizeMedium", "Permission": "" }, { "Size": 15.0, "Lang Key": "sizeSmall", "Permission": "" } ], "Default Size (index)": 0 }, "Color Settings": { "Default Active Color ID": 0, "Default Inactive Color ID": 2 }, "Key (MUST BE UNIQUE)": "Convoy" }, { "Enabled": false, "Permission": "", "Image": "https://i.imgur.com/LkmaOCm.png", "Type": 11, "Panel Settings": { "Enabled": true, "Permission": "", "Switch": true, "Color": true, "Size": true }, "Size Settings": { "Sizes": [ { "Size": 25.0, "Lang Key": "sizeBig", "Permission": "" }, { "Size": 20.0, "Lang Key": "sizeMedium", "Permission": "" }, { "Size": 15.0, "Lang Key": "sizeSmall", "Permission": "" } ], "Default Size (index)": 0 }, "Color Settings": { "Default Active Color ID": 0, "Default Inactive Color ID": 2 }, "Key (MUST BE UNIQUE)": "ArmoredTrain" }, { "Enabled": false, "Permission": "", "Image": "https://i.imgur.com/GbJGvQM.png", "Type": 12, "Panel Settings": { "Enabled": true, "Permission": "", "Switch": true, "Color": true, "Size": true }, "Size Settings": { "Sizes": [ { "Size": 25.0, "Lang Key": "sizeBig", "Permission": "" }, { "Size": 20.0, "Lang Key": "sizeMedium", "Permission": "" }, { "Size": 15.0, "Lang Key": "sizeSmall", "Permission": "" } ], "Default Size (index)": 0 }, "Color Settings": { "Default Active Color ID": 0, "Default Inactive Color ID": 2 }, "Key (MUST BE UNIQUE)": "WipeBlock" }, { "Enabled": false, "Permission": "", "Image": "https://i.imgur.com/CukDURt.png", "Type": 13, "Panel Settings": { "Enabled": true, "Permission": "", "Switch": true, "Color": true, "Size": true }, "Size Settings": { "Sizes": [ { "Size": 25.0, "Lang Key": "sizeBig", "Permission": "" }, { "Size": 20.0, "Lang Key": "sizeMedium", "Permission": "" }, { "Size": 15.0, "Lang Key": "sizeSmall", "Permission": "" } ], "Default Size (index)": 0 }, "Color Settings": { "Default Active Color ID": 0, "Default Inactive Color ID": 2 }, "Key (MUST BE UNIQUE)": "Sputnik" }, { "Enabled": false, "Permission": "", "Image": "https://i.imgur.com/p4rxub9.png", "Type": 14, "Panel Settings": { "Enabled": true, "Permission": "", "Switch": true, "Color": true, "Size": true }, "Size Settings": { "Sizes": [ { "Size": 25.0, "Lang Key": "sizeBig", "Permission": "" }, { "Size": 20.0, "Lang Key": "sizeMedium", "Permission": "" }, { "Size": 15.0, "Lang Key": "sizeSmall", "Permission": "" } ], "Default Size (index)": 0 }, "Color Settings": { "Default Active Color ID": 0, "Default Inactive Color ID": 2 }, "Key (MUST BE UNIQUE)": "SpaceEvent" }, { "Enabled": false, "Permission": "", "Image": "https://i.imgur.com/mm8nhlg.png", "Type": 16, "Panel Settings": { "Enabled": true, "Permission": "", "Switch": true, "Color": true, "Size": true }, "Size Settings": { "Sizes": [ { "Size": 25.0, "Lang Key": "sizeBig", "Permission": "" }, { "Size": 20.0, "Lang Key": "sizeMedium", "Permission": "" }, { "Size": 15.0, "Lang Key": "sizeSmall", "Permission": "" } ], "Default Size (index)": 0 }, "Color Settings": { "Default Active Color ID": 0, "Default Inactive Color ID": 2 }, "Key (MUST BE UNIQUE)": "AirEvent" }, { "Enabled": false, "Permission": "", "Image": "https://i.imgur.com/asflpJe.png", "Type": 7, "Panel Settings": { "Enabled": true, "Permission": "", "Switch": true, "Color": true, "Size": true }, "Size Settings": { "Sizes": [ { "Size": 25.0, "Lang Key": "sizeBig", "Permission": "" }, { "Size": 20.0, "Lang Key": "sizeMedium", "Permission": "" }, { "Size": 15.0, "Lang Key": "sizeSmall", "Permission": "" } ], "Default Size (index)": 0 }, "Color Settings": { "Default Active Color ID": 0, "Default Inactive Color ID": 2 }, "Key (MUST BE UNIQUE)": "UserNotify" }, { "Enabled": false, "Permission": "", "Image": "https://i.imgur.com/CukDURt.png", "Type": 13, "Panel Settings": { "Enabled": true, "Permission": "", "Switch": true, "Color": true, "Size": true }, "Size Settings": { "Sizes": [ { "Size": 25.0, "Lang Key": "sizeBig", "Permission": "" }, { "Size": 20.0, "Lang Key": "sizeMedium", "Permission": "" }, { "Size": 15.0, "Lang Key": "sizeSmall", "Permission": "" } ], "Default Size (index)": 0 }, "Color Settings": { "Default Active Color ID": 0, "Default Inactive Color ID": 2 }, "Key (MUST BE UNIQUE)": "Sputnik" }, { "Enabled": false, "Permission": "", "Image": "https://i.imgur.com/p4rxub9.png", "Type": 14, "Panel Settings": { "Enabled": true, "Permission": "", "Switch": true, "Color": true, "Size": true }, "Size Settings": { "Sizes": [ { "Size": 25.0, "Lang Key": "sizeBig", "Permission": "" }, { "Size": 20.0, "Lang Key": "sizeMedium", "Permission": "" }, { "Size": 15.0, "Lang Key": "sizeSmall", "Permission": "" } ], "Default Size (index)": 0 }, "Color Settings": { "Default Active Color ID": 0, "Default Inactive Color ID": 2 }, "Key (MUST BE UNIQUE)": "SpaceEvent" }, { "Enabled": false, "Permission": "", "Image": "https://i.imgur.com/mm8nhlg.png", "Type": 16, "Panel Settings": { "Enabled": true, "Permission": "", "Switch": true, "Color": true, "Size": true }, "Size Settings": { "Sizes": [ { "Size": 25.0, "Lang Key": "sizeBig", "Permission": "" }, { "Size": 20.0, "Lang Key": "sizeMedium", "Permission": "" }, { "Size": 15.0, "Lang Key": "sizeSmall", "Permission": "" } ], "Default Size (index)": 0 }, "Color Settings": { "Default Active Color ID": 0, "Default Inactive Color ID": 2 }, "Key (MUST BE UNIQUE)": "AirEvent" } ], "Economics": [ { "ID": 1, "Enabled": true, "Permission": "", "Image": "https://i.imgur.com/Q21Pwq9.png", "Plugin name": "Economics", "Balance show hook": "Balance", "Panel Settngs": { "Enabled": true, "Permission": "", "Switch": true, "Color": true, "Size": true }, "Size Settings": { "Sizes": [ { "Font Size": 20, "Lang Key": "sizeBig", "Permission": "" }, { "Font Size": 18, "Lang Key": "sizeMedium", "Permission": "" }, { "Font Size": 16, "Lang Key": "sizeSmall", "Permission": "" } ], "Default Size (index)": 0 }, "Default Color ID": 6 }, { "ID": 2, "Enabled": true, "Permission": "", "Image": "https://i.imgur.com/DhSC8z0.png", "Plugin name": "ServerRewards", "Balance show hook": "CheckPoints", "Panel Settngs": { "Enabled": true, "Permission": "", "Switch": true, "Color": true, "Size": true }, "Size Settings": { "Sizes": [ { "Font Size": 20, "Lang Key": "sizeBig", "Permission": "" }, { "Font Size": 18, "Lang Key": "sizeMedium", "Permission": "" }, { "Font Size": 16, "Lang Key": "sizeSmall", "Permission": "" } ], "Default Size (index)": 0 }, "Default Color ID": 7 } ], "Settings Interface": { "Icons On String": 4, "Size": 50.0, "Margin": 5.0 }, "Events Interface": { "Side Indent": 56.0, "Up Indent": 25.0, "Size": 35.0 }, "Hide Settings": { "Enabled": false, "Command": "panel", "Show Logo?": true }, "Colors": [ { "HEX": "#FFFFFF", "Opacity (0 - 100)": 100.0 }, { "HEX": "#000000", "Opacity (0 - 100)": 100.0 }, { "HEX": "#FFFFFF", "Opacity (0 - 100)": 60.0 }, { "HEX": "#FF6060", "Opacity (0 - 100)": 100.0 }, { "HEX": "#F6003B", "Opacity (0 - 100)": 100.0 }, { "HEX": "#0FF542", "Opacity (0 - 100)": 100.0 }, { "HEX": "#DCDCDC", "Opacity (0 - 100)": 100.0 }, { "HEX": "#4B68FF", "Opacity (0 - 100)": 100.0 }, { "HEX": "#0FF542", "Opacity (0 - 100)": 100.0 }, { "HEX": "#F68E00", "Opacity (0 - 100)": 100.0 }, { "HEX": "#F68E00", "Opacity (0 - 100)": 100.0 }, { "HEX": "#F6003B", "Opacity (0 - 100)": 100.0 }, { "HEX": "#F68E00", "Opacity (0 - 100)": 100.0 }, { "HEX": "#4B68FF", "Opacity (0 - 100)": 100.0 }, { "HEX": "#F68E00", "Opacity (0 - 100)": 100.0 }, { "HEX": "#0FF542", "Opacity (0 - 100)": 100.0 }, { "HEX": "#F68E00", "Opacity (0 - 100)": 100.0 }, { "HEX": "#0FF542", "Opacity (0 - 100)": 100.0 }, { "HEX": "#F68E00", "Opacity (0 - 100)": 100.0 }, { "HEX": "#F6003B", "Opacity (0 - 100)": 100.0 }, { "HEX": "#F6003B", "Opacity (0 - 100)": 100.0 }, { "HEX": "#F68E00", "Opacity (0 - 100)": 100.0 }, { "HEX": "#F68E00", "Opacity (0 - 100)": 100.0 }, { "HEX": "#0FF542", "Opacity (0 - 100)": 100.0 }, { "HEX": "#4B68FF", "Opacity (0 - 100)": 100.0 } ], "Version": { "Major": 1, "Minor": 1, "Patch": 5 } }$21.95 -

Version 1.0.9
111 downloads
Adds a coin flipping mini game to your server. Players can try their luck by playing against both a bot and a real player. Commands flip - open interface Permissions coinflipping.use - open interface coinflipping.players - play against players coinflipping.npcs - play against npcs coinflipping.createroom - create a room Config { "Commands": [ "flip" ], "Work with Notify?": true, "Economy": { "Type (Plugin/Item)": "Plugin", "Plugin name": "Economics", "Balance add hook": "Deposit", "Balance remove hook": "Withdraw", "Balance show hook": "Balance", "ShortName": "scrap", "Display Name (empty - default)": "", "Skin": 0 }, "Interface": { "Show coin in header?": true, "Coin Image": "https://i.imgur.com/GBVGvQa.png" }, "Values for Bot Game": [ 100, 200, 300 ], "Min Bet for Bot Game": 100, "Min Bet for Player Game": 100, "Permissions Settings": { "Opening the interface": "coinflipping.use", "Playing against players": "coinflipping.players", "Playing against NPCs": "coinflipping.npcs", "Creating a room": "coinflipping.createroom" } }$19.95 -
Version 1.1.42
4,157 downloads
Clans is an all-in-one manager that lets you create, manage and invite players all from one stunning interface. Toggle friendly fire, view clan, and player leaderboards, create and break alliances, modify gather rates for clan members and set clan skins to identify clan members abroad easily. Features Beautiful user interface Performance Allied clans Gather rate for players (allows you to set how much each clan member must collect resources. For example: each member of the clan must collect 10 thousand sulfur, so that later it can be used to craft explosives and attack another clan) Clan skins (allows you to set common skins for all clan players. All the clothes on the players of the same clan will be the same, which allows you to distinguish your own from the enemies during the battle) The clan TAG min- and max-length can be defined in the config The clan overview shows offline member names Clan members can toggle friendly-fire protection for clan mates and allies Clan creation can check TAG’s against a blocked word list Clan tagging can be optionally disabled Old (not updated since x days) clans can be automatically purged Clans rating Players rating Setting a personal avatar for your clan Autowipe with wipe (optional) Commands clans (display clan menu) clans help (get information about commands) clan create (create a clan) clan leave (leave from your clan) clan join (open UI with invitations) clan ff (toggle friendlyfire status) clan allyff (toggle friendlyfire status for allies) clan invite <name/steamid> (invite a player) clan withdraw <name/steamid> (cancel an invite) clan kick <name/steamid> (kick a member) clan allyinvite <clanTag> (invite a clan to ally) clan allywithdraw <clanTag> (cancel the offer of an alliance) clan allyaccept <clanTag> (accept the offer of an alliance) clan allycancel <clanTag> (cancen the offer of an alliance) clan promote <name/steamid> (promote a member) clan demote <name/steamid> (demote a member) clan disband (disband your clan) clans.loadavatars (download avatars of all players) clans.manage list - lists all clans, their owners and their member-count clans.manage listex - lists all clans, their owners/members and their on-line status clans.manage show [name/userId] - lists the chosen clan (or clan by user) and the members with status clans.manage msg [clanTag] [message] - sends a clan message clans.manage create [name/userId] [clanTag] - creates a clan clans.manage rename [oldTag] [newTag] - renames a clan clans.manage disband [clanTag] - disbands a clan clans.manage invite [clanTag] [name/userId] - sends clan invitation to a player clans.manage join [clanTag] [name/userId] - joins a player into a clan clans.manage kick [clanTag] [name/userId] - kicks a member from a clan clans.manage owner [clanTag] [name/userId] - sets a new owner clans.manage promote [clanTag] [name/userId] - promotes a member clans.manage demote [clanTag] [name/userId] - demotes a member clans.reborn.convert (convert data from Clans Reborn plugin) clans.umod.convert (convert data from uMod Clans (v0.2.2+) plugin) clans.convert.olddata (convert data from old data) clans.convert.old.stats – used to update player data when upgrading from older versions of the game to 1.1.31 and above. Permissions clans.cancreate (permission to create a clan) clans.canjoin (permission to join a clan) clans.canleave (permission to leave a clan) clans.candisband (permission to disband a clan) clans.cankick (permission to kick a clan member) clans.admin (permission to use command 'clans.manage') Loot Types None – used for disabled loot Gather – used for gathering loot LootCrate – used for a loot crate Look – used to look at loot Kill – used to kill entities Craft – used for crafting items HackCrate – used for hacking a loot crate FAQ Q: Where can I see an example of a config? A: Config Q: Does the Clans plugin support other plugins? A: Yes, this Clans plugin has an API similar to other popular clans plugins. If the plugin works with Clans - it works with this plugin too. Q: How do I enable the display of clan ratings on the screen? A: You need to install the Clans Top plugin Q: Does the Clans plugin work with other Rust plugins? A: The Clans plugin is designed to work with a wide range of other Rust plugins, but compatibility may vary depending on the specific plugins you are using.$45.95 -
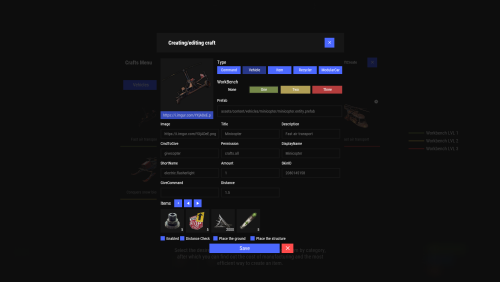
Version 2.10.21
1,368 downloads
Crafting system that allows you to create items, cars, vehicles, recyclers, etc! Commands craft open interface crafts.setwb [categories: cat1 cat2 ...] set new custom workbench Permissions You can set permission in config, for example: "Permission (ex: crafts.use)": "crafts.use", crafts.setworkbench - allows you to use the "crafts.setwb" command (set custom workbenches) Craft Types Command Vehicle Item Recycler ModularCar How to install a custom workbench 1. Spawn the workbench (for example, in RustEdit or a plugin) 2. In the game, go to him and use the command "crafts.setwb" and specify the necessary categories. Example: /crafts.setwb Misc 3. Go to config (oxide/config/Crafts.json) and configure this workbench (use SafeZone, workbench level, etc.) VIDEO FAQ Q: Where can I see an example of a config? A: Config$19.95 -
Version 1.1.0
76 downloads
The "F1 Item Menu" plugin allows players to open an interactive menu to select items in Rust and add them to their inventory using a simple command. The plugin provides a user-friendly interface with a search function and page navigation for convenient browsing of available items. Command: /f1menu - Opens the F1 item menu, allowing the player to select items and add them to their inventory. Permissions: f1itemmenu.f1 - This permission is required to use the /f1menu command. How to Use the Plugin: 1. To open the menu, the player enters the /f1menu command, provided they have the f1itemmenu.f1 permission. 2. In the menu, the player can search for items by entering a search term and clicking "Search." 3. The player can navigate through the available items by clicking the arrow buttons (< and >) to go to the previous or next page. 4. After selecting an item, the player is presented with another menu to specify the quantity of the chosen item. 5. The player can then choose the desired quantity (1, 10, 100, 1000, 10000) and click "Close" to exit the menu. 6. The selected item is automatically added to the player's inventory. { "Enable Discord Webhook": true, "Webhook URL": "", "Username": "Rust Server", "Avatar URL": "", "Discord Message Format": "Player **{playerName}** has taken **{quantity}** of **{itemName}**." }$15.95 -
Version 1.2.11
682 downloads
The radial menu is a customizable quick access panel with all popular and frequently used server commands. It makes it a lot easier and faster to interact with various server mechanics, be it teleportation, trades, setting house points and various panels. Features Allows to almost completely eliminate the manual entry of commands by the player. Automatic calculation and arrangement of any number of sections/subsections on a circle. Several display effects. Tracks a press of the MMB or on command (can be keyed to the same MMB). Checks for the privileges of a particular command, before executing it. Ability to use your own panel images. Full customization of the location and scale of icons and panel. Support for popular plugins (NTeleportation, TeleportGUI, Clans, Friends and Rust teams). Executing console or chat commands. General settings Track MMB presses to open a radial menu? - if the player has a MMB bind, the plugin will not open the Radial Menu. The command to open the radial menu - you can use both the command and the MMB tracking. When using MMB tracking and the command at the same time: If a player has a MMB bind, his bind will be executed when he clicks on it, and the Radial Menu will not open. If there is no bind, the player can use both the command and the MMB press. Upload images to players when they connect? - when a player connects to the server, the plugin will automatically download 3 images of menu rings to his client. This avoids displaying black rectangles when opening the menu while the plugin is downloading the images to the client. Section/Subsection settings The plugin has main sections (level 1), subsections at level 1 (level 2) and subsections at level 2 (level 3). Section name - the name of the section, which is displayed under the icon. Enable this section? – on/off section. Section permission [required] - permission required for the plugin to work (without dots). Add "_add" to the end of the name so that the plugin does not register or check permissions for child subsections. Section icon - direct link to the icon (recommended size 64x64). Fill icon with color below? - Completely fills the icon with the color set below. Inactive/active section color [HEX or Unity RGBA] - The plugin supports 2 types of colors: HEX (e.g. "#57de54" or "#57de54ff") and Unity RGBA ("0.34 0.87 0.33 1"). Command executed on behalf of the player - if you do not have subsections in this section, the command (without the "/" if chat) that will be executed for that player is specified here. If there are subsections in this section, the command is not specified. Specify %steamid% or %username% so that the plugin replaces them with the data of the player on whose behalf the command is executed. Command type - Where to run this command: true - chat, false - console. Permissions for above command - if the command above is specified, you can specify the privileges of that command in this field (e.g. "removertool.normal, removertool.structure, removertool.external"). The plugin will check if the player has these privileges before executing the command. Show this section only to those with permissions above? - allows to draw the section automatically (without giving permissions to this plugin) if the player has command permissions. Show this section even to those who don't have permissions? - forcibly displays the section to all players, even those who do not have privileges to it (if you click on it, a message about lack of permissions will be displayed in chat). Subsections layout [n - number] - this setting is responsible for how subsections are arranged. 0 - automatically. Suppose you have 10 subsections, then 360 degrees / 10 subsections = 36 degrees. The plugin will automatically position the 10 subsections every 36 degrees (clockwise, starting from the top). n - from the beginning. The plugin will arrange the subsections clockwise, starting from the top, not automatically, but in a certain step. For example, you have 3 subsections, but you do not want them to be automatically scattered all around the circle, you want them to be displayed at the top, with some small step, this step will be calculated due to the conditional number of subsections n (for example, 15). Now 360 degrees / 15 conditional subsections = 24 degrees, then your 3 subsections will be positioned from the beginning and there will be 24 degrees between them. -n - from the active item. The plugin will arrange the subsections relative to the active section. For example, you have 3 subsections, but you don't want them to be automatically scattered all around the circle, and you also don't want them to be arranged in some clockwise, starting from the top. By choosing this type of arrangement, the subsections will be located in the same place as the active section, in the increments you specify. It works the same way as above, only n is specified with a minus sign (for example, -15, the minus is needed for the plugin to understand what type of arrangement to use). All examples of the layout of the subsections are present in the standard config. Permissions It may be unclear how permissions work in this plugin. Let's figure it out with a simple example from the standard config. It's not hard to figure out that this is the home point section of the standard config. To exclude identical names of permissions the plugin converts them to this form. Because of the large number of permissions generated by the plugin, there are mechanics for reducing them. If you add "_all" to any section, in the "permission" field, the plugin will not register the permissions of child subsections. For example, if the player has the permission "_homes_all", then all displayed houses, all commands (add, remove, etc.), in general everything that belongs to the section "_homes_all" will obey and is checked by the permission "radialmenu._homes_all". The "permission" fields of the child sections still have to be filled in for the plugin to work. I strongly recommend using the "Permissions Manager" plugin to set privileges for players or groups. It draws a simple interface, through which it is very easy to add or remove permissions. Teleportation The plugin supports work with teleportation plugins (set/remove/teleport to home point) NTeleportation, TeleportGUI and Teleportation by OxideBro (for RU server owners). To do this, in the main section (level 1), you must specify the permission of the "_homes" section, this is necessary for the plugin to understand that it will work with the teleport plugin. Next, in the subsection "_homes" (level 2) you must add the MAXIMUM number of displayed house points, for example 5. If the player has more house points than this number, then only the first 5 will be displayed, if less, then all of them will be displayed. For each such point, you must set its unique name, which begins with "home_n", where "n" is any unique number or word (e.g. home_1, home_2, etc.). In addition to the house points here you can place a section with the establishment of the house point, its name should be "home_add", and the command "home add {0}" (command your plugin teleport), where {0} - the name of the new house point, the plugin itself will set it relative to the square in which the player at the moment is (for example D3, if there are several in the square, then D3h1, D3h2, etc.). After that, in the subsections (level 3) of each such house point, you can specify commands relating specifically to it. For example: "home {0}", "home remove {0}" or any other commands, where {0} is the name of the specific house, the plugin itself will substitute it when executing the command. If you find all of the above complicated, you can take a look at the standard config as an example. Friends The plugin supports work with plugins Friends, Clans by k1lly0u and Rust teams. Here everything is set up similar to Teleportation. But for the plugin to understand what to work with, in the main section (level 1) you must specify one of the three options: "_teammates" - the plugin will work with Rust teams "_friends" - the plugin will work with the Friends plugin "_clans" - the plugin will work with the Clans plugin In subsections (level 2) you must add the MAXIMUM number of displayed friends, for example 8. If the player has more friends than this number, then only the first 8 will be displayed, if less, then all of them will be displayed. For each friend you must set its unique name, which begins with "friend_n", where "n" is any unique number or word (for example friend_1, friend_2, etc.). After that, in the subsections (level 3) of each friend you can specify commands specific to him. For example: "tpr {0}", "trade {0}" or any other commands, where {0} is the nickname of the player, the plugin itself will substitute it when executing the command. An example of the configuration of this section is also present in the standard config. Plugin Config Example of plugin configuration in English Example of plugin configuration in Russian. If you need Russian config, open it (RadialMenu.cs) before loading the plugin, and at the top set the variable "isRus = true". Then save and upload this file to your server.$15.00 -

Version 1.1.1
1,482 downloads
Rusty Bangers is a UI for Vehicle Licence. STOP... I HAVE REWRITTEN THE PLUGIN TO MAKE SPACE FOR ANY OTHER VEHICLES COMING TO RUST. I HAVE ALSO ADDED THE ABILITY TO CUSTOMISE THE VEHICLE IMAGES. IF YOU USE THE DEFAULT CONFIG AND MY VEHICLE LICENSE CONFIG (PASTE BIN LINK BELOW) IT SHOULD WORK STRAIGHT OUT OF THE BOX (MINUS NEEDING SOME PRICE AND POSSIBLE COOL DOWN CHANGES TO MATCH YOUR SERVER) Check out updates below Permissions Rusty Bangers now requires vehiclelicence.use permission to be opened AND NOW Players can now only see options for vehicles that they have been granted permissions to spawn. Command /rusty << opens the UI Configuration { "Genericsettings": { "Command List": [ "mini", "tcop", "hab", "ch47", "rhib", "row", "sedan", "horse", "smallchassis", "mediumchassis", "largechassis", "smallcar", "mediumcar", "largecar", "workcart", "magnetcrane", "subsolo", "subduo" ] }, "Page1Settings": { "Slot 1 Permission": "vehiclelicence.minicopter", "Slot 1 Image": "https://i.imgur.com/1eCWmxC.png", "Slot 2 Permission": "vehiclelicence.transportcopter", "Slot 2 Image": "https://i.imgur.com/KMXvIiC.png", "Slot 3 Permission": "vehiclelicence.hotairballoon", "Slot 3 Image": "https://i.imgur.com/huK1pU3.png", "Slot 4 Permission": "vehiclelicence.chinook", "Slot 4 Image": "https://i.imgur.com/MQRcEcv.png", "Slot 5 Permission": "vehiclelicence.rhib", "Slot 5 Image": "https://i.imgur.com/jXf4fNl.png", "Slot 6 Permission": "vehiclelicence.rowboat", "Slot 6 Image": "https://i.imgur.com/SlE8lLs.png", "Slot 7 Permission": "vehiclelicence.sedan", "Slot 7 Image": "https://i.imgur.com/aNUvab6.png", "Slot 8 Permission": "vehiclelicence.ridablehorse", "Slot 8 Image": "https://i.imgur.com/eZvi0n2.png" }, "Page2Settings": { "Slot 1 Permission": "vehiclelicence.smallchassis", "Slot 1 Image": "https://i.imgur.com/Nlgsj4h.png", "Slot 2 Permission": "vehiclelicence.mediumchassis", "Slot 2 Image": "https://i.imgur.com/WX0iPUB.png", "Slot 3 Permission": "vehiclelicence.largechassis", "Slot 3 Image": "https://i.imgur.com/0JSrdCy.png", "Slot 4 Permission": "vehiclelicence.smallmodularcar", "Slot 4 Image": "https://i.imgur.com/7QsY72X.png", "Slot 5 Permission": "vehiclelicence.mediummodularcar", "Slot 5 Image": "https://i.imgur.com/65VPddU.png", "Slot 6 Permission": "vehiclelicence.largemodularcar", "Slot 6 Image": "https://i.imgur.com/zkmYF9d.png", "Slot 7 Permission": "vehiclelicence.workcart", "Slot 7 Image": "https://i.imgur.com/TU0DD1v.png", "Slot 8 Permission": "vehiclelicence.magnetcrane", "Slot 8 Image": "https://i.imgur.com/sXMrzuq.png" }, "Page3Settings": { "Slot 1 Permission": "vehiclelicence.submarinesolo", "Slot 1 Image": "https://i.imgur.com/bu3vBjM.png", "Slot 2 Permission": "vehiclelicence.submarineduo", "Slot 2 Image": "https://i.imgur.com/To7tiMp.png", "Slot 3 Permission": "", "Slot 3 Image": "https://i.imgur.com/6RjWdNd.png", "Slot 4 Permission": "", "Slot 4 Image": "https://i.imgur.com/6RjWdNd.png", "Slot 5 Permission": "", "Slot 5 Image": "https://i.imgur.com/6RjWdNd.png", "Slot 6 Permission": "", "Slot 6 Image": "https://i.imgur.com/6RjWdNd.png", "Slot 7 Permission": "", "Slot 7 Image": "https://i.imgur.com/6RjWdNd.png", "Slot 8 Permission": "", "Slot 8 Image": "https://i.imgur.com/6RjWdNd.png" }, "PageSettings": { "Home Icon Image": "https://i.imgur.com/ZTNqNQM.png", "Page 2 active": true, "Page 2 Icon Image": "https://i.imgur.com/W9Kr4jB.png", "Page 3 active": true, "Page 3 Icon Image": "https://i.imgur.com/qi5kX0c.png" }, "ButtonSettings": { "Buy Button Color": "1 0 0 1", "Deliver Button Color": "0 1 0 1", "Recall Button Color": "0 0 1 1", "Kill Button Color": "0.5 0.5 0.5 1" } } Set your config Variables to the same details displayed in your Vehicle Licence Config. Command List are the spawn commands from the Vehicle License config. e.g. In the Vehicle licence config "Commands": [ "car", "sedan" ], So in the list for RustyBangers we add either car or sedan. The order of the command list the must be the order of your icons and perms. The link below is a blank image. if you are not using the section I would suggest using this image. https://i.imgur.com/6RjWdNd.png Button Color Configuration is done in the RGBA format with values between 0 and 1. Examples at bottom. Vehicle licence config Here is a pastebin link for the config I use.. if your missing cars and chassis this contains them as you have to manually create them now. (Set prices and cool downs to your requirements mine maybe weird because it's for testing) https://pastebin.com/N5LKf6EJ Color Examples blackSolid black. RGBA is (0 0 0 1). blueSolid blue. RGBA is (0 0 1 1). clearCompletely transparent. RGBA is (0 0 0 0). cyanCyan. RGBA is (0 1 1 1). grayGray. RGBA is (0.5 0.5 0.5 1). greenSolid green. RGBA is (0 1 0 1). greyEnglish spelling for grey. RGBA is the same (0.5 0.5 0.5 1). magentaMagenta. RGBA is (1 0 1 1). redSolid red. RGBA is (1 0 0 1). whiteSolid white. RGBA is (1 1 1 1). The Last digit dictates Alpha channel... so for an opaque appearance select a value below 1 E.g. 0.7 UPDATE V1.1.0 Rewritten to allow users to make images that reflect their VL settings and include Subs, WorkCart and Crane. V1.0.4 Global configuration section removed thanks to Arainrr exposing fields in VehicleLicence for the RustyBangers project.Free- 60 comments
- 2 reviews
-
- 3
-
-
-
- #vehicle licence
- #ui
- (and 7 more)
-
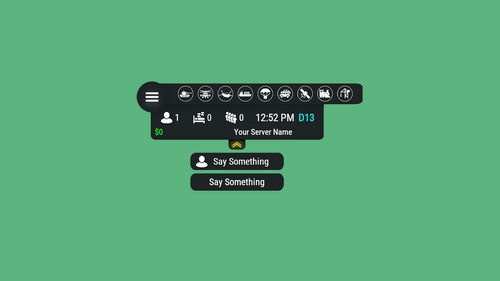
Version 3.3.5
10,588 downloads
Features: You can add any plugin event in the UI (if it has hooks, usually specified in the plugin description) Has ingame UI menu for configure your Hud The time format is adjusted to the player (depending on his language in the game), it checks which time format is used for this language You can also enable an additional menu that opens on the arrow. You can add various buttons to this menu, for example, to open a store, your server menu, etc. Almost all elements are customizable [for example: visibility of each element, Logo, Icons, Color e.t.c (check config down below)] Commands: /h setup - open UI for ingame config /h - show all Server Hud UI commands /h open - open Server Hud UI /h events - open Events Bar /h close - close Server Hud UI /h hide - hide Server Hud UI Q&A: Q: Where i can find a base icon for creating my events icons? A: Take a base icon below this message and using f.e photoshop for create you personal event icon! Q: Where i can find a ready to use icons? A: Here some links to ready to use icons packs(1 free, 2 paid): https://codefling.com/customizations/free-custom-hud-icons https://codefling.com/customizations/custom-hud-icons-paid https://codefling.com/customizations/server-hud-custom-icon-pack API: string API_PlayerHudState(string id) CanHudChangeState(BasePlayer player, string currentState, strint nextState) Config: { "Auto reload [If you change the config and save the file the plugin will reload itself]": true, "Main setup": { "Overall layer [you will see the hud in your inventory]": false, "Size ALL [0% - inf]": 100, "Logo [HUD interact button]": "https://media.discordapp.net/attachments/335512864548847617/1134455399756607549/logo.png", "Events background opacity [0% - 100%]": 100, "Background opacity [0% - 100%]": 100, "Position": { "Align [TopLeft | TopRight | BottomLeft | BottomRight": "TopLeft", "Left | Right - offset": 40, "Top | Bottom - offset": 25 }, "Server name": "Your Server Name", "Active players": { "Icon": "https://cdn.discordapp.com/attachments/335512864548847617/1134455395813965934/active.png", "Color": "#fff", "Enable": true }, "Sleep players": { "Icon": "https://cdn.discordapp.com/attachments/335512864548847617/1134455395138670652/sleep.png", "Color": "#fff", "Enable": true }, "Queue players": { "Icon": "https://cdn.discordapp.com/attachments/335512864548847617/1134455393972654171/line.png", "Color": "#fff", "Enable": true }, "Time": true, "Player position [hide permisson - hud.streamer]": { "Enable": true, "true - grid | false - x,z coordinates": true, "Color": "cyan" }, "Economy plugin [Economics | ServerRewards]": { "Currency": "$", "Value color": "#10ff10", "Enable": true }, "Info messages": { "Update interval [in seconds]": 60, "Align [BottomCenter | TopCenter | TopRight]": "BottomCenter", "Width [in px]": 260, "Offset [top | bottom]": 0, "Offset [right]": 15, "Outline color": "#000", "Overall [you will see messages in your invenotory]": true, "Enable": true, "Messages": [ "Welcome to Your Server Name", "Good luck" ] }, "Additional menu": { "Auto close timer [seconds | 0 - disable]": 60, "Auto close after command use": true, "Open/Close button color": "yellow", "Commands background opacity [0% - 100%]": 100, "Enable": true, "Commands": [ { "Background image": "https://media.discordapp.net/attachments/335512864548847617/1134455392420761671/command.png", "Icon [optional]": "https://media.discordapp.net/attachments/335512864548847617/1134455395813965934/active.png", "Command": "chat.say Hello there", "Text": "Say Something", "Outline color": "#000", "Is Console": true }, { "Background image": "https://media.discordapp.net/attachments/335512864548847617/1134455392420761671/command.png", "Icon [optional]": "", "Command": "/shop", "Text": "Say Something", "Outline color": "#000", "Is Console": false } ] } }, "Base Events": [ { "Name": "Bradley", "Active color": "#10ff10", "Icon": "https://media.discordapp.net/attachments/335512864548847617/1134455316654850049/bradley.png", "Color": "#fff", "Enable": true }, { "Name": "PatrolHeli", "Active color": "#10ff10", "Icon": "https://media.discordapp.net/attachments/335512864548847617/1134455315073597530/heli.png", "Color": "#fff", "Enable": true }, { "Name": "CH47", "Active color": "#10ff10", "Icon": "https://media.discordapp.net/attachments/335512864548847617/1134455317485342803/ch47.png", "Color": "#fff", "Enable": true }, { "Name": "Cargo", "Active color": "#10ff10", "Icon": "https://media.discordapp.net/attachments/335512864548847617/1134455317086879794/cargo.png", "Color": "#fff", "Enable": true }, { "Name": "AirDrop", "Active color": "#10ff10", "Icon": "https://cdn.discordapp.com/attachments/335512864548847617/1134455316143161374/airdrop.png", "Color": "#fff", "Enable": true } ], "Custom Events": [ { "Hook OnEventStart": "OnConvoyStart", "Hook OnEventStop": "OnConvoyStop", "Name": "Convoy", "Active color": "#10ff10", "Icon": "https://media.discordapp.net/attachments/335512864548847617/1134455318030598154/convoy.png", "Color": "#fff", "Enable": false }, { "Hook OnEventStart": "OnSputnikEventStart", "Hook OnEventStop": "OnSputnikEventStop", "Name": "Sputnik", "Active color": "#10ff10", "Icon": "https://cdn.discordapp.com/attachments/335512864548847617/1134455315488854016/sputnik.png", "Color": "#fff", "Enable": false }, { "Hook OnEventStart": "OnArmoredTrainEventStart", "Hook OnEventStop": "OnArmoredTrainEventStop", "Name": "ArmoredTrain", "Active color": "#10ff10", "Icon": "https://cdn.discordapp.com/attachments/335512864548847617/1134455315841155173/train.png", "Color": "#fff", "Enable": false }, { "Hook OnEventStart": "OnHarborEventStart", "Hook OnEventStop": "OnHarborEventEnd", "Name": "Harbor", "Active color": "#10ff10", "Icon": "https://cdn.discordapp.com/attachments/335512864548847617/1134455318332592219/harbor.png", "Color": "#fff", "Enable": false } ] }$14.99- 566 comments
- 33 reviews
-
- 39
-
-
-

-

-
- #hud
- #interface
- (and 6 more)
-

Version 2.2.0
341 downloads
VIP Status is a powerful plugin that shows custom status messages for VIP players (3 different groups) on your Rust server. With the user-friendly configuration options, you can customise the colours, icons and text of the VIP status message of all 3 VIP groups to suit your individual needs. Plus, the plugin comes with a fully customizable language file, so you can translate the status message and other plugin texts into your preferred language. But that's not all: VIP Status is designed to be stable and reliable. Unlike other plugins that use countdown timers to display the remaining time of a VIP status, VIP Status simply shows the expiration date and checks it against the player's permissions file at fixed intervals. This approach ensures that the plugin operates smoothly without causing any lags or performance issues. Many other plugins that constantly perform countdown calculations can be processor-intensive and lead to performance drops. That's why we opt for static end times, eliminating the need for resource-heavy calculations every minute. If you want to enhance the VIP experience on your Rust server and offer your players a premium status that stands out, VIP Status is the plugin for you. Try it out today and see how it can elevate your server to the next level! Please note that VIP Status requires the Free TimedPermissions plugin to function, as it relies on TimedPermissions to set and track the VIP expiration time. If a player is a member of the VIP group but not listed in the TimedPermission file, the VIP status is now displayed without an expiry date. vip groups now possible for a maximum of 3 groups with different settings (pictures, colour etc.) as well as long file for all 3 groups Toggle the visibility of your VIP status. Added new configuration option to display a custom status when the player does not belong to any group, as an example: no vip Commands: /vip - List of Commands /vt - Toggle the visibility of your VIP status. /vi - Shows how long you have left on your VIP status Config: { "VIPGroups": [ { "Color": "0.66 0.66 0.66 0.8", "IconColor": "1.5 0.8 0.0 0.9", "ImageUrl": "https://i.ibb.co/hmC7s0y/vip1.png", "SubTextColor": "1 1 1 0.7", "TextColor": "1.5 0.8 0.0 0.8", "VipStatusId": "vip1" ///name of the vip group 1 }, { "Color": "0.30 0.66 0.66 0.8", "IconColor": "1.5 0.8 0.0 0.9", "ImageUrl": "https://i.ibb.co/yN18d6h/vip2.png", "SubTextColor": "1 1 1 0.7", "TextColor": "1.5 0.8 0.0 0.8", "VipStatusId": "vip2" ///name of the vip group 2 }, { "Color": "1.0 0.0 0.0 0.4", "IconColor": "1.5 0.0 0.0 0.9", "ImageUrl": "https://i.ibb.co/py0GJpj/vip3.png", "SubTextColor": "1 1 1 0.7", "TextColor": "1.5 0.8 0.0 0.8", "VipStatusId": "vip3" ///name of the vip group 3 } ], "ShowCustomStatusWhenNoGroup": false, ///set true to display a custom status when the player does not belong to any group. "NoGroupConfig": { "Color": "1.0 0.0 0.0 0.4", "TextColor": "1.5 0.8 0.0 0.8", "SubTextColor": "1 1 1 0.7", "IconColor": "1.5 0.8 0.0 0.8", "ImageUrl": "https://i.ibb.co/hmC7s0y/vip1.png" } } Lang: { "VIPStatusText_group1": "GROUP1", ///visible name of the vip group 1 "UntilText_group1": "until {0}", ///subtext for Group 1 with expire time "NoExpireText_group1": "Unlimited", ///subtext for Group 1 without an expiry date. "VIPStatusText_group2": "GROUP2", ///visible name of the vip group 2 "UntilText_group2": "until {0}", ///subtext for Group 2 with expire time "NoExpireText_group2": "Unlimited",///subtext for Group 2 without an expiry date. "VIPStatusText_group3": "GROUP3", ///visible name of the vip group 3 "UntilText_group3": "until {0}",///subtext for Group 3 with expire time "NoExpireText_group3": "Unlimited", ///subtext for Group 3 without an expiry date. "VIPStatusOn": "VIP status display turned on.", "VIPStatusOff": "VIP status display turned off.", "VIPStatusExpiration": "{0} expires on: {1}", "VIPStatusUnlimited": "{0} has unlimited VIP status.", "MessageCommandsListTitle": "List of Commands:", "MessageCommandVT": "/vt - Toggle the visibility of your VIP status.", "MessageCommandVIPInfo": "/vi - Shows how long you have left on your VIP status.", "NoGroupStatus": "No VIPs" /// text for the custom status when the player does not belong to any group. }$15.00 -
Version 1.0.0
10 downloads
This is a simple, lightweight and easy to use plugin that allows you to grant permissions and groups for a specific amount of time. It also supports the creation of permission packs, which makes it easy to grant a large number of permissions at a time. Features Information panel with current user privileges. Customize notification in all popular notification plugins. Full-featured API for plugin developers (ability to create your own interface or integrate display of privileges into your game menu plugin). Ability to create privilege packs. Supported plugins: Notify, GUIAnnouncements - these plugins are used to display notifications. Permissions expiringpermissions.admin - to use commands to grant and revoke privileges. expiringpermissions.gui - to show a panel with the player's current privileges. Commands Commands can be entered from wherever you want: via chat, game console (F1) or server console. eperms (configurable) – shows a panel with the current privileges of the current player. setpack steamid/nickname packname time – to temporarily grant a pack of privileges to a player. revokepack steamid/nickname packname – forcibly revoke a pack of privileges from a player. grantperm steamid/nickname permission time title – temporarily grant a player a permission. revokeperm steamid/nickname permission – forcibly revoke a player's permission. addgroup steamid/nickname group time title – temporarily add a player to the group. removegroup steamid/nickname group – forcibly remove a player from a group. Description of command arguments: steamid/nickname - steamid or nickname of your choice. permission/group - plugin permission/oxide group. packname - package name from the Package name field in the config. time - duration of privileges, in the format 7d10h20m (e.g. 14d, 1d5h, 10m and etc.). title (optional) - name that will be displayed in the panel and indicated in messages to the player. If it is not specified, the plugin will write *title not specified*. General settings Check interval [sec] – interval for checking expiring player privileges. Show the start and end date of the permission in the panel (depends on the time on the physical server)? – in addition to the privilege name (if specified), the panel will display the privilege activation date and expiration date. Keep in mind that the plugin works with the time of the server machine (physical server). If the time and date are not configured there, they will be displayed incorrectly in the plugin. Type of notifications when permission are granted (none, title - only with name, all) none – the player will not be notified when a privilege is granted to him. title – the player will be notified about those privileges that have the name specified. all – the player will be notified when all privileges have been granted. If the privilege does not have a name set, *title not specified* will be displayed. Type of notifications when permission expire (none, title - only with name, all) – similar to the setting above, only when the privilege is revoked/expired. Show a notification if the permission is manually revoked? – show a notification to the player when an administrator manually removes a privilege. Notification settings Notification type (Chat, GameTips, Notify, GUIAnnouncements) – if this section is enabled, you must specify the type/plugin to notify the player of different warnings. Chat – notification to regular chat. GameTips – notification in the in-game Rust tooltips (blue or red at the bottom of the screen). Notify – notification in the Notify plugin by Mevent. GUIAnnouncements – notification in the GUIAnnouncements plugin by JoeSheep. Just below that are the customization fields for the specific type of notification. Setting permission packages To display privileges correctly in the panel, you can create packs. They allow you to collect several privileges or groups together. In this way you reduce the number of commands and assign a name to this pack, which will be displayed in the panel and when the player is notified. This is actually very convenient and saves problems and confusion. Display name – package name, it is displayed in the panel and in notifications. Package name – package short name, it is used when using commands. Permissions – list of permissions that will be included in the package. Groups – list of groups that will be included in the package. Then you just use the setpack command where you specify the name of the pack. Then everything in the pack (permissions and groups) will be given to the player. Plugin Api object ExpPermCanSetPackage(BasePlayer target, TimeSpan timeSpan, string packageName) { return null; } // before the pack is issued void ExpPermOnPackageSet(BasePlayer target, TimeSpan timeSpan, string packageName) // after issuing the pack object ExpPermCanRevokePackage(BasePlayer target, string packageName) { return null; } // before the pack is revoked void ExpPermOnPackageRevoked(BasePlayer target, string packageName) // after the pack is revoked object ExpPermCanGrantPermission(BasePlayer target, string permission, TimeSpan timeSpan, string title) { return null; } // before the permission is granted void ExpPermOnPermissionGranted(BasePlayer target, string permission, TimeSpan timeSpan, string title) // after the permission is granted object ExpPermCanRevokePermission(BasePlayer target, string permission) { return null; } // before the permission is revoked void ExpPermOnPermissionRevoked(BasePlayer target, string permission) // after the permission is revoked object ExpPermCanAddToGroup(BasePlayer target, string group, TimeSpan timeSpan, string title) { return null; } // before adding a player to the group void ExpPermOnAddedToGroup(BasePlayer target, string permission, TimeSpan timeSpan, string title) // after adding a player to the group object ExpPermCanRemoveFromGroup(BasePlayer target, string group) { return null; } // before a player is removed from the group void ExpPermOnRemovedFromGroup(BasePlayer target, string group) // after a player is removed from the group void ExpPermOnPackageExpired(string userId, string title, string packName) // when the privilege pack expired void ExpPermOnPermissionExpired(string userId, string title, string permName) // when the permission expired void ExpPermonGroupExpired(string userId, string title, string groupName) // when the group expired // *use the title to display the name of the privileges in your plugin ExpiringPermissions.Call<bool>("HasActivePermissions", string userID); ExpiringPermissions.Call<bool>("TryGetPlayerData", out List<Dictionary<string, object>> packages, out List<Dictionary<string, object>> permissions, out List<Dictionary<string, object>> groups); /* packages/permissions/groups Dictionary contains: ["value"] = string ["title"] = string ["startDate"] = DateTime ["expireDate"] = DateTime */ Plugin Config Example of plugin configuration in English: Example of plugin configuration in Russian. If you need Russian config, open it (ExpiringPermissions.cs) before loading the plugin, and at the top set the variable "isRus = true". Then save and upload this file to your server.$5.00