Search the Community
Showing results for tags 'shop'.
-
Version 2.2.0
8,427 downloads
Enjoy a highly customizable Shop that can be configured in game! Use NPCs as shopkeepers, and set up a shop with ease using the game interface to add, edit, or remove items on the fly! ️ Features of Shop Beautiful user interface Discount system (by permissions) Automatic shop filling (+ the plugin has support for the ItemCostCalculator plugin) Selling items (players can sell items to the store and receive money for it) Performance Adding/editing/removing items IN GAME Supports NPC Supports Custom Vending Machines Supports NoEscape Convert from ServerRewards Favorite items By default, the plugin has English, Russian and Chinese translations Transfer money between players directly in the plugin! Shop allows you to use multiple economy plugins at once (players can choose what they want to pay with) For each item, you can choose which payment methods are available and how much they will cost, based on the selected method Commands shop - open shop interface shop.install – starts the shop installation process shop.refill <recovery_rate> - refill shop again recoveryRate: A value between 0 and 1 that determines the multiplier for the cost of selling items. For example, shop.refill 0.5 means that items will have a sale cost of 50% of their purchase cost. shop.convert.sr [clear] - convert items from ServerRewards to Shop. The option clear means clearing Shop items before convert shop.setvm [categories: cat1 cat2 ...] - add custom VM in config shop.setnpc [categories: cat1 cat2 ...] - add NPC in config shop.remove all - a console command to remove all items and categories from the plugin shop.remove item [category name/all] - a console command to remove an item (or all items) shop.remove category [category name/all] - a console command to remove a category (or all categories) shop.fill.icc [all/buy/sell] - a console command for updating prices of items in the store using ItemCostCalculator. all - updates both Price and SellPrice, buy - updates Price, sell - updates SellPrice shop.convert.from.1.2.26 – command to convert Shop plugin version 1.2.26 to version 1.3.0+ shop.reset – resets store data, including templates, configurations, and items. shop.reset template – resets the store interface template data. shop.reset config – resets store configuration data. shop.reset items – resets store items data. shop.reset full – completely resets all store data (templates, configurations and items). shop.manage – used to manage the Shop plugin. shop.manage economy list – displays a list of all available economic systems in the plugin. shop.manage economy set <economy_ID> <name> – ыets the selected economic system by plugin ID and name. The command updates the corresponding economic system on the server and saves the changes in the configuration. FOR EXAMPLE: shop.manage economy set 0 Economics – sets the main economy plugin to “Economics”. shop.manage economy set 1 ServerRewards – sets the additional economy system with ID 1 to “ServerRewards”. Permissions shop.setvm - for command "shop.setvm" shop.setnpc - for command "shop.setnpc" shop.free - for free item purchases shop.admin - admin permission Sort Types None Name Amount PriceDecrease PriceIncrease Category Types None – normal category for items Favorite – category for favorite items Hided – hidden category, available only in NPC stores or Vending Machines Video P.S. Video of the old version, video for the V2+ version is now in development Showcase Full screen Templates Template OLD STYLE Template NEW RUST In-Menu Templates Template V1 (V1.1) Template V1 (V1.1) with BASKET Template V2 Template V2 with BASKET Installer Editor TEST SERVER Join our test server to view and experience all our unique features yourself! Copy the IP Address below to start playing! connect 194.147.90.147:28015 FAQ Q: I get the message “The plugin does not work correctly, contact the administrator!”. What should I do? A: This means that your plugin is not installed. To install the plugin, use the command “/shop.install”. You need to have “shop.admin” permission to access this command. Q: Where can I see an example of a config? A: Config Q: How to use BankSystem to store the economy A: "Economy": { "Type (Plugin/Item)": "Plugin", "Plugin name": "BankSystem", "Balance add hook": "Deposit", "Balance remove hook": "Withdraw", "Balance show hook": "Balance", "ShortName": "", "Display Name (empty - default)": "", "Skin": 0, "Lang Key (for Title)": "LangTitle", "Lang Key (for Balance)": "BalanceTitle" }, Q: How to use ServerRewards to store the economy A: "Economy": { "Type (Plugin/Item)": "Plugin", "Plugin name": "ServerRewards", "Balance add hook": "AddPoints", "Balance remove hook": "TakePoints", "Balance show hook": "CheckPoints", "ShortName": "", "Display Name (empty - default)": "", "Skin": 0, "Lang Key (for Title)": "LangTitle", "Lang Key (for Balance)": "BalanceTitle" }, Q: How to use Economics to store the economy A: "Economy": { "Type (Plugin/Item)": "Plugin", "Plugin name": "Economics", "Balance add hook": "Deposit", "Balance remove hook": "Withdraw", "Balance show hook": "Balance", "ShortName": "", "Display Name (empty - default)": "", "Skin": 0, "Lang Key (for Title)": "LangTitle", "Lang Key (for Balance)": "BalanceTitle" }, Q: How to use IQEconomic to store the economy A: "Economy": { "Type (Plugin/Item)": "Plugin", "Plugin name": "IQEconomic", "Balance add hook": "API_SET_BALANCE", "Balance remove hook": "API_GET_BALANCE", "Balance show hook": "API_REMOVE_BALANCE", "ShortName": "", "Display Name (empty - default)": "", "Skin": 0, "Lang Key (for Title)": "LangTitle", "Lang Key (for Balance)": "BalanceTitle" }, Q: How to use scrap to pay for items A: "Economy": { "Type (Plugin/Item)": "Item", "Plugin name": "", "Balance add hook": "", "Balance remove hook": "", "Balance show hook": "", "ShortName": "scrap", "Display Name (empty - default)": "", "Skin": 0, "Lang Key (for Title)": "LangTitle", "Lang Key (for Balance)": "BalanceTitle" }, Q: How to add KIT as shop item A: https://pastebin.com/4szBQCgz Q: How to add Command as shop item A: https://pastebin.com/bcCkzBEL Q: How do I make a weapon spawn with ammo in it? A: You need to configure the "Weapon" section in the item config: "Weapon": { "Enabled": true, "Ammo Type": "ammo.rifle.explosive", "Ammo Amount": 128 } Q: How do I make items spawn some content (liquid, weapon modifications)? A: You need to configure the "Content" section in the item config: "Content": { "Enabled": true, "Contents": [ { "ShortName": "weapon.mod.lasersight", "Condition": 100.0, "Amount": 1, "Position": -1 } ] }, Q: How to turn off the sell feature? A: You need to turn off “Enable item selling” in the config, or do it in the item setting in the game. "Enable item selling?": false, Q: How to use the ItemCostCalculator with Shop? A: You need to use command "shop.refill" (command to refill the Shop) Q: What should be the size of images for item icons? A: Typically, the image dimensions for item icons are 512x512 pixels, but any square image can suffice.$29.95- 647 comments
- 36 reviews
-
- 20
-

-

-

-
- #shop
- #shop ui
-
(and 25 more)
Tagged with:
- #shop
- #shop ui
- #store
- #market
- #server rewards
- #gui shop
- #custom items
- #rust shop
- #mevent
- #market system
- #marketplace
- #buy
- #sell
- #in game
- #economics
- #humannpc
- #market and magazine
- #gui
- #money exchange
- #rust shop plugin
- #shop system
- #best shop
- #best rust shop
- #shop items
- #shop mevent
- #shop in menu
- #shop gui
-
Version 2.6.11
717 downloads
EATURES: Selling custom items with a modified skin and display name Commands for sale as an item, allows you to use the command whenever the player wants, can be changed to instant use after purchase Creating a trader with the right set of items Players can check item description before they buy it Refill system Players can see marker on the map to check what the bot can sell them Local positions for Monuments (after wipe you don't need to change positions anymore) [Dependent on MonumentFinder] Commands: permission for use commands and edit the npc shop - npcshop.admin /settrader (use for create new trader) /remtrader (use for remove trader by his name) /newtraderpos (look directyl at the bot) then /newtraderpos update (use on new position) or /newtraderpos cancel (if you unselect the bot) Hooks: void OnNPCShopItemBuy(BasePlayer buyer, Item saleItem, Item priceItem) - called when player buys an item Example of plugin config My Discord Profile$18.99 -
Version 2.1.7.1
170 downloads
Warning: To use this config file, you need to purchase the Shop plugin developed by Mevent: https://codefling.com/plugins/shop We prioritize keeping this configuration updated to deliver a smooth and enjoyable experience. In this optimized configuration, item prices have been manually adjusted to offer balanced gameplay. Originally, default prices in the Shop are set to 100 RP and typically require adjustments, which can be time-consuming. However, with our configuration, prices for over 450 items are already optimized and ready for use. This setup has been tested and appreciated by over 10,000 players across 22 servers. This Shop Config file is versatile and can be applied to any server, whether it's 1x, 2x, 3x, 5x, 10x, or even 100x gather rates. Simply align the RP rewards provided by the Playtimereward plugin to suit your server's rate. For example, we use a 20 RP reward for every 30 minutes on our 3x servers, which works well with this configuration. Features: Manually Adjusted Prices: Over 450 items with carefully set RP values. Extensive Testing: Successfully used and positively received by players across 22 servers. Versatile Application: Compatible with any gather rate, from 1x to 100x. Continuous Updates: We strive to keep this configuration up-to-date to ensure the best experience. Positive Player Feedback: Excellent reception and feedback from players. Enjoy using this optimized setup! Installation Instructions: 1) Extract the RAR file you downloaded. There will be three folders: lang, data, and config. 2) Drag and drop these folders into the specified directory: /home/rustserver/serverfiles/oxide. 3) After that, upload the latest version of the Shop plugin to the plugins folder. If the Shop plugin is already installed, restart the server or use the following command in the RCON admin console to reload the plugin: o.reload Shop This will ensure the plugin is restarted properly. This config is prepared by fullwiped. By using this optimized Shop Config, you can provide a balanced and enjoyable experience for your players. Support: FULLWIPED DISCORD$14.00- 5 comments
-
- 3
-

-

-
- #shop
- #store
-
(and 36 more)
Tagged with:
- #shop
- #store
- #shop config
- #shop cfg
- #shop price config
- #shop custom
- #best shop
- #rust shop config
- #rust shop cfg
- #rust shop
- #gui shop
- #shop gui
- #market
- #shop configuration
- #shop rp
- #adjusted prices shop config
- #new shop
- #mevent
- #mevent shop
- #shop mevent
- #server shop
- #shop server
- #server config
- #market config
- #best shop config
- #shop settings
- #configs
- #config
- #2x server
- #3x server
- #5x server
- #10x server
- #servet loot
- #loot table
- #store rust
- #shop rust
- #rust
- #rust market
-
Version 1.2.6
1,201 downloads
Shoppy Stock introduces a plethora of innovative features to the RUST server economy that were previously unavailable. This plugin enables the creation of multiple shops with diverse currencies, stock markets with item listing, a highly customizable server selling center, and numerous other functionalities. Video Preview (Version 1.0.0) Features Global Over 12 detailed RUST-Themed GUI windows. Wrote with performance in mind. All plugin actions are lightweight for server. Highly expandable plugin. All that limits you is your imagination! Fully customizable PopUp message through PopUp API. Command and API currency management. Full language support for any displayed message and item. NoEscape support. Full UI color change support. NPC interact shop and stock market support. Shops Create multiple shops with different currencies. Easily transfer your old currency to the plugin with other economy plugins support. Split your shop items into categories with custom icons for easier navigation. Search though all categories with one search bar. Buy exact amount of items that you need. Full custom item support. You can configure which currencies should be available to transfer. Transfer currency to online/offline players. When currency is an item, you can make it available for deposit into the shop as virtual currency. The page is saved when you close the shop, so you can get easily back where you were. Full permission system configurable for each action. Limits for daily/wipe purchases. Set cooldown to your purchases. Discount system. Stock Market Create multiple different markets with different currencies. Mark your favorite items and have them in Favorite tab. Automatically adds all vanilla RUST items with ability to blacklist unwanted. Few options to sort all listings for better economy management. Create sell and buy requests for the items. Configurable server sell price history. Permission based system on how many listings can one player create. Listings can be canceled and refunded or placed back to the market without any costs. Configurable tax on each market action. Additional info support for things such as durability and plant genes. Price rolls can be configured to run on specific hours. Demand system which will increase/decrease price of item on the market based on their demand. Messages requires DiscordCore. Selling center with the price calculator with over 15 variables based on amount sold, players online and more. Stock Market Broker. You can give permission for access to bank, where players can store and optionally refund items that are available in the server's sell list. You can also set the alert price and insta-sell price, which will execute an PopUp or will insta-sell your bank resources even if you are offline. Custom category and full custom item support. Configurable Web API for your server developers or for checking the item price if you are offline. Requires Web Server. Statistics module for server technicians for easier economy setup. Permissions The permissions listed below are static and cannot be altered. The configuration files offer hundreds of possible permissions. shoppystock.admin - Gives access to the currency management command. Commands All commands can be fully customized. Here is a list of the default commands. /market /shop /s /m - Opens Shoppy Stock UI. /list - Open's window to create Sell Request in RP stock market. /sell - Open's window to sell items in RP stock market. curr - Admin command. Full usage description is available when you run this command. (Chat and console command) updateprices <shopName> - Forcefully update stock prices of the shop. (Chat and console command) Optional Supported Currency Plugins Economics ServerRewards BankSystem IQEconomic Help Page Due to the extensive features offered by this plugin, it may be challenging for some users to configure certain aspects without guidance. Therefore, we have provided a brief walkthrough below. Configuration Files The plugin is extensive, resulting in the configuration files being split into three distinct ones, with two of them varying for each shop. Firstly, in your oxide/config folder, you will find the default configuration file, which contains all the fundamental configuration lines to add or remove more shops and stock markets. Secondly, in the oxide/data/ShoppyStock folder, you will find three folders. The first is Shops, which contains all the configurations for each shop created in the primary configuration file. The second is StockMarket, which includes several folders with all the stock-related content. More information on this is provided later. Lastly, UserData contains data on each shop player's currency, username, and daily/wipe purchases. StockMarket Folder In the StockMarket folder, you will find up to six folders, namely AlertData, Config, FavouriteData, PlayerData, PriceCache, and Statistics.\ The AlertData folder contains data on the alert and insta-sell prices set by players. The Config folder contains all the configuration files for each available stock market. The FavouriteData folder holds data on favorite items marked by players. The PlayerData folder includes data on all buy/sell requests and their banks. The PriceCache folder contains cache on all the necessary data of current item prices and their price/sell history for the graph to function. The size of this file depends on how long your timeline goes. Lastly, the Statistics folder includes all the statistics collected in the market by all players, split into global/player values, which are further divided into all time/daily actions. These values should help you understand how many resources are being sold on the server and justify your Default Sell Amount Calculation or Price Calculator. Server-Selling Items → Default Sell Amount Calculation (DSAC) The Default Sell Amount Calculation (DSAC) is a critical component that determines the amount of items sold during a given period. It serves as a reflection of the average item sales by all players during that period. For instance, in a PvE x10 server with an average of 20-30 players online, the wood amount sold could be set to 1800000. However, this value is only an example, and it is not recommended to base your configuration solely on it. A good stock market requires time and effort. Web API The plugin offers a Web API feature that enables you to check your market prices through your website. To activate this feature, you need website hosting with PHP support and to download the provided PHP file named apiupdate.php. CLICK HERE TO DOWNLOAD! It should be placed in the same directory as the "Web Price API - Link" points to. While experienced users can change the file name for security reasons, they should remember to modify the plugin code as well. Ensure the file has sufficient permissions to create an output api.html file (the file's directory can be altered in the PHP file). If configured correctly, the output should be available at <Web Price API - Link>/api.html. Always Run Timer on Hour Minute The Always Run Timer on Hour Minute feature sets the time when the timer will commence rolling the prices of your stock market. For example, if the values are set to 0, 30, and 60, the timer will start rolling prices on the hour or half-hour (x:00 or x:30). Similarly, if the values were 0, 20, 40, and 60, the timer would start rolling prices on the hour or at intervals of 20 minutes (x:00, x:20, or x:40). Stock Market - Default Categories The stock market contains 4 default categories. Sometimes you want to display them as first when opening the stock market. here are their codenames for config usage: my_listings bank_management favourites all_items Stock Market - Category Icons These options are formatted as follows: "config/rust default category name": "URL". Stock Market - Custom Item Info Lang Key For custom items, it's possible to create custom info tags in listings, similar to the tool condition or genetic information for clones. You can add your own tag for certain types of items, such as "Upgrade Ingredients". Stock Market - Refund Storage Name A storage with this name needs to be created in the RedeemStorageAPI. Otherwise, items from certain actions may disappear and the plugin will generate errors. Custom Item Listings All items configured in the stock market must have the exact format of the keys. The correct format is: <shortname>-<skinId>. For instance, the key for a Metal Chestplate with skinId 2497693972 will be "metal.plate.torso-2497693972". Generating Shop Config With All Vanilla Items Go to main plugin config in oxide/config/ folder and in the shop section you want to add all vanilla items search for Config Generation - Generate With All Default Items and set it to true. After all, go to oxide/data/ShoppyStock/Shops/ and delete your desired shop JSON file and reload the plugin. The plugin should generate a new config with all vanilla RUST items. Shop Items - Commands Commands support 2 types of variables. {userId} - Will be replaced with steamId of buyer. {userName} - Will be replaced with nickname of buyer. {userPosX} - Coordinate X of buyer. {userPosY} - Coordinate Y of buyer. {userPosZ} - Coordinate Z of buyer. Community Q&A Multiplier Events Q: How does the demand system work? How does weight come into play? A: Demands works based on "Multiplier Events" in the main config. Each event has its own "Weight" which represents their chance to be rolled on a demand roll. Values for how often demands should appear can be found in your stock market configuration in /data/ShoppyStock/StockMarket/Config/<shopName>.json. Names from the main configuration must be equal to these in the data file in order to make them work. Q: How do minimal and maximal work? A: It's a randomized value by which the price will be multiplied/divided. So if the price is 1.4 and the rolled demand is between 1.4 and 1.8, the random value would be, for example, 1.685, and the price would be 2.359. If the price is larger or less than the max value, it will get locked to the value near min/max. Stock Market - Timestamps Q: What is it used for? Is it a historical trend? A: If you run your stock market for a while, the plugin will store the price data, and it will be available in a chart for all players with permission. The amount of data saved is equivalent to the highest timestamp, so if you want to start collecting data, I recommend making this a real value even without giving permission to players for high timestamp values. Data Folder, Stock Market Config Q: Blocked Multiplier Listing Keys A: These are listings that shouldn't be multiplied with the price multiplier bonus, which is implemented, but the items that give the price bonus aren't available yet. Item Price Calculator Q: Price Change - Regular Curve A: It's a randomization value of the stock prices. Each time the price is rolled, it adds or subtracts a certain percentage from the price to make it more "realistic" and not stay in one place if none of the other events are run. Q: Price Change - Same Price Actions Min/Max A: Actions on the market aren't random if they go up or down every time. You can specify how long the price should go up or down (not including other events). You can make it so that prices will go up for five rolls in a row and then go down for the next two rolls. Q: Price Change - Chances to Increment A: It's the chance to run the action listed above. It's made in "<price percentage>": <price increase chance (percentage)> format. It's made to make prices go higher more easily when they are low and harder when they are high. As far as I remember, the basic configuration has a 2% price increase if the price is below 50%, 4% below 47%, etc. Q: Price Drop - Amount Sell Values Penalty Multiplier A: If any of the listed values are exceeded, the price roll is always negative, plus it's multiplied by the configured value to make prices go realistically lower faster when there are a lot of items sold on the market in a short period of time. Q: Price Drop - Amount Sold Max Price Penalty A: If your players sell too much of any item, you can set that price to be locked at a certain percentage for a certain period of time. If they sell, 10000% of DSAC of wood, the price is locked at a maximum of 25% for 24 price rolls. Q: Price Increase - Goal Not Achieved (Which goal is this referring to here?) A: If there is a low demand for some items and there is less than 100% of the DSAC amount sold, you can encourage players to farm and sell them by increasing the price by a certain multiplier every time the price is rolled. Like making the price increase x1.5 times faster when there are less than 10% of items sold. Q: Default Sell Amount Calculation - Players Online Multiplier (What does the set value with respect to players online do?) A: If your server population varies from 20 to 150, you can easily manage the DSAC values by just multiplying or dividing them based on the current player count. The player count is checked on every price roll. Q: Price Multipliers - Minimal Time Distance Between Events (The event here refers to what? (Is it a player buying or selling listings?) A: It refers to the price multipliers that I described above in Multiplier Events. Q: Price Multipliers - Chance Based On Sell Amount (0-100) (What does this configuration do?) A: You can make the price multipliers run more often if there are not enough or too many items sold. Q: Price multipliers [minimal actions vs. maximal actions] A: It's how long in price rolls the price increase or decrease event runs. Server Sell Items Q: How does price parent impact the server sell price? A: Parent items are useful when you want to add item like Metal Fragments and Metal Ore, but encourage players to smelt them, because Metal Fragments price will be always higher than Metal Ore by an certain amount configured there. API for Developers int GetCurrencyAmount(string shopName, BasePlayer player) - Returns player's balance. If not found returns 0. int GetCurrencyAmount(string shopName, ulong userId) - Returns player's balance. If not found returns 0. bool TakeCurrency(string shopName, BasePlayer player, int amount) - Takes player currency. Returns true if taken and false if not. bool TakeCurrency(string shopName, ulong userId, int amount) - Takes player currency. Returns true if taken and false if not. void GiveCurrency(string shopName, ulong sellerId, int amount) - Gives player currency. string FormatCurrency(string shopName, BasePlayer player) - Returns player's formatted balance. Example Files (Version 1.0.0) Contains all configuration files from the video, without most of the custom items. It's not recommended to run this files, CLICK HERE TO DOWNLOAD! Default Main Config (Version 1.0.6) CLICK HERE! Default Shop Config (Version 1.0.6) CLICK HERE! Default Stock Market Config (Version 1.0.6) CLICK HERE!$50.00 -
Version 1.4.8
2,496 downloads
This plugin connects your https://tip4serv.com/ store to your Rust Oxide server. It checks if a player has made a donation on your Tip4Serv store and delivers the order in a minute (group, inventory item...) by typing commands in the server console. Supports Rust Garry's Mod FiveM Minecraft Discord ARK and more HMAC authentication Tip4serv adds a layer of security using HMAC authentication to communicate. It is a strong authentication method that is used by banks HMAC WIKI Features for starter plan (only 5% fee) Unlimited game servers & commands Create subscriptions plan Commands status tracking Stock management Deliver roles & messages on Discord Easily offer a product to a friend Create discount coupon Add managers for your store Purchase email and invoice Sales statistics Private flow for subscribers Custom sub-domain Resend commands Fast delivery of orders (less than 5 minutes) No ads Features for PRO members (subscription required) Dynamic Dark/Light theme Account linking with avatars Product page with gallery & video GUI colors editor & additional CSS Top customers & related products Store available in 15 languages English, Danish, Dutch, French, German, Hungarian, Italian, Norwegian, Polish, Portuguese, Romanian, Russian, Spanish, Swedish and Turkish. Several payment methods Here are the payment methods you can offer your players: Card, Paypal, Venmo, Google Pay, Ideal, Giropay, Bancontact, Sofort, My Bank, Sepa, EPS, BACS, Multibanco, BECS, Przelexy24, BOLETO, OXXO, Mercado Pago. Installation via Plugin Open an account at https://tip4serv.com/, follow the instructions and add a Rust server. Drag and drop tip4serv.cs into the oxide plugins directory on your Rust server Reload the plugin by typing oxide.reload Tip4serv in your Rust server console. Set key to your tip4serv API key in the config file tip4serv.json. Reload plugin by typing oxide.reload Tip4serv in console. You should get this message: Server has been successfully connected Installation via RCON Open an account at https://tip4serv.com/, follow the instructions and add a Rust server. Enter your server IP Enter your server RCON port Enter your server RCON password You should get this message: Server has been successfully connected Setting up commands on Tip4Serv Before setting up your commands on Tip4serv.com, you should know that command work in your server's console (not ingame as an admin). Here are some sample commands you can use in the products configuration: MY PRODUCTS. But you can use any plugin commands you want. Give a group or permission Add a player to a group previously created with oxide.group add [group-name]: oxide.usergroup add {steam_id} group-name Remove a player from a group: oxide.usergroup remove {steam_id} group-name Give a permission to a player: oxide.grant user {steam_id} permission-name Remove a permission from a player: oxide.revoke user {steam_id} permission-name Give an item to a player inventory with steam_id (advised) IMPORTANT: Please select the option [Player must be online] in your product editor inventory.giveto {steam_id} item-short-name quantity Example: inventory.giveto {steam_id} scientist 5 Give an item to a player inventory with Give plugin IMPORTANT: Please select the option [Player must be online] in your product editor giveto {steam_id} item-short-name quantity Example: giveto {steam_id} fun.guitar 1 Give a kit to a player with Give plugin: givekitto {steam_id} kit-name Give money Give money to a player with Economics plugin: deposit {steam_id} amount Give points Give points to a player with Server Rewards plugin: sr add {rust_username} amount Quantity multiplier You can also multiply the quantity choosen by the customer like this: {quantity*50} Note: You must first activate the **Allow quantity choice** option in your product. Use this command on Tip4serv if you want to sell bundles of $200 with economics plugin: deposit {steam_id} {quantity*200} This will run in your server console after a purchase if the player buys product 4 times: deposit 76561198181797231 800 Store examples https://2stonedrust.tip4serv.com/ https://murga.tip4serv.com https://instantcode.tip4serv.com Need Help ? Read the Tip4Serv documentation here https://docs.tip4serv.com Any issues feel free to contact us here https://tip4serv.com/contactFree -
Version 2.1.0
713 downloads
VehicleBuy - The Ultimate Vehicle Plugin for Rust Immerse yourself in the world of Rust with the VehicleBuy plugin! This powerful tool allows authorized players to easily access the /vehiclebuy command, which opens an intuitive interface for purchasing a variety of vehicles. With multiple payment options, including Items, Economics, and Server Rewards, you can enjoy a smooth gaming experience. Additionally, the Buy Cooldown feature helps maintain balance in the game. Upon purchasing a vehicle, players receive a unique gift: a skinned crate for land vehicles or a lifebuoy for water vehicles, which can be conveniently stored in their inventory. Features of VehicleBuy User-Friendly Interface: Access vehicle purchases through an easy-to-navigate GUI. Flexible Payment Methods: Choose from various payment options to suit your preferences. Customizable Settings: Administrators can adjust prices and fees as needed. Convenient Vehicle Recall: Use the /callback command to quickly retrieve your vehicle. Easy Re-packaging: Re-package vehicles using the /pickup command or by hitting them with a hammer. Commands /vehiclebuy: Open the vehicle purchase interface (for players) /callback "VehicleName": Retrieve your purchased vehicle /pickup: Re-package your vehicle or hit it three times with a hammer Admin Command: (VehicleName.add SteamID): Spawn vehicles directly into players' inventories vehiclebuy.template [fullscreen/inmenu]: Customize your UI templates with options for fullscreen or in-menu displays (only server console) Video Overview old overview: Test Server Join our test server to experience all our unique features firsthand! Copy the IP address below to start playing! connect 194.147.90.147:28015 FAQ Q: Where can I see an example of a config? A: Config$15.95- 43 comments
- 4 reviews
-
- 4
-

-

-
- #vehicle
- #buy
-
(and 25 more)
Tagged with:
- #vehicle
- #buy
- #gui
- #shop
- #vehiclebuy
- #vehicleshop
- #m&b-studios
- #vehiclebuy rust plugin
- #mevent team
- #rust vehicle purchase plugin
- #buy vehicles in rust
- #rust game vehicle management
- #vehicle buying system rust
- #rust vehicle gui
- #purchase vehicles rust plugin
- #rust admin vehicle commands
- #vehicle recall command rust
- #customizable vehicle prices rust
- #vehicle spawning plugin rust
- #rust game server plugins
- #user-friendly vehicle interface rust
- #vehicle rust
- #vehicles
- #cars
- #minicopter
- #motorbike
- #bike
-
Version 2.10.21
1,354 downloads
Crafting system that allows you to create items, cars, vehicles, recyclers, etc! Commands craft open interface crafts.setwb [categories: cat1 cat2 ...] set new custom workbench Permissions You can set permission in config, for example: "Permission (ex: crafts.use)": "crafts.use", crafts.setworkbench - allows you to use the "crafts.setwb" command (set custom workbenches) Craft Types Command Vehicle Item Recycler ModularCar How to install a custom workbench 1. Spawn the workbench (for example, in RustEdit or a plugin) 2. In the game, go to him and use the command "crafts.setwb" and specify the necessary categories. Example: /crafts.setwb Misc 3. Go to config (oxide/config/Crafts.json) and configure this workbench (use SafeZone, workbench level, etc.) VIDEO FAQ Q: Where can I see an example of a config? A: Config$19.95 -
Version 1.0.1
23 downloads
Virtual Vending is a simple tool to allow players to interact with vending machines in new ways. Virtual Vending comes with a Plugin and an optional Discord bot! FEATURES - In game UI - Search for specific items in any vending machine - Search all vending machines on the server and get what items they have in them - Search just for player made vending machines to see what they have in them - Virtually purchase any items out of the vending machines and they go into the vending machine just like they normally would - (DISCORD BOT) Supports multiple servers just through one instance of the bot - (DISCORD BOT) Search for items in any vending machine - (DISCORD BOT) Search any vending machines to see what items they have - (DISCORD BOT) Log transactions made VIA vending machines or the VV UI The Plugin and Discord Bot both have very simple installations. We have included a readme.md file to make it even easier to setup! Thank you to @shady14u for assisting with Virtual Vending.$19.99 -
Version 1.2.4-hotfix
14 downloads
Features: Responsive design, optimized for desktop as well as phone customers FAQ section, Can be enabled and disabled Easy to change Colors Easy Set up: Create a new template file on the webstore page. https://dashboard.paynow.gg/webstore Press the “Upload template” and drag in the Horizon.zip Activate the template Reload your webpage after a few seconds Preview:https://horizontheme.paynow.store Logo Float Animation Logo Grow Animation Logo Drop Animation$10.00- 2 comments
-
Version 1.0.5
13 downloads
Introducing the SupportFireworks plugin – a unique way to show gratitude for supporting your server! Now, every time a player buys a donation service in your store, the SupportFireworks plugin automatically launches spectacular fireworks at the player’s location, and a custom message about server support is sent to the global chat! Why SupportFireworks? Custom message: you can change the text of the chat notification at any time, adding the necessary details about the support; Random fireworks: each firework launched as a sign of gratitude has a random color, which creates a sense of unpredictability and uniqueness; Reliable operation: fireworks are guaranteed to go off in any place, regardless of where the player is; Multi-language support: the plugin is immediately translated into several languages, which allows players to receive messages in their native language automatically; Minimal load on the server: the simplicity of the plugin does not affect the server, but has a huge impact on player engagement. This is the perfect tool to increase motivation to support your project! SupportFireworks not only brings pleasure from spectacular effects, but also motivates players to support the server, creating a bright and memorable moment for all participants! The plugin is flexible for use, because it can be connected to any service in your store. This can be either buying an item, getting VIP status, or any other type of purchase. The plugin is activated by a single console command, so there will be no difficulties with its installation. Try SupportFireworks and make supporting your server even more memorable! Console command: support.project [STEAM ID]$3.70- 2 comments
-
- #rust plugin
- #plugin
- (and 4 more)
-
Version 1.0.8
864 downloads
Shop Controller is an advanced shop UI system. Offers selling of items and commands as well as an in-game item editor. FEATURES • UI Cart system (Optional) • In-game item editor • In-game command editor • Item cooldowns • Command cooldowns • Custom item skins • Sell back to shop (Optional) • Easy color editing of the UI • Multi currency support (RP, Economics, any item) • Custom shop commands PERMISSIONS shopcontroller.use shopcontroller.admin SETUP The setup is very easy! - Set the commands you want the shop to be opened with - Set your currency. It supports RP, Economics, or any item (use the shortname)! - Set if you want to use the cart system or not - Plugin images, change if you want to use images other than the default ones. - UI Elements, all of these are color, "Rust Format" > https://tools.rustplugins.io/colors Support? Questions? Comments? Concerns? Message me in my Discord! https://discord.gg/RVePam7pd7$29.99- 30 comments
- 3 reviews
-
- 3
-

-

-
Version 1.2.65
6,325 downloads
Well rounded shop, with various features. It's standalone plugin which is compatible with WelcomePanel, HumanNpc. This plugin also supports selling commands, wipe block, no escape, sales, permission access. Multi-currency support Use different currencies for different items. Economics and ServerRewards (RP) is supported as well as scrap or any other ingame item. Restrictions Combat, raid, spawn and building block supported alongside with basic cooldowns and wipe block. NoEscape is required for combat and raid block. Appearance Simple and clean design to ensure smooth user experience for your players. Additionally Shop can be inserted into WelcomePanel to achieve "all in" server panel. Customization Widely customizable and feature rich Shop which will fit all needs of your community. Field Tested Plugin made by experienced developer, tested by hundreds of server owners and used by some big organizations. Discord Customer support available on discord, Installation - unzip downloaded package and place Shop.cs file into your plugin folder. - after succesfuly loading the plugin, data folder oxide/data/Shop will be generated - take data files provided in plugin package and drop them into your Shop data folder After finishing these steps your shop is ready to used. Server Currency If you don't wish to use ingame items as currency make sure you use either Economics or ServerRewards as you currency management as only those two plugins are compatible with Shop. Default currency setting is Economics ("eco"), if you wish to change it navigate to "oxide/data/Shop/Items.json", open this file in some text editor (VSC recommended) and simply select "eco" and mass replace for desired value. (video here) "eco" for Economics "rp" for ServerRewards "scrap" or any other ingame item Shop Categories To remove, change or add new categories open "oxide/data/Shop/Categories.json" file. There you will find all categories alongside with items lists. If you wish to remove certain items from category, just head over to item list and delete from there. Items Changing prices In "oxide/data/Shop/Items.json" you will find every item with their properties, to quick search for specific items press "CTRL + F". By leaving BuyPrice or SellPrice at 0 you will disable selling or buying of said item. Due to multi-currency support prices can be set only in whole numbers, no decimals. To offset for this, you can set minimal amount requirement. For example instead of selling one piece of wood for 0.01$ you can set minimal amount of 100x wood for 1$. Removing items If you wish to remove some items from Shop, you can do that directly in "data/Shop/Categories.json" file. Removing items from "Items.json" is not needed as they have no effect unless they are listed in some category. Adding new items To add new item you must first head over to "Items.json" data file and create new entry by copy pasting some of the existing ones. Once done with that you can add the item into category. To add multiple versions of same item can be created by simply adding unique tag behind shortname, for example "rifle.ak{1}", "rifle.ak{2}", etc... Commands Adding new commands Commands can be create at "data/Shop/Commands.json". Plugin can only run server side console commands and then parse steam id or player name with tags {steamid} and {playername}. There are two examples shown in default data file. Server side console commands are common thing and almost all plugins utilize them. Listing commands in categories Simply type in one of your command names into category item list like this "cmd/yourCommandName". Slash cmd in front of command name is there to make difference between ingame item and command. Cooldowns These are very basic, cooldown is triggered when buy/sell action is triggered. By using minimal amount requirement for items you can manage how much player buy and how often. Cooldowns are managed in "data/Shop/Cooldowns.json". Default data file contains two example of cooldowns but it's simply shortname and amount of seconds. Restrictions Raid and Combat Block Managed by NoEscape plugin, option to enable these two block can be found in config file. Building Block Prevents players from using shop while they are building block, option can be found in config file. Spawn Block Prevents players from using shop after they respawn, amount of seconds can be set in config file, 0 = disabled. Wipe Block Prevents players from buying specific items after wipe. Settings are located in "data/Shop/ItemsWipeBlock.json", similar as cooldowns. Sales By Permission (config file) Discount on every item in the shop assigned by permission, multiple permission can be created with their own discount values. By Category (categories data file) Discount for every item within specified category. By Item Discount for specific item in the shop. If item is already in discounted category, higher discount will be applied. WelcomePanel integration To integrate this plugin into WelcomePanel simply use one of the four configs included in download package. These config were premade for each WelcomePanel template (goes from 1 to 4). In case you have own highly customized layout for WelcomePanel you will have to adjust "Layout Container" in Shop config file by yourself.$32.99 -
Version 0.1.3
44 downloads
The plugin allows displaying promo codes in the status bar. Depends on AdvancedStatus plugin. The ability to display promo codes in the status bar; The ability to specify the order of the bar; The ability to change the height of the bar; The abillity to customize the color and transparency of the background; The ability to set a material for the background; The ability to switch between CuiRawImageComponent and CuiImageComponent for the image; The ability to get images from the local folder(*SERVER*\oxide\data\AdvancedStatus\Images); The abillity to set own image and customize the color and transparency of the image; The abillity to set sprite instead of the image; The ability to customize the color, size and font of the text. promostatus.admin - Provides the ability to admin commands. { "Chat command": "promo", "Is it worth enabling GameTips for messages?": true, "Default time in seconds for displaying the promo code in the status bar. A value of 0 will keep the bar visible until the promo code expires": 600.0, "Status. Bar - Height": 26, "Status. Bar - Order": 20, "Status. Background - Color(Hex or RGBA)": "#FFD33A", "Status. Background - Transparency": 0.7, "Status. Background - Material(empty to disable)": "", "Status. Image - Url": "https://i.imgur.com/q15Cmu5.png", "Status. Image - Local(Leave empty to use Image_Url)": "PromoStatus_Promo", "Status. Image - Sprite(Leave empty to use Image_Local or Image_Url)": "", "Status. Image - Is raw image": false, "Status. Image - Color(Hex or RGBA)": "#FFD33A", "Status. Image - Transparency": 1.0, "Status. Image Outline - Is it worth enabling an outline for the image?": false, "Status. Image Outline - Color(Hex or RGBA)": "0.1 0.3 0.8 0.9", "Status. Image Outline - Transparency": 1.0, "Status. Image Outline - Distance": "0.75 0.75", "Status. Text - Size": 12, "Status. Text - Color(Hex or RGBA)": "#FFFFFF", "Status. Text - Font(https://umod.org/guides/rust/basic-concepts-of-gui#fonts)": "RobotoCondensed-Bold.ttf", "Status. Text - Offset Horizontal": 0, "Status. Text Outline - Is it worth enabling an outline for the text?": false, "Status. Text Outline - Color(Hex or RGBA)": "#000000", "Status. Text Outline - Transparency": 1.0, "Status. Text Outline - Distance": "0.75 0.75", "Status. SubText - Size": 12, "Status. SubText - Color(Hex or RGBA)": "#FFFFFF", "Status. SubText - Font": "RobotoCondensed-Bold.ttf", "Status. SubText Outline - Is it worth enabling an outline for the sub text?": false, "Status. SubText Outline - Color(Hex or RGBA)": "0.5 0.6 0.7 0.5", "Status. SubText Outline - Transparency": 1.0, "Status. SubText Outline - Distance": "0.75 0.75", "List of promo codes. Note: Dates should be in UTC(yyyy-MM-dd HH:mm). Example: 2025-01-25 13:00": {}, "Version": { "Major": 0, "Minor": 1, "Patch": 3 } } EN: { "MsgStatusText": "PROMO CODE:", "MsgNotAllowed": "You do not have permissions to use this command!", "MsgWrongCommand": "You entered an incorrect command!\nExample: /{0} toggle", "MsgWrongArguments": "You have not provided enough arguments for this command!", "MsgPromoNotFound": "Promo code {0} not found!", "MsgAddFailed": "Failed to add promo code. Invalid format or expiration date is earlier than the current date.\nExample: /{1} add \"{0}\" \"{2}\" \"{3}\"(optional)", "MsgPromoAdded": "Promo code {0} has been successfully added. Valid until {1}.", "MsgPromoUpdated": "Promo code {0} has been successfully updated. Valid until {1}.", "MsgPromoRemoved": "Promo code {0} has been successfully removed!", "MsgDisplayFailed": "Failed to update promo code display time.\nExample: /{1} display \"{0}\" 600", "MsgDisplayUpdated": "A new display time({1} sec) has been set in the status bar for promo code {0}.", "MsgBarEnabled": "Displaying the promo bar is enabled!", "MsgBarDisabled": "Displaying the promo bar is disabled!", "MsgPromoEmpty": "No available promo codes!", "MsgPromoList": "List of available promo codes(UTC):\n{0}" } RU: { "MsgStatusText": "ПРОМОКОД:", "MsgNotAllowed": "У вас недостаточно прав для использования этой команды!", "MsgWrongCommand": "Вы ввели не правильную команду!\nПример: /{0} toggle", "MsgWrongArguments": "Вы ввели не достаточно аргументов для этой команды!", "MsgPromoNotFound": "Промокод {0} не найден!", "MsgAddFailed": "Не удалось добавить промокод. Не верный формат, либо дата истечения меньше текущей даты.\nПример: /{1} add \"{0}\" \"{2}\" \"{3}\"(опционально)", "MsgPromoAdded": "Промокод {0} был успешно добавлен. Действителен до {1}.", "MsgPromoUpdated": "Промокод {0} был успешно обновлен. Действителен до {1}.", "MsgPromoRemoved": "Промокод {0} был успешно удален!", "MsgDisplayFailed": "Не удалось обновить время отображения промокода.\nПример: /{1} display \"{0}\" 600", "MsgDisplayUpdated": "Установлено новое время({1} сек) отображения в статус баре для промокода {0}.", "MsgBarEnabled": "Отображение промо баров включено!", "MsgBarDisabled": "Отображение промо баров выключено!", "MsgPromoEmpty": "Нет доступных промокодов!", "MsgPromoList": "Список доступных промокодов(UTC):\n{0}" } bar - personal toggle for displaying promo status bars; all - displays a list of all active promo codes in the chat. Admins also see inactive ones; add *code* *expireDate* *startDate*(optional) - adds a new promo code. Permission "promostatus.admin" required; remove *code* - removes a promo code. Permission "promostatus.admin" required; display *code* *seconds* - changes the display time(in seconds) of the promo code for each player. Permission "promostatus.admin" required. Example: /promo bar /promo all /promo add "test" "2024-12-23 14:06" /promo display "test" 360 There are 2 hooks that the plugin is subscribed to: OnPromoCodeAdded OnPromoCodeRemoved OnPromoCodeAdded: Used to add a new promo code. To call the OnPromoCodeAdded hook, you need to pass 3 parameters, 1 of which is optional: <string>promoCode - The promo code; <DateTime>expireDate - The expiration date; <DateTime>startDate - Optional. The start date of validity. Interface.CallHook("OnPromoCodeAdded", "*Your promo*", expireDate, startDate);//Calling the OnPromoCodeAdded hook to add a new promo code. OnPromoCodeRemoved: Used to remove a promo code. To call the OnPromoCodeRemoved hook, you need to pass 1 parameter: <string>promoCode - The promo code. Interface.CallHook("OnPromoCodeRemoved", "*Your promo*");//Calling the OnPromoCodeRemoved hook to remove a promo code.$3.99 -
Version 1.0.1
6 downloads
This plugin allows players to buy permissions and groups true UI. Very simple to use , all can be done true UI ... No need to hard placing perms ,groups in config . All modification work can be done true UI : Adding or removing perms/groups . Customize the permissions/groups . Changeable Perm/Group Title , ImageUrl, Description, What Perm/Group they will get , Cost . Flexible Economy : Item-Based Economy: Use in-game items as the currency for purchases. Plugin-Based Economy: Economics, ServerRewards, and CustomCurrency. Commands : Chat Command : /buyperms - Opens UI (Changeable chat command in config). Console Command : open_perms_ui - opens UI. Console Command : remove_perm <player_id or all> <permission or group_ or title> - remove from player or from all players that specific perm/group/title. Console Command : wipe_perms <player_id> or <all> - with this console command you wipe for that player , or for all players buyed perms/groups. Perms : "permbuy.buy" : required to open UI. "permbuy.admin" : required to be able to add/remove ,modify perms/groups true UI . "permbuy.bypasscost" : required for not taking any cost when you buying . Lang File Supported - you can change all texts there ! Data file - you can see there who buyed what ! Example Config : "Open UI Command": "buyperms", "UI Title Text": "Buy Permissions/Groups!", "Show Purchased Permissions in UI": true, "Cost Configuration": { "Economy Type [Item, Plugin]": "Item", "Plugin Cost Type [CustomCurrency, Economics, ServerRewards]": "CustomCurrency", "Item Shortname (if using Item-based)": "scrap", "Item Skin ID (if using Item-based)": 0, "Item Display Name (if using Item-based)": "" }, "Available Perms/Groups": [ { "Perm/Group Title": "God Mode", "Image URL": "https://www.dropbox.com/scl/fi/18yy55g7bfcz8tj4yhnkr/5e2c4da074770.png?rlkey=24zmukgzu3rll382s6wpkbd65&st=e1bi9i7k&dl=1", "Description": "Allows you to become truly invisible", "What Perm/Group": "vanish.allow", "Cost Amount": 100 }, { "Perm/Group Title": "Bronze VIP", "Image URL": "https://www.dropbox.com/scl/fi/ir8e03hvw0wtv59ofbey1/bronze-badge.png?rlkey=9gq4axhg5swt92dgqar6jk97e&st=8rz8iqh9&dl=1", "Description": "You will be Bronze VIP player!", "What Perm/Group": "group_VIP", "Cost Amount": 200 },$10.00- 2 comments
- 1 review
-
- #shop
- #permission
-
(and 4 more)
Tagged with:
-
Version 1.0.5
106 downloads
Tired of looking for vending offers on the map? The Marketplace UI allows players to search vending offers all across the map. The UI can be accessed either by using a computer station or by chat command (configurable). Features: Intuitive UI Players can search for specific items Offers can be sorted by distance, price and stock Show most searched items Chat Command: The chat command can be disabled in the configuration /market Permission: This permission is required for players to access the Marketplace UI marketplace.use Requires Rust Translation API for item translations: https://umod.org/plugins/rust-translation-api Configuration: { "Show vending machine owner": true, "Enable access via chat command": true, "Enable access via computer station": true }$9.99 -
Version 1.0.3
23 downloads
Inventory Shop is a plugin that introduces a fast user friendly shop, just a simple drag and drop to sell/purchase items. This plugin comes very configurable, with dynamic category's and shop item list with the ability to add custom items with permission and command run on purchase. All feedback will be accounted for and applied in future updates, what are you waiting for make your players love the unique fast to use shop today! Plugin Permissions: inventoryshop.useshop - Allows user to access the /shop command Plugin Config: { "Economic Settings": { "Use Economics": false, "Use Server Rewards": false, "Use Item Economy": true, "Item Name (For display)": "Scrap", "Item ID": -932201673, "Item Skin": 0 }, "Prevention Settings": { "Prevent shop when building blocked": true }, "NoEscape Settings": { "Use No Escape": true, "Block when Combat Blocked": true, "Block when Raid Blocked": true }, "Chat Settings": { "Message Prefix": "<color=#FFD700>[Inventory Shop]</color>", "Message Icon (Steam ID)": 76561198194158447, "Shop CMD Abbrivations": [ "s", "rewards" ] }, "Sound Effects": { "Purchase Sound Effect": "assets/prefabs/deployable/vendingmachine/effects/vending-machine-purchase-human.prefab", "Sell Sound Effect": "assets/prefabs/deployable/vendingmachine/effects/vending-machine-purchase-human.prefab", "Save Inventory Effect": "assets/prefabs/deployable/locker/sound/equip_zipper.prefab", "Not Enough Money Effect": "assets/prefabs/locks/keypad/effects/lock.code.denied.prefab", "Button Press Effect": "assets/bundled/prefabs/fx/notice/stack.world.fx.prefab" }, "Permission Settings": { "Require permission for Shop": true, "Shop permission": "inventoryshop.useshop" }, "Additional Settings": { "Allow shop open using shift + middle mouse": true, "Log players buy/sell transactions to console": true }, "Shop Categories": { "Weapons": [ { "Item ID": 1545779598, "Item Display Name (Leave blank for default)": "", "Item Buy Price (for 1)": 5000, "Item Sell Price (for 1)": 3000, "Item Skin": 0, "Item Amount In Store": 1, "Item Permission": "", "Item Command": "", "Condition Of Item": 150.0, "Weapon Attributes": { "Ammo Item ID": -1211166256, "Amount in Magazine": 30 } }, { "Item ID": -1812555177, "Item Display Name (Leave blank for default)": "", "Item Buy Price (for 1)": 3000, "Item Sell Price (for 1)": 1500, "Item Skin": 0, "Item Amount In Store": 1, "Item Permission": "", "Item Command": "", "Condition Of Item": 150.0, "Weapon Attributes": { "Ammo Item ID": -1211166256, "Amount in Magazine": 30 } }, { "Item ID": 28201841, "Item Display Name (Leave blank for default)": "", "Item Buy Price (for 1)": 3250, "Item Sell Price (for 1)": 2000, "Item Skin": 0, "Item Amount In Store": 1, "Item Permission": "", "Item Command": "", "Condition Of Item": 150.0, "Weapon Attributes": { "Ammo Item ID": -1211166256, "Amount in Magazine": 30 } } ], "Attire": [ { "Item ID": 1266491000, "Item Display Name (Leave blank for default)": "", "Item Buy Price (for 1)": 550, "Item Sell Price (for 1)": -1, "Item Skin": 0, "Item Amount In Store": 1, "Item Permission": "", "Item Command": "", "Condition Of Item": 200.0, "Weapon Attributes": { "Ammo Item ID": -1, "Amount in Magazine": -1 } }, { "Item ID": -470439097, "Item Display Name (Leave blank for default)": "", "Item Buy Price (for 1)": 600, "Item Sell Price (for 1)": -1, "Item Skin": 0, "Item Amount In Store": 1, "Item Permission": "", "Item Command": "", "Condition Of Item": 200.0, "Weapon Attributes": { "Ammo Item ID": -1, "Amount in Magazine": -1 } }, { "Item ID": 491263800, "Item Display Name (Leave blank for default)": "", "Item Buy Price (for 1)": 600, "Item Sell Price (for 1)": -1, "Item Skin": 0, "Item Amount In Store": 1, "Item Permission": "", "Item Command": "", "Condition Of Item": 200.0, "Weapon Attributes": { "Ammo Item ID": -1, "Amount in Magazine": -1 } } ], "Resources": [ { "Item ID": -151838493, "Item Display Name (Leave blank for default)": "", "Item Buy Price (for 1)": 10, "Item Sell Price (for 1)": -1, "Item Skin": 0, "Item Amount In Store": 1000, "Item Permission": "", "Item Command": "", "Condition Of Item": 0.0, "Weapon Attributes": { "Ammo Item ID": -1, "Amount in Magazine": -1 } }, { "Item ID": -2099697608, "Item Display Name (Leave blank for default)": "", "Item Buy Price (for 1)": 50, "Item Sell Price (for 1)": -1, "Item Skin": 0, "Item Amount In Store": 10000, "Item Permission": "", "Item Command": "", "Condition Of Item": 0.0, "Weapon Attributes": { "Ammo Item ID": -1, "Amount in Magazine": -1 } }, { "Item ID": -1581843485, "Item Display Name (Leave blank for default)": "", "Item Buy Price (for 1)": 100, "Item Sell Price (for 1)": -1, "Item Skin": 0, "Item Amount In Store": 1000, "Item Permission": "", "Item Command": "", "Condition Of Item": 0.0, "Weapon Attributes": { "Ammo Item ID": -1, "Amount in Magazine": -1 } } ] } } Plugin Language File: { "CannotDragOnItem": "You can not drag onto a slot with a item already in it.", "PurchaseSuccessful": "You have successfully purchased {0}x {1} for {2}.", "ErrorStacking": "You would be exceeding the max stack size of that item, please drag into another slot.", "ErrorPurchase": "There was an error purchasing this item, please try again.", "CannotAfford": "You can not afford this item with the selected amount.", "ItemCantBeSold": "This item is not able to be sold.", "SoldItem": "You have sold {0}x {1} for {2}.", "ErrorSelling": "There was an error selling this item, please try again.", "BuildingBlocked": "You cannot use this action when building blocked.", "CombatBlocked": "You cannot use this action when combat blocked.", "RaidBlocked": "You cannot use this action when raid blocked.", "InformationText": "<color=green>Purchase</color> items:\nSelect the BUY action in the action menu, and drag items from the crate into either your belt, main, or attire container. A conformation will pop up, with the price and amount you are purchasing.\n\n<color=red>Sell</color> items:\nSelect the SELL action in the action menu, and drag items from your inventory into the container on the right.", "NotEnoughAuto": "You did not have enough balance to auto purchase your kit.", "NoPermission": "You do not have permission to use this command.", "BuyTransactionLog": "{0} [{1}] has bought {3}x {2} for {4}.", "SellTransactionLog": "{0} [{1}] has sold {3}x {2} for {4}.", "ConformationText": "Conformation", "BuyConformationText": "Are you sure you want to buy {0}x {1} for {2}?", "SellConformationText": "Are you sure you want to sell {0}x {1} for {2}?", "ConfirmButton": "Confirm", "CancelButton": "Cancel", "NoConfBuyButton": "Purchase and dont show again", "NoConfSellButton": "Sell and dont show again" } Credits: Shoutout to RIPJAWBONES for giving me the idea and UI layout.$14.99- 5 comments
-
- 1
-

-
- #shop
- #inventory shop
-
(and 5 more)
Tagged with:
-
Version 1.1.1
922 downloads
This plugin will add a biplane to your server! You can configure its spawn on any monuments, give it as an item, and also put it up for sale in a custom AirWolf store, which is included in the plugin. The biplane can shoot rockets and drop bombs! In the plugin, you can create various configurations of biplanes, in which you can change their speed and power, set the number of slots in the box, allow or prohibit firing rockets and bombing, etc. The biplane can be placed on a standard carlift, in which the engine can be replaced or the aircraft repaired. Сontrol W – thrust; Mouse – direction; A/D – cren axis; Left mouse button – rocket shot; Right mouse button – dropping the bomb; Chat commands: /biplanemonument – adds the monument you are on in the plugin config; /biplanemonumentpoint – adds a random spawn point to the monument you are on; /biplaneseller – sets the spawn point of the seller on the monument you are on; /biplanesellerpoint – sets the spawn point of the biplane after purchase on the monument you are on; /givebiplane <itempresetname> – give yourself a biplane item. /biplanecustomspawnpoint - adds a custom biplane spawn point in your position Console commands givebiplane <itempresetname> – give yourself a biplane item; givebiplane <itempresetname> <userid> – give a biplane to player. Plugin Config en – example of plugin configuration in English ru – example of plugin configuration in Russian My Discord: Adem#9554 Join the Mad Mappers Discord here! Check out more of my work here!$19.99 -
Version 1.0.3
18 downloads
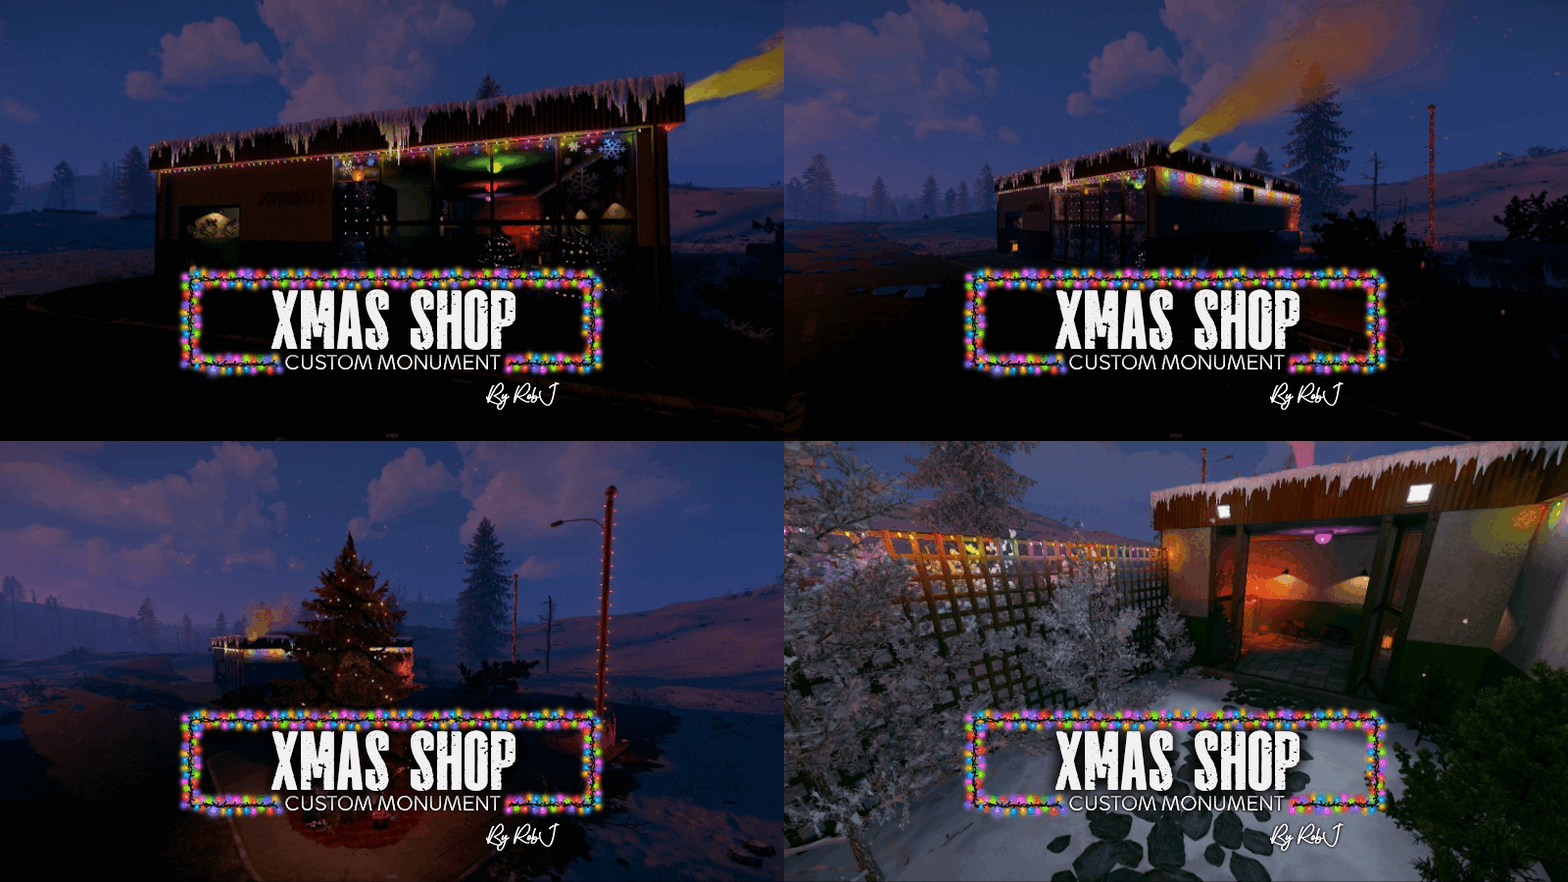
I introduce my Christmas Shop where you will find some low to mid-tier loot and a recycler. A nice compact monument with a holiday feel. Quick Start Extract the zip file into your RustEdit install folder. Start Rust Edit. Click on Prefabs at the top & open up your Prefab List. Under the Custom category, you will now find RobJs Premium Prefabs. Double-click on the prefab file, which will spawn it into the map for you. Drag it to the general area you want to place it and click on Snap To Terrain Apply the Terrain, Topology Mask, and Splat Mask. Contact And Help If you need to contact me discord is best: RobJ2210#2553 For help/support my discord group is best: Join RustMaps By RobJ Discord$12.99 -
Version 1.4.4
214 downloads
Large easily customizable shop – XDShop Features: Beautiful design – which can be customized for your server 2 built-in styles (dark and light) Which can be customized in your own way Great functionality Ability to connect the Human Npc plugin The ability to use any economy You can sell anything you want (Item, Blue-print, Custom Item, Command, Kit) Players can both buy goods and sell (Configurable) The ability to set a limit (purchases / sales) on WIPE, as well as a cooldown (purchases / sales) (by permissions) The ability to give access to categories by permissions Create personal discounts on permissions The ability to prohibit (buy/sell) items during the (raid/combat) block. And also during the duel This plugin does not load your server Beautiful notification option in the shopping menu Additional information I tested this plugin with the guys for a month. During testing, many problems were identified that were fixed. The plugin should work correctly. All settings have been checked. Feel free to write me your ideas. I will be happy to expand and add new functionality to this plugin! Also, if you use another plugin on the store, but you liked mine more and you want to buy it, Feel free to write to me in discord! I will help you move the goods from the old store to mine. Filling the store with standard categories and products For the convenience of configuring products, I made a very convenient function. It will allow you to fill your store with standard products and categories. And also if you install the plugin Item Cost Calculator, then when filling out the goods, the price for the item will be automatically set. How to do it? Just in case, save your old configuration Enter this command in the console – xdshop.refill and xdshop.yes After the process is completed successfully, the plugin will reboot. Next, you just need to change the settings for your server economy. Required Dependencies: ImageLibrary Supported Plugins (Optional): Economics Server Rewards IQEconomic Human NPC Item Cost Calculator IQKits Rust Kits Setup (Configuration): Economics: At the moment there are 4 variants of the economy Economics, Server Rewards, IQEconomic, Item Item – this is a type of economy in which the player will have to pay with an item, it can be scrap or other as well as custom items on your server. You will see an example of the setup below "Economics": { "Economics (0 - Economics, 1 - ServerRewards, 2 - IQEconomic, 3 - Item)": 3, "Prefix to the balance (for example, RP or $ - No more than 2 characters)": "$", "Item shortname (Use with type 3)": "", "Item SkinId (Use with Type 3)": 0 }, Product Setup: At the moment there are 5 different types of goods: Item, Blue-print, Custom item, Command, Kit (Whale plugins are supported Rust Kits & IQKits) Such a variety of items being sold will obviously appeal to your players! Product setup example { "Item Type (0 - Item, 1 - BluePrint, 2 - Custom item, 3 - Commands, 4 - Kit)": 0, "Unique ID (DO NOT TOUCH)": 1, "Shortame": "hat.wolf", "Descriptions": "", "Price": 11.0, "Sale price (If not necessary, leave 0)": 5.5, "Quantity": 1, "Quantity for sale": 1, "Custom item name (Use with item type 2, 3 and 4)": "", "Item SkinID (Use with item type 2)": 0, "Commands (Use with item type 3)": [], "Image URL": "", "Kits (Kits - kit name. IQKits - kit key)": "", "Purchase delay (0 - unlimited)": 0.0, "Sale delay (0 - unlimited)": 0.0, "Maximum number of lots for 1 purchase (Maximum 99)": {}, "Maximum number of lots for 1 sale (Maximum 99)": {}, "The maximum number of purchased lots per wipe (0 - unlimited)": {}, "The maximum number of lots sold per wipe (0 - unlimited)": {} }, Configuring integration with the Human NPC plugin: If you use this plugin, then you clearly need to use it with my plugin. This is a very interesting version of the NPC store Setup example "Setting up a Human NPC": { "Enable Human NPC support ?": false, "Human NPC [NPC ID | list shop category]": { "11223274496" : ["Attire","Weapon"] } }, Configuring the interface: The most interesting part of the plugin. After all, only in it you can customize the color palette for your server. You can create your own light and dark theme between which players will switch. I am sure that every player will choose what is best for him. You can customize the color of any element in my store. Setup example "Configuring the interface": { "Enable the ability to change the theme?": true, "Default theme (0 - light, 1 - dark)": 1, "Light Theme UI Settings": { "The color of the main background of the store": "1 1 1 1", "[TITLE] Text color": "0 0 0 1", "[TITLE] Picture Color": "0 0 0 1", "Color of the discount picture": "0.20 0.85 0.15 1.00", "Discount text color": "0 0 0 1", "Balance picture color": "0.26 0.53 0.80 1", "Balance text color": "0 0 0 1", "[PAGE] Page number text color": "0 0 0 1", "[PAGE] Color of the page switching buttons": "0.51 0.51 0.51 1.00", "[PRODUCT] color of the number of items (digits)": "0.627451 0.6313726 0.6392157 1", "[PRODUCT] product background color": "0.97 0.97 0.98 1.00", "[PRODUCT] Text color of the product name": "0 0 0 1", "[PRODUCT] Buy button color": "0.38 0.77 0.43 1.00", "[PRODUCT] Color of the sell button": "0.8588235 0.345098 0.3372549 1", "[PRODUCT] Close button color": "0.8392158 0.3647059 0.3568628 1", "[CATEGORY] color of the name of the active category": "0 0 0 1", "[CATEGORY] Color of the inactive category name": "0.51 0.51 0.51 1.00", "[CATEGORY] Band color of the active category": "0.5607843 0.8901961 0.4705883 0.6", "[CATEGORY] Color of the inactive category stripe": "0.4078432 0.4313726 0.4392157 0.6", "[NOTIFICATIONS] The color of the text in the notification": "0 0 0 1", "Color of additional gray text": "0.55 0.55 0.55 1.00", "The color of the exit UI button": "0.8392158 0.3647059 0.3568628 1" }, "Dark Theme UI Settings": { "The color of the main background of the store": "0.13 0.15 0.16 1.00", "[TITLE] Text color": "0.87 0.87 0.87 1.00", "[TITLE] Picture Color": "0.62 0.63 0.64 1.00", "Color of the discount picture": "0.20 0.85 0.15 1.00", "Discount text color": "1 1 1 1", "Balance picture color": "0.26 0.53 0.80 1", "Balance text color": "1 1 1 1", "[PAGE] Page number text color": "0.87 0.87 0.87 1.00", "[PAGE] Color of the page switching buttons": "0.51 0.51 0.51 1.00", "[PRODUCT] color of the number of items (digits)": "0.627451 0.6313726 0.6392157 1", "[PRODUCT] product background color": "0.17 0.18 0.21 1.00", "[PRODUCT] Text color of the product name": "0.87 0.87 0.87 1.00", "[PRODUCT] Buy button color": "0.38 0.77 0.43 1.00", "[PRODUCT] Color of the sell button": "0.8588235 0.345098 0.3372549 1", "[PRODUCT] Close button color": "0.8392158 0.3647059 0.3568628 1", "[CATEGORY] color of the name of the active category": "0.87 0.87 0.87 1.00", "[CATEGORY] Color of the inactive category name": "0.51 0.51 0.51 1.00", "[CATEGORY] Band color of the active category": "0.5607843 0.8901961 0.4705883 0.6", "[CATEGORY] Color of the inactive category stripe": "0.4078432 0.4313726 0.4392157 0.6", "[NOTIFICATIONS] The color of the text in the notification": "1 1 1 1", "Color of additional gray text": "0.55 0.55 0.55 1.00", "The color of the exit UI button": "0.8392158 0.3647059 0.3568628 1" } },$18.99- 34 comments
- 1 review
-
- 4
-

-

-
- #ui shop
- #shop rust
-
(and 4 more)
Tagged with:
-
Version 1.1.1
5 downloads
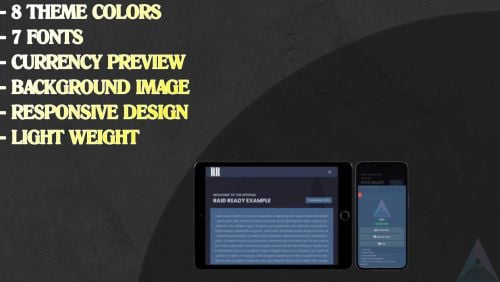
Features: Responsive design, optimized for desktop as well as phone customers 8 themes 7 fonts Easy Set Up: Create a new template file on the webstore page. https://dashboard.paynow.gg/webstore Press the “Upload template” and drag in the Horizon.zip Activate the template Reload your webpage after a few seconds Preview : https://raid-ready-example.paynow.store/ Scrollable product description$25.00 -
Version 1.0.1
18 downloads
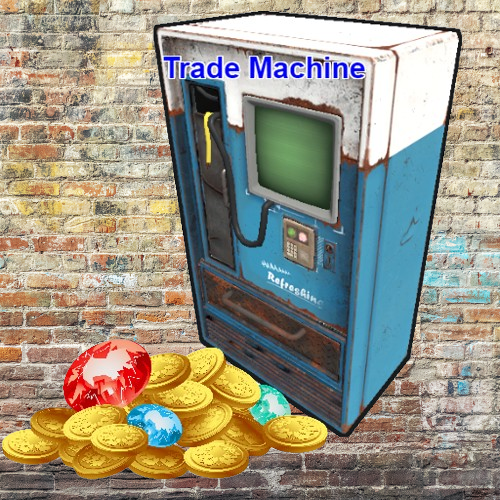
ABOUT TRADE MACHINE : Allows players to Sell/Buy - Custom/Default items. Players need to assign vending machine what will they use for trading items. One assigned machine per player ,can be placed anywhere in TC range . There are 2 ways to interact with trade machine ,with command and with button when player opens container of a vending machine. With command player can sell/buy items from anywhere ,with button option only when he have opened container of assigned vendingmachine. Players need to put items in container of assigned vending machine to be able to sell them. If they remove item from vending container ,item will not be on sell anymore. When buying item, player need to have cost for that item in his inventory . On succeed buying item ,item will be transferred to buyers assigned vending machine . SELL ITEM : Player can only sell items what he have in container of assigned vending machine. When player press in UI on item what he will sell ,he will see Description and Cost . In Description he can add what ever text ,confirm it , that text will buyer see when he is buying item . in Cost he can add cost items for that item ,up to 6 items . They can use custom and default items for cost . There are categories for cost items ,like "All" , "Custom" , "Weapons" ,and so on . When they chose cost item/items ,they will need to type cost amount of that item. After all that ,when player press Sell Item , buyers will be able to see it in and buy it. When seller sell item to buyer he will see in chat that he sold item. BUY ITEM : When seller added item for sell ,buyer will see item, amount, description ,and cost of that item . Items will be in categories "All" , "Custom" , "Weapons" and so on . He will pay cost from his inventory ,and he will get item in his assigned vending machine. CUSTOM /BLACKLISTED ITEMS : In config file you can add Custom and Blacklisted items ,by itemID and SkinID . For custom items ,if you add them in config ,players will be able to put that custom items for cost items, and they will be able to sell/buy those custom items. For blacklisted items ,if you add them in config, you will block that items , so players cant put those items for cost ,and they will not be able to sell/buy them . PERMISSION SYSTEM/COMMANDS : trademachine.button - players will be able to see trade button when they open container of vendingmachine . trademachine.command - players will be able to use /trade command . Command /myvm - to assign vending machine . Console command - cleartrade , This will wipe selling items and assigned machines . DATA : In data file you will see owners of assigned vending machine and what items are selling . When you wipe it with console command "cleartrade" , all will be wiped ... So no more assigned machines and no more selling items. TRADE INFO TEXT FIELD : When player open UI of trade machine he will see text on left side ,you can edit that text to your needs . In config file can be edited . CONFIG : { //// Here you can edit text field . "TradeInfo": [ "You need to assaign vending machine", "with /myvm.", "You can have only one", "assaigned vending machine", "", "In selling item you can chose:", "Description - just type it and confirm it.", "Cost - up to 6 items. ", "", "In buying items:", "You will see descripton what seller make.", "You will see cost for that item." ], "CustomItems": [ { "ItemId": -1707425764, "SkinId": 3122790562, "DisplayName": "" } ], "BlacklistedItems": [ { "ItemId": 550753330, "SkinId": 0 } ],$15.00-
- #custom item
- #trade
-
(and 3 more)
Tagged with:
-
Version 1.0.11
337 downloads
Random Trader is a plugin that spawns a random shop along the side of the road, and is loaded with a randomly chosen shop profile. When a player interacts with the vending machine they are presented with randomly selected items from the shop profile, which are given random stock amounts and a random scrap/econ/SRP price. The plugin allows for the minimum and maximum stock and price values to be set in the config, and allows for the number of items displayed to be adjusted. The plugin comes with 4 loot tables by default: Clothing Weapons Tools Random items The following shops are automatically added if you own the relevant plugins Cooking EpicLoot Installing the plugin is as simple as dropping some files inside of your oxide folders. Ensure CopyPaste and ImageLibrary are loaded on your server. The plugin will acquire the files from my dropbox and stores them in the appropriate folder. If you own Cooking and/or EpicLoot, both plugins will automatically create profiles for RandomTrader in your config. Command: spawntrader Usage: /spawntrader <profile name> Example: /spawntrader weapons - will spawn a random shop with the weapons profile loaded. Command: despawntrader Usage: /despawntrader <profile name> Example: /despawntrader weapons - will despawn the weapons shop if it is spawned. Command: rtremovestoredata Usage: /rtremovestoredata <profile name> Example: /rtremovestoredata cooking - deletes the data for cooking from your config. Command: rtfindnewshops Usage: /rtfindnewshops Example: /rtfindnewshops - Finds new shops that are not in the config and saves them to the config. Useful for forcing external plugins to load their shop profiles in (Cooking/EpicLoot). Command: rtcheckpoints Usage: /rtcheckpoints Example: /rtcheckpoints - shows you the potential spawn locations for the shops. randomtrader.use - required to access the shop. randomtrader.admin - required to manually spawn/despawn vending machines. Config example: https://pastebin.com/MvcdBtTb$15.00- 23 comments
- 1 review
-
- 4
-

-

-
- #vending
- #vending machine
-
(and 6 more)
Tagged with:
-
Version 1.2.5
800 downloads
Description : This plugin allows you to have a graphical interface on your servers which will then give you information on the number of players, my not only that, all that in real time Editor : https://hud-panel.foudugame360.com/ Requires : ImageLibrary Compatible : TimedPermissions Economics TruePVE ServerRewards ZoneManager BuildCost UI Panel function : An ON/OFF button on the panel. A store button/Kits/Info/... An online player counter. An sleeping player counter. An player counter. A clock that gives the time of the match. A dial that gives the player balance. A dial that gives PVP/PVE information. A dial that indicates the time of a leave. A dial that displays your messages. A counter that gives the distance between you and your point. A dial that shows the player’s position on the map in real time. A dial that gives the server’s fps. An icon for the cargo plane event. An icon for freight events. An icon for ch47 events. An icon for attack helicopter events. An icon for tank events. An icon for your custom events via ( hook). Time format : file : /oxide/lang/en/HUDPanel.json for 12h format "Time_Format": "hh:mm tt", for 24h format "Time_Format": "HH:mm", https://www.c-sharpcorner.com/blogs/date-and-time-format-in-c-sharp-programming1 Themes : HUD BASIC CUBE TRIANGLE Icon ID : Contents : - HUDPanel.cs Install : rust\oxide\plugins\HUDPanel.cs Config : rust\oxide\config\HUDPanel.json { "Scan current map events on reload": true, "Chat command to show/disappear the HUDPanel": "h", "Anti Freeze Server Fps Limit": 15, "Change the overall size of the HUD Panel (30 - 100) Default 48": 48, "Width between icon": 18, "Change the sound of the On/Off button": "assets/prefabs/locks/keypad/effects/lock.code.lock.prefab", "Type the coordinate ( X: 1000 | Z: 1000 : 0 ), ( map : A1 : 1 ), ( Auto : 2 )": 2, "List Messages": { "Messages": { "On/Off (true/false)": true, "How long until the next message": 10, "Messages": [ "Messages 1", "Messages 2", "Messages 3" ], "The order the icon should place": 0, "Change text alignment": 4, "Text size": 11, "Text fonts ( 0 - 3 )": 0, "Color Text ( HEX )": "#ffffff", "The position on the screen that the icon should be ( LeftTop, CenterTop, RightTop, LeftBottom, CenterBottom, RightBottom)": "CenterTop", "Swich On": { "Themes ( HUD - BASIC - CUBE - TRIANGLE )": "HUD", "Color 1": "#000000", "Color 2": "#3f51b5", "Color 3": null, "Color Icon": "#ffffff", "Opacity 1": 0.3, "Opacity 2": 1.0, "Opacity 3": 0.0, "Opacity icon": 1.0, "Enlarge icon": 2.1, "Icon ID": "Messages", "URL Custom": null }, "Swich OFF": null, "Position of text in the logo": "20 0 -1 0", "Width BAR SIZE : 1 - 15": 8 } }, "Timed Permissions: Edit 'vip_*' ( Permissions / Groups )": { "vip_1": { "On/Off (true/false)": true, "Reload delay": 5, "Commands (leave blank to disable)": null, "The order the icon should place": 0, "Change text alignment": 4, "Text size": 11, "Text fonts ( 0 - 3 )": 0, "Color Text ( HEX )": "#ffffff", "The position on the screen that the icon should be ( LeftTop, CenterTop, RightTop, LeftBottom, CenterBottom, RightBottom)": "CenterTop", "Swich On": { "Themes ( HUD - BASIC - CUBE - TRIANGLE )": "HUD", "Color 1": "#000000", "Color 2": "#ff9800", "Color 3": null, "Color Icon": "#ffffff", "Opacity 1": 0.3, "Opacity 2": 1.0, "Opacity 3": 0.0, "Opacity icon": 1.0, "Enlarge icon": 1.5, "Icon ID": "Vip_3", "URL Custom": null }, "Swich OFF": null, "Position of text in the logo": "20 0 -1 0", "Width BAR SIZE : 1 - 15": 7 }, "demo": { "On/Off (true/false)": true, "Reload delay": 5, "Commands (leave blank to disable)": null, "The order the icon should place": 0, "Change text alignment": 4, "Text size": 11, "Text fonts ( 0 - 3 )": 0, "Color Text ( HEX )": "#ffffff", "The position on the screen that the icon should be ( LeftTop, CenterTop, RightTop, LeftBottom, CenterBottom, RightBottom)": "CenterBottom", "Swich On": { "Themes ( HUD - BASIC - CUBE - TRIANGLE )": "HUD", "Color 1": "#000000", "Color 2": "#ff9800", "Color 3": null, "Color Icon": "#ffffff", "Opacity 1": 0.3, "Opacity 2": 1.0, "Opacity 3": 0.0, "Opacity icon": 1.0, "Enlarge icon": 1.5, "Icon ID": "Vip_1", "URL Custom": null }, "Swich OFF": null, "Position of text in the logo": "20 0 -2 0", "Width BAR SIZE : 1 - 15": 7 } }, "Custom events": { "Sputnik": { "On/Off (true/false)": true, "The order the icon should place": 5, "The position on the screen that the icon should be ( LeftTop, CenterTop, RightTop, LeftBottom, CenterBottom, RightBottom)": "RightTop", "On Event start ( Hook )": "OnSputnikEventStart", "On Event End ( Hook )": "OnSputnikEventStop", "Swich On": { "Themes ( HUD - BASIC - CUBE - TRIANGLE )": "HUD", "Color 1": "#000000", "Color 2": "#ff8100", "Color 3": "#ffffff", "Color Icon": "#ffffff", "Opacity 1": 0.4, "Opacity 2": 1.0, "Opacity 3": 0.0, "Opacity icon": 1.0, "Enlarge icon": 1.6, "Icon ID": "Sputnik", "URL Custom": null }, "Swich OFF": { "Themes ( HUD - BASIC - CUBE - TRIANGLE )": "HUD", "Color 1": "#000000", "Color 2": "#000000", "Color 3": "#ffffff", "Color Icon": "#ffffff", "Opacity 1": 0.3, "Opacity 2": 0.0, "Opacity 3": 0.1, "Opacity icon": 1.0, "Enlarge icon": 1.6, "Icon ID": "Sputnik", "URL Custom": null }, "Width BAR SIZE : 1 - 15": 1 }, "Convoy": { "On/Off (true/false)": true, "The order the icon should place": 6, "The position on the screen that the icon should be ( LeftTop, CenterTop, RightTop, LeftBottom, CenterBottom, RightBottom)": "RightTop", "On Event start ( Hook )": "OnConvoyStart", "On Event End ( Hook )": "OnConvoyEnd", "Swich On": { "Themes ( HUD - BASIC - CUBE - TRIANGLE )": "HUD", "Color 1": "#000000", "Color 2": "#ff8100", "Color 3": "#ffffff", "Color Icon": "#ffffff", "Opacity 1": 0.4, "Opacity 2": 1.0, "Opacity 3": 0.0, "Opacity icon": 1.0, "Enlarge icon": 1.6, "Icon ID": "Convoy", "URL Custom": null }, "Swich OFF": { "Themes ( HUD - BASIC - CUBE - TRIANGLE )": "HUD", "Color 1": "#000000", "Color 2": "#000000", "Color 3": "#ffffff", "Color Icon": "#ffffff", "Opacity 1": 0.3, "Opacity 2": 0.0, "Opacity 3": 0.1, "Opacity icon": 1.0, "Enlarge icon": 1.6, "Icon ID": "Convoy", "URL Custom": null }, "Width BAR SIZE : 1 - 15": 1 }, "ArmoredTrain": { "On/Off (true/false)": true, "The order the icon should place": 7, "The position on the screen that the icon should be ( LeftTop, CenterTop, RightTop, LeftBottom, CenterBottom, RightBottom)": "RightTop", "On Event start ( Hook )": "OnArmoredTrainEventStart", "On Event End ( Hook )": "OnArmoredTrainEventStop", "Swich On": { "Themes ( HUD - BASIC - CUBE - TRIANGLE )": "HUD", "Color 1": "#000000", "Color 2": "#ff8100", "Color 3": "#ffffff", "Color Icon": "#ffffff", "Opacity 1": 0.4, "Opacity 2": 1.0, "Opacity 3": 0.0, "Opacity icon": 1.0, "Enlarge icon": 1.6, "Icon ID": "Train", "URL Custom": null }, "Swich OFF": { "Themes ( HUD - BASIC - CUBE - TRIANGLE )": "HUD", "Color 1": "#000000", "Color 2": "#000000", "Color 3": "#ffffff", "Color Icon": "#ffffff", "Opacity 1": 0.3, "Opacity 2": 0.0, "Opacity 3": 0.1, "Opacity icon": 1.0, "Enlarge icon": 1.6, "Icon ID": "Train", "URL Custom": null }, "Width BAR SIZE : 1 - 15": 1 }, "Harbor": { "On/Off (true/false)": true, "The order the icon should place": 8, "The position on the screen that the icon should be ( LeftTop, CenterTop, RightTop, LeftBottom, CenterBottom, RightBottom)": "RightTop", "On Event start ( Hook )": "OnHarborEventStart", "On Event End ( Hook )": "OnHarborEventEnd", "Swich On": { "Themes ( HUD - BASIC - CUBE - TRIANGLE )": "HUD", "Color 1": "#000000", "Color 2": "#ff8100", "Color 3": "#ffffff", "Color Icon": "#ffffff", "Opacity 1": 0.4, "Opacity 2": 1.0, "Opacity 3": 0.0, "Opacity icon": 1.0, "Enlarge icon": 2.0, "Icon ID": "Harbor", "URL Custom": null }, "Swich OFF": { "Themes ( HUD - BASIC - CUBE - TRIANGLE )": "HUD", "Color 1": "#000000", "Color 2": "#000000", "Color 3": "#ffffff", "Color Icon": "#ffffff", "Opacity 1": 0.3, "Opacity 2": 0.0, "Opacity 3": 0.1, "Opacity icon": 1.0, "Enlarge icon": 2.0, "Icon ID": "Harbor", "URL Custom": null }, "Width BAR SIZE : 1 - 15": 1 } }, "Default events": { "Patrol": { "On/Off (true/false)": true, "Change text alignment": 4, "Text size": 11, "Text fonts ( 0 - 3 )": 0, "Color Text ( HEX )": "#ffffff", "Position of text in the logo": "20 0 -1 0", "The order the icon should place": 2, "The position on the screen that the icon should be ( LeftTop, CenterTop, RightTop, LeftBottom, CenterBottom, RightBottom)": "RightTop", "On Event start ( Hook )": null, "On Event End ( Hook )": null, "Swich On": { "Themes ( HUD - BASIC - CUBE - TRIANGLE )": "HUD", "Color 1": "#000000", "Color 2": "#ff0000", "Color 3": "#ffffff", "Color Icon": "#ffffff", "Opacity 1": 0.3, "Opacity 2": 1.0, "Opacity 3": 0.0, "Opacity icon": 1.0, "Enlarge icon": 1.6, "Icon ID": "Patrol", "URL Custom": null }, "Swich OFF": { "Themes ( HUD - BASIC - CUBE - TRIANGLE )": "HUD", "Color 1": "#000000", "Color 2": "#ff0000", "Color 3": "#ffffff", "Color Icon": "#ffffff", "Opacity 1": 0.3, "Opacity 2": 0.0, "Opacity 3": 0.1, "Opacity icon": 1.0, "Enlarge icon": 1.6, "Icon ID": "Patrol", "URL Custom": null }, "Width BAR SIZE : 1 - 15": 1 }, "Ch47": { "On/Off (true/false)": true, "Change text alignment": 4, "Text size": 11, "Text fonts ( 0 - 3 )": 0, "Color Text ( HEX )": "#ffffff", "Position of text in the logo": "20 0 -1 0", "The order the icon should place": 3, "The position on the screen that the icon should be ( LeftTop, CenterTop, RightTop, LeftBottom, CenterBottom, RightBottom)": "RightTop", "On Event start ( Hook )": null, "On Event End ( Hook )": null, "Swich On": { "Themes ( HUD - BASIC - CUBE - TRIANGLE )": "HUD", "Color 1": "#000000", "Color 2": "#ff0000", "Color 3": "#ffffff", "Color Icon": "#ffffff", "Opacity 1": 0.3, "Opacity 2": 1.0, "Opacity 3": 0.0, "Opacity icon": 1.0, "Enlarge icon": 1.8, "Icon ID": "Ch-47", "URL Custom": null }, "Swich OFF": { "Themes ( HUD - BASIC - CUBE - TRIANGLE )": "HUD", "Color 1": "#000000", "Color 2": "#ff0000", "Color 3": "#ffffff", "Color Icon": "#ffffff", "Opacity 1": 0.3, "Opacity 2": 0.0, "Opacity 3": 0.1, "Opacity icon": 1.0, "Enlarge icon": 1.8, "Icon ID": "Ch-47", "URL Custom": null }, "Width BAR SIZE : 1 - 15": 1 }, "Plane": { "On/Off (true/false)": true, "Change text alignment": 4, "Text size": 11, "Text fonts ( 0 - 3 )": 0, "Color Text ( HEX )": "#ffffff", "Position of text in the logo": "20 0 -1 0", "The order the icon should place": 10, "The position on the screen that the icon should be ( LeftTop, CenterTop, RightTop, LeftBottom, CenterBottom, RightBottom)": "RightTop", "On Event start ( Hook )": null, "On Event End ( Hook )": null, "Swich On": { "Themes ( HUD - BASIC - CUBE - TRIANGLE )": "HUD", "Color 1": "#000000", "Color 2": "#007f00", "Color 3": "#ffffff", "Color Icon": "#ffffff", "Opacity 1": 0.3, "Opacity 2": 1.0, "Opacity 3": 0.0, "Opacity icon": 1.0, "Enlarge icon": 1.8, "Icon ID": "Plane", "URL Custom": null }, "Swich OFF": { "Themes ( HUD - BASIC - CUBE - TRIANGLE )": "HUD", "Color 1": "#000000", "Color 2": "#ff0000", "Color 3": "#ffffff", "Color Icon": "#ffffff", "Opacity 1": 0.3, "Opacity 2": 0.0, "Opacity 3": 0.1, "Opacity icon": 1.0, "Enlarge icon": 1.8, "Icon ID": "Plane", "URL Custom": null }, "Width BAR SIZE : 1 - 15": 2 }, "Cargo": { "On/Off (true/false)": true, "Change text alignment": 4, "Text size": 11, "Text fonts ( 0 - 3 )": 0, "Color Text ( HEX )": "#ffffff", "Position of text in the logo": "20 0 -1 0", "The order the icon should place": 4, "The position on the screen that the icon should be ( LeftTop, CenterTop, RightTop, LeftBottom, CenterBottom, RightBottom)": "RightTop", "On Event start ( Hook )": null, "On Event End ( Hook )": null, "Swich On": { "Themes ( HUD - BASIC - CUBE - TRIANGLE )": "HUD", "Color 1": "#000000", "Color 2": "#007f00", "Color 3": "#ffffff", "Color Icon": "#ffffff", "Opacity 1": 0.3, "Opacity 2": 1.0, "Opacity 3": 0.0, "Opacity icon": 1.0, "Enlarge icon": 1.5, "Icon ID": "Cargo", "URL Custom": null }, "Swich OFF": { "Themes ( HUD - BASIC - CUBE - TRIANGLE )": "HUD", "Color 1": "#000000", "Color 2": "#ff0000", "Color 3": "#ffffff", "Color Icon": "#ffffff", "Opacity 1": 0.3, "Opacity 2": 0.0, "Opacity 3": 0.1, "Opacity icon": 1.0, "Enlarge icon": 1.5, "Icon ID": "Cargo", "URL Custom": null }, "Width BAR SIZE : 1 - 15": 1 }, "BradleyAPC": { "On/Off (true/false)": true, "Change text alignment": 4, "Text size": 11, "Text fonts ( 0 - 3 )": 0, "Color Text ( HEX )": "#ffffff", "Position of text in the logo": "20 0 -1 0", "The order the icon should place": 1, "The position on the screen that the icon should be ( LeftTop, CenterTop, RightTop, LeftBottom, CenterBottom, RightBottom)": "RightTop", "On Event start ( Hook )": null, "On Event End ( Hook )": null, "Swich On": { "Themes ( HUD - BASIC - CUBE - TRIANGLE )": "HUD", "Color 1": "#000000", "Color 2": "#ff0000", "Color 3": "#ffffff", "Color Icon": "#ffffff", "Opacity 1": 0.4, "Opacity 2": 1.0, "Opacity 3": 0.0, "Opacity icon": 1.0, "Enlarge icon": 1.4, "Icon ID": "BradleyAPC", "URL Custom": null }, "Swich OFF": { "Themes ( HUD - BASIC - CUBE - TRIANGLE )": "HUD", "Color 1": "#000000", "Color 2": "#ff0000", "Color 3": "#ffffff", "Color Icon": "#ffffff", "Opacity 1": 0.3, "Opacity 2": 0.0, "Opacity 3": 0.1, "Opacity icon": 1.0, "Enlarge icon": 1.4, "Icon ID": "BradleyAPC", "URL Custom": null }, "Width BAR SIZE : 1 - 15": 1 } }, "Information frame": { "Power": { "On/Off (true/false)": true, "Reload delay": 0, "Commands (leave blank to disable)": null, "The order the icon should place": 1, "Change text alignment": 4, "Text size": 11, "Text fonts ( 0 - 3 )": 0, "Color Text ( HEX )": "#ffffff", "The position on the screen that the icon should be ( LeftTop, CenterTop, RightTop, LeftBottom, CenterBottom, RightBottom)": "LeftTop", "Position of text in the logo": "0 0 0 0", "Swich On": { "Themes ( HUD - BASIC - CUBE - TRIANGLE )": "HUD", "Color 1": "#000000", "Color 2": "#007f00", "Color 3": null, "Color Icon": "#ffffff", "Opacity 1": 0.3, "Opacity 2": 1.0, "Opacity 3": 0.0, "Opacity icon": 1.0, "Enlarge icon": 1.8, "Icon ID": "Power", "URL Custom": null }, "Swich OFF": { "Themes ( HUD - BASIC - CUBE - TRIANGLE )": "HUD", "Color 1": "#000000", "Color 2": "#ff0000", "Color 3": null, "Color Icon": "#ffffff", "Opacity 1": 0.3, "Opacity 2": 1.0, "Opacity 3": 0.0, "Opacity icon": 1.0, "Enlarge icon": 1.8, "Icon ID": "Power", "URL Custom": null }, "Width BAR SIZE : 1 - 15": 1 }, "Players": { "On/Off (true/false)": true, "Reload delay": 1, "Commands (leave blank to disable)": null, "The order the icon should place": 2, "Change text alignment": 4, "Text size": 11, "Text fonts ( 0 - 3 )": 0, "Color Text ( HEX )": "#ffffff", "The position on the screen that the icon should be ( LeftTop, CenterTop, RightTop, LeftBottom, CenterBottom, RightBottom)": "LeftTop", "Position of text in the logo": "20 0 -1 0", "Swich On": { "Themes ( HUD - BASIC - CUBE - TRIANGLE )": "HUD", "Color 1": "#000000", "Color 2": "#3d3d44", "Color 3": null, "Color Icon": "#ffffff", "Opacity 1": 0.3, "Opacity 2": 1.0, "Opacity 3": 0.0, "Opacity icon": 1.0, "Enlarge icon": 1.8, "Icon ID": "Players", "URL Custom": null }, "Swich OFF": null, "Width BAR SIZE : 1 - 15": 3 }, "Sleep": { "On/Off (true/false)": true, "Reload delay": 2, "Commands (leave blank to disable)": null, "The order the icon should place": 3, "Change text alignment": 4, "Text size": 11, "Text fonts ( 0 - 3 )": 0, "Color Text ( HEX )": "#ffffff", "The position on the screen that the icon should be ( LeftTop, CenterTop, RightTop, LeftBottom, CenterBottom, RightBottom)": "LeftTop", "Position of text in the logo": "20 0 -1 0", "Swich On": { "Themes ( HUD - BASIC - CUBE - TRIANGLE )": "HUD", "Color 1": "#000000", "Color 2": "#ff8100", "Color 3": null, "Color Icon": "#ffffff", "Opacity 1": 0.3, "Opacity 2": 1.0, "Opacity 3": 0.0, "Opacity icon": 1.0, "Enlarge icon": 1.8, "Icon ID": "Sleep", "URL Custom": null }, "Swich OFF": null, "Width BAR SIZE : 1 - 15": 2 }, "Joining": { "On/Off (true/false)": true, "Reload delay": 1, "Commands (leave blank to disable)": null, "The order the icon should place": 4, "Change text alignment": 4, "Text size": 11, "Text fonts ( 0 - 3 )": 0, "Color Text ( HEX )": "#ffffff", "The position on the screen that the icon should be ( LeftTop, CenterTop, RightTop, LeftBottom, CenterBottom, RightBottom)": "LeftTop", "Position of text in the logo": "20 0 -1 0", "Swich On": { "Themes ( HUD - BASIC - CUBE - TRIANGLE )": "HUD", "Color 1": "#000000", "Color 2": "#ff0000", "Color 3": null, "Color Icon": "#ffffff", "Opacity 1": 0.3, "Opacity 2": 1.0, "Opacity 3": 0.0, "Opacity icon": 1.0, "Enlarge icon": 1.8, "Icon ID": "Joining", "URL Custom": null }, "Swich OFF": null, "Width BAR SIZE : 1 - 15": 2 }, "Times": { "On/Off (true/false)": true, "Reload delay": 5, "Commands (leave blank to disable)": null, "The order the icon should place": 5, "Change text alignment": 4, "Text size": 11, "Text fonts ( 0 - 3 )": 0, "Color Text ( HEX )": "#ffffff", "The position on the screen that the icon should be ( LeftTop, CenterTop, RightTop, LeftBottom, CenterBottom, RightBottom)": "LeftTop", "Position of text in the logo": "20 0 -1 0", "Swich On": { "Themes ( HUD - BASIC - CUBE - TRIANGLE )": "HUD", "Color 1": "#000000", "Color 2": "#00a7c2", "Color 3": null, "Color Icon": "#ffffff", "Opacity 1": 0.3, "Opacity 2": 1.0, "Opacity 3": 0.0, "Opacity icon": 1.0, "Enlarge icon": 1.8, "Icon ID": "Times", "URL Custom": null }, "Swich OFF": null, "Width BAR SIZE : 1 - 15": 2 }, "ServerRewards": { "On/Off (true/false)": true, "Reload delay": 3, "Commands (leave blank to disable)": null, "The order the icon should place": 1, "Change text alignment": 4, "Text size": 11, "Text fonts ( 0 - 3 )": 0, "Color Text ( HEX )": "#ffffff", "The position on the screen that the icon should be ( LeftTop, CenterTop, RightTop, LeftBottom, CenterBottom, RightBottom)": "RightBottom", "Position of text in the logo": "20 0 -1 0", "Swich On": { "Themes ( HUD - BASIC - CUBE - TRIANGLE )": "HUD", "Color 1": "#000000", "Color 2": "#ff5722", "Color 3": null, "Color Icon": "#ffffff", "Opacity 1": 0.3, "Opacity 2": 1.0, "Opacity 3": 0.0, "Opacity icon": 1.0, "Enlarge icon": 1.8, "Icon ID": "ServerRewards", "URL Custom": null }, "Swich OFF": null, "Width BAR SIZE : 1 - 15": 5 }, "Economics": { "On/Off (true/false)": true, "Reload delay": 0, "Commands (leave blank to disable)": null, "The order the icon should place": 6, "Change text alignment": 4, "Text size": 11, "Text fonts ( 0 - 3 )": 0, "Color Text ( HEX )": "#ffffff", "The position on the screen that the icon should be ( LeftTop, CenterTop, RightTop, LeftBottom, CenterBottom, RightBottom)": "LeftTop", "Position of text in the logo": "20 0 -1 0", "Swich On": { "Themes ( HUD - BASIC - CUBE - TRIANGLE )": "HUD", "Color 1": "#000000", "Color 2": "#007f00", "Color 3": null, "Color Icon": "#ffffff", "Opacity 1": 0.3, "Opacity 2": 1.0, "Opacity 3": 0.0, "Opacity icon": 1.0, "Enlarge icon": 1.8, "Icon ID": "Economics", "URL Custom": null }, "Swich OFF": null, "Width BAR SIZE : 1 - 15": 5 }, "FPS": { "On/Off (true/false)": true, "Reload delay": 1, "Commands (leave blank to disable)": null, "The order the icon should place": 2, "Change text alignment": 4, "Text size": 11, "Text fonts ( 0 - 3 )": 0, "Color Text ( HEX )": "#ffffff", "The position on the screen that the icon should be ( LeftTop, CenterTop, RightTop, LeftBottom, CenterBottom, RightBottom)": "LeftBottom", "Position of text in the logo": "20 0 -1 0", "Swich On": { "Themes ( HUD - BASIC - CUBE - TRIANGLE )": "HUD", "Color 1": "#000000", "Color 2": "#ff0066", "Color 3": null, "Color Icon": "#ffffff", "Opacity 1": 0.3, "Opacity 2": 1.0, "Opacity 3": 0.0, "Opacity icon": 1.0, "Enlarge icon": 1.8, "Icon ID": "FPS", "URL Custom": null }, "Swich OFF": null, "Width BAR SIZE : 1 - 15": 2 }, "PvpPve": { "On/Off (true/false)": true, "Reload delay": 10, "Commands (leave blank to disable)": null, "The order the icon should place": 1, "Change text alignment": 4, "Text size": 11, "Text fonts ( 0 - 3 )": 0, "Color Text ( HEX )": "#ffffff", "The position on the screen that the icon should be ( LeftTop, CenterTop, RightTop, LeftBottom, CenterBottom, RightBottom)": "LeftBottom", "Position of text in the logo": "20 0 -1 0", "Swich On": { "Themes ( HUD - BASIC - CUBE - TRIANGLE )": "HUD", "Color 1": "#000000", "Color 2": "#ff0066", "Color 3": null, "Color Icon": "#ffffff", "Opacity 1": 0.3, "Opacity 2": 1.0, "Opacity 3": 0.0, "Opacity icon": 1.0, "Enlarge icon": 1.8, "Icon ID": "PvpPve", "URL Custom": null }, "Swich OFF": null, "Width BAR SIZE : 1 - 15": 3 }, "Coordinate": { "On/Off (true/false)": false, "Reload delay": 3, "Commands (leave blank to disable)": null, "The order the icon should place": 5, "Change text alignment": 4, "Text size": 11, "Text fonts ( 0 - 3 )": 0, "Color Text ( HEX )": "#ffffff", "The position on the screen that the icon should be ( LeftTop, CenterTop, RightTop, LeftBottom, CenterBottom, RightBottom)": "RightTop", "Position of text in the logo": "20 0 -1 0", "Swich On": { "Themes ( HUD - BASIC - CUBE - TRIANGLE )": "HUD", "Color 1": "#000000", "Color 2": "#006bc3", "Color 3": null, "Color Icon": "#ffffff", "Opacity 1": 0.3, "Opacity 2": 1.0, "Opacity 3": 0.0, "Opacity icon": 1.0, "Enlarge icon": 1.8, "Icon ID": "Coordinate", "URL Custom": null }, "Swich OFF": null, "Width BAR SIZE : 1 - 15": 6 }, "MarkerPos": { "On/Off (true/false)": true, "Reload delay": 1, "Commands (leave blank to disable)": null, "The order the icon should place": 2, "Change text alignment": 4, "Text size": 11, "Text fonts ( 0 - 3 )": 0, "Color Text ( HEX )": "#ffffff", "The position on the screen that the icon should be ( LeftTop, CenterTop, RightTop, LeftBottom, CenterBottom, RightBottom)": "RightBottom", "Position of text in the logo": "20 0 -1 0", "Swich On": { "Themes ( HUD - BASIC - CUBE - TRIANGLE )": "HUD", "Color 1": "#000000", "Color 2": "#feab00", "Color 3": null, "Color Icon": "#ffffff", "Opacity 1": 0.3, "Opacity 2": 1.0, "Opacity 3": 0.0, "Opacity icon": 1.0, "Enlarge icon": 1.8, "Icon ID": "MarkerPos", "URL Custom": null }, "Swich OFF": null, "Width BAR SIZE : 1 - 15": 2 } }, "Button Custom": { "Shop": { "On/Off (true/false)": true, "Commands (leave blank to disable)": "shop", "The order the icon should place": 6, "Text size": 11, "Text fonts ( 0 - 3 )": 0, "Color Text ( HEX )": "#ffffff", "Position of text in the logo": "20 0 -1 0", "Change text alignment": 4, "The position on the screen that the icon should be ( LeftTop, CenterTop, RightTop, LeftBottom, CenterBottom, RightBottom)": "CenterBottom", "Swich On": { "Themes ( HUD - BASIC - CUBE - TRIANGLE )": "HUD", "Color 1": "#000000", "Color 2": "#000000", "Color 3": "#ffffff", "Color Icon": "#ffffff", "Opacity 1": 0.4, "Opacity 2": 0.4, "Opacity 3": 1.0, "Opacity icon": 0.9, "Enlarge icon": 1.7, "Icon ID": "Shop", "URL Custom": null }, "Swich OFF": null, "Width BAR SIZE : 1 - 15": 2 }, "Kits": { "On/Off (true/false)": true, "Commands (leave blank to disable)": "chat.say /kit", "The order the icon should place": 6, "Text size": 11, "Text fonts ( 0 - 3 )": 0, "Color Text ( HEX )": "#ffffff", "Position of text in the logo": "20 0 -1 0", "Change text alignment": 4, "The position on the screen that the icon should be ( LeftTop, CenterTop, RightTop, LeftBottom, CenterBottom, RightBottom)": "CenterBottom", "Swich On": { "Themes ( HUD - BASIC - CUBE - TRIANGLE )": "HUD", "Color 1": "#000000", "Color 2": "#000000", "Color 3": "#ffffff", "Color Icon": "#ffffff", "Opacity 1": 0.4, "Opacity 2": 0.4, "Opacity 3": 1.0, "Opacity icon": 0.9, "Enlarge icon": 1.7, "Icon ID": "Kits", "URL Custom": null }, "Swich OFF": null, "Width BAR SIZE : 1 - 15": 2 }, "Info": { "On/Off (true/false)": true, "Commands (leave blank to disable)": "chat.say /info", "The order the icon should place": 6, "Text size": 11, "Text fonts ( 0 - 3 )": 0, "Color Text ( HEX )": "#ffffff", "Position of text in the logo": "20 0 -1 0", "Change text alignment": 4, "The position on the screen that the icon should be ( LeftTop, CenterTop, RightTop, LeftBottom, CenterBottom, RightBottom)": "CenterBottom", "Swich On": { "Themes ( HUD - BASIC - CUBE - TRIANGLE )": "HUD", "Color 1": "#000000", "Color 2": "#000000", "Color 3": "#ffffff", "Color Icon": "#ffffff", "Opacity 1": 0.4, "Opacity 2": 0.4, "Opacity 3": 1.0, "Opacity icon": 0.9, "Enlarge icon": 1.9, "Icon ID": "Info", "URL Custom": null }, "Swich OFF": null, "Width BAR SIZE : 1 - 15": 1 } } }$12.99 -
Version 1.0.6
112 downloads
This is a plugin designed for servers that want to set up an area for RP purposes! With this plugin you can set Zones/plots up for players to be able top purchase them though the buy menu. You will also be able to set an amount of time before the Buyer is evicted from being offline too long so other can purchase that land who are active! You can also set up the cost of each plot of land. If a player tries to build in a plot of land they will not be able to as the zone will auto delete anything they attempt to build instantly. FAQ: How do I set up the zones? - Currently the only way to set up the zones is to use zone manager and put the zone id in the Data file of the Plugin. Example below Does Server Rewards work with this? - Yes! as of 10/7/2021 Server rewards support has been added Commands: /buyzone - Brings up the buyzone GUI When in the Buyzone menu. when you hit show in map a red circle with appear on your map for 15 seconds after clicking the button Admin Commands: /UI_ZONESELL EXIT "STEAMID" - Force evicts player. Example Video: Example Config: ZoneSell { "The number of days for the player to be evicted": 5, "Zone Settings": { "1": { "Cost of the zone": 3500, "Zone image": "https://i.imgur.com/XIWhXKP.jpg", "Zone descriptions": "Large 1 - $3500" }, "2": { "Cost of the zone": 3500, "Zone image": "https://i.imgur.com/XIWhXKP.jpg", "Zone descriptions": "Large 2 - $3500" }, "3": { "Cost of the zone": 3500, "Zone image": "https://i.imgur.com/XIWhXKP.jpg", "Zone descriptions": "Large 3 - $3500" }, "4": { "Cost of the zone": 3500, "Zone image": "https://i.imgur.com/XIWhXKP.jpg", "Zone descriptions": "Large 4 - $3500" }, "5": { "Cost of the zone": 3500, "Zone image": "https://i.imgur.com/XIWhXKP.jpg", "Zone descriptions": "Large 5 - $3500" }, "6": { "Cost of the zone": 3500, "Zone image": "https://i.imgur.com/XIWhXKP.jpg", "Zone descriptions": "Large 6 - $3500" }, "7": { "Cost of the zone": 3500, "Zone image": "https://i.imgur.com/XIWhXKP.jpg", "Zone descriptions": "Large 7 - $3500" }, "8": { "Cost of the zone": 3500, "Zone image": "https://i.imgur.com/XIWhXKP.jpg", "Zone descriptions": "Large 8 - $3500" }, "9": { "Cost of the zone": 3500, "Zone image": "https://i.imgur.com/XIWhXKP.jpg", "Zone descriptions": "Large 9 - $3500" } } } Example config: Zonemanager { "definitions": [ { "Name": "Large 1", "Radius": 20, "Radiation": 0, "Comfort": 0, "Temperature": 0, "SafeZone": false, "Location": "119.2166 23.62214 152.51", "Size": "22 22 22", "Rotation": "0 0 0", "Id": "1", "ParentID": null, "EnterMessage": null, "LeaveMessage": null, "Permission": null, "EjectSpawns": null, "Enabled": true, "Flags": "None" }, { "Name": "Large 2", "Radius": 20, "Radiation": 0, "Comfort": 0, "Temperature": 0, "SafeZone": false, "Location": "154.3679 23.62212 152.4911", "Size": "22 22 22", "Rotation": "0 0 0", "Id": "2", "ParentID": null, "EnterMessage": null, "LeaveMessage": null, "Permission": null, "EjectSpawns": null, "Enabled": true, "Flags": "None" }, { "Name": "Large 3", "Radius": 20, "Radiation": 0, "Comfort": 0, "Temperature": 0, "SafeZone": false, "Location": "189.7382 23.62219 152.3189", "Size": "22 22 22", "Rotation": "0 0 0", "Id": "3", "ParentID": null, "EnterMessage": null, "LeaveMessage": null, "Permission": null, "EjectSpawns": null, "Enabled": true, "Flags": "None" }, { "Name": "Large 4", "Radius": 20, "Radiation": 0, "Comfort": 0, "Temperature": 0, "SafeZone": false, "Location": "189.4252 23.62212 117.2129", "Size": "22 22 22", "Rotation": "0 0 0", "Id": "4", "ParentID": null, "EnterMessage": null, "LeaveMessage": null, "Permission": null, "EjectSpawns": null, "Enabled": true, "Flags": "None" }, Checkout Cashr's Other plugins! https://codefling.com/cashr Todo: Add a way to add zones easier.$18.00 -
Version 1.1.6
113 downloads
Hi everyone. I wanted to start by saying thank you to everyone who paid for this plugin when it initially came out. Last year, I had hired a trusted developer to create and maintain Marketplace Pro. Both myself and the primary developer on this project had some real tough problems in our lives. This is not an excuse and is completely my fault. I should of had a backup plan for this project to keep it going. I have been in contact with a close friend of mine @Drxp and he offered to help maintain and update this plugin going forward. Eventually I'd like to let Drxp takeover the project completely as I feel I am not the right person to maintain this product. Thank you for your patience. Enigma PLEASE NOTE: This product is currently under development. We have disabled purchasing at this time. Estimated time for update; 1 week. Marketplace+ (with Auctionhouse) - By RHG Digital Services WE NO LONGER DEPEND ON ECONOMICS! (ITS OPTIONAL!) For any known bugs or issues please contact us on discord https://discord.gg/mnQuucUpPH Summary: Buy, Sell & Auction items as players or as the 'server'. Auctioning items with specific durations and minimum bids. Use custom currency or on-board economics. Configure the UI with your color scheme, server logo and more. This plugin allows you to start your wipe with various preconfigured item and auction listings. These listings can include any item; such as weapons, hemp, tools and more. Here you can define meta data such as the price, quantity, type and duration of a listing. Upon sale or expiry of these listings, balance and inventory data are stored just like with a standard player, this means balance or inventory data for the default market profile can be utilized in various possible features. Dependencies: Economics (Optional dependency) NoEscape (Optional dependency) Core Features: 1. Auction House 2. Buy & Sell Market 3. Large Playerbase Stability 4. Raid Block Compatibility 5. Player Profiles 6. Custom currency-compatible 7. Hex colours & UI configurable 8. Custom item support and localisation Permissions: Allow VIP players only to auction items with onboard permissions. Commands: /market - opens main UI More Information: You can change the logo image placeholder on the main menu. You can change the text on the main menu in the language file. Player can access personal profiles. Most text options are configurable. Highlighting options for selecting items on menu. Sold & Purchase confirm tips pop-up during buy phase. Bid duration input accepts 30d30h30m30s format UI has no stretching, works to size appropriately. Input Item Price, quantity, select item for sell phase. Input Auction starting price, quantity, sell item, duration for auction phase. Navigation & cache allocation validated. Configuration: Category Settings Save Cycle Delay Permission Settings Inventory Settings Selling Settings by Category/Item Auction Settings$22.00

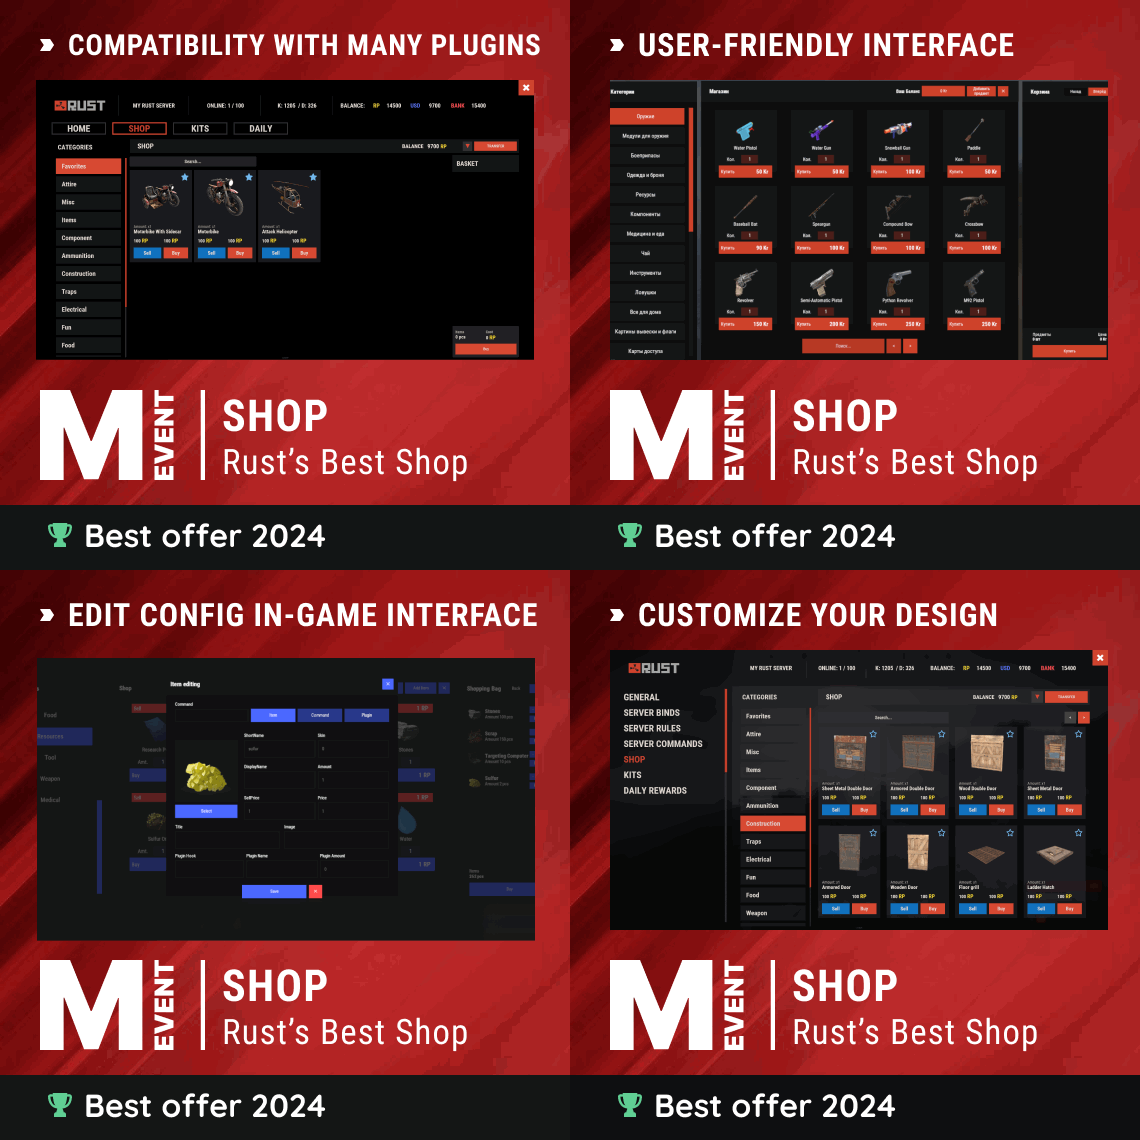
.thumb.gif.f0b0245e9c54ffe33eb112bfd730b972.gif)
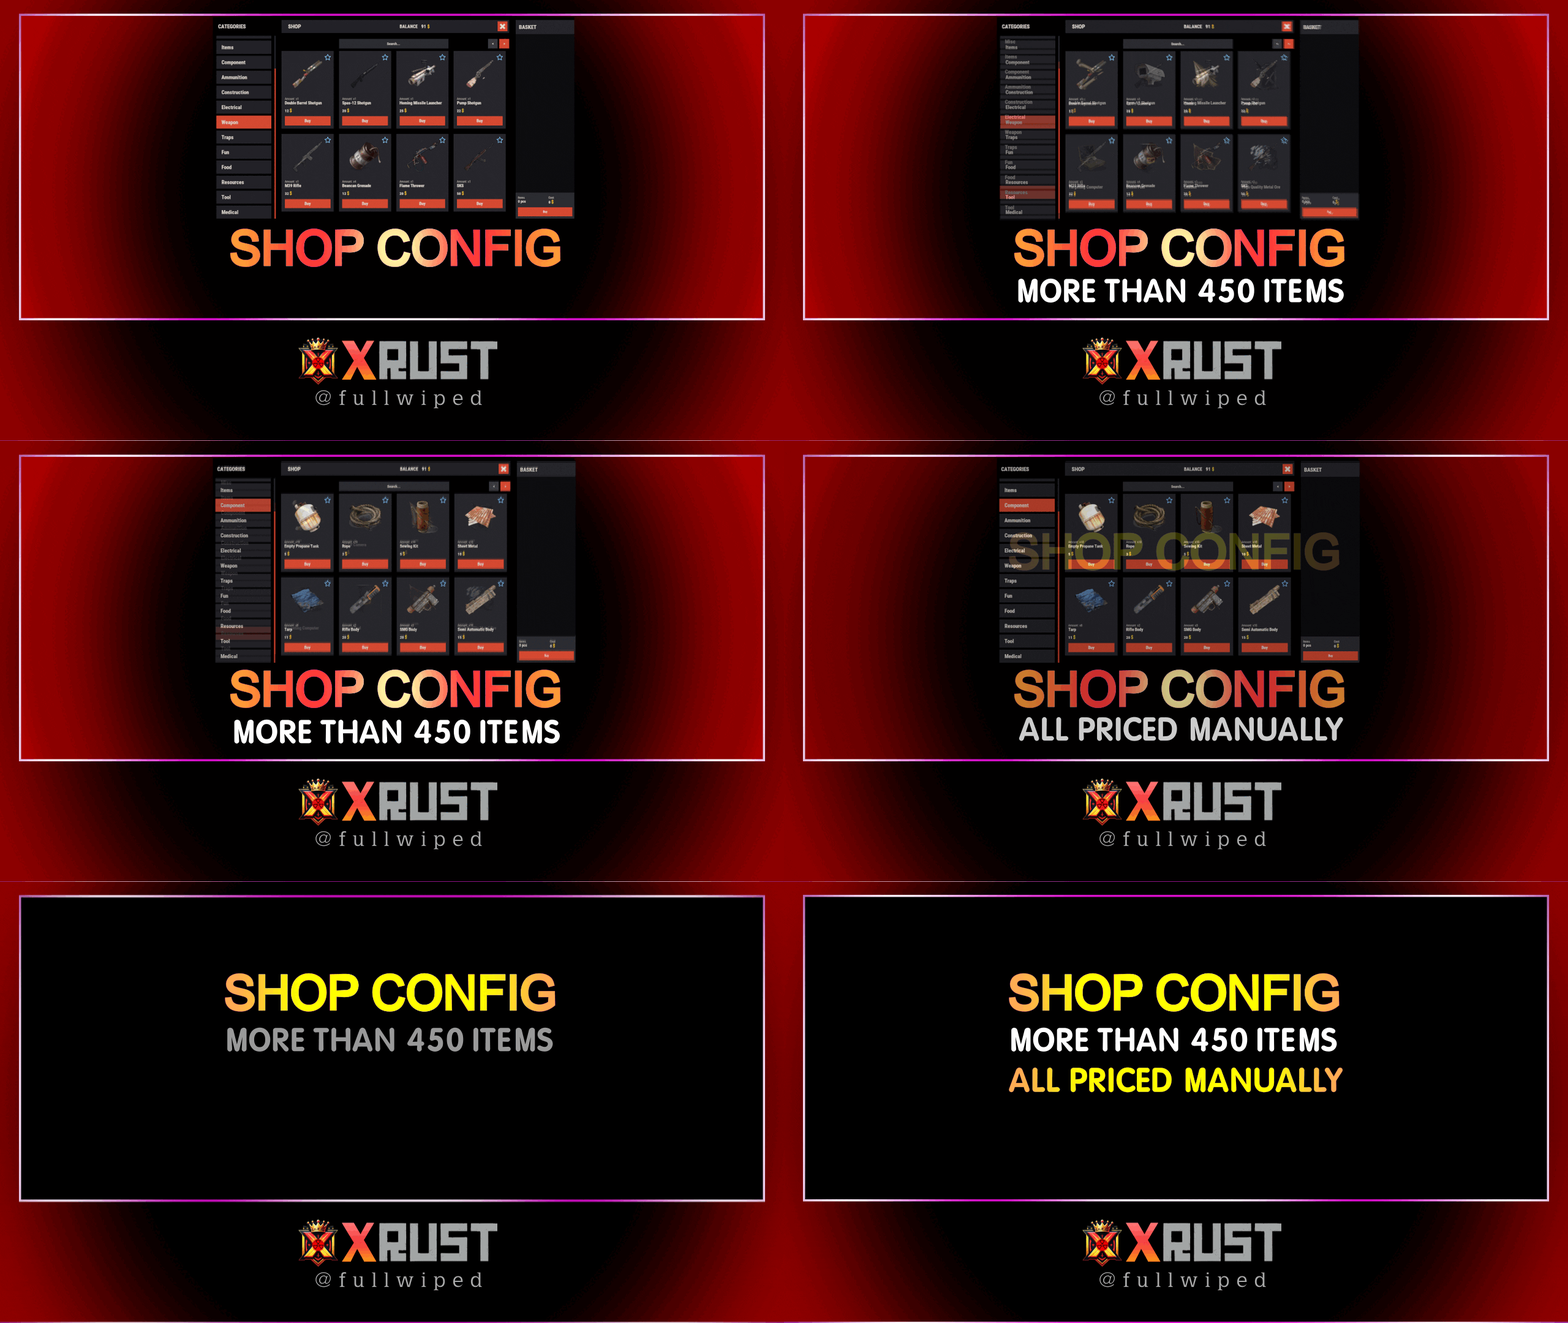

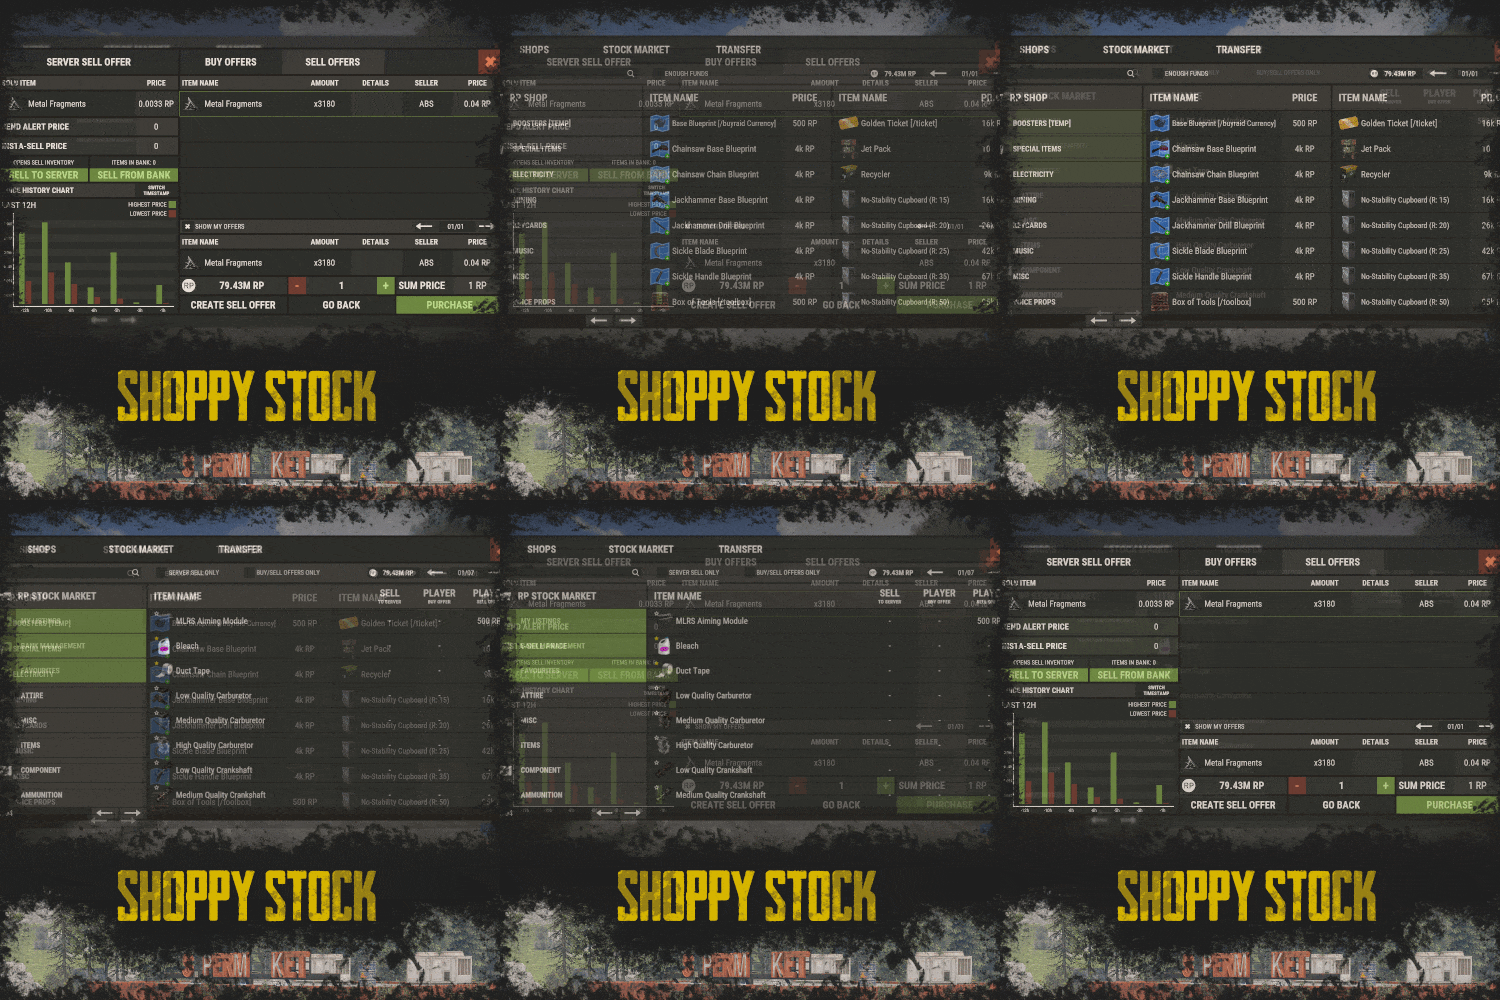

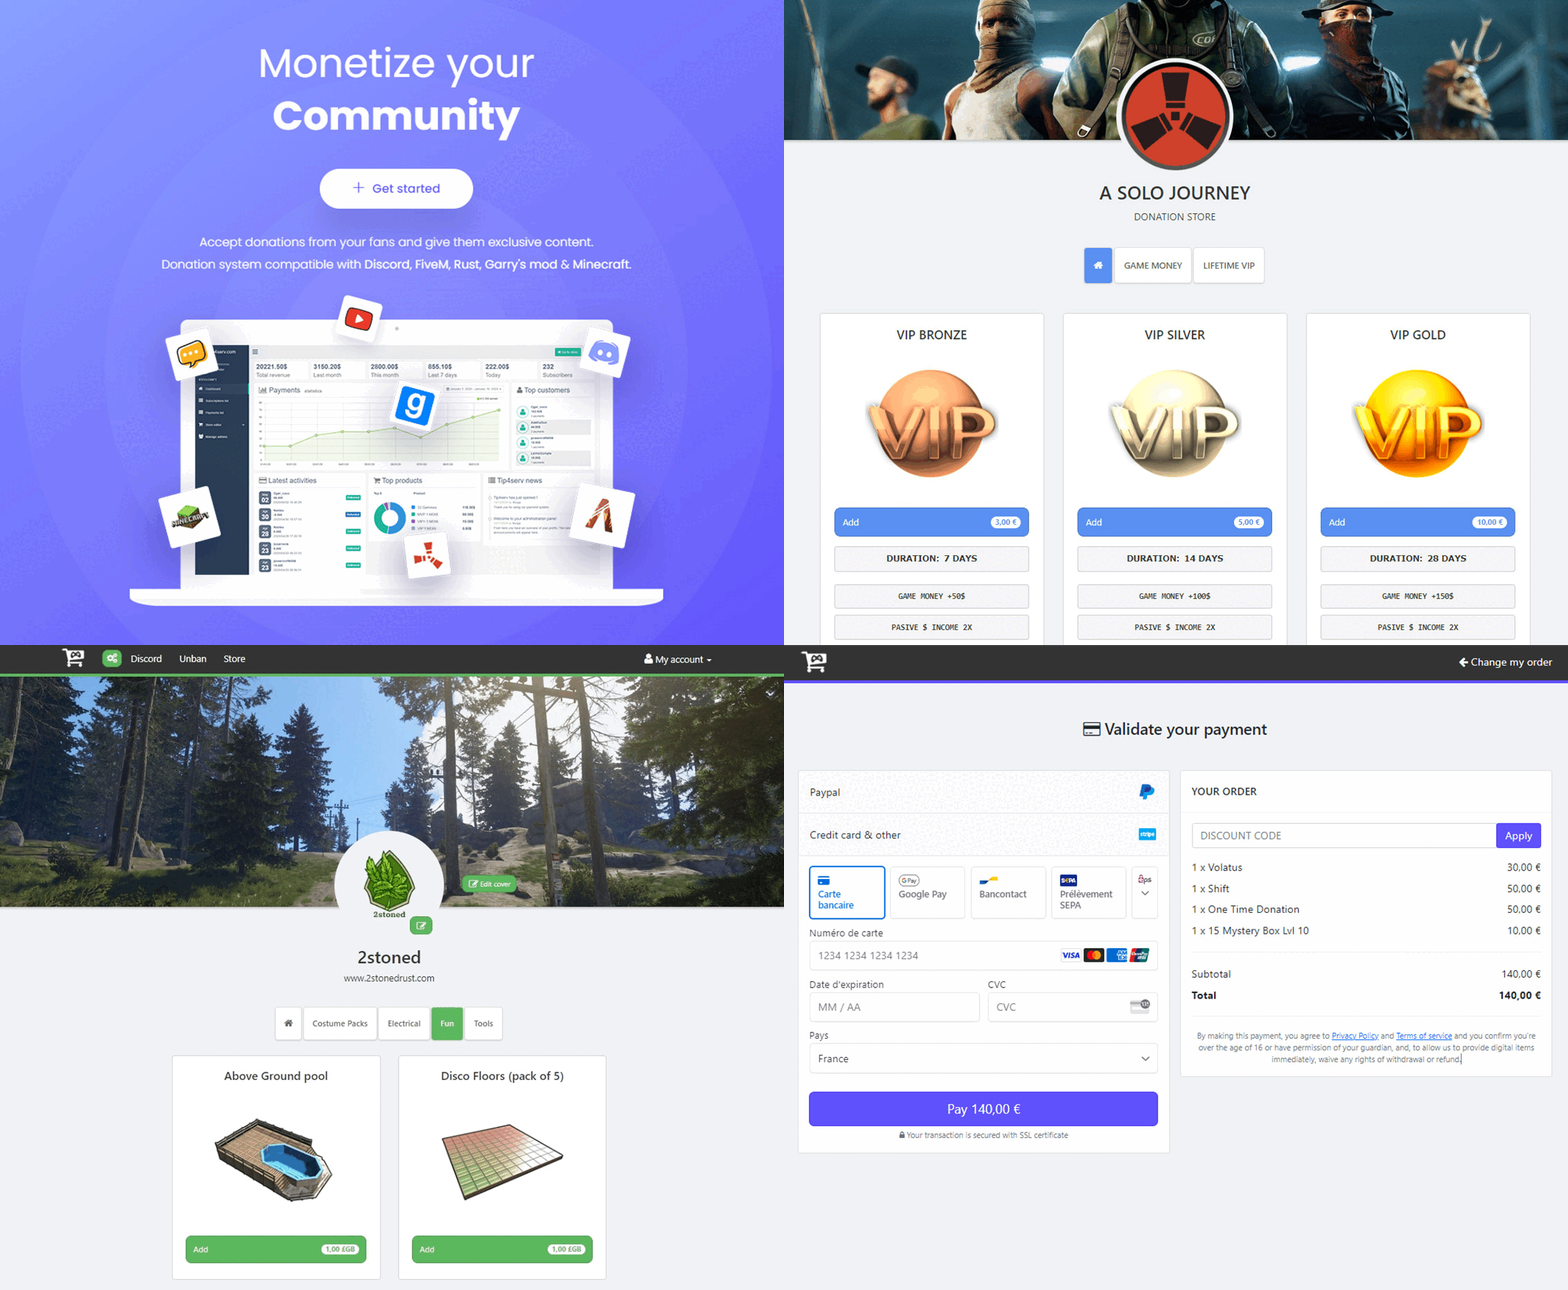
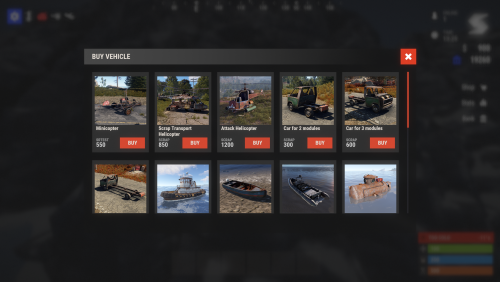
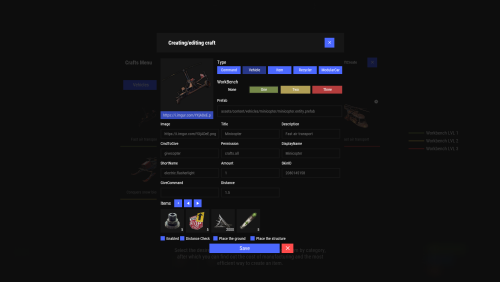


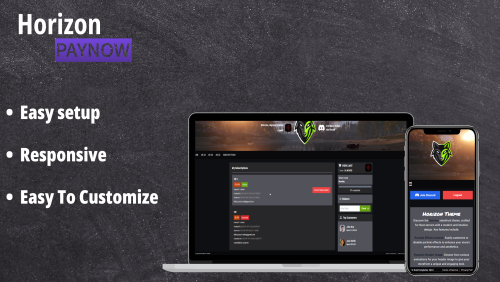
.thumb.png.224b5705b6c83fa28cf0f0d5f6e1413d.png)

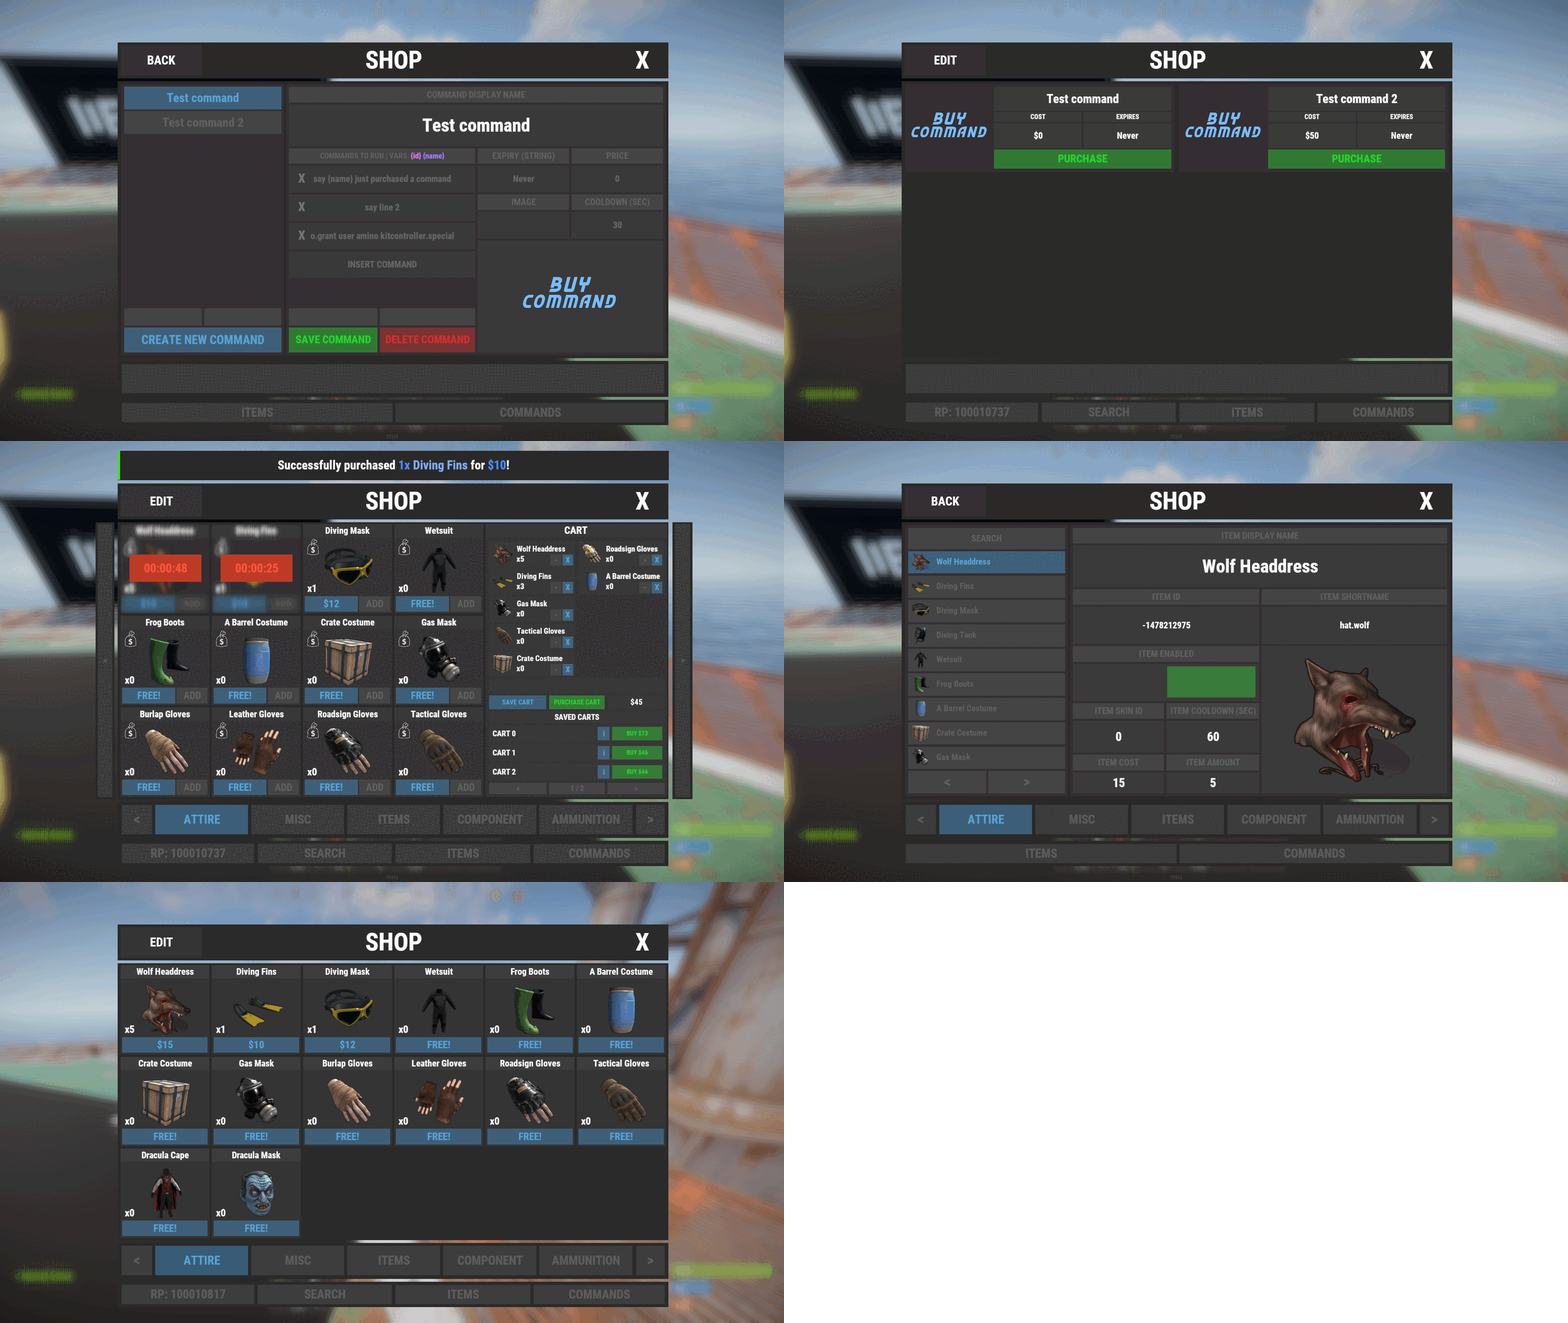
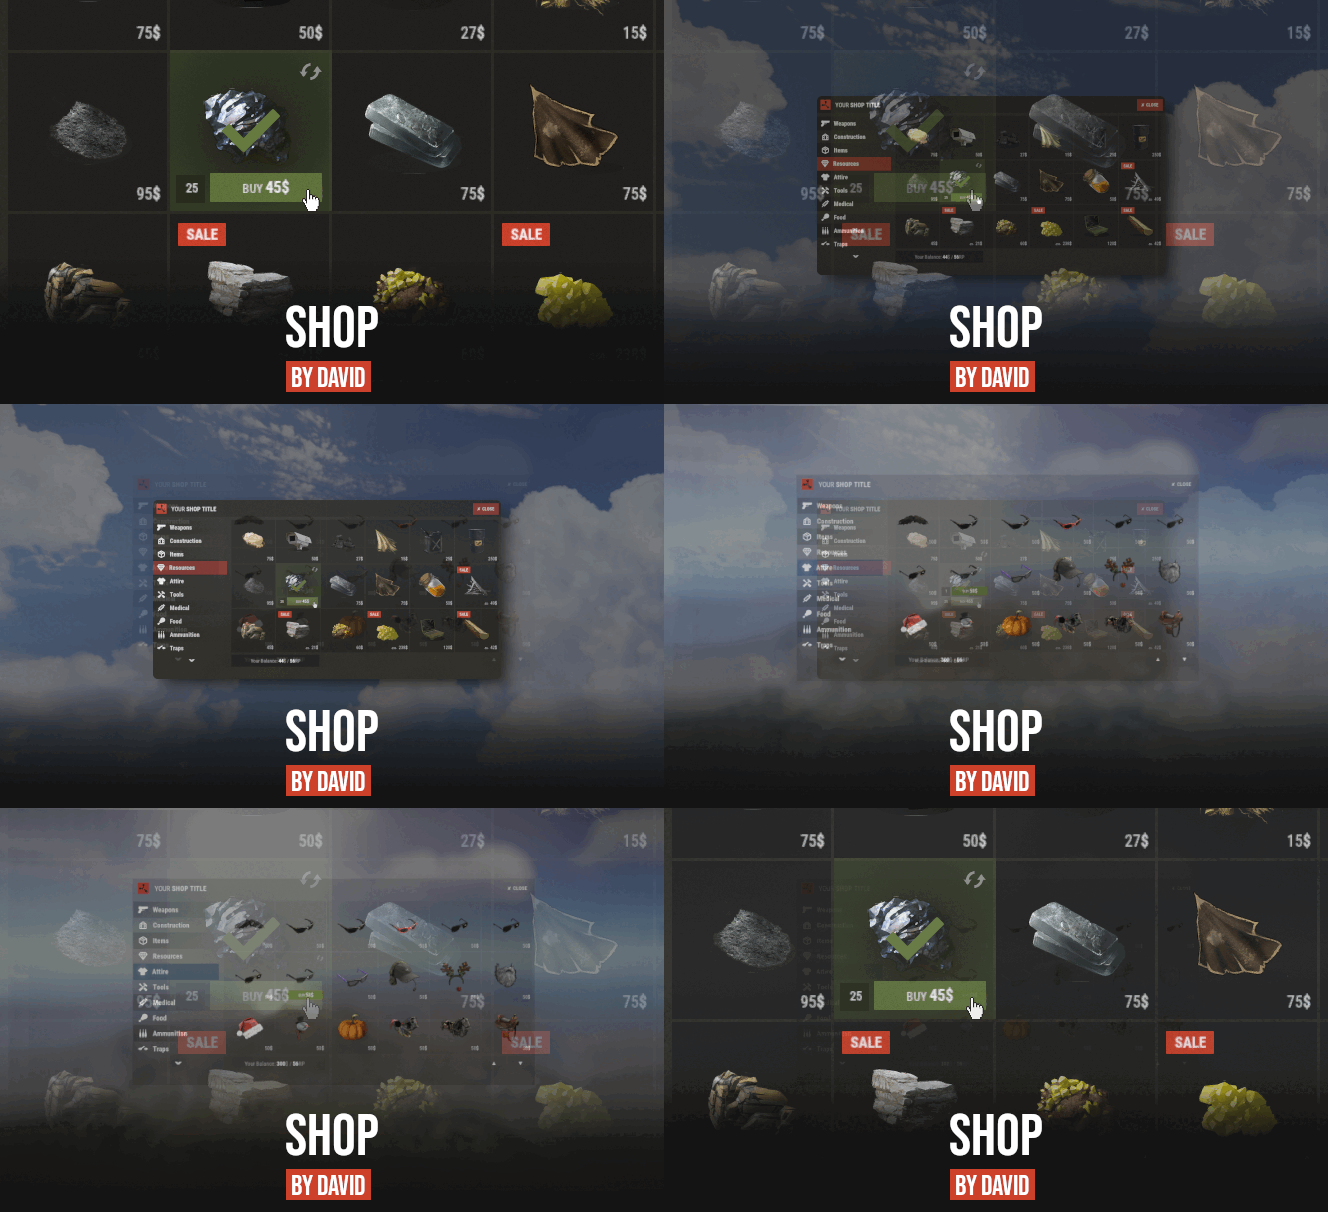

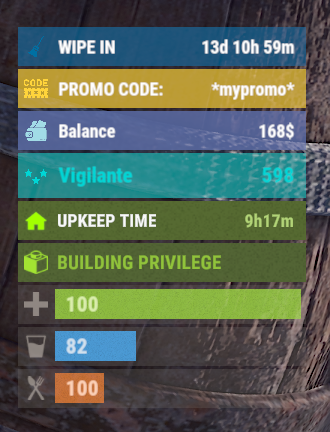
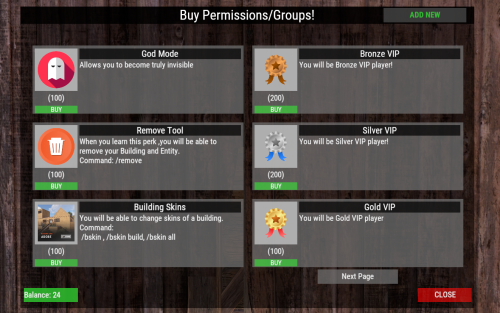


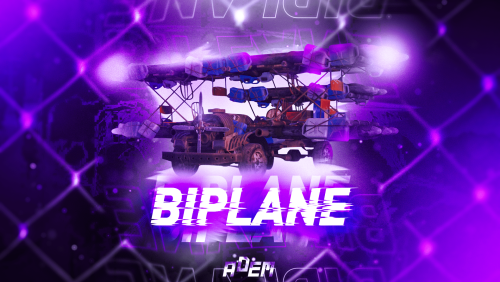
.thumb.gif.b68fcc45abe70ab7d7235dffc8a0c770.gif)
