Search the Community
Showing results for tags 'server'.
-
Version 1.1.2
1,186 downloads
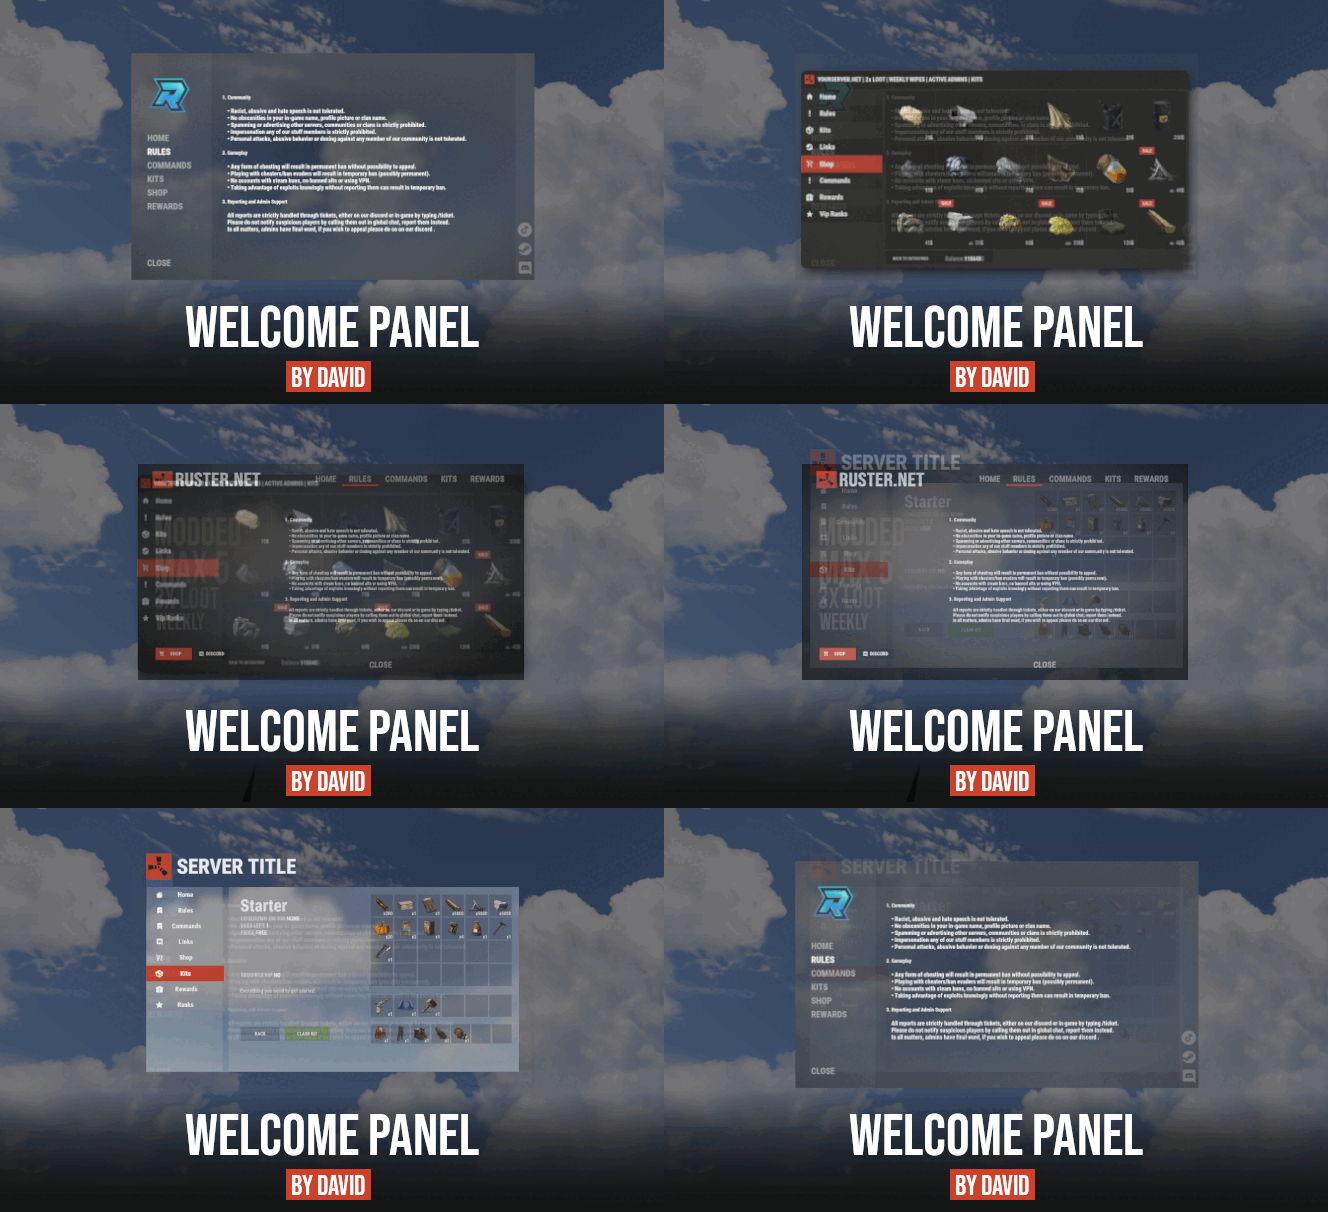
ServerPanel adds a player information menu to your server, where you can both share important and useful information with your players and integrate your plugins into it! Features User-Friendly Interface: Intuitive GUI for easy navigation and interaction. Economy Integration: Supports various economy plugins for seamless financial management. Dynamic Menu Categories: Organize functionalities into customizable categories for better user experience. Extensive Configuration Options: Almost every aspect of the plugin can be customized, including messages, colors, sizes, fonts, tion. Auto-Open Menu: Automatically displays the menu upon player connection, configurable per server settings. Block Settings: Control access to the menu during building, raiding, or combat situations to enhance gameplay balance. Multiple Economy Head Fields: Display various economic metrics such as balance, server rewards, and bank information. Permission Management: Fine-tune permissions for different user roles to control access to features. Localization Support: Easily translate and customize all messages for different languages. Performance Optimized: Designed to minimize server lag while providing rich functionality. Customizable Hooks: Integrate with existing economy systems using customizable hooks for adding, removing, and displaying balances. Editor Position Change: Admins can now change editor positions with a simple click, choosing between left, center, or right alignments. Command Enhancements: Commands are now processed with multiple arguments separated by "|", enabling bulk command processing. Commands /info – open menu /sp.install (or) /welcome.install – open installer menu Permissions serverpanel.edit – allows players to edit the plugin settings and open the edit menu serverpanelinstaller.admin - required to access the plugin installation functions Video Showcase Templates Template V1 Template V2 Template V3 Template V5 Editor Installer TEST SERVER Join our test server to view and experience all our unique features yourself! Copy the IP Address below to start playing! connect 194.147.90.147:28015 FAQ Q: Why can't I open the menu? A: Make sure that the plugin is installed and activated on your server. If the problem persists, contact the server administrator. Q: How do I enable Expert Mode? (disables automatic template updates) A: In the data file "Template.json", turn on the "Use an expert mod?" option: "Use an expert mod?": true, P.S. “Template.json” is located in the "oxide/data/ServerPanel" directory (if you use Oxide) or in the "carbon/data/ServerPanel" directory (if you use Carbon)$40.00- 45 comments
- 22 reviews
-
- 13
-

-

-

-
- #serverpanel
- #info
-
(and 32 more)
Tagged with:
- #serverpanel
- #info
- #panel
- #ui
- #server
- #serverinfo
- #welcome
- #welcomeui
- #infopanel
- #server gui
- #welcome controller
- #welcome video
- #infopanel mevent
- #welcome panel
- #welcome mevent panel
- #welcome info
- #multi-function info panel
- #server panel
- #menu by mevent
- #menu with info
- #menu gui
- #menu rust
- #rust menu
- #info hud
- #infomenu
- #information
- #best welcome plugin
- #rust welcome
- #welcomer
- #welcome menu
- #welcome ui
- #welcome gui
- #welcome plugin
- #welcome hud
-
Version 1.0.2
87 downloads
XTravel: Travel and redirect players to other servers using the Rust Nexus System XTravel is a plugin that allows you to travel between servers using the nexus system with a simple custom chat command. You can configure an unlimited number of destinations in an easy-to-use config file. Just enter the command name (which should be the name of your server), the IP, and the port. Configuration The configuration for the servers can be done in the config file. Here is an example of how to add a server: { "Servers": { "myservername": { "IP": "0.0.0.0", "Port": 28015 } } } In this example, myservername is the command that will be used to travel to this server. Usage instructions To allow a player to use this command, add the following Oxide permission: xtravel.use. In the in-game chat, type: /myservername. For example: /vanilla, /x2, or /coolserverx10. Upon entering the command, a 10-second timer will start, and a message will inform the player that the travel is about to commence. You can cancel the travel during this period by typing /canceltravel. Important note: Player inventories or BP's will not be transferred to the destination server. Admin commands First, add the admin permission: xtravel.admin - /myservername all: It will transport all players in the current server to the destination server. The cooldown cannot be cancelled by players (ex: /serverx2 all). - /myservername steamid: It will transport the specified player to the destination server (ex: /vanillaserver 76561198396973221). The steamid is a 17 digit number. Language files Language files for all messages can be edited in the oxide/lang/en directory. Support If you have any questions or comments, please post them here or contact me directly. Updates The plugin is regularly updated and tested live on multiple servers to ensure flawless operation. Please check the version number in the XTravel.cs file to ensure you are using the latest version.$4.99- 34 comments
- 3 reviews
-
- 2
-

-
- #connect
- #connection
-
(and 6 more)
Tagged with:
-
Version 4.3.6
12,899 downloads
Site In case you having issues with plugin feel free to open support ticket on site here. I will usually respond within 24 hours not including weekends. Discord I'm also available at my discord server where I provide support for my customers. You can also find small community here and get answers for your questions. Invite link here. Documentation To find out what can be customized within config file please refer to full plugin documentation here. Any questions prior to purchasing forward into DM here or into ticket at my discord. Default configs available as template with plugin. Screenshots bellow showcasing configurations created by customers. These are not available with the plugin but I decided to post them here since it's good demonstration of how customizable this plugin is. BOOBLEJ Tide Neighigh Paul Leunal17 BOOBLEJ How to start using plugin? Simply drop WelcomePanelLite.cs file into your plugin folder. After successfully loading plugin you can use default command /info in game. Configuration is handled in config file (oxide/config/WelcomePanelLite.json). How hard is to get this plugin all set up? It's fairly simple. Plugin comes with default configuration which showcases everything you need to know regarding text, styling and changing images. How hard it is to customize your own layout? When it comes to changing color or images it's simple, any inexperienced user can do it however if you want to customize positions of UI or add extra tab buttons, it requires understanding of "ui anchors". Anchors are not that complicated but it takes hour or two to fully understand it. For more info check documentation. Can I add multiple pages into WelcomePanel? Yes, you can add unlimited amount of pages. Can I add images into WelcomePanel? Yes, you can add image to any panel and you can set background for each tab What image sizes I should use? This is different for each panel across different templates. Basically images parented to any panel are stretched to its size. Best approach is to take screenshot of the panel and try to fit image size into that prior to uploading it. How to add addons? Each text tab has addon option at bottom, just type in plugin name. List of available addons can be found at the top of the plugin description, listed as "Works with".$16.99 -
Version 3.1.35.2
34 downloads
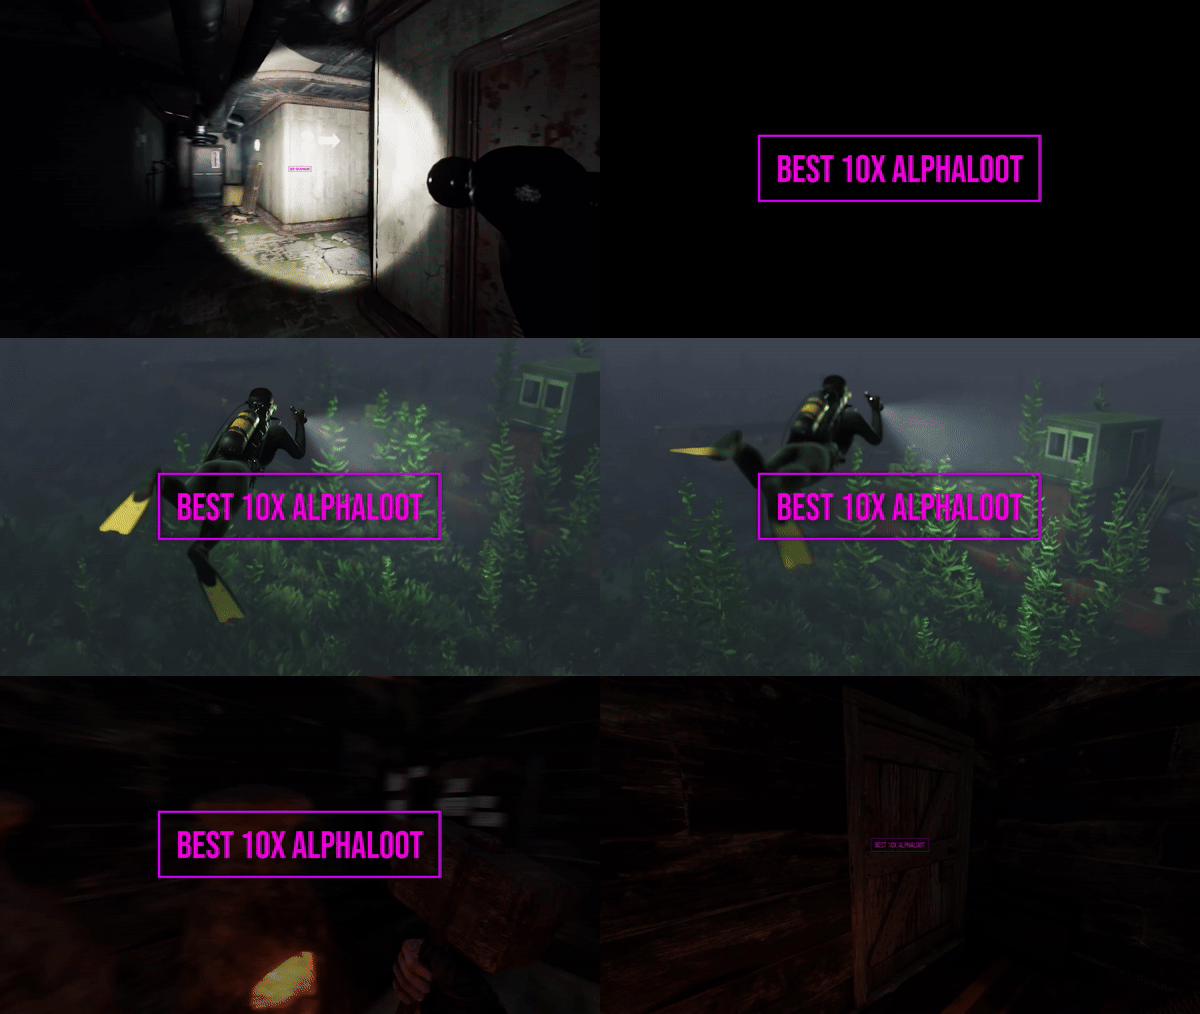
Warning: To use this config, you need to purchase the paid Alphaloot plugin if you do not already own it: https://chaoscode.io/resources/alphaloot.13/ Thank you for choosing this professionally crafted config by fullwiped (xrust.co). Designed to minimize junk items while maintaining a balanced loot experience for 10x modded servers, it includes a substantial balance of loot, including nearly all NPC drops. Our latest configuration overhaul features extensive updates across more than 40 loot crate types. Each crate, from Roadsign and ammo crates to food crates and variants like elite, basic, and normal, has undergone meticulous fine-tuning. We've significantly cleaned up redundant items while maintaining a balance between vanilla and 10x gameplay dynamics. To enhance variety, we've customized certain items to introduce medium-tier loot and expand diversity according to player preferences. In addition, we've introduced exclusive chances, such as a 1% or 2% drop rate for high-quality vehicle parts in crates and premium food items in food crates. Special event loot crates, like those for Halloween, Easter, or Christmas, have also been aligned to complement the 10x experience. Moreover, we've revamped and optimized NPC drops, ensuring that even the most detailed configurations are now tailored to fit seamlessly with the 10x server settings. From Gingerbread NPCs to Scarecrows, Scientist NPCs to Scientist NPC Cargos, and critical NPCs like Scientist NPC Heavies, each has been meticulously restructured. If you're seeking a professionally crafted loot table that ensures a seamless and enriched gaming experience, look no further. Installation Guide: Inside the downloaded zip file, locate the 'config' folder. Copy the 'AlphaLoot.json' file from this folder to the following directory: /home/rustserver/serverfiles/oxide/config If Rust is installed in a different directory, adjust accordingly. Next, within the downloaded zip file, find the 'data' folder. Inside, you'll find three files: 'fullwipedbradley', 'fullwipedheli', and 'fullwipedmain'. Copy these three files to the following directory: /home/rustserver/serverfiles/oxide/data/AlphaLoot/LootProfiles Adjust the path if your Rust installation differs. Final Steps: Once all files are successfully uploaded, restart your previously purchased AlphaLoot plugin. If needed, you can acquire the plugin or updates from the official vendor: https://chaoscode.io/resources/alphaloot.13/ If you've already made the purchase, proceed with file uploads and restart the plugin by typing o.reload AlphaLoot into RCON. Congratulations! Your 10x server now boasts a highly customized and well-prepared loot table. Customizing Your Config: If you need to modify the current config or adjust any settings, you can download the AlphaLoot Profile Editor from the following link: https://chaoscode.io/resources/alphaloot-profile-editor.183/ Editing the config may require some experience, but you can easily make simple adjustments. Feel free to use this tool to tailor your config to your preferences. Thank you for choosing us. Support: FULLWIPED DISCORD$14.00-
- 1
-

-
- #alphaloot
- #alpha
-
(and 25 more)
Tagged with:
- #alphaloot
- #alpha
- #better loot
- #10x
- #10x loot
- #x10
- #10x server
- #10x server files
- #10x loot table
- #10x alpha
- #alpha 10x
- #alpha loot 10x
- #10x loot tables
- #alphaloot 10x
- #loot tables
- #alpha loot
- #best loot
- #loot cfg
- #loot configs
- #server
- #server files
- #server loot
- #loot 10x
- #10x loot cfg
- #10x loot settings
- #better loot 10x
- #10x loot table alpha
-
Version 1.0.3
252 downloads
About 2x Server Setup (Full & Complete 2x Server) This 2x Server allows you to get your rust server up and running quickly and easily without the hassle. Hassle free setup: Installing can take as little as 5 minutes. Eliminating the countless frustrating days it takes to setup a server. Balanced setup: All loot tables are perfectly balanced to enhance gameplay for all players on your server. Teleportation: Players can teleport to anyone with a simple command as long as they are not combat or raid blocked. Blocked Teleportation: Players who are combat / raid blocked will not be able to teleport or trade for a set period of time. Rust Skins: Players will get access to all rust skins when using the /s command. (If you do not own skinbox you can uses skins from UMOD for free!) Admin Tools: Users with admin permissions will be able to vanish and moderate other players. And so much more features below! What's included? - Better chat config -Trading - Better Loot config - Automated events - Automatic Authorization - Fancy Drop config - Furnace Splitter - 2x Quick Smelt - 2x Gather Manager - Image Library - No escape config - NTeleportation config - Custom Recycler Speeds - Stack Size modifications - Always in stock vending machines. - Welcome Panel + UI Addons (CONFIG) - Skin Box (CONFIG) - Clans Reborn (CONFIG) Not all plugins have to be used. You can also modify all of the plugins to your exact liking if you wish to change anything. All of the items above are already modified for a 3x server.$5.19- 13 comments
- 3 reviews
-
- 1
-

-
- #2x
- #easysetup
-
(and 6 more)
Tagged with:
-
Version 0.4.4
196 downloads
Introducing the AutoBan plugin for Rust servers - a powerful and efficient tool for managing and controlling player behavior on your server. This plugin is designed to help server owners and administrators keep their servers running smoothly and free from rule-breaking players. AutoBan's key features include: Automatic banning of players based on the number of reports they have received: If a player exceeds a certain number of reports (configurable by the server owner), they will be automatically banned with a customizable reason message. Mass Reporting Protection: Prevents players from abusing the report system by implementing safeguards against mass reporting, including cooldown periods, limits on the number of reports a player can submit or receive within a specific time frame, and ensuring only unique reports are counted. Processing F7 (In-Game) Reports: Fully integrates with Rust's F7 report system, capturing and processing reports submitted through the in-game interface, ensuring they are counted towards a player's total reports, and sent to Discord if configured. Player-Friendly Reporting System: Allows players to choose from a list of available report reasons when reporting another player, making the reporting process more user-friendly and consistent. Customizable reason messages for bans: Server owners can customize the message shown to players when they are banned. Valid report reasons that can be set by the server owner: Define which reasons are considered valid for triggering automatic bans. Option to broadcast ban messages to the chat: Choose whether to publicly announce when a player has been banned. Ignored players list: Allows certain players (e.g., admins) to be excluded from automatic banning. Timer for broadcasting bans to administrators and console: Set a timer to periodically broadcast current bans to admins and console. Chat commands and console commands for managing reports and bans: Provides a suite of commands for administrators to manage the plugin's functionality. Permissions system for controlling who can access the plugin's features: Granular permissions allow precise control over who can report, view reports, ban, unban, etc. Detailed logging of all bans and reports: Keeps comprehensive records of all actions taken by the plugin. Discord Alerts: Sends notifications of reports and bans to specified Discord channels via webhooks. Option to send reports to a URL: Integrate with external systems by sending report data to a specified URL. Timed bans: Allows for bans to be temporary, based on a configurable time period. Usage: CHAT COMMANDS: /report <username> Initiate a report against a player. If no reason is specified, a list of valid reasons will be presented for selection. /report <username> <reason> Report a player with a specified reason. /reportreason <number> After initiating a report without a reason, use this command to select a reason from the presented list. /AB.viewreports View all current reports (requires permission). /AB.ban <user> <reason> Manually ban a player with a specified reason (requires permission). /AB.unban <user> Unban a player (requires permission). /AB.showbans View all current bans (requires permission). /AB.resetreports <userid> Reset the reports for a specific player (requires permission). CONSOLE COMMANDS: AB.getreports Display all current reports in the console. AB.getbans Display all current bans in the console. AB.resetreportsConsole <userid> Reset the reports for a specific player via console. AB.ban <userid> <reason> Manually ban a player via console. AB.unban <userid> Unban a player via console. OXIDE PERMISSIONS: AutoBan.report Allows a player to report others via the F7 menu (in-game reports). AutoBan.chatreport Allows a player to report others via chat commands. AutoBan.viewreports Allows viewing of all reports. AutoBan.ignore Excludes a player from being automatically banned (e.g., for admins). AutoBan.ban Allows a player to manually ban others. AutoBan.unban Allows a player to unban others. AutoBan.viewbans Allows viewing of all bans. AutoBan.resetreports Allows resetting reports for a player. AutoBan.tester Special permission that allows a player to report the same player multiple times (useful for testing). CONFIG: { "Max reports till user gets banned": 5, "Reason given to banned user": "You have been reported too many times, and have been banned for precautionary measures. An admin will review this suspension soon.", "Valid reasons *searches subject title and message of the report* (To make sure report is scanned, add different variations of reason; like cheat, cheater, cheating, cheats, etc.)": [ "cheating", "cheats", "hacks", "aimbot", "hacking", "esp", "teaming", "racism", "griefing", "walling", "doorcamping", "spawn killing" ], "Valid report types": [ "cheat", "abusive", "name", "spam" ], "Scan type of F7 reports": true, "Broadcast ban to chat": true, "Ignored Players *Steam ID's Only*": { "76561198000000000": "Admin" }, "Timer for broadcasting bans to admins and console": 820, "Send bans to users with the AutoBan.viewbans permission based on timer (In-Game)": false, "Send reports to URL": false, "URL to send reports to": "http://example.com", "Send reports to Discord": false, "Send bans to Discord": false, "Discord Reports Webhook URL": "http://example.com", "Discord Bans Webhook URL": "http://example.com", "Ban Timer (In hours or 'permanent')": "72", "Max reports a player can submit per hour": 3, "Max reports a player can receive per hour": 5, "Cooldown between reports from the same player in minutes": 10 }$24.99 -
Version 1.1.5
4,051 downloads
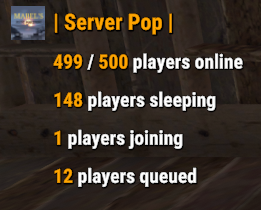
Display server population statistics in the chat using the !pop trigger. It provides detailed information about online, sleeping, joining, and queued players. Additionally, the !wipe trigger displays the time remaining until the next server wipe. The plugin supports cooldowns for trigger usage, customizable chat messages, and game tip responses. Features Cooldown Management Prevents spam by enforcing a configurable cooldown period for the !pop trigger. Detailed Player Statistics Displays the number of online players, sleeping players, players joining, and players in the queue. Customizable Messages Configure the chat prefix and SteamID for message icons. Customize messages' appearance, including colors and formats. Multi-Response Options Option to broadcast the server population message globally or to the player who issued the trigger. Supports both chat messages and game tip notifications. Welcome Messages Displays a customizable welcome message to players when they connect. Optionally shows the server population on player connect. Wipe Timer Displays time left till wipe with !wipe trigger. Trigger Filter Auto filters the !pop, !wipe, !bp, !purge, !st & !discord triggers so it isn't displayed in the chat (Reqs BetterChat) Configuration Options: Cooldown Settings • Cooldown (seconds): The cooldown period in seconds between uses of the !pop command. Chat Settings • Chat Prefix: The prefix displayed before the server population message in chat. • Chat Icon SteamID: The SteamID of the icon used for chat messages. Message Settings • Global Response: Determines if the response should be broadcast globally or sent only to the player who triggered the command. • Use Chat Response: If true, responses will be sent in the chat. • Use Game Tip Response: If true, responses will be shown as game tips (toasts). • Value Color (HEX): The color used for values in the messages. Response Settings • Show Online Players: Show the number of online players. • Show Sleeping Players: Show the number of sleeping players. • Show Joining Players: Show the number of players currently joining. • Show Queued Players: Show the number of players in the queue. Connect Settings • Show Pop On Connect: Show the server population message when a player connects. • Show Welcome Message: Show a welcome message when a player connects. • Show Wipe On Connect: Show wipe timer when a player connects. Wipe Settings • Wipe Timer Enabled: Enable the use of !wipe trigger to display wipe timer • Wipe Timer (epoch): Set the time till wipe using Epoch Time Stamp. Blueprint Wipe Settings • Blueprint Wipe Timer Enabled: Enable the use of !bp trigger to display blueprint wipe timer • Blueprint Wipe Timer (epoch): Set the time till blueprint wipe using Epoch Time Stamp. Purge Settings • Purge Enabled: Enable the use of !purge trigger to display purge timer • Purge Timer (epoch): Set the time till the purge using Epoch Time Stamp. Skill Tree Settings • Skill Tree Timer Enabled: Enable the use of !purge trigger to display purge timer • Skill Tree Timer (epoch): Set the time till skill tree using Epoch Time Stamp. Discord Settings • Discord Enabled Enable the use of !discord trigger to display invite link • Discord Invite Link: Set the discord link to be displayed. Triggers: !pop - displays server population !wipe - displays wipe time !bp - displays blueprint wipe time !purge - displays purge time !st - displays skill tree wipe time !discord - displays discord invite link Default Configuration: { "Cooldown Settings": { "Cooldown (seconds)": 60 }, "Chat Settings": { "Chat Prefix": "<size=16><color=#FFA500>| Server Pop |</color></size>", "Chat Icon SteamID": 76561199216745239 }, "Messgae Settings": { "Global Response (true = global response, false = player response)": true, "Use Chat Response": false, "Use Game Tip Response": true, "Use Single Line Chat Pop Response": false, "Value Color (HEX)": "#FFA500" }, "Response Settings": { "Show Online Players": true, "Show Sleeping Players": true, "Show Joining Players": true, "Show Queued Players": true }, "Connect Settings": { "Show Pop On Connect": true, "Show Welcome Message": true, "Show Wipe On Connect": true }, "Wipe Response Settings": { "Wipe Timer Enabled": false, "Wipe Timer (epoch)": 0 }, "Blueprint Wipe Response Settings": { "Blueprint Wipe Timer Enabled": false, "Blueprint Wipe Timer (epoch)": 0 }, "Purge Response Settings": { "Purge Timer Enabled": false, "Purge Timer (epoch)": 0 }, "Skill Tree Wipe Response Settings": { "Skill Tree Timer Enabled": false, "Skill Tree Wipe Timer (epoch)": 0 }, "Discord Response Settings": { "Discord Enabled": false, "Discord Invite Link": "" }, "Version": { "Major": 1, "Minor": 1, "Patch": 4 } } Default Language: { "Online": "{0} / {1} players online", "Sleeping": "{0} players sleeping", "Joining": "{0} players joining", "Queued": "{0} players queued", "WelcomeMessage": "Welcome to the server {0}!", "CooldownMessage": "You must wait {0} seconds before using this command again.", "WipeMessage": "Next wipe in: {0}", "DiscordMessage": "Join Us @ {0}", "OneLine": "{0} / {1} players with {2} joining! {3} queued", "BPWipeMessage": "Next blueprint wipe in: {0}", "PurgeMessage": "Purge starts in: {0}", "SkillMessage": "Next skill tree wipe in: {0}" }Free- 28 comments
- 5 reviews
-
- 7
-

-

-
- #population
- #server
-
(and 7 more)
Tagged with:
-
Version 1.3.0
34 downloads
BattleReplay is a plug-in of Rust, which provides real-time combat playback function. The plug-in will automatically record and save each player's battle log, allowing easy configuration of the detail level of the log, the cooling time between records and the recording range. Through the flexible settings in the configuration file, it provides advanced logging, asynchronous logging and error logging, and provides efficient server management and playback functions. characteristic 1. Automatic Battle Replay: This plug-in will automatically record the player's battle log, including detailed information such as attackers, targets, weapons, money, injuries, etc. Every time a player participates in a battle, the plug-in will create a replay and save the log. 2. Detailed log configuration: Plug-ins allow you to control the level of log detail through configuration files. You can enable the Advanced Log to capture more accurate combat data, such as the number of hits, changes in health, and so on. 3. Real-time combat output data: the administrator can use the command to view the player's combat log in real time. Commands /battlelog and /battlelog stats provide access to combat records and statistics. 4. Flexible configuration management: This plug-in allows you to dynamically modify the configuration through commands without having to manually edit files. 5. Error Log: Plug-ins record detailed error messages when loading configuration files, so as to ensure voice feedback when any problems occur. 6. Asynchronous recording and uploading: The process of generating and uploading battle logs is handled asynchronously, which reduces the performance impact on the server and ensures the stability under high load. 7. Performance optimization: In order to avoid performance degradation caused by too many log records, the plug-in limits the number of concurrent records and provides the function of cleaning up historical logs. 8. Player Activity Detection: This plug-in detects combat activities, such as player attacks, and triggers combat replay only when actual combat events occur, thus preventing unnecessary logs from being generated. 9. Configuration file: All settings can be customized through config.json, which is dynamically loaded and saved by plug-ins. 10. Discord notification Plug-ins support sending notifications through Discord Webhook when fighting playback starts and ends. Administrators can receive reminders about the start and stop of players' combat records in Discord. Installation and use Installation: put the BattleReplay plug-in file in the plug-in directory of the server (/ox/plugins). Configuration file modification: When the plug-in is started for the first time, it will automatically generate the configuration file BattleReplay.json, which you can do according to your own preferences. Command: /battlelog: View the battle log of the current player. /battlelog stats: View plug-in statistics, such as the number of combat logs recorded and uploaded. /setbattleconfig < option > < value >: modify plug-in configuration options, such as recording range and cooling time. /replay <playername|playerid >: Force a player to record the combat replay, even if they are not within the specified recording range. { "Check Interval (seconds)": 5.0, "Recording Distance (meters)": 100.0, "Region Size (meters)": 100.0, "Recording Cooldown (seconds)": 60.0, "Auto Recording Length (minutes)": 3, "Skip Admins": false, "Total Recorded Logs": 0, "Total Uploaded Logs": 0 } Configuration options: Recording distance: the maximum distance to record the combat log. Any combat events beyond this distance will not be recorded. CooldownTime: records the cooling time (in seconds) of the battle log to prevent multiple logs from being generated quickly and continuously. MaxSimultaneousRecordings: The maximum number of concurrent recordings allowed at any given time to prevent performance problems. LogAdvancedDetails: Enables or disables advanced logging details, such as hits, health changes, etc. FREQUENTLY ASKED QUESTIONS Q: The configuration file was not generated or failed to load? A: The configuration file will be automatically generated when the plug-in is started for the first time. If the file loading fails, the plug-in will load the default configuration and output an error log in the console. Q: How to modify the plug-in configuration? A: You can edit the BattleReplay.json file manually or use the /setbattleconfig command to dynamically modify the settings. Q: Does the plug-in support recording multiple battles at the same time? A: The plug-in will limit the number of simultaneous recordings (the default is 5) to prevent performance problems. If the coordinates of the players participating in the battle, the plug-in will give priority to the recorded content.$9.99- 4 comments
-
- 1
-

-
- #demo
- #anticheat
-
(and 2 more)
Tagged with:
-
Version 2.0.2
586 downloads
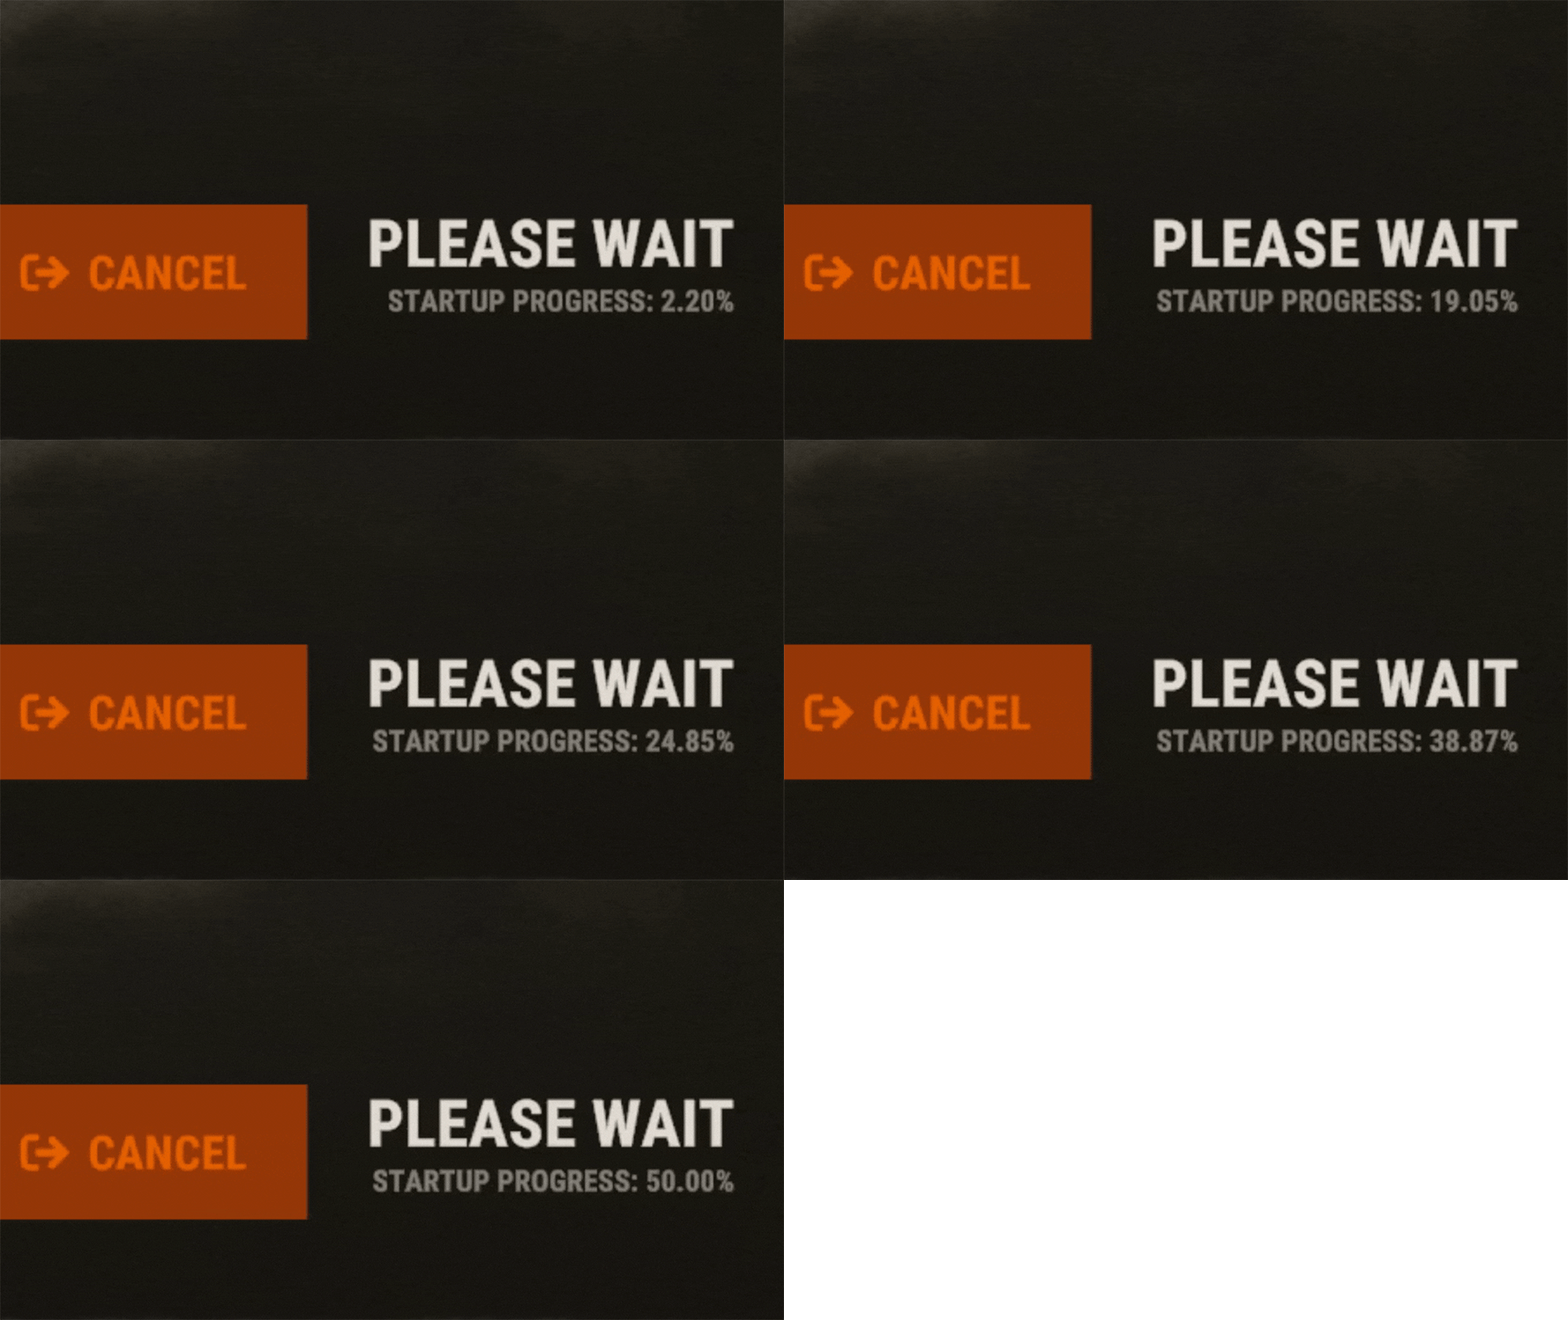
EarlyQ allows players to join prematurely the server while it is still starting. By default the server needs to fully start (which takes ~5 min, depends on map/specs) and after all that time its finally time for players to join, but they still have to wait warming prefabs & download the world. EarlyQ optimizes the process of players joining & startup of the server and minimizes wait times because its splitting the work in parallel. Features Allows players to load faster by initiating Asset Warmup as they are waiting for the server to start up! The world data is sent to the player as soon as its ready, so when the server is ready they can join right away without waiting! The steam server is started only after ~10 seconds when you launch the rust server! This means players can see it in the global server list even while it is loading! Increases your server uptime metrics! Custom messages that show the current loading progress of the server! You can customize said messages Demo (the demo is older & does not start loading the world after its ready, so im waiting a bit longer in the video. This is already implemented in EarlyQ) Custom message If you need to customize the message your players get when waiting for the server, you have to specify the message as a launch option on the server +earlyq.loading_msg - The loading message shown when the server is loading and the client is waiting for the server to load the world +earlyq.loading_icon - The icon shown +earlyq.ready_msg - The loading message shown when the client finishes loading fully and is waiting for the server +earlyq.ready_icon - The icon shown Default messages (Example): +earlyq.loading_msg "<color=#c47070>PLEASE WAIT (alot of spaces here) SERVER IS STILL STARTING: {progress}" +earlyq.loading_icon "Server" +earlyq.ready_msg "<color=#59a358>YOU ARE READY (alot of spaces here) WAITING FOR THE SERVER: {progress}" +earlyq.ready_icon "CheckCircle" You can see all the icons you can use here You can use some unity rich text components in the message: "color", "u", "b" and "i". If you want to add a new line currently the only way I found out is to spam a bunch of spaces since it will wrap to the next line, max is 3 lines At the time of writing this, these are all the limitations, they might change in the future. You can also use a config file if you prefer The config file needs to be created in a folder of the root of the server called "EarlyQ" and in the folder a file needs to be created called "config.json", it should look like "EarlyQ/config.json" The content of the config.json file need to be: { "loading_msg": "your custom msg", "loading_icon": "your custom icon", "ready_msg": "your custom msg", "ready_icon": "your custom icon" } Installation As this is a Harmony mod you need to place the EarlyQ.dll file in HarmonyMods folder, after that restart the server. (do not use harmony.load command with EarlyQ!) EarlyQ works for Linux & Windows EarlyQ works with the newest networking update EarlyQ works with RakNet and SteamNetworking EarlyQ works with Vanilla, Oxide and Carbon Note Facepunch confirmed this Harmony mod is not allowed on official servers, if you want to use it on official, do it at your own risk. Contact You can contact me on discord: turner1337$7.99- 29 comments
- 9 reviews
-
- 9
-

-

-
- #optimize
- #optimization
- (and 19 more)
-
Version 1.0.3
203 downloads
This 10x Server allows you to get your rust server up and running quickly and easily without the hassle. Hassle free setup: Installing can take as little as 5 minutes once you have bought/downloaded the plugins. Eliminating the countless frustrating days it takes to setup a server. Balanced setup: All loot tables are perfectly balanced to enhance gameplay for all players on your server. Teleportation: Players can teleport to anyone with a simple command as long as they are not combat or raid blocked. Blocked Teleportation: Players who are combat / raid blocked will not be able to teleport or trade for a set period of time. Rust Skins: Players will get access to all rust skins when using the /s command. (If you do not own skinbox you can uses skins from UMOD for free!) Admin Tools: Users with admin permissions will be able to vanish and moderate other players. And so much more features below! What's included? - Better chat config -Trading - Better Loot config - Automated events - Automatic Authorization - Fancy Drop config - Furnace Splitter - 10x Quick Smelt - 10x Gather Manager - Image Library - No escape config - NTeleportation config - Custom Recycler Speeds - Stack Size modifications - Always in stock vending machines. - Welcome Panel + UI Addons (CONFIG) - Skin Box (CONFIG) - Clans Reborn (CONFIG) Not all plugins have to be used. You can also modify all of the plugins to your exact liking if you wish to change anything. All of the items above are already modified for a 10x server.$5.19- 10 comments
- 2 reviews
-
- #10x
- #easysetup
- (and 10 more)
-
Version 1.1.0
6 downloads
Dynamic Warps - Teleportation Plugin for Rust | Plugin de teletransportacion para Rust ENGLISH Version: 1.0.0 Author: TSG_ERIC Description Dynamic Warps is a simple and efficient plugin for Rust servers that allows administrators with auth level 2 to manage teleportation points (warps). Players can easily access these warps, enhancing the overall server experience. Features Warp Management: Create, update, and remove teleportation points. Custom Delays: Set a waiting time before teleporting. Visual Effects: Optional animations when teleporting. Accessible Commands: Players can list and use warps effortlessly. ================================================================================ Main Commands Administrators (auth level 2): /warp create [name] → Create a warp at your current position. /warp set [name] → Update an existing warp's position. /warp remove [name] → Delete a warp. /warp time [name] [seconds] → Set a teleport delay for a warp. ================================================================================ Players: /warp list → Show the list of available warps. /[name] → Teleport to the selected warp. ================================================================================ Dynamic Warps is the perfect tool to enhance your Rust server gameplay, offering a balanced and easy-to-use teleportation system. Dynamic Warps - Plugin de Teletransporte para Rust ================================================================================================================================================================ ESPAÑOL Versión: 1.0.0 Autor: TSG_ERIC Descripción Dynamic Warps es un plugin sencillo y eficiente para servidores de Rust que permite a los administradores con auth level 2 gestionar puntos de teletransporte (warps). Los jugadores pueden acceder fácilmente a estos warps, mejorando la experiencia del servidor. ================================================================================ Características Gestión de warps: Crea, actualiza y elimina puntos de teletransporte. Retraso personalizable: Configura un tiempo de espera antes de teletransportarse. Efectos visuales: Animaciones opcionales al teletransportarse. Comandos accesibles: Los jugadores pueden listar y usar los warps fácilmente. ================================================================================ Comandos Principales Administradores (auth level 2): /warp create [nombre] → Crea un warp en tu posición actual. /warp set [nombre] → Actualiza la posición de un warp existente. /warp remove [nombre] → Elimina un warp. /warp time [nombre] [segundos] → Configura el retraso del warp en segundos. ================================================================================ Jugadores: /warp list → Muestra la lista de warps disponibles. /[nombre] → Teletranspórtate al warp seleccionado. ================================================================================ Dynamic Warps es la herramienta perfecta para mejorar la jugabilidad de tu servidor Rust, ofreciendo un sistema de teletransporte balanceado y fácil de usar. ================================================================================ YOUTUBE VIDEO ================================================================================ EXAMPLE OF CONFIGURATION FILE | EJEMPLO DE ARCHIVO DE CONFIGURACIÓN { "WarpList": { "example": { "x": -757.5041, "y": 2.30591822, "z": -184.441864 } }, "TeleportDelays": { "example": 5.0 }, "EnableTeleportAnimation": true } ================================================================================$2.99 -
Version 1.6.0
33,306 downloads
The easiest and fastest way to build a Rust server Functions: Server Config Installer Wipe Manager Custom Map Support - Server Config: Here you can set up all the settings for your server. Server Name Server Tag Server Description Server URL Server Logo URL Map Size Map Seed Generate Maps Seed MAX Player RCON Password Server Port Query Port RCON Port App Port Game Mode Custom Map - Installer: Here you can easily install your server and mods. Install or Update your Server Verify your server files Install or Update Oxide (Detects new version) Install or Update Carbon (Detects new version) Install or Update RustEdit (for Custom Map Users) Install or Update Discord Extension (to run Discord Plugins) - Wipe Manager: Here you can easily Wipe your Server Full Wipe Blueprints Map Oxide Data Backpacks Logs Player Deaths Player Identities Player Stats Player Tokens New Map Seed on Wipe HowTo: - Start Rust Server Tool as Admin - Install Server - Make your settings and save - Start Server That's allFree- 176 comments
- 16 reviews
-
- 26
-

-

-
- #server
- #installer
-
(and 7 more)
Tagged with:
-
Version 1.0.1
12 downloads
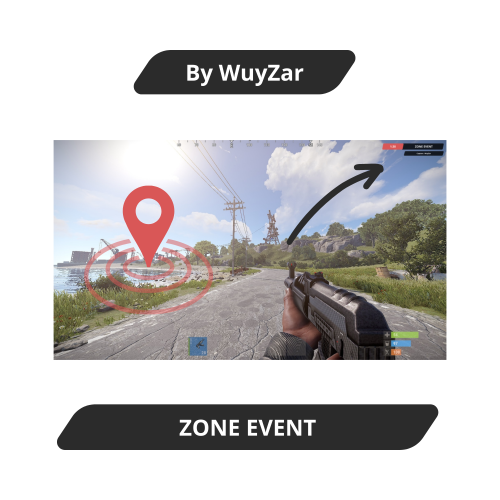
ZONE EVENT Description : This plugin allows you to carry out an event, the goal of the event is to stay in the zone for an allotted time, if the player leaves the zone or if he dies the timer starts from zero. If the player manages to stay in the zone until the end of the timer, he will earn a reward defined by the server administrators. Setings : - Capture Time - Zone Position - Zone Size - Webhooks Discord Chat - Commands : /ze.start <x> <y> <z> /ze.stop Permissions : ownerid <steamID/user> WuyZar's Discord : https://discord.gg/NVwRcQwGwh Game interface : Auto discord message :$7.90 -
Version 1.0.0
141 downloads
Description: The Pop Plugin is a powerful and flexible extension for Rust servers that provides players with a quick overview of the current server status. With a simple chat command, users can retrieve important information such as the number of online players, sleeping players and more. The plugin is characterized by its high level of customizability, allowing server administrators to design the appearance and content of the output according to their wishes. Das Pop Plugin ist die ideale Lösung für Serveradministratoren, die ihren Spielern einen schnellen und übersichtlichen Zugang zu Serverinformationen bieten möchten, ohne dabei auf Anpassungsmöglichkeiten oder Performance zu verzichten. Features: Easy access: Players can use the chat command /pop to call up server information at any time. Comprehensive information: Displays important server data, including: -> server name -> Number of online players -> Number of sleeping players -> Number of players joining -> Number of players in the queue -> List of names of all online players Highly configurable: Administrators can: -> Show or hide individual information components -> Customize colors for server name, labels and values Color coding: Improved readability through color highlighting of various information elements. Easy installation: Quick and uncomplicated integration into existing Rust servers. Lightweight: Minimal impact on server performance with maximum functionality. Permission: Keine Permission benötigt Config: { "Show Server Name": true, "Show Online Players Count": true, "Show Sleeping Players Count": true, "Show Joining Players Count": true, "Show Queued Players Count": true, "Show Online Player Names": true, "Server Name Color": "#ffed00", "Label Color": "#00BFFF", "Value Color": "#ffffff" } load, run, enjoy Support Discord$0.99 -
Version 1.3.2
68 downloads
For beginners and certified amateurs alike, setting up a Rust server can quickly become time-consuming. This is why we offer you our all-in-one server setup. With this, your server will be ready in 10 minutes. This server setup is a starting base for your future Battlefield server. Unlimited resources, armed from spawn, try to survive on the battlefield! Documentation detailing the installation process is provided. It also includes explanations of the plugins as well as the steps to take if you wish to make changes. (And we can be reached in case of problems) Server Features: 1000000x Gather Rates (It's ridiculous) No need for resources to build (secret inventory) 5 Preconfigured Kits (including a VIP) Custom WelcomePanel Shop UI Kill Rewards (the player earns money that he can spend in the shop) Playing Rewards (players earn $100 every 30 minutes) Always Day No BluePrint/All Unlock DeathNotes Permission Groups (default, VIP, Moderator & Admin) Inventory Save SkinBox BGrade InstantCraft on all items NoWorkbench NTeleportation No-Escape RemoverTool SpawnHeli + More! Plugins are not provided with this pack. You need to download them yourself. A document containing the main links is provided. For optimal operation, this setup requires the purchase of third-party paid plugins. However, you don't have to use all the plugins if you don't want to. For more information, visit our website.$6.49- 4 comments
- 1 review
-
- 1
-

-
- #battlefield
- #1000000x
-
(and 6 more)
Tagged with:
-
Version 1.0.3
176 downloads
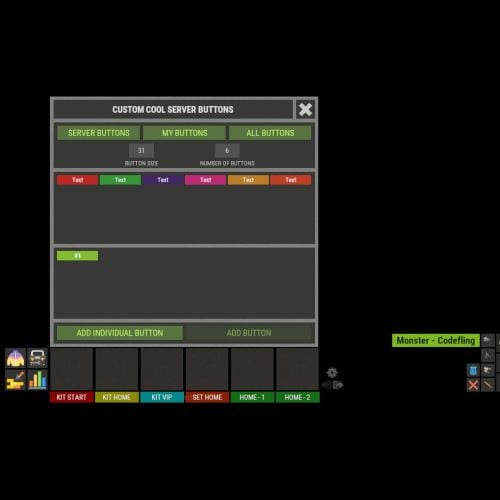
XFastButtons - custom buttons for your server. - Optimization of the interface for different monitor resolutions. - Storing player data in - oxide/data/XDataSystem/XFastButtons - There is a lang ru/en/uk/es. - Sound effects when interacting with the menu. - Various settings for buttons. [ Font, Text, Command, Image, Color, Size, Coordinates, Parent Layer ] - A handy list of buttons under the slots. - Easy and fast selection of coordinates. [ AnchorMin, AnchorMax, OffsetMin, OffsetMax ] - Customize the list of server images. [ For server logo, etc. ]. - Customize the image list. [ For button creation by the player. ]. - Customize the list of button colors. [ For button creation by the player. ]. - The player can hide server/my buttons using the settings menu. - The player can create his own buttons and place them on the screen as he wishes. - Ability to limit the number of buttons created by a player. - Ability to create buttons with commands (chat and console) that have multiple arguments. [ /kit vip, /home 1, /sethome 1 - etc. ] - Ability to edit already created buttons. - Ability to delete created buttons. - Ability to undo changes. [ Convenient preview while editing/creating a button. ]. - Ability to create any number of server(admin) buttons by permissions. - Ability to hide/show buttons when the player interacts with containers or mounted prefabs(chair, transport, etc.) [ Configure in config. ]. - By default, the plugin has a few customized buttons, a list of images, and a list of colors. Permissions xfastbuttons.settings - access to basic settings. xfastbuttons.use - access to create/edit/delete buttons. [ Regular players cannot create/edit/delete server(admin) buttons in any way! ] Config { "General setting": { "Maximum number of buttons a player can create": 6, "Maximum number of individual buttons a player can create": 5, "List of containers - buttons will react to open/close container. [ Leave the list empty to extend this to all containers. Or set null to disable this feature. ]": null, "List of mountable prefabs (chair, transport, etc) - buttons will react to interaction with the prefab. [ Leave the list empty to apply this to all prefabs. Or set null to disable this feature. ]": [ ......... ], "List of server buttons - [ You can only configure parameters - Text, Command, Color, Font ]": [ ......... ], "List of server buttons by permissions - [ You can only configure parameters - Text, Command, Color, Font ]": { ......... }, "List of individual server buttons - [ You can configure all parameters ]": [ ......... ], "List of individual server buttons by permissions - [ You can configure all parameters ]": { ......... } }, "GUI setting": { "Color_background_1": "0.517 0.521 0.509 1", "Color_background_2": "0.217 0.221 0.209 1", "Close button (icon) color": "1 1 1 0.75", "Server image list - [ These images are not available to players ]": { ......... }, "Image list - [ These images are available for players to select ]": { ......... }, "List of button colors": [ ......... ] } }$18.99 -
I need help with me server's tags, they dont show up when you search for my server and I dont know why, if some one can help me with this please. Tagstagsrust_server.txt
-
Version 1.0.0
2 downloads
Bring your website to life with this Rust-inspired Elementor kit! Shows all important information about your server. This kit is set to the official Rust colors and includes Header, Footer and a Home page. Everything is completely editable. Installation guide provided. ___ ___ Upcoming Update: Responsive Adaptation$10.00-
- #website
- #website template
-
(and 5 more)
Tagged with:
-
Version 1.9.0
98 downloads
Are you tired of spending countless hours setting up and configuring your Rust server? Look no further than my pre-configured Rust server package. With easy plug-and-play installation, you'll be up and running in no time, with a perfectly balanced 2x server that is sure to provide hours of fun for you and your friends including automatic permissions and group creation. You won't need to worry about giving any permissions or creating any groups - it will all be done for you automatically, without you having to lift a finger (or almost). What is this server about: My server configuration includes a range of features designed to enhance the gameplay experience. Upon respawn, players will be automatically granted a basic kit, making it easier to jump back into the action. Trading and teleportation between players and outposts/bandit camps has also been enabled, adding a new level of convenience to the game. Players can also access almost ALL rust SKINS with /skin command. Looting has been made much more rewarding with a perfectly balanced 2x loot table, ensuring that players won't regret looting monuments and other locations. Gathering resources has also been turned up to 2x, making it easier to acquire the materials you need to survive. Furnace and smelting speeds have been doubled, as has crafting speed, making it easier to create the items you need to stay ahead. In addition to these features, I've also implemented a furnace splitter to ensure resources are evenly distributed, and increased stack sizes by 2x to prevent the economy from being broken. All players will receive Tier 0 and 1 Blueprints, and junk has been removed from barrels and other containers, ensuring a smooth and streamlined gameplay experience. Lastly, my server configuration also offers admins the ability to track who placed each entity, making it easier to manage and monitor gameplay. For added convenience, a radar has also been enabled, allowing admins to quickly spot players and take action as necessary. Disclaimer: No need to set up any permissions/groups/etc. It will be done automatically. Specifications: This package is constantly updating with new feature as per buyers request and do not expect any sale on this package. PLUGINS ARE NOT INCLUDED, but this is what you will have as an idea: • Admin Tools • AutoModerator chat (Auto mute for saying naughty words) • Better Loot (2x Loot table) • Blueprints (T0 & T1 unlocked) • Crafting Controller (2x speed) • Smelting (2x speed and no burnt food) • Gather Manager (2x gather) • Kits (Auto kit) • Teleportation (Outpost/Bandit/Player) • Night (1 min long) • Extended Workbench (Can craft as far as 5 meters away from the base) • Furnace splitter (for everyone) • Trade (for everyone) • Skins (for everyone) (3000+ skins are pre-generated and NO need to buy skinbox) *Links to plugins are provided For any additional help write me back to: FlushedFiber8#6446$15.99- 3 comments
- 4 reviews
-
- 2
-

-

-
Version 1.6.1
33 downloads
For beginners and certified amateurs alike, setting up a Rust server can quickly become time-consuming. This is why we offer you our all-in-one server setup. This includes files already pre-configured for your plugins. (Not all plugins in the list have a pre-configured file, as some do not need one). With this, your server will be ready in 10 minutes. Documentation detailing the installation process is provided. It also includes explanations of the plugins as well as the steps to take if you wish to make changes. Perfect for your first Rust server. The icons and designs used are also provided (in .jpg and .psd format) Server Features: 10x Gather Rates 10x (Better) Loot Table 2x Recycler & Smelt Speed 2x Speed Craft on basic items 5 Preconfigured Kits Automatic Authorization Custom WelcomePanel Custom Outpost (More recycler, vending machine, fourniture) Custom VendingMachine Permission Groups (default, VIP, & Admin) SkinBox & BuildingSkin BGrade WorkBench extended to the base BluePrint Share NTeleportation No-Escape Shop w/ economics Kill Rewards + More! Plugins are not provided with this pack. You need to download them yourself. A document containing the main links is provided. However, you don't have to use all the plugins if you don't want to. RustSetup.com$5.49-
- 1
-

-
- #10x
- #complete setup
-
(and 4 more)
Tagged with:
-
Version 1.6.1
69 downloads
For beginners and certified amateurs alike, setting up a Rust server can quickly become time-consuming. This is why we offer you our all-in-one server setup. This includes files already pre-configured for your plugins. (Not all plugins in the list have a pre-configured file, as some do not need one). With this, your server will be ready in 10 minutes. Documentation detailing the installation process is provided. It also includes explanations of the plugins as well as the steps to take if you wish to make changes. Perfect for your first Rust server. The icons and designs used are also provided (in .jpg and .psd format) Server Features: 5x Gather Rates 5x (Better) Loot Table 2x Recycler & Smelt Speed 2x Speed Craft on basic items 5 Preconfigured Kits Automatic Authorization Custom WelcomePanel Custom Outpost (More recycler, vending machine, fourniture) Custom VendingMachine Permission Groups (default, VIP, & Admin) SkinBox & BuildingSkin BGrade WorkBench extended to the base BluePrint Share NTeleportation No-Escape Shop w/ economics Kill Rewards + More! Plugins are not provided with this pack. You need to download them yourself. A document containing the main links is provided. However, you don't have to use all the plugins if you don't want to. For more information, visit our website.$5.49- 7 comments
-
Version 1.6.1
49 downloads
For beginners and certified amateurs alike, setting up a Rust server can quickly become time-consuming. This is why we offer you our all-in-one server setup. This includes files already pre-configured for your plugins. (Not all plugins in the list have a pre-configured file, as some do not need one). With this, your server will be ready in 10 minutes. Documentation detailing the installation process is provided. It also includes explanations of the plugins as well as the steps to take if you wish to make changes. Perfect for your first Rust server. The icons and designs used are also provided (in .jpg and .psd format) Server Features: 3x Gather Rates 3x (Better) Loot Table 2x Recycler & Smelt Speed 2x Speed Craft on basic items 5 Preconfigured Kits Automatic Authorization Custom WelcomePanel Custom Outpost (More recycler, vending machine, fourniture) Custom VendingMachine Permission Groups (default, VIP, & Admin) SkinBox & BuildingSkin BGrade WorkBench extended to the base BluePrint Share NTeleportation No-Escape Shop w/ economics Kill Rewards + More! Plugins are not provided with this pack. You need to download them yourself. A document containing the main links is provided. However, you don't have to use all the plugins if you don't want to. For more information, visit our website.$5.49 -
Version 1.6.1
85 downloads
For beginners and certified amateurs alike, setting up a Rust server can quickly become time-consuming. This is why we offer you our all-in-one server setup. This includes files already pre-configured for your plugins. (Not all plugins in the list have a pre-configured file, as some do not need one). With this, your server will be ready in 10 minutes. Documentation detailing the installation process is provided. It also includes explanations of the plugins as well as the steps to take if you wish to make changes. Perfect for your first Rust server. The icons and designs used are also provided (in .jpg and .psd format) Server Features: 2x Gather Rates 2x (Better) Loot Table 2x Recycler & Smelt Speed 2x Speed Craft on basic items 5 Preconfigured Kits Automatic Authorization Custom WelcomePanel Custom Outpost (More recycler, vending machine, fourniture) Custom VendingMachine Permission Groups (default, VIP, & Admin) SkinBox & BuildingSkin BGrade WorkBench extended to the base BluePrint Share NTeleportation No-Escape Shop w/ economics Kill Rewards + More! Plugins are not provided with this pack. You need to download them yourself. A document containing the main links is provided. However, you don't have to use all the plugins if you don't want to. RustSetup.com$5.49- 2 comments
- 1 review
-
Version 1.0.3
123 downloads
Hud Controller is a very simple Hud system. It can do a ton of things, all listed below! Why should you choose Hud Controller? Having a unique server is very important when you choose to have a hud on your server, players see that 24/7. So, you want a good-looking, unique hud menu that stands out to players. With Hud Controller, you can do that, and much more, with ease. FEATURES - Built in UI editor - Add panels, change colors, change fonts, delete panels, change images, EVERYTHING IS EDITABLE! - Dynamic custom events - Normal rust events - Quick command buttons - Display RP or Economics - Display server time - Display player grid - Display players - ETC* Text fields can accept the following placeholders {serverName} {configServerName} {maxPlayers} {onlinePlayers} {joiningPlayers} {queuedPlayers} {totalPlayers} {playerGrid} {serverTime} {playerCurrency} Support? Questions? Comments? Concerns? Message me in my Discord! https://discord.gg/RVePam7pd7$19.99 -
Version 3.0.2
1,090 downloads
The main functionality of this egg is to have the ability to switch seamlessly between all Carbon builds, Oxide, and Vanilla. If you launch the egg with an Oxide build, you can then switch right on over to Carbon, and it will handle all of the removal and clean up of all of the Oxide files for you. If you switch to Vanilla from either Carbon or Oxide, it will make sure those files are cleaned up as well. You also have the ability to set a "Modding Root" folder. This folder is very important, as it allows you to have different plugins, configs, and data for different wipes or maps. Say you are running a proc gen map, and you are running a set of plugins that makes sense to have on a proc gen map, then you decide on wipe day to switch to a spooky, Halloween themed map. Obviously you'll probably want to have some different plugins running on that custom Halloween themed map. You can make that switch easily by just specifying the "Modding Root" folder that you want to use, instead of having to delete files, configs, etc. This guide assumes that you have already installed Pterodactyl panel, and are familiar with how to set up servers. You should also already have a location, a node, and ports already allocated on that node. If you don't know how to do any of this, or you missed a step, please refer to the Pterodactyl Panel installation instructions below. A link to their Discord server is also below for you to get support during installation. They however do not support Carbon specific questions, only questions relating to Pterodactyl panel itself. Just keep that in mind. Pterodactyl Installation Instructions Pterodactyl Discord Check Out The Carbon Docs This egg is now officially on the Carbon documentation page! That documentation can be found here: https://docs.carbonmod.gg/docs/server-hosting/pterodactyl Difference Between Carbon Builds The difference between the Production, Preview, and Edge builds of Carbon are: Production - The most stable version of Carbon. Updated once every few weeks. Preview - Updated frequently, contains future features for testing, and you will run into a few bugs here and there. Edge - Like living on the edge? This is the most current version of Carbon, and it used mainly by developers and server owners to test brand new features of Carbon that are still in the Beta development stage. Expect some bugs. One other thing is the difference between the Minimal and Standard versions of Carbon. The minimal version of Carbon does not contain the Admin Module, CarbonAuto, or the Zip Dev Script Processor. Its basically a lightweight version of carbon, stripping away the QoL features and focuses only on plugin execution. Its not like minimal is faster then the Standard build, it just has less "clutter". Adding The Egg To The Nest First we need to add the egg to the Rust nest. Here are the steps. Login to the admin dashboard of your Pterodactyl panel installation. Click on the "Nests" link in the side bar on the left. Since there is already a "Rust" nest, we don't have to create a new one. Lets just go ahead and add the egg to the nest. Click on the green "Import Egg" button on the right. Select the Custom Carbon Egg that you just downloaded by clicking browse, then navigate to the location you saved the egg to, and double click the file. Next we need to select the "Rust" nest under the "Associated Nest" field. Now all we have to do is click on "Import". Installing the Server This server installation guide is very similar to the Custom Rust Egg by MikeHawk, with some key differences. Some of the steps for installation might be the same. Please make sure to read these installation instructions throughly. Log into your admin dashboard of your panel. Navigate to your Servers by clicking on "Servers" on the side bar. Click the "Create New" button on the right Configure your server details in the "Core Details" section For your port allocations you are going to need 1 main port, and 3 additional allocations. These allocations are for the Query Port, RCON Port, and App Port. Configure your "Application Feature Limits" and "Resource Management" sections to your liking Under "Nest Configuration", select the "Rust" Nest Then if your "Egg" field does not already say "Rust Carbon", change it to "Rust - All Carbon Builds". The "Docker Configuration" section can be skipped. Next is the big part. The "Startup Configuration" section. In this section, you can fill out everything pretty much to your liking. However there are a few new options here that are not apart of the Default Rust Egg. Under the "Modding Framework" variable, you can choose different options for either Carbon, Oxide, or Vanilla. This is a combined version of the "Carbon Build" and "Minimal" variables from the other Custom Rust Egg by MikeHawk. The key difference here is this egg is also set up for the staging branch of Rust as well. See the "Difference Between Carbon Builds" section at the top of this page for more information. Lastly, the major difference between the Default Rust egg, and the Carbon Rust egg, is that you can set an IP address for your Rust+ App. This is critical in ensuring that your Rust+ connection is able to connect to the Rust+ API. Set this value to the public IP address of your server. Additionally, you can configure different Carbon/Oxide root directories. This is good if you want to run a certain set of plugins on one map, but don't want to go through the hassle of copying and pasting over different configs for that map. All you have to do is just change your Carbon directory, and it will automatically switch over to those plugins, configs, and data files. An important thing to note is that the "Modding Root" variable should be set appropriately. If you're running a build of Carbon, your "Modding Root" should have the word "carbon" in it. Same thing for Oxide. If you're running Oxide, your "Modding Root" variable should have the word "oxide" in it. The vanilla option does not need to have the variable set. Do not forget to set your RCON, Query, and App ports to the appropriate ports that you assigned under the "Core Details" section. These ports should be equal to one of the three ports you assigned under your "Additional Ports" section. Start your server by clicking the green "Create Server" button at the bottom of the page. And that's it! You now have a Rust server installed and ready to use! Credits to @BippyMiester for helping me create the egg Want to help contribute to the project? Visit our GitHub Pages! https://github.com/SturdyStubs/pterodactyl-images/ https://github.com/SturdyStubs/AIO.EggFree- 11 comments
- 2 reviews
-
- 9
-

-

-
- #pterodactyl
- #pterodactyl panel
- (and 7 more)



.thumb.gif.f0b0245e9c54ffe33eb112bfd730b972.gif)

.thumb.png.45dcc24e7014d186d7d1a360402feebf.png)




.thumb.png.43a1c9e31c417f20200c404e0d74005c.png)

