Search the Community
Showing results for tags 'automation'.
-
Version 1.2.4
1,112 downloads
UltimateLocker - Lock Everything, Auto Lock & Auto Closing UltimateLocker - Lock Everything, Auto Lock & Auto Closing, allows you to place Code Locks/Key Lock on Vehicles, Furnaces, Weapon Racks, Turrets, Mining Quarry, Pump Jack, Motorbike, Motorbike With Sidecar, Pedal Bike, Pedal Trike, Deployable Items and much more. Plus you can decide whether to automatically position the code locks, with many configurations and share locks with your clan/team members. You can also enable automatic closing by positioning door closers automatically or manually, change the closing delay time and decide on which entities to enable it. Place Code Lock wherever you want, Auto Lock and Auto Closing (Door Closer) with a single plugin, 3 plugin in 1. You can decide which entities to enable Code Lock on or Door Closer. It has commands for administrators to lock, unlock and remove Code Locks/Key Lock. IMPORTANT: Added the ability to also place Key Locks, in addition to Code Locks. Place Code Lock/Key Lock wherever you want with a single plugin: Vehicle Locks Motorbike, Motorbike With Sidecar, Pedal Bike, Pedal Trike Rust item lock Windows Lock Automatic lock closing when dismount of the vehicle Code Lock support for Medieval entities: Mounted Ballista, Battering Ram, Catapult, Siege Tower, Ballista Medieval entities block usage: opening/closing doors, reloading/firing ammo, mounting, driving, pushing, pulling, etc… Furnaces, Refineries, and more Weapon Rack Lock Farming Lock Electricity Lock / Electrical Lock Industrial Lock Construction Lock Mining Quarry, Pump Jack Items Lock Trap Lock Turrets Lock Misc Lock Fun Lock Deployable Lock And so on... EXAMPLES OF OPERATION/USE: Some examples of how the plugin works when there is a Code Lock/Key Lock to which you do not have access: Usage block/loot furnaces, refineries, electric furnaces, water dispensers, industrial conveyor, industrial crafter, car lift, elevator, small generator, metal shop front, dropbox, mail box, vending machine, etc... Usage block: workbench, research table, repair table, computer station, mixing table, etc... Device Identifier: If the Auto Turrets, CCTV Camera, PTZ CCTV Camera, etc…, are locked with Code Lock/Key Lock, you cannot access them remotely if you do not have access to Code lock/Key Lock, even if you know the identification number. Block use and loot of vehicles, including horses Block use and loot of vehicles, including Motorbike, Motorbike With Sidecar, Pedal Bike, Pedal Trike. Automatic lock closing when dismount of the vehicle Code Lock support for Medieval entities: Mounted Ballista, Battering Ram, Catapult, Siege Tower, Ballista Medieval entities block usage: opening/closing doors, reloading/firing ammo, mounting, driving, pushing, pulling, etc… Block use and loot of: Mining Quarry, Pump Jack. Auto Turret authorization lock, rotation, attack mode, remote control, lock to change identification ID. Locking loot and usafe of SAM Site. Lock to change camera identification ID and remote control. Block personal Quarry Mining usage and loot FARM: fertilizer container block, sowing block, harvesting/cutting plants and clone, or harvesting dead plants, composter block, etc... Weapon rack: weapons storage and collection block, weapon reloading, weapon exchange. Blocking the insertion and removal of electrical cables and pipes from the various components. Blocking the use of electrical components: switching on/off switches, switches, buttons, changing timer duration and much more... Blocking use and frequency change of transceiver components, RF Broadcaster, RF Receiver. Blocking the use of some entertainment objects such as the piano, drums, boom box, arcade games, etc... Block fun objects such as Strobe Light, Laser Light, Sound Light, Neon Sign, etc... And much more, with new items that will be added in future releases or at your suggestion via a request for support or comment AUTO LOCK: The plugin integrates an automatic positioning system for Code Lock or Key Lock. Using the /autolock or /codelock command the player can manage all the settings: Sharing locks with clan/team members. Create a code lock pin and/or update all your codelock pins with 1 click. Create a Guest pin for your Code Lock and/or update all Guest pins of your code locks with 1 click. Enable the ability to use Key Locks, if you do not have Code Locks in your inventory. Streamer mode: to hide the display of the Code Lock pin on the screen. In addition, there will be many other options that can be enabled/disabled. These options will be available based on how the plugin has been configured. For example: has the ability to place the code lock on the furnaces been enabled? Then there will be the option to enable and/or disable the automatic positioning of the locks on the furnaces. And so on for all the other configurations. And many other new features and features that will arrive with the next plugin updates. ---------- AUTO CLOSING (DOOR CLOSER): The plugin integrates a system for automatic closing, via Door Closer, of various entities. The player can change the settings through a simple and intuitive interface and apply these settings automatically or manually. Using the /autolock or /codelock command and by pressing the button "Auto Closing Settings" the player can manage all the settings: PERMISSIONS: ultimatelocker.use - Allows you to use the plugin to place Code Locks/Key Locks. ultimatelocker.admin - Allows you to execute some commands reserved for administrators. ultimatelocker.bypass.force - Allows you to bypass Code Locks/Key Locks. ultimatelocker.autolock.enabled - This role is required to be able to use the automatic positioning system of Code Lock or Key Lock. ultimatelocker.autolock.nolockrequired - With this role you do not need to have the Code Lock in your inventory, the Code Lock will be placed even if you do not have one. ultimatelocker.autoclosing.enabled - This role is required to be able to use the automatic closing system, Door Closer. ultimatelocker.autoclosing.nodoorcloserrequired - With this role you do not need to have the Door Closer in your inventory, the Door Closer will be placed even if you do not have one. COMMANDS FOR PLAYERS Commands can be typed in chat (by putting the / character in front of the command), or from console. /autolock or /codelock — Open Auto Lock/Auto Closing settings UI. /locker — Command to add lock manually. /closer — Command to add door closer manually. /ul code <code> — Change the Code Lock code of the entity you are looking at, if you own the entity or if it belongs to a clan/team member. /ul codeall <code> — Change the Code Lock code on all entities owned by the player. /ul ctime <time> — Set the closing delay time (seconds) for the Door Closer you are looking at. ---------- COMMANDS FOR ADMIN Commands can be typed in chat (by putting the / character in front of the command), or from console. To use these commands you must have the role: ultimatelocker.admin /ul unlock — Unlock the Code Lock/Key Lock of the entity you are watching. /ul unlockall <steamID> — Unlock all player Code Locks/Key Locks. /ul lock — Lock the Code Lock/Key Lock of the entity you are watching. /ul lockall <steamID> — Lock all player Code Locks/Key Locks. /ul remove — Removes the Code Lock/Key Lock of the entity you are watching. /ul removeall <steamID> — Removes all player Code Locks/Key Locks. /ul code <code> — Change the Code Lock code of the entity you are looking at. Instead of <code> you must insert the new code. Must consist of 4 numbers. /ul codeall <code> <steamID> — Change the Code Lock code on all entities owned by the player. You must pass the steamID of the player whose code you want to change instead of the <steamID>. Instead of <code> you must insert the new code. Must consist of 4 numbers. /ul show — Shows the Code Lock code of the entity you are looking at. -------------------- NB: To use these commands you must set the configuration AllowAdminToBypassCodeLock to be set to true or have the role ultimatelocker.bypass.force. -------------------- Commands can be added or modified in the configuration file: /oxide/config/UltimateLocker.json CLAN/TEAM If the player is part of a clan/team, he can block, unlock or remove Code Locks/Key Locks placed by other teammates, if enabled in the configurations. CONFIGURATION The settings and options can be configured in the UltimateLocker under the config directory. The use of an editor and validator is recommended to avoid formatting issues and syntax errors. { "TimeZone": "Europe/London", "ChatPrefix": "UltimateLocker", "AllowAdminToBypassCodeLock (Allows admin to bypass Code Lock without using commands). Default False.)": false, "Chat Command": [ "ul", "ultimatelocker" ], "Auto Lock Configuration": { "Chat Command": [ "autolock", "codelock" ], "Add Lock manually - Chat Command": "locker", "Player default settings": { "Allow automatic lock placement by default. (Default: TRUE)": true, "Allow automatic placement of Key Locks if there are no Code Locks in the inventory. (Default: TRUE)": true, "Allow Guest Code by default. (Default: FALSE)": false, "Allow automatic Share locks with clan/team members by default. (Default: TRUE)": true, "Enable streamer mode by default. (Default: FALSE)": false, "Allow automatic lock on Doors by default. (Default: TRUE)": true, "Allow automatic lock on Boxes by default. (Default: FALSE)": false, "Allow automatic lock on Storage Container by default. (Default: FALSE)": false, "Allow automatic lock on Lockers by default. (Default: TRUE)": true, "Allow automatic lock on TC (Cupboards) by default. (Default: TRUE)": true, "Allow automatic lock on Vehicle by default. (Default: TRUE)": true, "Allow automatic lock closing when dismount of the vehicle by default. (Default: TRUE)": true, "Allow automatic lock on Medieval entity by default. (Default: FALSE)": false, "Allow automatic lock on Furnace by default. (Default: FALSE)": false, "Allow automatic lock on Vending Machine by default. (Default: FALSE)": false, "Allow automatic lock on Composter by default. (Default: FALSE)": false, "Allow automatic lock on Mixing Table by default. (Default: FALSE)": false, "Allow automatic lock on Planter by default. (Default: FALSE)": false, "Allow automatic lock on Auto Turret by default. (Default: FALSE)": false, "Allow automatic lock on SAM Site by default. (Default: FALSE)": false, "Allow automatic lock on Traps by default. (Default: FALSE)": false, "Allow automatic lock on Weapon Rack by default. (Default: TRUE)": true, "Allow automatic lock on Stash by default. (Default: FALSE)": false, "Allow automatic lock on Neon Sign by default. (Default: FALSE)": false, "Allow automatic lock on Other Lockable Entities by default. (Default: FALSE)": false, "Allow automatic lock on Other Custom Entities by default. (Default: FALSE)": false } }, "Auto Closing Configuration": { "Add Door Closer manually - Chat Command": "closer", "Player Can Pickup Door Closer. (Default: TRUE)": true, "Enable automatic closing of Door. (Default: FALSE)": false, "Enable automatic closing of Double Door. (Default: FALSE)": false, "Enable automatic closing of Window. (Default: FALSE)": false, "Enable automatic closing of Garage. (Default: FALSE)": false, "Enable automatic closing of Ladder Hatch. (Default: FALSE)": false, "Enable automatic closing of External Gate. (Default: FALSE)": false, "Enable automatic closing of Fence Gate. (Default: FALSE)": false, "Enable automatic closing of Legacy Wood Shelter Door. (Default: FALSE)": false, "Minimum Closing Delay Time. (Default: 10 seconds)": 10, "Maximum Closing Delay Time. (Default: 60 seconds)": 60, "Default Closing Delay Time. (Default: 30 seconds)": 30 }, "Requires Building Privilege to place Code Locks. (Default: TRUE)": true, "Requires Building Privilege to place Code Locks in unowned vehicles. (Default: FALSE)": false, "Allow deployment of Code Lock in vehicles owned by other players. (Default: FALSE)": false, "Allow deployment of Code Lock in unowned vehicles. (Default: TRUE)": true, "Allow pushing vehicles blocked by the Code Lock (Default: TRUE)": true, "Set player as owner when placing a Mining Quarry or Pump Jack (also static). (Default: TRUE)": true, "Enable Lock": { "Vehicles": [ { "ItemName": "Minicopter", "EnableLock": true, "PrefabName": "assets/content/vehicles/minicopter/minicopter.entity.prefab", "RequiredPermission": [ "" ] }, { "ItemName": "Scrap Transport Helicopter", "EnableLock": true, "PrefabName": "assets/content/vehicles/scrap heli carrier/scraptransporthelicopter.prefab", "RequiredPermission": [ "" ] }, { "ItemName": "Attack Helicopter", "EnableLock": true, "PrefabName": "assets/content/vehicles/attackhelicopter/attackhelicopter.entity.prefab", "RequiredPermission": [ "" ] }, { "ItemName": "Armored / Hot Air Balloon", "EnableLock": true, "PrefabName": "assets/prefabs/deployable/hot air balloon/hotairballoon.prefab", "RequiredPermission": [ "" ] }, { "ItemName": "Row Boat", "EnableLock": true, "PrefabName": "assets/content/vehicles/boats/rowboat/rowboat.prefab", "RequiredPermission": [ "" ] }, { "ItemName": "RHIB", "EnableLock": true, "PrefabName": "assets/content/vehicles/boats/rhib/rhib.prefab", "RequiredPermission": [ "" ] }, { "ItemName": "Tugboat", "EnableLock": true, "PrefabName": "assets/content/vehicles/boats/tugboat/tugboat.prefab", "RequiredPermission": [ "" ] }, { "ItemName": "Submarinesolo", "EnableLock": true, "PrefabName": "assets/content/vehicles/submarine/submarinesolo.entity.prefab", "RequiredPermission": [ "" ] }, { "ItemName": "Submarine Duo", "EnableLock": true, "PrefabName": "assets/content/vehicles/submarine/submarineduo.entity.prefab", "RequiredPermission": [ "" ] }, { "ItemName": "Horse", "EnableLock": true, "PrefabName": "assets/rust.ai/nextai/testridablehorse.prefab", "RequiredPermission": [ "" ] }, { "ItemName": "Tomaha Snowmobile", "EnableLock": true, "PrefabName": "assets/content/vehicles/snowmobiles/tomahasnowmobile.prefab", "RequiredPermission": [ "" ] }, { "ItemName": "Snowmobile", "EnableLock": true, "PrefabName": "assets/content/vehicles/snowmobiles/snowmobile.prefab", "RequiredPermission": [ "" ] }, { "ItemName": "Sedan", "EnableLock": true, "PrefabName": "assets/content/vehicles/sedan_a/sedantest.entity.prefab", "RequiredPermission": [ "" ] }, { "ItemName": "2 Module Car", "EnableLock": true, "PrefabName": "assets/content/vehicles/modularcar/2module_car_spawned.entity.prefab", "RequiredPermission": [ "" ] }, { "ItemName": "3 Module Car", "EnableLock": true, "PrefabName": "assets/content/vehicles/modularcar/3module_car_spawned.entity.prefab", "RequiredPermission": [ "" ] }, { "ItemName": "4 Module Car", "EnableLock": true, "PrefabName": "assets/content/vehicles/modularcar/4module_car_spawned.entity.prefab", "RequiredPermission": [ "" ] } ], "Deployables": [ { "ItemName": "Large Furnace", "EnableLock": true, "PrefabName": "assets/prefabs/deployable/furnace.large/furnace.large.prefab", "RequiredPermission": [ "" ] }, { "ItemName": "Furnace", "EnableLock": true, "PrefabName": "assets/prefabs/deployable/furnace/furnace.prefab", "RequiredPermission": [ "" ] }, { "ItemName": "Legacy Furnace", "EnableLock": true, "PrefabName": "assets/prefabs/deployable/legacyfurnace/legacy_furnace.prefab", "RequiredPermission": [ "" ] }, { "ItemName": "Refinery", "EnableLock": true, "PrefabName": "assets/prefabs/deployable/oil refinery/refinery_small_deployed.prefab", "RequiredPermission": [ "" ] }, { "ItemName": "Electric Furnace", "EnableLock": true, "PrefabName": "assets/prefabs/deployable/playerioents/electricfurnace/electricfurnace.deployed.prefab", "RequiredPermission": [ "" ] }, { "ItemName": "Stone Fireplace", "EnableLock": true, "PrefabName": "assets/prefabs/deployable/fireplace/fireplace.deployed.prefab", "RequiredPermission": [ "" ] }, { "ItemName": "BBQ", "EnableLock": true, "PrefabName": "assets/prefabs/deployable/bbq/bbq.deployed.prefab", "RequiredPermission": [ "" ] }, { "ItemName": "Hobo Barrel", "EnableLock": true, "PrefabName": "assets/prefabs/misc/twitch/hobobarrel/hobobarrel.deployed.prefab", "RequiredPermission": [ "" ] }, { "ItemName": "Storage Barrel B", "EnableLock": true, "PrefabName": "assets/prefabs/misc/decor_dlc/storagebarrel/storage_barrel_b.prefab", "RequiredPermission": [ "" ] }, { "ItemName": "Storage Barrel C", "EnableLock": true, "PrefabName": "assets/prefabs/misc/decor_dlc/storagebarrel/storage_barrel_c.prefab", "RequiredPermission": [ "" ] }, ............ ] }, "VersionNumber": { "Major": 1, "Minor": 2, "Patch": 0 } } TimeZone: Default: Europe/London ChatPrefix: — Chat message prefix. AllowAdminToBypassCodeLock (Allows admin to bypass Code Locks/Key Locks without using commands). Default FALSE. Chat Command: Here you can add, edit or delete Commands can be typed in chat (by putting the / character in front of the command), or from console. Requires Building Privilege to place Code Locks: Requires Building Privilege to place Code Locks/Key Lock. Default: TRUE Requires Building Privilege to place Code Locks in unowned vehicles: Requires Building Privilege to place Code Locks/Key Lock in unowned vehicles. Default: FALSE Allow deployment of Code Lock in vehicles owned by other players: Allow deployment of Code Lock in vehicles owned by other players. Default: FALSE Allow deployment of Code Lock in unowned vehicles: Allow deployment of Code Lock in unowned vehicles. Default: TRUE Allow pushing vehicles blocked by the Code Lock: Allow pushing vehicles/horses blocked by the Code Lock. Default: TRUE Sets player as owner when placing a Mining Quarry or Pump Jack (also static): Set the player as owner of the Mining Quarry or Pump Jack placed (also those statistics). Default: TRUE Enable Lock: Here you can set which entities to enable, on which you can place a Code Lock/Key Lock. ItemName: The name of the entity EnableLock: Whether or not to enable Code Lock/Key Lock placement for this entity. RequiredPermission: Here you can specify the roles required to be able to insert a Code Lock/Key Lock in the entities enabled in the configuration. You can specify 1 or more roles, and as long as the player has at least one of these roles he can enter the Code Lock/Key Lock. Here you can specify the roles required to be able to insert a Code Lock/Key Lock in the entities enabled in the configuration. You can specify 1 or more roles, and as long as the player has at least one of these roles he can enter the Code Lock/Key Lock. When you enter a role, a server-side role will be created which must then be assigned to the player, here are some examples. “RequiredPermission”: [ “vip_1”]: In this case the ultimatelocker.vip_1 role will be created, it will be necessary to assign this role to the player to enable the insertion of the Code Lock/Key Lock in the configured entity. “RequiredPermission”: [ “user_1”, “vip_2” ]: In this case the ultimatelocker.user_1 and ultimatelocker.vip_2 roles will be created and it will be necessary to assign one of these roles to the player (or even both) to enable the insertion of the Code Lock/Key Lock in the configured entity. The role name must respect certain parameters and can only contain these alphanumeric characters: a-z A-Z 0-9 . _ – Any unsupported characters will be removed, the space character will be replaced by the _ character. AUTO LOCK – CONFIGURATION Chat Command: Here you can specify 1 or more commands to open the UI for Auto Lock settings Add Lock manually – Chat Command: Command to add lock manually. Default /locker Allow automatic …. …. by default: The settings that start with “Allow automatic …. …. by default“, are the basic settings once the Auto Lock system is enabled. EXAMPLE: If you have Auto Lock enabled and have the setting “Allow automatic lock on Doors by default = true“, then it will be set to automatically place the code lock /key lock on doors by default. After that the player can change this setting via the UI. This applies to all basic “allow configuration properties”. -------------------- Allow automatic lock closing when dismount of the vehicle by default.: If the vehicle has a lock, the lock will be automatically closed when you dismount the vehicle, so as to avoid leaving vehicles open and potentially stolen. Default TRUE AUTO CLOSING (DOOR CLOSER) - CONFIGURATION Add Door Closer manually – Chat Command: Command to add door closer manually. Default /closer Player Can Pickup Door Closer. (Default: TRUE): If set to false, the player does not get the Door Close back once it is removed. Enable automatic closing of Door. (Default: FALSE): Enable automatic closing for Single Doors. Permission is still required: ultimatelocker.autoclosing.enabled Enable automatic closing of Double Door. (Default: FALSE): Enable automatic closing for Double Doors. Permission is still required: ultimatelocker.autoclosing.enabled Enable automatic closing of Window. (Default: FALSE): Enable automatic closing for Windows. Permission is still required: ultimatelocker.autoclosing.enabled Enable automatic closing of Garage. (Default: FALSE): Enable automatic closing for Garage. Permission is still required: ultimatelocker.autoclosing.enabled Enable automatic closing of Ladder Hatch. (Default: FALSE): Enable automatic closing for Ladder Hatch. Permission is still required: ultimatelocker.autoclosing.enabled Enable automatic closing of External Gate. (Default: FALSE): Enable automatic closing for External Gate. Permission is still required: ultimatelocker.autoclosing.enabled Enable automatic closing of Fence Gate. (Default: FALSE): Enable automatic closing for Fence Gate. Permission is still required: ultimatelocker.autoclosing.enabled Enable automatic closing of Legacy Wood Shelter Door. (Default: FALSE): Enable automatic closing for Legacy Wood Shelter Door. Permission is still required: ultimatelocker.autoclosing.enabled Minimum Closing Delay Time. (Default: 10 seconds): Minimum delay time usable for automatic closing, Door Closer. Maximum Closing Delay Time. (Default: 60 seconds): Maximum delay time that can be used for automatic closing, Door Closer. Default Closing Delay Time. (Default: 30 seconds): Default delay time for automatic closing, Door Closer. LOCALIZATION The plugin, therefore the automatic messages and statistics, are translated into the following languages: English Italian Translation files are located in the /oxide/lang folder, here is an example of a /oxide/lang/en/UltimateLocker.json translation file. You can add translations for other languages by adding them to the folder: /oxide/lang AVAILABLE ENTITIES VEHICLES: Minicopter, Scrap Transport Helicopter, Attack Helicopter, Armored / Hot Air Balloon, Kayak, Row Boat, RHIB, Tugboat, Submarine Solo, Submarine Duo, Horse, Tomaha Snowmobile, Snowmobile, Sedan, 2 Module Car, 3 Module Car, 4 Module Car, Motorbike, Motorbike With Sidecar, Pedal Bike, Pedal Trike, Mounted Ballista, Battering Ram, Catapult, Siege Tower, Ballista DEPLOYABLES: Large Furnace, Furnace, Legacy Furnace, Refinery, Electric Furnace, Stone Fireplace, BBQ, Hobo Barrel, Medieval Large Wood Box, Storage Barrel B, Storage Barrel C, RHIB Storage, Metal Shop Front, Dropbox, Mail Box, Vending Machine, Computer Station, Twitch Rivals Desk, Mixing Table, Composter, Small Planter Box, Large Planter Box, Minecart Planter, Bath Tub Planter, Rail Road Planter, Hitch & Trough, Small Water Catcher, Large Water Catcher, Water Barrel, Powered Water Purifier, Fluid Switch & Pump, Repair Bench, Research Table, Workbench Level 1, Workbench Level 2, Workbench Level 3, Button, Switch, Smart Switch, Timer, Small Generator, SAM Site, Auto Turret, Flame Turret, Shotgun Trap, Modular Car Lift, Snow Machine, Fogger-3000, Elevator, Mining Quarry, Pump Jack, Tall Weapon Rack, Horizontal Weapon Rack, Wide Weapon Rack, Weapon Rack Stand, Frontier Bolts Single Item Rack, Frontier Horseshoe Single Item Rack, Frontier Horns Single Item Rack, Small Stash, Chippy Arcade Game, Strobe Light, Laser Light, Sound Light, Small Neon Sign, Medium Neon Sign, Large Neon Sign, Medium Animated Neon Sign, Large Animated Neon Sign, Search Light, CCTV Camera, PTZ CCTV Camera, RF Broadcaster, RF Receiver, Industrial Conveyor, Industrial Crafter, Wheelbarrow Piano, Junkyard Drum Kit, Boom Box, Chinese Lantern, Chinese Lantern White, Tuna Can Lamp, Lantern, Camp Fire, Cursed Cauldron, Skull Fire Pit, Jack O Lantern Angry, Jack O Lantern Happy, Wood Shutters NEW ENTITIES New entities will be added with future releases. If you want to request the addition of a specific entity, feel free to open a support request and it will be added to the plugin. ENTITY IMAGE PREVIEW VEHICLES: Minicopter Scrap Transport Helicopter Attack Helicopter Hot Air Balloon Armored Hot Air Balloon Kayak Row Boat RHIB Tugboat Submarine Solo Submarine Duo Horse Snowmobile Tomaha Snowmobile Sedan 2 Module Car 3 Module Car 4 Module Car Motorbike Motorbike With Sidecar Pedal Bike Pedal Trike Mounted Ballista Battering Ram Catapult Siege Tower Ballista DEPLOYABLES: Large Furnace Furnace Legacy Furnace Small Oil Refinery Electric Furnace Stone Fireplace Barbeque (BBQ) Hobo Barrel Storage Barrel Vertical Storage Barrel Horizontal Metal Shop Front Drop Box Mail Box Vending Machine Computer Station Twitch Rivals Desk Mixing Table Composter Small Planter Box Large Planter Box Minecart Planter Bath Tub Planter Rail Road Planter Hitch & Trough Small Water Catcher Large Water Catcher Water Barrel Powered Water Purifier Fluid Switch & Pump Repair Bench Research Table Workbench Level 1 Workbench Level 2 Workbench Level 3 Button Switch Smart Switch Timer Small Generator SAM Site Auto Turret Flame Turret Shotgun Trap Modular Car Lift Snow Machine Fogger-3000 Elevator Mining Quarry Pump Jack RHIB Storage Wood Shutters Medieval Large Wood Box Tall Weapon Rack Horizontal Weapon Rack Wide Weapon Rack Weapon Rack Stand Frontier Bolts Single Item Rack Frontier Horseshoe Single Item Rack Frontier Horns Single Item Rack Small Stash Chippy Arcade Game Strobe Light Laser Light Sound Light Small Neon Sign Medium Neon Sign Large Neon Sign Medium Animated Neon Sign Large Animated Neon Sign Search Light CCTV Camera PTZ CCTV Camera RF Broadcaster RF Receiver Industrial Conveyor Industrial Crafter Wheelbarrow Piano Junkyard Drum Kit Boom Box Chinese Lantern Chinese Lantern White Tuna Can Lamp Lantern Camp Fire Cursed Cauldron Skull Fire Pit Jack O Lantern Angry Jack O Lantern Happy$9.99- 96 comments
- 9 reviews
-
- 1
-

-
- #carbon
- #oxide
-
(and 36 more)
Tagged with:
- #carbon
- #oxide
- #security
- #automation
- #locking
- #vehicles
- #deployables
- #furnaces
- #mining
- #quarries
- #construction
- #doors
- #protection
- #weapons
- #turrets
- #storage
- #customization
- #admin
- #utilities
- #access
- #teams
- #door closer
- #auto closing
- #auto lock
- #code lock
- #key lock
- #lock everything
- #windows
- #windows lock
- #wood shutters lock
- #medieval
- #medieval entities
- #mounted ballista
- #battering ram
- #catapult
- #siege tower
- #ballista
- #medieval large wood box
-
Version 1.4.7
2,248 downloads
Fed up with the need to use multiple addons on my server for functions that players could execute from within the game, and considering the constant increase of new Skins for builds, I found myself dissatisfied with the limited supply of automatic upgrades on the market. For this reason, I have reworked the most used TC-related features on my server into a single plugin, which has been enriched with ideas contributed by players and other Rust administrators. All this under an attractive graphical interface, inspired by the item store of the game itself. Video Update 1.4.0 Old Video Features LIST OF AUTHORIZED PLAYERS It allows players or simply the rest of the Staff to easily see which players are authorized in the locker. Except for the administrators themselves, if you activate it in the config. (I don't think any player needs to know that the admin was authorized in their locker to check something) You can also allow authorizations to be deleted individually. AUTOMATIC CONSTRUCTION SKINS With BetterTC your players will be able to improve their builds to any level of improvement, but they will also be able to choose their favorite Skin (if you enable it) completely free of charge or offering it to the VIPS on your server. Update system: I have added a small system that checks for new skins to automatically add them to the configuration. When you install the plugin for the first time and once you obtain permission from bettertc.admin, you must click on "Check Update" so that it performs an internal check and adds all the skins and options that exist to date. AUTOMATIC IMPROVEMENT SYSTEM Allows your players to upgrade the grade of their bases automatically by obtaining resources directly from the TC. As long as they don't have RaidBlock (if you use NoEscape/RaidBlock plugin of course). You can configure different speed levels and costs depending on the player's permission from the plugin's own settings. That is, you can have players improve a building every 5 seconds for free and VIPs can improve every 2 or 1... Use your imagination! In addition, you can also calculate the cost of materials that will be required to carry out said improvement by clicking on the info button. AUTOMATIC REPAIR SYSTEM Allows your players to repair their bases automatically by obtaining resources directly from the TC. As long as they don't have RaidBlock (if you use NoEscape of course). Now since version 1.4.0 it will also repair damaged objects such as doors, trapdoors, windows, boxes! CONSTRUCTION DEGRADATION It allows players to regret upgrading their huge base to metal and not being able to afford it anymore. Of course, it will charge them resources as if they improved it from 0. However, if you do not want to allow downgrade you can disable it from the config. WALLPAPER PLACEMENT Allows your players to place any wallpaper available in the game automatically based on the building type. You will get the closet interior fabric as a placement cost. The skin list is remotely updatable, so if new skins are added they will be added without the need to update the plugin. You will just have to click (as admin) on the check for update button. In addition, with BetterTC you can place wallpapers on both sides of the walls, even if they are on the outside of the building, as it includes an option in the configuration to force this placement. TC SKINS Give your players the ability to change the appearance of their TC. CONSTRUCTION EFFECTS Allows players to disable auto-build buff effects and reduces headaches.However, if you do not want to allow them to disable this, you can disable it from the config. BETTER GUI The plugin's interface has been programmed so that it maintains its size regardless of the interface scaling settings of each player. It has also been taken into account that perhaps not everyone wants to enable all options for their players. Therefore, the buttons that appear at the top of the TC have been programmed so that if a player does not have permission for a specific function, instead of leaving the space empty, the buttons adapt their position automatically. The player list GUI and construction SKINS have also been prepared with a pagination system if necessary. 90% of the images used in the plugin are loaded directly from the client side, thus optimizing the loading and rendering of the interface and reducing the use of Image Library. Permissions bettertc.admin Exclusive for Admin. It allows you to check if there are new skins to add. You will not appear in the list of authorized players if the option in the settings is activated. bettertc.authlist Shows a button at the top of the TC to check which players are authorized. bettertc.deleteauth Allows you to individually revoke an authorized player. You can give this permission to players if you want them to be able to delete individually. bettertc.use It is the basic degree of use found in the configuration. bettertc.vip It is the level of use for advanced that is found in the configuration. Depending on how you configure it, it makes players with this permission improve/repair/change skin faster. Or it simply costs them less resources. bettertc.repair Displays a button on top of the TC to repair the build automatically. bettertc.repair.nocost No explanation needed I think. (USE WITH CAUTION) bettertc.reskin Allows players to change the skin of their build automatically. Imagine one day you upgrade your entire foundation to container and the next day you regret losing FPS and would like to leave it on normal metal. bettertc.reskin.nocost No explanation needed I think. bettertc.updefault Shows players the default upgrade options. Without SKINS. bettertc.upskin Show players upgrade options with SKINS. bettertc.upgrade Permission to evade blocking of all items. bettertc.upgrade.nocost No explanation needed I think. (USE WITH CAUTION) bettertc.wallpaper Allows players to place Wallpaper. bettertc.wallpaper.nocost No explanation needed I think. (USE WITH CAUTION) Commands There are no chat commands. Everything is managed from the TC interface. Configuration DEFAULT CONFIGURATION { "Use NoEscape Plugin": true, "Use RaidBlock Plugin": true, "GUI Buttons TC - Color Default": "0.3 0.40 0.3 0.60", "GUI Buttons TC - Color Active": "0.90 0.20 0.20 0.50", "GUI Buttons TC - AnchorMin": "0.71 0.862", "GUI Buttons TC - AnchorMax": "0.947 0.892", "Alert Gametip": true, "Alert Chat": true, "Alert Notify Plugin": false, "Notify: select what notification type to be used": { "error": 0, "info": 0 }, "Color Prefix Chat": "#f74d31", "Show Admin Auth List": false, "Show SteamID Auth List": true, "Upgrade Effect": true, "Reskin Enable": true, "Deployables Repair": true, "Downgrade Enable": true, "Downgrade only Owner Entity Build": false, "Upgrade only Owner Entity Build": false, "Upgrade / Downgrade only Owner and Team": true, "Wallpaper placement Cost (Cloth)": 5, "Wallpaper both sides": true, "Force both sides including external sides": true, "Cooldown Frequency Upgrade (larger number is slower)": { "bettertc.use": 2.0, "bettertc.vip": 1.0 }, "Cooldown Frequency Reskin (larger number is slower)": { "bettertc.use": 2.0, "bettertc.vip": 1.0 }, "Cooldown Frequency Repair (larger number is slower)": { "bettertc.use": 2.0, "bettertc.vip": 1.0 }, "Cooldown Frequency Wallpaper (larger number is slower)": { "bettertc.use": 2.0, "bettertc.vip": 1.0 }, "Cost Modifier for repairs": { "bettertc.use": 1.5, "bettertc.vip": 1.0 }, ... ] } Bonus For any problem, doubt, suggestion or assistance do not hesitate to contact me by Discord ninco90#6219 If you need me to configure everything from scratch, according to your tastes, for your server I can also do it for an additional fee. Although you should be able to configure everything yourself$25.00- 194 comments
- 19 reviews
-
- 10
-

-

-
- #builder
- #automation
-
(and 9 more)
Tagged with:
-
Version 1.0.3
6 downloads
Automated Maps - plugin that allows you fully automate map wipe replacements. Plugin will automatically detect server wipe, get next map from configured maps pool and replace it. What this plugin can do? Create voting polls in using Discord API, so players can choose next map listed in map pool. Announce next map using Discord API. Automatically detect wipe. RustMaps integration, plugin can fill map pool using RustMaps.com API, supports custom map config and other paid subscription features. Configuration Language { "Discord_Poll_Title": "Please, choose next wipe map: ", "Discord_Poll_Option": "MAP #{0}", "Discord_Poll_Result_Title": "Vote ended with result: ", "Discord_Poll_MostVoted": "Most voted map", "Discord_Post_Title": "Next wipe map ({0}):", "Discord_Seed": "Seed", "Discord_Size": "Size", "Discord_PreviewLink": "Preview Link", "Discord_MapLink": "[Map Link]({0})" } CONTACT Need help or custom plugin for your server? Contact me using Discord: metangerine ----------------------------------------------------------------------$20.00- 1 review
-
- #automated
- #maps
-
(and 9 more)
Tagged with:
-
Version 3.0.0
4,249 downloads
This script will install a Rust Server on your Windows machine all within one file. The following things are supported and handled by the script: SteamCMD Installation Release and Staging Branch Support Custom Map Support - With the choice of adding the RustEdit DLL during install. Oxide Support (Release Branch Only) Carbon Support Defining an admin post install Creation of StartServer.bat, UpdateServer.bat, and WipeServer.bat files based on user values. How to Use Launch the RustServerInstaller.bat file. Follow the listed prompts. Be sure to use actual file paths (Ex: C:\RustServer) Note: If you do not specify a value for something, the default value will be chosen. For assistance, please open a support case here on Codefling or message me on Discord: lilciv#2944 This script heavily depends on the use of cURL. The following OS versions are supported out of the box: Windows 10 (builds after 17063 - run winver to ensure you're up to date) Windows 11 Windows Server 2019 Windows Server 2022 Windows Server 2025 For Windows Server 2016, 2012R2 and Windows 8/8.1 support, you need to install cURL. (see https://curl.se/download.html) Alternatively, you can use my Powershell edition for older operating systems found on my GitHub - this will work on all of the operating systems listed above. FYI: If you use any sort of Antivirus program that manages SSL certificates, you will need to disable it for this script to run properly. Kaspersky and Bitdefender seem to be two common ones causing issues. Note: If you change your Server Identity name after running the script (the default is "RustServer") - you will need to adjust two lines in the WipeServer.bat file: Line 17 (cd /d server/identity) - change the identity name to your new one. Line 30 (cd /d server/identity) - change the identity name to your new one. Note: It is not recommended to move the install directory of your server after the script has run, as the UpdateServer.bat file will no longer function as expected. While you can manually update the file to reference the new directory, it is generally easier and recommended to run the script from scratch to complete a fresh Rust Server install, and then copy over your server and oxide or carbon folders, ensuring your identity name remains the same. Custom Maps One thing to note about using Custom Maps: Custom Maps MUST have a direct downloadable link, meaning the link must immediately start the map download. For example, https://www.dropbox.com/s/ig1ds1m3q5hnflj/proc_install_1.0.map?dl=1 is a direct download link. For Dropbox links, ensure that the end of the link has "dl=1" and not "dl=0" How To Join Your Server To join your new server, you'll need to type one of the following commands into the Rust F1 console: If your server is hosted on the machine that you are running Rust from: client.connect localhost:ServerPort An example of what you would type when using the default Server Port of 28015: client.connect localhost:28015 If your server is hosted on another machine in your local network: client.connect MachineIP:ServerPort An example of what you would type when using the default Server Port of 28015: client.connect 192.168.1.10:28015 How To Let Others Outside Your Network Join To let others outside your local network join your server, you will need to forward the UDP Server Port and UDP Query Port to your server machine. Along with this, in many cases you will need to allow the required ports through the Windows Defender Firewall. While every Router/Firewall is different, please watch SRTBull's video explaining the process. YouTube Overview Video By SRTBullFree- 20 comments
- 9 reviews
-
- 9
-

-

-
- #rust
- #automation
-
(and 4 more)
Tagged with:
-
Version 1.0.0
358 downloads
This script will install a Rust Server or Client on your Windows machine using SteamDB Manifest IDs. All files are downloaded through SteamCMD. This script will combine all required client or server files into one specified location. That means no manually combining files to have a complete set. How Do I Find the Version I Want? You can review the Facepunch Devblog, which will have important dates that different versions of the game were released. You can take these dates over to SteamDB to find the corresponding Manifest IDs that you want. Navigate to SteamDB. Determine whether you are downloading client files or server files. Client: https://steamdb.info/app/252490/depots/ Server: https://steamdb.info/app/258550/depots/ Click on the Common and Windows 64 depots and locate the Manifest IDs that you want. For example, May 5th, 2022 (Old Recoil) has the following Manifest IDs: Client (Common): 5939934877855656786 Client (Windows 64): 5702227544774217577 Server (Common): 8568126655709130498 Server (Windows 64): 7513979545449517167 How To Use Right click on the RustDepotDownloader.ps1 file and choose "Run with PowerShell" Follow the listed prompts. If you do not input Manifest IDs, it will use the default Old Recoil ones listed above. This is not a way to download Rust for free. The server installation will allow anonymous install, however the client files of the game require Steam Authentication. All files are downloaded directly through Steam's servers. For assistance, please message me on Discord: lilciv#2944 Tested on Windows 10 and Windows Server 2019. NOTE: For Windows 11, you will need to do the following beforehand: Open PowerShell as Administrator Enter the following command: Set-ExecutionPolicy Unrestricted Then press A to confirm. Run the script. It will ask for confirmation. Press R to run it.Free- 2 comments
-
- 1
-

-
- #rust
- #automation
-
(and 7 more)
Tagged with:
-
Version 2.1.8
3,118 downloads
Automate devices and light sources to turn on and off depending on the time of day and toggle them from anywhere using the provided chat and console commands. You can also configure lights to consume no fuel when on, and each type is easily configurable in the config file. Permissions lightson.allowed Granting that to a group or player allows them to toggle the lights for the entire server (Admin level). Example: o.grant group admin lightson.allowed Console Commands lights on - Turn on specified lights (either all for all entities or a specific name) lights off - Turn off specified lights (either all for all entities or a specific name) lights check - Check the lights after reloading the config to allow changes without reload There is a second parameter where you can specify a portion of the light source short name to force all of them to the on or off state, ignoring the config. Example: lights on fireplace -- Turn on all fireplaces regardless of the config settings Chat Commands /lights on - Turn on specified lights (either all for all entities or a specific name) /lights off - Turn off specified lights (either all for all entities or a specific name) /lights check - check the lights after reloading the config to allow changes without reload There is a second parameter where you can specify a portion of the light source short name to force all of them to the on or off state, ignoring the config. Example: /lights check candle -- Turn on all candles if the the flag is appropriate for the time of day Configuration The settings and options for this plugin can be configured in the LightsOn.json file under the oxide/config directory. The use of a JSON editor or validation site such as jsonlint.com is recommended to avoid formatting issues and syntax errors. Console Output set to false will stop messages (other than errors and night toggles) from logging in to the console. These can be set in the JSON, which lets you determine what is turned off and on automatically: BBQs BoomBoxes (deployed and portable) Campfires Candles Cauldrons Ceiling Lights CCTVs Deluxe Christmas Lights Electric Furnace (not for processing, just lights, can instantly cook [to be consistent with other furnaces]) Fire Pits Fireplaces Flasher Lights Fluid Splitters Fog Machines Furnaces Hobo Barrels Heaters Igniters Industrial Combiners (processing, not just lights on) Industrial Conveyors (processing, not just lights on) Industrial Crafters (processing, not just lights on) Industrial Splitters (processing, not just lights on) Industrial Lights (Lamps) Lanterns (which include Chinese Lanterns, Tuna Can Lamps, Lanterns, and Jack'O Lanterns, and Torch Holders) Laser Detectors Laser Lights Mining Quarries Mixing Tables Neon Signs Pump Jacks Reactive Targets Refineries RF Broadcasters RF Receivers Searchlights Simple Lights Siren Lights Smart Alarm Smart Switch Snow Machine Spooky Speakers Storage Alarms Strobe Lights Telephones Vehicle Lifts Water Pumps Water Purifiers Weapon Racks Electric Water Purifiers Valid values are a - always on, d - on during the day only, n - on during the night only, i - do not process this entity. To avoid automatically turning off active processing, there is protection you can set to true for the following: BBQs Campfires Cauldrons Fire Pits Fireplaces Furnaces (including electric ones) Hobo Barrels Mixing Tables Refineries If there is anything inside these (including fuel), they will not have their state changed. You can still force them off by the name. For example: /lights off furnace Additional control parameters: Console Output Check Frequency (10-600) Dusk Time (0-24) Dawn Time (0-24) Use Zone Manager Plugin Boom boxes On (to toggle them to play) Notes Exciting New Feature: Now, with optional instant cooking, fuel can be optional. New configuration for instant cooking, optional fuel. Simple toggle on, and it will instantly cook the contents. The most over-powered cooking in Rust. If you use this feature, you do not need to set Protection to true, as it will not be needed. Note: Instant cooking does not work with Industrial equipment. Please cook (instantly) and put the materials in a box as the source of ingredients. New Feature: Players can toggle on/off any light that is not electric based if it is empty. Useful for cave bases and emergency lighting. Note: if the item is set to ignore, you can't do this. Note: the timed process will turn it back on/off the next time it runs. Quick Hack for players to note: placing any items in an "oven" with protections set to true will prevent the light source from being toggled by the plugin. So you could turn on/off an oven and then place a single stone (for example), and it will stay in that state. Note Ovens include all furnaces, cauldrons, BBQ, campfire, fireplace, fire pits, oil refineries, and hobo barrels. Operators, please note the protection flag now has two uses. Hopefully, this is acceptable. A big thank you to Wulf and k1lly0u for their awesome lights plugins. If you need fine-grained control of lights, they are both superior options. If you want fuel use for lighting, then AutoFuel is an awesome choice. My understanding of lights came directly from reading these plugins, and they inspired me to make this low load and slightly more inclusive of entities plugin. If it generates lights or effects, I tried to include it. I include a lot of non-light devices (Water Pumps, Fog Machine, Snow Machine, Spooky Speakers, Strobe Lights) to allow operators to have fun with players. I am open to suggestions to improve this plugin as long as it does not hurt performance. I use it on my PVE server, and it has a lot of lights. By using "always on" the load of the lights is light on the server. It can still be brutal on the client due to the graphics load. Night Toggle (turning the lights on and off is reasonably efficient, but can spike server load). It is nice for role-playing, but use "always on" if you want the best server-side performance. This plugin is not designed to support user-level permissions. The only permission is for admin access. This is to minimize the overhead for efficient processing. There are alternative plugins with permissions if you want it as a VIP perk. Please do not ask for player permissions. It will not be added. If the server lights are on (either via "always on" or the night toggle is on) and you place a light source you have selected to be on, it is turned on when placed. This avoids having to periodically turn the lights on to catch newly placed lights. This alters fuel requirements to zero through the methods it is using to toggle the lights, since you are removing player agency around fuel usage. Note: Furnaces etc., turned on will not process their contents. Just look active and produce light. You are giving free light, but not free processing (unless you activate InstaCook). Simply turn them off and back on for normal processing. It is important to let players know this, as they may initially be confused or frustrated. Since this plugin is toggling animation flag states (where ever possible), it allows things like hobo barrels to light up with no fuel in them. It does some "hacky" flag settings to avoid needing fuel in other light sources. It is not elegant, but efficient. If you want free fuel, NoFuelRequirements or AutoFuel are good solutions, this plugin tries to avoid altering the fuel level in entities other than hats and jack o lanterns. I only add fuel where the toggle of animation state trick is not working in that use case. It is best to set any item being processed by another plugin to ignore to avoid conflicts. Hats and Jack O Lanterns usually require at least one fuel in them to allow players to toggle them. Toggling Lanterns (which includes Jack O Lanterns) with the commands do not need fuel. If you are using the commands to turn a light source on, and it is already on, it is not altered. If you are turning a light source off with the commands, and it is already off, it is not altered. Toggling lights on should not mess up processing content, as their state is not changed. It will mess up processing if you toggle off and then back on for an entity that processes things (grills, furnaces, refineries, campfires, fire pits, and fireplaces). Since I added the Night Toggle feature, I also added Protection for light sources that also process contents. I would recommend you leave these to true. Doing so will not turn these off when dawn happens. That is, to avoid annoying players by interrupting their processing. The side effect is they will always appear if they are set to automatically turn on in the configuration. Choose carefully what you will configure to be controlled if you plan to use the off command or Night Toggle. If you are going to use the off command, I recommend you do not include Furnaces, Grills, or Refineries, as it will stop processing if they are in legitimate use. If folks tend to cook in campfires, fire pits, and fireplaces, you may want to skip them as well if you plan to use the off command. Honest, I normally just turn items not normally used to do processing on and leave them on, as it has the smallest server load and will not annoy players. It is important to consider the consequences of turning things off or toggling them on and off. Check Frequency controls how often the plugin checks for the night or to toggle the lights in seconds. It has a relatively small load unless there are lights to process. If you want the lights on at a very precise time, then a lower number (more frequent check) will help increase the accuracy. I like to light up all the hobo barrels on the map to give a nice effect. That is why I originally wrote this. It should cover all light sources, please let me know if any are missing. I will do my best to ensure this keeps functioning as entities keep changing. The light source name tries to match, so "a" would match all light sources with "a" in their name. Use "all" to force all lights server-wide regardless of the configuration setting. Support for Zone manager via adding zones to \oxide\data\LightsOn-Zones.json Example: ["supermarket_1","supermarket_2","gas_station_1","miningoutpost_1","miningoutpost_2","supermarket_3","gas_station_2","gas_station_3","miningoutpost_3","sphere_tank","launch_site"] LightsOn.jsonFree- 98 comments
- 2 reviews
-
- 11
-

-

-
- #lighting
- #automation
- (and 6 more)
-
Version 1.0.8
3 downloads
This plugin introduces a generator system for Rust’s oil rigs, allowing players to activate drills that extract specific items. Easily customizable through the config, players can start the oil extraction process and receive items directly from the rig. Watch the demo video and explore the configuration options for complete customization! Config { "Large Oil Settings": { "Generator Fuel Item": "lowgradefuel", "Running Tick Time Per Fuel": 10.0, "Amount Of Fuel To Use Per Runing Tick": 10, "Oil Tick Time InSeconds": 10, "Amount Of Oil To Output Per Oil Tick": 5, "Oil Item To Output": "crude.oil", "Oil Item Output DispalyName": "", "Oil Item Output Skin": 0, "Disable Toast Message": false, "Disable Spawning. Will need to manualy ent kill entitys": false }, "Small Oil Settings": { "Generator Fuel Item": "lowgradefuel", "Running Tick Time Per Fuel": 10.0, "Amount Of Fuel To Use Per Runing Tick": 10, "Oil Tick Time InSeconds": 10, "Amount Of Oil To Output Per Oil Tick": 5, "Oil Item To Output": "crude.oil", "Oil Item Output DispalyName": "", "Oil Item Output Skin": 0, "Disable Toast Message": false, "Disable Spawning. Will need to manualy ent kill entitys": false }, "Version": { "Major": 1, "Minor": 0, "Patch": 5 } }$15.00- 5 comments
-
- 1
-

-
- #extraction
- #automation
-
(and 3 more)
Tagged with:
-
Version 1.1.0
25 downloads
About Team Share Teamshare automatically authorizes team members on Code Locks, Tool Cupboards, and Auto Turrets upon deployment. Features toggles for every function so that the end user decides which feature is enabled or disabled. Toggle Codelock On or Off -- Enables or disables the sharing of Codelocks Toggle Cupboard On or Off -- Enables or disables the sharing of Cupboards (TC's) Toggle Turret On or Off -- Enables or disables the sharing of Turrets Enable Guest Code On or Off -- Enables or disables the automat input of guest code's Quiet Mode On or Off - Quiet mode stops all messages being posted in chat Supports WelcomeController V2 with full support for theme editor and panel support. Simply add a new addon panel and add TeamShare. Enable the setting in the config json "Using WelcomeController": true, AddonName for WelcomeController : TeamShare Permission teamshare.use teamshare.codelock teamshare.cupboard teamshare.turret teamshare.guest Configuration { "Use Permissions": true, "Using WelcomeController": false, "Debug Mode": false, "Messages": { "NoPermission": "You don't have permission to use this command.", "InvalidCode": "Invalid code. Please enter a 4-digit numerical code.", "CodeSet": "Code set to: {0}", "GuestCodeSet": "Guest code set to: {0}", "NoCodeSet": "You have not set any code. Use the UI to set a code.", "CodeAutoLocked": "Code lock placed with code {0}.", "CodeAutoLockedWithGuest": "Code lock placed with code {0} and guest code {1}.", "CupboardAuthorized": "{0} authorized on the Tool Cupboard", "NoEscape.RaidBlocked": "Cannot set codes during raid block.", "NoEscape.CombatBlocked": "Cannot set codes during combat block." }, "UI Settings": { "UIBackgroundColor": "0 0 0 0.6", "UIPrimaryColor": "1 0.4 0 0.5", "UIDangerButtonColor": "1 0 0 1" }, "Commands Settings": { "Open UI Command": "teamui", }, "AddonName for WelcomeController": "TeamShare", "NoEscape Integration": { "Block During Raid Block": true, "Block During Combat Block": true } }$10.00-
- #automation
- #team
-
(and 2 more)
Tagged with:
-
Version 2024.5.2.1658
235 downloads
SAVE 13% WHEN BUYING THE BUNDLE NOW SUPPORTING PROCGEN AND CUSTOM URL BASED MAPS ! This plugin will allow you to setup automatic server wipes without requiring external scripts. This plugin is very useful for any server owner but I'm positive that it will be really useful for those hosting providers running panel based game instances where you do not have full access to customize the server or the provided wipe tool is very limited. You should have a look at the suggested plugins for Oxidation's Scheduler which is a perfect fit for a fully in-game automatic wipe process. The plugin also allows you to set a list of seeds that will be used at server wipe to select the new map seed. You can define as many different wipe types as you'd like on the config file like so: This example is for a "forced" wipe. In order to execute the wipe type on the rcon console "wipe forced". "Forced": { "Restart": 120, "Message": "A server wipe is being executed, we'll be back shortly", "Game": { "Blueprints": true, "Logs": true, "Map": true, "PlayerDeaths": true, "PlayerIdentities": true, "PlayerStates": true, "PlayerTokens": true }, "Plugins": { "Convalence": true, "Data": true, "Groups": true, "Language": true, "Logs": true, "Users": true }, "Files": [ "my/custom/path/this_file_will_be_deleted.json" ], "Blacklist": [ "carbon/data/this_file_will_never_be_deleted.json" ] } This example is for a "weekly" wipe. In order to execute the wipe type on the rcon console "wipe weekly". "Weekly": { "Restart": 120, "Message": "A server wipe is being executed, we'll be back shortly", "Game": { "Blueprints": false, "Logs": true, "Map": true, "PlayerDeaths": true, "PlayerIdentities": false, "PlayerStates": true, "PlayerTokens": false }, "Plugins": { "Convalence": false, "Data": true, "Groups": false, "Language": true, "Logs": true, "Users": false }, "Files": [ "my/custom/path/this_file_will_be_deleted.json" ], "Blacklist": [ "carbon/data/this_file_will_never_be_deleted.json" ] } This is a standalone Harmony patch, Oxide installation is optional. Copy the Oxidation.Wiper.X.dll file into your HarmonyMods folder and restart your server. At the first server start after installing the patch a new configuration file Oxidation.Wiper.json will be created at the HarmonyMods folder. What is Harmony ? Harmony is a library for patching .NET code during runtime, it directly manipulates game code (CIL) without any additional abstraction layer such as Oxide. The direct patching of the game's byte code allows more performant modding as developers no longer need to rely on third party code, events or hooks to build custom functionality.$4.99 -
Version 1.0.1
2 downloads
Take your Rust base automation up a notch with Usable Droppers, a simple yet powerful plugin that turns regular containers into functional droppers. These droppers continuously drop items with full customization, making them perfect for automatic setups like furnace farms or creating seamless item-dispensing systems. Usable Droppers pairs perfectly with Usable Hoppers to create an efficient, hands-off system for managing your resources. Whether you're automating resource processing or need an easy way to drop items, Usable Droppers gives you the flexibility to control how and when items are dispensed. With a detailed configuration, you decide the drop interval, item types, and much more, making it easy to fit into any server setup. Chat commands: /ud - Shows available UsableDroppers commands. /udset - Sets the container you are looking at to a dropper. /udremove - Remove the dropper from the container you are looking at. /udlist - Display all droppers you own. /udsetmode <player|direction|random> - Sets the dropper mode to specify drop location of the items. Player mode will save the current player location and the dropper will start to drop items there. Direction drops items in a specific direction chosen by the player and random will drop items in a random sphere around the container. /udsetdirection <forward|backward|left|right|up|down> - Specify the direction if chosen direction mode. /udrange - Display the drop location and dropper range. Admin commands: /udclearall - Removes all droppers in the game. /udclearplayer <playername or steamid> - Remove a specific player's dropper. Permissions: Config: Allowed containers for droppers - Which containers are allowed to be turned into droppers. Available drop modes - Which drop mode the user's will be able to choose. Command cooldown - The cooldown between command usage (in seconds). Debug mode - Used for detailed feedback in console. Drop interval seconds - How often the dropper will attempt to drop items. Higher values will increase performance. Drop radius - Drop radius when the user has random drop mode selected Item types allowed - Which types of items that the dropper will drop. Max distance for commands - How close to the dropper/container you need to be to use commands. Max droppers per player - The number of droppers available to each player. Max items per tick - The number of item stacks the dropper will drop each tick. Max range for player mode - The maximum range of player mode, from the dropper to the player. If this is higher than max distance for commands then this will be ignored. Default config. { "Allowed container types for droppers": [ "woodbox_deployed", "box.wooden.large", "furnace", "storage_barrel_c", "storage_barrel_b" ], "Available drop modes": { "direction": true, "player": true, "random": true }, "Command cooldown": 0.0, "Debug mode": false, "Drop interval seconds": 5.0, "Drop radius": 2.0, "Item types allowed": { "ammunition": true, "attire": true, "blueprint": true, "component": true, "construction": true, "electrical": true, "food": true, "fun": true, "items": true, "medical": true, "misc": true, "resources": true, "tool": true, "traps": true, "weapon": true }, "Max distance for commands": 15.0, "Max droppers per player": 5, "Max items per drop": 3, "Max range for player mode": 15.0 }$7.99 -
Version 1.0.2
15 downloads
**I'm working on config, so you can easily adjusts limits of your designated groups** Why Is It Essential for Your Rust Experience? Are you tired of managing pesky water pumps and purifiers, only to face server lag in your Rust adventures? Introducing OPSprinkler, the plugin that revolutionizes your farming experience by allowing sprinklers to work seamlessly without any water! Regardless of if you have these issues or not, this plugin will streamline farming and make it more manageable. So it is still useful on those servers that may not run a lot of plugins. Convenience With OPSprinkler, you can now place up to 20 sprinklers effortlessly. Forget about the hassle of maintaining water supplies—your crops will be watered automatically, reducing lag on your server and enhancing your gameplay experience. Plus, for your VIP players, we offer a special feature to increase the limit of allowed sprinklers to 40! Want even more flexibility? Customize your experience with multiple VIP tiers I can help you with at any moment. Whether it's Bypass+, Bypass++, VIP, VIP+, or even VIP2X. Just for examples. The choice is yours! Just reach out to me and we can make it work for you! Effects/Statistics It's crucial to note that while using the /deletesprinklers command will remove your sprinklers, it does not refund the metal fragments spent on them. This is something I'm currently working on, so if you'd like this feature, please reach out and let me know! The benefits of reduced lag and increased convenience far outweigh this small issue. Commands at Your Fingertips - My plugin is user-friendly, giving you easy commands to manage your sprinklers: /turnonsprinklers - Turns on all of your sprinklers. - All of your sprinklers have been turned on. /turnoffsprinklers - Turns off all of your sprinklers. - You have turned off all of your sprinklers. /deletesprinklers - Deletes all of your placed sprinklers. - You have deleted all of your sprinklers. Of course you can use bind anykey chat.say /command here to make it even easier Permissions - With just a simple command, you can grant users additional privileges: o.grant user <username> sprinkler.bypass - Allows this player to bypass the sprinkler limit and access more than the standard allowed sprinklers. Does not create unnecessary lists when turning on and off sprinklers. Transform Your Gameplay! Don't let water management slow you down. Experience heightened performance and enjoy a smoother Rust experience with OPSprinkler. Enhance your in-game experience today and turn your farming aspirations into a reality! Feel free to reach out if you have any customization requests or questions! Let's make your Rust server the best it can be with OPSprinkler! This also works in conjunction with LimitEntities Plugin. Thanks! Have a great day! -Jesh$10.00- 2 reviews
-
- 1
-

-
- #sprinkler
- #farming
-
(and 1 more)
Tagged with:
-
Version 1.0.2
8 downloads
Take your Rust base automation to the next level with Usable Hoppers, the plugin that turns any containers into fully functional hoppers that automatically collect items from the ground within a configurable range. While Usable Hoppers is perfect for setting up an automated horse farm—where it gathers horse poop and deposits it into a composter—it’s versatile enough for other tasks too. Whether you're automating gathering dropped resources, or organizing loot from the battlefield, Usable Hoppers will save you time and effort. The plugin is designed to automate item collection directly from the ground, making resource management in your base smoother and more efficient. Usable on regular chests, furnaces, lootable crates and even airdrops. Fully customizable, you can control the pickup radius, item types, and collection frequency, giving you complete control over how it works in your base. Simplify your Rust gameplay and let Usable Hoppers do the heavy lifting! Chat commands: /uh - Shows available UsableHoppers commands. /uhset - Sets the container you are looking at to a hopper. /uhremove - Remove the hopper from the container you are looking at. /uhlist - Display all hoppers you own. /uhrange - Display the range of your hoppers. Admin commands: /uhclearall - Removes all hoppers in the game. /uhclearplayer <playername or steamid> - Removes a specific player's hopper. Permissions: Config: The config is easily configurable to your liking and performance requirements. Allowed containers for hoppers - Which containers allowed to be turned into hoppers. Command cooldown - The cooldown between command usage (in seconds). Debug mode - Used for detailed feedback in console. Hopper radius - The hopper pickup range, in a spherical dome. How often the hopper collects items - How often the hopper will attempt to pickup items in range. Higher values will increase performance Item types allowed - Which types of items that the hopper will pickup. Max hoppers per players - The number of hoppers available to each player. Max items per tick - The number of items the hopper will pickup at each tick. Default config. { "Allowed containers for hoppers": [ "woodbox_deployed", "box.wooden.large", "furnace", "storage_barrel_c", "storage_barrel_b" ], "Command cooldown": 0.0, "Debug mode": false, "Hopper radius": 3.0, "How often the hopper collects items": 10.0, "Item types allowed": { "ammunition": true, "attire": true, "blueprint": true, "component": true, "construction": true, "electrical": true, "food": true, "fun": true, "items": true, "medical": true, "misc": true, "resources": true, "tool": true, "traps": true, "weapon": true }, "Max hoppers per players": 5, "Max items per tick": 10 }$7.99 -
Version 1.0.0
32 downloads
Rust Wipe Bot Rust Wipe Bot is a tool that automates the process of wiping your Rust server. It works by using the Pterodactyl or Pelican panels' Schedules feature to send commands to the bot, which then triggers different actions on your server. It is also possible to send commands to the bot directly in the command prompt on the panel page. The bot is compatible with any Pterodactyl or Pelican Rust egg, as it utilizes the panel API to perform actions such as removing files, sending in-game messages, or executing commands on your Rust server. Know working Rust eggs: Rust Autowipe Rust All-in-One Pterodactyl Egg (Oxide/Carbon) One of the advantages of the bot is that it doesn't need to be restarted when you make changes to the configuration files. The files are loaded dynamically when a command is called. Additionally, the bot is capable of handling multiple servers and commands simultaneously, thanks to its ability to run each command in its own thread. The supported configuration file formats for the bot are .yml or .yaml and is located in the config folder, where you also can find a example. It is strongly recommended to create one configuration file for each wipe schedule. Available commands: command <config file> <command to execute> - Execute a command on the server. message <config file> <message to send> - Send a in-game message to the server, useful for notifying players about an upcoming wipe. wipe <config file> - Triggers a server wipe. quit - Shutdown the bot. How to use the bot: 1. Make a copy or edit the example configuration file inside the config folder to meet your needs. 2. Go to Schedules and create a new schedule. 3. Add a new task with the action "Send command" and add a command to the payload: command <name of config file> o.reload * or message <name of config file> Server will wipe in 10 minutes. or wipe <name of config file> Note: If more than one task is provided within the scheduler don't forget to set the time offset. How to install: 1. Create a new server using the provided egg called "egg-rust-wipe-bot.json". 2. Upload the "rustwipebot.zip" archive to the server's Files section. Once uploaded, you can unarchive the zip file or trigger a reinstall in the server's Settings section. 3. Navigate to the Files section and modify the .ENV file with the panel url and a client API key. Note: You can create a client API key under your profile on the panel website, Account Settings -> API Credentials. 4. Start the bot. During startup, it will automatically install all the necessary dependencies. Example of a configuration file. # Server identifier (abbreviated UUID) server_id: abcd1234 # If the server do not shutdown properly by any reason, the bot will attempt to kill the server process. force_kill: false # Set to true if you want to reinstall the server. This should not be used unless you want to reinstall the server for any reason. reinstall_server: false # Remove specified files or folders. Supports wildcards. files_to_remove: [ server/rust/player.deaths.*.db, server/rust/player.deaths.*.db-wal, server/rust/player.identities.*.db, server/rust/player.identities.*.db-wal, server/rust/player.states.*.db, server/rust/player.states.*.db-wal, server/rust/player.blueprints.5.db, server/rust/player.blueprints.5.db-wal, server/rust/proceduralmap.*.*.*.map, server/rust/proceduralmap.*.*.*.sav, server/rust/proceduralmap.*.*.*.sav.*, server/rust/sv.files.*.db, server/rust/sv.files.*.db-wal, oxide/data/Kits_Data.json, oxide/data/NTeleportationHome.json, oxide/logs/*.log, oxide/logs/*.txt, ] # Set the server seed(s) and size to use for the world. # Add "random" as a seed to generate a random seed between 100000 and 999999, or a custom range to use like 3000-4000. # If multiple seeds are provided, the bot will randomly choose one, but it will never use the same seed unless only one seed is provided. world_seeds: - seed: 153525773 size: 1000 - seed: 3000-4000 size: 1500 - seed: random size: 2000 # Custom world URL(s) to download and install. This overrides the world seed and size. # If multiple map URLs are provided, the bot will randomly choose one, but it will never use the same map unless only one map URL is provided. custom_world_urls: [] # Set custom commands to run in the wipe command before the server stops and after the server starts. run_commands: before: [o.reload *] after: [ kit reset, ecowipe, ]$9.99 -
Version 1.0.7
105 downloads
Features Dynamic Population Control: Automatically updates the server’s maximum player limit based on the current number of players, ensuring the max players setting is always one step ahead of the current population. Configurable Maximum and Minimum Population: Allows setting absolute maximum and minimum population limits that the server will not exceed or fall below, regardless of other calculations. Configurable Cooldown: Includes a cooldown mechanism to prevent the server settings from being updated too frequently, helping to maintain server performance. Console Message Toggle: Allows server administrators to enable or disable console messages when the max population is adjusted to reduce log clutter. Efficient Timer Management: Implements a smarter timer mechanism that avoids unnecessary recalculations when multiple players connect or disconnect in quick succession. Configuration The plugin uses a JSON configuration file which is automatically generated if it does not exist. Here are the default settings and descriptions for each configurable option: { "MaxPlayersOffset": 1, "CooldownPeriod": 10.0, "MaximumPopulation": 200, "MinimumPopulation": 1, "ConsoleMessagesEnabled": true } MaxPlayersOffset: The number of player slots to add to the current player count when setting the maximum players (default is 1). CooldownPeriod: The cooldown period in seconds between adjustments to prevent performance degradation (default is 10 seconds). MaximumPopulation: The highest number of players that the server can support at any time (default is 200). MinimumPopulation: The lowest number of players that the server will not fall below (default is 1). ConsoleMessagesEnabled: Whether to log changes to the server’s max players in the console (default is true). Commands This plugin operates in the background automatically and does not require any commands to be used by players or administrators. Permissions No permissions are required for this plugin as it is designed for server-side configuration and operation. Installation Download the ElasticPopulation.cs file from the ElasticPopulation page on uMod. Place the file in your RustServer/oxide/plugins directory. Use the command oxide.reload ElasticPopulation to load the plugin. The plugin will automatically create a default configuration file if one doesn’t already exist. Usage After installation, the plugin will function automatically. Server administrators can modify the MaxPlayersOffset, CooldownPeriod, MaximumPopulation, MinimumPopulation, and ConsoleMessagesEnabled in the configuration file to tailor the plugin to their server’s needs. Troubleshooting If you encounter issues, check the server console for any error messages related to the ElasticPopulation plugin. Ensure that the configuration file is formatted correctly and that you have the latest version of the plugin.Free- 1 comment
-
- #population
- #automation
-
(and 1 more)
Tagged with:
-
Version 2.0.0.0
39 downloads
Rust Wipe Tool Master is a tool for server owners or admins who run their Rust server on Windows based machines, be it locally or on a server, that want to save some time on wipe days. 4 easy steps: #1 - Simply enter the location of the server identity you wish to wipe. #2 - Get the list of files for plugins installed on your server with the "Get Plugin Files" button. #3 - Select which files you wish to delete for the wipe. #4 - Click "Wipe Server" and confirm. Your server is now wiped, simply change your map size or seed as you like and boot up your server. Some changes in the latest update. (v2.0.0.0) The above instructions are still accurate, but for the new functionality, the Help button explains the new functions. Disclaimer: There are files that will show up on your list if you use the Advanced checkbox, that if you delete it could break your server, know what files you are deleting and what they are for. Any comments, suggestions or if you need help, message me! Attention: I am aware that Windows Defender doesn't like the latest version, I can assure you the results are false positives. Here is a scan: https://www.virustotal.com/gui/file/254e60904fa9a84cb581afcc7023742be1b8f30428e407d6002131e3c7ad2912$6.09 -
Version 1.2
241 downloads
By installing this addon, that was balanced and made exclusively for my pre-configured 2x Rust server, you will have three VIP roles automatically installed. These roles are: KING Role: [KING] Tag in chat with a colorful name. Ability to change the color of their name. Access to sign artist (Allows importing images on signs). TP cooldowns reduced by 5 seconds compared to an average player. Can set and have access to three additional homes compared to an average player. Will have an exclusive KING kit. Will have access to MASTER and VIP kits, totaling three kits. Kits can be used only 3 hours after wipe. Each kit has a 12-hour cooldown before it can be used again. MASTER Role: [MASTER] Tag in chat with a colorful name. Ability to change the color of their name. Access to sign artist (Allows importing images on signs). TP cooldowns reduced by 5 seconds compared to an average player. Can set and have access to two additional homes compared to an average player. Will have an exclusive MASTER kit. Will have access to the VIP kit, totaling two kits. Kits can be used only 3 hours after wipe. Each kit has a 12-hour cooldown before it can be used again. VIP Role: [VIP] Tag in chat with a colorful name. Ability to change the color of their name. Access to sign artist (Allows importing images on signs). TP cooldowns reduced by 5 seconds compared to an average player. Can set and have access to two additional homes compared to an average player. Will have an exclusive VIP kit. Kits can be used only 3 hours after wipe. Each kit has a 12-hour cooldown before it can be used again. Please note that this order reflects the features and functions of each role, with KING having the most privileges, followed by MASTER, and then VIP.Free -
Version 1.0.0
498 downloads
ComTimer is a plugin that runs console commands after an amount of time. Good for automating events quickly and easily Set the commands you want to run into the config list. Set a timer upper limit and a timer lower limit and the plugin will pick a number between and countdown... on completion it will run a command from the list and start the whole process over again. any command that you can run in rcon you can run with this. Configuration Default configuration is as follows: { "Command List": [], "Upper Time In Seconds": 500.0, "Lower Time In Seconds": 200.0 } Setting a single command: { "Command List": ["say Welcome to the server"], "Upper Time In Seconds": 500.0, "Lower Time In Seconds": 200.0 } Setting more then one command: { "Command List": ["say Welcome to the server","callheli","giveall scrap 1"], "Upper Time In Seconds": 500.0, "Lower Time In Seconds": 200.0 } Works well with plugins like CustomHeliTiers if the plugin doesn't have its own spawn timer: { "Command List": ["callheli 1","callheli 2","callheli 3","callheli 4","callheli 5","callheli 6"], "Upper Time In Seconds": 500.0, "Lower Time In Seconds": 200.0 }Free- 15 comments
-
- #admin
- #admin tools
-
(and 6 more)
Tagged with:
-
Version 1.0.2
21 downloads
NO LONGER FOR SALE ! Need help with watching other players? Automatically? On demand? Hello, I present you Watchdog. What is Watchdog ? A plugin/mod for your server, whose whole purpose is to record players on demand An essential tool for server admins Why to use Watchdog ? > One of the main problem with Rust and any game in general is always those pesky cheaters > But catching cheaters requires constant watching and making sure that the person being reported is indeed cheating > Watchdog solves this problem! > You as an admin may never even join the server if you wanted, and yet, you still can find and ban the cheaters, almost entirely from Discord! Features of Watchdog 24/7 Demo recording Very customizable triggers for starting a recording & managing that recording Very customizable combatlog saving Notifications of triggers & events entirely in Discord Compression! Watchdog can compress the demo files and save on avarage 70% of your machine's disk space Memory usage control Disk usage control (with Hard Limit for when your VPS/VM is limited) How to use Watchdog ? > After a recording of a player is saved > Just get the .dem file and place it in your 'demos' folder which is located in Rust's game folder > Go in game and type in the console 'demo.browser' > Thats it, you can now watch the demo Section 1: Hardware Recommended server/VPS/VM hardware: - The more RAM, the more demos can be recorded simultaneously without triggering the memory control, also better performance when compressing demos. - At least 4 virtual cores are recommended. Rust's server is well known to not utilize multithreading technologies, Watchdog is heavily optimized for multithreading. - Disk space. I really mean it, A LOT is needed, the more the better! Watchdog is able to produce over 20gb/hour of data for 300 player server (even with compression turned on). The more disk space you have the more demos can be stored on your server. Of course Watchdog is optimized for limited systems as well, so it has a Hard Limit option which will limit the data production with demos. - Fairly powerful CPU. While this may not be needed for non-compressed demos, the compression of demos is pretty computationally intensive, as the algorithm used for compressing is aggressive (LZMA) All of the recommendations are based on the testing I've done on my machine, you need to do your own testing to see what you need. The recommended hardware is just that, recommendation. My recommendations might even be incorrect. Section 2: Software Because of the insane capabilities of Watchdog, it can generate a really big amounts of data. So for this reason Watchdog should be used with other custom software for ease of use. This is not required, but recommended. This includes: - A discord bot that can read the combatlog file format and the compressed demos. This can be found here: https://codefling.com/discord-bots/watchdog-discord-bot Section 3: Installation This is a Harmony mod, its not an oxide plugin. Watchdog works with full-vanilla servers and with Oxide servers! On Windows: - To install Watchdog you need to place the 'Watchdog.dll' file in your HarmonyMods folder, and either restart the server or type 'harmony.load Watchdog' which will dynamically load Watchdog while the server is running. On Linux: - To install Watchdog you first need to set your terminal emulator to 'xterm', this is done with the following linux command: 'export TERM=xterm'. IMPORTANT: If the terminal emulator is not xterm Watchdog WILL FAIL to load, this is because of a bug with Mono - After that place the 'Watchdog.dll' file in your HarmonyMods folder, and either restart the server or type 'harmony.load Watchdog' (NOTE: On linux this name is case-sensitive) which will dynamically load Watchdog while the server is running. After watchdog runs for the first time a folder with the name 'Watchdog' will be created in the root folder of the server. Inside this folder there will be 2 folders and 1 file named 'config.json', don't forget to change the default config to your taste, and if you want you can change the localization file with your custom messages More on this in sections 4 and 5 ... Section 4: Configuration Before we start with the configuration, remember that if you change the config file, in order to see the changes you need to either reload Watchdog with: 'harmony.load Watchdog' or restart the server. NOTE: There is a bug with the Harmony loader in Rust's Dedicated Server and sometimes (unpredictable) when you load Watchdog it will not be loaded fully and might have strange bugs, this is fixed with a server restart. If you are familiar with JSON every setting is a string. (even if its a number) If you are not familiar with JSON, just dont delete the quotes ("") at the most right & left of the setting and type only in between them, always! Everything is non case-sensitive, except webhook URLs in the Feedback settings. The configuration file is split up into sections for easier presentation, these sections are the following: - General - Main settings of Watchdog - Specific - Settings that are specific to what main setting was chosen - Optimization - Settings for optimization - Limit - Limiters for Memory and Disk usage - Privacy - Privacy related settings - Feedback - Watchdog feedback info, mostly discord information In general settings section: - recording_mode When and how to record players, you might want to record players 24/7 or only when they kill something, this is the setting you use for that This setting should be a number and can be one or combination of the follwing: 0 : Always - Players will be recorded 24/7 while they are in the server 1 : On Kill - Players will be recorded only when they have killed X amount of players/scientist. If this setting is selected, 'include_scientists' and 'kill_threshold' options from specific settings will be used 2 : On Report - Players will be recorded only when they have been reported X amount of times. If this setting is selected, 'report_threshold' setting from specific settings will be used 4 : On HitArea - Players will be recorded only when they have hit a player/scientist in X area of their body, X amount of times. If this setting is selected, 'include_scientists', 'hit_areas' and 'hit_count_threshold' options from specific settings will be used 8 : On Stash - Players will be recorded only when they have uncovered X amount of stashes. If this setting is selected, 'stashes_threshold' and 'remember_stash_owner' options from specific settings will be used You can use these triggers individually or combine them, if you want to combine them you just add the numbers together. For example if you want to record OnKill and OnReport you will add them up, 1 + 2 = 3, so you type 3 in the config. If you want to record on every trigger its all of them added up, which is 15 - recording_timout When to stop the recording after being triggered, this is applicable only when 'recording_mode' is not Always This setting should be a time, this is in the format <number>s<number>m<number>h, set to 0 to be infinite (until user disconnects) Examples: If you want to record someone for 30 minutes on recording trigger "recording_timout": "30m" If you want to record someone for 90 minutes on recording trigger "recording_timout": "1h30m" or "recording_timout": "90m" If you want to record someone for 2 hours, 30 minutes and 20 seconds on recording trigger "recording_timout": "2h30m20s" the order can also be different "recording_timout": "30m20s2h" If you want to record someone until they disconnect on recording trigger "recording_timout": "0" - combatlog_saving If you want to save the combatlog of players This setting can be one of the following: - never : This setting is off and will not save anything to disk - on_humanoid_combat - Saves combatlog of any combat to a player or scientist - on_player_combat - Saves combatlog of any combat to a player - on_humanoid_kill - Saves combatlog of killing a player or scientist - on_player_kill - Saves combatlog of killing a player - always - Saves every combatlog of every player to disk, this includes someone hitting a stone wall for example When any of the kill settings are set, the setting 'combatlog_history' from specific settings will be used to determine how many logs (including body hits) in the past are to be saved when someone kills a target This is for example if 'combatlog_history' is set to "10" and 'combatlog_saving' is set to "on_humanoid_kill", when a player kills a scientist or a player, the combatlog of that entire fight will be saved with up to 10 older hits, so the last 9 combat logs (anything, including stone wall hits) and the last kill hit log In specific settings section: - include_scientists Should scientists be included in the trigger filter, this is applicable to 'recording_mode' setting with OnKill and OnHitArea This should be a yes/no answer For example: "include_scientists": "yes" You can use a short form of 'y','n' or '+','-' or 'true','false' or 't','f' and there is more - kill_threshold How many kills to make to trigger a recording This should be a number For example: "kill_threshold": "5" - report_threshold How many reports to receive to trigger a recording This should be a number For example: "report_threshold": "2" - hit_areas Which HitAreas to watch for. This is applicable to 'recording_mode' setting with OnHitArea This should be a number and can be a combination 1 : Head 2 : Chest 4 : Stomach 8 : Arms 16 : Hands 32 : Legs 64 : Feet To select multiple again as in recording_mode setting you just add up the numbers For example if you want to watch for headshots, chest and stomach hits you will do: 1 + 2 + 4 = 7 - hit_count_threshold How many times a player needs to hit someone in 'hit_areas' areas in order to trigger a recording This should be a number For example: "hit_count_threshold": "2" So with this example and the one before if someone hits a player/scientist (depends on setting) in the head,chest or stomach 2 times or more they will start being recorded - stashes_threshold How many stashes should a player uncover to trigger a recording This should be a number For example: "stashes_threshold": "2" - remember_stash_owner If a player uncovers their own potentially forgotten stash, should they trigger a recording This should be a yes/no answer For example: "remember_stash_owner": "yes" I recommend setting this to 'yes' always - combatlog_history How many combat logs to save when a kill event is triggered in 'combatlog_saving' setting This should be a number For example: "combatlog_history": "10" For example: Player A kills Player B, but in the process of their fight, Player A hits another player behind Player B, you can see it, with this setting you can see up to X amount of combatlog hits before their fight finished In optimization settings section: - compress_recorded_demos Should the saved demos be compressed. Compression is saving ~70% of space but uses more CPU & RAM This should be a yes/no answer For example: "compress_recorded_demos": "yes" - compress_recorded_demos_thread_model If 'compress_recorded_demos' is turned on, should the demo be compressed on the main server thread or on a separate thread This should be one of the following values - threaded - default For example: "compress_recorded_demos": "threaded" I recommend setting to threaded if the machine hosting the server has spare CPU cores. Be careful with fewer core machines, the compression operation can take up to 200ms per demo (maybe even more on larger demos) - stop_demo_for_afk_players Should the demo recording be paused if a player goes AFK This should be a yes/no answer For example: "stop_demo_for_afk_players": "yes" I recommend setting this to yes as it will save you disk space on players who are AFK and being recorded. A small lagspike for the player might occur when they come back from being afk (for example move their mouse), the demo might be choppy at the start if its a transition between AFK and non AFK - afk_time_threshold Should the demo recording be paused if a player goes AFK This should be time, this is in the format <number>s<number>m<number>h (this is the same format as in setting 'recording_timout') For example, at 1 minute AFK user's recording will get paused: "afk_time_threshold": "1m" - suppress_console_demo_messages When a player is being recorded or their recording is stopped you get a message in the console, this setting will remove that message if turned on This should be a yes/no answer For example: "suppress_console_demo_messages": "no" - combatlog_buffer_size_threshold When this RAM threshold is reached the buffer of the global combatlog will be saved to disk This should be a size (in B, KB, MB or GB) For example: "combatlog_buffer_size_threshold": "10MB" I recommend leaving this to default if you are not experiencing issues. Might need to be increased with more player activity for optimal performance - combatlog_buffer_time_threshold When this time threshold is reached the buffer of the global combatlog will be saved to disk. This should be a time, this is in the format <number>s<number>m<number>h (this is the same format as in setting 'recording_timout') For example: "combatlog_buffer_size_threshold": "10s" I recommend leaving this to default if you are not experiencing issues. Might need to be increased with more player activity for optimal performance NOTE: If both combatlog_buffer_thresholds are set to 0, the combatlog will be only saved to disk when Watchdog is unloaded (aka on server restart/stop). If one of them is 0 only the other one is active, if both are not 0 then whichever threshold first gets reached In limit settings section: - max_total_gb_ram Memory limit for all currently recording demos, if this limit is reached all of them are stopped This should be a size (in B, KB, MB or GB) For example: "max_total_gb_ram": "4GB" - max_total_gb_disk_hardlimit Disk limit for all saved demos and combatlog file. When this limit is reached no further demos/combatlogs will be saved. This hardlimit is useful if your VPS/Machine has limited storage or you pay for every GB. IMPORTANT: Do not set the limit to the exact size of your disk size or free space, leave some wiggle room This should be a size (in B, KB, MB or GB) For example: "max_total_gb_disk_hardlimit": "300GB" In privacy settings section: - notify_users_when_recording Should the user get notified in chat & their console that they are being currently recorded This should be a yes/no answer For example: "notify_users_when_recording": "no" - notify_users_when_joining Should the user get notified in chat & their console that the server is using Watchdog This should be a yes/no answer For example: "notify_users_when_joining": "yes" - send_diagnostics_information Should Watchdog send diagnostic information that will be used to further optimize and improve watchdog This should be a yes/no answer For example: "send_diagnostics_information": "yes" I recommend leaving this turned on because it will greatly help me to see what needs to get optimized and/or changed The data being collected is the following: - Internal performance & error data - Server identity (server ip, port, player count, server uptime, server average fps) - Plugins/Mods being used - send_diagnostics_interval How often to send the diagnostics information This should be a time. this is in the format <number>s<number>m<number>h (this is the same format as in setting 'recording_timout') For example: "send_diagnostics_interval": "5m" I recommend leaving this on the default. Increase if you notice more than comfortable network usage. The higher this interval is the higher the network impact will be when the data is being uploaded as its being uploaded as a big chunk In privacy settings section: - notify_recording_triggered_webhook Discord Webhook that will be used to send messages to when a recording is started This should be a URL, leave empty to disable For example: "notify_recording_triggered_webhook": "https://discord.com/api/webhooks/1095317841874187282/LHjjksahd_tokengoeshere_d182u9182" - player_reported_webhook Discord Webhook that will be used to send messages to when a player is F7 reported This should be a URL, leave empty to disable For example: "player_reported_webhook": "https://discord.com/api/webhooks/1095317841874187282/LHjjksahd_tokengoeshere_d182u9182" - recording_about_to_finish_webhook Discord Webhook that will be used to send messages to when a recording is about to finish This should be a URL, leave empty to disable For example: "recording_about_to_finish_webhook": "https://discord.com/api/webhooks/1095317841874187282/LHjjksahd_tokengoeshere_d182u9182" - recording_about_to_finish_threshold When the recording time hits this percentage threshold a message will be sent in discord informing you that the recording is about to finish This should be a percentage For example: "recording_about_to_finish_threshold": "90%" If this is set to 100% you will get a message when the recording stopped (roughly, timing is not exact millisecond precision) NOTE: You can always see what the default generated config is by deleting or renaming the file 'config.json', if you want to use it as a reference Ingame config settings: These settings are built-in ConVars and can be changed via the console like any other ConVar - demo.splitmegabytes : When a demo reaches this amount of megabytes in size it gets stopped and another is started, this is to split them - demo.splitseconds : When a demo reaches this amount of time recording it gets stopped and another is started, this is to split them - demo.recordlist : Add player steamids in here to record them automatically on join - demo.recordlistmode : 0 for whitelist, 1 for blacklist. Whitelist means all players in 'demo.recordlist' will be recorded on server join, blacklist means all player NOT in 'demo.recordlist' will be recorded on server join Section 5: Localization Watchdog supports localization (although currently only 1 type of language is supported) To edit the localization, go to the 'Watchdog' folder which is at the root of your server folder, from there go into the directory 'localization', a file 'english.txt' will contain the localization strings Just open that file with any text editor and edit the messages to your liking The format of the localization file is "some locale = some text" After the equals sign is the message, you edit that, do not touch the text that is at the left of the equals sign Whenever you see a percentage in front and back of some text that means this is a variable and is replaced with the actual value when that event happens For example %steamid% means the steamid64 of the person who initiated this message Here are the meanings of all the variables: %steamid% - steamid64 of player %username% - in-game name of player %recording_trigger% - what triggered the recording, this can tell you for example if it was someone uncovering a stash or killing a player or any other thing %reported_times% - how many times this person was reported since the last recording %progress% - current recording progress at the time of sending this message Section 6: Commands Watchdog has some built-in commands and modifies another, the commands are: - watchdog.version - Prints the version of Watchdog - watchdog.webhooktest - Sends test messages to all enabled webhooks. This is used if you want to see if the link you provided is working - demo.record - Starts a manual demo recording, this will not stop automatically until you stop with manually again, even if the user disconnects, this is useful if you want to record someone 24/7 - demo.stop - Stops a manual demo recording, if a demo is started with 'demo.record' this is the only way to stop that demo Section 7: Contact If you have any questions, suggestions or want to report a bug you can contact me on discord: turner#7777$999,999.00- 2 comments
-
- #antimacros
- #antiscript
- (and 18 more)
-
I'm looking for a plugin that handles spectate : I want the plugin to have a pre-set time, changeable by command. It needs to move to the next player to spectate after a set time. Optional extra : Ignore players who are AFK/ otherwise not moving around. 2nd Optional extra: An onscreen button that records a demo when pressed and stores the file with the format [Playername][Date][Time].dem
-
Version 1.0.0
23 downloads
This is a script that can be used to automatically wipe your servers on a set schedule, changing either your seeds or level URL. You may need Administrator privileges on the system to setup & run this script depending on your server's setup. Files Batch script which turns on/off your server and deletes your chosen data/map/bp files Executable which will handle changing the seed/levelurl seeds.txt file which stores all your seeds/levelurls which will be randomly chosen every wipe (the name can be changed later) Requirements Rust Server(s) setup in a standard way on a Windows dedicated server. Administrator privileges on said Dedicated server. File editing software (Notepad++ works) Rust server(s) running as a service (you can use NSSM to set this up) Microsoft Visual C++ Redistributable Package (64 Bit, 32 Bit) How to Setup Open auto-wipe.bat Enter your server's service name Replace the example paths with the plugin and map file paths you want to be deleted on wipe Note: Using *.db will delete all .db files in the folder Open config.json in Notepad++ Replace the example server config path with your own server.cfg location Replace the example seed / txt file with the path of your own seeds.txt or levels.txt file (the name of the file does not matter) Note: Make sure to use double \\ just like in the example provided or it will not work! Optional: Change the value of replacement from server.seed to server.levelurl if you wish to change the server levelurl each wipe. Choosing your "Replacement" value This can be anything that you wish for the code to look for, but it is necessary that the seed or levelurl is the last thing on the line and it is separated by a space. For example, if you wanted to change something where the line started with +server.seed you can change the replacement property to match this. For most standard setups and usages, the default of server.seed will be sufficient. Open Task Scheduler in Windows Click Create Task Select "Run whether user is logged on or not" Select "Run with highest privileges" In the drop-down box select "Configure for Windows Server 2016" (may be different depending on server version) In the "Triggers" tab click "New..." and select your schedule In the "Actions" tab click "New..." and select the auto-wipe.bat file In the "Conditions" tab deselect any power options Populate your seeds.txt file If you're using levelurls, the same will apply just with different values Open seeds.txt (you may have called it something else) in Notepad++ Go to https://just-wiped.net/search-rust-maps and search for some seeds using your map size. Put each seed or levelurl on a new line Save the file Perform a Dry-Run Whilst your server is online with no pop, manually run the auto-wipe.bat to ensure that it is working as expected. If not, please go through all of the steps again and make sure you read everything! It is very common to forget double backslashes in the config file, or to have a typo in one of your file paths. This is a general method to setup your auto wipes, each setup will be different so you must ensure you adapt and change ALL file paths to match your setup and desires. I cannot aid you in making your server into a service, though it is highly recommended for all servers to do so as it will make your setup safer and more relaible. There are numerous tutorials available on YouTube if you desire to do so. If you have time, and would like to help better this product, please fill out this form: https://forms.gle/pvssvoM3KxEPAxVj9.Thank you.$30.00- 3 comments
-
- 1
-

-
Version 1.0.1
686 downloads
Simple plugin that prints server rules with a custom icon on command. Add the Chat Icon of your choice in the config file and change your rules in the SimpleRules.json in the oxide/lang/en folder. Reload the plugin and you're set. Thanks to @Death @Nivex @KillYou for helping out! Permission simplerules.use Config { "Chat Icon (SteamID64)": 0, "Use Chat Prefix": true } Lang File { "Rules": "1.)No Griefing.\n2.)No Door Camping.", "No Permission": "You do not have permission to run this command!", "Prefix": "<color=#55aaff>[Server Rules]</color> \n" }Free









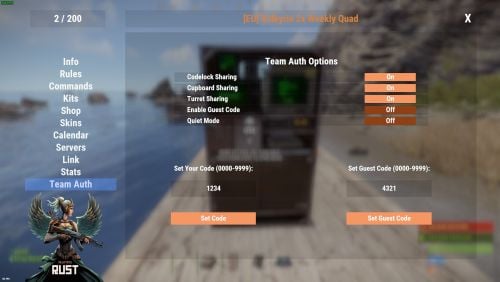



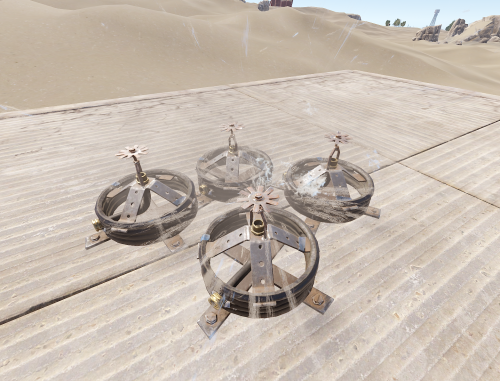

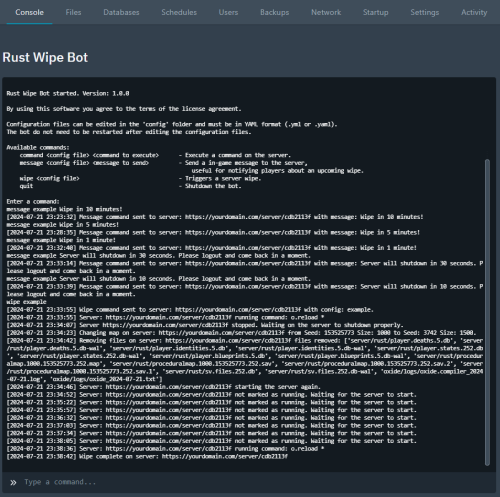


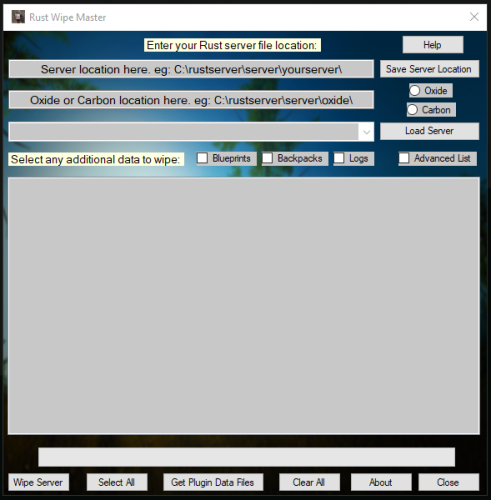





.thumb.png.0cbb1686d57f37a63dd5cb315afe4e98.png)


