Search the Community
Showing results for tags 'craft'.
-
Version 1.0.61
1,841 downloads
Having trouble fitting larger entities into your compound? By combining PlaceAnything with EntityScaleManager you can downsize big entities. Vehicles can be directly added to the player's inventory, allowing them to deploy the vehicles whenever needed. Vehicles can be picked up by players (optional). Deployable trees and bushes, perfect for pve servers! pre-configured data file with some trees and bushes Entities.json With the help of the CopyPaste plugin, you can sell pre-built bases for players to deploy. • How can I pick up items? Deployed structures can be picked up by hitting it with hammer. Items can be picked up only by owner. • How to upload custom icons? Custom icons can be uploaded with Steam workshop uploader. WorkshopUploader.zip original repository • How to use CopyPaste plugin with PlaceAnyting? In data file Entities.json, put 'copypaste/buildingName' instead of prefab path. • Where I can find list of all prefabs? Here is full updated list but not every prefab can be spawned from there and some of them you might not be able to destroy, I do not recommend testing this on live server. Commands (admin only) CHAT /gimme CONSOLE placeanything <steamid> "<item display name>" • Known issues and limitations - some prefabs cannot be damaged thus can be used to grief players. (recycler, slotmachine, test generator...etc) - hitting gambling wheel with hammer will make wheel disappear, game issue cant be fixed Please note that PlaceAnything is a simple plugin that only spawns entities, similar to using the 'spawn' command in the console. It does not manage the behavior of entities after they are spawned. If you are unsure about the functionality of a specific entity, spawn it in-game as an admin and test it yourself before making purchase Plugin comes with 19 pre-configured items. Use /gimme chat command in game to get those items for testing.$5.50 -
Version 1.5.5
44 downloads
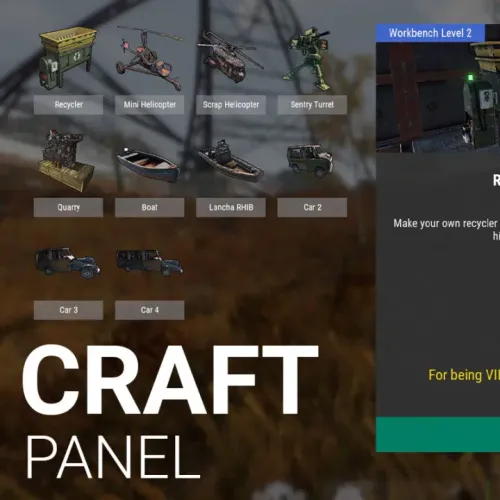
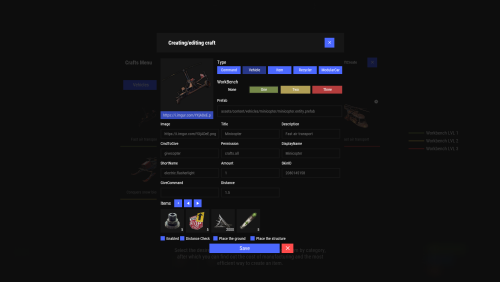
I present to you Craft Panel, an elegant and simple custom craft panel. Before starting: This mod works mainly with the help of other mods. Basically, the operation consists of configuring the necessary ingredients to obtain an item. Either by command of a third-party mod or a game item. Video The interface is based on three main blocks: List of items to craft. Currently, the maximum be recommended that it be 16 items available. Since there is currently no implemented page (it will come in the future). Central information panel. You can write a more complete title, assign a header image, set the Workbench requirement (whether it needs it or not), and set a description. Ingredients panel. Basically what players will need to craft each item. Complete Configuration: From the configuration, you can adjust the name of the Panel, as well as the colors of the buttons and text. Effect Sounds. We have 3 sounds for Crafting time, page change, etc. You can choose to disable all sounds or manually change it to another. Add new Items easily with the example structure, just duplicate and customize. (Requires a bit of knowledge in mod setup.) Discount for VIPS. Set a permission for VIPS to get a discount that you set. Permissions and Command: As a general rule, for players to have access to / craft, you must set the following permission: craftpanel.use Regardless of that general permission, you must assign the user permissions for each item. Example: craftpanel.rhib.use craftpanel.boat.use craftpanel.supercard.use ... Future improvements: Pagination of Items. (Ready) Make the interface modular, so that only one part is recharged. (Ready) Add Crafting time? Leave me your suggestion for improvement. Finally, as a detail, currently this mod does not use Data file, perhaps in the future with some new feature this will be implemented. Config Example: { "Custom": { "Title": "Craft Panel", "ID Item Default": 1, "Show even if you don't have permissions (you won't be able to craft)": true, "Show button when opening Workbench": true, "Sound Effects": true, "Sound Prefab 1": "assets/prefabs/tools/keycard/effects/swipe.prefab", "Sound Prefab 2": "assets/bundled/prefabs/fx/build/promote_toptier.prefab", "Sound Prefab 3": "assets/prefabs/misc/xmas/presents/effects/wrap.prefab", "Permission Use /craft": "craftpanel.use", "Permission to show the Button in the Workbench": "craftpanel.btnworkbench", "Color Title": "1.00 1.00 1.00 0.43", "Color Button List": "0.3 0.40 0.3 0.60", "Color Title Item": "0.2 0.30 0.2 0.60", "Color Scrollbar": "0.15 0.25 0.15 0.8", "Color Button Craft": "0.80 1.00 0.50 0.10", "Color Background Panel": "0.2 0.23 0.2 0.40", "Color Text VIP": "0.90 0.80 0.04 1.00", "Color Text Amount": "1.00 1.00 1.00 1.00", "Color Text Amount VIP": "0.90 0.80 0.04 1.00", "GUI Button Close - Color": "0.90 0.20 0.20 0.50", "GUI Button Close - Font Size": 20, "GUI Button Close - AnchorMin": "0.45 0.7", "GUI Button Close - AnchorMax": "0.55 0.725", "Img Block Item": "https://img.rustspain.com/craftpanel/block.png" }, "Craft": [ { "ID": 1, "Enabled": true, "Short Name": "Recycler", "Full Name": "Recycler at Home", "Img Full": "https://i.imgur.com/wdVWxDB.jpg", "Img Icon": "https://i.imgur.com/Vgcfs3n.png", "Description": "Make your own recycler to install it on your base. You can collect it by hitting with the hammer.", "Description Font Size": 13, "Craft Result": { "Command (keep empty to create item)": "recycler.give {steamID}", "Shortname": "", "Name Default": false, "Amount": 0, "Skin ID": 0 }, "Permission Use": "craftpanel.recycler.use", "Permission VIP": "craftpanel.recycler.vip", "Permission No Cost": "craftpanel.recycler.nocost", "VIP discount: 10 = 10%": 10, "Require Workbench? 0 = NOT, 1 = Level 1,...": 2, "Items": [ { "Item": "metal.fragments", "Amount": 50000, "Skin ID": 0 }, { "Item": "metal.refined", "Amount": 300, "Skin ID": 0 }, { "Item": "gears", "Amount": 50, "Skin ID": 0 }, { "Item": "fuse", "Amount": 10, "Skin ID": 0 }, { "Item": "techparts", "Amount": 15, "Skin ID": 0 } ] }, { "ID": 2, "Enabled": true, "Short Name": "Mini Helicopter", "Full Name": "Mini Helicopter", "Img Full": "https://i.imgur.com/vnZND1c.jpg", "Img Icon": "https://i.imgur.com/qg9aIGz.png", "Description": "Because having your own Helicopters whenever you want is cool too.nCraft your Helis, put them away and take them out when you need them.", "Description Font Size": 13, "Craft Result": { "Command (keep empty to create item)": "portablevehicles.give {steamID} minicopter", "Shortname": "", "Name Default": false, "Amount": 0, "Skin ID": 0 }, "Permission Use": "craftpanel.miniheli.use", "Permission VIP": "craftpanel.miniheli.vip", "Permission No Cost": "craftpanel.miniheli.nocost", "VIP discount: 10 = 10%": 25, "Require Workbench? 0 = NOT, 1 = Level 1,...": 0, "Items": [ { "Item": "metal.fragments", "Amount": 5000, "Skin ID": 0 }, { "Item": "propanetank", "Amount": 10, "Skin ID": 0 }, { "Item": "gears", "Amount": 10, "Skin ID": 0 }, { "Item": "roadsigns", "Amount": 5, "Skin ID": 0 }, { "Item": "sheetmetal", "Amount": 10, "Skin ID": 0 } ] }, ... ] }$15.00- 8 comments
- 1 review
-
- 2
-

-
- #craft
- #craft menu
-
(and 4 more)
Tagged with:
-
Version 1.1.3
58 downloads
Make life easier for the players on your server, this plugin allows you to craft items if there is a vault nearby with the right resources, and you can easily move items from one vault to another. Features: When you want to craft an item and you don't have enough resources but there is a craft store that has enough resources, they will be moved to your crafting inventory Three resource movement modes Basic transfer - By hitting one vault with Hammer and then the other one in transfer all items from the 1st to the 2nd vault. My transfer - transferring items from all available storages in the area (radius in the config) into your inventory and vice versa Advance transfer - move from any available storage within the radius to any other Commands: (You need to hold the hammer in your hands to use it) Press "R" - for open the UI change transfer mode. Press "RMB" - for open the UI transfer menu. Permissions: "inventoryhelper.all" - allow you use full functionality "inventoryhelper.swap" - allows you to swap the contents "inventoryhelper.pull" - allows you to get items from containers when he try to craft something "inventoryhelper.basictransfer" - allows you to transfer items between containers "inventoryhelper.mytransfer" - allows you to trasfer all your items to the container "inventoryhelper.adtransfer" - allows you to transfer items between continaser with UI Config: { "Pull request cooldown": 3.0, "Use UI messages": true, "Use Chat messages": true, "UI message duration": 3.0, "Storage pull|search radius": 18.5 } Lang: { "CH_CPBB": "<color=#ff0a0a>You can't pull resources in Building Block zone.</color>", "CH_PCD": "<color=#ff0a0a>Pull cooldown {0}s</color>", "CH_PMR": "<color=#ff0a0a>Not enough resources for pull:</color>{0}", "CH_PRC": "<color=#beff7f>Resources pulled for {0} craft. ({1} items pulled)</color>", "CH_SS": "<color=#ff0a0a>This is the same storage</color>", "CH_STFA": "<color=#ff0a0a>The storage is too far away</color>", "CH_SSL": "<color=#ffff00>Select a storage location where you want to move items</color>", "CH_SISEMPTY": "<color=#ff0a0a>The storage is empty</color>", "CH_FULLINV": "<color=#ff0a0a>There's not enough room in your inventory</color>", "CH_FULLSTORAGE": "<color=#ff0a0a>There's not enough room in the storage</color>", "CH_TRASFITEMS": "<color=#beff7f>{0} items trasfered from {1} to {2}</color>", "CH_NOTAVALIBLE": "<color=#ff0a0a>The storage isn't avalible</color>", "CH_PERM": "<color=#ff0a0a>You don't have enough permission</color>" } { "CH_CPBB": "<color=#ff0a0a>无法在\"构建基块\"区域中拉取资源。</color>", "CH_PCD": "<color=#ff0a0a>拉动冷却时间 {0}</color>", "CH_PMR": "<color=#ff0a0a>没有足够的资源用于拉取:</color>{0}", "CH_PRC": "<color=#beff7f>为{0}工艺而拉动的资源。({1}项目拉出)</color>", "CH_SS": "<color=#ff0a0a>这是相同的存储</color>", "CH_STFA": "<color=#ff0a0a>存储太远</color>", "CH_SSL": "<color=#ffff00>选择要移动项目的存储位置</color>", "CH_SISEMPTY": "<color=#ff0a0a>存储为空</color>", "CH_FULLINV": "<color=#ff0a0a>库存中没有足够的空间</color>", "CH_FULLSTORAGE": "<color=#ff0a0a>储物空间不足</color>", "CH_TRASFITEMS": "<color=#beff7f>从{1}到{2}的{0}物品</color>", "CH_NOTAVALIBLE": "<color=#ff0a0a>存储不可用</color>", "CH_PERM": "<color=#ff0a0a>您没有足够的权限</color>" } { "CH_CPBB": "<color=#ff0a0a>Вы не можете тянуть ресурсы в зоне Building Block.</color>", "CH_PCD": "<color=#ff0a0a>Вытягивания будет доступно через {0}с</color>", "CH_PMR": "<color=#ff0a0a>Недостаточно ресурсов для вытягивания:</color>{0}", "CH_PRC": "<color=#beff7f>Нужно ресурсов для крафта {0}. ({1} ресурсов)</color>", "CH_SS": "<color=#ff0a0a>Это тоже самое хранилище</color>", "CH_STFA": "<color=#ff0a0a>Хранилище слишком далеко</color>", "CH_SSL": "<color=#ffff00>Выберите хранилище, в которое вы бы хотели переместить ресурсы</color>", "CH_SISEMPTY": "<color=#ff0a0a>Хранилище пустое</color>", "CH_FULLINV": "<color=#ff0a0a>У вас нет места в инвентаре</color>", "CH_FULLSTORAGE": "<color=#ff0a0a>Недостаточно места в хранилище</color>", "CH_TRASFITEMS": "<color=#beff7f>{0} предметов перемещено из {1} в {2}</color>", "CH_NOTAVALIBLE": "<color=#ff0a0a>Хранилище не доступно</color>", "CH_PERM": "<color=#ff0a0a>У вас нет разрешения на выполнения этого действия</color>", }$8.88- 8 comments
-
- #craft
- #transfer items
- (and 6 more)
-
Version 0.1.18
2,189 downloads
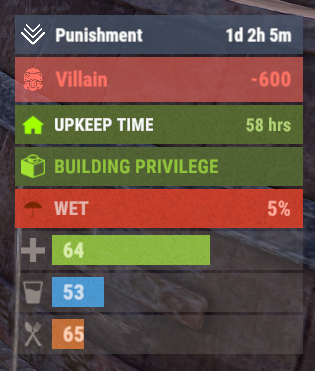
A useful API plugin that mimics in-game status bars and allows the addition of custom ones. Note: AdvancedStatus does not display any bars on its own. This is done by other plugins that work with it. An example plugin demonstrating interaction with AdvancedStatus. The ability to specify the frequency of calculating the number of bars; The ability to specify the order of the bar; The ability to change the height of the bar; The abillity to customize the color and transparency of the background; The ability to set a material for the background; The ability to switch between CuiRawImageComponent and CuiImageComponent for the image; The ability to get images from the local folder(*SERVER*\oxide\data\AdvancedStatus\Images); The abillity to set own image and customize the color and transparency of the image; The abillity to set sprite instead of the image; The ability to specify custom text; The ability to customize the color, size and font of the text; No need to pass all parameters; No need to manually delete your bar when unloading your plugin. advancedstatus.admin - Grants access to the chat command(by default /bar). { "Chat command": "bar", "Is it worth enabling console notifications for the successful loading of local images?": false, "Interval(in seconds) for counting in-game status bars": 0.5, "Interval(in seconds) for counting Building Privilege status bars. Note: Calculating Building Privilege is significantly more resource-intensive than other counts": 1.0, "Bar - Display Layer. If you have button bars, it's advisable to use Hud(https://umod.org/guides/rust/basic-concepts-of-gui#layers)": "Under", "Bar - Left to Right": true, "Bar - Offset between status bars": 2, "Bar - Default Height": 26, "Main - Default Color": "#505F75", "Main - Default Transparency": 0.7, "Main - Default Material(empty to disable)": "", "Image - Default Image": "AdvancedBar_Image", "Image - Default Color": "#6B7E95", "Image - Default Transparency": 1.0, "Image - Outline Default Color": "#000000", "Image - Outline Default Transparency": 1.0, "Image - Outline Default Distance": "0.75 0.75", "Text - Default Size": 12, "Text - Default Color": "#FFFFFF", "Text - Default Transparency": 1.0, "Text - Default Font(https://umod.org/guides/rust/basic-concepts-of-gui#fonts)": "RobotoCondensed-Bold.ttf", "Text - Default Offset Horizontal": 0, "Text - Outline Default Color": "#000000", "Text - Outline Default Transparency": 1.0, "Text - Outline Default Distance": "0.75 0.75", "SubText - Default Size": 12, "SubText - Default Color": "#FFFFFF", "SubText - Default Transparency": 1.0, "SubText - Default Font": "RobotoCondensed-Bold.ttf", "SubText - Outline Default Color": "#000000", "SubText - Outline Default Transparency": 1.0, "SubText - Outline Default Distance": "0.75 0.75", "Progress - Default Color": "#89B840", "Progress - Default Transparency": 0.7, "Progress - Default OffsetMin": "25 2.5", "Progress - Default OffsetMax": "-3.5 -3.5", "Version": { "Major": 0, "Minor": 1, "Patch": 18 } } EN: { "MsgDays": "d", "MsgHours": "h", "MsgMinutes": "m", "MsgSeconds": "s" } RU: { "MsgDays": "д", "MsgHours": "ч", "MsgMinutes": "м", "MsgSeconds": "с" } images reload *ImageName* - Reloads the specified image from the image folder; all - Reloads all local images from the image folder. Example: /bar images reload all Note: To access the commands, the player must be an admin(console or owner) or have the advancedstatus.admin permission. OnAdvancedStatusLoaded: Called after the AdvancedStatus plugin is fully loaded and ready. OnPlayerGainedBuildingPrivilege: Called after the player enters their building privilege. OnPlayerLostBuildingPrivilege: Called after the player exits their building privilege. void OnAdvancedStatusLoaded() { Puts("The AdvancedStatus plugin is loaded and ready to go!"); } void OnPlayerGainedBuildingPrivilege(BasePlayer player) { Puts($"{player.displayName} entered the authorized building privilege zone."); } void OnPlayerLostBuildingPrivilege(BasePlayer player) { Puts($"{player.displayName} exited the authorized building privilege zone."); } [PluginReference] private Plugin AdvancedStatus; There are 15 methods: IsReady CreateBar UpdateContent DeleteBar DeleteCategory DeleteAllBars GetTotalClientBars GetTotalPlayerBars LoadImages LoadImage CopyImage DeleteImages DeleteImage BarExists InBuildingPrivilege There are 5 types of bar: Default - A simple bar that displays the provided information. Does not update the value of SubText by itself; Timed - Similar to the default bar, but it automatically disappears after the specified time in the TimeStamp parameter; TimeCounter - The SubText shows the remaining time until TimeStamp. Also automatically removed upon expiration of the TimeStamp; TimeProgress - Similar to the Timed bar, but additionally features an automatically filling progress bar; TimeProgressCounter - Similar to the TimeCounter bar, but additionally features an automatically filling progress bar. IsReady: Used to check if the AdvancedStatus plugin is loaded and ready to work. The IsReady method returns true if it is ready, or null if it is not. (bool)AdvancedStatus?.Call("IsReady");//Calling the IsReady method. If the result is not null(bool true), the plugin is ready. CreateBar: Used to create a bar or update bar values for a player. To call the CreateBar method, you need to pass 2 parameters. The first one is BasePlayer or <ulong>playerID. The second one is a dictionary with the parameters you need. In the CreateBar method, all parameters are optional, except for two: Id; Plugin. Parameters not specified when creating a new bar will use the values set in the AdvancedStatus plugin's configuration file. Parameters not specified during bar update will retain the values they had before the update. Note: The plugin does not update values automatically, you need to manually send new values. Dictionary<string, object> parameters = new Dictionary<string, object> { { "Id", "AdvancedStatusDemo_1" }, //<string>Unique identifier for the bar in your plugin. ***This is a required field. { "BarType", "Default" }, //<string>Type of the bar. There are 4 types: Default, Timed, TimeCounter and TimeProgress. { "Plugin", "AdvancedStatusDemo" }, //<string>Name of your plugin. ***This is a required field. { "Category", "Default" }, //<string>Internal plugin category of the bar. { "Order", 10 }, //<int>The position of your bar relative to others. Order is determined by increasing values(ASC). { "Height", 26 }, //<int>The height of your bar. A standard bar is 26 pixels. { "Main_Color", "#505F75" }, //<string>HTML Hex color of the bar background. { "Main_Transparency", 0.7f }, //<float>Transparency of the bar background. { "Main_Material", "assets/content/ui/uibackgroundblur.mat" }, //<string>Material of the bar background(empty to disable). { "Image", "scrap" }, //<string>Name of the image saved in the ImageLibrary or a direct link to the image if ImageLibrary is not used. { "Image_Local", "AdvancedStatusDemo_Scrap" }, //<string>The name of the image file(without its extension) located in *SERVER*\data\AdvancedStatus\Images. Leave empty to use Image. { "Image_Sprite", "" }, //<string>Sprite image of the bar. Leave empty to use Image_Local or Image. { "Is_RawImage", true }, //<bool>Which type of image will be used? True - CuiRawImageComponent. False - CuiImageComponent. { "Image_Color", "#6B7E95" }, //<string>HTML Hex color of the bar image. { "Image_Transparency", 1.0f }, //<float>Transparency of the image. { "Text", "Scrap" }, //<string>Main text. { "Text_Size", 12 }, //<int>Size of the main text. { "Text_Color", "#FFFFFF" }, //<string>HTML Hex color of the main text. { "Text_Font", "RobotoCondensed-Bold.ttf" }, //<string>Font of the main text. { "Text_Offset_Horizontal", 0 }, //<int>Horizontal offset for the main text. { "SubText", "35" }, //<string>Sub text. { "SubText_Size", 12 }, //<int>Size of the sub text. { "SubText_Color", "#FFFFFF" }, //<string>HTML Hex color of the sub text. { "SubText_Font", "RobotoCondensed-Bold.ttf" }, //<string>Font of the sub text. { "TimeStampStart", Network.TimeEx.currentTimestamp }, //<double>Responsible for specifying the start point of the time reference and 0% for TimeProgress and TimeProgressCounter bars. Used if the bar type is Timed, TimeCounter, TimeProgress or TimeProgressCounter. { "TimeStamp", Network.TimeEx.currentTimestamp + 6 }, //<double>Specifies the end time point after which the bar will be destroyed and 100% for TimeProgress and TimeProgressCounter bars. Used if the bar type is Timed, TimeCounter, TimeProgress or TimeProgressCounter. { "TimeStampDestroy", Network.TimeEx.currentTimestamp + 3 }, //<double>If TimeStampDestroy is specified and it is less than TimeStamp, the bar will be destroyed by TimeStampDestroy. Used if the bar type is Timed, TimeCounter, TimeProgress or TimeProgressCounter. { "Progress", (float)35 / 100f }, //<float>Progress. From 0.0 to 1.0. { "Progress_Reverse", false }, //<bool>Progress reverse. A value of false means that the progress will increase. Used if the bar type is TimeProgress or TimeProgressCounter. { "Progress_Color", "#89B840" }, //<string>Progress color. { "Progress_Transparency", 1f }, //<float>Progress transparency. { "Progress_OffsetMin", "25 2.5" }, //<string>Progress OffsetMin: "*left* *bottom*". { "Progress_OffsetMax", "-3.5 -3.5" }, //<string>Progress OffsetMax: "*right* *top*". { "Command", "kit" } //<string>If the field is not empty, the bar becomes clickable, and the specified command is executed upon clicking. Note: the command must be covalence. }; AdvancedStatus?.Call("CreateBar", player.userID.Get(), parameters); //Calling the CreateBar method with the passing of BasePlayer/playerID and a dictionary containing the required parameters. UpdateContent: Used to update only the content of an existing status bar. To call the UpdateContent method, you need to pass 2 parameters. The first one is BasePlayer or <ulong>playerID. The second one is a dictionary with the parameters you need. In the UpdateBar method, all parameters are optional, except for two: Id; Plugin. var parameters = new Dictionary<string, object> { { "Id", "MyID" }, //<string>Unique identifier for the bar in your plugin. ***This is a required field. { "Plugin", Name }, //<string>Name of your plugin. ***This is a required field. { "Text", "MyText" }, //<string>Main text. { "SubText", "MyText" }, //<string>Sub text. { "Progress", (float)amount / 100f }, //<float>Progress. From 0.0 to 1.0. }; AdvancedStatus?.Call("UpdateContent", player.userID.Get(), parameters); //Calling the UpdateContent method with the passing of BasePlayer/playerID and a dictionary containing the required parameters. DeleteBar: Used to remove the bar for a player. There are two methods for removing a bar by ID: with specifying a particular player; To call this method, you need to pass 3 parameters. The first one is BasePlayer or <ulong>playerID. The second one is Id of your bar and the third one is name of your plugin. without specifying a particular player (which removes it for all players) To call this method, you need to pass 2 parameters. The first one is Id of your bar and the second one is name of your plugin. AdvancedStatus?.Call("DeleteBar", player.userID.Get(), barID, Name); //Calling the DeleteBar method with the passing of BasePlayer/playerID, ID of the bar and the name of your plugin. AdvancedStatus?.Call("DeleteBar", barID, Name); //Calling the DeleteBar method with the passing of ID of the bar and the name of your plugin. If you try to delete a bar that doesn't exist, nothing bad will happen. So feel free to delete the bar without checking its existence. P.S. When unloading your plugin, there is no need to manually delete bars for players, AdvancedStatus will handle it automatically. DeleteCategory: Used to remove all bars associated with the plugin's category. To call the DeleteCategory method, you need to pass 2 parameters. The first one is category and the second one is name of your plugin. AdvancedStatus?.Call("DeleteCategory", "Default", Name);//Calling the DeleteCategory method by passing the category and name of your plugin DeleteAllBars: Used to remove all bars associated with the plugin. To call the DeleteAllBars method, you need to pass only 1 parameter. It is name of your plugin. AdvancedStatus?.Call("DeleteAllBars", Name);//Calling the DeleteAllBars method, passing the name of your plugin GetTotalClientBars: Used to get the number of client bars for the player. To call the GetTotalClientBars method, you need to pass only 1 parameter. It is BasePlayer or <ulong>playerID. (int)AdvancedStatus?.Call("GetTotalClientBars", player.userID.Get());//Calling the GetTotalClientBars method, passing the name of BasePlayer/playerID GetTotalPlayerBars: Used to get the number of active custom bars for the player. To call the GetTotalPlayerBars method, you need to pass only 1 parameter. It is BasePlayer or <ulong>playerID. (int)AdvancedStatus?.Call("GetTotalPlayerBars", player.userID.Get());//Calling the GetTotalPlayerBars method, passing the name of BasePlayer/playerID LoadImages: Used to check if the local images specified in the list are loaded. If any of the images are not loaded but their files exist in the images folder, the plugin will load them. To call the LoadImages method, you need to pass only 2 parameters. The first one is the <List<string>>list of image's name and the second one(optional) is <bool>force, which, if set to true, will force reload the image even if it already exists. AdvancedStatus?.Call("LoadImages", list, false);//Calling the LoadImages method, passing a list of image names LoadImage: Used to check if the local image is loaded. If the file is not loaded and exists in the images folder, the plugin will load it. To call the LoadImage method, you need to pass 2 parameters. The first one is the <string>image's name and the second one(optional) is <bool>force, which, if set to true, will force reload the image even if it already exists. AdvancedStatus?.Call("LoadImage", imgName, false);//Calling the LoadImage method, passing an image's name CopyImage: Used to create and load a copy of an existing image. To call the CopyImage method, you need to pass 3 parameters. The first parameter is the <string>source image's name, the second parameter is the <string>new image's name and the third one(optional) is <bool>force, which, if set to true, will force copy and reload the image even if it already exists. AdvancedStatus?.Call("CopyImage", "ZoneStatus_Default", "ZoneStatus_NewZone", false);//Calling CopyImage, passing the source image name and the new image name. DeleteImages: Used to delete a list of images and their files. To call the DeleteImages method, you need to pass 2 parameters. The first one is the <List<string>>list of image's name and the second one(optional) parameter is <bool>deleteFile, which, if set to true, will delete image's file too. AdvancedStatus?.Call("DeleteImages", list, true);//Calling DeleteImages, passing a list of image names. DeleteImage: Used for removing the image and the image file. To call the DeleteImage method, you need to pass 2 parameters. The first parameter is the <string>image's name and the second one(optional) parameter is <bool>deleteFile, which, if set to true, will delete image's file too. AdvancedStatus?.Call("DeleteImage", "ZoneStatus_NewZone", true);//Calling DeleteImage, passing the image name. BarExists: Used to check if the specified bar exists. To call the BarExists method, you need to pass 3 parameters. The first one is BasePlayer or <ulong>playerID. The second one is Id of your bar. And the third one is name of your plugin. (bool)AdvancedStatus?.Call("BarExists", player.userID.Get(), barID, Name);//Calling the BarExists method with the passing of BasePlayer/playerID, ID of the bar and name of your plugin. InBuildingPrivilege: Used to check if the player has authorized building privileges. To call the InBuildingPrivilege method, you need to pass BasePlayer or <ulong>playerID. (bool)AdvancedStatus?.Call("InBuildingPrivilege", player.userID.Get());//Checking if the player has Building Privilege.$1.99 -
Version 1.2.10
307 downloads
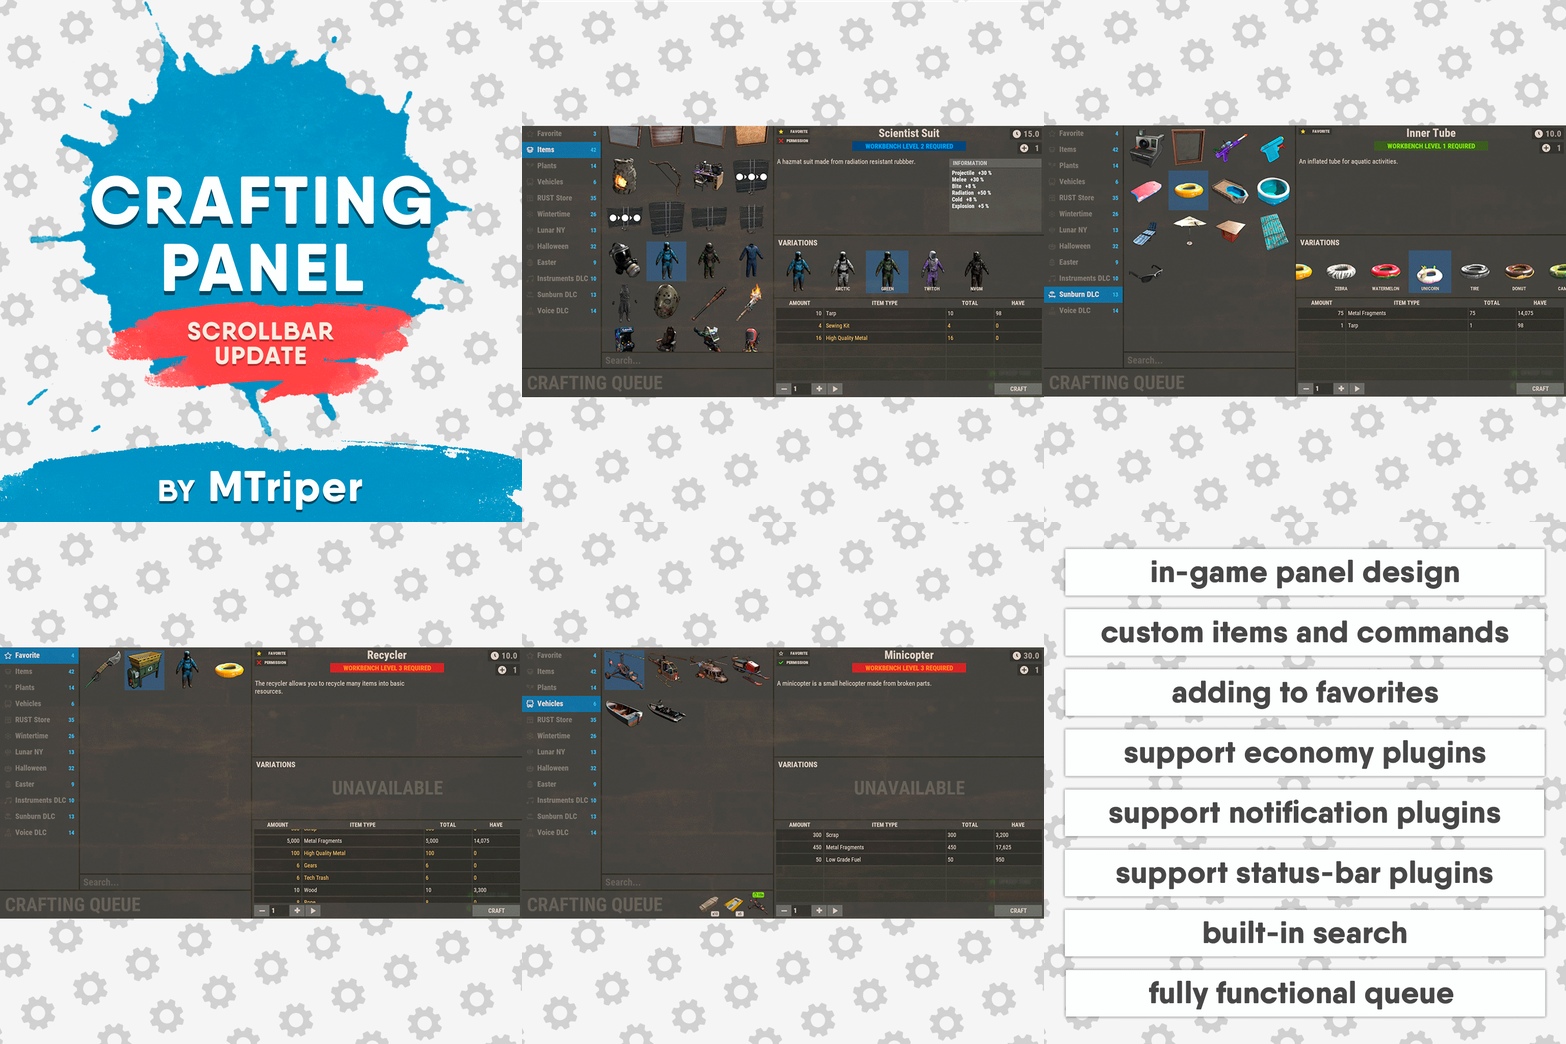
This plugin provides a beautiful and convenient crafting panel for your server. Its design and mechanics are as similar as possible to the in-game Rust crafting panel. Add crafting of any custom items, commands, permissions and anything else you like. Features The design is ~90% similar to the design of Rust's in-game crafting panel. Support for any custom items and commands. Ability to unlock all DLC items in the in-game crafting menu. The plugin only registers permissions for items that you have specified to it. Thus, preventing the creation of a large number of permissions. Customizable sound effects, notifications in the status bar on the right, and text notifications in popular plugins. The plugin can take and give out items from inventory, game backpack and Backpacks plugin, depending on the fullness of any of them. Ability to add item variations (just look at the screenshots). Supports work with skill plugins. Supports work with economy plugins. The player can choose whether to craft or buy an item. Add items to favorites, built-in search, fully functional queue and more. Scrollbar support. Supported plugins: SkillTree - allows you to use bonuses such as: Craft_Speed, Craft_Refund, Craft_Duplicate. Also allows you to give bonuses when crafting and take away when crafting is canceled. Backpacks - plugin can take and give items in an additional backpack. ItemRetriever - plugin can take crafting ingredients from all containers that are connected to the player (including inventory, game backpack, Backpacks plugin, and any other plugin that uses ItemRetriever as Suppliers). ZLevelsRemastered - allows you to use the craft speed bonus. Economics, ServerRewards, IQEconomic - these plugins are used to purchase items with the currency of these plugins. Notify, GUIAnnouncements - these plugins are used to display notifications. SimpleStatus, AdvancedStatus - these plugins are used to display notifications in the status bar at the bottom right of the screen. Permissions The plugin has immutable and generated permissions. The immutable ones include: craftingpanel._use – is responsible for opening the panel. If there is no permission, the panel will not open. craftingpanel._admin – give this permission only to administrators. It adds an additional "Give yourself" button to get items from the panel for free. This permission is also needed to use the givecraft command (about it below). craftingpanel._instant – all player crafts will be instant. craftingpanel._death – crafting queue will not be reset when the player dies. craftingpanel._disconnect – when a player leaves the server, the craft queue will not be reset. craftingpanel._economics – allows you to purchase items for the currency of the selected economy plugin. If the player does not have permission, the cost panel will still be displayed, but the player will not be able to make a purchase. craftingpanel._workbench - allows you to reduce crafting time by having a workbench of a higher level than necessary for crafting. craftingpanel._bonuses – allows the player to access the crafting bonuses from the "Crafting bonuses" section. craftingpanel._unlockdlc - if a player has this permission, he can craft all DLC items in the in-game crafting menu. If you revoke this permission, all DLC items will become unavailable again. The generated permissions are created by the plugin itself, here's how it works: craftingpanel.section.vehicles- this is permission for the "vehicles" section. craftingpanel.vehicles.minicopter - this is permission for the item "minicopter" in the "vehicles" section. craftingpanel.vehicles.snowmobile.tomaha - this is permission for the item "snowmobile" in the "vehicles" section and in "tomaha" variation. Commands Only one command is present in the plugin: givecraft steamid/nickname section item 5 skin steamid/nickname – steamid or nickname of your choice. section – section name from the Section permission [required] field. item – item name from the Item permission [required] field. 5 – how much of the current item to give out (craft multiplier). skin - name of the item from the Ingredients section, Item permission [required] fields. All arguments of this command are required. If your item has an empty "Variations" section or you want a default item, specify "default" in place of skin. General settings Allow panel scaling when the interface is scaled? - if this setting is enabled, the craft panel will be resized depending on the game interface scale (setting "user interface scale"). If the setting is disabled, the panel will always be the same size, regardless of the player interface scale. Remember the last selected section and item? - plugin will remember the last selected section, item and variation the next time the panel is opened by the player. Enable multilingual mode? – if your server has players from different countries, this mode allows you to customize translation for other languages. When you enable this mode, the plugin will write all the data that needs to be translated to the lang - file. These include: section names, item names, item descriptions, item properties, item variation names, and ingredient names. The lang - file consists of a pair: key - value. The key is a unique name, with the help of which the plugin understands what phrase to use. Section translation: section.*section permission* – key template for section name translation. For example: "section.favorite": "Favorite" – Favorite section. Translation of item information: *section permission*.*item permission*.name – key template for item name translation. For example: "sunburn.innertube.name": "Inner Tube" – item name. *section permission*.*item permission*.description – key template for item description translation. For example: "sunburn.innertube.description": " Inflatable lap for water fun." – item description. *section permission*.*item permission*.properties – key template for item properties translation. For example: "sunburn.innertube.properties ": "Any properties ..." – item properties. *section permission*.*item permission*.variations.*variation permission* – key template for variation name translation. For example: "sunburn.innertube.variations.zebra": "ZEBRA" – variation name. Translation of ingredient names: *ingredient shortname *.*ingredient skinId* - key template for ingredient name translation. For example: "wood.0": "Wood" – ingredient name. Allow work with the Backpacks plugin? – plugin can take and give items in an additional backpack (Backpacks by WhiteThunder). Allow work with the ItemRetriever plugin? – this plugin provides advanced functionality for interacting with player containers: If the ItemRetriever plugin is enabled, the CraftingPanel will take crafting ingredients from all containers that are connected to the player (including inventory, game backpack, Backpacks plugin, and any other plugin that uses ItemRetriever as Suppliers). If the ItemRetriever plugin is disabled, the CraftingPanel will take items with the next priority (if the item is not found, it goes to the next container): Backpacks plugin (if enabled) -> game backpack -> inventory. The CraftingPanel plugin is fully in charge of giving out items (since ItemRetriever only allows you to take items from the player), it gives out items with the next priority (if the container is full, it moves on to the next one): inventory -> game backpack -> Backpacks plugin (if enabled) -> drop item. Delete player data from the Data file if they have not logged into the server for so many days – this setting is added to prevent the plugin from keeping in memory the settings of all players who have ever visited your server. Effect at the start/end/canceling – game effects that will be played at the start of crafting/completion of crafting/cancellation of crafting (effects list, plugin for playing effects). Specify a plugin to work with the economy – specify one plugin from the list or leave the field empty to disable work with economy. Crafting bonuses This section allows you to customize crafting bonuses when using one of the supported plugins. Each of these plugins has its own settings. Amount of experience will depend on crafting time? – if this setting is disabled, then the given/taken experience will be the same (which are specified in the settings above). If this setting is enabled, the experience will be calculated using the following formula: calculated experience = crafting time * experience from the settings above. It should be taken into account that to calculate the experience for a crafted item, the full crafting time is taken (which is specified in the item's setting), and to calculate the experience for crafting cancellation, the time left to create the item is taken. The ZLevelsRemastered plugin does not have a full-fledged api for interaction with crafting bonuses, so the work with it is not fully implemented (no rewards are given in economy plugins, permission of this plugin is not taken into account, etc.). Notification settings Notification type (Chat, GameTips, Notify, GUIAnnouncements) – if this section is enabled, you must specify the type/plugin to notify the player of different warnings. Chat – notification to regular chat. GameTips – notification in the in-game Rust tooltips (blue or red at the bottom of the screen). Notify – notification in the Notify plugin by Mevent. GUIAnnouncements – notification in the GUIAnnouncements plugin by JoeSheep. Just below that are the customization fields for the specific type of notification. Game Status Settings Game status is a notification that is shown at the bottom right of the screen (like in-game crafting). The plugin can show 3 types of game status: Current craft – it's the blue panel with the gear. It is displayed while the crafting process is in progress. Giving item – it's the green panel with the down arrow. It is displayed when a player is given a craft item. Dropping item – it's the red panel with the cross. It is displayed when the items given by the plugin do not fit in the inventory and drop out near the player. Crafting Panel working with Rust's in-game status and two plugins (SimpleStatus, AdvancedStatus) that have slightly advanced features. Rust – is the in-game status built into the game. It does not require any additional plugins, but it cannot show the Current craft (blue panel with a gear). SimpleStatus – this plugin displays customizable statuses. It can show Current craft and Giving item. But cannot display Dropping item due to limitations in its operation. AdvancedStatus - this plugin displays customizable statuses. It works with all of the above status types. Section settings Section name – the displayed section name on the menu button. Section permission [required] – be sure to fill in these fields and make sure they are all unique. Because it is by this field that the plugin understands which section it is currently working with. If you specify "favorite" here, the plugin will use this section to display the player's favorite items (don't add items to it, the plugin will delete them anyway). Register this permission? – if enabled, the plugin will register a permission with the above name. In this case this section will be shown only to those players who have this permission. Section item settings Item name [required] – required field. The name of the item is displayed only in this plugin. If you need to create an item with the same name, you will find this setting below. Item permission [required] – required field. Make sure that each item in the section has a unique field. Because by this field the plugin understands which item in the current section it is currently working with. Register this permission? - if enabled, the plugin will register permission with the above name. Keep in mind that the current item will still be shown to all players, but they will not be able to craft it (this is also notified by the icon on the top left of the information section). Item description – item description, is not passed to the item when crafting, only displayed in the panel of this plugin. Item properties – if the item has some characteristics (e.g., damage, radiation protection, etc.) you can specify them here. This data is displayed in a separate panel in the information section of the item. Item shortname – if you are using the command as a craft result, leave this field empty. Create an item with the default name (true) or the above name (false)? – if true, the plugin will create an item with the default game name (which refers to the current shortname), otherwise it will set the name from the Item name field. Item skinId – if the item is custom, specify the required skinId, otherwise set it to 0. Item image [optional] – if as a result of craft, you have to execute some command, you can specify a link to a picture related to this command. Console commands executed after crafting (%steamid%, %username%, %amount%) [optional] – if you need to execute some commands as a result of crafting, you can list them with commas in this field. In the command you can specify %steamid% and %username%, the plugin will replace them with the data of the current player. The plugin can also replace %amount% with the amount per craft (next setting). If the command gives some custom game item and you know its shortname and skinid you can specify them in the fields above. This way you don't need to additionally save the image of this item to the hosting and specify its link. Amount per craft – number of items given out per craft. Max craft multiplier - maximum allowable craft multiplier. The craft multiplier (selected by the player in the Ingredients section) is how many times an item will be dispensed or how many times commands will be executed. If Amount per craft = 3, and the player chose multiplier = 2, he will receive 2 * 3 = 6 items. Crafting time [sec] – time to craft the item. It can be set to 0, then the item will be crafted instantly. Show notification in game status (if they are enabled)? – if a command from another plugin is used to give a custom item and that plugin displays game status, duplication of game statuses may occur. Therefore, it is possible to disable the display of game status for a particular item. Keep in mind that this only disables the Giving item status. Apply craft bonuses (if they are enabled)? – allows you to apply craft bonuses (from the "Crafting bonuses" section) to this item. Crafting cost in the economy plugin [0 - disable] – the value of the current item in your economy server currency. The customization works if you specified one of the supported economy plugins at the beginning. Item Variation settings In the in-game Rust crafting panel this section is called Skins, here it is called Variations. This is done because here it can include not only skins, but any items or commands related to the parent item. For example, you have several modular car presets, with different types of modules, but they are all related to modular cars. Therefore, you can specify them in one item - "Modular car". The settings in this section are similar to the parent item, except for the crafting ingredients. They will be the same as the parent item. Item Ingredient settings Resource name [required] – required field. Is used to display the name of the ingredient in the plugin panel (it is not taken into account when taking ingredients from the player). When canceling the craft, the plugin can set this ingredient to the specified name, you will find this setting below. Use this resource in ingredients? – enables or disables this resource for use in ingredients. Resource shortname [required] – required field. Shortname of the item that the plugin will look for from the player for crafting. Resource skinId – if it's a custom item, give its skinId, otherwise set it to 0. Return an item with the default name (true) or the above name (false)? – when the craft is canceled, if true, the plugin will create an ingredient with the default game name (which refers to the current shortname), otherwise it will set the name from the Resource name field. Plugin Config Example of plugin configuration in English: Example of plugin configuration in Russian. If you need Russian config, open it (CraftingPanel.cs) before loading the plugin, and at the top set the variable "isRus = true". Then save and upload this file to your server.$30.00- 122 comments
- 2 reviews
-
- 7
-

-

-
- #craft
- #craft menu
- (and 17 more)
-
Version 1.5.0
724 downloads
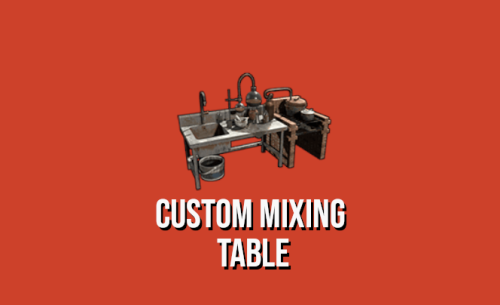
This plugin is basically custom made mixing table which works pretty much same as "vanilla" Mixing Table. Worth mentioning detail, vanilla mixing table interface is no longer accessible while using this plugin although you can still list "teas" in DrugMixing and make them craft-able this way. By using one of my other plugins called Consumable Effects you can add special buffs to consumable items. These buffs are activated upon consuming the item with custom item name listed in data file. Buffs can modify metabolism values like health, bleeding, hunger, comfort etc. or apply Tea Boost with customized values (time, value, type). FAQ Default configuration. Default config files are included with plugin, you will find there 7 recipes which supports ConsumableEffects plugin. Alternatively you can look into configuration made by my customers here -> Default Tea Recipes / Complete Drug Config for RP servers Changing and uploading custom item icons. You can upload any icon on steam workshop with uploader tool, it is simple as just clicking one button. I can provide you with free one on my discord. Where can players find custom ingredients for mixing table. There is few different ways how to do it. Best way is to use any plugin which modifies loot tables and add your special items in there. Getting custom item when picking up plants. This is done by using free plugin ExtraGatherBonuses (link here). With this plugin you can set up any gather chance for custom items. Special effects/buffs when consuming custom items. To set up any buffs, please check out optional dependency Consumable Effects If you have any questions prior to purchasing, feel free to message me here, for faster response reach out on my discord.gg/rustplugins/ For more detailed documentation visit this link. Create Recipe Additional Options$10.99 -
Version 1.10.62
191 downloads
IQRecycler - a plugin that allows you to set up your own recycler for your players! This plugin will allow you to extensively customize and monetize the recycler on your server. You can have full control over it and customize it according to your preferences, individually for each privilege! It supports pickup the recycler, inflicting damage, displaying health, and has a large base of supported plugins. List of features: Interface: - The plugin has a simple, stylish, and intuitive UI interface with the ability to craft the recycler. Recycler Configuration: - Configuration of the placement of the recycler. - Configuration for lifting the recycler by the owner or their friends. - Configuration of the durability of the recycler after lifting. - Configuration of the overall durability for the recycler. Ability to /remove the recycler: - It has support for the IQGradeRemove plugin, which allows players to lift the recycler using /remove. Damage to the recycler: - The plugin includes support for damage to the recycler from all types of Rust weapons and items. - Support for customizing the damage to the recycler from specific items. Repairing the recycler: - The plugin supports the ability to repair the recycler by hitting it with a hammer. You can configure the required resources and the amount of durability it will receive per hit. Item Recycling: - You can configure the speed of item recycling for players. - Full customization of recycling, allowing you to configure the final loot after recycling an item. For example, replacing all the loot with an AK47 or any other item, with the option to set the drop chance, support for SkinID, and custom names! Blacklist of items: - You can prohibit players from recycling specific items in their recyclers. These items will be marked in the player's inventoryand cannot be transferred to the recycler. The "Item Recycling" and "Blacklist of items" features can be individually configured for each privilege group, according to their own rights! Recycler Crafting: - You can allow all players to craft the recycler or only specific groups by granting them permissions. - Full customization of the items and quantities required to craft the recycler, with support for custom items. - Optionally, you can set a cost for crafting the recycler using: IQEconomic, Economics, ServerRewards. Item Configuration: - You can configure the display of the item in players' inventories by changing its name (supports both Russian and English) and changing the icon (SkinID). Permissions: iqrecycler.craft - ability to use the recycler crafting iqrecycler.ignorepayment - ability to ignore payment for crafting from economy plugins Other permissions are configured in the configuration. Configuration : { "Recycler crafting configuration": { "Use craft recycler (UI) (true - yes/false - no)": true, "List of items for the Recycler crafting recipe (can hold no more than 5 pieces)": [ { "Shortname": "metal.fragments", "Amount": 500, "SkinID": 0, "Item names for display to the player": { "Text in Russian": "фрагменты металл", "Text in English": "metal fragments" } }, { "Shortname": "metal.refined", "Amount": 50, "SkinID": 0, "Item names for display to the player": { "Text in Russian": "металл высокого качества", "Text in English": "metal refined" } }, { "Shortname": "scrap", "Amount": 70, "SkinID": 0, "Item names for display to the player": { "Text in Russian": "металлолом", "Text in English": "scrap" } }, { "Shortname": "techparts", "Amount": 10, "SkinID": 0, "Item names for display to the player": { "Text in Russian": "микросхемы", "Text in English": "tech trash" } } ], "Use charging for crafting the recycler (IQEconomic, Economics, ServerRewards) (true - yes/false - no)": false, "Crafting cost of the recycler (IQEconomic, Economics, ServerRewards)": 100 }, "Setting up a recycler Item": { "The recycler's display name (in the inventory)": { "Text in Russian": "Домашний переработчик", "Text in English": "Home recycler" }, "SkinID for the image (required field)": 2976924191 }, "Settings Recycler": { "Install recycler controllerr": { "The recycler can be installed only in the area of the cupboard (building zone) (true - yes/false - no)": true, "The ability to install a recycler on the ground (true - yes/false - no)": false, "Prohibit installing a recycler during a raid block (true - yes/false - no)": true }, "Pickup of a recycler": { "How many seconds will a recycler pick up": 12, "You can pickup the recycler only in the area of the cupboard (building zone) (true - yes/false - no)": true, "Only the owner who installed it or his friends can pickup the recycler (true - yes/false - no)": false, "Disable recycler pickup during raid block (true - yes/false - no)": true, "Recycler condition setting": { "Use condition removal from recycler when picking it up (true - yes/false - no)": true, "How much % of condition to remove from an object when it is raised (0 - 100)": 25 } }, "Health Count": 750, "Damage Controller Recycler": { "Use Damage Recycler (true - yes/false - no)": true, "Custom Damage List [Shortname] = Damage": { "multiplegrenadelauncher": 40.0, "grenade.beancan": 25.0, "grenade.f1.deployed": 35.0, "explosive.satchel": 130.0, "explosive.timed": 300.0, "ammo.rocket.basic": 190.0, "ammo.rocket.hv": 140.0, "ammo.rocket.fire": 80.0, "surveycharge": 10.0 } }, "Recycler repair settings": { "Use the ability to repair the recycler (true - yes/false - no)": true, "Use prohibition on repairing the recycler if it has recently been damaged (true - yes/false - no) (damage support for the recycler must be enabled)": true, "How many seconds until the recycler can be repaired after it has been damaged": 20.0, "How much durability will be replenished for the recycler per one repair": 100, "Items that will be taken during repairs": [ { "Shortname": "metal.fragments", "Amount": 30, "SkinID": 0, "Item names for display to the player": { "Text in Russian": "фрагменты металла", "Text in English": "metal fragments" } }, { "Shortname": "metal.refined", "Amount": 5, "SkinID": 0, "Item names for display to the player": { "Text in Russian": "металл высокого качества", "Text in English": "metal refined" } } ] }, "Disallow the use of a recycler during a raid block (true - yes/false - no). (true - yes/false - no)": false }, "Settings supports plugins": { "Settings IQChat": { "IQChat : Custom prefix in chat": "[<color=#64D15D>IQRecycler</color>]\n", "IQChat : Custom chat avatar (If required)": "0", "IQChat : Use UI notification (true - yes/false - no)": false } }, "Standard recycling process settings (available to all players)": { "Blacklist of items that cannot be recycled": { "Use blacklist of items (true - yes/false - no)": true, "List of items that cannot be recycled": [ { "Shortname": "gears", "SkinID": 0 }, { "Shortname": "techparts", "SkinID": 0 }, { "Shortname": "metalspring", "SkinID": 0 } ] }, "Item recycling speed settings": { "Use recycling speed editing": true, "How many seconds the item recycling will last (default in RUST: 5 seconds)": 5.0 }, "Replacement of dropped items after recycling": { "Use item replacement after recycling function": false, "Item recycling settings, you can replace the dropped items after recycling [Incoming item (to be recycled) = List of items to be given after recycling]": [ { "Shortname": "rifle.ak", "SkinID": 0, "OutputList": [ { "Shortname": "metal.refined", "SkinID": 0, "Amount per 1 unit of recycled item": 25, "Item drop chance": 100, "Displayed item name": "" }, { "Shortname": "wood", "SkinID": 0, "Amount per 1 unit of recycled item": 100, "Item drop chance": 100, "Displayed item name": "" }, { "Shortname": "metalspring", "SkinID": 0, "Amount per 1 unit of recycled item": 2, "Item drop chance": 50, "Displayed item name": "" }, { "Shortname": "riflebody", "SkinID": 0, "Amount per 1 unit of recycled item": 1, "Item drop chance": 15, "Displayed item name": "" } ] }, { "Shortname": "explosive.timed", "SkinID": 0, "OutputList": [ { "Shortname": "explosives", "SkinID": 0, "Amount per 1 unit of recycled item": 5, "Item drop chance": 100, "Displayed item name": "" }, { "Shortname": "cloth", "SkinID": 0, "Amount per 1 unit of recycled item": 3, "Item drop chance": 100, "Displayed item name": "" }, { "Shortname": "wood", "SkinID": 0, "Amount per 1 unit of recycled item": 100, "Item drop chance": 100, "Displayed item name": "" }, { "Shortname": "techparts", "SkinID": 0, "Amount per 1 unit of recycled item": 1, "Item drop chance": 50, "Displayed item name": "" } ] }, { "Shortname": "spraycan", "SkinID": 0, "OutputList": [ { "Shortname": "bleach", "SkinID": 1337228, "Amount per 1 unit of recycled item": 5, "Item drop chance": 100, "Displayed item name": "Coin" } ] } ] } }, "List of recycling settings by privileges [Permission] = Setting": { "iqrecycler.premium": { "Blacklist of items that cannot be recycled": { "Use blacklist of items (true - yes/false - no)": false, "List of items that cannot be recycled": [] }, "Item recycling speed settings": { "Use recycling speed editing": true, "How many seconds the item recycling will last (default in RUST: 5 seconds)": 2.0 }, "Replacement of dropped items after recycling": { "Use item replacement after recycling function": false, "Item recycling settings, you can replace the dropped items after recycling [Incoming item (to be recycled) = List of items to be given after recycling]": [ { "Shortname": "rifle.ak", "SkinID": 0, "OutputList": [ { "Shortname": "metal.refined", "SkinID": 0, "Amount per 1 unit of recycled item": 50, "Item drop chance": 80, "Displayed item name": "" }, { "Shortname": "wood", "SkinID": 0, "Amount per 1 unit of recycled item": 200, "Item drop chance": 100, "Displayed item name": "" }, { "Shortname": "metalspring", "SkinID": 0, "Amount per 1 unit of recycled item": 3, "Item drop chance": 50, "Displayed item name": "" }, { "Shortname": "riflebody", "SkinID": 0, "Amount per 1 unit of recycled item": 2, "Item drop chance": 20, "Displayed item name": "" } ] }, { "Shortname": "explosive.timed", "SkinID": 0, "OutputList": [ { "Shortname": "explosives", "SkinID": 0, "Amount per 1 unit of recycled item": 6, "Item drop chance": 100, "Displayed item name": "" }, { "Shortname": "cloth", "SkinID": 0, "Amount per 1 unit of recycled item": 10, "Item drop chance": 100, "Displayed item name": "" }, { "Shortname": "wood", "SkinID": 0, "Amount per 1 unit of recycled item": 200, "Item drop chance": 100, "Displayed item name": "" }, { "Shortname": "techparts", "SkinID": 0, "Amount per 1 unit of recycled item": 2, "Item drop chance": 50, "Displayed item name": "" } ] } ] } }, "iqrecycler.vip": { "Blacklist of items that cannot be recycled": { "Use blacklist of items (true - yes/false - no)": true, "List of items that cannot be recycled": [ { "Shortname": "techparts", "SkinID": 0 } ] }, "Item recycling speed settings": { "Use recycling speed editing": true, "How many seconds the item recycling will last (default in RUST: 5 seconds)": 3.5 }, "Replacement of dropped items after recycling": { "Use item replacement after recycling function": false, "Item recycling settings, you can replace the dropped items after recycling [Incoming item (to be recycled) = List of items to be given after recycling]": [ { "Shortname": "rifle.ak", "SkinID": 0, "OutputList": [ { "Shortname": "metal.refined", "SkinID": 0, "Amount per 1 unit of recycled item": 50, "Item drop chance": 80, "Displayed item name": "" }, { "Shortname": "wood", "SkinID": 0, "Amount per 1 unit of recycled item": 200, "Item drop chance": 100, "Displayed item name": "" }, { "Shortname": "metalspring", "SkinID": 0, "Amount per 1 unit of recycled item": 3, "Item drop chance": 50, "Displayed item name": "" }, { "Shortname": "riflebody", "SkinID": 0, "Amount per 1 unit of recycled item": 2, "Item drop chance": 20, "Displayed item name": "" } ] }, { "Shortname": "explosive.timed", "SkinID": 0, "OutputList": [ { "Shortname": "explosives", "SkinID": 0, "Amount per 1 unit of recycled item": 4, "Item drop chance": 100, "Displayed item name": "" }, { "Shortname": "cloth", "SkinID": 0, "Amount per 1 unit of recycled item": 5, "Item drop chance": 100, "Displayed item name": "" }, { "Shortname": "wood", "SkinID": 0, "Amount per 1 unit of recycled item": 150, "Item drop chance": 100, "Displayed item name": "" }, { "Shortname": "techparts", "SkinID": 0, "Amount per 1 unit of recycled item": 1, "Item drop chance": 60, "Displayed item name": "" } ] } ] } } } }$9.99 -
Version 1.3.4
337 downloads
SAVE 10% WHEN BUYING THE BUNDLE We are proud to announce the release of Crafting Manager superseding "Instant Crafting". Crafting Manager main features: Instant crafting (craftingmanager.instant.allow) Define a global scaling per workbench tier to be applied to all users by default Create as many "custom" profiles you need, each one will have a permission to control who gets access to the custom scaling Item blacklist allows you to block items from being crafted. Players get a message when the item is uncraftable. PermanentWorkbenchLevel permanently assigns workbench level to your players. Example of a custom profile, the values are in percentage of the original crafting duration. If you want to craft a Cupboard (30s original) and set tier0 to 0.5 (50%) then the Cupboard will take 15s to craft. "vip1": { "0": 0.25, "1": 0.5, "2": 0.75, "3": 1.0 } To assign the vip1 profile to a user type "o.grant user my_player craftingmanager.profile.example1", to assign it to a group type "o.grant group my_group craftingmanager.profile.example1". If you'd like to assign instant crafting it to all your players just grant the permission to the default group by typing "o.grant group default craftingmanager.instant.allow". Full configuration example: { "CraftingScale": { "Global": { "0": 1.0, "1": 1.0, "2": 1.0, "3": 1.0 }, "Profiles": { "example1": { "0": 0.25, "1": 0.5, "2": 0.75, "3": 1.0 }, "example2": { "0": 0.0, "1": 0.25, "2": 0.5, "3": 0.75 } } }, "Miscellaneous": { "InstantCrafting": 1.0, "PermanentWorkbenchLevel": 0 }, "BlacklistedItems": [ "syringe.medical", "explosives", "autoturret" ] }$4.99- 27 comments
- 2 reviews
-
Version 2.10.21
1,368 downloads
Crafting system that allows you to create items, cars, vehicles, recyclers, etc! Commands craft open interface crafts.setwb [categories: cat1 cat2 ...] set new custom workbench Permissions You can set permission in config, for example: "Permission (ex: crafts.use)": "crafts.use", crafts.setworkbench - allows you to use the "crafts.setwb" command (set custom workbenches) Craft Types Command Vehicle Item Recycler ModularCar How to install a custom workbench 1. Spawn the workbench (for example, in RustEdit or a plugin) 2. In the game, go to him and use the command "crafts.setwb" and specify the necessary categories. Example: /crafts.setwb Misc 3. Go to config (oxide/config/Crafts.json) and configure this workbench (use SafeZone, workbench level, etc.) VIDEO FAQ Q: Where can I see an example of a config? A: Config$19.95 -
Version 1.1.7
2,841 downloads
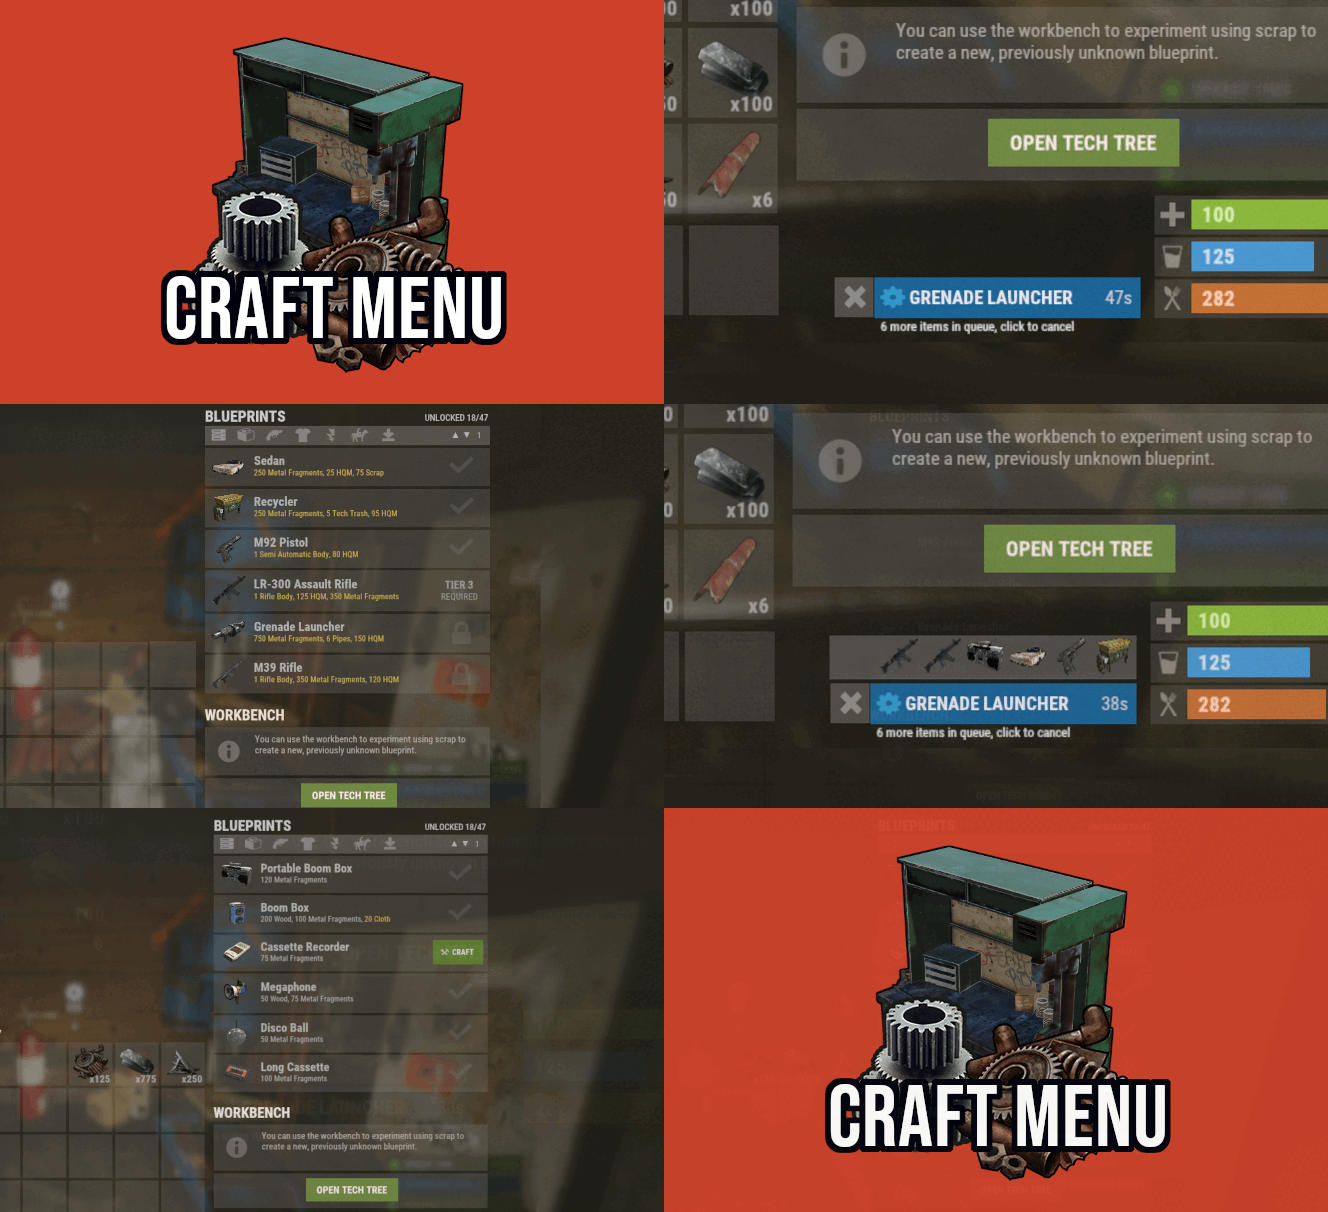
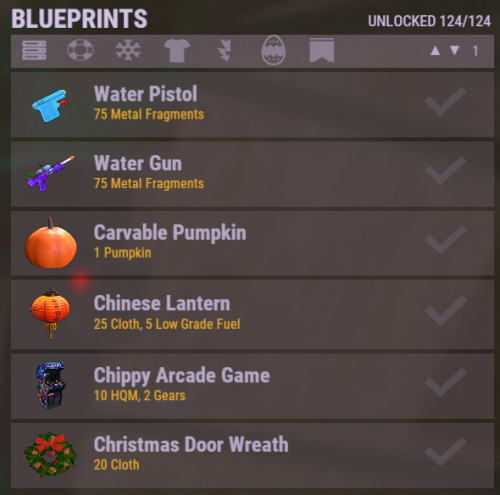
Custom crafting panel at player's workbenches. Craft custom or non-craftable items, create your own blueprints. No chat commands required! oxide permission - craftmenu.use • How to create default blueprint. Simply leave ResearchCost as 0. • Crafting Recycler. Plugins for placing entities usually utilizes specific item together with skin id. Here you can find list of examples PlaceableEntities.txt • Adding same shortname multiple times. When you using same shortname for more than one blueprint you have add {number} at the end of it to prevent duplicates. Ex.: "box.wooden.large{1}" • Item is name too long. Inside lang file you can create replacements for default item names. • Wiping blueprints manualy. There are two admin console commands. "craftmenu_admin wipe" will wipe blueprints for all players "craftmenu_admin wipe <steamID>" wipes blueprints only for certain player. Premade blueprints from screenshots Blueprints.json$16.00 -
Version 1.2.7
205 downloads
Open UI - /craftcontrole (craftcontroller.use) FEATURES: Changing the minimum required workbench for item crafting Craft time is adjustable For items with a certain skinID Block crafting Block explore a blueprint Block explore at the workbench P.s - (My Discord - tofurahie#4144) Config: { "Craft Rate in %": 50, "Item Settings": { "ammo.shotgun.slug": { "Default Skin": 0, "Block craft": false, "Block to explore a blueprint": false, "Block to explore at the workbench": false, "Craft time (-1 => Default)": -1.0, "WorkbenchLevel (-1 => Default)": -1 }, "ammo.rifle": { "Default Skin": 0, "Block craft": true, "Block to explore a blueprint": true, "Block to explore at the workbench": false, "Craft time (-1 => Default)": 15.0, "WorkbenchLevel (-1 => Default)": 1 } } }$8.49- 2 comments
- 1 review
-
- #craft
- #workbench
- (and 9 more)
-
Version 0.1.4
317 downloads
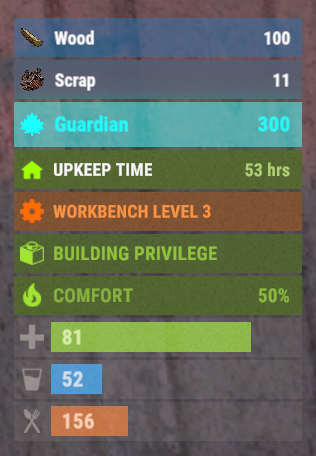
This plugin demonstrates the integration with the AdvancedStatus plugin. It displays the amount of a specific item in the player's inventory in the status bar. In this case, it's Scrap, to track a different item, replace the itemID value on line 47 with the ID of the desired item. This plugin can be downloaded by plugin developers as a reference to understanding how to work with the AdvancedStatus and by server owners to easily display desired items in the status bar.Free -
Version 1.6.2
27 downloads
Plugin Features: Custom Crafting Recipes: Craft weapons, armor, tools, medic items, special items and vehicles with fully customizable recipes and ingredients. You chose what will be able to craft for how much ! Custom items or default items ,its about you ! This is great for giving player chance to upgrade items ,to get that Recycler or what ever . You have text fields : Server name , and short info where you chose your text in config. How to open Craft UI : command - /upgrades or/and in WorkBench custom button You can chose how players will open UI ,will you give them both ways ,or only one , its about you ! Permissions : "crafting.craft" - perm for crafting "crafting.upgrades" - perm for command /upgrades "crafting.button" - perm for WorkBench button How to use Plugin : This is very simple plugin with easy to understand UI. Most important thing is that for every item you need to put his : "Identifier": " " . You can add what ever item in what ever tab , based on shortname/skinID ,and cost for that item. You can give amount of item what will be crafted ,will it be 1 Ak or 10 ,hmm yea .. You can change names of items ,you have description for each item . You can put what ever number of items per tab ,there are pages . There is text field where you can put server name ,and some info text. Now you are able to change icons and text field of tabs ,and image of background/main image in config file. Everything is in config ... Vehicles : You can craft vehicles now ,and you can pick them up with hammer.. Vehicles are placed like innertube and large box . Spawn distance is how far will vehicle spawn . Identifier = 67, DisplayName = "Attack Helicopter", Shortname = "box.wooden.large", Amount = 1, SkinID = 3033643127, IsVehicle = true, VehiclePrefab = "assets/content/vehicles/attackhelicopter/attackhelicopter.entity.prefab", SpawnDistance = -0.5f, Description = "Attack Helicopter", Future Plans : Economic/ServerRewards Config Example : { "BackGroundIconUrl": "https://www.dropbox.com/scl/fi/oekoayvmkcc73b2ip77pv/Anvil.png?rlkey=cmrd35fxc2p7uk6ivtzb7v9h9&dl=1", "Panel1Text": "WEAPONS", "Panel1IconUrl": "https://www.dropbox.com/scl/fi/f1i0stpz9zz758i8azo0p/rifle.ak.png?rlkey=4w3ew16xrjcg81g6vxuhtl5gp&dl=1", "Panel2Text": "ARMOR", "Panel2IconUrl": "https://www.dropbox.com/scl/fi/0dmyzne2p3cv318337wf6/metal.facemask.png?rlkey=btxceyv5xnuc9yqlz7pj6s52a&dl=1", "Panel3Text": "TOOLS", "Panel3IconUrl": "https://www.dropbox.com/scl/fi/1grgskr9xhfdfoccytblv/icepick.salvaged.png?rlkey=8pased5k7rn4gtei0mjyx90sq&dl=1", "Panel4Text": "MEDIC", "Panel4IconUrl": "https://www.dropbox.com/scl/fi/zdhfaer2crjcqr907c7e9/largemedkit.png?rlkey=qedbem0v9pb43whx6gk6edzi2&dl=1", "Panel5Text": "SPECIALS", "Panel5IconUrl": "https://www.dropbox.com/scl/fi/pe2gw856tjn6kv8goq024/star.png?rlkey=9jnasfu3xa4ntzub24oxzja1b&dl=1", "Panel6Text": "VEHICLES", "Panel6IconUrl": "https://www.dropbox.com/scl/fi/u1sd8tthfvtvue9i37j6r/attackhelicopter.png?rlkey=olivi4ki0g3o5q2aay9hgm5yq&dl=1", "ServerName": [ "Welcome to My Server Name" ], "Info": [ "INFO:", "There are 6 tabs : Weapon, Armor, Tool, Medic, Special, Vehicle.", "", "You can upgrade level of item.", "", "You will need some items and resources for crafting.", "", "You can put what ever text here ,and add more text!" ], "WeaponCraftRecipes": [ { "Identifier": 1, "DisplayName": "Vamipre Ak Lv1", "Shortname": "rifle.ak", "Amount": 1, "SkinID": 3065510373, "Description": "5% lifesteal", "Ingredients": [ { "Shortname": "rifle.ak", "Amount": 1, "SkinID": 0, "DisplayName": "" }, { "Shortname": "scrap", "Amount": 100, "SkinID": 0, "DisplayName": "" } ] }, "ArmorCraftRecipes": "ToolCraftRecipes": "MedicCraftRecipes": "SpecialCraftRecipes": "VehicleCraftRecipes":$8.00- 12 comments
-
- #craft
- #craft menu
-
(and 3 more)
Tagged with:
-
Version 1.0.5
21 downloads
This plugin allows admins to control all about researching and crafting. With all default items ,and with custom ones! So what you chose to be researchable that players will be able to research and craft ,for prices what you chose . And with other options like Craft time, Wb Level , Display Name, Description, Category, Quantity. Researching is true research table ,crafting UI is similar to default rust crafting UI . You can block default crafting ,block researching in wb ,block tech tree ... You can combine what you will block what not ,. You can use it in full potential with research and craft UI ,with your own prices and stats ,blocking all default crafts/researchs! Or you will just use it for custom cost of research ,and default craft by rust , its all about you ! Best explanation is true config file : "Block Default Crafts": true/false, // You are able to block completely default craft system, so players can only craft items true plugin UI. "Block WB Tech Tree": true/false, // You are able to block completely researching true TechTree. "Block ResearchTable Research": true/false, // You are able to block completely default research true research table , so players can only research items true plugin UI . "Play Sound On Research Success": true, "Research Success Sound Asset": "assets/prefabs/deployable/research table/effects/research-success.prefab", "Play Sound On Research Fail": true, "Research Fail Sound Asset": "assets/prefabs/deployable/research table/effects/research-fail.prefab", //This is default config for one item ,but you will get all items in config with their default values. //As you can see rifle.ak is loaded with his default properties. "Items": { "rifle.ak": { //Shortname "0": { //SkinID "AllSkins": true, // if true ,player will be able to research rifle.ak no matter of his skin of item, if you put false ,then it will check for skinID of item(if you add custom items with same shortname ,then use false) "IsResearched": false, //if false, item will not be researched by default ,if true it will be researched ,so player will be able to craft it without reasrching it . "IsResearchable": true, //if true ,palyers can research this item , if false item is not researchable. "DisplayName": null, // if null default name of item will be , you can give custom name to item example: "mygun" . "Description": null, // if null it will be default description of item ,,you can use custom description ,example "this gun is best gun" . "ResearchCost": [ // price for research item ,you can add up to 4 items total ,you can use default rust items ,and custom ones . { "Shortname": "scrap", "Amount": 500, "SkinID": 0, "DisplayName": null } ], "RequiredCraftWBLevel": 3, // what workbench level item needs for craft ,0 is no workbench level "CraftTime": 45.0, // this is default craft time ,you can change it ,in seconds . "CraftCost": [ // price for craft item ,you can add up to 8 items total ,you can use default rust items ,and custom ones . { "Shortname": "metal.refined", "Amount": 50, "SkinID": 0, "DisplayName": null }, { "Shortname": "wood", "Amount": 200, "SkinID": 0, "DisplayName": null }, { "Shortname": "riflebody", "Amount": 1, "SkinID": 0, "DisplayName": null }, { "Shortname": "metalspring", "Amount": 4, "SkinID": 0, "DisplayName": null } ], "Category": "Weapon", // category of item ,where item will be placed in what tab,you can change this also ,to some custom ones or what ever name you like ! "CraftOutputQuantity": 1 // this is default output quantity of item (when you craft lowgradefuel you get for 1 craft 4 lowgrade) ,you can change output . } }, On first loading of plugin you will get in config all items ,with their default properties : Default items what are researched by default in game ,will be researched (lets say Sleeping Bag,Hammer,etc), items what are by default researchable they will be researchable (with their scrap cost), Those items will also have default craft prices , required workbench level ,time for craft ,craft quantity ,category. So it will be easy for you to change what you need to change for items. Categorie tabs are in config file : "Categories": [ "FAVORITES", "CUSTOM", "WEAPON", "ATTIRE", "TOOL", "MEDICAL", "AMMUNITION", "RESOURCES", // you can change all categories how you like ,,you can remove some ,add more ,rename them . "ITEMS", //if you rename category lets say "WEAPON" to "guns" dont forget to change on items also category ,so they can be placed in that new "gun" categorie . "COMPONENT", "CONSTRUCTION", "ELECTRICAL", "FOOD", "TRAPS", "MISC", "FUN" ], "Favorite Category Name": "Favorites", // this is core name for favorite items ,when change this be sure that you have in Categories that name what you put for favorite tab . Commands : Chat command : /q (configurable) - open craft ui . Console command : bind <key> craft.openui - in F1 players can bind <key> so they can open Craft UI with key (keyboard button) so they dont need to type shat command. Console command : wipe_research_data - wipe player researched items. Console command : wipe_favorite_data - wipe players favorite items. Permissions: "craftsystem.research" - without this perm player cant see UI for research. "craftsystem.craft" - without this perm player cant open Craft Ui . Data : you will see in data what player researched ,and his favorites . LangFile - you are able to change text ,on something else that you like ,on some different language . How to add custom or skined item : "box.repair.bench": { // this is default item "0": { // without SkinID "AllSkins": false, // We have here false ,so it will look for Shortname and SkinId "IsResearched": true, // Its researched. "IsResearchable": false, "DisplayName": null, "Description": null, "ResearchCost": [ { "Shortname": "scrap", "Amount": 10, "SkinID": 0, "DisplayName": null } ], "RequiredCraftWBLevel": 1, "CraftTime": 30.0, "CraftCost": [ { "Shortname": "metal.fragments", "Amount": 125, "SkinID": 0, "DisplayName": null } ], "Category": "Items", "CraftOutputQuantity": 1 } "1594245394": { // Here we add SkinID. We added SkinId to shortname what belongs to that custom item . "AllSkins": false, // We have here false ,so it will look for Shortname and SkinId "IsResearched": false, // Not researched , "IsResearchable": true, // But its researchable . "DisplayName": "Recycler", // we use custom name for item. "Description": "With this i can recycle home", // we use custom description for item. "ResearchCost": [ { "Shortname": "scrap", // some cost for research . "Amount": 1000, "SkinID": 0, "DisplayName": null }, { "Shortname": "gears", "Amount": 50, "SkinID": 0, "DisplayName": null } ], "RequiredCraftWBLevel": 3, // we need to be at level 3 workbench to craft it. "CraftTime": 60.0, // 60 sec craft time . "CraftCost": [ // craft cost. { "Shortname": "metal.fragments", "Amount": 2500, "SkinID": 0, "DisplayName": null }, { "Shortname": "rifle.ak", "Amount": 1, "SkinID": 2585539626, "DisplayName": null } ], "Category": "Custom", // we changed category to custom ,so recycler will be in custom tab . "CraftOutputQuantity": 1 // quantity is 1 ,we will get 1 recy per craft } }, For any questions fell free to join my discord channel !$20.00- 6 comments
-
- 1
-

-
Version 1.0.4
1,901 downloads
Features Changes the speed of crafting. Usage - Copy the downloaded DLL file into server/HarmonyMods folder - After loading the plugin it will create a directory in the server's folder called HarmonyConfig, where you will be able to change the config options. Support - If you need help or If you have any issues or suggestions you can contact me by joining my discord server: https://discord.gg/efVKDG6z6F or by adding me on discord: Farkas#6006Free -
Version 1.1.0
35 downloads
The SimpleCraftSystem Plugin introduces a versatile and sleek crafting interface reminiscent of Rust's original style. It seamlessly integrates into the game, offering a highly customizable experience. This plugin empowers players to design and implement numerous recipes, providing the freedom to tailor their crafting journey to their liking. Acquiring this plugin unlocks an array of opportunities to amplify your server's gameplay. Its pivotal feature lies in the ability to seamlessly integrate with other plugins, thereby expanding your crafting options significantly. By investing in this plugin, you gain the power to incorporate an extensive range of crafts for various items from diverse plugins. One of its standout features is the ability to create multiple crafting pages, each serving as a dedicated space for crafting specific items or categories. This not only streamlines the crafting process but also allows for organized and efficient gameplay. Navigating between these crafting pages is intuitive, enabling quick access to various recipes without hassle. This expanded crafting system serves as a catalyst for increased engagement and intrigue among your server's community. It diversifies the available items and resources, encouraging players to experiment, strategize, and delve deeper into the game's intricacies. As a result, the server becomes a dynamic and thrilling environment where creativity and exploration flourish. Example Config: { "Recipes": { "example.trashcan": { "Result": { "Shortname": "box.wooden.large", "SkinID": 1595211850, "Amount": 1, "Name": "Trashcan", "Description": "Trashcan that disposes anything you've put in the box permanetely." }, "Ingradients": [ { "Shortname": "box.wooden.large", "SkinID": 0, "Amount": 1, "Name": null, "Description": null }, { "Shortname": "scrap", "SkinID": 0, "Amount": 100, "Name": null, "Description": null } ] }, "backpack.small": { "Result": { "Shortname": "backpack.small", "SkinID": 0, "Amount": 1, "Name": null, "Description": null }, "Ingradients": [ { "Shortname": "cloth", "SkinID": 0, "Amount": 1000, "Name": null, "Description": null } ] }, "backpack.large": { "Result": { "Shortname": "backpack.large", "SkinID": 0, "Amount": 1, "Name": null, "Description": null }, "Ingradients": [ { "Shortname": "backpack.small", "SkinID": -1, "Amount": 1, "Name": null, "Description": null }, { "Shortname": "cloth", "SkinID": 0, "Amount": 10000, "Name": null, "Description": null } ] } }, "Craft Pages": { "example.craftpage": { "Buttons": [ { "Label": "BACKPACKS", "Craft Page ID": "backpacks" } ], "Recipes": [ "example.trashcan" ], "Effect": "assets/bundled/prefabs/fx/item_unlock.prefab", "Chat Command to open": "cs", "Console Command to open": "", "Loot entity to open": { "Entity skin ID": 0, "Prefab full name": "assets/prefabs/deployable/repair bench/repairbench_deployed.prefab" } }, "backpacks": { "Buttons": [ { "Label": "MAIN", "Craft Page ID": "example.craftpage" } ], "Recipes": [ "backpack.small", "backpack.large" ], "Effect": null, "Chat Command to open": "", "Console Command to open": "", "Loot entity to open": { "Entity skin ID": 0, "Prefab full name": "" } } } }$12.50 -
Version 1.1.0
458 downloads
Crafting of Stationary Paper with new skins for organisiation and a locked `Admin Note` Features : Vanilla Notes get a new skin when crafted Craft different stationary papers each with their own skin and name Admin Note cant be rewritten or crafted if a player doesn't have the stationarypaper.admin permission assigned (to avoid abuse) Set a crafting price (wood for now) the Admin Notes are free to craft by admins Chat notification when not enough wood to craft in your inventory Craft canceling if no free inventory space Popup with costs when crafted (custom items don't show in notifications when crafting) Can be added to kits Backpacks safe (Bank does not support custom item names) Permissions : stationarypaper.admin (to be able to craft the admin note) stationarypaper.normal (To craft the notes for vanilla price : 10 wood) Commands : /note info : for a full listing of Configuration setup and commands /note admin : Crafts a Admin Note (locked for editing) /note bomb : Crafts a Bomb Letter (Does not explode) /note crow : Crafts a Crow Note /note information : Crafts a Info Note /note love : Crafts a Love Letter Configuration : { "Main config": { "Debug": false, "Chat Prefix": "[<color=purple>Stationary Paper</color>] " }, "Crafting Costs": { "Wood ammount": 100 } } Localisation : English language file included to use a diffrent language just make a new file in the language folder. { "NoteCrafted": "You succesfully crafted a <color=orange>{0}</color>", "Info": "\n<color=green>Available Commands</color> :\n<color=orange>/note info</color> : Shows info on version/author and commands", "InfoAdmin": "<color=orange>/note admin</color> : Crafts a Admin Note", "InfoBomb": "<color=orange>/note bomb</color> : Crafts a Bomb letter (does not explode)", "InfoCrow": "<color=orange>/note crow</color> : Crafts a Crow Note", "InfoInfo": "<color=orange>/note information</color> : Crafts a Info Note", "InfoLove": "<color=orange>/note love</color> : Crafts a Love Letter", "InvalidInput": "Please enter a valid command!", "InventoryFull": "You need at least 1 more slot in your inventory,canceling the craft", "Version": "Version : V", "NoPermission": "You do not have permission to use that command!" } Skins are uploaded with : Totally worth itFree -
Version 2022.9.24.1102
26 downloads
This high performance patch will make craft be instant for all your players. After installing the patch and restarting your server you need to set "craft.instant 1" to activate the instant crafting. This is a standalone Harmony patch, Oxide installation is optional. Copy the Oxidation.Instacraft.dll file into your HarmonyMods folder and restart your server. What is Harmony ? Harmony is a library for patching .NET code during runtime, it directly manipulates game code (CIL) without any additional abstraction layer such as Oxide. The direct patching of the game's byte code allows more performant modding as developers no longer need to rely on third party code, events or hooks to build custom functionality.$2.99 -
Version 1.0.4
431 downloads
Simple plugin that allows crafting speed multipliers to be set per oxide/uMod group. Commands These commands can be ran via ingame console (with permission) or RCON. gcraft gcraft <group> <multiplier> Permissions The following permission is only needed to allow users to access commands via ingame console. groupcrafting.admin Configuration The config can be edited directly or can be adjusted with the commands above. "group": Multiplier, "group2": Multiplier Oxide/uMod groups automatically populate the config when plugin is loaded. Default multiplier is 1 and increases crafting speed higher the value. For instant crafting, set multiplier to 0. Thanks to @SawyerWD for icon!Free -
Version 1.0.2
943 downloads
Config Files for Craft Menu Plugin Along with @ArtiIOMI we created Config For Craft Menu and we want to share it with you knowing how much time it takes to write one by yourself The config file contains items that are normally craftable in game but for which you need DLC or an item on Steam. It was made for VIPs on my server. I wanted it bo be not P2W feature. We also changed categories for our own, that match to items on the list a little bit better Item List : Make sure to check @Flammable version, he also did a great job by doing a config for this plugin, maybe you will like it betterFree- 2 comments
- 1 review
-
- 3
-

-

-
- #craft menu
- #config
-
(and 1 more)
Tagged with:

