Search the Community
Showing results for tags 'tools'.
-
Version 1.2.0
1,821 downloads
Manage your Rust server easier and more efficiently with the AdminMenu plugin. Track players, interact with them, edit their data and permissions, as well as change server convars and manage plugins. Features: Menu retains its state after closing, you won't lose everything you did before. Ability to fully translate the menu into any language. Large range of permissions for each action, will allow you to flexibly customize the admin menu for each group of administrators. Quick menu that allows you to perform quick actions Full list of players with the ability to filter by online, offline, admins and moderators. Also has a frame of different colors depending on the level of authorization. Wide range of information and actions for the selected player. Editing convars with search. Has a complete list of editable convars with descriptions for some of them. Extensive issue menu by category, with easy management of name, skin and amount (manual, +1, +100, +1000, +10000). Plugin management menu. It is possible to reload, unload or load a plugin easily and quickly. Updates occur in real time. Ability to create your own custom buttons that execute several commands Quick Start: You install the plugin in the plugins folder. Give yourself the adminmenu.fullaccess permission. Commands, use one of your choice, one for the player and one for the admin group: o.grant user {name/steamid} adminmenu.fullaccess o.grant group admin adminmenu.fullaccess Press the X button (swap seat button) or type adminmenu in the console. Enjoy Useful stuff: You can quickly open a player in the admin menu. To do this, point at the player and press X. You don't have to hover over the player exactly, you will be able to open players within a certain radius of the place you are looking at. CUSTOM BUTTONS Custom buttons are buttons that when pressed will execute commands on behalf of the administrator, commands can be several, below will be the details. At the moment, custom buttons can be created in two places: in the quick menu and in the menu when selecting a player. These places are separated in the config. Button Fields: "Execution as server" - Call the command on behalf of the server, not the administrator "Label" - Text that will be on the button, for each such inscription creates a field in the lang file, accordingly you can translate this text into several languages. "Commands" - Array of commands that will be executed on behalf of the administrator. Chat commands require a special entry, see examples. "Permission"- permission to display and use the button. You need to write the permission that will be after "adminmenu.". Example: if you enter the permission "test" the permission will be adminmenu.test "Position" - The location for the button, the first number is responsible for the row number, the second for the position within the row, starts from 0.There are limits of locations, if you have gone beyond the limit - the button will not be displayed. Common Tags: {adminUID} - administrator's id. {position} - administrator coordinates (underfoot) {view_position} - the position where the administrator is looking (can be used for spawning or something similar) {view_direction_forward} - forward view direction of the administrator {view_direction_backward} - the direction the administrator is looking backwards {view_direction_left} - direction of the administrator’s view to the left {view_direction_right} - administrator’s view direction to the right Tags for target only: {steamid}, {steamID}, {userID}, {STEAMID}, {USERID} - mean the same thing, namely the id of the selected player. {target_position} - target coordinates (underfoot) Example of commands: chat.say \"/{chat command}\" vanish ban {steamID} teleport {steamID} {adminUID} More information about the grant menu: The grant menu includes the full list of items including hidden items as well as custom items created by the CustomItemDefinitions library. The menu can be accessed from the navigation or from the menu of the selected player. When issuing itself has categories. Search works in any registry by any part of the name or short name. Has a page system at any stage. More information about the buttons in the Quick Menu: [Teleport to 0 0 0] - Teleport to coordinates 0 0 0. Requires adminmenu.quickmenu.teleportto000 permission [Teleport to Deathpoint] - Teleport to your deathpoint. Requires adminmenu.quickmenu.teleporttodeath permission [Teleport to Spawn point] - Teleport to a random spawn point. Requires adminmenu.quickmenu.teleporttospawnpoint permission [Kill Self] - Kill Self, kills even when immortal. Does not require permission. [Heal Self] - Fully heal yourself. Requires adminmenu.quickmenu.healself permission [Call Heli] - Call Helicopter to yourself (arrives in time). Requires adminmenu.quickmenu.helicall permission [Spawn Bradley] - Spawn bradley on yourself. Requires adminmenu.quickmenu.spawnbradley permission More information about the buttons in the menu of the selected player: [Teleport Self To] - Teleport yourself to the selected player. Requires adminmenu.userinfo.teleportselfto permission [Teleport To Self] - Teleport the selected player to yourself. Requires adminmenu.userinfo.teleporttoself permission [Teleport To Auth] - Teleportation to random authorization (TC). Requires adminmenu.userinfo.teleporttoauth permission [Teleport to Deathpoint] - Teleportation to a player's deathpoint. Requires adminmenu.userinfo.teleporttodeath permission [Heal] - Full healing, including metabolism. Requires adminmenu.userinfo.fullheal permission [Heal 50%] - Half healing. Requires adminmenu.userinfo.halfheal permission. [View Inventory] - View and edit player's inventory. Requires adminmenu.userinfo.viewinv permission [Strip Inventory] - Clear player's inventory. Requires adminmenu.userinfo.stripinventory permission [Unlock Blueprints] - Unlock all Blueprints. Requires adminmenu.userinfo.unlockblueprints permission [Revoke Blueprints] - Reset all Blueprints. Requires adminmenu.userinfo.revokeblueprints permission. [Kill] - Kill a player. Requires adminmenu.userinfo.kill permission [Kick] - Kick a player. Requires adminmenu.userinfo.kick permission [Ban] - Ban a player. Requires adminmenu.userinfo.ban permission More information about the buttons in the menu of the selected group: [Remove Group] - Remove group, has confirmation. Requires adminmenu.groupinfo.removegroup permission [Clone Group] - Clone group with the ability to copy users. Requires adminmenu.groupinfo.clonegroup permission Permissions: adminmenu.use - Ability to use admin menu with basic set. Open tab quick menu (each button has its own permission, without permissions is present only kill yourself button) and the list of players. adminmenu.fullaccess - Full access to all functions without the need for each permission, includes also adminmenu.use. It is recommended to give only to the main administrators. adminmenu.quickmenu.teleportto000 - Access to the button in the quick menu, teleportation to coordinates 0 0 0 0. adminmenu.quickmenu.teleporttodeath - Access to the button in the quick menu, teleportation to the point of your death. adminmenu.quickmenu.teleporttospawnpoint - Access to the button in the quick menu, teleportation to a random spawn point. adminmenu.quickmenu.healself - Access button in quickmenu, heal yourself completely. adminmenu.quickmenu.helicall - Access to the button in the quick menu, call a helicopter to yourself (arrives in time). adminmenu.quickmenu.spawnbradley - Access button in quickmenu, spawn bradley. adminmenu.userinfo.teleportselfto - Access to the button in the menu of the selected player, teleportation to the selected player. adminmenu.userinfo.teleporttoself - Access to the button in the menu of the selected player, teleport the selected player to himself. adminmenu.userinfo.teleporttoauth - Access to the button in the menu of the selected player, teleportation to random authorization (TC). adminmenu.userinfo.teleporttodeath - Access to the button in the menu of the selected player, teleportation to the place of death of the player. adminmenu.userinfo.fullheal - Access to the button in the menu of the selected player, full healing, including metabolism. adminmenu.userinfo.halfheal - Access to the button in the menu of the selected player, half healing. adminmenu.userinfo.viewinv - Access to the button in the selected player's menu, view and edit the player's inventory. adminmenu.userinfo.stripinventory - Access to the button in the menu of the selected player, clear the player's inventory. adminmenu.userinfo.unlockblueprints - Access the button in the menu of the selected player, unlock all drafts. adminmenu.userinfo.revokeblueprints - Access to the button in the menu of the selected player, reset all drafts. adminmenu.userinfo.kill - Access the button in the selected player's menu to kill the player. adminmenu.userinfo.kick - Access the button in the selected player's menu to kick the player. adminmenu.userinfo.ban - Access to the button in the menu of the selected player, ban the player. adminmenu.groupinfo.removegroup - Access to the button in the menu of the selected group, the ability to remove the group. adminmenu.groupinfo.clonegroup - Access to the button in the menu of the selected group, the ability to clone the group. adminmenu.convars - View and edit convars. adminmenu.permissionmanager - View and edit permissions in groups, player groups, create, delete and clone groups (requires additional permissions from these buttons). adminmenu.pluginmanager - Access to plugin management, reloading, unloading, loading plugins. adminmenu.give - Access to give resources, as well as yourself and the selected player.$25.00 -
Version 1.1.2
295 downloads
Team Tracker is your is the best admin tool for monitoring player associations and enforce team size rules. Whether you need to ban an entire team or track players abusing the system, Team Tracker has you covered. It offers live logging, team queries, and auto-banning—all in one customizable and performant package. Dynamic identification of player teams Live discord logging Query a player team at any time Automatic custom ban system Battlemetrics integration High Performance clearplayerdata - deletes a players team data/history teamcheck - Sends a discord embed with a report of group data, warnings and current team players to discord. Note: All chat commands are universal meaning they can be used via the console, rcon(for import commands) and can be customized via the configuration. teamtracker.whitelist - Whitelists a player from being included in any team alerts (Admins and Developers are automatically whitelisted) teamtracker.admin - allows the use of the checkteam and whitelist commands Proximity - configurable distance between players Sleeping bag placement - bags given or placed within building Codelock authorization - authorized players on a codelock Turret authorization - authorized players on a turret Toolcupboard authorization - authorized players on a toolcupboard Healing - healing and reviving of other players Vehicle mounting - mounting of the same vehicle at the same time Team-members - history of team members Alerts: All alert types can be customized via the plugin config. Options include: Enable - this toggles any usage of the alert type to enable or disable the alert type Log to discord - Enables discord logs Warn Players - Sends an ingame warning to a player up to 30 seconds after the offense Weighting - configures how important the alert type is. This contributes to the ban by association score value. Warnings: Warnings are logged as a type of violation. This provides discord logs and the optional in game warning display to the violator. Display Warnings to Players - option to disable in game warnings Length of time to display warning - optional length of time to display warnings Warning Text - customizable warning text Bans: Team-Tracker allows for customizable automatic bans of players, who go over the group limits. Enable Bans - allows toggeling of the ban system Ban text - text to display as the reason for a player ban Log Bans to Discord - optionally log bans to discord. Logging Only Mode: Set Enable Bans & Log Bans to Discord to true and set Local Bans and Battlemetrics Bans to False Enable Ban by Max Association - enables banning a player or a team by summing all association values to create a total weighting. Example: if the team limit is 5 players and the Max Association Weighting is 10, if a player has more than 5 players with an association weighting of more than 10 this will apply a ban. Max Association Weighting - set the max association weighting per player in a group Ban Duration - length of time to ban for Ban Team - ban all team members of a banned player Ban Associations - bans all players over Max Association Weighting in relation to a banned player Local Bans - apply bans locally An API token for your battlemetrics org is required to use the battlemetrics ban features. A token can be acquired by visiting: https://www.battlemetrics.com/developers Server ID - set the BM server ID Go to https://www.battlemetrics.com/rcon, click into the select server. Check the address bar in your browser, the address will be ending with the Server Id, for example: https://www.battlemetrics.com/rcon/servers/123456 means 123456 is the Server Id. Org ID - set an organisation ID Go to https://www.battlemetrics.com/rcon/orgs, click into the org. Check the address bar in your browser, the address will be ending with the Organization Id, for example: https://www.battlemetrics.com/rcon/orgs/edit/123456 means 123456 is the Organization Id. BanList ID - adds a ban to a specific ban list Go to https://www.battlemetrics.com/rcon/ban-lists, click "View Bans". Check the address bar in your browser, the address will be ending with the Banlist Id, for example: https://www.battlemetrics.com/rcon/bans/?filter[banList]=abcdef-123456-example-banlist-example91011 means abcdef-123456-example-banlist-example91011 is the Banlist Id. Org Wide Ban - true if the ban should be applied to all servers in your organization Auto Add - true if the ban should automatically ban new identifiers after kicking a matching player. Native Enabled - true if native bans should be issued for this ban$24.99- 6 comments
- 3 reviews
-
- 4
-

-

-
- #teamalerts
- #team
- (and 27 more)
-
Version 2.0.0
230 downloads
Admin Tools is an all-in-one plugin designed to make your job as a server owner/admin easier. This plugin has a wide range of features and commands that allow you to control your server easily, both in-game and via Discord. It also adds custom quality of life features exclusive to this plugin! ★ Inventory Viewing System - View an NPC or player's inventory in Discord and in-game ★ Multi-Server Support - Allows you to manage multiple Rust servers from a single bot ★ Custom Combatlog System - View a player's combatlog in Discord and in-game ★ Backpack Viewing System - View a player's backpack (uMod plugin) in Discord ★ Custom ID System - Get the ID of players on your server quick and easy, copy directly from chat ★ Warn System - Inform players of their wrongdoings and keep track of them (Warn Visuals: UI, Chat, Chat + Toast/Gametip) ★ Watchlist System - Lets you put suspicious players on a list for you to monitor, logs in-game and to discord ★ Server Command System - Reload/load/unload plugins and other console commands in Discord and in-game ★ F7 Report Logging System - Log F7 reports to discord with their combat log attached (if enabled) ★ and more! (Rest of features below) (Changed/Exclusive): * Timestamps for video in video's description - Make sure to up video quality if watching from this site. * Timestamps for video in video's description - Make sure to up video quality if watching from this site. ★ Permission System - Grant/revoke permissions to groups and players from Discord and in-game ★ Minecraft Creative System - While enabled, hold middle click to get the item you're looking at ★ Rename System - Rename the players who think they are funny (toggle in config) ★ Tempban System - Tempban players with no database required ★ Unique ID System - Find players even when they have the same or similar names -- Thanks to nivex ★ Kill, Wound, Revive & Respawn System - Kill, wound (down), revive and respawn players from Discord and in-game ★ Team Viewing System - View a player's team members from Discord and in-game Q: How do I set up the bot? A: Set Up Instructions - If you miss any permissions, can always add them to the Admin Tools role in discord after you invite the bot. Q: Does this plugin link players to Rust? A: No. You can use the free plugin DiscordCore by MJSU if you would like to link your players. Q: Does this plugin log kills/PMs/F1 Spawn/chat? A: No. Admin Tools only logs the following if enabled: F7 Reports, Bans, commands from this plugin, and players who are watchlisted. You can always view a player's combatlog from discord though. You can use the free logging plugins DiscordLogger by MONoH or DiscordChat by MJSU depending on your goal. However, personally, I recommend against using logging functionality that would be occurring very frequently due to Discord's rate limiting. Though, DIscordLogger is made in a way that combines messages if possible to prevent limiting. Q: Can this log to multiple Discord servers? A: YES. All you need to put for logging to multiple servers is the channel ID you want to log to in the list of channel IDs in the config. Q: Does this plugin ONLY work with Discord Extension 3.0.0+? A: YES. You need to download the 3.0.0+ version from GitHub, it is linked at the top (and right here) as a required dependency. Any version prior to 3.0.0 will not work with this plugin, but any version 3.0.0 and later will. Q: Will this work on a shared hosting server? A: Yes, BUT you will not be able to take advantage of the threading done within the plugin. It should still work fine, but when you're on a shared host, you may only have access to a single core/thread (not positive on which) and as a result the threading I am doing in the plugin will just be ran on the main thread. As a result some of the discord functionality (ie: image generation) may affect the server as its now running on the main thread (what the server uses to run the game on) instead of a separate thread which would normally not affect the server. The image generation stuff (backpack and inventory) is normally pretty quick depending on number of items and pictures being used/sent, and can be between 100-250ms to generate on my server, however that was while no players were on. Q: How do I fix this error Response Code: Forbidden Discord Error Code: 50001 Discord Error: Missing Access ? A: All you need to fix this issue is MFA/2FA on the account used to create the bot. This issue is caused by Discord requiring your account to have either MFA or 2FA due to the bot being in a Community Discord server. After you add 2FA/MFA this error will go away. Q: Renaming isn't working, how do I fix this? A: The issue is likely that you don't have it enabled in the config, make sure to enable it in the config, its above the warning options and the discord API options. Q: My commands aren't appearing, how do I fix this? A: You can do the following in an attempt to try and force the bot to update its commands: Discord > Server Settings > Integrations > Admin Tools Bot > Toggle one of the checkboxes it shows in either Roles & Members or Channels > Save > Undo toggle > Save again. Q: Does this work with Rustcord? A: Yes, however you need this version here by MJSU as it has been updated to work with DiscordExtension 3.0.0+ versions. Q: How do I set up Multi-Server Support? A: Do as follows: Enable the bool (true/false) config option for multi-server system. Fill and keep the list of servers order the same if possible between configs (not required, but recommended). Use the /server command in discord to swap to the server you want to start listening to/sending commands to. On first use of command, it will error in all but one server console (tries to reply to a message more than once), that is expected and doesn't do that after that first command. It is used to set it up. If you want the activity information to change when swapping servers, make sure to enable that functionality in the config. Special thanks to Nivex for creating the method used to generate unique IDs. For support, please make a support ticket or join the Cobalt Studios Discord.$29.99- 15 comments
- 4 reviews
-
- 8
-

-

-
- #admin
- #tools
-
(and 38 more)
Tagged with:
- #admin
- #tools
- #admin tools
- #moderation
- #discord
- #inventory
- #watchlist
- #warn
- #rename
- #backpacks
- #combatlog
- #custom
- #discord tools
- #id
- #ban
- #tempban
- #report
- #configurable
- #owner
- #discord bot
- #controller
- #team
- #team view
- #f7
- #f7 report
- #cobalt
- #cobalt studios
- #system
- #copy paste
- #copypaste
- #backpack
- #creative
- #permission
- #violationhandler.exe
- #violationhandler
- #admintools
- #clans
- #essentials
- #admin tool
- #tool
-
Version 1.5.37
3,427 downloads
Introducing a feature-rich plugin that will take your in-game building experience to new heights - Build Tools! This plugin is not just a tool, it is the key to creating incredible builds and will make the processes of upgrading, removing and even downgrading buildings easy and fun! !ATTENTION! After the last update of the game, the additional slot does not work ️ Features of Build Tools Beautiful user interface: Our plugin has a lovely and easy-to-use interface that makes building tasks smooth and functional; Bar progress display: Keep track of your building progress with a clear progress bar, so you can see your upgrades easily; Upgrade of the entire building at once: You can make them stronger and more secure quickly; Interface customization: Personalize the user interface to match your preferences and workflow. Returning an item to remove: Don't worry about losing items when removing structures; our plugin ensures you get them back; Returning items with condition as in the game: Items are returned to the same condition as in the game, with the option to set their condition as a percentage; Blocked list items for remove: You can specify which items should not be removed for precise construction control. Ability to use icons both from the game and your own Work with Clans/Friends/NoEscape Building Skins (+ automatic parsing command) Downgrade: Make structure downgrades simple and adapt your base to changing needs with just a few clicks Edit config via in-game interface (no JSON editing required) Commands /up [1-4] - enable upgrading mode /up all - allows you to upgrade the entire building at once /remove - enable removing mode /remove all - allows you to remove the building at once /down - enable downgrading mode /down all - allows you to downgrade building at once buildtools.parse.skins – allows parsing new building skins from the game + images to them /bskin – open settings menu Permissions buildtools.all – allows you to upgrade/remove the entire building at once buildtools.free – allows you to upgrade buildings for free buildtools.edit – allows you to enable edit mode buildtools.vision – allows you to toggle the remove mode on in the vision mode Video Hooks object canDowngrade(BasePlayer player, BaseEntity entity) object canRemove(BasePlayer player, BaseEntity entity) object CanBuildToolsGiveRefund(BasePlayer player, BaseEntity entity) FAQ Q: Where can I see an example of a config? A: Config$21.95- 295 comments
- 14 reviews
-
- 7
-

-

-
- #building
- #foundation
-
(and 27 more)
Tagged with:
- #building
- #foundation
- #tool
- #tools
- #ui
- #upgrading
- #remove
- #upgrade
- #blocks
- #clans
- #friends
- #noescape
- #interface
- #hud
- #build skins
- #grade
- #gredable bases
- #grade rust bases
- #build system
- #upgrade buildings
- #remove structures
- #downgrade structures
- #base customization
- #best grade plugin
- #build plugin by mevent
- #reskin
- #bgrade
- #skins
- #building skins
-
Version 1.0.4
95 downloads
Introducing the Rust Store & Twitch Drops Updates Discord Bot – your all-in-one solution for keeping your Rust community informed about the latest in-game items and exclusive Twitch Drops! This bot automatically checks for updates from the Rust item store and Twitch Drops, delivering them directly to your Discord channel. Perfect for Rust server communities, content creators, and enthusiasts who want to stay ahead of the game without manual tracking. --- What This Bot Does 1. Rust Store Updates Automatically checks the Steam Rust store for the latest skins and items. The bot sends updates in a beautiful embed format, including: Item Name Price High-Quality Image Direct Purchase Link 2. Twitch Drops Notifications Keeps track of Twitch Drops and notifies your community about: General Drops available on all Rust streams with the "Drops Enabled" tag. Streamer-Specific Drops with details on the specific streamer to watch, the time required to earn the drop, and an image preview. 3. Fully Customizable Adjust colors, text, and database preferences in the simple config.json file. The bot supports both SQLite and MySQL, allowing it to scale from small communities to large, high-traffic Discord servers. 4. Efficient and Lightweight Built for speed and reliability, the bot ensures no updates are missed, with configurable intervals to suit your community's needs. Why Use This Bot? 1. Stay Updated Automatically Never miss a Rust store or Twitch Drops update – the bot does all the tracking for you. 2. Engage Your Community Hype up your members with instant notifications about new skins, exclusive Twitch Drops, and more. 3. Support for Twitch Drops Ensure your community is informed about limited-time skins available through Twitch events, boosting engagement and excitement. 4. Easy to Configure Whether you're running a local server, VPS, or hosting on Pterodactyl, the bot is simple to set up with clear configuration options. Features Rust Store Updates Weekly updates about new items in the Rust store. Twitch Drops Notifications Real-time notifications about available general and streamer-specific Twitch Drops. Customizable Embeds Easily adjust text fields, colors, and footer messages to align with your community's branding. Database Flexibility Use SQLite for smaller setups or MySQL for more complex environments. Ideal Use Cases - Rust Server Communities: Announce new items and keep your server members engaged. - Rust Content Creators: Share weekly updates with fans and followers to keep them engaged with your community. - Twitch Streamers: Integrate this bot to notify viewers about Twitch Drop items and make your streams the go-to place for exclusive updates. --- Feel free to contact me on Discord: bxcas for any questions, customizations, or support! Config File { "check_interval_minutes": 1440, "enable_steam": true, "enable_twitch": true, "steam_webhook_url": "https://discord.com/api/webhooks/your-webhook-url", "twitch_webhook_url": "https://discord.com/api/webhooks/your-webhook-url", "embed": { "steam": { "title": "Steam Store", "title_field_name": "Item Name", "price_field_name": "Price", "footer_text": "YourCompany © 2024", "footer_icon_url": "https://example.com/path/to/icon.png", "color": "FF0000" }, "twitch": { "title": "Twitch Drops", "streamer_field_name": "Streamer", "watch_time_field_name": "Watch Time Required", "footer_text": "YourCompany © 2024", "footer_icon_url": "https://example.com/path/to/icon.png", "color": "9146FF" } }, "database": { "type": "mysql or sqlite", "mysql": { "host": "your-database-host", "user": "your-database-user", "port": 3306, "password": "your-database-password", "database": "your-database-name" } } } General Settings check_interval_minutes - Interval in minutes between each check for new Rust items. Example: 60 for every hour. enable_steam: true/false - Enable/Disable Steam Store notifications enable_twitch: true/false - Enable/Disable Twitch Drops notifications steam_webhook_url: Your Steam Discord webhook URL for sending updates. twitch_ webhook_url: Your Twitch Discord webhook URL for sending updates. Embed Settings (Customize Discord Message) title_field_name - Label for the item title in the message. Example: "Name". price_field_name - Label for the item’s price in the message. Example: "Price". footer_company_name - Name of your server or community displayed in the message footer. Example: "Rust Server". footer_icon_url - URL for an icon image (like your logo) shown in the footer. Example: "https://yourwebsite.com/logo.png". embed_color - Color of the embed message Database Settings type - Type of database to use. Options are "sqlite" for local or "mysql" for remote storage. MySQL Settings (Only if using "mysql") host - Hostname or IP address of your MySQL database. Example: "localhost" or "123.45.67.89". user - Username for accessing your MySQL database. Example: "root". port - Port number for connecting to MySQL. Default: 3306. password - Password for your MySQL database user. Example: "mysecretpassword". database - Name of the specific MySQL database for storing item data. Example: "rust_store_data".$9.99 -
Version 1.8.0
81 downloads
Say goodbye to the hassle of manual code locking! With this plugin, you can easily auto-lock items with a preset code straight from your inventory. Your teammates will also get instant access, no extra steps needed. The interface is super easy to use, making code updates and settings changes quick and simple. Give your Rust server a boost with this must-have plugin! Join our Discord community to stay informed on new plugins and updates. Click here to get started. Automated code locking: Automatically applies a code lock to any lockable item with a predetermined code. 3 plugins in 1: Lock regular items, secure things that normally can't be locked (like furnaces or turrets, great for PVE), and easily add automatic door closers. Balanced gameplay: Optional use of the players inventory code locks or key locks. Team authorization: Automatically grants and removes the players team to the code lock. Configuration options for data management: Provides configurable options to automatically clean up saved data on each server wipe or after a specified number of days of player inactivity. User-friendly interface: Offers an intuitive interface for players to easily update their code and adjust settings. Streamer mode: Lock items that normally cannot be locked like furnaces, turrets, and more (Great for PVE!): Optional feature for automatic door closers: Easily customizable - Toggle each item on or off to suit your server: Lockable Items: As mentioned before each of these can be individually enabled/disabled on your server! Vanilla - Doors and Ladder hatches, Storage containers, Tool Cupboards, Lockers. Extra - Furnaces, Electric ovens, Composters, Mixing Tables, Repair Benches, Research Tables, Drop Boxes, Flame Turrets, Gun Traps, Auto Turrets, Sam Sites. Automatic Door Closer Features/Config Settings: Enable/disable door closer functionality. Automatically closes the door after a player specified delay. All door types are supported, including doors, hatches, and gates. Block door removal if not placed by the player. Option to prevent door closers from being returned upon removal. Optional required resources to use door closers. 1 metal spring, 100 metal fragments per closer for example. Chat commands to manage door closers. (Required) Image Library /lock – Opens the auto lock settings UI. (Configurable) /closer – Adds or removes a door closer to the door in front of the player. (Configurable, Optional) autolock.wipe – Removes and resets all saved user data. (Automatic data cleanup included as well) autolock.admin – Grants access to the autolock.wipe console command. autolock.use – Grants access to the /lock chat command.$9.95 -
Version 1.3.3
192 downloads
Reduce the decay damage by tick; Upgrade the authorizations limit; Upgrade the building grade limit; Upgrade the storage capacity of the cupboard; Unlock some deployable items; Upgrade the stack size limit of the cupboard; Set a default building grade for the server; Modify the default decay; Keep the cupboard attributes when remove; Make your server fun ^u^ The plugin has a unique permission, which allows the player to use the cupboard upgrade: tclevels.use F.A.Q How many items can be blocked? and which? You can block unlimited items and all items must be deployable or they will not be blocked. Which area will be checked when I place my cupboard? The entire privilege area will be checked. But you can also disable checks in the configuration file. Could it cause conflict with any plugin? Yes, but i am providing an API for the plugin so that other developers can integrate with it, so if there is a conflict, just go to the developer's plugin support and ask them to integrate it. Also if it is possible for me to integrate it from my plugin, i will do so without any problem.$20.00 -
Version 1.0.7
417 downloads
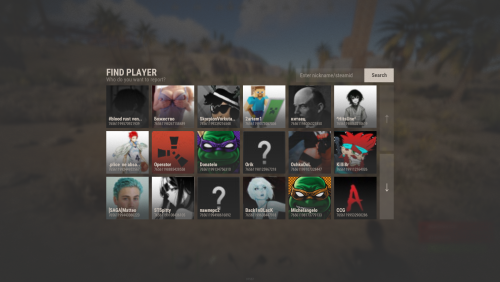
Report System - is a simple plugin from RustApp.IO that allows you to get reports on players in Discord, using a nicely designed interface or F7. Need Help? Any issues feel free to contact us here: t.me/rustapp_help Configuration: { "[UI] Chat commands": [ "report" ], "[UI] Report reasons": [ "Cheat", "Abusive", "Spam" ], "[UI] Cooldown between reports (seconds)": 300, "[UI] Auto-parse reports from F7 (ingame reports)": true, "[Discord] Webhook to send reports": "https://discord.com/api/webhooks/...", "[Discord-Translations] Nickname field": "Nickname", "[Discord-Translations] Reason field": "Reason", "[Discord-Translations] Comment field": "Comment", "[Discord-Translations] Report sent text": "Report sent" } Default Language: { "Header.Find": "FIND PLAYER", "Header.SubDefault": "Who do you want to report?", "Header.SubFindResults": "Here are players, which we found", "Header.SubFindEmpty": "No players was found", "Header.Search": "Search", "Header.Search.Placeholder": "Enter nickname/steamid", "Subject.Head": "Select the reason for the report", "Subject.SubHead": "For player %PLAYER%", "Cooldown": "Wait %TIME% sec.", "Sent": "Report succesful sent" }Free -
Version 1.0.3
17 downloads
Are you tired of having to change configurations and plugins manually on multiple Rust servers that run the same configurations? (eg. a mirrored US and EU version of your server) Then this is just what you are looking for! Introducing RustSyncBot—your ultimate solution for seamless server synchronization. Designed with ease of use in mind, RustSyncBot is an easy-to-install Pterodactyl egg that effortlessly keeps your game servers in sync across multiple machines. Whether you're running a network of Rust servers or any other setup requiring consistency across servers, RustSyncBot is here to simplify your workflow. With RustSyncBot, you can easily specify the directories and files that need to be mirrored from a main server to one or more secondary servers. The bot’s robust configuration options allow you to manage multiple pairs of servers, ensuring your server network stays perfectly synchronized at all times. Key Features: Easy Installation: Install and set up within minutes with our user-friendly Pterodactyl egg. Seamless Synchronization: Automatically sync specified directories and files from your main server to secondary servers. Multi-Server Management: Configure multiple server pairs to maintain consistency across your entire server setup. Efficiency Boost: Streamline your server management, making it easier than ever to run the same server setup across multiple servers. RustSyncBot takes the hassle out of server synchronization, letting you focus on what matters most—delivering an exceptional gaming experience to your community. Tested and working with "BotReaper Python Discord Bot" node. You just need to modify the "APP PY FILE" to be "main.py" instead of "app.py" Pterodactyl is NOT needed, you can run this bot through normal python on any server or even windows machine with python installed! Installation Instructions: How to install: 1. Create a new server using the provided egg called "egg-rust-sync-bot.json". 2. Upload the "rustsyncbot.zip" archive to the server's Files section. Once uploaded, you can unzip the file or trigger a reinstall in the server's Settings section. 3. Navigate to the Files section and modify the .env file if you would like to change the sync time (default 120 seconds) (do not set it too low, as then you will have alot of network requests often, test and set to your needs) 4. Navigate to the config directory and look through the "example.yaml" file, you will need to setup your configuration files to connect to your servers, specify what files/folders you would like to sync (I recommend using https://yamlchecker.com/ OR https://jsonformatter.org/yaml-formatter/ to verify that your syntax is correct) 5. Start the server. All dependencies will be installed on startup, and bot will automatically start. (The bot will ONLY copy files that have a newer modified date from server_1 over to server_2. so make sure your files are the latest version on server_1) 6. Leave server running, bot will recheck files based on the SYNC_INTERVAL you have set in the .env file NOTE: All directories/files are RELATIVE to the starting location of your SFTP login. this means that you should NOT put /home/container/ before each of your folder/file locations I have made a tool to help with generating the correct information for the configuration. It can be found at: https://rustsync.rustvideo.com/ Sample Configuration: # MAIN server server_1_name: Server 1 Display Name server_1_url: ip:port # eg 192.168.1.1:2022 using sftp://domain.com:2022 "should" work also server_1_user: username.shortcode server_1_pass: panelpassword server_1_sftp: True # do not change, for future functionality # SECONDARY server server_2_name: Server 2 Display Name server_2_url: ip:port # eg 192.168.1.1:2022 using sftp://domain.com:2022 "should" work also server_2_user: username.shortcode server_2_pass: panelpassword server_2_sftp: True # do not change, for future functionality # directories for the bot to keep in sync CASE SENSITIVE # directories are listed as key/pair. where the key is the directory on the main server, and value is the directory # on the secondary server eg. # oxide/plugins: carbon/plugins # # will sync the directory of oxide/plugins on server_1 to the carbon/plugins directory on server_2 # you can use trailing slashes and preceding slashes. eg. # /oxide/plugins , /oxide/plugins/, and oxide/plugins are all valid options # CASE SENSITIVE directories_to_sync: oxide/plugins: oxide/plugins oxide/config: oxide/configs oxide/data/copypaste: oxide/data/copypaste # files for the bot to keep in sync CASE SENSITIVE # files are listed as key/pair. where the key is the location on the main server, and value is the location on the secondary server # eg. # oxide/plugins/ZoneManager.cs carbon/plugins/ZoneManager.cs # # will sync the individual file of "oxide/plugins/ZoneManager.cs" on server_1 to the location of "carbon/plugins/ZoneManager.cs" on server_2 # CASE SENSITIVE files_to_sync: steam_appid.txt: steam_appid.txt # directories for the sync bot to ignore, it will ignore these directories if the path is found within the sync, eg, if you are syncing carbon/data, it will # ignore the following # - carbon/data/AdminMenu # CASE SENSITIVE directories_to_ignore: - carbon/data/AdminMenu - carbon/data/Shop - carbon/data/Backpacks # files for the sync bot to ignore, it will ignore these files if the path is found within the sync, eg, if you are syncing carbon/config, it will # ignore the following # - carbon/configs/AbandonedBases.json # CASE SENSITIVE files_to_ignore: - carbon/configs/AbandonedBases.json - carbon/configs/RaidableBases.json$12.00- 2 comments
- 2 reviews
-
- 1
-

-
- #sync
- #pterodactyl egg
-
(and 7 more)
Tagged with:
-
Version 1.0.0
21 downloads
SkinFinder is an admin tool with which you can pull the SkinID of certain objects. The nice side effect is that the short name and the NetID are also displayed. More Free Plugins: If you are looking for more useful free plugins, please have a look at my Discord, you only have to choose the Flash role when you join. Support Discord Permission: To use the plugin, you need the .use permission. skinfinder.use load, run, enjoy$0.99-
- #admin
- #admin tool
- (and 10 more)
-
-
Version 1.0.0
54 downloads
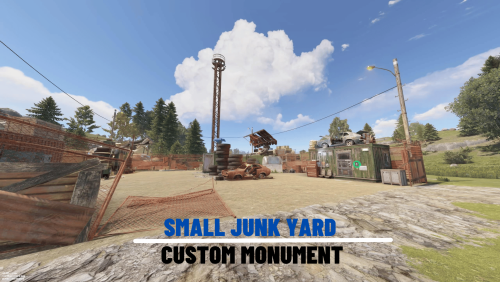
Custom small scrap yard with custom tunnels that you can put in your custom map. Features: Simple installing. Great detail. Optimized FPS. There is radiation. Loot: Oil barrels. Food box/crates. Barrels. Ordinary crates. Military crates. Elite crate. and 1 blue card. Other works.Free -
Version 1.2.0
272 downloads
A simple plugin to allow users to toggle creative mode for themselves based on permissions. As of now, this plugin is considered complete, however if you have suggestions please feel free to reach out. Commands: /creative - Toggle Creative mode for the user who issued the command /creativefreerepair - Toggles the creative.freeRepair Convar /creativefreebuild - Toggles the creative.freeBuild Convar /creativefreeplacement - Toggles the creative.freePlacement Convar /creativefreeunlimitedio - Toggles the creative.unlimitedIo Convar Config Options: { ConsoleLoggingEnabled = true, ChatMessageEnabled = true, IconEnabled = true, IconAnchorMin = "0.345 0.11", IconAnchorMax = "0.375 0.16", IconImageURL = "https://i.postimg.cc/nVvW4Smw/Creative-Mode.png", IconColor = "1 1 1 0.3", CreativePermission = "creativetoggle.use", ConVarPermission = "creativetoggle.convars" } This plugin still relies on the built-in Rust convars. See the quote below for more information about those. Permissions: creativetoggle.use - Allows the user to toggle creative mode for themselves. creativetoggle.convars - Allows the user to toggle the state of the convars related to creative mode. Resources used: Visual Studio Code Visual Studio 2022 Github Copilot VS Code Extension HandyS11's RustPluginTemplateFree -
Version 2.0.2
362 downloads
WHAT IS IT FOR? This is a tool that creates temporary notifications on the user's screen, used to facilitate messages between plugins and server users. CONSOLE COMMANDS toastify [toast_id] [player] [message] - to send a toast notification for a specific player toastify.global [toast_id] [message] - to send a toast notification for everyone PERMISSION toastify.use- the permission to access the toastify commands API </> // Send a toast notification for the target player // Returns the ID of the toast to destroy it if necessary // @deprecated string SendToast(BasePlayer player, string toastId, string message, float? duration); // Use this new one instead of the above: string SendToast(BasePlayer player, string toastId, string title, string message, float? duration); // Destroy a toast notification void DestroyToast(BasePlayer player, string toastId); GOOD WAY TO IMPLEMENT If you want to integrate your plugin with Toastify, I recommend that you add an option in the configuration file of your plugin that the user can link their notification ID with the notifications you will use, you can see an example of how this was implemented in the FurnaceUpgrades or TCLevels configuration file. CONFIGURATION The default configuration file of the plugin: SCREENSHOTFree- 4 comments
- 1 review
-
- 5
-

-

-
Version 1.0.5
65 downloads
Enables administrators to perform administrative actions anonymously, hiding their profile when they use in-game chat as well as within the game environment, displaying 'ADMIN' instead of their nickname above their character. Commands /aa - Admin Anon Enable /aa - Admin Anon Disable Permissions adminanon.use - Enables anonymity in the game. Permission Recommendation: We recommend adding the permission to the individual user rather than to a group. For example, grant the permission to John Doe directly, not to the "admin" group (even if John Doe belongs to that group). Change Color This plugin allows Rust admins to hide their identity in the chat. To change the username color for the "ADMIN" group, configure the "admin" group in BetterChat. Changes in BetterChat will automatically reflect in the plugin. Steps: 1. Open BetterChat Configuration: Locate and edit BetterChat.json. 2. Edit the "admin" group: Change the username color for the "admin" group. 3. Save and Apply Changes: Save and reload BetterChat & AdminAnon (Just in case) Change avatar admin ? Changing the admin's avatar is unnecessary for this plugin, as its purpose is to hide the admin's identity, not to impersonate another player. Configuration { "Stay Anonymous After Reconnecting": false, "Properties": [ { "Name": "ADMIN", "Better Chat Group": "admin", "Required Permission": "adminanon.use" } ] } Data (example) { "PlayerData": { "76561198196941415": { "Groups": [ "admin", "default" ], "Name": "ADMIN", "Better Chat Group": "admin", "Required Permission": "adminanon.use" } } } Language (EN) { "No Permission": "<size=12>You don't have permission to use this command</size>", "No Profile Permission": "<size=12>You don't have permission to use this profile</size>", "Admin Anon Enabled": "<size=12>Admin Anon has been <color=#00fa9a>ENABLED</color></size>", "Admin Anon Disabled": "<size=12>Admin Anon has been <color=#00fa9a>DISABLED</color></size>", "Admin Anon Changed": "<size=12>Fake identity has changed to <color=#00fa9a>{0}</color></size>", "Requested Fake Identify Not Found": "<size=12>Requested fake identity is not found</size>", "No Fake Identities Available": "<size=12>No fake identities available</size></size>", "Fake Identify Not Found": "<size=12>Fake identity is not found</size>", "Data Corrupted Up": "<size=12>Data is corrupt</size>" }$4.00- 2 reviews
-
- #admin
- #administrator
-
(and 33 more)
Tagged with:
- #admin
- #administrator
- #administration
- #administration tool
- #administrative tools
- #administrative
- #staff
- #tools
- #tool
- #chat
- #chat admin
- #chatsystem
- #chat prefix
- #chat system
- #chat customization
- #chat anon
- #admin anon
- #staff anon
- #admin chat
- #staff chat
- #chat icon
- #icon chat
- #chat icon admin
- #icon chat admin
- #profile
- #profile admin
- #admin profile
- #no admin profile
- #incognito
- #incognite admin
- #admin incognito
- #incognited admin
- #hidden admin
- #hidden admin chat
- #hide
-
Version 0.1.0
194 downloads
This utility is designed to help you edit and create a loot table for events from Adem and KpucTaJl For the program to work, you will need .net 6 installed and some basic skills in editing plug-in configs. To get started, you will need: 1. Make sure that .net 6 is installed 2. Download and unzip the data archive to a convenient location for you 3. open the file MMEventsLootEditor.exe The process of creating a loot table 1. Right-click on the desired items from the left side of the screen 2. Edit the spawn metrics of the items 3. Click SAVE and select the configuration language 4. After saving, open the file and select all the contents, starting and ending with square brackets 5. Open the desired config, select the desired profile position and replace the contents in square brackets 6. Save the configuration and restart the plugin The process of loading the loot table 1. Create a text file in a place convenient for you 2. open the configuration of the desired plugin 3. Highlight the contents with square brackets of the desired profile 4. Open the previously created text file and paste the previously copied content 5. Save this file 6. Open the utility MMEventsLootEditor.exe 7. Click LOAD and select the previously saved text file After that, the table you copied will load and you will be able to edit it, then return to the save point described earlier [ { "ShortName": "ammo.shotgun", "Минимальное кол-во": 1, "Максимальное кол-во": 100, "Шанс выпадения предмета [0.0-100.0]": 100.0, "Это чертеж? [true/false]": false, "SkinID (0 - default)": 0, "Название (empty - default)": "" }, { "ShortName": "ammo.shotgun.fire", "Минимальное кол-во": 1, "Максимальное кол-во": 1, "Шанс выпадения предмета [0.0-100.0]": 100.0, "Это чертеж? [true/false]": false, "SkinID (0 - default)": 0, "Название (empty - default)": "" }, { "ShortName": "ammo.shotgun.slug", "Минимальное кол-во": 1, "Максимальное кол-во": 1, "Шанс выпадения предмета [0.0-100.0]": 100.0, "Это чертеж? [true/false]": false, "SkinID (0 - default)": 0, "Название (empty - default)": "" }, ] P.S. The utility is based on a project from beee. I want to express my gratitude to him for the opportunity to create this utility to facilitate the creation of a loot collection and for his help in the moments of creation. The archive contains a readme file to familiarize yourself with the instructions and illustrations for a better understanding. If you still have questions about creating/editing the config, you can write to me in Discord: xacku.mappingFree- 2 comments
- 1 review
-
- #tools
- #madmappers
- (and 4 more)
-
Version 1.0.5
601 downloads
This is a simple tool for developers who want to make custom items, this allows you to chose a item name (Workshop Name) and item image anywhere on your computer (.png) and upload it to your rust steam workshop. This will allow you to get the workshop ID in which you use to create a "custom" item. Requirements - Must have steam running - Must have rust in steam library Installation Download the zip and extract the folder to chosen location Run the unity game named, Rust Custom Icons.exe Tips I recommend running this in windowed which you can get to by pressing ALT + ENTER GIF of how it work$10.00- 30 comments
- 9 reviews
-
- 7
-

-

-
Version 1.0.4
21 downloads
Features: First Join and Command triggered multi commands executor with delayed start and duration for any commands needed. Need help, please join my discord @ The Cantina RUN INDIVIDUAL COMMANDS Option 1: When a player joins and spawns in, if you have a set command with isNewPlayer set to true, it will run after the set delay time (Seconds). If there is a set command for endCommand (OPTIONAL) it will then run that command and theDuration to run the command the amount of time after the initial command. Option 2: You can set commands from other plugins to be run by staff/players using the "runcmd <commandName> <player/id>" if <player/id> is omitted will run on self. this avoids the need to give players individual permissions for other plugins. For example you can use "/runcmd god" and if you have the GODMODE plugin the player would be set to GODMODE, if you have a duration of 30.0 set the endCommand set to "god player", it would automatically be run after 30 seconds. You as the server owner can set any commands that can be run through console and configure durations of the commands for you staff/players. Sky is the limit for this. RUN ALL COMMANDS ONPLAYERSPAWN Option 3: Example isNewPlayer set to true: Player joins/spawns, command set to "say hi {player}" theDelay set to 10 with a endCommand set to "good bye {player}" and theDuration set to 15. "SERVER hi CupsOhJoe" would run 10 seconds after player joins then waits 15 seconds to run the "SERVER good bye CupsOhJoe". If there are more commands it will run until all are completed. (TIP: Add theDelay + theDuration to get the time needed for the next Command unless you want to run multiple commands at once) Example Config: { "exists": true, "TheCommands": [ { "commandName": "Command1", //Commnad Identifier "enabled": true, //Should this command be run "isNewPlayer": false, //is this command to be run only on a new player join "singleCast": true, //Will be able to be run using the /runcmd <command> format "theCommand": "this command run at 5 seconds", //First Command to run after a certain delay "endCommand": "this command runs 10 after the above command", //Command to be run after a certain duration (OPTIONAL) "theDelay": 0.0, //Will run instantly when using /runcmd <commandName> "theDuration": 5.0 //amount of time to run before the end command is run }, { "commandName": "Command2", "enabled": true, "isNewPlayer": false, "singleCast": true, //Will be able to be run using the /runcmd <command> format "theCommand": "this command runs at 10 seconds as well", "endCommand": "", //Will not run if empty "theDelay": 10.0, "theDuration": 5.0 }, { "commandName": "Command3", "enabled": true, "isNewPlayer": true, //Will execute onPlayerSpawn "singleCast": false, //Will not be run using the /runcmd <command> format "theCommand": "this command runs at 15 seconds as for new players only", "endCommand": "This command runs 5 seconds after the above command", "theDelay": 15.0, "theDuration": 5.0 } ] } Commands: runcmd <commandName> "optional" <player/id>- Execute commandName from config, with optional endCommand if set Permissions: FirstCommand.use - Allows the ability to run the individual commands (Only one command at a time) FirstCommand.admin - Allows the ability to run all commands in sequence (At Once) FirstCommand.multi - Same as above but will allow to run all commands set with isNewPlayer = true only Planned features: Placeholder API support$2.50 -
Version 2.0.0
14 downloads
XFireGloves - are fire gloves. After putting them on, the player mines melted resources with any tool. - Each glove can be customized. [ Default config is 2 gloves ] You can create an unlimited number of different gloves. - There is a lang ru/en/uk/es. - Mining of remelted resources. - Pickuping of remelted resources. - Radiation accumulation when mining with fire gloves. - Adjusting raites of mined and picked up resources in gloves. - Set the number of glove usings ( lives ). [ Gloves will be deleted after N actions. Number of stones and pickups from the ground ] - Customizing custom items with glove recycling. - Customizing crates and the chance to find gloves in them. - Binding to SkinID (Do not lose functionality if put in a "Backpack"). - Information in chat when a player puts on gloves. - Information in chat when gloves break. - Gloves can only be put in slot 7. [ For optimization ] - Permission to be able to use gloves. - Customize the list of items that can smelt/fry gloves. - Customize the list of items that will not be affected by rates. Permissions Permissions to be able to find fire gloves in crates: xfiregloves.glovesloot Commands Command to give gloves via console or store - gl_give %STEAMID% SkinID_gloves Config { "General settings": { "Use permission for a chance to find gloves in crates: xfiregloves.glovesloot": true, "Display information in chat when a player puts on gloves": true }, "List of fire gloves": { "SkinID": { "Name of the fire gloves": "Fire gloves", "Permission to use gloves": "xfiregloves.default", "Rates of mined resources in gloves": 2.0, "Rates of picked resources in gloves": 2.0, "Amount of radiation when picked resources": 2.0, "Amount of radiation in bonus mining": 1.0, "Number of usings": 25, "List of resources that can smelt gloves": [ "chicken.raw", "humanmeat.raw", "bearmeat", "deermeat.raw", "meat.boar", "wolfmeat.raw", "horsemeat.raw", "hq.metal.ore", "metal.ore", "sulfur.ore", "wood" ], "A list of resources that are not affected by rates": [ "diesel_barrel" ], "List of custom items after recycling": [ { "Item shortname": "wood", "Item skin": 0, "Item name": "", "Chance [ 100.0 - 100% ]": 50, "Text [ If it's a note ]": "", "Number of usings [ If it's a glove ]": 0, "Minimum amount": 50, "Maximum amount": 100 } ], "Enable delete gloves after N usings - only for smelting": true, "Enable delete gloves after N usings - when mining/pickup any resources": false, "Enable smelting of mined resources": true, "Enable smelting of pickuped resources": true, "Enable mined resource rates": true, "Enable pickuped resource rates": true, "Enable custom items after recycling fire gloves": true, "Enable gloves to drop out of crates at a certain chance": true, "Enable radiation accumulation when pickuping resources": true, "Enable radiation accumulation when bonus mining": true, "Customize the gloves drop chance from crates and barrels. Name crate/barrel | Drop chance: 100.0 - 100%": { "crate_tools": 50.0, "crate_normal_2": 50.0 } } } }$8.59 -
Version 1.0.0
14 downloads
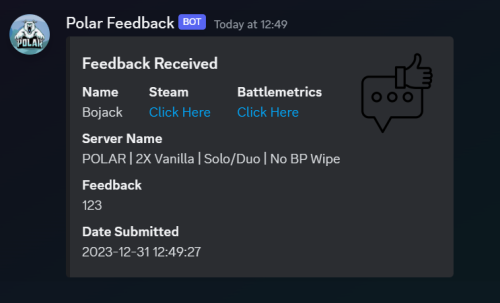
Discord Feedback takes ingame comments from your players and outputs them straight to your chosen Discord channel! Includes: Player Steam Profile Link, Battlemetrics Link, Name Server Name Feedback Submitted By Player Date Submitted readme file included for help setting up a Discord webhook! - your webhook URL can be added via the main plugin file.$0.60 -
Version 1.0.3
38 downloads
Admin Trolling Tool Commands: /nofarm <playerNameOrID>: Toggle a player's ability to farm. /nodamage <playerNameOrID>: Prevent the player from causing any damage to anyone or anything. /dropchance <playerNameOrID> <percentage>: Set a base chance for a player to drop their weapon when damaging an enemy. /sit: Seat the target player in a chair at the admin's crosshairs. /noheal <playerNameOrID>: Toggle a player's ability to heal themselves using medical items. /dropplayer <playerNameOrID>: Drop a player from a height. /dropinventory <playerNameOrID>: Discard all items from a player's inventory. /reflectdamage <playerNameOrID>: Reflect any damage the player inflicts back onto the target player. chairs you can use (Change in the config oxide/config/AdminTools.json) assets/prefabs/deployable/secretlab chair/secretlabchair.deployed.prefab assets/bundled/prefabs/static/chair.invisible.static.prefa assets/bundled/prefabs/static/toilet_b.static.prefab assets/prefabs/misc/summer_dlc/beach_chair/beachchair.deployed.prefab$10.00- 1 comment
-
- 1
-

-
- #cheater troling
- #tools
-
(and 2 more)
Tagged with:
-
Version 1.0.1
24 downloads
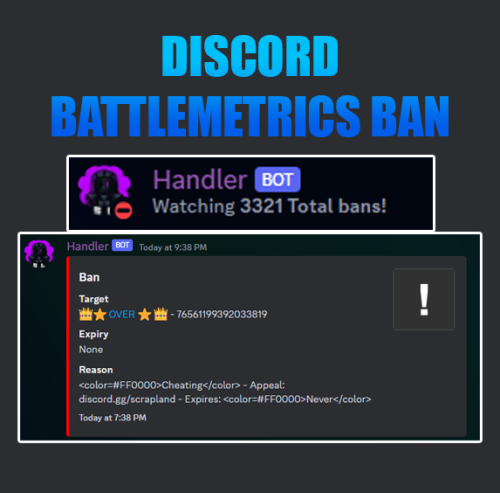
This python discord bot handler will allow you to display bans directly to your discord server, with it's high configurable capabilities, you can configure this to your liking! The product comes with: - A python code that will fetch your Battlemetrics ban and store them to a json file. - The main python ban handler. - Highly configurable config. - Written Guide too assist you understand the configuration. Features • NSFW Blocker / Inappropriate username blocker • Bans Displayer • Configurable Embed • Separate Python File to store all Battlemetrics ban to JSON file • Pterodactyl Integration • Custom Bot Status • Custom Ban REGEX Configuration { "Refresh Rate": 15, "API Tokens": { "BotToken": "", "Battlemetrics": "", "DeepAI": "", "Steam": "" }, "Discord Channels": { "Bans Channel": 0, "Error Webhook": "" }, "Discord Embed": { "Embed Title": "Ban", "Players Profile Picture (TopRight)": true, "Embed Color": "#FF0000", "Regex Ban Reason": "", "Timestamp": true, "Footer": { "Image URL": "", "Text": "" }, "Fields": { "Target": { "Enabled": true, "Display Title": "Target" }, "Expiry": { "Enabled": true, "Display Title": "Expiry" }, "Reason": { "Enabled": true, "Display Title": "Reason" } } }, "Battlemetrics Information": { "OrganizationID": 0 }, "Bans Database Method": { "Check All Bans": true, "[Information All Bans]": "Check all bans can be slow, and can cause small delays but is recommended if you would like to avoid having duplicate bans being sent!", "Page Size": 100, "[Information_PageSize]": "Min: 1, Max:100 | It is recommended you keep this at 100 and you run the transfer codes, to make sure all of your bans are storred!" }, "Bot Information": { "Bot Prefix": "!", "Customization": true, "Status": "dnd", "Custom Status": "{BanCount} Total bans!", "[Information]": "Available status: dnd/online/offline/idle" }, "DeepAI Integration": { "Enabled": false, "Profanitiy List": ["CussWord1", "CussWord2"], "Replaced Profile Picture":"https://imgur.com/yxrwNL4.png" }, "Pterodactyl Integration": { "Enabled": false, "Pterodactyl Node Status Change": "change this part" } } ( A written guide will be in the product files )$10.00- 1 comment
-
- #tools
- #battlmetrics
-
(and 2 more)
Tagged with:
-
Version 1.0.6
10 downloads
This plugin allows to be warned in case of deloot of the players. Only items deloots from corpses, or storage containers are considered #FEATURES All items in the game are loaded with their default rarity level When adding new items in the game, they are directly added You can configure a higher alert level according to the number of deloot quantities (stack) You can set up an alert on discord with the webhook. I advise you to leave a delay before sending the alert to 1 minute. To avoid false positives. The admin panel is only available for admins #INFO Each item is configurable You can display an in-game ath displaying all deloot items by zone. A color is assigned to each alert level (Low, Very Low, Moderate, Hight) When you wipe, the logs are cleared The plugin can work without image library, however not all images will be displayed When an item is delooted it is saved, if it is picked up it is removed For the functioning of the zones: - When an item is delooted it is assigned a zone name. This one will have the name of the box on the map. For example D15 followed by the zone id. D15.1, D15.2 ... - With the ath you can distinguish the name of the zone id in blue. From the admin panel you can consult all the deloot items in this zone with several options (teleport to zone, delete zone, restore all item destroyed in zone). Or you can delete or restore only the items you want. - All the plugin is configurable, ergonomic and designed to be as intuitive as possible. /cdeloot (for open panel)$21.50 -
Version 1.3.2
27 downloads
CPunishTool is an admin tool. Very intuitive way to punish a player # INFO WHEN TOOL IS EQUIPED AND ACTIVE - Show crosshair - Show UI - Display info in chat for each mode ALL MODE IS SECURED WITH PERMISSIONS AVAILABLE MODE - Kill (Wounded, Stop wounded, Kill) - Kick (with multiple custom reason) - Mute (with multiple custom duration and unmute option) - Voice Mute (with multiple custom duration and unmute option) - Freeze (if player is freeze, unfreeze him) - Ban (with multiple custom reason) # PERMISSION cpunishtool.use - Require for use and get the tool cpunishtool.kill - Require for kill player cpunishtool.kick - Require for kick player cpunishtool.mute - Require for mute player cpunishtool.voicemute - Require for voicemute player cpunishtool.freeze - Require for freeze player cpunishtool.ban - Require for ban player # CHAT COMMAND /punishtool - Get the tool in your inventory # OPTIONAL PLUGIN REFERENCE #PREVIEW # CONFIGURATION { "Kill Option": { "1": { "Short Description": "Wounded", "Details": "startwounded" }, "2": { "Short Description": "Stop Wounded", "Details": "stopwounded" }, "3": { "Short Description": "Kill", "Details": "" }, }, "Kick Option": { "1": { "Short Description": "No reason", "Details": "" }, "2": { "Short Description": "Language", "Details": "Thanks for guarding your language!" }, "3": { "Short Description": "Come discord", "Details": "You are expected on discord.gg/5NtNRhU" }, "4": { "Short Description": "Stop it !", "Details": "Stop and calm down. !" } }, "Mute Option": { "1": { "Short Description": "5 minutes", "Details": "5m" }, "2": { "Short Description": "10 minutes", "Details": "10m" }, "3": { "Short Description": "30 minutes", "Details": "30m" }, "4": { "Short Description": "1 hour", "Details": "1h" }, "5": { "Short Description": "1 day", "Details": "1d" }, "6": { "Short Description": "Permanent", "Details": "" }, "7": { "Short Description": "Unmute", "Details": "unmute" } }, "Mute Voice Option": { "1": { "Short Description": "5 minutes", "Details": "5m" }, "2": { "Short Description": "10 minutes", "Details": "10m" }, "3": { "Short Description": "30 minutes", "Details": "30m" }, "4": { "Short Description": "1 hour", "Details": "1h" }, "5": { "Short Description": "1 day", "Details": "1d" }, "6": { "Short Description": "Permanent", "Details": "" }, "7": { "Short Description": "Unmute", "Details": "unmute" } }, "Ban Option": { "1": { "Short Description": "No reason", "Details": "" }, "2": { "Short Description": "Language", "Details": "Language" }, "3": { "Short Description": "Rules infractions", "Details": "Violation of rules" }, "4": { "Short Description": "Staff deliberation", "Details": "Staff Deliberation" }, "5": { "Short Description": "Cheat", "Details": "Cheat" }, "6": { "Short Description": "Macro", "Details": "Macro" }, "7": { "Short Description": "Insults", "Details": "Insults" } } }$9.99- 3 comments
-
- #admin tools
- #tools
-
(and 7 more)
Tagged with:




![More information about "Build Tools [grade/remove/skins]"](https://codefling.com/uploads/monthly_2024_02/v4final.thumb.gif.47c01c6bcae439a1dad6cea581e5ec41.gif)

















.thumb.png.849fc8f159612758a017df5348615535.png)
