Search the Community
Showing results for tags 'looting'.
-
Version 0.1.14
837 downloads
Plugin for Real PvE servers, featuring damage prevention, anti-griefing measures, customizable PvP zones, an automatic loot queue in radtowns and raid zones, and much more. P.S. Since the previous implementation with DynamicPVP was not correct and had some issues, I have added universal hooks(Developer API section) for general access from all PvP plugins, which are currently missing in DynamicPVP. I have requested the author to add them(3 lines), but for now, you will need to use the modified version of DynamicPVP.cs The ability to set "server.pve" to "true", which allows the server to have a "PvE" flag; Damage from NPC's are enabled when server.pve is true; The ability to inflict damage to one's own structures with "server.pve true"; The ability to destroy(including external walls) or rotate one's structures without any time constraints; The ability to force the decay of building blocks with Twigs grade, even if there is wood in the Tool Cupboard; The ability to toggle the gather resource restriction in someone else's Building Privileges; No one, except the owner or their friends, will be able to open their loot containers (chests, storages, bodies, etc.); Administrators can bypass loot restrictions; The ability to schedule the killing of players if they disconnect within someone else's Building Privilege; Disabling backpack and active item drop upon death, even if backpack is full; The ability to disable 'Give' messages; The ability to modify the items given at spawn on the beach; The ability to create an unlimited number of custom permissions; The ability to allow players to bypass the queue; The ability to set limits on sleeping bags, shelters and auto turrets for each permission; The ability to set a multiplier for the prices of monuments and events for each permission; The ability to customize the price and amount of vehicles for each of your custom permissions; The ability to assign vehicles to each player; The ability to customize the assigned price and available amount of vehicles for each of your custom permissions; An assigned vehicle can't be damaged, looted or pushed by other players, but it can be pushed if it is within someone else's Building Privilege; The ability to loot monuments through a queue system; The ability to configure monuments, setting their looting price and time, and adjusting status bars for each monument; The ability to acquire the privilege to loot events (helicopters, bradleys, and raidable bases) through a purchase; The ability to customize the price of each event types and loot attempts (lives); NPCs only aggress against players who are looting monuments, events or raidable bases; Only players who are looting monuments, events or raidable bases can inflict damage to NPCs; RaidableBases are protected from griefing(no damage, no loot and etc). Only the owner can interact with the raid; Neutral RaidableBases can be purchased; Prices for purchasing neutral raids are configurable for each difficulty level; Configurable raid limits (currently available) along with discount multipliers for purchases, for each permission. File location: *SERVER*\oxide\data\RealPVE\PermissionConfig.json Default: https://pastebin.com/5VtWZZVr All permissions are created and configured in the config file under the "List of permissions" section. You can create as many permissions as needed and customize them flexibly. It is recommended to use the prefix "realpve" in the permission's name, for example: "realpve.vip". NOTE: The first permission will serve as the default permission for those who do not have any permissions. { "List of permissions. NOTE: The first permission will be used by default for those who do not have any permissions.": [ { "Permission Name": "realpve.default", "Bypass Queue": false, "Limit of beds": 15, "Limit of shelters": 1, "Limit of auto turrets": 12, "Seconds that will be skipped when opening HackableLockedCrate": 0.0, "Monuments price multiplier": 1.0, "Events price multiplier": 1.0, "Limit of RaidableBases(at the time)": 1, "RaidableBases price multiplier": 1.0, "Vehicles settings": { "Horse": { "Limit": 1, "Price": 10.0 }, "Bike": { "Limit": 1, "Price": 5.0 }, "MotorBike": { "Limit": 1, "Price": 20.0 }, "Car": { "Limit": 1, "Price": 25.0 }, ... } }, { "Permission Name": "realpve.vip", "Bypass Queue": true, "Limit of beds": 20, "Limit of shelters": 2, "Limit of auto turrets": 15, "Seconds that will be skipped when opening HackableLockedCrate": 450.0, "Monuments price multiplier": 0.9, "Events price multiplier": 0.9, "Limit of RaidableBases(at the time)": 2, "RaidableBases price multiplier": 0.9, "Vehicles settings": { "Horse": { "Limit": 5, "Price": 9.0 }, "Bike": { "Limit": 5, "Price": 4.5 }, "MotorBike": { "Limit": 5, "Price": 18.0 }, "Car": { "Limit": 5, "Price": 22.5 }, ... } } ], "Version": { "Major": 0, "Minor": 1, "Patch": 1 } } An example of a monument/event/rb multipliers using default permissions. For example, if you set the price for the Harbor at $1000, a player with the default permission(1.0) will pay $1000 * 1 = $1000. Meanwhile, a player with a VIP permission(0.9) will pay $1000 * 0.9 = $900. However, if a player possesses a misbehaving permission with a value of 1.1, they will need to pay $1000 * 1.1 = $1100. { "Chat command": "realpve", "Chat admin command": "adminpve", "Is it worth forcibly implementing PvE for a server?": true, "Is it worth enabling GameTips for messages?": true, "Is it worth preventing the sending of 'Give' messages?": true, "Is it worth preventing resource gathering in someone else's building privilege area?": false, "Is it worth preventing the pickup of plants spawned by the server in someone else's building privilege zone?": false, "Is it worth forcibly blocking damage from the patrol helicopter to building blocks and deployables?": false, "Is it worth preventing players from handcuffing others?": true, "Is it worth assigning portals(Halloween and Christmas) to the first player?": true, "Is it worth preventing a backpack from dropping upon player death?": true, "Is it worth preventing damage to the laptop of the Hackable Crate?": true, "Is it worth removing the penalties for recyclers in safe zones?": true, "Is it worth allowing all players to pick up items dropped by others? If enabled, personal settings will be ignored": false, "The format that will be used for prices": "${0}", "Vehicles - Time in seconds to display the marker when searching for a vehicle. A value of 0 disables the marker": 15.0, "Anti-Sleeper - Time in seconds after which a player will be killed if they disconnect while inside someone else's Building Privilege. Set to 0 to disable": 1200.0, "Is it worth enabling support for the 'Npc Random Raids' plugin?": true, "Is friendly fire enabled by default when creating a new team?": false, "PvP - Is it worth adding map markers for PvP zones?": true, "PvP - Name of the map maker": "PvP Zone!", "PvP - Settings for the status bar": { "Order": 9, "Height": 26, "Main_Color(Hex or RGBA)": "1 0.39 0.28 0.7", "Main_Transparency": 0.8, "Main_Material": "", "Image_Url": "https://i.imgur.com/oi5vIkk.png", "Image_Local(Leave empty to use Image_Url)": "RealPVE_PvP", "Image_Sprite(Leave empty to use Image_Local or Image_Url)": "", "Image_IsRawImage": false, "Image_Color(Hex or RGBA)": "1 0.39 0.28 1", "Image_Transparency": 1.0, "Is it worth enabling an outline for the image?": false, "Image_Outline_Color(Hex or RGBA)": "0.1 0.3 0.8 0.9", "Image_Outline_Transparency": 0.0, "Image_Outline_Distance": "0.75 0.75", "Text_Size": 12, "Text_Color(Hex or RGBA)": "1 1 1 1", "Text_Font(https://umod.org/guides/rust/basic-concepts-of-gui#fonts)": "RobotoCondensed-Bold.ttf", "Is it worth enabling an outline for the text?": false, "Text_Outline_Color(Hex or RGBA)": "#000000", "Text_Outline_Transparency": 1.0, "Text_Outline_Distance": "0.75 0.75", "SubText_Size": 12, "SubText_Color(Hex or RGBA)": "1 1 1 1", "SubText_Font": "RobotoCondensed-Bold.ttf", "Is it worth enabling an outline for the sub text?": false, "SubText_Outline_Color(Hex or RGBA)": "0.5 0.6 0.7 0.5", "SubText_Outline_Transparency": 0.0, "SubText_Outline_Distance": "0.75 0.75" }, "PvP - Settings for the progress status bar": { "Main_Color(Hex or RGBA)": "1 1 1 0.15", "Main_Transparency": 0.15, "Progress_Reverse": true, "Progress_Color": "#FF6347", "Progress_Transparency": 0.7, "Progress_OffsetMin": "0 0", "Progress_OffsetMax": "0 0" }, "Wipe ID": null, "Version": { "Major": 0, "Minor": 1, "Patch": 14 } } ENG: https://pastebin.com/ZMUL6pYL RUS: https://pastebin.com/Mx8cbMts Main commands(/realpve ) : autobuy - Toggle autobuy for monuments, vanilla events and raid bases with a total price greater than 0; pickup - Toggle access to pick up your items from the ground for all players; share - Manage access to looting your entities by other players(outside of the team): status *entityID*(optional) - Display information about the settings of the entity you are looking at or the one you specified; add *nameOrID* *entityID*(optional) - Add the specified player to the entity list you are looking at or the one you specified; remove *nameOrID* *entityID*(optional) - Remove the specified player from the entity list you are looking at or the one you specified; toggle *entityID*(optional) - Toggle the entity list you are looking at or the one you specified; delete *entityID*(optional) - Delete the settings for the entity you are looking at or the one you specified; clear - Delete the settings for all your entities. team - Manage your team: ff - Toggle the ability to damage your teammates. vehicle - Manage your vehicles: list - List of IDs for all your vehicles; find *vehicleID*(optional) - Help finding the vehicle you are looking at or the one you specified; unlink *vehicleID*(optional) - Unlink the vehicle you are looking at or the one you specified; clear - Unlink all your vehicles. Admin commands(/adminpve). Permission "realpve.admin" required: autobuy - Manage autobuy for monuments, vanilla events and raid bases: *nameOrId* - Toggle autobuy for the specified player; force monument/event/rb - Toggle forced autobuy. If enabled, player settings will be ignored; clear - Disable autobuy for everyone. config - Manage settings for values in the configuration file: forcepve *boolValue*(optional) - Is it worth forcibly implementing PvE for a server? gametips *boolValue*(optional) - Is it worth enabling GameTips for messages? givemsg *boolValue*(optional) - Is it worth preventing the sending of 'Give' messages? resource_privilege *boolValue*(optional) - Is it worth preventing resource gathering in someone else's building privilege area? plant_privilege *boolValue*(optional) - Is it worth preventing the pickup of plants spawned by the server in someone else's building privilege zone? heli_damage *boolValue*(optional) - Is it worth forcibly blocking damage from the patrol helicopter to building blocks and deployables? handcuffs *boolValue*(optional) - Is it worth assigning portals(Halloween and Christmas) to the first player? portals *boolValue*(optional) - Is it worth preventing players from handcuffing others? backpack_drop *boolValue*(optional) - Is it worth preventing a backpack from dropping upon player death? laptop_damage *boolValue*(optional) - Is it worth preventing damage to the laptop of the Hackable Crate? recycler_safezone *boolValue*(optional) - Is it worth removing the penalties for recyclers in safe zones? item_pickup *boolValue*(optional) - Is it worth allowing all players to pick up items dropped by others? If enabled, personal settings will be ignored; priceformat *stringValue* - The format that will be used for prices; vehicle_marker_time *floatValue* - Vehicles - Time in seconds to display the marker when searching for a vehicle. A value of 0 disables the marker; antisleeper *floatValue* - Anti-Sleeper - Time in seconds after which a player will be killed if they disconnect while inside someone else's Building Privilege. Set to 0 to disable; randomraids *boolValue*(optional) - Is it worth enabling support for the 'Npc Random Raids' plugin? teamff *boolValue*(optional) - Is friendly fire enabled by default when creating a new team? pvpmarkers *boolValue*(optional) - PvP - Is it worth adding map markers for PvP zones? pvpmarkersname *stringValue* - PvP - Name of the map maker. loot - Manage player access to entities without restrictions: *nameOrId* - Toggle unrestricted access for the specified player; self - Toggle unrestricted access for yourself; clear - Revoke unrestricted access for all players. monument - Manage monuments: list - List of available monuments; *monumentID*/this - Instead of the monumentID, you can use the word "this", but you must be inside the monument: suffix *boolValue*(optional) - Toggle the suffix display in the monument's name; broadcast *boolValue*(optional) - Toggle notifications about monument occupancy/release; time *intValue* - Set the looting time limit for the monument in seconds; price *floatValue* - Set the cost for looting rights. A value of 0 makes the monument free; offer *floatValue* - Set the offer duration for purchasing the monument in seconds; map_mode *intValue* - Set the marker display mode on the map. 0 - disabled, 1 - enabled, 2 - enabled during PvP mode; map_circle *boolValue*(optional) - Toggle the display of the monument's circle marker on the map; pvp *boolValue*(optional) - Toggle PvP mode for the monument; pvp_delay *floatValue* - Set the PvP mode duration in seconds for players after leaving the PvP monument; bar_progress *boolValue*(optional) - Toggle between TimeProgressCounter and TimeCounter bars for the monument. perm - Manage permissions: add *permName* - Adds a new permission to the list by copying values from the first(default) permission in the list. If the permission name starts with 'realpve', it will also register a new permission; add *permName* *sourcePermName* - Adds a new permission to the list by copying values from an existing permission in the list; remove *permName* - Removes an existing permission from the list; edit *permName* - Edits a permission: queue - Toggle the permission to bypass the server queue; beds *intValue* - Restriction on the number of available beds; shelters *intValue* - Restriction on the number of available shelters; turrets *intValue* - Restriction on the number of available turrets; hackable *floatValue* - Number of seconds(0-900) to skip when opening a hackable crate; monuments *floatValue* - Price multiplier for monuments; events *floatValue* - Price multiplier for vanilla events; rb_limit *intValue* - Restriction on the number of raid bases available simultaneously; rb_mult *floatValue* - Price multiplier for raid bases; vehicles *vehType* - Vehicles settings: limit *intValue* - Limit on the number of available vehicles by type; price *floatValue* - Price for registering a vehicle by type. clear - Removes all permissions from the list except the first one. pickup - Manage access to picking up another player's items from the ground: *nameOrId* - Toggle access to picking up a specific player's items from the ground; clear - Revoke access for all players to pick up items from the ground. share - Manage access to looting entities by other players(outside of the team): status *entityID*(optional) - Display information about the settings of the entity you are looking at or the one you specified; add *nameOrID* *entityID*(optional) - Add the specified player to the entity list you are looking at or the one you specified; remove *nameOrID* *entityID*(optional) - Remove the specified player from the entity list you are looking at or the one you specified; toggle *entityID*(optional) - Toggle the entity list you are looking at or the one you specified; delete *entityID*(optional) - Delete the settings for the entity you are looking at or the one you specified; clear *nameOrID*(optional) - Delete the settings for all entities or all entities of the specified player. tc - Manage building privilege: add self/*entityID* *nameOrID*(optional) - Add yourself or a specified player to the building privilege of the area you or the specified entity are in; remove self/*entityID* *nameOrID*(optional) - Remove yourself or a specified player from the building privilege of the area you or the specified entity are in; clear self/*entityID* - Clear the list of authorized players in the building privilege of the area you or the specified entity are in; info self/*entityID* - Get information about the building privilege of the area you or the specified entity are in. vehicle - List of all available vehicle types: types - List of available vehicle types. Example: /realpve pickup /realpve vehicle find *netID* /realpve team ff /adminpve perm add realpve.vip2 /adminpve perm add realpve.vip2 realpve.vip /adminpve perm edit realpve.vip2 queue true /adminpve perm edit realpve.vip2 vehicles horse limit 5 /adminpve monument list /adminpve monument *monumentID* pvp /adminpve monument *monumentID* price 7.5 /adminpve loot iiiaka /adminpve pickup iiiaka /adminpve tc info self /adminpve tc info 6959689 /adminpve vehicle types This plugin provides the ability to claim vehicles, thereby preventing theft and griefing from other players. In permissions, you can set the price and quantity restrictions for each type of vehicle, ensuring flexible customization according to your preferences. An assigned vehicle can't be damaged, looted or pushed by other players, but it can be pushed if it is within someone else's Building Privilege. File location: *SERVER*\oxide\data\RealPVE\MonumentConfig.json Default: https://pastebin.com/XY1d9YaM This plugin introduces queue system and loot purchases for monuments. You can customize the price and time for looting for each monument. Within monuments, only the "Looter" and his friends have the ability to loot, pick up items or damage entities. Additionally, NPCs and animals within monuments do not aggress against other players and do not receive damage from them. If a player dies within the monument, they will have a grace period to return. This allows players to safely loot monuments without fear of griefing. Example of monument configuration: "ferry_terminal_1": { "Type(This parameter is just a hint. Changes won’t have any effect)": "RadTown", "Is it worth displaying the suffix(if any) in the monument's name?": true, "Is it worth notifying all players about the occupation/release of the monument?": true, "The cost for the right to loot the monument. A value of 0 makes the monument free": 15.0, "The time in seconds(1-3600) given for looting the monument": 900, "The time in seconds(1-15) given to make a decision to purchase the monument": 5.0, "Map marker display mode: 0 - disabled, 1 - enabled, 2 - enabled during PvP mode": 1, "Is it worth creating a circle in the map marker?": true, "PvP - Is PvP enabled at this monument? If so, players will be able to kill each other and loot will be publicly accessible": false, "PvP - The time in seconds(0-60) during which the player retains PvP mode after leaving the PvP monument": 10.0, "Is it worth using a progress bar for bars with a counter?": true, "Settings for the status bar": { "Order": 10, "Height": 26, "Main_Color(Hex or RGBA)": "#FFBF99", "Main_Transparency": 0.8, "Main_Material": "", "Image_Url": "https://i.imgur.com/awUrIwA.png", "Image_Local(Leave empty to use Image_Url)": "RealPVE_ferry_terminal_1", "Image_Sprite(Leave empty to use Image_Local or Image_Url)": "", "Image_IsRawImage": false, "Image_Color(Hex or RGBA)": "#FFDCB6", "Image_Transparency": 1.0, "Is it worth enabling an outline for the image?": false, "Image_Outline_Color(Hex or RGBA)": "0.1 0.3 0.8 0.9", "Image_Outline_Transparency": 0.0, "Image_Outline_Distance": "0.75 0.75", "Text_Size": 12, "Text_Color(Hex or RGBA)": "1 1 1 1", "Text_Font(https://umod.org/guides/rust/basic-concepts-of-gui#fonts)": "RobotoCondensed-Bold.ttf", "Is it worth enabling an outline for the text?": false, "Text_Outline_Color(Hex or RGBA)": "#000000", "Text_Outline_Transparency": 1.0, "Text_Outline_Distance": "0.75 0.75", "SubText_Size": 12, "SubText_Color(Hex or RGBA)": "1 1 1 1", "SubText_Font": "RobotoCondensed-Bold.ttf", "Is it worth enabling an outline for the sub text?": false, "SubText_Outline_Color(Hex or RGBA)": "0.5 0.6 0.7 0.5", "SubText_Outline_Transparency": 0.0, "SubText_Outline_Distance": "0.75 0.75" }, "Settings for the progress status bar": { "Main_Color(Hex or RGBA)": "1 1 1 0.15", "Main_Transparency": 0.15, "Progress_Reverse": true, "Progress_Color": "#FFBF99", "Progress_Transparency": 0.7, "Progress_OffsetMin": "0 0", "Progress_OffsetMax": "0 0" } } Type - This field serves only as an indicator for you. The changes won't have any impact; ShowSuffix - Suffix display. Some monuments (for example Warehouses) have suffixes in the name, like "Warehouse #12"; Broadcast - Enabling or disabling broadcasts when a monument is occupied or vacated; LootingTime - Time allocated for looting the monument; Price - The price for which you can start looting the monument. 0 means looting is free; BarSettings - Settings for the Advanced Status Bar. You can also choose the types of monuments by specifying them under the "List of tracked types of monuments" section. A list of all available types can be viewed on the MonumentsWatcher's page in the "Developer API" section. "List of tracked types of monuments": [ "RadTown", "RadTownWater", "RadTownSmall", "TunnelStation", "Custom" ] Events, similar to monuments, offer the opportunity to claim events. All events are configured in the config file under the "Settings for the events" section. You can customize the price of looting and looting attempts(deaths, including friends). Just like in monuments, only the "Looter" and his friends have the ability to loot and damage entities. Additionally, in events, NPCs do not aggress against other players. If a player(including friends) exceeds the death limit, the event became free, thereby providing other players with the opportunity to claim the event. Example of event configuration: { "Is it worth enabling forced auto-buy for vanilla events where the final price is greater than 0?": false, "Settings for the PatrolHelicopter events": { "IsEnabled": true, "Time in seconds (1-15) given to respond for purchasing this event. Note: This is shown to everyone who deals damage, and the first person to buy it will claim it": 5.0, "Is it worth removing fire from crates?": true, "The price to claim the event. A value of 0 means it's free": 50.0, "The number of deaths after which the event becomes public. A value of 0 disables the limit": 5, "The time in seconds for which the event is locked to the player. A value of 0 disables the time limit": 1800.0 }, "Settings for the BradleyAPC events": { "IsEnabled": true, "Time in seconds (1-15) given to respond for purchasing this event. Note: This is shown to everyone who deals damage, and the first person to buy it will claim it": 5.0, "Is it worth removing fire from crates?": true, "The price to claim the event. A value of 0 means it's free": 50.0, "The number of deaths after which the event becomes public. A value of 0 disables the limit": 5, "The time in seconds for which the event is locked to the player. A value of 0 disables the time limit": 1800.0 }, "Version": { "Major": 0, "Minor": 1, "Patch": 0 } } Price - The price to claim the event. 0 means looting is free; DeathLimit - Limit of deaths after which the event becomes free. File location: *SERVER*\oxide\data\RealPVE\NewbieConfig.json Default: https://pastebin.com/QHZCqpji An example of an item list given for the main inventory: "List of items for the main inventory": [ { "ShortName": "note", "Slot": 0, "Amount": 1, "SkinID": 0, "Text": "MsgNoteText" } ] P.S. In the Text field, you need to specify the language key. Or, you can just write any text, but there won't be a translation of the text. File location: *SERVER*\oxide\data\RealPVE\RaidableBasesConfig.json Default: https://pastebin.com/rpDng7Fd Integration with the RaidableBases plugin does not restrict its functionality in any way. On the contrary, it adds an anti-grief system that protects bases from malicious players. In raid bases, NPCs and other entities can only receive damage from the raid owner or their friends; Turrets and traps do not aggress against outsiders; You can customize the price of claiming to each difficulty and set individual discounts for each permission. You can still purchase raid bases using the /buyraid command. Raid bases without owners(buyable, maintained, manual and scheduled) can be bought for a price set in the configuration file or assigned to the first player who enters its radius, if the final price(price * discount) less or equals to 0. Additionally, as a bonus, upon buying this plugin, you receive 5 free bases for 3 difficulty levels, along with configured loot for them. [PluginReference] private Plugin RealPVE; There are 6 universal hooks that the plugin is subscribed to, the use of which allows interaction with PVP in various PVE plugins: OnPlayerEnterPVP OnPlayerExitPVP OnEntityEnterPVP OnEntityExitPVP CreatePVPMapMarker DeletePVPMapMarker OnPlayerEnterPVP: Used to add a player to PVP mode/zone. To call the OnPlayerEnterPVP hook, you need to pass 2 parameters: <BasePlayer>player - The player to add to PVP; <string>zoneID - A unique identifier for your PVP zone. This parameter is very important because a player can be in multiple PVP zones at the same time and passing the zoneID in this case allows for correct processing of the player's location within them. Interface.CallHook("OnPlayerEnterPVP", player, "*Your unique zone identifier*");//Calling the OnPlayerEnterPVP hook to tell PVE plugins that the player needs to be added to the specified PVP zone. OnPlayerExitPVP: Used to remove a player from PVP mode/zone. Calling this hook guarantees the player’s removal from the specified PVP zone, but does not guarantee the removal from PVP mode, as there may be other zones in addition to yours. Also, when a player dies, they are automatically removed from all PVP zones. To call the OnPlayerExitPVP hook, you need to pass 3 parameters, 1 of which is optional: <BasePlayer>player - The player to remove from PVP; <string>zoneID - A unique identifier for your PVP zone; <float>pvpDelay - Optional. When the player exits your PVP zone, you can also pass the PVP delay time. However, if the player still has other active PVP zones, your PVP delay will not take effect. Interface.CallHook("OnPlayerExitPVP", player, "*Your unique zone identifier*", 10f);//Calling the OnPlayerExitPVP hook to tell PVE plugins that the player needs to be removed from the specified PVP zone, with the pvpDelay(10 seconds) specified if the player no longer has any active PVP zones. OnEntityEnterPVP: Used to add an entity to PVP mode/zone. In the case of RealPVE, this hook is only necessary to add entities with an owner(player) to a PVP, allowing other players to interact with them, such as a player's corpse after death(PlayerCorpse) or a backpack after the corpse disappears(DroppedItemContainer). To call the OnEntityEnterPVP hook, you need to pass 2 parameters: <BaseEntity>entity - The entity to add to PVP; <string>zoneID - A unique identifier for your PVP zone. Interface.CallHook("OnEntityEnterPVP", entity, "*Your unique zone identifier*");//Calling the OnEntityEnterPVP hook to tell PVE plugins that the entity needs to be added to the specified PVP zone. OnEntityExitPVP: Used to remove an entity from PVP mode/zone. When an entity dies, it is automatically removed from all PVP zones. To call the OnEntityExitPVP hook, you need to pass 3 parameters, 1 of which is optional: <BaseEntity>entity - The entity to remove from PVP; <string>zoneID - A unique identifier for your PVP zone; <float>pvpDelay - Optional. When the entity exits your PVP zone, you can also pass the PVP delay time. However, if the entity still has other active PVP zones, your PVP delay will not take effect. Interface.CallHook("OnEntityExitPVP", entity, "*Your unique zone identifier*", 10f);//Calling the OnEntityExitPVP hook to tell PVE plugins that the entity needs to be removed from the specified PVP zone, with the pvpDelay(10 seconds) specified if the entity no longer has any active PVP zones. CreatePVPMapMarker: Used to create a map marker for the PVP zone. To call the CreatePVPMapMarker hook, you need to pass 5 parameters, 2 of which is optional: <string>zoneID - A unique identifier for your PVP zone; <Vector3>pos - The position of your PVP zone; <float>radius - The radius of the circle for your PVP zone; <string>displayName - Optional. The display name for the map marker; <BaseEntity>entity - Optional. The entity to which the map marker should be attached. Interface.CallHook("CreatePVPMapMarker", "*Your unique zone identifier*", pos, 25f, "ATTENTION! This is a PVP zone!");//Calling the CreatePVPMapMarker hook to tell PVE plugins to create a map marker for the specified zone, at the specified position with the given radius, but without specifying a parent entity. DeletePVPMapMarker: Used to delete a map marker for the PVP zone. To call the DeletePVPMapMarker hook, you need to pass only 1 parameter: <string>zoneID - A unique identifier for your PVP zone. Interface.CallHook("DeletePVPMapMarker", "*Your unique zone identifier*");//Calling the DeletePVPMapMarker hook to tell PVE plugins to delete a map marker for the specified zone. There are 5 hooks that the plugin calls: OnPlayerPVPDelay OnPlayerPVPDelayed OnPlayerPVPDelayRemoved OnZoneStatusText CanRedeemKit OnPlayerPVPDelay: Called when a player exits the last active PVP zone, allowing other plugins to overwrite the value for pvpDelay. Returning a float value allows changing the pvpDelay for the player. A value less than zero disables the pvpDelay. When calling the OnPlayerPVPDelay hook, 3 parameters are passed: <BasePlayer>player - The player to whom the pvpDelay is applied; <float>pvpDelay - The initial value of pvpDelay; <string>zoneID - A unique identifier of PVP zone. object OnPlayerPVPDelay(BasePlayer player, float pvpDelay, string zoneID) { Puts($"Attempting to set a PvP delay of {pvpDelay} seconds for player {player.displayName} in zone {zoneID}!"); if (zoneID == "*Your unique zone identifier*") { return 15f;//Overriding the values for pvpDelay } return null;//Leave unchanged } OnPlayerPVPDelayed: Called after the PVP delay has been set for the player. When calling the OnPlayerPVPDelayed hook, 3 parameters are passed: <BasePlayer>player - The player to whom the pvpDelay is applied; <float>pvpDelay - The value of pvpDelay; <string>zoneID - A unique identifier of PVP zone. void OnPlayerPVPDelayed(BasePlayer player, float pvpDelay, string zoneID) { Puts($"A PvP delay of {pvpDelay} seconds has been set for player {player.displayName} in zone {zoneID}!"); } OnPlayerPVPDelayRemoved: Called when the PVP delay is removed from the player after they enter a PVP zone with an active PVP delay. When calling the OnPlayerPVPDelayRemoved hook, only 1 parameter is passed: <BasePlayer>player - The player from whom the PVP delay has been removed. void OnPlayerPVPDelayRemoved(BasePlayer player) { Puts($"PVP delay has been removed for player {player.displayName} as they entered a PVP zone!"); } OnZoneStatusText: Called when the text with the nice name for the specified zone is needed, to be displayed in the status bar. When calling the OnZoneStatusText hook, 2 parameters are passed: <BasePlayer>player - The player for whom the nice name for the zone is being requested; <string>zoneID - A unique identifier of PVP zone. object OnZoneStatusText(BasePlayer player, string zoneID) { Puts($"Text for the status bar is required for zone {zoneID}"); if (zoneID == "*Your unique zone identifier*") { return lang.GetMessage("*langKey*", this, player.UserIDString);//<string>Overriding the value for the status bar text } return null;//Leave unchanged } CanRedeemKit: Called before giving the starter kit, in the OnDefaultItemsReceive hook. A non-zero value cancels this action. When calling the CanRedeemKit hook, only 1 parameter is passed: <BasePlayer>player - The player to whom the kit is being attempted to be given. object CanRedeemKit(BasePlayer player) { Puts($"Attempting to give the kit to player {player.displayName}!"); if (player.IsAdmin) { return false;//Cancel the action } return null;//Leave unchanged }$39.99- 45 comments
- 1 review
-
- 3
-

-
- #rust
- #real
-
(and 56 more)
Tagged with:
- #rust
- #real
- #pve
- #pvp
- #solo
- #build
- #friendly
- #raid
- #npc
- #monument
- #monuments
- #loot
- #looting
- #farm
- #newbie
- #custom
- #bar
- #ui
- #cui
- #panel
- #vehicle
- #claim
- #limit
- #limits
- #sleeping
- #bag
- #sleeping bag
- #bed
- #shelter
- #permission
- #permissions
- #vip
- #economy
- #economics
- #rad
- #town
- #radtown
- #queue
- #bypass
- #vehicles
- #raidable
- #base
- #bases
- #raidablebases
- #raider
- #raiders
- #humannpc
- #event
- #events
- #copy
- #paste
- #copypaste
- #plugin
- #plugins
- #umod
- #oxide
- #carbon
- #iiiaka
-
Version 2.1.0
19 downloads
LootSpawnerPlus is an advanced, performance-optimized Rust plugin designed to make loot spawning more dynamic and customizable. With this plugin, server admins can easily create and manage loot spawn points directly through a clean and intuitive user interface (UI). Whether you need random quantities, random intervals, or a combination of both, LootSpawnerPlus gives you full control with zero memory leaks and excellent performance. Key Features • Full UI Management: Manage all loot spawn configurations directly from the in-game UI. No need for complex commands or editing files manually! • Random Quantity & Interval: Choose whether your loot spawns at random quantities, random intervals, or both. Customize the behavior to suit your server's needs. • Easy Configuration: Spawn loot at specific locations and set timers and quantities, all with just a few clicks. • Performance Optimized: LootSpawnerPlus is designed with efficiency in mind, ensuring your server stays lag-free even with numerous spawn points. • Memory Leak-Free: Enjoy a smooth, stable experience with zero memory leaks. • Simple Command: Use the command /lootspawnerplus to access to the UI and manage all spawn settings. How It Works Once installed, admins can configure loot spawns using a highly intuitive UI system. Adjust settings like: • Spawn Name • Item Name • Position (X, Y, Z) • Quantity: Set a fixed amount or enable random quantities for a more dynamic loot experience. • Interval: Set a fixed spawn interval or enable random intervals for unpredictability. Why LootSpawnerPlus? • Flexibility: Control over both random intervals and quantities means you can fine-tune loot spawning to create the perfect gameplay experience. • Performance: The plugin is crafted with high performance in mind, ensuring that even with many loot spawns, server performance is never compromised. • No Memory Leaks: Say goodbye to memory leaks! LootSpawnerPlus ensures your server runs smoothly over time. Command /lootspawnerplus - Open the loot spawn UI and manage spawn points. Make loot management on your Rust server easier, more dynamic, and more efficient with LootSpawnerPlus! Example Config: { "Spawn1": { "Interval": 30.0, "IsEnabled": true, "IsRandomInterval": true, "IsRandomQuantity": false, "ItemName": "ammo.rifle", "Position": { "x": 0.0, "y": 0.0, "z": 0.0 }, "Quantity": 16, "RandomIntervalMax": 60.0, "RandomIntervalMin": 30.0, "RandomQuantityMax": 60, "RandomQuantityMin": 10, "SpawnName": "Spawn1" } }$14.99 -
Version 1.1.3
41 downloads
Allows you to restrict certain commands and actions for admins, monitor their activities, and prevent admin abuse. Features Command Blocking: Prevents specified commands from being executed by certain admins. Action Blocking: Disables interactions like looting, building, or interacting with vehicles, cupboards, and more. Team Management: Manage the admins team and their permissions. Anti-Abuse: Detects abusive behavior with configurable actions such as kick or ban. Action Logging: Logs movements and interactions. Permissions adminrestrictions.limitactions - limit the admin actions. adminrestrictions.ignore - ignores a specific admin. Configuration { "Commands Block": { "Enable commands blocking": false, "Commands list": [ "server.stop", "server.hostname", "server.description", "server.restart", "server.quit", "server.url", "kickall", "ownerid", "moderatorid" ], "Log without blocking": false, "Print to Console": false, "Log to File": false }, "Actions Block": { "Enable actions blocking": false, "Actions": { "Damage": { "Block Action": false, "Enable Discord Logging": false }, "Loot": { "Block Action": false, "Enable Discord Logging": false }, "Pickups": { "Block Action": false, "Enable Discord Logging": false }, "Building": { "Block Action": false, "Enable Discord Logging": false }, "Player Assist": { "Block Action": false, "Enable Discord Logging": false }, "Gathering/Farming": { "Block Action": false, "Enable Discord Logging": false }, "Locked Entity Usage": { "Block Action": false, "Enable Discord Logging": false }, "Cupboard Interaction": { "Block Action": false, "Enable Discord Logging": false }, "Codelock Interaction": { "Block Action": false, "Enable Discord Logging": false }, "Stash Interaction": { "Block Action": false, "Enable Discord Logging": false }, "Vehicles Interaction": { "Block Action": false, "Enable Discord Logging": false }, "Turret Interaction": { "Block Action": false, "Enable Discord Logging": false }, "Hack Locked Crate": { "Block Action": false, "Enable Discord Logging": false }, "Bed/Sleeping Bag Renaming": { "Block Action": false, "Enable Discord Logging": false }, "Oven Toggle": { "Block Action": false, "Enable Discord Logging": false }, "Recycler Toggle": { "Block Action": false, "Enable Discord Logging": false }, "Mixing Table Toggle": { "Block Action": false, "Enable Discord Logging": false }, "Diesel Engine Interaction": { "Block Action": false, "Enable Discord Logging": false }, "Excavator Interaction": { "Block Action": false, "Enable Discord Logging": false }, "Vending Machine Interaction": { "Block Action": false, "Enable Discord Logging": false }, "Entities Target": false, "Lift Usage": { "Block Action": false, "Enable Discord Logging": false }, "Buttons Interaction": { "Block Action": false, "Enable Discord Logging": false }, "Switches Interaction": { "Block Action": false, "Enable Discord Logging": false }, "Explosives Usage": { "Block Action": false, "Enable Discord Logging": false }, "Ent Kill": { "Block Action": false, "Enable Discord Logging": false }, "Ent Lock": { "Block Action": false, "Enable Discord Logging": false }, "Ent Unlock": { "Block Action": false, "Enable Discord Logging": false } }, "Print to Console": false, "Log to File": false }, "Team Management": { "Enable team management": false, "Force admins to be in one team (overwrites all the below)": false, "Team Permissions": { "Can create team": false, "Can leave team": false, "Can invite to team": false, "Can be invited to team": false } }, "Anti Abuse": { "Enable anti-abuse": false, "Action on Detection (0 = None, 1 = Kick, 2 = Ban)": 0, "Teleport to building block zone": false, "Teleport to cargo": false, "Teleport Damage": false, "Print to Console": false, "Log to File": false }, "Actions Logger": { "Enable action logger": false, "Actions": { "Movements": false, "Door Interactions": { "Door Opened": false, "Door Closed": false, "Door Knocked": false }, "Box Looting": { "Loot Started": false, "Loot Ended": false, "Item Added": false, "Item Looted": false } }, "Ignore player-owned entities": false, "Print to Console": false, "Log to File": false }, "Discord Logging": { "Enable discord logging": false, "Webhook": "" } } Note: Anti-Abuse will disable damage and teleport the player back to his previous location upon detection.$19.99- 4 comments
-
- 2
-

-
- #admin
- #restrictions
- (and 14 more)
-
Version 2.1.7
10,565 downloads
Say goodbye to configuration and data files. This plugin lets yo edit the loot of (almost) every lootable object directly over a custom UI. It also includes a graphical stack size editor thus making it ideal for anyone who is not familiar with editing config files. Do not use in combination with any other stack size controller or loot plugin. NEW with version 2.1.7: Direct Loot Refresh Players with the permission loottable.test can use a button to directly refresh the loot in the crate they are currently looting. Features: User friendly GUI - no need to edit config files Loot configuration for every prefab in the game Stack size controller supports individual stack sizes for every prefab Support for custom items Support for third party plugins Fully backwards compatible with version 1.x.x Default config included for every prefab Configuration for Smelting Speed, Recycler Speed and Efficiency Supply Drop configuration Supported prefabs: Crates, Barrels NPCs Trees, Ores, Animal corpses Excavator, Quarries Christmas Presents, Eggs, Loot Bags Collectables like Hemp, Corn, etc. Additional Configuration: Smelting Speed Supply Drop Recycler Speed / Efficiency Commands: loottable - Open the Loottable UI loottable reload - Manually refresh loot Permission: loottable.edit - Required to use the Loottable UI Required Dependencies (Oxide only): Image Library: https://umod.org/plugins/image-library Translations: This plugin fully supports translation. Out of the box only english is included. For item names to be translated, the plugin https://umod.org/plugins/rust-translation-api is required. English translations are located in /oxide/lang/en/Loottable.json For Developers: Loot Api: Developers can use the Loot Api to register loot profiles for custom NPCs or other plugin related loot. It is highly recommended to use one of the provided wrappers to access the api. Both wrappers offer the same functionality. Non-static (with documentation): https://gist.github.com/TheKiiiing/53a37e8bbb48d8a24c8e8b21b9da37ac Static (with documentation): https://gist.github.com/TheKiiiing/77ee60fa5d23934fd138fde58a2b147f Loot Api Example: // This example uses the non-static version of the Loot Api private LoottableApi loottableApi; void OnServerInitialized() { loottableApi = new LoottableApi(this); timer.In(5f, () => { loottableApi.ClearPresets(); loottableApi.CreatePresetCategory("Crates"); loottableApi.CreatePreset("c_locked", "Locked Crate", "crate_hackable"); loottableApi.CreatePreset("c_elite", "Elite Crate", "crate_elite"); loottableApi.CreatePreset("c_military", "Military Crate", "crate_military"); loottableApi.CreatePreset("c_normal", "Normal Crate", "crate_normal"); loottableApi.CreatePresetCategory("NPCs"); loottableApi.CreatePreset(true, "npc_cargo", "Cargo Ship NPC", "npc_militunnel"); loottableApi.CreatePreset(true, "npc_control", "Control Center NPC", "npc_militunnel"); }); } void SpawnNpc() { // Spawn NPC here ScientistNPC npc; // Assign a loot preset to the NPC loottableApi.AssignPreset(scientist, "npc_control"); } void SpawnCrate() { // Spawn crate here LootContainer crate; // Assign a preset to the crate if (loottableApi.AssignPreset(container, "c_locked")) { // The container has been filled with loot return; } else { // The container is not handled by Loottable // Default loot logic goes here } } The resulting configuration page would look like this: Custom Items API: Developers can use the Custom Items Api to add a custom item to the Loottable item list. If an item is marked as persistent it will remain in the custom item list until it is removed by ClearCustomItems. All non-persistent items will be removed after the plugin that registered them has been unloaded. (void) AddCustomItem(Plugin plugin, int itemId, ulong skinId) (void) AddCustomItem(Plugin plugin, int itemId, ulong skinId, bool persistent) //(v1.0.27 or higher) (void) AddCustomItem(Plugin plugin, int itemId, ulong skinId, string customName) (void) AddCustomItem(Plugin plugin, int itemId, ulong skinId, string customName, bool persistent) //(v1.0.27 or higher) (void) ClearCustomItems(Plugin plugin) //(v1.0.27 or higher) Hooks: (object) OnContainerPopulate(LootContainer container) This hook is called every time a loot container is about to be populated with loot. Returning a non-null value prevents the plugin from spawning loot into that crate. (object) OnCorpsePopulate(LootableCorpse corpse) This hook is called every time an npc corpse is about to be populated with loot. Returning a non-null value prevents the plugin from spawning loot into that corpse. (object) OnCustomAirdrop(SupplySignal signal) This hook is called every time a custom supply drop is about to be delivered. Returning a non-null value will cancel the custom supply drop. Outdated documentation for Version 1: New with version 1.0.27: Custom Items can now be created and edited directly in the GUI. They can be created from any existing item and modified in the Item Select menu You can now create and load backups of your configuration. Commands (F1 or Server Console): loottable.backup load <name> - Load backup with the given name from the backups folder (will wipe your current configuration) loottable.backup create <name> - Create backup of everything with the given name Backups will be created in the data/Loottable/backups folder. To load a backup, the backup file needs to be present in that folder. When creating backups in the in-game console, the permission loottable.debug is required. IMPORTANT: DO NOT LOAD BACKUPS FORM SOURCES YOU DO NOT TRUST, they might cause harm to your server New with version 1.0.16: Custom Items: Now you can add custom items used by other plugins directly to your loot table. Other plugins can can register these items using the api (documentation below). Screenshots: Overview of crates and their current loot table Stacksize Editor Commands: loottable - Open the editor loottable refresh - Manually refresh crate loot loottable flags - List available flags (explained below) loottable flags <name> <1|0> - Enable / disable a certain flag loottable reload_vanilla_profiles - Manually re-download vanilla loot profiles (only for debuging) Permission: loottable.edit - Required to use the editor Flags: There are flags to disable some limits in the editor. Only enable these flags if you really need to as they might cause unexpected behavior of the editor. There are currently 3 flags available: Debug If enabled, the Debug flag provides more detailed information about errors and other actions in the editor. Don't enable this flag unless you want your console full of spam. UnlockGatherMultiplier allows you to use gahter multipliers less than one and higher than 1000. Note that multipliers less than one might lead to unexpected results in some cases. DisableItemLimit Probably the safest flag to use is DisableItemLimit as it simply lets you set stack sizes and every other item amount in the editor as high as 2,147,483,647 which is the biggest possible value of a 32-bit integer. UnlockFurnaceMultiplier lets you use any value as the furnace speed multiplier. Don't enable this flag unless you know what you are doing, since the default value range from 0.1 to 100 should cover most use cases and larger values might impact server performance. UnlockItemMultiplier unlocks the multiplier when multiplying a loot table. DisableStackingHooks will disable all stacking related hooks. Enable if you encounter problems when stacking items. RefreshLootOnExit controls if all crates get refreshed after closing the editor or when reloading the plugin. Enable this only for testing, there might be an increase in entities. Refer to the Commands section for more information about enableing flags. Vanilla Configurations: Since version 1.0.7 there are vanilla loot profiles available for most crates and NPCs. These profiles can be loaded using the "Load default loot table" button at the top center of the editor. DISCLAIMER: The vanilla loot profiles in the editor might not exactly match the vanilla loot distribution of the game as it uses a completely different loot distribution system than Rust. These profiles rather serve as a reference point for custom loot profiles. Important for Carbon users: In order for this plugin to work with carbon, Harmony references need to be enabled. This can be done with the following command: c.harmonyreference 1 Required Dependencies (Oxide only): Image Library: https://umod.org/plugins/image-library Custom Items API: Add a custom item to the item list. If an item is marked as persistent it will remain in the custom item list until it is removed by ClearCustomItems. All non-persistent items will be removed after the plugin that registered them has been unloaded. (void) AddCustomItem(Plugin plugin, int itemId, ulong skinId) (void) AddCustomItem(Plugin plugin, int itemId, ulong skinId, bool persistent) //(v1.0.27 or higher) (void) AddCustomItem(Plugin plugin, int itemId, ulong skinId, string customName) (void) AddCustomItem(Plugin plugin, int itemId, ulong skinId, string customName, bool persistent) //(v1.0.27 or higher) (void) ClearCustomItems(Plugin plugin) //(v1.0.27 or higher) Example: Its recommended to delay the call a little bit to make sure Loottable is loaded private void Init() { timer.In(1f, () => { Loottable?.Call("AddCustomItem", this, -946369541, 2664651800, "High Quality Fuel"); }); } Hooks: (object) OnContainerPopulate(LootContainer container) This hook is called every time a loot container is about to be populated with loot. Returning a non-null value prevents the plugin from spawning loot into that crate. (object) OnCorpsePopulate(LootableCorpse corpse) This hook is called every time an npc corpse is about to be populated with loot. Returning a non-null value prevents the plugin from spawning loot into that corpse. (object) OnCustomAirdrop(SupplySignal signal) This hook is called every time a custom supply drop is about to be delivered. Returning a non-null value will cancel the custom supply drop.$40.00- 962 comments
- 29 reviews
-
- 14
-

-

-
- #loot
- #customloot
- (and 13 more)
-
Version 1.2.3
75 downloads
Video : Showcase Video Features : - Randomized loot respawn intervals, configurable for each monument. Example: "launch site": "5-10" (in seconds) - Default respawn time is set between 30-60 minutes but can be fully adjusted through the configuration. - Automatically removes monuments that no longer exist after a server wipe, keeping the configuration clean and up-to-date. Supported Crates : Supported Monuments : All Game Monuments Additional Settings : "Direct container removal without dropping loot": false, "Enable When Player Dont Finish Looting Containers Will Drop Loot On Ground": true,$19.99 -
Version 1.0.0
7 downloads
AutoLootNpcCorpse allows players with permission to automatically move items from the corpses of NPCs to the player's inventory. Players will not need to the location of the corpse and loot it And support to set the list of items that will not be loot automatically in the config. Supports vanilla human npcs, and 99% of plugin npcs, like using NPCSpawn's plugins, BotReSpawn... Permission AutoLootNpcCorpse.use - Permission to use Commands /lootnpc - Enable / disable auto loot npc corpse Config { "Block Items (shortname)": [ "keycard_green" ] }$9.90 -
Version 1.0.0
2 downloads
DestroyUnlootedCrates is a plugin designed for Rust servers to automatically handle loot containers (crates) that have not been looted within a specified time frame. This plugin provides a way to manage the environment, ensuring that loot containers do not remain forever, encouraging players to interact with them. It can be customized to convert items to scrap or gradually destroy items in the container. Server admins can easily configure which loot containers are affected, how long they remain before being cleared, and if they should be converted to scrap upon destruction. Features: Automatic Crate Cleanup: Loot containers that are not looted within a specific time are automatically destroyed. Item Conversion to Scrap: Items in the crates can be converted into scrap when they are destroyed. Gradual Destruction: Instead of instant deletion, items in the crates can be destroyed over time. Configurable: Every aspect of the plugin can be adjusted via a configuration file, including crate types, time delays, and whether items are converted to scrap. Multi-Language Support: Supports multiple languages for in-game notifications. Flexible Settings: You can enable or disable crate types in the config file, and even set different destruction delays for each crate. Installation: Download: Download the DestroyUnlootedCrates plugin file and place it in the oxide/plugins/ folder on your Rust server. Configuration: Upon first installation, the plugin will automatically generate a configuration file (DestroyUnlootedCrates.json) in the oxide/config/ folder. Open the configuration file to customize the plugin settings. All crates, delays, and scrap conversion options can be set here. Configuration File: The configuration file (DestroyUnlootedCrates.json) contains several customizable options: PluginEnabled: Enable or disable the plugin. NotifyPlayer: Whether players should receive a notification when items are converted to scrap or destroyed. ConvertToScrap: Determines if items should be converted to scrap when the container is destroyed. GradualDestruction: Whether items should be destroyed gradually instead of immediately. ScrapAmount: Defines how much scrap an item should be converted into. AffectedContainers: A dictionary of loot containers that can be affected by the plugin (each crate type can be individually enabled or disabled). ContainerDestroyDelays: The time (in seconds) before a crate is destroyed after its contents have not been looted. Example Configuration: { "PluginEnabled": true, "NotifyPlayer": true, "ConvertToScrap": false, "GradualDestruction": false, "ScrapAmount": 5, "AffectedContainers": { "crate_normal": true, "crate_basic": true, "crate_tools": true, "crate_elite": true, "crate_military": true }, "ContainerDestroyDelays": { "crate_normal": 10, "crate_basic": 10, "crate_tools": 15, "crate_elite": 20, "crate_military": 30 } } How It Works: Crate Cleanup: Once a loot container is placed and has been left unopened for a set time (based on the container’s destroy delay), the plugin will either destroy the items or convert them to scrap, depending on your settings. Item Conversion: If enabled, all items inside the crate will be converted into scrap upon destruction. The amount of scrap given can be adjusted in the configuration. Gradual Destruction: If gradual destruction is enabled, the plugin will destroy items over a specified period rather than instantly. Notification: Players who are near the affected crate will receive a notification when the loot is either converted to scrap or destroyed. Commands: No specific commands are needed for this plugin, as it works automatically based on the configuration settings. Example Use Case: Imagine you are running a Rust server where you want to ensure that crates don't sit around forever, cluttering the map. You could configure the plugin to delete basic crates after 10 minutes if they are not looted. You could also configure elite crates to convert any remaining items to scrap after 30 minutes. This helps to maintain server performance and adds an additional challenge for players who need to loot crates before they are destroyed. Troubleshooting: "Entität ist keine LootContainer!": This error occurs when the plugin is trying to interact with an entity that is not a loot container. Make sure the entities in your server are valid loot containers. Config not loading properly: If the configuration is not loading correctly, check the oxide/config/ folder for the DestroyUnlootedCrates.json file. If it's missing or corrupted, the plugin will generate a new one. Notes: Make sure your server's performance is optimal when running plugins that modify loot containers frequently. Test the plugin on a local server first to ensure it meets your needs before deploying it to a live server. Regularly back up your server configuration and plugin files. Conclusion: The DestroyUnlootedCrates plugin provides server admins with an efficient way to manage loot containers in Rust. With its customizable settings, it ensures that the game world remains dynamic and prevents clutter from containers that are left unattended for too long. Whether you want to clear the loot, convert it to scrap, or gradually destroy items, this plugin has you covered!$9.99 -
Version 1.5.2
356 downloads
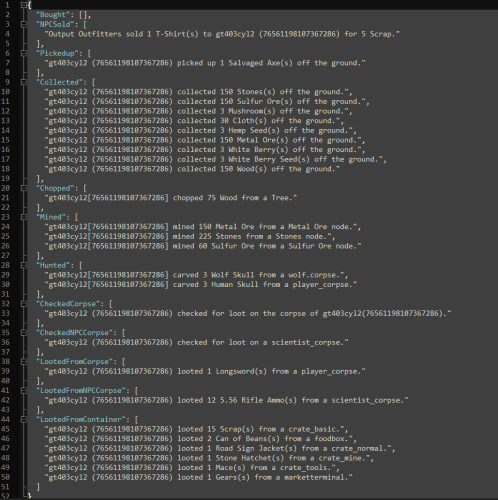
A plugin for Rust server owners or admin that can assist in determining if a player is cheating to gain loot. Loot Audit is used by granting the permission "uselog" to the specific player they suspect is cheating and the plugin will categorically log what the loot is and where it was looted from. Discord integration is quickly setup by creating a webhook in discord and adding it to the Discord Webhook line in the config. If you do not wish to use the Discord logging feature then leave that line as is in the config. NOTE: *** Use permissions can be toggled on/off (true/false) in the config, it is highly recommended to leave it true (set by default) as the logs will add up fairly quickly and can impact server performance. *** Permissions: lootaudit.admin - Allows admin to clear the logs from the data file. lootaudit.uselog - Allows the players loot to be logged. Commands: - /clrla - Clears the data files. - /lasave - Manually saves the data file. (configurable for chat command, non configurable for console) - /tiadmin - Toggles Ignore admin - /lahelp - Lists the current set commands to the admin in chat. - /cdebug - Toggles debug to console. Features: * Ignore admin, regardless of permissions. * Detailed logs sorted by category. * Easily configurable. * Logs items even when stacked. Default Config: { "Chat Prefix": "<color=#32CD32>Loot Audit</color>: ", "Discord Prefix": "Loot Audit: ", "Discord WebHook": "https://support.discord.com/hc/en-us/articles/228383668-Intro-to-Webhooks", "Change Commands": { "/list Shows Help Syntax": "lahelp", "/lasave manually saves the datafile (in game chat": "lasave", "/cdebug Toggles console debug": "cdebug", "/clrla Clear's data file": "clrla", "/tiadmin Toggles Ignore Admin": "tiadmin" }, "Logging Options": { "Use data file to log": true, "Ignore Admin": false, "Use Console Debugging": true, "Clear data file on wipe": false, "Use Permissions (Recommended)": true }, "Enable or Disable Specific Logs": { "Vending Machines": true, "Item Pickups": true, "Collectible Pickups": true, "Checking Corpses": true, "Player Corpse Looting": true, "NPC Corpse Looting": true, "Looting From Containers": true, "Dispensers": true, "Growables": true, "Looting of Players": true, "Looting of Drop bags": true } } Default Data File: { "Bought": [], "NPCSold": [], "Pickedup": [], "Collected": [], "Chopped": [], "Mined": [], "Hunted": [], "Farmed": [], "CheckedCorpse": [], "CheckedSleeper": [], "CheckedNPCCorpse": [], "LootedFromCorpse": [], "LootedFromNPCCorpse": [], "LootedFromPlayerInventory": [], "LootedFromContainer": [], "LootedFromPlayerDropBag": [] } Default Lang File: { "perms": "You don't have permission to use this command.", "clrla": "Loot Audit Data has been cleared.", "iadmin": "Ignore admin now set.", "iadminf": "Ignore admin now disabled.", "databought": "{0} ({1}) bought {2} {3}(s) from {4} for {5} {6} from {7} ({8}) {9} UTC time.", "databoughtnpc": "{0} sold {1} {2}(s) to {3} ({4}) for {5} {6} {7} UTC time.", "databoughtnpcd": "{0} sold {1} {2}(s) to {3} ({4}) {5} UTC time.", "datalootpickup": "{0} ({1}) picked up {2} {3}(s) off the ground {4} UTC time.", "datachopped": "{0} chopped {1} {2} from a {3} {4} UTC time.", "datamined": "{0} mined {1} {2} from a {3} node {4} UTC time.", "datamined2": "{0} ({1}) mined {2} {3} from a Metal Ore node {4} UTC time.", "datahunted": "{0} carved {1} {2} from a {3} {4} UTC time.", "datafarmed": "{0} ({1}) harvested {2} {3} {4} UTC time.", "datalootcollect": "{0} ({1}) collected {2} {3}(s) off the ground {4} UTC time.", "datacheckcorpse": "{0} ({1}) checked for loot on the corpse of {2} ({3}) {4} UTC time.", "datachecksleeper": "{0} ({1}) checked for loot on sleeping body of {2} ({3}) {4} UTC time.", "datachecknpccorpse": "{0} ({1}) checked for loot on a {2} {3} UTC time.", "datalootfromcorpse": "{0} ({1}) looted {2} {3}(s) from the dead body of {4} ({5}) {6} UTC time.", "datalootfromnpccorpse": "{0} ({1}) looted {2} {3}(s) from a {4} {5} UTC time.", "datalootfromplayerinventory": "{0} ({1}) looted {2} {3}(s) from a {4} owned by {5} {6} UTC time.", "datalootfromcontainer": "{0} ({1}) looted {2} {3}(s) from a {4} {5} UTC time.", "datalootfromdropbag": "{0} ({1}) looted {2} {3}(s) from a drop bag {4} UTC time." } Other information: Comments, suggestions or for support message me here or on Discord: gt403cyl2$9.99 -
Version 1.0.7
191 downloads
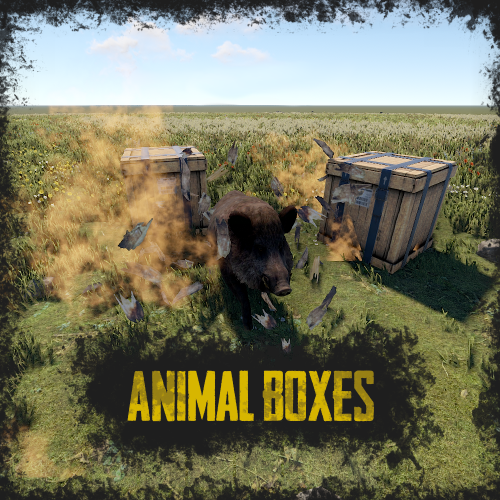
RUST Plugin Test Server TEST MY PLUGINS THERE! connect play.thepitereq.ovh:28050 Animal Crates plugin adds a unique twist to looting barrels and crates. You can place any animal in a crate or barrel to surprise players while they collect loot, or increase the number of animals on your server in a new way. You can add any type of animal to crates and barrels. To check if an animal is in a crate, hit it with a melee weapon. Chances for animal spawns and types are configurable, as well as the number of animals to spawn. You can also set any entity to spawn when breaking or looting the container. animalboxes.use - Gives permission to spawn animals in crates. { "Require Permission": false, "Animal Prefab List": { "bear": "assets/rust.ai/agents/bear/bear.prefab", "boar": "assets/rust.ai/agents/boar/boar.prefab", "chicken": "assets/rust.ai/agents/chicken/chicken.prefab", "heavy_scientist": "assets/rust.ai/agents/npcplayer/humannpc/scientist/scientistnpc_heavy.prefab", "scarecrow": "assets/prefabs/npc/scarecrow/scarecrow.prefab", "scientist": "assets/rust.ai/agents/npcplayer/humannpc/scientist/scientistnpc_roam.prefab", "stag": "assets/rust.ai/agents/stag/stag.prefab", "wolf": "assets/rust.ai/agents/wolf/wolf.prefab" }, "Crate Container List": [ "crate_normal_2", "crate_normal_2_food", "crate_normal_2_medical" ], "Barrel Container List": [ "loot_barrel_1", "loot_barrel_2", "loot-barrel-1", "loot-barrel-2", "oil_barrel" ], "Crate Animal Chance (0-100)": 5.0, "Barrel Animal Chance (0-100)": 15.0, "Crate Minimum Animal Amount": 1, "Crate Maximum Animal Amount": 1, "Barrel Minimum Animal Amount": 1, "Barrel Maximum Animal Amount": 2, "Crate Animal Chances": { "bear": 5.0, "boar": 40.0, "chicken": 10.0, "heavy_scientist": 5.0, "scarecrow": 10.0, "scientist": 10.0, "stag": 25.0, "wolf": 40.0 }, "Barrel Animal Chances": { "bear": 0.0, "boar": 0.0, "chicken": 9.0, "heavy_scientist": 0.0, "scarecrow": 1.0, "scientist": 0.0, "stag": 0.0, "wolf": 0.0 } }$5.00 -
Version 1.0.2
2 downloads
When you kill the set entity, a bonus bag will come out with a chance. ※ Warning ※ Place at the top when the probability is low. { "General Settings": { "Steam Api key for player image (https://steamcommunity.com/dev/apikey)": null, "Webhook URL": null, "Prefix": "[Bonus-Loot]", "SteamID": "0", "BonusLoot find distance": 10.0 }, "Loot Settings": { "scientistnpc_roam": [ { "NPC Name (null or empty default)": [ "test" ], "Backback Spawn Percent [0-100]": 50.0, "Backpack Item List": [ { "Item Short Name": "rifle.ak", "Item Name": "", "Item SkinId": 0, "Item Amount": { "Amount Minimum": 1, "Amount Maximum": 5 }, "Percent [0-100]": 5.0, "Alarm Text": null }, { "Item Short Name": "rifle.lr300", "Item Name": "", "Item SkinId": 0, "Item Amount": { "Amount Minimum": 1, "Amount Maximum": 5 }, "Percent [0-100]": 7.0, "Alarm Text": null }, { "Item Short Name": "stones", "Item Name": "", "Item SkinId": 0, "Item Amount": { "Amount Minimum": 11, "Amount Maximum": 511 }, "Percent [0-100]": 43.0, "Alarm Text": null }, { "Item Short Name": "stones", "Item Name": "", "Item SkinId": 0, "Item Amount": { "Amount Minimum": 1, "Amount Maximum": 5 }, "Percent [0-100]": 45.0, "Alarm Text": null }, { "Item Short Name": "wood", "Item Name": "", "Item SkinId": 0, "Item Amount": { "Amount Minimum": 1, "Amount Maximum": 1 }, "Percent [0-100]": 50.0, "Alarm Text": null } ], "Backpack Item Spawn Maximum": 3, "Effect Settings": { "Effect Name (Prefabs)": "assets/content/effects/crossbreed/pfx crossbreed yellow.prefab", "Effect Refresh Timer": 0.5, "Effect Repeat Timer (0 - Repeat until the bag is gone)": 0.0 } }, { "NPC Name (null or empty default)": [], "Backback Spawn Percent [0-100]": 50.0, "Backpack Item List": [ { "Item Short Name": "rifle.ak", "Item Name": "", "Item SkinId": 0, "Item Amount": { "Amount Minimum": 1, "Amount Maximum": 5 }, "Percent [0-100]": 5.0, "Alarm Text": null }, { "Item Short Name": "rifle.lr300", "Item Name": "", "Item SkinId": 0, "Item Amount": { "Amount Minimum": 1, "Amount Maximum": 5 }, "Percent [0-100]": 7.0, "Alarm Text": null }, { "Item Short Name": "stones", "Item Name": "", "Item SkinId": 0, "Item Amount": { "Amount Minimum": 11, "Amount Maximum": 511 }, "Percent [0-100]": 43.0, "Alarm Text": null }, { "Item Short Name": "stones", "Item Name": "", "Item SkinId": 0, "Item Amount": { "Amount Minimum": 1, "Amount Maximum": 5 }, "Percent [0-100]": 45.0, "Alarm Text": null }, { "Item Short Name": "wood", "Item Name": "", "Item SkinId": 0, "Item Amount": { "Amount Minimum": 1, "Amount Maximum": 1 }, "Percent [0-100]": 50.0, "Alarm Text": null } ], "Backpack Item Spawn Maximum": 3, "Effect Settings": { "Effect Name (Prefabs)": "assets/content/effects/crossbreed/pfx crossbreed yellow.prefab", "Effect Refresh Timer": 0.5, "Effect Repeat Timer (0 - Repeat until the bag is gone)": 0.0 } } ] }, "Version": { "Major": 1, "Minor": 0, "Patch": 1 } }$7.77-
- #bonus
- #bonus loot
-
(and 6 more)
Tagged with:
-
Version 1.0.2
25 downloads
What is “Bind Looting”? “BindLooting” is a powerful tool for Rust players who want to loot crates quickly. Whether you’re an admin on a community server or a player, this plugin allows you to control your gaming style. Main Features Easy Looting: Just bind the /bindlooting command and then just press the bind key! All items in the container you're looting will move to your inventory instantly! No UI: Say goodbye to complicated user interfaces – everything happens through bind! Optional settings: Allowing a player to use a bind if they have "building privilige". Allow only "box.wooden.large" and "woodbox_deployed" (or other entities as desired) to be looted. Permissions bindlooting.use: Grants access to the /bindlooting command. Assign According to Your Preferences bind <key> "chat.say "/bindlooting"" Enhance your Rust experience today with “BindLooting” – the ultimate tool for quick looting!$11.99 -
Version 1.0.0
6 downloads
The VIPBarrel plugin is a Rust plugin that enhances the gameplay experience by allowing players to multiply the loot they receive from breaking loot barrels. When a player activates the VIP barrel gather rate using the "/vipbarrel" command, their loot multiplier is set to a configurable value and every loot item obtained from breaking loot barrels is multiplied by this factor. The plugin includes cooldown periods and reminder notifications to manage the usage of the VIP barrel gather rate. Players can stop the VIP barrel gather rate at any time using the "/vipbarrelstop" command. This plugin adds a new dimension to looting gameplay in Rust by providing players with the opportunity to boost their loot gains from loot barrels. Config file: { "VIPGatherDuration": 240, "CooldownDuration": 300, "ReminderInterval": 30, "LootMultiplier": 2.0 }$3.99 -
Version 1.0.0
11 downloads
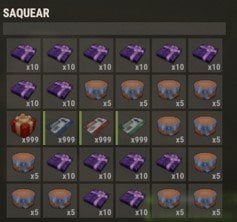
This is a 2 level warehouse, packed with all the resources and in large quantities, to share large amounts of lots with other players or for your exclusive use, you decide. For rapid deployment after reset map Some loot examples: -More of 100K wood -More of 250K stones -More of 180k Metal -More of 21K High quality metal -More of 36K low grade fuel -More of 72K gun power -More of 1k pumpkin -and more more items (practically all rust objects)$3.95







.thumb.webp.df16a3c608b3523db80a864e081ad5a5.webp)






.thumb.png.ca6510d8a5dcc89ed0a86e40e8cf72ab.png)

