Search the Community
Showing results for tags 'advanced'.
-
Version 3.1.36
84 downloads
Our AlphaLoot configuration is fully updated and compatible with The Primitive update released on February 6, 2025. Warning: To use this config, you need to purchase the paid Alphaloot plugin if you do not already own it: https://chaoscode.io/resources/alphaloot.13/ Thank you for choosing this professionally crafted config by fullwiped (xrust.co). Designed to minimize junk items while maintaining a balanced loot experience for 3x modded servers, it includes a substantial balance of loot, including nearly all NPC drops. Our latest configuration overhaul features extensive updates across more than 40 loot crate types. Each crate, from Roadsign and ammo crates to food crates and variants like elite, basic, and normal, has undergone meticulous fine-tuning. We've significantly cleaned up redundant items while maintaining a balance between vanilla and 3x gameplay dynamics. To enhance variety, we've customized certain items to introduce medium-tier loot and expand diversity according to player preferences. In addition, we've introduced exclusive chances, such as a 1% or 2% drop rate for high-quality vehicle parts in crates and premium food items in food crates. Special event loot crates, like those for Halloween, Easter, or Christmas, have also been aligned to complement the 3x experience. Moreover, we've revamped and optimized NPC drops, ensuring that even the most detailed configurations are now tailored to fit seamlessly with the 3x server settings. From Gingerbread NPCs to Scarecrows, Scientist NPCs to Scientist NPC Cargos, and critical NPCs like Scientist NPC Heavies, each has been meticulously restructured. If you're seeking a professionally crafted loot table that ensures a seamless and enriched gaming experience, look no further. Installation Guide: Inside the downloaded zip file, locate the 'config' folder. Copy the 'AlphaLoot.json' file from this folder to the following directory: /home/rustserver/serverfiles/oxide/config If Rust is installed in a different directory, adjust accordingly. Next, within the downloaded zip file, find the 'data' folder. Inside, you'll find three files: 'fullwipedbradley', 'fullwipedheli', and 'fullwipedmain'. Copy these three files to the following directory: /home/rustserver/serverfiles/oxide/data/AlphaLoot/LootProfiles Adjust the path if your Rust installation differs. Final Steps: Once all files are successfully uploaded, restart your previously purchased AlphaLoot plugin. If needed, you can acquire the plugin or updates from the official vendor: https://chaoscode.io/resources/alphaloot.13/ If you've already made the purchase, proceed with file uploads and restart the plugin by typing o.reload AlphaLoot into RCON. Congratulations! Your 3x server now boasts a highly customized and well-prepared loot table. Customizing Your Config: If you need to modify the current config or adjust any settings, you can download the AlphaLoot Profile Editor from the following link: https://chaoscode.io/resources/alphaloot-profile-editor.183/ Editing the config may require some experience, but you can easily make simple adjustments. Feel free to use this tool to tailor your config to your preferences. Thank you for choosing us. Support: FULLWIPED DISCORD$14.00- 2 comments
-
- 2
-

-

-
- #alphaloot
- #3x
-
(and 24 more)
Tagged with:
- #alphaloot
- #3x
- #3x loot
- #log
- #alpha loot
- #alpha
- #alpha loot tables
- #loot table config
- #config loot
- #loot table configs
- #loot table
- #3x loots
- #3x loot table
- #alphaloot 3x config
- #best loot table
- #3x loot tables
- #loot tables
- #best loot
- #advanced
- #advanced alphaloot
- #alpha loots
- #alpha loot config
- #alpha loot cfg
- #alpha cfg
- #loot cfg
- #loot config
-
Version 0.1.18
2,145 downloads
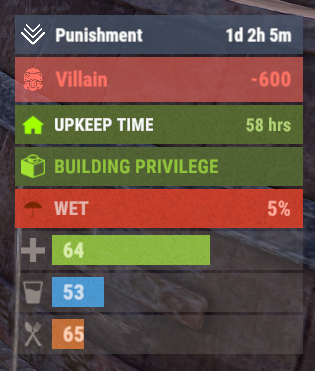
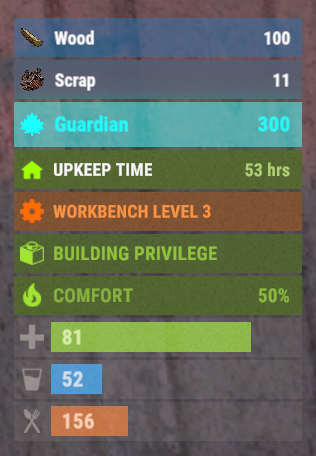
A useful API plugin that mimics in-game status bars and allows the addition of custom ones. Note: AdvancedStatus does not display any bars on its own. This is done by other plugins that work with it. An example plugin demonstrating interaction with AdvancedStatus. The ability to specify the frequency of calculating the number of bars; The ability to specify the order of the bar; The ability to change the height of the bar; The abillity to customize the color and transparency of the background; The ability to set a material for the background; The ability to switch between CuiRawImageComponent and CuiImageComponent for the image; The ability to get images from the local folder(*SERVER*\oxide\data\AdvancedStatus\Images); The abillity to set own image and customize the color and transparency of the image; The abillity to set sprite instead of the image; The ability to specify custom text; The ability to customize the color, size and font of the text; No need to pass all parameters; No need to manually delete your bar when unloading your plugin. advancedstatus.admin - Grants access to the chat command(by default /bar). { "Chat command": "bar", "Is it worth enabling console notifications for the successful loading of local images?": false, "Interval(in seconds) for counting in-game status bars": 0.5, "Interval(in seconds) for counting Building Privilege status bars. Note: Calculating Building Privilege is significantly more resource-intensive than other counts": 1.0, "Bar - Display Layer. If you have button bars, it's advisable to use Hud(https://umod.org/guides/rust/basic-concepts-of-gui#layers)": "Under", "Bar - Left to Right": true, "Bar - Offset between status bars": 2, "Bar - Default Height": 26, "Main - Default Color": "#505F75", "Main - Default Transparency": 0.7, "Main - Default Material(empty to disable)": "", "Image - Default Image": "AdvancedBar_Image", "Image - Default Color": "#6B7E95", "Image - Default Transparency": 1.0, "Image - Outline Default Color": "#000000", "Image - Outline Default Transparency": 1.0, "Image - Outline Default Distance": "0.75 0.75", "Text - Default Size": 12, "Text - Default Color": "#FFFFFF", "Text - Default Transparency": 1.0, "Text - Default Font(https://umod.org/guides/rust/basic-concepts-of-gui#fonts)": "RobotoCondensed-Bold.ttf", "Text - Default Offset Horizontal": 0, "Text - Outline Default Color": "#000000", "Text - Outline Default Transparency": 1.0, "Text - Outline Default Distance": "0.75 0.75", "SubText - Default Size": 12, "SubText - Default Color": "#FFFFFF", "SubText - Default Transparency": 1.0, "SubText - Default Font": "RobotoCondensed-Bold.ttf", "SubText - Outline Default Color": "#000000", "SubText - Outline Default Transparency": 1.0, "SubText - Outline Default Distance": "0.75 0.75", "Progress - Default Color": "#89B840", "Progress - Default Transparency": 0.7, "Progress - Default OffsetMin": "25 2.5", "Progress - Default OffsetMax": "-3.5 -3.5", "Version": { "Major": 0, "Minor": 1, "Patch": 18 } } EN: { "MsgDays": "d", "MsgHours": "h", "MsgMinutes": "m", "MsgSeconds": "s" } RU: { "MsgDays": "д", "MsgHours": "ч", "MsgMinutes": "м", "MsgSeconds": "с" } images reload *ImageName* - Reloads the specified image from the image folder; all - Reloads all local images from the image folder. Example: /bar images reload all Note: To access the commands, the player must be an admin(console or owner) or have the advancedstatus.admin permission. OnAdvancedStatusLoaded: Called after the AdvancedStatus plugin is fully loaded and ready. OnPlayerGainedBuildingPrivilege: Called after the player enters their building privilege. OnPlayerLostBuildingPrivilege: Called after the player exits their building privilege. void OnAdvancedStatusLoaded() { Puts("The AdvancedStatus plugin is loaded and ready to go!"); } void OnPlayerGainedBuildingPrivilege(BasePlayer player) { Puts($"{player.displayName} entered the authorized building privilege zone."); } void OnPlayerLostBuildingPrivilege(BasePlayer player) { Puts($"{player.displayName} exited the authorized building privilege zone."); } [PluginReference] private Plugin AdvancedStatus; There are 15 methods: IsReady CreateBar UpdateContent DeleteBar DeleteCategory DeleteAllBars GetTotalClientBars GetTotalPlayerBars LoadImages LoadImage CopyImage DeleteImages DeleteImage BarExists InBuildingPrivilege There are 5 types of bar: Default - A simple bar that displays the provided information. Does not update the value of SubText by itself; Timed - Similar to the default bar, but it automatically disappears after the specified time in the TimeStamp parameter; TimeCounter - The SubText shows the remaining time until TimeStamp. Also automatically removed upon expiration of the TimeStamp; TimeProgress - Similar to the Timed bar, but additionally features an automatically filling progress bar; TimeProgressCounter - Similar to the TimeCounter bar, but additionally features an automatically filling progress bar. IsReady: Used to check if the AdvancedStatus plugin is loaded and ready to work. The IsReady method returns true if it is ready, or null if it is not. (bool)AdvancedStatus?.Call("IsReady");//Calling the IsReady method. If the result is not null(bool true), the plugin is ready. CreateBar: Used to create a bar or update bar values for a player. To call the CreateBar method, you need to pass 2 parameters. The first one is BasePlayer or <ulong>playerID. The second one is a dictionary with the parameters you need. In the CreateBar method, all parameters are optional, except for two: Id; Plugin. Parameters not specified when creating a new bar will use the values set in the AdvancedStatus plugin's configuration file. Parameters not specified during bar update will retain the values they had before the update. Note: The plugin does not update values automatically, you need to manually send new values. Dictionary<string, object> parameters = new Dictionary<string, object> { { "Id", "AdvancedStatusDemo_1" }, //<string>Unique identifier for the bar in your plugin. ***This is a required field. { "BarType", "Default" }, //<string>Type of the bar. There are 4 types: Default, Timed, TimeCounter and TimeProgress. { "Plugin", "AdvancedStatusDemo" }, //<string>Name of your plugin. ***This is a required field. { "Category", "Default" }, //<string>Internal plugin category of the bar. { "Order", 10 }, //<int>The position of your bar relative to others. Order is determined by increasing values(ASC). { "Height", 26 }, //<int>The height of your bar. A standard bar is 26 pixels. { "Main_Color", "#505F75" }, //<string>HTML Hex color of the bar background. { "Main_Transparency", 0.7f }, //<float>Transparency of the bar background. { "Main_Material", "assets/content/ui/uibackgroundblur.mat" }, //<string>Material of the bar background(empty to disable). { "Image", "scrap" }, //<string>Name of the image saved in the ImageLibrary or a direct link to the image if ImageLibrary is not used. { "Image_Local", "AdvancedStatusDemo_Scrap" }, //<string>The name of the image file(without its extension) located in *SERVER*\data\AdvancedStatus\Images. Leave empty to use Image. { "Image_Sprite", "" }, //<string>Sprite image of the bar. Leave empty to use Image_Local or Image. { "Is_RawImage", true }, //<bool>Which type of image will be used? True - CuiRawImageComponent. False - CuiImageComponent. { "Image_Color", "#6B7E95" }, //<string>HTML Hex color of the bar image. { "Image_Transparency", 1.0f }, //<float>Transparency of the image. { "Text", "Scrap" }, //<string>Main text. { "Text_Size", 12 }, //<int>Size of the main text. { "Text_Color", "#FFFFFF" }, //<string>HTML Hex color of the main text. { "Text_Font", "RobotoCondensed-Bold.ttf" }, //<string>Font of the main text. { "Text_Offset_Horizontal", 0 }, //<int>Horizontal offset for the main text. { "SubText", "35" }, //<string>Sub text. { "SubText_Size", 12 }, //<int>Size of the sub text. { "SubText_Color", "#FFFFFF" }, //<string>HTML Hex color of the sub text. { "SubText_Font", "RobotoCondensed-Bold.ttf" }, //<string>Font of the sub text. { "TimeStampStart", Network.TimeEx.currentTimestamp }, //<double>Responsible for specifying the start point of the time reference and 0% for TimeProgress and TimeProgressCounter bars. Used if the bar type is Timed, TimeCounter, TimeProgress or TimeProgressCounter. { "TimeStamp", Network.TimeEx.currentTimestamp + 6 }, //<double>Specifies the end time point after which the bar will be destroyed and 100% for TimeProgress and TimeProgressCounter bars. Used if the bar type is Timed, TimeCounter, TimeProgress or TimeProgressCounter. { "TimeStampDestroy", Network.TimeEx.currentTimestamp + 3 }, //<double>If TimeStampDestroy is specified and it is less than TimeStamp, the bar will be destroyed by TimeStampDestroy. Used if the bar type is Timed, TimeCounter, TimeProgress or TimeProgressCounter. { "Progress", (float)35 / 100f }, //<float>Progress. From 0.0 to 1.0. { "Progress_Reverse", false }, //<bool>Progress reverse. A value of false means that the progress will increase. Used if the bar type is TimeProgress or TimeProgressCounter. { "Progress_Color", "#89B840" }, //<string>Progress color. { "Progress_Transparency", 1f }, //<float>Progress transparency. { "Progress_OffsetMin", "25 2.5" }, //<string>Progress OffsetMin: "*left* *bottom*". { "Progress_OffsetMax", "-3.5 -3.5" }, //<string>Progress OffsetMax: "*right* *top*". { "Command", "kit" } //<string>If the field is not empty, the bar becomes clickable, and the specified command is executed upon clicking. Note: the command must be covalence. }; AdvancedStatus?.Call("CreateBar", player.userID.Get(), parameters); //Calling the CreateBar method with the passing of BasePlayer/playerID and a dictionary containing the required parameters. UpdateContent: Used to update only the content of an existing status bar. To call the UpdateContent method, you need to pass 2 parameters. The first one is BasePlayer or <ulong>playerID. The second one is a dictionary with the parameters you need. In the UpdateBar method, all parameters are optional, except for two: Id; Plugin. var parameters = new Dictionary<string, object> { { "Id", "MyID" }, //<string>Unique identifier for the bar in your plugin. ***This is a required field. { "Plugin", Name }, //<string>Name of your plugin. ***This is a required field. { "Text", "MyText" }, //<string>Main text. { "SubText", "MyText" }, //<string>Sub text. { "Progress", (float)amount / 100f }, //<float>Progress. From 0.0 to 1.0. }; AdvancedStatus?.Call("UpdateContent", player.userID.Get(), parameters); //Calling the UpdateContent method with the passing of BasePlayer/playerID and a dictionary containing the required parameters. DeleteBar: Used to remove the bar for a player. There are two methods for removing a bar by ID: with specifying a particular player; To call this method, you need to pass 3 parameters. The first one is BasePlayer or <ulong>playerID. The second one is Id of your bar and the third one is name of your plugin. without specifying a particular player (which removes it for all players) To call this method, you need to pass 2 parameters. The first one is Id of your bar and the second one is name of your plugin. AdvancedStatus?.Call("DeleteBar", player.userID.Get(), barID, Name); //Calling the DeleteBar method with the passing of BasePlayer/playerID, ID of the bar and the name of your plugin. AdvancedStatus?.Call("DeleteBar", barID, Name); //Calling the DeleteBar method with the passing of ID of the bar and the name of your plugin. If you try to delete a bar that doesn't exist, nothing bad will happen. So feel free to delete the bar without checking its existence. P.S. When unloading your plugin, there is no need to manually delete bars for players, AdvancedStatus will handle it automatically. DeleteCategory: Used to remove all bars associated with the plugin's category. To call the DeleteCategory method, you need to pass 2 parameters. The first one is category and the second one is name of your plugin. AdvancedStatus?.Call("DeleteCategory", "Default", Name);//Calling the DeleteCategory method by passing the category and name of your plugin DeleteAllBars: Used to remove all bars associated with the plugin. To call the DeleteAllBars method, you need to pass only 1 parameter. It is name of your plugin. AdvancedStatus?.Call("DeleteAllBars", Name);//Calling the DeleteAllBars method, passing the name of your plugin GetTotalClientBars: Used to get the number of client bars for the player. To call the GetTotalClientBars method, you need to pass only 1 parameter. It is BasePlayer or <ulong>playerID. (int)AdvancedStatus?.Call("GetTotalClientBars", player.userID.Get());//Calling the GetTotalClientBars method, passing the name of BasePlayer/playerID GetTotalPlayerBars: Used to get the number of active custom bars for the player. To call the GetTotalPlayerBars method, you need to pass only 1 parameter. It is BasePlayer or <ulong>playerID. (int)AdvancedStatus?.Call("GetTotalPlayerBars", player.userID.Get());//Calling the GetTotalPlayerBars method, passing the name of BasePlayer/playerID LoadImages: Used to check if the local images specified in the list are loaded. If any of the images are not loaded but their files exist in the images folder, the plugin will load them. To call the LoadImages method, you need to pass only 2 parameters. The first one is the <List<string>>list of image's name and the second one(optional) is <bool>force, which, if set to true, will force reload the image even if it already exists. AdvancedStatus?.Call("LoadImages", list, false);//Calling the LoadImages method, passing a list of image names LoadImage: Used to check if the local image is loaded. If the file is not loaded and exists in the images folder, the plugin will load it. To call the LoadImage method, you need to pass 2 parameters. The first one is the <string>image's name and the second one(optional) is <bool>force, which, if set to true, will force reload the image even if it already exists. AdvancedStatus?.Call("LoadImage", imgName, false);//Calling the LoadImage method, passing an image's name CopyImage: Used to create and load a copy of an existing image. To call the CopyImage method, you need to pass 3 parameters. The first parameter is the <string>source image's name, the second parameter is the <string>new image's name and the third one(optional) is <bool>force, which, if set to true, will force copy and reload the image even if it already exists. AdvancedStatus?.Call("CopyImage", "ZoneStatus_Default", "ZoneStatus_NewZone", false);//Calling CopyImage, passing the source image name and the new image name. DeleteImages: Used to delete a list of images and their files. To call the DeleteImages method, you need to pass 2 parameters. The first one is the <List<string>>list of image's name and the second one(optional) parameter is <bool>deleteFile, which, if set to true, will delete image's file too. AdvancedStatus?.Call("DeleteImages", list, true);//Calling DeleteImages, passing a list of image names. DeleteImage: Used for removing the image and the image file. To call the DeleteImage method, you need to pass 2 parameters. The first parameter is the <string>image's name and the second one(optional) parameter is <bool>deleteFile, which, if set to true, will delete image's file too. AdvancedStatus?.Call("DeleteImage", "ZoneStatus_NewZone", true);//Calling DeleteImage, passing the image name. BarExists: Used to check if the specified bar exists. To call the BarExists method, you need to pass 3 parameters. The first one is BasePlayer or <ulong>playerID. The second one is Id of your bar. And the third one is name of your plugin. (bool)AdvancedStatus?.Call("BarExists", player.userID.Get(), barID, Name);//Calling the BarExists method with the passing of BasePlayer/playerID, ID of the bar and name of your plugin. InBuildingPrivilege: Used to check if the player has authorized building privileges. To call the InBuildingPrivilege method, you need to pass BasePlayer or <ulong>playerID. (bool)AdvancedStatus?.Call("InBuildingPrivilege", player.userID.Get());//Checking if the player has Building Privilege.$1.99 -
Version 1.1.7
379 downloads
Multi permission based entity limit system Limit number of entities per player/group/team/clan UI config setup options Auto updating player permissions Chat Commands: /limits: Opens the user interface (UI) for managing entity limits Console Commands: ael.createnew <advancedentitylimit.NAME> <optional: copy from advancedentitylimit.NAME>: Adds new permissions for entities. Optionally, you can copy permissions from an existing entity limit. Player Permissions: advancedentitylimit.ui: Allows players to seethe UI. advancedentitylimit.default: Applies the default entity limits advancedentitylimit.vip: Applies the vip entity limits You can create custom permission groups to have various limits per group. Admin Permissions: advancedentitylimit.setlimit: Grants permission to set limits for entities. advancedentitylimit.createperm: Allows the creation of new permissions for entities. advancedentitylimit.admin: Provides full access. { "Auto-fill missing entities?": true, "Chat prefix": "<color=red>[Limits]</color>: ", "A message when the player reaches the maximum limit of objects": "You have <color=red>reached</color> the limit of this object ({0})", "Use teams for sum them constructions": false, "Use clans?": false, "Clans plugin for sum player constructions (Mevent, k1lly0u)": "Mevent" } Credit to @MuB-Studios the original author of this plugin$15.99- 71 comments
- 9 reviews
-
- 4
-

-

-
- #limit
- #advanceentitylimit
- (and 21 more)
-
Version 2.0.10
2,754 downloads
Skin Controller is meant to bring together a ton of skinning options for your player all in one place! Easy for the player, easy for the server owner. FEATURES - Supports backpacks - Saving of outfits (A list of skins for doors, weapons, clothing, etc*) - Add infinite items in an outfit - Skin stacks of items - Skin your whole inventory with one click - Skin items in containers that you're looking at with one command - Skin all the deployed items in your base with one command - Search items in the skin list to easily find the skin you're looking for - Auto skin items when crafted and picked up - Auto imports all accepted workshop skins - Manual imports of non-accepted workshop skins and collections - Infinite outfit saves, you can limit the amount of outfit saves someone has via perms. - Server owners can toggle whether they want players to be able to skin items on pickup and craft - If server owners allow skinning on craft and pickup, players can toggle that on and off for themselves - Set your own custom commands for all available types of commands - Blacklist skins COMMANDS /skin or /sb (Configurable) - Opens the skin menu /skinc (Configurable) - Skins the items in the container that you're looking at /skinbase (Configurable) - Skins all the deployed items in your base /skinitem (Configurable) - Skins the item you're looking at /addskin - Command for admins to add workshop skins to the skinbox /addcollection - Command for admins to add collections of workshop skins to the skinbox PERMISSIONS skincontroller.addskins skincontroller.use skincontroller.skinoncraft skincontroller.skinonpickup skincontroller.skinbase skincontroller.skinitem skincontroller.skincontainer To set the amount of outfits someone can save, go into the config, there will be a setting where you can set custom permission and how many outfits each outfit can save Need support or want updates about what is coming to the plugin? Join the support discord here https://discord.gg/RVePam7pd7$39.99 -
Version 0.1.4
316 downloads
This plugin demonstrates the integration with the AdvancedStatus plugin. It displays the amount of a specific item in the player's inventory in the status bar. In this case, it's Scrap, to track a different item, replace the itemID value on line 47 with the ID of the desired item. This plugin can be downloaded by plugin developers as a reference to understanding how to work with the AdvancedStatus and by server owners to easily display desired items in the status bar.Free -
Version 2.0.0
1,143 downloads
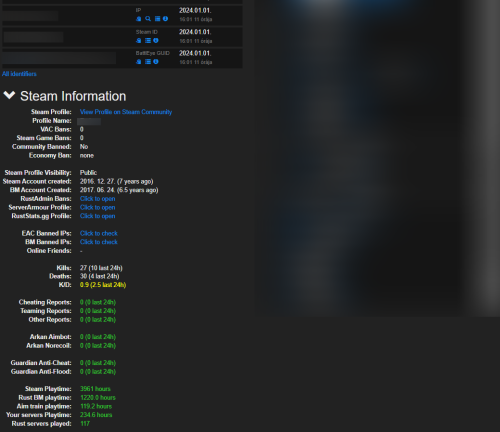
Features: This chrome extension collects and shows additional information about players in battlemetrics rcon. Such as: Steam profile, Battlemetrics profile creation date EAC Ban, EAC Banned Friends, EAC Banned Identifiers (IPs), BM Banned Identifiers (IPs) (if player with an ip can be found on your ban list) Temp ban counts Kills, Deaths, KD Reports, Arkan and Guardian violations (optional) Rust servers played, playtime on: rust servers, aim train servers, your servers Global rust stats (optional) Steam profile picture and the current server's name in battlemetrics Link for ServerArmour, RustAdmin and RustBanned profile (optional) What you receive: By purchasing the product you receive: The source code of this extension Lifetime access Detailed setup guide Support If you need help or If you have any issues or suggestions you can contact me by joining my discord server: https://discord.gg/efVKDG6z6F or by adding me on discord: Farkas#6006$9.90- 12 comments
- 6 reviews
-
- 10
-

-

-
- #battlemetrics
- #bm
- (and 15 more)
-
Version 1.0.5
44 downloads
RUST AUTO WIPER Rust auto wiper is an advanced but simple-to-set-up Discord bot that makes your server wipes 100% automated! Features: 100% automates the server wipe process. Start map votes for the next wipe automatically. Manage wipes of as many servers as you need. Dynamically update server details on the wipe. (ex: server title, description) Deletes a selection of files and folders on the wipe. (ex: plugin data files) Sends wipe announcements. Updates server on the wipe. Set up wipe reminders. Information: This advanced server wipe system covers 100% of the wipe cycles on all your servers. The real power of this tool is that it's running separately from the server, this makes managing server files much easier when the server is offline. with this tool, you don't need batch files or other crap to get your server(s) wiped. This tool also uses cron intervals to determine the exact wipe dates and times. *Note: This tool must be run on a Windows VPS/Server* Configuration: (This example shows 1 server, but you can set up as many servers as you want) module.exports = { token: '', // Your Discord bot token rustMapsApiKey: '', // the rustmaps.io api key guildId: '984577959648174121', // the id of the discord server you want to use the bot in logChannelId: '1102195648683585616', // the id of the channel where the bot should log all actions dbdAccountId: '', // your dbd account id (get this by typing /license display in the support server) debugMode: true, // if true, the bot will log all actions to the console servers: [ // in this list your can add as many servers as you need { server_identifier: 'server1', // the unique identifier of the server. (used for internal purposes) server_name: 'Test Server', // the name of the server server_ip: '', // the ip of the server server_port: 28015, // the port of the server server_queryPort: 28017, // the query port of the server server_rconPort: 28016, // the rcon port of the server server_rconPassword: '', // the rcon password of the server server_modded: true, // if the server is modded or not (if plugins are used) wipe_Interval: '0 20 19 1/1 * ? *', // the interval of the wipe. (generate interval at http://www.cronmaker.com/) wipe_bpWipe: false, // if the wipe is a bp wipe or not files_serverRootPath: 'C:\\Users\\user\\Desktop\\rsmtesting', // the path to the main server folder. (where your start.bat is located) files_savesFolderPath: 'C:\\Users\\user\\Desktop\\rsmtesting\\server\\rsm', // the path to the saves folder. (where your map file is located) files_serverCfgPath: 'C:\\Users\\user\\Desktop\\rsmtesting\\server\\rsm\\cfg\\server.cfg', // the path to the server.cfg file files_startFilePath: 'C:\\Users\\user\\Desktop\\rsmtesting\\start.bat', // the path to the start.bat file files_oxideFolderPath: 'C:\\Users\\user\\Desktop\\rsmtesting\\oxide', // the path to the oxide folder files_excludeSafeFiles: ['logs', 'cfg', 'Log.EAC.txt'], // save files that should not be deleted on wipe. (always exclude cfg) files_deletables: [ // file paths that should be deleted on wipe. (use absolute paths) 'C:\\Users\\user\\Desktop\\rsmtesting\\oxide\\data\\Shop.json', 'C:\\Users\\user\\Desktop\\rsmtesting\\oxide\\data\\Referrals.json', 'C:\\Users\\user\\Desktop\\rsmtesting\\oxide\\data\\StaticLootables_data.json', 'C:\\Users\\user\\Desktop\\rsmtesting\\oxide\\data\\VanishPlayers.json', 'C:\\Users\\user\\Desktop\\rsmtesting\\oxide\\data\\Kits', ], vote_autoStart: true, // if the vote should start automatically vote_channelId: '1098325670687416331', // the id of the channel where the vote should be posted vote_StartAt: '0 0 19 1/1 * ? *', // the interval when the vote should start. (generate interval at http://www.cronmaker.com/) vote_endAt: '0 10 19 1/1 * ? *', // the interval when the vote should end. (generate interval at http://www.cronmaker.com/) vote_maps: ['1000_1', '1000_50000', '1000_1000'], // the maps that should be voted for. (always format the map name like this: 'mapSize_mapSeed') vote_mapCount: 3, // the amount of maps that should be voted for. the maps from the list will be randomly selected vote_multiple: true, // if players can vote for multiple maps update_dynamicTitle: true, // if the title should be updated dynamically update_serverTitle: 'Test Server wiped on {wipeDate} test1', // the title of the server. placeholders: {wipeDate} update_dynamicDescription: true, // if the description should be updated dynamically update_serverDescription: 'Test Server wiped on {wipeDate} test1', // the description of the server. placeholders: {wipeDate} // embed placeholders: {serverName} {mapSeed} {mapSize} {mapImage} {mapUrl} {wipeDate} {nextWipeDate} {nextBpWipeDate} {nextVoteDate} announcement_autoAnnounce: true, // if the announcement should be posted automatically after a wipe announcement_channelId: '1098325694930497607', // the id of the channel where the announcement should be posted announcement_content: '@ ping roles', // the content of the announcement. (can be used to ping roles) announcement_embedTitle: '{serverName} just wiped!', // the title of the embed announcement_embedDescription: '**Join Server:**\nSteam: steam://connect/{serverIp}:{serverPort}\nF1: `client.connect {serverIp}:{serverPort}`\n\n**Planned:**\nNext wipe: {nextWipeDate}\nNext BP wipe: {nextBpWipeDate}\nNext vote: {nextVoteDate}\n\n**Map:** [rustmaps.com]({mapUrl})', // the description of the embed announcement_embedColor: '#038CB5', // the color of the embed. (must be a hex color) announcement_embedImage: '{mapImage}', // the image of the embed announcement_embedFooterText: 'Server just wiped!', // the footer text of the embed announcement_embedFooterIcon: '', // the footer icon of the embed announcement_embedThumbnail: '', // the thumbnail of the embed announcement_embedAuthorName: '', // the author name of the embed announcement_embedAuthorIcon: '', // the author icon of the embed announcement_embedUrl: '', // the url of the embed reminder_autoRemind: true, // if the reminder should be posted automatically before a wipe reminder_Interval: '0 15 19 1/1 * ? *', // the interval when the reminder should be posted. (generate interval at http://www.cronmaker.com/) reminder_channelId: '1098325694930497607', // the id of the channel where the reminder should be posted reminder_content: '@ ping roles', // the content of the reminder. (can be used to ping roles) reminder_embedTitle: '{serverName} is about to wipe!', // the title of the embed reminder_embedDescription: 'Make sure to vote for the next map!', // the description of the embed reminder_embedColor: '#038CB5', // the color of the embed. (must be a hex color) reminder_embedImage: '', // the image of the embed reminder_embedFooterText: 'Server is about to wipe!', // the footer text of the embed reminder_embedFooterIcon: '', // the footer icon of the embed reminder_embedThumbnail: '', // the thumbnail of the embed reminder_embedAuthorName: '', // the author name of the embed reminder_embedAuthorIcon: '', // the author icon of the embed reminder_embedUrl: '', // the url of the embed }, ], }; Support: You can get support at my Discord server by clicking HERE!$30.00- 8 comments
-
- #wipe
- #automatic
-
(and 5 more)
Tagged with:
-
Version 1.0.6
500 downloads
Research Table Options Custom Research Currency * Allows you to change the default research requirement which will be scrap as default. * Allows you to make money by repeatedly researching already researched items. * Converts players scrap into the selected currency system option. * Has a list of all default scrap cost amounts allows you to customize the cost/price of each research item! * Supports Separate Earned amount from researching amount costs. Random Custom Research Options * Supports Success Chance Values for each item being researched ( So you can make researching fail x percent of the time ) * You can set your own research times for each item (default is 10 seconds). * Allows you to block items from researching if they already unlocked the blueprint. "Already Researched Toggle": false, - If this is true it will block re-researching and show them a message response. * Allows you to change the research amount needed to research an item! But you will always need the default requirement on you for the research button to show up properly. This is because it is handled client side and cannot be fixed. * You can setup permissions to each individual Re-searchable Item. It's already Prefixed for you! "SetPermission": "vip" < Example Important notes about Tech Tree Support. "Block Tech Tree Researching": false, - Enabling this will fully lock out tech tree use! * If that ^^ is false it will check if a blocked item is in the blocked list and block that as well. * All Research-Table Permissions setup applies to the tech tree as well. * Supports First Time Research Cost ( if unlocking in TechTree ). XPerience Plugin Support version 1.1.6 & up! * Set the config option inside XPerience to true! and reload it! * Advanced Researching will take over and work together with it! * You can also change this inside the Admin Panel inside XPerience! TODO * Finish UI integration * Finish Multi Language Permissions advancedresearching.use - Only players that have permission are affected advancedresearching.bypass - Only players that have this permission can bypass any blocked item set. Configuration { "Chat Prefix": "<color=#32CD32>Advanced Researching</color>: ", "Research Requirement this is the type of resource used to research items (Expects Item Shortname)": "scrap", "Already Researched Toggle": false, "Block Tech Tree Researching": false, "Use Popup Notifications": false, "Use Notify Notifications (Mevents Version CodeFling)": false, "Notify Notification Type": 0, "Use CustomUI Overlay Notifications": true, "Research Table Currency": { "Enable Economics": false, "Enable ServerRewards": false, "Enable Custom Currency": true, "Custom Name": "", "Custom Item ID (Default is scrap -932201673": -932201673, "Custom SkinId": 0 }, "TechTree Currency": { "Enable Economics": false, "Enable ServerRewards": false, "Enable Custom Currency": true, "Custom Name": "", "Custom Item ID (Default is scrap -932201673": -932201673, "Custom SkinId": 0 }, "Research Table UI Options": { "CostColor": "#FFFFFF", "CurrencyColor": "#ff3333" }, "TechTree UI Options": { "CostColor": "#ff3333" }, "Blocked Items": [], "Custom Research Options": { "kayak": { "DisplayName": "Kayak", "EarnCurrencyAmount": 20.0, "TechTreeFirstUnlockCost": 20, "CostToResearchAmount": 20, "ResearchDuration": 30.0, "ResearchSuccessChance": 100.0, "SetPermission": "" }, "arrow.fire": { "DisplayName": "Fire Arrow", "EarnCurrencyAmount": 20.0, "TechTreeFirstUnlockCost": 20, "CostToResearchAmount": 20, "ResearchDuration": 3.0, "ResearchSuccessChance": 100.0, "SetPermission": "" }, "ammo.pistol": { "DisplayName": "Pistol Bullet", "EarnCurrencyAmount": 75.0, "TechTreeFirstUnlockCost": 75, "CostToResearchAmount": 75, "ResearchDuration": 3.0, "ResearchSuccessChance": 100.0, "SetPermission": "" }, } } ## Lang { "AlreadyUnlocked": "You already unlocked {0}", "AddedCurrency": "has deposited {0} coins into your account", "Blocked": "{0} is not researchable", "Requires": "New requirement for researching is now {0}", "NoPerm": "You do not have permission {0} to research {1}", "AmountTo": "{0} needs {1} {2} to research it", "TechTreeUI": "{0} requires {1} {2} to research", "ResearchedRolled": "Researching {0} Failed!", "InvalidShortname": "Not a valid item shortname {0} set for research requirement! \n List of valid item shortnames can be found at https://www.corrosionhour.com/rust-item-list/", "NowResearching": "Now Researching {0} for {1} {2}" }$24.99 -
Version 1.0.1
2,348 downloads
Easy Configurable & Show Rules with Style Config file : oxide/config/EasyRules.json Config: { "Chat Icon - SteamID64": 0, "Use Chat Prefix - True/False": true, "Chat Prefix": "Rules", "Chat Prefix Color": "#D65757", "Chat Message": "1. No Racism\n2. No Advertising\n3. No Cheat's or Macro's\n4. No Teaming\n5. Don't be a prick" } Commands: /rules - Display the rules in chat /prefix (name) - Admin command, Change the "Chat Prefix" ingame Permissions: easyrules.admin Special Thanks to @Steenamaroo & @supreme for the help!Free

.thumb.gif.f0b0245e9c54ffe33eb112bfd730b972.gif)
