
Vinni_TV_'s Wishlist
-
$15.00
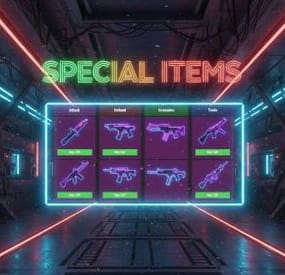
Special Items Z
With this plugin you can sell and put to loot containers the special items for players.
Boost your server with special weapons, clothing, grenades, and tools. All devices can be customized in the config.
It can be added to the Shop, with the itemID and skinID.
Added spawn Special Items to Loot container after spawn.
Config
{ "Command_and_General_Settings": { "Command": "sishop", "Cost_Type__1_Scrap__2_Economics__3_ServerRewards": 1, "VIP_Cost_Multiplier__1_0__default__0_5__50_": 0.5, "Can_Attack_Other_Players_Entities_": false, "UI_Size__default__1_": 1.0 }, "Weapons": { "_1_hit_npc_Knife": { "Cost__0_disable": 1, "Damage_Multiplier": 1, "Loot_Chance_Percent__0_disable": 1, "Loot_Amount": 1 }, "SMG": { "Cost__0_disable": 1, "Damage_Multiplier": 2, "Loot_Chance_Percent__0_disable": 1, "Loot_Amount": 1 }, "Semi_automatic": { "Cost__0_disable": 1, "Damage_Multiplier": 2, "Loot_Chance_Percent__0_disable": 1, "Loot_Amount": 1 }, "MP5": { "Cost__0_disable": 1, "Damage_Multiplier": 2, "Loot_Chance_Percent__0_disable": 1, "Loot_Amount": 1 }, "LR300": { "Cost__0_disable": 1, "Damage_Multiplier": 2, "Loot_Chance_Percent__0_disable": 1, "Loot_Amount": 1 }, "M39": { "Cost__0_disable": 1, "Damage_Multiplier": 2, "Loot_Chance_Percent__0_disable": 1, "Loot_Amount": 1 }, "AK47": { "Cost__0_disable": 1, "Damage_Multiplier": 3, "Loot_Chance_Percent__0_disable": 0, "Loot_Amount": 0 }, "m249": { "Cost__0_disable": 1, "Damage_Multiplier": 3, "Loot_Chance_Percent__0_disable": 0, "Loot_Amount": 0 } }, "Armor": { "Facemask": { "Cost__0_disable": 1, "Damage_Absorption_Percent": 25, "Loot_Chance_Percent__0_disable": 1, "Loot_Amount": 1 }, "Chest_Plate": { "Cost__0_disable": 1, "Damage_Absorption_Percent": 25, "Loot_Chance_Percent__0_disable": 1, "Loot_Amount": 1 }, "Kilt": { "Cost__0_disable": 1, "Damage_Absorption_Percent": 25, "Loot_Chance_Percent__0_disable": 1, "Loot_Amount": 1 }, "Boots": { "Cost__0_disable": 1, "Damage_Reflection_Percent": 10, "Loot_Chance_Percent__0_disable": 1, "Loot_Amount": 1 }, "Gloves": { "Cost__0_disable": 1, "Damage_Reflection_Percent": 10, "Loot_Chance_Percent__0_disable": 1, "Loot_Amount": 1 }, "TShirt": { "Cost__0_disable": 1, "Damage_Reflection_Percent": 10, "Loot_Chance_Percent__0_disable": 1, "Loot_Amount": 1 }, "Pants": { "Cost__0_disable": 1, "Damage_Reflection_Percent": 10, "Loot_Chance_Percent__0_disable": 1, "Loot_Amount": 1 }, "Animal_Gloves": { "Cost__0_disable": 1, "Damage_to_Healing_Conversion_Percent": 10, "Loot_Chance_Percent__0_disable": 0, "Loot_Amount": 0 } }, "Grenades": { "Trap_Grenade": { "Cost__0_disable": 1, "Radius": 4.0, "Loot_Chance_Percent__0_disable": 1, "Loot_Amount": 1 }, "Wall_grenade": { "Cost__0_disable": 1, "Radius": 4.0, "Loot_Chance_Percent__0_disable": 1, "Loot_Amount": 1 }, "Door_grenade": { "Cost__0_disable": 1, "Radius": 3.0, "Loot_Chance_Percent__0_disable": 1, "Loot_Amount": 1 }, "Tank_grenade": { "Cost__0_disable": 1, "Radius": 10.0, "Loot_Chance_Percent__0_disable": 1, "Loot_Amount": 1 }, "Cluster_grenade": { "Cost__0_disable": 1, "Radius": 15.0, "Spawn_Grenades_Amount": 20, "Loot_Chance_Percent__0_disable": 1, "Loot_Amount": 1 }, "Spawn_landmines_grenade": { "Cost__0_disable": 1, "Radius": 20.0, "Spawn_Mines_Amount": 10, "Loot_Chance_Percent__0_disable": 1, "Loot_Amount": 1 }, "Basic_rocket_grenade": { "Cost__0_disable": 1, "Radius": 30.0, "Spawn_Rockets_Amount": 25, "Loot_Chance_Percent__0_disable": 0, "Loot_Amount": 0 }, "MLRS_grenade": { "Cost__0_disable": 1, "Radius": 40.0, "Spawn_Rockets_Amount": 35, "Loot_Chance_Percent__0_disable": 0, "Loot_Amount": 0 } }, "Utility_Tools": { "Repair_hammer": { "Cost__0_disable": 1, "Repair_Radius": 20.0, "Loot_Chance_Percent__0_disable": 0, "Loot_Amount": 0 }, "Remover_hammer": { "Cost__0_disable": 1, "Loot_Chance_Percent__0_disable": 0, "Loot_Amount": 0 } }, "Gathering_Tools": { "Golden_hatchet": { "Cost__0_disable": 1, "Gather_Multiplier": 2, "Loot_Chance_Percent__0_disable": 1, "Loot_Amount": 1 }, "Golden_icepick": { "Cost__0_disable": 1, "Gather_Multiplier": 2, "Loot_Chance_Percent__0_disable": 1, "Loot_Amount": 1 }, "Diamond_hatchet": { "Cost__0_disable": 1, "Gather_Multiplier": 4, "Loot_Chance_Percent__0_disable": 0, "Loot_Amount": 0 }, "Diamond_icepick": { "Cost__0_disable": 1, "Gather_Multiplier": 4, "Loot_Chance_Percent__0_disable": 0, "Loot_Amount": 0 }, "Rubin_hatchet": { "Cost__0_disable": 1, "Gather_Multiplier": 8, "Loot_Chance_Percent__0_disable": 0, "Loot_Amount": 0 }, "Rubin_icepick": { "Cost__0_disable": 1, "Gather_Multiplier": 8, "Loot_Chance_Percent__0_disable": 0, "Loot_Amount": 0 } }, "Lootcontainer_Settings": { "Custom_Spawn_Shortnames": [ "bradley_crate", "heli_crate", "codelockedhackablecrate" ] } } Language: 31 file
Permissions
SpecialItemsZ.use //player can open ui SpecialItemsZ.vip SpecialItemsZ.freebuy Required plugin:
Imagelibrary.cs Usable plugin:
ServerRewards.cs, Economics.cs
I guarantee the functionality of the plugin as described. However, I cannot take responsibility for conflicts or issues arising from incompatibility with third-party plugins or themes. Please take this into account before purchasing. I will list all known compatibility details in the product description.
-
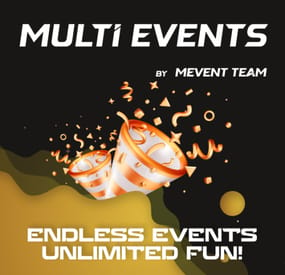
$41.00$31.95Multi Events
Introducing MultiEvents, the ultimate event management plugin for your Rust server! Seamlessly create, manage, and display events with a beautiful, customizable interface that engages your players. With support for multiple event types, easy integration with other plugins, and a powerful visual editor, MultiEvents is the perfect solution to enhance your server's community experience and keep players coming back for more.
⭐️ Features of Multi Events
Beautiful, fully customizable UI with multiple template options (Fullscreen, ServerPanel V1, ServerPanel V2) for a tailored player experience. In-game visual editor for creating and customizing event interfaces, allowing for real-time adjustments without coding. Support for event categories, descriptions, icons, and banners to enhance event visibility and player engagement. Integrated event notifications system to alert players about upcoming and ongoing events, ensuring maximum participation. Event inventory management with customizable permissions, providing control over player access and participation. Image library support for custom graphics and icons, enabling a unique and branded event presentation. Multi-language support with easy localization, making the plugin accessible to a global player base. ServerPanel integration for seamless menu access, enhancing user interaction and ease of use. Developer-friendly API for plugin integration, allowing for extended functionality and customization. Pre-loaded with diverse events such as CollectionResources, FoundationDrop, HelicopterPet, HuntAnimal, KingOfHill, LookingLoot, and SpecialCargo, each offering unique gameplay experiences. Advanced configuration options in JSON format, providing flexibility in event setup and management. Optimized for performance, ensuring smooth operation even with large player bases and extensive data.
🏆 Included Events
MultiEvents comes pre-loaded with several exciting events ready to use on your server:
CollectionResources - Collect resources and compete with other players! The more resources you collect, the higher your score. Use different tools to get multipliers for your gathering. Top players will receive valuable rewards! FoundationDrop - Players spawn on a platform made of foundations. The foundations begin to degrade and fall away one by one. Players must survive by jumping between foundations. The last player standing wins! When only one foundation remains, players receive weapons and radiation appears to speed up the finale. HelicopterPet - Try to get the attention of the patrol helicopter! The more it focuses on you, the more points you earn. Get points when the helicopter orbits around you and even more when it's attacking. The player with the most points at the end wins! Be careful though - this isn't your friendly neighborhood chopper! HuntAnimal - Hunt animals across the map to earn points! Different animals are worth different amounts - chickens are worth 1 point, while bears are worth 10 points. Wolves, boars, horses, and deer are worth 4 points each. The player with the most points at the end of the event wins! KingOfHill - Race to the highest point! Your score is based on the highest elevation you reach. Stay on solid ground - no flying, swimming, or using vehicles. The player who reaches the highest point and maintains their position wins! Watch your step and keep climbing! LookingLoot - Search for loot across the map! Earn points by looting containers and barrels. Most items are worth 1 point each, but special items like scrap and gears are worth 2 points. The player who collects the most valuable loot wins! Be quick - containers can only be looted once! SpecialCargo - Deliver the special cargo from one monument to another! A random player will be chosen to carry the cargo. The carrier must reach the destination monument marked on the map while avoiding other players. If the carrier dies, a new random player becomes the carrier. Teleportation is disabled for the carrier. Successfully deliver the cargo to win! Each event is fully customizable through the visual editor and comes with default settings ready to play immediately after installation!
🚀 Expansion Packs & Add‑ons
Enhance MultiEvents with premium expansion packs and our large‑scale raid framework. Pre‑configured, fully customizable, and designed to plug directly into your server.
✨ MultiEvents Pack 1 Barrels, PvP Player Battle, NPC Missile Silo, Pumpkin Picker, Vehicle Hunter. View on Codefling → 🌟 MultiEvents Pack 2 Another set of competitive and gathering‑focused events to diversify rotations. View on Codefling → 💠 MultiEvents Pack 3 Corn Collector, Gold Rush (with rare items), Mushroom Madness, NPC Underwater Lab, Patrol Helicopter Hit. View on Codefling → 🏰 OPERATION FORTRESS Large‑scale PvE raid framework with handcrafted bases, waves, and rewards — a perfect complement to your event ecosystem. View on Codefling →
🖼️ Showcase
Fullscreen Template
ServerPanel V1 Template
ServerPanel V2 Template
📬 Video Overview
🎮 Commands
/events - Opens the events menu for players
🛡️ Permissions
multievents.edit - Permission to edit events
🗒️ Visual Editor
MultiEvents includes a robust visual editor that simplifies the process of creating and customizing events. No coding is required—use the intuitive interface to adjust settings, modify colors, add text, and configure event elements directly in-game. This allows for quick and efficient event setup, ensuring your server's events are both engaging and visually appealing.
⚙️ Web Config Editor
Easily manage your MultiEvents settings with our web-based configuration editor. This tool allows you to adjust plugin configurations through a user-friendly interface, eliminating the need to manually edit files on your server.
P.S. To access the web config editor, you must be part of the "MultiEvents" group in our Discord server. Join us at https://discord.gg/mevent and submit a request in the #ticket-verify channel to get started.
📚 FAQ
Q: Can I integrate MultiEvents with other plugins?
A: Yes! MultiEvents has an API that allows other plugins to register and manage events. It also integrates with ServerPanel for menu access.
Q: How do I add MultiEvents to the ServerPanel menu?
A: You can do this directly from the ServerPanel in-game:
1. Open the ServerPanel menu in-game.
2. If you have permission to edit, switch the panel to edit mode so you can see the blue "EDIT CATEGORY" and "EDIT PAGES" buttons.
3. Choose the category where you want MultiEvents to appear and click the "EDIT CATEGORY" button for that category.
4. While you are in this category in the ServerPanel, click the "EDIT PAGES" button to create a new page (or edit an existing one) for MultiEvents.
5. For that page, set these exact parameters:
Type: Plugin Plugin Name: MultiEvents Plugin Hook: API_OpenPlugin 6. Save the changes. The MultiEvents button will now appear in the ServerPanel in the category you selected.
Q: How do I add custom images for my events?
A: MultiEvents supports an image library. Upload your images to your server, and reference them in the plugin configuration or through the visual editor.
Q: Does MultiEvents support multiple languages?
A: Yes, MultiEvents has built-in localization support. You can customize all text elements in the editor and add translations for different languages.
Q: How do I configure rewards in MultiEvents?
A: Rewards can be configured in two ways. If you want rewards to drop into a custom inventory UI, you need to set up items in the inventory settings and assign them unique IDs. Then, reference these IDs in the event configuration. If you prefer to give rewards directly to the player's in-game inventory, simply specify the rewards directly within the event settings.
Q: How do I set up rewards (Item, Command, Plugin, Kit) and what placeholders are available?
A: Types: Item (ShortName, Amount, DisplayName, Skin), Command (Command string), Plugin (Plugin Name, Hook, Amount), Kit (Kit name). Placeholders for Command: %steamid%, %username%. Multiple commands are separated by | (line breaks are also supported).
Give an item: "Type": "Item", "ShortName": "stones", "Amount": 2500, "DisplayName": "Stones", "Skin": 0 Give a kit: "Type": "Kit", "Kit": "vip_starter" Run commands: "Type": "Command", "Command (%steamid%)": "inventory.giveto %steamid% scrap 1000|oxide.usergroup add %steamid% vip" Add BankSystem balance (via Plugin): "Type": "Plugin", "Plugin": "BankSystem", "Hook": "Deposit", "Amount": 2500 Q: What are the recommended sizes for event images?
A: For optimal display, event banners should be 390x349 pixels, and event icons should be 64x64 pixels.
💻 Developer API
MultiEvents provides a developer-friendly API for integration with other plugins:
void API_RegisterEvent(string eventId, JObject data) - Register a new event with MultiEvents API_RegisterEvent Parameters:
eventId (string): unique identifier for the event. data (JObject): JSON object containing event details. JObject Structure:
title (string, required): The title of the event. description (string, optional): A brief description of the event. commandToStart (string, required): The command to start the event. commandToStop (string, required): The command to stop the event. bannerURL (string, optional): URL for the event's banner image. icon (string, optional): URL for the event's icon image. scrollElements (JArray, optional): Custom UI elements for the event's scroll view. Creating UI Elements for scrollElements:
The scrollElements parameter allows you to add custom UI elements to your event description. Each element is defined as a JObject with specific properties based on its type.
Common Properties: type (string): "label", "image", "panel", or "button" color (string): HEX color code (e.g., "#FFFFFF") alpha (float): Opacity from 0 to 100 position (JObject): Element position and dimensions Type-Specific Properties: Text Elements: text (JArray of strings), textColor (HEX), fontSize (int), font (string) Image Elements: image (string URL) Button Elements: text, textColor, fontSize, command (string) Panel Elements: cursorEnabled (bool) Example of UI Elements:
var customScrollElements = new JArray { // Label example new JObject { ["type"] = "label", ["text"] = new JArray { "Duration: <color=#D74933>10 mins</color>", "Reward: <color=#D74933>100 scrap, Jackhammer, Python Revolver</color>" }, ["textColor"] = "#E2DBD3", ["alpha"] = 100f, ["fontSize"] = 14, ["font"] = "robotocondensed-regular.ttf", ["align"] = "MiddleLeft", ["position"] = new JObject { ["anchorMinX"] = 0f, ["anchorMinY"] = 1f, ["anchorMaxX"] = 1f, ["anchorMaxY"] = 1f, ["offsetMinX"] = 0f, ["offsetMinY"] = -200f, ["offsetMaxX"] = 0f, ["offsetMaxY"] = -140f } }, // Image example new JObject { ["type"] = "image", ["image"] = "https://example.com/image.png", ["color"] = "#FFFFFF", ["alpha"] = 100f, ["position"] = new JObject { ["anchorMinX"] = 0f, ["anchorMinY"] = 1f, ["anchorMaxX"] = 0f, ["anchorMaxY"] = 1f, ["offsetMinX"] = 0f, ["offsetMinY"] = -234f, ["offsetMaxX"] = 42f, ["offsetMaxY"] = -192f } }, // Button example new JObject { ["type"] = "button", ["text"] = "Click Me", ["textColor"] = "#FFFFFF", ["color"] = "#D74933", ["alpha"] = 100f, ["fontSize"] = 14, ["command"] = "customcommand {user}", ["position"] = new JObject { ["anchorMinX"] = 0.5f, ["anchorMinY"] = 0f, ["anchorMaxX"] = 0.5f, ["anchorMaxY"] = 0f, ["offsetMinX"] = -60f, ["offsetMinY"] = 20f, ["offsetMaxX"] = 60f, ["offsetMaxY"] = 50f } } }; Example Usage:
MultiEvents.Call("API_RegisterEvent", "CollectionResources", new JObject { ["title"] = "Collection Resources", ["description"] = "Collect resources and compete with other players! The more resources you collect, the higher your score. Use different tools to get multipliers for your gathering. Top players will receive valuable rewards!", ["commandToStart"] = "collectionresources.start", ["commandToStop"] = "collectionresources.stop", ["bannerURL"] = "https://gitlab.com/TheMevent/PluginsStorage/raw/main/Images/MultiEvents/CollectionResources.png", ["icon"] = "https://gitlab.com/TheMevent/PluginsStorage/raw/main/Images/MultiEvents/Icons/CollectionResources.png", ["scrollElements"] = customScrollElements });
(hook) OnEventStart(string eventName) - Hook called when an event begins (hook) OnEventEnd(string eventName) - Hook called when an event ends bool API_PlayerHideNotify(ulong userId) - Allows hiding event notifications for a specific player. Returns a boolean indicating whether notifications are hidden for the player. string GetBannerUrlByEventId(string eventId) - Retrieves the banner URL for a specific event by its ID. This is useful when you need to reference an event's banner in your custom UI.
🧪 TEST SERVER
Join our test server to view and experience all our unique features yourself!
Copy the IP Address below to start playing!
connect 194.147.90.239:28015
Elevate your server's event management with MultiEvents - the complete solution for creating engaging and visually stunning events that will keep your players excited and coming back for more!
- #mutlievents
- #events
- (and 15 more)
-
$59.90
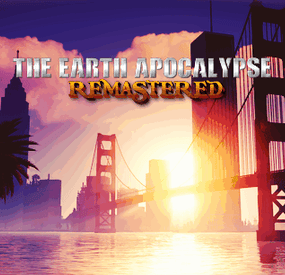
The Earth Apocalypse : Remastered
This is The Earth Apocalypse, the most known custom map in Rust history, now available on Codefling ! This map has been showcased and played by Facepunch themselves, along with many youtubers such as Frost, hJune and more who made movies/livestreams and videos on it ! The map constantly receive new updates to keep in line with new rust contents.
NEW UPDATE, Version R1365 : MAJOR MAP OVERHAUL : CLIFF, ROCKS, LAKES, JUNGLE !
The Earth – Apocalypse by Keirox. The craziest rust custom map ever made. Years of hardwork. This map features a post-apocalyptic city, many unique monuments, crazy electricity puzzles, custom caves, and much more… So many places to explore and great things to experience. When this map released it was an huge earthquake to the custom map world thanks to it’s endless amount of content and awesome builts, and it inspirated a lot of people. This map has also been showcased by Facepunch and multiple youtubers.
https://youtu.be/ZHHAceDvsGk
– Map Size : 5800 (Ocean) Terrain equal to 3500km
– Monuments : Launch Site, Harbor, The Dome, Super Market, Compound, Giant Excavator, Large Oil Rig, Submarine Labs, Fishing Villages, Farm, Missile Outpost, Nuclear Silo, Ferry, Oil Rig, Radtown
– Custom : Installation 07, AC-130 Hangar, The Golden Gate Bridge, AC-130 Crash Site, Apocalyptic City, Infected Scientist Bunker, Mariana Trench, Abandonned Outpost, Custom Caves, Sea Safezone, and more.
Performance is on point and everything is setup for vanila gameplay. BotRespawn and Kits data included for optimal experience.
Prefabs count : 72,500
Keirox Custom Maps Discord : https://discord.gg/GXz2v7K3FJ
Keirox Custom Maps Website : https://rust-keiroxcustommaps.com/
-
$9.99
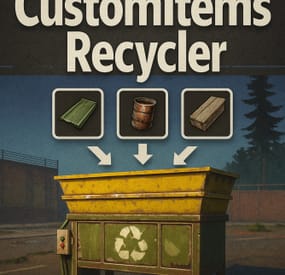
Custom Items Recycler
CustomItemsRecycler for Oxide – transform your Rust server’s recycling system! Ability to recycle any items, with support for skinned items. Full customization of recycling on your server.
# Key Features
Fully Configurable Yields Define per-item output amounts, skins, and names via a simple JSON config. Support for both resources and blueprints—mix and match however you like. Custom Shortnames & Display Names Use standard Rust item names or override them with your own text to fit server lore and branding. Blueprint Support Turn recycled items into usable blueprints automatically, or keep them as tradable resources—perfect for modded crafting loops. Skin Integration Assign any SkinID to recycled items, letting you reward players with rare or event-specific cosmetic drops.
# Configuration:
{ "Item settings": [ { "Item ShortName": "diesel_barrel", "Item SkinID": 0, "How many items are processed in one run (maximum—if you set 10, it will process 10 at a time)": 2, "Custom item name in UI": "Custom Item Name", "Output item settings (per processed item)": [ { "ShortName": "lowgradefuel", "Amount": 150, "SkinID": 0, "Custom name on creation (leave empty to use the default item name)": "", "IsBlueprint": false }, { "ShortName": "metal.fragments", "Amount": 100, "SkinID": 0, "Custom name on creation (leave empty to use the default item name)": "", "IsBlueprint": false } ] }, { "Item ShortName": "computerstation", "Item SkinID": 0, "How many items are processed in one run (maximum—if you set 10, it will process 10 at a time)": 1, "Custom item name in UI": "", "Output item settings (per processed item)": [ { "ShortName": "wood", "Amount": 500, "SkinID": 0, "Custom name on creation (leave empty to use the default item name)": "", "IsBlueprint": false }, { "ShortName": "metal.fragments", "Amount": 100, "SkinID": 0, "Custom name on creation (leave empty to use the default item name)": "", "IsBlueprint": false } ] }, { "Item ShortName": "glue", "Item SkinID": 0, "How many items are processed in one run (maximum—if you set 10, it will process 10 at a time)": 1, "Custom item name in UI": "", "Output item settings (per processed item)": [ { "ShortName": "lowgradefuel", "Amount": 10, "SkinID": 0, "Custom name on creation (leave empty to use the default item name)": "", "IsBlueprint": false } ] }, { "Item ShortName": "crude.oil", "Item SkinID": 0, "How many items are processed in one run (maximum—if you set 10, it will process 10 at a time)": 1, "Custom item name in UI": "", "Output item settings (per processed item)": [ { "ShortName": "lowgradefuel", "Amount": 20, "SkinID": 0, "Custom name on creation (leave empty to use the default item name)": "", "IsBlueprint": false } ] }, { "Item ShortName": "horsedung", "Item SkinID": 0, "How many items are processed in one run (maximum—if you set 10, it will process 10 at a time)": 1, "Custom item name in UI": "", "Output item settings (per processed item)": [ { "ShortName": "scrap", "Amount": 1, "SkinID": 0, "Custom name on creation (leave empty to use the default item name)": "", "IsBlueprint": false } ] } ], "Configuration version": { "Major": 1, "Minor": 2, "Patch": 1 } } # Lang RU/EN:
{ "UI.TITLE": "Custom item recycling information" }
-
$22.00
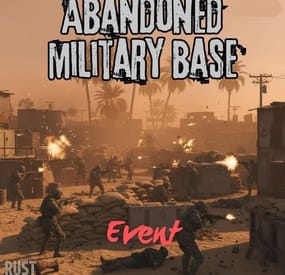
Abandoned Military Base Event
An exciting event at the desert military base. The essence of the event is to find the special explosive among the NPCs spawning in waves and use it to blow up the convoy consisting of three vehicles.
The plugin does not contain permissions.
RCON Commands:
amstart
amstop
Hooks:
void OnMilitaryBaseEventEventStart() void OnMilitaryBaseEventStop() Contact:
Additional free plugins created by me are available on Discord:https://discord.gg/C5CehdJMdK
Config:
{ "Version": { "Major": 1, "Minor": 0, "Patch": 0 }, "Automatic event start": true, "Minimum time for event start": 3600.0, "Maximum time for event start": 7200.0, "Duration of the event": 2800.0, "Warning messages before event start": 300.0, "Warning messages before event end": 300.0, "Chat icon": 0, "Chance that Convoy Killer C4 will drop from NPCs (Minimum 10% recommended) ": 30.0, "Convoy Killer C4 skinID:": 3587480685, "Convoy Killer C4 name:": "Convoy Killer C4", "Military detonator skinID:": 3588005672, "Military detonator name:": "Military Detonator", "Disable BetterNpc plugin npc's for the duration of the event?": false, "Messages setting": { "Use event message?": true, "Message before the event starts.": "Everyone be careful, the <color=#ff0000>Abandoned Military Event</color> is about to start.", "Warning message before the event stop.": "The Abandoned Military Event will end soon!!", "Use Game Tip?": true, "Game TIP message:": "Look for the <color=#f2D705>convoy killer C4</color> and the <color=#f2D705>miltary detonator</color> in the NPCs.", "GUI message": "Blow up the convoy with <color=#f2D705>Convoy Killer C4!</color>", "Message when someone event owner": "has become the owner of <color=#ff0000>Abandoned Military Event</color>!", "Start message": "<color=#ff0000>Abandoned Military Event</color> has started!!", "Stop message": "<color=#ff0000>Abandoned Military Event</color> end!", "Map marker name": "Abandoned Military Event", "Map marker radius": 0.6, "Color": { "r": 1.0, "g": 0.0, "b": 0.0 } }, "How many crates should fall out of the modular cars?": 3, "List of modulacar lootable crates": { "Are you deleting the original loot from the crate?": false, "Use custom loot?": false, "CustomLoot": { "Minimum items": 1, "Maximum items": 1, "Use minimum - maxium?": false, "List of items": [ { "ShortName": "xmas.present.small", "Minimum": 3, "Maximum": 6, "Chance": 100.0, "Give blueprint?": false, "SkinID": 0, "Displayname": "" } ] } }, "How many crates should fall out of the MLRS?": 3, "List of Mlrs lootable crates": { "Are you deleting the original loot from the crate?": false, "Use custom loot?": false, "CustomLoot": { "Minimum items": 1, "Maximum items": 1, "Use minimum - maxium?": false, "List of items": [ { "ShortName": "xmas.present.small", "Minimum": 3, "Maximum": 6, "Chance": 100.0, "Give blueprint?": false, "SkinID": 0, "Displayname": "" } ] } }, "Npcs settings": { "Minimum": 5, "Maximum": 6, "NPCs setting": { "Name": "Military Guard", "Health": 150.0, "Roam Range": 30.0, "Chase Range": 30.0, "Attack Range Multiplier": 2.0, "Sense Range": 40.0, "Target Memory Duration [sec.]": 60.0, "Scale damage": 0.6, "Aim Cone Scale": 1.5, "Detect the target only in the NPC's viewing vision cone? [true/false]": false, "Vision Cone": 135.0, "Speed": 7.5, "Disable radio effects? [true/false]": false, "Is this a stationary NPC? [true/false]": false, "Use custom loot?": false, "CustomLoot": { "Minimum items": 1, "Maximum items": 1, "Use minimum - maxium?": false, "List of items": [ { "ShortName": "xmas.present.small", "Minimum": 3, "Maximum": 6, "Chance": 100.0, "Give blueprint?": false, "SkinID": 0, "Displayname": "" } ] }, "Wear items": [ { "ShortName": "metal.facemask", "SkinID (0 - default)": 3566806303 }, { "ShortName": "pants", "SkinID (0 - default)": 2425765853 }, { "ShortName": "hoodie", "SkinID (0 - default)": 1674441601 }, { "ShortName": "roadsign.jacket", "SkinID (0 - default)": 2305545961 }, { "ShortName": "roadsign.kilt", "SkinID (0 - default)": 2305553897 }, { "ShortName": "shoes.boots", "SkinID (0 - default)": 3566804523 } ], "Belt items": [ { "ShortName": "smg.mp5", "Amount": 1, "SkinID (0 - default)": 0, "Mods": [], "Ammo": "" }, { "ShortName": "syringe.medical", "Amount": 2, "SkinID (0 - default)": 0, "Mods": [], "Ammo": "" } ] } }, "Sniper Npcs settings": { "Minimum": 2, "Maximum": 2, "NPCs setting": { "Name": "Military Guard", "Health": 150.0, "Roam Range": 30.0, "Chase Range": 30.0, "Attack Range Multiplier": 2.0, "Sense Range": 50.0, "Target Memory Duration [sec.]": 60.0, "Scale damage": 0.6, "Aim Cone Scale": 1.5, "Detect the target only in the NPC's viewing vision cone? [true/false]": false, "Vision Cone": 135.0, "Speed": 7.5, "Disable radio effects? [true/false]": false, "Is this a stationary NPC? [true/false]": true, "Use custom loot?": false, "CustomLoot": { "Minimum items": 1, "Maximum items": 1, "Use minimum - maxium?": false, "List of items": [ { "ShortName": "xmas.present.small", "Minimum": 3, "Maximum": 6, "Chance": 100.0, "Give blueprint?": false, "SkinID": 0, "Displayname": "" } ] }, "Wear items": [ { "ShortName": "metal.facemask", "SkinID (0 - default)": 0 }, { "ShortName": "pants", "SkinID (0 - default)": 3468431914 }, { "ShortName": "hoodie", "SkinID (0 - default)": 3468432155 }, { "ShortName": "roadsign.jacket", "SkinID (0 - default)": 3472579116 }, { "ShortName": "roadsign.kilt", "SkinID (0 - default)": 3472577950 }, { "ShortName": "shoes.boots", "SkinID (0 - default)": 916448999 } ], "Belt items": [ { "ShortName": "rifle.bolt", "Amount": 1, "SkinID (0 - default)": 0, "Mods": [], "Ammo": "" }, { "ShortName": "syringe.medical", "Amount": 2, "SkinID (0 - default)": 0, "Mods": [], "Ammo": "" } ] } }, "PVE Mode Setting (only for users PveMode plugin)": { "Use PveMode plugin?": false, "Required damage to the event owner": 500.0, "The event is a right of ownership, to obtain it you need damage multiplier.": { "Npc": 1.0 }, "Non owner can loot the crates?": false, "Non owner can loot the Npc's?": false, "Non owner can damage Npc's?": false, "Non owner can be attacked by Npc's?": false, "Non owner, can you enter the event zone?": false, "Allow a player who has an active cooldown of the Event Owner to enter the event zone?": true, "The time that the Event Owner may not be inside the event zone.": 300, "The time until the event owner can return to the event zone.": 60, "Block the RestoreUponDeath plugin in the event zone.": true, "After all this time, an event owner can be an event owner again.": 86400.0, "Darkening the sphere.": 15 } }