
Tikomatura's Wishlist
-
$24.99
Skinner
By Whispers88 in Plugins
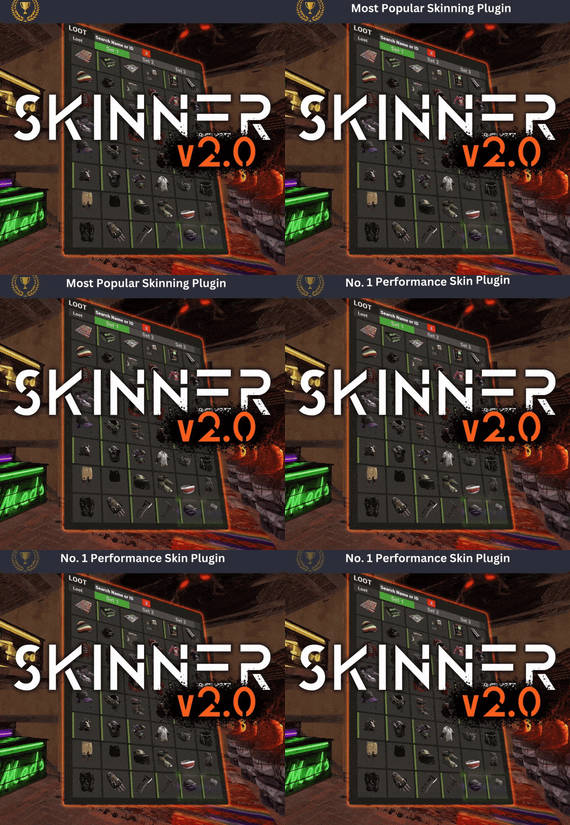
Premium Item Skinning · Oxide + Carbon SKINNER v3.1.6 Skin every item like it’s worth keeping — 60x faster, 200x leaner.
The unrivalled no.1 performance skinning plugin. Skin any item in the game with a unique skinbox — live skinning, auto skinning, and skin sets.
The numbers, not the noise Measured, not marketed
Skinner 2.0 delivers unrivalled efficiency. In standard testing versus the closest performing plugin, runtime was 60x faster and memory use 200x more efficient.
What’s new in 3.0 Skinner 3.0 is here — a full visual overhaul with dynamic, permission-based UI menus.
✓Visual overhaul with dynamic, permission-based UI menus ✓Automatic skin filtering and dev modes for the new TOS ✓Permission-based skin sets ✓Team-share skins ✓Auto-unlock owned skins Features Everything skinner does
Live skinning Skin items in place without moving them. Auto import Automatically import and use all game-approved skins. Skin sets Create a variety of skin sets for any item. Skin requests Players request skins; admins approve them in game. Auto skins Apply selected skins to every item that enters your inventory. Team share Skin your whole team’s inventory from your own sets. See it running Live demo
Live-skin any item in your inventory. Skin deployables you’re looking at. Commands Every command
Skin menu
/skin /s, /skinbox, /sb Live-skin any item in your inventory by picking a skin. /skincraft /sc Build skin sets used by the auto, team, and base commands. /skinitem /si, /skindeployed, /sd Skin a deployable you are looking at. Args: 1, 2 or 3 to use a skin set. Automatic
/skincon /scon Skin every item in the container you are looking at. Args: 1/2/3 (optional). /skininv /sinv Skin every item in your inventory. Args: 1/2/3 (optional). /skinauto /sauto Auto-skin every item as it enters your inventory. Args: 1/2/3 (optional). /skinteam /st Skin your inventory and your team’s. Args: 1/2/3. Use /skinteam toggle to opt in or out. /skinbase /skinbuilding Skin all deployables in your base. Args: item filter, e.g. /skinbase sleepingbag. /skinall /sa Skin all items in every container in your base. Args: shortname, e.g. /skinall rifle.ak. /skinset /ss Set your currently selected skin set. Import & requests
/skinimport /sip Import a custom workshop skin. Args: WorkshopID, e.g. /skinimport 2397648701. /colimport /cip Import a workshop collection. Args: Collection ID, e.g. /colimport 2921147807. /skinrequest /sr Request a skin be added — shows in the requests box. Args: WorkshopID. /skinrequests /srs Open the approval box. Try = copy the item, Approve = add the skin, Deny = remove it. Permissions Grant exactly what you want
Player
skinner.default /skin skinner.items /skinitem skinner.craft /skincraft skinner.skinauto /skinauto skinner.skincon /skincon skinner.skininv /skininv skinner.skinbase /skinbase skinner.skinteam /skinteam skinner.skinall /skinall skinner.skinrequest /skinrequest Admin
skinner.import Enables /skinimport, /colimport, and /skinrequests. skinner.bypassauth Skips the building-auth check when using /skinitem. skinner.permskintry Enables Try in /skinrequests. Trying a skin copies the item — admins only. Auto-assigned
skinner.skinautotoggled A player disables skinauto. skinner.skinteamblock A player opts out of team skins. Cooldowns Grant skinner.<command><seconds> (e.g. skinner.default30) to enforce the cooldowns set in the config. No cooldown permission = no cooldown. If a player has several, the shortest wins. Importing skins Five ways to add skins
Via config Add workshop IDs to the Imported Skins List; reload and shortnames/display names auto-populate. Via collections Add whole workshop collection IDs; every skin imports automatically on load. Via commands /skinimport <WorkshopID> and /colimport <CollectionID> from chat, the F1 console, or RCON. Via skin requests Players /skinrequest; admins Try/Approve/Deny in the requests box. Requests log to a Discord webhook. From other plugins Convert data from SkinBox, xSkins, and SkinController with the SkinDataConverter tool, then paste into the config. Get the converter → Configuration Tune every behaviour
{ "Auto import approved skins": true, "Remove player data after inactivity (days)": 14, "Apply names of skins to skinned items": true, "Add Search Bar UI": true, "Override spraycan behaviour": false, "Use spraycan effect when holding spraycan and skinning deployables": true, "Blacklisted Skins (skinID)": [], "Blacklisted Items (itemID)": [], "Import Skin collections (steam workshop ID)": [], "Imported Skins List": { "861142659": {}, "2617744110": {} } } Developer API Hook into Skinner
A small, stable surface for reading the cached skin data and resolving redirect items from your own plugin.
//Get all cached skins public Dictionary<int, List<ulong>> GetAllCachedSkins() => _cachedSkins; //Check if a skin is a redirect item public bool IsRedirectID(ulong uID) => HasMask(uID); //Convert a redirect ID to its item ID public int RedirectIDtoItemID(ulong uID) => (int)UnsetMask(uID); //Get the list of skins for an item public List<ulong>? GetSkinsItemList(int itemid) { _cachedSkins.TryGetValue(itemid, out List<ulong>? cachedSkins); return cachedSkins; } Watch See Skinner in action
http://youtu.be/ewKlNILTwv8
Skin every item like it’s worth keeping.
The unrivaled no.1 performance skinbox for Rust — 60x faster, 200x leaner. Oxide + Carbon.
Join the Discord → Skinner v3.1.6 · by Whispers88 · Oxide + Carbon · 5/5 from 50 reviews · 69 versions · on Codefling since March 2022 -
$40.00$30.00Raidable Bases
Create fully automated raidable bases with NPCs in Rust.
Raidable Bases supports maintained, scheduled, buyable and manually spawned events, with separate options for each difficulty.
📄Compatibility notes
server.pve true is not supported; please use TruePVE or another compatible PVE plugin that calls the necessary hooks required by Raidable Bases. Raidable Bases does not currently use Harmony patches. I could implement such patches, but it's often better to use a supported hook when it exists instead. Raidable Bases is not compatible with Raid Windows in Softcore mode after the Tool Cupboard is destroyed or after raidwindow_fresh_tc_seconds elapses. This will be supported when the appropriate hooks exist for this behavior. 📄Raidable Bases & Boats Loot Editor by @beee 😎
This is the easiest way to create and manage Raidable Bases loot tables. It provides a visual editor for item selection, amounts, probability, skins and other loot fields, making it the best starting point for most server owners.
https://codefling.com/tools/raidable-bases-boats-loot-editor/ ⚙️Built with performance in mind
Raidable Bases manages a lot of work behind the scenes, so performance is treated as a core part of development. Pasting and cleanup are batched, recurring work is shared through central schedulers, temporary collections are pooled, and spawn searches are spread across frames to reduce noticeable spikes.
These systems help provide a smoother experience across a wide range of server sizes. Performance will continue to be reviewed and improved anywhere measurable gains can be made.
📄There are just a few steps
Get bases spawning within minutes
An experienced administrator may finish in a few minutes. A novice should allow roughly 30 minutes, while a complete beginner may need 60 to 120 minutes. Fine-tuning depends on how large you want the project to become. Once the initial setup is complete, maintaining the plugin is fairly simple, and growing your base catalog becomes an art form of its own. Server owners regularly report that players love the variety, which makes building that collection rewarding for everyone involved.
Step 1 - Add your bases
You can obtain bases by:
Downloading them from Fortify. Purchasing a Raidable Bases package. Purchasing compatible CopyPaste files from another creator. Creating your own bases. Place the CopyPaste JSON files in:
Oxide — oxide/data/copypaste/ Carbon — carbon/data/copypaste/ Step 2 - Set up profiles
Profiles serve a specific purpose: they extend the main configuration file. For clarity, they should always be referred to as profiles.
Profiles are located in:
Oxide — oxide/data/RaidableBases/Profiles/ Carbon — carbon/data/RaidableBases/Profiles/ Bases can be added manually or with the command:
rb.config add "Easy Bases" raideasy1 raideasy2 raideasy3 rb.config add "Medium Bases" raidmed1 raidmed2 raidmed3 The named profile can contain any number of CopyPaste bases that share its options. Quotes around the profile name are required, and it is best practice to use them even when the name has no spaces. Use straight double quotes only; curly quotes will not work correctly.
Step 3 - Enable automatic events
For public automated events, enable Maintained Events or Scheduled Events in the main configuration and choose how many events you would like active.
The main configuration file is located in:
Oxide — oxide/config/RaidableBases.json Carbon — carbon/configs/RaidableBases.json Edit the configuration file.
Maintained Events: keeps the configured number of raids available. Max Maintained Events: Set this to the amount of events that you want to always have spawned. Max Amount Allowed To Automatically Spawn Per Difficulty: Set this to the amount of events that you want to spawn per difficulty. Scheduled Events: spawns raids according to a timer. Max Scheduled Events: Set this to the amount of events that you want spawned on a timed basis. Max To Spawn At Once: Set this to the amount of events that can spawn at once from Max Scheduled Events. Set to 0 to use the full amount from Max Scheduled Events. Step 4 - Save your files then use the commands:
Oxide: o.reload RaidableBases Carbon: c.reload RaidableBases Shortcuts: rb.reloadconfig rb.reloadprofiles Once grid initialization completes, automatic events can begin spawning. The included Default_Loot table is enough to get started and can be replaced whenever you are ready. Ultimately, the Default_Loot table should be discarded once your other loot tables are configured.
📁File locations
Main configuration
Oxide: oxide/config/RaidableBases.json Carbon: carbon/configs/RaidableBases.json Profiles
Oxide: oxide/data/RaidableBases/Profiles/ Carbon: carbon/data/RaidableBases/Profiles/ CopyPaste bases
Oxide: oxide/data/copypaste/ Carbon: carbon/data/copypaste/ Loot and data
Oxide: oxide/data/RaidableBases/ Carbon: carbon/data/RaidableBases/ The main configuration controls server-wide behavior. Profiles contain options for specific difficulties, while loot tables and CopyPaste files provide the content used by each event.
🗺️Map terrain and spawn locations
Raidable Bases depends on the map having enough flat, unobstructed terrain for automated events. Most procedural maps provide plenty of locations, while custom or heavily modified maps may need additional flat terrain, islands, or custom spawn points.
The grid scans the map when the plugin initializes and reports the number of potential spawn locations. A low location count usually means the map offers fewer suitable areas or the current settings narrow the available terrain. Spawns Database files are useful for sky bases, underwater bases, custom maps and any setup that needs exact locations. You can disable using the grid by providing a valid spawn file for each raid type (buyable, maintained, scheduled and manual). You may view the grid by typing /rb grid in-game to view detailed drawings of all locations on the grid.
X - Green - Potential spawn point, generally in clusters X - Red - Currently in use C - Cyan - Construction detected nearby TC - Yellow - TC detected nearby W - Blue - Water depth is too high - Refreshes on ocean level change Green clusters have the highest chance of being picked as a spawn point, constantly changing depending on player activity and remaining a safe distance away.
📄Profiles and difficulties
A profile is where options can be found that pertain to specific difficulties. Any number of CopyPaste bases can share the same profile, so a large base rotation can be managed while the difficulty is adjusted in one place.
Profiles can control loot, NPCs, PVP or PVE behavior, protection radius, damage, doors, locks, water placement, height, rewards, building options and much more. Dynamic difficulties
rb.difficulty add "Sky" rb.difficulty remove "Sky" Adding a difficulty creates the matching configuration and language entries. Profiles and loot tables can then be assigned to it. Removing a difficulty removes its active configuration entries without deleting the related files.
📄Event types
Maintained — Keeps up to the configured number of public raids available. Another can spawn after one despawns. Scheduled — Spawns public raids between the configured minimum and maximum interval. Buyable — Lets players purchase a raid through the configured buy command, subject to availability, costs and cooldowns. Manual — Lets an administrator spawn a selected raid at a chosen location. Each event type can use the automatic grid or its own Spawns Database file.
🔧Loot tables
Loot can come from a base-specific table, difficulty table, weekday table and the default table. The plugin combines the available sources according to the profile and loot settings until it has enough usable entries.
Default loot
Default_Loot.json contains a small demonstration loot list. It is enough to show how the plugin works, but most servers should replace it with loot tables in the Base_Loot and/or Difficulty_Loot folders. Loot table editor
For most servers, the Loot Table Editor by @beee 😎 is the quickest way to build and manage these files. Thanks, beee!
https://codefling.com/tools/raidable-bases-boats-loot-editor/ Important loot fields
shortname — Rust item shortname. amount — Maximum amount created for the entry. amountMin — Minimum amount created for the entry. probability — Spawn chance from 0.0 to 1.0, where 1.0 is 100%. stacksize — Optional stack-size override. Use -1 to use the item's normal Rust stack size. skin — Optional skin ID. Editable item lists
The rb.populate all command creates a file for each difficulty inside the Editable_Lists folder. Each file contains every available Rust item, allowing you to remove unwanted entries and configure the amounts for items you would like to spawn. Any items with an amount set to 0 will be inactive, so you do not have to remove any entry.
A list containing hundreds of items may look intimidating at first, but deleting unwanted entries or configuring from a preset list is usually much faster than adding every item manually. The command also includes items already present in your Difficulty_Loot files. This makes it useful when you want to rebuild a list and reevaluate which items should be available later. Files inside Editable_Lists are for editing only. Their contents need to be copied into an active loot file before the plugin will use them.
To use Editable_Lists/Easy.json for Easy raids, copy its contents into Difficulty_Loot/Easy.json. To use Editable_Lists/Expert.json for a profile named Expert Bases, copy its contents into Base_Loot/Expert Bases.json. Item amounts and probability
An item will not spawn when both amount and amountMin are set to 0. You may remove these entries or leave them in the file for later use.
When amountMin is 0, probability determines whether the item spawns. If the item fails its probability check, another item will not automatically replace it unless additional eligible entries are available. Tool Cupboard loot
Items moved into the Tool Cupboard may combine into larger stacks. The visible stack count can therefore be lower than the amount that was originally generated. Loot priority
Loot is loaded from the data files inside:
Oxide: oxide/data/RaidableBases/ Carbon: carbon/data/RaidableBases/ The Profiles folder is not a loot source. It contains the options used by each profile and difficulty. Please do not place any file in the Profiles folder that is not a profile, the hamsters will cry.
Base Loot
If a file inside Base_Loot has the same name as a profile, the bases assigned to that profile can use that loot table. For example: Base_Loot/Expert Bases.json applies to the profile named: Expert Bases Enable Always Spawn Base Loot Table in the profile when items from that table should always be included. Difficulty Loot
Files inside Difficulty_Loot are selected according to the difficulty assigned to the profile. For example: Difficulty_Loot/Hard.json is used by profiles assigned to the Hard difficulty. Day of Week Loot
When Use Day Of Week Loot is enabled, the plugin selects the loot table matching the current day. Default Loot
Default_Loot.json acts as the fallback table. It is used when the other available loot tables do not provide enough eligible items to satisfy Amount Of Items To Spawn. Generally, this file should be discarded once Base Loot and Difficulty Loot tables have been created. 🤖NPCs
Profiles include NPC options for scientists, murderers and sleepers. You can keep the defaults or tailor their amount, health, accuracy, kits, movement and loot to suit each difficulty.
Valid Kits entries take priority over the matching manual loadout lists. NPCs spawned inside bases remain stationary, while outdoor NPCs can roam and engage players around the event. More NPCs naturally create more work, so busy servers may prefer to increase counts gradually. ⚔️PVP, PVE, ownership and raid options
Raid behavior is controlled by a combination of profile options and server-wide configuration. Together, these determine whether a raid is PVP or PVE and can control ownership, team or clan access, building, teleporting, cupboard access, damage across the dome, PVP delay, completion requirements and rewards.
Ownership and participation
Public raids can lock to the first attacker, while purchased raids can remain associated with their buyer. Players may become participants by damaging the base, killing NPCs, looting or using other supported raiding methods. PVP delay
PVP delay can keep a player temporarily vulnerable after leaving a PVP raid. This discourages zone hopping across the event boundary to gain an unfair advantage on a PVE server, where normal protection would otherwise resume immediately after leaving. 🛒Buyable raids and shop plugins
Buyable raids use the configured buy command, commonly /buyraid. A purchase can still be declined by cooldowns, ownership options, event limits, permissions, availability or the inability to find a suitable location.
Using a shop plugin (support is not guaranteed)
The shop should provide the buyraid command for free or at zero cost, while Raidable Bases handles the actual payment and any refund. This allows the plugin to safely return the payment when the raid cannot be created. Shop plugins that cannot sell the command at zero cost are not supported. buyraid 0 <steamid> The player placeholder depends on the shop plugin. Prices are configured in Raidable Bases and should remain zero in the external shop. If using a Tier Package of mine, the only requirement to use Buyable Events with the /buyraid command is to enable a cost per difficulty in the config file. These are not configured for obvious reasons; I don't know your servers economy. 🙂
Config snippet: https://i.ibb.co/x8XW9Lbs/image.png
⚙️ Options that benefit from an explanation (the majority have names that are meant to be self-explanatory to save time)
The complete configuration already lists every available option. This section only covers settings that are easier to understand with a little context.
Advanced Protection Radius — Controls the event area used by domes, markers, damage checks, ejection, NPC ranges and nearby spawn checks. Configurable per event type: Buyable Events, Maintained Events, Manual Events, and Scheduled Events. Amount Of Items To Spawn — Sets the target amount of generated loot, limited by available entries from your loot tables and container space in each base. Divide Loot Into All Containers — Spreads generated loot across the raid's available containers. This does not serve much purpose when disabled, it is advised to keep it set to true. Create Dome Around Event Using Spheres — Creates the visible event boundary. Set to 0 to disable it. Spawn Silently — Hides the normal announcement, dome and map marker for the profile. Height Adjustment Applied To This Paste — Adds the same vertical offset whenever a base using this profile is pasted. Forced Height — Uses a fixed world height for controlled sky or special-event setups. Allow Players To Raid With Items Up To What Workbench Level? — Limits raiding items according to their workbench level. Water Settings — Controls floating, surface, underwater and seabed placement. Workbench-level option
-1 — No workbench-level limit, future-proof where level 3 may be increased to 4 in a later Rust update. 0 — Allows raiding items that require no workbench. 1 — Allows items up to Workbench Level 1. 2 — Allows items up to Workbench Level 2. 3 — Allows items up to Workbench Level 3. The plugin checks the available workbench information for weapons, ammunition, attack entities and projectiles. A player is notified when the item being used exceeds the profile's allowed level.
⌨️Commands and permissions
Many command names are configurable. The examples below use their common defaults.
/buyraid — Open or use the buyable raid system. /rb — View player-facing raid information and available subcommands. rbe [base] [difficulty] — Spawn a manual event using the configured event command. rb.config add "<profile>" <bases...> — Add CopyPaste bases that share the selected profile options. Straight quotes around the profile name are required. rb.config list — List configured bases. rb.config remove <base> — Remove a configured base from any profiles containing it. rb.config maintained — Toggle Maintained Events in the config on or off. rb.config scheduled — Toggle Scheduled Events in the config on or off. rb.toggle - Temporarily toggles events on or off, refreshing when toggled back on or when the plugin is reloaded again. rb.reloadconfig — Reload the main configuration. rb.reloadprofiles — Reload profiles. rb.reloadtables — Reload loot tables. rb.populate all — Create editable item reference lists. rb.difficulty add "name" — Create a new difficulty and its matching configuration entries. rb.difficulty remove "name" — Remove a difficulty from the active configuration without deleting its files. rbe despawn - Despawns the base you are nearest to. Use noclip or vanish to ensure other options do not block the despawn. Cannot be used while a base is pasting or being setup by the plugin, wait to use until after the event has started. Players do not require permissions by default. Administrative permissions are best limited to trusted administrators, moderators and staff only.
raidablebases.allow — Allows player to use the available ADMIN commands. This is NOT recommended as players can use the commands 'buyraid' and 'rb' already. raidablebases.canbypass — Bypass dome restrictions. Noclip or vanish will bypass many features too, so you can assist players without interfering. raidablebases.blockbypass — Bypass Owning More Than One Raid settings for Clans/Friends/Teams raidablebases.mapteleport — Teleporting to map marker now simply requires this permission and to be enabled in config raidablebases.ddraw — Allows support for direct draw to players. raidablebases.config — Allows access to rb.config command in-game (server console does not require this permission) raidablebases.banned — Bans the user from entering any raids - accidentally banned yourself? Use /rb unban raidablebases.durabilitybypass — Bypass `Block Plugins Which Prevent Item Durability Loss` raidablebases.notitle — Exclude users from ranked title rewards raidablebases.buyraid — Optionally require this permission with `Use Permission (raidablebases.buyraid)` (not required by default) See other permissions using Permissions Manager (click the link to visit the page on Codefling) 🧾RBE DEBUG
The RBE DEBUG command displays information related to the configuration, profiles, map and spawn checks. Using it before requesting support usually makes the cause much easier to identify.
Too much information displayed at once? Not a problem, it is constantly recording data but the solution is very simple. Run RBE DEBUG once to enable it, then run it again to disable it and clear the previously recorded data. Next, attempt to spawn the raid using /buyraid or /rbevent Run RBE DEBUG again to view any newly recorded information. Do this promptly, as it will immediately continue to record. When you are finished, toggle it off by typing the command again. It will continue to output debug until it is turned off. Helpful information to include
Raidable Bases and CopyPaste versions. The base filename, profile, difficulty and event type. The command used and relevant console output. Whether the same file works when pasted directly with CopyPaste. Map seed, size and whether the map is procedural or custom when the issue involves placement. Debug contains all relevant information to events, good or bad. Use this information to determine what is happening and how to resolve the issue on your own. 📄Facepunch Terms of Service
Raidable Bases includes safeguards designed to help servers remain compliant with Facepunch policies for paid DLC items and restricted cosmetic content. These safeguards may remove restricted deployables or loot and prevent unauthorized pickup.
Server-owner responsibility
Changes that disable or bypass these safeguards can place a server outside Facepunch policy. Custom loot tables, imported workshop skins, CopyPaste files and third-party content should be reviewed before use. 🧰Tools and further reference
Community-made Facepunch content checker by ninco90: https://app.rustspain.com/facepunch/checkitems Loot Table Editor: https://codefling.com/tools/raidable-bases-boats-loot-editor/ 🧩Developer API
Signatures reflect Raidable Bases 3.1.5
The following hooks receive this argument set: OnRaidableBaseStarted, OnRaidableBaseEnded, OnRaidableBasePrivilegeDestroyed, OnRaidableBaseDespawn, OnRaidableBaseDespawned and one overload of OnRaidableBaseCompleted and OnRaidableAwardOwner. Please note that unused args will be removed in a future update.
object[] raidData = { Vector3 location, int level, bool allowPVP, string id, float unused1, float unused2, float loadTime, ulong ownerId, BasePlayer owner, List<BasePlayer> raiders, List<BasePlayer> intruders, List<BaseEntity> entities, string baseName, DateTime spawnDateTime, DateTime despawnDateTime, float protectionRadius, int lootRemaining }; OnPlayerPvpDelayStart, OnPlayerPvpDelayReset and OnPlayerPvpDelayExpired receive this argument set.
object[] delayData = { BasePlayer player, ulong userid, int level, Vector3 location, bool allowPVP, string id, ulong ownerId, string baseName, DateTime spawnDateTime, DateTime despawnDateTime, int lootRemaining }; Event hooks
void OnRaidableBaseStarted(Vector3 location, int level, bool allowPVP, string id, float unused1, float unused2, float loadTime, ulong ownerId, BasePlayer owner, List<BasePlayer> raiders, List<BasePlayer> intruders, List<BaseEntity> entities, string baseName, DateTime spawnDateTime, DateTime despawnDateTime, float protectionRadius, int lootRemaining) — Called when setup finishes. void OnRaidableBaseStarted(RandomBase rb) — Also called with the active spawn request. void OnRaidableBaseEnded(Vector3 location, int level, bool allowPVP, string id, float unused1, float unused2, float loadTime, ulong ownerId, BasePlayer owner, List<BasePlayer> raiders, List<BasePlayer> intruders, List<BaseEntity> entities, string baseName, DateTime spawnDateTime, DateTime despawnDateTime, float protectionRadius, int lootRemaining) — Called when the raid object is being released. void OnRaidableBaseDespawn(Vector3 location, int level, bool allowPVP, string id, float unused1, float unused2, float loadTime, ulong ownerId, BasePlayer owner, List<BasePlayer> raiders, List<BasePlayer> intruders, List<BaseEntity> entities, string baseName, DateTime spawnDateTime, DateTime despawnDateTime, float protectionRadius, int lootRemaining) — Called when despawn begins. void OnRaidableBaseDespawned(Vector3 location, int level, bool allowPVP, string id, float unused1, float unused2, float loadTime, ulong ownerId, BasePlayer owner, List<BasePlayer> raiders, List<BasePlayer> intruders, List<BaseEntity> entities, string baseName, DateTime spawnDateTime, DateTime despawnDateTime, float protectionRadius, int lootRemaining) — Called after entity cleanup completes. void OnRaidableBasePrivilegeDestroyed(Vector3 location, int level, bool allowPVP, string id, float unused1, float unused2, float loadTime, ulong ownerId, BasePlayer owner, List<BasePlayer> raiders, List<BasePlayer> intruders, List<BaseEntity> entities, string baseName, DateTime spawnDateTime, DateTime despawnDateTime, float protectionRadius, int lootRemaining) — Called when the primary Tool Cupboard is destroyed. void OnRaidableBaseCompleted(Vector3 location, int level, bool allowPVP, string id, float unused1, float unused2, float loadTime, ulong ownerId, BasePlayer owner, List<BasePlayer> raiders, List<BasePlayer> intruders, List<BaseEntity> entities, string baseName, DateTime spawnDateTime, DateTime despawnDateTime, float protectionRadius, int lootRemaining) — Called when the raid is completed. void OnRaidableBaseCompleted(Vector3 location, int level, bool allowPVP, ulong ownerId, List<ulong> raiders) — Completion overload containing eligible raider IDs. void OnRaidableAwardOwner(Vector3 location, int level, bool allowPVP, string id, float unused1, float unused2, float loadTime, ulong ownerId, BasePlayer owner, List<BasePlayer> raiders, List<BasePlayer> intruders, List<BaseEntity> entities, string baseName, DateTime spawnDateTime, DateTime despawnDateTime, float protectionRadius, int lootRemaining) — Called when the owner qualifies for awards. void OnRaidableAwardOwner(Vector3 location, int level, bool allowPVP, ulong ownerId, List<ulong> raiders) — Compact overload containing eligible raider IDs. void OnRaidableAwardGiven(string username, string userid, string serializedPlayerInfo) — Called after ranked-ladder data is updated. void OnRaidableDespawnUpdate(Vector3 location, int level, bool allowPVP, ulong ownerId, string baseName, float protectionRadius, int lootRemaining, DateTime despawnDateTime) — Called when the despawn time changes. void OnRaidableTurretsInitialized(List<AutoTurret> turrets, Vector3 location, float radius, int level, bool allowPVP, ulong ownerId) — Called after event turrets finish initialization. void OnPlayerEnteredRaidableBase(BasePlayer player, Vector3 location, bool allowPVP, int level, string id, float unused1, float unused2, float loadTime, ulong ownerId, string baseName, DateTime spawnDateTime, DateTime despawnDateTime, float protectionRadius, int lootRemaining) — Called when a player enters the event. void OnPlayerExitedRaidableBase(BasePlayer player, Vector3 location, bool allowPVP, int level, string id, float unused1, float unused2, float loadTime, ulong ownerId, string baseName, DateTime spawnDateTime, DateTime despawnDateTime, float protectionRadius, int lootRemaining) — Called when a player exits the event. void OnPlayerPvpDelayStart(BasePlayer player, ulong userid, string pluginName, int level, Vector3 location, bool allowPVP, string id, ulong ownerId, string baseName, DateTime spawnDateTime, DateTime despawnDateTime, int lootRemaining) — Called when PVP delay begins. void OnPlayerPvpDelayReset(BasePlayer player, ulong userid, string pluginName, int level, Vector3 location, bool allowPVP, string id, ulong ownerId, string baseName, DateTime spawnDateTime, DateTime despawnDateTime, int lootRemaining) — Called when an active PVP delay is refreshed. void OnPlayerPvpDelayExpired(BasePlayer player, ulong userid, string pluginName, int level, Vector3 location, bool allowPVP, string id, ulong ownerId, string baseName, DateTime spawnDateTime, DateTime despawnDateTime, int lootRemaining) — Called when PVP delay expires.
Purchase, ownership, backpack, and other special hooks
void OnRaidableBasePurchased(string userid, Vector3 location, string grid, int level, bool allowPVP, string baseName, DateTime spawnDateTime, DateTime despawnDateTime) — Called when a purchased raid is created. void OnRaidableBaseLocked(string userid, Vector3 location, string grid, int level, bool allowPVP, float loadTime, string baseName, DateTime spawnDateTime, DateTime despawnDateTime) — Called when a public raid becomes locked. void OnRaidableBaseUnlocked(string userid, Vector3 location, string grid, int level, bool allowPVP, string baseName, DateTime spawnDateTime, DateTime despawnDateTime) — Called when a raid unlocks. object OnRaidableResetPublicOwner(ulong ownerId, Vector3 location, float radius, List<BasePlayer> raiders, List<BaseEntity> entities, int level) — Return a non-null value to prevent the public owner reset. object OnRaidableResetPayLock(ulong ownerId, Vector3 location, float radius, List<BasePlayer> raiders, List<BaseEntity> entities, int level) — Return a non-null value to prevent the purchased lock reset. object OnRaidableBaseBackpackEject(DroppedItemContainer container, ulong playerSteamID, Vector3 location, bool allowPVP, int level, BasePlayer owner, List<BasePlayer> raiders, string baseName, bool playersLootable) — Return a non-null value to prevent Raidable Bases from ejecting the backpack. void OnRaidableBaseBackpackEjected(BasePlayer player, ulong playerSteamID, BaseEntity container, Vector3 location, bool allowPVP, int level, BasePlayer owner, List<BasePlayer> raiders, string baseName) — Called after a backpack or corpse container is ejected. object OnRaidablePlayerCorpseCreate(PlayerCorpse corpse, Vector3 location, bool allowPVP, int level, BasePlayer owner, List<BasePlayer> raiders, string baseName, bool playersLootable) — Return a non-null value to prevent Raidable Bases corpse handling. void OnRaidableLootDestroyed(Vector3 location, float radius, int lootRemaining, StorageContainer container, int level) — Called when a tracked loot container is destroyed. void OnRaidableBaseHint(BasePlayer player, Vector3 location, float radius, int level, int lootRemaining, BasePlayer owner, List<BasePlayer> raiders) — Called after loot hints are drawn. void OnRaidableTableLoaded(string filename, int count, string serializedLoot) — Called after a loot table is loaded. object OnRaidableNpcStrip(BasePlayer npc, int reason) — Return a non-null value to prevent inventory stripping. object OnBlockRaidableBasesTeleport(BasePlayer player, Vector3 location) — Return a non-null value to allow another plugin to override RB's teleport block. object CanRaidableBasesRemoveClutter(BaseEntity entity, Vector3 location, float radius, bool kill) — Return a non-null value to prevent clutter removal or ejection. object OnPurchaseBase(BasePlayer buyer, BasePlayer recipient) — Return a non-null value to stop the no-argument purchase flow. object OnPurchaseTakePayments(BasePlayer buyer, BasePlayer recipient, string value, string mode) — Return a non-null value to replace or stop the normal payment flow. float GetGridWaitTime() — Return a float to override the grid coroutine wait time. int GetGridWaitThreshold() — Return an int to override how many grid checks occur before yielding.
Callable API methods
bool AddLootToDifficultyProfile(string mode, List<object[]> lootObjects) — Adds loot entries to a difficulty profile. float GetSpawnHeight(Vector3 position, bool max = true, bool shouldSkipSmallRock = false, int mask = 8454145, BasePlayer player = null) — Returns the spawn height calculated by Raidable Bases. List<string> GetRaidableModes() — Returns the configured difficulty names. List<(string mode, int level)> GetAllDifficulties() — Returns difficulty names and numeric levels. bool HasPVPDelay(ulong userid) — Returns true while the player has an active PVP delay. int GetAllEventsCount() — Returns the total number of active raid objects. int GetActiveEventCount() — Returns the number of raids with progress. List<(Vector3 location, string mode, int level, bool allowPVP, string id, float unused1, float unused2, float unused3, ulong ownerId, BasePlayer owner, List<BasePlayer> raiders, List<BasePlayer> intruders, HashSet<BaseEntity> entities, string baseName, DateTime spawnDateTime, DateTime despawnDateTime, float protectionRadius, int lootRemaining)> GetAllEvents() — Returns information for all current raids. void GetAllEventsNonAlloc(List<(Vector3 location, string mode, int level, bool allowPVP, string id, float unused1, float unused2, float unused3, ulong ownerId, BasePlayer owner, List<BasePlayer> raiders, List<BasePlayer> intruders, HashSet<BaseEntity> entities, string baseName, DateTime spawnDateTime, DateTime despawnDateTime, float protectionRadius, int lootRemaining)> results) — Fills a supplied list with current raid information. bool EventTerritory(Vector3 position, float extra = 0f) — Returns true when the position is inside an event. bool EventTerritoryAny(Vector3[] positions, float extra = 0f) — Returns true when any supplied position is inside an event. bool EventTerritoryAll(Vector3[] positions, float extra = 0f) — Returns true when all supplied positions are inside events. List<BasePlayer> GetPlayersFrom(Vector3 position, float extra = 0f, bool intruders = false) — Returns raiders or intruders from the event at the position. BasePlayer GetOwnerFrom(Vector3 position, float extra = 0f) — Returns the owner of the event at the position.
-

$19.99$15.99Airfield Event
Adds an airfield event to your server! A cargo plane lands on the airfield and drops airdrops, boxes. Strong NPCs, Bradley and a patrol helicopter will protect the crates
You can also set up custom loot using the "SimpleLootTable" plugin
Features:
Easy to set up. Excellent customization options in the config
Commands(admin only):
afestart - force the event to start
afestart {steamID/name} - the event will be reserved for one player
afefast - quick landing of a cargo plane, for testing settings
afefast {steamID/name} - quick landing of a cargo plane, the event will be reserved for one player
afestop - cause the event to end
afe_addcustom - adds a custom landing place for a cargo plane. You must stand on level ground and look in the direction where the cargo plane will move(do not forget to set in the config file "Use a custom place to land a cargo plane": true)
Hooks:
void AirfieldEventStarted() - called when the event starts
void AirfieldEventEnded() - called when the event has ended
AirfieldEventWinner(BasePlayer player) - called at the end of the event, returns the event winner
AirfieldEventPlayerEnteredDome(BasePlayer player) - triggered when a player enters the event dome
AirfieldEventPlayerExitedDome(BasePlayer player) - triggered when a player exits the event dome
AirfieldEvent config:
{ "PVE mode (crates can only be looted by the player who first dealt damage to the NPC)": false, "Time after which the owner of the event will be deleted if he left the dome or left the server (for PVE mode)": 300, "Give event ownership to the owner's teammates if he is no longer the owner. Only if teammates are within the event radius (for PVE mode)": true, "Radius for event(for PVE mode)": 380, "Create a dome for PVE mode": false, "Dome transparency (the higher the value, the darker the dome, recommended 4)": 4, "Dome offset": { "x": 0.0, "y": 0.0, "z": 30.0 }, "Do not allow other players into the event(only for PVE mode if there is a dome)": false, "Allow admin to be in event dome (only for PVE mode if there is a dome)": true, "Triggering an event by timer (disable if you want to trigger the event only manually)": true, "Minimum time to event start(in seconds)": 3600, "Maximum time to event start(in seconds)": 7200, "Event duration(In seconds. Time is calculated from the moment the cargo is dropped by the plane at the airfield)": 3600, "End the event early if all crates were completely looted and all NPCs were killed(including Bradley and Heli)": true, "Minimum number of online players to trigger an event": 1, "Minimum drops amount(minimum number of cargo spawns after plane landing, should not be less than 1)": 2, "Maximum drops amount(maximum number of cargo spawns after plane landing, should not be less than 1, maximum 10)": 4, "Minimum crates amount(spawn every cargo drop)": 1, "Maximum crates amount(spawn every cargo drop)": 1, "Crate simple loot table name(plugin SimpleLootTable is required)": "", "Minimum number of items in a crate(plugin SimpleLootTable is required)": 0, "Maximum number of items in a crate(plugin SimpleLootTable is required)": 0, "Remove crates after being looted by a player(in seconds)": 300, "Extend event duration if NPCs, Heli or Bradley is attacked (if less time left, extend to set time (in seconds))": 600, "Crates timer(in seconds)": 900, "Minimum airdrops amount(spawn every cargo drop)": 1, "Maximum airdrops amount(spawn every cargo drop)": 1, "Airdrop simple loot table name(plugin SimpleLootTable is required)": "", "Minimum number of items in an airdrop(plugin SimpleLootTable is required)": 0, "Maximum number of items in an airdrop(plugin SimpleLootTable is required)": 0, "Minimum NPCs amount(spawn every cargo drop)": 1, "Maximum NPCs amount(spawn every cargo drop)": 2, "NPCs type(NPCs prefab, experimental setting, it is not known how the NPCs will behave) 0 - tunneldweller; 1 - underwaterdweller; 2 - excavator; 3 - full_any; 4 - lr300; 5 - mp5; 6 - pistol; 7 - shotgun; 8 - heavy; 9 - junkpile_pistol; 10 - oilrig; 11 - patrol; 12 - peacekeeper; 13 - roam; 14 - roamtethered; 15 - bandit_guard; 16 - cargo; 17 - cargo_turret_any; 18 - cargo_turret_lr300; 19 - ch47_gunner": 8, "NPCs health(0 - default)": 0, "NPCs damage multiplier": 1.0, "NPCs accuracy(the lower the value, the more accurate, 0 - maximum accuracy)": 2.0, "NPCs attack range": 75.0, "Radius of chasing the player(NPCs will chase the player as soon as he comes closer than the specified radius, must be no greater than the attack range)": 60.0, "Minimum distance to NPC damage": 75.0, "Forcibly immobilize an NPC": false, "Method of distribution of kits for NPCs(1 - sequentially, 2 - repeating, 3 - randomly)": 1, "List of kits for NPC(requires Kits plugin)": [ "kit1", "kit2", "kit3" ], "Default displayName for NPC(for SimpleKillFeed/DeathNotes plugin)": "Airfield NPC", "List of displayNames for each NPC(for SimpleKillFeed/DeathNotes plugin)": [ "Airfield NPC1", "Airfield NPC2", "Airfield NPC3" ], "Chance of an NPC throwing a grenade(0-100%) Only if the NPC loses sight of the player, if the player is in a vehicle, if the player is trying to search crates": 50, "NPC grenade damage scale": 1.0, "Will the NPC take damage from a collision with a car": true, "Will NPCs attack zombies": true, "Remove NPC corpses": false, "Patrol helicopter spawn chance (0 - 100%)": 50, "Call the helicopter only after activating the hackable crate": false, "How long the helicopter will patrol the airfield (in minutes)": 5, "Helicopter damage multiplier": 1.0, "Helicopter health": 10000.0, "Helicopter main rotor health": 900.0, "Helicopter tail rotor health": 500.0, "The patrol helicopter will not patrol the airfield if it has found a target": true, "Spawns a helicopter right on the airfield(if false, then the helicopter will arrive from afar in a few seconds)": false, "Helicopter patrol range": 150, "Event marker on the map(will spawn a marker immediately after the start of the event)": false, "If true, spawn the marker only after the plane lands": true, "Event marker name": "Airfield event", "Display on the marker how much time is left until the end of the event": true, "Event marker transparency(0-1)": 0.75, "Event marker radius": 0.5, "Event marker color.R(0-1)": 1.0, "Event marker color.G(0-1)": 0.0, "Event marker color.B(0-1)": 0.0, "Use a custom place to land a cargo plane": false, "Custom place position": { "x": 0.0, "y": 0.0, "z": 0.0 }, "Custom place rotation": { "x": 0.0, "y": 0.0, "z": 0.0 }, "Use custom navmesh (enable if using custom airfield and getting NPC navmesh error)": false, "BradleyAPC spawn chance (0 - 100%) If you are not using a custom map, correct operation of BradleyAPC is not guaranteed. Use the default airfield or a landing spot that is similar to the default airfield": 50, "BradleyAPC bullet damage": 7.0, "BradleyAPC health": 1000.0, "Notification type for the Notify plugin (-1 does not use Notify)": -1, "Notice message type (0 or 1, -1 do not use notice messages)": -1, "SteamID for chat message icon": 0, "Number of points for the winner(only for ServerRewards plugin)": 0, "Number of skill points for the winner(only for Skill Tree plugin)": 0, "Drone Ban Radius (0 - not used)": 0.0, "Damage drones take when near an event(every 5 seconds)": 50.0 }
-
.thumb.png.ac72dca13c4e30a2d2181ddd2b0fdc0a.png)
$29.99$24.99Armored Train
Halloween Update
Have you already prepared your server for Halloween?
On the eve of the Halloween Rust update, I have prepared for customization of all armored train cars.
After installing the update, customization will be automatically applied to all cars in the configuration of the armored train. To disable this, make the "Customization preset" parameter empty in the config.
New Year Update
The New Year is coming and I have prepared for you a new preset customization for the train!After installing the update, customization will be automatically applied to all cars in the configuration of the armored train. To disable this, make the "Customization preset" parameter empty in the config.
You can also disable the customization of certain wagons or change the customization of the NPCs in the file oxide/data/ArmoredTrain/NewYear
New Year's map from the video:
This plugin will add an armored train to your server, which can travel both in the subway and by rail.
It can consist of any number of wagons. A helicopter can accompany it.
Bradley, npc, turrets, simsites can be installed on the train.
The plugin allows you to create any number of train presets, for which the order of wagons, the helicopter preset, the probability of spawn and the duration of patrolling can be specified. Each wagon or locomotive can be configured separately. Any speed can be set by the locomotive.If there is no spawn of trains on the surface on your custom map, read the section "Custom spawn points”
Custom spawn points
If you are using a custom map in which there are no spawn trains on the surface, but there is a railway, then for the train to work on the surface, you need to add custom spawn points of the train.
Instruction:
Stand at the point where you want the train to spawn Enter the command /atrainpoint If you receive a message that a point has been created, enable "Use custom spawn coordinates [true/false]” in config For correct operation, it is recommended to create several spawn points of the train
Chat commands (only for administrators)
/atrainstart– launches the event in a random configuration /atrainstartunderground - forcibly launches an event underground /atrainstartaboveground - forcibly launches an event aboveground /atrainstart <trainPresetName> – launches the event in the <trainPresetName> configuration /atrainstartunderground <trainPresetName> /atrainstartaboveground <trainPresetName> /atrainstop– stops the event /atrainpoint– creates a custom spawn point of the train in your position
Console commands (RCON only)
atrainstart– launches the event in a random configuration atrainstartunderground - forcibly launches an event underground atrainstartaboveground - forcibly launches an event aboveground atrainstart <trainPresetName> – launches the event in the <trainPresetName> configuration atrainstartunderground <trainPresetName> atrainstartaboveground <trainPresetName> atrainstop – stops the event
Config
en – example of plugin configuration in English ru – example of plugin configuration in Russian
Dependencies (optional, not required)
True PVE PveMode GUI Announcements Notify DiscordMessages AlphaLoot CustomLoot Economics Server Rewards IQEconomic Api
bool IsArmoredTrainActive() bool StopArmoredTrain() bool StartArmoredTrainEvent() bool EndArmoredTrainEvent() bool IsTrainBradley(uint netID) bool IsTrainHeli(uint netID) bool IsTrainCrate(uint netID) bool IsTrainSamSite(uint netID) bool IsTrainWagon(uint netID) bool IsTrainTurret(uint netID) Vector3 ArmoredTrainLocomotivePosition()
Hooks
OnArmoredTrainEventStart OnArmoredTrainEventStop
Contact me in Discord: Adem#955
-
$45.99
XStatistics
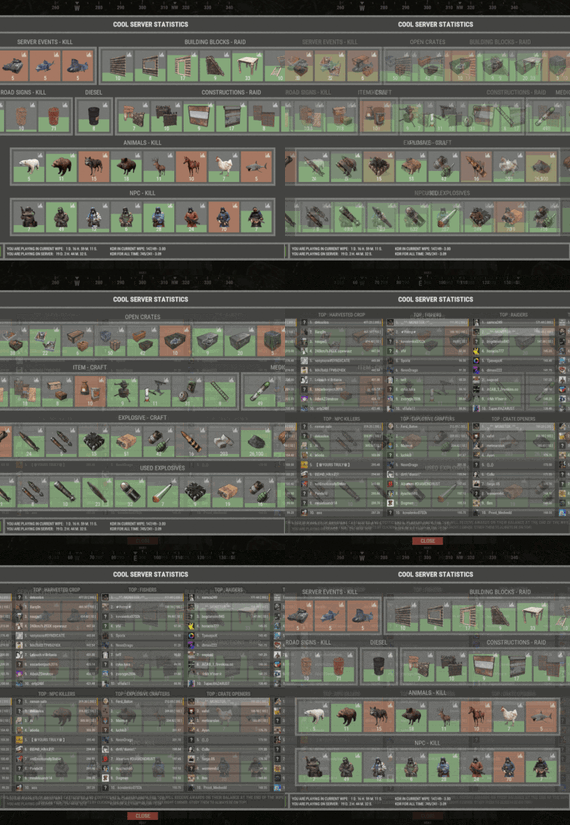
XStatistics - statistics for your server.
- Optimization of the interface for different monitor resolutions.
- Storing player data in - oxide/data/XDataSystem/XStatistics or MySQL or SQLite.
- There is a lang ru/en/uk/es.
- Sound effects when interacting with the menu.
- UI settings in the configuration.
- Display TOPs in game chat.
- Ability to customize the privacy of the default statistics.
- Ability to delete a player's stats after they have been banned.
- Ability to customize grades of building blocks. [ To be recorded in statistics. ]
- Ability to add a player to the blacklist. [ Player's statistics will not be displayed in the TOPs and will not be available to other players. ]
- Ability to use MySQL or SQLite database.
- Ability to automatically give awards and clear data after a WIPE. [ Settings in the configuration. ]
[ Plugin economics or any other. Also [ RU ] GameStores. ]
- A player can hide/open his statistics. [ Need permission. ]
- A player can view the statistics of other players. [ Need permission. ]
- A player can reset their statistics to zero. [ Need permission. ]
- The player can view the entire list of players and search. [ Need permission. ]
- Creating an unlimited number of categories, subcategories and pages.
- Creating custom TOPs, coefficients and awards. [ Unlimited number. ]
- Various admin commands to manage player statistics.
- Support and compatibility with many plugins.
- Server events (Bradley, Chinook, and Patrol Helicopter) count as stats for the player who did the most damage.
- Checking OwnerID of Building blocks, Constructions and other entities.
- Ability to create a Global TOP of your project. [ For this purpose it is enough to enter MySQL data and server name into the configuration.]
[ This TOP can be disabled in the configuration and only the TOP players of the server can be used. Or you can use two TOPs at the same time! ]
- Ability to use pages for categories with subcategories.
- Administrator Mode. [ View hidden player stats, open player search and more ].
- Automatic deletion of statistics of players who have not logged connection the server for N days.
- Ability for players to disable messages with the TOP players in chat.
If your server is visited by more than 500 players, it is recommended to use SQLite or MySQL.
Statistics were tested on a server with 120 online and 5000 players in the database. Excellent result on optimization.
To display player avatars you need to customize the configuration of the ImageLibrary plugin!
What are the statistics at this point?
Global TOP data is manually deleted from the MySQL database. [ It is important that the servers are turned off so that online players data is not written to the database ].
Or after all servers are wiped, run the command - player_stats_reset globaldata null - on one of the servers.
[ Also take into account the servers parameters, for a fair TOP they should be the same! ]
Shortnames to customize statistics
Permissions
xstatistics.use - access to the statistics menu. xstatistics.top - access to the TOPs of subcategories. xstatistics.coefficients - access to view the coefficients. xstatistics.player - access to view player statistics, player list and player search. xstatistics.resetwipe - access to the ability for a player to reset his statistics - WIPE. xstatistics.resetall - access to the ability for a player to reset his statistics - ALL TIME. xstatistics.shstats - access to the ability to hide/open your statistics. [ If the permission has been revoked, the statistics privacy will automatically change to default. ] xstatistics.admin - access to admin mode. Commands
/stat, /stats, /statistic, /statistics - to open the statistics menu. [ Commands can be changed in the config. ] Server console --- Admin commands. stats_ct <customTopName> - to see the top players. [ Custom TOP. ] stats_t <subcategoryName> - to see the top players. [ TOP subcategory. ] player_stats_reset statswipe <steamID> - to reset a player stats to zero - WIPE. player_stats_reset statsall <steamID> - to reset a player stats to zero - ALL TIME. player_stats_reset all <steamID> - to reset a player stats to zero - WIPE and ALL TIME. player_stats_reset global <steamID> - delete a player from the database Global TOP. [ Player must be offline! ] player_stats_reset globaldata null - Delete data from a table in a MySQL database - Global TOP. [ Use this command after all of your servers have been wiped. ] [ The command can be used on any of the Global TOP servers. ] player_actstats global true/false - change statistics privacy for all players. player_actstats <steamID> true/false - change statistics privacy for a player. stats_give_award - start giving out awards for TOPs. stats_clear_data_wipe - to clear all statistics - WIPE. [ Same as after a server wipe ] API
- void API_AddSubcategoryValue(BasePlayer player, string subcategoryName, long amount) - Add a value for the subcategory. player - must be online and not equal to null. - void API_SetSubcategoryValue(BasePlayer player, string subcategoryName, long amount) - Set a value for the subcategory. player - must be online and not equal to null. - bool API_CheckForSubcategory(ulong userID, string subcategoryName) - Check if a subcategory exists. - long API_GetSubcategoryValue(ulong userID, string subcategoryName) - Get the subcategory value. Config