
Leaderboard
.thumb.jpg.cd820ab870802b66e9b4930863d43ea3.jpg)


Popular Content
Showing content with the highest reputation since 02/29/2020 in Files
-
Version 3.1.3
47,271 downloads
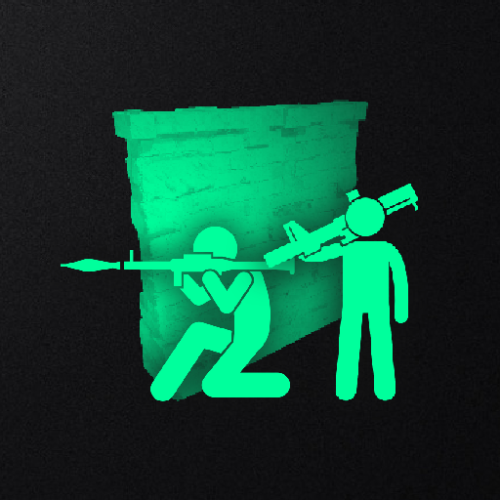
Create fully automated raidable bases with NPCs in Rust NOT compatible with server.pve when set to true. Use a PVE plugin like TruePVE if you want PVE protection. This is the premium version of Raidable Bases. The differences between this and the free version are too many to list. A few key differences are: five (5) difficulties and associated loot table functionality instead of one (1), buyable events, lockouts for players. Requires latest version of CopyPaste. This plugin does NOT come with any bases. Packages are sold separately that include bases. Check out my packages for this plugin for tier1, tier2, and tier3 which contain everything you need to get the plugin working in minutes with all bases and loot already configured for you! Packages are sold separately. Facepunch TOS Disclaimer: The Facepunch Terms of Service have been updated to explicitly prohibit servers from enabling players to access Facepunch-approved DLC content or cosmetic skins through any method other than those officially provided by vanilla Rust (e.g., legitimate crafting or ownership-based unlocking mechanisms). This plugin includes built-in configuration options—enabled by default—that are designed to assist servers in maintaining compliance with this policy. Modification, disabling, or circumvention of these safeguards may place the server in breach of Facepunch's Terms of Service. By using this plugin, server operators acknowledge and accept full responsibility for any alterations made to its configuration, and the developer assumes no liability for any misuse, policy violations, or enforcement actions resulting therefrom. You should independently ensure that any prohibited content—such as unauthorized DLC items or restricted skins—is removed from your server files. Do not rely solely on this plugin or any third-party tool for compliance. The developer assumes no liability for servers found in violation due to misconfiguration, oversight, or failure to remove such content manually. You can add unapproved (non-paid) skins manually to your ImportedWorkshopSkins.json file found in the Profiles directory, which has an example provided already. Profiles in Oxide are located in the folder: oxide/data/RaidableBases/Profiles Profiles in Carbon are located in the folder: carbon/data/RaidableBases/Profiles ninco90 has created a tool to help with this. At the time of this posting, he’s still actively working on this, so please be patient while he fixes issues with it. https://app.rustspain.com/facepunch/checkitems RBE DEBUG This command exists to aid with issues regarding your configuration, profiles and/or map by displaying information, both good and bad, related to finding spawn points and spawning of bases. It is your responsibility to use this command before asking for help. Loot Table Editor by @beee https://codefling.com/tools/raidable-bases-boats-loot-editor/ heya, I can't say without your config file. TL;DR, it's likely your config as your map has an abundance of available spawn points given how flat some of the areas on your map are. you've likely changed the biome settings, or have forced everything elsewhere. Shop Plugins TL;DR: A shop/store plugin will not be supported unless they sell at zero cost. Otherwise players can pay and get blocked by RB cooldowns/restrictions with no possible refund. Price at 0, run the command, let RB charge/refund. The buyraid command handles all payments from players and purchases from plugins. RaidableBases has multiple cooldowns and restrictions that can make a purchase invalid and block it. If a shop plugin handles payment, and RaidableBases then blocks the purchase due to a cooldown or restriction, the player will not be refunded: The shop plugin does not know the purchase failed, so it cannot refund. RaidableBases did not see or handle the payment, so it cannot refund either. Because of that, the shop must sell the event for free (0) and only trigger the purchase command. RaidableBases must handle charging and refunds internally without exception. If a shop plugin cannot sell at zero cost it will not be supported. Supported method: Set the cost in the RaidableBases config Set the shop price to free/0 (if a shop plugin cannot sell for free/0, it will not be supported) Shop command: buyraid 0 <steamid> <steamid> must use the placeholder syntax your shop plugin requires. Example: if your shop uses %steamid%, then use: buyraid 0 %steamid% By default, 0 is the difficulty level (0=Easy, 1=Medium, 2=Hard, 3=Expert, 4=Nightmare) Map Terrain and it's importance with this plugin (maps must be designed appropriately for use with this plugin) Flat terrain only: I do not support spawning bases on bumpy terrain—design them on flat terrain only. Fortify on Steam is perfect for this, and there are plenty of bases available there. Be careful when downloading bases from ANY source: vet them first, and remember that bases are not all designed equally. Stability can be shaky in some, causing them to crumble as they paste in. Inventories may contain items the designer forgot to remove. Worst of all, some bases aren’t copied properly from their centermost foundation—copying at the wrong height can make them spawn below the map or way above it. If you look at the ground, paste it in, and it appears elsewhere, it was not copied properly. Recopy it—don’t rely on ANY height settings in profiles! Those settings are for MINOR adjustments, not for bases that got yeeted halfway around the world. If the plugin is ignoring terrain, it's usually due to one of three reasons: The terrain is not flat enough for bases to spawn on- bases should be designed on unobstructed flat and equal terrain. You've modified a setting in your config or profiles, use compare in Notepad++ or diff on the default config file, and your config file, and see what changes are different. This is the EASIEST way to see what you've changed! The spawn point is blocked by a visible or invisible entity. Just because you can't see it does not mean it's not there. RBE DEBUG (see documentation) exists solely so you can spot issues like this on-the-fly. Understand that debug contains GOOD and BAD information, use your common sense to narrow it down weighing the highest number occurrences of BAD debug at the most likely causes. Easier than it sounds. No worries. If your map’s terrain is bad, you’ve still got options: the beach, the water, or custom spawn points. Shagadelic, baby. Custom spawn points Spawns Database plugin Create spawn points yourself, and put the name of the file (e.g: nivexspawnpoints10 - note that .json is NOT appended to the end of the filename, do not append it, using the filename without its path or extension as I've shown) in your config OR profile (not both, highly recommend profile only). Allow Raid Bases On Beaches in the config, not the profiles. This is for the beach and all beach terrain under the water within its vicinity, usually a very short distance out from the shore. Water Settings - In the profiles, not the config. Highly recommended: Water is abundant in the ocean, surprise! Enable within your profiles, force them on top of the waters surface. Highly recommended for maps with bad terrain. Allow Bases To Float Above Water: true Chance For Underwater Bases To Spawn: 100 Spawn On The Surface Of Water: true Ignore Land Level On Seabed: true Prevent Bases From Floating Above Water By Also Checking Surrounding Area: false Maximum Water Depth Level Used For Float Above Water Option: 1 Minimum Water Depth Level Used For Seabed Option: -20 (negative twenty, forcing the spawn points AWAY from the shoreline) Keep these settings enabled (true), knowing that changing them can and will break the plugin depending on the maps you use. Some maps may embrace these changes, while others will feel like a distant echo—terrain reduced to nothing, the memory abandoned entirely, lost to the abyss for all eternity. Just kidding—use the damn water settings and quit pouting. Bad spawns are notoriously brutal on custom maps. Allow Raid Bases On Beaches Allow Raid Bases Inland Allow Raid Bases On Building Topology Enable (true) these settings if you're in desperate need of more spawn points: Allow Raid Bases On Roads Allow Raid Bases On Rivers Do not use these options if you have high traffic on railroads Allow Raid Bases On Railroads Do not modify Allow Raid Bases In Biomes without understanding that disable a biome will prevent all bases from spawning within that biome! Allow Raid Bases In Biomes Arctic: true Arid: true Temperate: true Tundra: true or false Jungle: true or false Last but not least, the most important of them all for anyone not using custom spawn points from Spawns Database plugin (see documentation): The number of potential spawn points is displayed when the grid loads. First, the plugin must initialize, then it generates potential spawn points across your map. Once this process is complete—usually within a few minutes—it will output the results to your server console. If potential points are under 1000, the map has poor terrain, or you’ve disabled too many options in the config. If potential points are above 1500, you’ll have a reliable amount of spawns. This number will naturally decline as players build more bases on the server. If potential points are above 2500 but nothing spawns, your config and/or profiles are set up incorrectly. Read the documentation. Do not disable biome options in the config. Doing so blocks all spawns in those biomes. There are just a few steps required to get bases spawn on your server within minutes (3 minutes for experts, 30 minutes for a novice, and 60 to 120 minutes for beginners. Total time to configure the plugin beyond these steps is infinite, you'll never stop making changes so long as you continue building your base catalog into a massive collection of artwork). You must have the CopyPaste plugin installed. (Disclaimer: Configuring this to your servers specific needs will require a lot of time and effort) Step 1: Obtain Your Bases You can get bases by: Downloading them from Fortify Purchasing a tier package from me Buying a base package from third-party sellers (be wary that some sellers include items in their CopyPaste files!) Creating your own bases CopyPaste files belong in the oxide/data/copypaste/ folder for Oxide users, and the carbon/data/copypaste/ folder for Carbon users. Note that the folder name must be in all lowercase. Step 2: Set Up Profiles Profiles are located in: oxide/data/RaidableBases/Profiles/ carbon/data/RaidableBases/Profiles/ There are five different profiles. You can add the filenames of your CopyPaste bases manually, or by using the command: For example (You must use straight double quotes. Curly double quotes are not supported!): Step 3: Edit the Configuration The configuration file is located in: oxide/config/RaidableBases.json carbon/configs/RaidableBases.json Make the following changes: Always Maintain Max Events: Set this to true. Max Maintained Events: Set this to the number of bases you want to spawn. Minimum Required Players Online: If you want bases to spawn even when no players are online, set this to 0. Step 4: Save and Reload After making your changes: Save your files. Reload the plugin. The bases will now start spawning automatically. They will use the Default Loot table, located in: oxide/data/RaidableBases/Default_Loot.json carbon/data/RaidableBases/Default_Loot.json Step 5: Customize Loot Tables Refer to the documentation to learn how to set up your own custom loot tables. Additional Information If you want buyable events using the /buyraid command, you can set a cost under the Buyable Event Costs section. This includes: Economics Buy Raid Costs ServerRewards Buy Raid Costs Custom Buy Raid Costs Tips for Customizing Your Setup The plugin has many settings to customize. No guide can cover everything, so you will need to go through each setting and adjust it to meet your server’s needs. Important: Make backups as you configure the settings. Don’t rush—take it one step at a time. Dynamic difficulties (added in 3.0.0): Easily add or remove your own difficulties. You should reload the plugin whenever you make changes! Add a difficulty: rb.difficulty add "Sky" This will create the profile "Sky Bases.json" and set the difficulty to "Sky" rb.config add "Sky Bases" sky1 sky2 sky3 sky4 sky5 Reload the plugin! This will create language messages in the EN and RU language files which you can copy to other language files. If your messages do not update after a reload then you must restart your Rust server to reset Oxide cache. This will create all relevant settings for "Sky" within the config file where you must set them all as desired You need your own copypaste files and loot tables using their new respective names. Base Loot folder - add a loot table with the filename "Sky Bases.json" to match the profile name. Difficulty Loot folder - add a loot table with the filename "Sky.json" to match the difficulty name. Remove a difficulty: rb.difficulty remove "Sky" This will remove all settings for this difficulty from the config file - and disable the profile - only. No files are deleted! Edit or change a difficulty name: This is not supported and will not be - some hosts restrict System.File.IO namespace Please avoid trying to do this unless you are an expert user - you must rename EVERYTHING yourself Configuration errors are shown in rcon when the plugin loads If you make a mistake, you can use the add command a second time which will re-add any missing settings. If you feel overwhelmed or frustrated, take a break and return to it later. I am always here to answer your questions and help you (even if it takes some hours for me to respond). Tutorial This is not your run-of-the-mill plugin. DO NOT INSTALL WITHOUT READING THIS DOCUMENTATION FIRST. This plugin is extremely advanced and requires utmost attention to detail to configure properly. Jumping around in the configuration file or profiles will lead to more problems than it's worth. Take your time to understand each option before enabling or disabling its functionality. Raidable Bases is an independent expansion of Dangerous Treasures. You may learn how to enable the expansion mode below. It does not require Dangerous Treasures for any other purpose. Configuration Loot Tables The plugin comes with some very basic items (Default_Loot.json) that only serve as a demo loot list for you to either delete or expand upon. In order to make any use of the plugin (beyond demonstration) you will have to create your own loot lists instead. It will take a very long time to configure your loot tables, and fine-tune each to your specific needs. To start, I recommend that you use the rb.populate all command. This creates files in the Editable_Lists folder for each difficulty that contain every item in the game. Edit each file and set the amounts for the items that you want to spawn, and remove those that you do not want to spawn. It may look intimidating editing a list of 660 items, but don't underestimate how easy it is to delete items from a list compared to adding each one manually. Items that have their amount AND amountMin set to 0 will not spawn. So you may either delete these items from the list, or come back to them later. If you set amountMin to 0 then chance will determine if the item spawns or not, and another item will not replace it unless there are extra items available (as of 1.7.3). You can set the item skin that you want to use, but I suggest using the Skins settings in the configuration file to use random skins, or none at all. The rb.populate command which populates the Editable_Lists folder also includes items already inside of your Difficulty_Loot folder. This allows you to easily repopulate lists in order to re-evaluate which items spawn at a later date. Files inside of the Editable_Lists folder must be copied into an existing loot file in order to use the loot table. As the name implies, it is for editing only. - If you want to use Editable_Lists/Easy.json for your Easy bases then copy the contents of the file into the Difficulty_Loot/Easy.json file. - If you want to use Editable_Lists/Expert.json for the Expert Bases.json profile, then you must copy the contents of the Expert.json file into the Bases_Loot/Expert Bases.json file probability - the chance that the item can spawn. value must be between 0.0 and 1.0 where 1.0 is 100% chance Loot Priority Loot is pulled from all datafiles within the oxide/data/RaidableBases/ folder with the exception of the Profiles folder which is used to configure bases. oxide/data/RaidableBases/Base Loot - If a loot table exists in this folder with the same name as a profile then all of the bases in that profile will use this loot table. If you want items in this loot table to always spawn then you must enable Always Spawn Base Loot Table in the respective profile. oxide/data/RaidableBases/Difficulty Loot - Items will be chosen from these files based on the difficulty of each profile. If Use Day Of Week Loot is enabled then it will choose the loot table for that specific day. Otherwise, it will pick from Default_Loot.json. This is the default list, and is only used when all other loot tables do not have a sufficient amount of loot to spawn based on the Amount Of Items To Spawn setting. Loot Settings Block paid and restricted content to comply with Facepunch TOS (true) – removes paid content on NPC death, prevents pickup of DLC/paid deployables, resets skins on pickup, and blocks paid loot in boxes. Future update may allow pickup for content owners. Allow Duplicate Items - This is useful when you do not have enough items in your loot tables , and you want to spawn Amount Of Items To Spawn by using the same items more than once. Amount Of Items To Spawn - This is the number of items that you want to spawn. If you do not have enough items in your loot tables then it will only spawn the amount that you have available. It will not spawn items if the container does not have enough space. Drop Tool Cupboard Loot After Raid Is Completed (false) Divide Loot Into All Containers - This allows you to divide loot evenly from all of your loot lists into all containers when enabled. You MUST increase or decrease Amount Of Items To Spawn respective to how many items you want in each container. This includes large boxes, small boxes, coffins and storage barrels. Optional settings include (in order of priority) cupboard, bbq, oven, fridge and lockers. Allow Players To Pickup Deployables (false) - As name implies, overridden by Entities Not Allowed To Be Picked Up Allow Players To Deploy A Cupboard (true) - Block players from placing a TC after destroying the TC in the base. Drop Container Loot X Seconds After It Is Looted (false) - Prevent players from cherry picking items and leaving the rest, in order to despawn the raid quicker. Drop Container Loot Applies Only To Boxes And Cupboards (true) - As name implies Empty All Containers Before Spawning Loot (true) - Useful if using CopyPaste files that contain loot already - I suggest leaving this true as it can complicate how many items spawn if there are too few inventory slots remaining. Ignore Containers That Spawn With Loot Already (false) - Useful if you want specific loot to spawn from a copypaste file. Require Cupboard Access To Loot (false) - Prevent all players from looting until they reach the TC, or destroy it. Skip Treasure Loot And Use Loot In Base Only (false)" - Useful if you want all loot to spawn from a copypaste file - not recommended - will allow players to memorize which boxes to raid and ignore the rest. Always Spawn Base Loot Table (false) - Very useful if you want items in the Base_Loot file to always spawn (such as C4, rockets, ammo, etc) Advanced Loot Configuration Loot Behavior in Tool Cupboards Stacked Items Combine Items that spawn into the Tool Cupboard (TC) automatically combine into single stacks. For example, two separate 500-stone stacks will merge into one 1,000-stone stack. This is reflected in the Status UI. TC Always Counts Toward Remaining Loot In Status UI The contents of the TC are always included in the loot remaining total shown in the Status UI — even if looting the TC is not required for event completion. There is no reason players should not be aware of the TC amount. Making the TC a Requirement By default, players do not need to loot the TC to complete the raid. To require TC and boxes to be looted before the event can be completed, enable: Require Cupboard To Be Looted Before Completion To require only the TC to be looted before the event can be completed, enable: Destroying The Cupboard Completes The Raid Stack Size Options Stack-Split Items Reduce Remaining Loot When using stack size options, the split stacks are counted individually, which reduces the number of remaining items needed to meet the Amount Of Items To Spawn requirement. Optional Setting To Change This Behavior: Amount Of Items To Spawn Increased By Item Splits When enabled, one item will still count as one, even if it becomes split into multiple smaller stacks. An option exists in the configuration file for all items: Use Stack Size Limit For Spawning Items An option exists in the loot tables for each individual item, and will override the above option: stacksize Additional Containers Only TC and Boxes are counted in the Status UI by default Other containers (e.g., furnaces, lockers) are not included in the remaining loot count by default. To include others, add the prefab short name (not item shortname) found with /tpve_prod to: Additional Containers To Include As Boxes Settings Blacklisted Commands (none) - prevents players from using these commands inside of a raid base Automatically Teleport Admins To Their Map Marker Positions (true) - right-click map to teleport (requires raidablebases.mapteleport permission) Block Wizardry Plugin At Events (false) - Block players from using wands Chat Steam64ID (0) - The steam profile icon to show in chat messages Expansion Mode (Dangerous Treasures) (false) - Allow Dangerous Treasures to take over a random box for its event Remove Admins From Raiders List (false) - Allows admins to help players without receiving any rewards Show X Z Coordinates (false) - Show X Z coordinates alongside grid location Buy Raid Command (buyraid) - Opens the buyable UI to purchase raids for each difficulty Event Command (rbe) - Specify command name Hunter Command (rb) - Specify command name Server Console Command (rbevent) - Specify command name Remove Paid Content Command - Name is generated randomly on load. This command will edit your loot tables and all copypaste files. Backup your files before using this command. The edit will remove any restricted content from these files. Block paid and restricted content to comply with Facepunch TOS (true) – removes paid content on NPC death, prevents pickup of DLC/paid deployables, resets skins on pickup, and blocks paid loot in boxes. Future update may allow pickup for content owners. Raid Management Allow Teleport (false) - Allow/prevent players from teleporting Allow Cupboard Loot To Drop (true) - Allows loot to drop when TC is destroyed by a player Allow Players To Build (true) Allow Players To Use Ladders (true) Allow Players To Deploy Barricades (true) Allow Players To Upgrade Event Buildings (false) - Prevent players from upgrading buildings with no TC to prevent this otherwise Allow Player Bags To Be Lootable At PVP Bases (true) - Bypasses Prevent Looting plugin Allow Player Bags To Be Lootable At PVE Bases (true) - Bypasses Prevent Looting plugin Allow Traps To Drop Loot (false) - Allow traps such as guntraps and turrets to drop loot on death Allow Players To Loot Traps (false) - Allows players to loot traps such as guntrap and turrets with TC access Allow Raid Bases On Roads (true) Allow Raid Bases On Rivers (true) Allow Raid Bases On Building Topology (true) - Specifically added for custom map makers Allow Vending Machines To Broadcast (false) - Prevents vending machines from showing on the map Allow Bases To Float Above Water (false) - Keyword: FLOAT Allow Bases To Spawn On The Seabed (false) Prevent Bases From Floating Above Water By Also Checking Surrounding Area (false) - Keyword: FLOAT Maximum Water Depth Level Used For Float Above Water Option (1.0) - Keyword: FLOAT, but allows you to prevent on water if the value is low enough Backpacks Can Be Opened At PVE Bases (true) Backpacks Can Be Opened At PVP Bases (true) Backpacks Drop At PVE Bases (false) - Will drop a backpack on death, even if explicity disabled in Backpack configuration (requires Backpacks 3.4.0 ) Backpacks Drop At PVP Bases (false) Block Mounted Damage To Bases And Players (false) - Prevent players from dealing damage while on mini, scrap heli, etc Block RestoreUponDeath Plugin For PVP Bases (false) Block RestoreUponDeath Plugin For PVE Bases (false) Bypass Lock Treasure To First Attacker For PVE Bases (false) - Do not set an owner for PVE bases Bypass Lock Treasure To First Attacker For PVP Bases (false) - Do not set an owner for PVP bases Despawn Spawned Mounts (true) - Allows mounts such as mini or scrap heli to remain if not abandoned when raid despawns Do Not Destroy Player Built Deployables (true) - Loot is not lost if the plugin destroys a player's box with this option - it is dropped on the ground in a grey loot container just as if they destroyed the box themselves Do Not Destroy Player Built Structures (true) Divide Rewards Among All Raiders (true) Draw Corpse Time (Seconds) (300.0) - The amount of time the players corpse location is drawn on their screen Eject Sleepers Before Spawning Base (true) Extra Distance To Spawn From Monuments (0.0) Flame Turrets Ignore NPCs (false) - Can help with performance on some servers Maximum Land Level (2.5) - The allowed height of the surrounding terrain for spawning bases (this should never be changed) Move Cookables Into Ovens (true) Move Food Into BBQ Or Fridge (true) Move Resources Into Tool Cupboard (true) Move Items Into Lockers (true) Lock Treasure To First Attacker (true) - Sets the first attacker as the owner of a raid. You must set eject enemies settings in each profile if you do not want players entering private raids Lock Treasure Max Inactive Time (Minutes) (20.0) - Resets the raid as public after this time Assign Lockout When Lock Treasure Max Inactive Time Expires (false) - useful those who partially raid bases in order to avoid the lockout timer Lock Players To Raid Base After Entering Zone (false) - Forces players to be locked to a raid once they enter it, even on accident Only Award First Attacker and Allies (false) Minutes Until Despawn After Looting (min 1) (15) - The time until the base despawns after being raided Minutes Until Despawn After Inactive (0 = disabled) (45) - The time until the base despawns after being inactive Minutes Until Despawn After Inactive Resets When Damaged (true) - Resets the time until the base despawns when it is damaged by a player Mounts Can Take Damage From Players (false) Mounts Can Take Damage From SamSites (true) Player Cupboard Detection Radius (100.0) - Extra layer of protection to prevent raid bases from spawning too closely to player bases (this should never be under 100 and never too high either, 100-200 at most) Players With PVP Delay Can Damage Anything Inside Zone (false) - Applies specifically to PVP raid bases Players With PVP Delay Can Damage Other Players With PVP Delay Anywhere (false) PVP Delay Between Zone Hopping (10.0) - The amount of time players can take damage while on a PVE server after stepping outside of a PVP zone - prevents exploiting - recommended value: 120 Prevent Fire From Spreading (true) - Helps with server performance by preventing forest fires, err, fire from spreading after initial spawn Prevent Players From Hogging Raids (true) - Prevents players from tagging multiple raids at once Require Cupboard To Be Looted Before Despawning (false) Destroying The Cupboard Completes The Raid (false) Require All Bases To Spawn Before Respawning An Existing Base (false) - Rotate through all bases specific to each difficulty before reusing an existing base Turn Lights On At Night (true) Turn Lights On Indefinitely (false) Traps And Turrets Ignore Users Using NOCLIP (false) Use Random Codes On Code Locks (true) Wait To Start Despawn Timer When Base Takes Damage From Player (false) - Prevents the inactive despawn timer from starting until it is damaged by a player. Combos well when inactive resets is disabled by giving players a limited time to finish a raid once they start it Additional Containers To Include As Boxes (none) - example: vendingmachine Eject Mounts Boats (false) - Set any true to prevent them from entering a raid base Cars (Basic) (false) Cars (Modular) (false) Campers (true) Chinook (false) Flying Carpet (false) Horses (false) HotAirBalloon (true) MiniCopters (false) Pianos (true) Scrap Transport Helicopters (false) All Other Mounts (false) All Controlled Mounts (false) - Mounts controlled via another plugin Max Amount Of Players Allowed To Enter Each Difficulty (0 = infinite, -1 = none) (infinite) Easy Difficulty => Amount (0) Medium Difficulty => Amount (0) Hard Difficulty => Amount (0) Expert Difficulty => Amount (0) Nightmare Difficulty => Amount (0) Max Amount Allowed To Automatically Spawn Per Difficulty (0 = infinite) -1 = disabled) Easy (0) - Specifies how many of each difficulty can be spawned at any given time Medium (0) Hard (0) Expert (0) Nightmare (0) Player Lockouts (0 = ignore) - this is for PUBLIC raids where buyable events use the Buyable Cooldowns and these are not shared - players may still do 1 public and 1 buyable event if these are both enabled Time Between Raids In Minutes (Easy) (0.0) - Set a cooldown before the player can enter another raid base Time Between Raids In Minutes (Medium) (0.0) Time Between Raids In Minutes (Hard) (0.0) Time Between Raids In Minutes (Expert) (0.0) Time Between Raids In Minutes (Nightmare) (0.0) Block Clans From Owning More Than One Raid (false) - Prevent clans from hogging multiple raid bases Block Friends From Owning More Than One Raid (false) Block Teams From Owning More Than One Raid (false) Easy|Medium|Hard|Expert|Nightmare Raids Can Spawn On Monday (true) Tuesday (true) Wednesday (true) Thursday (true) Friday (true) Saturday (true) Sunday (true) Difficulty Colors (Border) Easy (000000) Medium (000000) Hard (000000) Expert (000000) Nightmare (000000) Difficulty Colors (Inner) Easy (00FF00) Medium (FFEB04) Hard (FF0000) Expert (0000FF) Nightmare (000000) Map Markers Marker Name (Raidable Base Event) Radius (0.25) Use Vending Map Marker (true) Show Owners Name on Map Marker (true) Use Explosion Map Marker (false) Create Markers For Buyable Events (true) Create Markers For Maintained Events (true) Create Markers For Scheduled Events (true) Create Markers For Manual Events (true) Buyable Events Do Not Reward Buyable Events (false) Refunds > Refund Despawned Bases (false) Refunds > Refund Percentage (100.0) Refunds > Refund Resets Cooldown Timer (false) Refunds > Block Refund If Base Is Damaged (true) Cooldowns (0 = No Cooldown) VIP Permission (raidablebases.vipcooldown (300.0) Admin Permission (raidablebases.allow (0.0) Server Admins (0.0) Normal Users (600.0) Allow Players To Buy PVP Raids (false) - If all of your profiles have PVP enabled then players will NOT be able to buy any raids! Convert PVE To PVP (false) Convert PVP To PVE (false) Distance To Spawn Bought Raids From Player (500.0) Lock Raid To Buyer And Friends (true) Ignore Player Entities At Custom Spawn Locations (false) Ignore Safe Checks (false) - if enabled will prevent the plugin from checking the area for a TC, buildings, or deployables Max Buyable Events (1) Reset Purchased Owner After X Minutes Offline (10.0) Spawn Bases X Distance Apart (100.0) - most maps cannot support this being above 200 ! Spawns Database File (Optional) (none) - Useful if you want buyable raids to spawn in specific locations using spawn files from the Spawns Database plugin Maintained Events Always Maintain Max Events (false) - Spawn another raid soon after one despawns Ignore Player Entities At Custom Spawn Locations (false) - spawn regardless of what player entities are built in the area Chance To Randomly Spawn PVP Bases (0 = Ignore Setting) (0.0) - Overrides all PVP Allow profile settings for a chance to make the raid PVE or PVP Convert PVE To PVP (false) Convert PVP To PVE (false) Include PVE Bases (true) Include PVP Bases (true) Ignore Safe Checks (false) - Bypass checks that ensure no buildings or other objects are blocking the spawn Minimum Required Players Online (1) - Max Maintained Events (1) - How many bases you want available at any given time Spawn Bases X Distance Apart (100.0) - most maps cannot support this being above 200 ! Spawns Database File (Optional) (none) - Useful if you want maintained raids to spawn in specific locations using spawn files from the Spawns Database plugin Time To Wait Between Spawns (15.0) - Wait a specific time frame between each paste (can be set to 0) Manual Events Convert PVE To PVP (false) Convert PVP To PVE (false) Max Manual Events (1) Spawn Bases X Distance Apart (100.0) Spawns Database File (Optional) (none) - Useful if you want manually spawned raids to spawn in specific locations using spawn files from the Spawns Database plugin Scheduled Events Enabled (false) - Spawn raids on a timer specific to random amount of time between Every Min and Every Max Seconds Ignore Player Entities At Custom Spawn Locations (false) - spawn regardless of what player entities are built in the area Chance To Randomly Spawn PVP Bases (0 = Ignore Setting) (0.0) - Overrides all PVP Allow profile settings for a chance to make the raid PVE or PVP Convert PVE To PVP (false) Convert PVP To PVE (false) Every Min Seconds (3600.0) Every Max Seconds (7200.0) Include PVE Bases (true) Include PVP Bases (true) Ignore Safe Checks (false) - Bypass checks that ensure no buildings or other objects are blocking the spawn Max Scheduled Events (1) Max To Spawn At Once (0 = Use Max Scheduled Events Amount) (0) Minimum Required Players Online (1) Spawn Bases X Distance Apart (100.0) - most maps cannot support this being above 200 ! Spawns Database File (Optional) (none) - Useful if you want scheduled raids to spawn in specific locations using spawn files from the Spawns Database plugin Time To Wait Between Spawns (15.0) - Wait a specific time frame between each paste (can be set to 0) Economics Buy Raid Costs (0 = disabled) - if you do not configure at least one cost for Buyable Events then players will not be able to buy any raids Easy (0.0) - How much each raid costs, use the /buyraid command to see the UI Medium (0.0) Hard (0.0) Expert (0.0) Nightmare (0.0) ServerRewards Buy Raid Costs (0 = disabled) - if you do not configure at least one cost for Buyable Events then players will not be able to buy any raids Easy (0) - How much each raid costs, use the /buyraid command to see the UI Medium (0) Hard (0) Expert (0) Nightmare (0) Custom Buy Raid Costs (false = disabled) - if you do not configure at least one cost for Buyable Events then players will not be able to buy any raids Easy (50 scrap) - How much each raid costs, use the /buyraid command to see the UI Medium (100 scrap) Hard (150 scrap) Expert (200 scrap) Nightmare (250 scrap) All are disabled by default. All can require its own specific item. Allowed Zone Manager Zones List: pvp, 99999999 - the list of zones where raid bases may spawn at - Zone Manager is not required to use this plugin. Use Grid Locations In Allowed Zone Manager Zones Only - forces all spawns into zones by Zone Manager. Adding flags to your zones may conflict with this plugin. Use of Spawns Database plugin is advised instead Event Messages Notify Plugin (-1 = disabled) Notification Interval (1 second) Announce Raid Unlocked (false) Announce Buy Base Messages (false) Announce Thief Message (true) Announce PVE/PVP Enter/Exit Messages (true) Show Destroy Warning (true) Show Opened Message (true) Show Opened Message For Paid Bases (true) Show Prefix (true) Show Messages To Player (true) - set false if you do not want players to receive CHAT messages, other messages from notifications will still show GUIAnnouncements and Advanced Alerts plugins can be used instead of CHAT messages Advanced Alerts Enabled (true) Anchor Min and Max Time Shown (5) Panel Alpha (0.98) Background Color Title Background Color GUIAnnouncements Enabled (false) Banner Tint Color (Grey) Maximum Distance (300.0) Text Color (White) Lusty Map Enabled (false) Icon File (http://i.imgur.com/XoEMTJj.png) Icon Name (rbevent) Icon Rotation (0.0) Ranked Ladder (based on points system) Award Top X Players On Wipe (3) - Set 0 to disable permissions and groups from being created. Every wipe the top 3 players are awarded the raidablebases.th permission and raidhunter group. Used with plugins that give titles based on permissions/groups, such as BetterChat Enabled (true) Difficulty Points (for each difficulty) Assign To Owner Of Raid Only (false) Assign Rank After X Completions - Players that complete the required amount of completions will receive the relevant above permission and group automatically - Set value above 0 to enable this feature for any given difficulty as it is disabled for all difficulties by default Permissions and groups are given to players for being top 3 in each difficulty at the end of a wipe Set Award Top X Playrs On Wipe to 0 to disable these permissions and groups from being created. permissions: raidablebases.ladder.easy, raidablebases.ladder.medium, raidablebases.ladder.hard, raidablebases.ladder.expert, raidablebases.ladder.nightmare, raidablebases.th groups: raideasy, raidmedium, raidhard, raidexpert, raidnightmare, raidhunter Skins (Boxes, Loot Items, Npcs all have there own settings) (skin settings revamped in 2.7.4) Use Identical Skins Include Workshop Skins (true) Use Random Skin (true) Use Imported Workshop Skins File (true) - copy existing Imported Workshop Skins section from Skinbox to the Imported Workshop Skins json file to apply. Boxes (including above Skins options) Preset Skins - you can add any box skin here and it will randomly apply to any relevant box this skin can be used with Loot Items (including above Skins options) Use Identical Skins For Stackable Items Use Identical Skins For Non-Stackable Items Deployables (including above Skins options) List: Partial Names (door, barricade, chair, fridge, furnace, locker, reactivetarget, rug, sleepingbag, table, vendingmachine, waterpurifier, skullspikes, skulltrophy, summer_dlc, sled) Skin Everything (true) - if true then the Partial Names list will not be used Preset Door Skins - you can add any door skin here and it will randomly apply to any relevant door this skin can be used with Ignore If Skinned Already (false) Treasure Resources Not Moved To Cupboards (skull.human, battery.small, bone.fragments, can.beans.empty, can.tuna.empty, water.salt, water, skull.wolf) Use Day Of Week Loot (false) Do Not Duplicate Base Loot (false) Do Not Duplicate Difficulty Loot (false) Do Not Duplicate Default Loot (false) Use Stack Size Limit For Spawning Items (false) Status UI - Shows PVE/PVP, time left, amount of loot left and the status of owner Details UI - Shows owner and active status Delay UI - Shows UI for PVP delay Buyable Cooldowns UI - Shows UI for the Buyable Cooldowns option Buyable Events UI - Shows players a UI for buying events including the primary cost Lockouts UI - Shows UI for the Player Lockouts option Enabled Offset Min Offset Max Panel Alpha Font Size Background Color Title Background Color etc Weapons Fog Machine Allows Motion Toggle (true) Fog Machine Requires A Power Source (true) SamSite Repairs Every X Minutes (0.0 = disabled) (5.0) SamSite Range (350.0 = Rust default) (75.0) Test Generator Power (100.0) Tesla Coil settings in profiles Infinite Ammo AutoTurret (true) FlameTurret (true) FogMachine (true) GunTrap (true) SamSite (true) Ammo AutoTurret (256) FlameTurret (256) FogMachine (5) GunTrap (128) SamSite (24) Tesla Coil (profiles) Requires A Power Source (true) Max Discharge Self Damage Seconds (0 = None) 120 = Rust default) (0.0) Max Damage Output (35.0) Profiles Difficulty - very first setting. If your raids show as NORMAL then you're using the free plugin. If all bases show as EASY then this setting is not configured. Entities Not Allowed To Be Picked Up (List: generator.small, generator.static autoturret_deployed - overrides Allow Players To Pickup Deployables) Additional Bases For This Difficulty (default) - A list of bases to use within this profile Paste Options (default) - Paste options specific to the profiles filename if it is also a base Profile Enabled (true)- Useful for disabling a profile instead of deleting it Add Code Lock To Unlocked Or KeyLocked Doors (true) Add Code Lock To Boxes (false) Add Code Lock To Tool Cupboards (false) Close Open Doors With No Door Controller Installed (true) Allow Duplicate Items (false) - [Explained above] Allow Players To Pickup Deployables (false) - [Explained above] Allow Players To Deploy A Cupboard (true)- [Explained above] Allow PVP (true) Allow Friendly Fire (Teams) (true) Amount Of Items To Spawn (30) - [Explained above] Minimum Amount Of Items To Spawn (0 = Use Max Value) (0) Flame Turret Health (300.0) Block Plugins Which Prevent Item Durability Loss (false) - Force items to take condition losses Block Damage Outside Of The Dome To Players Inside (false) - Prevent damage from outside of the dome to players inside of the dome Block Damage Outside Of The Dome To Bases Inside (false) - Prevent damage from outside of the dome to the base inside Block Damage Inside From Npcs To Players Outside (false) Building Blocks Are Immune To Damage (false) Boxes Are Invulnerable (false) Spawn Silently (No Notifcation, No Dome, No Map Marker) (false) Divide Loot Into All Containers (true) - [Explained above] Drop Container Loot X Seconds After It Is Looted (0.0) - [Explained above] Drop Container Loot Applies Only To Boxes And Cupboards (true) - [Explained above] Create Dome Around Event Using Spheres (0 = disabled, recommended = 5) (5) - A visible dome for players to distinguish raid bases from player bases Empty All Containers Before Spawning Loot (true) - [Explained above] Eject Corpses From Enemy Raids (Advanced Users Only) (true) - Prevents corpses from remaining inside of a raid when it becomes private and prevents the user from looting it Eject Enemies From Purchased PVE Raids (true) - Useful when Lock Raid To Buyer And Friends is enabled Eject Enemies From Purchased PVP Raids (false) Eject Enemies From Locked PVE Raids (true) - Useful when Lock Treasure To First Attacker is enabled Eject Enemies From Locked PVP Raids (false) Explosion Damage Modifier (0-999) (100.0) - Modify the damage of all explosives Force All Boxes To Have Same Skin (true) Ignore Containers That Spawn With Loot Already (false) - [Explained above] Penalize Players On Death In PVE (ZLevels) (true) Penalize Players On Death In PVP (ZLevels) (true) Loot Amount Multiplier (1.0) - useful to scale loot amounts without having to adjust them all individually Protection Radius (50.0) - This options controls every single option and feature that relies explicity on distance or radius in one regard or another. Setting an incorrect value, either too low, or too high, will break the functionality of the plugin. It's best to leave it alone. Require Cupboard Access To Loot (false) - [Explained above] Minimum Respawn Npc X Seconds After Death (0.0) - Useful in simulating a real raid where players respawn Maximum Respawn Npc X Seconds After Death (0.0) Skip Treasure Loot And Use Loot In Base Only (false) - [Explained above] Always Spawn Base Loot Table (false) - [Explained above] - Arena Walls Enabled (true) Extra Stacks (1) - How many times you want walls to stack on top of one another Use Stone Walls (true) - set false to use wooden walls instead Use Iced Walls (false) - not advised to use this as it can cause client lag (not a plugin issue) Use Least Amount Of Walls (true) Use UFO Walls (false) - Walls spawn horizontally instead of vertically Radius (25.0) NPC Levels Level 2 - Final Death (false) - Respawns all npcs when raid is completed NPCs Enabled (true) Spawn Inside Bases (Options: Spawn On Floors, Spawn On Rugs, Spawn On Beds) Murderer Items Dropped On Death (none) Scientist Items Dropped On Death (none) Murderer (Items) (metal.facemask, metal.plate.torso, pants, tactical.gloves, boots.frog, tshirt, machete) Scientist (Items) (hazmatsuit_scientist, rifle.ak) Murderer Kits (murderer_kit_1, murderer_kit_2) - Kits have priority over these lists of items Scientist Kits (scientist_kit_1, scientist_kit_2) Random Names (none) - Spawn with a custom random name instead of a provided random name Amount To Spawn (3) Aggression Range (70.0) - Aggression range is increased by 250 meters when engaged Despawn Inventory On Death (true) Health For Murderers (100 min, 5000 max) (150.0) Health For Scientists (100 min, 5000 max) (150.0) Minimum Amount To Spawn (1) Use Dangerous Treasures NPCs (false) - Tells Dangerous Treasures to control and outfit the NPCs instead Spawn Murderers And Scientists (true) Scientist Weapon Accuracy (0 - 100) (30.0) - These bots are meant to be savages. 30% is average for highly skilled players, while the average player has 10-20% accuracy Spawn Murderers (false) Spawn Random Amount (false) Spawn Scientists Only (false) Rewards Economics Money (0.0) - How much is rewarded after a raid. Overridden by Divide Rewards Among All Raiders ServerRewards Points (0) Change Building Material Tier To Wooden (false) - Useful for upgrading or downgrading buildings automatically Stone (false) Metal (false) HQM (false) Change Door Type To Wooden (false) - Useful for upgrading or downgrading doors automatically Metal HQM Player Building Restrictions Wooden (false) Stone (false) Metal (false) HQM (false) Auto Turrets Aim Cone (5.0) - shots fired will spread into a cone pattern based on this radius. Lowering this value will group the shots closer together. Minimum Damage Modifier (1.0) Maximum Damage Modifier (1.0) Start Health (1000.0) Sight Range (30.0) Set Hostile (False = Do Not Set Any Mode) (true) Requires Power Source (false) Remove Equipped Weapon (false) Weapon To Equip When Unequipped (null = Do Not Equip) (rifle.ak) Permissions raidablebases.allow -- Allows player to use the available ADMIN commands. This is NOT recommended as players can use the commands 'buyraid' and 'rb' already. raidablebases.canbypass permission (or to be flying) to bypass dome restrictions (this previously worked for admins, but now requires the permission instead) raidablebases.blockbypass permission to bypass Owning More Than One Raid settings for Clans/Friends/Teams raidablebases.mapteleport Teleporting to map marker now simply requires this permission and to be enabled in config raidablebases.ddraw allows support for FauxAdmin users raidablebases.config allows use of the rb.config command in-game (server console does not require this permission) raidablebases.banned bans the user from entering any raids - If you grant this by accident, use /rb unban name|id to revoke it. Do not grant this to any groups, especially not the default group... raidablebases.durabilitybypass to bypass `Block Plugins Which Prevent Item Durability Loss` raidablebases.notitle permission to exclude users from ranked title rewards See other permissions using Permissions Manager Players do not require any permissions by default. Grid This plugin creates it's own spawn points automatically, which cover the entirety of your server's map when the plugin is loaded. This is created one-time when the plugin loads. The grid maintains itself without requiring any input. You may view the grid by typing /rb grid in-game to view detailed drawings of all locations on the grid. X - green - possible spawn point X - Red - currently in use C - Cyan - construction detected nearby TC - yellow - TC detected nearby W - blue - water depth is too high - refreshes on ocean level change Each location on the grid is checked a second time before spawning a base to insure it does not spawn the base on players or their buildings. You can disable using the grid by providing a valid spawn file for each raid type (buyable, maintained, scheduled and manual). Commands buyraid - buys a raid, eg: buyraid easy, buyraid easy steamid, buyraid 0, buyraid 0 steamid. I suggest typing the command and using the UI to buy bases. rb - for players to see the ladder (also for admins to see the status of each raid going on, which includes showing the allies and owners of each raid) rb ui [lockouts|status] - COMMAND REMOVED rbe despawn - despawns a players purchased base if they have raidablebases.despawn.buyraid permission For admins, or players with the admin permission raidablebases.allow: rb.config stability true/false - sets stability in every profile rbe debug - toggles debug messages shown every second to server console for maintained and scheduled warning messages rb grid - see the grid and all monument names rb resettime - reset the time for the next scheduled event rb savefix - to cancel a server save that has become stuck - requires authlevel 2 rb prod - to gather information from a raid base entity for debugging purposes - requires admin or raidablebases.allow rbe - spawns a base at the position you are looking at. You cannot spawn a base on a player (including yourself) rbe draw - draw the raids radius rbe despawn - despawn a base near you (can be used by players with raidablebases.despawn.buyraid permission to despawn a base they purchased) rbe despawnall - despawn all bases rbe [basename] [difficulty] - spawn a raid at the location you are looking at rbe expire steamid|playername - removes a lockout for a specific player rbe expireall rbe active - shows status for each event rbevent [basename] [difficulty] - spawn a raid randomly on the map - and teleport to it if using the command in-game rb.reloadconfig - allows you to reload the config without needing to reload the plugin. Some changes are not applied immediately, and no changes are retroactive to bases that are already spawned. rb.config - allows you to edit the config by adding, removing, and listing bases. Requires the permission raidablebases.config when not being used from the server console. rb.toggle - toggles Maintained Events and Scheduled Events on/off, if enabled in the config, until plugin reloads rbe setowner name - Sets the player as the owner of the raid rbe clearowner - Clears the owner of the raid Additional Bases allows you to add additional files to an existing base so that all bases in that list share the same configuration as the primary base/profile. This is great for setting up a list of bases for easy, medium, hard, expert and nightmare. Command rb.populate all will add every item in the game to specific loot tables under the oxide/data/RaidableBases/Editable_Lists folder, with each disabled by default (amount is 0) Arguments: - rb.populate easy medium hard expert nightmare loot all - rb.populate 0 1 2 3 4 loot all - easy - Populates oxide/data/RaidableBases/Editable_Lists/Easy.json - all - Populates ALL diifficulty loot tables Configure the items to your liking then copy the files contents into a loot table that you would like to use Example: - Difficulty_Loot/Easy.json to match the difficulty - Base_Loot/Easy Bases.json to match the profile name API No return behavior: void OnRaidableBaseStarted(Vector3 raidPos, int mode, bool allowPVP) void OnRaidableBaseEnded(Vector3 raidPos, int mode, bool allowPVP) void OnPlayerEnteredRaidableBase(BasePlayer player, Vector3 raidPos, bool allowPVP, int mode) void OnPlayerExitedRaidableBase(BasePlayer player, Vector3 raidPos, bool allowPVP, int mode) OnRaidableBaseDespawn, OnRaidableBaseDespawned, OnRaidableBasePrivilegeDestroyed, OnRaidableBaseCompleted find more hooks and arguments by searching for CallHook in the plugin file Tips Players will be considered raiders after looting, killing an npc, using explosives, eco raiding, destroying a building block/high wall/door or dealing damage from INSIDE of the dome You must change easybase1, mediumbase2, expertbase3, etc to the name of your CopyPaste files, or vis-versa. This plugin doesn't create or come with any bases. You can use the rb.config command (rb.config add "easy bases" easybase1 easybase2 0) in the server console to make this process easier. You can rename all profiles or additional base filenames. When copying a base with CopyPaste, make certain that you copy the base from eye level of the CENTER foundation within the base, or slightly clipped into this foundation with noclip. Whichever provides better results for you. You must verify that the base pastes down correctly (with /paste command) after you've copied it. I would not change autoheight from false to true. height is the distance the base is spawned off of the ground. elevation determines how flat the surrounding terrain must be in order for bases to spawn on it Scheduled Events is how often you want a random base to spawn on the map. This is disabled by default. This randomness comes from Every Min Seconds and Every Max Seconds Maintain Events will always spawn the Max Events amount of bases on your map. This is disabled by default. When one despawns, another will take its place shortly after. Allow Teleport will prevent players from teleporting when disabled. Compatible with NTeleportation or any plugin that uses the CanTeleport hook. Help This plugin does NOT use Zone Manager - it creates and manages everything on its own. If you are having issues with too few locations on the grid, or each attempt to spawn a base returns a manual spawn was already requested then it is likely because of how you have setup Zone Manager. You either have far too many zones, or you have zones which are far too large. Raidable Bases will not spawn in these zones unless the ZoneID is added to Allowed Zone Manager Zones in the config file. This plugin requires CopyPaste plugin to work. It also requires that you have copypaste files already made. Raidable bases will be spawned using the CopyPaste plugin. This plugin does NOT come with any bases. PvE server friendly with TruePVE and other plugins that support the hooks CanEntityTakeDamage, CanEntityBeTargeted, and CanEntityTrapTrigger. Bases can have 5 difficulty settings: 0 for easy, 1 for medium, 2 for hard, 3 for expert, and 4 for nightmare. This is configurable per profile. Bases can spawn on roads and other areas that do not allow building by Rust. Building ladders in these areas is allowed by the plugin. I will add support for building twig later. My bases often spawn in the same biome If you're having issues with spawn points being repeatedly used, or with a biome being favored consistently over other biomes then this is an elevation issue with the terrain on your map. You can fix this by increasing the Elevation in the configuration. For example, if your Elevation is 1.0 then set it to 1.5 and try again. This will also increase the height the base is allowed to spawn off of the ground. With certain maps you'll just have to make do with this issue. Corpses appear outside of the dome as backpacks This is intended, and it is optional. The location is drawn on the players screen to notify them that their corpse moved. This allows players to retrieve their backpack in the event that the raid becomes locked privately to another player, and prevents them from entering. Players do not drop their active item when they die. Bases Stop Spawning On Linux Machine [Error] Exception while calling NextTick callback (DllNotFoundException: libgdiplus.so.0) If you see this error after bases spawn then you need to install libgdiplus on your machine. This will mimic the below issue but it is NOT a bug like the below issue is. A quick google search shows the install command is: sudo apt-get install -y libgdiplus This happens when images in the CopyPaste file are being rendered by converting the byte array to bitmap. Paste/Spawn/Despawn FPS/Rubberbanding Issues: Upgrade your servers hardware (please don't tell me how good your hardware is-- if it's having issues or is overloaded with plugins then it's not) Use copypaste files under 3MB Reduce the amount of bases that you are spawning Remove plugins - if you have too many resource hogs then you're going to have issues! Reduce Amount of entities to paste per batch. Use to tweak performance impact of pasting in your CopyPaste config to between 1 and 5 Restart your server daily to mitigate server degradation issues It could be as simple as a bad copypaste file. Note the base(s) that spawned around the time that the lag started, go to each of those bases and despawn them (/rbe despawn). If the lag disappears, then the base is the cause. Remove it from rotation (rb.config remove badbase1) until you can figure out what's wrong with it. RaidableBases is a large plugin, with a lot of functionality, and that functionality demands hook time. I constantly strive to improve performance and provide high quality products.$40.0074 points -
Version 4.3.6
15,716 downloads
Site In case you having issues with plugin feel free to open support ticket on site here. I will usually respond within 24 hours not including weekends. Discord I'm also available at my discord server where I provide support for my customers. You can also find small community here and get answers for your questions. Invite link here. Documentation To find out what can be customized within config file please refer to full plugin documentation here. Any questions prior to purchasing forward into DM here or into ticket at my discord. Default configs available as template with plugin. Screenshots bellow showcasing configurations created by customers. These are not available with the plugin but I decided to post them here since it's good demonstration of how customizable this plugin is. BOOBLEJ Tide Neighigh Paul Leunal17 BOOBLEJ How to start using plugin? Simply drop WelcomePanelLite.cs file into your plugin folder. After successfully loading plugin you can use default command /info in game. Configuration is handled in config file (oxide/config/WelcomePanelLite.json). How hard is to get this plugin all set up? It's fairly simple. Plugin comes with default configuration which showcases everything you need to know regarding text, styling and changing images. How hard it is to customize your own layout? When it comes to changing color or images it's simple, any inexperienced user can do it however if you want to customize positions of UI or add extra tab buttons, it requires understanding of "ui anchors". Anchors are not that complicated but it takes hour or two to fully understand it. For more info check documentation. Can I add multiple pages into WelcomePanel? Yes, you can add unlimited amount of pages. Can I add images into WelcomePanel? Yes, you can add image to any panel and you can set background for each tab What image sizes I should use? This is different for each panel across different templates. Basically images parented to any panel are stretched to its size. Best approach is to take screenshot of the panel and try to fit image size into that prior to uploading it. How to add addons? Each text tab has addon option at bottom, just type in plugin name. List of available addons can be found at the top of the plugin description, listed as "Works with".$16.9949 points -
.thumb.png.144bf0e8de79ab4c3f2404ebe745437b.png)
Version 2.11.2
12,804 downloads
Ever wondered why Rust has so many desks, toilets, boxes and even washing machines but you've never been able to see the hidden secrets inside? Now you can! With Static Lootables you can turn those boring props into loot containers filled with all sorts of goodies. Loot containers that aren't normally supposed to be looted. For best experience, have the UI scale set to 1. Lootables are being refilled based on each individual configuration set. Compatible with Static Lootables: Lootables.Ext $5.26 Prefab creator that directly works with Static Lootables in order to create custom lootable definitions for your servers! This plugin provides more than there already is. See it in action here. or get it as a bundle! -> Editor This plugin now has an integrated editor that allows anyone with the permission to customize the loot that can be found in-game in defined static lootables. Scroll to the bottom of this page to see it in action. Modify lootables using all the tools in-game. Update global settings to your liking on the fly. Dependencies ImageLibrary (Required) QuickSort ZoneManager Permissions StaticLootables.admin: Use the MMB when not holding any item to privately print the name of the object in front of you to chat. StaticLootables.editor: Allows players with the permission to use the /sledit command, which gives them the power to create/update/delete lootables using the editor. Features Highly customizable and intuitive system. ZoneManager inclusion / exclusion (per lootable prefab OR global settings). Parented filtering. Locked container system. Hacking system. Interaction icons (with template), customized text and opening container effects. Individual lootable container refilling rates. Consistent support & open to suggestions. Very user-friendly editor for server owners to modify or customize lootables. Unique System: create lootables that only apply on one or more prefabs. Integrated API for manipulating lootable definitions. Get the default loot-tables They will be updated in the future. Add StaticLootables.json to your oxide/config folder. Updated on 23th of October, 2021 #13 (OLD): StaticLootables.json Updated on 9th of July, 2023 (NEW): StaticLootables.json To create your own custom icons, you can use this template: staticlootables_template.zip Please make sure you maintain the margins as weird artifacts will show up if the icons are touching the edges of the icon, in-game. Lootable Objects Supermarket Cash Register (locked, 500 HP) Toilets Cardboard Boxes Lockers (closed models are locked, 50 HP) File Cabinets (locked, 50 HP) Desks (locked, 250 HP) Kitchen Fridges Electrical Boxes Washing Machine Trash Bag Gas Pumps Toolboxes (locked, 100 HP) Plant Pots Type-writers Kitchen Cooker (Underwater Labs) Pickup Truck (Rusty), Sedan A (Junkyard), Compact Car C (all locked, 75 HP), can be accessed anywhere but Junkyard Barge Coal Metal Crate (B) (locked, 500 HP; hackable, 120s, code resets every 300m) NEW Pallet Stacks (A-through-C) NEW Bin NEW Vodka Bottle Your suggestions are welcome! If there are any ideas in regards to prefabs or possible loot to find in them, use the Discussion tab to let me know about it so I add it for everyone to use. Hacking This is how Hackable containers work and why they're an OP mini-game: Hacking one will give you the PIN which will allow you to use with the container for a couple of hours 'till it becomes obsolete and resets. If one has hacked a container, the next hack will double in the amount of time taken. X3 for the third hack, and so on. The PIN can be shared within the team so they can come back every a couple a minutes and loot the hacked box. Press R when looking at an unlocked hacked container to pull up the PIN dialog. API Be creative! Information Here's to clarify how config properties work and what they mean. General Settings Distance: The maximum distance between the player and container. ItemAmountMultiplier: The multiplier for the amount of the items found in containers. LootableHealthMultiplier: The multiplier of the (maximum) health of locked lootable containers. ShadowOpacity: The white glow behind the text which highlights the text more in the dark. ShowLockedLootableApproximateCount: Shows the amount next to the health bar of containers. (e.g ~2 ITEMS APPX.) DamageMultiplierMinimum: The minimum damage dealt to the locked containers by melee weapons. Maximum does the same but for maximum. DamageCUIRefreshRate: The refresh rate for the CUI when containers are being hit at a high rate (with a jackhammer for example). Recommended 0.5. EnforcedFilters: It disallows all definitions from being lootable if their path contain the parent names in this array. EnforcedInZone: It only allows definitions to be lootable only within the zone(s) defined in this array. EnforcedNotInZone: It only allows definitions to be lootable when they're out of the zone(s) defined in this array. Interaction Settings Icon: The icon of the interaction definition. Text: The text of the interaction definition. OpenEffect: The (usually sound) effect of the interaction definition. Definition Settings PrefabFilter: The prefab name used by the definition to set this definition as lootable. InteractionIndex: The index of the interaction defined in the Interactions array. It starts at 0. ContainerSize: The slot count of the container non-relative to the contents defined in the contents array. AllowStack: Can items in the container stacked. Mainly used if you have 2 or more slots that have the same kind of item. Liquid: Marks the container as liquid. If this is set to true, no matter the contents defined, only liquid objects (water, salt water, blood?) can get in. Lock: Health: The maximum health of a container. Set to null if you wanna disable it. (e.g "Lock": null) Hack: Wait Time: The time in seconds! players have to wait for the initial hacking attempt. Code Resetting Rate: The time in minutes! until the hack resets the PIN and goes down an increment for how many times has been hacked used for the Wait Time multiplier. Rule: Refill Rate: The rate in minutes! until the container gets wiped from the server & memory is being freed for server resource reasons. OnlyIfParentFilter: It allows all definitions to be lootable if their path contain the parent names in this array. OnlyIfNotParentFilter: It disallows all definitions from being lootable if their path contain the parent names in this array. OnlyIfInZone: It only allows definitions to be lootable only within the zone(s) defined in this array. OnlyIfNotInZone: It only allows definitions to be lootable when they're out of the zone(s) defined in this array. Contents: ShortName: The short name of the item definition. CustomName: The in-game name of the item. SkinId: The skin of the ID. UseRandomSkins: Use the RandomSkins array to create more variety on what skinned items are used. SkinId: The skin of the ID. RandomSkins: The skin ID array used in replacement of SkinID when UseRandomSkins is true. MinimumAmount: The minimum range used for the item amount randomisation. MaximumAmount: The maximum range used for the item amount randomisation. ConditionMinimumAmount: The minimum range used for the item condition / durability randomisation. ConditionMaximumAmount: The maximum range used for the item condition / durability randomisation. SpawnChanceTimes: How many times in the SpawnChanceScale will it be likely for the item to be spawned. SpawnChanceScale: The scale of the odds for the item to be spawned. Contents: It's recursive, has the exact same content structure as this property. Installation Download the config which can be found above on this page. Put it in the oxide/config folder. Put StaticLootables.cs file in oxide/plugins. You're good to go! FOR BEST ENTERTAINMENT, USE THE DEFAULT SETTINGS OF THE PLUGIN. Screenshots Videos * The annoying flicker has been fixed in the live version, this was recorded while testing.$12.6947 points -

Version 1.5.1
17,258 downloads
Spawns set numbers of customised npcs at monuments, various events, supply drops, biomes, custom locations, and 'toplayer'. Plugin Description. Highly customisable and intuitive npc plugin, setup exclusively via UI. See images for an overview of the available options globally, and per npc profile. Every option in the UI is clickable, showing a detailed description of its use. Optional dependencies - Kits (free at uMod.org) CustomLoot Permissions. botrespawn.allowed - Required for non-admin use Chat commands. /botrespawn - Opens UI. /botrespawn add *profilename* - Adds a custom profile then opens UI. (please don't use spaces or hyphens) /botrespawn remove *profilename* - Removes a custom profile. /botrespawn info - Tells you about the npc you're looking at. Console commands. bot.count - Gives total number of spawned npcs. bots.count - Gives a breakdown of spawned npcs per profile. botrespawn toplayer NameOrId ProfileName amount(optional) botrespawn enable/disable "Profile name here" botrespawn tempspawn "Profile name here" - Spawns npcs from a profile at random points around that profile's location addspawn - Enabled via UI, in Edit Spawnpoints menu - for keybinding. botrespawn showspawns - Added for binding convenience. botrespawn checknav - Added for binding convenience. * Note = addspawn and showspawns commands require the user to select "Edit with console commands" first, from a profile's spawnpoints menu. Default locations. All major monuments are automatically included, plus profiles for the four biomes. The following events also have default profiles Airdrop (supply grenade optional) Locked Crate Spawn Locked Crate Hack Start APC Kill PatrolHeli Kill CH47 Kill Configurable via json, per profile. BotNames BotNamePrefix Announcement_Text Instant_Death_From_Headshot_Allowed_Weapons (accepts item shortnames) See note at end for weapon list formatting. Everything else is configurable via UI - All options have a description in UI, accessible by clicking the name/label. Kits. Kits are managed, per profile, in UI. As with BotSpawn, kit probability can be balanced by assigning a number to a kit. When selecting multiple kits, increasing a kit's number increases its chances of being picked. Only kits with weapons in the belt are shown in UI. Most weapons are supported for npc use, including normal bullet and melee weapons, rocket launchers, bows, crossbows, MGLs, nailguns, flamethrowers, etc. Throwable explosives can be used but throwable melee (like spears) can be used but will not be thrown. Spawnpoints. Adding and managing spawnpoints is done, per profile, in UI, or by enabling 'add by command' in spawnpoints menu, then using 'addspawn' console command. You can bind this command for your convenience. When opting to use the 'addspawn' command, a button will show in UI main page, allowing you to quickly return to the profile you were editing. A new feature is that each spawn point can have overrides, forcing that specific npc to have different values to the rest of the profile's npcs. At present you can override Stationary Kits Health RoamRange If you choose to use Parent_Monument, you can select it via UI, but do so before you add custom spawn points (if applicable). Parent_Monument ensures that your profile and its spawn points will relocate after a map change, so that they are in the same place, relative to that chosen monument. If a profile uses custom spawn points, but does not have enough custom spawn points to cover the whole population, it will spawn randomly placed npcs to make up the numbers, in accordance with the profile "Radius" setting. EG : Day_Time_Spawn_Amount 10 Number of custom spawn points 5 Result : 5 npcs on custom spawn points, and 5 randomly placed around the area, within the specified radius. Murderer Murderer true/false is no longer an option. Instead, the AI will respond differently based on the weapons you give it. If you want the AI to run directly at victims and attack, give it melee weapons only. I believe you can still make murderer-style kits, although you also have Frankenstein clothing options built into the the UI options now. Peacekeeper Peacekeeper is now based on whether or not players are marked hostile. An additional option 'Peacekeeper_Uses_Damage' restores the old behaviour, where peacekeeper npcs will completely ignore players until attacked by them. Configuration. "DataPrefix": "default", (tells BotReSpawn which data files to load), Allow_Parented_HackedCrates Allow_HackableCrates_With_OwnerID Allow_HackableCrates_From_CH47 Allow_HackableCrates_At_Oilrig Allow_All_Other_HackedCrates Disable_WaterWells Disable_Substations Disable_UndergroundCaves Disable_UnderwaterLabs "UseServerTime": Uses server IsNight check, instead of manual day/hour settings, "Show_Profiles_Seconds": 10, "DayStartHour": 8, "NightStartHour": 20, "SuicideBoom": true, (toggles explosion sound for suicide npcs), "Animal_Safe": true, "Supply_Enabled": false, (spawn 'airdrop' bots for user-called supplys), "Ignore_Skinned_Supply_Grenades": true, "Remove_BackPacks_Percent": 100 is always : 0 is never, "Remove_KeyCard": true, (any keycards in bot default loot will be destroyed), "Remove_Frankenstein_Parts": true, (any frankenstein parts in bot default loot will be destroyed), "Ignore_Sleepers": true/false, "Pve_Safe": true, (bots will not be injured by fire/barbs, etc.), "Max_Chute_Fall_Speed": 100, "Chute_Speed_Variation": 100, "Staggered_Despawn": false, "Disable_Non_Parented_Custom_Profiles_After_Wipe": false "Announce_Toplayer": false "RustRewards_Whole_Numbers": true "XPerience_Whole_Numbers: true "NPCs_Damage_Armour": true "Limit_ShortRange_Weapon_Use": false "Allow_Ai_Dormant": false "Prevent_Biome_Ai_Dormant": false "Scale_Meds_To_Health": false (increases npc heal amount relative to npc's max health. "Ignore_Factions": false - Makes all profiles fight all profiles if true. "Reduce_Damage_Over_Distance: false "Deaggro_Memory_Duration: 20 - Number of seconds it takes an npc to forget you outside deaggro range/line of sight. "Ignore_HackableCrates_With_OwnerID" - Makes hackable crate profiles only respond to crates with OwnerID 0 (server spawned) "NPCs_Assist_NPCs" - true/false. When a botrespawn npc is attacked, nearby botrespawn npcs will also respond and defend. "Enable_Targeting_Hook": false "Allow_AlphaLoot": true Can be used to prevent AlphaLoot from giving loot to BotReSpawn npcs. "Parachute_From_Height": 200 "Smooth_Damage_Scale": false "Allow_Oilrigs": false - NPCs here must be custom spawn point and stationary true. "Show_Spawns_Duration": 20, These values are adjustable and described in detail in in-game UI, with the exception of DataPrefix. Profile values. Each profile value and description is not listed here, but all (apart from text strings) are now configurable via UI, and have sensible default values. Every option has a full in-game description, accessible by clicking an option's name/label. If any specific setting/value is unclear, please just ask in CF discord, my discord, or the support section here. Notes : Durations which used to be in seconds are now in minutes. "Type" is an internal use variable - Users should not change this option. Profile copy/paste does not include location, Parent_Monument, or custom spawnpoints. BotNames, and Headshot weapons should be formatted as follows: ["name1"], for single or ["name1", "name2", "name3"], for many. ["rifle.lr300"], for single or [ "rifle.lr300", "pistol.m92" ], for many. Faction and Subfaction of 0 means this profile will not fight any other, and will not be attacked by any other. Faction and Subfaction settings greater than 1 are used for configuring which profiles should be allies / enemies. API : string[] AddGroupSpawn(Vector3 location, string profileName, string group, int quantity) string[] RemoveGroupSpawn(string group) string NPCProfile(NPCPlayer npc) (returns "No Name" for non BotReSpawn npcs) object OnBotReSpawnNPCTarget(ScientistNPC npc, BasePlayer player) void OnBotReSpawnNPCSpawned(ScientistNPC npc, string profilename, string group) void OnBotReSpawnNPCKilled(ScientistNPC npc, string profilename, string group, HitInfo info) bool IsBotReSpawn(NPCPlayer npc) bool IsBotReSpawn(ulong id) For preventing BotReSpawn npc spawns for event profiles. object OnBotReSpawnCrateDropped(HackableLockedCrate crate) object OnBotReSpawnCrateHackBegin(HackableLockedCrate crate) object OnBotReSpawnAPCKill(BradleyAPC apc) object OnBotReSpawnPatrolHeliKill(PatrolHelicopterAI heli) object OnBotReSpawnCH47Kill(CH47HelicopterAIController ch) object OnBotReSpawnAirdrop(SupplyDrop drop) Example usage. [PluginReference] private Plugin BotReSpawn; Vector3 location = new Vector3(0,0,0); string[] Spawn = BotReSpawn?.Call("AddGroupSpawn", location, "The Dome 0", "MadeUpNameHere", 5) as string[]; Puts($"{Spawn[0]}"); Puts($"{Spawn[1]}"); Passing 0 for quantity will spawn the appropriate amount of npcs for the time of day, according to the profile. Method call OnBotReSpawnNPCSpawned(ScientistNPC npc, string profile, string group, notifies of spawned npcs. Example. void OnBotReSpawnNPCSpawned(ScientistNPC npc, string profile, string group) { if (String.IsNullOrEmpty(group)) Puts($"BotReSpawn spawned an npc from profile {profile}"); else Puts($"BotReSpawn spawned an npc from profile {profile} - API group name {group}"); } FAQ. Q: My npcs don't move and/or won't attack A: If you have any PVE plugins or settings please try disabling those temporarily to test. A: Make sure the server has the following settings. nav_wait true nav_disable false ai.think true A: If you use Rust Admin, please ensure that the animal AI option is enabled. A: If you have Vanish installed please try unloading it. If this worked, check you don't have the permission for permanent Vanish. Q: There's a million options. Where do I start? A: Open the UI with /botrespawn and set AutoSpawn to true for at least one monument, then click the button to reload that profile. A: Everything else is preference/user customisation. A: If the monument has a building/structure near the middle, like Dome, you may need to increase the spawn radius option to get going. Q: My bots won't die / my bots take damage when attacking people. A: Make sure Godmode permissions allow you to do damage. A: Same for vanish ^. A: Ensure you don't have a PVE plugin which is causing this damage behaviour. Q: I take damage when attacking my bots. A: This can also be caused by server, or plugin, PVE settings. Q: Will X kill my bots? A: Radiation, drowning, falling, and helicopters should not kill your bots. A: Turrets targeting bots can be toggled. Bradleys targeting bots can be toggled. A: Fire (campfires etc) will kill your bots. Damage from barbs, cacti etc will kill your bots, but can be prevented with the 'Pve_Safe' config option set to true. Q: What weapons can my bots use? A: As far as I know they should use all weapons except for throwable melee (eg. spears). A: Flamethrowers, nail guns, rocket launchers, bows, grenade launchers, etc were added in a recent update. A: Throwable explosives can be used as 'backup' weapons and are thrown when line-of-sight is temporarily broken. A: All npcs, even those with throwables, must have at least one valid held weapon to use. Q: Can I have custom profile locations? A: Yes. Your custom locations are stored in data with a filename of *YourPrefix*-CustomProfiles.json. Use chat command '/botrespawn add NewNameHere' to create a profile at your present location. A: Doing so will open the UI, at the page for your new profile's settings. Q: Can I spawn bots at events. A: Yes. There are event profiles for aidrop, hackable crate spawn and hack start, and the destruction of CH47, Patrol Heli, and APC. For the airdrop profile, spawn at user-supply call is an additional option, found in the global config. Q: Can I have specific custom spawn points? (underground, etc) A: Yes. Use the built in UI to create custom spawn points and set UseCustomSpawns to true, for some profile.. A: That BotReSpawn profile will now ignore radius settings and use the precise spawn points from your file. A: Event profiles which can occur underground should work automatically now (crate spawn/crate hack). A: Even if parachutes are enabled, these profiles should still work with underground-spawning npcs, if the event takes place under ground. Q: My bot kits aren't working. A: Kits which don't have a valid weapon in the belt will not be made available in the UI. A: Please redeem the kit yourself to an empty inventory, to ensure that the expected items are definitely in it. Q: How can I prove that bots have spawned? I can't find them. A: Type bot.count into console for a total number, or bots.count for a per-profile breakdown. A: Respawn timer is taken into account so if you spawn one and kill him, bot.count will show 0 until respawn. Q: bot.count console command shows that there are 0 bots. A: Double check that at least one monument is set "AutoSpawn": true in your config, and reload the plugin. A: Also, don't forget their respawn timer. If they're all dead when you do bot.count, it will show 0.$40.0044 points -

Version 6.1.0
15,846 downloads
MyRustServer is a Rust Server Tool that allows you to create and manage your own Rust Server in just a few clicks. The tool brings many possibilities and options that simplify your life as a server admin. No unnecessary creation of batch files, easy installation of the server and extensions, easy updating of your plugins, wipe your server with one click and manage your players. Join the discord for better and faster support Big thanks to everyone who supports the project and helped me You can run MyRustServer on up to 4 different systems. You can create as many servers on one system as your hardware allows. It is a standalone program for Windows Only, with which you can host your own server, connecting to other server host service providers is not possible. No Support for OneDrive Drives. No Support for Cracked Servers. The dashboard shows you all relevant information about your server. Here you control your server. Auto Restart Server Auto Update Server Auto Update Oxide/Carbon Only Updates on Startup Force Restart Set Game Mode (Vanilla, Survival, Softcore, Hardcore, Weapontest and Primitive) Set CPU Affinity Set Process Priority Start/Restart Kill and Save Server With the installer you can easily install and update your server. No batch files are used. Server Install or Update Server (Master, BETA, AUX01, AUX02, AUX03) Verify Server Files Repair Server Files Install Discord Extension Install RustEdit Install Rust.UI Oxide Install Oxide (Public, Staging) Update/Uninstall Oxide Show Server in Modded/Community Permisson Manager Carbon Install Carbon (Production, Preview, Edge, Staging, AUX02, AUX03) Update/Uninstall Carbon Show Server in Modded/Community Under Settings you give your server your personal touch. Here you can set everything for your server. Server Settings Name Logo URL Web URL App Logo URL Description Tags Max Players Add Users (Admins, Mods) RCON Password Add Ports to Windows Firewall Server Port RCON Port Query Port App Port Server IP RCON IP Add Custom Maps Server Map (Procedural, Custom, Barren, Hapis Island, Craggy, Savas Island, Savas Island Island_koth) Map Size Map Seed Start Configs (convars) Backups (MRS, Oxide/Carbon, Server, Harmony) Advanced Settings Create Backup on Server Start Minimize Server Console at Startup Start Rust Server on MyRustServer Startup Disable MyRustServer Console Process Start Commands for RustDedicated.exe In Plugins you can easily manage your plugins. No annoying manual reload after editing. Plugins Reload Update View Website Enable/Disable Delete Update Check Plugins for Update (Supported sites for checking are: uMod, Codefling, Lone.Design, Chaos, RustWorkshop, Github, ModPulse, RustPlugins, ServerArmour, ImperialPlugins, MyVector, SkyPlugins, Game4Freak) Update Plguin (Only plugins from uMod can be updated directly from MyRustServer.) Editor Edit Configs/Data Auto Reload Plugin on Save Reload Search by Text Plugin Installer Install Plugins from uMod Here you can create your own schedule if I don't have time at the moment. Wipe Shedule Blueprints, Map, Backpacks, Logs, Player Deaths, Player Identities, Player Stats, Player Tokens, Custom Folder/File Custom Map New Map Seed on Wipe Custom Seed Date to Server Title Customs (Wipe Shedule) Custom Maps Custom Seed Wipe Blueprints, Map, Backpacks, Logs, Player Deaths, Player Identities, Player Stats, Player Tokens, Custom Folder/File Custom Map New Map Seed on Wipe Custom Seed See exactly who is on your server. Online Player List Offline Player List Banned Player List Give Item Open Steam profile Copy SteamID Copy Name Check IP Kick Player Ban Player Teleport to Me to Player Teleport Player to Me Set/Remove Admin/Mod White List Kick Max Allowed Bans Kick Max Allowed Ping Enable Whitelist Block Country View Server Console Send Commands/Say to your Server Add Quick Commands Connect your server to your Discord to use as remote control or status information. Start Bot on MyRustServer Startup Bot Commands: send Commands talk to Server check server status start the server stop the server restart the server kill the server version status update server update Oxide update Carbon check plugins Webhooks: Send Server Startup Send Server Online Send Server Offline Send Server Restart Send Client Update Send Server Update Send Oxide Update Send Carbon Update Send Wipe Notification Send Low FPS Warning Send Plugins Update Personalize your server messages. Send Server Messages (Restart, Updates and Wipe) Send Custom Messages Send Custom Commands Sets for each Message a Time Determine how long your server needs until it is reloaded. Server Restart Server Update Update Oxide/Carbon Server Wipe$29.9944 points -
Version 1.7.8
27,699 downloads
This plugin adds a character progression system to your server in the form of a leveling and skill tree system. Players gain xp by cutting trees, mining rocks, killing NPCs etc, and are rewarded with skill points when they level up. These points can be used to unlock perks and buffs across a number of different skill trees. The plugin is extremely customizable and server owners can change, move, scale or disable any perk to tailor the setup to their server. It features: 116 unique buff types across 130 skill nodes. 13 unique skill trees. 67+ sources of xp, along with custom xp settings for BotRespawn and NpcSpawn. An extremely large amount of xp options to really tweak the plugin for your server. A functional tree system that prevents unlocking/upgrading of nodes if the player has not invested enough skill points into a tree. Fun & unique ultimate abilities across most trees. Global yield settings for servers that want to run 2x/3x etc. Ability to create custom skill trees and nodes using permissions from other plugins. Considerable amount of options for persistent data through server wipes. A prestige system to reward your most hardcore players. SkillTree allows users to focus on multiple skill trees and unlock nodes in each tree as they level, to make their characters more powerful and unique. Plugins that work well with Skill Tree RaidableBases - SkillTree integrates with RaidableBases by rewarding raiders with xp (either handled via SkillTree directly or via RaidableBases directly). The raiding tree can also exclusively work with RaidableBases if servers don't allow raiding. Economics & ServerRewards - integrated as a way to pay for the respec cost. SurvivalArena - Rewards the winner of the event with xp. Cooking - adds new skills to the Cooking tree as well as xp rewards when successfully cooking meals. BotRespawn - Adds additional xp sources for each NPC profile. NpcSpawn - Adds additional xp sources for each NPC profile. UINotify - Shows notifications relevant to leveling etc. ZombieHorde - Provides xp for killing zombies generated by this plugin. LootDefender - Provides the ability for shared xp when killing BradleyAPC. Configured through LootDefender. EpicLoot - Adds a skill to the Scavenging tree FishingHotspots - Allows for modified XP gain while fishing in a hotspot. ZoneManager - Allows you to disable buffs while in a zone. skilltree.chat - required to use the chat commands to access the skill tree menu. skilltree.xp - required to obtain xp from xp sources. skilltree.tree - required to access and use the skill tree. skilltree.admin - required to use the admin commands. skilltree.all - allows user access to all trees. skilltree.Mining - allows the user to access the mining tree. skilltree.Woodcutting - allows the user to access the woodcutting tree. skilltree.Skinning - allows the user to access the skinning tree. skilltree.Harvesting - allows the user to access the harvesting tree. skilltree.Combat - allows the user to access the combat tree. skilltree.Medical - allows the user to access the medical tree. skilltree.Build_Craft - allows the user to access the build craft tree. skilltree.Scavenging - allows the user to access the scavenging tree. skilltree.Vehicles - allows the user to access the vehicles tree. skilltree.Cooking - allows the user to access the cooking tree. skilltree.bag.keepondeath - prevents the ExtraPockets bag from dropping on death. skilltree.notitles - Removes the level title from the player (Requires BetterChat) skilltree.noxploss - Prevents xp loss. skilltree.roguelike - If enabled via the config, will be required to participate in the Roguelike system. skilltree.teabonus - Ignores the config option preventing the yield increases from working with mining and woodcutting teas. skilltree.noscoreboard - Prevents players with this permission from being added to the scoreboard. skilltree.respec.bypass - removes the cost for respeccing skilltree.togglebc - required to toggle BetterChat titles on/off //Custom permission settings "Modified max skill points based on permissions [must be higher than default]": { "vip": 120 }, "Cost per point to respec based on permissions [must be lower than default]": { "vip": 10.0 }, "Maximum amount of xp a player can lose when they die based on permissions [must be less than default]": { "vip": 500.0 }, "Permissions to adjust xp gain modifiers (skilltree.<perm>) [1.0 is default modifier]": { "vip": 1.2 }, The permission for "vip" would be skilltree.vip Assigning this perm to players would override the default values for the respective settings (max skill points, respec cost, xp gain and xp loss). Command: st Description: Opens the skill tree menu. Requires skilltree.chat permissions. Command: updatexptable Description: Recalculates the xp table based on the config values. Requires Command: togglexpdrops Description: Toggles the xp popup when obtaining xp. Command: togglexphud Description: Toggles the xp hud on the players screen. Command: givexp Parameters: <name> <amount> <optional: Ignore modifiers true/false> Description: Gives the player matching the name parameter, xp equal to the amount parameter. Ignore modifiers will ignore all forms of xp boosts such as rested xp. Command: givesp Parameters: <name> <amount> Description: Gives the player matching the name parameter, skill points equal to the amount parameter. Command: resetdata Parameters: <name> Description: Resets the target players data. Command: turbo Description: Toggles the turbo on the boat if the player has the relevant perk. Command: togglebc Description: Toggles the BetterChat title on/off for the user. Command: movebar Description: brings up a ui that can be used to relocate the xp bar on the players screen. Command: stresetalldata Description: Resets all players data. Command: sb or score or scoreboard Description: Chat and console command that brings up the scoreboard, showing who has the most xp. Command: sttogglenotifications Description: Toggle notifications from buff triggers. Command: stgiveitem Parameters: <id> <shortname> <quantity> <skin ID> <optional: displayName> Description: gives an item to the target ID that matches the parameters. Command: givexpdebt Parameters: <id/name> <amount> Description: Gives the target player xp debt. Console Command: strespecallplayers Description: Resets skills for all online and offline players. Console Command: strespecplayer Parameters: <target name/userID> Description: Resets the target online/offline players skills. Console Command: givexptoall Parameters: <amount> <online only: true/false> Description: Will give the amount of xp to all players. If online only is true, it will only give it to those that are online. Console Command: givesptoall Parameters: <amount> <online only: true/false> Description: Will give the amount of skill points to all players. If online only is true, it will only give it to those that are online. Console Command: stremoveplayerdata Parameters: <userid> Description: Will remove the player data file for the specified userid. Console Command: sttogglebuffs Parameters: <true/false> Description: Disables/enableds buffs globally for all players. Experience can be gained from a number of different sources. The value for each source can be adjusted via the config. NodeHit - Hitting a stone, metal or sulfur mining node. NodeHitFinal - Finishing a stone, metal or sulfur mining node. TreeHit - Hitting a tree. TreeHitFinal - Knocking down a tree. SkinHit - Hitting an animal with a skinning tool. SkinHitFinal - Finishing off an animal with a skinning tool. CollectWildPlant - Collecting any map generated collectible, such as hemp, corn, pumpkin, stone, sulfur or metal. CollectGrownPlant - Collecting any player grown produce. BuildingBlockDeployed - Placing down a twig building block. FishCaught - Catching a fish. Crafting - Whenever a craft is successfully completed. XP is calculated based on the duration of the craft. ScientistNormal - Killing a blue scientist. ScientistHeavy - Killing a heavy scientists. SmallAnimal - Killing a small animal such as a chicken. MediumAnimal - Killing a medium animal such as a boar, wolf or stag. LargeAnimal - Killing a large animal such as a horse, shark or bear. Barrel - Destroying barrels. RoadSign - Destroying road signs. Scarecrow - Killing scarecrows or a zombie in ZombieHorde. Mission - Completing a mission in rust. BradleyAPC - Getting the last hit on Bradley. LootHackedCrate - First player to loot a locked crate. LootHeliCrate - First player to loot a heli crate. LootBradleyCrate - First player to loot a bradley crate. CookingMealXP - (Requires cooking plugin) XP is calculated per ingredient used. Example 2 tomatos and 8 bear meat would yield 100xp. RaidableBaseCompletion - Awards raiders of a RaidableBase xp upon the completion of the raid. Win_HungerGames - Awards xp to the winner of the Hunger Games arena. Win_ScubaArena - Awards xp to the winner of the Scuba arena. Win_Skirmish - Awards xp to the winner of the Skirmish arena. Gut_Fish - Awards xp when gutting a fish. default_botrespawn - default amount xp given when killing a bot made using botrespawn. Overriding values can be added to the config based on the bot group. crate_basic - when opening crates crate_elite - when opening crates crate_mine - when opening crates crate_normal - when opening crates carte_normal_2 - when opening crates crate_normal_2_food - when opening crates crate_normal_2_medical - when opening crates crate_tools - when opening crates crate_underwater_advanced - when opening crates crate_underwater_basic - when opening crates crate_ammunition - when opening crates crate_food_1 - when opening crates crate_food_2 - when opening crates crate_fuel - when opening crates crate_medical - when opening crates Harbor_Event_Winner - Winner of the Harbor event plugin Junkyard_Event_Winner - winner of the Junkyard event plugin PowerPlant_Event_Winner - winner of the Power plant event plugin Satellite_Event_Winner - winner of the Satellite event plugin Water_Event_Winner - winner of the Water event plugin Air_Event_Winner - winner of the Air event plugin. Armored_Train_Winner - winner of the Armored train plugin Convoy_Winner - winner of the Convoy event plugin. Supply_drop - first player that opens a supply drop. SurvivalArena_Winner - winning the SurvivalArena event. swipe_card_level_1 - using a green swipe card reader swipe_card_level_2 - using a blue swipe card reader swipe_card_level_3 - using a red swipe card reader boss_monster - killing an NPC from boss monster Zombie - Killing a ZombieHorde zombie UnderwaterDweller NPCs - NPCs in underwater labs JetPilot - JetPilot plugin ArcticBaseEvent_Winner - winner of the Arctic Base Event GasStationEvent_Winner - winner of the Gas Station Event SputnikEvent_Winner - winner of the Sputnik Event detect_diggable - triggered when a metal detector site is dig up. ShipWreckEvent_Winner - winner of the Ship Wreck Event pvp - when a player kills another player (default: off). Triangulation_Winner - winner of the triangulation event Caravan_Winner - winner of the Caravan event SupermarketEvent_Winner - winner of the Supermarket event Name: Mining Yield Description: Increases the amount of resources gained while mining. Name: Instant Mine Description: Gives the user a chance to instantly mine out a stone, sulfur or metal node. Name: Smelt On Mine Description: Gives the user a chance to smelt some of the ore as its mined from sulfur and metal nodes. Name: Mining Luck Description: Gives the user a chance to obtain items from the Mining luck loot table when they finish mining a node. Name: Mining Tool Durability Description: Decreses the durability loss of mining tools. Name: Woodcutting Yield Description: Increases the amount of resources gained while woodcutting. Name: Instant Chop Description: Gives the user a chance to instantly chop down a tree. Name: Woodcutting Coal Description: Gives the user a chance to obtain some charcoal while woodcutting. Name: Woodcutting Luck Description: Gives the user a chance to obtain items from the Woodcutting luck loot table when they finish cutting down a tree. Name: Woodcutting Tool Durability Description: Decreses the durability loss of woodcutting tools. Name: Skinning Yield Description: Increases the amount of resources gained while skinning. Name: Instant Skin Description: Gives the user a chance to instantly cut up an animal. Name: Skinning Tool Durability Description: Decreases the durability loss of skinning tools. Name: Skinning Cook Description: Gives the user a chance to received cooked meat, instead of raw meat, while skinning an animal. Name: Harvest Wild Yield Description: Increases the yield when harvesting map generated collectibles, such as berries, hemp, stone, sulfur and mushrooms. Name: Harvest Grown Yield Description: Increases the yield when harvesting player grown produce. Name: Extra Fish Description: Gives the user a chance of receiving an extra fish while fishing. Name: Double Bandage Heal Description: Doubles the healing power of cloth bandages. Name: Radiation Reduction Description: Reduces the amount of radiation damage taken by the player. Name: Extra Food Description: Increases the amount of calories the player receives when consuming food. Name: Fire Damage Reduction Description: Reduces the amount of fire damage received. Name: Fall Damage Reduction Description: Reduces the amount of fall damage received. Name: No Cold Damage Description: Removes all cold damage from the player. Name: Wounded Resist Description: Gives the player a chance to get straight back on their feet after entering the wounded state. Name: Animal Damage Resist Description: Reduces the damage taken by animals. Name: Riding Speed Description: Increases the speed of a horse while riding it. Name: Free Bullet Chance Description: Gives the player a chance to not expend a bullet when firing a gun. Name: Primitive Expert Description: Removes durability loss for primitive weapons. Name: Upgrade Refund Description: Gives the player a chance to receive their resources back when upgrading a building block. Name: Craft Speed Description: Increases the crafting speed of a player. Name: Research Refund Description: Gives the player a chance to receive their scrap back when researching an item on the research bench. Name: Craft Refund Description: Gives the player a chance to receive their crafting materials back when crafting an item. Name: Extra Scrap Barrel Description: Gives the player a chance to receive additional scrap when destroying a barrel. Name: Barrel Smasher Description: Allows the player to instantly smash a barrel with any weapon. Name: Extra Scrap Crate Description: Gives the player a chance to obtain extra scrap when looting a crate for the first time. Name: Component Chest Description: Gives the player a chance to obtain additional components when looting a crate for the first time. Name: Electronic Chest Description: Gives the player a chance to obtain additional electronics when looting a crate for the first time. Name: Component Barrel Description: Gives the player a chance to obtain additional components when smashing a barrel. Name: Electronic Barrel Description: Gives the player a chance to obtain additional electronics when smashing a barrel. Name: Melee Resist Description: Reduces the damage taken by melee weapons. Name: Iron Stomach Description: Allows the player to eat spoiled and raw food without being poisoned. Name: Boat Speed Description: Allows the user to activate a turbo boost while on a boat, increasing the boats speed. Name: Recycler Speed Description: Increases the speed of recycling for the player. Name: Smelt_Speed Description: Adds a chance for ore to smelt whenever wood is consumed, in addition to the standard smelt rate. Name: Heli_Fuel_Rate Description: Reduces the fuel consumption for your helicopters. Name: Boat_Fuel_Rate Description: Reduces the fuel consumption for your boats. Name: Vehicle_Mechanic Description: Allows the user to repair a vehicle at no cost. Name: Reviver Description: Brings a wounded player up with additional health if the reviving player has the buff. Name: Rationer Description: Provides the consumer a chance to receive their food/tea back once consumed. Name: PVP_Critical Description: Gives the attacker a chance to critically damage the target in PVP. Name: PVP_Damage Description: Increases the damage of all PVP attacks. Name: PVP_Shield Description: Reduces the damage of all incoming PVP attacks. Name: Metabolism_boost Description: Increases your calories and hydration above the maximum. Name: LootPickup Description: Chance to have the loot from destroyed barrels given moved directly to their inventory. Name: Node_Spawn_Chance Description: Chance to spawn a new node when a new one is mined out. Name: HealthRegen Description: Passively regenerates x health per second Name: AnimalTracker Description: Allows the user to use the /track command to find the direction of the closest animal. Name: ExtraPockets Description: Creates a backpack style storage system, providing players the ability to access the storage using a chat command (/pouch). Slots are given based on points spent. Name: Human_NPC_Damage Description: Increases damages against scientists. Name: Animal_NPC_Damage Description: Increases damages against animals. Name: Human_NPC_Defence Description: Decrease damage from scientist. Name: Craft_Duplicate Description: Chance to duplicate an item while crafting. Name: WaterBreathing Description: Breath underwater. Name: SharkResistance Description: Reduce damage taken from sharks. Name: SharkSkinner Description: Chance to receive random items while skinning sharks. Name: DeepSeaLooter Description: Chance to receive additional items while looting sunken crates. Name: InstantUntie Description: Instantly untie sunken crates. Name: UnderwaterDamageBonus Description: Increase damage to all living things while underwater (including underwater labs). Name: Permission Description: Used for permission based skills. Name: MaxRepair Description: Resets the max condition for any items that are repaired. Name: Durability Description: Reduces condition loss for all items that the player is using. Name: Regrowth Description: Provides a chance for a tree to respawn when cut down. Name: Skinning_Luck Description: Provides a chance to receive an item when skinning an animal. Name: Fishing_Luck Description: Provides a chance to receive an item when catching a fish. Name: Trap_Damage_Reduction Description: Reduces the damage received from traps. Name: Trap_Damage_Increase Description: Increases the damage done to traps. Name: Personal_Explosive_Reduction Description: Reduces the damage received from your own explosives. Name: Double_Explosion_Chance Description: Provides a chance for your explosives to trigger twice. Name: Lock_Picker Description: Provides a chance to open a locked entity that you do not have access to. Name: Explosion_Radius Description: Increases the explosion radius of your explosives. Name: Dudless_Explosive Description: Reduces the chance of your satchels and beancans being duds. Name: Woodcutting_Hotspot Description: Treats each hit on a tree as though you hit the hotspot. Name: Mining_Hotspot Description: Treats each hit on a node as though you hit the hotspot. Name: Extended_Tea_Duration Description: Increases the duration of tea buffs by x% per level. Name: Extended_Mag Description: Increases the magazine capacity of weapons by x% per level. Name: Tea_Looter Description: Provides you with a x% chance per level to find tea in certain containers. Name: Bite_Speed Description: Decreases the time it takes to hook a fish by x% per level. Name: Heli_Speed Description: Increases the max thrust speed of the heli by x% per level. Name: Sonar Description: Allows the user to run a command to find all nearby submerged objects (dive sites, sharks, scientists etc). Name: Comfort Description: Provides the player and all nearby team mates with a % of comfort per level. Name:Heal_Share Description: Provides surrounding team mates with a % of health received per level. Name:XP_Share Description: Provides surrounding team mates with a % of the xp you gain per level. Name: Tea_Share Description: Provides surrounding team mates with a % of tea buffs when you consume tea per level. Name: Metabolism_Share Description: Provides surrounding team mates with a % of hydration and calories received per level. Name: Human_Workbench Description: Creates a workbench aura on the player. The player and nearby team mates can use them as a workbench (the level of which is based on the skill level). Name: Recycler_Efficiency Description: Increases the recycler efficiency by x%. Name: Metal_Detector_Luck Description: Provides the player with a chance per level to obtain an additional item when they excavate metal detection sites. Name: Efficient_Digger Description: Provides the player with a chance per level to automatically dig up metal detection sites when they are flagged. Name: Magnetic_Digger Description: Provides the player with a chance per level to automatically collect dug up items. Name: RadiationBaseValue Description: Provides you with a base radiation resistance of % per level, even when naked. Name: RadiationResistModifier Description: Increases the effectiveness of your clothings radiation resistance by % per level. Name: BikeEnginePower Description: Increases the engine power of all bikes (peddal and motor) by x % per level. Name: DriverCollisionResistance Description: Decreases the damage taken from collisions while driving a vehicle by x% per level. Name: Harvesting_Luck Description: Provides a drop table when a player collects harvesting materials. Grown and wild collectibles have their own loot tables. Name: Awareness Description: This skill will show the nearby location of (configurable): npcs, animals, dropped items, droppted item containers, corpses within x meters. Name: Cooking_Speed Description: This skill reduces the amount of time it takes to cook items using the cooking workbench by x% per level. Name: Rocket_Velocity Description: This skill increases the velocity of all missiles launched by the player by x% per level. Name: Armor_Slots Description: Sets the minimum armor slots rolled based on level of skill (1 slot per level). Name: ShieldReflect Description: Provides a %X chance per level for projectile damage blocked by a shield to be reflected to the attacker. Name: Free_Repairs Description: Allow repairing of items for free. Name: Bradley_Damage_Bonus Description: Bonus damage to the bradley tank. Name: Heli_Damage_Bonus Description: Bonus damage to the patrol heli. Name: Loot_Spotter Description: Highlights nearby BoxStorage container entities. Name: Woodcutting_Ultimate Description: Harvests the surrounding trees when cutting down a tree. Name: Mining_Ultimate Description: Provides access to a chat command to see all surrounding node locations. Name: Combat_Ultimate Description: Heals the player for a percentage of the damage that they deal to all sources. Name: Vehicle_Ultimate Description: Reduces damage dealt to the players mounted vehicle (default 100% deduction). Name: Harvester_Ultimate Description: Allows the player to set the genetic composition of plants. Name: Medical_Ultimate Description: Gives the player a chance to resurrect at their point of death if they choose to. Name: Skinning_Ultimate Description: Killing an animal with this buff active will provide the player with an enhanced ability for a period of time, depending on the animal killed. - Chicken: No fall damage. - Boar: Chance to find components while harvesting mushrooms and berries. - Wolf: Increased healing while near team mates. - Stag: Notification when a neutral player is nearby, and their last known location (configurable). - Bear: Scientists will not attack the player unless attacked. - Polarbear: Overshield. Name: Build_Craft_Ultimate Description: Use any coloured swipe cards in any reader. Name: Scavengers_Ultimate Description: Will automatically recycle components from barrels when they are broken. The xp table uses a common equation to calculate its levels and xp requirements. You can read more about the method here: https://blog.jakelee.co.uk/converting-levels-into-xp-vice-versa/ There is also a spreadsheet you can make a copy of and adjust the x value at the top of. Increasing the number minimizes the xp between levels. Find a good value, then put it in the "x" value under the "Leveling information" section in the config. It is recommended that you leave the y value at 2 or 3, and adjust the x value only. Rule of thumb: - 0.07: default - 0.04: grindy. API API documentation: https://codefling.com/files/documentation/11-skill-tree-api/$29.9942 points -
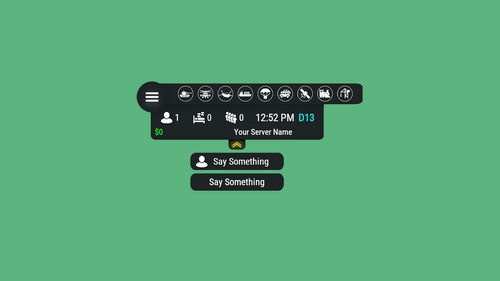
Version 3.3.7
12,829 downloads
Features: You can add any plugin event in the UI (if it has hooks, usually specified in the plugin description) Has ingame UI menu for configure your Hud The time format is adjusted to the player (depending on his language in the game), it checks which time format is used for this language You can also enable an additional menu that opens on the arrow. You can add various buttons to this menu, for example, to open a store, your server menu, etc. Almost all elements are customizable [for example: visibility of each element, Logo, Icons, Color e.t.c (check config down below)] Commands: /h setup - open UI for ingame config /h - show all Server Hud UI commands /h open - open Server Hud UI /h events - open Events Bar /h close - close Server Hud UI /h hide - hide Server Hud UI Q&A: Q: Where i can find a base icon for creating my events icons? A: Take a base icon below this message and using f.e photoshop for create you personal event icon! Q: Where i can find a ready to use icons? A: Here some links to ready to use icons packs(1 free, 2 paid): https://codefling.com/customizations/free-custom-hud-icons https://codefling.com/customizations/custom-hud-icons-paid https://codefling.com/customizations/server-hud-custom-icon-pack API: string API_PlayerHudState(string id) CanHudChangeState(BasePlayer player, string currentState, strint nextState) Config: { "Auto reload [If you change the config and save the file the plugin will reload itself]": true, "Main setup": { "Overall layer [you will see the hud in your inventory]": false, "Size ALL [0% - inf]": 100, "Logo [HUD interact button]": "https://media.discordapp.net/attachments/335512864548847617/1134455399756607549/logo.png", "Events background opacity [0% - 100%]": 100, "Background opacity [0% - 100%]": 100, "Position": { "Align [TopLeft | TopRight | BottomLeft | BottomRight": "TopLeft", "Left | Right - offset": 40, "Top | Bottom - offset": 25 }, "Server name": "Your Server Name", "Active players": { "Icon": "https://cdn.discordapp.com/attachments/335512864548847617/1134455395813965934/active.png", "Color": "#fff", "Enable": true }, "Sleep players": { "Icon": "https://cdn.discordapp.com/attachments/335512864548847617/1134455395138670652/sleep.png", "Color": "#fff", "Enable": true }, "Queue players": { "Icon": "https://cdn.discordapp.com/attachments/335512864548847617/1134455393972654171/line.png", "Color": "#fff", "Enable": true }, "Time": true, "Player position [hide permisson - hud.streamer]": { "Enable": true, "true - grid | false - x,z coordinates": true, "Color": "cyan" }, "Economy plugin [Economics | ServerRewards]": { "Currency": "$", "Value color": "#10ff10", "Enable": true }, "Info messages": { "Update interval [in seconds]": 60, "Align [BottomCenter | TopCenter | TopRight]": "BottomCenter", "Width [in px]": 260, "Offset [top | bottom]": 0, "Offset [right]": 15, "Outline color": "#000", "Overall [you will see messages in your invenotory]": true, "Enable": true, "Messages": [ "Welcome to Your Server Name", "Good luck" ] }, "Additional menu": { "Auto close timer [seconds | 0 - disable]": 60, "Auto close after command use": true, "Open/Close button color": "yellow", "Commands background opacity [0% - 100%]": 100, "Enable": true, "Commands": [ { "Background image": "https://media.discordapp.net/attachments/335512864548847617/1134455392420761671/command.png", "Icon [optional]": "https://media.discordapp.net/attachments/335512864548847617/1134455395813965934/active.png", "Command": "chat.say Hello there", "Text": "Say Something", "Outline color": "#000", "Is Console": true }, { "Background image": "https://media.discordapp.net/attachments/335512864548847617/1134455392420761671/command.png", "Icon [optional]": "", "Command": "/shop", "Text": "Say Something", "Outline color": "#000", "Is Console": false } ] } }, "Base Events": [ { "Name": "Bradley", "Active color": "#10ff10", "Icon": "https://media.discordapp.net/attachments/335512864548847617/1134455316654850049/bradley.png", "Color": "#fff", "Enable": true }, { "Name": "PatrolHeli", "Active color": "#10ff10", "Icon": "https://media.discordapp.net/attachments/335512864548847617/1134455315073597530/heli.png", "Color": "#fff", "Enable": true }, { "Name": "CH47", "Active color": "#10ff10", "Icon": "https://media.discordapp.net/attachments/335512864548847617/1134455317485342803/ch47.png", "Color": "#fff", "Enable": true }, { "Name": "Cargo", "Active color": "#10ff10", "Icon": "https://media.discordapp.net/attachments/335512864548847617/1134455317086879794/cargo.png", "Color": "#fff", "Enable": true }, { "Name": "AirDrop", "Active color": "#10ff10", "Icon": "https://cdn.discordapp.com/attachments/335512864548847617/1134455316143161374/airdrop.png", "Color": "#fff", "Enable": true } ], "Custom Events": [ { "Hook OnEventStart": "OnConvoyStart", "Hook OnEventStop": "OnConvoyStop", "Name": "Convoy", "Active color": "#10ff10", "Icon": "https://media.discordapp.net/attachments/335512864548847617/1134455318030598154/convoy.png", "Color": "#fff", "Enable": false }, { "Hook OnEventStart": "OnSputnikEventStart", "Hook OnEventStop": "OnSputnikEventStop", "Name": "Sputnik", "Active color": "#10ff10", "Icon": "https://cdn.discordapp.com/attachments/335512864548847617/1134455315488854016/sputnik.png", "Color": "#fff", "Enable": false }, { "Hook OnEventStart": "OnArmoredTrainEventStart", "Hook OnEventStop": "OnArmoredTrainEventStop", "Name": "ArmoredTrain", "Active color": "#10ff10", "Icon": "https://cdn.discordapp.com/attachments/335512864548847617/1134455315841155173/train.png", "Color": "#fff", "Enable": false }, { "Hook OnEventStart": "OnHarborEventStart", "Hook OnEventStop": "OnHarborEventEnd", "Name": "Harbor", "Active color": "#10ff10", "Icon": "https://cdn.discordapp.com/attachments/335512864548847617/1134455318332592219/harbor.png", "Color": "#fff", "Enable": false } ] }$14.9939 points -

Version 2.0.9
82,868 downloads
Convenient GUI manager for player and group permissions. Allows assignment of player permissions. (online or sleeping) Allows assignment of group permissions. Allows one-click removal of all players from a group. (group page - "Remove All") Allows adding/removing a player from groups. Supports unlimited plugins/permissions/groups Up to 60 plugins per-page. Up to 40 permissions per-page. Up to 40 user groups per-page Allows for local and sql backup and recall of all permissions or groups. Permissions. permissionsmanager.allowed - Allows players to use GUI. Plugin can be used with this permission, or by any Admin : Auth Level 2. Chat commands. /perms data - Backup and restore permissions and/or groups - local data file and/or SQL. ** /perms OR /perms player - Opens GUI player list, allowing a player to be chosen. /perms group - Opens GUI group list, allowing a group to be chosen. /perms player <playername> - Opens permissions GUI for the specified player. /perms group <groupname> - Opens permissions GUI for the specified group. Console commands. EmptyGroup <groupname> - Removes all players from the specified group. Configuration. Global. Chat - Title colour Chat - Message colour GUI - Label colour GUI - On colour GUI - Off colour GUI - AllPerPage - Sets All/None option to per-page, or per plugin. Options - GUI Transparency 0-1 Options - Plugin BlockList - ex. "playerranks,botspawn" Block list must be lower case, comma separated, no spaces, and no final comma, as above. Useful tool for picking CUI colours - RGB Decimal - Take the RGB Normalized decimal output, and remove all commas. ** Please note that with data backups : SQL saving is accumulative - Saving adds current permissions/group data to whatever was already saved. Local data file saving is not accumulative. It overwrites any existing backup with the current server permissions/groups. FAQ. Q: I'm trying to revoke permission(Y) for a player, but it says "Inherited". A: The player is in a group(X) which is also granted permission(Y). Solution: Revoke permission (Y) from group(X) or remove the player from group(X). Q: I removed a player from group(X), but they still have permission(Y). A: This is the opposite of the above. This player must have been independently granted permission(Y) at some time. Solution: Revoke permission(Y) from the player.Free39 points -
Version 3.3.0
57,834 downloads
This plugin does not have its own functionality. This plugin is only used as an API for other plugins. Supported Plugins AirEvent HarborEvent WaterEvent Satellite Dish Event Power Plant Event Junkyard Event BossMonster BetterNpc Defendable Bases Defendable Homes Water Patrol Convoy Armored Train Sputnik Space Cobalt Laboratory XDChinookEvent IQSphereEvent IQBoss Christmas Commands /preset Opens the NPC preset configuration GUI. Allows you to create, edit, and manage NPC presets through a graphical interface /SpawnPreset <presetName> Spawns an NPC near the player using the specified preset. Where <presetName> is the name of an existing NPC preset. /CheckInfo Displays current parameter values of the NPC you are looking at. Useful for inspection and debugging. API --------------------------------------------------------------------------------------------------------------------------------------------------------------------------------------------- ScientistNPC SpawnNpc(Vector3 position, JObject configJson) Spawn an NPC using a JSON configuration block Parameters: position — world position where the NPC will be spawned configJson — NPC configuration block (JObject) Returns: Spawned ScientistNPC instance. --------------------------------------------------------------------------------------------------------------------------------------------------------------------------------------------- ScientistNPC SpawnPreset(Vector3 position, string preset) Spawn an NPC using a preset from the NpcSpawn presets folder Parameters: position — world position where the NPC will be spawned preset — preset name from the NpcSpawn presets folder Returns: Spawned ScientistNPC instance. --------------------------------------------------------------------------------------------------------------------------------------------------------------------------------------------- void CreatePreset(string preset, JObject configJson) Create a new NPC preset file in the plugin folder. Parameters: preset — preset name configJson — NPC configuration block --------------------------------------------------------------------------------------------------------------------------------------------------------------------------------------------- void AddTargetRaid(CustomScientistNpc npc, HashSet<BuildingBlock> foundations) Assign a building as a raid target for the NPC. You must provide all foundations of the building that should be raided. Parameters: npc — target NPC foundations — set of building foundations to raid --------------------------------------------------------------------------------------------------------------------------------------------------------------------------------------------- void SetParent(CustomScientistNpc npc, Transform parent, Vector3 localPos, float updateTime = 1f) Attach the NPC to a moving Transform. The NPC home position will be recalculated in local coordinates relative to the parent Transform at a fixed interval. Parameters: npc — NPC instance parent — moving Transform used as reference localPos — local offset relative to parent updateTime — position update interval in seconds (default: 1f) --------------------------------------------------------------------------------------------------------------------------------------------------------------------------------------------- void SetHomePosition(CustomScientistNpc npc, Vector3 pos) Set a new home position for the NPC. Parameters: npc — NPC instance pos — new world position --------------------------------------------------------------------------------------------------------------------------------------------------------------------------------------------- void SetCurrentWeapon(CustomScientistNpc npc, Item weapon) Force the NPC to equip a specific weapon from its inventory. Parameters: npc — NPC instance weapon — weapon item from NPC inventory --------------------------------------------------------------------------------------------------------------------------------------------------------------------------------------------- void SetCustomNavMesh(CustomScientistNpc npc, Transform transform, string navMeshName) Apply a custom navigation mesh to the NPC. Parameters: npc — NPC instance transform — root Transform used for navmesh coordinate calculations navMeshName — navmesh name from the NpcSpawn navmesh folder --------------------------------------------------------------------------------------------------------------------------------------------------------------------------------------------- BaseEntity GetCurrentTarget(CustomScientistNpc npc) Get the current combat target of the NPC. Parameters: npc — NPC instance Returns: Current target entity or null. --------------------------------------------------------------------------------------------------------------------------------------------------------------------------------------------- void AddStates(CustomScientistNpc npc, HashSet<string> states) Add additional AI states to an already spawned NPC. Parameters: npc — NPC instance states — set of state names to add. Example: "RoamState", "ChaseState", "CombatState" --------------------------------------------------------------------------------------------------------------------------------------------------------------------------------------------- void DestroyTraps(CustomScientistNpc npc) Remove all traps and mines owned by the NPC. Parameters: npc — NPC instance --------------------------------------------------------------------------------------------------------------------------------------------------------------------------------------------- bool IsStationaryPreset(string preset) Check whether a preset defines a stationary NPC. Parameters: preset — preset name Returns: true if the preset is stationary; otherwise false. --------------------------------------------------------------------------------------------------------------------------------------------------------------------------------------------- int GetAreaMask(string preset) Get the AreaMask value defined in a preset. Parameters: preset — preset name Returns: AreaMask integer value. --------------------------------------------------------------------------------------------------------------------------------------------------------------------------------------------- string GetPresetName(CustomScientistNpc npc) Get the preset name used by an already spawned NPC. Parameters: npc — NPC instance Returns: Preset name. --------------------------------------------------------------------------------------------------------------------------------------------------------------------------------------------- void RegisterPresetUsage(string preset, string plugin, string category) Register that a preset is used by a specific plugin and category in the NpcSpawn GUI. Parameters: preset — preset name plugin — plugin name category — optional category name inside your plugin (for example: monument name groups in BetterNpc) --------------------------------------------------------------------------------------------------------------------------------------------------------------------------------------------- void UnregisterPresetUsage(string preset, string plugin, string category) Remove preset usage registration for a plugin/category. Parameters: preset — preset name plugin — plugin name category — category name --------------------------------------------------------------------------------------------------------------------------------------------------------------------------------------------- void ClearPresetUsage(string plugin) Clear all preset usage registrations for a plugin. Not required on plugin unload or reload — handled automatically. Parameters: plugin — plugin name --------------------------------------------------------------------------------------------------------------------------------------------------------------------------------------------- Parameter List --------------------------------------------------------------------------------------------------------------------------------------------------------------------------------------------- string Prefab ["assets/rust.ai/agents/npcplayer/humannpc/scientist/scientistnpc_heavy.prefab"] Path to the NPC prefab to spawn. Only prefabs of the ScientistNPC class are supported --------------------------------------------------------------------------------------------------------------------------------------------------------------------------------------------- string Names ["Scientist"] In-game names assigned to NPCs. Separate multiple names with commas (e.g. Name1,Name2) --------------------------------------------------------------------------------------------------------------------------------------------------------------------------------------------- int Gender [0] 0 = Random, 1 = Female, 2 = Male --------------------------------------------------------------------------------------------------------------------------------------------------------------------------------------------- int SkinTone [0] 0 = Random, 1 = Very Light, 2 = Light, 3 = Dark, 4 = Very Dark --------------------------------------------------------------------------------------------------------------------------------------------------------------------------------------------- uint Underwear [0] Underwear worn by NPCs --------------------------------------------------------------------------------------------------------------------------------------------------------------------------------------------- HashSet<NpcWear> WearItems Clothing and armor worn by NPCs --------------------------------------------------------------------------------------------------------------------------------------------------------------------------------------------- HashSet<NpcBelt> BeltItems Weapons and items equipped in NPCs belt --------------------------------------------------------------------------------------------------------------------------------------------------------------------------------------------- string Kit [""] Kit name --------------------------------------------------------------------------------------------------------------------------------------------------------------------------------------------- bool DestroyTrapsOnDeath [false] If enabled, all traps placed by NPCs will be destroyed when the NPC dies --------------------------------------------------------------------------------------------------------------------------------------------------------------------------------------------- float Health [100f] Total health points of the NPC --------------------------------------------------------------------------------------------------------------------------------------------------------------------------------------------- bool InstantDeathIfHitHead [false] If enabled, NPCs die instantly from any headshot, regardless of their health --------------------------------------------------------------------------------------------------------------------------------------------------------------------------------------------- float RoamRange [10f] Maximum distance NPCs can patrol from their spawn point. Values below 2 mean no movement --------------------------------------------------------------------------------------------------------------------------------------------------------------------------------------------- float ChaseRange [80f] Maximum distance NPCs can pursue their target from their spawn point --------------------------------------------------------------------------------------------------------------------------------------------------------------------------------------------- float SenseRange [40f] Maximum distance at which NPCs can detect targets --------------------------------------------------------------------------------------------------------------------------------------------------------------------------------------------- float ListenRange [20f] NPCs hear gunshots at full range, footsteps at 1/3, and crouched movement at 1/9 --------------------------------------------------------------------------------------------------------------------------------------------------------------------------------------------- float DamageRange [80f] Maximum distance at which players can damage NPCs. Use -1 for unlimited range --------------------------------------------------------------------------------------------------------------------------------------------------------------------------------------------- float ShortRange [10f] Distance at which NPCs increase firearm spray duration when targets get closer --------------------------------------------------------------------------------------------------------------------------------------------------------------------------------------------- float AttackLengthMaxShortRangeScale [2f] Multiplier for spray length increase when targets are within the short range --------------------------------------------------------------------------------------------------------------------------------------------------------------------------------------------- float AttackRangeMultiplier [1f] Multiplier applied to the default Facepunch attack range of NPC weapons --------------------------------------------------------------------------------------------------------------------------------------------------------------------------------------------- bool CheckVisionCone [false] If enabled, NPCs will only detect targets within their forward vision cone --------------------------------------------------------------------------------------------------------------------------------------------------------------------------------------------- float VisionCone [286f] Defines the NPCs field of view in degrees (20–340) --------------------------------------------------------------------------------------------------------------------------------------------------------------------------------------------- bool HostileTargetsOnly [false] If enabled, NPCs only attack players marked hostile after firing or carrying weapons near safe zones --------------------------------------------------------------------------------------------------------------------------------------------------------------------------------------------- bool DisplaySashTargetsOnly [false] If enabled, NPCs will only attack players who have previously picked up a weapon after respawning --------------------------------------------------------------------------------------------------------------------------------------------------------------------------------------------- bool IgnoreSafeZonePlayers [true] If enabled, NPCs will ignore players inside safe zones --------------------------------------------------------------------------------------------------------------------------------------------------------------------------------------------- bool IgnoreSleepingPlayers [true] If enabled, NPCs will ignore players who are sleeping --------------------------------------------------------------------------------------------------------------------------------------------------------------------------------------------- bool IgnoreWoundedPlayers [true] If enabled, NPCs will ignore players who are wounded and downed --------------------------------------------------------------------------------------------------------------------------------------------------------------------------------------------- int NpcAttackMode [2] 0 = Do not attack, 1 = Attack all, 2 = Detailed targeting --------------------------------------------------------------------------------------------------------------------------------------------------------------------------------------------- float NpcSenseRange [40f] Maximum distance at which this NPC can sense other NPCs --------------------------------------------------------------------------------------------------------------------------------------------------------------------------------------------- float NpcDamageScale [1f] Damage modifier against NPCs. Multiplied by the global Scale Damage value --------------------------------------------------------------------------------------------------------------------------------------------------------------------------------------------- string NpcWhitelist ["FrankensteinPet,14922524"] Allowed NPCs to attack. Use ShortPrefabName, SkinID, class name, NPC name. Separated by commas --------------------------------------------------------------------------------------------------------------------------------------------------------------------------------------------- string NpcBlacklist ["11162132011012"] Blocked NPCs to attack. Use ShortPrefabName, SkinID, class name, NPC name. Separated by commas --------------------------------------------------------------------------------------------------------------------------------------------------------------------------------------------- int AnimalAttackMode [0] 0 = Do not attack, 1 = Attack all, 2 = Detailed targeting --------------------------------------------------------------------------------------------------------------------------------------------------------------------------------------------- float AnimalSenseRange [20f] Maximum distance at which this NPC can sense animals --------------------------------------------------------------------------------------------------------------------------------------------------------------------------------------------- float AnimalDamageScale [1f] Damage modifier against animals. Multiplied by the global Scale Damage value --------------------------------------------------------------------------------------------------------------------------------------------------------------------------------------------- string AnimalWhitelist [""] Allowed animals to attack. Use ShortPrefabName, SkinID, class name. Separated by commas --------------------------------------------------------------------------------------------------------------------------------------------------------------------------------------------- string AnimalBlacklist ["11491311214163"] Blocked animals to attack. Use ShortPrefabName, SkinID, class name. Separated by commas --------------------------------------------------------------------------------------------------------------------------------------------------------------------------------------------- float DamageScale [0.75f] Global damage multiplier applied to all NPC attacks --------------------------------------------------------------------------------------------------------------------------------------------------------------------------------------------- bool CanTurretTarget [true] If enabled, turrets are allowed to target NPCs --------------------------------------------------------------------------------------------------------------------------------------------------------------------------------------------- float DamageScaleFromTurret [0.5f] Damage multiplier applied when NPCs receive damage from turrets --------------------------------------------------------------------------------------------------------------------------------------------------------------------------------------------- float DamageScaleToTurret [1f] Damage modifier against turrets. Multiplied by the global Scale Damage value --------------------------------------------------------------------------------------------------------------------------------------------------------------------------------------------- float AimConeScale [2f] The spread of NPC shots. Default Facepunch value is 2. Negative values are not allowed --------------------------------------------------------------------------------------------------------------------------------------------------------------------------------------------- bool DisableRadio [false] If enabled, disables the default radio chatter sounds made by scientist NPCs --------------------------------------------------------------------------------------------------------------------------------------------------------------------------------------------- bool CanRunAwayWater [true] If enabled, NPCs that enter deep water will return to their spawn point --------------------------------------------------------------------------------------------------------------------------------------------------------------------------------------------- bool CanSleep [true] If enabled, NPCs can enter sleep mode to reduce performance cost when no players are nearby --------------------------------------------------------------------------------------------------------------------------------------------------------------------------------------------- float SleepDistance [100f] Distance at which NPCs will enter sleep mode if no players are within range --------------------------------------------------------------------------------------------------------------------------------------------------------------------------------------------- float Speed [5f] Movement speed of NPCs. Default Facepunch value is 5 --------------------------------------------------------------------------------------------------------------------------------------------------------------------------------------------- int AreaMask [1] int AgentTypeID [-1372625422] Navigation Grid Type --------------------------------------------------------------------------------------------------------------------------------------------------------------------------------------------- float BaseOffSet [0f] Vertical offset from the navmesh. Positive = above, negative = below, 0 = default height --------------------------------------------------------------------------------------------------------------------------------------------------------------------------------------------- string HomePosition [""] Base position of the NPC used as its home and reference point for movement --------------------------------------------------------------------------------------------------------------------------------------------------------------------------------------------- float MemoryDuration [10f] How long NPCs remember a target after losing sight of it --------------------------------------------------------------------------------------------------------------------------------------------------------------------------------------------- HashSet<string> States [HashSet<string> { "RoamState", "ChaseState", "CombatState" }] List of AI states the NPC can use --------------------------------------------------------------------------------------------------------------------------------------------------------------------------------------------- string LootPreset ["Default-Npc-KpucTaJl"] Name of LootManager preset applied on NPC. Leave empty for no preset --------------------------------------------------------------------------------------------------------------------------------------------------------------------------------------------- string CratePrefab [""] Prefab path of the crate to spawn at NPC death location. Leave empty for none --------------------------------------------------------------------------------------------------------------------------------------------------------------------------------------------- bool IsRemoveCorpse [true] If enabled, NPC corpses are removed instantly on death --------------------------------------------------------------------------------------------------------------------------------------------------------------------------------------------- bool GroupAlertEnabled [false] If enabled, NPCs share attacker info with nearby NPCs of matching presets --------------------------------------------------------------------------------------------------------------------------------------------------------------------------------------------- float GroupAlertRadius [40f] Radius in which NPCs can alert nearby groups about the attacking player --------------------------------------------------------------------------------------------------------------------------------------------------------------------------------------------- string GroupAlertReceivers [""] NPC presets to alert. Use All or preset names (Preset1,Preset2). Own preset added automatically --------------------------------------------------------------------------------------------------------------------------------------------------------------------------------------------- float HeadDamageScale [1f] Damage multiplier for head hits --------------------------------------------------------------------------------------------------------------------------------------------------------------------------------------------- float BodyDamageScale [1f] Damage multiplier for body hits --------------------------------------------------------------------------------------------------------------------------------------------------------------------------------------------- float LegDamageScale [1f] Damage multiplier for leg hits ---------------------------------------------------------------------------------------------------------------------------------------------------------------------------------------------Free35 points -
Version 2.9.6
30,143 downloads
Set your server apart with a roaming mobile event that has nearly endless configuration options! Configure the loot truck as well as the Convoy of protection vehicles ranging from sedans, module cars, Bradley tanks, motorbikes, vendor trucks, to a patrol helicopter! The plugin runs on custom and procedural generated maps, can use custom routes or let the plugin find a random route based on your configuration. You can make yours an aggressive or a peaceful Convoy, who shoots first? You can set all kinds of parameters regarding the many pieces of the event, how to beat it, whether destroying the loot truck destroys the loot or not for example. There are many compatible plugins like TruePVE, GUIAnnouncements, Notify, DiscordMessages, and RustCord to name a few. The plugin has a built in UI that will give you important information about the event as you are inside it's zone. Check the map to see the location of the event as a marker and even see the timer on the event! All of the ground vehicles are driven and filled with NPCs. Every vehicle, the NPCs, and the loot as well as all timers can be configured to suit your server. A PvP zone can be created within the event area for those of you who use TruePVE to control damage on your servers. The limits are nearly endless! If you have some players on your server that you want to really send everything you have at, this is the plugin for you. Watch players crap their pants when they first encounter a full Convoy with multiple tanks and a Patrol Heli all attacking at once. Sit back and delight in their fear as all of the vehicles empty their occupants and NPCs swarm them mercilessly! Required Dependency (must install this free plugin) NpcSpawn – link is included and can be found in the ReadMe file included with download Chat commands (admin only) /convoystart - launches the event using a random preset based on your configuration /convoystart PresetName - add the name of a preset from the configuration to launch a specific preset /convoystop - stops the event /convoyroadblock - the event will not be held on the road where you are standing (clear the Blocked roads section of config when you change maps) /convoypathstart - stand at starting point and enter command to start recording a custom route /convoypathsave RoutePresetName - to save a custom route (enter anything you'd like in place of RoutePresetName) multiple routes can be added to one route preset, one will be selected at random in this case /convoypathcancel - to reset the route Console commands (RCON only) convoystart - launches the event using a random preset based on your configuration convoystart PresetName - add the name of a preset from the configuration to launch a specific preset convoystop - stops the event Plugin Config en – example of plugin configuration in English ru – example of plugin configuration in Russian API bool IsConvoyVehicle(BaseEntity entity) bool IsConvoyCrate(BaseEntity crate) bool IsConvoyHeli(BaseHelicopter baseHelicopter) bool IsConvoyNpc(ScientistNPC scientistNPC) Hooks void OnConvoyStart() - яalled when a convoy appears void OnConvoyStop() - яalled when a convoy disappears void OnPlayerEnterConvoy(BasePlayer player) - яalled when a player enters the event area void OnPlayerExitConvoy(BasePlayer player) - яalled when the player leaves the event area void OnConvoyEventWin(ulong userId) - called at the end of the event and informs about its winner void OnConvoyStartMoving(Vector3 convoyPosition) void OnConvoyStopMoving(Vector3 convoyPosition) void OnConvoyAttacked(BasePlayer player, Vector3 convoyPosition) Check out the rest of my work: Adem's Codefling Library You can reach out to me in Discord: Adem's Discord Profile Thanks to Jbird for writing, translation, & support: Jbird's Discord Profile Join the Mad Mappers Discord!$39.9934 points -
Version 2.0.10
20,490 downloads
Automatic application of DLC skins for building blocks. This is a simple plugin that allows players to use DLC skins without having to buy them. After obtaining permission and activating the skin, the player will be able to build building blocks with the skin from the DLC. Use the /bskin command to switch modes. To update the skin for existing building blocks, you need to activate the skin and hit the block with a hammer. The block will be updated with the selected skin. To change the skin for all buildings using the /bskin build or /bskin all command, you need to select a skin mode. Depending on the mode you choose, the skin will be updated. Permissions: buildingskins.use - Allows the player to use a command to apply a skin. buildingskins.build - Allows the player to use the bskin build command. buildingskins.all - Allows the player to use the bskin all command. buildingskins.admin — Allows the player to use the bskin all <steam id> command and bypass the build owner check. buildingskins.tc - Allows the player to change the skin of a building from the tool cupboard. To assign a permission, use oxide.grant <user or group> <Steam name or ID> buildingskins.use. To remove a permission, use oxide.revoke <user or group> <Steam name or ID> buildingskins.use. Commands: /bskin - opens a GUI to set the default building skin (can be changed in the config file). /bskin build — updating the skin of the block you are looking at and everything that touches it. /bskin all - updating the skin of all buildings owned by the player. /bskin all <steam id> - updating the skin of all buildings for the selected player. (ex: /bskin all 76561100000000000) /bskin toggle - Disable/enable building skins. Configuration: Building skin change commands - list of commands to switch the skin. You can change, add or remove if the command conflicts with other plugins. Commands will work both in chat and in the console. Block building skin in building blocked - prevents changing the building skin if the player is in building blocked mode and does not have buildingskins.admin permission. Number of blocks updated per tick - description is not required. Don't make changes if you're not sure what you're doing. Automatically activate skin when player connects - when the player connects for the first time, the skins from the dlc will be installed by default. Apply selected paint color to all building blocks - Sets the selected spray paint color for all building blocks when updated. Image and description settings - Image settings and descriptions in the GUI menu.Free32 points -
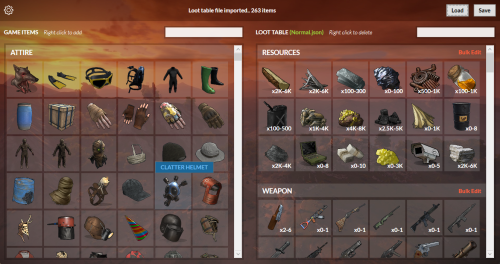
Version 1.8.0
13,282 downloads
UI Loot Tables Editor for Raidable Bases plugin by Nivex and Raidable Boats plugin by VisEntities. Features Import/Export loot table json file Complete database of game items (Categorized, friendly names and pics) Add/Delete loot table items Edit loot table items spawn details Bulk edit/delete items Bulk multiply items values (min amount, max amount, stack size) How to Download and extract RustRBLootEditor-v***.zip Run RustRBLootEditor.exe (having trouble running?, make sure you download and install .NET 9.0) Click Load, and locate your desired loot table file to be modified in "oxide\data\RaidableBases\.." or "oxide\data\RaidableBoats\LootTables\.." Now you can move game items into your loot table or remove them using mouse right click (you can use search box for filtering) Edit loot table item Amount Min/Max and Skin id using mouse left click, change amounts, then click anywhere outside the modal to collapse Click Save and replace your file, and you're done (or save as draft with a new name)Free31 points -
Version 2.0.229
25,722 downloads
Carbon is a self-updating, lightweight framework for Rust offering the best performance and stability possible. It's backwards compatibility Oxide data files and plugins make it the ultimate replacement for those wanting more from their plugins with less headache and performance overhead. Why use Carbon Carbon manages hooks in memory, instead of having to physically patch server files like Oxide does. This allows you to freely update the server without having to update Carbon, and the convenient fact that a Carbon update is rarely required, even if a new server update is released. It has much better performance thanks to dynamic hooks, which allows Carbon to dynamically load and unload hooks depending on the plugins you're running, instead of having over 800 hooks invoking that aren't being used. In addition to our full-time development team, we're able to hyper-optimize everything to ensure the best performance possible. Switching from Oxide This process is very simple thanks to our backwards compatibility and automatic migration when you boot the server with Carbon for the first time. It automatically copies all of your Oxide user and user data files, plugins, plugin configs, plugin data files, extensions and Harmony patches over to the managed Carbon directory. It's as easy as installing Carbon and letting it work! Automatic migration to Carbon Manual migration to Carbon More Reasons to Switch Carbon is free and will always be free Extremely lightweight Seamless migration from Oxide MySQL and SQLite user permission and data support Built-in modules maintained by the Carbon team to ensure essentials plugins are always ready for the big update Accurate and detailed error logging (No more incorrect stack traces. Find the issue quickly.) Native profiler to quickly identify performance issues with an intuitive in-game interface Plugin metrics to also identify performance issues at a glance that offers detailed print outs of plugin and hook usage Carbon is updated hours in advanced to force updates so you're never worrying if you can update your servers on-time Carbon updates itself when your server boots. No more auto update scripts or manual updates needed! Install, update and configure plugins all from our panel in-game without ever having to touch files again! Carbon offers a staging build that's updated all month to enable you to run modded staging servers and test your plugins well in advance to the big update Documentation Installing Carbon - https://carbonmod.gg/owners/installing-carbon Configuring Carbon - https://carbonmod.gg/owners/configuring-carbon Staging Builds Would you like to run Carbon on staging or aux branches of Rust throughout the month? Our staging and aux branches are always up-to-date, so you can properly test plugins prior to a major update or provide a modded server for players to try out new Rust updates before they're live! Staging - https://github.com/CarbonCommunity/Carbon.Core/releases/tag/rustbeta_staging_build Aux01 - https://github.com/CarbonCommunity/Carbon.Core/releases/tag/rustbeta_aux01_build Aux02 - https://github.com/CarbonCommunity/Carbon.Core/releases/tag/rustbeta_aux02_build Aux03 - https://github.com/CarbonCommunity/Carbon/releases/tag/rustbeta_aux03_build For Developers If you're a developer, you can enjoy all of the latest improvements of C# 10 as well as the ability to add your own methods anywhere in the assembly without being locked down to pre-existing hooks. All of your existing Oxide plugins will be compatible, though we recommend making a Carbon-specific version available to utilize Carbon to its fullest. Check out Creating your First Plugin to get started!Free31 points -

Version 4.3.3
18,420 downloads
FEATURES: Auto search (you can check supported sites below) User-friendly UI for customization (use permission "updatechecker.setup" | opencommand by default = "ucsetup") Notifications of new versions also come to the console via the channel you specify with a download link Plugins are checked after n number of minutes which is specified in config Auto Reload when the configuration has been changed then the plugin will reload itself Check orphaned config files via server console command (uc_check_config) and delete them via (uc_clean_config) Q&A Q: What is "Discord message ID"? A: This will allow the plugin to edit the message he already sent earlier to avoid spam. Q: How to get "Discord message ID"? A: You need to copy the link to the message that will send the bot through the webhook that you specified and copy from there the last digits before the symbol /. Example [Discord's GUIDE]: Link: https://discord.com/channels/1109772761158647808/1109773148775251978/1110125298017648641 You need to copy "1110125298017648641". Supported sites: [uMod | Codefling | Lone.Design | Chaos | RustWorkshop | Github | ModPulse | RustPlugins | ServerArmour | ImperialPlugins | MyVector | SkyPlugins | Game4Freak] Thx for ServerArmour API from @Pho3niX90 Example of plugin config My Discord ProfileFree28 points -
.thumb.png.c7f4bb064c82c82a091c981534225577.png)
Version 1.9.7
17,671 downloads
New Year Update The New Year is coming and I have prepared for you a new preset customization for the train!After installing the update, customization will be automatically applied to all cars in the configuration of the armored train. To disable this, make the "Customization preset" parameter empty in the config. You can also disable the customization of certain wagons or change the customization of the NPCs in the file oxide/data/ArmoredTrain/NewYear New Year's map from the video: Halloween Update Have you already prepared your server for Halloween? On the eve of the Halloween Rust update, I have prepared for customization of all armored train cars. After installing the update, customization will be automatically applied to all cars in the configuration of the armored train. To disable this, make the "Customization preset" parameter empty in the config. This plugin will add an armored train to your server, which can travel both in the subway and by rail. It can consist of any number of wagons. A helicopter can accompany it. Bradley, npc, turrets, simsites can be installed on the train. The plugin allows you to create any number of train presets, for which the order of wagons, the helicopter preset, the probability of spawn and the duration of patrolling can be specified. Each wagon or locomotive can be configured separately. Any speed can be set by the locomotive.If there is no spawn of trains on the surface on your custom map, read the section "Custom spawn points” Custom spawn points If you are using a custom map in which there are no spawn trains on the surface, but there is a railway, then for the train to work on the surface, you need to add custom spawn points of the train. Instruction: Stand at the point where you want the train to spawn Enter the command /atrainpoint If you receive a message that a point has been created, enable "Use custom spawn coordinates [true/false]” in config For correct operation, it is recommended to create several spawn points of the train Chat commands (only for administrators) /atrainstart– launches the event in a random configuration /atrainstartunderground - forcibly launches an event underground /atrainstartaboveground - forcibly launches an event aboveground /atrainstart <trainPresetName> – launches the event in the <trainPresetName> configuration /atrainstartunderground <trainPresetName> /atrainstartaboveground <trainPresetName> /atrainstop– stops the event /atrainpoint– creates a custom spawn point of the train in your position Console commands (RCON only) atrainstart– launches the event in a random configuration atrainstartunderground - forcibly launches an event underground atrainstartaboveground - forcibly launches an event aboveground atrainstart <trainPresetName> – launches the event in the <trainPresetName> configuration atrainstartunderground <trainPresetName> atrainstartaboveground <trainPresetName> atrainstop – stops the event Config en – example of plugin configuration in English ru – example of plugin configuration in Russian Dependencies (optional, not required) True PVE PveMode GUI Announcements Notify DiscordMessages AlphaLoot CustomLoot Economics Server Rewards IQEconomic Api bool IsArmoredTrainActive() bool StopArmoredTrain() bool StartArmoredTrainEvent() bool EndArmoredTrainEvent() bool IsTrainBradley(uint netID) bool IsTrainHeli(uint netID) bool IsTrainCrate(uint netID) bool IsTrainSamSite(uint netID) bool IsTrainWagon(uint netID) bool IsTrainTurret(uint netID) Vector3 ArmoredTrainLocomotivePosition() Hooks OnArmoredTrainEventStart OnArmoredTrainEventStop Contact me in Discord: Adem#955$29.9927 points -
Version 1.7.3
44,671 downloads
The easiest and fastest way to build a Rust server Functions: Server Config Installer Wipe Manager Custom Map Support - Server Config: Here you can set up all the settings for your server. Server Name Server Tag Server Description Server URL Server Logo URL Map Size Map Seed Generate Maps Seed MAX Player RCON Password Server Port Query Port RCON Port App Port Game Mode Custom Map - Installer: Here you can easily install your server and mods. Install or Update your Server Verify your server files Install or Update Oxide (Detects new version) Install or Update Carbon (Detects new version) Install or Update RustEdit (for Custom Map Users) Install or Update Discord Extension (to run Discord Plugins) - Wipe Manager: Here you can easily Wipe your Server Full Wipe Blueprints Map Oxide Data Backpacks Logs Player Deaths Player Identities Player Stats Player Tokens New Map Seed on Wipe HowTo: - Start Rust Server Tool as Admin - Install Server - Make your settings and save - Start Server That's allFree27 points -

Version 2.3.2
18,714 downloads
GUI with personal stats, leaderboard, per-category stats, and #1 player custom chat titles Tables with personal bests per category, top scoring player per category, and top-30 players per category. The same tables can be viewed for clans, rather than players. Server-wide top-list per category can be advertised on a timer. Tables have clickable headers for ascending/descending sort Multiple leaderboard snapshots (top single player for each category) can be taken for SQL/web use. Can also issue rewards (in command format) either on your command or automatically after wipe. Rewards are in a separate PlayerRanksRewards.json data file. Multiple commands issued as one reward should, be, comma, separated. Use {id} as a placeholder for player's Steam ID. Optional uMod dependencies. Clans. Economics. EventManager. Friends. PlaytimeTracker. BetterChat. (for titles) Permissions. playerranks.use - Allows players to use GUI, if 'RequiresPermission' is true. playerranks.admin - Allows admin UI and command access. playerranks.excludefromstats - Allows players to toggle /pr optout - taking their stats out of public displays. playerranks.excludedfromstats - Force a player to be excluded from stats playerranks.optout - Used behind the scenes for user preference persistence across wipes. By default, stats for admins are not publicised. Chat commands. The plugin will respond to whatever commands you have specified in the config for `chatCommandAliases` The defaults are { "pr", "ranks", "rank" }; This documentation will use 'pr' for its examples. Player commands. /pr - Open PlayerRanks GUI /pr chat - Enable/Disable chat announcements. /pr optout - Have your stats removed from, or included in, public displays. /pr reward <category name> - Issues rewards for the category. /pr reward - Issues rewards for all categories. Requires playerranks.excludefromstats permission. Admin commands. /pr save - Save the database /pr wipe - Wipe the database /pr del - Remove all stats for that player's steamID /pr wipecategory <categoryname> - Remove all of user stats for that category Console commands. playerranks.save - Save the database playerranks.wipe - Wipe the database playerranks.reward <category name> - Issues rewards for the category. playerranks.reward - Issues rewards for all categories. SaveLeaderboard - Takes a snapshot of the current #1 players for all categories. Configuration. General options. displayClanStats - True/False record_ClanMate_Kills - Toggle killing of clan-members contributing to PVPKills. record_FriendsAPI_Kills - Toggle killing of 'Friends' contributing to PVPKills. record_RustIO_Friend_Kills - Toggle killing of RustIO friends contributing to PVPKills. record_Rust_Teams_Kills - Toggle killing of Rust team mates contributing to PVPKills. blockEvents - Toggle EventManager contributing to ranks. statCollection - True/False RequiresPermission - Makes user /pr access by 'playerranks.use' permission only. allowadmin - Toggle admin stats in public displays. chatCommandAliases - { "pr", "ranks", "rank" } useTimedTopList - Toggle public broadcast rotation. TimedTopListAmount TimedTopListTimer TimedTopListSize - Font size for chat output. TimedTopListNumbered - Adds ordered numbering to chat output (1st,2nd,etc). deleteOnBan - true/false PVPHeadshotsOnly - true/false CountHeadshotsOnlyIfKill - true/false saveTimer (minutes) lastLoginLimit - in days.Deletes data for users who haven't logged in since X days ago. Value of 0 means disabled. wipeOnDeath - true/false WipeOnNewMap - Wipes PlayerRanks data base when a new map is detected. CommandOpensTop30 = false KDRExcludesSuicides = false PVPKillsCountsSleeperKills = false PlayTime_HH_MM = false CountPlantsOnlyFromPlanters = true GlobalTitleBroadcast = true - Tells everyone (true) or just the taker and loser of a title (false) useIntenseOptions - Enable/disable.Toggle gathering of information, and displays, relating to: StructuresBuilt ItemsDeployed ItemsCrafted EntitiesRepaired StructuresDemolished Resources Gathered GUI. UiTextColourStrong = "<color=#b3522b>"; UiTextColourWeak = "<color=#bdbdbd>"; ChatTextColourStrong = "<color=#d4d3d3>"; ChatTextColourWeak = "<color=#bdbdbd>"; ButtonColour = "0.7 0.32 0.17 1"; CategorySortButtonColour = "0.48 0.2 0.1 1"; GuiTransparency = 0.9; Useful tool for picking CUI colours - RGB Decimal. Titles (requires BetterChat) EnablePlayerTitles = false; MaxDisplayedTitles = 3; MaxTitlesBeforeLineBreak = 3; TitleStart = "["; TitleEnd = "]"; AddTitleHoldersToGroup = true; DestroyGroupOnUnload = false; Categories. Each category has the following options in config. "PVPKills": { "EnabledInPersonal": true, "EnabledInTop1": true, "EnabledInTop30": true, "IncludeInChatBroadcast": true, "Title": "[Killer]", "ShowTitleInPlayerChatMessages": true, "ChatPriority": 1, "BroadcastTitleChanges": true }, Title. Leave blank to have no title. Players with titles are automatically placed in a group of the category name. Players are removed when they lose #1, and all groups are emptied on unload. SQL - optional. Database Name Host Password Port Username tablename - Main data table name that PR will create. LBtableName - Leaderboards table name that PR will create. Use MySQL - true/false autoWipe - true/false (wipes SQL with main database) The SQL database will be created on the first save, whether automatic or manually with command /pr save. Category List. PVPKills PVPDistance PVEKills PVEDistance NPCKills NPCDistance Sleepers Killed HeadShots Deaths Suicides KDR (kill to death ratio) SDR (suicide to death ratio) SkullsCrushed TimesWounded TimesHealed HeliHits HeliKills APC Hits APCKills BarrelsDestroyed Explosives Thrown Arrows Fired Bullets Fired Rockets Launched MLRS Fired WeaponTrapsDestroyed Drops Looted Fish Caught Structures Built Structures Demolished Items Deployed Items Crafted Entities Repaired Resources Gathered Plants Gathered Structures Upgraded Economics** ServerRewards** PlayTime** (DD:HH:MM:SS) MySQL Only. Online/Offline Status** ActiveDate - Player's last login date. ** - These options are reported by Player Ranks, but not incremented or maintained by Player Ranks. Resetting Player Ranks database will not set these entries to zero, as they are read from elsewhere. Wipe Playtime Tracker data and/or Economics data to set these to zero. API ResetClan(string clanname) ResetPlayer(ulong ID) Key Binds. Personal stats and leader board can be bound to toggle as follows, using H J as examples: bind h callPersonalStatsUI bind j callLeaderBoardUI Notes. Data for banned players is automatically removed. Heli Kills are attributed to the player who hit the heli the most - not the last hitter. If a player dies from his wounds, the person who wounded him gets the PVP kill. PVP distance is recorded based on the wounding shot.Free24 points -

Version 2.0.72
2,995 downloads
Create your own UI buttons for your rust server! Plugin comes with built ingame editor which makes creating proccess so much easier! • Features - Create as many buttons as you want. - Attach Images or Text to buttons. - Set chat commands to each button. - UI Editor ingame - Toggle hide function to create small gui menu. • Commands • Permissions • Config Example • Cui Data Example Special thanks to @SinKohhfor contributing and testing plugin before release.$7.5023 points -
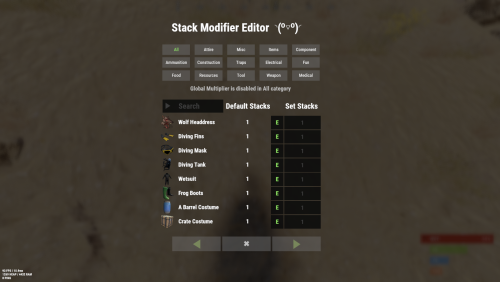
Version 2.9.94
16,708 downloads
Stack Modifier is a performance-focused plugin that enhances and refines item stacking behavior in Rust. Includes a built in GUI Editor for quick and easy setup of stack sizes! This plugin uses harmony for the best performance! Features Includes GUI Editor - Blocks Player movements while using GUI Editor Including Keybinds! Adds NEW Stacking Support for the following. STACKING TAG support, crafted, spawned, picked-up, etc. Repair Bench, broken item stacks, spam repair! Melee Weapon throwing! Item Condition Merging! Stacks of Items not breaking one 1 in the stack breaks. liquids ( like bota bags etc ) Stacking of Fuel Containers (hats, tools, etc.) Stacking of Guns Weapon Attachments Stacking of Skins Works with SkinBox plugins Supports stacking armor slot armors Supports Genetic Stacking Supports Food Spoil stacking Stacking of Custom Items Stacking of Custom Items with Custom Display Names Stacking of Key Cards without losing the stack when swiping Stacking Candy Cane Club without losing the stack while lick Support for modified presents for unwrapping Limits wearable clothing items to stack sizes of 1! ( on the player wear container only ) Limits weapon attachments to stack sizes of 1! ( On the weapon its self! so you can have bigger stacks! ) The largest possible value in C# is 2,147,483,647 Which means anything over this stack-size will break the plugin Patches All Industrial Conveyor stack issues! ( Yes custom items no problems! ) -- THIS IS NOW IT"S OWN PLUGIN AS AN ADDON. 4-2-2025 Patches Stacks being lost when stacked items break! Like mining! Etc Patches Stacks being lost when Melee weapons are thrown! Like spear! Etc STACK MODIFIER INDUSTRIAL ADDON: Known Conflicts RoadBradley & HeliSignals Are doing item creations wrong and setting the item.name field as vanilla item display names thus breaking stack support. ( don't set a vanilla display name only set them if its custom names as the fix ) Conveyor Stacks Not needed & conflicts, stack-modifier already does this & has config settings for it. Davids Shop UI ( recently changed how his default data files are createdfor items ) ( you need to generate a new Items.json file and re-do custom items / pricing inside it to fix stack bugs with old data files ) Magic Coin uses some of the same hooks set up config in it correctly to not conflict Custom Skin Stack Fix not needed this handles it properly Stack Size Controller cannot have 2 of the same plugins basically Extra Loot causes a stacking bug when a reboot occurs with skinned items preventing old skinned items from stacking with new skinned items IndustrialCustomSkinsFix not needed stack-modifier has the same patch in it. IQAlcoholFarm by BadMandarin/Mercury is not supported & will cause stack bugs / problems ( could be supported with an author update, but current version is not supported ) ItemPerks by imthenewguy Causes stack bugs/problems just by having this plugin on your server due to harmony patching done inside it + repair logic is bugged. Item creation is also not handled properly resulting in duplication issues with Conveyor movements nothing can be done about that. ( plugin requires a full rewrite for proper support & repairs. ) Custom Item Definitions causes stack bugs/problems and I am not going to support a plugin that heavily modifies vanilla game items in that way its simply far too much work to try and support. I'd have to import almost half of that plugins code just for mine to accurately handle stack logic for it & for plugins that use that plugin. Plugins that do not handle Item Creation Correctly: ( Which break stacks ) Custom Item Drops by Machine ( Always sets the vanilla display name when its supposed to be null for vanilla items ) XP System by fastburst ( Always sets the vanilla display name when its supposed to be null for vanilla items ) Copy Paste ( Items created by copy paste its self will not stack since item creation is not handled properly ) This list will be constantly updated as devs fix their code accordingly & new ones are discovered to be flawed. Getting Started - Click Either Link to play video Video One Video Two Permissions stackmodifier.admin - Allows players access to the UI Editor. Chat Commands /stackmodifier -- Opens Editor UI, Must enable config option "Enable UI Editor": true /stackmodifier.reset ( is also console cmd ) -- Requires stackmodifier.admin perm ( resets stack-sizes ) /resetvenders -- Requires being an admin, only resets facepunches messed-up vendors, not all /stackmodifiercolor <inputpanel|inputtext|text|transparent> <color> <alpha|ex, 0.98> Example /stackmodifiercolor inputpanel #207086 0.25 UI Editor Commands set 8 -- Inside a categories Search Bar, type set and a value and it will apply it to the whole category, reset -- Inside a categories Search Bar type reset hit the enter key or click out of the field and it resets it. multiply -- Inside a categorie use the Search Bar & type multiply and a value and it will apply it to the whole category. if you reset or set, re-click the Category Tab to refresh it before making more changes! Otherwise you will have to do your first edit twice for it to start working again UI Editor Without Images? * At the top of the config you will see the following setting set to true save and reload. "Disable Images for UI Editor": false, < Disables images and allows full use Having Problems? * Warning this plugin is not compatible with custom-skins-stacks-fix plugin since this already handles everything. * If you already have a plugin that modifies the rust stack sizes you will first need to remove that plugin. * Then you simply load Stack Modifier onto your server open the config and start editing the Modified values to your new stack-size amounts! * When you are done simply save and reload the plugin! ( oxide. reload StackModifier ) * Alternatively you can utilize the built-in UI Editor and not ever need to touch the config! * Admins - Auth level 2 will always be ignored. * This plugin is not compatible with BetterVanish, I only support Vanish from umod. How to revert to vanilla? * Run the reset command while having the stackmodifier.admin perm or Unload Stack Modifier, delete the config, and restart your server. * It will reset the config back to vanilla settings allowing you to start over. API Hooks Interface.CallHook("OnStackSizeUpdated"); //called after the plugin updates the stack sizes on server reboots & when reloading the plugin. //It's also still called right after the UI editor is closed from modifying. //Inside the oxide hook I use called OnItemAddedToContainer theirs a hook of mine, if called mine will not touch it or fix the stacks. if (Interface.CallHook("OnIgnoreStackSize", player, item) != null) return; ## Configuration { "Disable Industrial Conveyor Patch (true = disabled)": false, "Industrial Conveyor Max Stack Size Per Move Default = 60": 130, "Industrial Conveyor Move Frequency Default = 5 (Lower = faster moving)": 3, "Disable Weapon Attachment stack fix (Unsubscribes from both OnWeaponModChange & CanMoveItem)": false, "Disable Wearable Clothes fix (Unsubscribes from OnItemAddedToContainer)": false, "Disable Ammo/Fuel duplication fix (Recommended false)": false, "Disable Candy Cane Club Lick fix & unwrap fix (Unsubscribes from OnItemAction)": false, "Disable OnCardSwipe fix (Unsubscribes from OnCardSwipe)": false, "Enable VendingMachine Ammo Fix (Recommended)": true, "Enable UI Editor": true, "Disable Images / Toggles off Images for UI Editor": false, "Sets editor command": "stackmodifier", "Sets reset command for both console & chat": "stackmodifier.reset", "Sets editor color command": "stackmodifiercolor", "Sets Default Category to open": "All", "Stack Modifier UI Title": "Stack Modifier Editor ◝(⁰■¿⁰)◞", "UI - Stack Size Label": "Default Stacks", "UI - Set Stack Label": "Set Stacks", "UI - Search Bar Label": "Search", "UI - Back Button Text": "◀", "UI - Forward Button Text": "▶", "UI - Close Label": "✖", "Colors": { "InputPanel": { "Hex": "#0E0E10", "Rgb": "0.0549019607843137 0.0549019607843137 0.0627450980392157 0.98" }, "InputText": { "Hex": "#FFE24B", "Rgb": "1 0.886274509803922 0.294117647058824 0.15" }, "TextColor": { "Hex": "#FFFFFF", "Rgb": "1 1 1 1" }, "Transparency": { "Hex": "#", "Rgb": "0 0 0 0.95" } }, "Category Stack Multipliers": { "Attire": 1, "Misc": 1, "Items": 1, "Ammunition": 1, "Construction": 1, "Component": 1, "Traps": 1, "Electrical": 1, "Fun": 1, "Food": 1, "Resources": 1, "Tool": 1, "Weapon": 1, "Medical": 1 }, "Stack Categories": { "Attire": { "hat.wolf": { "DisplayName": "Wolf Headdress", "Modified": 10 }, "horse.shoes.basic": { "DisplayName": "Basic Horse Shoes", "Modified": 10 } }, "Misc": { "fogmachine": { "DisplayName": "Fogger-3000", "Modified": 10 }, "sickle": { "DisplayName": "Sickle", "Modified": 10 } }, "Items": { "kayak": { "DisplayName": "Kayak", "Modified": 10 }, "map": { "DisplayName": "Paper Map", "Modified": 10 } }, "Ammunition": { "ammo.grenadelauncher.buckshot": { "DisplayName": "40mm Shotgun Round", "Modified": 20 }, "ammo.rocket.sam": { "DisplayName": "SAM Ammo", "Modified": 10 } }, "Construction": { "door.double.hinged.metal": { "DisplayName": "Sheet Metal Double Door", "Modified": 10 }, "building.planner": { "DisplayName": "Building Plan", "Modified": 10 } }, "Component": { "bleach": { "DisplayName": "Bleach", "Modified": 2 }, "vehicle.module": { "DisplayName": "Generic vehicle module", "Modified": 10 } }, "Traps": { "trap.bear": { "DisplayName": "Snap Trap", "Modified": 30 }, "samsite": { "DisplayName": "SAM Site", "Modified": 10 } }, "Electrical": { "ceilinglight": { "DisplayName": "Ceiling Light", "Modified": 10 }, "wiretool": { "DisplayName": "Wire Tool", "Modified": 100 } }, "Fun": { "firework.boomer.blue": { "DisplayName": "Blue Boomer", "Modified": 200 }, "telephone": { "DisplayName": "Telephone", "Modified": 10 } }, "Food": { "apple": { "DisplayName": "Apple", "Modified": 100 }, "woodtea.pure": { "DisplayName": "Pure Wood Tea", "Modified": 100 } }, "Resources": { "skull.human": { "DisplayName": "Human Skull", "Modified": 10 }, "wood": { "DisplayName": "Wood", "Modified": 10 } }, "Tool": { "tool.instant_camera": { "DisplayName": "Instant Camera", "Modified": 10 }, "bucket.water": { "DisplayName": "Water Bucket", "Modified": 10 } }, "Weapon": { "gun.water": { "DisplayName": "Water Gun", "Modified": 10 }, "spear.wooden": { "DisplayName": "Wooden Spear", "Modified": 10 } }, "Medical": { "blood": { "DisplayName": "Blood", "Modified": 100 }, "bandage": { "DisplayName": "Bandage", "Modified": 30 } } } }$24.9922 points -
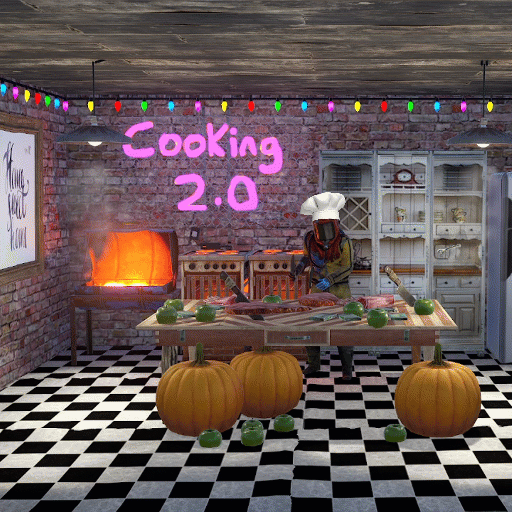
Version 2.0.32
6,281 downloads
This plugin extends the vanilla cooking system in rust by adding a number of ingredients and advanced recipes to the game. The ingredients are obtained from any of the 45+ different sources, from ore nodes, to trees, to collectibles such as hemp and pumpkins. These ingredients are used to create delicious meals that will provide the player with 1 of the 55 different buffs the plugin has to offer, or your own custom buffs should you wish to create your own using permissions from other plugins. The plugin comes standard with 47 custom recipes and 11 custom ingredients included. It also utilizes a number of rusts existing items, such as pumpkins, corn, wheat and potatoes. There are over 47 recipes that come with the default configuration. Each recipe allows for any number of ingredients to be added (default is up to 4), and any number of the 46 buffs to be added to each meal. Recipes can be easily added via the config. This allows server owners to get creative by creating their own custom meals and buffs. The above video showcases how new recipes and ingredients can be easily added to your configuration. The plugin comes with 11 unique custom ingredients, and also utilizes 16 of the default items in rust. Ingredients can be easily added to the configuration (see the above video). All non-default ingredients can be found from 49 different sources including cutting trees, mining nodes, collecting hemp etc. Each sources drop rate can be customized to suit your server, and the sources for ingredients can be changed incredible easily by simply adjusting a number in the config file. There are 49 unique sources that ingredients can be obtained from from cutting trees to collecting pumpkins. The chances for each ingredient drop are based on the interaction with that source. For example, picking a pumpkin offers 1 chance, as it is 1 interaction to pick a pumpking, while cutting a tree may be 10-20 chances (depending on the tool), as it takes a number of hits to fall a tree (this can be adjusted to be based on 1 chance per tree/node etc via the config). When a roll is successful, it then rolls through each item type and selects the item based on that items "dropWeight", allowing you to make ingredients more or less common than others on the same drop table. The Farmers Market is an in-built market that allows players to buy and sell ingredients for scrap, server rewards or economics. By default, the markets stocks will start at 0, and will only increase as players sell their unwanted ingredients to it. It can be configured to allow all items, or only custom items to be bought and sold through it, and also allows for a maximum stock to be set (default 100), meaing that it cannot have more than 100 of an item type. The buy/sell values for each ingredient can be adjusted in the config file (default $10 buy, $5 sell). Starting quantities can also be set if you do not want the market to start at 0. The market can be accessed by typing in /market (if config is enabled) or by speaking to an NPC that can be spawned with the plugin (addmarketnpc). Ingredient: A useful ingredient used to make more complex meals. Woodcutting_Yield: Increases the amount of wood received by a percentage when cutting trees and logs. Mining_Yield: Increases the amount of ore received by a percentage when mining any ore type. Skinning_Yield: Increases the amount of animal products received by a percentage when skinning animals. Heal_Share: Heals those around you for a percentage of the healing you receive. Heal: Instantly heals you for a percentage of your maximum health. Food_Share: Shares your food with nearby players, providing them with a percentage of the calories that you consume. Metabolism_Overload: Increases your maximum calories and hydration capacity by a percentage. Comfort: Provides an aura of comfort around you. Each nearby player will receive a percentage comfort. Water_Breathing: Will allow you to breath underwater for the duration. Fire_Resist: Reduces the damage taken from all sources of fire/heat by a percentage. Cold_Resist: Reduces the damage taken from the cold by a percentage. Explosion_Resist: Reduces the damage taken from explosives by a percentage. Animal_Resist: Reduces the damage taken from animals by a percentage. Melee_Resist: Reduces the damage taken from attacks made with a melee weapon by a percentage. Wounded_Resist: If you would enter the wounded state while this buff is active, you will instead be brought to your feet. Any negative modifiers will be removed. Spectre: You will become invisible to auto-turrets, flame turrets and shotgun traps for the duration. Madness: This food will make you sound strange to others. Wealth: Provides you with a percentage find scrap/economics/points when breaking barrels. Barrel_Smasher: Provides you with a percentage chance to instantly break a barrel with any amount of damage. Crafting_Refund: Provides you with a percentage chance to refund components when crafting an item. Passive_Regen: Will passively regenerate a percentage health each second. Horse_Stats: Will increase the speed any horse you ride by a percentage. Fall_Damage_resist: Reduces damage taken from falling by a percentage. Condition_Loss_Reduction: Reduces the condition loss of all worn and held items by a percentage. Ingredient_Chance: Increases the chance to obtain cooking ingredients by a percentage. Upgrade_Refund: Provides you with a percentage chance to receive a free upgrade when upgrading your building blocks. Research_Refund: Provides you with a percentage chance to receive a scrap refund when using a research bench. Role_Play: This item provides no buffs as it a Roleplay item. Anti_Bradley_Radar: Makes you invisible to the Bradley APC. Fishing_Luck: Provides you with a percentage chance to obtain a random item while fishing. Farming_Yield: Increases the amount of resources collected by a percentage when harvesting player-grown plants. Component_Luck: Provides a percentage chance to receive a random component when breaking barrels. Electronics_Luck: Provides a percentage chance to receive a random electrical item when breaking barrels. Permission: Used for firing off custom commands such as assigning and removing permissions. Bleed_Resist: Reduces the damage taken from bleeding by a percentage. Radiation_Resist: Reduces the damage taken from radiation by a percentage. Max_Repair: Any item that is repaired while this buff is active, will have its maximum condition reset. Smelt_On_Mine: Provides you with a percentage chance to receive refined resources instead of ores, when mining sulfur and metal nodes. Loot_Pickup: Provides you with a percentage chance for all items to be moved directly into your inventory when breaking barrels. Reviver: Sets a players health to a percentage when bringing them up from the wounded state. Duplicator: Provides you with a percentage chance to duplicate an item when crafting. Harvest: Increases the amount of resources collected by a percentage> when harvesting wild entities. Ingredient_Storage: Stores ingredients. Extra_Calories: Instantly provides you with a percentage of your maximum calories when consumed. Extra_Hydration: Instantly provides you with a percentage of your maximum hydration when consumed. Max_Health: Increases your maximum health by a percentage. Fishing_Yield: Increases the amount of fish received by a percentage. Damage_Over_Time: This perk will damage the consumer every second for the set value. Mining_Hotspot: The player will always hit the hot spot while mining. Woodcutting_Hotspot: The player will always hit the marker while chopping wood. Dehydration: Removes hydration when applied. Damage: Damages the consumer by the value. Radiation: Gives the consumer radiation equal to the value. Hunger: Removes calories when applied. Lifelink: Heals the user for a percentage of damage done. SkillTreeXp: Increases the amount of Skill Tree xp received from all sources.. Default: Default Rust item AnyTree: Chopping any tree ArcticTree: Chopping arctic trees DesertTree: Chopping palm trees TemperateTree: Chopping temperate trees TundraTree: Chopping tundra trees Cactus: Chopping cacti AnyNode: Mining any node AnyArcticNode: Mining any arctic nodes AnyDesertNode: Mining any desert nodes AnyTemperateNode: Mining any temperate nodes AnyTundraNode: Mining any tundra nodes StoneNode: Mining stone nodes MetalNode: Mining metal nodes SulfurNode: Mining sulfur nodes AnyAnimal: Skinning any animal Deer: Skinning deer Bear: Skinning bears Wolf: Skinning wolves Chicken: Skinning chickens PolarBear: Skinning polar bears Shark: Skinning sharks Boar: Skinning boar horse: Skinning horses Fishing: Catching fish Gut: Gutting fish Pumpkin: Harvesting pumpkins Potato: Harvesting potatos Corn: Harvesting corn Mushroom: Picking mushrooms BerryBush: Picking berries BerryBushBlack: Picking black berries BerryBushBlue: Picking blue berries BerryBushGreen: Picking green berries BerryBushRed: Picking red berries BerryBushWhite: Picking white berries BerryBushYellow: Picking yellow berries Hemp: Harvesting hemp CollectableSulfur: Collectable sulfur nodes CollectableStone: Collectable stone nodes CollectableMetal: Collectable metal nodes Crafted: Crafted Foodbox: Food boxes Excavated: Digging up metal detector sites Wheat: Picking up wheat JungleTree: Picking up wheat Tiger: Picking up wheat Panther: Picking up wheat Crocodile: Picking up wheat Snake: Picking up wheat AnyJungleNode: Picking up wheat Command: cook or recipemenu Action: Opens the recipe menu from anywhere. Permission: cooking.recipemenu.chat Command: market Action: Opens the farmers market from anywhere. Permission: cooking.market.cmd Command: ibag Action: Opens the ingredient bag from anywhere. Permission: cooking.bag.cmd Command: addmarketnpc Action: Creates a farmers market NPC Permission: cooking.admin Command: removemarketnpc Action: Removes the targeted farmers market NPC Permission: cooking.admin Command: clearingredientbags Action: Clears the contents of ingredient bags for all players Permission: cooking.admin Command: giverecipe <recipe> Action: Gives the command user the specified recipe card Permission: cooking.admin Command: givemeal <target> <meal> <amount> Action: Gives the specified meal to the target player. Permission: cooking.admin Command: giveingredient <target> <ingredient> <amount> Action: Gives the specified ingredient to the target player. Permission: cooking.admin Command: setmarketquantity <ingredient> <amount> Action: Sets the available market quantity of the specified item. Permission: cooking.admin // Recipe menu chat command cooking.recipemenu.chat // Using the cooking menu cooking.use // Admin related cooking comands cooking.admin // Bypass cooking time cooking.instant // Bypass ingredient requirements cooking.free // Removes ability to gather ingredients cooking.nogather // Allows the ingredient bag to be opened via CMD cooking.bag.cmd // Disables drop notifications cooking.disable.notify.drop // Disables Notify notifications cooking.disable.notify.proc // Disables menu sounds cooking.disable.sound // Allows access to the farmers market via CMD cooking.market.cmd // Allows the user to speak to the market NPC cooking.market.npc // Allows the user to gather ingredients cooking.gather // Required to find recipe cards cooking.recipecards Economics - Used for the farmers market and the Wealth buff type. ServerRewards - Used for the market and the Wealth buff type. SkillTree - Will provide xp when creating meals with the Cooking plugin. bool CanGatherIngredient(BasePlayer player, uint source) Returning a non-null value will prevent players from receiving ingredients from certain drop sources. the source is the networked ID of the entity. void OnMealCrafted(BasePlayer player, string meal, Dictionary<string, int> ingredients, bool isIngredient) Called after a meal has been created and given to the player. bool IsCookingMeal(Item item) Useful if you want to see if an item is from the recipe menu. bool IsHorseBuffed(RidableHorse horse) Used to prevent stacking modifiers if a horse is buffed by the Cooking plugin. object OnAddRecipeCardToLootContainer(BasePlayer player, LootContainer container) Returning a non-null value will prevent recipe cards from being added to the container. object OnIngredientBagDrop(BasePlayer player) Returning a non-null value will prevent the bag from dropping. void OnMealConsumed(BasePlayer player, Item item, int duration) Triggered when a player successfully consumes a meal. No return types.$24.9922 points -
Version 2.2.6
5,453 downloads
Allows bases to become raidable when all players in a base become inactive. Compatible with TruePVE and NextGenPVE servers. This plugin is not compatible with servers that have server.pve set true. It is possible to implement this, but I see no reason to do so as TruePVE provides the same protection and more. Abandoned Bases checks each building on the server in order to determine which bases are inactive. Bases become inactive when all players authorized on the tool cupboard have been offline for the configured amount of days. When a base becomes inactive there are one of two outcomes. 1.) It will be immediately destroyed if it does not meet the configured minimum requirements. 2) It will become raidable for a configurable period of time, and when the time expires the base will be destroyed. Each zone has a map marker, allows PVP and is surrounded by a dome that protects it from being attacked from the outside. Players who zone hop will be flagged with a PVP delay where they can still be attacked for a configurable amount of time. Command /sar - requires abandonedbases.convert permission and converts a base into an abandoned base - this can be used on any base that you are authorized to and will cause the base to be destroyed when the timer expires Command /sab - starts a manual check for each building on the server in order to determine which bases are inactive (requires abandonedbases.admin permission) Command /sar radius - requires abandonedbases.convert permission and converts a base into an abandoned base and uses the specified radius for the dome / zone radius. Min and max radius are configurable. Command /sar cancel - requires abandonedbases.convert and abandonedbases.convert.cancel permissions - completely cancels an event (destroys map marker and dome, disables PVP and prevents base from being despawned) effectively allowing the base to be taken over Command /sar claim - requires abandonedbases.convert and abandonedbases.convert.claim permissions and converts a finished abandoned base into a claimed base that can be taken over by players "Loot Required (SAR)" "Foundations Required (SAR)" "Walls Required (SAR)" These options should be set realistically so that players cannot exploit the /sar command. I recommend Loot Required 100, Foundations Required 10, Walls Required 10 at minimum Command /sar purge - converts all bases on the server into abandoned bases for purge day (requires abandonedbases.convert, abandonedbases.admin and abandonedbases.purgeday permissions) This is a two part command that requires you type /sab afterwards to begin. Requires abandonedbases.purgeday, abandonedbases.convert, and abandonedbases.admin permissions. Announcements are muted during purge to prevent spam. Time To Wait Between Spawns (15) will delay how quickly every base is converted Permissions (ADMINS REQUIRE PERMISSIONS TOO) abandonedbases.convert - required to use /sar command abandonedbases.convert.free - converting is free for users that have this permission abandonedbases.convert.claim - required to use /sar claim command abandonedbases.purgeday - required to use /sar purge command abandonedbases.admin - required to use /sab and purge commands abandonedbases.notices - users with this command can see event-opened notices from the plugin abandonedbases.attack - lets players hunt bases and convert them by attacking if they're abandoned abandonedbases.attack.time - shows players how much time is left before a base becomes abandoned when they attack it abandonedbases.attack.lastseen - required to see the last time the player was online when attacking a base Auto-add abandonedbases.immune to configuration if one does not exist already (lifetime set to "none") - abandonedbases.immune will not be automatically added if the configuration contains a different immunity permission already - abandonedbases.immune will give the user immunity to any base they've built at or are authed at from becoming abandoned - abandonedbases.exclude does not provide immunity and is explicitly intended for the plugin to ignore the player only - abandonedbases.exclude is intended for admins, mods, staff or helpers to be able to freely make repairs or auth at bases without interfering with the abandoned timer abandonedbases.exclude: excludes the user from being checked as an authorized user to a TC this permission should not be used to exempt users - exempt users with immunity by assigning them a permission from a role that has the lifetime set to "none" example roles that includes permission abandonedbases.immune and lifetime set to "none" to properly exempt a user or group by granting abandonedbases.immune to a user or group: "Purge Settings": [ { "Permission": "abandonedbases.immune", "Lifetime (Days)": "none" }, { "Permission": "abandonedbases.vip", "Lifetime (Days)": "7" }, { "Permission": "abandonedbases.veteran", "Lifetime (Days)": "5" }, { "Permission": "abandonedbases.basic", "Lifetime (Days)": "3" } ], Purge Settings Permission - The permission to use with this setting Lifetime (Days) - The amount of time in days before a base is considered abandoned. Set to none to not consider players with this permission as inactive. Conversions Before Destroying Base (1) - The amount of times a base can become abandoned before it is finally destroyed when the Despawn Timer expires. Comes with 3 configured permissions and lifetime days by default Abandoned Settings Blacklisted Commands (command1, command2, command3) - Commands players are not allowed using at a raid or marked with PVP delay Marker Name (Minutes) (Abandoned Player Base [{time}m]) - Text shown on map marker for minutes Marker Name (Seconds) (Abandoned Player Base [{time}s]) - Text shown on map marker for seconds Foundations Required (4) - Minimum amount of foundations required to become raidable Walls Required (3) - Minimum amount of walls required to become raidable Sphere Amount (10) - Increase to darken the dome, or decrease to brighten it Sphere Radius (50) - How big the dome is in meters Use Dynamic Sphere Radius (false) - Allow the dome to detect the best dome size Max Dynamic Radius (75.0) - How maximum size of the dynamic radius Min Custom Sphere Radius - The minimum radius allowed when using /sar <radius> Max Custom Sphere Radius - The maximum radius allowed when using /sar <radius> PVP Delay (15.0) - The amount of time in seconds that players can take damage after leaving the dome Despawn Timer (1800.0) - The amount of time in seconds that players have to finish the raid Reset Despawn Timer When Base Is Attacked (true) - When enabled this will reset the above despawn timer back to 1800 seconds by default Do Not Destroy Base When Despawn Timer Expires (false) - Use this to override and prevent a base from being destroyed when Despawn Timer expires Backpacks Can Be Opened (true) - When enabled players will be allowed to open their backpacks while inside of the dome Backpacks Can Be Looted By Anyone (false) - Bypass PreventLooting plugin and allow backpacks to be lootable if enabled Corpses Can Be Looted By Anyone (true) - Bypass PreventLooting plugin and allow backpacks to be lootable if enabled Allow PVP (true) - Allows PVP while inside of the dome, and when flagged with a PVP delay Seconds Until Despawn After Looting (600) Seconds Until Despawn After Looting Resets When Damaged (true) Cancel Automated Events If Abandoned Owner Comes Online (false) Message Raiders When Event Ends During Automated Cancellation (true) Change Marker Color On First Entity Destroyed (true) Cooldown Between Conversions (3600) - Time required between each manual conversion of a base using /sar Cooldown Between Events (3600) - Time between each event - prevents looting, damage and using /sar claim Cooldown Between Cancel (3600) - Time the player must wait to use /sar cancel Cooldown Between Conversions Ignored During Purge (true) Cooldown Between Cancel Ignored During Purge (true) Cooldown Between Events Ignored During Purge (true) Prevent Hogging Ignored During Purge (false) Run Once On Server Startup (false) - Check for abandoned bases immediately after server startup is complete Run Every X Seconds (0.0) - The time in seconds to check for each building on the server in order to determine which bases are inactive Kill Inactive Sleepers (false) - When enabled players with a permission from purge settings will be executed when they are offline for the configured amount of lifetime days Let Players Kill Abandoned Sleepers (false) - Allows players to kill anyone sleeping inside of an abandoned base rather than the server killing them automatically Economics/ServerRewards Cost To Manually Convert (0 = disabled) - Used with /sar command to convert any base into an abandoned base Use Map Marker (true) Require Event Be Finished Before It Can Be Canceled (true) Various auto turret settings Hooks (implemented in 2.1.4, updated in 2.2.5) participants - anyone that has actively participated (excludes admin if configured, and those in noclip or vanish) - this should not contain null elements participantIds - contains the userid of all participants - this list is better as anyone offline and dead will be included in this but not in the participants list because they would be null! intruders - anyone currently inside of the event (does not exclude anyone) - this should not contain null elements intruderIds - contains the userid of everyone inside of the event (does not exclude anyone) - this list is better as anyone offline and dead will be included in the list but not in the intruders list because they would be null! void OnBaseSkipped(Vector3 v, ulong userid, HashSet<ulong> owners, string reason, BuildingManager.Building building) { } void OnTugboatSkipped(Vector3 v, ulong userid, HashSet<ulong> owners, string reason, BaseEntity entity) { } void OnShelterSkipped(Vector3 v, ulong userid, HashSet<ulong> owners, string reason, BaseEntity entity) { } void OnAbandonedBaseStarted(Vector3 center, float radius, bool AllowPVP, List<BasePlayer> intruders, List<ulong> intruderIds, List<BaseEntity> entities, List<BuildingPrivlidge> privs, bool canDropBackpack, bool automatedEvent, bool attackEvent, Guid guid) { } void OnAbandonedBaseEnded(Vector3 center, float radius, bool AllowPVP, List<BasePlayer> participants, List<ulong> participantIds, List<BaseEntity> entities, List<BuildingPrivlidge> privs, bool canDropBackpack, bool automatedEvent, bool attackEvent, Guid guid) { } void OnAbandonedBaseTurretsInitialized(List<AutoTurret> turrets,Vector3 center, float radius, bool AllowPVP, ulong raiderId, bool CanDropBackpack, List<BaseEntity> entities, List<BuildingPrivlidge> privs, bool canDropBackpack, bool automatedEvent, bool attackEvent, Guid guid) { } void OnRaidableDespawnUpdate(Vector3 center, float radius, bool AllowPVP, ulong raiderId, DateTime DespawnDateTime, List<BasePlayer> intruders, List<ulong> intruderIds, List<BaseEntity> entities, List<BuildingPrivlidge> privs, bool canDropBackpack, bool automatedEvent, bool attackEvent, Guid guid) { } void OnPlayerEnteredAbandonedBase(BasePlayer player, Vector3 center, float radius, bool AllowPVP, List<BasePlayer> intruders, List<ulong> intruderIds, List<BaseEntity> entities, List<BuildingPrivlidge> privs, bool canDropBackpack, bool automatedEvent, bool attackEvent, Guid guid) { } void OnPlayerExitAbandonedBase(BasePlayer player, Vector3 center, float radius, bool AllowPVP, List<BasePlayer> intruders, List<ulong> intruderIds, List<BaseEntity> entities, List<BuildingPrivlidge> privs, bool canDropBackpack, bool automatedEvent, bool attackEvent, Guid guid) { } void OnAbandonedBaseCompleted(Vector3 center, float radius, bool AllowPVP, List<BasePlayer> intruders, List<ulong> intruderIds, List<BaseEntity> entities, List<BuildingPrivlidge> privs, bool canDropBackpack, bool automatedEvent, bool attackEvent, Guid guid) { } void OnAbandonedBaseClaimed(BasePlayer player, Vector3 center, float radius, bool AllowPVP, List<BasePlayer> participants, List<ulong> participantIds, List<BaseEntity> entities, List<BuildingPrivlidge> privs, bool canDropBackpack, bool automatedEvent, bool attackEvent, Guid guid) { } void OnAbandonedBaseClaimFailed(BasePlayer player, Vector3 center, float radius, bool AllowPVP, List<BasePlayer> participants, List<ulong> participantIds, List<BaseEntity> entities, List<BuildingPrivlidge> privs, bool canDropBackpack, bool automatedEvent, bool attackEvent, Guid guid) { } object OnBlockRaidableBasesTeleport(BasePlayer player, Vector3 to) => null; // return true to allow the blocked teleport, return a string to block with your message instead void OnAbandonedBasePrivilegeDestroyed(Vector3 center, float radius, bool AllowPVP, List<BasePlayer> intruders, List<ulong> intruderIds, List<BaseEntity> entities, List<BuildingPrivlidge> privs, bool canDropBackpack, bool automatedEvent, bool attackEvent, BuildingPrivlidge priv, bool areCupboardsTaken, Guid guid) { } void OnPlayerPvpDelayStart(BasePlayer player, ulong userid, Vector3 eventPos, float radius, List<BasePlayer> intruders, List<ulong> intruderIds, List<BaseEntity> entities, List<BuildingPrivlidge> privs, bool canDropBackpack, bool automatedEvent, bool attackEvent, Guid guid) { } void OnPlayerPvpDelayExpiredII(BasePlayer player, ulong userid, Vector3 eventPos, float radius, List<BasePlayer> intruders, List<ulong> intruderIds, List<BaseEntity> entities, List<BuildingPrivlidge> privs, bool canDropBackpack, bool automatedEvent, bool attackEvent, Guid guid) { } void OnPlayerPvpDelayReset(BasePlayer player, ulong userid, Vector3 eventPos, float radius, List<BasePlayer> intruders, List<ulong> intruderIds, List<BaseEntity> entities, List<BuildingPrivlidge> privs, bool canDropBackpack, bool automatedEvent, bool attackEvent, Guid guid) { } void OnAbandonedBaseDespawned(Vector3 eventPos, float radius, bool allowPVP, List<BasePlayer> intruders, List<ulong> intruderIds, List<BaseEntity> entities, Guid guid) { } object OnProcessPlayerEntity(BaseEntity entity, HitInfo info) => null; // cancel to prevent the plugin from handling this entity, though it can still be an event entity already in some cases void OnAbandonedBaseDespawn(List<BaseEntity> entities) { } // only called when a base is not eligible to convert void OnAbandonedBaseDespawn(Vector3 center, float radius, bool AllowPVP, List<BasePlayer> intruders, List<ulong> intruderIds, List<BaseEntity> entities, List<BuildingPrivlidge> privs, bool canDropBackpack, bool automatedEvent, bool attackEvent, Guid guid) { } void OnAbandonedBaseStart(Vector3 center, float radius, bool allowPVP, List<BasePlayer> intruders, List<ulong> intruders, List<ulong> intruderIds, List<BaseEntity> entities, bool canDropBackpack, bool automatedEvent, bool attackEvent, Guid guid) Added OnEntityEnteredAbandonedBase(BaseEntity entity, Vector3 center, float radius, bool allowPVP, List<BasePlayer> intruders, List<ulong> intruderIds, List<BaseEntity> entities, List<BuildingPrivlidge> privs, bool canDropBackpack, bool automatedEvent, Guid guid) Convert Bases and/or Claim Bases Credits: misticos for giving permission to use some of his code$30.0022 points -

Version 3.2.4
12,999 downloads
Gives reward payments to players for performing various in-game actions. Uses Economics, Server Rewards, or Scrap. **Although V3 is a rewrite, the original plugin was written and maintained by MalS** Thank you to MalS for the original submission and continued support. Chat Commands. /rr – Opens RustRewards UI. UI allows players to customise their notification preferences. It also allows viewing of reward and multiplier values, if that option is enabled in config. Holders of rustrewads.admin permission can use the same UI to adjust reward and multiplier values. See images. Permissions. rustrewards.adminui Enables adjustment buttons for values in UI. Players with the following permissions can earn rewards for that category. rustrewards.harvest rustrewards.kill rustrewards.open rustrewards.pickup rustrewards.activity rustrewards.welcome All reward values are 0.0 by default. All multipliers have basic default values. Reward categories. Kill Harvest Open Pickup Activity Welcome Harvesting and looting containers must be carried out to completion in order to receive the reward. Multipliers. Group Permission Weapon used Happy hour (optional) Day of the week RaidableBases (action within RB area) Zone (action within specific zone) Distance (for kill rewards) Group and permission multipliers apply to players in X group or players holding X permission. Adding group or permission names to their lists in config will automatically create that group or permission. Permissions from other plugins can also be added here, in full, without issue – eg "kits.vip” "Group_Multipliers": { "Regulars": 1.0 }, "Permission_Multipliers": { "loyalty": 10.0 }, This, for example, will register the permission 'rustrewards.loyalty', and create the group "Regulars”. General Settings UseServerDayNightHours = true UseRealTime = false UTCHourOffset = -1 DayStartHour = 8 NightStartHour = 20 Reset_Activity_Reward_At_Wipe = false Disable_All_Notifications = false, TakeMoneyfromVictim: false, LogToFile = false, LogToConsole = false HappyHour_BeginHour: 17, HappyHour_EndHour: 21, Player_Kill_Reward_CoolDown_Seconds: 0, View_Reward_Values": true - Enables UI access to reward and multiplier values for players. Default_Notification_Type - 0/1/2/3 : The numbers correspond to Chat/Banner/Icon/Off Chaticon: 0 Only_Reward_Growables_From_Planters: false, Use_Harvesting_Cooldown = true, Add_Multipliers = false, Use_Highest_Multiplier_Only = false, Delete_Player_Prefs_After_Days = 100, RewardCurrency UseScrap: true, UseEconomics: false, UseServerRewards: false Chosen currency for rewards. Only one can be used at any one time. Allies UseFriendsPlugin: true, UseClansPlugin: true, UseRustTeams: true Prevent rewards for killing friends/clan mates/team mates. Plugins UseGUIAnnouncementsPlugin: false, - Enables 'banner' notification option UseZoneManagerPlugin: false, - Allows for zone specific multipliers UseNoEscape: false - Prevents rewards when NoEscape-blocked Data file. 'Friendly names' for items and entities can be customised in the data file. Each item or entity has a pair listed – Edit the right hand value. Example : "vehicle_parts": "vehicle parts, "loot_barrel_2": "barrel”, "loot_barrel_1": "barrel”, "crate_tools": "tool crate", Notes. Npcs. An extensive list of npcs types has been added for 'Kill' and 'Harvest' (flesh) rewards, including entries for BotSpawn and Zombiehorde. Item Actions 'Open' rewards are now given for items with "Unwrap” or "Gut” actions, including all recently added fish. AI vehicle kills. Rewards are given to the player who caused the most damage to APC / Patrol Heli / CH47. UI Amount adjust increments. As different servers will have different base units of currency, you can change how much the + and – buttons in UI adjust the amounts. Reward_Small_Increment: 1.0, Reward_Large_Increment: 10.0, Multiplier_Increment: 0.1, API OnRustReward(BasePlayer player, string category)Free22 points -
Version 2.1.7
6,357 downloads
This plugin adds to the game a variety of NPC bosses with different abilities and a very adaptable configuration Description Using this plugin you can add NPC bosses to any point on the map. You can set up any ability with the plugin configuration. If it is necessary, you can add multiple abilities to one boss. Abilities are divided into two categories, ones take place in a certain radius from the NPC, and others are triggered by damaging from an NPC. The map also displays the location of the actual bosses (their name and amount of health). You can give any clothes and weapons for NPCs using the configuration. Custom Map Maps that have a configuration for the appearance of boss on their custom monuments You can also download all these files for all maps here Dark Ages Blue Tears All files for custom maps are stored in the folder oxide/data/BossMonster/CustomMap. You don't have to delete files from there, the plugin will understand by itself which map is currently installed on the server and will download only the necessary file if there is one in this folder. The plugin will tell you about this process in the console during the plugin loading. It will write in the console what file works on the current map, and what ones don’t work If you want to create a custom place for the boss to appear on your custom map or on a map that is not in this list, you have to create the ID of this custom map. After that you need to place an item such as a RAND Switch on your map. It must be placed randomly, where it will not be visible to other players. You will get the identifier, if you add up the three coordinates of the position of this object from RustEdit (x, y and z) and write the resulting value in the parameter of your file (an example file can be taken from ready-made files) - ID As an example, let's take the coordinates (26.896, -456.158, 527.258), then our identifier is 26.896 - 456.158 + 527.258 = 97.996 Then you need to indicate a list of bosses that will appear on your map. You need to copy the configuration data block for each boss. In the database parameters you will specify the name of the boss and a list of positions where it can appear Dependencies (optional, not required) GUI Announcements Notify Discord Messages AlphaLoot CustomLoot Economics Server Rewards IQEconomic PveMode Chat commands (only for administrators) /WorldPos - displays the actual player’s position on the map /SavePos <name> - saves a new position to the configuration file for the boss with the name - name, relative to the nearest monument /SpawnBoss <name> - spawn of the boss with the name - name in the coordinates of the administrator Console commands (RCON only) SpawnBoss <name> – spawn of the boss with the name – name KillBoss <name> – kill all bosses with the name – name Plugin Config en - example of plugin configuration in English ru - example of plugin configuration in Russian Boss Config en - example of plugin configuration in English ru - example of plugin configuration in Russian Custom Map Config en - example of plugin configuration in English ru - example of plugin configuration in Russian Hooks void OnBossSpawn(ScientistNPC boss) - сalled when a boss appears on the map void OnBossKilled(ScientistNPC boss, BasePlayer attacker) - сalled when a player kills a boss API ScientistNPC SpawnBoss(string name, Vector3 pos) - spawns a boss named name in position pos void DestroyBoss(ScientistNPC boss) - destroys the boss My Discord: KpucTaJl#8923 Join the Mad Mappers Discord here! Check out more of my work here!$35.0022 points -
Version 1.4.6
1,422 downloads
FurnaceLevels is giving players another form of progression by letting them upgrade their furnaces. Amount of levels you can create is nearly unlimited. Available modifiers are speed, fuel consumption and resource output. FEATURES FurnaceLevels is giving players another form of progression by letting them upgrade their furnaces. Amount of levels you can create is nearly unlimited. Available modifiers are speed, fuel consumption and resource output. Players can pay for upgrades with ingame items, Economics or ServerRewards. Upgrades are tied to specific furnace placed, upon picking it up levels are lost. FURNACE LEVELS CHANGES VANILLA BEHAVIOR OF OVENS AND IS NOT COMPATIBLE WITH OTHER PLUGINS WHICH MODIFIES OVEN BEHAVIOR. COMPARISON WITH VANILLA RATES WITHOUT UPGRADES HERE https://youtu.be/DkBS7iAzgyM FURNACE LEVELS CAN BE USED AS REPLACEMENT FOR QUICKSMELT FURNACE LEVELS IS NOT COMPATIBLE WITH FURNACE SPPLITTERS (and most likely it wont change since furnace splitters are not that useful after furnace update) COMMANDS /furnace player command to get information on upgrades PERMISSIONS furnacelevels.use Required permission to access upgrade menu. CONFIG CREDITS @SinKohh co-developing plugin$7.9922 points -
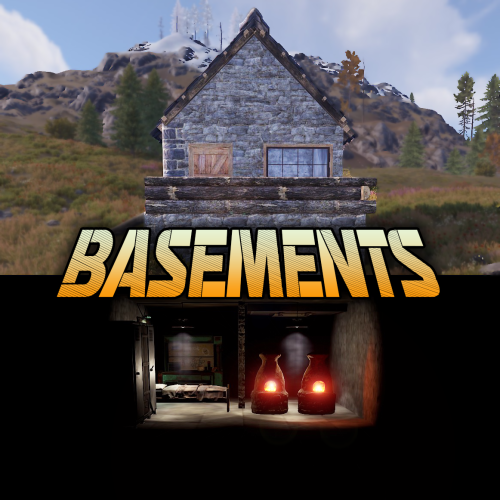
Version 1.0.6
1,235 downloads
Basements lets players build underground rooms beneath their bases. Place a hatch on your foundation and dig straight down into a hidden basement with walls, ceilings, and full building privileges. Great for stashing loot, setting up secret bunkers, or just adding extra space. Readme Link - Click Here for Instruction and Documentation Highly recommend reading the FAQ section! BUILD Build basements easily from your tool cupboard. Just place an entrance to get started. EXPAND Expand your basement by drilling underground. But don't forget to bring a headlamp - its dark down there! TRAVERSE Place multiple entryways, building out your labyrinth of tunnels beneath your base. DECORATE All deployables, electricity, and storage items can be placed in your basement. Take advantage of your new space! RAID Nothing is safe in Rust, including your basement. If all the entrances are destroyed, then the basement is too. Any loot below will float to the surface. Protect the entrance at all costs! API METHODS (For Plugin Developers) // Returns true if the given entityId is part of a basement. bool IsBasementEntity(ulong entityId) // Returns the building ids of the basements connected to a given surface building id. uint[] GetBasementBuildingIds(uint surfaceBuildingId) // Returns the building ids of the surface buildings connected to a given basement building id. uint[] GetSurfaceBuildingIds(uint basementBuildingId) Extension Plugins These are free plugins that add additional functionality to Basements. BasementsManager Provides a UI for admins to view and manage the basements on the server. Useful for debugging & fixing issues. Use with the /bm command, requires the basements.admin permission to use. BasementsManager.cs$29.9921 points -
Version 2.4.16
16,634 downloads
Enjoy a highly customizable Shop that can be configured in game! Use NPCs as shopkeepers, and set up a shop with ease using the game interface to add, edit, or remove items on the fly! Features of Shop Beautiful user interface with multiple templates (Fullscreen, In-Menu V1/V2/V4) Shopping Basket - add multiple items to cart and purchase them all at once Search functionality - search for items by name across all categories Pagination - efficient item browsing with page-by-page navigation Discount system (by permissions) with per-item custom discounts Automatic shop filling (+ the plugin has support for the ItemCostCalculator plugin) Selling items (players can sell items to the store and receive money for it) Sell containers configuration - choose which containers (main, belt) players can sell from Blocked skins - prevent selling of specific item skins High performance with optimized item loading Adding/editing/removing items IN GAME with visual editor Supports NPC shops (HumanNPC integration) Supports Custom Vending Machines Supports NoEscape plugin integration Supports Duel/Duelist - blocks shop access during duels Convert from ServerRewards Favorite items system - players can mark items as favorites Buy Again feature - quick repurchase of previously bought items By default, the plugin has English, Russian and Chinese translations LangAPI integration for custom translations Transfer money between players directly in the plugin (including offline players option) Shop allows you to use multiple economy plugins at once (players can choose what they want to pay with) For each item, you can choose which payment methods are available and how much they will cost, based on the selected method Cooldown system - per-item buy/sell cooldowns with per-permission overrides Wipe cooldown - block items for purchase/sale after server wipe Respawn cooldown - prevent shop access immediately after respawn Buy/Sell limits - lifetime and daily limits per permission Max buy/sell amount - limit items per transaction Force buy - fast purchase without confirmation dialogs Plant genes configuration for plant items Weapon configuration - spawn weapons with ammo and attachments Content system - configure container contents (liquid, weapon mods, etc.) Customizable UI - full color customization and formatting options Offline Image Mode - use local images instead of downloading from internet Image loading on login - preload images when players connect Console and file logging - comprehensive logging system ServerPanel integration - add Shop to ServerPanel menu Notify/UINotify integration for notifications Auto-wipe settings - automatically reset cooldowns, limits, and player data on wipe Discord Logging - Track all purchases, sales, and transfers directly in your Discord server via webhooks with customizable embeds API methods for other plugins to interact with Shop Commands shop - open shop interface shop.install – starts the shop installation process shop.refill <recovery_rate> - refill shop again recoveryRate: A value between 0 and 1 that determines the multiplier for the cost of selling items. For example, shop.refill 0.5 means that items will have a sale cost of 50% of their purchase cost. shop.convert.sr [clear] - convert items from ServerRewards to Shop. The option clear means clearing Shop items before converting shop.setvm [categories: cat1 cat2 ...] - add custom VM in config shop.setnpc [categories: cat1 cat2 ...] - add NPC in config shop.remove all - a console command to remove all items and categories from the plugin shop.remove item [category name/all] - a console command to remove an item (or all items) shop.remove category [category name/all] - a console command to remove a category (or all categories) shop.fill.icc [all/buy/sell] - a console command for updating prices of items in the store using ItemCostCalculator. all - updates both Price and SellPrice, buy - updates Price, sell - updates SellPrice shop.convert.from.1.2.26 – command to convert Shop plugin version 1.2.26 to version 1.3.0+ shop.reset – resets store data, including templates, configurations, and items. shop.reset template – resets the store interface template data. shop.reset config – resets store configuration data. shop.reset items – resets store items data. shop.reset full – completely resets all store data (templates, configurations and items). shop.manage – used to manage the Shop plugin. shop.manage economy list – displays a list of all available economic systems in the plugin. shop.manage economy set <economy_ID> <name> – sets the selected economic system by plugin ID and name. The command updates the corresponding economic system on the server and saves the changes in the configuration. FOR EXAMPLE: shop.manage economy set 0 Economics – sets the main economy plugin to "Economics". shop.manage economy set 1 ServerRewards – sets the additional economy system with ID 1 to "ServerRewards". shop.wipe – manually trigger wipe (resets cooldowns, limits, and player data) shop.change – change item category (used in editor) shop.item – console command for item actions Permissions shop.setvm - for command "shop.setvm" shop.setnpc - for command "shop.setnpc" shop.free - for free item purchases shop.admin - admin permission shop.bypass.dlc - allows bypassing Facepunch ToS item restrictions (WARNING: your server may be banned for this) API Methods The Shop plugin provides API methods for other plugins to interact with it: API_OpenPlugin(BasePlayer player) – opens the shop UI for a player. Returns empty string if failed, or UI data if successful. API_GetShopPlayerSelectedEconomy(ulong playerID) – returns the economy ID (0 = main, 1+ = additional) that the player has selected for shopping. Note: Other plugins can call these methods using Shop.Call("API_MethodName", ...) syntax. Sort Types None Name Amount PriceDecrease PriceIncrease Category Types None – normal category for items Favorite – category for favorite items Hidden – hidden category, available only in NPC stores or Vending Machines Video P.S. Video of the old version, video for the V2+ version is now in development Showcase Full screen Templates Template OLD STYLE Template NEW RUST In-Menu Templates Template V1 (V1.1) Template V1 (V1.1) with BASKET Template V2 Template V2 with BASKET Template V4 Template V4 with BASKET Installer Editor Discord Logging Track all shop activity via Discord webhooks: purchases, sales, and money transfers. TEST SERVER Join our test server to view and experience all our unique features yourself! Copy the IP Address below to start playing! connect 194.147.90.239:28015 FAQ Q: I get the message "The plugin does not work correctly, contact the administrator!”. What should I do? A: This means that your plugin is not installed. To install the plugin, use the command "/shop.install”. You need to have "shop.admin” permission to access this command. Q: Where can I see an example of a config? A: Config Q: How to use BankSystem to store the economy A: "Economy": { "Type (Plugin/Item)": "Plugin", "Plugin name": "BankSystem", "Balance add hook": "Deposit", "Balance remove hook": "Withdraw", "Balance show hook": "Balance", "ShortName": "", "Display Name (empty - default)": "", "Skin": 0, "Lang Key (for Title)": "LangTitle", "Lang Key (for Balance)": "BalanceTitle" }, Q: How to use ServerRewards to store the economy A: "Economy": { "Type (Plugin/Item)": "Plugin", "Plugin name": "ServerRewards", "Balance add hook": "AddPoints", "Balance remove hook": "TakePoints", "Balance show hook": "CheckPoints", "ShortName": "", "Display Name (empty - default)": "", "Skin": 0, "Lang Key (for Title)": "LangTitle", "Lang Key (for Balance)": "BalanceTitle" }, Q: How to use Economics to store the economy A: "Economy": { "Type (Plugin/Item)": "Plugin", "Plugin name": "Economics", "Balance add hook": "Deposit", "Balance remove hook": "Withdraw", "Balance show hook": "Balance", "ShortName": "", "Display Name (empty - default)": "", "Skin": 0, "Lang Key (for Title)": "LangTitle", "Lang Key (for Balance)": "BalanceTitle" }, Q: How to use IQEconomic to store the economy A: "Economy": { "Type (Plugin/Item)": "Plugin", "Plugin name": "IQEconomic", "Balance add hook": "API_SET_BALANCE", "Balance remove hook": "API_GET_BALANCE", "Balance show hook": "API_REMOVE_BALANCE", "ShortName": "", "Display Name (empty - default)": "", "Skin": 0, "Lang Key (for Title)": "LangTitle", "Lang Key (for Balance)": "BalanceTitle" }, Q: How to use scrap to pay for items A: "Economy": { "Type (Plugin/Item)": "Item", "Plugin name": "", "Balance add hook": "", "Balance remove hook": "", "Balance show hook": "", "ShortName": "scrap", "Display Name (empty - default)": "", "Skin": 0, "Lang Key (for Title)": "LangTitle", "Lang Key (for Balance)": "BalanceTitle" }, Q: How to add KIT as shop item A: https://pastebin.com/4szBQCgz Q: How to add Command as shop item A: https://pastebin.com/bcCkzBEL Q: How do I make a weapon spawn with ammo in it? A: You need to configure the "Weapon" section in the item config: "Weapon": { "Enabled": true, "Ammo Type": "ammo.rifle.explosive", "Ammo Amount": 128 } Q: How do I make items spawn some content (liquid, weapon modifications)? A: You need to configure the "Content" section in the item config: "Content": { "Enabled": true, "Contents": [ { "ShortName": "weapon.mod.lasersight", "Condition": 100.0, "Amount": 1, "Position": -1 } ] }, Q: How to turn off the sell feature? A: You need to turn off "Enable item selling” in the config, or do it in the item setting in the game. "Enable item selling?": false, Q: How to use the ItemCostCalculator with Shop? A: You need to use command "shop.refill" (command to refill the Shop) Q: What should be the size of images for item icons? A: Typically, the image dimensions for item icons are 512x512 pixels, but any square image can suffice. Q: I get the error "UI is unavailable for player. Reason: Menu UI is not initialized". How to fix it? A: This error occurs when the interface template is not installed or configured. Follow these steps: 1. Reset the template using the command: shop.reset template (use only template to avoid data loss). 2. Install the interface via shop.install in the game (to visually select a template) or through the console. Note: Ensure you have the shop.admin permission to execute these commands. Q: How do I add Shop to the ServerPanel menu? A: Follow these simple steps: 1. Open ServerPanel menu in-game and click "+ADD CATEGORY" button 2. Set these exact parameters: Type: Plugin Plugin Name: Shop Plugin Hook: API_OpenPlugin 3. Click "SAVE" button to create the category 4. Reset Shop template and install it: Type in console: shop.reset template (IMPORTANT: use only "template"!) Then type: shop.install Note: If Shop doesn't appear in ServerPanel menu, make sure both plugins are loaded and you typed the parameters exactly as shown above. Q: I see black images with Rust logo or get error 429 when loading images. What should I do? A: These issues occur when there are problems downloading images from the internet. The Shop plugin sends images to ImageLibrary but is not responsible for the downloading process itself. Error 429 typically occurs due to rate limits imposed by image hosting services like Imgur (see HTTP 429 documentation for more details). To fix this, enable Offline Image Mode which will use local images instead: Enable the mode in config: Open "oxide/config/Shop.json" (or "carbon/config/Shop.json" for Carbon) Set "Enable Offline Image Mode": true Set up the images: Create folder "TheMevent" in "oxide/data" (or "carbon/data" for Carbon) Download PluginsStorage (click "CODE" → "Download ZIP") Extract the ZIP and copy all contents to the "TheMevent" folder Reload the plugin: Type o.reload Shop (Oxide) or c.reload Shop (Carbon) Note: If you want to add your own custom images, place them in the "TheMevent" folder and reference them with the "TheMevent/" prefix. For example: "TheMevent/Icon1.png", "TheMevent/MyCustomIcon.jpg", etc. Q: What placeholders are available for commands and what do they do? A: You can use these placeholders in shop commands and they will be automatically replaced when a player purchases a command item: %steamid% - Replaced with the player's Steam ID (e.g., "76561198000000000") %username% - Replaced with the player's display name (e.g., "PlayerName") %player.x% - Replaced with the player's X coordinate position %player.y% - Replaced with the player's Y coordinate position %player.z% - Replaced with the player's Z coordinate position Example usage in shop commands: "Command (%steamid%)": "say Welcome %username%!|teleport %steamid% %player.x% %player.y% %player.z%" Note: Multiple commands can be separated by the "|" character, and they will be executed in sequence when the item is purchased. Q: How to set different prices for different currencies (RP and balance)? A: You can configure separate currency prices for each item. Edit the file oxide/data/Shop/Shops/Default.json and find the item you want to modify. In the "Currencies" section, set different prices for each economy: "Currencies": { "Enabled": true, "Currencies": { "0": {"Price": 1000}, "1": {"Price": 500} } } This means players pay 1000 from their main balance (Economics) or 500 RP from their ServerRewards balance. Economy ID 0 = main economy, ID 1 = ServerRewards. Q: How to create a shop using HumanNPC plugin and set specific categories? A: To create a shop with HumanNPC, follow these steps: Create an NPC using HumanNPC plugin Get the NPC ID (you can find it in the HumanNPC config or use the command humannpc.list) Use the Shop command to add the NPC: shop.setnpc [categories: cat1 cat2 ...] Example: shop.setnpc categories: Weapon Ammunition Tools - adds the NPC with Weapon, Ammunition, and Tools categories shop.setnpc categories: * - adds the NPC with all available categories Note: You need the shop.setnpc permission to use this command. Make sure both HumanNPC and Shop plugins are loaded on your server. Q: How to add Custom Vending Machines to Shop plugin? A: To add Custom Vending Machines to Shop, follow these steps: Place a Custom Vending Machine in your world Look at the vending machine and use the command: shop.setvm [categories: cat1 cat2 ...] Example: shop.setvm categories: Weapon Ammunition - adds the vending machine with Weapon and Ammunition categories shop.setvm categories: * - adds the vending machine with all available categories Note: You need the shop.setvm permission to use this command. The vending machine will be automatically added to the Shop configuration. Q: How does the Shopping Basket feature work? A: The Shopping Basket allows players to add multiple items to a cart before purchasing. Players can add items to the basket, review their selection, and purchase everything at once. The basket shows the total cost and allows players to remove items before checkout. This feature must be enabled in the template settings. Q: How does the Search functionality work? A: The Search feature allows players to search for items by name across all categories. Simply type in the search box and the shop will filter items matching your query. Search works across all enabled categories and respects permission settings. The search feature can be enabled/disabled in the template configuration. Q: What are Wipe Cooldown and Respawn Cooldown? A: These are time-based restrictions: Wipe Cooldown: Blocks items from being bought/sold for a specified time after a server wipe. This is useful for preventing powerful items from being purchased immediately after wipe. Configure in config: "Wipe Cooldown": true and "Wipe Cooldown Timer": 3600 (seconds). Respawn Cooldown: Prevents players from opening the shop immediately after respawning. Helps prevent abuse. Configure in config: "Respawn Cooldown": true and "Respawn Cooldown Timer": 60 (seconds). Q: How do Daily and Lifetime Limits work? A: Limits control how many times players can buy/sell items: Lifetime Limits: Total number of times a player can buy/sell an item across their entire account. Set to 0 for unlimited. Daily Limits: Maximum number of times per day a player can buy/sell an item. Resets daily. Set to 0 for unlimited. Limits are per-permission, so you can set different limits for VIP players, regular players, etc. The plugin uses the highest limit among all permissions the player has. Q: What is the "Buy Again" feature? A: Buy Again allows players to quickly repurchase items they have bought before. This feature shows a history button in the shop UI (if enabled) and requires a permission. To enable, set "Buy Again Settings": {"Enabled": true, "Permission": "shop.buyagain"} in the config. Q: How do I configure blocked skins for selling? A: You can prevent players from selling specific item skins. In the config, add entries to "Blocked skins for sell": "Blocked skins for sell": { "rifle.ak": [52, 25], "pistol.m92": [100, 200] } Q: How do I configure which containers players can sell from? A: In the config, set "Settings available containers for selling item": "Settings available containers for selling item": { "Enabled": true, "Containers": ["main", "belt"] } Available container names: "main" (inventory), "belt" (hotbar), "wear" (clothing), etc. Q: What are Auto-Wipe Settings? A: Auto-Wipe Settings automatically reset certain data when you run the shop.wipe command. Configure in config: "Auto-Wipe Settings": { "Cooldown": true, "Players": true, "Limits": true } Cooldown: Resets all item cooldowns Players: Resets all player data (favorites, economy selection, etc.) Limits: Resets all buy/sell limits Q: How do I customize price formatting? A: In the config, set "Formatting Settings" to control how prices are displayed: "Formatting Settings": { "Buy Price Format": "G", "Sell Price Format": "G", "Shopping Bag Cost Format": "G", "Balance Format": "G" } Format options: "G" (general), "N" (number with separators), "C" (currency), "F" (fixed-point), etc. See .NET number formatting for all options. Q: How do I enable transfers to offline players? A: In the config, set "Allow money transfers to offline players?": true. By default, this is disabled for security reasons. Q: How do I configure Duel/Duelist integration? A: To block shop access during duels, set "Blocking the opening in duels?": true in the config. Make sure you have the Duel or Duelist plugin loaded. Q: What do all shop item settings mean and how should I configure them? A: Below is a short explanation of the most important item fields and how they affect the plugin. Type – what this entry does: Item (gives an in-game item), Command (runs server commands), Plugin (calls another plugin hook), Kit (gives a kit). ID – unique numeric ID of the item inside Shop. Used internally (for logs, favorites, editor); normally you don’t change it manually. Image – custom UI icon key. If empty, Shop will try to use the item icon found by ShortName. Permission – Oxide/Carbon permission required to see and use this item. Leave empty to make the item available to everyone, or set e.g. shop.vip for VIP‑only items. Title – custom title shown in the UI. If empty, the plugin will try to use DisplayName, then the in‑game display name of the item, or fall back to an empty string. Description – additional text shown in the item window. Optional, purely visual. Command (%steamid%) – used when Type = Command. The plugin will execute this command on the server. You can use placeholders like %steamid%, %username%, %player.x%, %player.y%, %player.z%. Each purchase can run multiple commands (split internally by |). Kit – kit name for Type = Kit. The plugin will give a kit with this name when the player buys the item. Plugin – used for Type = Plugin. Contains plugin name, hook name and amount. When the item is purchased, the specified hook will be called in the target plugin. DisplayName (empty – default) – overrides the in‑game item name shown to the player (for Type = Item). If empty, the plugin uses the original item display name (optionally via Lang API). ShortName – shortname of the item (e.g. rifle.ak). This is required for Type = Item; it is used to find ItemDefinition, icon, stack size, etc. Skin – workshop skin ID for the item. Only used when Type = Item. Is Blueprint – if enabled, Shop will give the item as a blueprint instead of the regular item. Amount – how many items are given/sold per one purchase. For blueprints this is how many separate blueprint items are created. Enable item buying? (CanBuy) – if disabled, the item cannot be bought (only sold, if selling is enabled). Price – default purchase price. Can be overridden per‑economy in Currencies – if a currency is configured for buying, its price will be used instead of this value. Enable item selling? (CanSell) – if disabled, players cannot sell this item back to the shop. Sell Price – default sell price. Can also be overridden in Currencies for selling. Buy Cooldown / Sell Cooldown – base cooldown in seconds between purchases/sales of this item. Can be overridden by per‑permission cooldowns below. Buy Cooldowns / Sell Cooldowns – per‑permission cooldowns. Keys are permission names (e.g. shop.vip), values are cooldown seconds. The plugin uses the lowest cooldown among permissions that the player has. Use custom discount? – if enabled, the item will use its own Discount map instead of the global discount configuration. Discount (%) – per‑permission discount percentages for this item (only if custom discount is enabled). The highest discount from permissions that the player has will be applied. Sell Limits / Buy Limits – global lifetime limits per permission. A value of 0 means “no limit”. The plugin selects the highest limit among permissions the player has. Daily Buy Limits / Daily Sell Limits – per‑day limits (reset by the plugin’s daily logic). 0 means “no daily limit”. Max Buy Amount / Max Sell Amount – maximum number of items that can be bought/sold in a single transaction (0 disables this limit). Force Buy – if enabled, the item will use fast purchase flow (without extra confirmation windows, depending on UI settings). Prohibit splitting item into stacks? – if enabled, the plugin will try to give the item in a single stack instead of splitting it into multiple stacks, when possible. Purchase/Sale block duration after wipe – time (in seconds) after a wipe during which this item cannot be bought/sold. Useful for limiting powerful items early in the wipe. Localization – per‑language messages for the item title. If enabled and a translation exists for the player’s language, it will override the normal title. Content – configuration of contents for containers (e.g. boxes, weapons with attachments, etc.). You can add inner items (shortname, amount, condition, position). Weapon – additional settings for weapons (ammo type, ammo amount, etc.). Applied when the item is created. Genes – plant gene configuration. If enabled, the plugin will set specified genes on the created item. Currencies – per‑economy price configuration. You can set different prices for each enabled economy plugin (by economy ID) for both buying and selling. If a currency is configured and enabled for the player’s selected economy, its price takes priority over the default Price/Sell Price. Q: What do shop category settings mean and how should I configure them? A: Categories group your shop items and control how they are shown, sorted and filtered for players. Enabled – turns this category on or off. If disabled, the category and all its items will not appear in the shop UI at all. Category Type – controls special behavior of the category: None – a normal category that shows the items you added to Items. Favorite – a virtual category that shows each player’s favorite items (based on their own favorites list). Items here are taken from other categories the player marked as favorite. Hidden – a hidden category. It is stored in data and can be used for management, but is not shown in the normal category list in UI. Title – the name of the category displayed in the UI. If Localization is enabled and contains a translation for the player’s language, that localized text will be shown instead of this value. Permission – permission required to see and use this category. If you leave it empty, all players can see the category (subject to item‑level rules). If you set e.g. shop.category.vip, only players with that permission will see this category in the shop. Sort Type – how items inside the category are sorted: None – items are shown in the order they are stored/edited. Name – items are sorted alphabetically by their PublicTitle (what the player sees). Amount – items are sorted by Amount (stack size) in ascending order. PriceIncrease – items are sorted by price from cheaper to more expensive. PriceDecrease – items are sorted by price from more expensive to cheaper. Sorting is applied every time the category items are requested. Items – the list of ShopItem entries that belong to this category. For normal categories (Type = None/Hidden) this is what will be displayed in the item grid. For Favorite categories this list is not used for display – the plugin uses the player’s favorites instead. Localization – optional localized title for the category. When enabled, the plugin will try to show a translated title based on the player’s language. If no translation is found, it falls back to the Title field. How visibility and filtering work – when the shop builds a category: For normal categories, only items that are available for the player (permission, currencies, buy/sell rules, etc.) are included. Skip/take pagination is applied on top of that filtered list to show items page by page. For favorite categories, the plugin takes the player’s favorite items, applies sorting, and displays them in this special category. Reordering categories and items – categories and items can be moved up/down (or left/right) in the in‑game editor. This changes the order in which categories are shown in the UI and the default order of items when Sort Type = None. Q: How do I enable and use ADMIN MODE? A: ADMIN MODE is a visual in-game editor that allows you to manage your shop without editing files manually. Step 1: Enable ADMIN MODE Ensure you have the shop.admin permission Open shop with /shop command Click the "ADMIN MODE" button in the header (shows "■" when active) Step 2: Create/Edit Categories To create a new category: With ADMIN MODE enabled, click the "+" button in categories list Fill in category details (Title, Enabled, Type, Permission, Sort Type) Click "SAVE" To edit an existing category: Click the "Edit" button (pencil icon) next to the category Modify settings Click "SAVE" or "CANCEL" Step 3: Create/Edit Items To create a new item: Open the target category Click "+ADD ITEM" button Select item from the selection panel Configure all item properties (price, amount, permissions, etc.) Click "SAVE" To edit an existing item: Click the "Edit" button on the item Modify properties Click "SAVE" or "CANCEL" Additional ADMIN MODE Features: Use ↑↓ arrows to reorder categories Use ←→ arrows to reorder items within categories Use "DELETE" button in editor to remove categories/items All changes save automatically - no manual file editing needed Q: Where are shop files stored and what do they contain? A: Shop plugin data is organized in the following structure: Configuration (oxide/config/Shop.json or carbon/config/Shop.json) Plugin settings (permissions, commands, economy configuration) Notification settings Discord logging configuration Global plugin options Shop Data (oxide/data/Shop/Shops/Default.json or carbon/data/Shop/Shops/Default.json) This is the main shop inventory file All categories and their settings All items with prices, permissions, cooldowns, limits Item configurations (weapons, content, currencies, etc.) Edited through ADMIN MODE or manually UI Template (oxide/data/Shop/UI.json or carbon/data/Shop/UI.json) Interface template configuration Colors, sizes, positions Display settings Reset with: shop.reset template then shop.install Player Data (oxide/data/Shop/Players/ or carbon/data/Shop/Players/) Individual player files (one per player)$29.9521 points -
Version 3.1.3
10,348 downloads
Skinner! The unrivaled no.1 performance skinning plugin. Skin any item in the game with a unique skinbox giving you live skinning, auto skinning and skin sets. Thanks for everyone who has given feed back through the duration of the beta release. Skinner 3.0 is finally here! Visual overhaul! - with dynamic UI menus for permission based player menus Automatic skin filtering and dev modes for new TOS Permission based skin sets Team share skins! Auto unlock owned skins! and More!!! Live Skinning - Skin items in place without moving them Auto import - Automatically import and use all game approved skins Skin Sets - Create a variety of different skin sets for any item Skin Requests - Allows players to request and Admins to accept new skins in game Auto Skins - Automatically apply selected skins to every item that enters your inventory Skinner 2.0 offers unrivaled performance in plugin efficiency. Our standard testing shows runtime results were 60x faster and memory usage was 200x more efficient than the closest peforming plugin. SkinMenu Commands: /Skin or /S - Live skin any item in your inventory by selecting a skin you wish to apply /SkinCraft or /Sc - Create multiple skin sets for use in other functions such as skinauto or skinteam /Skinitem or /Si - Skin a deployable item you are looking at ingame. Args - Spectify 1, 2 or 3 to automatically use a skin set. Automatic Commands: /Skincon or /scon - sets all items in a container you are looking at to your default craft set Args - Optional, spectify 1, 2 or 3 to automatically use a skin set. /Skininv or /sinv - sets all items in your inventory to your default craft set Args - Optional, spectify 1, 2 or 3 to automatically use a skin set. /Skinauto or /Sauto - Automatically apply selected skins to every item that enters your inventory based off your skin sets. Args - Optional, spectify 1, 2 or 3 to automatically use a skin set. /Skinteam or /st - sets all items in your inventory and your teams to your default craft set Args - Optional, spectify 1, 2 or 3 to automatically use a skin set. Toggle - Use /skinteam toggle to opt in or out of the team skin set /SkinBase - Allows you to skin all deployables in your base to your default skincraft skins. Args - Optional, specify item name to filter items being skinned example: /Skinbase sleepingbag to only skin sleeping bags. /SkinAll Command - Skin all the items in all the containers in your base. Args - Optional, specify item by shortname example: /SkinAll rifle.ak to only skin ak47's. Skin Import Commands: /Skinimport or /sip - Import custom workshop skins Args - WorkshopID example: /Skinimport 2397648701 /Colimport or /cip - Import custom workshop collection using /skinimport collectionID Args - Collection ID example: /Colimport 2921147807 /Skinrequest or /Sr - Request a skin to be added to skinner, requested skins will show in the /Skinrequests UI for approval Args - WorkshopID example: /Skinrequest 2397648701 /Skinrequests or /Srs - Opens the the skinner menu with a box of skins awating approval Button Usage - Select an option and remove the skin to enact the process Try - Recieve a copy of an item with that skin Approve - Adds the skin from the menu to the imported skins list Deny - Removes the skin Note: All chat commands are universal meaning they can be used via the console, rcon(for import commands) and can be customized via the configuration. Player Permissions: Skinner.default - enables /skin command Skinner.items - enables /skinitem command Skinner.craft - enables /skincraft command Skinner.skinauto - enables /skinauto command Skinner.skincon - enables /skincon command Skinner.skininv - enables /skininv command Skinner.skinbase - for use of the /skinbase command Skinner.skinteam - Allows the use of the /skinteam command Skinner.skinall - for the use of the /skinall command Skinner.skinrequest - enables /skinrequest Cooldowns Permissions: Cooldown settins can be adjusted via the plugin config. Applying the cooldown permission example skinner.default30 will enforce cooldowns on those with the permission. If no cooldown permission is applied no cooldowns will be enforced. If multiple cooldown perms are assigned to a single player they fastest cooldown will be used. "Command based cooldowns ('permission' : 'command' seconds": { "Default30CD": { "skin": 30.0, "skinitem": 30.0, "skincraft": 30.0, "skincon": 30.0, "skininv": 30.0, "skinteam": 30.0, "skinbase": 60.0, "skinall": 60.0 } Admin Permissions: Skinner.import – enables /Skinimport, /Colimport and /Skinrequests Skinner.bypassauth - bypasses the building auth requirement when using /Skinitem Skinner.permskintry - enables try feature when using /Skinrequests Warning: trying a skin will make a copy of that item. Only give this perm to admins who are allowed to spawn items. Other Permissions: Skinner.skinautotoggled - applied when a player disables skinauto Skinner.skinteamblock - applied when a player disables team skins Skinner offers multiple ways of importing skins including via the config and through commands: Importing via the config: To import skins via the config insert workshopIDs into the imported skins list as per the code snippet below, once finished reload skinner and the shortname and displayname fields will be automatically populated. You can add extra skins at any stage using this method. "Imported Skins List": { "861142659": {}, "2617744110": {} }, Optionally entire workshop skin collections can be added to conifg, each item skin is automatically imported to your imported skins list on plugin load. "Import Skin collections (steam workshop ID)": [496517795,2921147807], Importing via commands: Commands can be used to edit the config options for imported skins and collections via RCON, chat commands and the f1 console. Commands include: /Skinimport WorkshopID /Colimport CollectionID Importing via Skin Requests: Players can requests skins to be added to the game using the skinrequests feature. By using the command /skinrequest WorkshoID a skin gets automatically uploaded to the skin requests box. Admins with the skinner.import permission can open the requests box with the /skinrequests command. Skins from the request box can then be "tried" approved or denied. Each skin requested can be logged to discord using the webhook in the config. Importing from other plugins: Skinner now has a tool for windows to import data from skinbox, xskins and skincontroller. Simply select your json data file with imported skins into the tool and copy the new imported skins list into the skinner config. https://github.com/Whispers88/SkinDataConverter/releases/tag/Main Note: The "Imported Skins (skinid : 'shortnamestring', skinid2 : 'shortnamestring2'": {}" is now redundant and automatically converted to imported skins list. { "Skin Commands (skin items in you inventory": [ "skin", "s", "skinbox", "sb" ], "Skin Items Commands (skin items you have already placed": [ "skinitem", "si", "skindeployed", "sd" ], "Set default items to be skinned": [ "skincraft", "sc" ], "Automatically set all items in you inventory to your default skins": [ "skininv", "sinv" ], "Automatically set all items a container to your default skins": [ "skincon", "scon" ], "Automatically skin all deployables in your base": [ "skinbase", "skinbuilding" ], "Automatically skin all items in your base": [ "skinall", "sa" ], "Automatically skin all items that are moved into you inventory": [ "skinauto", "sauto" ], "Skin your teams inventories with your skin set": [ "skinteam", "st" ], "Request workshop skins via workshop ID": [ "skinrequest", "sr" ], "Approve workshop skin requests": [ "skinrequests", "srs" ], "Set your selected skin set": [ "skinset", "ss" ], "Import Custom Skins": [ "skinimport", "sip" ], "Import Workshop Collection Command": [ "colimport", "cip" ], "Skin Request Notification Discord Webhook": "", "Custom Page Change UI Positon anchor/offset 'min x, min y', 'max x', max y'": [ "0.5 0.0", "0.5 0.0", "198 60", "400 97" ], "Custom Searchbar UI Positon anchor/offset 'min x, min y', 'max x', max y'": [ "0.5 0.0", "0.5 0.0", "410 635", "572 660" ], "Custom Set Selection UI Positon anchor/offset 'min x, min y', 'max x', max y'": [ "0.5 0.0", "0.5 0.0", "250 610", "573 633" ], "Auto import approved skins": true, "Remove player data after inactivity (days)": 14, "Apply names of skins to skinned items": true, "Add Search Bar UI": true, "Use on itemcraft hook (skin items after crafting - not required when using skinauto)": false, "Override spraycan behaviour": false, "Use spraycan effect when holding spraycan and skinning deployables": true, "Blacklisted Skins (skinID)": [], "Blacklisted Itemms (itemID)": [], "Import Skin collections (steam workshop ID)": [], "Command based cooldowns ('permission' : 'command' seconds": { "Default30CD": { "skin": 30.0, "skinitem": 30.0, "skincraft": 30.0, "skincon": 30.0, "skininv": 30.0, "skinteam": 30.0, "skinbase": 60.0, "skinall": 60.0 } }, "Imported Skins List": {} } //Get all Cached skins public Dictionary<int, List<ulong>> GetAllCachedSkins() { return _cachedSkins; } //Check if skin is a Redirect item public bool IsRedirectID(ulong uID) { return HasMask(uID); } //Convert Redirect ID to item ID public int RedirectIDtoItemID(ulong uID) { return (int)UnsetMask(uID); } //Get a list of skins for a particular item public List<ulong>? GetSkinsItemList(int itemid) { _cachedSkins.TryGetValue(itemid, out List<ulong>? cachedSkins); return cachedSkins; }$24.9919 points -

Version 1.6.4
11,331 downloads
Adds a cargo plane crash event to your server. The crash site is guarded by NPCs that patrol the area and can chase players. You can also set up custom loot using the "SimpleLootTable" plugin. Features: Support for third-party plugins Great customization options in the config Console commands: callcargoplane - force the event to start callcargoplane {steamID/name} - the event will be reserved for one player crashcargoplane - force a cargo plane to crash cpc_stop - force the event to end Chat commands(need admin privileges): showcrashzone - displays the crash area setcrashzonecenter - set the center of the crash zone to where the player is callcargoplane - force the event to start callcargoplane {steamID/name} - the event will be reserved for one player crashcargoplane - force a cargo plane to crash cpc_calltome - force an event to start (the cargo plane will go to the player's coordinates) cpc_stop - force the event to end cpc_add_crashzone - adds a new zone at the location where the player is, can be used if you use multiple zones(you can set the name and radius - /cpc_add_crashzone "name" "radius") Hooks: void CargoPlaneCrashStarted() // called when the event starts void CargoPlaneCrashCrashed() // called when a cargo plane crashes void CargoPlaneCrashEnded() // called when the event ends void CargoPlaneCrashEventWinner(BasePlayer player) // called when a player loots any crate first CargoPlaneCrash config: { "PVE mode (crates can only be looted by the player who first dealt damage to the NPC)": false, "Give event ownership to the owner's teammates if he is no longer the owner. Only if teammates are within the event radius (for PVE mode)": true, "Radius for event(for PVE mode)": 380, "Create a dome for PVE mode": false, "Dome transparency (the higher the value, the darker the dome, recommended 4)": 4, "Time after which the owner of the event will be deleted if he left the dome or left the server (for PVE mode)": 300, "Message when a player enters the event dome(only for PVE mode if there is a dome)": "You have entered the Cargo Plane Crash Event", "Message when the event owner leaves the event dome (only for PVE mode if there is a dome)": "Return to the event dome, otherwise after 300 seconds you will no longer be the owner of this event", "Do not allow other players into the event(only for PVE mode if there is a dome) Be careful, if the crash site is near the player's base and the player is not the owner of the event, he will be ejected from his base outside the dome": false, "Message when a player is ejected from the event dome(only for PVE mode if there is a dome)": "You cannot be here, you are not the owner of this event", "Allow admin to be in event dome (only for PVE mode if there is a dome)": true, "Triggering an event by timer (disable if you want to trigger the event only manually)": true, "Time to event start(in seconds)": 3600.0, "Random time to event start": false, "Minimum time to event start(in seconds)": 600, "Maximum time to event start(in seconds)": 10800, "CargoPlane speed(recommended 4 to 6)": 5.0, "Minimum amount of online players to trigger the event": 1, "Minimum crates amount(spawn after crash)": 1, "Maximum crates amount(spawn after crash)": 1, "Crate simple loot table name(plugin SimpleLootTable is required)": "", "Minimum number of items in a crate(plugin SimpleLootTable is required)": 0, "Maximum number of items in a crate(plugin SimpleLootTable is required)": 0, "Crates lifetime(in seconds). The crate will not be destroyed if it has been activated": 3600, "Crates timer(in seconds)": 900, "Remove crates after being looted by a player(in seconds)": 300, "Minimum airdrops amount(spawn after crash)": 1, "Maximum airdrops amount(spawn after crash)": 1, "Airdrop simple loot table name(plugin SimpleLootTable is required)": "", "Minimum number of items in an airdrop(plugin SimpleLootTable is required)": 0, "Maximum number of items in an airdrop(plugin SimpleLootTable is required)": 0, "Airdrops lifetime(in seconds)": 3600, "Fireballs amount(spawn after crash)": 5, "Passengers amount(spawn after crash)": 2, "Explosion marker on the map(spawn after crash)": true, "Explosion marker lifetime(in seconds)": 300, "Enable signal smoke(spawn after crash)": true, "Signal smoke lifetime(in seconds, max 214)": 214, "Map size(crash zone size), you can see the zone, use the chat command /showcrashzone": 4500.0, "Starting altitude, defaults to map size, can be increased if cargo plane hits high ground(no more than 10000 recommended)": 4500.0, "Crash zone center. Use chat command /setcrashzonecenter to set to player position. You can check crash zone center, use the chat command /showcrashzone": { "x": 0.0, "y": 0.0, "z": 0.0 }, "Use multiple zones": false, "Select a zone from the list sequentially(if false, then the crash zone will be chosen randomly)": false, "Zones list": [ { "name": "0", "radius": 300, "center": { "x": -300.0, "y": 0.0, "z": 0.0 } }, { "name": "1", "radius": 200, "center": { "x": 100.0, "y": 0.0, "z": 0.0 } } ], "Event message(if empty, no message will be displayed)": "CargoPlane event started", "Crash message(if empty, no message will be displayed)": "Cargo plane crashed", "Event end message(if empty, no message will be displayed)": "CargoPlaneCrash event ended", "Message about coordinates(will display the coordinates of the crash site. If empty, no message will be displayed)": "", "Kit name(you can use kits for passengers if you have Kits plugin)": "", "Passenger name": "Mister bot", "Use NPC prefab for passengers": false, "Minimum NPCs amount(spawn after crash)": 2, "Maximum NPCs amount(spawn after crash)": 2, "NPCs lifetime(in seconds)": 3600, "NPCs type(NPCs prefab, experimental setting, it is not known how the NPCs will behave) 0 - tunneldweller; 1 - underwaterdweller; 2 - excavator; 3 - full_any; 4 - lr300; 5 - mp5; 6 - pistol; 7 - shotgun; 8 - heavy; 9 - junkpile_pistol; 10 - oilrig; 11 - patrol; 12 - peacekeeper; 13 - roam; 14 - roamtethered; 15 - bandit_guard; 16 - cargo; 17 - cargo_turret_any; 18 - cargo_turret_lr300; 19 - ch47_gunner": 8, "NPCs health(0 - default)": 0, "NPCs damage multiplier": 1.0, "NPCs accuracy(the lower the value, the more accurate, 0 - maximum accuracy)": 2.0, "NPCs attack range": 75.0, "Radius of chasing the player(NPCs will chase the player as soon as he comes closer than the specified radius, must be no greater than the attack range)": 60.0, "Minimum distance to NPC damage": 75.0, "Message if the player attacks far away NPCs": "NPC is too far away, he doesn't take damage", "Kit for NPCs. The NPC will use the weapon that is in the first slot of the belt(requires Kits plugin)": "", "Default displayName for NPC(for SimpleKillFeed/DeathNotes plugin)": "Crashsite NPC", "List of displayNames for each NPC(for SimpleKillFeed/DeathNotes plugin)": [ "Crashsite NPC1", "Crashsite NPC2", "Crashsite NPC3" ], "Will NPCs attack zombies": true, "Remove NPC corpses": false, "Prohibit building near the crash site": false, "Building prohibition radius": 20.0, "How long construction is prohibited near the crash site(in seconds)": 1800, "Event marker on the map(spawn an event marker at the crash site)": false, "Display approximate end time of event on marker": false, "Event marker name": "Cargo plane crash site", "Event marker lifetime(in seconds)": 3600, "Event marker transparency(0-1)": 0.75, "Event marker radius": 0.5, "Event marker color.R(0-1)": 1.0, "Event marker color.G(0-1)": 0.0, "Event marker color.B(0-1)": 0.0, "Do not spawn crates and NPCs when a cargo plane falls under water (if the water depth is greater than)": 0.5, "Do not choose a crash site near monuments": false, "If possible, the crash site will not be chosen near player bases": true, "SteamID for chat message icon": 0, "Complete the event if all crates were destroyed after looting": false, "Use Notify plugin for messages": false, "Notify message type": 0 }$19.9918 points -

Version 1.2.14
3,558 downloads
SimplePVE is exactly what it says. An easy, simple PVE plugin for your server to modify or change PVE rules individually & now also have a Simple CUI to control PVE rules and create or edit Schedules. Key Features Control PVE Rules from in-game or in the config Easy to understand each rule Create PVP Schedules Loot prevention Automatic PVE/PVP purge events Zone Manager support Most event plugins support Works without "server.pve true" Discord Embed Messages on PurgeStart or End Many more features are added with every update Commands /simplepve - Use to enable or disable pve toggle (Chat & Console command) /simplepve on or off - Use to enable disable pve (Chat & Console command) /sprules - Use to Open a Cui to control PVE Rules & Creating Schedules (Chat command) /spdebug - Use this for debuging rules Permissions simplepve.admin - Required to enable or disable SimplePVE simplepve.adminloot - Required to view Loots of other players simplepve.admindamage - Required for Admin damages to any entity Video Showcase API & Hooks void OnSPVEPurgeStarted() void OnSPVEPurgeEnded() TimeSpan GetPVPStartTimeRemaining() TimeSpan GetPVPEndTimeRemaining() Configurations Support Check Out My Other plugins as Well$15.0018 points -
Version 1.0.1
1,082 downloads
Welcome to Steenamaroo's Workshop! Here you can see what it's like to be inside the work space of Steen, though it's a bit messy and has a questionable amount of alcohol, you will find a cozy place of drunken creativity. Want to support Steen? Here is his patreon! https://www.patreon.com/Steenamaroo 1500 Prefabs (most of it was sandpaper) No special instructions PS. Ignore the footsteps in the attic, Death lives up there. We try to get him to come down and we even put out traps but nothing aside his midnight raids on the fridge will move him. Want to see more of my stuff or just hang out? Join my Discord! https://discord.gg/96SRSyc7nTFree18 points -
Version 2.3.9
7,874 downloads
Creates a unique event at the Harbor monument for players to participate in for rewards. Players must battle numerous NPCs and APCs to access the puzzle to open the loot room! Description This event started off as a warning on the chatbox about the ships coming soon to dock in Port, loaded with precious cargo. After the period has passed, a ship appears in one of the locations at Harbour that are accessible from the map, where the crane loads the container. The loading area is protected by one Tank and 7 NPCs by default. The container door is locked, you must push a button from inside the cranes cockpit to open the door. Inside the container, there is a default security camera, locked box, 2 DMS, 2 Elite, and 2 Military boxes. The locations and loot from all crates/NPCs can be configured within configurations, and unwanted crates/NPCs added or removed. Also, ships will generate the default ship loot, e.g. The config file allows to modify tank as well as loot inside of the ship. When the event occurs, the map displays the markers (configured in the config file). All players that are inside the event area will have a timer counting down the amount of time until the event ends. Dependencies Required NpcSpawn Dependencies (optional, not required) True PVE PveMode GUI Announcements Notify Discord Messages AlphaLoot CustomLoot NTeleportation HeliControl Economics Server Rewards IQEconomic Kits Chat commands (only for administrators) /harborstart – starting of the event /harborstop – ending of the event /harborpos – determining the position and rotation coordinates for changing the location of NPCs and crates.It should write in the configuration (Attention! The event must be started, the current position of the administrator in relation to the cargoship is read) Console commands (RCON only) harborstart – starting of the event harborstop – ending of the event Plugin Config en - example of plugin configuration in English ru - example of plugin configuration in Russian Hooks void OnHarborEventStart() – called when the event starts void OnHarborEventEnd() – called when the event ends void OnHarborEventWinner(ulong winnerId) – called at the end of the event, where the winnerId is the player who did more actions to complete the event My Discord: KpucTaJl#8923 Join the Mad Mappers Discord here! Check out more of my work here!$35.0017 points -
Version 2.2.10
18,534 downloads
Say goodbye to configuration and data files. This plugin lets yo edit the loot of (almost) every lootable object directly over a custom UI. It also includes a graphical stack size editor thus making it ideal for anyone who is not familiar with editing config files. Do not use in combination with any other stack size controller or loot plugin. Russian lang file (файл русского языка) You can now enjoy the interface of Loottable in Russian. Just download the file and place it in the /oxide/lang/ru/ folder Loottable.json DISCLAIMER: Translations are provided by the community and I can not guarantee for their accuracy NEW with version 2.2.7: You can now add new items to all your configurations with the click of a button on the settings page. This only works for items that have been newly added with the last rust update. Amount and drop chance will be set to the vanilla values. This can also be done via command loottable add_new_items NEW with version 2.1.16: Improved item search You can now search for hidden items by adding h: to the start of your search (e.g. the search h:cable will show the cable tunnel item which is hidden by default). This works in both item editor and stack size controller. Full support for CustomItemDefinitions NEW with version 2.1.7: Direct Loot Refresh Players with the permission loottable.test can use a button to directly refresh the loot in the crate they are currently looting. Features: User friendly GUI - no need to edit config files Loot configuration for every prefab in the game Stack size controller supports individual stack sizes for every prefab Support for custom items Support for third party plugins Fully backwards compatible with version 1.x.x Default config included for every prefab Configuration for Smelting Speed, Recycler Speed and Efficiency Supply Drop configuration Supported prefabs: Crates, Barrels NPCs Trees, Ores, Animal corpses Excavator, Quarries Christmas Presents, Eggs, Loot Bags Collectables like Hemp, Corn, etc. Additional Configuration: Smelting Speed Supply Drop Recycler Speed / Efficiency Commands: loottable - Open the Loottable UI loottable reload - Manually refresh loot loottable remove_dlc_items - Remove all DLC items from your loot configs. This action can not be undone loottable add_new_items - Add all new items from this months rust update to your configurations. This action can not be undone Permission: loottable.edit - Required to use the Loottable UI Required Dependencies (Oxide only): Image Library: https://umod.org/plugins/image-library Translations: This plugin fully supports translation. Out of the box only english is included. For item names to be translated, the plugin https://umod.org/plugins/rust-translation-api is required. English translations are located in /oxide/lang/en/Loottable.json For Developers: Loot Api: Developers can use the Loot Api to register loot profiles for custom NPCs or other plugin related loot. It is highly recommended to use the provided wrapper to access the API. Documentation is also included: https://gist.github.com/TheKiiiing/53a37e8bbb48d8a24c8e8b21b9da37ac Loot Api Example: void OnLoottableInit() { LoottableApi.ClearPresets(); LoottableApi.CreatePresetCategory(this, "Crates"); LoottableApi.CreatePreset(this, "c_locked", "Locked Crate", "crate_hackable"); LoottableApi.CreatePreset(this, "c_elite", "Elite Crate", "crate_elite"); LoottableApi.CreatePreset(this, "c_military", "Military Crate", "crate_military"); LoottableApi.CreatePreset(this, "c_normal", "Normal Crate", "crate_normal"); LoottableApi.CreatePresetCategory(this, "NPCs"); LoottableApi.CreatePreset(this, true, "npc_cargo", "Cargo Ship NPC", "npc_militunnel"); LoottableApi.CreatePreset(this, true, "npc_control", "Control Center NPC", "npc_militunnel"); } void SpawnNpc() { // Spawn NPC here ScientistNPC npc; // Assign a loot preset to the NPC LoottableApi.AssignPreset(this, scientist, "npc_control"); } void SpawnCrate() { // Spawn crate here LootContainer crate; // Assign a preset to the crate if (LoottableApi.AssignPreset(this, container, "c_locked")) { // The container has been filled with loot return; } else { // The container is not handled by Loottable // Default loot logic goes here } } The resulting configuration page would look like this: Custom Items API: Developers can use the Custom Items Api to add a custom item to the Loottable item list. If an item is marked as persistent it will remain in the custom item list until it is removed by ClearCustomItems. All non-persistent items will be removed after the plugin that registered them has been unloaded. (void) AddCustomItem(Plugin plugin, int itemId, ulong skinId) (void) AddCustomItem(Plugin plugin, int itemId, ulong skinId, bool persistent) //(v1.0.27 or higher) (void) AddCustomItem(Plugin plugin, int itemId, ulong skinId, string customName) (void) AddCustomItem(Plugin plugin, int itemId, ulong skinId, string customName, bool persistent) //(v1.0.27 or higher) (void) ClearCustomItems(Plugin plugin) //(v1.0.27 or higher) Hooks: (void) OnLoottableInit() This hook is called when Loottable is ready to receive API calls. This happens either on server boot or when the plugin is loaded. Use this hook to register custom items and loot presets. (object) OnContainerPopulate(LootContainer container) This hook is called every time a loot container is about to be populated with loot. Returning a non-null value prevents the plugin from spawning loot into that crate. (object) OnCorpsePopulate(LootableCorpse corpse) This hook is called every time an npc corpse is about to be populated with loot. Returning a non-null value prevents the plugin from spawning loot into that corpse. (object) OnCustomAirdrop(SupplySignal signal) This hook is called every time a custom supply drop is about to be delivered. Returning a non-null value will cancel the custom supply drop. Outdated documentation for Version 1: New with version 1.0.27: Custom Items can now be created and edited directly in the GUI. They can be created from any existing item and modified in the Item Select menu You can now create and load backups of your configuration. Commands (F1 or Server Console): loottable.backup load <name> - Load backup with the given name from the backups folder (will wipe your current configuration) loottable.backup create <name> - Create backup of everything with the given name Backups will be created in the data/Loottable/backups folder. To load a backup, the backup file needs to be present in that folder. When creating backups in the in-game console, the permission loottable.debug is required. IMPORTANT: DO NOT LOAD BACKUPS FORM SOURCES YOU DO NOT TRUST, they might cause harm to your server New with version 1.0.16: Custom Items: Now you can add custom items used by other plugins directly to your loot table. Other plugins can can register these items using the api (documentation below). Screenshots: Overview of crates and their current loot table Stacksize Editor Commands: loottable - Open the editor loottable refresh - Manually refresh crate loot loottable flags - List available flags (explained below) loottable flags <name> <1|0> - Enable / disable a certain flag loottable reload_vanilla_profiles - Manually re-download vanilla loot profiles (only for debuging) Permission: loottable.edit - Required to use the editor Flags: There are flags to disable some limits in the editor. Only enable these flags if you really need to as they might cause unexpected behavior of the editor. There are currently 3 flags available: Debug If enabled, the Debug flag provides more detailed information about errors and other actions in the editor. Don't enable this flag unless you want your console full of spam. UnlockGatherMultiplier allows you to use gahter multipliers less than one and higher than 1000. Note that multipliers less than one might lead to unexpected results in some cases. DisableItemLimit Probably the safest flag to use is DisableItemLimit as it simply lets you set stack sizes and every other item amount in the editor as high as 2,147,483,647 which is the biggest possible value of a 32-bit integer. UnlockFurnaceMultiplier lets you use any value as the furnace speed multiplier. Don't enable this flag unless you know what you are doing, since the default value range from 0.1 to 100 should cover most use cases and larger values might impact server performance. UnlockItemMultiplier unlocks the multiplier when multiplying a loot table. DisableStackingHooks will disable all stacking related hooks. Enable if you encounter problems when stacking items. RefreshLootOnExit controls if all crates get refreshed after closing the editor or when reloading the plugin. Enable this only for testing, there might be an increase in entities. Refer to the Commands section for more information about enableing flags. Vanilla Configurations: Since version 1.0.7 there are vanilla loot profiles available for most crates and NPCs. These profiles can be loaded using the "Load default loot table" button at the top center of the editor. DISCLAIMER: The vanilla loot profiles in the editor might not exactly match the vanilla loot distribution of the game as it uses a completely different loot distribution system than Rust. These profiles rather serve as a reference point for custom loot profiles. Important for Carbon users: In order for this plugin to work with carbon, Harmony references need to be enabled. This can be done with the following command: c.harmonyreference 1 Required Dependencies (Oxide only): Image Library: https://umod.org/plugins/image-library Custom Items API: Add a custom item to the item list. If an item is marked as persistent it will remain in the custom item list until it is removed by ClearCustomItems. All non-persistent items will be removed after the plugin that registered them has been unloaded. (void) AddCustomItem(Plugin plugin, int itemId, ulong skinId) (void) AddCustomItem(Plugin plugin, int itemId, ulong skinId, bool persistent) //(v1.0.27 or higher) (void) AddCustomItem(Plugin plugin, int itemId, ulong skinId, string customName) (void) AddCustomItem(Plugin plugin, int itemId, ulong skinId, string customName, bool persistent) //(v1.0.27 or higher) (void) ClearCustomItems(Plugin plugin) //(v1.0.27 or higher) Example: Its recommended to delay the call a little bit to make sure Loottable is loaded private void Init() { timer.In(1f, () => { Loottable?.Call("AddCustomItem", this, -946369541, 2664651800, "High Quality Fuel"); }); } Hooks: (object) OnContainerPopulate(LootContainer container) This hook is called every time a loot container is about to be populated with loot. Returning a non-null value prevents the plugin from spawning loot into that crate. (object) OnCorpsePopulate(LootableCorpse corpse) This hook is called every time an npc corpse is about to be populated with loot. Returning a non-null value prevents the plugin from spawning loot into that corpse. (object) OnCustomAirdrop(SupplySignal signal) This hook is called every time a custom supply drop is about to be delivered. Returning a non-null value will cancel the custom supply drop.$40.0017 points -

Version 1.1.2
5,078 downloads
Checks for updates for all Codefling plugins, and prints to console and, optionally, discord. Reports to console "Codefling has updates for the following plugins.", then lists the names. Config Authors - Each author name has a true/false option to enable/disable checking their plugins. CheckIntervalMinutes - How often the plugin requests updated information from Codefling. DiscordWebhookAddresses - Addresses for your discord server's webhook, for posting updates. Ignore - String array for plugin names to ignore. eg ["one plugin"] or ["multiple", "plugins"]Free17 points -

Version 3.4.18
4,944 downloads
The ultimate base protection plugin that allows players to pay a resource in exchange for configurable protection for their base or tugboat. This plugin has been rewritten from the ground up for performance, quality, and integrating community suggested features. Features There are many different ways you can configure this plugin to fit the needs of your server. Many features can be modified or disabled entirely through the plugin configuration file. These include: Both online and/or offline base protection Trade currency for protection or provide it for free Players can turn on/off protection Permission based protection tiers Configure what gets protected and who it is protected from Set limits on how long protection lasts Indicator(s) for displaying base protection Option for allowing raiders to bypass protection if they can drain the protection balance with damage Options for making protection more expensive for larger bases/clans and cheaper for small groups. UI that blends in seamlessly with vanilla Rust. Disclaimer This plugin will be updated at the owners discretion. Before purchasing any plugin, I recommend checking the date of the last update and refer to support tickets to see if there might be any issues with the latest Rust game version. If a game update breaks this plugin, please open a support ticket (if it doesn't already exist) and direct message me on Discord (link found below). How to Use Configure the plugin and load it Once loaded, assign yourself (or your group) one of the protection level permissions. Place a new tool cupboard, or find one that YOU have previously placed. Open the tool cupboard inventory, at the top you should see two tabs: "Upkeep" and "Protection". Select the protection tab to view the raid protection info. On this screen, you will be able to spend the configured currency in order to purchase hours of protection. By default, this currency is scrap. Use the buttons on the right to add some hours of protection, you should see that status change to show the time you are protected. Your base will now be protected for the amount of time specified. Notes You can use the Clear button to withdraw all balance, and stop protection The Pause/Resume button can be used to start/stop protection without changing the balance. The Info button will reveal a panel which displays additional information on protection. The +Max button will deposit the maximum amount of time that you can afford Quick Start Presets There is a lot of documentation for this plugin because there is a lot you can do with it! However, it doesn't have to be complicated. If you have a simple use case in mind, you can use one of these preset configurations to get what you need or use as a starting point without having to figure it out yourself! Important: You will want to assign your default permission group the raidprotection.level.1 permission for any of these configurations. Always Free Provides free raid protection for all players with the level 1 permission Protection for tugboat bases Recommended for PvE or light PvP servers Offline Only Same as the default config, but only offers offline protection Has a limit of 48 hours of protection for level 1 Includes a level 2 permission with unlimited hours of protection (VIP) Protection for tugboat bases Recommended for PvP servers Hardcore Offline only protection Two protection levels, one with a 48 hour limit and one with no limit Additional costs that scale with number of owners and building size Raiders can damage a structure and cause it to "bleed" protection balance to attempt to disable the protection with enough damage Significant delay for activating protection No protection for tugboat bases Recommended for hardcore PvP servers Upgrading Versions When a new version is released, you may need delete your config and lang files and reload them to accommodate the new changes. You do NOT need to delete the data file, unless specifically instructed. As long as you do not delete the data file, then all of your protection balances will persist, even between versions. Not all updates will require this process, but if it does, you will be notified with a message like this: To resolve this, simply delete the config and lang files and reload the plugin. You will need to manually update these files to align with what you want. As of v3.4.0 you no longer need to delete your config files when upgrading from a previous version. However, you still should check the config after the update is installed to verify no unintended changes have occurred. Protection Levels Protection levels are how you assign a particular set of rules to a player. These protection levels are added in the configuration file, and are then assigned to an auto-generated permission. Each protection level needs a unique Rank property, this rank determines the order of precedence when a player is assigned multiple protection levels. In this event, a player's protection level will always be the highest ranked protection level they are granted. Protection levels are managed in the configuration file, here is some information on some of the properties: Cost per damage protected - This amount will be deducted from the protection balance for each point of damage that was protected. So if this value is set to 1 and someone attempts to deal 100 damage to a protected structure, and that structure has 100% protection, then 100 balance will be deducted. If in that same example it was only 50% protection, then only 50 balance would be deducted. Entity resistances are taken into account as well (twig will take more damage than metal, ect). Hourly base cost - This is a fixed cost that is charged per hour of protection. Hourly cost per authorized player - This amount will be charged for each owner every hour. Can be used to charge players more if they have a larger clan. Hourly cost per floor - This amount will be charged for each floor every hour. Can be used to charge players more for protecting a larger base. Max protection time - The max number of hours protection can be applied for. If set to null, then there will be no limit. Offline protection percent - The percent of protection a structure will receive when all the owners are offline. A value of 0 will be unprotected, and a value of 100 will be fully protected. Online protection percent - The percent of protection a structure will receive when at least one owner is online. A value of 0 will be unprotected, and a value of 100 will be fully protected. Rank - A number value indicating the order of importance when a player is assigned multiple protection ranks. Higher values indicate a greater importance. For example, if a player is assigned both protection rank 1 and protection rank 2, then tool cupboards they place will be of protection rank 2 instead of 1. These ranks must be unique DO NOT create protection levels with the same rank. This value needs to be 1 or higher, it cannot be 0. Delay after taking damage - The number of seconds before protection may begin after a structure has taken unprotected damage. It is recommended to set this to a higher amount on PvP servers. Delay for offline protection - The number of seconds before offline protection kicks in after the last owner has gone offline. It is recommended to set this to a higher amount on PvP servers. Damage resets timer when owner is offline - If this is set to true, then if a raid has already started on a structure that has offline only protection, but the protection hasn't kicked in yet (due to a delay timer) then the attackers can continue to raid indefinitely as long as they continue to do damage while the owner(s) are offline. If this is set to false, then the attackers will only have a certain amount of time to continue their raid if the owner(s) are offline. Allow tugboat protection - If this is set to true, then players with this protection level may receive protection for tugboat bases. For these tugboat bases the protection panel can be accessed in the fuel inventory of the boat. The founder of a tugboat base is whomever is the FIRST player to authorize on a tugboat. Founder Limit - The number of tool cupboards that a player can be a Founder of and receive raid protection. If a player exceeds this limit, then future tool cupboards will not receive protection until enough previously placed ones have been destroyed in order to be within the limit. If a player places a tool cupboard, and they have exceeded the limit, once they are no longer exceeding the limit they can "activate" that tool cupboard in the info panel to have it gain raid protection. If this value is set to null then there is no limit. Founders and Owners When a tool cupboard is placed, the player who places it is permanently labeled as the "Founder" of that tool cupboard and building privilege. The protection level of that building privilege is derived soley from the founder's protection level, and therefore won't change unless the founder's protection level changes. Whenever a player is authorized on a tool cupboard, they will be permanently branded as an "Owner" of that tool cupboard. Owners are all the players, including the founder, who have EVER been authorized on the tool cupboard. This means that players will still be listed as an owner even if they deauthorize themselves. Owners are important because they affect how Online/Offline protection will be triggered. A base will only be granted offline protection if ALL the owners are offline, otherwise online protection (if available) will be granted if at least one owner is online. For tugboat bases, the founder is whomever is the first player to authorize themselves on the tugboat. Permissions raidprotection.admin raidprotection.level.x - these permissions are autogenerated based on your protection level settings in the config, they will show up in the server console when the plugin is loaded (unless you have Enable Console Messages set to false) raidprotection.ignore - raid protection will not count any player with this permission towards being an owner. They will not show up in the owner list and will not count toward team member count for offline protection. They also will not receive protection on bases they build even if they have a protection level assigned. This is useful for admin groups so that you don't have to remember to deauth on tool cupboards. However, if this permission is ever revoked, that player will be retroactively counted as an owner on ALL tool cupboards they are currently authed on. Commands Player Commands These commands require no permissions and can be used by any player. /pro - displays the raid protection information panel, requires authorization on the tool cupboard in the current area. /lev - displays a screen that tells the player their personal assigned protection level and explains the benefits that comes with it. Admin Commands These commands require the raidprotection.admin permission to use. /tc - displays a screen with all the available admin commands /tc help - same as /tc Use the above commands to see a full command list in game. Configuration The default config file: Here is an explanation for some of the fields: Enable Logging - Set to true to keep logs of tool cupboards protection activity. Logs will be saved to the oxide/logs/RaidProtection folder. It is recommended only to enable this only for debugging purposes, as it will take a significant amount of storage space if you have a larger server. Enable Ledger - Set to true to keep track of protection balance changes for tool cupboard. These ledger files are stored in oxide/data/RaidProtection/Ledgers. It is recommended to keep this enabled, as it will help you roll back balances if a player has an issue. This does not take up as much storage space as logging does as it only keeps track of balances. Enable Console Messages - Set to false to disable the info messages upon plugin reload. Commands - You can change the prefix for the commands this plugin uses here. Chat Message Icon ID - A steam id for the portrait of chat messages. Protection Tabs Offset - This value will adjust the vertical placement of the Protection Tabs in the tool cupboard menu. Positive values will move it up, negative values will move it down. Useful for making it so those tabs don't conflict with other UI plugins that use that area. Image Settings - Links for the images the plugin uses. Indicator Settings - Settings for the indicator that (by default) appears in the top right when you attack a protected structure. You can change its size and position or disable it. Plugin Integration - Set any of these to true if you want this plugin to take advantage of the features of another supported plugin. Custom Status Framework Settings (Ignore if you do not have Custom Status Framework integration enabled) Popup Attack Indicator - If set to true, a status will briefly appear when a player attacks a protected structure. Persistent Status For Owners - If set to true, a status will appear while a player is in a protected area that they are an owner for. Slight performance cost when enabled. Persistent Status For Non Owners - If set to true, a status will appear while a player is in a protected area that they are NOT an owner for. Slight performance cost when enabled. Popup Status When Hammer Equipped - If set to true, a status indicating the protection level of the area they are in will appear while they are holding a hammer. This will appear regardless of if you are an owner of that area or not. Protection Settings Admin owners removed when deauthorized - Normally, you cannot remove an owner even if they deauthorize. But if this setting is enabled, it allows admins to remove themselves as owners when they deauthorize from a tool cupboard. They can also achieve this with commands. Allow balance withdraw - If set to true, then players will see a "Clear" button in the tool cupboard panel that allows them to withdraw any protection balance. Allow max deposit - If set to true, there will be a "+Max" button that will purchase the maximum number of protection hours a player can afford. Award remaining balance when cupboard is destroyed - If set to true, whomever destroys a tool cupboard will be awarded whatever amount was in the protection balance. Currency item - The item that will be used as currency for protection, this will only be overridden if you are using Server Rewards or Economics for your currency. If you want it to be a custom item that has a skin, you can put # followed by the skin id after the item name. For example "scrap#12345" would only accept scrap items with the skin 12345. Protected entities - If any of these are set to true, then that type of entity will be covered under Raid Protection. If you are using other protection plugins like TruePvE, then you will want to configure these to not overlap with what other plugins are protecting. Protected from - If these are set to true, then damage from that type of source will be protected. By default Authed Players is set to false, which means that players will be able to damage their own structures, but enemy players cannot. Protection levels - See the section about protection levels for information. Protect twig - If set to true, then twig building blocks will receive raid protection. If set to false, then twig building blocks will not receive raid protection, even if placed by an owner of the base. Ledgers As of Raid Protection v3.2.0, you can optionally configure ledgers to be enabled. When enabled, the plugin will keep logs protection balance changes for all tool cupboards. These logs will be saved to oxide/data/RaidProtection/Ledgers. There is a ledger file for each tool cupboard, and it's filename will make the entity ID of that tool cupboard. You can use the /tc id command to see what the ID of a tool cupboard is (see commands section). The benefit of ledgers is that each balance change has a specific GUID identifier attached to it that can be used to restore a tool cupboard's balance to that exact state in the event that a player has an issue. An example of a ledger file might look like this: Ledger file for tool cupboard with ID 2250729 [ "05/26/2023 16:17:56,ad87f16e-52eb-4689-887f-ecc53cd3ff13,0,Withdraw", "05/26/2023 16:18:20,108e54c0-98c4-46df-9eb3-e17192c37bb3,0,CollectionStopped", "05/26/2023 16:18:23,a2f03162-200c-47ce-948e-b0c703435e51,0,CollectionStarted", "05/26/2023 16:18:28,5c83390e-bbd2-4049-8ec9-8f2951746159,0,Withdraw", "05/26/2023 16:19:29,cd892a3f-249b-4cad-8949-abf904656288,20,Added", "05/26/2023 16:19:31,6e710dfc-23c2-4375-8c4f-07017d4d44c6,40,Added", "05/26/2023 16:19:31,bc51f8c7-3f3a-4abc-8fd2-8bb4c47fe454,60,Added", "05/26/2023 16:20:25,f08cfa34-a623-4de3-9027-7c3acb3e3ec3,60,CollectionStarted", "05/26/2023 16:20:52,a849be59-899c-4779-bba6-2f5f1b0ffb8d,59.93055,CollectionStopped" ] The format of each row goes as follows, from left to right separated by commands. Date and Time of balance activity GUID identifier, used by the /tc restore command to roll back a balance The protection balance of the tool cupboard at that given time A brief descriptive reason as to what changed about that balance For example, using the ledger file listed above, if we wanted to rollback the tool cupboard to before the collection started (the last "Added" one), we could run the following command. /tc restore 2250729 bc51f8c7-3f3a-4abc-8fd2-8bb4c47fe454 Running this command will set the balance of the tool cupboard with ID 2250729 back to its balance of 60. As of v3.2.3 you can also mass restore all tool cupboards to a specific time or date. For example, using the ledger file listed above, if we wanted to rollback the tool cupboard to the time 16:19:00. We could run the following command. /tc ledger rollback 16:19 This will rollback ALL TOOL CUPBOARDS to the first ledger entry that comes BEFORE the given time. In this case that entry would be GUID=5c83390e-bbd2-4049-8ec9-8f2951746159 at time 16:18:28 because that is the latest entry before 16:19:00. Thus the balance will be 0. Rollbacks can also accept a date in addition to a time. For example, if you wanted to rollback to noon the following day you could run the following command. /tc ledger rollback "5/25/2023 12:00" Notice that there is no ledger entry for this tool cupboard that goes back that far. In this case, the balance of the cupboard will be set to ZERO. Please note that if you include a date and time the value MUST be enclosed in quotes (see the example above). Tugboat Bases As of v3.3.0, Raid Protection can optionally be allowed for tugboat bases. This is configurable per protection level. Tugboat bases can utilize all the features of a normal tool cupboard base. You can access the protection panel for tugboat bases in the fuel inventory in the drivers seat. For tugboat bases, the founder of the base is considered to be the FIRST player to authorize on the tugboat. Plugin Integration Clans This plugin provides built-in support for Clans. If a player is in a Clan, it will automatically treat all clan members as owners. This of course means that the owners will not be removed even when a member is kicked from a clan. True PVE This plugin is compatible with True PVE as long as both plugins are configured in a non-conflicting way. For example, if you use True PVE to provide protection to players, then in your Raid Protection config file under the Protected entities section you should set Authed Players and Unauthed Players both to false to avoid hook conflict errors. If you do see hook conflicts, see the section of this documentation about how to resolve hook conflict errors. Zone Manager This plugin is compatible with ZoneManager without any extra configuration. ZoneManager will take priority if the zone has the "undestr" flag. Custom Status Framework If you have CustomStatusFramework installed and want to take advantage of the status indicators (that appear in the bottom right) in your Raid Protection config file under the Plugin Integration section set Custom Status Framework to true. Simple Status Simple Status is a plugin that is still being developed, and will be an alternative, more performance friendly option to Custom Status Framework. This plugin is not yet available, but as of v3.4.0, configuration options have been added to support this plugin when it releases. Preview of indicators: Economics and Server Rewards If you wish to use economics balance or server rewards points as a currency instead of an item, you can set ONE of these to true in the plugin integration section of the config. It is important to set ONLY ONE of these to true, or else both will be disabled and you will get a warning in the console. Protection panel with Economics: NoDecay This plugin is compatible with NoDecay without any extra configuration. Notify If you want to use Notify as your source of indicators you can enable the flag for it in the Raid Protection config. Abandoned Bases If you enable Abandoned Bases in the integration config, then bases that are labeled as Abandoned will not receive raid protection. Raidable Bases Bases spawned by Raidable Bases will be ignored by Raid Protection. They should not show up in ledgers and players cannot add balance to them. Skill Tree If Skill Tree is enabled in the integration config then it will prevent players with the lockpicking skill from picking locks in raid protected areas. Other Plugins Should be compatible with most other plugins given they don't use the onEntityTakeDamage hook. If they do use this hook, it just means you have to change your configuration settings, see the hook conflicts section for more info. Images If you experience any issues with the default images provided by this plugin I recommend hosting them yourself. The urls can be changed in the config. Here is a zip file containing all the images. icons.zip Carbon As of 8/19/2023 I can confirm that this plugin is compatible with Carbon. Please open a support ticket if you experience any Carbon related issues. Hook Conflicts If you're getting messages in the server console that looks similar to this: OnEntityTakeDamage resulted in a conflict between the following plugins: NoDecay - True (Boolean), RaidProtection (False (Boolean)) That means that another plugin is conflicting with Raid Protection. In most cases this is an easy fix, and it just means that you need to update your Raid Protection config file to not protect the same entities that another plugin is already protecting. So for example, if you have a plugin already that makes it so player's cannot attack each other, then there is no need for Raid Protection to do that job, and therefore in the Protected entities section of the config you should set Authed players and Unauthed players to false to avoid conflicts. Previous Versions You may have seen the free version of this plugin available on uMod. That version (2.X.X) will stay available for free on umod, but is no longer supported. If you are upgrading from the free version, you must first delete the config/lang/data files before installing v3.0.0 and above. If you do not delete these files, you will likely run into issues, as despite having the same name, the plugin has been completely rewritten, and therefore is completely incompatible with the free version. Developer API /* * Returns 0 if entity unprotected and 100 if entity fully protected */ private float GetProtectionPercent(BaseEntity entity) /* * Returns a list of the owners of the structure associated with the given entity */ private List<BasePlayer> GetOwners(BaseEntity entity) /* * Returns the player who is the founder of the structure associated with the given entity. Can be null. */ private BasePlayer GetFounder(BaseEntity entity) /* * Returns the protection balance of the structure associated with the given entity */ private float GetProtectionBalance(BaseEntity entity) /* * Returns the hours of protection remaining of the structure associated with the given entity */ private float GetProtectionHours(BaseEntity entity) Discord If you want to report a bug, require support, have a suggestion or want to be notified when I release an update you can join my plugin development discord with this link: Plugin Development Discord Link Donate Writing and maintaining these plugins takes a tremendous amount of work. Donating is one way to give some positive feedback which helps me continue making them! Buy me a coffee here! FAQ Please check out this section before opening a support ticket, it may save us both some time! Q: I don't see the status indicators in the bottom right. A: The status indicators come from another plugin called CustomStatusFramework, you must install it and enable it in the config file to get the indicators. Q: I have protection time, but I am able to damage my own structure. By default "Authed players" are able to damage their own structures. You can change this in the config file. Q: The add hours buttons aren't showing for me in the tool cupboard panel. A: The hours buttons will not show if the protection has 0 cost. Q: I have a max protection time set, but it says "protected for forever" A: If the protection cost is 0, then there cannot be a max protection time. Q: I deauthorized myself from the tool cupboard, but I am still listed as an owner. A: Owners are not removed after deauthorization. Only admins can remove owners. Q: How are overlapping tool cupboards handled? A: If a player has a base with overlapping tool cupboards, then each cupboard will need its own protection. Which entities are protected depend upon which tool cupboard governs that entity. Q: Can player's exploit offline only protection by deauthorizing? A:Deauthorizing will not help players looking to exploit offline only protection because they will still be considered an Owner even if they deauthorize. Q: Can a player exploit offline only protection by never authorizing? A: If a player is never authorized on a cupboard, then they will not count toward being online, and therefore offline protection can occur. However, players cannot add or manage protection balance unless they are authorized, and therefore the protection balance will run out, especially if a max protection time is set. Q: I have protection for horses on, but now the horses never poop A: If horses don't lose health, they will never eat and therefore never poop, this is a side effect of protection for horses. Q: Why does protection say "pending" in the bottom right? A: Pending either means that you have offline only protection or your structure has recently taken damage and therefore protection is delayed. See the tool cupboard protection panel for more info. Q: I'm seeing conflict warnings in my console between Raid Protection and True PvE A: Please refer to the sections of documentation for TruePvE and Hook Conflicts Q: I'm seeing Image failed to download! Error: HTTP/1.1 429 Too Many Requests A: Refer to the Images section of the documentation.$29.9917 points -
Version 1.3.23
10,817 downloads
Bundle of four addons made for Welcome Panel UI. All four addons including preset default config files as you see them on screenshots.$14.9917 points -
Version 2.0.6
753 downloads
Rust Snippets Rust Snippets are designed to enhance the coding experience for Rust plugin developers. It streamlines the programming workflow, eliminating the need to repeatedly visit forums or perform repetitive tasks. Rust Snippets integrates all Rust plugin hooks directly into Visual Studio, allowing developers to code on the fly with embedded comments for each hook. Expect regular updates. Shortcuts Setup: Initializes a default Oxide plugin setup. Harmony: Sets up a default Harmony Oxide plugin. Config: Sets up a basic config file. Language: Sets up a basic language file. ChatCommand: Creates a basic ChatCommand. ConsoleCommand: Creates a basic ConsoleCommand. Permissions: Configures basic permissions. Hook Snippets The remaining shortcuts are related to various Rust plugin hooks. Typing "On" or "Can" triggers a dropdown with all available hooks. These hooks currently include all hooks from https://umod.org/documentation/games/rust Tutorial Included in the download is a comprehensive readme that guides users through the setup process. The instructions are easy to follow, ensuring a smooth onboarding experience. Feel free to reach out with any questions. Credits Special thanks to @Billy Joe for the initial idea. Although he didn't continue his work, his contributions inspired me to carry on. Be sure to check out his previous work, he produced some excellent content. I hope I could make your life easier with these snippetsFree17 points -
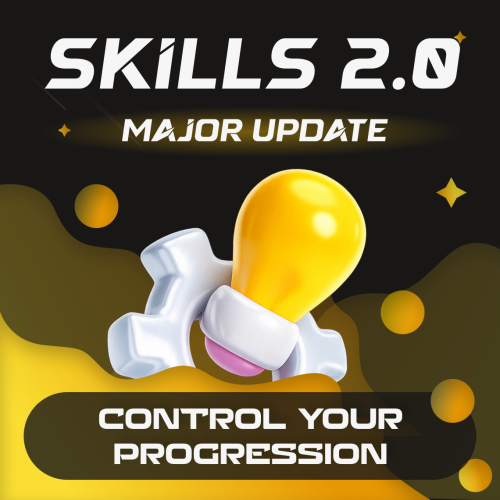
Version 2.1.12
2,947 downloads
Introducing Skills, the ultimate skill progression system for Rust servers featuring 71+ pre-configured skills across 13 categories! Complete with 4 UI templates, modal windows system, automatic migration from SkillTree/Skills V1, and comprehensive API. Transform your server into a world of specialization where players can master every aspect of Rust - from elite resource gathering and crafting to combat dominance and survival expertise. With intuitive progression, stunning visuals, and seamless integration, Skills delivers endless replayability and keeps players engaged for months! Why Choose Skills? Massive Skill Library - 71+ pre-configured skills covering every gameplay aspect Ready to Deploy - All skills are balanced and ready to use immediately Deep Progression - 10 levels per skill with meaningful advancement Visual Editor - Easy customization without coding knowledge Server Integration - Native support for ServerPanel V1/V2/V4, Notify/UINotify, and all major economy plugins Performance Focused - Optimized for high-population servers Seamless Migration - Automatic data conversion from SkillTree and Skills V1 Modal Windows - Advanced modal system for custom interfaces Multi-Template Support - Fullscreen, V1, V2, V4 ServerPanel templates Real-time Notifications - Integrated Notify/UINotify support Video Overview Showcase Templates Fullscreen Template ServerPanel V1 Template ServerPanel V2 Template ServerPanel V4 Template Modal Windows & Editor Modal Windows System Complete Skill Arsenal (71+ Skills) Skills comes with a massive library of pre-configured skills covering every aspect of Rust gameplay. All skills are ready to use with balanced 10-level progression systems! Mining Skills All Ores Mining - Boosts yields from stone, sulfur, metal, and HQM ore by up to 50% Stone Mining - Specialized stone gathering with up to 50% bonus Sulfur Mining - Enhanced sulfur ore collection up to 50% Metal Mining - Increased metal ore yields up to 50% HQM Mining - High-quality metal ore bonuses up to 50% Instant Ore Destruction - Chance to instantly destroy ore nodes (up to 20%) Durability Skills Tool Durability - Reduces wear on gathering tools Weapon Durability - Preserves weapon condition in combat Clothing Durability - Maintains armor integrity Wood Skills Wood Gathering - Increased wood collection from trees Instant Tree Chopping - Chance to fell trees instantly Coal Chance - Bonus coal drops from woodcutting Resources Skills Smelted Ore Chance - Bonus metal from ore smelting Animal Butchering - More meat from animal carcasses Instant Butchering - Chance to butcher animals instantly Plant Gathering - Better yields from bushes and hemp Crop Harvest - Increased vegetable production Fishing - Improved fishing success and rare catches Instant Barrel Destruction - Instant barrel breaking chance Crafting Skills Craft Duplicate - Chance for double crafted items Craft Speed - Faster crafting times Recycler Speed - Quicker recycling Furnace Smelting Speed - Faster ore smelting Component Find Chance - Bonus components from scrapping Cooking Speed - Faster food preparation Defense Skills Fire Resistance - Reduced fire damage Fall Damage Resistance - Less fall damage Temperature Resistance - Better cold/heat protection Radiation Resistance - Reduced radiation damage Explosive Resistance - Protection from explosions Stand Up Chance - Higher chance to stand when wounded Melee Damage Resistance - Less melee damage taken Damage From Scientists Resistance - Reduced scientist damage Damage From Players Resistance - PvP damage reduction Animal & Shark Defense Animal Damage Resistance - Protection from animal attacks Shark Damage Resistance - Reduced shark damage Metabolism Skills Hunger Metabolism - Slower hunger depletion Thirst Metabolism - Reduced thirst buildup Health Regeneration - Faster natural healing Horse Skills Horse Speed - Faster horse movement Horse Damage Resistance - Horse takes less damage Horse Fall Resistance - Better horse fall survival Underwater Skills Underwater Breathing - Extended underwater time Crate Skills Crate Unlocking Speed - Faster locked crate opening Crate Extra Loot - Bonus items from containers Building Skills Building Upgrade Cost - Reduced building upgrade costs Vehicle Skills Fuel Consumption - Reduced vehicle fuel usage Vehicle Repair Cost - Cheaper vehicle repairs Air Vehicle Takeoff Speed - Faster helicopter takeoff Damage Skills Damage To Scientists - Increased damage to scientists Damage To Animals - More damage to animals Damage To Players - Bonus PvP damage output Trap Damage - Increased trap and turret damage Combat Skills Magazine Size - Larger weapon magazines Effect Duration - Longer buff/debuff effects Revive Healing - More health from revives Special Skills Teleportation VIP - VIP teleport permissions Wipe Protection - Data protection across wipes Migration & Conversion Skills supports seamless data migration from popular skill plugins: SkillTree Plugin - Automatic conversion of player XP and skill levels Skills V1 - Full data transfer including custom skills and configurations Advanced Features Modal Windows System - Create custom modal interfaces for additional functionality Multi-Template UI - Support for Fullscreen, ServerPanel V1/V2/V4 templates Real-time Notifications - Integrated Notify/UINotify system for skill progression alerts Advanced API - Comprehensive developer API for third-party integrations ImageLibrary Integration - Offline image mode with automatic fallback Custom Economy Hooks - Flexible economy integration with plugin hooks XP Transfer System - Transfer XP between players on death (configurable) Cooldown System - Configurable action cooldowns to prevent spam Commands /skills or /skill - Opens the skills interface skills.modal <modalID> - Open specific modal window Admin Console Commands: skills.manage addxp <player> <amount> - Add XP to player skills.manage takexp <player> <amount> - Take XP from player skills.manage setxp <player> <amount> - Set player's XP balance skills.manage setskill <player> <skillId> <level> - Set skill level skills.manage giveskill <player> <skillId> <levels> - Increase skill level skills.manage resetskill <player> <skillId> - Reset specific skill skills.manage resetall <player> - Reset all skills skills.manage info <player> - Show player skill information Permissions skills.use - Access to skills interface (set in config as "Permission") skills.edit - Access to visual skill editor skills.xprate.vip - 1.5x XP rate bonus skills.xprate.premium - 2x XP rate bonus skills.xptransfer.vip - 75% XP transfer on death skills.xptransfer.premium - 100% XP transfer on death skills.gathering.level6-10 - Access to advanced gathering levels Developer API Skills provides a comprehensive API for developers: Methods: API_GetPlayerSkillLevel(ulong playerId, int skillId) - Get player's skill level API_AddPlayerXP(ulong playerId, float amount) - Grant XP to player API_GetSkillInfo(int skillId) - Get skill configuration data API_OnGather(BasePlayer player, Item item) - Handle gather events API_OnSkillLevelUp(BasePlayer player, int skillId, int level) - Skill level up events API_GetSkillLevel(BasePlayer player, int skillId) → int - Skill level API_GetSkillValue(BasePlayer player, int skillId) → float - Skill effect value API_GetPlayerSkills(BasePlayer player) → Dictionary<int, int> - All skill levels API_IsPlayerLoaded(BasePlayer player) → bool - Player data loaded API_SetSkillLevel(BasePlayer player, int skillId, int level) - Set skill level API_ResetPlayerSkills(BasePlayer player) - Reset all skills Hooks: OnSkillsPlayerLoaded(BasePlayer player) - Player data loaded OnSkillsXPEarned(BasePlayer player, float amount) - XP earned from gameplay (not admin commands) OnSkillsSkillLevelUp(BasePlayer player, int skillId, int newLevel) - Skill upgraded. Return null to allow, string to deny Web Config Editor Easily manage your Skills settings with our web-based configuration editor. This tool allows you to adjust plugin configurations through a user-friendly interface, eliminating the need to manually edit files on your server. P.S. Join our Discord at https://discord.gg/mevent and request the "Skills" group for access to the web configuration editor. FAQ Q: How many skills come with Skills? A: Skills includes 71+ pre-configured skills across 13 categories, all ready to use with balanced progression systems. Q: Do I need to configure anything? A: No! All skills are pre-configured and balanced. Simply install, enable desired skills, and grant permissions. Q: How does the XP system work? A: Players earn XP through gameplay activities (mining, combat, crafting, etc.) and spend it to unlock skill levels. Q: Can I customize skills? A: Yes! Use the visual editor to modify skill costs, bonuses, requirements, and create new custom skills. Q: What happens on server wipe? A: Fully configurable - you can preserve skills/XP, reset everything, or choose selective wipe protection. Q: Does it work with economy plugins? A: Yes! Full integration with ServerRewards, Economics, BankSystem, IQEconomic, and custom economy systems. Q: Can I migrate from SkillTree or Skills V1? A: Absolutely! Skills automatically converts data from both plugins. All player progress is preserved. Q: What are modal windows? A: Modal windows are custom popup interfaces you can create for additional features like shops, information displays, or mini-games. Q: Which ServerPanel versions are supported? A: Skills supports ServerPanel V1, V2, V4, and Fullscreen templates - all with dedicated banner images and layouts. Q: Can I use custom images? A: Yes! Skills supports ImageLibrary integration with offline image mode for custom skill icons and backgrounds. Q: Is there a cooldown system? A: Yes, configurable cooldowns prevent spam actions and maintain server performance. Q: How does XP transfer work? A: When enabled, defeated players can transfer a percentage of their XP to the killer, adding competitive depth. Q: Can I limit skill access? A: Yes! Skills support permission requirements, playtime requirements, and other prerequisites. Q: What's the performance impact? A: Skills is highly optimized with caching, batch processing, and efficient data structures for minimal server load. Q: How do I add Skills to the ServerPanel menu? A: You can do this directly from the ServerPanel in-game: 1. Open the ServerPanel menu in-game. 2. If you have permission to edit, switch the panel to edit mode so you can see the blue "EDIT CATEGORY" and "EDIT PAGES" buttons. 3. Choose the category where you want Skills to appear and click the "EDIT CATEGORY" button for that category. 4. While you are in this category in the ServerPanel, click the "EDIT PAGES" button to create a new page (or edit an existing one) for Skills. 5. For that page, set these exact parameters: Type: Plugin Plugin Name: Skills Plugin Hook: API_OpenPlugin 6. Save the changes. The Skills button will now appear in the ServerPanel in the category you selected.$24.9516 points -

Version 2.0.11
7,188 downloads
ServerPanel adds a player information menu to your server, where you can both share important and useful information with your players and integrate your plugins into it! Features User-Friendly Interface: Intuitive GUI for easy navigation and interaction. Economy Integration: Supports various economy plugins for seamless financial management. Dynamic Menu Categories: Organize functionalities into customizable categories for better user experience. Extensive Configuration Options: Almost every aspect of the plugin can be customized, including messages, colors, sizes, fonts, tion. Auto-Open Menu: Automatically displays the menu upon player connection, configurable per server settings. Block Settings: Control access to the menu during building, raiding, or combat situations to enhance gameplay balance. Multiple Economy Head Fields: Display various economic metrics such as balance, server rewards, and bank information. Permission Management: Fine-tune permissions for different user roles to control access to features. Localization Support: Easily translate and customize all messages for different languages. Performance Optimized: Designed to minimize server lag while providing rich functionality. Customizable Hooks: Integrate with existing economy systems using customizable hooks for adding, removing, and displaying balances. Editor Position Change: Admins can now change editor positions with a simple click, choosing between left, center, or right alignments. Command Enhancements: Commands are now processed with multiple arguments separated by "|", enabling bulk command processing. Commands /info – open menu /sp.install (or) /welcome.install – open installer menu sp.migrations – console command for updating plugin data structure when upgrading to new versions. Automatically creates backups before making changes. sp.migrations list – shows available migrations and whether they need to run sp.migrations run <version> – runs specific migration (e.g., "1.3.0") sp.migrations run <version> force – forces migration even if not detected as needed Permissions serverpanel.edit – allows players to edit the plugin settings and open the edit menu serverpanelinstaller.admin - required to access the plugin installation functions Video Showcase Templates Template V1 Template V2 Template V3 Template V5 Editor Installer TEST SERVER Join our test server to view and experience all our unique features yourself! Copy the IP Address below to start playing! connect 194.147.90.239:28015 Update Fields ServerPanel supports dynamic update fields that can be used in your templates to display real-time information. These fields are automatically updated and can be used in text components, headers, and other interface elements. Player Information {online_players} – Number of currently online players {sleeping_players} – Number of sleeping players {all_players} – Total number of players (online + sleeping) {max_players} – Maximum server capacity {player_kills} – Player's kill count (requires KillRecords, Statistics, or UltimateLeaderboard) {player_deaths} – Player's death count (requires KillRecords, Statistics, or UltimateLeaderboard) {player_username} – Player's display name {player_avatar} – Player's Steam ID for avatar display Economy {economy_economics} – Economics plugin balance {economy_server_rewards} – ServerRewards points {economy_bank_system} – BankSystem balance Note: Economy fields are fully customizable in "oxide/config/ServerPanel.json" under "Economy Header Fields". You can add support for any economy plugin by configuring the appropriate hooks (Add, Balance, Remove). Custom keys can be created and used in templates just like the default ones. Server Information {server_name} – Server hostname {server_description} – Server description {server_url} – Server website URL {server_headerimage} – Server header image URL {server_fps} – Current server FPS {server_entities} – Number of entities on server {seed} – World seed {worldsize} – World size {ip} – Server IP address {port} – Server port {server_time} – Current server time (YYYY-MM-DD HH:MM:SS) {tod_time} – Time of day (24-hour format) {realtime} – Server uptime in seconds {map_size} – Map size in meters {map_url} – Custom map URL {save_interval} – Auto-save interval {pve} – PvE mode status (true/false) Player Stats {player_health} – Current health {player_maxhealth} – Maximum health {player_calories} – Calorie level {player_hydration} – Hydration level {player_radiation} – Radiation poisoning level {player_comfort} – Comfort level {player_bleeding} – Bleeding amount {player_temperature} – Body temperature {player_wetness} – Wetness level {player_oxygen} – Oxygen level {player_poison} – Poison level {player_heartrate} – Heart rate Player Position {player_position_x} – X coordinate {player_position_y} – Y coordinate (height) {player_position_z} – Z coordinate {player_rotation} – Player rotation (degrees) Player Connection {player_ping} – Connection time in seconds {player_ip} – Player's IP address {player_auth_level} – Authorization level (0=Player, 1=Moderator, 2=Admin) {player_steam_id} – Steam ID {player_connected_time} – Connection start time {player_idle_time} – Idle time (HH:MM:SS) Player States {player_sleeping} – Is sleeping (true/false) {player_wounded} – Is wounded (true/false) {player_dead} – Is dead (true/false) {player_building_blocked} – Is building blocked (true/false) {player_safe_zone} – Is in safe zone (true/false) {player_swimming} – Is swimming (true/false) {player_on_ground} – Is on ground (true/false) {player_flying} – Is flying (true/false) {player_admin} – Is admin (true/false) {player_developer} – Is developer (true/false) Network & Performance {network_in} – Network input (currently shows 0) {network_out} – Network output (currently shows 0) {fps} – Server FPS {memory} – Memory allocations {collections} – Garbage collections count Usage Example: You can use these fields in any text component like: "Welcome {player_username}! Server has {online_players}/{max_players} players online." API Documentation for Developers ServerPanel provides an API for plugin developers to integrate their plugins into the menu system. Required Methods API_OpenPlugin(BasePlayer player) - Main integration method that returns CuiElementContainer OnServerPanelClosed(BasePlayer player) - Called when panel closes (cleanup) OnServerPanelCategoryPage(BasePlayer player, int category, int page) - Called when category changes (cleanup) OnReceiveCategoryInfo(int categoryID) - Receives your category ID Integration Example [PluginReference] private Plugin ServerPanel; private int _serverPanelCategoryID = -1; private void OnServerInitialized() { ServerPanel?.Call("API_OnServerPanelProcessCategory", Name); } private void OnReceiveCategoryInfo(int categoryID) { _serverPanelCategoryID = categoryID; } private void OnServerPanelCategoryPage(BasePlayer player, int category, int page) { // Cleanup when player switches categories } private CuiElementContainer API_OpenPlugin(BasePlayer player) { var container = new CuiElementContainer(); // Create base panels (required structure) container.Add(new CuiPanel() { RectTransform = {AnchorMin = "0 0", AnchorMax = "1 1"}, Image = {Color = "0 0 0 0"} }, "UI.Server.Panel.Content", "UI.Server.Panel.Content.Plugin", "UI.Server.Panel.Content.Plugin"); container.Add(new CuiPanel() { RectTransform = {AnchorMin = "0 0", AnchorMax = "1 1"}, Image = {Color = "0 0 0 0"} }, "UI.Server.Panel.Content.Plugin", "YourPlugin.Background", "YourPlugin.Background"); // Add your plugin's UI elements here container.Add(new CuiLabel { RectTransform = {AnchorMin = "0.1 0.8", AnchorMax = "0.9 0.9"}, Text = {Text = "Your Plugin Interface", FontSize = 16, Align = TextAnchor.MiddleCenter, Color = "1 1 1 1"} }, "YourPlugin.Background", "YourPlugin.Title"); // Add buttons, panels, etc. using "YourPlugin.Background" as parent return container; } private void OnServerPanelClosed(BasePlayer player) { // Cleanup when panel closes } Header Update Fields API_OnServerPanelAddHeaderUpdateField(Plugin plugin, string updateKey, Func<BasePlayer, string> updateFunction) - Registers a per-player string provider for a header placeholder. Returns true on success. API_OnServerPanelRemoveHeaderUpdateField(Plugin plugin, string updateKey = null) - Unregisters a specific updateKey for your plugin, or all keys for your plugin when updateKey is null. Returns true on success. Usage Example [PluginReference] private Plugin ServerPanel; private void OnServerInitialized() { // Register a dynamic header field for each player ServerPanel?.Call("API_OnServerPanelAddHeaderUpdateField", this, "{player_kdr}", (Func<BasePlayer, string>)(player => GetKdr(player))); } private string GetKdr(BasePlayer player) { // Compute and return the value to display in the header for this player return "1.23"; } Using in UI: Place your key (e.g., {player_kdr}) directly in Header Field texts. The value will be updated per player using your function. FAQ Q: Why can't I open the menu? A: Make sure that the plugin is installed and activated on your server. If the problem persists, contact the server administrator. Q: How do I enable Expert Mode? (disables automatic template updates) A: In the data file "Template.json", turn on the "Use an expert mod?" option: "Use an expert mod?": true, P.S. "Template.json” is located in the "oxide/data/ServerPanel" directory (if you use Oxide) or in the "carbon/data/ServerPanel" directory (if you use Carbon) Q: I see black images with Rust logo or get error 429 when loading images. What should I do? A: These issues occur when there are problems downloading images from the internet. To fix this, enable Offline Image Mode which will use local images instead: Enable the mode in config: Open "oxide/config/ServerPanel.json" (or "carbon/config/ServerPanel.json" for Carbon) Set "Enable Offline Image Mode": true Set up the images: Create folder "TheMevent" in "oxide/data" (or "carbon/data" for Carbon) Download PluginsStorage (click "CODE" → "Download ZIP") Extract the ZIP and copy all contents to the "TheMevent" folder Reload the plugin: Type o.reload ServerPanel (Oxide) or c.reload ServerPanel (Carbon) Note: If using a hosting service, you may need to use their file manager or FTP to upload the files. Q: Does ServerPanel work only with Mevent's plugins? A: Currently, ServerPanel integrates seamlessly with Mevent's plugins (Shop, Kits, Daily Rewards, etc.). However, other developers can use the provided API to integrate their plugins into the menu system. The plugin system is designed to be extensible for third-party integrations. Q: Why do integrated plugins (Shop, Kits) have different window sizes? A: Different plugins may use different templates for integration. Make sure all your integrated plugins use the same template version (V1, V2, etc.) that matches your ServerPanel template. Update the template in each plugin to ensure consistent sizing. Q: The panel displays differently for different players. How can I make it show the same on everyone's screen? A: This issue occurs when players have different UI scale settings. To fix this and ensure consistent display for all players: Open the "Template.json" file located in "oxide/data/ServerPanel" (or "carbon/data/ServerPanel" for Carbon) Find the "Parent (Overlay/Hud)" setting in the "Background" section Change the value from "Overlay" to "OverlayNonScaled" Save the file and restart your server or reload the plugin Q: How can I change the video displayed in the ServerPanel interface to my own custom video? A: Yes, you can replace the default video with your own! You need to find and modify the command: serverpanel_broadcastvideo [your_video_url] Replace [your_video_url] with the direct link to your video. For best compatibility, we recommend hosting your video on imgur.com. Q: My custom images are not loading or show as blank/question marks. What image hosting should I use? A: For custom images, we recommend using imgbb.com for image hosting. Avoid Imgur and services without direct access to the image. For the most reliable experience, use Offline Image Mode with local images instead. Q: How can I make plugin UIs open outside of the ServerPanel menu instead of inside categories? A: You can configure buttons to execute chat commands that open plugin UIs independently. To do this: In your button configuration, set "Chat Button": true Set the "Commands" field to "chat.say /command" (replace "command" with the actual plugin command) Example: To open the Cases plugin outside the menu: "Chat Button": true "Commands": "chat.say /cases" This will execute the command as if the player typed it in chat, opening the plugin's interface independently rather than within the ServerPanel menu. Q: Text in V4 template is shifting or sliding out of place. How can I fix this? A: This issue occurs when text width isn't properly configured. ServerPanel provides "TITLE LOCALIZATION" settings to control text width for categories and pages: Open the ServerPanel editor (click the "ADMIN MODE" button to open the edit menu) Select the category or page you want to edit (click to "EDIT CATEGORY" or "EDIT PAGE" button) In the editor, find the "TITLE LOCALIZATION" section For each language (en, ru, etc.), you'll see three columns: LANGUAGE - The language code TEXT - The localized text content WIDTH (px) - The width setting in pixels Adjust the "WIDTH (px)" value to match your text length. Longer text requires larger width values Save your changes and test in-game Tip: Start with a width value around 100-150 pixels for short text, and increase it for longer titles. You can adjust this value until the text displays correctly without shifting.$40.0016 points -
Version 2.2.0
12,464 downloads
This plugin adds variety of NPC sets with very high number of parameter sets on standard and custom monuments. Also it is added during dropping the server AirDrop, locked crate and destroying a tank or helicopter Dependencies (optional, not required) AlphaLoot CustomLoot True PVE Kits Economics Server Rewards IQEconomic PveMode Custom maps Maps that have default settings for their custom monuments. For these maps, you will not need to create places for the appearance of NPCs, they have already been created by the map developer and are located inside the archive when buying the map You can also download all these files for all maps here Detroit: Irreparable Damage Oregon 2: Last Hope Lostly Island Frontier – American Old West Oregon: Land of Dead Badlands Foreign Lands Namalsk Kong: Skull Island Destroyed World Deathland Dreamland Last Train Pandora Railway Island Wasteland Cataclysm: Fury of Nature Last Oasis Crazy Island Standard monuments This item of the plugin settings is used for appearing NPCs in all standard monuments. All these settings are located in the Monument folder (oxide/data/BetterNpc/Monument). Each file in this folder corresponds to a standard monument If there is no standard monument file in the folder, you can create it (you need to name the file the same way as the standard monuments on the map inside the game). You can copy the settings from any other standard monument Configuration parameters: Enabled? [true/false] – It allows to enable/disable the appearance of NPC on the monument. If you need NPCs appearing on the map and don’t need it on another map, you can use this option simply The size of the monument – this parameter contains two values. It is the length and width of the monument. This parameter is necessary for random appearance of NPC on the monument and indication of limits of removal of standard NPCs on the monument (if it is necessary) Remove other NPCs? [true/false] – It deletes the standard NPCs inside the limits of this monument Presets – It is a list of all the NPC presets to appear on the monument (the description of the NPC preset settings is located below) Custom monuments This item of the plugin settings is responsible for the appearance of NPCs on custom monuments. All these settings are located in the Custom folder (oxide/data/BetterNpc/Custom). Each file in this folder corresponds to a custom monument If you have bought a map with already configured NPC appearance files for custom monuments you will copy these files into the Custom folder. If you want to create and configure the appearance of NPC in your custom location on the map, you will use the command in the administrators’ chat /SpawnPointAdd {name} (see the description of this command below in the instruction) Configuration parameters: Enabled? [true/false] – It allows to enable/disable the appearance of NPC on the monument. If you need NPCs appearing on the map and don’t need it on another map, you can use this option simply Position – It is a position of the custom monument on the map Rotation – It is a rotation of the custom monument on the map (this parameter is necessary for using custom places to appear of NPC on the monument, if the monument is used on more than one map) Radius – It is the radius of the custom monument from the position on the map Remove other NPCs? [true/false] – It removes the standard NPCs inside the limits of this monument Presets – It is a list of all the NPC presets to appear on the monument (the description of the NPC preset settings is located below) Roads This item of the plugin settings is used to appear NPCs on all types of roads. All these settings are located in the Road folder (oxide/data/BetterNpc/Road). Each file in this folder corresponds to a particular road type ExtraNarrow – It is a narrow, unpaved walkway ExtraWide It is a wide, paved, two-lane, beltway road Standard – It is a regular, paved road Configuration parameters: Enabled? [true/false] – It allows to enable/disable the appearance of NPC on the road. If you need NPCs appearing on the map and don’t need it on another map, you can use this option simply Presets – It is a list of all the NPC presets to appear on the road (the description of the NPC preset settings is located below) Biomes This item of the plugin settings is used to appear NPCs on all types of biomes. All these settings are located in the Biome folder (oxide/data/BetterNpc/Biome). Each file in this folder corresponds to a particular biome type (Arctic, Arid, Temperate, Tundra) Configuration parameters: Enabled? [true/false] – It allows to enable/disable the appearance of NPC on the biome. If you need NPCs appearing on the map and don’t need it on another map, you can use this option simply Presets – It is a list of all the NPC presets to appear on the biome (the description of the NPC preset settings is located below) In-game events This item of the plugin settings is used to appear the NPCs in standard Rust events. All of these settings are located in the Event folder (oxide/data/BetterNpc/Event). Each file in this folder corresponds to its own type of event The supported events: When the plane drops the server AirDrop, it will be guarded by specific NPC presets CH47 – When the chinook drops a locked crate during patrolling the map, it will be guarded by specific NPC presets Bradley – When someone destroys a tank, its crates will be guarded by specific NPC presets Helicopter – When someone shoots down a patrol helicopter, its crates will be guarded by specific NPC presets Configuration parameters: Enabled? [true/false] – It allows to enable/disable the appearance of NPC on the event. If you need NPCs appearing on the map and don’t need it on another map, you can use this option simply Radius – NPC appearance radius Presets – It is a list of all the NPC presets to appear on the event (the description of the NPC preset settings is located below) The NPC preset parameters Enabled? [true/false] – It is enabling/disabling the preset Minimum numbers – Day – It is the minimum number of NPCs from the day preset Maximum numbers – Day – It is the maximum number of NPCs from the day preset Minimum numbers – Night – It is the minimum number of NPCs from the night preset Maximum numbers – Night – It is the maximum number of NPCs from the night preset NPCs setting – It is all NPC settings of this preset (see the description of NPC settings for details) Type of appearance (0 – random; 1 – own list) – It is a type of NPC appearance. You can create your own list of places of NPC appearance. The NPC will appear only randomly. This parameter is not used in Road appearance types Own list of locations – It is your own list of NPC appearances. You need to use the number of locations at least the maximum possible number of NPCs in this preset. This parameter is not used in Road appearance types The path to the crate that appears at the place of death – It is the full path to the crate prefab that appears at the place of death of an NPC. If you don’t need this parameter, you should leave this blank Which loot table should the plugin use (0 – default; 1 – own; 2 – AlphaLoot; 3 – CustomLoot; 4 – loot table of the Rust objects; 5 – combine the 1 and 4 methods) – It is the type of the NPC loot table in this preset. Type 5 includes two types (1 and 4) at the same time and locates items from both types Loot table from prefabs (if the loot table type is 4 or 5) – It is a setting of the loot tables from Rust objects. You can see the loot table of Rust objects description for more details Own loot table (if the loot table type is 1 or 5) – It’s NPC’s own loot table. You can see the description of your own loot table for more details The NPC settings description Names is a list of NPC names. It is selected from the list randomly Health – It’s the HP amount of the NPC Roam Range – It’s the patrolling area distance. It’s the distance that the NPC can move from the place of appearance during patrolling Chase Range – It’s the chase range of the target. It’s the distance that the NPC can chase his target from the place of appearance Attack Range Multiplier – It’s the attack range multiplier of the NPC’s weapon Sense Range – It’s a target detection radius Target Memory Duration [sec.] – It’s the time that the NPC can remember his target Scale damage – It’s the damage multiplier from NPC to the player Aim Cone Scale – It’s the spread of NPC shooting, the default value in Rust is 2. It doesn’t take negative values Detect the target only in the NPCs viewing vision cone? [true/false] – It’s the parameter that allows detecting the target only in a certain NPC viewing. If you want to detect the target in 360 degrees, you will set the parameter "False” Vision Cone – It’s the NPC viewing. The range of values is from 20 to 180 degrees. If the previous parameter is False, this parameter is not used Speed – It’s the NPC speed. The default value in Rust is 5 Minimum time of appearance after death [sec.] – It’s the minimum time of NPC appearance after the death. This parameter is not used in the NPC Event places Maximum time of appearance after death [sec.] – It’s the maximum time of NPC appearance after the death. This parameter is not used in the NPC Event places Disable radio effects? [true/false] – You can disable/enable radio effects Is this a stationary NPC? [true/false] – If this parameter is True, the NPC will not move or run Remove a corpse after death? [true/false] – This parameter can control the deleting of NPC corpses (only backpacks are left). This parameter improves efficiency if there are a lot of NPCs Wear items – It’s a list of NPCs’ clothes and armor Belt items – It’s a list of weapons and items NPCs’ fast slots. Medical syringes are used for healing. If you give grenades to an NPC, he will use them. Smoke grenades are used for creating smoke screens (if you don’t need them, you should remove them from your inventory). If you give a Rocket Launcher to an NPC, he will raid the target’s building (if the target is inside it) Kits – It gives a pack of Kits plugin. If you don’t need this parameter, you should leave this blank. I recommend using the previous 2 points to configure NPC items A description of the Rust loot table settings Minimum numbers of prefabs –It’s the minimum numbers of prefabs that are needed to appear in the NPC loot table Maximum numbers of prefabs –It’s the maximum numbers of prefabs that are needed to appear in the NPC loot table Use minimum and maximum values? [true/false] – this parameter specifies whether to use the minimum and maximum numbers to limit the number of items List of prefabs – It’s a list of prefabs that need to add in the loot table. It is necessary to indicate the full path to the prefab and the probability of falling out this prefab A description of the own loot table settings Minimum numbers of items – It’s the minimum number of items Maximum numbers of items – It’s the maximum number of items Use minimum and maximum values? [true/false] – this parameter specifies whether to use the minimum and maximum numbers to limit the number of items List of items – It’s a total list of all items that can fall out in the NPC loot table. You can specify any standard items, their blueprints and any skinned or custom items The commands in the chat (for admins only) /SpawnPointPos {name} – To show the local admin’s position coordinates relative to the place where the NPC {name} appears /SpawnPointAdd {name} – To create the NPC appearance point {name} in the Admin’s custom coordinates. A file with this name will be created in the folder Custom and you can configure it as you need /SpawnPointAddPos {number} {name} – To write the local admin’s coordinate into the preset with the positional number {number} (starting from 1) to the place where the NPC {name} appears /SpawnPointAddWear {number} {name} – To write all the admin’s dressed clothes into the preset with the positional number {number} (starting from 1) to the place where the NPC {name} appears /SpawnPointAddBelt {number} {name} – To write all the admins’ quick slots cells into a preset with the positional number {number} ( starting from 1) to the place where the NPC {name} appears /SpawnPointShowPos {number} {name} – To show to the Admin all the custom NPC appearance points in the preset with the positional number {number} ( starting from 1) in the place where the NPC {name} appears /SpawnPointReload {name} – Reload Spawn Point with the name {name} Console commands (RCON only) ShowAllNpc – Shows the number of all NPCs of the BetterNpc plugin on your server Hooks object CanAirDropSpawnNpc(SupplyDrop supplyDrop) – It is called before an NPC appearance to guard an AirDrop. The returning of a non-zero value stops an NPC appearance object CanCh47SpawnNpc(HackableLockedCrate crate) – It is called before an NPC appearance to guard a locked chinook crate. The returning of a non-zero value stops an NPC appearance object CanBradleySpawnNpc(BradleyAPC bradley) – It is called before an NPC appearance to guard the boxes from crushed Bradley. The returning of a non-zero value stops an NPC appearance object CanHelicopterSpawnNpc(BaseHelicopter helicopter) – It is called before an NPC appearance to guard the crates from crushed patrol helicopter. The returning of a non-zero value stops an NPC appearance API void DestroyController(string name) – It destroys the place of appearance NPC with the name {name} void CreateController(string name) – It creates the place of appearance NPC with the name {name} These APIs can be used with standard monuments, custom monuments (NPC locations) and roads. The name of this monument is in standard monuments {name}. It is the name of the file in the Custom and Road folder in custom monuments and roads My Discord: KpucTaJl#8923 Join the Mad Mappers Discord here! Check out more of my work here! Creator of the default configuration – jtedal$35.0016 points -
Version 1.5.6
9,487 downloads
Sputnik is a server event that allows players to contest fallen sputnik satellite fragments that fall around the map. Players will need to battle their way past patrol helicopters, NPCs, turrets, and mines to gain access to loot locked behind keycards that require 'Space Cards,' which can be added to loot tables or sold in a shop! Alternatively, you can use standard keycards. Overview By default, there are five types of debris that can fall in any quantity and combination. The fragment can be guarded by a helicopter, NPCs, turrets, and mines. For each preset, you can configure the location and number of crates. A radiation zone can be created around the fragment. By default, there is a card reader in one of the locations that open a locked crate. It is activated using the "Space card.” For more information, see the "Space card” section. Space Card A card reader can be placed on any type of sputnik debris. By default, it is activated using a purple "Space Card." This card reader opens the crates specified in a special section of the config. A custom card can be added to the loot tables of standard crates and crates of this event. It can also be given with the help of a command or sold in the server store. If necessary, the card reader can be removed, and the card can be replaced with any type of standard card. Location presets The location preset is specified for each wreckage preset separately. By default, a data file with five types of prefabs is included: sputnik_1 debris_1 debris_2 debris_3 debris_4 They are shown in pictures 6 - 10. The first location includes a locked crate that opens with the help of a "Space Map." Chat commands (only for administrators) /sputnikstart– launches the event in a random configuration /sputnikstart <eventPresetName> – launches the event in the <eventPresetName> configuration /sputnikstop – stops the event /givespacecard – give yourself a "Space Card". Console commands (RCON only) sputnikstart– launches the event in a random configuration sputnikstart <eventPresetName> – launches the event in the <eventPresetName> configuration givespacecard <userID> – give a "Space Card" to player Config en – example of plugin configuration in English ru – example of plugin configuration in Russian Dependencies (optional, not required) True PVE PveMode GUI Announcements Notify DiscordMessages AlphaLoot CustomLoot Economics Server Rewards IQEconomic Hooks OnSputnikEventStart () OnSputnikEventStop () OnSputnikEventWin (ulong userID) OnPlayerEnterSputnik{BasePlayer player} OnPlayerExitSputnik{BasePlayer player} My Discord: Adem#9554 Join the Mad Mappers Discord here! Check out more of my work here!$29.9916 points -

Version 2.3.2
9,475 downloads
Unique kit system with the highest possible functionality and beautiful design. This will please you (no need to sit in the config every time and try to fill in some incomprehensible values, etc.), and your players (convenient, clear and informative interface). You just start editing items directly in the game) and your players (comfortable, clear, informative interface)! Features of Kits Beautiful User Interface: Experience a visually appealing and user-friendly design. High Performance: Optimized for fast, reliable performance. Automatic Kit Conversion (uMod): Easily convert your existing kits. In-Game Kit and Item Setup: Configure kits directly in the game. Auto Kits & Wipes (Optional): Automate kit distribution and server wipes. Custom Items & Commands: Assign unique items and commands to kits. Advanced Item Settings: Fine-tune every aspect of your items. CopyPaste Integration: Seamlessly work with CopyPaste. Optional Features: Delays after wipes, set blocking in Building Block, logging, and item chances. Skills & ServerPanel Support: Enhance player experience with integrated support. Commands kit – open the kit interface kit help – get help with kits kit autokit – enable or disable automatic kit. Requires the "kits.changeautokit" permission. You can set this permission up in the plugin configuration under "Permission to enable/disable autokit". kit list – display all available kits kit [name] – redeem a specific kit kits.resetkits – delete all kits kits.give [name/steamid] [kitname] – grant a kit to player kits.convert – convert from uMod Kits kits.wipe – clear players data kits.reset – resets the player data or kits in the kits system. kits.reset data [<targetID>/all] – resets the data of a player or all players. Parameters: <targetID>: The ID of the player whose data is to be reset. If you specify all, the data of all players will be reset. kits.reset kits – resets all kits in the data kits.template <interface_type> <interface_style> <template> [template_version] – allows the administrator to customize the appearance of the bundles interface by choosing between fullscreen and inmenu mode. Different styles and templates are available for each interface type. The old style (old) is only available for fullscreen mode, while the new Rust style (rust) is available for both interface types. When using the Rust style, you must specify a specific template such as normal, content, categories or content_categories. For inmenu rust templates, you can also specify the ServerPanel template version (1 or 2). Parameters: <interface_type>: The type of interface template. Valid values: fullscreen: Fullscreen interface template. inmenu: Menu interface template. <interface_style>: The style of the interface. Valid values: old: The old interface style (fullscreen only). rust: New Rust interface style (for fullscreen and inmenu). <template>: The name of the target template. Valid values depend on the interface style: normal, content, categories, content_categories. [template_version]: (Optional, only for inmenu rust) ServerPanel template version. Valid values: 1 or 2. Specifies the template version to be used with the selected inmenu rust template. Examples: kits.template fullscreen old - Sets the fullscreen interface to the old style. kits.template fullscreen rust normal - Sets the fullscreen interface to the Rust style with the normal template. kits.template fullscreen rust content - Sets the fullscreen interface to the Rust style with the content template. kits.template fullscreen rust categories - Sets the fullscreen interface to the Rust style with the categories template. kits.template fullscreen rust content_categories - Sets the fullscreen interface to the Rust style with the content_categories template. kits.template inmenu rust normal 1 - Sets the menu interface to the Rust style with the normal template for ServerPanel version 1. kits.template inmenu rust content 2 - Sets the menu interface to the Rust style with the content template for ServerPanel version 2. kits.template inmenu rust categories 1 - Sets the menu interface to Rust style with the categories template for ServerPanel version 1. kits.template inmenu rust content_categories 1 - Sets the menu interface to the Rust style with the content_categories template for ServerPanel version 1. Video P.S. Video of the old version, video for the V2+ version is now in development Showcase Full screen Templates Template OLD STYLE Template NEW RUST Default: Content: Categories: Content & Categories: In-Menu Templates Template V1 (V1.1) Default: Content: Categories: Content & Categories: Template V2 Default: Content: Categories: Content & Categories: Template V4 Default: Content: Categories: Content & Categories: Editor Web Config Editor Easily manage your Kits settings with our web-based configuration editor. This tool allows you to adjust plugin configurations through a user-friendly interface, eliminating the need to manually edit files on your server. P.S. Join our Discord at https://discord.gg/mevent and request the "Kits" group for access to the web configuration editor. TEST SERVER Join our test server to view and experience all our unique features yourself! Copy the IP Address below to start playing! connect 194.147.90.239:28015 FAQ Q: Where can I see an example of a config? A: Config Q: Where can I see an example of a data? A: Data Q: How do I add Kits to ServerPanel? A: To add Kits to your ServerPanel, create a new category in your ServerPanel configuration with these settings: "Type": "Plugin", "Plugin Name": "Kits", "Plugin Hook": "API_OpenPlugin". Q: Does the Kits plugin support other plugins? A: Yes, this Kits plugin has an API similar to other popular kits plugins. If the plugin works with Kits - it works with this plugin too. Q: How do I enable the sale of kits? A: You need to configure the plugin economy (which plugin, its hooks, etc.), enable "Enable sale" in the Kits data (oxide/data/Kits/Kits.json or carbon/data/Kits/Kits.json) and set the price to "Selling price" "Enable sale": true, "Selling price": 100, Q: How do I use Economics to pay for kits? A: Example configuration settings: "Economy": { "Type (Plugin/Item)": "Plugin", "Plugin name": "Economics", "Balance add hook": "Deposit", "Balance remove hook": "Withdraw", "Balance show hook": "Balance", "ShortName": "", "Display Name (empty - default)": "", "Skin": 0 }, Q: How do I use ServerRewards to pay for kits? A: Example configuration settings: "Economy": { "Type (Plugin/Item)": "Plugin", "Plugin name": "ServerRewards", "Balance add hook": "AddPoints", "Balance remove hook": "TakePoints", "Balance show hook": "CheckPoints", "ShortName": "", "Display Name (empty - default)": "", "Skin": 0 }, Q: How do I use scrap to pay for kits? A: Example configuration settings: "Economy": { "Type (Plugin/Item)": "Item", "Plugin name": "", "Balance add hook": "", "Balance remove hook": "", "Balance show hook": "", "ShortName": "scrap", "Display Name (empty - default)": "", "Skin": 0 }, Q: How do I resize the kit image? A: You can do this in the config, here's an example of the image setup (-32 and 32 are width, and -75 and -11 are height "Kit Image": { "AnchorMin": "0.5 1", "AnchorMax": "0.5 1", "OffsetMin": "-32 -75", "OffsetMax": "32 -11" }, Q: How can I remove the numbers on the kits ("#1", "#2", etc.)? A: You need to turn off "Show Number?" in the config: "Show Number?": false, Q: How do I make it so that others can see kits with different permissions without being able to claim them? A: You need to turn off "Show All Kits?" in the config: "Show All Kits?": true, Q: Where can I edit the names in the plugin or add my own language? A: You can edit lang files that are located (for example) at "oxide/lang/en/Kits.json" or "carbon/lang/en/Kits.json". Q: Players get "The plugin does not work correctly, contact the administrator!" message. How to fix? A: This error occurs when the ImageLibrary plugin is not working properly. Solutions: Install the ImageLibrary plugin if it's not installed. Make sure ImageLibrary is loaded and running properly (check with o.plugins command). Restart the server after installing ImageLibrary. Check server console for ImageLibrary errors and fix them. Q: I see black images with Rust logo or get error 429 when loading images. What should I do? A: These issues occur when there are problems downloading images from the internet. The Kits plugin sends images to ImageLibrary but is not responsible for the downloading process itself. Error 429 typically occurs due to rate limits imposed by image hosting services like Imgur (see HTTP 429 documentation for more details). To fix this, enable Offline Image Mode which will use local images instead: Enable the mode in config: Open "oxide/config/Kits.json" (or "carbon/config/Kits.json" for Carbon) Set "Enable Offline Image Mode": true Set up the images: Create folder "TheMevent" in "oxide/data" (or "carbon/data" for Carbon) Download PluginsStorage (click "CODE" → "Download ZIP") Extract the ZIP and copy all contents to the "TheMevent" folder Reload the plugin: Type o.reload Kits (Oxide) or c.reload Kits (Carbon) Note: If you want to add your own custom images, place them in the "TheMevent" folder and reference them with the "TheMevent/" prefix. For example: "TheMevent/Icon1.png", "TheMevent/MyCustomIcon.jpg", etc. Q: What placeholders are available for commands and what do they do? A: You can use these placeholders in kit commands and they will be automatically replaced: %steamid% - Replaced with the player's Steam ID (e.g., "76561198000000000") %username% - Replaced with the player's display name (e.g., "PlayerName") %player.x% - Replaced with the player's X coordinate position %player.y% - Replaced with the player's Y coordinate position %player.z% - Replaced with the player's Z coordinate position Example usage in kit commands: "Commands on receiving (via '|')": "say Welcome %username%!|teleport %steamid% %player.x% %player.y% %player.z%" Note: Multiple commands can be separated by the "|" character, and they will be executed in sequence when the kit is redeemed. HOOKS private string[] canRedeemKit(BasePlayer player) private void OnKitRedeemed(BasePlayer player, string kitName) private double OnKitCooldown(BasePlayer player, double cooldown) API private bool TryClaimKit(BasePlayer player, string name, bool usingUI) private string[] GetAllKits() private object GetKitInfo(string kitname) private string[] GetKitContents(string kitname) private double GetKitCooldown(string kitname) private double PlayerKitCooldown(ulong ID, string kitname) private int KitMax(string kitname) private double PlayerKitMax(ulong ID, string kitname) private string KitImage(string kitname) private bool IsKit(string kitname) private bool isKit(string kitname) private void GetKitNames(List<string> list) private double GetPlayerKitCooldown(ulong userId, string name) private double GetPlayerKitCooldown(string userId, string name) private void SetPlayerCooldown(ulong userId, string name, int amount) private int GetPlayerKitUses(ulong userId, string name) private int GetPlayerKitUses(string userId, string name) private void SetPlayerKitUses(ulong userId, string name, int amount) private JObject GetKitObject(string name) private int GetKitMaxUses(string name) private string GetKitDescription(string name) private string GetKitImage(string name) private bool GiveKit(BasePlayer player, string name, bool usingUI) private bool HasKitAccess(string userId, string name) private int GetPlayerKitAmount(string userId, string name)$34.9516 points -
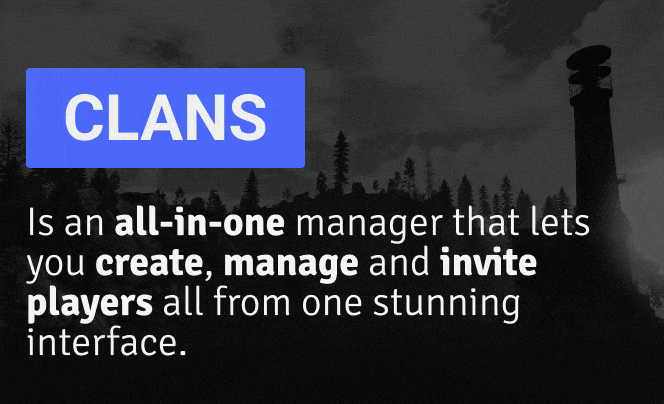
Version 1.1.57
6,194 downloads
Clans is an all-in-one manager that lets you create, manage and invite players all from one stunning interface. Toggle friendly fire, view clan, and player leaderboards, create and break alliances, modify gather rates for clan members and set clan skins to identify clan members abroad easily. Features Beautiful user interface Performance Allied clans Gather rate for players (allows you to set how much each clan member must collect resources. For example: each member of the clan must collect 10 thousand sulfur, so that later it can be used to craft explosives and attack another clan) Clan skins (allows you to set common skins for all clan players. All the clothes on the players of the same clan will be the same, which allows you to distinguish your own from the enemies during the battle) The clan TAG min- and max-length can be defined in the config The clan overview shows offline member names Clan members can toggle friendly-fire protection for clan mates and allies Clan creation can check TAG’s against a blocked word list Clan tagging can be optionally disabled Old (not updated since x days) clans can be automatically purged Clans rating Players rating Setting a personal avatar for your clan Autowipe with wipe (optional) Commands clans (display clan menu) clans help (get information about commands) clan create (create a clan) clan leave (leave from your clan) clan join (open UI with invitations) clan ff (toggle friendlyfire status) clan allyff (toggle friendlyfire status for allies) clan invite <name/steamid> (invite a player) clan withdraw <name/steamid> (cancel an invite) clan kick <name/steamid> (kick a member) clan allyinvite <clanTag> (invite a clan to ally) clan allywithdraw <clanTag> (cancel the offer of an alliance) clan allyaccept <clanTag> (accept the offer of an alliance) clan allycancel <clanTag> (cancen the offer of an alliance) clan promote <name/steamid> (promote a member) clan demote <name/steamid> (demote a member) clan disband (disband your clan) clans.loadavatars (download avatars of all players) clans.manage list - lists all clans, their owners and their member-count clans.manage listex - lists all clans, their owners/members and their on-line status clans.manage show [name/userId] - lists the chosen clan (or clan by user) and the members with status clans.manage msg [clanTag] [message] - sends a clan message clans.manage create [name/userId] [clanTag] - creates a clan clans.manage rename [oldTag] [newTag] - renames a clan clans.manage disband [clanTag] - disbands a clan clans.manage invite [clanTag] [name/userId] - sends clan invitation to a player clans.manage join [clanTag] [name/userId] - joins a player into a clan clans.manage kick [clanTag] [name/userId] - kicks a member from a clan clans.manage owner [clanTag] [name/userId] - sets a new owner clans.manage promote [clanTag] [name/userId] - promotes a member clans.manage demote [clanTag] [name/userId] - demotes a member clans.reborn.convert (convert data from Clans Reborn plugin) clans.umod.convert (convert data from uMod Clans (v0.2.2+) plugin) clans.convert.olddata (convert data from old data) clans.convert.old.stats – used to update player data when upgrading from older versions of the game to 1.1.31 and above. Permissions clans.cancreate (permission to create a clan) clans.canjoin (permission to join a clan) clans.canleave (permission to leave a clan) clans.candisband (permission to disband a clan) clans.cankick (permission to kick a clan member) clans.admin (permission to use command 'clans.manage') Loot Types None – used for disabled loot Gather – used for gathering loot LootCrate – used for a loot crate Look – used to look at loot Kill – used to kill entities Craft – used for crafting items HackCrate – used for hacking a loot crate FAQ Q: Where can I see an example of a config? A: Config Q: Does the Clans plugin support other plugins? A: Yes, this Clans plugin has an API similar to other popular clans plugins. If the plugin works with Clans - it works with this plugin too. Q: How do I enable the display of clan ratings on the screen? A: You need to install the Clans Top plugin Q: Does the Clans plugin work with other Rust plugins? A: The Clans plugin is designed to work with a wide range of other Rust plugins, but compatibility may vary depending on the specific plugins you are using.$45.9516 points -

Version 1.2.9
7,754 downloads
Give kits to all Rust npcs by location/type. Also mods weapon drop and condition. Configurable via UI. General information. Give custom Kits to all default Rust npc types, and control what, if anything, becomes lootable when the npc is killed. Also has control for dropping weapon on death, weapon condition, and magazine contents, corpse duration, and backpack duration. Notes : All options have full descriptions in UI, accessible by clicking the option's name. Please make sure that the weapons you're giving to the npcs are suitable. Oilrig npcs, in particular, seem to become stupid with certain weapons. Place weapon in the first, left-most, slot of the kit's belt container. Frankenstein clothing can be given in UI, instead of via kit. Optional dependencies. Kits. Permissions. NPCKits.allowed - allows use of UI customisation, by chat command. Chat commands. /npckits - Opens UI, if user has NPCKits.allowed permission Configuration. NPC types. OilRig Excavator CompoundScientist BanditTown MountedScientist JunkPileScientist DungeonScarecrow ScareCrow MilitaryTunnelScientist CargoShip HeavyScientist TunnelDweller UnderwaterDweller Trainyard Airfield DesertScientist ArcticResearchBase LaunchSite Gingerbread MissionProviderOutpost MissionProviderFishing MissionProviderStables MissionProviderBandit BoatShopkeeper BanditShopkeeper Options per type: "enabled": false, "Kits": [], "Health": 100, "Weapon_Drop_Percent": 100, "Min_Weapon_Drop_Condition_Percent": 100, "Max_Weapon_Drop_Condition_Percent": 100, "Dropped_Weapon_Has_Ammo_Percent_Chance": 100, "Wipe_Default_Weapons", Removes default spawn weapons from npcs. "Wipe_Default_Clothing", Removes default spawn attire from npcs. "Wipe_Main_Inventory_Percent": 100, - Remove from corpse anything placed in main by Kits plugin "Wipe_Clothing_Percent": 100, - Remove from corpse anything placed in clothing by Kits plugin "Wipe_Belt_Percent": 100, - Remove from corpse anything placed in belt by Kits plugin "Default_Rust_Loot_Percent": 100 - Remove from corpse default loot given by Rust Note : Kits follows the same format as BotSpawn kits. If multiple are listed, one is chosen at random each time. "Kits":["Kit One"] "Kits":["Kit One", "Kit Two", "Kit Three"] API: Object hook OnNpcKits(ulong) is provided. Return non null to prevent this plugin from giving kits to your spawned npcs.Free16 points -
Version 1.3.5
4,710 downloads
Take your players to new heights in the game of Rust, and get a few laughs watching people try to fly one for the first time! Introducing Jetpack! A plugin that allows your players to soar around like never before in the game of Rust. Grab this plugin and give your players something to talk about! Many functions have already been implemented like the ability to shoot while piloting a jetpack, and the plugin will continue to expand and grow with the community. You'll find the configuration covers almost anything you can think of, and you'll see a breakdown of the configuration file in the description below. By default you can simply press the middle mouse wheel to equip and remove the jetpack quickly, you can't run around once you've equipped it. You can customize loot crates the jetpack might appear in, and all of the stats from thrust to rotation and all of the other controls. Be sure to check the permission section and feel free to use the command creatively to give jetpacks as an award for completing other tasks on your server using the commands provided. Make sure you have some lowgrade handy, let's take to the skies! Сontrols Space bar - thrust W/S keys - pitch axis A/D keys - yaw axis Chat commands (check config for permissions) /jet - toggle jetpack on & off /givejetpack - give a jetpack to yourself Console commands (admin only) givejetpack - give a jetpack to yourself givejetpack SteamID - give a jetpack to player using their SteamID Plugin config en – example of plugin configuration in English ru – example of plugin configuration in Russian Check out the rest of my work: Adem's Codefling Library You can reach out to me in Discord: Adem's Discord Profile Thanks to Jbird for writing, translation, & support: Jbird's Discord Profile Join the Mad Mappers Discord!$19.9916 points -
Version 3.3.17
5,028 downloads
Discover the EventsManager plugin, a powerful and flexible tool crafted specifically for Rust game servers. Designed by senyaa & M&B-Studios, this plugin streamlines the management and scheduling of various in-game events, enhancing player engagement and server dynamics. Features of Events Manager Multi-Event Support: Seamlessly manage multiple events, each with customizable settings. Customizable Display: Assign distinct names, commands, and colors for UI buttons to each event. Scheduling Flexibility: Schedule events to run on specific days and at designated hours. Administrative Control: Utilize commands to launch events, providing server admins with ultimate flexibility. Enhanced Player Experience: Introduce regular events to boost player engagement within the Rust environment. Random Event Start: Introduce surprise elements by allowing the plugin to randomly select events from a pool. Integration of Facepunch Events: Enjoy a dynamic gameplay experience with popular Facepunch events now included in the plugin. Commands /em: Set up events, including start time and day. /newevent: Add new events tailored to your preferences, enhancing the versatility of the Event Manager. /newcreator: Easily add new creators to the event manager. eventmanager.convert.v2: Migrates V2 data to V3 (console only) Permissions eventsmanager.use: This permission allows users to access the event management features and open the menu. Video Overview FAQ Q: Where can I see an example of a config? A: Config Q: Do I need to configure anything special for events? A: Yes, it's important to disable autostart in your events when using EventsManager. The plugin handles the scheduling and starting of events, so having autostart enabled could cause conflicts or unexpected behavior.$21.9515 points -
Version 2.10.23
1,664 downloads
Crafting system that allows you to create items, cars, vehicles, recyclers, etc! Commands craft open interface crafts.setwb [categories: cat1 cat2 ...] set new custom workbench Permissions You can set permission in config, for example: "Permission (ex: crafts.use)": "crafts.use", crafts.setworkbench - allows you to use the "crafts.setwb" command (set custom workbenches) Craft Types Command Vehicle Item Recycler ModularCar How to install a custom workbench 1. Spawn the workbench (for example, in RustEdit or a plugin) 2. In the game, go to him and use the command "crafts.setwb" and specify the necessary categories. Example: /crafts.setwb Misc 3. Go to config (oxide/config/Crafts.json) and configure this workbench (use SafeZone, workbench level, etc.) VIDEO FAQ Q: Where can I see an example of a config? A: Config$19.9515 points -
Version 1.7.8
5,768 downloads
Skins Editor for SkinBox by k1lly0u, Skinner by Whispers88, LSkins by LAGZYA, SkinController by Amino and Skins by misticos. Features Visual editor for skins configured Add workshop skins by url or id (collections supported) Select and bulk delete skins Ability to import from one skin plugin, and export to another How to Download and extract RustSkinsEditorv***.zip Run RustSkinsEditorv***.exe (having trouble running?, make sure you download .NET 9.0) Click Import, pick Plugin you would like to Import (SkinBox, Skinner, Skins), then locate json file you would like to import. Add Skins using workshop link or id, workshop collection supported. When done editing, click Export, pick Plugin you would like to Import (SkinBox, Skinner, Skins). For SkinBox and Skinner, you will get a json code for you to copy and paste in the appropriate config file (This is for avoiding interference with the config properties).Free15 points -
Version 2.11.2
1,217 downloads
Prefab creator that directly works with Static Lootables in order to create custom lootable definitions for your servers! This plugin provides more than there already is. [!] Known Issue When placing points that are (almost) perfectly vertical in all points (bottom points align with the top ones), the prefab gets applied flipped in the horizontal axis. Currently investigating this. Watch the tutorial down below to get an insight of how this works! It's simple, follow the instructions in chat designed to quickly help you integrate it in your server. Open the editor; Press [Reload] while looking at an object; If Lootables.Ext is loaded, the [PRO] section will show up, click on "Create Prefab"; Follow the instructions in chat & go wild; Press [Use] while looking at your newly created prefab; Set it up as a regular prefab; Voila!$5.2615 points -
.thumb.png.bd9cb20b7b8f45063ad9ff98d2334a10.png)
Version 1.5.0
4,467 downloads
Map Size: 6000 Prefab: 85k+ Edits: Not permitted (you can purchase the RustEdit version and support the maps development HERE) The gameplay goal for this map was to slightly change the way you play Rust and promote a more realistic experience that rewards exploration. To do this, I have totally removed the roadside junk pile spawns you'd usually see beside the roads of a vanilla map. Loot is now mostly allocated to certain zones, so If you want lots of a specific resource, you will have to leave your base area and explore the map and it's zones. Explore the map and you will be rewarded. Not only with loot, but insider knowledge. There are many secret places hidden around the map. Some small and very well hidden and some hidden in plain sight. I figure it's better a player be rewarded by discovering secret locations instead of relying on monument markers for everything, so if you see something intriguing, go check it out. You never know what you may find. Some of the urban areas may seem small, but I tried to put at least something to represent the larger populated cities of England & Wales. These are still more than equal to small vanilla monuments regarding loot. It's also important to note that players are free to create player-built settlements beside urban zones and increasing a specific cities density, in fact I encourage it. That's why the nobuild zones are minimally size to allow building close by. Houses, Ruined Houses, Boarded Rowhouse, High-rise buildings, Petrol Stations, Bus Stops Vehicle Junk Piles spawn on Driveways & Carparks Yard Junk Piles spawn on back yards Rusty Robob Vendors in the Shops Jump puzzles a plenty Urban Warfare! Trees, Logs, Stones, Berries, Mushrooms, Hemp Lumberjack Cabins & Mission NPC Wild Animal Spawns Harbours, Docks, Racetracks, Factory & Warehouse Buildings Industrial Prop Junk Pile spawns Abandoned Static Vehicles & Trucks (Requires Static Lootables Plugin) Fuel Tanks (Requires Static Lootables Plugin) Fuel Barrels Recycler Oil Refinery Airfield, Dome, Military Tunnels, Satellite Dish, Launch Site, Towers, Naval Base The usual crates & barrels Security Cards Military Gear High End Loot Ammo Vehicles Guns! Metal Ore, Sulfur Ore, HQ Metal Ore, Stone Only 'Minable' Stone Ore will spawns in England & Wales (No Metal or Sulfur) Normal/Vanilla 'Minable' Ore spawns in Scotland & Ireland Excav808 (The Custom-Built and fully working Excavator) Mining Pits (Including Mining Mission NPC) Realistic Forest splat (Every National Park is where it should be. Google map it!) 50 Custom made variations of Junk Piles Ireland is a no-build zone (Hardcore PVP/PVE Zone) Bradley Patrols the main road on Ireland and Isle of Man Only Stone Ore spawns in England & Wales (No Metal/Sulfur Ore) Jumps (More Special GTA style jumps will be added to challenge drivers. Destruction Derby Arena. (Host amazing vehicular events) Automated Above-Ground Rail Network 5 Custom Tunnels England Network - Stops at London Outpost, Trainyard, Destruction Derby, Newcastle, Liverpool docks, Midlands Ireland Network - Stops at Dublin Docks, Satellite Dish, Launch, Dome and Airfield Requires Automated Workcart plugin Custom Plugin config Files Included Racetracks - Data & Config Files included Racetrack 1 - Tarmac Track, Typical Rust Theme, 5 laps Drift Racetrack - Ice Track, Winter/Icy Theme, 2 laps Ring of Death - Ring Road, Damage On, 5 Laps Dublin Docks - Tarmac Track, Industrial Theme, 3 Laps Destruction Derby - Damage On - 10 Laps Vanilla Monuments Military Tunnels Oilrig (Large & Small) Airfield Bandit Town Lighthouse Dome Scrapyard Military Base Underwater Labs Satellite Dish Sulfur Quarry High Quality Metal Quarry Custom Monuments Cobalt Harbour Chop Shop Dublin Docks Excavator (Fully Working) London Outpost Large Oil Refinery Mining Outpost MLRS Base Camp (Isle of Man) Racetrack 1 Racetrack 2 Russian Submarine Fleet Sunken Cargo ship Stone Henge Loch Ness Lough Neagh CCTV Codes RACETRACK0, 1, 2, 3, 4, 5, 6, 8 COBALTHARBOUR1, 2, 3 LIVERPOOL1, 2, 3 SNOWTRACK0, 1 LONDON1, 2 TRAINYARD1, 2, 3 VAULT808 DUBLINDOCKS1, 2 JUMPTRAFFIC NAVALBASE HIGHRISE1 TRAINYARDBUNKER ..more to come! Special Thanks Knockcree for allowing me to chop up his broken Outpost monument for my London Outpost. 38-RA for being so kind to give me one of his older Russian Submarines. His creations are amazing and so detailed. You can check his stuff out HERE A big thanks to all the supporters of the map! Tasty • Tails • HowlingWolf • strand • Christian Gaevert • Lushenko • Basanta Malakar • Admiral Nappa Torsten Metz • Jarrod Everhart • Laur_xo • Jigsaw • ooooldguy • Luuxen • Andrel38 CM1234 • astra • keithvsmith • LazyPVE • Pilgrim • DE7AULT • Haya • Tradertet • TheLoginator TheRiddledNote • Mercy • Dazzorm • CupsOhJoe • Taracmeden • CyberWarden bulldogbateson • Papa Vibes • Exelfoli • warwick815 • geekyplaster • Abs • MrLiquid • Gold Mysterious lazywoodz • MrsTricks • BialyMisiaczek • tabitha1511 Requests Setup for Automated Workcarts on both rail networks Oxide - Automated Workcarts Files.zip ( Ireland Network - Stops at Dublin Docks, Satellite Dish, Launch, Dome and Airfield ) No building restrictions on Ireland UKoR6Kv1.0.14buildireland.zip BetterNPC - Config & Data BetterNPC files.zip Note: I am always here to help & advise you with any issues you may have. I'm also willing to make small edits for you, as long as they aren't too complicated or time consuming. If you have any questions, contact me on Discord: smoke.uk#1373Free15 points


.thumb.jpg.f2f378cbb4943d7036c8a674f8a23b40.jpg)


