Jump to content
sale
$40.00 $31.95
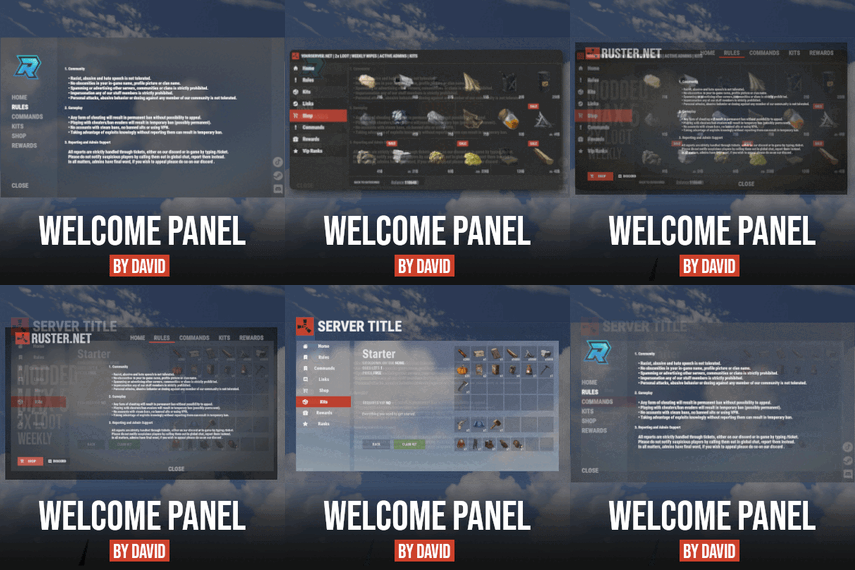
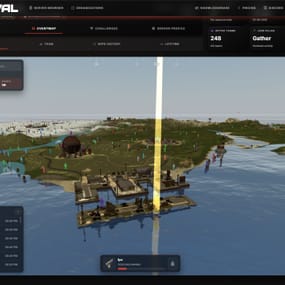
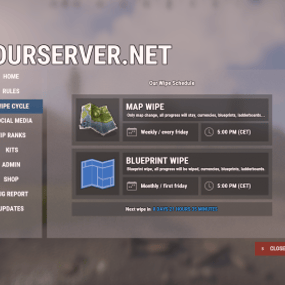
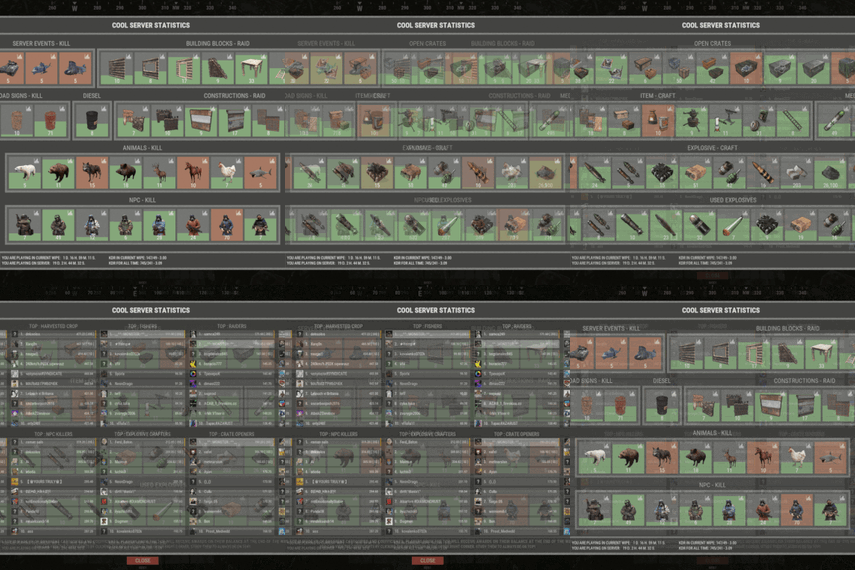
ServerPanel adds a player information menu to your server, where you can both share important and useful information with your players and integrate your plugins into it!     🌟  Features User-Friendly Interface: Intuitive GUI for easy navigation and interaction. Economy Integration: Supports various economy plugins for seamless financial management. Dynamic Menu Categories: Organize functionalities into customizable categories for better user experience. Extensive Configuration Options: Almost every aspect of the plugin can be customized, including messages, colors, sizes, fonts, tion. Auto-Open Menu: Automatically displays the menu upon player connection, configurable per server settings. Block Settings: Control access to the menu during building, raiding, or combat situations to enhance gameplay balance. Multiple Economy Head Fields: Display various economic metrics such as balance, server rewards, and bank information. Permission Management: Fine-tune permissions for different user roles to control access to features. Localization Support: Easily translate and customize all messages for different languages. Performance Optimized: Designed to minimize server lag while providing rich functionality. Customizable Hooks: Integrate with existing economy systems using customizable hooks for adding, removing, and displaying balances. Editor Position Change: Admins can now change editor positions with a simple click, choosing between left, center, or right alignments. Command Enhancements: Commands are now processed with multiple arguments separated by "|", enabling bulk command processing.   🎮  Commands /info –  open menu /sp.install  (or) /welcome.install –  open installer menu sp.migrations –  console command for updating plugin data structure when upgrading to new versions. Automatically creates backups before making changes. sp.migrations list – shows available migrations and whether they need to run sp.migrations run <version> – runs specific migration (e.g., "1.3.0") sp.migrations run <version> force – forces migration even if not detected as needed   🛡️  Permissions serverpanel.edit – allows players to edit the plugin settings and open the edit menu serverpanelinstaller.admin - required to access the plugin installation functions   🎥  Video   🖼️  Showcase Templates Template V1 Template V2 Template V3 Template V5 Editor Installer   🧪  TEST SERVER Join our test server to view and experience all our unique features yourself! Copy the IP Address below to start playing! connect 194.147.90.239:28015   📊  Update Fields ServerPanel supports dynamic update fields that can be used in your templates to display real-time information. These fields are automatically updated and can be used in text components, headers, and other interface elements. Player Information {online_players} – Number of currently online players {sleeping_players} – Number of sleeping players {all_players} – Total number of players (online + sleeping) {max_players} – Maximum server capacity {player_kills} – Player's kill count (requires KillRecords, Statistics, or UltimateLeaderboard) {player_deaths} – Player's death count (requires KillRecords, Statistics, or UltimateLeaderboard) {player_username} – Player's display name {player_avatar} – Player's Steam ID for avatar display Economy {economy_economics} – Economics plugin balance {economy_server_rewards} – ServerRewards points {economy_bank_system} – BankSystem balance Note: Economy fields are fully customizable in "oxide/config/ServerPanel.json" under "Economy Header Fields". You can add support for any economy plugin by configuring the appropriate hooks (Add, Balance, Remove). Custom keys can be created and used in templates just like the default ones. Server Information {server_name} – Server hostname {server_description} – Server description {server_url} – Server website URL {server_headerimage} – Server header image URL {server_fps} – Current server FPS {server_entities} – Number of entities on server {seed} – World seed {worldsize} – World size {ip} – Server IP address {port} – Server port {server_time} – Current server time (YYYY-MM-DD HH:MM:SS) {tod_time} – Time of day (24-hour format) {realtime} – Server uptime in seconds {map_size} – Map size in meters {map_url} – Custom map URL {save_interval} – Auto-save interval {pve} – PvE mode status (true/false) Player Stats {player_health} – Current health {player_maxhealth} – Maximum health {player_calories} – Calorie level {player_hydration} – Hydration level {player_radiation} – Radiation poisoning level {player_comfort} – Comfort level {player_bleeding} – Bleeding amount {player_temperature} – Body temperature {player_wetness} – Wetness level {player_oxygen} – Oxygen level {player_poison} – Poison level {player_heartrate} – Heart rate Player Position {player_position_x} – X coordinate {player_position_y} – Y coordinate (height) {player_position_z} – Z coordinate {player_rotation} – Player rotation (degrees) Player Connection {player_ping} – Connection time in seconds {player_ip} – Player's IP address {player_auth_level} – Authorization level (0=Player, 1=Moderator, 2=Admin) {player_steam_id} – Steam ID {player_connected_time} – Connection start time {player_idle_time} – Idle time (HH:MM:SS) Player States {player_sleeping} – Is sleeping (true/false) {player_wounded} – Is wounded (true/false) {player_dead} – Is dead (true/false) {player_building_blocked} – Is building blocked (true/false) {player_safe_zone} – Is in safe zone (true/false) {player_swimming} – Is swimming (true/false) {player_on_ground} – Is on ground (true/false) {player_flying} – Is flying (true/false) {player_admin} – Is admin (true/false) {player_developer} – Is developer (true/false) Network & Performance {network_in} – Network input (currently shows 0) {network_out} – Network output (currently shows 0) {fps} – Server FPS {memory} – Memory allocations {collections} – Garbage collections count Usage Example: You can use these fields in any text component like: "Welcome {player_username}! Server has {online_players}/{max_players} players online."   🔧  API Documentation for Developers ServerPanel provides an API for plugin developers to integrate their plugins into the menu system. Required Methods API_OpenPlugin(BasePlayer player) - Main integration method that returns CuiElementContainer OnServerPanelClosed(BasePlayer player) - Called when panel closes (cleanup) OnServerPanelCategoryPage(BasePlayer player, int category, int page) - Called when category changes (cleanup) OnReceiveCategoryInfo(int categoryID) - Receives your category ID Integration Example [PluginReference] private Plugin ServerPanel; private int _serverPanelCategoryID = -1; private void OnServerInitialized() { ServerPanel?.Call("API_OnServerPanelProcessCategory", Name); } private void OnReceiveCategoryInfo(int categoryID) { _serverPanelCategoryID = categoryID; } private void OnServerPanelCategoryPage(BasePlayer player, int category, int page) { // Cleanup when player switches categories } private CuiElementContainer API_OpenPlugin(BasePlayer player) { var container = new CuiElementContainer(); // Create base panels (required structure) container.Add(new CuiPanel() { RectTransform = {AnchorMin = "0 0", AnchorMax = "1 1"}, Image = {Color = "0 0 0 0"} }, "UI.Server.Panel.Content", "UI.Server.Panel.Content.Plugin", "UI.Server.Panel.Content.Plugin"); container.Add(new CuiPanel() { RectTransform = {AnchorMin = "0 0", AnchorMax = "1 1"}, Image = {Color = "0 0 0 0"} }, "UI.Server.Panel.Content.Plugin", "YourPlugin.Background", "YourPlugin.Background"); // Add your plugin's UI elements here container.Add(new CuiLabel { RectTransform = {AnchorMin = "0.1 0.8", AnchorMax = "0.9 0.9"}, Text = {Text = "Your Plugin Interface", FontSize = 16, Align = TextAnchor.MiddleCenter, Color = "1 1 1 1"} }, "YourPlugin.Background", "YourPlugin.Title"); // Add buttons, panels, etc. using "YourPlugin.Background" as parent return container; } private void OnServerPanelClosed(BasePlayer player) { // Cleanup when panel closes } Header Update Fields API_OnServerPanelAddHeaderUpdateField(Plugin plugin, string updateKey, Func<BasePlayer, string> updateFunction) - Registers a per-player string provider for a header placeholder. Returns true on success. API_OnServerPanelRemoveHeaderUpdateField(Plugin plugin, string updateKey = null) - Unregisters a specific updateKey for your plugin, or all keys for your plugin when updateKey is null. Returns true on success. Usage Example [PluginReference] private Plugin ServerPanel; private void OnServerInitialized() { // Register a dynamic header field for each player ServerPanel?.Call("API_OnServerPanelAddHeaderUpdateField", this, "{player_kdr}", (Func<BasePlayer, string>)(player => GetKdr(player))); } private string GetKdr(BasePlayer player) { // Compute and return the value to display in the header for this player return "1.23"; } Using in UI: Place your key (e.g., {player_kdr}) directly in Header Field texts. The value will be updated per player using your function.   📚  FAQ Q: Why can't I open the menu? A:  Make sure that the plugin is installed and activated on your server. If the problem persists, contact the server administrator. Q: How do I enable Expert Mode? (disables automatic template updates) A: In the data file "Template.json", turn on the "Use an expert mod?" option: "Use an expert mod?": true, P.S.  "Template.json” is located in the "oxide/data/ServerPanel" directory (if you use Oxide) or in the "carbon/data/ServerPanel" directory (if you use Carbon) Q: I see black images with Rust logo or get error 429 when loading images. What should I do? A: These issues occur when there are problems downloading images from the internet. To fix this, enable Offline Image Mode which will use local images instead: Enable the mode in config: Open "oxide/config/ServerPanel.json" (or "carbon/config/ServerPanel.json" for Carbon) Set "Enable Offline Image Mode": true Set up the images: Create folder "TheMevent" in "oxide/data" (or "carbon/data" for Carbon) Download PluginsStorage (click "CODE" → "Download ZIP") Extract the ZIP and copy all contents to the "TheMevent" folder Reload the plugin: Type o.reload ServerPanel (Oxide) or c.reload ServerPanel (Carbon) Note: If using a hosting service, you may need to use their file manager or FTP to upload the files. Q: Does ServerPanel work only with Mevent's plugins? A: Currently, ServerPanel integrates seamlessly with Mevent's plugins (Shop, Kits, Daily Rewards, etc.). However, other developers can use the provided API to integrate their plugins into the menu system. The plugin system is designed to be extensible for third-party integrations. Q: Why do integrated plugins (Shop, Kits) have different window sizes? A: Different plugins may use different templates for integration. Make sure all your integrated plugins use the same template version (V1, V2, etc.) that matches your ServerPanel template. Update the template in each plugin to ensure consistent sizing. Q: The panel displays differently for different players. How can I make it show the same on everyone's screen? A: This issue occurs when players have different UI scale settings. To fix this and ensure consistent display for all players: Open the "Template.json" file located in "oxide/data/ServerPanel" (or "carbon/data/ServerPanel" for Carbon) Find the "Parent (Overlay/Hud)" setting in the "Background" section Change the value from "Overlay" to "OverlayNonScaled" Save the file and restart your server or reload the plugin Q: How can I change the video displayed in the ServerPanel interface to my own custom video? A: Yes, you can replace the default video with your own! You need to find and modify the command: serverpanel_broadcastvideo [your_video_url] Replace [your_video_url] with the direct link to your video. For best compatibility, we recommend hosting your video on imgur.com. Q: My custom images are not loading or show as blank/question marks. What image hosting should I use? A: For custom images, we recommend using imgbb.com for image hosting. Avoid Imgur and services without direct access to the image. For the most reliable experience, use Offline Image Mode with local images instead. Q: How can I make plugin UIs open outside of the ServerPanel menu instead of inside categories? A: You can configure buttons to execute chat commands that open plugin UIs independently. To do this: In your button configuration, set "Chat Button": true Set the "Commands" field to "chat.say /command" (replace "command" with the actual plugin command) Example: To open the Cases plugin outside the menu: "Chat Button": true "Commands": "chat.say /cases" This will execute the command as if the player typed it in chat, opening the plugin's interface independently rather than within the ServerPanel menu. Q: Text in V4 template is shifting or sliding out of place. How can I fix this? A: This issue occurs when text width isn't properly configured. ServerPanel provides "TITLE LOCALIZATION" settings to control text width for categories and pages: Open the ServerPanel editor (click the "ADMIN MODE" button to open the edit menu) Select the category or page you want to edit (click to "EDIT CATEGORY" or "EDIT PAGE" button) In the editor, find the "TITLE LOCALIZATION" section For each language (en, ru, etc.), you'll see three columns: LANGUAGE - The language code TEXT - The localized text content WIDTH (px) - The width setting in pixels Adjust the "WIDTH (px)" value to match your text length. Longer text requires larger width values Save your changes and test in-game Tip: Start with a width value around 100-150 pixels for short text, and increase it for longer titles. You can adjust this value until the text displays correctly without shifting.
5.0
$18.99
FEATURES: Selling custom items with a modified skin and display name Commands for sale as an item, allows you to use the command whenever the player wants, can be changed to instant use after purchase Creating a trader with the right set of items Players can check item description before they buy it Refill system Players can see marker on the map to check what the bot can sell  them Local positions for Monuments (after wipe you don't need to change positions anymore) [Dependent on MonumentFinder]     Commands: permission for use commands and edit the npc shop - npcshop.admin /settrader  (use for create new trader) /remtrader (use for remove trader by his name) /newtraderpos (look directyl at the bot) then /newtraderpos update (use on new position) or /newtraderpos cancel (if you unselect the bot)   Hooks: void OnNPCShopItemBuy(BasePlayer buyer, Item saleItem, Item priceItem) - called when player buys an item   Example of plugin config My Discord Profile
5.0
$29.99
Basements lets players build underground rooms beneath their bases. Place a hatch on your foundation and dig straight down into a hidden basement with walls, ceilings, and full building privileges. Great for stashing loot, setting up secret bunkers, or just adding extra space. Readme Link - Click Here for Instruction and Documentation 👆Highly recommend reading the FAQ section! BUILD Build basements easily from your tool cupboard. Just place an entrance to get started.  EXPAND Expand your basement by drilling underground. But don't forget to bring a headlamp - its dark down there! TRAVERSE Place multiple entryways, building out your labyrinth of tunnels beneath your base.  DECORATE All deployables, electricity, and storage items can be placed in your basement. Take advantage of your new space! RAID Nothing is safe in Rust, including your basement. If all the entrances are destroyed, then the basement is too. Any loot below will float to the surface. Protect the entrance at all costs! API METHODS (For Plugin Developers) // Returns true if the given entityId is part of a basement. bool IsBasementEntity(ulong entityId) // Returns the building ids of the basements connected to a given surface building id. uint[] GetBasementBuildingIds(uint surfaceBuildingId) // Returns the building ids of the surface buildings connected to a given basement building id. uint[] GetSurfaceBuildingIds(uint basementBuildingId) Extension Plugins These are free plugins that add additional functionality to Basements. BasementsManager Provides a UI for admins to view and manage the basements on the server. Useful for debugging & fixing issues. Use with the /bm command, requires the basements.admin permission to use. BasementsManager.cs
4.9
$19.99
This plugin allows you to set how many times per day players can raid bases. It is a very straight forward plugin with lots of features to customize it for your server such as scheduled reset times, custom UI, and protection options.     Features: Limit number of raids that players can perform daily Scheduled reset times, even when server is offline Option for "free" raids against your attackers when defending your base Limit sync with teams and clans Assign bonus raid points to individuals Damage thresholds for raids Configurable messages Customizable UI Works with Simple Status Works with Clans Works with protection plugins (configurable) Documentation: A full readme including permissions, command, and config options is available in  this google doc link.   Disclaimer: Like all of my plugins - this plugin is sold as is. I will be happy to take feature requests into consideration but make no guarantees about which ones get implemented. Please refer to the feature list before you make your purchase  🙂
5.0
$14.99
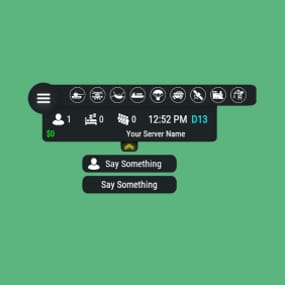
🗒️Features: You can add any  plugin event in the UI  (if it has hooks, usually specified in the plugin description) Has ingame UI menu for configure your Hud The time format is adjusted to the player (depending on his language in the game), it checks which time format is used for this language You can also enable an additional menu that opens on the arrow. You can add various buttons to this menu, for example, to open a store, your server menu, etc. Almost all elements are customizable  [for example: visibility of each element, Logo, Icons, Color e.t.c (check config down below)]                     📕Commands: /h setup - open UI for ingame config /h - show all Server Hud UI commands /h open - open Server Hud UI /h events - open Events Bar /h close - close Server Hud UI /h hide - hide Server Hud UI Q&A: Q: Where i can find a base icon for creating my events icons? A: Take a base icon below this message and using f.e photoshop for create you personal event icon! Q: Where i can find a ready to use icons? A: Here some links to ready to use icons packs(1 free, 2 paid): https://codefling.com/customizations/free-custom-hud-icons https://codefling.com/customizations/custom-hud-icons-paid https://codefling.com/customizations/server-hud-custom-icon-pack API: string API_PlayerHudState(string id) CanHudChangeState(BasePlayer player, string currentState, strint nextState) 🗒️Config: { "Auto reload [If you change the config and save the file the plugin will reload itself]": true, "Main setup": { "Overall layer [you will see the hud in your inventory]": false, "Size ALL [0% - inf]": 100, "Logo [HUD interact button]": "https://media.discordapp.net/attachments/335512864548847617/1134455399756607549/logo.png", "Events background opacity [0% - 100%]": 100, "Background opacity [0% - 100%]": 100, "Position": { "Align [TopLeft | TopRight | BottomLeft | BottomRight": "TopLeft", "Left | Right - offset": 40, "Top | Bottom - offset": 25 }, "Server name": "Your Server Name", "Active players": { "Icon": "https://cdn.discordapp.com/attachments/335512864548847617/1134455395813965934/active.png", "Color": "#fff", "Enable": true }, "Sleep players": { "Icon": "https://cdn.discordapp.com/attachments/335512864548847617/1134455395138670652/sleep.png", "Color": "#fff", "Enable": true }, "Queue players": { "Icon": "https://cdn.discordapp.com/attachments/335512864548847617/1134455393972654171/line.png", "Color": "#fff", "Enable": true }, "Time": true, "Player position [hide permisson - hud.streamer]": { "Enable": true, "true - grid | false - x,z coordinates": true, "Color": "cyan" }, "Economy plugin [Economics | ServerRewards]": { "Currency": "$", "Value color": "#10ff10", "Enable": true }, "Info messages": { "Update interval [in seconds]": 60, "Align [BottomCenter | TopCenter | TopRight]": "BottomCenter", "Width [in px]": 260, "Offset [top | bottom]": 0, "Offset [right]": 15, "Outline color": "#000", "Overall [you will see messages in your invenotory]": true, "Enable": true, "Messages": [ "Welcome to Your Server Name", "Good luck" ] }, "Additional menu": { "Auto close timer [seconds | 0 - disable]": 60, "Auto close after command use": true, "Open/Close button color": "yellow", "Commands background opacity [0% - 100%]": 100, "Enable": true, "Commands": [ { "Background image": "https://media.discordapp.net/attachments/335512864548847617/1134455392420761671/command.png", "Icon [optional]": "https://media.discordapp.net/attachments/335512864548847617/1134455395813965934/active.png", "Command": "chat.say Hello there", "Text": "Say Something", "Outline color": "#000", "Is Console": true }, { "Background image": "https://media.discordapp.net/attachments/335512864548847617/1134455392420761671/command.png", "Icon [optional]": "", "Command": "/shop", "Text": "Say Something", "Outline color": "#000", "Is Console": false } ] } }, "Base Events": [ { "Name": "Bradley", "Active color": "#10ff10", "Icon": "https://media.discordapp.net/attachments/335512864548847617/1134455316654850049/bradley.png", "Color": "#fff", "Enable": true }, { "Name": "PatrolHeli", "Active color": "#10ff10", "Icon": "https://media.discordapp.net/attachments/335512864548847617/1134455315073597530/heli.png", "Color": "#fff", "Enable": true }, { "Name": "CH47", "Active color": "#10ff10", "Icon": "https://media.discordapp.net/attachments/335512864548847617/1134455317485342803/ch47.png", "Color": "#fff", "Enable": true }, { "Name": "Cargo", "Active color": "#10ff10", "Icon": "https://media.discordapp.net/attachments/335512864548847617/1134455317086879794/cargo.png", "Color": "#fff", "Enable": true }, { "Name": "AirDrop", "Active color": "#10ff10", "Icon": "https://cdn.discordapp.com/attachments/335512864548847617/1134455316143161374/airdrop.png", "Color": "#fff", "Enable": true } ], "Custom Events": [ { "Hook OnEventStart": "OnConvoyStart", "Hook OnEventStop": "OnConvoyStop", "Name": "Convoy", "Active color": "#10ff10", "Icon": "https://media.discordapp.net/attachments/335512864548847617/1134455318030598154/convoy.png", "Color": "#fff", "Enable": false }, { "Hook OnEventStart": "OnSputnikEventStart", "Hook OnEventStop": "OnSputnikEventStop", "Name": "Sputnik", "Active color": "#10ff10", "Icon": "https://cdn.discordapp.com/attachments/335512864548847617/1134455315488854016/sputnik.png", "Color": "#fff", "Enable": false }, { "Hook OnEventStart": "OnArmoredTrainEventStart", "Hook OnEventStop": "OnArmoredTrainEventStop", "Name": "ArmoredTrain", "Active color": "#10ff10", "Icon": "https://cdn.discordapp.com/attachments/335512864548847617/1134455315841155173/train.png", "Color": "#fff", "Enable": false }, { "Hook OnEventStart": "OnHarborEventStart", "Hook OnEventStop": "OnHarborEventEnd", "Name": "Harbor", "Active color": "#10ff10", "Icon": "https://cdn.discordapp.com/attachments/335512864548847617/1134455318332592219/harbor.png", "Color": "#fff", "Enable": false } ] }
5.0
FEATURES: Friendly UI (Open command by default  -  /rs   [you need be an admin or have  a permission "gatherlootmultiplier.setup" by default])   (new) respawn rates for crates, barrels, e.t.c. and JunkPiles Set the gather for each resource, excavator, querry, pump jack Global rate Gather | Loot Personal rate for items Block loot containers     Example of plugin config
5.0
sale
This is a custom package created by us, featuring 110 unique bases and a specialized loot setup tailored for five difficulty levels, ranging from Easy to Nightmare. Note:  The building skins in the package showcase images may differ from the spawned bases or use the default building skin. Warning: The Raidable Bases plugin requires the Copy Paste plugin to function. You must install both for this bases pack to work. 🔗 Raidable Bases (Paid): https://codefling.com/plugins/raidable-bases 🔗 Copy Paste (Free): https://umod.org/plugins/copy-paste This Raidable Bases Pack & Loot Tables package includes: 🏡30 Easy Bases            +🗡️Base_Loot Tables   (Easy "Vanilla" and "Enhanced" tables included) 🏡30 Medium Bases       +🗡️Base_Loot Tables   (Medium "Vanilla" and "Enhanced" tables included) 🏡30 Hard Bases            +🗡️Base_Loot Tables   (Hard   "Vanilla" and "Enhanced" tables included) 🏡10 Expert Bases          +🗡️Base_Loot Tables   (Expert "Vanilla" and "Enhanced" tables included) 🏡10 Nightmare Bases   +🗡️Base_Loot Tables   (Nightmare "Vanilla" and "Enhanced" tables included) Beware:   Our loot table package includes only the 5-tier loot tables within the Base_loot folder, ranging from easy to nightmare. It does not include the loot tables from the Difficulty_Loot or Weekday_Loot folders. With a total of 110 bases, this package focuses on simplicity and optimization. Most bases are protected by turrets and traps, and each base is designed with player PC performance and server stability in mind.   VANILLA AND ENHANCED LOOT TABLES FOR RAIDABLE BASES This package includes 10 different base loot table files, ensuring a well-structured and advanced configuration for every difficulty level, from Easy to Nightmare. 5 loot files for the Vanilla setup (Easy, Medium, Hard, Expert, Nightmare), offering a balanced loot experience with some junk items, staying close to a 1x rate. 5 loot files for the Enhanced setup (Easy, Medium, Hard, Expert, Nightmare), designed for modded servers with 2x, 3x, or higher gather rates, featuring cleaner loot tables with minimal junk and more valuable rewards. 📁 Installation Path: All loot table files are intended for the /oxide/data/RaidableBases/Base_Loot directory. ⚠️ Setup Requirement: You must choose and install only one loot table setup at a time—either Vanilla or Enhanced. If you want to switch, you can replace the current files with the other set, but both cannot be active simultaneously. For those exclusively seeking the loot table, we offer it as a standalone product:  https://codefling.com/customizations/raidable-bases-loot-tables-pack (Note: If you've purchased our Raidable Bases Pack & Loot Tables (110 Bases) package, there is no need to buy this separately.)   WARNING: TWO DIFFERENT INSTALLATION METHODS (PLEASE READ BOTH AND APPLY ONLY THE ONE THAT FITS YOUR NEEDS) INSTALLATION GUIDE 1: (If you do not have a custom configuration and are not a professional in server configurations, choose this option. However, if you already have your own configuration and profile settings and do not wish to use the optional configs we provide—in other words, if you only need the bases and loot tables—use the second installation guide instead.) Step 1: Place the Config File From the extracted ZIP files, locate the config folder and find the RaidableBases.json file. Move it to the following directory: 📁 /serverfiles/oxide/config Step 2: Place the Bases From the extracted ZIP files, locate the copypaste folder and move it to the following directory: 📁 /serverfiles/oxide/data Step 3: Place the Base_Loot Tables From the extracted ZIP files, locate the Base_Loot folder and move it to the following directory: 📁 /serverfiles/oxide/data/RaidableBases Important: If there are any existing JSON files inside this folder that are not part of our loot tables, delete them to ensure proper functionality. Choose between Vanilla or Enhanced loot tables based on your preference. If the folder is named "Base_Loot (Enhanced loot)", remove the text in parentheses so that the correct folder name is simply: "Base_Loot"   (Otherwise, the loot tables will not work properly.) Step 4: Place the Profiles Folder From the extracted ZIP files, locate the profiles folder and move it to the following directory: 📁 /serverfiles/oxide/data/RaidableBases Why Are Profiles Important? The profiles folder contains crucial settings that allow you to: ✔️ Enable/disable the dome ✔️ Enable/disable NPCs ✔️ Adjust the number of lootable items These are just a few examples—there are dozens of important settings that directly affect how raid bases function. The config file alone is not enough—these files play a major role in customizing your raid bases. ⚠️ I strongly recommend reviewing each difficulty setting (Easy to Nightmare) inside the profiles folder and adjusting them based on your needs. Step 5: Restart the plugin via RCON: o.reload RaidableBases INSTALLATION GUIDE 2: (Use this installation method if you do not want to use our configurations and instead prefer to use your own config files and your own /oxide/data/RaidableBases/Profiles configurations.) In this case, you only need to add the bases. To do this, use the following commands in RCON:   Step 1:   You can add bases one by one or in bulk. After executing the commands in RCON, the bases will be registered inside the Profiles configuration. If you do not want to deal with these adjustments, it is recommended to use Installation Guide 1 instead. A- Example RCON commands:   rb.config add "Easy Bases" fullwipedeasy1 rb.config add "Hard Bases" fullwipedhard1 B- Commands to Integrate Raid Bases in Bulk via RCON: rb.config add "Easy Bases" fullwipedeasy1 fullwipedeasy2 fullwipedeasy3 fullwipedeasy4 fullwipedeasy5 fullwipedeasy6 fullwipedeasy7 fullwipedeasy8 fullwipedeasy9 fullwipedeasy10 fullwipedeasy11 fullwipedeasy12 fullwipedeasy13 fullwipedeasy14 fullwipedeasy15 fullwipedeasy16 fullwipedeasy17 fullwipedeasy18 fullwipedeasy19 fullwipedeasy20 fullwipedeasy21 fullwipedeasy22 fullwipedeasy23 fullwipedeasy24 fullwipedeasy25 fullwipedeasy26 fullwipedeasy27 fullwipedeasy28 fullwipedeasy29 fullwipedeasy30 rb.config add "Medium Bases" fullwipedmed1 fullwipedmed2 fullwipedmed3 fullwipedmed4 fullwipedmed5 fullwipedmed6 fullwipedmed7 fullwipedmed8 fullwipedmed9 fullwipedmed10 fullwipedmed11 fullwipedmed12 fullwipedmed13 fullwipedmed14 fullwipedmed15 fullwipedmed16 fullwipedmed17 fullwipedmed18 fullwipedmed19 fullwipedmed20 fullwipedmed21 fullwipedmed22 fullwipedmed23 fullwipedmed24 fullwipedmed25 fullwipedmed26 fullwipedmed27 fullwipedmed28 fullwipedmed29 fullwipedmed30 rb.config add "Hard Bases" fullwipedhard1 fullwipedhard2 fullwipedhard3 fullwipedhard4 fullwipedhard5 fullwipedhard6 fullwipedhard7 fullwipedhard8 fullwipedhard9 fullwipedhard10 fullwipedhard11 fullwipedhard12 fullwipedhard13 fullwipedhard14 fullwipedhard15 fullwipedhard16 fullwipedhard17 fullwipedhard18 fullwipedhard19 fullwipedhard20 fullwipedhard21 fullwipedhard22 fullwipedhard23 fullwipedhard24 fullwipedhard25 fullwipedhard26 fullwipedhard27 fullwipedhard28 fullwipedhard29 fullwipedhard30 rb.config add "Expert Bases" fullwipedexp1 fullwipedexp2 fullwipedexp3 fullwipedexp4 fullwipedexp5 fullwipedexp6 fullwipedexp7 fullwipedexp8 fullwipedexp9 fullwipedexp10 rb.config add "Nightmare Bases" fullwipednight1 fullwipednight2 fullwipednight3 fullwipednight4 fullwipednight5 fullwipednight6 fullwipednight7 fullwipednight8 fullwipednight9 fullwipednight10 Step 2: Place the Base_Loot Tables From the extracted ZIP files, locate the Base_Loot folder and move it to the following directory: 📁 /serverfiles/oxide/data/RaidableBases Important: If there are any existing JSON files inside this folder that are not part of our loot tables, delete them to ensure proper functionality. Choose between Vanilla or Enhanced loot tables based on your preference. If the folder is named "Base_Loot (Enhanced loot)", remove the text in parentheses so that the correct folder name is simply: "Base_Loot"   (Otherwise, the loot tables will not work properly.) Step 3: Restart the plugin via RCON: o.reload RaidableBases EXTRA IMPORTANT INFORMATIONS: We do not use a dome, NPCs, or arena walls around raid bases on our servers, and in the ZIP file we provided, these features are also disabled by default. If you want to enable them, you will need to adjust the settings accordingly. For example, to enable the dome, follow the steps below: Navigate to: /oxide/data/RaidableBases/Profiles Open the files inside the Profiles folder with a text editor. Locate the following settings: (This is already set to false because it is required for markers to appear on the map.) "Spawn Silently (No Notification, No Dome, No Map Marker)": false, "Create Dome Around Event Using Spheres (0 = disabled, recommended = 5)": 0, Change the value from 0 to 5 as shown below: "Create Dome Around Event Using Spheres (0 = disabled, recommended = 5)": 5, Additionally, the loot amount for bases varies depending on the difficulty level (easy, medium, hard, expert, and nightmare). You can adjust this setting in the same Profiles location according to your needs: "Amount Of Items To Spawn": 210, For example, in medium bases, this value is set to 210, which determines the total number of items that will appear in crates, furnaces, and the cupboard. Our current configuration is specifically adjusted to prevent players from feeling overwhelmed by massive buildings right after a wipe. We have configured Maintained Events accordingly to ensure a balanced experience. In our setup: - Timed events and purchasable events are disabled. - After a wipe, easy bases will start spawning 30 minutes later. - Nightmare bases will begin spawning 48 hours (2 days) later. Imagine starting the game with just a torch in hand and immediately encountering a nightmare base on the shore. You’d likely quit the game right away—this setting is crucial for us to avoid such scenarios. Configuration Example: serverfiles/oxide/config "Maintained Events": {   "Always Maintain Max Events": true,   "Max Maintained Events": 30,   "Enable X Hours After Wipe (0 = immediately)": {     "Easy": 0.5,     "Medium": 1.0,     "Hard": 3.0,     "Expert": 24.0,     "Nightmare": 48.0       All of our bases from Easy to Nightmare are equipped with turret protection. If you do not want turrets to spawn in your raidable bases on your server, you can use the following method. Go to the file path /data/RaidableBases/Profiles, open the JSON files inside with a text editor, and apply the following:   "Kill These Prefabs After Paste": [     "assets/prefabs/npc/autoturret/autoturret_deployed.prefab",     "autoturret_deployed" ], If you are satisfied with this package, you can support us by leaving a 5-star review on the site where you purchased it. Your feedback motivates us to continue improving and providing even better configurations for dedicated server owners like you. Please leave a review here:  https://codefling.com/bases/raidable-bases-pack-loot-tables-110-bases?tab=reviews Thank you! ❤️ Support:  FULLWIPED DISCORD  
5.0
sale
Elevate your server’s economy with the 3x Alpha Loot Table, a meticulously balanced configuration designed for peak progression and player enjoyment! Save yourself hours of agonizing dragging, dropping and deleting and hop right into the important things without needing to worry! Zero Junk, Pure Value: We’ve scrubbed the clutter, ensuring every barrel break and crate opening rewards you with items that actually matter. Progress-Focused: Every item is curated to keep the gameplay loop tight, rewarding players for their time and effort. Comprehensive Coverage: From perfected barrel spawns to fully overhauled loot tables for scientists, NPCs, and the latest underwater encounters. HIGHLY Tuned: Backed by over 10 hours of hands-on, granular balancing to ensure the perfect 3x experience for your players. Stop wasting time on useless scrap and give your players the high-stakes, high-reward progression they crave! Continued Updates Are Supported!   Installation instructions: Unzip the file into your server directory it should work automatically if you replace the config and repopulate alpha loot. Follow the file directory in the zip if your having issues.  Requires Alpha Loot
0.0
$15.00
Add a working Anvil and a Metal Hammer to your server and let players reforge their gear. Drop an item onto the anvil, strike it with the hammer, and it transforms into an upgraded or reskinned version — with resource costs and chance-based outcomes you fully control.   ⭐ Key Features ✅ Adds a custom Anvil deployable and a Metal Hammer tool as real in-game items ✅ Reforge system — place an item in the anvil and strike it with the hammer to convert it ✅ Chance-based results: one input can roll into several possible outputs (the default recipe turns an AK into ice, jungle, medical, diver, or a skinned variant) ✅ Fully configurable recipes — define the input item (shortname, skin, name, amount), its resource cost, the number of hammer strokes required, and the weighted result table ✅ Optional Metal Hammer durability, measured in strikes, with a found-condition range and repair support (can be turned off entirely) ✅ Tunable anvil entity: health, per-damage-type protection, optional invulnerability, and a lootable toggle ✅ Anvil decay with delay, duration, indoor decay, heal rate, and tick controls ✅ Anvil repair and pickup rules — require the hammer, require building privilege, and carry condition over on pickup ✅ Per-item world-model transform overrides so each item sits correctly on the anvil ✅ In-world UI that shows the resources needed for the current upgrade ✅ Localized into 31 languages out of the box   🔑 Permissions & Commands None — AnvilUpgrade has no permissions or chat/console commands. Everything happens in the world: whoever holds the Anvil and Metal Hammer items can use them. Control access by choosing who receives those items.   ⚙️ Configuration A full config is generated on first load at oxide/config/AnvilUpgrade.json. Excerpt of the key sections (the per-damage-type protection table is generated automatically with sensible defaults): { "Config Version": 1, "Metal Hammer Item": { "Enable Condition": true, "Max Condition (durability / strikes)": 500.0, "Found Condition Fraction Min (0-1)": 0.1, "Found Condition Fraction Max (0-1)": 0.4, "Repairable": true, "Maintain Max Condition": true }, "Anvil Entity": { "Health": 1000.0, "Lootable": true, "Invulnerable": false, "Base Protection (per damage type, 0-1)": { "Generic": 0.98, "Bullet": 0.9999, "Explosion": 0.4998, "...": "remaining damage types generated automatically" }, "Decay": { "Enabled": true, "Decay Delay (hours)": 8.0, "Decay Duration (hours)": 8.0, "Decay Indoors": false, "Override Heal Rate": false, "Heal Rate": 1.0, "Decay Tick Override (seconds, 0 = default)": 0.0 }, "Repair": { "Enabled": true, "Resources": [ { "Short Name": "metal.refined", "Skin ID": 0, "Amount": 25 } ] } }, "Anvil Pickup": { "Enabled": true, "Require Hammer": true, "Require Building Privilege": true, "Item Count": 1, "Set Condition From Health": true, "Subtract Condition (0-1)": 0.25 }, "Configs": [ { "Requirements": { "Short Name": "rifle.ak", "Skin ID": 0, "Text": null, "Amount": 1, "Number of strokes (Min 1)": 10, "Resources": [ { "Short Name": "metal.refined", "Skin ID": 0, "Amount": 30 } ] }, "Collect resources on success only": false, "Result Items": [ { "Short Name": "rifle.ak.ice", "Skin ID": 0, "Chance (0-100)": 20.0 }, { "Short Name": "rifle.ak.jungle", "Skin ID": 0, "Chance (0-100)": 20.0 }, { "Short Name": "rifle.ak.med", "Skin ID": 0, "Chance (0-100)": 20.0 }, { "Short Name": "rifle.ak.diver", "Skin ID": 0, "Chance (0-100)": 20.0 }, { "Short Name": "rifle.ak", "Skin ID": 2436647042, "Chance (0-100)": 20.0 } ] } ], "World Item Transform Override": {} } Each result item also supports amount ranges and a condition range; add as many recipes to "Configs" as you like.   🌍 Localization Ships with 31 languages, including English, Russian, German, French, Spanish, Portuguese, Italian, Polish, Turkish, Ukrainian, Chinese (Simplified & Traditional), Japanese, Korean, and more. Every message is editable under oxide/lang.   🧩 Dependencies CustomItemDefinitions (required) — library that provides the custom Anvil and Metal Hammer items ServerPrefabs (required) — library that provides the custom anvil entity and hammer prefab   📥 Installation Install the required libraries CustomItemDefinitions and ServerPrefabs. Drop AnvilUpgrade.cs into your oxide/plugins/ folder. Edit the generated config to define your recipes, then reload the plugin. Distribute the custom items to players — the Anvil (anvil) and Metal Hammer (hammer.metal) — through your kits, shop, or give system.   🙏 Credits Prefab created by m1t1ngg.   💬 Support Questions, ideas, or issues? Leave a comment or send me a DM here on Codefling.
0.0
DemoPro: The Anti Cheat That Works 🎥 DemoPro turns F7 reports into a single evidence bundle with timeline markers + jump points, so you can jump straight to the key moments fast. It captures footage  Before / during / after the f7 report is made Cheaters can’t hide from this system — no more relying on outdated anti-cheat plugins. This is clear video evidence that makes decisions easier, faster, and fairer. 100% accurate, No False Positives  Key Features 🎥      ✅ Converts **F7 reports** into a  single evidence bundle      ✅ Records BEFORE, DURING, and AFTER every F7 report. You NEVER miss what happens.      ✅ Saves you and your admins loads of time. No more wasting hours spectating players      ✅ Smart sorts demos with Timeline markers + jump points  to reach key moments fast      ✅ Private portal access for you and your admins with **Steam sign-in**      ✅ Assignments, notes, outcomes  (keeps reviews organised)      ✅ Server-friendly: all data is stored off-site on your account, not on your game server, keeping things lightweight and smooth.      ✅ Can be use as a content tool,  you can make cinematic videos from the demos you receive.      ✅ Fully compatible with all Rust server setups.   Proof it works: 🔍 join our Discord and check out the #cheater-clips channel  https://discord.gg/2DCfVFFgvW   7-day free trial: https://rustdemopro.com   RustAdmin Integration: https://www.rustadmin.com Visual snippet of recoil mapping with each attack in timeline Shareable filtered portal links Discord ban feed + global portal search Redesign the portal + dashboard for a more modern and fluid feel  New portal is now live Future Updates AI Integration 🧠 Introduce an AI/ML system that analyses demo files to learn the difference between normal players behaviour vs a cheaters behaviour All Seeing Eye  👁️ An AI powered monitoring layer that automatically flags suspicious players and triggers evidence capture without relying on F7 reports.   Set Up Guide   Step 1 — Create Your DemoPro Space Sign in at https://rustdemopro.com using your Steam account Create your community space Choose monthly or annual billing (includes a 7-day free trial)   Step 2 — Install the Harmony Mod Copy the DLL into: server_root/HarmonyMods/ Start the server once to generate: server_root/HarmonyConfig/ (this contains the config) After editing the config, run: rdm.reloadcfg to apply changes   Step 3 — Connect Your Server In the portal, generate a Server Key Paste the key into the plugin config Make sure uploads are enabled in the config Reload the config, enter this command in your console rdm.reloadcfg    Step 4 — Reports Create Cases When an in-game report (F7) happens, DemoPro automatically builds an evidence bundle The bundle is uploaded to your portal as a case for review   Step 5 — Review & Decide Open the case, assign it, and add notes Download the bundle, jump to the timeline markers Mark the outcome as Reviewed (Clear) or Reviewed (Cheating) with notes for your team If you need any help setting up DemoPro, please open a ticket on our Discord.         How it works  🎥 Server records players in 15-minute chunks with ~30 minutes rolling history. When someone is F7 reported, Demo Pro grabs the “before” buffer and keeps recording. 15 minutes later it adds the “after” clip and uploads everything to the portal. If a player disconnects/reconnects, chunk lengths can be shorter than 15 minutes—that’s normal. Portal statuses 🎥 Players reported → Clip uploaded → Needs Review → Admin downloads → Admin reviews → Mark result Needs Review — new or reset incidents. Downloaded (Needs Review) — someone pulled the bundle but hasn’t finished. Reviewed — Clear / Reviewed — Cheating — finished decisions. Opening & assigning a report 🎥 Click Open on a card to see details. Assign it to yourself immediately and add notes as you investigate. Set the review state to Reviewed (Clear) or Reviewed (Cheating) when done. Assignments and outcomes keep other moderators from duplicating work. Finding the action fast 🎥 Timeline dots: hits/shots, kills, report moment. Use the event feed to jump to notable damage or kill events. Report marker shows where the F7 report landed inside the clip. Downloading the bundle Use Download bundle for a ZIP containing .dem files and a README. The README points to the first demo and the timestamp to jump to—start there. Clip lengths can vary if players disconnect; that’s expected. Load demos into Rust 🎥 Copy the suggested .dem into C:\Program Files (x86)\Steam\steamapps\common\Rust\demos. If the demos folder doesn’t exist, create it (restart Rust once if needed). Playing + controls From Rust main menu, open the Demo browser, refresh, pick the file, and play. Use Alt to toggle cursor, Tab for UI, and debugcamera to free-fly. Cycle nearby players with Spacebar; pause/rewind/fast-forward as needed. Review guidance 🎥 Use the README timestamps as a starting point; check other demos if nothing obvious. If cheating is confirmed: capture proof, upload to the usual place, mark Reviewed (Cheating), and leave clear notes. If clean: mark Reviewed (Clear) and add a quick note (e.g., desync, valid prefire). long story short, when someone f7 reports, you can get a clip, you replay in rust of exactly why, and it shows footage before and during the report. For tips and useful keybinds to help you get the most out of DemoPro, check out the dedicated channels in our Discord.    Discord: https://discord.gg/2DCfVFFgvW Website: https://rustdemopro.com/ Youtube: https://www.youtube.com/@RustDemoPro Cheater Videos            
5.0
Highest Rated
Top-rated picks trusted and loved by the community.
Great Deals
Discounted picks, limited-time deals, and sale items worth grabbing now.
Recently Updated
Recently improved files with fresh updates, fixes, and new content.

About Us

Codefling is the largest marketplace for plugins, maps, tools, and more, making it easy for customers to discover new content and for creators to monetize their work.

Downloads
2.7m
Total downloads
Customers
11.6k
Customers served
Files Sold
165.5k
Total sales
Payments
3.6m
Processed total
×
×
  • Create New...

Important Information

We have placed cookies on your device to help make this website better. You can adjust your cookie settings, otherwise we'll assume you're okay to continue.