
will007's Wishlist
-
$16.99
Welcome Panel
Site
In case you having issues with plugin feel free to open support ticket on site here. I will usually respond within 24 hours not including weekends.
Discord
I'm also available at my discord server where I provide support for my customers. You can also find small community here and get answers for your questions. Invite link here.
Documentation
To find out what can be customized within config file please refer to full plugin documentation here. Any questions prior to purchasing forward into DM here or into ticket at my discord.
Default configs available as template with plugin.
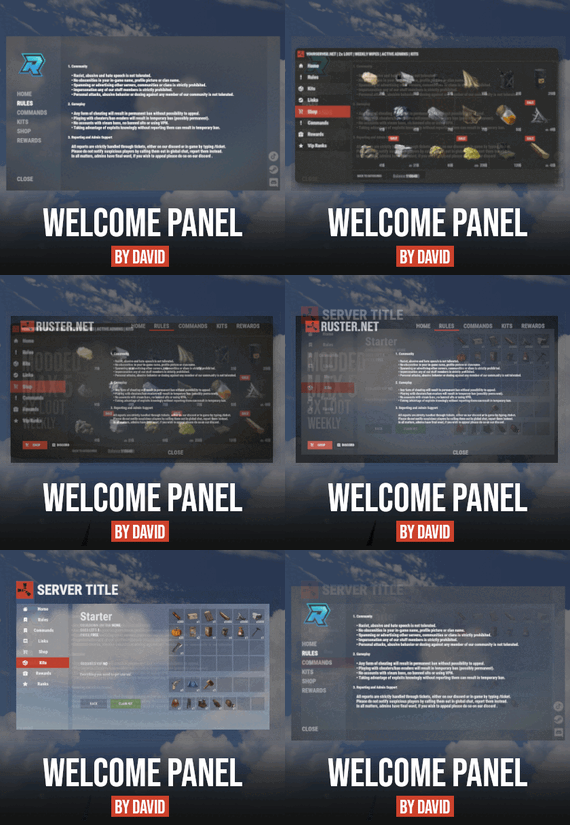
Screenshots bellow showcasing configurations created by customers. These are not available with the plugin but I decided to post them here since it's good demonstration of how customizable this plugin is.
BOOBLEJ
Tide
Neighigh
Paul
Leunal17
BOOBLEJ
How to start using plugin? Simply drop WelcomePanelLite.cs file into your plugin folder. After successfully loading plugin you can use default command /info in game. Configuration is handled in config file (oxide/config/WelcomePanelLite.json).
How hard is to get this plugin all set up? It's fairly simple. Plugin comes with default configuration which showcases everything you need to know regarding text, styling and changing images.
How hard it is to customize your own layout?
When it comes to changing color or images it's simple, any inexperienced user can do it however if you want to customize positions of UI or add extra tab buttons, it requires understanding of "ui anchors". Anchors are not that complicated but it takes hour or two to fully understand it. For more info check documentation.
Can I add multiple pages into WelcomePanel?
Yes, you can add unlimited amount of pages.
Can I add images into WelcomePanel?
Yes, you can add image to any panel and you can set background for each tab
What image sizes I should use?
This is different for each panel across different templates. Basically images parented to any panel are stretched to its size. Best approach is to take screenshot of the panel and try to fit image size into that prior to uploading it.
How to add addons?
Each text tab has addon option at bottom, just type in plugin name. List of available addons can be found at the top of the plugin description, listed as "Works with".
-
$24.99
Skinner
By Whispers88 in Plugins
Premium Item Skinning · Oxide + Carbon SKINNER v3.1.6 Skin every item like it’s worth keeping — 60x faster, 200x leaner.
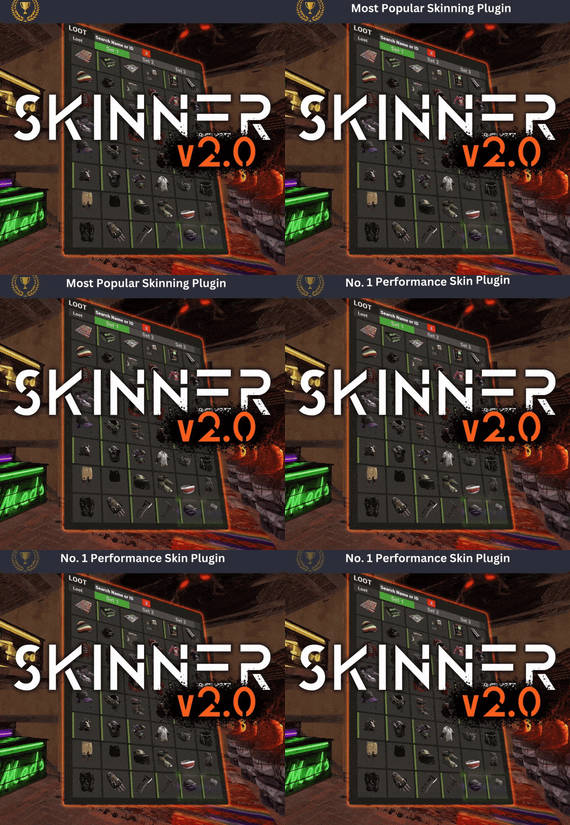
The unrivalled no.1 performance skinning plugin. Skin any item in the game with a unique skinbox — live skinning, auto skinning, and skin sets.
The numbers, not the noise Measured, not marketed
Skinner 2.0 delivers unrivalled efficiency. In standard testing versus the closest performing plugin, runtime was 60x faster and memory use 200x more efficient.
What’s new in 3.0 Skinner 3.0 is here — a full visual overhaul with dynamic, permission-based UI menus.
✓Visual overhaul with dynamic, permission-based UI menus ✓Automatic skin filtering and dev modes for the new TOS ✓Permission-based skin sets ✓Team-share skins ✓Auto-unlock owned skins Features Everything skinner does
Live skinning Skin items in place without moving them. Auto import Automatically import and use all game-approved skins. Skin sets Create a variety of skin sets for any item. Skin requests Players request skins; admins approve them in game. Auto skins Apply selected skins to every item that enters your inventory. Team share Skin your whole team’s inventory from your own sets. See it running Live demo
Live-skin any item in your inventory. Skin deployables you’re looking at. Commands Every command
Skin menu
/skin /s, /skinbox, /sb Live-skin any item in your inventory by picking a skin. /skincraft /sc Build skin sets used by the auto, team, and base commands. /skinitem /si, /skindeployed, /sd Skin a deployable you are looking at. Args: 1, 2 or 3 to use a skin set. Automatic
/skincon /scon Skin every item in the container you are looking at. Args: 1/2/3 (optional). /skininv /sinv Skin every item in your inventory. Args: 1/2/3 (optional). /skinauto /sauto Auto-skin every item as it enters your inventory. Args: 1/2/3 (optional). /skinteam /st Skin your inventory and your team’s. Args: 1/2/3. Use /skinteam toggle to opt in or out. /skinbase /skinbuilding Skin all deployables in your base. Args: item filter, e.g. /skinbase sleepingbag. /skinall /sa Skin all items in every container in your base. Args: shortname, e.g. /skinall rifle.ak. /skinset /ss Set your currently selected skin set. Import & requests
/skinimport /sip Import a custom workshop skin. Args: WorkshopID, e.g. /skinimport 2397648701. /colimport /cip Import a workshop collection. Args: Collection ID, e.g. /colimport 2921147807. /skinrequest /sr Request a skin be added — shows in the requests box. Args: WorkshopID. /skinrequests /srs Open the approval box. Try = copy the item, Approve = add the skin, Deny = remove it. Permissions Grant exactly what you want
Player
skinner.default /skin skinner.items /skinitem skinner.craft /skincraft skinner.skinauto /skinauto skinner.skincon /skincon skinner.skininv /skininv skinner.skinbase /skinbase skinner.skinteam /skinteam skinner.skinall /skinall skinner.skinrequest /skinrequest Admin
skinner.import Enables /skinimport, /colimport, and /skinrequests. skinner.bypassauth Skips the building-auth check when using /skinitem. skinner.permskintry Enables Try in /skinrequests. Trying a skin copies the item — admins only. Auto-assigned
skinner.skinautotoggled A player disables skinauto. skinner.skinteamblock A player opts out of team skins. Cooldowns Grant skinner.<command><seconds> (e.g. skinner.default30) to enforce the cooldowns set in the config. No cooldown permission = no cooldown. If a player has several, the shortest wins. Importing skins Five ways to add skins
Via config Add workshop IDs to the Imported Skins List; reload and shortnames/display names auto-populate. Via collections Add whole workshop collection IDs; every skin imports automatically on load. Via commands /skinimport <WorkshopID> and /colimport <CollectionID> from chat, the F1 console, or RCON. Via skin requests Players /skinrequest; admins Try/Approve/Deny in the requests box. Requests log to a Discord webhook. From other plugins Convert data from SkinBox, xSkins, and SkinController with the SkinDataConverter tool, then paste into the config. Get the converter → Configuration Tune every behaviour
{ "Auto import approved skins": true, "Remove player data after inactivity (days)": 14, "Apply names of skins to skinned items": true, "Add Search Bar UI": true, "Override spraycan behaviour": false, "Use spraycan effect when holding spraycan and skinning deployables": true, "Blacklisted Skins (skinID)": [], "Blacklisted Items (itemID)": [], "Import Skin collections (steam workshop ID)": [], "Imported Skins List": { "861142659": {}, "2617744110": {} } } Developer API Hook into Skinner
A small, stable surface for reading the cached skin data and resolving redirect items from your own plugin.
//Get all cached skins public Dictionary<int, List<ulong>> GetAllCachedSkins() => _cachedSkins; //Check if a skin is a redirect item public bool IsRedirectID(ulong uID) => HasMask(uID); //Convert a redirect ID to its item ID public int RedirectIDtoItemID(ulong uID) => (int)UnsetMask(uID); //Get the list of skins for an item public List<ulong>? GetSkinsItemList(int itemid) { _cachedSkins.TryGetValue(itemid, out List<ulong>? cachedSkins); return cachedSkins; } Watch See Skinner in action
http://youtu.be/ewKlNILTwv8
Skin every item like it’s worth keeping.
The unrivaled no.1 performance skinbox for Rust — 60x faster, 200x leaner. Oxide + Carbon.
Join the Discord → Skinner v3.1.6 · by Whispers88 · Oxide + Carbon · 5/5 from 50 reviews · 69 versions · on Codefling since March 2022 -
.thumb.gif.2d1b41b0ae0c1d0a34f2f55dc65983b5.gif)
$45.99
Raidable Bases Pack (Easy to Nightmare 110 Bases)
This is a custom package created by us, featuring 110 handcrafted bases across five difficulty levels, ranging from Easy to Nightmare.
Note: The building skins in the package showcase images may differ from the spawned bases or use the default building skin.
(This package does not include loot tables. If you need bases + loot tables, you may want to check out the higher-tier package: 110 Raibable Bases + Loot Tables package)
Warning: The Raidable Bases plugin requires the Copy Paste plugin to function. You must install both for this bases pack to work.
🔗Raidable Bases (Paid): https://codefling.com/plugins/raidable-bases
🔗Copy Paste (Free): https://umod.org/plugins/copy-paste
This Raidable Bases package includes:
(In addition to the bases, it includes a well-configured config file that can be uploaded to 📁/serverfiles/oxide/config, but its usage is optional.
It also contains 5 different profile configs that can be uploaded to 📁/oxide/data/RaidableBases/Profiles. These are also well-configured and optional to use.
The usage of both is entirely up to you.)
🏡30 Easy Bases
🏡30 Medium Bases
🏡30 Hard Bases
🏡10 Expert Bases
🏡10 Nightmare Bases
WARNING: TWO DIFFERENT INSTALLATION METHODS
(PLEASE READ BOTH AND APPLY ONLY THE ONE THAT FITS YOUR NEEDS)
INSTALLATION GUIDE 1
(If you do not have a custom configuration and are not a professional in server configurations, choose this option. However, if you already have your own configuration and profile settings and do not wish to use the optional configs we provide—in other words, if you only need the bases—use the second installation guide instead.)
▶ Step 1: Place the Config File
From the extracted ZIP files, locate the config folder and find the RaidableBases.json file. Move it to the following directory:
📁 /serverfiles/oxide/config
▶ Step 2: Place the Bases
From the extracted ZIP files, locate the copypaste folder and move it to the following directory:
📁 /serverfiles/oxide/data
▶ Step 3: Place the Profiles Folder
From the extracted ZIP files, locate the profiles folder and move it to the following directory:
📁 /serverfiles/oxide/data/RaidableBases
Why Are Profiles Important?
The profiles folder contains crucial settings that allow you to:
✔️ Enable/disable the dome
✔️ Enable/disable NPCs
✔️ Adjust the number of lootable items
These are just a few examples—there are dozens of important settings that directly affect how raid bases function. The config file alone is not enough—these files play a major role in customizing your raid bases.
I strongly recommend reviewing each difficulty setting (Easy to Nightmare) inside the profiles folder and adjusting them based on your needs.
▶ Step 4: Restart the plugin via RCON:
o.reload RaidableBases
INSTALLATION GUIDE 2
(Use this installation method if you do not want to use our configurations and instead prefer to use your own config files and your own 📁/oxide/data/RaidableBases/Profiles configurations.)
In this case, you only need to add the bases. To do this, use the following commands in RCON:
▶ Step 1:
You can add bases one by one or in bulk.
After executing the commands in RCON, the bases will be registered inside the Profiles configuration.
Note: If you do not want to deal with these adjustments, it is recommended to use Installation Guide 1 instead.
A- Example RCON commands:
rb.config add "Easy Bases" fullwipedeasy1 rb.config add "Hard Bases" fullwipedhard1 B- Commands to Integrate Raid Bases in Bulk via RCON:
rb.config add "Easy Bases" fullwipedeasy1 fullwipedeasy2 fullwipedeasy3 fullwipedeasy4 fullwipedeasy5 fullwipedeasy6 fullwipedeasy7 fullwipedeasy8 fullwipedeasy9 fullwipedeasy10 fullwipedeasy11 fullwipedeasy12 fullwipedeasy13 fullwipedeasy14 fullwipedeasy15 fullwipedeasy16 fullwipedeasy17 fullwipedeasy18 fullwipedeasy19 fullwipedeasy20 fullwipedeasy21 fullwipedeasy22 fullwipedeasy23 fullwipedeasy24 fullwipedeasy25 fullwipedeasy26 fullwipedeasy27 fullwipedeasy28 fullwipedeasy29 fullwipedeasy30 rb.config add "Medium Bases" fullwipedmed1 fullwipedmed2 fullwipedmed3 fullwipedmed4 fullwipedmed5 fullwipedmed6 fullwipedmed7 fullwipedmed8 fullwipedmed9 fullwipedmed10 fullwipedmed11 fullwipedmed12 fullwipedmed13 fullwipedmed14 fullwipedmed15 fullwipedmed16 fullwipedmed17 fullwipedmed18 fullwipedmed19 fullwipedmed20 fullwipedmed21 fullwipedmed22 fullwipedmed23 fullwipedmed24 fullwipedmed25 fullwipedmed26 fullwipedmed27 fullwipedmed28 fullwipedmed29 fullwipedmed30 rb.config add "Hard Bases" fullwipedhard1 fullwipedhard2 fullwipedhard3 fullwipedhard4 fullwipedhard5 fullwipedhard6 fullwipedhard7 fullwipedhard8 fullwipedhard9 fullwipedhard10 fullwipedhard11 fullwipedhard12 fullwipedhard13 fullwipedhard14 fullwipedhard15 fullwipedhard16 fullwipedhard17 fullwipedhard18 fullwipedhard19 fullwipedhard20 fullwipedhard21 fullwipedhard22 fullwipedhard23 fullwipedhard24 fullwipedhard25 fullwipedhard26 fullwipedhard27 fullwipedhard28 fullwipedhard29 fullwipedhard30 rb.config add "Expert Bases" fullwipedexp1 fullwipedexp2 fullwipedexp3 fullwipedexp4 fullwipedexp5 fullwipedexp6 fullwipedexp7 fullwipedexp8 fullwipedexp9 fullwipedexp10 rb.config add "Nightmare Bases" fullwipednight1 fullwipednight2 fullwipednight3 fullwipednight4 fullwipednight5 fullwipednight6 fullwipednight7 fullwipednight8 fullwipednight9 fullwipednight10 ▶ Step 2: Restart the plugin via RCON:
o.reload RaidableBases
EXTRA IMPORTANT INFORMATIONS:
We do not use a dome, NPCs, or arena walls around raid bases on our servers, and in the ZIP file we provided, these features are also disabled by default. If you want to enable them, you will need to adjust the settings accordingly.
For example, to enable the dome, follow the steps below:
Navigate to:
📁/oxide/data/RaidableBases/Profiles
Open the files inside the Profiles folder with a text editor.
Locate the following settings:
(This is already set to false because it is required for markers to appear on the map.)
"Spawn Silently (No Notification, No Dome, No Map Marker)": false,
"Create Dome Around Event Using Spheres (0 = disabled, recommended = 5)": 0,
Change the value from 0 to 5 as shown below:
"Create Dome Around Event Using Spheres (0 = disabled, recommended = 5)": 5,
In our setup:
- Timed events and purchasable events are disabled.
- After a wipe, easy bases will start spawning 30 minutes later.
- Nightmare bases will begin spawning 48 hours (2 days) later.
Imagine starting the game with just a torch in hand and immediately encountering a nightmare base on the shore.
You’d likely quit the game right away—this setting is crucial for us to avoid such scenarios.
Configuration Example: 📁/serverfiles/oxide/config
"Maintained Events": {
"Always Maintain Max Events": true,
"Max Maintained Events": 30,
"Enable X Hours After Wipe (0 = immediately)": {
"Easy": 0.5,
"Medium": 1.0,
"Hard": 3.0,
"Expert": 24.0,
"Nightmare": 48.0
All of our bases from Easy to Nightmare are equipped with turret protection.
If you do not want turrets to spawn in your raidable bases on your server, you can use the following method.
Go to the file path /data/RaidableBases/Profiles, open the JSON files inside with a text editor, and apply the following:
"Kill These Prefabs After Paste": [ "assets/prefabs/npc/autoturret/autoturret_deployed.prefab", "autoturret_deployed" ],
If you need not only these bases but also the loot tables for the items that will spawn inside them, check out our one-of-a-kind, exceptional Raidable Base Loot Tables at the link below:
🔗 https://codefling.com/customizations/raidable-bases-loot-tables-pack
(Our loot tables are designed to cater to different server types, including Vanilla (1x) servers as well as 2x, 3x, 5x, 10x, and higher multipliers to match various loot requirements.)
If you are satisfied with this package, you can support us by leaving a 5-star review on the site where you purchased it. Your feedback motivates us to continue improving and providing even better configurations for dedicated server owners like you.
Please leave a review here: https://codefling.com/bases/raidable-bases-pack-110-bases?tab=reviews
Thank you!
-
$35.00
Raidable Shelters 50+ |
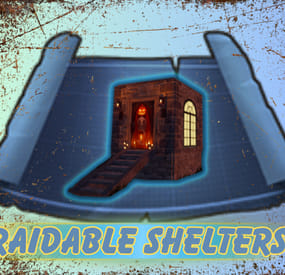
Raidable base shelters the perfect solution for an fast exciting and dynamic raiding experience! These compact bases are designed to be blown up and enjoyed, offering endless fun and tactical opportunities for players.
Total 40 Bases
10 easy
10 medium
10 hard
5 Expert
5 Nightmare
The bases are good for adding to your rotation something different ! players will love to see them spawn .
Bases include:
Strange placements of boxes, traps,tc
Traps
NO hidden loot or TC
Lockers
Furnace
Fridge
Large box
Small box
Teslacoil
Flame trowers
Neartraps
Mines
( everything you need in a raidable bases )
Include Readme
Base names for easy start up
-

$18.99
Dungeon Bases
The plugin adds a dungeon event to your server. Dungeons are bases with puzzles, NPC defenders, turrets and more. You can create your own dungeons of varying difficulty. Procedurally generated dungeons are also now available (currently only in test mode)
You can build your own bases or modify existing ones:
There are moving NPC guardians in the dungeons:
There are puzzles with protective doors in the dungeons:
In the dungeons there are secret notes with codes in boxes or on NPCs:
Commands:
dungbase_start - force start event
dungbase_start <entrance name> <dungeon name> <X> <Y> <Z> - force an event to start using the specified entrance and dungeon at coordinates X Y Z (you can also specify the name of the entrance or dungeon <random>)
dungbase_start <X> <Y> <Z> - force an event to start using a random entrance and dungeon at X Y Z coordinates.
example:
dungbase_start #dung#entrance1 #dung#dungeon1 122.3 5.2 872 dungbase_start random #dung#dungeon3
dungbase_stop <id|all> - force stop event
dungbase_list - displays a list of current dungeons
dungbase_addblack <radius> - add a zone where dungeon spawning is not allowed
dungbase_start - force start event
Command to launch procedurally generated dungeons:
example:
dungbase_start #dung#entrance1 procedural_hard - an event starts where the entrance is #dung#entrance1, and the dungeon is procedurally generated with the name of the tier hard dungbase_start random procedural_normal - an event starts where the entrance is randomly selected from a list of entrance names, and the dungeon is procedurally generated with the tier name normal dungbase_start random procedural_easy 100 6 84 - an event starts where the entrance is randomly selected from a list of entrance names, and a procedurally generated dungeon named easy is created at coordinates (100, 6, 84)
Hooks:
void DungeonBasesEventStarted() - // called when event starts
void DungeonBasesEventEnded() - // called when event ends
Configuration:
{ "Allow only the event owner (the one who entered the dungeon first) into the dungeon": true, "Allow owner's teammates to enter the dungeon": true, "Time before ownership is lost after leaving the server(in seconds)": 300, "Event marker on the map": true, "Event marker name": "Dungeon Base", "Event marker transparency(0-1)": 0.55, "Event marker radius": 0.5, "Event marker color.R(0-1)": 1.0, "Event marker color.G(0-1)": 0.0, "Event marker color.B(0-1)": 0.0, "Display event owner name on marker": true, "Display the time remaining until the end of the event on the marker": true, "Autostart event(disable if you want to trigger the event only manually)": true, "Calculate the time until the next event only after the previous one has finished": false, "Minimum time to event start(in seconds)": 3600, "Maximum time to event start(in seconds)": 7200, "Minimum event duration(in seconds)": 2000, "Maximum event duration(in seconds)": 3000, "Minimum number of online players to trigger an event": 1, "List of NPC names": [ "Dungeon NPC", "Dungeon Keeper", "Dungeon guard" ], "Dungeons list": [ "#dung#base1", "#dung#base2", "#dung#base3", "#dung#base4" ], "Entrances list": [ "#dung#entrance1", "#dung#entrance2", "#dung#entrance3", "#dung#entrance4" ], "Random order of choosing a dungeon from the list (if false, will be selected in turn)": true, "Random order of choosing the entrance to the dungeon from the list (if false, will be selected in turn)": true, "Change the time of day when entering the dungeon(from 0 to 23, if -1 - do not change the time)": 0.0, "How long before the end of the event does radiation start to affect players inside the dungeon": 180, "How long before the event ends will a warning message be displayed to players": 300, "How long after the event ends should the entrance be destroyed": 60, "Close the entrance and exit to the dungeon when the event time is over": true, "Will autoturrets attack NPCs": false, "Save event data (If true, the event will be saved and will continue even if you restart the server or plugin. Disable this if you get lag when saving)": true, "SteamID for chat message icon": 0 } Note: The plugin is guaranteed to work correctly with bases enabled. NPCs will not behave as standard, as they use different algorithms. Only one dungeon can spawn on the map at a time.