
GangstaPichu's Wishlist
-
$15.00
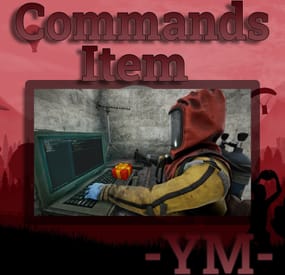
Commands Item
By YaMang -w- in Plugins
Add commands to items. Press Unwrap to run the command. And Healing Items And Throw Items (smoke, f1, etc...)
Effect List: Effects | https://umod.org/plugins/effects-panel
Commands:
/cicd - Cooldown Hud
/ci - basic command
Config:
{ "General Settings": { "Prefix": "<color=#5892bf>[Commands-Item]</color>\n", "SteamID": 0, "Commands": "ci", "Use Active Commands": true, "Use Throw Commands": false, "Use Healing Commands": false, "Use Message on used count": false, "Use Map Wipe Data Clear": false, "Debug": false }, "Item Settings (custom name)": { "Supply Space Fanny Drop": { "Item short name": "grenade.smoke", "Item skin": 2867732572, "Commands": [ "ad.dropspace $player.id" ], "Message on use (leave blank for no message)": "Warning Space Drop !!", "Global Cooldown [true | false]": false, "Shared Cooldown": null, "Cooldown (0 for disable - ※second※)": 0, "MaxUsed (0 for unlimited)": 0, "Sound Effect (blink notting)": "", "Effect (blink notting)": "assets/bundled/prefabs/fx/smoke_signal_full.prefab", "Flags": [ "" ] }, "Teleport Granade": { "Item short name": "grenade.smoke", "Item skin": 2814909703, "Commands": [ "teleport.topos $player.id $entity.x $entity.y $entity.z" ], "Message on use (leave blank for no message)": "Teleporting", "Global Cooldown [true | false]": false, "Shared Cooldown": "testshared", "Cooldown (0 for disable - ※second※)": 0, "MaxUsed (0 for unlimited)": 0, "Sound Effect (blink notting)": "", "Effect (blink notting)": "", "Flags": [ "" ] }, "Unwarp Space Drop": { "Item short name": "xmas.present.medium", "Item skin": 2814909703, "Commands": [ "ad.dropspace $player.id" ], "Message on use (leave blank for no message)": "Warning Space Drop !!", "Global Cooldown [true | false]": false, "Shared Cooldown": "testshared", "Cooldown (0 for disable - ※second※)": 0, "MaxUsed (0 for unlimited)": 0, "Sound Effect (blink notting)": "", "Effect (blink notting)": "", "Flags": [ "" ] } }, "items Shared Cooldowns": { "Shard Name | Time (sec)": { "testshared": 5 } }, "Version": { "Major": 2, "Minor": 2, "Patch": 7 } } Permission:
CommandsItem.allow - access command Lang:
{ "NotExist": "<color=#d0d0d0>Item (<color=orange>{0}</color>) could not be found. Please use a valid SkinID!</color>\n<color=#5892bf>Usage: /{1} <skinid></color>", "UsageCI": "<color=red>Usage Sta: /{0} <Name> [Amount]</color>", "InvFull": "<color=#d0d0d0>Inventory is full. Clear some space and try again!</color>", "Received": "<color=yellow>[{0}] Was added to your inventory.</color>", "NoPerm": "<color=#d0d0d0>You dont have permission!</color>", "HasCooldown": "<color=yellow>{0}</color> <color=red>can be used after {1}</color>" }
Flags:
IsBuildingBlock - Unusable while player is build block IsSwimming - Unusable while player is swimming InSafeZone - Unusable while player is in safe zone IsBleeding - Unusable while player is bleeding IsPlayerInZone - Unusable while player is special zone ※Require Zone Manager※ IsPlayerInGrid - Unusable while player is special grid HasTCAuth - Usable while player is Has Tool Cupboard Auth
Format:
pconsole - player input console ex) pconsole chat.say /shop timer_x - Execute the command after x seconds. ex) timer_15 say commandsitem! $player.id - player steam id $player.name - player name $player.x - player x location $player.y - player y location $player.z - player z location $entity.x - entity x location (※Only Throw Items※) $entity.y - entity z location (※Only Throw Items※) $entity.z - entity y location (※Only Throw Items※)
@Azmo idea Thanks 😄 image, text fleids
- #custom item
- #command item
- (and 4 more)
-
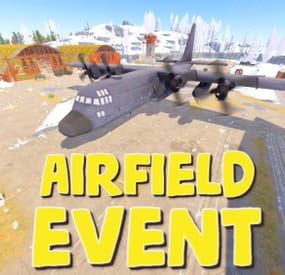
$19.99$15.99Airfield Event
Adds an airfield event to your server! A cargo plane lands on the airfield and drops airdrops, boxes. Strong NPCs, Bradley and a patrol helicopter will protect the crates
You can also set up custom loot using the "SimpleLootTable" plugin
Features:
Easy to set up. Excellent customization options in the config
Commands(admin only):
afestart - force the event to start
afestart {steamID/name} - the event will be reserved for one player
afefast - quick landing of a cargo plane, for testing settings
afefast {steamID/name} - quick landing of a cargo plane, the event will be reserved for one player
afestop - cause the event to end
afe_addcustom - adds a custom landing place for a cargo plane. You must stand on level ground and look in the direction where the cargo plane will move(do not forget to set in the config file "Use a custom place to land a cargo plane": true)
Hooks:
void AirfieldEventStarted() - called when the event starts
void AirfieldEventEnded() - called when the event has ended
void AirfieldEventWinner(BasePlayer player) - called when a player loots any crate first
AirfieldEvent config:
{ "PVE mode (crates can only be looted by the player who first dealt damage to the NPC)": false, "Time after which the owner of the event will be deleted if he left the dome or left the server (for PVE mode)": 300, "Give event ownership to the owner's teammates if he is no longer the owner. Only if teammates are within the event radius (for PVE mode)": true, "Radius for event(for PVE mode)": 380, "Create a dome for PVE mode": false, "Dome transparency (the higher the value, the darker the dome, recommended 4)": 4, "Dome offset": { "x": 0.0, "y": 0.0, "z": 30.0 }, "Do not allow other players into the event(only for PVE mode if there is a dome)": false, "Allow admin to be in event dome (only for PVE mode if there is a dome)": true, "Triggering an event by timer (disable if you want to trigger the event only manually)": true, "Minimum time to event start(in seconds)": 3600, "Maximum time to event start(in seconds)": 7200, "Event duration(In seconds. Time is calculated from the moment the cargo is dropped by the plane at the airfield)": 3600, "End the event early if all crates were completely looted and all NPCs were killed(including Bradley and Heli)": true, "Minimum number of online players to trigger an event": 1, "Minimum drops amount(minimum number of cargo spawns after plane landing, should not be less than 1)": 2, "Maximum drops amount(maximum number of cargo spawns after plane landing, should not be less than 1, maximum 10)": 4, "Minimum crates amount(spawn every cargo drop)": 1, "Maximum crates amount(spawn every cargo drop)": 1, "Crate simple loot table name(plugin SimpleLootTable is required)": "", "Minimum number of items in a crate(plugin SimpleLootTable is required)": 0, "Maximum number of items in a crate(plugin SimpleLootTable is required)": 0, "Remove crates after being looted by a player(in seconds)": 300, "Extend event duration if NPCs, Heli or Bradley is attacked (if less time left, extend to set time (in seconds))": 600, "Crates timer(in seconds)": 900, "Minimum airdrops amount(spawn every cargo drop)": 1, "Maximum airdrops amount(spawn every cargo drop)": 1, "Airdrop simple loot table name(plugin SimpleLootTable is required)": "", "Minimum number of items in an airdrop(plugin SimpleLootTable is required)": 0, "Maximum number of items in an airdrop(plugin SimpleLootTable is required)": 0, "Minimum NPCs amount(spawn every cargo drop)": 1, "Maximum NPCs amount(spawn every cargo drop)": 2, "NPCs type(NPCs prefab, experimental setting, it is not known how the NPCs will behave) 0 - tunneldweller; 1 - underwaterdweller; 2 - excavator; 3 - full_any; 4 - lr300; 5 - mp5; 6 - pistol; 7 - shotgun; 8 - heavy; 9 - junkpile_pistol; 10 - oilrig; 11 - patrol; 12 - peacekeeper; 13 - roam; 14 - roamtethered; 15 - bandit_guard; 16 - cargo; 17 - cargo_turret_any; 18 - cargo_turret_lr300; 19 - ch47_gunner": 8, "NPCs health(0 - default)": 0, "NPCs damage multiplier": 1.0, "NPCs accuracy(the lower the value, the more accurate, 0 - maximum accuracy)": 2.0, "NPCs attack range": 75.0, "Radius of chasing the player(NPCs will chase the player as soon as he comes closer than the specified radius, must be no greater than the attack range)": 60.0, "Minimum distance to NPC damage": 75.0, "Forcibly immobilize an NPC": false, "Method of distribution of kits for NPCs(1 - sequentially, 2 - repeating, 3 - randomly)": 1, "List of kits for NPC(requires Kits plugin)": [ "kit1", "kit2", "kit3" ], "Default displayName for NPC(for SimpleKillFeed/DeathNotes plugin)": "Airfield NPC", "List of displayNames for each NPC(for SimpleKillFeed/DeathNotes plugin)": [ "Airfield NPC1", "Airfield NPC2", "Airfield NPC3" ], "Chance of an NPC throwing a grenade(0-100%) Only if the NPC loses sight of the player, if the player is in a vehicle, if the player is trying to search crates": 50, "NPC grenade damage scale": 1.0, "Will the NPC take damage from a collision with a car": true, "Will NPCs attack zombies": true, "Remove NPC corpses": false, "Patrol helicopter spawn chance (0 - 100%)": 50, "Call the helicopter only after activating the hackable crate": false, "How long the helicopter will patrol the airfield (in minutes)": 5, "Helicopter damage multiplier": 1.0, "Helicopter health": 10000.0, "Helicopter main rotor health": 900.0, "Helicopter tail rotor health": 500.0, "The patrol helicopter will not patrol the airfield if it has found a target": true, "Spawns a helicopter right on the airfield(if false, then the helicopter will arrive from afar in a few seconds)": false, "Helicopter patrol range": 150, "Event marker on the map(will spawn a marker immediately after the start of the event)": false, "If true, spawn the marker only after the plane lands": true, "Event marker name": "Airfield event", "Display on the marker how much time is left until the end of the event": true, "Event marker transparency(0-1)": 0.75, "Event marker radius": 0.5, "Event marker color.R(0-1)": 1.0, "Event marker color.G(0-1)": 0.0, "Event marker color.B(0-1)": 0.0, "Use a custom place to land a cargo plane": false, "Custom place position": { "x": 0.0, "y": 0.0, "z": 0.0 }, "Custom place rotation": { "x": 0.0, "y": 0.0, "z": 0.0 }, "Use custom navmesh (enable if using custom airfield and getting NPC navmesh error)": false, "BradleyAPC spawn chance (0 - 100%) If you are not using a custom map, correct operation of BradleyAPC is not guaranteed. Use the default airfield or a landing spot that is similar to the default airfield": 50, "BradleyAPC bullet damage": 7.0, "BradleyAPC health": 1000.0, "Notification type for the Notify plugin (-1 does not use Notify)": -1, "Notice message type (0 or 1, -1 do not use notice messages)": -1, "SteamID for chat message icon": 0, "Number of points for the winner(only for ServerRewards plugin)": 0, "Number of skill points for the winner(only for Skill Tree plugin)": 0, "Drone Ban Radius (0 - not used)": 0.0, "Damage drones take when near an event(every 5 seconds)": 50.0 }
-
$40.00
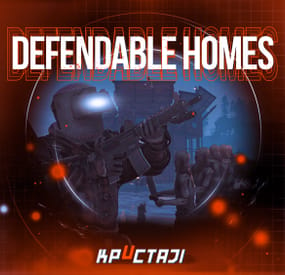
Defendable Homes
Defend your home.. well.. defend what's left of it! Welcome to an epic new event where the players will defend their bases against waves of Frankenraiders! They will use any weapons they have available to try to raid your base. Some will come with whatever they can swing at you and your base, some will just try to defend their kin, some have found some heavy weaponry too! I think that one has a rocket launcher?!
Description
To launch the event first you must find a flare bright enough to attract their attention. You'll be able to find flares bright enough to attract an Easy Frankenraid in Bradley, Elite, Military, and Supply crates. When you've found a flare just toss it on or near the base within Tool Cupboard range. Once you successfully defend an Easy Frankenraiding party, you will be rewarded with a flare bright enough for a Medium party. Then upon defending successfully against a Medium raid, well if you really want to risk your wipe being wiped by a full Frankenraider party, then you will have earned a flare bright enough to attract a Hard Frankenraid! When you complete any difficulty level and are able to defend your base, a chinook will be sent to your location with rewards for your service to the island in clearing out the threat!
If your base is destroyed, the event ends, chat notifications are sent, and there you stand in shame. Hopefully you're on a low pop server and not too many people noticed. It's okay champ, happens to the best of us some days! Just keep an eye on the in game UI like the timer and wave information to give yourself the best shot at keeping your base standing!
There are various ways to configure this plugin to customize it for your server, for any level and number of players. The creativity is in your hands with the configuration file as well as your communities wants or needs. The loot table, the flare spawns, the different enemy types and their setups, everything is there for you to customize this if you so choose.
Dependencies (optional, not required)
True PVE GUI Announcements Notify AlphaLoot CustomLoot Base Repair
Chat commands
/defstop - in game command to end event in your current Tool Cupboard range (be near the event you are trying to end) - only for administrators!
/checkfoundations - checks all the foundations of the house for the event (it is necessary to be inside the Cupboard area of the house)
⊘ - you or your friends are not the owner of the foundation ⊝ - the foundation does not match in height/depth ⊛ - the foundation does not match the topology (prohibited topologies: Cliff, Cliffside, Decor, Building, Monument, Clutter, Mountain) ◉ - the foundation is located within a radius of 40 meters from the custom monument
Console commands (RCON only)
giveflare {skinid} {steamid} - Console command to give a custom flare with a Steam Workshop SkinID ({skinid}) to a player using their SteamID ({steamid})
Plugin Config
en - example of plugin configuration in English ru - example of plugin configuration in Russian
My Discord: KpucTaJl#8923
Join the Mad Mappers Discord here!
Check out more of my work here!
Creator of the default configuration – jtedal
Help in creating a plugin description – Jbird
-
$24.90
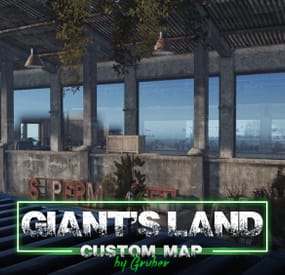
Giant’s Land
Would you like to feel like a little ant in a huge world? You have such an opportunity to play on my new map. The 5 times enlarged custom monuments such as Supermarket and Gas Station located on a small map will give you and your players a lot of pleasure to realize that you are just an ant in the land of Giants. Also added to all this are several places to build a base on the territory of the Huge Monuments.
Features:
The map size is 1500.
In fact, the map looks like 2000-2500.
Number of Prefabs – 13562
The monument with the tower has a ring road with a tank guarding it.
To avoid problems with components, barrels and crates are added to the main monuments in large quantities.
Custom monuments:
Huge Supermarket (5 times enlarged)
Gas station (Increased by 5 times)
Tarkova Sanctuary
Completely redesigned gang camp, reduced by 3 times, with all functions such as Merchants, buying a minicopter and casino.
Ship Cargo with the possibility of building a base in the hold.
2 large boats to build the base
2 huge containers for building a base
2 passenger barges with green and blue cards
Winter biom is covered with ice and eisberg to players with a large online was where to build your home.
Monument FP:
Oil Rig Big
Oil Rig Small
Gas Station in Supermarket
Lighthouse
Monument from Hapis map
-
$39.90
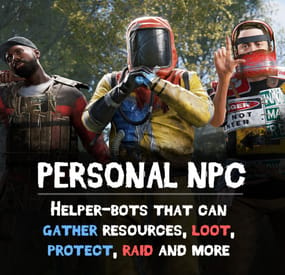
Personal NPC
Take your server experience to new level using Personal NPC companions that can fight, loot, gather, drive, fly, and assist! Whether combat, gathering resources, or traveling is on your to-do list, your bot is on hand to help out!
Features:
✋ Battle-Ready AI
• Command your bot to attack players, enemies, buildings, barrels, and more.
• Protects you against enemies attacks.
• Assist in combat by attacking targets that you engage with (/pnpc combat).
• Raid using rocket/grenade launchers (addon required).
💰 Resource Collection
• Auto-farm of wood, metal, sulfur, and stone.
• Pick up dropped items and collectable resources.
• Enable auto-pickup within a 50m radius along with auto-farm.
🧰 Smart Assistant
• Follow you or stay in position.
• Loot containers.
• Recovers you while wounded.
• Travel with you in minicopters, cars, boats, and more.
• Can drive cars, helicopters and boats (addon required).
Full Control & Personalization
🎯 Bot Setup:
• Set bot name, health, speed, and appearance.
• Enable unlimited ammo and on map visibility.
• Setup bot abilities: combat, looting, resource gathering, and more.
• Setup damage rates, player interactions, and turret targeting.
🛠️ Other Customization:
• Adjust spawn delays, task buttons, and 3D arrow displays.
• Personalize the GUI interface – refresh rate, position, colors, and shortcut keys.
• Blacklist specific items from the bot’s inventory.
Commands:
/pnpc where (shows a location of the bot in chat) /pnpc health (shows current bot's health in chat) /pnpc follow (bot will follow you) /pnpc hover (hover over a place, for Heli AI Addon) /pnpc inventory (open inventory, if enabled "Can player open bot's inventory through '/pnpc inventory' command?' option) /pnpc farm {resource name} (bot will farm exactly this resource, no need to write a lot of /pnpc auto-farm commands to make him work) /pnpc pickup {resource name} (same as "farm" but bot will pickup resources) /pnpc auto-pickup {resource name}/enable/disable /pnpc auto-farm {resource name}/enable/disable /pnpc ignore (bot will ignore everybody who deal damage to him or the owner) /pnpc loot-all (bot will loot everything in radius) /pnpc pvp (bot will fight anybody who's in radius) /pnpc combat (bot will fight only players who attack him or owner)
Expand with Addons!
💡Enhance your bot’s features using add-ons:
• PNPC Helicopter AI Addon
• PNPC Car AI Addon
• PNPC Boat AI Addon
• PNPC Raid Addon
📸 See It in Action! Watch The Video
📃 Configuration:
{ "Control setup": { "Which button will assign tasks to the bot, kill/get/collect, etc. (MIDDLE_MOUSE, SECOND_MOUSE, E, RELOAD, SPRINT)": "MIDDLE_MOUSE", "Range of the task assignment button": 25.0, "Display 3D arrows over a target?": true, "Arrow display duration": 2 }, "GUI customization": { "How many seconds to update the GUI?": 6.0, "Panel layer (Hud, Overlay, Overall, Hud.Menu, Under)": "Overlay", "Panel position adjustment": { "type": "RectTransform", "anchormin": "1 1", "anchormax": "1 1", "offsetmin": "-170 -104", "offsetmax": "-10 -10" }, "1 panel color": "#7f8c8d", "2 panel color": "#bdc3c7", "Health bar color": "#2ecc71", "Shortcut buttons": [ { "Text on button": "Auto-Farm: Wood", "Executable chat commands": [ "pnpc auto-farm wood", "pnpc auto-farm enable" ] }, { "Text on button": "Auto-Farm: Stone", "Executable chat commands": [ "pnpc auto-farm stone", "pnpc auto-farm enable" ] }, { "Text on button": "Auto-Pickup: Wood", "Executable chat commands": [ "pnpc auto-pickup wood", "pnpc auto-pickup enable" ] }, { "Text on button": "Auto-Pickup: Stone", "Executable chat commands": [ "pnpc auto-pickup stone", "pnpc auto-pickup enable" ] } ] }, "Bot settings by permission": { "personalnpc.bot1": { "Bot spawn delay": 300.0, "The name of the bot to be selected through the command when spawning": "bot1", "Bot name": "Personal bot of player %OWNER_NAME%", "Bot appearance (0 - random)": 0, "Maximum health": 150.0, "Bot speed (slowest, slow, normal, fast)": "normal", "Enable infinite ammo for the bot?": true, "Enable display of the bot on the map? (frankenstein icon)": true, "Start kit": [ { "Item name": "", "Item shortname": "shoes.boots", "Item skin": 0, "Item amount": 1, "In which container to place? (belt, main, wear)": "wear" }, { "Item name": "", "Item shortname": "pants", "Item skin": 0, "Item amount": 1, "In which container to place? (belt, main, wear)": "wear" }, { "Item name": "", "Item shortname": "hoodie", "Item skin": 0, "Item amount": 1, "In which container to place? (belt, main, wear)": "wear" }, { "Item name": "", "Item shortname": "mask.bandana", "Item skin": 0, "Item amount": 1, "In which container to place? (belt, main, wear)": "wear" }, { "Item name": "", "Item shortname": "hat.boonie", "Item skin": 0, "Item amount": 1, "In which container to place? (belt, main, wear)": "wear" }, { "Item name": "", "Item shortname": "sunglasses", "Item skin": 0, "Item amount": 1, "In which container to place? (belt, main, wear)": "wear" } ], "Functions setup": { "Can a bot loot crates?": true, "Can the bot mine trees and stones?": true, "Can the bot pick up resources? (wood, sulfur and metal ore, stones)": true, "Should the bot protect the owner?": true, "Should the bot defend itself?": true, "Can the bot travel by car/copter and other vehicles?": true, "Can the bot pick up dropped items?": true, "Recover the owner from a wounded state": { "Can the bot recover the owner if he is in a wounded state?": true, "Recover time": 6.0 }, "Can the bot attack other people's buildings?": true, "Can a bot attack its owner's buildings?": false, "Can the bot collect resources within a radius of 50 meters? (/pnpc auto-pickup)": true, "Can the bot farm resources within a radius of 50 meters? (/pnpc auto-farm)": true }, "Gather setup": { "Shortname of items that can harvest trees": [ "hatchet", "chainsaw", "hammer.salvaged", "stonehatchet", "axe.salvaged" ], "Shortname of items that can mine stones and ore": [ "pickaxe", "stone.pickaxe", "hammer.salvaged", "jackhammer", "icepick.salvaged" ], "Setting up mining rates": { "stones": 2.0, "wood": 5.0 } }, "Damage and interactions setup": { "Bot damage rate": 2.0, "Bot recive damage rate": 0.5, "Can players damage the bot?": true, "Can the bot damage players?": true, "Can turrets target and kill a bot? (all turrets will not be able to damage the bot)": false, "Prevent bot owner turrets from aiming and killing the bot? (bot owner's turrets will not be able to damage the bot)": true, "Blacklist of objects that the bot will ignore when owner selecting a target (short prefab name)": [ "barricade.sandbags" ] }, "Black list of items that cannot be put into the inventory of the bot": [ "rocket.launcher" ] } }, "Bot install by item": [ { "Item name": "PersonalNPC", "Item shortname": "furnace", "Item skin": 2741314889, "Bot info": { "Bot spawn delay": 300.0, "The name of the bot to be selected through the command when spawning": "bot1", "Bot name": "Personal bot of player %OWNER_NAME%", "Bot appearance (0 - random)": 0, "Maximum health": 150.0, "Bot speed (slowest, slow, normal, fast)": "normal", "Enable infinite ammo for the bot?": true, "Enable display of the bot on the map? (frankenstein icon)": true, "Start kit": [ { "Item name": "", "Item shortname": "shoes.boots", "Item skin": 0, "Item amount": 1, "In which container to place? (belt, main, wear)": "wear" }, { "Item name": "", "Item shortname": "pants", "Item skin": 0, "Item amount": 1, "In which container to place? (belt, main, wear)": "wear" }, { "Item name": "", "Item shortname": "hoodie", "Item skin": 0, "Item amount": 1, "In which container to place? (belt, main, wear)": "wear" }, { "Item name": "", "Item shortname": "mask.bandana", "Item skin": 0, "Item amount": 1, "In which container to place? (belt, main, wear)": "wear" }, { "Item name": "", "Item shortname": "hat.boonie", "Item skin": 0, "Item amount": 1, "In which container to place? (belt, main, wear)": "wear" }, { "Item name": "", "Item shortname": "sunglasses", "Item skin": 0, "Item amount": 1, "In which container to place? (belt, main, wear)": "wear" } ], "Functions setup": { "Can a bot loot crates?": true, "Can the bot mine trees and stones?": true, "Can the bot pick up resources? (wood, sulfur and metal ore, stones)": true, "Should the bot protect the owner?": true, "Should the bot defend itself?": true, "Can the bot travel by car/copter and other vehicles?": true, "Can the bot pick up dropped items?": true, "Recover the owner from a wounded state": { "Can the bot recover the owner if he is in a wounded state?": true, "Recover time": 6.0 }, "Can the bot attack other people's buildings?": true, "Can a bot attack its owner's buildings?": false, "Can the bot collect resources within a radius of 50 meters? (/pnpc auto-pickup)": true, "Can the bot farm resources within a radius of 50 meters? (/pnpc auto-farm)": true }, "Gather setup": { "Shortname of items that can harvest trees": [ "hatchet", "chainsaw", "hammer.salvaged", "stonehatchet", "axe.salvaged" ], "Shortname of items that can mine stones and ore": [ "pickaxe", "stone.pickaxe", "hammer.salvaged", "jackhammer", "icepick.salvaged" ], "Setting up mining rates": { "stones": 2.0, "wood": 5.0 } }, "Damage and interactions setup": { "Bot damage rate": 2.0, "Bot recive damage rate": 0.5, "Can players damage the bot?": true, "Can the bot damage players?": true, "Can turrets target and kill a bot? (all turrets will not be able to damage the bot)": false, "Prevent bot owner turrets from aiming and killing the bot? (bot owner's turrets will not be able to damage the bot)": true, "Blacklist of objects that the bot will ignore when owner selecting a target (short prefab name)": [ "barricade.sandbags" ] }, "Black list of items that cannot be put into the inventory of the bot": [ "rocket.launcher" ] } } ], "How many seconds will the bot update the information? (affects the performance and operation of the bot)": 0.01, "Spawn a backpack with his items when a bot dies? (otherwise his corpse will spawn)": false, "List of prefabs that the bot can loot (useful if the bot attacks loot instead of looting it)": [ "vehicle_parts" ] }