KD Gaming 5x's Wishlist
-

$24.00
aQuarry
By AvG Лаймон in Plugins
This plugin will add variable custom quarries and pumpjacks to your server.
You can create any amount of different quarries and pumpjacks!
You can get the fastest support in our Discord: Alias™ dev.
⭐ Features
Prefab substitution
You can avoid using survey charges for installing quarries.
Static quarries
All 4 type of statics (pumpjack, stone, sulfur, HQM) can be configured separately.
Toggle & Loot protection
Each quarry have their own protection settings. There is also protection system by permissions for static quarries.
Built-in remove
You can configure different remove and refund settings per quarry.
Repair
It is very similar to the standard system with all the sounds and effects. It also supports custom items.
Build limits
Built in options to set limits for quarries and pumpjacks separately.
Custom Items
You can use any normal and/or skinned items (custom items) as fuel and/or resource production.
Fuel system
You can set up several different fuel types with different production settings per fuel type.
Production system
You can set up min/max amount of items and probability chances per item.
Permissions
You can set up build limits and/or gather rates by permissions and also sum all permission parameters (or not).
Upgrade system
You can upgrade from one quarry to another using different skin id.
UI
Adaptive and informative interface made in modern rust-style design so it may seem like part of the game. It will automatically change its size and screen location depending on your quarry settings.
Langs
You can translate any phrase in the plugin.
Performance
The plugin completely has its own mechanics, which ensures the best performance even compared to the standard system. This also fixes all of the default quarry bugs.
Optimization
You can completely disable some of the plugin's functions in the main config.
Configuration
Main config (oxide/config/aQuarry.json)
Static quarries config (oxide/data/aQuarry/StaticQuarries/)
Personal quarries config (oxide/data/aQuarry/PersonalQuarries/)
Commands
quarry.give «SteamID» «SkinID» => give to player the quarry with specified skin from config
quarry.giveme => give all quarries from config to self
Permissions:
aQuarry.admin => allows to use «quarry.give» and «quarry.giveme» commands from in-game console
API
bool CanBuildCustomQuarry(Planner plan, BasePlayer builder, bool IsQuarryOrPumpjack) // Called right before other built-in checks. // Returning false will cancel the construction. void OnCustomQuarryBuilded(MiningQuarry quarry, BasePlayer builder, bool IsQuarryOrPumpjack) // Called right after player has built custom quarry or pumpjack.
-
$45.99
XStatistics
XStatistics - statistics for your server.
- Optimization of the interface for different monitor resolutions.
- Storing player data in - oxide/data/XDataSystem/XStatistics or MySQL or SQLite.
- There is a lang ru/en/uk/es.
- Sound effects when interacting with the menu.
- UI settings in the configuration.
- Display TOPs in game chat.
- Ability to customize the privacy of the default statistics.
- Ability to delete a player's stats after they have been banned.
- Ability to customize grades of building blocks. [ To be recorded in statistics. ]
- Ability to add a player to the blacklist. [ Player's statistics will not be displayed in the TOPs and will not be available to other players. ]
- Ability to use MySQL or SQLite database.
- Ability to automatically give awards and clear data after a WIPE. [ Settings in the configuration. ]
[ Plugin economics or any other. Also [ RU ] GameStores. ]
- A player can hide/open his statistics. [ Need permission. ]
- A player can view the statistics of other players. [ Need permission. ]
- A player can reset their statistics to zero. [ Need permission. ]
- The player can view the entire list of players and search. [ Need permission. ]
- Creating an unlimited number of categories, subcategories and pages.
- Creating custom TOPs, coefficients and awards. [ Unlimited number. ]
- Various admin commands to manage player statistics.
- Support and compatibility with many plugins.
- Server events (Bradley, Chinook, and Patrol Helicopter) count as stats for the player who did the most damage.
- Checking OwnerID of Building blocks, Constructions and other entities.
- Ability to create a Global TOP of your project. [ For this purpose it is enough to enter MySQL data and server name into the configuration.]
[ This TOP can be disabled in the configuration and only the TOP players of the server can be used. Or you can use two TOPs at the same time! ]
- Ability to use pages for categories with subcategories.
- Administrator Mode. [ View hidden player stats, open player search and more ].
- Automatic deletion of statistics of players who have not logged connection the server for N days.
- Ability for players to disable messages with the TOP players in chat.
If your server is visited by more than 500 players, it is recommended to use SQLite or MySQL.
Statistics were tested on a server with 120 online and 5000 players in the database. Excellent result on optimization.
To display player avatars you need to customize the configuration of the ImageLibrary plugin!
What are the statistics at this point?
Global TOP data is manually deleted from the MySQL database. [ It is important that the servers are turned off so that online players data is not written to the database ].
Or after all servers are wiped, run the command - player_stats_reset globaldata null - on one of the servers.
[ Also take into account the servers parameters, for a fair TOP they should be the same! ]
Shortnames to customize statistics
Permissions
xstatistics.use - access to the statistics menu. xstatistics.top - access to the TOPs of subcategories. xstatistics.coefficients - access to view the coefficients. xstatistics.player - access to view player statistics, player list and player search. xstatistics.resetwipe - access to the ability for a player to reset his statistics - WIPE. xstatistics.resetall - access to the ability for a player to reset his statistics - ALL TIME. xstatistics.shstats - access to the ability to hide/open your statistics. [ If the permission has been revoked, the statistics privacy will automatically change to default. ] xstatistics.admin - access to admin mode. Commands
/stat, /stats, /statistic, /statistics - to open the statistics menu. [ Commands can be changed in the config. ] Server console --- Admin commands. stats_ct <customTopName> - to see the top players. [ Custom TOP. ] stats_t <subcategoryName> - to see the top players. [ TOP subcategory. ] player_stats_reset statswipe <steamID> - to reset a player stats to zero - WIPE. player_stats_reset statsall <steamID> - to reset a player stats to zero - ALL TIME. player_stats_reset all <steamID> - to reset a player stats to zero - WIPE and ALL TIME. player_stats_reset global <steamID> - delete a player from the database Global TOP. [ Player must be offline! ] player_stats_reset globaldata null - Delete data from a table in a MySQL database - Global TOP. [ Use this command after all of your servers have been wiped. ] [ The command can be used on any of the Global TOP servers. ] player_actstats global true/false - change statistics privacy for all players. player_actstats <steamID> true/false - change statistics privacy for a player. stats_give_award - start giving out awards for TOPs. stats_clear_data_wipe - to clear all statistics - WIPE. [ Same as after a server wipe ] API
- void API_AddSubcategoryValue(BasePlayer player, string subcategoryName, long amount) - Add a value for the subcategory. player - must be online and not equal to null. - void API_SetSubcategoryValue(BasePlayer player, string subcategoryName, long amount) - Set a value for the subcategory. player - must be online and not equal to null. - bool API_CheckForSubcategory(ulong userID, string subcategoryName) - Check if a subcategory exists. - long API_GetSubcategoryValue(ulong userID, string subcategoryName) - Get the subcategory value. Config
-

$18.00
Ganja
By The_Kiiiing in Plugins
This plugin allows players to gather weed from hemp plants and craft joints using a mixing table. There are different types of weed where each type can be found in a different biome. Joints can be crafted at a mixing table and will give the player configurable buffs and healing with each tier having different effects.
Features:
Fully customizable Different types of weed Configurable effects for each type Custom crafting UI integrates in the mixing table UI Configurable recipes for mixing table Yield amount and chance configurable for each type Ideal for Roleplay Servers
New in v2.0.10: Give command
Server owners can use this command to give weed or joints to themselves or a certain player. The identifier has to be specified in the config file for every type of weed or joint.
ganja.give <weed|joint> <identifier> <amount> <player?>
Permission:
ganja.give - Required to use ganja.give command
New in v2.0.0: Fully configurable crafting:
With Version 2.0.0 the crafting system has been integrated in the mixing table. Joints can now be crafted by using the right ingredients in the right slot. The crafting recipes are fully configurable. New recipes can also be added.
New in v1.0.8: Loot Table integration:
This plugin now supports the custom item api of Loot Table and Stack Size GUI, so you can easily add weed to the loot table. When both plugins are installed on the server, the weed items will show up in the custom items tab of Loottable (right image):
Different tiers:
Depending on the biome, you will receive different tiers of weed, the biomes can also be changed in the config. By default, tier2 weed can be gathered in the snow biome, tier1 in the desert and tier0 everywhere else.
Names, droprates, and boosts can also be configured individually for each tier.
Controls:
With a joint selected in the hot bar:
Right click to ignite / extinguish a joint When joint is bruning: left click to use a joint
Permissions:
Permissions can be disabled in the config, making gathering and crafting accessible to everyone regardless of permissions.
ganja.craft - Required to craft joints ganja.gather - Required to obtain weed
Biome masks:
The biome mask is a simple 4-bit number that determines where a certain tier of weed can be found. Each biome has its own number; add these numbers together to select multiple biomes. The numbers for each biome are as follows:
1 - Arid 2 - Temperate 4 - Tundra 8 - Arctic For example: Low Quality Weed has the biome mask 6 by default (see configuration below). That means it can be found in the Temperate and the Tundra biome.
Configuration:
{ "Weed configuration": [ { "Drop chance when harvesting (1 = 100%)": 0.4, "Drop amount when harvesting": { "min": 1, "max": 3 }, "Biome mask (see description for details)": 6, "Custom item name (null = default name)": "Low Quality Weed", "Item short name": "sticks", "Item skin id": 2661029427 }, { "Drop chance when harvesting (1 = 100%)": 0.3, "Drop amount when harvesting": { "min": 1, "max": 3 }, "Biome mask (see description for details)": 1, "Custom item name (null = default name)": "Medium Quality Weed", "Item short name": "sticks", "Item skin id": 2661031542 }, { "Drop chance when harvesting (1 = 100%)": 0.1, "Drop amount when harvesting": { "min": 1, "max": 2 }, "Biome mask (see description for details)": 8, "Custom item name (null = default name)": "High Quality Weed", "Item short name": "sticks", "Item skin id": 2660588149 } ], "Crafting Recipes": [ { "Ingredient Slots": { "0": { "Amount": 1, "Item short name": "note", "Item skin id": 0 }, "1": { "Amount": 1, "Item short name": "sticks", "Item skin id": 2661029427 }, "2": { "Amount": 1, "Item short name": "sticks", "Item skin id": 2661029427 } }, "Produced Item": { "Custom item name (null = default name)": "Low Quality Joint", "Item short name": "horse.shoes.basic", "Item skin id": 2894101592 }, "Is joint": true, "Boosts (only works for joints)": { "Wood boost percentage (1 = 100%)": 0.4, "Wood boost duration (seconds)": 20.0, "Ore boost percentage (1 = 100%)": 0.0, "Ore boost duration (seconds)": 0.0, "Scrap boost percentage (1 = 100%)": 0.0, "Scrap boost duration (seconds)": 0.0, "Max Health percentage (1 = 100%)": 0.0, "Max Health duration (seconds)": 0.0, "Healing per use": 1.0 } }, { "Ingredient Slots": { "0": { "Amount": 1, "Item short name": "note", "Item skin id": 0 }, "1": { "Amount": 1, "Item short name": "sticks", "Item skin id": 2661031542 }, "2": { "Amount": 1, "Item short name": "sticks", "Item skin id": 2661031542 } }, "Produced Item": { "Custom item name (null = default name)": "Medium Quality Joint", "Item short name": "horse.shoes.basic", "Item skin id": 2894101290 }, "Is joint": true, "Boosts (only works for joints)": { "Wood boost percentage (1 = 100%)": 0.0, "Wood boost duration (seconds)": 0.0, "Ore boost percentage (1 = 100%)": 0.8, "Ore boost duration (seconds)": 20.0, "Scrap boost percentage (1 = 100%)": 0.0, "Scrap boost duration (seconds)": 0.0, "Max Health percentage (1 = 100%)": 0.0, "Max Health duration (seconds)": 0.0, "Healing per use": 4.0 } }, { "Ingredient Slots": { "0": { "Amount": 1, "Item short name": "note", "Item skin id": 0 }, "1": { "Amount": 1, "Item short name": "sticks", "Item skin id": 2660588149 }, "2": { "Amount": 1, "Item short name": "sticks", "Item skin id": 2660588149 } }, "Produced Item": { "Custom item name (null = default name)": "High Quality Joint", "Item short name": "horse.shoes.basic", "Item skin id": 2893700325 }, "Is joint": true, "Boosts (only works for joints)": { "Wood boost percentage (1 = 100%)": 0.0, "Wood boost duration (seconds)": 0.0, "Ore boost percentage (1 = 100%)": 0.0, "Ore boost duration (seconds)": 0.0, "Scrap boost percentage (1 = 100%)": 1.0, "Scrap boost duration (seconds)": 30.0, "Max Health percentage (1 = 100%)": 0.3, "Max Health duration (seconds)": 30.0, "Healing per use": 8.0 } } ], "Require permission for crafting": true, "Require permission for gathering": true, "Disable built-in stack fix (set to true if you have problems with item stacking/splitting)": false } -

$20.00
Store Robbery
Store Robbery plugin is a plugin that was made from my memory of Arma 3 Life Gas Station robbery's, currently this plugin allows you to place Robbable Store Clerk's around the map for players to attract PvP too. Only the best will be able to survive a store robbery and walk away with the reward!
Permission
storerobbery.manage - Allow creating and deleting of Store Clerks
Commands
/createclerk - Creates a clerk at your current location
/removeclerk - Removes a clerk that you are looking at.
/getclerkid - Ability to get the id of the clerk in the data file, so you can edit rotation or position if needed.
Features
Spawn guards at robbery start or robbery end
Live progress bar showing robbery progress
Toggable Markers and Chat Anouncment
Auto fill clerks at all gas stations and supermarkets
Configurable robbery times and cooldowns
Support for Server Rewards and Economics plugin
Configurable Item List with item counts, and probability.
Config
{ "Announce Robberies In Chat": true, "Use Clerk Marker": true, "Use Robbery Area Marker": true, "Allow Shoot To Rob": false, "Robbery Distance (m)": 5.0, "Robbery Time (Secs)": 20, "NPC Cooldown/Reset Time (Secs)": 10, "Use Player Cooldown?": true, "Player Robbery Cooldown Time (Secs)": 10, "Whitelisted Robbery Weapons": [ "rifle.ak", "rifle.bolt", "smg.2", "rifle.l96", "lmg.m249", "rifle.lr300", "rifle.m39", "pistol.m92", "smg.mp5", "pistol.python", "pistol.revolver", "rocket.launcher", "rifle.semiauto", "pistol.semiauto", "shotgun.spas12", "smg.thompson" ], "Clear NPCs On New Save": true, "Clerk Name": "Store Clerk", "Fill Clerks at Supermarkets": true, "Supermarket Clerk Position": { "x": 8.8, "y": 0.0, "z": 3.5 }, "Supermarket Clerk Rotation": { "x": 8.8, "y": 0.0, "z": 2.0 }, "Fill Clerks at Gas Stations": true, "Gas Station Clerk Position": { "x": -8.7, "y": 0.0, "z": 21.5 }, "Gas Station Clerk Rotation": { "x": -8.2, "y": 0.0, "z": 21.5 }, "Guard Settings": { "Play Alarm Sound": true, "Spawn Guards at Robbery Start": false, "Spawn Guards at Robbery End": false, "Chance of Guard Spawn (0-100%)": 75, "Amount of Guard at Robbery Start": 0, "Amount of Guard at Robbery End": 5, "Store Guard": "Store Guard", "Gaurds HP": 400.0 }, "NPC Clothing": { "Clothing": [ "hat.cap", "shirt.collared", "pants.shorts", "shoes.boots" ], "Skins": [ 1125552993, 1145623671, 883719992, 2592902166 ] }, "Robbery Rewards": { "Use Economics Plugin": false, "Minimum Amount Of Credits": 3000, "Maximum Amount Of Credits": 6000, "Use Server Rewards Plugin": false, "Minimum Amount Of RP": 300, "Maximum Amount Of RP": 600, "Use Item Box Rewards": true, "Minimum Amount Of Items From List": 3, "Maximum Amount Of Items From List": 6, "Possible Item List": [ { "shortname": "rifle.ak", "customname": "Red Zircon AK47", "skin": 2589524856, "minamount": 1, "maxamount": 1, "probability": 90 }, { "shortname": "rifle.bolt", "customname": "", "skin": 0, "minamount": 1, "maxamount": 1, "probability": 5 }, { "shortname": "ammo.pistol", "customname": "", "skin": 0, "minamount": 10, "maxamount": 50, "probability": 70 }, { "shortname": "ammo.shotgun", "customname": "", "skin": 0, "minamount": 10, "maxamount": 30, "probability": 70 }, { "shortname": "syringe.medical", "customname": "", "skin": 0, "minamount": 1, "maxamount": 3, "probability": 40 }, { "shortname": "keycard_blue", "customname": "", "skin": 0, "minamount": 1, "maxamount": 1, "probability": 35 }, { "shortname": "cctv.camera", "customname": "", "skin": 0, "minamount": 1, "maxamount": 2, "probability": 50 }, { "shortname": "shotgun.double", "customname": "", "skin": 0, "minamount": 1, "maxamount": 1, "probability": 70 }, { "shortname": "bow.hunting", "customname": "", "skin": 0, "minamount": 1, "maxamount": 1, "probability": 90 }, { "shortname": "pistol.revolver", "customname": "", "skin": 0, "minamount": 1, "maxamount": 1, "probability": 80 }, { "shortname": "arrow.wooden", "customname": "", "skin": 0, "minamount": 10, "maxamount": 40, "probability": 85 }, { "shortname": "arrow.fire", "customname": "", "skin": 0, "minamount": 5, "maxamount": 20, "probability": 70 }, { "shortname": "rope", "customname": "", "skin": 0, "minamount": 3, "maxamount": 6, "probability": 75 }, { "shortname": "propanetank", "customname": "", "skin": 0, "minamount": 3, "maxamount": 6, "probability": 75 }, { "shortname": "metalpipe", "customname": "", "skin": 0, "minamount": 2, "maxamount": 4, "probability": 75 } ] } } -
$7.99
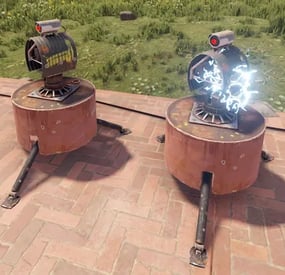
Auto Turret Interference & Settings
Auto Turret Interference & Settings
Auto Turret Interference allows you or your CLAN/TEAM to change the limit of turrets allowed for different players, based on your configurations and assigned roles. You can also make sure that the server or event turrets do not have interference, for example Raidable Base.
In addition, it offers commands to see the statistics on the auto turrets, the possibility of turning the turrets ON and OFF via command, automatic switching ON and OFF of the auto turrets and much more.
It also allows you to modify some automatic turret configurations, for example:
Customize rotation angle, Viewing angle and target scanning, Infinite Ammo: In the next release Health, Range, Bullet Speed, Aim Cone, Damage Scale
Oxide/Carbon compatibility
Basically, 4 groups are configured: Default, VIP1, VIP2, VIP3, in this way you can decide the limit of turrets in a given radius based on the group assigned to the user or the group they belong to
Permissions:
autoturretinterference.admin – Allows you to execute some commands reserved for administrators autoturretinterference.show.allowed – Allows you to use the /ati show command, to display text above the auto turrets with the status they are in.
---------------------------------------- autoturretinterference.default - Assign configurations: Default autoturretinterference.vip1 - Assign configurations: VIP1 autoturretinterference.vip2 - Assign configurations: VIP2 autoturretinterference.vip3 — Assign configurations: VIP3
These are the groups that are created by default, but you can add and/or edit groups as you wish.
For example, if you change the group vip1 to vip_elite, the permission autoturretinterference.vip_elite will be created
If you create a new group, for example vipvanilla, the permission autoturretinterference.vipvanilla will be created.
COMMANDS
Commands can be typed in chat (by putting the / character in front of the command), or from console.
/ati status or /ati st — This command allows the player to see his auto turret statistics and limits /ati status <steamID> or /ati st <steamID> — This command allows the administrator to see another player’s auto turret and limit statistics. To use this command you must have permission: autoturretinterference.admin
/ati start or /ati stop — This command allows the player to turn on or off the single auto turret you are looking at. To use this command, you must enable the AllowCommandsToStartAndStop = true property in your configuration or have permission: autoturretinterference.admin NB: If you have autoturretinterference.admin permission, you can turn on or off the auto turret you are watching of any player.
/ati startall or /ati stopall — This command allows the player to turn all of your auto turrets ON or OFF. To use this command, you must enable the AllowCommandsToStartAndStop = true property in your configuration or have permission: autoturretinterference.admin NB: If the player is part of a clan/team, all turrets of all members of the clan/team will be turned ON or OFF. /ati startall <steamID> or /ati stopall <steamID> — This command allows you to turn ON or OFF all turrets of a player based on its SteamID. To use this command you must have permission: autoturretinterference.admin NB: If the player is part of a clan/team, all turrets of all members of the clan/team will be turned ON or OFF.
/ati show or /ati sh — Command to display text above the auto turret with the status they are in.
Useful for finding turrets that are having problems.
To use this command you must have permission: autoturretinterference.show.allowed
You can pass one of these parameters: /ati show 0: Show all player auto turrets in all states. /ati show 1: Show text on all player active auto turrets /ati show 2: Show text on all player turned off auto turrets /ati show 3: Display text on all player auto turrets not connected to power /ati show 4: Display text on all player auto turrets with interference /ati show 5: Display text on all player auto turrets with information on the name of the weapon and the ammunition present in the auto turrets /ati show 6: Display text on all player auto turrets without a weapon /ati show 7: Display text on all player auto turrets without ammunition
/ati show <numbr> <steamID> or /ati sh <numbr> <steamID> — Command to display text above the auto turret with the state it is in based on the player’s SteamID.
To use this command you must have permission: autoturretinterference.admin Commands can be added or modified in the configuration file: /oxide/config/AutoTurretInterference.json
Command output example (/ati status or /ati st) :
Command output example (/ati show or /ati sh) :
CLAN/TEAM
If you are part of a clan/team and there are 1 more members who have the VIP/ROLE, then all members of the clan/team will benefit.
Example: a clan/team member has the VIP/ROLE to be able to place 40 turrets, in this case all clan/team members will be able to place 40 turrets, but this does not mean that the total number of turrets you can place are added, the limit in in this case there are still 40 turrets, but they can be positioned by all members of the clan/team, rather than just the player who has the VIP/ROLE (in this case we assumed that the VIP/ROLE limited to 40 turrets).
If there are multiple clan/team members who have different VIPs/ROLES, the VIP/ROLE with the lowest priority, assigned in the configuration, will be chosen.
Configuration
The settings and options can be configured in the AutoTurretInterference under the config directory. The use of an editor and validator is recommended to avoid formatting issues and syntax errors.
{ "Remove interference for server auto turrets: default true (Useful for Raidable Bases or events)": true, "PlayerShowTurretCountInfoMessage (Show the player, when he places a turret, a message with the number of turrets that are placed in the radius he is in. Default true.)": true, "AllowCommandsToStartAndStop (If set to TRUE, enables commands to allow the player or clan/team to turn their all auto turrets ON or OFF. Default FALSE)": false, "EnableAutomaticsStartAndStop (If set to TRUE, the player's turrets will be turned OFF when they go offline and ON when they come back online. For the clan/team, the entire clan must be offline to turn OFF the turrets automatically, but if at least one member of the clan comes back online, all the auto turrets will turn ON. Default FALSE)": false, "EnableMessageInfo (If set to TRUE, it shows a message info to the player, when he takes hold of an auto turret, of the commands that the plugin makes available to him)": true, "Auto Turret Draw Time (seconds). Default 60s": 60, "Auto Turret Draw Font Size (px). Default 16 pixel": 16, "Chat Command": [ "ati", "autoturretinterference" ], "RolePermission": { "vip1": { "Priority. (lower = higher priority)": 1, "Force the maximum number of Auto Turrets for player or entire clan/team (-1 no limit). Default -1": -1, "Player Auto Turrets without interference limit": 40, "Radius within which the system checks for other turrets (lower = more turrets)": 40, "Rotate Auto Turrets 180° degrees instead 90°. Default false": false, "Rotate Auto Turrets 270° degrees instead 90°. Default false": false, "Rotate Auto Turrets 360° degrees instead 90°. Default false": false, "Auto Turret Viewing angle and target scanning. Default 180° Degrees": 180, "Enable Auto Turrets custom settings": false, "Health (Default 1000)": 1000.0, "Range (Default 30)": 30.0, "Bullet Speed (Default 200)": 200.0, "Aim Cone (Default 4)": 4.0, "Damage Scale (Default 1.0)": 1.0 }, "vip2": { "Priority. (lower = higher priority)": 2, "Force the maximum number of Auto Turrets for player or entire clan/team (-1 no limit). Default -1": -1, "Player Auto Turrets without interference limit": 30, "Radius within which the system checks for other turrets (lower = more turrets)": 40, "Rotate Auto Turrets 180° degrees instead 90°. Default false": false, "Rotate Auto Turrets 270° degrees instead 90°. Default false": false, "Rotate Auto Turrets 360° degrees instead 90°. Default false": false, "Auto Turret Viewing angle and target scanning. Default 180° Degrees": 180, "Enable Auto Turrets custom settings": false, "Health (Default 1000)": 1000.0, "Range (Default 30)": 30.0, "Bullet Speed (Default 200)": 200.0, "Aim Cone (Default 4)": 4.0, "Damage Scale (Default 1.0)": 1.0 }, "vip3": { "Priority. (lower = higher priority)": 3, "Force the maximum number of Auto Turrets for player or entire clan/team (-1 no limit). Default -1": -1, "Player Auto Turrets without interference limit": 20, "Radius within which the system checks for other turrets (lower = more turrets)": 40, "Rotate Auto Turrets 180° degrees instead 90°. Default false": false, "Rotate Auto Turrets 270° degrees instead 90°. Default false": false, "Rotate Auto Turrets 360° degrees instead 90°. Default false": false, "Auto Turret Viewing angle and target scanning. Default 180° Degrees": 180, "Enable Auto Turrets custom settings": false, "Health (Default 1000)": 1000.0, "Range (Default 30)": 30.0, "Bullet Speed (Default 200)": 200.0, "Aim Cone (Default 4)": 4.0, "Damage Scale (Default 1.0)": 1.0 }, "default": { "Priority. (lower = higher priority)": 100, "Force the maximum number of Auto Turrets for player or entire clan/team (-1 no limit). Default -1": -1, "Player Auto Turrets without interference limit": 12, "Radius within which the system checks for other turrets (lower = more turrets)": 40, "Rotate Auto Turrets 180° degrees instead 90°. Default false": false, "Rotate Auto Turrets 270° degrees instead 90°. Default false": false, "Rotate Auto Turrets 360° degrees instead 90°. Default false": false, "Auto Turret Viewing angle and target scanning. Default 180° Degrees": 180, "Enable Auto Turrets custom settings": false, "Health (Default 1000)": 1000.0, "Range (Default 30)": 30.0, "Bullet Speed (Default 200)": 200.0, "Aim Cone (Default 4)": 4.0, "Damage Scale (Default 1.0)": 1.0 } }, "VersionNumber": { "Major": 1, "Minor": 2, "Patch": 0 } }
Remove interference for server auto turrets: default true (Useful for Raidable Bases or events): Whether or not to enable interference for server auto turrets. By default it is true, in this way the server's automatic turrets will not have interference, useful for events for example: Raidable Base. PlayerShowTurretCountInfoMessage: Show the player, when he places a turret, a message with the number of turrets that are placed in the radius he is in. Default: TRUE. AllowCommandsToStartAndStop: If set to TRUE, enables commands to allow the player or clan/team to turn their all auto turrets ON or OFF. Default FALSE. EnableAutomaticsStartAndStop: If set to TRUE, the player's turrets will be turned OFF when they go offline and ON when they come back online. For the clan/team, the entire clan must be offline to turn OFF the turrets automatically, but if at least one member of the clan comes back online, all the auto turrets will turn ON. Default FALSE. EnableMessageInfo: If set to TRUE, it shows a message info to the player, when he takes hold of an auto turret, of the commands that the plugin makes available to him. Default: TRUE. Auto Turret Draw Time (seconds). Default 60s: Duration of display of text above the auto turret. Default 60 seconds. Auto Turret Draw Font Size (px). Default 16 pixel: Size of text above auto turret. Default 16 pixel Chat Command: Here you can add, edit or delete Commands can be typed in chat (by putting the / character in front of the command), or from console.
Priority. (lower = higher priority) -- Each group has its own property, the lower this number is, the more important the group is.
This is useful in the case where a player has more roles assigned. In this case, the group with the lowest priority will be assigned, the most important group.
Negative numbers are also allowed. Player Auto Turrets without interference limit: How many automatic turrets can a player place within the radius within which the system controls the other turrets, without them interfering. For example, basic rust allows 12 turrets in a radius of 40 meters, you can set for example 30 turrets instead of 12. Radius within which the system checks for other turrets (lower = more turrets) Force the maximum number of Auto Turrets for player or entire clan/team (-1 no limit).
Maximum total number of auto turrets that can be active for player or entire clan/team.
When Auto Turrets are placed, only a certain number in a certain radius, configured in the configuration file, can be active at a given time.
However, this does not prevent you from being able to place unlimited Auto Turrets.
For example, you have set a limit of 20 Auto Turrets in a 40 meter radius, this means that in a 40 meter radius there can be a maximum of 20 Auto Turrets. But if you place another 20 Auto Turrets more than 40 meters away from the first ones, then you can place another 20 active Auto Turrets, and so on.
With this option you can establish the maximum number of Auto Turrets that can be active regardless of the radius, in order to avoid unlimited Auto Turrets.
It is always recommended to use this configuration together with the others.
For example you can decide that the forced maximum Auto Turrets limit is 5 times the number of active Auto Turrets in a given radius, it's up to you to decide. Default -1.
Auto Turrets rotation angle: Allows you to change the rotation angle of the turret. Targets will be acquired as usual, if they are in front of the turret which however can move to a larger angle. Rotate Auto Turrets 180° degrees instead 90°: If set to TRUE, the auto turrets will rotate 180° instead of the default 90° (degrees). Default False Rotate Auto Turrets 270° degrees instead 90°: If set to TRUE, the auto turrets will rotate 270° instead of the default 90° (degrees). Default False Rotate Auto Turrets 360° degrees instead 90°: If set to TRUE, the auto turrets will rotate 360° instead of the default 90° (degrees). Default False
Auto Turret Viewing angle and target scanning: This is a very powerful setting, it allows the auto turrets to see and acquire targets instantly based on the set angle, regardless of whether the target is in front of the auto turrets or not.
For example if set to 200°, the auto turrets will acquire targets instantly within 200°.
Or if set to 360°, the auto turrets will acquire targets instantly in all directions. You can choose the angle you prefer by entering a number between 1° and 360° (degrees). Default 180° Degrees.
Enable Auto Turrets custom settings: If set to TRUE, it allows you to change some Auto turret settings. Default FALSE Health (Default 1000): Auto Turrets maximum health.
Range (Default 30): Distance from which the weapon can see.
Bullet Speed (Default 200): Speed of bullets fired.
Aim Cone (Default 4): The weapon's aiming cone.
Damage Scale (Default 1.0): allows you to increase the damage of Auto turrets. A higher value indicates greater damage.
PlayerShowTurretCountInfoMessage EXAMPLE:
EnableMessageInfo EXAMPLE:
Localization
The plugin, therefore the automatic messages and statistics, are translated into the following languages:
English Italian Spanish French German Dutch Turkish Russian Ukrainian Translation files are located in the /oxide/lang folder, here is an example of a /oxide/lang/en/AutoTurretInterference.json translation file.
You can add translations for other languages by adding them to the folder: /oxide/lang
- #auto turret interference
- #auto turret
- (and 22 more)