
general2811's Wishlist
-
$19.99
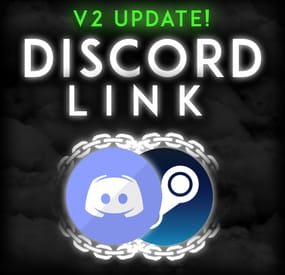
Discord Link
Discord Link is a very simple, performant, and feature-rich Discord and Rust linking system. 2 Simple steps and a player can link to Discord!
NO DISCORD.DLL!!
FEATURES
- NO DISCORD.DLL REQUIRED!!! - Link Rust and Discord accounts - Grant a role in discord and group in game for linked players - Soft unlinking (All past data on a user's account links will be forever stored) - 2 Way role syncing between rust to discord and discord to rust - Supports multi server linking - Booster perks for linked players boosting your discord - Steam to discord name syncing (Auto renames users in discord to their steam name) - Admin perms to unlink players - Search link commands in discord and in game to get who a player is linked to - Logs to discord when players link and unlink - Auto remove players from being linked when they leave the Discord - Syncing your old database files from steamcord, discord auth, or discord core PERMISSIONS
discordlinkbot.search - ability to search players and use the UI
The Plugin and Discord Bot both have very simple installations.
We have included a readme.md file to make it even easier to setup!
Need support or want updates about what is coming to the bot? Join the support discord here https://discord.gg/ZsRgCUNv2x
This will require bot hosting to run the bot 24/7 since we do not use the Discord DLL therefore the server cannot host the bot.
Thanks to @shady14u for co-developing!!
-
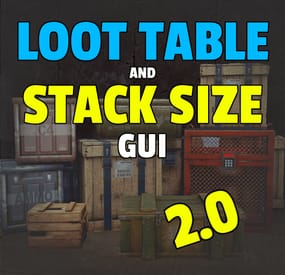
$40.00$20.00Loot Table & Stacksize GUI
By The_Kiiiing in Plugins
Say goodbye to configuration and data files. This plugin lets yo edit the loot of (almost) every lootable object directly over a custom UI. It also includes a graphical stack size editor thus making it ideal for anyone who is not familiar with editing config files.
Do not use in combination with any other stack size controller or loot plugin.
Russian lang file (файл русского языка)
You can now enjoy the interface of Loottable in Russian. Just download the file and place it in the /oxide/lang/ru/ folder
Loottable.json
DISCLAIMER: Translations are provided by the community and I can not guarantee for their accuracy
NEW with version 2.2.7:
You can now add new items to all your configurations with the click of a button on the settings page. This only works for items that have been newly added with the last rust update. Amount and drop chance will be set to the vanilla values. This can also be done via command loottable add_new_items
NEW with version 2.1.16:
Improved item search
You can now search for hidden items by adding h: to the start of your search (e.g. the search h:cable will show the cable tunnel item which is hidden by default). This works in both item editor and stack size controller. Full support for CustomItemDefinitions
NEW with version 2.1.7: Direct Loot Refresh
Players with the permission loottable.test can use a button to directly refresh the loot in the crate they are currently looting.
Features:
User friendly GUI - no need to edit config files Loot configuration for every prefab in the game Stack size controller supports individual stack sizes for every prefab Support for custom items Support for third party plugins Fully backwards compatible with version 1.x.x Default config included for every prefab Configuration for Smelting Speed, Recycler Speed and Efficiency Supply Drop configuration
Supported prefabs:
Crates, Barrels NPCs Trees, Ores, Animal corpses Excavator, Quarries Christmas Presents, Eggs, Loot Bags Collectables like Hemp, Corn, etc.
Additional Configuration:
Smelting Speed Supply Drop Recycler Speed / Efficiency
Commands:
loottable - Open the Loottable UI loottable reload - Manually refresh loot loottable remove_dlc_items - Remove all DLC items from your loot configs. This action can not be undone loottable add_new_items - Add all new items from this months rust update to your configurations. This action can not be undone
Permission:
loottable.edit - Required to use the Loottable UI
Required Dependencies (Oxide only):
Image Library: https://umod.org/plugins/image-library
Translations:
This plugin fully supports translation. Out of the box only english is included. For item names to be translated, the plugin https://umod.org/plugins/rust-translation-api is required. English translations are located in /oxide/lang/en/Loottable.json
For Developers:
Loot Api:
Developers can use the Loot Api to register loot profiles for custom NPCs or other plugin related loot.
It is highly recommended to use the provided wrapper to access the API. Documentation is also included:
https://gist.github.com/TheKiiiing/53a37e8bbb48d8a24c8e8b21b9da37ac
Loot Api Example:
void OnLoottableInit() { LoottableApi.ClearPresets(); LoottableApi.CreatePresetCategory(this, "Crates"); LoottableApi.CreatePreset(this, "c_locked", "Locked Crate", "crate_hackable"); LoottableApi.CreatePreset(this, "c_elite", "Elite Crate", "crate_elite"); LoottableApi.CreatePreset(this, "c_military", "Military Crate", "crate_military"); LoottableApi.CreatePreset(this, "c_normal", "Normal Crate", "crate_normal"); LoottableApi.CreatePresetCategory(this, "NPCs"); LoottableApi.CreatePreset(this, true, "npc_cargo", "Cargo Ship NPC", "npc_militunnel"); LoottableApi.CreatePreset(this, true, "npc_control", "Control Center NPC", "npc_militunnel"); } void SpawnNpc() { // Spawn NPC here ScientistNPC npc; // Assign a loot preset to the NPC LoottableApi.AssignPreset(this, scientist, "npc_control"); } void SpawnCrate() { // Spawn crate here LootContainer crate; // Assign a preset to the crate if (LoottableApi.AssignPreset(this, container, "c_locked")) { // The container has been filled with loot return; } else { // The container is not handled by Loottable // Default loot logic goes here } } The resulting configuration page would look like this:
Custom Items API:
Developers can use the Custom Items Api to add a custom item to the Loottable item list. If an item is marked as persistent it will remain in the custom item list until it is removed by ClearCustomItems. All non-persistent items will be removed after the plugin that registered them has been unloaded.
(void) AddCustomItem(Plugin plugin, int itemId, ulong skinId) (void) AddCustomItem(Plugin plugin, int itemId, ulong skinId, bool persistent) //(v1.0.27 or higher) (void) AddCustomItem(Plugin plugin, int itemId, ulong skinId, string customName) (void) AddCustomItem(Plugin plugin, int itemId, ulong skinId, string customName, bool persistent) //(v1.0.27 or higher) (void) ClearCustomItems(Plugin plugin) //(v1.0.27 or higher)
Hooks:
(void) OnLoottableInit() This hook is called when Loottable is ready to receive API calls. This happens either on server boot or when the plugin is loaded. Use this hook to register custom items and loot presets.
(object) OnContainerPopulate(LootContainer container) This hook is called every time a loot container is about to be populated with loot. Returning a non-null value prevents the plugin from spawning loot into that crate.
(object) OnCorpsePopulate(LootableCorpse corpse) This hook is called every time an npc corpse is about to be populated with loot. Returning a non-null value prevents the plugin from spawning loot into that corpse.
(object) OnCustomAirdrop(SupplySignal signal) This hook is called every time a custom supply drop is about to be delivered. Returning a non-null value will cancel the custom supply drop.
Outdated documentation for Version 1:
New with version 1.0.27:
Custom Items can now be created and edited directly in the GUI. They can be created from any existing item and modified in the Item Select menu
You can now create and load backups of your configuration. Commands (F1 or Server Console):
loottable.backup load <name> - Load backup with the given name from the backups folder (will wipe your current configuration) loottable.backup create <name> - Create backup of everything with the given name Backups will be created in the data/Loottable/backups folder. To load a backup, the backup file needs to be present in that folder. When creating backups in the in-game console, the permission loottable.debug is required.
IMPORTANT: DO NOT LOAD BACKUPS FORM SOURCES YOU DO NOT TRUST, they might cause harm to your server
New with version 1.0.16:
Custom Items:
Now you can add custom items used by other plugins directly to your loot table. Other plugins can can register these items using the api (documentation below).
Screenshots:
Overview of crates and their current loot table
Stacksize Editor
Commands:
loottable - Open the editor loottable refresh - Manually refresh crate loot loottable flags - List available flags (explained below) loottable flags <name> <1|0> - Enable / disable a certain flag loottable reload_vanilla_profiles - Manually re-download vanilla loot profiles (only for debuging)
Permission:
loottable.edit - Required to use the editor
Flags:
There are flags to disable some limits in the editor. Only enable these flags if you really need to as they might cause unexpected behavior of the editor. There are currently 3 flags available:
Debug If enabled, the Debug flag provides more detailed information about errors and other actions in the editor. Don't enable this flag unless you want your console full of spam.
UnlockGatherMultiplier allows you to use gahter multipliers less than one and higher than 1000. Note that multipliers less than one might lead to unexpected results in some cases.
DisableItemLimit Probably the safest flag to use is DisableItemLimit as it simply lets you set stack sizes and every other item amount in the editor as high as 2,147,483,647 which is the biggest possible value of a 32-bit integer.
UnlockFurnaceMultiplier lets you use any value as the furnace speed multiplier. Don't enable this flag unless you know what you are doing, since the default value range from 0.1 to 100 should cover most use cases and larger values might impact server performance.
UnlockItemMultiplier unlocks the multiplier when multiplying a loot table.
DisableStackingHooks will disable all stacking related hooks. Enable if you encounter problems when stacking items.
RefreshLootOnExit controls if all crates get refreshed after closing the editor or when reloading the plugin. Enable this only for testing, there might be an increase in entities.
Refer to the Commands section for more information about enableing flags.
Vanilla Configurations:
Since version 1.0.7 there are vanilla loot profiles available for most crates and NPCs. These profiles can be loaded using the "Load default loot table" button at the top center of the editor.
DISCLAIMER:
The vanilla loot profiles in the editor might not exactly match the vanilla loot distribution of the game as it uses a completely different loot distribution system than Rust. These profiles rather serve as a reference point for custom loot profiles.
Important for Carbon users:
In order for this plugin to work with carbon, Harmony references need to be enabled. This can be done with the following command:
c.harmonyreference 1
Required Dependencies (Oxide only):
Image Library: https://umod.org/plugins/image-library
Custom Items API:
Add a custom item to the item list. If an item is marked as persistent it will remain in the custom item list until it is removed by ClearCustomItems. All non-persistent items will be removed after the plugin that registered them has been unloaded.
(void) AddCustomItem(Plugin plugin, int itemId, ulong skinId) (void) AddCustomItem(Plugin plugin, int itemId, ulong skinId, bool persistent) //(v1.0.27 or higher) (void) AddCustomItem(Plugin plugin, int itemId, ulong skinId, string customName) (void) AddCustomItem(Plugin plugin, int itemId, ulong skinId, string customName, bool persistent) //(v1.0.27 or higher) (void) ClearCustomItems(Plugin plugin) //(v1.0.27 or higher) Example:
Its recommended to delay the call a little bit to make sure Loottable is loaded
private void Init() { timer.In(1f, () => { Loottable?.Call("AddCustomItem", this, -946369541, 2664651800, "High Quality Fuel"); }); }
Hooks:
(object) OnContainerPopulate(LootContainer container) This hook is called every time a loot container is about to be populated with loot. Returning a non-null value prevents the plugin from spawning loot into that crate.
(object) OnCorpsePopulate(LootableCorpse corpse) This hook is called every time an npc corpse is about to be populated with loot. Returning a non-null value prevents the plugin from spawning loot into that corpse.
(object) OnCustomAirdrop(SupplySignal signal) This hook is called every time a custom supply drop is about to be delivered. Returning a non-null value will cancel the custom supply drop.
- #loot
- #customloot
- (and 13 more)
-
$40.00
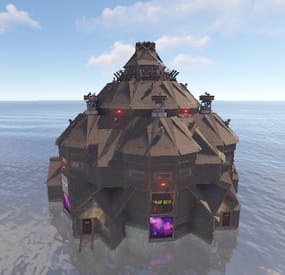
Pack 1| Raidable Bases
Don't have time to make your own Raid Bases? No worries, we have you covered! Just purchase the pack and pop in your copy/paste folder and setup your profiles!
Rotate out your base line up with over40+ bases in this pack!
Pack include:
40+ Bases
- 9 Easy Bases.
- 6 Expert Bases.
- 9 Hard Bases.
- 10 Medium Bases.
- 8 Nightmare Bases.
- 1 Extra Base Halloween
## How to Add Bases
To add new bases, follow these steps:
1. **Open the F1 Console**:
- Press the F1 key to open the console.
2. **Copy and Paste the Command**:
- Use the following command to add the bases:
rb.config add "Easy Bases" Easy-1re Easy-2re Easy-3re Easy-4re Easy-5re Easy-6re Easy-7re Easy-8re Easy-9re Easy-10re rb.config add "Medium Bases" Medium-1re Medium-2re Medium-3re Medium-4re Medium-5re Medium-6re Medium-7re Medium-8re Medium-9re Medium-10re rb.config add "Hard Bases" Hard-1re Hard-2re Hard-3re Hard-4re Hard-5re Hard-6re Hard-7re Hard-8re Hard-9re rb.config add "Expert Bases" Expert-1 Expert-2 Expert-3 Expert-4 Expert-5 Expert-6 rb.config add "Nightmare Bases" Nightmare-1 Nightmare-2 Nightmare-3 Nightmare-4 Nightmare-5 Nightmare-6 Nightmare-7 Nightmare-8
Discord https://discord.gg/bBczVRbPBs
-
$24.99
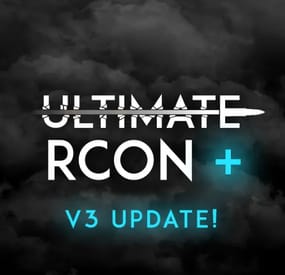
Ultimate RCON+
By Amino in Discord Bots
The aim for this file is to remove the need for some of your Discord plugins and move it externally from your server so you do not have any server impact from those plugins. This offers you a TON of features all ran externally from your server, so no lag! No more dookie Discord extension
Ultimate RCON+ is a more advanced version of Ultimate RCON
ULTIMATE RCON+ ONLY FEATURES
+ Advanced kill logging + Logging for heli, cargo, cargo plane, ch47, and brad + Multi reason auto mute system + Option plugin integration for more logging features + Permission loggers for group and permission changes + You can now have a player leaderboard for all your servers as-well as a global leaderboard! (Image below) + Server stat display that actively updates with how many players on your server, last wipe, etc* + The bot now saves a database on all players! (Kills, deaths, connections, chat messages, f7 reports, etc) + F7 Reports report counter + Set it to ignore people who are getting F7 reported or sending in F7 reports. + Add players to a watchlist that pings staff when they join. + Player profiler that tracks a lot of information on players (Get data VIA command) + Advanced kill feed. Now logs all sorts of kills and deaths + The bot no longer sometimes misses people joining the server. + Player counts are now tracked for each server, it will save all your peak player counts for all of your servers. (This information can be shown in a stats board) + Those stats for your server can also track the number of messages, connections, kills, and deaths that have been recorded on the server. + Rcon commands no longer need to be sent VIA a slash command + Discord to rust chat no longer needs to be sent through a command + Server offline and online messages + ETC* ULTIMATE RCON+ & ULTIMATE RCON FEATURES
- Bot status = Player count on server (Can change status if the server has recently wipe and include just wiped in the status) - Global status bot = all your servers player counts combined into one - Dynamic server cap changer (Changes the max amount of players allowed on the server depending on the amount of players currently online and or the queue size) - Auto discord wipe announcements - Check players for private profiles - Check players for VAC, EAC, and Temp rust bans - Team and global chat logs - 2 Way chat (Send messages in game through discord) - Leave and join logs - Kill logs - Private message logs - Auto muting players VIA triggered key words - Manual staff muting through discord - RCON Console in Discord with message filtering - Send rcon commands through Discord - F7 report logs - F1 spawn logs - (SERVER) message logs
Plugin info
Permission: ultimaterconplus.admin
Command: /urplus
The bot is very simple to install.
The file includes a setup guide within it. All quite simple.
Need support or want updates about what is coming to the bot? Join the support discord here https://discord.gg/ZsRgCUNv2x
INSTALLATION VIDEO
- #ultimatercon
- #amino
- (and 4 more)
-
$24.99
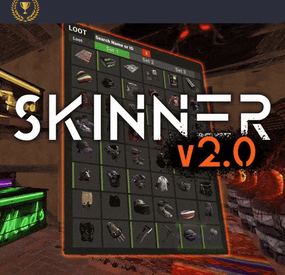
Skinner
By Whispers88 in Plugins
Premium Item Skinning · Oxide + Carbon SKINNER v3.1.6 Skin every item like it’s worth keeping — 60x faster, 200x leaner.
The unrivalled no.1 performance skinning plugin. Skin any item in the game with a unique skinbox — live skinning, auto skinning, and skin sets.
The numbers, not the noise Measured, not marketed
Skinner 2.0 delivers unrivalled efficiency. In standard testing versus the closest performing plugin, runtime was 60x faster and memory use 200x more efficient.
What’s new in 3.0 Skinner 3.0 is here — a full visual overhaul with dynamic, permission-based UI menus.
✓Visual overhaul with dynamic, permission-based UI menus ✓Automatic skin filtering and dev modes for the new TOS ✓Permission-based skin sets ✓Team-share skins ✓Auto-unlock owned skins Features Everything skinner does
Live skinning Skin items in place without moving them. Auto import Automatically import and use all game-approved skins. Skin sets Create a variety of skin sets for any item. Skin requests Players request skins; admins approve them in game. Auto skins Apply selected skins to every item that enters your inventory. Team share Skin your whole team’s inventory from your own sets. See it running Live demo
Live-skin any item in your inventory. Skin deployables you’re looking at. Commands Every command
Skin menu
/skin /s, /skinbox, /sb Live-skin any item in your inventory by picking a skin. /skincraft /sc Build skin sets used by the auto, team, and base commands. /skinitem /si, /skindeployed, /sd Skin a deployable you are looking at. Args: 1, 2 or 3 to use a skin set. Automatic
/skincon /scon Skin every item in the container you are looking at. Args: 1/2/3 (optional). /skininv /sinv Skin every item in your inventory. Args: 1/2/3 (optional). /skinauto /sauto Auto-skin every item as it enters your inventory. Args: 1/2/3 (optional). /skinteam /st Skin your inventory and your team’s. Args: 1/2/3. Use /skinteam toggle to opt in or out. /skinbase /skinbuilding Skin all deployables in your base. Args: item filter, e.g. /skinbase sleepingbag. /skinall /sa Skin all items in every container in your base. Args: shortname, e.g. /skinall rifle.ak. /skinset /ss Set your currently selected skin set. Import & requests
/skinimport /sip Import a custom workshop skin. Args: WorkshopID, e.g. /skinimport 2397648701. /colimport /cip Import a workshop collection. Args: Collection ID, e.g. /colimport 2921147807. /skinrequest /sr Request a skin be added — shows in the requests box. Args: WorkshopID. /skinrequests /srs Open the approval box. Try = copy the item, Approve = add the skin, Deny = remove it. Permissions Grant exactly what you want
Player
skinner.default /skin skinner.items /skinitem skinner.craft /skincraft skinner.skinauto /skinauto skinner.skincon /skincon skinner.skininv /skininv skinner.skinbase /skinbase skinner.skinteam /skinteam skinner.skinall /skinall skinner.skinrequest /skinrequest Admin
skinner.import Enables /skinimport, /colimport, and /skinrequests. skinner.bypassauth Skips the building-auth check when using /skinitem. skinner.permskintry Enables Try in /skinrequests. Trying a skin copies the item — admins only. Auto-assigned
skinner.skinautotoggled A player disables skinauto. skinner.skinteamblock A player opts out of team skins. Cooldowns Grant skinner.<command><seconds> (e.g. skinner.default30) to enforce the cooldowns set in the config. No cooldown permission = no cooldown. If a player has several, the shortest wins. Importing skins Five ways to add skins
Via config Add workshop IDs to the Imported Skins List; reload and shortnames/display names auto-populate. Via collections Add whole workshop collection IDs; every skin imports automatically on load. Via commands /skinimport <WorkshopID> and /colimport <CollectionID> from chat, the F1 console, or RCON. Via skin requests Players /skinrequest; admins Try/Approve/Deny in the requests box. Requests log to a Discord webhook. From other plugins Convert data from SkinBox, xSkins, and SkinController with the SkinDataConverter tool, then paste into the config. Get the converter → Configuration Tune every behaviour
{ "Auto import approved skins": true, "Remove player data after inactivity (days)": 14, "Apply names of skins to skinned items": true, "Add Search Bar UI": true, "Override spraycan behaviour": false, "Use spraycan effect when holding spraycan and skinning deployables": true, "Blacklisted Skins (skinID)": [], "Blacklisted Items (itemID)": [], "Import Skin collections (steam workshop ID)": [], "Imported Skins List": { "861142659": {}, "2617744110": {} } } Developer API Hook into Skinner
A small, stable surface for reading the cached skin data and resolving redirect items from your own plugin.
//Get all cached skins public Dictionary<int, List<ulong>> GetAllCachedSkins() => _cachedSkins; //Check if a skin is a redirect item public bool IsRedirectID(ulong uID) => HasMask(uID); //Convert a redirect ID to its item ID public int RedirectIDtoItemID(ulong uID) => (int)UnsetMask(uID); //Get the list of skins for an item public List<ulong>? GetSkinsItemList(int itemid) { _cachedSkins.TryGetValue(itemid, out List<ulong>? cachedSkins); return cachedSkins; } Watch See Skinner in action
http://youtu.be/ewKlNILTwv8
Skin every item like it’s worth keeping.
The unrivaled no.1 performance skinbox for Rust — 60x faster, 200x leaner. Oxide + Carbon.
Join the Discord → Skinner v3.1.6 · by Whispers88 · Oxide + Carbon · 5/5 from 50 reviews · 69 versions · on Codefling since March 2022