
-
Posts
587 -
Joined
-
Days Won
2
Content Type
Profiles
Warranty Claims
Downloads
Forums
Store
Services
Downloads Plus Support
DOWNLOADS EXTRA
Everything posted by fullwiped
-
Changed Status from Pending to Closed Changed Fixed In to 1.0.2
-
Hello, sorry for the late reply. The installation instructions are available either in the description or inside the downloaded zip file. You can also get help from the plugin guide.
-
Changed Status from Not a Bug to Closed
-
Changed Status from Pending to Not a Bug Changed Fixed In to 2.3.6
-
Changed Status from Not a Bug to Closed
-
Changed Status from Pending to Not a Bug Changed Fixed In to 2.3.6
-
My suggestion is that instead of modifying the shop, you should adjust the other configs that use the Economics plugin. This shop contains nearly a thousand items, so changing the RP values one by one would take days. Also, bulk editing is not really an option, as it would break the shop’s balance, for example if it were done using AI or automated tools. Another option would be to disable Economics in the shop config and run it with a different currency using the Server Rewards plugin instead. The decision is yours.
-
 { "Amount of entities to paste per batch. Use to tweak performance impact of pasting": 15, "Amount of entities to copy per batch. Use to tweak performance impact of copying": 100, "Amount of entities to undo per batch. Use to tweak performance impact of undoing": 15, "Prevent These Prefabs From Spawning": [], "Enable data saving feature": true, "Copy Options": { "Check radius from each entity (true/false)": true, "Share (true/false)": false, "Tree (true/false)": false, "Default radius to look for entities from block": 3.0 }, "Paste Options": { "Auth (true/false)": false, "Deployables (true/false)": true, "Inventories (true/false)": true, "Vending Machines (true/false)": true, "Stability (true/false)": true, "EntityOwner (true/false)": true, "DLC items and deployables (true/false)": false, "Skins (0=no skins, 1=all, 2=no paid skins, 3=allow specified only, 4=block specified only)": 0, "Specified Skins (skin id, like 2601577757, or item shortname for redirected skins, like hazmatsuit.spacesuit)": [] } } For example: In the CopyPaste config, "DLC items and deployables (true/false)": false should be set.
 -
Our bases do not contain any DLC items. As a precaution, there are configuration settings related to this in the CopyPaste and RaidableBases configs.
-
Hello, please download version 2.4.15 of the plugin Shop. However, first remove your old files from the configs and data folders, then perform a clean installation from scratch.
-
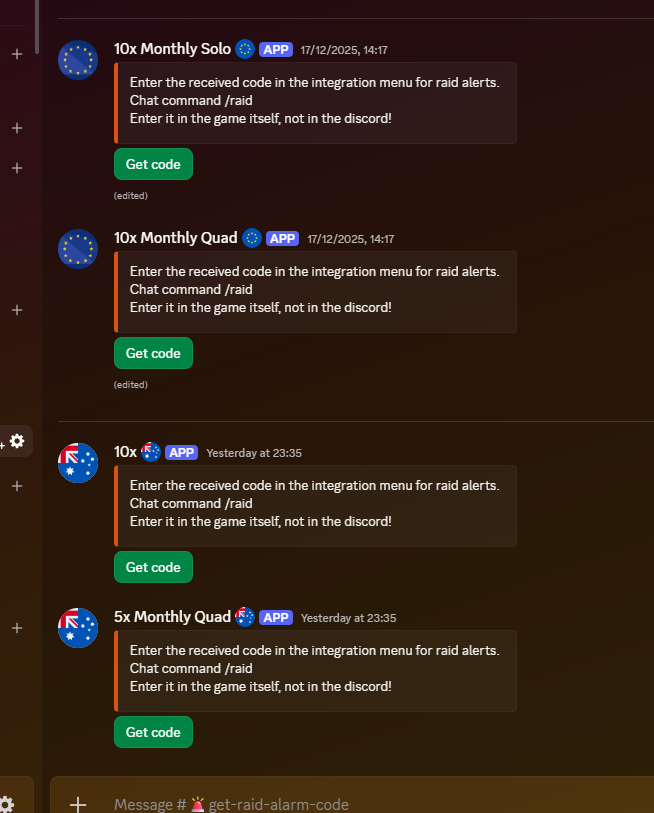
Hello, sometimes after a restart, even though the Get Code bot is already in the channel, a new Get Code bot post appears again on a random server. It is rare and happens about once every one or two months. It is not a serious issue. I just delete the previous Get Code post, but I wanted to let you know.

-
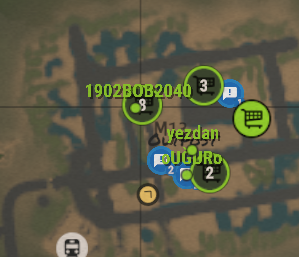
Hello, some players appear at a location on the map even though they are not actually there. It seems they might have been there previously and their position remained on the map. I am using the default config. Could you please take a look when you have time? (Plugin version: 2.2.4) Thank you!
-
Hello, A player found a stash trap, and the same stash log was sent to the Discord webhook six times within one minute. The first notification appeared at that time. The location was (-1091.31, 10.05, 69.15), Grid E11, and it was the same in all of the notifications. This might be a bug, so I wanted to let you know. I would appreciate it if you could take a look when you have time. Have a good day.
-
The issue seems to be resolved after I deleted the config and generated a new default one. It was probably caused by these settings: "swim_block": false, "fly_block": false, "sit_block": false, The plugin may not have automatically added these settings to the existing config, so that might have been the cause of the problem. I hope it will be an easy solution for both you and the other servers as well. Thank you for your help. My config: { "request_repeats": 2, "request_timeout": 60.0, "accept_delay": 0.5, "trade_cooldowns": { "default": 320 }, "cancel_cooldown": 10, "daily_limits": { "default": -1 }, "daily_limit_creator_only": false, "slot_limits": { "default": 12 }, "chat_prefix": "[Trading]", "chat_profile": "", "onscreen_notifications": { "enabled": false, "anchor": { "x": 0.5, "y": 0.0 }, "offset": { "x": 0.0, "y": 180.0 } }, "player_list": { "enabled": false, "anchor": { "x": 0.5, "y": 0.5 }, "offset": { "x": 0.0, "y": 0.0 }, "hidden_players": [] }, "sound_notifications": true, "sound_effects": { "request_sent": "", "request_received": "assets/bundled/prefabs/fx/invite_notice.prefab", "request_accepted": "assets/prefabs/deployable/locker/effects/locker-deploy.prefab", "request_declined": "", "trade_opened": "assets/prefabs/building/wall.frame.shopfront/effects/metal_transaction_complete.prefab", "trade_cancelled": "", "trade_completed": "assets/prefabs/deployable/locker/effects/locker-deploy.prefab" }, "building_block": true, "require_building_auth": false, "minimum_distance": -1.0, "maximum_distance": -1.0, "fee": 1.0, "fee_per_metre": 0.0, "refunds": false, "item_blacklist": [], "integrations": { "temp_ids": false, "ui_notify": false, "block_users": true, "ignore": false, "afk_api": false, "no_escape": { "raid_block": true, "combat_block": true }, "server_rewards": false, "economics": false, "clans": { "enabled": false, "fee_discount": 0.0, "no_limits": true, "cooldown_multiplier": 0.8 } }, "file_logging": false, "console_logging": false, "discord_webhook": { "enabled": false, "url": "", "username": "WTrading", "avatar_url": "", "embed_color": 5793266, "server_name": "Server 1" } }
-
Hi, while sending a trade request to another player using /trade, I just noticed the following log. (18:44:10) | Failed executing chat command 'trade' in 'WTrading v1.1.17 by Tom.bat' [callback] (Object reference not set to an instance of an object) at bool Oxide.Plugins.WTrading+Command.CanPlayersTrade(TradePlayer caller, TradePlayer target) in /home/rustserver/serverfiles/carbon/plugins/WTrading.cs:line 2127 at void Oxide.Plugins.WTrading+TradeCommand.Execute(TradePlayer caller, string[] arguments) in /home/rustserver/serverfiles/carbon/plugins/WTrading.cs:line 1966 at void Oxide.Plugins.WTrading.CommandHandler(BasePlayer player, string name, string[] arguments) in /home/rustserver/serverfiles/carbon/plugins/WTrading.cs:line 206 at void Oxide.Game.Rust.Libraries.Command.AddChatCommand(string command, BaseHookable plugin, Action<BasePlayer, string, string[]> callback, string help, object reference, string[] permissions, string[] groups, int authLevel, int cooldown, bool isHidden, bool protected, bool silent, bool doCooldownPenalty)+(Args arg) => { } in /home/runner/work/Carbon/Carbon/src/Carbon.Components/Carbon.Common/src/Oxide/Command.cs:line 103
-
Is there anything else I can help you with, or any additional information you would like me to provide so you can better understand the issue?
-
Hello, providing a screenshot probably would not help much because when I type /trade playername, nothing appears in the chat. My players reported this to me first, and then I tested it myself. It looks like there is indeed an issue. I even removed version 1.1.17 and reinstalled 1.1.16 on one of our other servers for testing, but the trade request still did not go through. There was also nothing in the RCON logs.
-
Hi, when typing /trade, the plugin appears to respond in chat. However, when typing /trade PlayerName, it seems the trade request is not being sent. Could you please check this?
-
We appreciate your feedback on BP fragments. If needed, we can make further adjustments in a future update. Thanks again for sharing your thoughts.
-
Hello sir, it is sufficient for you to apply the following. Have a good day. For existing users, the only file that needs to be updated is fullwipednight7.json inside CopyPaste. Some improvements were made to fix certain box-related issues in this base.
-
.thumb.gif.2d1b41b0ae0c1d0a34f2f55dc65983b5.gif) Hi @nivex Thanks for the clarification. I understand your point about the UI features and how they are intended to be part of the overall experience of the plugin. For the configs I share with other server owners, I’ll review the UI options and keep the ones that are intended to be enabled by default where appropriate. Hopefully this will help more people experience the features the plugin provides. I also appreciate the work you continue to put into Raidable Bases and the effort to keep it updated over time. The attention to detail and ongoing improvements are valued by many server owners.
Hi @nivex Thanks for the clarification. I understand your point about the UI features and how they are intended to be part of the overall experience of the plugin. For the configs I share with other server owners, I’ll review the UI options and keep the ones that are intended to be enabled by default where appropriate. Hopefully this will help more people experience the features the plugin provides. I also appreciate the work you continue to put into Raidable Bases and the effort to keep it updated over time. The attention to detail and ongoing improvements are valued by many server owners. -
Yep same. AdminMenu.cs 5552:60 'Pool' does not contain a definition for 'GetList'
-
 Hello, will there be an update soon?
 -
 Hi @Mevent, when a permission is added to a case, it gets hidden immediately. Wouldn’t it be better if it stayed visible and showed a warning like “You don’t have permission to open this case”? It would be great if this message could also be customized via the lang/en file. That way, for example, we could encourage players to join Discord to access the free daily case.
 -
Is there a known bug where cupboards suddenly disappear or break after a force wipe?