
Nubie's Wishlist
-
$25.95$21.95Linking System
Linking System is a Discord integration plugin for your Rust server. It links your players' Rust accounts to their Discord profiles, assigns roles automatically and rewards linked players with exclusive perks. Linking System comes with a beautiful UI, a complete Discord bot and automation features, and helps keep your Discord server active.
⭐️ Features of Linking System
Discord integration with automatic role assignment for linked players. Beautiful, customizable UI with ServerPanel V1 and V2 templates, so it fits into your existing server interface. Secure code generation with a configurable cooldown to prevent abuse. Linked players are added to a permission group automatically. Customizable UI elements show the benefits and server perks they can get. A complete Python Discord bot is included, with installation guides for Windows, Linux and Pterodactyl. Multi-server support: one Discord bot handles linking for several Rust servers at once. Automatic group management with a configurable group for linked players, useful for permission and role-based systems. Discord and the Rust server stay in sync over RCON, so updates and status changes apply right away. Linking data is saved and loaded automatically, so player links survive server restarts. Works with the ImageLibrary, ServerPanel and Notify plugins. An API for custom integrations: other plugins can check linking status and trigger their own actions. Players get notifications about their linking status, with support for several notification plugins. Configurable UI settings: set "Use UI ?" to false to run in command-only mode without a graphical interface.
🤖 Complete Discord bot solution
LinkingSystem includes a complete Python Discord bot with everything needed for the integration. Setup is simple: follow our step-by-step guides.
⚠️ Important: Python 3.12 is required. Python 3.13 is not compatible due to library issues.
🖥️ Windows Installation Complete guide for Windows servers with automatic startup configuration and service management. 🐧 Linux Installation Full Linux support with systemd service configuration for Ubuntu, Debian, CentOS, and RHEL systems. 🦕 Pterodactyl Support Optimized for Pterodactyl game panel with dedicated setup instructions and panel integration. 🔗 Multi-Server One bot can manage multiple Rust servers simultaneously with individual RCON configurations.
📬 Video Overview
🎮 Commands
/link - Opens the linking interface for players to connect their Discord account /link status - Shows your current linking status with Discord /link code - Generates a new linking code for Discord connection /link remove - Removes the existing link between Discord and Rust accounts
🛡️ Permissions
linkingsystem.use - Permission to access the linking system and connect Discord account
⚙️ How It Works
Linking Discord and Rust accounts takes three steps, through the UI or with commands only:
Generate Code: players use the /link command to open the UI, or /link code to generate a code by command only, with a built-in cooldown. Discord Verification: players post their code in the designated Discord channel, and the bot links the accounts automatically. Instant Benefits: once linked, players get their Discord role right away, along with exclusive in-game perks and rewards. Discord and your Rust server stay in sync in real time, so role changes and new links are processed instantly.
📚 FAQ
Q: Do I need to create my own Discord bot?
A: Yes, but we provide complete step-by-step instructions for creating and configuring your Discord bot, including all necessary permissions and settings.
Q: Can LinkingSystem work with multiple Rust servers?
A: Yes. The Discord bot supports multiple servers at once. Add your server configurations to the bot's config file.
Q: How do I add LinkingSystem to the ServerPanel menu?
A: Follow these steps:
1. Open ServerPanel menu in-game and click "+ADD CATEGORY" button
2. Set these exact parameters:
Type: Plugin Plugin Name: LinkingSystem Plugin Hook: API_OpenPlugin 3. Click "SAVE" button to create the category
Q: How do linked players receive their rewards?
A: Rewards are granted automatically when a player links their Discord account: the system assigns the configured permission group to linked players.
Q: Are the rewards shown in the UI actually given to players?
A: The reward items in the UI are for display only. What players actually get is automatic membership in a permission group (default: "discord"), which you can set up to give server perks through your permission system.
Q: Can I customize the rewards for linked players?
A: Yes. You choose which permission group linked players receive and what benefits that group gives through your server's permission system. The reward elements shown in the UI are customizable too.
Q: What happens if a player leaves the Discord server?
A: The bot automatically detects when linked players leave the Discord server and can remove their in-game benefits accordingly.
Q: Is the linking data saved if the server restarts?
A: Yes. All linking data is saved automatically and survives server restarts, so player links are not lost.
Q: Can I use LinkingSystem without the UI interface?
A: Yes. Set "Use UI ?" to false in the configuration to switch to command-only mode. Players then use /link code to generate linking codes, /link status to check their connection and /link remove to unlink their accounts, all through chat commands.
🔄 Migrations
LinkingSystem includes migration tools for moving from other linking plugins. Currently supported:
DiscordLink Migration keeps all existing player links and Discord information, so no data is lost when you switch to LinkingSystem.
💻 Developer API
Linking System has an API for integration with other plugins:
CuiElementContainer API_OpenPlugin(BasePlayer player) - Opens the linking interface for ServerPanel integration
🧪 TEST SERVER
Join our test server to try Linking System and all our features yourself.
Copy the IP address below to start playing.
connect 155.103.86.38:28015 -

$34.95$21.95Kits
A kit system with a wide feature set and a clean design. It suits you (no need to dig through the config every time and fill in confusing values: you edit items right in the game) and your players (a convenient, clear and informative interface).
🌟 Features of Kits
Beautiful user interface: A clean design that is easy to use. High performance: Optimized to run fast and reliably. Automatic kit conversion (uMod): Convert your existing kits. In-game kit and item setup: Configure kits directly in the game. Auto kits & wipes (optional): Automate kit distribution and server wipes. Custom items & commands: Add your own items and commands to kits. Advanced item settings: Detailed settings for every item. CopyPaste integration: Works with CopyPaste. Optional features: Delays after wipes, set blocking in Building Block, logging, and item chances. Skills & ServerPanel support: Works with Skills and ServerPanel.
🎮 Commands
kit - open the kit interface kit help - get help with kits kit autokit - enable or disable automatic kit.
Requires the "kits.changeautokit" permission. You can set this permission up in the plugin configuration under "Permission to enable/disable autokit". kit list - display all available kits kit [name] - redeem a specific kit kits.resetkits - delete all kits kits.give [name/steamid] [kitname] - grant a kit to a player kits.convert - convert from uMod Kits kits.wipe - clear players data kits.reset - resets the player data or kits in the kits system. kits.reset data [<targetID>/all] - resets the data of a player or all players.
Parameters:
<targetID>: The ID of the player whose data is to be reset. If you specify all, the data of all players will be reset. kits.reset kits - resets all kits in the data kits.template <interface_type> <interface_style> <template> [template_version] - lets the administrator change the look of the kits interface by choosing between fullscreen and inmenu mode. Different styles and templates are available for each interface type. The old style (old) is only available for fullscreen mode, while the new Rust style (rust) is available for both interface types. When using the Rust style, you must specify a specific template such as normal, content, categories or content_categories. For inmenu rust templates, you can also specify the ServerPanel template version (1 or 2).
Parameters: <interface_type>: The type of interface template. Valid values: fullscreen: Fullscreen interface template. inmenu: Menu interface template. <interface_style>: The style of the interface. Valid values: old: The old interface style (fullscreen only). rust: New Rust interface style (for fullscreen and inmenu). <template>: The name of the target template. Valid values depend on the interface style: normal, content, categories, content_categories. [template_version]: (Optional, only for inmenu rust) ServerPanel template version. Valid values: 1 or 2. Specifies the template version to be used with the selected inmenu rust template. Examples: kits.template fullscreen old - Sets the fullscreen interface to the old style. kits.template fullscreen rust normal - Sets the fullscreen interface to the Rust style with the normal template. kits.template fullscreen rust content - Sets the fullscreen interface to the Rust style with the content template. kits.template fullscreen rust categories - Sets the fullscreen interface to the Rust style with the categories template. kits.template fullscreen rust content_categories - Sets the fullscreen interface to the Rust style with the content_categories template. kits.template inmenu rust normal 1 - Sets the menu interface to the Rust style with the normal template for ServerPanel version 1. kits.template inmenu rust content 2 - Sets the menu interface to the Rust style with the content template for ServerPanel version 2. kits.template inmenu rust categories 1 - Sets the menu interface to Rust style with the categories template for ServerPanel version 1. kits.template inmenu rust content_categories 1 - Sets the menu interface to the Rust style with the content_categories template for ServerPanel version 1.
🎥 Video
P.S. This video shows the old version. A video for V2+ is in development.
🖼️ Showcase
Full screen templates
Template OLD STYLE
Template NEW RUST
Default:
Content:
Categories:
Content & Categories:
In-menu templates
Template V1 (V1.1)
Default:
Content:
Categories:
Content & Categories:
Template V2
Default:
Content:
Categories:
Content & Categories:
Template V4 Default:
Content:
Categories:
Content & Categories:
Editor
⚙️ Web Config Editor
Manage the Kits settings in our web config editor. You change the config in a browser form instead of editing files on the server by hand.
P.S. The web config editor is open to members of the "Kits" group in our Discord server. Join at https://discord.gg/mevent and ask for the group.
🧪 TEST SERVER
Join our test server to try all these features yourself.
Copy the IP address below to start playing.
connect 155.103.86.38:28015
📚 FAQ
Q: Where can I see an example of a config?
A: Config
Q: Where can I see an example of the data?
A: Data
Q: How do I add Kits to ServerPanel?
A: To add Kits to your ServerPanel, create a new category in your ServerPanel configuration with these settings:
"Type": "Plugin", "Plugin Name": "Kits", "Plugin Hook": "API_OpenPlugin". Q: Does the Kits plugin support other plugins?
A: Yes, this Kits plugin has an API similar to other popular kits plugins. If a plugin works with Kits, it works with this plugin too.
Q: How do I enable the sale of kits?
A: You need to configure the plugin economy (which plugin, its hooks, etc.), enable "Enable sale" in the Kits data (oxide/data/Kits/Kits.json or carbon/data/Kits/Kits.json) and set the price to "Selling price"
"Enable sale": true, "Selling price": 100, Q: How do I use Economics to pay for kits?
A: Example configuration settings:
"Economy": { "Type (Plugin/Item)": "Plugin", "Plugin name": "Economics", "Balance add hook": "Deposit", "Balance remove hook": "Withdraw", "Balance show hook": "Balance", "ShortName": "", "Display Name (empty - default)": "", "Skin": 0 }, Q: How do I use ServerRewards to pay for kits?
A: Example configuration settings:
"Economy": { "Type (Plugin/Item)": "Plugin", "Plugin name": "ServerRewards", "Balance add hook": "AddPoints", "Balance remove hook": "TakePoints", "Balance show hook": "CheckPoints", "ShortName": "", "Display Name (empty - default)": "", "Skin": 0 }, Q: How do I use scrap to pay for kits?
A: Example configuration settings:
"Economy": { "Type (Plugin/Item)": "Item", "Plugin name": "", "Balance add hook": "", "Balance remove hook": "", "Balance show hook": "", "ShortName": "scrap", "Display Name (empty - default)": "", "Skin": 0 }, Q: How do I resize the kit image?
A: You can do this in the config, here's an example of the image setup (-32 and 32 are width, and -75 and -11 are height). The setup looks like this:
"Kit Image": { "AnchorMin": "0.5 1", "AnchorMax": "0.5 1", "OffsetMin": "-32 -75", "OffsetMax": "32 -11" }, Q: How can I remove the numbers on the kits ("#1", "#2", etc.)?
A: You need to turn off "Show Number?" in the config:
"Show Number?": false, Q: How do I make it so that others can see kits with different permissions without being able to claim them?
A: You need to turn on "Show All Kits?" in the config:
"Show All Kits?": true, Q: Where can I edit the names in the plugin or add my own language?
A: You can edit lang files that are located (for example) at "oxide/lang/en/Kits.json" or "carbon/lang/en/Kits.json".
Q: Menus open without images and the console shows "IMAGE LIBRARY IS NOT INSTALLED." How to fix?
A: On Oxide the plugin loads its images through ImageLibrary (Carbon has its own image database and does not need it). Solutions:
Install the ImageLibrary plugin if it's not installed. Make sure ImageLibrary is loaded and running properly (check with o.plugins command). Restart the server after installing ImageLibrary. Check server console for ImageLibrary errors and fix them. Q: I see black images with Rust logo or get error 429 when loading images. What should I do?
A: This happens when images fail to download from the internet. The Kits plugin sends images to ImageLibrary but is not responsible for the downloading process itself. Error 429 typically occurs due to rate limits imposed by image hosting services like Imgur (see HTTP 429 documentation for more details). To fix this, enable Offline Image Mode, which uses local images instead:
Enable the mode in config: Open "oxide/config/Kits.json" (or "carbon/config/Kits.json" for Carbon) Set "Enable Offline Image Mode": true Set up the images: Create folder "TheMevent" in "oxide/data" (or "carbon/data" for Carbon) Download PluginsStorage (click "CODE" → "Download ZIP") Extract the ZIP and copy all contents to the "TheMevent" folder Reload the plugin: Type o.reload Kits (Oxide) or c.reload Kits (Carbon) Note: If you want to add your own custom images, place them in the "TheMevent" folder and reference them with the "TheMevent/" prefix. For example: "TheMevent/Icon1.png", "TheMevent/MyCustomIcon.jpg", etc.
Q: What placeholders are available for commands and what do they do?
A: You can use these placeholders in kit commands and they will be automatically replaced:
%steamid% - Replaced with the player's Steam ID (e.g., "76561198000000000") %username% - Replaced with the player's display name (e.g., "PlayerName") %player.x% - Replaced with the player's X coordinate position %player.y% - Replaced with the player's Y coordinate position %player.z% - Replaced with the player's Z coordinate position Example usage in kit commands:
"Commands on receiving (via '|')": "say Welcome %username%!|teleport %steamid% %player.x% %player.y% %player.z%" Note: Multiple commands can be separated by the "|" character, and they will be executed in sequence when the kit is redeemed.
🛠️ HOOKS
private string[] canRedeemKit(BasePlayer player) private void OnKitRedeemed(BasePlayer player, string kitName) private double OnKitCooldown(BasePlayer player, double cooldown)
🧩 API
private bool TryClaimKit(BasePlayer player, string name, bool usingUI) private string[] GetAllKits() private object GetKitInfo(string kitname) private string[] GetKitContents(string kitname) private double GetKitCooldown(string kitname) private double PlayerKitCooldown(ulong ID, string kitname) private int KitMax(string kitname) private double PlayerKitMax(ulong ID, string kitname) private string KitImage(string kitname) private bool IsKit(string kitname) private bool isKit(string kitname) private void GetKitNames(List<string> list) private double GetPlayerKitCooldown(ulong userId, string name) private double GetPlayerKitCooldown(string userId, string name) private void SetPlayerCooldown(ulong userId, string name, int amount) private int GetPlayerKitUses(ulong userId, string name) private int GetPlayerKitUses(string userId, string name) private void SetPlayerKitUses(ulong userId, string name, int amount) private JObject GetKitObject(string name) private int GetKitMaxUses(string name) private string GetKitDescription(string name) private string GetKitImage(string name) private bool GiveKit(BasePlayer player, string name, bool usingUI) private bool HasKitAccess(string userId, string name) private int GetPlayerKitAmount(string userId, string name) -
$25.95$17.95Cases
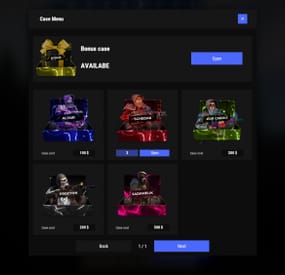
Cases with a juicy interface and a scroll animation when a case opens.
Features
Beautiful user interface Opening animation Performance Each case is configured separately
Commands
cases (open cases interface) givecase <steamid> <caseid> <amount> (give a case to the player) givecase * <caseid> <amount> (give a case to all online players)
⚙️ Web Config Editor
Manage the Cases settings in our web config editor. You change the config in a browser form instead of editing files on the server by hand.
P.S. The web config editor is open to members of the "Cases" group in our Discord server. Join at https://discord.gg/mevent and ask for the group.
FAQ
Q: Where can I see an example of a config?
A: Config
Q: How do I use Economics to pay for cases?
A:
"Economy": { "Show Balance": true, "Type (Plugin/Item)": "Plugin", "Plugin name": "Economics", "Balance add hook": "Deposit", "Balance remove hook": "Withdraw", "Balance show hook": "Balance", "ShortName": "scrap", "Display Name (empty - default)": "", "Skin": 0 }, Q: How do I use ServerRewards to pay for cases?
A:
"Economy": { "Show Balance": true, "Type (Plugin/Item)": "Plugin", "Plugin name": "ServerRewards", "Balance add hook": "AddPoints", "Balance remove hook": "TakePoints", "Balance show hook": "CheckPoints", "ShortName": "scrap", "Display Name (empty - default)": "", "Skin": 0 }, Q: I have a question/problem. What should I do?
A: Send me a PM on the site, open a ticket, or write to me in Discord: mevent
Q: How does a player give out Skill Tree XP?
A:
{ "Type": "Command", "ID": 7, "Image": "", "Title": "Give 1K XP from SkillTree", "Command (%steamid%)": "givexp %username% 1000", "Plugin": { "Hook": null, "Plugin name": null, "Amount": 0 }, "Display Name (empty - default)": "", "ShortName": "", "Skin": 0, "Amount": 1, "Chance": 65.0 }, Q: How can I add cases not for purchase, but just to have them?
A: Give them out with the "givecase" command:
givecase <steamid> <caseid> <amount> give a case to the player givecase * <caseid> <amount> give a case to all online players -

$11.99
Item Perks: Legendary Items
By imthenewguy in Plugins
Item Perks: Legendary items is a plugin that allows you to create and fully customize legendary named items on your rust server.
It uses the perk sets available from the Item Perks plugin, allowing for the creation of some very unique items in Rust.
The fields for creating a new item are:
Name: Give the item a unique name that captures it's essence Skin: Assign a skin that matches what the item does. Description/Story: Add some flavor to the item and write a short blurb or backstory for the item, which will display when the player mouses over the ownership banner, along with the buffs. Buffs: Add as many or as few ItemPerk buffs as you would like, with any amount of buff values. Restrict enhancement: Prevent or allow enhancement kits to affect each Legendary item. Global chat announcement: Announce in chat when a player finds a really rare or powerful item. Amour slots: Set the amount of armor slots the item spawns with (if applicable).
There are a number of drop sources that can be selected for your legendary items to drop. Along with the source, you can specify which item/prefab shortname you want to restrict the drop to, or which shortnames you want it to exclude.
The shortname will depend on the loot source. Loot sources with the type "Prefab" will need to use the prefab shortname, where as those with the "Item" type will need to use item shortnames.
Type: Prefab
Example: crate_normal_2, heli_crate, crate_elite.
Type: Prefab
Example: loot-barrel-2, loot-barrel-1
Type: Boss name
Example: scarecrow the destroyer.
Type: Event name
Supports:
Harbor Event: "Harbor" Junkyard Event: "Junkyard" Satellite Dish Event: "SatDish" Water Event: "Water" Air Event: "Air" Arctive Base Event: "Arctic" Gas Station Event: "GasStation" Sputnik Event: "Sputnik" Shipwreck Event: "Shipwreck" Triangulation Event: "Triangulation" Supermarket Event: "Supermarket" Caravan Event: "Caravan" Powerplant Event: "Powerplant" Armored Train Event: "ArmoredTrain" Convoy Event: "Convoy" Ferry Terminal Event: "FerryTerminal" SurvivalArena: "SurvivalArena"
Type: Prefab
Example: scientistnpc_arena, scientistnpc_heavy.
Type: Prefab
Example: npc_tunneldweller, npc_underwaterdweller.
Type: Npc name
Example: military defenders.
Type: Prefab
Example: oak_b, swamp_tree_a, pine_dead_snow_c.
Type: Prefab
Example: stone-ore, sulfur-ore, metal-ore.
Type: Prefab
Example: chicken.corpse, shark.corpse, player_corpse.
Type: Prefab
Example: hemp-collectable, berry-red-collectable, corn-collectable.
Type: Prefab
Example: hemp.entity, pumpkin.entity, wheat.entity.
Type: Item
Example: rifle.ak, axe.salvaged, icepick.salvaged.
-

$19.99
Custom Item Vending
By imthenewguy in Plugins
This plugin allows your players to list and sell custom items through their vending machines.
By creating a store via the back of the vending machine, players can list any item (custom or vanilla) for sale through their machines.
Players can then interact with the players vending machine to purchase their wares, just like vanilla rust.
This is ideal for any server, but especially for servers with heavy role play elements, or servers that use a lot of custom items.
Custom Item Vending can receive data from other plugins for both a currency and an item properties.
Custom items can be added manually through the config, or sent via an API directly from another plugin.
Allows players to sell items for vanilla items, custom items, economics and server rewards. Customizable limit on how many listings each vending machine can have. A map marker that will display what is currently being sold (and is in stock) in the machine. Floating text at the front of each custom item machine indicating what is being sold and its stock level. Supports almost every custom item, identifying them uniquely based on skin, name, text field, slot count and condition. Economics and Server rewards are withdrawn from the back of the machine.
The only requirement to use this plugin is the permission: customitemvending.create.
This is require to turn a regular vending machine into a Custom Item Vending machine.
Please note that due to the nature of the plugin and the way the map's vending listings are handled via client side, it is not possible to use market drones to obtain items using this plugin.