
Mirdon's Wishlist
-
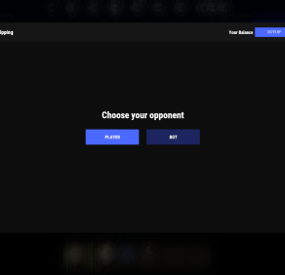
$19.95$11.95Coin Flipping
Adds a coin flipping mini game to your server. Players can try their luck by playing against both a bot and a real player.
Commands
flip - open interface
Permissions
coinflipping.use - open interface coinflipping.players - play against players coinflipping.npcs - play against npcs coinflipping.createroom - create a room
Config
{ "Commands": [ "flip" ], "Work with Notify?": true, "Economy": { "Type (Plugin/Item)": "Plugin", "Plugin name": "Economics", "Balance add hook": "Deposit", "Balance remove hook": "Withdraw", "Balance show hook": "Balance", "ShortName": "scrap", "Display Name (empty - default)": "", "Skin": 0 }, "Interface": { "Show coin in header?": true, "Coin Image": "https://i.imgur.com/GBVGvQa.png" }, "Values for Bot Game": [ 100, 200, 300 ], "Min Bet for Bot Game": 100, "Min Bet for Player Game": 100, "Permissions Settings": { "Opening the interface": "coinflipping.use", "Playing against players": "coinflipping.players", "Playing against NPCs": "coinflipping.npcs", "Creating a room": "coinflipping.createroom" } }
-
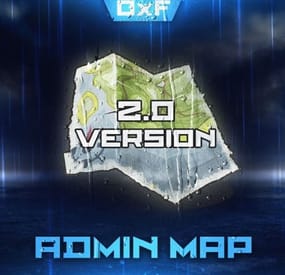
$20.00
Admin Map
Admin Map is an innovative plugin for the game of Rust, designed to make server administration easier and improve the quality of the gaming experience. Focused on optimization and functionality, this plugin provides admins with the tools to effectively control players, minimizing the negative impact on the server and other participants.
Main features:
Interactive map with players: Admin Map provides server admins with a detailed and user-friendly map showing the positions of all players. This allows admins to easily monitor player activity and movements, and quickly detect suspicious activity. Large variety of different admin map layers:
- Marker,
- Text ,
- Sleeper,
- TC,
- Stash,
- Sleeping Bag Quick Commands on Players: The plugin allows admins to perform quick actions on players directly from the map. Send messages, punish or help players in real time, minimizing reaction time and increasing interaction efficiency. Minimal server load: One of the key features of Admin Map is its low server load. All processing takes place solely on the client side, which means that the plugin will not slow down the server or create additional delays for players. This makes it an ideal choice even for servers with high traffic. Ease of use: The plugin's intuitive user interface provides admins with easy access to functionality. Navigating the map, sending commands and monitoring players is done with minimal effort, making server administration easy. Customization: Admin Map provides admins with the option to customize the functionality to suit their needs. Scanning area, available commands, buttons, permissions and other options. Hardcore bypass: Admins will be able to access the map on servers with the hardcore game mode installed.
After permission is granted, it is necessary to rejoin the server Support in RUST+: You will be able to view players online on the map directly in your phone without going to the server! Admin Map is an innovative solution that combines convenience, functionality and optimization. It provides administrators with tools to effectively manage players without negatively impacting gameplay and other server participants. The Admin Map plugin is an essential asset for any Rust server administrator looking to create a comfortable and safe gaming environment.
Permissions:
adminmap.allow - for use adminmap and hardcore bypass adminmap.<button perm> - any permissions specified in the button settings adminmap.teleport2marker - teleportation by marker via CTRL+RMB adminmap.invis - hide player from the player map adminmap.rust+ - enable rust+ admin map adminmap.rust+.invis - hide from rust+ admin map (recommended in case of giving the map to players)
Commands:
/amap - show sidebar /amap off - disable everything and hide the sidebar
Color designations on the cupboards map:
Default Config:
{ "Auto show sidebar panel": true, "Open the admin menu instead of the action menu": false, "Text Map Settings": { "Font size": 8.0, "Use color generation for teams?": true, "Color for team": "ffaf4d", "Color for solo player": "9bd92f", "Color for sleeper": "404040" }, "Command Buttons": [ { "Permission (adminmap.<perm>)": "", "Label": "TP", "Command": "teleport {steamid}", "Color": "1 1 1 1" }, { "Permission (adminmap.<perm>)": "", "Label": "TP2ME", "Command": "teleport {steamid} {admin.steamid}", "Color": "1 1 1 1" }, { "Permission (adminmap.<perm>)": "", "Label": "INV", "Command": "/viewinv {username}", "Color": "1 1 1 1" }, { "Permission (adminmap.<perm>)": "", "Label": "SPECTATE", "Command": "spectate {steamid}", "Color": "1 1 1 1" }, { "Permission (adminmap.<perm>)": "", "Label": "KILL", "Command": "kill {steamid}", "Color": "0.9 0.1 0.25 1" }, { "Permission (adminmap.<perm>)": "", "Label": "KICK", "Command": "kick {steamid}", "Color": "0.9 0.1 0.25 1" }, { "Permission (adminmap.<perm>)": "", "Label": "SHOW\nTEAMMATES", "Command": "adminmap.cmd show_player_teammates {steamid}", "Color": "1 1 1 1" }, { "Permission (adminmap.<perm>)": "", "Label": "SHOW\nPRIVLIDGES", "Command": "adminmap.cmd show_player_privlidges {steamid}", "Color": "1 1 1 1" }, { "Permission (adminmap.<perm>)": "", "Label": "SHOW\nSLEEPING\nBAGS", "Command": "adminmap.cmd show_player_sleepingbags {steamid}", "Color": "1 1 1 1" }, { "Permission (adminmap.<perm>)": "", "Label": "SHOW\nSTASHES", "Command": "adminmap.cmd show_player_stashes {steamid}", "Color": "1 1 1 1" } ] }
Button Library:
Give item to player for AdminMenu by k1lly0u | Minimum required version 1.0.1 { "Permission (adminmap.<perm>)": "", "Label": "GIVE", "Command": "adminmenu.callback {steamid}.4;adminmenu.callback {steamid}.4", "Color": "1 1 1 1" } Permanent ban
{ "Permission (adminmap.<perm>)": "", "Label": "BAN", "Command": "ban {steamid}", "Color": "1 0 0 1" } View backpack (for Backpack Pro)
{ "Permission (adminmap.<perm>)": "", "Label": "Backpack", "Command": "/b {steamid}", "Color": "1 1 1 1" } View backpack (for Backpacks plugin from uMod)
{ "Permission (adminmap.<perm>)": "", "Label": "Backpack", "Command": "viewbackpack {steamid}", "Color": "1 1 1 1" } Spectate
{ "Permission (adminmap.<perm>)": "", "Label": "SPECTATE", "Command": "spectate {steamid}", "Color": "1 1 1 1" }
If you want to add buttons here, message me on my discord server
-

$10.00
The Imposter
TheImposter allows players with permission to become an animal at will
The whole system depends on using Blood(ingame item) to make players Impose an animal
the amount of Blood in your hot bar will dictate time in the Impose
Permissions
TheImposter.use - use Imposter command TheImposter.bear -can harvest this animal's blood TheImposter.polarbear -can harvest this animal's blood TheImposter.wolf -can harvest this animal's blood TheImposter.boar -can harvest this animal's blood TheImposter.stag -can harvest this animal's blood TheImposter.horse -can harvest this animal's blood TheImposter.chicken -can harvest this animal's blood TheImposter.tiger -can harvest this animal's blood TheImposter.panther -can harvest this animal's blood TheImposter.croc -can harvest this animal's blood
Commands
/imposter - opens the Imposter UI (I like to bind this command ex "bind F6 chat.say /imposter" )
Console Commands
blood <playername/ID> <type> <amount> - gives player blood type by amount Types
boar bear wolf stag horse chicken polarbear panther tiger croc
Player Inputs
using Primary fire when in close proximity of other players will make animal attack (Dont work for now with AI2)
Config File
{ "1. Blood amouut to use per second (must be full amounts cant be Decimals)": 1, "2. Use Multiblood System": true, "3. Blood gather amount per harvest hit": { "Bear": 1, "PolarBear": 1, "Boar": 2, "Wolf": 2, "Stag": 2, "Horse": 2, "Chicken": 3, "Tiger": 2, "Panther": 2, "Crocodile": 2 }, "4. Image URL list": { "Bear": "http://www.noobhub.co.za/bear.png", "Boar": "http://www.noobhub.co.za/boar.png", "Stag": "http://www.noobhub.co.za/stag.png", "Wolf": "http://www.noobhub.co.za/wolf.png", "PolarBear": "http://www.noobhub.co.za/polarbear.png", "Horse": "http://www.noobhub.co.za/ridablehorse.png" }, "5. Animal health settings": { "boarHealth": 150, "bearHealth": 325, "wolfHealth": 150, "stagHealth": 150, "horseHealth": 150, "chickenHealth": 25, "polarbearHealth": 420, "tigerHealth": 240, "pantherHealth": 240, "crocHealth": 450 }, "6. Command name to use": "imposter" } Lang File
{ "NoBlood": "You dont have Blood in your HotBar", "NoMultiBlood": "You cant have Multiple Blood tipes in your HotBar", "NoPerm": "You dont have the Permission to use this", "NoVanish": "You cant Do this in Vanish", "HasActiveItem": "You cant Animal Attack with items in your hands", "NoMount": "You cant do this while Mounted", "NoMountTry": "You cant Mount while Imposter", "OnCargo": "You Cant Imposter on CargoShip" }
Intro from West Coast Servers by @Neighigh
video for tests(intro vid coming soon)
b03bc62e80030f234e93b4aa6d85f1c0
-
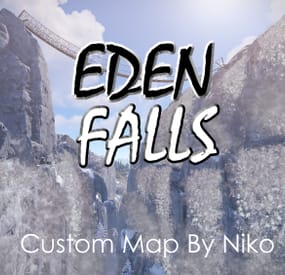
$39.95$27.96Eden Falls
Eden Falls is a fully custom map 3000 in size - Jungle Update - Only use after 1st May
It features a road, river and now a rail network covering most corners of the map, Some standard monuments are here along with a number of new and unique monuments created by me.
The additional monuments are
LUMBER MILL MISSILE SILO MARINA ICESTATION THULE EDEN FALLS CANYON RAVENSCROFT ASYLUM FORT KNOX COLDITZ CASTLE BAYOU HMS RACE HORSE CAR REPAIR RACE TRACK OIL DERICK ALCATRAZ SKULL TUNNEL Video is not fully representative of the map as it was originally done many years ago, E&OE
Finally, please make yourself aware of the TOS-Restrictions for use
-
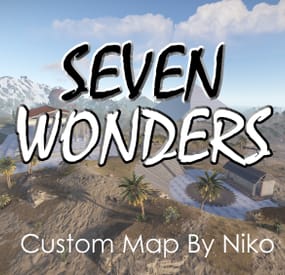
$39.95$27.96Seven Wonders Map
Embark on an adventure to explore the Seven Wonders of the Ancient World in this beautifully crafted custom map by Niko. From the Great Pyramid of Giza, to the Lighthouse of Alexandria, this map features amazing points of interest for players to explore as they venture through the marvels of a long forgotten world.
This 3,000k map boasts 82K prefabs
Explore the Seven Wonders
Great Pyramid of Giza Hanging Gardens of Babylon Temple of Artemis Statue of Zeus at Olympia Mausoleum at Halicarnassus Colossus of Rhodes Lighthouse of Alexandria
Also Featuring
Large Airport Modern City Missile Silo Murder Mansion Ski Resort Construction Yard Pumpkin Farm Amphitheatre
Vanilla Monuments
Mining Quarries Harbour Sewer Branch Gas Stations Fishing Villages Super Markets Mining Outposts Junkyard Lighthouses Outpost Bandit Camp Arctic Bases Military Bases Dome Underwater Labs Oilrigs Satellite Dish Stables Short Film