KD Gaming 5x's Wishlist
-
.thumb.gif.ea365de66286e648aec7695b898231ab.gif)
$39.90
Gasoline
The near future, the planet has suffered a global ecological catastrophe, the sun has burned out most civilizations and green nature. All that remains are the ruins of an old civilization. People turned into looters and raiders, they created several factions of their own and started a war with each other for the most significant resource on this planet - Gasoline. This resource allows gangs to move around a huge island in search of new production, most of the oil fields are captured by raiders, their bases are everywhere, on land, on water. The city located on this island was sunk and its new inhabitants became Sharks. I present to your attention a new map in the post-apocalyptic wasteland style, here you will find many custom locations, more than 20, locations are located everywhere, on land, on water, underground. You will also find some great places to build your base, a huge number of bridges, ziplines will give you the opportunity to quickly move between the peninsulas. You can also buy a flight transport at the outpost. The relief map also offers the use of parachutes to overcome long distances. Drinking water in the bays will give you the opportunity to quench your thirst and build a farm. Good luck in surviving on this island!
Features:
Prefab Count: ~46к prefabs Size: 4000 A lot of interesting locations to explore Marketplaces and recycler have been added to fishing villages Railway Optimal FPS A large number of places for the construction of foundations in the form of unusual rocks, caves, landscape and icebergs More than 20 custom monuments Large number of bridges Custom plugin UnderwaterGuard (by Adem) This map is constantly supported and updated for the current version of the game with all updates!
How can I view the map?
You can do this in our Discord server by submitting a request for an invitation to our servers. There you will be given the rights of an “administrator” and without any difficulties you will be able to fly around the map and fully familiarize yourself with it.
Custom Monuments:
Gas Town Red Rock Overview Point Diesel Storage Shark City Trail Camp Port Station Broken oil pipeline Crew Barracks Loners Shelter Marauders Hangar Oil Station Fault Rogue Camp Junk Base Roger Dam Pier Diesel Rigs Bridge Security Sea Wolves Rusty Ship Drawbridge Coaling Tower West Bridge North Bridge East Bridge interesting places to build a base marked X Monument Facepunch:
Launch Site Missile Silo Junkyard Harbor 1 and 2 Arctic Research Base Satellite Dish Airfield Bandit Camp Outpost (mod version) Giant Excavator Pit Water Treatment Military Tunnel The Dome Sewer Branch Ranch Fishing Village 1,2,3 (Modified version) Lighthouse Underwater Lab Railway HQM, Sulfur, Stone Quarry Roadside Monument RadTown Water Well- #gruber
- #custom map
- (and 5 more)
-
$19.99
JetPack
Take your players to new heights in the game of Rust, and get a few laughs watching people try to fly one for the first time! Introducing Jetpack! A plugin that allows your players to soar around like never before in the game of Rust. Grab this plugin and give your players something to talk about! Many functions have already been implemented like the ability to shoot while piloting a jetpack, and the plugin will continue to expand and grow with the community.
You'll find the configuration covers almost anything you can think of, and you'll see a breakdown of the configuration file in the description below. By default you can simply press the middle mouse wheel to equip and remove the jetpack quickly, you can't run around once you've equipped it. You can customize loot crates the jetpack might appear in, and all of the stats from thrust to rotation and all of the other controls. Be sure to check the permission section and feel free to use the command creatively to give jetpacks as an award for completing other tasks on your server using the commands provided. Make sure you have some lowgrade handy, let's take to the skies!
Сontrols
Space bar - thrust W/S keys - pitch axis A/D keys - yaw axis
Chat commands (check config for permissions)
/jet - toggle jetpack on & off /givejetpack - give a jetpack to yourself
Console commands (admin only)
givejetpack - give a jetpack to yourself givejetpack SteamID - give a jetpack to player using their SteamID
Plugin config
en – example of plugin configuration in English
ru – example of plugin configuration in Russian
Check out the rest of my work: Adem's Codefling Library
You can reach out to me in Discord: Adem's Discord Profile
Thanks to Jbird for writing, translation, & support: Jbird's Discord Profile
Join the Mad Mappers Discord!
-
$5.99
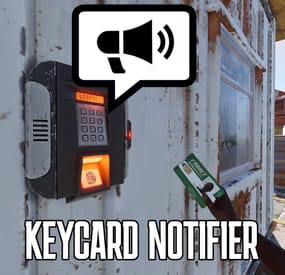
Keycard Notifier
This plugin broadcasts a message to the chat that says a user has swiped a keycard at a monument.
Permissions
keycardnotify.block -- If a player has this perms and they swipe a card it will not broadcast a message. Configuration
{ "Send Game Chat Message" : true, "Use Webhook": false, "Webhook Url": "Webhook Url Here", "Webhook Message": "**{0}** ({1}) has activated the **{2} Card** puzzle at **{3}**!\nhttps://steamcommunity.com/profiles/{1}", "Red (Webhook Message {2})": "Red", "Blue (Webhook Message {2})": "Blue", "Green (Webhook Message {2})": "Green" } Localization
{ "massage": "<color=#a6a4a4>{0}</color><color=#dedede> has activated the </color>{1} Card</color><color=#dedede> puzzle at </color><color=#a6a4a4>{2}</color><color=#dedede>!</color>", "green": "<color=#7efc87>Green", "blue": "<color=#99c5ff>Blue", "red": "<color=#ff7373>Red" }
-
$25.00
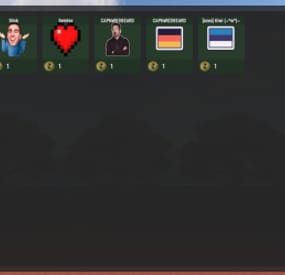
ZStickers
Forget about emoji, STICKERS are the next best thing to use in chat.
This plugin gives you and your players the ability to unlock stickers that can be used to express yourself in chat. Besides that, it adds a sticker market: Here stickers can be traded, which adds a great way for your players to make some good money on rare stickers.
Stickers are shown by using their :tag: in chat. By default, stickers are shown to every online player (players can turn them off individually by command). They popup on their screen and disappear in a few seconds. The possibilities are endless, and a lot of fun and interaction are guaranteed. You can add your own memes, cat pictures, word art or whatever image you can think of, tip: sneaky spiders give good results.
Sticker Editor
The main command for stickers is /sticker, but you will need some stickers first! Add any new stickers by using this command:
/sticker add :stickername: https://imgur.com/yoursticker.png After adding a sticker, you can find it in the sticker browser. Open the UI by using:
/sticker For admins (or people with the right permission) there is an in game sticker editor. From the browser, click the pencil icon on any sticker to start editing the sticker. The 3x3 grid sets your sticker’s start position, then you can align your sticker with the other values.
A group can be entered or chosen by clicking the … icon.
The 4 main tiers are only used for colors and not for real rarity, the only important tier here is the HIDE tier. Every sticker in this tier will not be available for players. Stickers are added in the hidden tier by default, so make sure to select another tier when you finish editing your sticker.
The TOTAL field is the maximum amount of copies of this sticker to be owned by players in total *. The right field shows the current number of owners.
* Stickers are limited!
Every sticker added to the plugin requires you to set up a maximum number of ‘owners’ for that sticker. The sticker can only be unlocked this many times.
Note that players can also have duplicate stickers. A sticker that has almost reached its max owners will be way harder to get when buying stickers. This rarity is useful in the sticker market and the recycler.
In the config file are settings for inactive players. After a certain amount of inactive days, X stickers will be taken from the player and become available again in the market.
Sticker Browser
Browse your stickers and click any sticker for details. The sticker browser has handy filters to quickly find the sticker you are looking for. Use the lock icons to toggle (un)locked stickers. Sorting is possible by age, a-z, rarity, collections (groups) and availability.
On the right side of the screen all sticker groups are shown.
These are basically collections of stickers that can be used like sticker packs. Collect them all!
Click any of the stickers to get more details, trade or recycle them. The eye icon on top of the sticker sends a chat message to show the sticker. Only visible for admins are the edit button (pencil) and lock/unlock button. The number on the top right shows the amount of this sticker you own. This sticker will be shown if a player who owns it uses :care: in global chat.
Buy Stickers
Players need sticker tokens to be able to unlock new random stickers.
Different packs with tokens can be set up in the config file. The (token) price of a sticker can also be configured. At the moment only random stickers are available.
You can unlock specific stickers for players by command. Tokens can also be given by (server) command, for example to be used as a vote or quest reward.
Sticker Market
In the sticker market, players can trade stickers they own. After setting a price, the sticker will be shown in the list of available trades. Other players can then buy the sticker and ownership will be transferred.
Sellers get paid in the same currency as the one setup for buying sticker tokens. In case you use items as a currency, the seller has to be online to make a trade.
Failed trades are being removed after a (configurable) amount of time.
Sticker Recycler
Besides trading your stickers, you can also decide to recycle them for sticker tokens.
The reward for recycling depends on the rarity of the sticker at that moment and the amount of the same sticker being recycled.
Recycling more of the same sticker results in higher rewards.
Permissions
zstickers.admin - needed for all sticker management zstickers.use - enables /sticker command zstickers.trade - allows to trade stickers zstickers.teamchat - allows players to use stickers in team chat (ninja mode)
Commands
/sticker - almost everything can be done inside the UI /sticker add :stickername: https://imgur.com/sticker.png - add stickers /sticker give <player name or id> <amount> - gives player x number of sticker tokens /sticker unlock <player name or id> :stickername: - unlocks a sticker for a player /sticker hide - hide all stickers /sticker show - show stickers again There are some debug commands in case something looks off (please report):
/sticker list - prints your unlocked stickers to chat /sticker clearallmystickers - clears all your stickers /sticker valid - validates all stickers and their owners /sticker update - refresh all sticker stats / find missing stickers /sticker cleanuptrades - manually cleans up sticker trades /sticker debug - logs what's happening to console /sticker stats - shows totals of stickers and their availability
Console commands
These commands can be used by admins and other plugins.
sticker givetokens <player name or id> <amount> - gives a player sticker tokens sticker unlock <player name or id> :stickername: - unlocks a sticker for a player sticker import <sticker pack name> - import sticker pack, see below for more info sticker import <sticker pack name> hidden - import a sticker pack but hide all stickers instead of using the sticker pack tiers
Config & Data
The config file is pretty straight forward. You can add or remove token packs. The currency is set by picking one of the numbers. If you want to use items as currency, make sure to setup the shortname of the item. Optionally you can add a skin ID too, so only items with a certain skin can be used to buy sticker tokens.
The plugin will create 3 files in /oxide/data/ZStickers/:
market_data.json - contains all trades, this data is automatically managed/wiped player_stickers.json - contains ownership data and token balance, you CAN wipe this, but this is not required: Players can keep their stickers forever, as long as they are active. stickers.json - contains all sticker data - don't wipe this if you want to keep your stickers. If you wipe this file, make sure to wipe the others too. New in version 1.1.0 is the ability to configure the buttons used to buy stickers. Check out the config below: The first item is the default buy-button (buy 1 sticker for 5 tokens). The 2nd item is a new custom buy button: Here you but 5 stickers at once for 22 tokens. Optionally you can also define what permission is needed to see the button and what collection (group) the sticker should be picked from.
Import Sticker Packs
Sticker packs are a way to easily add or share a bunch of stickers. They come with predefined settings, so it's basically plug and play. For sticker packs, a data folder called 'import' is created
/oxide/data/ZStickers/import/ Sticker packs can be added here to easy import a list of stickers. If the import folder is not there, you can create it yourself.
Add the sticker pack json file(s) to the folder and run the import command from your console. Results will be shown in your console. Stickers with the same :tag: can not be added this way. Make sure to remove other sticker first.
If you don't want the stickers to be visible for everyone right away, add the parameter 'hidden' to the import command. This will put all stickers in the hidden tier. Console command for example:
sticker import SuperCoolPack hidden
Dependencies & Plugin support
Required plugins: ImageLibrary
Optional currency plugins: ServerRewards, ZCoins
Economics plugin is added but untested, let me know if this works for you. This plugin will be fully supported.
Note: You can use any item with any skin if you're not using any of these plugins on your server.
Support / Contact me
If you encounter any problems or if you have any suggestions, feature requests or questions, please message me on Discord (josh.z) for the fastest response.
This plugin is made with love and I feel it's never really 'done'. I'd love to discuss your ideas for it on my Discord server here: https://discord.gg/KveEUQhGsZ
There's also a cool dude there (Nexus) who always sees your questions quicker than I do. If my response takes too long, find Nexus!
-
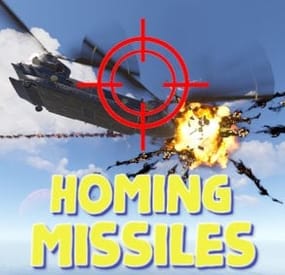
$11.99$5.99Homing Missiles
Adds homing missiles to the server. Just load the rocket launcher with a smoke rocket and aim. Require a smoke rocket to be used as the ammo type!
Great damage system, you can set damage for all types of objects (buildings, animals, NPCs, players, trains, boats, helicopters and others) Great crafting system, you can customize the amount of resources needed to craft homing missiles, set the level of the workbench required for crafting You can customize crosshair size and color, aiming time, aiming sound You can set the type of rocket explosion, set rocket speed, self-detonation time and more You can set zones where you cannot use homing missiles, (you need the ZoneManager plugin) This plugin utilizes the smoke rocket. As it is not a item that players can usually get through loot it makes the perfect placeholder for this purpose.
Simply use a plugin such as BetterLoot to insert the smoke rocket into your loot tables, then any smoke rocket that is picked up by a player can be used as a Homing Missile. Or you can just use the crafting system.
Commands:
/hmcraft - use to craft homing missiles (if enabled in the config)
/hmcraft X - use to craft multiple homing missiles, where X is the amount of homing missiles
This plugin uses the permission system.
Permissions:
homingmissiles.use - required to use homing missiles
homingmissiles.craft - required to use the craft command
To assign a permission, use: oxide.grant <user or group> <name or steam id> homingmissiles.use
To remove a permission, use: oxide.revoke <user or group> <name or steam id> homingmissiles.use
To assign a permission, use: oxide.grant <user or group> <name or steam id> homingmissiles.craft
To remove a permission, use: oxide.revoke <user or group> <name or steam id> homingmissiles.craft
Developer API:
(void) LaunchHomingMissile(Vector3 launchPosition, Vector3 targetPosition, Vector3 startVelocity, BaseEntity target)
Launches a homing missile from a point with coordinates "launchPosition" with velocity "startVelocity" (startVelocity can just be a Vector3.zero).
You can set any "targetPosition" value if you have specified a "target". If you set the "target" to null, then the target will be the point with coordinates "targetPosition".
Config file:
{ "Rocket display name": "Homing missile", "Rocket icon skinID": 3018993457, "Allow homing missiles crafting": true, "Workbench level required to craft(0-3)": 3, "Crafting costs": [ { "shortname": "ammo.rocket.basic", "amount": 1 }, { "shortname": "techparts", "amount": 2 } ], "List of zones where homing missiles cannot be used (requires ZoneManager plugin)": [ "111111111", "222222222", "333333333" ], "Make it so that only in these zones you can use homing missiles": false, "A message when you are in an area where homing missiles cannot be used": "You can't use homing missiles here", "Rocket speed": 50, "Rocket acceleration(1 - 10)": 1.0, "Amount of time before the rocket self detonates": 20.0, "Amount of time to acquire target lock(in seconds)": 1.0, "How quickly the target lock is lost if you lose the target(0-1)": 1.0, "First crosshair size": 24.0, "First crosshair color Red (0-1)": 1.0, "First crosshair color Green (0-1)": 0.0, "First crosshair color Blue (0-1)": 0.0, "Left side of the first crosshair": "<", "Right side of the first crosshair": ">", "Middle of the first crosshair": "+", "Second crosshair size": 24.0, "Second crosshair color Red (0-1)": 0.0, "Second crosshair color Green (0-1)": 1.0, "Second crosshair color Blue (0-1)": 0.0, "Second crosshair": "[ + ]", "Enable sound effects when aiming": true, "Base damage of the rocket(affect everything, including buildings)": 100.0, "Damage to players": 100.0, "Damage to animals": 500.0, "Damage to patrol helicopter": 3500.0, "Damage to chinook": 2000.0, "Damage to bradleyAPC": 500.0, "Damage to submarine": 400.0, "Damage to NPCs": 300.0, "Damage to snowmobile": 300.0, "Damage to boat": 400.0, "Damage to modular cars": 400.0, "Damage to hot air baloon": 1000.0, "Damage to scrap transport helicopter": 500.0, "Damage to minicopter": 750.0, "Damage to train": 500.0, "Explosion type: 1 - basic; 2 - fire; 3 - smoke; 4 - heli; 5 - heli napalm; 6 - heli airburst; 7 - sam; 8 - 40mm_grenade_he; 9 - c4; 10 - f1; 11 - beancan grenade; 12 - satchelcharge; 13 - mlrs": 13, "Use homing missiles for building blocks": false, "Use homing missiles for constructions": false, "Use homing missiles for items": false, "Use homing missiles for traps and turrets": false }