
GangstaPichu's Wishlist
-

$29.90
Traffic Drivers
Tired of driving on abandoned roads in Rust? Traffic Drivers adds AI-driven vehicles with armed companions ready to defend their drivers. Customize everything from vehicle setups to AI behavior, making each road feel more dynamic and unpredictable!
Features:
🚗 Dynamic AI Traffic
• AI-powered vehicles patrol Rust’s roads with armed drivers and companions.
• Customizable AI reactions – decide how they respond to attacks!
• Companions will fiercely protect their driver.
🔥 High-Speed Combat & Encounters
• Bots fight back when their vehicle is attacked.
• Drivers can temporarily accelerate when under fire.
• Setup damage rates, loot tables, and AI health settings.
🔧 Full Vehicle Customization
• Set fuel limits or enable infinite fuel.
• Adjust max speed, destroy rules, and car respawn times.
• Optional locks for security
💰 Loot & Rewards System
• Configure loot inside storage modules – control drop rates and item amounts.
• Customize driver & companion inventory – weapons, clothes, and other supplies.
⚙ Spawn Control
• Set limits on active traffic vehicles.
• Adjust minimum road length
• Configure auto-destruction for stuck cars.
• Prevent AI from attacking friendly drivers and companions.
Total Customization & Control:
🛠️ Vehicle Presets:
• Adjust fuel, speed, engine durability, and others.
• Define loot contents inside storage modules.
🎯 Driver & Companion AI:
• Set driver names, health, appearance, and clothing.
• Configure damage resistance and response to attacks.
• Equip companions with custom armor, health, and weapons to protect their driver.
📸 See It in Action! Watch the Video
⚠️ After downloading you’ll also get plugin called DriverController. It’s a single plugin to setup presets of bots and loot between all of my plugins.
📃 Configuration:
{ "Event settings": { "Allowed events (vehicle) count": { "Min": 3.0, "Max": 6.0 }, "Event restart delay": { "Min": 60.0, "Max": 120.0 }, "Prevent NPC from attacking drivers and companions?": true, "Block damage to transport from not players?": true, "Block damage to driver and companion from not players?": true, "Destroy events of this plugin when pause is enabled?": true, "Behavior when Convoy spawns": { "Pause events when Convoy starts?": true }, "Marker text color": { "Color (for HEX, put # at the beginning)": "0.2 0.21 0.62 1" }, "Event name for the marker": "EVENT CAR", "Route recording settings": { "Enable recorded routes usage?": true, "Clear saved routes after wipe?": true, "Minimum distance between points to record in route (used when recording route)": 20.0, "Minimum number of points to save (used when recording route)": 50.0 }, "Route generation": { "Enable route generation": true }, "Controller settings": { "Controller update timer (0 - 0.2)": 0.0 } }, "Car settings": [ { "Activate this event?": true, "Transport type for event (Random2Module, Random3Module, Random4Module, Module2, Module3, Module4)": "Module2", "Driver name (key) from driver settings in DriverController plugin": "DriverCar", "Companion name (key) from companion settings in DriverController plugin (list to occupy free seats in the vehicle)": [ "Companion1", "Companion2" ], "Engine settings": { "Engine parts level (1 - 3)": 1, "Drop the parts when destroying vehicle?": false }, "Loot container settings": { "Enable loot in vehicle container?": true, "Drop the loot when destroying the transport?": false, "Amount of slots": 1, "Name of loot set from loot settings in DriverController plugin (list loot sets for random selection)": [ "ResourcesCar" ] }, "Use Road Routes (has priority over off-road)": true, "Use Off-Road Routes (used if no road routes are available)": true, "Controller settings": { "Max speed (km/h)": 60.0, "Maximum speed when obstacles detected (km/h)": 5.0, "Chase mode settings": { "Chase attacking players?": true, "Max chase distance": 150.0, "Chase timer": 120.0 } }, "Turret Settings (will add the specified amount to each suitable module)": { "Enable Turrets on Vehicle": false, "Disable Turrets on Event End": true, "Maximum Attack Range": 50.0, "Player Damage Multiplier": 0.5, "Max turrets amount": 1, "At what percentage of the module's remaining health remove the turret installed on it": { "Min": 2.0, "Max": 5.0 } }, "Damage receive rate": 1.0, "Fuel settings": { "Enable automatic fuel refueling?": true, "Remove fuel when unlocking vehicle?": true, "Maximum fuel in vehicle": 500 }, "Vehicle headlight settings": { "Enable vehicle headlights?": true, "Use headlights only at night?": true }, "Detonator settings": { "Add C4 to the vehicle after the death of the driver (used to despawn vehicles)": true, "After how many seconds explosives will be blown up": 60.0, "Explosives position offset": { "x": 0.0, "y": 0.8, "z": 0.0 } } }, { "Activate this event?": true, "Transport type for event (Random2Module, Random3Module, Random4Module, Module2, Module3, Module4)": "Random3Module", "Driver name (key) from driver settings in DriverController plugin": "DriverCar", "Companion name (key) from companion settings in DriverController plugin (list to occupy free seats in the vehicle)": [ "Companion1", "Companion2" ], "Engine settings": { "Engine parts level (1 - 3)": 1, "Drop the parts when destroying vehicle?": false }, "Loot container settings": { "Enable loot in vehicle container?": true, "Drop the loot when destroying the transport?": false, "Amount of slots": 1, "Name of loot set from loot settings in DriverController plugin (list loot sets for random selection)": [ "ResourcesCar" ] }, "Use Road Routes (has priority over off-road)": true, "Use Off-Road Routes (used if no road routes are available)": true, "Controller settings": { "Max speed (km/h)": 60.0, "Maximum speed when obstacles detected (km/h)": 5.0, "Chase mode settings": { "Chase attacking players?": true, "Max chase distance": 150.0, "Chase timer": 120.0 } }, "Turret Settings (will add the specified amount to each suitable module)": { "Enable Turrets on Vehicle": false, "Disable Turrets on Event End": true, "Maximum Attack Range": 50.0, "Player Damage Multiplier": 0.5, "Max turrets amount": 1, "At what percentage of the module's remaining health remove the turret installed on it": { "Min": 2.0, "Max": 5.0 } }, "Damage receive rate": 1.0, "Fuel settings": { "Enable automatic fuel refueling?": true, "Remove fuel when unlocking vehicle?": true, "Maximum fuel in vehicle": 500 }, "Vehicle headlight settings": { "Enable vehicle headlights?": true, "Use headlights only at night?": true }, "Detonator settings": { "Add C4 to the vehicle after the death of the driver (used to despawn vehicles)": true, "After how many seconds explosives will be blown up": 60.0, "Explosives position offset": { "x": 0.0, "y": 0.8, "z": 0.0 } } } ] } 📑 DriverController Configuration:
{ "Drivers settings": { "DriverBike": { "Bot health": { "Min": 100.0, "Max": 150.0 }, "Prevent attacking players first?": true, "Damage receive rate": 2.0, "Damage rate": 2.0, "Spawn bag with items instead of corpse on death?": true, "In how many seconds remove bots, after destroying the vehicle? (0 - will not remove)": 120.0, "Clothes": [ { "Item": { "Item shortname or ID": "shoes.boots", "Item skin": 0 }, "Item custom name (if not needed leave empty)": null, "Amount": 1 }, { "Item": { "Item shortname or ID": "wood.armor.pants", "Item skin": 0 }, "Item custom name (if not needed leave empty)": null, "Amount": 1 }, { "Item": { "Item shortname or ID": "pants", "Item skin": 0 }, "Item custom name (if not needed leave empty)": null, "Amount": 1 }, { "Item": { "Item shortname or ID": "wood.armor.jacket", "Item skin": 0 }, "Item custom name (if not needed leave empty)": null, "Amount": 1 }, { "Item": { "Item shortname or ID": "hoodie", "Item skin": 0 }, "Item custom name (if not needed leave empty)": null, "Amount": 1 }, { "Item": { "Item shortname or ID": "riot.helmet", "Item skin": 0 }, "Item custom name (if not needed leave empty)": null, "Amount": 1 } ], "Weapons": [ { "Item": { "Item shortname or ID": "pistol.revolver", "Item skin": 0 }, "Item custom name (if not needed leave empty)": null, "Amount": 1 } ], "Bot loot": { "Enable loot after bot's death?": true, "Amount of slots": 5, "Loot set name (key) from loot settings (you can enter many sets for random selection)": [ "ResourcesDriver" ] } }, "DriverCar": { "Bot health": { "Min": 100.0, "Max": 150.0 }, "Prevent attacking players first?": true, "Damage receive rate": 2.0, "Damage rate": 2.0, "Spawn bag with items instead of corpse on death?": true, "In how many seconds remove bots, after destroying the vehicle? (0 - will not remove)": 120.0, "Clothes": [ { "Item": { "Item shortname or ID": "hazmatsuit", "Item skin": 0 }, "Item custom name (if not needed leave empty)": null, "Amount": 1 } ], "Weapons": [ { "Item": { "Item shortname or ID": "rifle.ak", "Item skin": 0 }, "Item custom name (if not needed leave empty)": null, "Amount": 1 } ], "Bot loot": { "Enable loot after bot's death?": true, "Amount of slots": 5, "Loot set name (key) from loot settings (you can enter many sets for random selection)": [ "ResourcesDriver" ] } }, "DriverBoat": { "Bot health": { "Min": 100.0, "Max": 150.0 }, "Prevent attacking players first?": true, "Damage receive rate": 2.0, "Damage rate": 2.0, "Spawn bag with items instead of corpse on death?": true, "In how many seconds remove bots, after destroying the vehicle? (0 - will not remove)": 120.0, "Clothes": [ { "Item": { "Item shortname or ID": "hazmatsuit", "Item skin": 0 }, "Item custom name (if not needed leave empty)": null, "Amount": 1 } ], "Weapons": [ { "Item": { "Item shortname or ID": "t1_smg", "Item skin": 0 }, "Item custom name (if not needed leave empty)": null, "Amount": 1 } ], "Bot loot": { "Enable loot after bot's death?": true, "Amount of slots": 5, "Loot set name (key) from loot settings (you can enter many sets for random selection)": [ "ResourcesDriver" ] } }, "PilotHeli": { "Bot health": { "Min": 100.0, "Max": 150.0 }, "Prevent attacking players first?": true, "Damage receive rate": 2.0, "Damage rate": 2.0, "Spawn bag with items instead of corpse on death?": true, "In how many seconds remove bots, after destroying the vehicle? (0 - will not remove)": 120.0, "Clothes": [ { "Item": { "Item shortname or ID": "jumpsuit.suit.blue", "Item skin": 0 }, "Item custom name (if not needed leave empty)": null, "Amount": 1 } ], "Weapons": [ { "Item": { "Item shortname or ID": "rifle.ak", "Item skin": 0 }, "Item custom name (if not needed leave empty)": null, "Amount": 1 } ], "Bot loot": { "Enable loot after bot's death?": true, "Amount of slots": 5, "Loot set name (key) from loot settings (you can enter many sets for random selection)": [ "ResourcesDriver" ] } } }, "Companion settings": { "Companion1": { "Bot health": { "Min": 100.0, "Max": 150.0 }, "Prevent attacking players first?": true, "Damage receive rate": 2.0, "Damage rate": 2.0, "Spawn bag with items instead of corpse on death?": true, "In how many seconds remove bots, after destroying the vehicle? (0 - will not remove)": 120.0, "Clothes": [ { "Item": { "Item shortname or ID": "hazmatsuit_scientist_nvgm", "Item skin": 0 }, "Item custom name (if not needed leave empty)": null, "Amount": 1 } ], "Weapons": [ { "Item": { "Item shortname or ID": "rifle.ak", "Item skin": 0 }, "Item custom name (if not needed leave empty)": null, "Amount": 1 } ], "Bot loot": { "Enable loot after bot's death?": true, "Amount of slots": 5, "Loot set name (key) from loot settings (you can enter many sets for random selection)": [ "ResourcesCompanion", "WeaponsCompanion" ] } }, "Companion2": { "Bot health": { "Min": 100.0, "Max": 150.0 }, "Prevent attacking players first?": true, "Damage receive rate": 2.0, "Damage rate": 2.0, "Spawn bag with items instead of corpse on death?": true, "In how many seconds remove bots, after destroying the vehicle? (0 - will not remove)": 120.0, "Clothes": [ { "Item": { "Item shortname or ID": "hazmatsuit.arcticsuit", "Item skin": 0 }, "Item custom name (if not needed leave empty)": null, "Amount": 1 } ], "Weapons": [ { "Item": { "Item shortname or ID": "rifle.ak", "Item skin": 0 }, "Item custom name (if not needed leave empty)": null, "Amount": 1 } ], "Bot loot": { "Enable loot after bot's death?": true, "Amount of slots": 5, "Loot set name (key) from loot settings (you can enter many sets for random selection)": [ "ResourcesCompanion", "WeaponsCompanion" ] } }, "Companion3": { "Bot health": { "Min": 100.0, "Max": 150.0 }, "Prevent attacking players first?": true, "Damage receive rate": 2.0, "Damage rate": 2.0, "Spawn bag with items instead of corpse on death?": true, "In how many seconds remove bots, after destroying the vehicle? (0 - will not remove)": 120.0, "Clothes": [ { "Item": { "Item shortname or ID": "hazmatsuit.lumberjack", "Item skin": 0 }, "Item custom name (if not needed leave empty)": null, "Amount": 1 } ], "Weapons": [ { "Item": { "Item shortname or ID": "rifle.ak", "Item skin": 0 }, "Item custom name (if not needed leave empty)": null, "Amount": 1 } ], "Bot loot": { "Enable loot after bot's death?": true, "Amount of slots": 5, "Loot set name (key) from loot settings (you can enter many sets for random selection)": [ "ResourcesCompanion", "WeaponsCompanion" ] } }, "Companion4": { "Bot health": { "Min": 100.0, "Max": 150.0 }, "Prevent attacking players first?": true, "Damage receive rate": 2.0, "Damage rate": 2.0, "Spawn bag with items instead of corpse on death?": true, "In how many seconds remove bots, after destroying the vehicle? (0 - will not remove)": 120.0, "Clothes": [ { "Item": { "Item shortname or ID": "hazmatsuit.spacesuit", "Item skin": 0 }, "Item custom name (if not needed leave empty)": null, "Amount": 1 } ], "Weapons": [ { "Item": { "Item shortname or ID": "rifle.ak", "Item skin": 0 }, "Item custom name (if not needed leave empty)": null, "Amount": 1 } ], "Bot loot": { "Enable loot after bot's death?": true, "Amount of slots": 5, "Loot set name (key) from loot settings (you can enter many sets for random selection)": [ "ResourcesCompanion", "WeaponsCompanion" ] } } }, "Loot settings": { "ResourcesBike": [ { "Item": { "Item shortname or ID": "wood", "Item skin": 0 }, "Item custom name (if not needed leave empty)": null, "Spawn chance (0-100%)": { "Min": 100.0, "Max": 100.0 }, "Amount": { "Min": 5000.0, "Max": 50000.0 } }, { "Item": { "Item shortname or ID": "stones", "Item skin": 0 }, "Item custom name (if not needed leave empty)": null, "Spawn chance (0-100%)": { "Min": 100.0, "Max": 100.0 }, "Amount": { "Min": 1000.0, "Max": 10000.0 } } ], "ResourcesCar": [ { "Item": { "Item shortname or ID": "wood", "Item skin": 0 }, "Item custom name (if not needed leave empty)": null, "Spawn chance (0-100%)": { "Min": 100.0, "Max": 100.0 }, "Amount": { "Min": 5000.0, "Max": 50000.0 } }, { "Item": { "Item shortname or ID": "stones", "Item skin": 0 }, "Item custom name (if not needed leave empty)": null, "Spawn chance (0-100%)": { "Min": 100.0, "Max": 100.0 }, "Amount": { "Min": 1000.0, "Max": 10000.0 } } ], "ResourcesBoat": [ { "Item": { "Item shortname or ID": "wood", "Item skin": 0 }, "Item custom name (if not needed leave empty)": null, "Spawn chance (0-100%)": { "Min": 100.0, "Max": 100.0 }, "Amount": { "Min": 5000.0, "Max": 50000.0 } }, { "Item": { "Item shortname or ID": "stones", "Item skin": 0 }, "Item custom name (if not needed leave empty)": null, "Spawn chance (0-100%)": { "Min": 100.0, "Max": 100.0 }, "Amount": { "Min": 1000.0, "Max": 10000.0 } } ], "ResourcesHeli": [ { "Item": { "Item shortname or ID": "wood", "Item skin": 0 }, "Item custom name (if not needed leave empty)": null, "Spawn chance (0-100%)": { "Min": 100.0, "Max": 100.0 }, "Amount": { "Min": 5000.0, "Max": 50000.0 } }, { "Item": { "Item shortname or ID": "stones", "Item skin": 0 }, "Item custom name (if not needed leave empty)": null, "Spawn chance (0-100%)": { "Min": 100.0, "Max": 100.0 }, "Amount": { "Min": 1000.0, "Max": 10000.0 } } ], "ResourcesDriver": [ { "Item": { "Item shortname or ID": "wood", "Item skin": 0 }, "Item custom name (if not needed leave empty)": null, "Spawn chance (0-100%)": { "Min": 100.0, "Max": 100.0 }, "Amount": { "Min": 1000.0, "Max": 10000.0 } }, { "Item": { "Item shortname or ID": "stones", "Item skin": 0 }, "Item custom name (if not needed leave empty)": null, "Spawn chance (0-100%)": { "Min": 100.0, "Max": 100.0 }, "Amount": { "Min": 100.0, "Max": 1000.0 } } ], "ResourcesCompanion": [ { "Item": { "Item shortname or ID": "wood", "Item skin": 0 }, "Item custom name (if not needed leave empty)": null, "Spawn chance (0-100%)": { "Min": 100.0, "Max": 100.0 }, "Amount": { "Min": 100.0, "Max": 1000.0 } }, { "Item": { "Item shortname or ID": "stones", "Item skin": 0 }, "Item custom name (if not needed leave empty)": null, "Spawn chance (0-100%)": { "Min": 100.0, "Max": 100.0 }, "Amount": { "Min": 10.0, "Max": 100.0 } } ], "WeaponsCompanion": [ { "Item": { "Item shortname or ID": "rifle.ak", "Item skin": 0 }, "Item custom name (if not needed leave empty)": null, "Spawn chance (0-100%)": { "Min": 40.0, "Max": 80.0 }, "Amount": { "Min": 1.0, "Max": 1.0 } } ] } }
-
$39.99
Convoy
Set your server apart with a roaming mobile event that has nearly endless configuration options! Configure the loot truck as well as the Convoy of protection vehicles ranging from sedans, module cars, Bradley tanks, motorbikes, vendor trucks, to a patrol helicopter! The plugin runs on custom and procedural generated maps, can use custom routes or let the plugin find a random route based on your configuration.
You can make yours an aggressive or a peaceful Convoy, who shoots first? You can set all kinds of parameters regarding the many pieces of the event, how to beat it, whether destroying the loot truck destroys the loot or not for example. There are many compatible plugins like TruePVE, GUIAnnouncements, Notify, DiscordMessages, and RustCord to name a few. The plugin has a built in UI that will give you important information about the event as you are inside it's zone. Check the map to see the location of the event as a marker and even see the timer on the event! All of the ground vehicles are driven and filled with NPCs. Every vehicle, the NPCs, and the loot as well as all timers can be configured to suit your server. A PvP zone can be created within the event area for those of you who use TruePVE to control damage on your servers. The limits are nearly endless!
If you have some players on your server that you want to really send everything you have at, this is the plugin for you. Watch players crap their pants when they first encounter a full Convoy with multiple tanks and a Patrol Heli all attacking at once. Sit back and delight in their fear as all of the vehicles empty their occupants and NPCs swarm them mercilessly!
Required Dependency (must install this free plugin)
NpcSpawn – link is included and can be found in the ReadMe file included with download
Chat commands (admin only)
/convoystart - launches the event using a random preset based on your configuration /convoystart PresetName - add the name of a preset from the configuration to launch a specific preset /convoystop - stops the event /convoyroadblock - the event will not be held on the road where you are standing (clear the Blocked roads section of config when you change maps) /convoypathstart - stand at starting point and enter command to start recording a custom route /convoypathsave RoutePresetName - to save a custom route (enter anything you'd like in place of RoutePresetName) multiple routes can be added to one route preset, one will be selected at random in this case /convoypathcancel - to reset the route
Console commands (RCON only)
convoystart - launches the event using a random preset based on your configuration convoystart PresetName - add the name of a preset from the configuration to launch a specific preset convoystop - stops the event
Plugin Config
en – example of plugin configuration in English ru – example of plugin configuration in Russian
API
bool IsConvoyVehicle(BaseEntity entity) bool IsConvoyCrate(BaseEntity crate) bool IsConvoyHeli(BaseHelicopter baseHelicopter) bool IsConvoyNpc(ScientistNPC scientistNPC) Hooks
void OnConvoyStart() - яalled when a convoy appears void OnConvoyStop() - яalled when a convoy disappears void OnPlayerEnterConvoy(BasePlayer player) - яalled when a player enters the event area void OnPlayerExitConvoy(BasePlayer player) - яalled when the player leaves the event area void OnConvoyEventWin(ulong userId) - called at the end of the event and informs about its winner void OnConvoyStartMoving(Vector3 convoyPosition) void OnConvoyStopMoving(Vector3 convoyPosition) void OnConvoyAttacked(BasePlayer player, Vector3 convoyPosition)
Check out the rest of my work: Adem's Codefling Library
You can reach out to me in Discord: Adem's Discord Profile
Thanks to Jbird for writing, translation, & support: Jbird's Discord Profile
Join the Mad Mappers Discord!
-

$5.00
UAV Drones
Adds UAV Function to in game Drones
All that needs to be done is set Drone Identifier to " UAV" and then something unique ex. "UAVnoob" (Can be Changed via config)
remember you don't want others to control your drone
NOTE: all other RemoteConnections with the identifier starting with your prefix will be removed when leaving computerstation
so when you open ComputerStation , all your teammates(and your own) drones with the UAV in identifier will be displayed,
and when you have the perms the drone will ping all players near it(other players red and teammates green,NPC purple) 😄
UI to see Direction and buttons to toggle pings
Remote UAV . you need a RFtransmitter and a Computer station in inventory
then setting RF to FREQ 9992 (to be config soon) will remote deploy computerstation.
Permissions
UAVDrone.silent - Players with this permission can use function to not alert pinged players
UAVDrone.admin - Players with this permission dont show up on pings
UAVDrone.use - Players with this permission can use UAV ability
UAVDrone.npc - allows players to ping Scientists
CONFIG
{ "CustomSoundPrefab": "assets/bundled/prefabs/fx/invite_notice.prefab", "DroneRange": 5000.0, "IdentifierPrefix": "UAV", "Pingfrequency": 9.0, "PingPlayersinsidebases": true, "PingRange": 150.0, "PlayPingSound": true, "UseCustomSound": false, "UsePluginDroneLightSystem": true }
LANGUAGE FILE
{ "Pinged": "You are being <color=red>Pinged</color> by a UAV Drone!!!!" }
Videos
Preview
-
$29.95$21.95Shop
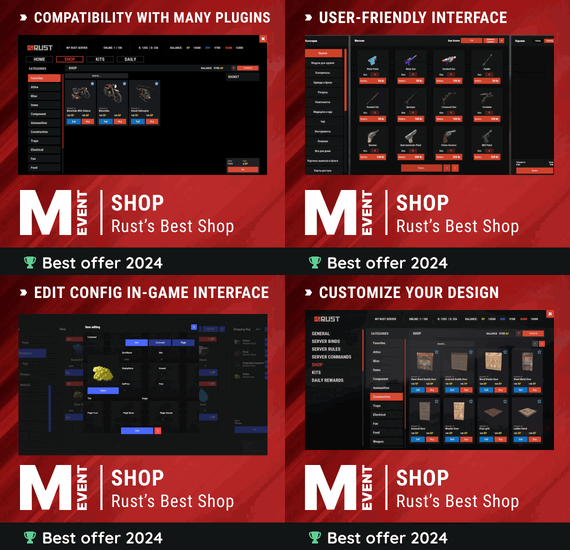
Enjoy a highly customizable Shop that can be configured in game! Use NPCs as shopkeepers, and set up a shop with ease using the game interface to add, edit, or remove items on the fly!
⭐ Features of Shop
Beautiful user interface with multiple templates (Fullscreen, In-Menu V1/V2/V4) Shopping Basket - add multiple items to cart and purchase them all at once Search functionality - search for items by name across all categories Pagination - efficient item browsing with page-by-page navigation Discount system (by permissions) with per-item custom discounts Automatic shop filling (+ the plugin has support for the ItemCostCalculator plugin) Selling items (players can sell items to the store and receive money for it) Sell containers configuration - choose which containers (main, belt) players can sell from Blocked skins - prevent selling of specific item skins High performance with optimized item loading Adding/editing/removing items IN GAME with visual editor Supports NPC shops (HumanNPC integration) Supports Custom Vending Machines Supports NoEscape plugin integration Supports Duel/Duelist - blocks shop access during duels Convert from ServerRewards Favorite items system - players can mark items as favorites Buy Again feature - quick repurchase of previously bought items By default, the plugin has English, Russian and Chinese translations LangAPI integration for custom translations Transfer money between players directly in the plugin (including offline players option) Shop allows you to use multiple economy plugins at once (players can choose what they want to pay with) For each item, you can choose which payment methods are available and how much they will cost, based on the selected method Cooldown system - per-item buy/sell cooldowns with per-permission overrides Wipe cooldown - block items for purchase/sale after server wipe Respawn cooldown - prevent shop access immediately after respawn Buy/Sell limits - lifetime and daily limits per permission Max buy/sell amount - limit items per transaction Force buy - fast purchase without confirmation dialogs Plant genes configuration for plant items Weapon configuration - spawn weapons with ammo and attachments Content system - configure container contents (liquid, weapon mods, etc.) Customizable UI - full color customization and formatting options Offline Image Mode - use local images instead of downloading from internet Image loading on login - preload images when players connect Console and file logging - comprehensive logging system ServerPanel integration - add Shop to ServerPanel menu Notify/UINotify integration for notifications Auto-wipe settings - automatically reset cooldowns, limits, and player data on wipe Discord Logging - Track all purchases, sales, and transfers directly in your Discord server via webhooks with customizable embeds API methods for other plugins to interact with Shop
🎮 Commands
shop - open shop interface shop.install – starts the shop installation process shop.refill <recovery_rate> - refill shop again
recoveryRate: A value between 0 and 1 that determines the multiplier for the cost of selling items. For example, shop.refill 0.5 means that items will have a sale cost of 50% of their purchase cost. shop.convert.sr [clear] - convert items from ServerRewards to Shop. The option clear means clearing Shop items before converting shop.setvm [categories: cat1 cat2 ...] - add custom VM in config shop.setnpc [categories: cat1 cat2 ...] - add NPC in config shop.remove all - a console command to remove all items and categories from the plugin shop.remove item [category name/all] - a console command to remove an item (or all items) shop.remove category [category name/all] - a console command to remove a category (or all categories) shop.fill.icc [all/buy/sell] - a console command for updating prices of items in the store using ItemCostCalculator. all - updates both Price and SellPrice, buy - updates Price, sell - updates SellPrice shop.convert.from.1.2.26 – command to convert Shop plugin version 1.2.26 to version 1.3.0+ shop.reset – resets store data, including templates, configurations, and items. shop.reset template – resets the store interface template data. shop.reset config – resets store configuration data. shop.reset items – resets store items data. shop.reset full – completely resets all store data (templates, configurations and items). shop.manage – used to manage the Shop plugin. shop.manage economy list – displays a list of all available economic systems in the plugin. shop.manage economy set <economy_ID> <name> – sets the selected economic system by plugin ID and name. The command updates the corresponding economic system on the server and saves the changes in the configuration. FOR EXAMPLE:
shop.manage economy set 0 Economics – sets the main economy plugin to "Economics".
shop.manage economy set 1 ServerRewards – sets the additional economy system with ID 1 to "ServerRewards". shop.wipe – manually trigger wipe (resets cooldowns, limits, and player data) shop.change – change item category (used in editor) shop.item – console command for item actions
🛡️ Permissions
shop.setvm - for command "shop.setvm" shop.setnpc - for command "shop.setnpc" shop.free - for free item purchases shop.admin - admin permission shop.bypass.dlc - allows bypassing Facepunch ToS item restrictions (WARNING: your server may be banned for this)
📈 API Methods
The Shop plugin provides API methods for other plugins to interact with it:
API_OpenPlugin(BasePlayer player) – opens the shop UI for a player. Returns empty string if failed, or UI data if successful. API_GetShopPlayerSelectedEconomy(ulong playerID) – returns the economy ID (0 = main, 1+ = additional) that the player has selected for shopping. Note: Other plugins can call these methods using Shop.Call("API_MethodName", ...) syntax.
⚖️ Sort Types
None Name Amount PriceDecrease PriceIncrease
🧬 Category Types
None – normal category for items Favorite – category for favorite items Hidden – hidden category, available only in NPC stores or Vending Machines
🎥 Video
P.S. Video of the old version, video for the V2+ version is now in development
🖼️ Showcase
Full screen Templates
Template OLD STYLE
Template NEW RUST
In-Menu Templates
Template V1 (V1.1)
Template V1 (V1.1) with BASKET
Template V2
Template V2 with BASKET
Template V4
Template V4 with BASKET
Installer
Editor
⚙️ Web Config Editor
Easily manage your Shop settings with our web-based configuration editor. This tool allows you to adjust plugin configurations through a user-friendly interface, eliminating the need to manually edit files on your server.
P.S. To access the web config editor, you must be part of the "Shop" group in our Discord server. Join us at https://discord.gg/mevent and request the group to get started.
📢 Discord Logging
Track all shop activity via Discord webhooks: purchases, sales, and money transfers.
🧪 TEST SERVER
Join our test server to view and experience all our unique features yourself!
Copy the IP Address below to start playing!
connect 194.147.90.239:28015
📚 FAQ
Q: I get the message "The plugin does not work correctly, contact the administrator!”. What should I do?
A: This means that your plugin is not installed. To install the plugin, use the command "/shop.install”. You need to have "shop.admin” permission to access this command.
Q: Where can I see an example of a config?
A: Config
Q: How to use BankSystem to store the economy
A:
"Economy": { "Type (Plugin/Item)": "Plugin", "Plugin name": "BankSystem", "Balance add hook": "Deposit", "Balance remove hook": "Withdraw", "Balance show hook": "Balance", "ShortName": "", "Display Name (empty - default)": "", "Skin": 0, "Lang Key (for Title)": "LangTitle", "Lang Key (for Balance)": "BalanceTitle" }, Q: How to use ServerRewards to store the economy
A:
"Economy": { "Type (Plugin/Item)": "Plugin", "Plugin name": "ServerRewards", "Balance add hook": "AddPoints", "Balance remove hook": "TakePoints", "Balance show hook": "CheckPoints", "ShortName": "", "Display Name (empty - default)": "", "Skin": 0, "Lang Key (for Title)": "LangTitle", "Lang Key (for Balance)": "BalanceTitle" }, Q: How to use Economics to store the economy
A:
"Economy": { "Type (Plugin/Item)": "Plugin", "Plugin name": "Economics", "Balance add hook": "Deposit", "Balance remove hook": "Withdraw", "Balance show hook": "Balance", "ShortName": "", "Display Name (empty - default)": "", "Skin": 0, "Lang Key (for Title)": "LangTitle", "Lang Key (for Balance)": "BalanceTitle" }, Q: How to use IQEconomic to store the economy
A:
"Economy": { "Type (Plugin/Item)": "Plugin", "Plugin name": "IQEconomic", "Balance add hook": "API_SET_BALANCE", "Balance remove hook": "API_GET_BALANCE", "Balance show hook": "API_REMOVE_BALANCE", "ShortName": "", "Display Name (empty - default)": "", "Skin": 0, "Lang Key (for Title)": "LangTitle", "Lang Key (for Balance)": "BalanceTitle" }, Q: How to use scrap to pay for items
A:
"Economy": { "Type (Plugin/Item)": "Item", "Plugin name": "", "Balance add hook": "", "Balance remove hook": "", "Balance show hook": "", "ShortName": "scrap", "Display Name (empty - default)": "", "Skin": 0, "Lang Key (for Title)": "LangTitle", "Lang Key (for Balance)": "BalanceTitle" }, Q: How to add KIT as shop item
A: https://pastebin.com/4szBQCgz
Q: How to add Command as shop item
A: https://pastebin.com/bcCkzBEL
Q: How do I make a weapon spawn with ammo in it?
A: You need to configure the "Weapon" section in the item config:
"Weapon": { "Enabled": true, "Ammo Type": "ammo.rifle.explosive", "Ammo Amount": 128 } Q: How do I make items spawn some content (liquid, weapon modifications)?
A: You need to configure the "Content" section in the item config:
"Content": { "Enabled": true, "Contents": [ { "ShortName": "weapon.mod.lasersight", "Condition": 100.0, "Amount": 1, "Position": -1 } ] }, Q: How to turn off the sell feature?
A: You need to turn off "Enable item selling” in the config, or do it in the item setting in the game.
"Enable item selling?": false,
Q: How to use the ItemCostCalculator with Shop?
A: You need to use command "shop.refill" (command to refill the Shop)
Q: What should be the size of images for item icons?
A: Typically, the image dimensions for item icons are 512x512 pixels, but any square image can suffice.
Q: I get the error "UI is unavailable for player. Reason: Menu UI is not initialized". How to fix it?
A: This error occurs when the interface template is not installed or configured. Follow these steps:
1. Reset the template using the command: shop.reset template (use only template to avoid data loss).
2. Install the interface via shop.install in the game (to visually select a template) or through the console.
Note: Ensure you have the shop.admin permission to execute these commands.
Q: How do I add Shop to the ServerPanel menu?
A: Follow these simple steps:
1. Open ServerPanel menu in-game and click "+ADD CATEGORY" button
2. Set these exact parameters:
Type: Plugin Plugin Name: Shop Plugin Hook: API_OpenPlugin 3. Click "SAVE" button to create the category
4. Reset Shop template and install it:
Type in console: shop.reset template (IMPORTANT: use only "template"!) Then type: shop.install Note: If Shop doesn't appear in ServerPanel menu, make sure both plugins are loaded and you typed the parameters exactly as shown above.
Q: I see black images with Rust logo or get error 429 when loading images. What should I do?
A: These issues occur when there are problems downloading images from the internet. The Shop plugin sends images to ImageLibrary but is not responsible for the downloading process itself. Error 429 typically occurs due to rate limits imposed by image hosting services like Imgur (see HTTP 429 documentation for more details). To fix this, enable Offline Image Mode which will use local images instead:
Enable the mode in config: Open "oxide/config/Shop.json" (or "carbon/config/Shop.json" for Carbon) Set "Enable Offline Image Mode": true Set up the images: Create folder "TheMevent" in "oxide/data" (or "carbon/data" for Carbon) Download PluginsStorage (click "CODE" → "Download ZIP") Extract the ZIP and copy all contents to the "TheMevent" folder Reload the plugin: Type o.reload Shop (Oxide) or c.reload Shop (Carbon) Note: If you want to add your own custom images, place them in the "TheMevent" folder and reference them with the "TheMevent/" prefix. For example: "TheMevent/Icon1.png", "TheMevent/MyCustomIcon.jpg", etc.
Q: What placeholders are available for commands and what do they do?
A: You can use these placeholders in shop commands and they will be automatically replaced when a player purchases a command item:
%steamid% - Replaced with the player's Steam ID (e.g., "76561198000000000") %username% - Replaced with the player's display name (e.g., "PlayerName") %player.x% - Replaced with the player's X coordinate position %player.y% - Replaced with the player's Y coordinate position %player.z% - Replaced with the player's Z coordinate position Example usage in shop commands:
"Command (%steamid%)": "say Welcome %username%!|teleport %steamid% %player.x% %player.y% %player.z%" Note: Multiple commands can be separated by the "|" character, and they will be executed in sequence when the item is purchased.
Q: How to set different prices for different currencies (RP and balance)?
A: You can configure separate currency prices for each item. Edit the file oxide/data/Shop/Shops/Default.json and find the item you want to modify. In the "Currencies" section, set different prices for each economy:
"Currencies": { "Enabled": true, "Currencies": { "0": {"Price": 1000}, "1": {"Price": 500} } } This means players pay 1000 from their main balance (Economics) or 500 RP from their ServerRewards balance. Economy ID 0 = main economy, ID 1 = ServerRewards.
Q: How to create a shop using HumanNPC plugin and set specific categories?
A: To create a shop with HumanNPC, follow these steps:
Create an NPC using HumanNPC plugin Get the NPC ID (you can find it in the HumanNPC config or use the command humannpc.list) Use the Shop command to add the NPC: shop.setnpc [categories: cat1 cat2 ...] Example:
shop.setnpc categories: Weapon Ammunition Tools - adds the NPC with Weapon, Ammunition, and Tools categories
shop.setnpc categories: * - adds the NPC with all available categories
Note: You need the shop.setnpc permission to use this command. Make sure both HumanNPC and Shop plugins are loaded on your server.
Q: How to add Custom Vending Machines to Shop plugin?
A: To add Custom Vending Machines to Shop, follow these steps:
Place a Custom Vending Machine in your world Look at the vending machine and use the command: shop.setvm [categories: cat1 cat2 ...] Example:
shop.setvm categories: Weapon Ammunition - adds the vending machine with Weapon and Ammunition categories
shop.setvm categories: * - adds the vending machine with all available categories
Note: You need the shop.setvm permission to use this command. The vending machine will be automatically added to the Shop configuration.
Q: How does the Shopping Basket feature work?
A: The Shopping Basket allows players to add multiple items to a cart before purchasing. Players can add items to the basket, review their selection, and purchase everything at once. The basket shows the total cost and allows players to remove items before checkout. This feature must be enabled in the template settings.
Q: How does the Search functionality work?
A: The Search feature allows players to search for items by name across all categories. Simply type in the search box and the shop will filter items matching your query. Search works across all enabled categories and respects permission settings. The search feature can be enabled/disabled in the template configuration.
Q: What are Wipe Cooldown and Respawn Cooldown?
A: These are time-based restrictions:
Wipe Cooldown: Blocks items from being bought/sold for a specified time after a server wipe. This is useful for preventing powerful items from being purchased immediately after wipe. Configure in config: "Wipe Cooldown": true and "Wipe Cooldown Timer": 3600 (seconds). Respawn Cooldown: Prevents players from opening the shop immediately after respawning. Helps prevent abuse. Configure in config: "Respawn Cooldown": true and "Respawn Cooldown Timer": 60 (seconds). Q: How do Daily and Lifetime Limits work?
A: Limits control how many times players can buy/sell items:
Lifetime Limits: Total number of times a player can buy/sell an item across their entire account. Set to 0 for unlimited. Daily Limits: Maximum number of times per day a player can buy/sell an item. Resets daily. Set to 0 for unlimited. Limits are per-permission, so you can set different limits for VIP players, regular players, etc. The plugin uses the highest limit among all permissions the player has. Q: What is the "Buy Again" feature?
A: Buy Again allows players to quickly repurchase items they have bought before. This feature shows a history button in the shop UI (if enabled) and requires a permission. To enable, set "Buy Again Settings": {"Enabled": true, "Permission": "shop.buyagain"} in the config.
Q: How do I configure blocked skins for selling?
A: You can prevent players from selling specific item skins. In the config, add entries to "Blocked skins for sell":
"Blocked skins for sell": { "rifle.ak": [52, 25], "pistol.m92": [100, 200] } Q: How do I configure which containers players can sell from?
A: In the config, set "Settings available containers for selling item":
"Settings available containers for selling item": { "Enabled": true, "Containers": ["main", "belt"] } Available container names: "main" (inventory), "belt" (hotbar), "wear" (clothing), etc.
Q: What are Auto-Wipe Settings?
A: Auto-Wipe Settings automatically reset certain data when you run the shop.wipe command. Configure in config:
"Auto-Wipe Settings": { "Cooldown": true, "Players": true, "Limits": true } Cooldown: Resets all item cooldowns Players: Resets all player data (favorites, economy selection, etc.) Limits: Resets all buy/sell limits Q: How do I customize price formatting?
A: In the config, set "Formatting Settings" to control how prices are displayed:
"Formatting Settings": { "Buy Price Format": "G", "Sell Price Format": "G", "Shopping Bag Cost Format": "G", "Balance Format": "G" } Format options: "G" (general), "N" (number with separators), "C" (currency), "F" (fixed-point), etc. See .NET number formatting for all options.
Q: How do I enable transfers to offline players?
A: In the config, set "Allow money transfers to offline players?": true. By default, this is disabled for security reasons.
Q: How do I configure Duel/Duelist integration?
A: To block shop access during duels, set "Blocking the opening in duels?": true in the config. Make sure you have the Duel or Duelist plugin loaded.
Q: What do all shop item settings mean and how should I configure them?
A: Below is a short explanation of the most important item fields and how they affect the plugin.
Type – what this entry does: Item (gives an in-game item), Command (runs server commands), Plugin (calls another plugin hook), Kit (gives a kit). ID – unique numeric ID of the item inside Shop. Used internally (for logs, favorites, editor); normally you don’t change it manually. Image – custom UI icon key. If empty, Shop will try to use the item icon found by ShortName. Permission – Oxide/Carbon permission required to see and use this item. Leave empty to make the item available to everyone, or set e.g. shop.vip for VIP‑only items. Title – custom title shown in the UI. If empty, the plugin will try to use DisplayName, then the in‑game display name of the item, or fall back to an empty string. Description – additional text shown in the item window. Optional, purely visual. Command (%steamid%) – used when Type = Command. The plugin will execute this command on the server. You can use placeholders like %steamid%, %username%, %player.x%, %player.y%, %player.z%. Each purchase can run multiple commands (split internally by |). Kit – kit name for Type = Kit. The plugin will give a kit with this name when the player buys the item. Plugin – used for Type = Plugin. Contains plugin name, hook name and amount. When the item is purchased, the specified hook will be called in the target plugin. DisplayName (empty – default) – overrides the in‑game item name shown to the player (for Type = Item). If empty, the plugin uses the original item display name (optionally via Lang API). ShortName – shortname of the item (e.g. rifle.ak). This is required for Type = Item; it is used to find ItemDefinition, icon, stack size, etc. Skin – workshop skin ID for the item. Only used when Type = Item. Is Blueprint – if enabled, Shop will give the item as a blueprint instead of the regular item. Amount – how many items are given/sold per one purchase. For blueprints this is how many separate blueprint items are created. Enable item buying? (CanBuy) – if disabled, the item cannot be bought (only sold, if selling is enabled). Price – default purchase price. Can be overridden per‑economy in Currencies – if a currency is configured for buying, its price will be used instead of this value. Enable item selling? (CanSell) – if disabled, players cannot sell this item back to the shop. Sell Price – default sell price. Can also be overridden in Currencies for selling. Buy Cooldown / Sell Cooldown – base cooldown in seconds between purchases/sales of this item. Can be overridden by per‑permission cooldowns below. Buy Cooldowns / Sell Cooldowns – per‑permission cooldowns. Keys are permission names (e.g. shop.vip), values are cooldown seconds. The plugin uses the lowest cooldown among permissions that the player has. Use custom discount? – if enabled, the item will use its own Discount map instead of the global discount configuration. Discount (%) – per‑permission discount percentages for this item (only if custom discount is enabled). The highest discount from permissions that the player has will be applied. Sell Limits / Buy Limits – global lifetime limits per permission. A value of 0 means “no limit”. The plugin selects the highest limit among permissions the player has. Daily Buy Limits / Daily Sell Limits – per‑day limits (reset by the plugin’s daily logic). 0 means “no daily limit”. Max Buy Amount / Max Sell Amount – maximum number of items that can be bought/sold in a single transaction (0 disables this limit). Force Buy – if enabled, the item will use fast purchase flow (without extra confirmation windows, depending on UI settings). Prohibit splitting item into stacks? – if enabled, the plugin will try to give the item in a single stack instead of splitting it into multiple stacks, when possible. Purchase/Sale block duration after wipe – time (in seconds) after a wipe during which this item cannot be bought/sold. Useful for limiting powerful items early in the wipe. Localization – per‑language messages for the item title. If enabled and a translation exists for the player’s language, it will override the normal title. Content – configuration of contents for containers (e.g. boxes, weapons with attachments, etc.). You can add inner items (shortname, amount, condition, position). Weapon – additional settings for weapons (ammo type, ammo amount, etc.). Applied when the item is created. Genes – plant gene configuration. If enabled, the plugin will set specified genes on the created item. Currencies – per‑economy price configuration. You can set different prices for each enabled economy plugin (by economy ID) for both buying and selling. If a currency is configured and enabled for the player’s selected economy, its price takes priority over the default Price/Sell Price. Q: What do shop category settings mean and how should I configure them?
A: Categories group your shop items and control how they are shown, sorted and filtered for players.
Enabled – turns this category on or off. If disabled, the category and all its items will not appear in the shop UI at all. Category Type – controls special behavior of the category: None – a normal category that shows the items you added to Items. Favorite – a virtual category that shows each player’s favorite items (based on their own favorites list). Items here are taken from other categories the player marked as favorite. Hidden – a hidden category. It is stored in data and can be used for management, but is not shown in the normal category list in UI. Title – the name of the category displayed in the UI. If Localization is enabled and contains a translation for the player’s language, that localized text will be shown instead of this value. Permission – permission required to see and use this category. If you leave it empty, all players can see the category (subject to item‑level rules). If you set e.g. shop.category.vip, only players with that permission will see this category in the shop. Sort Type – how items inside the category are sorted: None – items are shown in the order they are stored/edited. Name – items are sorted alphabetically by their PublicTitle (what the player sees). Amount – items are sorted by Amount (stack size) in ascending order. PriceIncrease – items are sorted by price from cheaper to more expensive. PriceDecrease – items are sorted by price from more expensive to cheaper. Sorting is applied every time the category items are requested. Items – the list of ShopItem entries that belong to this category. For normal categories (Type = None/Hidden) this is what will be displayed in the item grid. For Favorite categories this list is not used for display – the plugin uses the player’s favorites instead. Localization – optional localized title for the category. When enabled, the plugin will try to show a translated title based on the player’s language. If no translation is found, it falls back to the Title field. How visibility and filtering work – when the shop builds a category: For normal categories, only items that are available for the player (permission, currencies, buy/sell rules, etc.) are included. Skip/take pagination is applied on top of that filtered list to show items page by page. For favorite categories, the plugin takes the player’s favorite items, applies sorting, and displays them in this special category. Reordering categories and items – categories and items can be moved up/down (or left/right) in the in‑game editor. This changes the order in which categories are shown in the UI and the default order of items when Sort Type = None. Q: How do I enable and use ADMIN MODE?
A: ADMIN MODE is a visual in-game editor that allows you to manage your shop without editing files manually.
Step 1: Enable ADMIN MODE
Ensure you have the shop.admin permission Open shop with /shop command Click the "ADMIN MODE" button in the header (shows "■" when active) Step 2: Create/Edit Categories
To create a new category:
With ADMIN MODE enabled, click the "+" button in categories list Fill in category details (Title, Enabled, Type, Permission, Sort Type) Click "SAVE" To edit an existing category:
Click the "Edit" button (pencil icon) next to the category Modify settings Click "SAVE" or "CANCEL" Step 3: Create/Edit Items
To create a new item:
Open the target category Click "+ADD ITEM" button Select item from the selection panel Configure all item properties (price, amount, permissions, etc.) Click "SAVE" To edit an existing item:
Click the "Edit" button on the item Modify properties Click "SAVE" or "CANCEL" Additional ADMIN MODE Features:
Use ↑↓ arrows to reorder categories Use ←→ arrows to reorder items within categories Use "DELETE" button in editor to remove categories/items All changes save automatically - no manual file editing needed Q: Where are shop files stored and what do they contain?
A: Shop plugin data is organized in the following structure:
📁 Configuration (oxide/config/Shop.json or carbon/config/Shop.json)
Plugin settings (permissions, commands, economy configuration) Notification settings Discord logging configuration Global plugin options 📁 Shop Data (oxide/data/Shop/Shops/Default.json or carbon/data/Shop/Shops/Default.json)
This is the main shop inventory file All categories and their settings All items with prices, permissions, cooldowns, limits Item configurations (weapons, content, currencies, etc.) Edited through ADMIN MODE or manually 📁 UI Template (oxide/data/Shop/UI.json or carbon/data/Shop/UI.json)
Interface template configuration Colors, sizes, positions Display settings Reset with: shop.reset template then shop.install 📁 Player Data (oxide/data/Shop/Players/ or carbon/data/Shop/Players/)
Individual player files (one per player) -
$19.95$15.95Skip Night
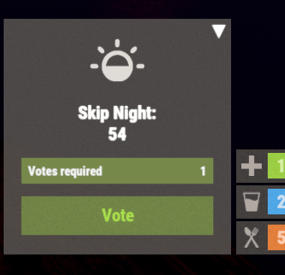
The best plugin that allows you to skip the night on the server. In addition to instant night skipping, you can use night acceleration. You can turn on white nights (under the full moon). Your players will love it!
Features:
Beautiful interface Voting is automatic (at the specified time in the config, without a command) Easy customization (time settings, text, interface, colors, etc.) Speeding up the day Speeding up the night White Nights (Full Moon)
Commands
sn.admin start_manually – Start voting manually
Permissions
skipnight.admin - for command "sn.admin"
Video:
FAQ:
Where can I ask questions/get help quickly? My Discord: Mevent#4546
How do I turn on the full moon? 1. Enable nights with a full moon in the config.
"Night with a full moon": true, 2. Configure the dates of the full moon in the config (you can get them from https://www.timeanddate.com/moon/phases/usa/new-york?year=2024)
"Full Moon Dates": [ "2024-01-25T00:00:00", "2024-02-24T00:00:00", "2024-03-25T00:00:00", "2024-04-23T00:00:00", "2024-05-23T00:00:00", "2024-06-21T00:00:00", "2024-07-21T00:00:00", "2024-08-19T00:00:00", "2024-09-17T00:00:00", "2024-10-17T00:00:00", "2024-11-15T00:00:00", "2024-12-15T00:00:00" ]
Config
{ "Time Settings": { "Day Start": "06:00", "Night Start": "18:00", "Voting time": 60, "Voting start time (time to check)": "20:00", "Time until which hour the voting will take place (time to check)": "21:00", "Time after voting (to which the night passes)": "08:00", "Fast skip the night": true, "Length of the night (minutes)": 5.0, "Length of the FAST night (minutes)": 2.0, "Length of the day (minutes)": 45.0, "Night with a full moon": true, "Full Moon Dates": [ "2024-01-25T00:00:00", "2024-02-24T00:00:00", "2024-03-25T00:00:00", "2024-04-23T00:00:00", "2024-05-23T00:00:00", "2024-06-21T00:00:00", "2024-07-21T00:00:00", "2024-08-19T00:00:00", "2024-09-17T00:00:00", "2024-10-17T00:00:00", "2024-11-15T00:00:00", "2024-12-15T00:00:00" ] }, "UI Settings": { "Destroy Time": 5.0, "Show Image?": true, "Image": "https://i.imgur.com/uNSAY42.png", "Image Width": 42.0, "Image Height": 33.0, "Image Up Indent": 16.0, "Left Indent": 212.0, "Bottom Indent": 16.0, "Width": 178.0, "Height for default version": 82.0, "Height for unfolded version": 184.0, "Background Color": { "HEX": "#F8EBE3", "Opacity (0 - 100)": 4.0 }, "Background Materal": "assets/content/ui/uibackgroundblur-ingamemenu.mat", "Voting Button": { "Width": 150.0, "Height": 30.0, "Bottom Indent": 15.0 }, "Progress Bar": { "Width": 150.0, "Height": 20.0, "Bottom Indent": 55.0 }, "Colors": { "Color 1": { "HEX": "#ABE04E", "Opacity (0 - 100)": 100.0 }, "Color 2": { "HEX": "#595651", "Opacity (0 - 100)": 75.0 }, "Color 3": { "HEX": "#74884A", "Opacity (0 - 100)": 95.0 }, "Color 4": { "HEX": "#FFFFFF", "Opacity (0 - 100)": 100.0 } } }, "Votes Settings": { "Number of votes": 5, "Use a percentage of the online?": true, "Percentage of the online": 30.0 } }