Search the Community
Showing results for tags 'vendingmachine'.
-
Version 1.0.2
25 downloads
This monument was created for holding events in it. The arena is made in such a way that players can be divided into 2 teams, red and blue. The administrator can manage the arena without leaving the place from which he watches the battle. Observers of the battle can sit on the stands, where I have installed invisible chairs. There are 2 entrances to the arena, entrance 1 and entrance 2, in order to get there, you need to open the kinetic doors from the inside, this could be your assistant. What can you manage? I have divided the control view into 2 parts, "light" and "doors". Which doors can be opened? - Doors in which gladiators sit - Doors to the store. - Doors for buying horses. - Doors for access to the arena doors(climb up). - Exit doors to the arena What kind of electricity can be used? - Light in the gladiator chambers - Light between the cameras and the store - Light at the horse spawn place -Light between the exit to the arena doors - Light at the Arena door - Light in the place where the administrator is sitting - Circular illumination on the battlefield inside the arena - Circular lighting around the arena - Turning on and off the cameras inside the arena All electricity is divided into 2 teams, you can separately open the doors of the blue or red ones. For greater historicity and convenience, I added an option called "pollice verso", which allows the administrator to give an order to spare or kill the loser, well, or just show everyone what decision he made. I thought that 2 teams would not be enough, and added 2 more exits "Bot1" and "Bot2", there you can spawn bots and open the doors for them to enter the arena. In the arena itself, I placed 2 traps, a barbed post and an electric pressure plate. What can players buy in the store and what are they like? - Food Store - Medical supplies Store - Weapons Store - Armor Shop - Clothing store The weapon is only melee, the armor is only wooden.But you can change the settings at your discretion. Clothing, weapons, can be sold at a price 2 times less. To do this, I divided the stores into "Buy" and "Sell"sections. The currency in the store is bones, gladiators can get bones from those killed in the arena. How do the cameras work? To turn off the cameras, the administrator should simply move the switch to the "off" position. Total of 20 cameras 4 cameras are located on the site of the gladiator battle. 5 cameras in the rooms of the red team. 5 cameras in the rooms of the blue team. 3 cameras at the exits of the red team. 3 cameras at the exits of the blue team. Camera names arena1 arena2 arena3 arena4 Blue Team Cameras bglad1 bglad2 bglad3 bglad4 bglad5 bglads bglads2 bglads2 Red Team Cameras rglad1 rglad2 rglad3 rglad4 rglad5 rglads rglads2 rglads2 There are 14500 objects in total.$9.00- 19 comments
-
- 4
-

-

-
- #arena
- #colosseum
- (and 15 more)
-
Version 1.2.0
209 downloads
Extra VendingMachine adds a vending machine at outpost with custom items to be added via a config All items has a refill timer . Setting it at 0 disables the timer for that item (time in seconds) Permission ExtraVendingMachine.use - if config is set to true this is needed from player to use vending machine Config file example item to buy will be the item sold to client item to sell will be what player pays for the buyitem so in this example itemtobuy is 5.56 ammo and itemtosell is scrap vending machine is selling ammo for scrap max stock is amount of ammo in vending machine to sell NOTE : only first 7 sellorders will be listed in vending machine { "ShopName1": "The Awesome Shop 1", "ShopName2": "The Awesome Shop 2", "SpawnCorrection1": { "x": -2.5, "y": 0.0, "z": 7.0 }, "SpawnCorrection2": { "x": -3.5, "y": 0.0, "z": 6.0 }, "SpawnRotation1 in degrees": 0.0, "SpawnRotation2 in degrees": -90.0, "Use Permission to access Vending machine": false, "use2VendingMachines": true, "VendingSellOrder1": [ { "ItemBuyAmount": 1, "ItemName": "goNoob", "ItemsellAmount": 200, "ItemSkinID": 3385529905, "ItemToBuy": 223891266, "ItemToSell": -932201673, "MaxStock": 10, "RefillAmount": 1, "Refilltime": 1500 }, { "ItemBuyAmount": 1, "ItemName": "", "ItemsellAmount": 50, "ItemSkinID": 0, "ItemToBuy": -1442559428, "ItemToSell": -932201673, "MaxStock": 10, "RefillAmount": 1, "Refilltime": 600 }, { "ItemBuyAmount": 1, "ItemName": "", "ItemsellAmount": 200, "ItemSkinID": 1390752238, "ItemToBuy": -148794216, "ItemToSell": -932201673, "MaxStock": 10, "RefillAmount": 1, "Refilltime": 1500 }, { "ItemBuyAmount": 128, "ItemName": "", "ItemsellAmount": 100, "ItemSkinID": 0, "ItemToBuy": -1211166256, "ItemToSell": -932201673, "MaxStock": 10000, "RefillAmount": 128, "Refilltime": 1500 }, { "ItemBuyAmount": 1, "ItemName": "", "ItemsellAmount": 500, "ItemSkinID": 0, "ItemToBuy": -1003665711, "ItemToSell": -932201673, "MaxStock": 20, "RefillAmount": 5, "Refilltime": 0 }, { "ItemBuyAmount": 1, "ItemName": "", "ItemsellAmount": 100, "ItemSkinID": 0, "ItemToBuy": 602628465, "ItemToSell": -932201673, "MaxStock": 50, "RefillAmount": 10, "Refilltime": 300 }, ], "VendingSellOrder2": [ { "ItemBuyAmount": 1, "ItemName": "hole", "ItemsellAmount": 1000, "ItemSkinID": 832577120, "ItemToBuy": 223891266, "ItemToSell": -932201673, "MaxStock": 10, "RefillAmount": 1, "Refilltime": 1500 }, { "ItemBuyAmount": 1, "ItemName": "", "ItemsellAmount": 500, "ItemSkinID": 0, "ItemToBuy": 573676040, "ItemToSell": -932201673, "MaxStock": 10, "RefillAmount": 1, "Refilltime": 1500 }, ], }$6.00- 43 comments
- 1 review
-
- #vendingmachine
- #vending
-
(and 2 more)
Tagged with:
-
Version 1.1.4
42 downloads
Add a whole new level of excitement to your Rust server with Lucky Crates! This customizable loot crate plugin randomly spawns crates around the map, giving players a shot at discovering unique items and valuable loot. Whether you're aiming for thrilling high-stakes loot runs or just want to drop some fun surprises, Lucky Crates is designed to fit seamlessly into your server. With easy-to-tweak settings, you have full control over how often the crates spawn, what kind of loot they contain, and how long they stick around. You can even set it up so the whole server gets notified when a crate spawns, turning it into a server-wide event that gets everyone racing for the prize. Lucky Crates not only reward players with valuable loot but also create hot spots for potential PvP encounters, making every crate spawn a thrilling event. Want to make it easier for players to find the crates? No problem—just enable map markers! Whether your server is all about intense PvP action or focuses more on community-driven PvE, Lucky Crates will keep things fresh and fun for your players. Config: The configuration is fully customizable to fit your preferences and performance needs. Please note that these values have been tested on a 1000x1000 'small' map, so be sure to adjust them as needed for different map sizes. Log player looting to file - Logs Lucky Crate's loot interaction to file for admins. Destroy Lucky Crate on looting - Instantly destroy the Lucky Crate after it has been looted, or allow it to remain for the entire duration. Max number of slots in a container - The number of item slots available in each Lucky Crate. Always fill all container slots - This will always fill all container slots in the Lucky Crate. Prevent duplicate items - This will make sure each item is unique in the Lucky Crate. Note: this will override "always fill container slots", meaning it's best to use if you have a large loot table. If the loot table length is lower than the container size, it will result in empty slots. Container type to use - Choose whether to spawn Lucky Crate in large or small wooden boxes. Large box skin id - The skin ID for the large wooden box. By default, this uses a custom-made Lucky Crate skin. Small box skin id - The skin ID for the small wooden box. By default, this uses a custom-made Lucky Crate skin. Debug mode - Enables detailed feedback in the console for troubleshooting. Broadcast Lucky Crate spawn to all player - Sends a global message to all players when a Lucky Crate spawns. Broadcast message - This customizable global message uses placeholders: {x}, {y}, {z} for coordinates, {grid} for the grid location, {distance} for how far the player is from the Lucky Crate, and {direction} for the direction in compass terms. Total maximum number of Lucky Crates that can exist: Defines the overall maximum Lucky Crates allowed across the server. Set to -1 for unlimited. Number of Lucky Crates to spawn each interval - Controls how many Lucky Crates are spawned per spawn interval. Maximum number of Lucky Crates on the map at any given time: The maximum number of Lucky Crates that can exist simultaneously on the map. Duration of Lucky Crates in seconds - The lifespan of each Lucky Crate before it is automatically removed. Lucky Crate spawn frequency in seconds - How often the system will attempt to spawn new Lucky Crates. If a player loots a crate, this will trigger a new spawn attempt after one minute (up to the maximum number of crates allowed). Lucky Crate spawn attempts - The number of attempts the system will make to find a valid spawn location for each Lucky Crate. Enable map marker - Displays a map icon at the spawn location of each Lucky Crate to encourage PvP or help players find the crates. Map marker duration in seconds - The lifespan of the map marker. If "Destroy Lucky Crate on looting" is set to false, the marker can encourage PvP by keeping players aware of crate locations. Check Lucky Crates to destroy interval in seconds - The interval at which the plugin checks to see if crates should be destroyed. Higher intervals can improve performance, but the interval should not exceed the crate's lifespan. Default config: { "Log player looting to file": true, "Destroy Lucky Crate on looting": true, "Max number of slots in a container": 1, "Always fill all container slots": true, "Prevent duplicate items": true, "Container type to use": "box.wooden.large", "Large box skin id": 3346528269, "Small box skin id": 3346533967, "Debug mode": false, "Broadcast Lucky Crate spawn to all players": true, "Broadcast message": "<color=#FF9900>[LuckyCrate]</color> A Lucky Crate has spawned at {x}, {y}, {z} in grid {grid}, {distance}m away to the {direction}!", "Total maximum number of Lucky Crates that can exist": 50, "Number of Lucky Crates to spawn each interval": 1, "Maximum number of Lucky Crates on the map at any given time": 10, "Duration of the Lucky Crate in seconds": 300.0, "Lucky Crate spawn frequency in seconds": 60, "Lucky Crate spawn attempts": 10, "Maximum allowed slope angle for crate spawning": 45.0, "Enable map marker": true, "Show Lucky Crates items on the map marker": true, "Map marker duration in seconds": 300.0, "Check Lucky Crates to destroy interval in seconds": 60.0 } Loot table: You can keep the standard setup or use your imagination to add a wide variety of items that fit your server's theme. Whether it's high-tier weapons, rare resources, or fun and quirky surprises, the choice is yours! Add more items to make every Lucky Crate spawn feel unique and rewarding for players. The weight system determines the likelihood of each item appearing in a Lucky Crate. Items with higher weights are more likely to spawn compared to items with lower weights. For example, if an item has a weight of 50 and another item has a weight of 1, the item with weight 50 is much more likely to appear. This allows you to control the rarity of specific items, creating a balanced and engaging loot experience for your players. { "LootTable": [ { "ItemName": "rifle.ak", "Weight": 1, "AmountMin": 1, "AmountMax": 1 }, { "ItemName": "weapon.mod.holosight", "Weight": 5, "AmountMin": 1, "AmountMax": 1 }, { "ItemName": "ammo.pistol", "Weight": 50, "AmountMin": 10, "AmountMax": 10 }, { "ItemName": "scrap", "Weight": 75, "AmountMin": 50, "AmountMax": 100 }, { "ItemName": "metal.fragments", "Weight": 50, "AmountMin": 200, "AmountMax": 250 }, { "ItemName": "supply.signal", "Weight": 3, "AmountMin": 1, "AmountMax": 1 }, { "ItemName": "wood", "Weight": 100, "AmountMin": 500, "AmountMax": 500 }, { "ItemName": "metal.refined", "Weight": 15, "AmountMin": 50, "AmountMax": 100 }, { "ItemName": "rifle.bolt", "Weight": 2, "AmountMin": 1, "AmountMax": 1 }, { "ItemName": "explosive.timed", "Weight": 1, "AmountMin": 1, "AmountMax": 1 }, { "ItemName": "weapon.mod.silencer", "Weight": 10, "AmountMin": 1, "AmountMax": 1 }, { "ItemName": "leather", "Weight": 50, "AmountMin": 100, "AmountMax": 100 }, { "ItemName": "sulfur.ore", "Weight": 75, "AmountMin": 200, "AmountMax": 300 } ] } The logging format: Each time a player loots a Lucky Crate, the plugin logs the event in a file, making it easy for admins to track interactions. Here’s an example of what the log file might look like: [ "Matt looted a Lucky Crate at (1262.12, 10.45, 522.40) on 10/11/2024 03:40:00", "Matt looted a Lucky Crate at (782.73, 8.85, 1693.96) on 10/11/2024 03:40:14", "Matt looted a Lucky Crate at (754.21, 22.18, 79.26) on 10/11/2024 03:53:53", "Matt looted a Lucky Crate at (314.68, 48.28, -224.63) on 10/11/2024 03:54:06", "Matt looted a Lucky Crate at (-1121.76, 11.11, -240.14) on 10/11/2024 03:57:48", "Matt looted a Lucky Crate at (-475.64, 16.85, -208.04) on 10/11/2024 03:57:57", "Matt looted a Lucky Crate at (-236.99, 32.97, 349.00) on 10/11/2024 03:58:07" ] Hooks SpawnLuckyCrate This hook allows you to spawn a crate at any given location. It takes a Vector3 position and spawns a container at those coordinates. Server owners can use this to manage custom crate placement. [HookMethod("SpawnLuckyCrate")] private BaseEntity SpawnLuckyCrate(Vector3 position) { return SpawnContainer(position); } With Lucky Crates, server owners have a powerful tool to inject excitement and unpredictability into their world, keeping players engaged and eager for the next crate to appear.$7.99- 9 comments
-
- 1
-

-
- #lucky
- #lucky crates
-
(and 20 more)
Tagged with:
-
Version 1.0.1
19 downloads
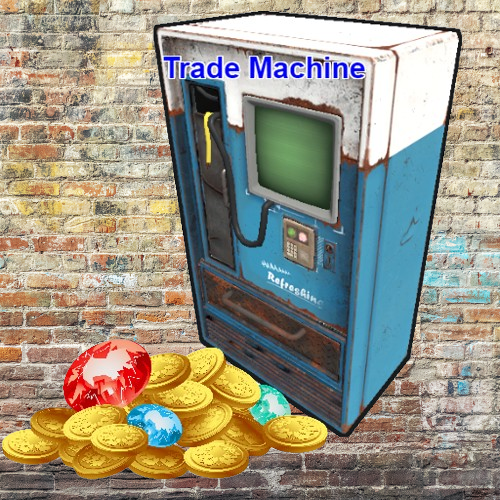
ABOUT TRADE MACHINE : Allows players to Sell/Buy - Custom/Default items. Players need to assign vending machine what will they use for trading items. One assigned machine per player ,can be placed anywhere in TC range . There are 2 ways to interact with trade machine ,with command and with button when player opens container of a vending machine. With command player can sell/buy items from anywhere ,with button option only when he have opened container of assigned vendingmachine. Players need to put items in container of assigned vending machine to be able to sell them. If they remove item from vending container ,item will not be on sell anymore. When buying item, player need to have cost for that item in his inventory . On succeed buying item ,item will be transferred to buyers assigned vending machine . SELL ITEM : Player can only sell items what he have in container of assigned vending machine. When player press in UI on item what he will sell ,he will see Description and Cost . In Description he can add what ever text ,confirm it , that text will buyer see when he is buying item . in Cost he can add cost items for that item ,up to 6 items . They can use custom and default items for cost . There are categories for cost items ,like "All" , "Custom" , "Weapons" ,and so on . When they chose cost item/items ,they will need to type cost amount of that item. After all that ,when player press Sell Item , buyers will be able to see it in and buy it. When seller sell item to buyer he will see in chat that he sold item. BUY ITEM : When seller added item for sell ,buyer will see item, amount, description ,and cost of that item . Items will be in categories "All" , "Custom" , "Weapons" and so on . He will pay cost from his inventory ,and he will get item in his assigned vending machine. CUSTOM /BLACKLISTED ITEMS : In config file you can add Custom and Blacklisted items ,by itemID and SkinID . For custom items ,if you add them in config ,players will be able to put that custom items for cost items, and they will be able to sell/buy those custom items. For blacklisted items ,if you add them in config, you will block that items , so players cant put those items for cost ,and they will not be able to sell/buy them . PERMISSION SYSTEM/COMMANDS : trademachine.button - players will be able to see trade button when they open container of vendingmachine . trademachine.command - players will be able to use /trade command . Command /myvm - to assign vending machine . Console command - cleartrade , This will wipe selling items and assigned machines . DATA : In data file you will see owners of assigned vending machine and what items are selling . When you wipe it with console command "cleartrade" , all will be wiped ... So no more assigned machines and no more selling items. TRADE INFO TEXT FIELD : When player open UI of trade machine he will see text on left side ,you can edit that text to your needs . In config file can be edited . CONFIG : { //// Here you can edit text field . "TradeInfo": [ "You need to assaign vending machine", "with /myvm.", "You can have only one", "assaigned vending machine", "", "In selling item you can chose:", "Description - just type it and confirm it.", "Cost - up to 6 items. ", "", "In buying items:", "You will see descripton what seller make.", "You will see cost for that item." ], "CustomItems": [ { "ItemId": -1707425764, "SkinId": 3122790562, "DisplayName": "" } ], "BlacklistedItems": [ { "ItemId": 550753330, "SkinId": 0 } ],$15.00-
- #custom item
- #trade
-
(and 3 more)
Tagged with:
-
Version 1.0.1
7 downloads
Swipe a keycard to start hacking HVMs, after hacking, enjoy discounted items and extra loot. Default Hacking Times: AccessLevel 1 - 2 minutes AccessLevel 2 - 3.75 minutes AccessLevel 3 - 7.5 minutes Default Reset Times: AccessLevel 1 - 15 minutes AccessLevel 2 - 20 minutes AccessLevel 3 - 25 minutes 3 Tiers (AccessLevel 1, 2, 3). Map Marker off by default, enable in config. Rewards: Item Shop & Loot Stashes Tier 2 HVM Rewards Example: Starting the HVM hacking gives you rewards in Economics & ServerRewards if configured. HVMs are located at every monument by default, configurable in config. + Spawn HVMs manually by using commands. Commands: (permission - "hvms.Admin") /hvm: Shows all available commands. /hvm spawn [1-3] [name]: Spawns an HVM and saves its location. /hvm remove [name]: Destroys an HVM and removes its location. /hvm list [page]: Lists all HVM spawn locations. Config preview: Map Marker Visibility, Custom Messages, Notifications, Vending Machine Skins, Hacking Times, Reset Times, Success Rates, Rewards (Item Shop & Loot Stashes), Locations Default Config: { "General Settings": { "Map Marker Visibility || '1'= Always until Hacked, '2'= Only when Hacking, '3'= Off": 3, "Marker Name": "A Locked Vending Machine", "Marker Name (Hacking)": "Hacking...", "Gametip Msg when HVM is Locked": "Swipe keycard to start hacking.", "Gametip Msg when HVM is Hacking": "Hacking... {formattedTime}", "Global Chat Notify Hacking": false, "Global Chat Hacking Msg": "HVM Hacking near {mapGridLocation} !", "Notify Groups Only || All 0.0 = Global Chat; Chance 0.0 = 0%; 1.0 = 100%": { "Default": 0.0, "Admin": 0.0 }, "Economics Reward Msg": "You received {economicsAmount} <color=#3e9c35>$</color>", "Server Rewards Msg": "You received {serverRewardsAmount} <color=#cd4632>RP</color>", "Remove Non-Monument HVM Locations on Wipe": true, "Disable 'Dynamic Pricing' for HVM Item Shop": true, "Console Debug": false }, "Main Settings": { "Workshop SkinIDs for HVMs": { "|AccessLevel 1|": 3174792873, "|AccessLevel 2|": 3174791726, "|AccessLevel 3|": 3174785929 }, "Hacking Times | 1.0 = 1 second": { "|AccessLevel 1|": 119.0, "|AccessLevel 2|": 225.0, "|AccessLevel 3|": 450.0 }, "Reset Times | 1.0 = 1 second": { "|AccessLevel 1|": 900.0, "|AccessLevel 2|": 1200.0, "|AccessLevel 3|": 1500.0 }, "Hacking Success Rates | 1.0 = 100%": { "|AccessLevel 1|": { "Min": 0.85, "Max": 0.9 }, "|AccessLevel 2|": { "Min": 0.9, "Max": 0.95 }, "|AccessLevel 3|": { "Min": 0.95, "Max": 1.0 } }, "Item Shop - Added when Hacking completes - Chance 1.0 = 100%": { "|AccessLevel 1|": [ { "Chance To Add": 0.7, "Item For Sale": "pistol.revolver", "Sell Amount": 1, "Stock": 3, "Currency": "scrap", "Price": 25 }, { "Chance To Add": 1.0, "Item For Sale": "ammo.pistol", "Sell Amount": 10, "Stock": 100, "Currency": "scrap", "Price": 10 }, { "Chance To Add": 0.06, "Item For Sale": "pistol.prototype17", "Sell Amount": 1, "Stock": 1, "Currency": "scrap", "Price": 150 }, { "Chance To Add": 0.5, "Item For Sale": "pistol.semiauto", "Sell Amount": 1, "Stock": 3, "Currency": "scrap", "Price": 65 }, { "Chance To Add": 0.05, "Item For Sale": "supply.signal", "Sell Amount": 1, "Stock": 1, "Currency": "scrap", "Price": 50 } ], "|AccessLevel 2|": [ { "Chance To Add": 0.5, "Item For Sale": "rifle.sks", "Sell Amount": 1, "Stock": 3, "Currency": "scrap", "Price": 100 }, { "Chance To Add": 0.7, "Item For Sale": "smg.thompson", "Sell Amount": 1, "Stock": 2, "Currency": "scrap", "Price": 100 }, { "Chance To Add": 1.0, "Item For Sale": "ammo.rifle", "Sell Amount": 25, "Stock": 150, "Currency": "scrap", "Price": 15 }, { "Chance To Add": 1.0, "Item For Sale": "ammo.pistol", "Sell Amount": 15, "Stock": 300, "Currency": "scrap", "Price": 10 }, { "Chance To Add": 0.15, "Item For Sale": "grenade.flashbang", "Sell Amount": 1, "Stock": 30, "Currency": "scrap", "Price": 1 } ], "|AccessLevel 3|": [ { "Chance To Add": 0.06, "Item For Sale": "shotgun.m4", "Sell Amount": 1, "Stock": 1, "Currency": "scrap", "Price": 250 }, { "Chance To Add": 0.4, "Item For Sale": "rifle.ak", "Sell Amount": 1, "Stock": 3, "Currency": "scrap", "Price": 150 }, { "Chance To Add": 1.0, "Item For Sale": "ammo.rifle", "Sell Amount": 25, "Stock": 300, "Currency": "scrap", "Price": 10 }, { "Chance To Add": 0.05, "Item For Sale": "explosive.timed", "Sell Amount": 1, "Stock": 3, "Currency": "scrap", "Price": 100 }, { "Chance To Add": 0.055, "Item For Sale": "ammo.rocket.basic", "Sell Amount": 1, "Stock": 2, "Currency": "scrap", "Price": 75 } ] }, "Loot Stash Slots": { "|AccessLevel 1|": 5, "|AccessLevel 2|": 8, "|AccessLevel 3|": 10 }, "Loot Stash Rewards - Added when Hacking completes - Chance 1.0 = 100%": { "|AccessLevel 1|": [ { "Chance": 1.0, "Item": "scrap", "Item Amount": { "Min": 125, "Max": 450 } }, { "Chance": 0.3, "Item": "halloween.lootbag.small", "Item Amount": { "Min": 1, "Max": 4 } } ], "|AccessLevel 2|": [ { "Chance": 1.0, "Item": "scrap", "Item Amount": { "Min": 325, "Max": 850 } }, { "Chance": 0.3, "Item": "halloween.lootbag.medium", "Item Amount": { "Min": 1, "Max": 2 } } ], "|AccessLevel 3|": [ { "Chance": 1.0, "Item": "scrap", "Item Amount": { "Min": 625, "Max": 1850 } }, { "Chance": 0.3, "Item": "halloween.lootbag.large", "Item Amount": { "Min": 1, "Max": 1 } } ] }, "ServerRewards & Economics Rewards - Given when Player starts Hacking - |Plugins Required|": { "|AccessLevel 1|": { "Economics - Plugin": { "Min": 0, "Max": 0 }, "ServerRewards - Plugin": { "Min": 0, "Max": 0 } }, "|AccessLevel 2|": { "Economics - Plugin": { "Min": 0, "Max": 0 }, "ServerRewards - Plugin": { "Min": 0, "Max": 0 } }, "|AccessLevel 3|": { "Economic - Plugin": { "Min": 0, "Max": 0 }, "ServerRewards - Plugin": { "Min": 0, "Max": 0 } } } }, "HVM Locations": { "harbor/harbor_1.prefab": [ { "Enabled": true, "|AccessLevel|": 1, "Monument Quantity (or 0)": 1, "HVM Location X,Y,Z": "5.15,1.25,98.2", "HVM Rotation X,Y,Z": "0.0,180.0,0.0" } ], "harbor/harbor_2.prefab": [ { "Enabled": true, "|AccessLevel|": 1, "Monument Quantity (or 0)": 1, "HVM Location X,Y,Z": "36.68,4.0,77.8", "HVM Rotation X,Y,Z": "0.0,-180.0,0.0" } ], "harbor/ferry_terminal_1.prefab": [ { "Enabled": true, "|AccessLevel|": 1, "Monument Quantity (or 0)": 1, "HVM Location X,Y,Z": "-7.5,5.25,0.45", "HVM Rotation X,Y,Z": "0.0,0.0,0.0" } ], "medium/junkyard_1.prefab": [ { "Enabled": true, "|AccessLevel|": 1, "Monument Quantity (or 0)": 1, "HVM Location X,Y,Z": "11.5,0.6,1.3", "HVM Rotation X,Y,Z": "0.0,162.0,0.0" } ], "lighthouse/lighthouse.prefab": [ { "Enabled": true, "|AccessLevel|": 1, "Monument Quantity (or 0)": 2, "HVM Location X,Y,Z": "3.0,14.0,6.0", "HVM Rotation X,Y,Z": "0.0,-70.0,0.0" } ], "roadside/warehouse.prefab": [ { "Enabled": true, "|AccessLevel|": 1, "Monument Quantity (or 0)": 2, "HVM Location X,Y,Z": "-4.35,0.0,-1.76", "HVM Rotation X,Y,Z": "0.0,165.0,0.0" } ], "roadside/supermarket_1.prefab": [ { "Enabled": true, "|AccessLevel|": 1, "Monument Quantity (or 0)": 2, "HVM Location X,Y,Z": "0.45,0.025,-6.9", "HVM Rotation X,Y,Z": "0.0,-180.0,0.0" } ], "medium/radtown_small_3.prefab": [ { "Enabled": true, "|AccessLevel|": 1, "Monument Quantity (or 0)": 1, "HVM Location X,Y,Z": "-50.1,19.7725,-46.3", "HVM Rotation X,Y,Z": "0.0,90.0,0.0" } ], "roadside/gas_station_1.prefab": [ { "Enabled": true, "|AccessLevel|": 1, "Monument Quantity (or 0)": 2, "HVM Location X,Y,Z": "1.75,3.245,16.0", "HVM Rotation X,Y,Z": "0.0,-180.95,0.0" } ], "small/satellite_dish.prefab": [ { "Enabled": true, "|AccessLevel|": 1, "Monument Quantity (or 0)": 1, "HVM Location X,Y,Z": "5.85,6.025,0.0", "HVM Rotation X,Y,Z": "0.0,-90.0,0.0" } ], "large/powerplant_1.prefab": [ { "Enabled": true, "|AccessLevel|": 2, "Monument Quantity (or 0)": 1, "HVM Location X,Y,Z": "41.7,0.27,69.2", "HVM Rotation X,Y,Z": "0.0,180.0,0.0" }, { "Enabled": true, "|AccessLevel|": 3, "Monument Quantity (or 0)": 1, "HVM Location X,Y,Z": "10.3,0.27,-39.1", "HVM Rotation X,Y,Z": "0.0,-90.0,0.0" } ], "large/military_tunnel_1.prefab": [ { "Enabled": true, "|AccessLevel|": 2, "Monument Quantity (or 0)": 1, "HVM Location X,Y,Z": "-62.4,19.65,36.25", "HVM Rotation X,Y,Z": "0.0,-23.0,0.0" }, { "Enabled": true, "|AccessLevel|": 3, "Monument Quantity (or 0)": 1, "HVM Location X,Y,Z": "-1.0,13.4,67.9", "HVM Rotation X,Y,Z": "0.0,-85.0,0.0" } ], "large/airfield_1.prefab": [ { "Enabled": true, "|AccessLevel|": 2, "Monument Quantity (or 0)": 1, "HVM Location X,Y,Z": "26.2,0.3,7.0", "HVM Rotation X,Y,Z": "0.0,-90.0,0.0" }, { "Enabled": true, "|AccessLevel|": 3, "Monument Quantity (or 0)": 1, "HVM Location X,Y,Z": "-44.1,0.3,-75.3", "HVM Rotation X,Y,Z": "0.0,-45.0,0.0" } ], "small/sphere_tank.prefab": [ { "Enabled": true, "|AccessLevel|": 2, "Monument Quantity (or 0)": 1, "HVM Location X,Y,Z": "-28.3,10.6,-16.1", "HVM Rotation X,Y,Z": "0.0,-115.0,0.0" } ], "large/water_treatment_plant_1.prefab": [ { "Enabled": true, "|AccessLevel|": 2, "Monument Quantity (or 0)": 1, "HVM Location X,Y,Z": "3.25,0.3,-67.4", "HVM Rotation X,Y,Z": "0.0,90.0,0.0" } ], "large/trainyard_1.prefab": [ { "Enabled": true, "|AccessLevel|": 2, "Monument Quantity (or 0)": 1, "HVM Location X,Y,Z": "48.5,0.27,-13.5", "HVM Rotation X,Y,Z": "0.0,-90.0,0.0" }, { "Enabled": true, "|AccessLevel|": 3, "Monument Quantity (or 0)": 1, "HVM Location X,Y,Z": "-21.5,0.27,17.0", "HVM Rotation X,Y,Z": "0.0,90.0,0.0" } ], "xlarge/launch_site_1.prefab": [ { "Enabled": true, "|AccessLevel|": 3, "Monument Quantity (or 0)": 1, "HVM Location X,Y,Z": "182.0,3.0,12.0", "HVM Rotation X,Y,Z": "0.0,-90.0,0.0" }, { "Enabled": true, "|AccessLevel|": 3, "Monument Quantity (or 0)": 1, "HVM Location X,Y,Z": "182.0,3.0,-12.0", "HVM Rotation X,Y,Z": "0.0,-90.0,0.0" } ], "medium/nuclear_missile_silo.prefab": [ { "Enabled": true, "|AccessLevel|": 3, "Monument Quantity (or 0)": 1, "HVM Location X,Y,Z": "6.08,0.27,19.9", "HVM Rotation X,Y,Z": "0.0,-178.0,0.0" } ], "arctic_bases/arctic_research_base_a.prefab": [ { "Enabled": true, "|AccessLevel|": 3, "Monument Quantity (or 0)": 1, "HVM Location X,Y,Z": "-26.70,0.23,6.0", "HVM Rotation X,Y,Z": "0.0,90.0,0.0" } ], "military_bases/desert_military_base_a.prefab": [ { "Enabled": false, "|AccessLevel|": 1, "Monument Quantity (or 0)": 1, "HVM Location X,Y,Z": "0.0,10.0,0.0", "HVM Rotation X,Y,Z": "4.64,0.01,-0.41" } ], "military_bases/desert_military_base_b.prefab": [ { "Enabled": false, "|AccessLevel|": 1, "Monument Quantity (or 0)": 1, "HVM Location X,Y,Z": "0.0,0.0,0.0", "HVM Rotation X,Y,Z": "0.0,0.0,0.0" } ], "military_bases/desert_military_base_c.prefab": [ { "Enabled": false, "|AccessLevel|": 1, "Monument Quantity (or 0)": 1, "HVM Location X,Y,Z": "0.0,0.0,0.0", "HVM Rotation X,Y,Z": "0.0,0.0,0.0" } ], "military_bases/desert_military_base_d.prefab": [ { "Enabled": false, "|AccessLevel|": 1, "Monument Quantity (or 0)": 1, "HVM Location X,Y,Z": "0.0,0.0,0.0", "HVM Rotation X,Y,Z": "0.0,0.0,0.0" } ], "OilrigAI": [ { "Enabled": false, "|AccessLevel|": 1, "Monument Quantity (or 0)": 1, "HVM Location X,Y,Z": "9.8,27.01,-4.5", "HVM Rotation X,Y,Z": "0.0,165.0,0.0" } ], "OilrigAI2": [ { "Enabled": false, "|AccessLevel|": 1, "Monument Quantity (or 0)": 1, "HVM Location X,Y,Z": "-10.7,36.15,-9.0", "HVM Rotation X,Y,Z": "0.0,90.0,0.0" } ], "assets/bundled/prefabs/autospawn/monument/medium/bandit_town.prefab": [ { "Enabled": false, "|AccessLevel|": 1, "Monument Quantity (or 0)": 1, "HVM Location X,Y,Z": "0.0,0.0,0.0", "HVM Rotation X,Y,Z": "0.0,180.0,0.0" } ], "assets/bundled/prefabs/autospawn/monument/medium/compound.prefab": [ { "Enabled": false, "|AccessLevel|": 1, "Monument Quantity (or 0)": 1, "HVM Location X,Y,Z": "-7.0,0.25,-1.4", "HVM Rotation X,Y,Z": "0.0,0.0,0.0" } ] } }$32.75- 8 comments
-
- #vending
- #vendingmachine
- (and 9 more)
-
Version 1.0.2
100 downloads
This plugin let you manage the placement of vending machines by permission and limit. It´s also possible to prevent from placing vending machines on land or/and water seperatly. Permissions Allow above water managevendingplacement.canplace.abovewater Allow under water managevendingplacement.canplace.underwater Allow above water with limit managevendingplacement.canplace.limited.abovewater Allow under water with limit managevendingplacement.canplace.limited.underwater Chat Command Show the List of limits by rank /vplimit Configuration { "AllowAboveWaterDefault": true, "AllowUnderWaterDefault": true, "ChatCommand": "vplimit", "DefaultLandLimit": 5, "DefaultWaterLimit": 3, "GroupLandLimits": { "default": 5, "vip": 10 }, "GroupWaterLimits": { "default": 3, "vip": 6 } } Localization English & German { "CannotPlaceUnderwater": "You cannot place vending machines underwater.", "ReachedLandLimit": "You have reached the land limit for placing vending machines.", "ReachedWaterLimit": "You have reached the water limit for placing vending machines.", "NoPermission": "You do not have permission to place vending machines.", "CheckLimit": "You have placed {0} out of {1} allowed vending machines.", "NoLimitedPermission": "You do not have a limited permission to place vending machines.", "RankLimits": "Land Limits: {0}\nWater Limits: {1}", "LimitsHeader": "Vending Machine Limits by Rank:" } The plugin was created in parts with the help of artificial intelligenceFree-
- #vendingmachine
- #limit
-
(and 1 more)
Tagged with:
-
Version 2.1.0
4 downloads
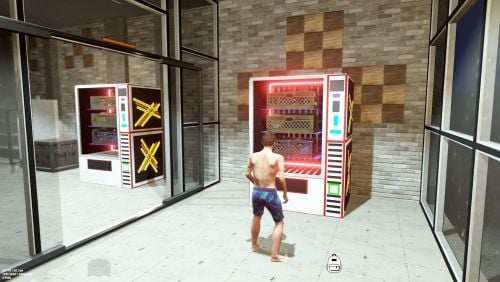
I offer you my version of a stylish vending machine in a sleek white style with a touch of red. It will fit well on any map and seamlessly complement any server. It's easily visible both day and night. What's included: The vending machine itself Invisible supplier Supplier preset (COMPONENTS) - priced the same as at outpost In the future, I'll be updating it along with all my prefabs and monuments. There are still plenty of ideas. I'd appreciate any feedback! Instructions on changing the items will be provided here! my Discord$7.00 -
Version v1.1
3 downloads
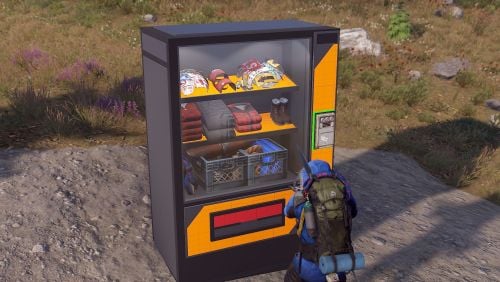
I propose you check out my version of the Venom vending machine, which will perfectly fit your custom map. The prefab will be supported and periodically updated! The package includes: Two versions of the vending machine: Clothing and Weapons. Added the main prefab of the vending machine itself and invisible supplier prefabs. The items are mine, but the prices are the same as in the game. You can replace the presets with your own at any time! Instructions are included. link You don't need to do anything; just place it on your map, and everything will work.$7.00 -
Version 1.0.2
62 downloads
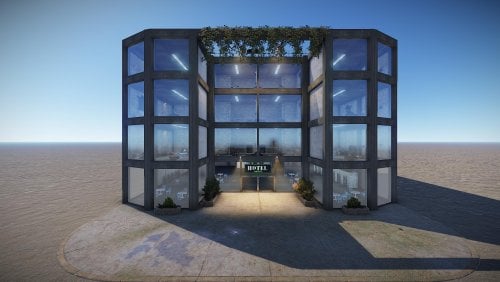
A nice hotel made to work with the Hotel plugin. Has lobby floor with 10 NPCvendingmachines, poker tables, blackjack, slot machines, arcade machines, tables/chairs, phone and radio. Has 3 floors with 8 rooms in each floor. Recycler on each floor. Can interact with everything in the rooms. Roof with helipad. Also has working CCTV on each floor. To make it work with the Hotel plugin all you need to do is place codelocks on the doors and setup the plugin.$15.99- 14 comments
- 2 reviews
-
- 2
-


![More information about "Skorm Arena [EVENT]"](https://codefling.com/uploads/monthly_2021_09/1585673294_1(9).thumb.jpg.55e6ccf804c9c03137a56424148edf90.jpg)


.thumb.jpg.4abde6ce06035db4993ba98aa473b214.jpg)
