Search the Community
Showing results for tags 'raiding'.
-
Version 1.3.7
553 downloads
Allows both PVE and PVP players to exist on a server at the same time. PVE players will have certain configurable protections and restrictions. You can have players use a command to flag themselves as PVP/PVE or you can assign it to them when they first spawn. If you have ZoneManager you can also designate specific zones to force player's to be PVE or PVP. Plugin is also compatible with SimpleStatus. Note: Video is outdated, see documentation for a full list of new features! Documentation: A full readme including permissions, commands, and config options is available in this google doc link. Disclaimer: Like all of my plugins - this plugin is sold as is. I will be happy to take feature requests into consideration but make no guarantees about which ones get implemented. Please refer to the feature list before you make your purchase! Developer API: API Methods // Returns the mode of the given entity. Also takes into account if the entity is in a forced mode zone. string GetEntityMode(BaseEntity entity); // Returns the group name for the given mode. For example if given 'pve' will return 'warmodepve' string GetModeGroup(string modeId); // Returns the target type for a given entity. Target types are the category that an entity falls into. // For example, if given a BasePlayer entity, it will return 'players'. If given a horse entity is will // return 'horses'. string GetEntityTargetType(BaseEntity entity); Hooks - place these in your plugin and WarMode will call them. // Called when a player's mode has been updated or config changes have ocurred that may affect the mode. private void WarMode_PlayerModeUpdated(string userid, string modeId) // Used to override WarMode logic for taking damage. // If true/false is returned then WarMode logic will be skipped. Return null to continue WarMode logic. private object CanEntityTakeDamage(BaseCombatEntity target, HitInfo info) // Used to override WarMode logic for targeting. // If true/false is returned then WarMode logic will be skipped. Return null to continue WarMode logic. private object CanEntityBeTargeted(BasePlayer target, BaseEntity attacker, bool skipVendingCheck) // Used to override WarMode logic for triggering a trap. // If true/false is returned then WarMode logic will be skipped. Return null to continue WarMode logic. private object CanEntityTrapTrigger(BaseTrap trap, BasePlayer basePlayer) // Used to override WarMode logic for looting an entity. // If true/false is returned then WarMode logic will be skipped. Return null to continue WarMode logic. private object CanEntityLoot(BasePlayer looter, BaseEntity target, bool skipVendingCheck) FREE Extension Plugins: War Mode Admin Panel Use the /warmode.config or /wmc command to open a panel that allows admins to update mode rules in game without having to reload the pluign. Requires the warmode.admin permission to use. I HIGHLY recommend you use this extension! WarModeAdminPanel.cs War Mode Spawn UI Provides a UI that is shown to players when they first spawn that prompts them to choose whether they want to be PVP or PVE. Also supports custom modes. Localization and config options available. This can also be configured to appear when players use the /flag command. WarModeSpawnUI.cs War Mode Rules UI Using the /rules command (which is configurable) players can see a list of what restrictions they have for their current mode. These ruling will update dynamically based on your config settings. WarModeRulesUI.cs War Mode Badges Customizable UI elements that will appear on the player's HUD to indicate what their current mode is. WarModeBadges.cs$24.99- 205 comments
- 9 reviews
-
- 7
-

-

-
Version 1.5.22
48 downloads
Offline Raid Limiter Stop Unfair Offline Raids in Their Tracks Tired of seeing your Rust server overrun by offline raid abuse? Offline Raid Limiter steps in to restore balance and fair play. With powerful tracking and immediate damage blocking, your players can enjoy a more authentic Rust experience—and you can enjoy worry-free server management. Key Benefits Prevent Offline Raid Abuse Daily Raid Limit: Automatically restrict how many offline raids each player (or team) can perform per day. Proximity-Based Tracking: Only counts raids when attackers are within range of a Tool Cupboard (TC), ensuring offline raid limits don’t trigger prematurely. Smart Raid Session Management Team & Additional Raider Tracking: Keeps tabs on individual players as well as entire teams—even if they leave and rejoin. Plus, if additional players jump into the same raid, their involvement is recorded. Edge Case Handling: No more confusion or gaps in coverage if a defender goes offline mid-raid or when multiple attackers are involved. Offline Raid Limiter’s robust logic sorts out these scenarios seamlessly. Instant Damage Blocking Enforce Fair Play: Once a team or individual hits their daily offline raid quota, further damage is blocked automatically. That means no more sneaky workarounds or unstoppable raids. Modded Server UI In-Game Control: For modded servers, gain access to a simple in-game UI that displays raid history, player statistics, and real-time session data. Player-Friendly Features: Grant permissions so your players can check their offline raid counts with the /myraids command—helping everyone stay within the rules. Detailed Alerts & Reporting Discord Integration: Offline Raid Limiter sends comprehensive alerts to Discord, making admin oversight a breeze. Export & Clear Sessions: Use /exportraidsessions to log and share your entire raid history for deeper analysis, then wipe all sessions with a simple console command if you need a fresh start. Designed for Vanilla & Modded Servers Flexible Configuration: If you set your server to “Vanilla,” the plugin automatically disables UI and direct damage blocks, limiting itself to Discord notifications so admins can monitor raiding behind the scenes. Seamless Integration: Works hand-in-hand with Rust’s existing frameworks and requires only the Simple Status & Image Library for certain UI elements. Why Choose Offline Raid Limiter? Enhanced Fairness: Players can’t take shortcuts with offline raids for easy loot. Clear Oversight: Admins see exactly who’s raiding and how often, helping you enforce balanced gameplay. Configurable & User-Friendly: Tailor the plugin to your server’s needs in just a few clicks, with plenty of documentation to guide you. If you’re ready to level the playing field and protect your community from unfair offline raids, Offline Raid Limiter has you covered. Bring your Rust server to new heights of balance, transparency, and peace of mind! OfflineRaidLimiter_FullDocumentation_Updated.zip Commands & Usage Damage Blocking & Clearing Sessions clearraidsessions Console command: clearraidsessions Usage: Immediately removes all saved offline raid sessions. Purpose: Useful for resetting the entire raid history if you’ve made big changes or just need a fresh start. clearraidsforplayer <SteamID64> Console command: clearraidsforplayer <SteamID64> Usage: Removes every offline raid session associated with a specific player (and their team). Notes: Handy for admins who need to give a particular player or group a second chance. simulatecleanup Console command: simulatecleanup Usage: Triggers the plugin’s internal cleanup routine on demand to remove expired sessions. Notes: Essentially forces the “scheduled” cleanup to run right away for testing or maintenance. Exporting Raid Data exportraidsessions Console command: exportraidsessions Usage: Exports a JSON file of all existing raid sessions and sends it to the Discord debug webhook for easy admin review. Notes: Great for deeper analysis or archiving raid history. Damage / Raid Logic OfflineRaidLimiter checks incoming damage to building blocks, doors, external walls, and more. If a team or player has exceeded the daily offline raid limit, all further damage to offline bases is blocked—and you can optionally broadcast an alert to Discord. Key Points to Note About Commands Some commands differ depending on your permissions and server setup. For instance, if a player types /exportraidsessions in chat, it won’t work unless they have OfflineRaidLimiter.admin. For “Vanilla” servers (as set in the config), UI, damage blocking, and certain other features may be disabled—so commands like clearraidsessions and clearraidsforplayer will still work, but may only be visible to server admins via console. When Commands Might Defer Cleanup Commands: If the plugin detects that some raid sessions are still “cooling down” (meaning the raid window hasn’t fully expired), the system may defer clearing them until the next pass. This prevents conflicts with currently active raids. Blocking Logic: After the daily limit is reached, the blocking triggers immediately and remains in place until the next server reset or cleanup routine (depending on how you configure it).$14.99- 2 reviews
-
- #raid
- #protection
- (and 12 more)
-
Version 1.1.61
794 downloads
Ever wanted to be able to rain death on your enemies while being in what is essentially a flying tank!? The GunShip plugin allows you to spawn 16 different preconfigured customized vehicles allowing for new ways to play the game! Whether it is base raiding, pvp, or monument clearing youll always have the right tools, and the right firepower, to get the job done! The plugin itself requires one main dependency but has a few optional ones as well. After Entity Scale Manager is installed all vehicles will be able to be spawned in and used right out of the box! Support Please read through this as well as the extended documentation available on my discord before flagging a ticket! Open a support request here or join the discord and get in touch with me directly! I may not answer right away, please allow around 24 hours for me to be able to help you with your request! Dependency Setup REQUIRED DEPENDENCIES: Entity Scale Manager OPTIONAL DEPENDENCIES: Death Notes Sign Artist Server Rewards Economics Raidable Bases Entity Scale Manager (Required) Once downloaded, upload the plugin to the same directory as the GunShip plugin and check console to ensure it has loaded, once it has reload the GunShip plugin (if needed). OPTIONALLY you can change the following setting in the config file of Entity Scale Manager to make the scaling spheres disappear. // Change the below value to true if you would like to enable it in the EntityScaleManager.json config file. { "Hide spheres after resize (performance intensive)": false } Death Notes (Optional) Implementing Death Notes allows players to see custom death messages when a player kills something or gets killed by something on a server. When using Death Notes with the GunShip plugin you can see additional custom death messages for when a NPC / Player is killed by a GunShip vehicle. Near the end of the DeathNotes.json configuration file in the oxide/config directory you can add the following lines to enable the custom death messages! "muzzlebrake.entity": "Armed Sedan", "lasersight.entity": "Heavy Technical", "smoke_grenade.weapon": "Light Technical", "hammer.entity": "Apache Attack Helicopter", "spraycan.weapon": "Huey Attack Helicopter", "flare.weapon": "Viper Attack Helicopter", "detonator.entity": "Enforcer UAV", "supplysignal.weapon": "Cargo Truck" Append the above lines to the end of the 'Weapons' section of the config. It should look like something below. Sign Artist (Optional) Sign artist is used to load custom images onto signs from a url. In the GunShip plugin it is used to load the specified image to all signs by default when they are initially spawned in. Upload the the oxide/plugins directory and enjoy! Reseller Info As of version 1.0.5 the reseller framework has been added! This new feature allows server owners to optionally add the 'reseller' / salesman role into their servers allowing a assigned player to sell other players gunship vehicles. Additionally if enabled the assigned player can also make a comission of the configured currency for the sale depending on how much money they took off of the original price of the vehicle. For a reseller to be able to make commission the option for enable reseller comission must be enabled. If you want the ability to allow resellers to edit the price of the vehicle within the configured discount range enable the Allow Resellers to Modify Price option in the config file. The actual comission is based off of the amount that the reseller did not take off of the sale. For example, if the reseller ran /sellgs huey 15 false they would make 5% of the total sale meaning that the comission is (sale price) * ((configured discount max) - (specified discount)) = reseller commission amount Custom Item Info Land / Air Vehicles Item Shortname: box.wooden Water Vehicles Item Shortname: boogieboard Steam Skin IDs: Permission Info System Permissions gunship.vip - Enables VIP perks / settings for players with this permission. gunship.spawn - Required to spawn any gunship vehicle (just to use the /gunship command). gunship.nocooldown - Players with this permission do not have a spawn command cooldown. gunship.admin - Players get admin settings / perks. gunship.target_immune - Players with this permission cannot be targeted by GunShip managed AutoTurrets (Vehicle Auto Turrets). gunship.nowipefee - Players with this permission do not pay a wipe fee for any vehicle (Start of wipe fee). gunship.norespawnfee - Players with this permission do not pay a respawn fee to spawn their vehicle after paying the wipe fee. gunship.norecallfee - Removes the cost of using the /gunship.util recall vehicle_name command gunship.nohominglock - Players that have this permission cannot be locked onto by a gunship smart missile system (what the guardian uses) gunship.reseller - Allows a player to use the reseller commands and sell vehicle items to other players and make commission (if enabled) Vehicle Permissions gunship.apache - Huey Attack Helicopter gunship.guardian - Guardian Homing AA Helicopter gunship.stinger - Agile Missile Attack Helicopter gunship.viper - Agile Gunner Attack Helicopter gunship.cobra - AA Helicopter gunship.huey - Heavy Attack Helicopter gunship.reaper - Heavy Attack Helicopter gunship.technical - Light Armoured Ground Attack Vehicle gunship.heavy_technical - Heavy Armoured Ground Attack Vehicle gunship.cargo_truck - Heavy Armoured Ground Transport Vehicle gunship.sedan - Heavy Ground Attack Vehicle gunship.fighter - Agile Attack Helicopter gunship.stallion - Heavy Cargo Transport Helicopter gunship.cougar - Light Cargo Transport Helicopter gunship.enforcer - Tactical UAV gunship.attack_rhib - Light Gun Boat Command Info Player Commands: /gunship - USE: /gunship <vehicle_name> - The base GunShip command. Used for spawning vehicles. /gunship.help - USE: /gunship.help - Displays the help information for all vehicles. (Grey Names: No Permission, Yellow Names: Has Permission) /gunship.util - USE: /gunship.util <kill/recall/find> <vehicle_name> - Kill, recall, or find, the specified vehicle (if it is spawned) Admin Commands: /clearsave - USE: /clearsave - Wipe the save file in its entirety. /gunship.reloadconfig - USE: /gunship.reloadconfig - Reload the configuration values without reloading the plugin. /vehiclereport - USE: /vehiclereport - Get the information of the actively spawned vehicles. /checkstatus - USE: /checkstatus - View a report of the information relating to the vehicle you are looking at. /resetwf_all - USE: /resetwf_all - Reset the wipe fees of all players. /resetwf_player - USE: /resetwf_player <player_name> - Reset the wipe fees of the specified player. Debug Commands: /getlayer - USE: /getlayer - Return the layer information of the entity that you are currently looking at, prints to RCON console. /getparent - USE: /getparent - Return the information about the parent of the entity you are looking at (if any). /getname - USE: /getname - Return the name, item id, and skin id, of the currently held item. Reseller Commands (Requires gunship.reseller): /sellgs - USE: /sellgs <profile_name> <discount_percentage> <is_one_time_sale (true/false)> - Create a vehicle sale offer for the player you are facing /processsale - USE: /processsale <"confirm"/"cancel"> - Confirms or cancels the current sale offer and sends it to the customer Reseller Customer Commands: /buygs - USE: /buygs <"confirm"/"cancel"> - Confirms or cancels the given sale offer after being sent by a reseller Configuration File { "General Config": { "Chat Settings": { "Chat Message Icon": 0, // The default icon of all images sent by the plugin "Chat Message Prefix": "[<color=#d93d3d>GunShip</color>]" // The default chat prefix of all messages sent by the plugin }, "Sign Settings": { "Load Default Image on All Vehicle Signs": false, // Whether or not to load a default image when a vehicle is first spawned in "Sign URL Load (Requires Sign Artist)": "", // The URL of the default image to be loaded on the the sign "Load default image on vanilla vehicles": true }, "Vehicle Purchase Settings": { "Enable Wipe Fee": true, // Whether or not to enable the wipe fee "Enable Respawn Fee": true, // Whether or not to enable the respawn fee "Respawn Fee": 500.0, // The Respawn Fee amount "Recall Fee (To disable set to 0)": 200.0, // The recall fee amount "Payment Settings": { "Use Economics Plugin (Priority, will use this over SR if enabled)": false, "Use Server Rewards Plugin": false, "Use Custom Currency": true, // Whether or not to use a custom currency instead of SR or Economics "Points Name (when using SR or Economics)": "dollars", "Custom Currency Item Shortname (Specify item shortname [e.g scrap, or metal.refined])": "scrap", // Shortname of the custom currency "Custom Currency Skin (0 = Default Skin)": 0, // The Skin Id of the custom currency "Custom Currency Display Name (Leave empty for default item name)": "" // The display name of the custom currency } }, "PvP Settings": { "Enable PvE Mode (Disable all Damage between Players / Owned Entities and GunShip Vehicles)": false, // Enable the PvE Damage profile "Damage Options (Individual Settings)": { "Disable Gunship Damage to Owned Vehicles": false, "Disable Gunship Damage to Players": false, "Enable Friendly Fire": false, // Disable Friendly fire between teammates "Disable Player Damage to Gunships": false, "Disable Player Damage to All OWNED Vehicles (Global)": false, "Disable Global Fireball Damage": false, // Disable Fireball Damage to everything! "Disable Fireball Damage to GunShips": true,// Disable Fireball damage to gunships only (Above value overrides this) "Allow Fireball Damage in Raidable Base Raid Zones": true, "Disable Gunship To Building Damage": false, // Disable GunShip to OWNED player building damage "Disable GunShip Vehicle decay": true, "GunShips Override True PvE Damage Checks": false // Override the behaviour of TruePvE using the above damage settings for outgoing gunship damage "Building Damage Settings": { "Disable GunShip to Building Damage": true, "Allow Owned Building Damage (Players can damage their own buildings)": true, "Allow Friendly Fire Building Damage Between Teammates": true } } }, "Gunship System Targeting Settings": { "Allow GunShip Turrets to Target Sleepers": false, "Allow GunShip Turrets to Target Players": true, "Allow Gunship Sam Sites to target players": true, "Allow Gunship SAM Sites to target Patrol Helicopter": false, "Allow Non-GunShip SAM sites to target gunship vehicles": true, "Allow Gunship Homing Missiles to Lock onto Patrol Helicopter": true, "Allow Gunship Homing Missiles to Lock onto Bradley APC": true, "Enable Homing Lock PvP": true, // Enable the gunship smart missiles to lock onto players (Guardian Smart Missiles) "Enable Homing Lock Friendly Fire (between teammates)": false // Allow homing lock from smart missiles to friendly players (teammates) }, "Spawn Cooldown Time": 120.0, "Use Vehicle Locks Plugin to Manage Vehicle and Storage Access": false, "Drop items and fuel from GunShip vehicle on death": true, "Disable Auto Save Message": true }, "Spawn Point Config": { "Enable Spawn Point Config": false, "Spawn Point Data": { "Spawn Point List": { "default": { "Monument Prefab": "assets/bundled/prefabs/autospawn/monument/large/airfield_1.prefab", "Spawn Point Location (Local)": { "x": -87.03, "y": 0.3, "z": 37.91 }, "Spawn Point Rotation (Local)": { "x": 0.0, "y": 0.0, "z": 0.0 } } } } }, "VIP Permission Config": { "VIP Permission": "vip", "Enable VIP Cooldown Config (if false, uses default)": true, "VIP Perks Config": { "Enable VIP Perks (Set False to Disable All)": true, "VIP Vehicle Respawn Cooldown": 15, "VIP Respawn Fee Amount": 150 } }, "Permission Config": { "Spawn Permission": "spawn", "No Cooldown Permission": "nocooldown", "GunShip Turret Targeting System Immunity": "target_immune", "No Wipe Fee Permission": "nowipefee", "No Respawn Fee Permission": "norespawnfee", "No Recall Fee Permission": "norecallfee", "Administrator Permission (Enables Config from Admin Permission Config Settings)": "admin", "Homing Lock Immunity Permission": "nohominglock", "Admin Settings": { "Admin Default Minimum Permission Level -> Player Connection Level 0, 1, or 2": 2, "Admin Default Permissions (players with auth level >= configured level)": { "Auto Override Storage": true, "Auto Override Mount": true, "Admins Can be targeted by Gunship System": true, "Auto Override Spawn Cooldown": true, "Auto Overrride Wipe Fee": true, "Admin Override Respawn Fee": true, "Enable Wipe Fee Reset Commands (/resetwf_player & /resetwf_all)": true }, "Admin Permission Config (players with the gunship.admin permission)": { "Auto Override Storage": true, // Admins can open any gunship vehicle storage regardless of auth "Auto Override Mount": true, // Admins can mount any vehicle regardless of auth "Admins Can be targeted by Gunship System": true, // Allow admins to be targeted by gunship auto turrets "Auto Override Spawn Cooldown": true, "Auto Overrride Wipe Fee": true, "Admin Override Respawn Fee": true, "Enable Wipe Fee Reset Commands (/resetwf_player & /resetwf_all)": true } } }, "Vehicle Mod Config": { "Vanilla Vehicle Global Settings": { "Drop Dead Vehicle Items": true, "Scraptransport Helicopter Config": { "Add Radio to Scrap Transport Helicopter": true, "Add Sign to Scrap Transport Helicopter": true, "Add Boxes to Scrap Transport Helicopter": true, "Add Heater to Scrap Transport Helicopter": true, "Number of Boxes to Add (1-6)": 2 }, "Minicopter Config": { "Add Radio to Minicopter": true, "Add Sign to Minicopter": true, "Add Storage Box to Minicopter": true }, "Sedan Config": { "Add Radio to Sedan": true, "Add Boxes to Sedan": true }, "Attack Helicopter Config": { "Add Radio to Player Attack Helicopter": true, "Add Boxes to Player Attack Helicopter": false } } }, "Vehicle config": { "Vehicle Control Config": { "Disable remote turret control of gunship auto turrets": true }, "Apache Config": { "General Vehicle Settings": { "Vehicle Enabled": true, "Use Permission": true, "Vehicle Drops fuel": true }, "Vehicle Display Name": "Apache", "Vehicle Wipe Fee Price": 6500, "Vehicle Wipe Fee Price (VIP)": 0, "Vehicle Spawn Permission": "apache", "Infinite Machine Gun Ammo": false, "Mod Configuration": { "Add Radio to Scrap Transport Helicopter": true, "Add Sign to Scrap Transport Helicopter": true, "Add Heater to Scrap Transport Helicopter": true, "Number of Boxes to Add (1-6)": 2 }, "Engine Configuration": { "Thurst Multiplier (1 = Vanilla Default)": 1.0, "Lift Fraction Multiplier (0 = Vanilla Default)": 1.0, "Control Torque Multipler": { "x": 1.0, "y": 1.0, "z": 1.0 }, "Fuel Consumption (100 = Vanilla Default)": 1.0, "Fuel Config": { "Add Fuel to Vehicle": false, "Only add fuel on initial spawn": true, "Fuel Amount": 150, "Fuel Skin ID (0 = Default)": 0, "Fuel Custom Name (Leave blank for default)": "" } } }, "Minicopter Fighter Config": { "General Vehicle Settings": { "Vehicle Enabled": true, "Use Permission": true, "Vehicle Drops fuel": true }, "Vehicle Display Name": "Minicopter Fighter", "Vehicle Wipe Fee Price": 2800, "Vehicle Wipe Fee Price (VIP)": 0, "Vehicle Spawn Permission": "fighter", "Mod Configuration": { "Add Radio to Minicopter": true, "Add Sign to Minicopter": true, "Add Heater to Minicopter": true, "Add Back Light to Minicopter": true }, "Engine Configuration": { "Thurst Multiplier (1 = Vanilla Default)": 1.0, "Lift Fraction Multiplier (0 = Vanilla Default)": 1.0, "Control Torque Multipler": { "x": 1.0, "y": 1.0, "z": 1.0 }, "Fuel Consumption (100 = Vanilla Default)": 1.0, "Fuel Config": { "Add Fuel to Vehicle": false, "Only add fuel on initial spawn": true, "Fuel Amount": 150, "Fuel Skin ID (0 = Default)": 0, "Fuel Custom Name (Leave blank for default)": "" } } }, "Sedan Config": { "General Vehicle Settings": { "Vehicle Enabled": true, "Use Permission": true, "Vehicle Drops fuel": true }, "Vehicle Display Name": "Armed Sedan", "Vehicle Wipe Fee Price": 2000, "Vehicle Wipe Fee Price (VIP)": 0, "Vehicle Spawn Permission": "sedan", "Infinite Machine Gun Ammo": false, "Mod Configuration": { "Add Radio to Sedan": true, "Add Boxes to Sedan": true } }, "Technical Config": { "General Vehicle Settings": { "Vehicle Enabled": true, "Use Permission": true, "Vehicle Drops fuel": true }, "Vehicle Display Name": "Light Technical", "Vehicle Wipe Fee Price": 1900, "Vehicle Wipe Fee Price (VIP)": 0, "Vehicle Spawn Permission": "technical", "Mod Configuration": {}, "Engine Configuration": { "Engine Parts Config": { "Add Engine Parts": false, "Engine Parts Grade (0 = Low Quality, 1 = Medium Quality, 2 = High Quality)": 0, "Lock Engine when using added parts": true }, "Fuel Config": { "Add Fuel to Vehicle": false, "Only add fuel on initial spawn": true, "Fuel Amount": 150, "Fuel Skin ID (0 = Default)": 0, "Fuel Custom Name (Leave blank for default)": "" } } }, "Heavy Technical Config": { "General Vehicle Settings": { "Vehicle Enabled": true, "Use Permission": true, "Vehicle Drops fuel": true }, "Vehicle Display Name": "Heavy Technical", "Vehicle Wipe Fee Price": 2600, "Vehicle Wipe Fee Price (VIP)": 0, "Vehicle Spawn Permission": "heavy_technical", "Mod Configuration": {}, "Engine Configuration": { "Engine Parts Config": { "Add Engine Parts": false, "Engine Parts Grade (0 = Low Quality, 1 = Medium Quality, 2 = High Quality)": 0, "Lock Engine when using added parts": true }, "Fuel Config": { "Add Fuel to Vehicle": false, "Only add fuel on initial spawn": true, "Fuel Amount": 150, "Fuel Skin ID (0 = Default)": 0, "Fuel Custom Name (Leave blank for default)": "" } } }, "Cargo Truck Config": { "General Vehicle Settings": { "Vehicle Enabled": true, "Use Permission": true, "Vehicle Drops fuel": true }, "Vehicle Display Name": "Cargo Truck", "Vehicle Wipe Fee Price": 2800, "Vehicle Wipe Fee Price (VIP)": 0, "Vehicle Spawn Permission": "cargo_truck", "Add Default Image to Signs": true, "Mod Configuration": {}, "Engine Configuration": { "Engine Parts Config": { "Add Engine Parts": false, "Engine Parts Grade (0 = Low Quality, 1 = Medium Quality, 2 = High Quality)": 0, "Lock Engine when using added parts": true }, "Fuel Config": { "Add Fuel to Vehicle": false, "Only add fuel on initial spawn": true, "Fuel Amount": 150, "Fuel Skin ID (0 = Default)": 0, "Fuel Custom Name (Leave blank for default)": "" } } }, "Cougar Config": { "General Vehicle Settings": { "Vehicle Enabled": true, "Use Permission": true, "Vehicle Drops fuel": true }, "Vehicle Display Name": "Cougar", "Vehicle Wipe Fee Price": 4600, "Vehicle Wipe Fee Price (VIP)": 0, "Vehicle Spawn Permission": "cougar", "Mod Configuration": { "Add Radio to Scrap Transport Helicopter": true, "Add Sign to Scrap Transport Helicopter": true, "Add Heater to Scrap Transport Helicopter": true, "Number of Boxes to Add (1-6)": 2 }, "Engine Configuration": { "Thurst Multiplier (1 = Vanilla Default)": 1.0, "Lift Fraction Multiplier (0 = Vanilla Default)": 1.0, "Control Torque Multipler": { "x": 1.0, "y": 1.0, "z": 1.0 }, "Fuel Consumption (100 = Vanilla Default)": 1.0, "Fuel Config": { "Add Fuel to Vehicle": false, "Only add fuel on initial spawn": true, "Fuel Amount": 150, "Fuel Skin ID (0 = Default)": 0, "Fuel Custom Name (Leave blank for default)": "" } } }, "Stallion Config": { "General Vehicle Settings": { "Vehicle Enabled": true, "Use Permission": true, "Vehicle Drops fuel": true }, "Vehicle Display Name": "Stallion", "Vehicle Wipe Fee Price": 5200, "Vehicle Wipe Fee Price (VIP)": 0, "Vehicle Spawn Permission": "stallion", "Mod Configuration": { "Add Radio to Scrap Transport Helicopter": true, "Add Sign to Scrap Transport Helicopter": true, "Add Heater to Scrap Transport Helicopter": true, "Number of Boxes to Add (1-6)": 2 }, "Engine Configuration": { "Thurst Multiplier (1 = Vanilla Default)": 1.0, "Lift Fraction Multiplier (0 = Vanilla Default)": 1.0, "Control Torque Multipler": { "x": 1.0, "y": 1.0, "z": 1.0 }, "Fuel Consumption (100 = Vanilla Default)": 1.0, "Fuel Config": { "Add Fuel to Vehicle": false, "Only add fuel on initial spawn": true, "Fuel Amount": 150, "Fuel Skin ID (0 = Default)": 0, "Fuel Custom Name (Leave blank for default)": "" } } }, "Stinger Config": { "General Vehicle Settings": { "Vehicle Enabled": true, "Use Permission": true, "Vehicle Drops fuel": true }, "Vehicle Display Name": "Stinger Attack Minicopter", "Vehicle Wipe Fee Price": 4400, "Vehicle Wipe Fee Price (VIP)": 0, "Vehicle Spawn Permission": "stinger", "Infinite Rockets": false, "Mod Configuration": { "Add Radio to Minicopter": true, "Add Sign to Minicopter": true, "Add Heater to Minicopter": true, "Add Back Light to Minicopter": true }, "Engine Configuration": { "Thurst Multiplier (1 = Vanilla Default)": 1.0, "Lift Fraction Multiplier (0 = Vanilla Default)": 1.0, "Control Torque Multipler": { "x": 2.0, "y": 2.0, "z": 2.0 }, "Fuel Consumption (100 = Vanilla Default)": 1.0, "Fuel Config": { "Add Fuel to Vehicle": false, "Only add fuel on initial spawn": true, "Fuel Amount": 150, "Fuel Skin ID (0 = Default)": 0, "Fuel Custom Name (Leave blank for default)": "" } } }, "Huey Config": { "General Vehicle Settings": { "Vehicle Enabled": true, "Use Permission": true, "Vehicle Drops fuel": true }, "Vehicle Display Name": "Huey Attack Helicopter", "Vehicle Wipe Fee Price": 7600, "Vehicle Wipe Fee Price (VIP)": 0, "Vehicle Spawn Permission": "huey", "Infinite Rockets": false, "Infinite Machine Gun Ammo": false, "Mod Configuration": { "Add Radio to Scrap Transport Helicopter": true, "Add Sign to Scrap Transport Helicopter": true, "Add Heater to Scrap Transport Helicopter": true, "Number of Boxes to Add (1-6)": 2 }, "Engine Configuration": { "Thurst Multiplier (1 = Vanilla Default)": 1.0, "Lift Fraction Multiplier (0 = Vanilla Default)": 1.0, "Control Torque Multipler": { "x": 1.0, "y": 1.0, "z": 1.0 }, "Fuel Consumption (100 = Vanilla Default)": 1.0, "Fuel Config": { "Add Fuel to Vehicle": false, "Only add fuel on initial spawn": true, "Fuel Amount": 150, "Fuel Skin ID (0 = Default)": 0, "Fuel Custom Name (Leave blank for default)": "" } }, "Disable MiniGun Scaling (Enable No Sphere Setting in EntityScaleManager if visual issues)": false }, "Cobra Config": { "General Vehicle Settings": { "Vehicle Enabled": true, "Use Permission": true, "Vehicle Drops fuel": true }, "Vehicle Display Name": "Cobra AA Helicopter", "Vehicle Wipe Fee Price": 4600, "Vehicle Wipe Fee Price (VIP)": 0, "Vehicle Spawn Permission": "cobra", "Mod Configuration": { "Add Radio to Scrap Transport Helicopter": true, "Add Sign to Scrap Transport Helicopter": true, "Add Heater to Scrap Transport Helicopter": true, "Number of Boxes to Add (1-6)": 2 }, "Engine Configuration": { "Thurst Multiplier (1 = Vanilla Default)": 1.0, "Lift Fraction Multiplier (0 = Vanilla Default)": 1.0, "Control Torque Multipler": { "x": 1.0, "y": 1.0, "z": 1.0 }, "Fuel Consumption (100 = Vanilla Default)": 1.0, "Fuel Config": { "Add Fuel to Vehicle": false, "Only add fuel on initial spawn": true, "Fuel Amount": 150, "Fuel Skin ID (0 = Default)": 0, "Fuel Custom Name (Leave blank for default)": "" } } }, "Viper Config": { "General Vehicle Settings": { "Vehicle Enabled": true, "Use Permission": true, "Vehicle Drops fuel": true }, "Vehicle Display Name": "Viper Attack Minicopter", "Vehicle Wipe Fee Price": 4100, "Vehicle Wipe Fee Price (VIP)": 0, "Vehicle Spawn Permission": "viper", "Infinite Machine Gun Ammo": false, "Mod Configuration": { "Add Radio to Minicopter": true, "Add Sign to Minicopter": true, "Add Heater to Minicopter": true, "Add Back Light to Minicopter": true }, "Engine Configuration": { "Thurst Multiplier (1 = Vanilla Default)": 1.0, "Lift Fraction Multiplier (0 = Vanilla Default)": 1.0, "Control Torque Multipler": { "x": 1.0, "y": 1.0, "z": 1.0 }, "Fuel Consumption (100 = Vanilla Default)": 1.0, "Fuel Config": { "Add Fuel to Vehicle": false, "Only add fuel on initial spawn": true, "Fuel Amount": 150, "Fuel Skin ID (0 = Default)": 0, "Fuel Custom Name (Leave blank for default)": "" } } }, "Enforcer Config": { "General Vehicle Settings": { "Vehicle Enabled": true, "Use Permission": true, "Vehicle Drops fuel": true }, "Vehicle Display Name": "Enforcer Attack Drone", "Vehicle Wipe Fee Price": 6100, "Vehicle Wipe Fee Price (VIP)": 0, "Vehicle Spawn Permission": "enforcer" }, "Guardian Config": { "General Vehicle Settings": { "Vehicle Enabled": true, "Use Permission": true, "Vehicle Drops fuel": true }, "Vehicle Display Name": "Guardian AA Helicopter", "Vehicle Wipe Fee Price": 6100, "Vehicle Wipe Fee Price (VIP)": 0, "Vehicle Spawn Permission": "guardian", "Mod Configuration": { "Add Radio to Scrap Transport Helicopter": true, "Add Sign to Scrap Transport Helicopter": true, "Add Heater to Scrap Transport Helicopter": true, "Number of Boxes to Add (1-6)": 2 }, "Engine Configuration": { "Thurst Multiplier (1 = Vanilla Default)": 1.0, "Lift Fraction Multiplier (0 = Vanilla Default)": 1.0, "Control Torque Multipler": { "x": 1.0, "y": 1.0, "z": 1.0 }, "Fuel Consumption (100 = Vanilla Default)": 1.0, "Fuel Config": { "Add Fuel to Vehicle": false, "Only add fuel on initial spawn": true, "Fuel Amount": 150, "Fuel Skin ID (0 = Default)": 0, "Fuel Custom Name (Leave blank for default)": "" } } }, "Attack RHIB Config": { "General Vehicle Settings": { "Vehicle Enabled": true, "Use Permission": true, "Vehicle Drops fuel": true }, "Vehicle Display Name": "Attack RHIB", "Vehicle Wipe Fee Price": 3100, "Vehicle Wipe Fee Price (VIP)": 0, "Vehicle Spawn Permission": "attack_rhib" }, "Reaper Config": { "General Vehicle Settings": { "Vehicle Enabled": true, "Use Permission": true, "Vehicle Drops fuel": true }, "Vehicle Display Name": "Reaper Attack Helicopter", "Vehicle Wipe Fee Price": 6500, "Vehicle Wipe Fee Price (VIP)": 0, "Vehicle Spawn Permission": "reaper", "Mod Configuration": { "Add Radio to Scrap Transport Helicopter": true, "Add Sign to Scrap Transport Helicopter": true, "Add Heater to Scrap Transport Helicopter": true, "Number of Boxes to Add (1-6)": 2 }, "Engine Configuration": { "Thurst Multiplier (1 = Vanilla Default)": 1.0, "Lift Fraction Multiplier (0 = Vanilla Default)": 1.0, "Control Torque Multipler": { "x": 1.0, "y": 1.0, "z": 1.0 }, "Fuel Consumption (100 = Vanilla Default)": 1.0, "Fuel Config": { "Add Fuel to Vehicle": false, "Only add fuel on initial spawn": true, "Fuel Amount": 150, "Fuel Skin ID (0 = Default)": 0, "Fuel Custom Name (Leave blank for default)": "" } } } }, "Item Spawn Settings": { // For non-reseller spawn items, only for use with small wooden box spawn item "Enable Item Spawning": true, // Whether or not Item Spawning is Enabled "Require Vehicle Permission to Place Vehicle Item": false, // Require the player to have the associated permission for the vehicle to be able to spawn it with a item "Grant Vehicle Permission on Item Use (Recommended for Shop use)": true, // Grant the vehicle permission when the spawn item is deployed "Grant Vehicle Wipe fee On Use (Recommended for Shop use)": true, // Grant the vehicle wipe fee when the spawn item is deployed "Only Allow Wipe Fee to be Paid via a Reseller": false // Only allow wipe fee payments through a spawn item / reseller transaction }, "Reseller Config": { "Enable GunShip Vehicle Reselling": false, // Enable the Roleplay reselling framework "Sale Confirmation TTL (seconds)": 300, // The amount of time a transaction can take before it expires "Allow sale of a vehicle that a player already has": false, // Allow full vehicle sales even when a player already has the vehicle perm "Reseller Permission": "reseller", // The reseller pemission suffix -> gunship.reseller_permission_name "Reseller Price Editor Options": { "Allow Resellers to Modify Price": true, // Allow resellers to set a discount percentage "Enable Reseller Commission": true, // Allow resellers to be paid comission for the discount remainder percentage of the sale "Price Disount Percentage": 20.0, // The % amount the reseller can play around with in a sale "Sale Pricing Options": { "One Time Sale Price Options": { "Total Price Discount Percentage (0-99)": 40.0 // The initial % discount of a vehicle's wipe fee in a one-time-purchase sale }, "Full Sale Price Options (Grants Vehicle Permission)": { "Total Price Discount Percentage (0-99)": 0.0, // The initial % discount of a vehicle's wipe fee in a full vehicle sale "Enable item give on full sale": false } } } }, "Experimental Settings": { "Enable NoDismount on Vehicle Load Data": false, // Disable players getting dismounted from vehicles when the plugin reloads (not recommended) "Enable No Drone Sway for All modified drones": false // Enable No Sway Script for all drones w/ attatched entities (enabled for enforcer) }, "Debug Settings": { "Log Death": false, // Log Death Info "Log Vehicle Kill": false, // Log Vehicle Death Info "Log Vehicle Respawn Script": false, // Log Raw Respawn Script Output "Log Raw Save Data (Not Recommended to Turn on)": false, // Log Raw Save Messages "Log Pre-load info": false, "Enable Damage Logs": false, // Log Damage Output "Enable Gunship Item Logging": false, // Log Internal Item Logging "Enable Reseller Logging": false, // Log Internal Reseller Logging "Enable Engine Modifier Logging": false // Log info / changes related to the adjustment of vehicle's engines on spawn } } Monument Spawn Nodes (API / Command Implementation) The monument spawn node feature allows you to set up preset spots where you can spawn vehicles via a command (intended for use with a third-party plugin). Node Setup Enable the spawn node config by setting "Enable Spawn Point Config" to true Goto a spot within a monument where you want to have the vehicles spawn. Execute the /getspawnpoint command in chat, this will give you the closest monument’s prefab path as well as the relative position within the monument for use within the config file. The data from this command will also be printed to RCON as well. Either copy or directly edit the entire entry of the “default” preset in the “Spawn Point List” within the GunShip.json config file and change the name from “default” to whatever name you want to use to reference this spawn point later on. Change “Monument Prefab” to the prefab given by the command you ran in step 2 Change x, y, z entries within the “Spawn Point Location (Local)” entry to that of the coordinates that were given from the command in step 2 Confirm your changes and save the changes to your config file. Vehicle Spawning / Node Usage To actually spawn a vehicle at a created node run the following command via RCON or a hook (within a plugin, the arguments and usage will be the same) Command: SpawnVehicle_AtNode <node_name> <vehicle_name> <player_steam_id> Arguments: Node Name: The name of the node, (e.g “default”) Vehicle Name: The name of the vehicle (e.g “huey”) Player Steam Id: The steam id of the player you are spawning the vehicle for Example: > spawnvehicle_atnode “default” “huey” “81658972110849190” Use with a NPC Vendor By default the command will work similar to the /gunship or /gs command in that it will try to check if a player has paid the wipe fee (if enabled) for the specified vehicle, if not, charge them, and if they don’t have enough funds it will not spawn the vehicle. Additionally if the spawn node is blocked by another vehicle the new vehicle will not be spawned. As such it is recommended to not charge the user on a sale through a third party plugin such as through an npc vendor. However if this is not possible please refer to the below message. When using a third party plugin’s vendor it is recommended to do the following if you do not want the gunship plugin to check for a player’s purchase or for any vehicle obstructions to avoid the vehicle spawn being canceled. Change "Disable Vehicle Payment Processing" to true Change "Check For Spawn Node Obstructions" to false !! IMPORTANT !! The API does not assign the vehicle’s permission, and if "Disable Vehicle Payment Processing" is set to true the player will not have their wipe fee processed. If you want to have the player get the permission for the vehicle as well as have their wipe fee paid without having the gunship plugin charge them and potentially cancel the command if they do not have funds please add the following commands to the list of commands to be ran. > addplayervehicle <player_steam_id> <vehicle_name> > o.grant user <player_steam_id> gunship.<vehicle_permission> API bool CheckIfGunShip_API(NetworkableId entId) // Returns if whether or not the specified Net ID is a GunShip Vehicle bool GiveGunShipItem(BasePlayer player, string profilename) // Give the specified player a gunship spawn item bool SpawnGunShip(string profileName, ulong playerId, Vector3 position, Quaternion rotation, bool checkFunds, bool takeFunds, bool overridePermission, bool limitCheck) // Spawn a GunShip vehicle bool AddPlayerVehicle(string player, string profileName) // Add the specified vehicle to the list of purchased vehicles for that player bool RemovePlayerVehicle(string player, string profileName) // Remove the specified vehicle from the list of purchased vehicles for that player bool SpawnVehicle(string nodeName, string profileName, string playerID) // Spawn a vehicle at the specified node$32.99 -
Version 1.0.5
15 downloads
Raid Alerts 1.0.5: Real-Time Base Defense Notifications for Rust Simple Plugin Preview: Raid Alerts is an essential plugin for Rust, providing instant notifications when your base is under attack. With in-game alerts, Discord integration, and Clan compatibility, Raid Alerts ensures you’re always informed of any threats to your base, even if you’re offline. Key Features: Instant Alerts: Immediate in-game notifications keep you informed the moment a raid begins. Clan Compatibility: Integrates with the Clans plugin to notify all authorized clan members of any raid, enabling coordinated defenses. Advanced Discord Integration: Personal Webhooks: Each player can register a unique Discord webhook, allowing notifications to be sent to their private Discord server. Clan Webhooks: Clan owners can set a clan-wide Discord webhook so that all members are alerted on a shared Discord server. Global Notifications: Server owners can specify a global webhook for all raid alerts. Embed Option: Configure alerts as embedded messages for rich visuals or simple text for minimalistic notifications. Note: Each player and clan can save one webhook at a time, allowing personalized or clan-specific Discord notifications. Why Use Raid Alerts? Knowing your base is under raid as it happens is vital in Rust. Whether you’re farming resources or raiding another base, Raid Alerts keeps you connected, helping you act quickly to defend your assets. Use Cases: Resource Gathering or Raiding: Rest assured you’ll be notified if your base is compromised. Monument Exploration: Raid Alerts informs you of any threats, so you can stay focused on looting. Clan Defense Strategy: Enable seamless coordination as Raid Alerts notifies all clan members, facilitating quick defenses. Command Overview: Example Usage: To register a personal or clan webhook, only part of the webhook URL is required. Simply use the ID and token (as shown below) to configure alerts. The complete link is not necessary. All Player And Clan WebHooks Are Automatically Saved And Dynamically Stored/Removed/Loaded From The Generated Config Command Example /registerpersonalwebhook 1300063659304947833/KxfSH7NFWd65HGfHSv9yBoLNj6rC1ISjU0zAjh0zoCBqCQUWipCDtTGYdMB8Nf6j5EO5 /registerclanwebhook 1300063659304947833/KxfSH7NFWd65HGfHSv9yBoLNj6rC1ISjU0zAjh0zoCBqCQUWipCDtTGYdMB8Nf6j5EO5 Discord Webhook URLs typically look like: https://discord.com/api/webhooks/1300063659304947833/KxfSH7NFWd65HGfHSv9yBoLNj6rC1ISjU0zAjh0zoCBqCQUWipCDtTGYdMB8Nf6j5EO5 However, only the ID and token section is needed in the command. Server owners configuring a global webhook must use the entire link. Commands: Personal Webhook: /registerpersonalwebhook <webhook_id/token>: Register a personal webhook for individual alerts. /removepersonalwebhook: Remove your registered personal webhook. Clan Webhook: /registerclanwebhook <webhook_id/token>: Clan owners can register a webhook for shared alerts among clan members. /removeclanwebhook: Clan owners can remove the registered clan webhook. Default Configuration: On installation, a default configuration file is created in oxide/config, where you can adjust settings for notifications, Discord integration, and more. { "Main plugin settings": { "Cooldown for sending notifications in the game [Seconds]": 120, "Time after which the UI disappears [seconds]": 15.0, "Which ShortName image will be used for the notification": "explosive.timed", "Discord Global RaidAlert Webhook URL": "", "Use Discord Embed for Notifications": true, "Enable Discord notification cooldown (true/false)": false, "Discord notification cooldown [seconds]": 30, "Enable global message cooldown for each grid location (true/false)": false, "Global message cooldown for each grid location [seconds]": 180, "Personal RaidAlert Webhook URLs": { "Clan RaidAlert Webhooks": } }, "Config version": { "Major": 1, "Minor": 0, "Patch": 5 } } Configuration Options: cooldownGame: Frequency of in-game notifications to prevent spamming (in seconds). destroyUi: Duration of in-game notifications on-screen (in seconds). imageNotify: Icon for in-game notifications (e.g., "explosive.timed"). discordWebhookUrl: Global webhook URL for sending alerts to Discord. useEmbed: true for embedded alerts with rich visuals; false for plain text alerts. personalWebhooks: Stores individual player webhook URLs for personal base alerts. clanWebhooks: Stores clan webhook URLs for shared alerts. Stay informed and ready with Raid Alerts 1.0.2! Whether playing solo or as part of a clan, this plugin provides essential notifications to help you respond to any threats, ensuring your base’s security. Plugins By Duff https://discord.gg/2KBPH7hXb7$9.99 -
Version 1.8.0
3,378 downloads
They will raid your base tell they find the tc or the time set in the config runs out or you kill all npc waves. Only People authorized on the tc they are going after can kill the npc and only the npc can attack them. You can use kits plugin from umod to kit them with clothing and guns See config example below. Perms are set in config per raid type. Permissions npcraiders.use - Needed to use /raidme chat command. npcraiders.admin - Needed to use /raidme reload chat command. npcraiders.nocooldown - Disable the setting of your cooldown. npcraiders.nocost - Disable the being charged. Chat Command /raidme - Will show raid help menu. /raidme buy - Will show raid buy help menu and costs. /raidme buy <type> - To start raid of the type. /raidme reload player <playerName> = Will cancel there raid event. /raidme reload all - Will cancel all events. /raidme terrain - Get Terrain name your standing on. /raidme loot - Generate a loot profile with all the items in your inventory Loot Profiles /raidme loot add <profileName> - Create or add more items to a profile /raidme loot clear <profileName> - Clear all information from a profile When you create a loot profile you will need to edit its datafile and set the min and max amount of items to give.. There you can change other min/max for item ammounts default is 1 to Amount when created Config BuyType ByTypes can be "Itemid" , "ServerRewards", or "Economics" Default is scrap "-932201673" Config.RewardType RewardType can be "Itemid" , "ServerRewards", "Economics" , or "kit" Config.AutoTurretDamage "AutoTurretDamage": 0.0 - Disable targeting the npc. "AutoTurretDamage": 1.0 - Full damage to the npc / Range is 0.0 to 1.0.$24.00 -
Version 1.1.15
2,136 downloads
The Offline Raid Protection plugin is a comprehensive solution designed to protect players' structures and vehicles while they are offline. It offers a range of customisable protection levels based on real-time or the length of time a player has been offline, and integrates with the Clans plugin and the in-game teams feature to determine protection status based on the online status of all clan or team members and authorised players. Key Features Configurable Protection Levels: Set protection levels based on real time or the amount of time since a player went offline. For example, a building can have 100% protection one hour after a player goes offline, and 50% protection after two hours. This feature is highly configurable. Clan/Team Integration: The plugin integrates with the Clans plugin and the in-game teams feature. The protection status of a structure or vehicle is determined by the online status of all clan or team members and authorised players. Penalty System: An optional penalty system is implemented to prevent abuse of the protection feature. For example, if a player leaves a clan or team, a penalty can be applied to all members and protection can be disabled for a configurable period of time. Game Tip Messages: The plugin displays game tip messages to players when they hit a protected structure or vehicle. The message includes the percentage of protection and is colour coded according to the level of protection. It supports all the languages available in Rust. Commands: Players with permission can use commands to check the protection status of other players, change the offline time of other players, and change the penalty status. Cache System: The plugin uses a caching system to optimise performance and keep the impact on the server to a bare minimum. Configuration: The plugin includes a configuration file that allows you to customise the behaviour of the plugin. Commands All commands can be configured. /orp or /ao <steam id or full name> — Check a player's offline protection status. You can type the command without a name when looking at a player's structure. /raidprot — Display offline raid protection information. /orp.fill.onlinetimes — Fill all players offline times. (Chat & Console command) /orp.test.offline <steam id or full name> <hours> — Change a player's offline time. /orp.test.online <steam id or full name> — Change a player's offline time to the current time. /orp.test.penalty <steam id or full name> <hours> — Change the duration of a player's penalty. A negative value or zero would disable the penalty. /orp.update.permission — Update the permissions status (offlineraidprotection.protect) for all players. orp.update.prefabs <true> - Updates the 'Prefabs to protect' list in the configuration. Overwrites the list with the 'true' argument. (Console command) orp.dump.prefabs - Clears the 'Prefabs to protect' list in the configuration. (Console command) Permissions All permissions can be configured. offlineraidprotection.protect — Allows a player to be protected from raids. offlineraidprotection.check — Allows a player to check the offline protection status of other players. offlineraidprotection.admin — Allows a player to use all admin commands of the plugin. To grant a permission, use carbon/oxide.grant <user or group> <steamname or ID> <permission>. To revoke a permission, use carbon/oxide.revoke <user or group> <steamname or ID> <permission>. Configuration The configuration is to a large extent self-explanatory. Raid Protection Options Only mitigate damage caused by players: Choose whether or not to only mitigate damage caused directly by players. Protect players that are online: Choose whether or not to protect the bases of the players who are online. Works when "Scale of damage depending on the current hour of the real day" is configured. Scale of damage depending on the current hour of the real day: Defines the protection levels based on the current hour of the real day. The key is the hour of the day (0-23), and the value is the protection scale (0 — 340282300000000000000000000000000000000). Example: "0": 0.0, "1": 0.0, "2": 0.0, "3": 0.0 This means that the protection level is 100% from midnight to 3am. Scale of damage depending on the offline time in hours: Defines the protection levels based on the time since the player went offline. The key is the number of hours since the player went offline, and the value is the protection scale (0 — 340282300000000000000000000000000000000). The value of the hours can also be a decimal number. Example: "12": 0.25, "24": 0.5, "48": 1.0, "96": 2.0 This means that 12 hours after the player goes offline, the protection level will be 75%. After 24 hours it will be 50% and after 48 hours it will be 0%. After 96 hours, the damage is increased by 200%. Cooldown in minutes: During this time, damage levels will remain vanilla. Raids are possible. Scale of damage between the cooldown and the first configured time: During this time, the level of damage between the cooldown and the first configured time can be set to a specific value, such as 0.0 Online time to qualify for offline raid protection in minutes: Time to qualify for offline raid protection after a player connects Protect all prefabs: Choose whether to protect all prefabs or only specific ones. This will protect anything in the TC range. Protect AI (animals, NPCs, Bradley and attack helicopters etc.) if 'Protect all Prefabs' is enabled: Choose whether or not to protect AI entities if "Protect all Prefabs" is enabled. May cause high hook times if set to true. Protect vehicles: Choose whether to protect vehicles or not. Vehicle authorisation always has priority. If you want to exclude certain vehicles from protection, add them to the blacklist. Protect twigs: Choose whether to protect twigs or not. Prefabs to protect: List of prefabs that will be protected. Make sure you remove the prefabs you don't want to protect, some of them are pointless. Prefabs blacklist: List of prefabs that will not be protected. Prefabs in the blacklist will always have priority to be unprotected. Timezone Options The fallback timezone is UTC if you leave it blank in the configuration, or if your configured timezone doesn't exist. The timezone identifiers are different for Windows and Linux. You can check the appendices to find your preferred timezone. Conclusion: The Offline Raid Protection plugin provides a comprehensive solution for protecting players' structures and vehicles. This plugin is essential for any Rust server owner who wants to provide a fair and enjoyable gaming experience for their players. Acknowledgments Special thanks to @Kulltero for his valuable feedback and suggestions during the development of this plugin. Windows_Timezones.txt Linux_Timezones.txt Prefabs.txtFree -
Version 4.0.7
559 downloads
The plugin allows to define opening and closing times for raids for each day of the week, with the ability to block damage outside of those hours. The configuration is customizable with many options, #FEATURES Defined schedules raids are allowed during the day. Blocks damage or execute console command outside the allowed period. Displaying an UI or use CustomStatusFramework. Everything is customizable, configurable with many options. Protects the player if he has recently joined the server Prevents raids if not enough time to play #INFO Bypass allows you to destroy if is not the raid time (only if block damage is enabled). All options are optional and can be configured The plugin is compatible with players languages The times displayed can be configured for the players, in order to adapt to the format of their country /craid (for open panel) #API private bool API_IsRaidTime() => _mainController.currentSchedule.isRaidTime; private List<int> API_StartSchedule() { return new List<int> { (int)_mainController.currentSchedule.start.day, _mainController.currentSchedule.start.hour, _mainController.currentSchedule.start.minute }; } private List<int> API_EndSchedule() { return new List<int> { (int)_mainController.currentSchedule.end.day, _mainController.currentSchedule.end.hour, _mainController.currentSchedule.end.minute }; }$23.00- 251 comments
- 11 reviews
-
- 9
-

-

-

-
Version 1.3.20
2 downloads
Drastically changing how Rust raids and trap bases work! How can you best defend against raiders entering your base? Pop some smoke and toss TearGas! TearGas will cause any raider who enters the smoke to take damage and bleed while they are in the smoke cloud. Teargas is classified by police and militaries as an "area denial tool". Keep raiders away. If they can't get close to your base, they can't raid it! Any TearGas thrower who has TC auth won't take damage, and any victim that's wearing a HazMat suit will take half the normal damage. Outside your building privilege area, anybody will take damage from the TearGas, including yourself if you enter the smoke cloud. Defend your base the proper way-with teargas and bullets! Dependencies: https://umod.org/plugins/skins Once the plugin is installed, server owners must add the SkinID 3338854123 to the server. Only smoke grenades skinned with this SkinID will turn into TearGas. You can add the SkinID with the commands below: Console: skin add grenade.smoke 3338854123 Chat: /skin add grenade.smoke 3338854123 You can also add TearGas grenades to Shop(https://lone.design/product/shop-rust-plugin/) by going to "Add Item", then entering "grenade.smoke" as the shortname, then entering the SkinID 3338854123 and setting your price. More updates coming soon!$9.99 -
Version 1.1.1
83 downloads
This plugin allows you to set how many times per day players can raid bases. It is a very straight forward plugin with lots of features to customize it for your server such as scheduled reset times, custom UI, and protection options. Features: Limit number of raids that players can perform daily Scheduled reset times, even when server is offline Option for "free" raids against your attackers when defending your base Limit sync with teams and clans Assign bonus raid points to individuals Damage thresholds for raids Configurable messages Customizable UI Works with Simple Status Works with Clans Works with protection plugins (configurable) Documentation: A full readme including permissions, command, and config options is available in this google doc link. Disclaimer: Like all of my plugins - this plugin is sold as is. I will be happy to take feature requests into consideration but make no guarantees about which ones get implemented. Please refer to the feature list before you make your purchase$19.99 -
Version 1.0.8
16 downloads
Are your players tired of getting surprised by AutoTurrets in Raid Bases? Or maybe you want to change up the PVP raid Strats a bit, and now you can with these EMP and Snapshot Grenades. Works with Raidable Bases. EMPS disable Tesla Traps and AutoTurrets that are powered within range. Snapshot pings traps within range for the using player. You can even make them sticky if needed Simply set your Custom Grenades in your loot table, and let the plugin handle the rest. The Extra Grenade properties relies on the SkinId upon throw/drop. DEMO COMMANDS /GIVEGRENADES - REQUIRES ADMIN - WILL SEND BOTH GRENADES TO YOUR INVENTORY CONFIG { "Snapshot Settings": { "Snapshot CustomName": "Snapshot Grenade", "Snapshot Skin ID": 3294746628, "Snapshot Radius": 20, "Ping Timer": 10, "Ping Batch Spacing (Helps with bases with a lot of Traps)": 0.2, "Enable Snapshot Stick?": false, "Enable Snapshot Sphere?": true }, "EMP Settings": { "EMP CustomName": "EMP Grenade", "EMP Skin ID": 3294872882, "EMP Radius": 10, "Reset Flag Timer": 15, "Enable EMP Stick?": false, "Enable Emp Sphere?": true } }$8.99-
- 4
-

-

-
- #snapshot grenade
- #emp grenade
-
(and 1 more)
Tagged with:
-
Version 1.1.0
59 downloads
In short, this plugin turns low grade, crude oil and diesel into a liquid, which forces players to use jugs, bota bags and bottles to interact with fuel. Based on this, we can introduce new features such as fuel splashing, refining crude oil in regular purifiers or building autonomous refining factories using powered water purifiers and pumps! Also players can get their fuel from Oxum's Gas Station. 1. Introducing Liquid Fuel This plugin introduces 3 new liquids: Low Grade, Crude Oil and Diesel. 1 ml of the liquid represents 1 respecting "vanilla" item. Vanilla fuel is completely replaced by its liquid form. All items, vehicles, weapons and deployables now use liquid fuel. Players need to use liquid containers in order to get and store fuel. 2. Getting fuel There are several ways players can get fuel From Oxum's Gas Station Gas pumps now contain a bit of low grade inside them. Players can come to gas station and loot them. You can modify behaviour of this in the configuration file. From Red Oil Barrels Just like the regular old red barrels, players can get fuel from them, but they need to have free liquid containers inside their inventory. But players should be careful, because this plugin introduces gas explosions. From Pump Jacks. Since pump jacks now only farm crude oil, this plugin adds an option to increase crude oil production rates, see [3. Looting] Aditional Crude Oil in pumpjack configuration option. All drop rates are configurable. 2.1 Commands There are several chat and console commands so players, admins and other plugins could give liquid fuel. Chat commands: /buylowgrade /buycrudeoil /buydiesel these chat commands require liquidfuel.buyfuel permission liquidfuel.freefuel permission gives fuel for free Admin console commands: givefuel <1 - LGF , 2 - Crude Oil l, 3 - Diesel > <amount> <player name> 3. Refining Crude Oil This plugin completely rethinks the way players refine their crude oil. Old oil refineries become non-existent the second you load the plugin, which makes players use purifiers. Players are able to refine the fuel at their base almost immediately after starting out. They use regular water purifiers, that run on campfires, these purifier are slower and refine at a slower pace. Mid-game way to get fuel is to place a powered water purifier. By default, it refines faster and more efficiently, producing more low grade. Also, all purifiers have a input/output slots for connecting them to barrels or other purifiers. This allows players to build complicated autonomous fuel refining factories, which I find very interesting. Remember, speed and refining rates are configurable, so you can balance it the way you see it! 4. Fuel Splashing Now players can splash and then ignite fuel anywhere and in any pattern they wish. This allows players to raid bases, use it in PvP, create interesting trap contraptions and much more! 5. XM42 Flamethrower It was removed from the plugin, since it was added in vanilla Rust. 6. Explosions Red fuel barrels now explode when they are ignited or shot. Players should carefully farm oil barrels using tools, because one shot can initiate a chain reaction of explosions of other neighbouring oil barrels and can easily kill them. Also, fuel wagons now have a chance of exploding when hit with something flammable. You can change the projectiles and the explosion chance in the configuration file. 7. Crafting Crafting with liquid fuel is quite easy - to craft low grade you just need to have a liquid container in your inventory to store the crafted fuel inside, to craft something with low grade, you need to have a liquid container with enough fuel inside it. 7.2 Crafting with mixing table mixing low grade is done as before, by placing cloth and fat, players can get fuel, it's just in liquid form mixing recipes that require low grade are done by placing a liquid container in place of low grade. 8. Localization Built-in localization: English Russian But you can always add your own or change existing ones by modifying files in /oxide/lang/{your_language}/LiquidFuel.json 9. Configuration LiquidFuel's configuration is quite easy to understand and work with. Here is the example of the configuration file. It is located in /oxide/config/LiquidFuel.json { "[1. Prices] Low Grade Fuel Amount": 300, "[1. Prices] Low Grade Fuel Price (set value to 0 to make it free, use ServerRewards or Economics as a shortname to use RP points or Economics balance respectively)\"": { "ShortName": "scrap", "Amount": 50, "SkinID": 0 }, "[1. Prices] Crude Oil Amount": 150, "[1. Prices] Crude Oil Price (set value to 0 to make it free, use ServerRewards or Economics as a shortname to use RP points or Economics balance respectively)\"": { "ShortName": "scrap", "Amount": 75, "SkinID": 0 }, "[1. Prices] Diesel Amount": 10, "[1. Prices] Diesel Price (set value to 0 to make it free, use ServerRewards or Economics as a shortname to use RP points or Economics balance respectively)\"": { "ShortName": "scrap", "Amount": 100, "SkinID": 0 }, "[2. Entity Fuel Tanks] Max interaction distance (m)": 4.0, "[2. Entity Fuel Tanks] Fuel tank stack limits": { "fuel_storage_scrapheli": 1000, "fuel_storage_attackheli": 1000, "fuel_storage": 500, "fuelstorage": 20, "engine": 20, "crudeoutput": 5000, "crate_fuel": 100, "modular_car_fuel_storage": 250, "snowmobilefuelstorage": 250, "submarinefuelstorage": 250, "tugboat fuel_storage": 250, "workcart_fuel_storage": 250, "locomotive_fuel_storage": 250, "wagon_storage_fuel": 2500, "coaling_tower_fuel_storage.entity": 5000, "flameturret.deployed": 250, "tunalight.deployed": 250, "lantern.deployed": 250, "carvable.pumpkin": 100, "jackolantern.happy": 100, "jackolantern.angry": 100, "chineselantern.deployed": 250, "skylantern.deployed": 250, "skylantern.skylantern.red": 250, "skylantern.skylantern.green": 250, "skylantern.skylantern.orange": 250, "skylantern.skylantern.purple": 250, "fogmachine": 500, "snowmachine": 500 }, "[3. Looting] Minumum of Low Grade Fuel in red barrel": 5, "[3. Looting] Maximum of Low Grade Fuel in red barrel": 9, "[3. Looting] Minumum of Crude Oil in red barrel": 15, "[3. Looting] Maximum of Crude Oil in red barrel": 19, "[3. Looting] Minumum of Diesel per diesel barrel": 1, "[3. Looting] Maximum of Diesel per diesel barrel": 1, "[3. Looting] Aditional Crude Oil in pumpjack": 3, "[3.1. Looting Oxum's Gas Station] Enable gas pumps in Oxum's Gas Station (true/false)": true, "[3.1. Looting Oxum's Gas Station] Max interaction distance": 2.0, "[3.1. Looting Oxum's Gas Station] Raycasting interval (higher number results in better performance, but slower UI)": 0.2, "[3.1. Looting Oxum's Gas Station] Minimum gas refill time (minutes)": 2.0, "[3.1. Looting Oxum's Gas Station] Maximum gas refill time (minutes)": 5.0, "[3.1. Looting Oxum's Gas Station] Minimum Low Grade Fuel": 15, "[3.1. Looting Oxum's Gas Station] Maximum Low Grade Fuel": 40, "[4. Refineries] Regular purifier purification ratio (per 1 crude oil)": 1, "[4. Refineries] Powered purifier purification ratio (per 1 crude oil)": 3, "[4. Refineries] Regular purifier purification speed (per minute)": 24, "[4. Refineries] Powered purifier purification speed (per minute)": 60, "[5. Fuel splashing] Enable fuel splashing (true/false)": true, "[5. Fuel splashing] Minimum burn time (seconds)": 20.0, "[5. Fuel splashing] Maximum burn time (seconds)": 25.0, "[5. Fuel splashing] Fire damage radius (m)": 0.2, "[5. Fuel splashing] Fire damage (per second)": 5.0, "[5. Fuel splashing] Delay between igniting next fuel path node (seconds)": 0.1, "[5. Fuel splashing] Fuel spent per second of splashing": 15, "[5. Fuel splashing] Fuel path decay time (seconds)": 180.0, "[6. XM42 Flamethrower] Price": { "ShortName": "scrap", "Amount": 500, "SkinID": 0 }, "[6. XM42 Flamethrower] Item Name": "XM42 Flamethrower", "[6. XM42 Flamethrower] Fuel capacity": 150, "[6. XM42 Flamethrower] Damage per second": 90, "[7. Explosions] Fuel wagon explosion chance": 0.2, "[7. Explosions] Projectiles that initiate fuel wagon explosion": [ "riflebullet_fire", "pistolbullet_fire", "riflebullet_explosive" ], "[7. Explosions] Red barrel explosion damage": 60, "[8. Misc] Fuel poisoning amount": 15.0 } 10. API This plugin exposes the following API methods: // Type: 1 - LGF; 2 - Crude Oil; 3 - Diesel Item CreateFuel(int type, int amount) -> Returns the stack of the requested fuel 11. Notes Because this plugin quite drastically changes Rust world and items, it is not recommended to install/uninstall this plugin mid-wipe. Even though it preserves its state after reloads, it's not recommended to unload the plugin for long periods of time. 12. Credits Thanks to @Nikita and @kyrich for helping me with testing and video production.$18.99 -
Version 0.1.0
110 downloads
This plugin converts the boring old F1 Grenade into a powerhouse! But... you can scale the Damage output, Splash Damage, And Range, So you are always in control. Give your players a new tool to Raid (or blow themselves up) with, The plugin checks the Semtex item, and adds the custom properties. Stick feature and Beeps that increase in speed on stick until Detonation to simulate the "Semtex" Grenade. The Semtex can be setup to be spawned in whatever crate you choose, I have it set to elite in default config. Spawn Chance, and Min Max Spawn can be set as well. Every Server has different tastes and settings so feel free to make this Grenade yours Via Config. Perms to use need Semtex.Use Permission, Commands either require Admin Auth or Rcon Access. { "Explosion Damage": 500, "Splash Damage": 200, "Explosion Radius": 2, "Crate To Spawn In": "crate_elite", "Crate Chance (Out of 100%)": 50, "Minimum In Crate": 1, "Maximum in Crate": 3 } /spawnsemtex - Will deposit semtex to your inventory. - admin only /givesemtex "player" amount - Will send that player the specified amount of semtex. -admin only RCON givesemtextto "player" amount - Will send that player the specified amount of semtex. 3031605679 - SKINID If help is ever needed and I am off site feel free to reach me on discord - WrecksOnTheBeat Thank you for viewing!$6.50 -
Version 1.0.0
3 downloads
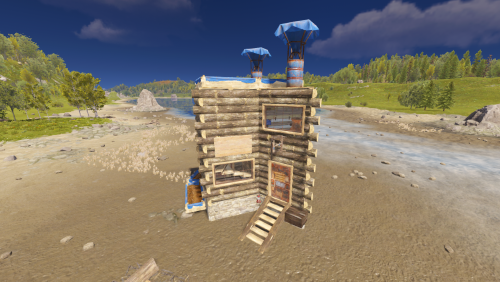
This raid base is rated as Easy on a five tier raidable bases model on our Rust server. made by Team Bunny __ All bases were initially built without stability and are still used that way - dont know how they work with stability enabled. All bases made by us fit into a 17x17x15 raid base bubble. All bases were made to be used with a raid base plugin, and as that are also used on our Rust server. All bases includes loot boxes, turrets, shotgun traps, and some bonus items too - depending on a raid tier. If there are turrets in bases, they are all without a gun - as the plugin take care of it. __ Come visit " Tims Place 10x PVE " Rust server and try out our raids! client.connect 168.100.163.35:28015$1.50-
- #raid base
- #raid
- (and 19 more)

