Jump to content

Mevent

Curator
  • Posts

    3,089
  • Joined

  • Last visited

  • Days Won

    45

Everything posted by Mevent

  1. Mevent

    Clans

    Version 1.1.55

    5,884 downloads

    Clans is an all-in-one manager that lets you create, manage and invite players all from one stunning interface. Toggle friendly fire, view clan, and player leaderboards, create and break alliances, modify gather rates for clan members and set clan skins to identify clan members abroad easily. Features Beautiful user interface Performance Allied clans Gather rate for players (allows you to set how much each clan member must collect resources. For example: each member of the clan must collect 10 thousand sulfur, so that later it can be used to craft explosives and attack another clan) Clan skins (allows you to set common skins for all clan players. All the clothes on the players of the same clan will be the same, which allows you to distinguish your own from the enemies during the battle) The clan TAG min- and max-length can be defined in the config The clan overview shows offline member names Clan members can toggle friendly-fire protection for clan mates and allies Clan creation can check TAG’s against a blocked word list Clan tagging can be optionally disabled Old (not updated since x days) clans can be automatically purged Clans rating Players rating Setting a personal avatar for your clan Autowipe with wipe (optional) Commands clans (display clan menu) clans help (get information about commands) clan create (create a clan) clan leave (leave from your clan) clan join (open UI with invitations) clan ff (toggle friendlyfire status) clan allyff (toggle friendlyfire status for allies) clan invite <name/steamid> (invite a player) clan withdraw <name/steamid> (cancel an invite) clan kick <name/steamid> (kick a member) clan allyinvite <clanTag> (invite a clan to ally) clan allywithdraw <clanTag> (cancel the offer of an alliance) clan allyaccept <clanTag> (accept the offer of an alliance) clan allycancel <clanTag> (cancen the offer of an alliance) clan promote <name/steamid> (promote a member) clan demote <name/steamid> (demote a member) clan disband (disband your clan) clans.loadavatars (download avatars of all players) clans.manage list - lists all clans, their owners and their member-count clans.manage listex - lists all clans, their owners/members and their on-line status clans.manage show [name/userId] - lists the chosen clan (or clan by user) and the members with status clans.manage msg [clanTag] [message] - sends a clan message clans.manage create [name/userId] [clanTag] - creates a clan clans.manage rename [oldTag] [newTag] - renames a clan clans.manage disband [clanTag] - disbands a clan clans.manage invite [clanTag] [name/userId] - sends clan invitation to a player clans.manage join [clanTag] [name/userId] - joins a player into a clan clans.manage kick [clanTag] [name/userId] - kicks a member from a clan clans.manage owner [clanTag] [name/userId] - sets a new owner clans.manage promote [clanTag] [name/userId] - promotes a member clans.manage demote [clanTag] [name/userId] - demotes a member clans.reborn.convert (convert data from Clans Reborn plugin) clans.umod.convert (convert data from uMod Clans (v0.2.2+) plugin) clans.convert.olddata (convert data from old data) clans.convert.old.stats – used to update player data when upgrading from older versions of the game to 1.1.31 and above. Permissions clans.cancreate (permission to create a clan) clans.canjoin (permission to join a clan) clans.canleave (permission to leave a clan) clans.candisband (permission to disband a clan) clans.cankick (permission to kick a clan member) clans.admin (permission to use command 'clans.manage') Loot Types None – used for disabled loot Gather – used for gathering loot LootCrate – used for a loot crate Look – used to look at loot Kill – used to kill entities Craft – used for crafting items HackCrate – used for hacking a loot crate FAQ Q: Where can I see an example of a config? A: Config Q: Does the Clans plugin support other plugins? A: Yes, this Clans plugin has an API similar to other popular clans plugins. If the plugin works with Clans - it works with this plugin too. Q: How do I enable the display of clan ratings on the screen? A: You need to install the Clans Top plugin Q: Does the Clans plugin work with other Rust plugins? A: The Clans plugin is designed to work with a wide range of other Rust plugins, but compatibility may vary depending on the specific plugins you are using.
    $45.95
  2. Mevent

    Cases

    Version 2.0.0

    1,403 downloads

    Revolutionary cases, the juiciest interface, scroll animations and much more! Features Beautiful user interface Opening animation Performance Each case is configured separately Commands cases (open cases interface) givecase <steamid> <caseid> <amount> (give a case to the player) givecase * <caseid> <amount> (give a case to all online players) FAQ Q: Where can I see an example of a config? A: Config Q: How do I use Economics to pay for cases? A: "Economy": { "Show Balance": true, "Type (Plugin/Item)": "Plugin", "Plugin name": "Economics", "Balance add hook": "Deposit", "Balance remove hook": "Withdraw", "Balance show hook": "Balance", "ShortName": "scrap", "Display Name (empty - default)": "", "Skin": 0 }, Q: How do I use ServerRewards to pay for cases? A: "Economy": { "Show Balance": true, "Type (Plugin/Item)": "Plugin", "Plugin name": "ServerRewards", "Balance add hook": "AddPoints", "Balance remove hook": "TakePoints", "Balance show hook": "CheckPoints", "ShortName": "scrap", "Display Name (empty - default)": "", "Skin": 0 }, Q: I have a question/problem. What should I do? A: You can write to me in a PM on the site, create a ticket. Or write me in Discord: mevent Q: How does a player give out Skill Tree XP? A: { "Type": "Command", "ID": 7, "Image": "", "Title": "Give 1K XP from SkillTree", "Command (%steamid%)": "givexp %username% 1000", "Plugin": { "Hook": null, "Plugin name": null, "Amount": 0 }, "Display Name (empty - default)": "", "ShortName": "", "Skin": 0, "Amount": 1, "Chance": 65.0 }, Q: How can I add cases not for purchase, but just to have them? A: For example, if you give cases with the "givecase" command: givecase <steamid> <caseid> <amount> give a case to the player givecase * <caseid> <amount> give a case to all online players
    $25.95
  3. Mevent

    Quarry Levels

    Version 2.2.0

    1,197 downloads

    Allows players to upgrade their quarries or pumpjacks with another quarry or pumpjack effectively allowing them to stack up to x quarries and pumpjacks together instead of having them placed individually causing clutter. This plugin is very performant and was designed to run on very high-pop servers. A level 2 quarry will produce the same amount as 2 level 1 quarries. Same for pumpjacks. Every quarry level will also unlock the next tier of production. Level 3 will unlock metal, level 4 sulfur and level 5 HQM. The production rates for each output are default but can be adjusted in the config. The GUI displays the production amount, process rate, capacity and fuel consumption for each level. The production of each type is also displayed under it's respective icon each time fuel is consumed. The time it takes to complete 1 cycle is based on process rate. Permissions quarrylevels.use - Required to use the quarry levels system. Config ChatIconId - Set the Steam ID to the account with your server's icon. UnlockMetalAtLevel - Set what level metal unlocks at while upgrading. UnlockSulfurAtLevel - Set what level sulfur unlocks at while upgrading. UnlockHQMAtLevel - Set what level HQM unlocks at while upgrading. PreventUnauthorizedToggling - When enabled, only authorized players can toggle quarries/pumpjacks PreventUnauthorizedLooting - When enabled, only authorized players can access the quarry/pumpjack. EnableOilCraters - When enabled, oil craters will have a chance to spawn while surveying. OilCraterChance - The chance an oil crater will spawn while surveying. QuarryMaxLevel - Sets the maximum level a player can upgrade their quarry to. PumpjackMaxLevel - Sets the maximum level a player can upgrade their pumpjack to. QuarryCapacityPerLevel - Sets the number of slots unlocked per level. PumpjackCapacityPerLevel - Sets the number of slots unlocked per level. EnableEconomics - Enables the Economics plugin for upgrades. Leaving disable will use the old upgrade method. EconomicsCost - Sets the price per upgrade for both quarries and pumpjacks. EconomicsCurrency - Sets the vanity name of the currency to be displayed in the GUI and info text. EnableServerRewards - Enables the ServerRewards plugin for upgrades. Leaving disable will use the old upgrade method. ServerRewardsCost - Sets the price per upgrade for both quarries and pumpjacks. ServerRewardsCurrency - Sets the vanity name of the currency to be displayed in the GUI and info text. Metal_Production - Increases the amount produced each process rate. Lower = higher. Sulfur_Production - Increases the amount produced each process rate. Lower = higher. HQM_Production - Increases the amount produced each process rate. Lower = higher. ButtonBounds - Change the position of the "upgrade" button. ButtonColor - Change the container color of the "upgrade" button. ButtonOpacity - Change the background opacity of the "upgrade" button. ButtonFontColor - Change the font color of the "upgrade" button. PanelBounds - Change the position of the upgrade panel. PanelColor - Change the container color of the upgrade panel. PanelOpacity - Change the background opacity of the upgrade panel. PanelFontColor - Change the font color of the upgrade panel. Commands QL reload - Hot loads the config to apply config changes without having to reload the plugin. (Console command)
    $15.00
  4. Mevent

    Statistics

    Hi! Try wipe ImageLibrary and reload the server
  5. Mevent

    Statistics

    In the configuration, enable autowipe
  6. Mevent

    Shop

    Version 2.4.12

    15,610 downloads

    Enjoy a highly customizable Shop that can be configured in game! Use NPCs as shopkeepers, and set up a shop with ease using the game interface to add, edit, or remove items on the fly! Features of Shop Beautiful user interface with multiple templates (Fullscreen, In-Menu V1/V2/V4) Shopping Basket - add multiple items to cart and purchase them all at once Search functionality - search for items by name across all categories Pagination - efficient item browsing with page-by-page navigation Discount system (by permissions) with per-item custom discounts Automatic shop filling (+ the plugin has support for the ItemCostCalculator plugin) Selling items (players can sell items to the store and receive money for it) Sell containers configuration - choose which containers (main, belt) players can sell from Blocked skins - prevent selling of specific item skins High performance with optimized item loading Adding/editing/removing items IN GAME with visual editor Supports NPC shops (HumanNPC integration) Supports Custom Vending Machines Supports NoEscape plugin integration Supports Duel/Duelist - blocks shop access during duels Convert from ServerRewards Favorite items system - players can mark items as favorites Buy Again feature - quick repurchase of previously bought items By default, the plugin has English, Russian and Chinese translations LangAPI integration for custom translations Transfer money between players directly in the plugin (including offline players option) Shop allows you to use multiple economy plugins at once (players can choose what they want to pay with) For each item, you can choose which payment methods are available and how much they will cost, based on the selected method Cooldown system - per-item buy/sell cooldowns with per-permission overrides Wipe cooldown - block items for purchase/sale after server wipe Respawn cooldown - prevent shop access immediately after respawn Buy/Sell limits - lifetime and daily limits per permission Max buy/sell amount - limit items per transaction Force buy - fast purchase without confirmation dialogs Plant genes configuration for plant items Weapon configuration - spawn weapons with ammo and attachments Content system - configure container contents (liquid, weapon mods, etc.) Customizable UI - full color customization and formatting options Offline Image Mode - use local images instead of downloading from internet Image loading on login - preload images when players connect Console and file logging - comprehensive logging system ServerPanel integration - add Shop to ServerPanel menu Notify/UINotify integration for notifications Auto-wipe settings - automatically reset cooldowns, limits, and player data on wipe Discord Logging - Track all purchases, sales, and transfers directly in your Discord server via webhooks with customizable embeds API methods for other plugins to interact with Shop Commands shop - open shop interface shop.install – starts the shop installation process shop.refill <recovery_rate> - refill shop again recoveryRate: A value between 0 and 1 that determines the multiplier for the cost of selling items. For example, shop.refill 0.5 means that items will have a sale cost of 50% of their purchase cost. shop.convert.sr [clear] - convert items from ServerRewards to Shop. The option clear means clearing Shop items before converting shop.setvm [categories: cat1 cat2 ...] - add custom VM in config shop.setnpc [categories: cat1 cat2 ...] - add NPC in config shop.remove all - a console command to remove all items and categories from the plugin shop.remove item [category name/all] - a console command to remove an item (or all items) shop.remove category [category name/all] - a console command to remove a category (or all categories) shop.fill.icc [all/buy/sell] - a console command for updating prices of items in the store using ItemCostCalculator. all - updates both Price and SellPrice, buy - updates Price, sell - updates SellPrice shop.convert.from.1.2.26 – command to convert Shop plugin version 1.2.26 to version 1.3.0+ shop.reset – resets store data, including templates, configurations, and items. shop.reset template – resets the store interface template data. shop.reset config – resets store configuration data. shop.reset items – resets store items data. shop.reset full – completely resets all store data (templates, configurations and items). shop.manage – used to manage the Shop plugin. shop.manage economy list – displays a list of all available economic systems in the plugin. shop.manage economy set <economy_ID> <name> – sets the selected economic system by plugin ID and name. The command updates the corresponding economic system on the server and saves the changes in the configuration. FOR EXAMPLE: shop.manage economy set 0 Economics – sets the main economy plugin to "Economics". shop.manage economy set 1 ServerRewards – sets the additional economy system with ID 1 to "ServerRewards". shop.wipe – manually trigger wipe (resets cooldowns, limits, and player data) shop.change – change item category (used in editor) shop.item – console command for item actions Permissions shop.setvm - for command "shop.setvm" shop.setnpc - for command "shop.setnpc" shop.free - for free item purchases shop.admin - admin permission shop.bypass.dlc - allows bypassing Facepunch ToS item restrictions (WARNING: your server may be banned for this) API Methods The Shop plugin provides API methods for other plugins to interact with it: API_OpenPlugin(BasePlayer player) – opens the shop UI for a player. Returns empty string if failed, or UI data if successful. API_GetShopPlayerSelectedEconomy(ulong playerID) – returns the economy ID (0 = main, 1+ = additional) that the player has selected for shopping. Note: Other plugins can call these methods using Shop.Call("API_MethodName", ...) syntax. Sort Types None Name Amount PriceDecrease PriceIncrease Category Types None – normal category for items Favorite – category for favorite items Hidden – hidden category, available only in NPC stores or Vending Machines Video P.S. Video of the old version, video for the V2+ version is now in development Showcase Full screen Templates Template OLD STYLE Template NEW RUST In-Menu Templates Template V1 (V1.1) Template V1 (V1.1) with BASKET Template V2 Template V2 with BASKET Template V4 Template V4 with BASKET Installer Editor Discord Logging Track all shop activity via Discord webhooks: purchases, sales, and money transfers. TEST SERVER Join our test server to view and experience all our unique features yourself! Copy the IP Address below to start playing! connect 194.147.90.239:28015 FAQ Q: I get the message "The plugin does not work correctly, contact the administrator!”. What should I do? A: This means that your plugin is not installed. To install the plugin, use the command "/shop.install”. You need to have "shop.admin” permission to access this command. Q: Where can I see an example of a config? A: Config Q: How to use BankSystem to store the economy A: "Economy": { "Type (Plugin/Item)": "Plugin", "Plugin name": "BankSystem", "Balance add hook": "Deposit", "Balance remove hook": "Withdraw", "Balance show hook": "Balance", "ShortName": "", "Display Name (empty - default)": "", "Skin": 0, "Lang Key (for Title)": "LangTitle", "Lang Key (for Balance)": "BalanceTitle" }, Q: How to use ServerRewards to store the economy A: "Economy": { "Type (Plugin/Item)": "Plugin", "Plugin name": "ServerRewards", "Balance add hook": "AddPoints", "Balance remove hook": "TakePoints", "Balance show hook": "CheckPoints", "ShortName": "", "Display Name (empty - default)": "", "Skin": 0, "Lang Key (for Title)": "LangTitle", "Lang Key (for Balance)": "BalanceTitle" }, Q: How to use Economics to store the economy A: "Economy": { "Type (Plugin/Item)": "Plugin", "Plugin name": "Economics", "Balance add hook": "Deposit", "Balance remove hook": "Withdraw", "Balance show hook": "Balance", "ShortName": "", "Display Name (empty - default)": "", "Skin": 0, "Lang Key (for Title)": "LangTitle", "Lang Key (for Balance)": "BalanceTitle" }, Q: How to use IQEconomic to store the economy A: "Economy": { "Type (Plugin/Item)": "Plugin", "Plugin name": "IQEconomic", "Balance add hook": "API_SET_BALANCE", "Balance remove hook": "API_GET_BALANCE", "Balance show hook": "API_REMOVE_BALANCE", "ShortName": "", "Display Name (empty - default)": "", "Skin": 0, "Lang Key (for Title)": "LangTitle", "Lang Key (for Balance)": "BalanceTitle" }, Q: How to use scrap to pay for items A: "Economy": { "Type (Plugin/Item)": "Item", "Plugin name": "", "Balance add hook": "", "Balance remove hook": "", "Balance show hook": "", "ShortName": "scrap", "Display Name (empty - default)": "", "Skin": 0, "Lang Key (for Title)": "LangTitle", "Lang Key (for Balance)": "BalanceTitle" }, Q: How to add KIT as shop item A: https://pastebin.com/4szBQCgz Q: How to add Command as shop item A: https://pastebin.com/bcCkzBEL Q: How do I make a weapon spawn with ammo in it? A: You need to configure the "Weapon" section in the item config: "Weapon": { "Enabled": true, "Ammo Type": "ammo.rifle.explosive", "Ammo Amount": 128 } Q: How do I make items spawn some content (liquid, weapon modifications)? A: You need to configure the "Content" section in the item config: "Content": { "Enabled": true, "Contents": [ { "ShortName": "weapon.mod.lasersight", "Condition": 100.0, "Amount": 1, "Position": -1 } ] }, Q: How to turn off the sell feature? A: You need to turn off "Enable item selling” in the config, or do it in the item setting in the game. "Enable item selling?": false, Q: How to use the ItemCostCalculator with Shop? A: You need to use command "shop.refill" (command to refill the Shop)
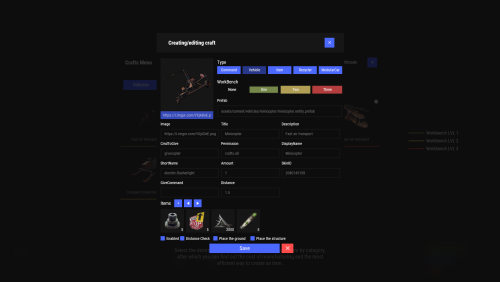
 Q: What should be the size of images for item icons? A: Typically, the image dimensions for item icons are 512x512 pixels, but any square image can suffice. Q: I get the error "UI is unavailable for player. Reason: Menu UI is not initialized". How to fix it? A: This error occurs when the interface template is not installed or configured. Follow these steps: 1. Reset the template using the command: shop.reset template (use only template to avoid data loss). 2. Install the interface via shop.install in the game (to visually select a template) or through the console. Note: Ensure you have the shop.admin permission to execute these commands. Q: How do I add Shop to the ServerPanel menu? A: Follow these simple steps: 1. Open ServerPanel menu in-game and click "+ADD CATEGORY" button 2. Set these exact parameters: Type: Plugin Plugin Name: Shop Plugin Hook: API_OpenPlugin 3. Click "SAVE" button to create the category 4. Reset Shop template and install it: Type in console: shop.reset template (IMPORTANT: use only "template"!) Then type: shop.install Note: If Shop doesn't appear in ServerPanel menu, make sure both plugins are loaded and you typed the parameters exactly as shown above. Q: I see black images with Rust logo or get error 429 when loading images. What should I do? A: These issues occur when there are problems downloading images from the internet. The Shop plugin sends images to ImageLibrary but is not responsible for the downloading process itself. Error 429 typically occurs due to rate limits imposed by image hosting services like Imgur (see HTTP 429 documentation for more details). To fix this, enable Offline Image Mode which will use local images instead: Enable the mode in config: Open "oxide/config/Shop.json" (or "carbon/config/Shop.json" for Carbon) Set "Enable Offline Image Mode": true Set up the images: Create folder "TheMevent" in "oxide/data" (or "carbon/data" for Carbon) Download PluginsStorage (click "CODE" → "Download ZIP") Extract the ZIP and copy all contents to the "TheMevent" folder Reload the plugin: Type o.reload Shop (Oxide) or c.reload Shop (Carbon) Note: If you want to add your own custom images, place them in the "TheMevent" folder and reference them with the "TheMevent/" prefix. For example: "TheMevent/Icon1.png", "TheMevent/MyCustomIcon.jpg", etc. Q: What placeholders are available for commands and what do they do? A: You can use these placeholders in shop commands and they will be automatically replaced when a player purchases a command item: %steamid% - Replaced with the player's Steam ID (e.g., "76561198000000000") %username% - Replaced with the player's display name (e.g., "PlayerName") %player.x% - Replaced with the player's X coordinate position %player.y% - Replaced with the player's Y coordinate position %player.z% - Replaced with the player's Z coordinate position Example usage in shop commands: "Command (%steamid%)": "say Welcome %username%!|teleport %steamid% %player.x% %player.y% %player.z%" Note: Multiple commands can be separated by the "|" character, and they will be executed in sequence when the item is purchased. Q: How to set different prices for different currencies (RP and balance)? A: You can configure separate currency prices for each item. Edit the file oxide/data/Shop/Shops/Default.json and find the item you want to modify. In the "Currencies" section, set different prices for each economy: "Currencies": { "Enabled": true, "Currencies": { "0": {"Price": 1000}, "1": {"Price": 500} } } This means players pay 1000 from their main balance (Economics) or 500 RP from their ServerRewards balance. Economy ID 0 = main economy, ID 1 = ServerRewards. Q: How to create a shop using HumanNPC plugin and set specific categories? A: To create a shop with HumanNPC, follow these steps: Create an NPC using HumanNPC plugin Get the NPC ID (you can find it in the HumanNPC config or use the command humannpc.list) Use the Shop command to add the NPC: shop.setnpc [categories: cat1 cat2 ...] Example: shop.setnpc categories: Weapon Ammunition Tools - adds the NPC with Weapon, Ammunition, and Tools categories shop.setnpc categories: * - adds the NPC with all available categories Note: You need the shop.setnpc permission to use this command. Make sure both HumanNPC and Shop plugins are loaded on your server. Q: How to add Custom Vending Machines to Shop plugin? A: To add Custom Vending Machines to Shop, follow these steps: Place a Custom Vending Machine in your world Look at the vending machine and use the command: shop.setvm [categories: cat1 cat2 ...] Example: shop.setvm categories: Weapon Ammunition - adds the vending machine with Weapon and Ammunition categories shop.setvm categories: * - adds the vending machine with all available categories Note: You need the shop.setvm permission to use this command. The vending machine will be automatically added to the Shop configuration. Q: How does the Shopping Basket feature work? A: The Shopping Basket allows players to add multiple items to a cart before purchasing. Players can add items to the basket, review their selection, and purchase everything at once. The basket shows the total cost and allows players to remove items before checkout. This feature must be enabled in the template settings. Q: How does the Search functionality work? A: The Search feature allows players to search for items by name across all categories. Simply type in the search box and the shop will filter items matching your query. Search works across all enabled categories and respects permission settings. The search feature can be enabled/disabled in the template configuration. Q: What are Wipe Cooldown and Respawn Cooldown? A: These are time-based restrictions: Wipe Cooldown: Blocks items from being bought/sold for a specified time after a server wipe. This is useful for preventing powerful items from being purchased immediately after wipe. Configure in config: "Wipe Cooldown": true and "Wipe Cooldown Timer": 3600 (seconds). Respawn Cooldown: Prevents players from opening the shop immediately after respawning. Helps prevent abuse. Configure in config: "Respawn Cooldown": true and "Respawn Cooldown Timer": 60 (seconds). Q: How do Daily and Lifetime Limits work? A: Limits control how many times players can buy/sell items: Lifetime Limits: Total number of times a player can buy/sell an item across their entire account. Set to 0 for unlimited. Daily Limits: Maximum number of times per day a player can buy/sell an item. Resets daily. Set to 0 for unlimited. Limits are per-permission, so you can set different limits for VIP players, regular players, etc. The plugin uses the highest limit among all permissions the player has. Q: What is the "Buy Again" feature? A: Buy Again allows players to quickly repurchase items they have bought before. This feature shows a history button in the shop UI (if enabled) and requires a permission. To enable, set "Buy Again Settings": {"Enabled": true, "Permission": "shop.buyagain"} in the config. Q: How do I configure blocked skins for selling? A: You can prevent players from selling specific item skins. In the config, add entries to "Blocked skins for sell": "Blocked skins for sell": { "rifle.ak": [52, 25], "pistol.m92": [100, 200] } Q: How do I configure which containers players can sell from? A: In the config, set "Settings available containers for selling item": "Settings available containers for selling item": { "Enabled": true, "Containers": ["main", "belt"] } Available container names: "main" (inventory), "belt" (hotbar), "wear" (clothing), etc. Q: What are Auto-Wipe Settings? A: Auto-Wipe Settings automatically reset certain data when you run the shop.wipe command. Configure in config: "Auto-Wipe Settings": { "Cooldown": true, "Players": true, "Limits": true } Cooldown: Resets all item cooldowns Players: Resets all player data (favorites, economy selection, etc.) Limits: Resets all buy/sell limits Q: How do I customize price formatting? A: In the config, set "Formatting Settings" to control how prices are displayed: "Formatting Settings": { "Buy Price Format": "G", "Sell Price Format": "G", "Shopping Bag Cost Format": "G", "Balance Format": "G" } Format options: "G" (general), "N" (number with separators), "C" (currency), "F" (fixed-point), etc. See .NET number formatting for all options. Q: How do I enable transfers to offline players? A: In the config, set "Allow money transfers to offline players?": true. By default, this is disabled for security reasons. Q: How do I configure Duel/Duelist integration? A: To block shop access during duels, set "Blocking the opening in duels?": true in the config. Make sure you have the Duel or Duelist plugin loaded. Q: What do all shop item settings mean and how should I configure them? A: Below is a short explanation of the most important item fields and how they affect the plugin. Type – what this entry does: Item (gives an in-game item), Command (runs server commands), Plugin (calls another plugin hook), Kit (gives a kit). ID – unique numeric ID of the item inside Shop. Used internally (for logs, favorites, editor); normally you don’t change it manually. Image – custom UI icon key. If empty, Shop will try to use the item icon found by ShortName. Permission – Oxide/Carbon permission required to see and use this item. Leave empty to make the item available to everyone, or set e.g. shop.vip for VIP‑only items. Title – custom title shown in the UI. If empty, the plugin will try to use DisplayName, then the in‑game display name of the item, or fall back to an empty string. Description – additional text shown in the item window. Optional, purely visual. Command (%steamid%) – used when Type = Command. The plugin will execute this command on the server. You can use placeholders like %steamid%, %username%, %player.x%, %player.y%, %player.z%. Each purchase can run multiple commands (split internally by |). Kit – kit name for Type = Kit. The plugin will give a kit with this name when the player buys the item. Plugin – used for Type = Plugin. Contains plugin name, hook name and amount. When the item is purchased, the specified hook will be called in the target plugin. DisplayName (empty – default) – overrides the in‑game item name shown to the player (for Type = Item). If empty, the plugin uses the original item display name (optionally via Lang API). ShortName – shortname of the item (e.g. rifle.ak). This is required for Type = Item; it is used to find ItemDefinition, icon, stack size, etc. Skin – workshop skin ID for the item. Only used when Type = Item. Is Blueprint – if enabled, Shop will give the item as a blueprint instead of the regular item. Amount – how many items are given/sold per one purchase. For blueprints this is how many separate blueprint items are created. Enable item buying? (CanBuy) – if disabled, the item cannot be bought (only sold, if selling is enabled). Price – default purchase price. Can be overridden per‑economy in Currencies – if a currency is configured for buying, its price will be used instead of this value. Enable item selling? (CanSell) – if disabled, players cannot sell this item back to the shop. Sell Price – default sell price. Can also be overridden in Currencies for selling. Buy Cooldown / Sell Cooldown – base cooldown in seconds between purchases/sales of this item. Can be overridden by per‑permission cooldowns below. Buy Cooldowns / Sell Cooldowns – per‑permission cooldowns. Keys are permission names (e.g. shop.vip), values are cooldown seconds. The plugin uses the lowest cooldown among permissions that the player has. Use custom discount? – if enabled, the item will use its own Discount map instead of the global discount configuration. Discount (%) – per‑permission discount percentages for this item (only if custom discount is enabled). The highest discount from permissions that the player has will be applied. Sell Limits / Buy Limits – global lifetime limits per permission. A value of 0 means “no limit”. The plugin selects the highest limit among permissions the player has. Daily Buy Limits / Daily Sell Limits – per‑day limits (reset by the plugin’s daily logic). 0 means “no daily limit”. Max Buy Amount / Max Sell Amount – maximum number of items that can be bought/sold in a single transaction (0 disables this limit). Force Buy – if enabled, the item will use fast purchase flow (without extra confirmation windows, depending on UI settings). Prohibit splitting item into stacks? – if enabled, the plugin will try to give the item in a single stack instead of splitting it into multiple stacks, when possible. Purchase/Sale block duration after wipe – time (in seconds) after a wipe during which this item cannot be bought/sold. Useful for limiting powerful items early in the wipe. Localization – per‑language messages for the item title. If enabled and a translation exists for the player’s language, it will override the normal title. Content – configuration of contents for containers (e.g. boxes, weapons with attachments, etc.). You can add inner items (shortname, amount, condition, position). Weapon – additional settings for weapons (ammo type, ammo amount, etc.). Applied when the item is created. Genes – plant gene configuration. If enabled, the plugin will set specified genes on the created item. Currencies – per‑economy price configuration. You can set different prices for each enabled economy plugin (by economy ID) for both buying and selling. If a currency is configured and enabled for the player’s selected economy, its price takes priority over the default Price/Sell Price. Q: What do shop category settings mean and how should I configure them? A: Categories group your shop items and control how they are shown, sorted and filtered for players. Enabled – turns this category on or off. If disabled, the category and all its items will not appear in the shop UI at all. Category Type – controls special behavior of the category: None – a normal category that shows the items you added to Items. Favorite – a virtual category that shows each player’s favorite items (based on their own favorites list). Items here are taken from other categories the player marked as favorite. Hidden – a hidden category. It is stored in data and can be used for management, but is not shown in the normal category list in UI. Title – the name of the category displayed in the UI. If Localization is enabled and contains a translation for the player’s language, that localized text will be shown instead of this value. Permission – permission required to see and use this category. If you leave it empty, all players can see the category (subject to item‑level rules). If you set e.g. shop.category.vip, only players with that permission will see this category in the shop. Sort Type – how items inside the category are sorted: None – items are shown in the order they are stored/edited. Name – items are sorted alphabetically by their PublicTitle (what the player sees). Amount – items are sorted by Amount (stack size) in ascending order. PriceIncrease – items are sorted by price from cheaper to more expensive. PriceDecrease – items are sorted by price from more expensive to cheaper. Sorting is applied every time the category items are requested. Items – the list of ShopItem entries that belong to this category. For normal categories (Type = None/Hidden) this is what will be displayed in the item grid. For Favorite categories this list is not used for display – the plugin uses the player’s favorites instead. Localization – optional localized title for the category. When enabled, the plugin will try to show a translated title based on the player’s language. If no translation is found, it falls back to the Title field. How visibility and filtering work – when the shop builds a category: For normal categories, only items that are available for the player (permission, currencies, buy/sell rules, etc.) are included. Skip/take pagination is applied on top of that filtered list to show items page by page. For favorite categories, the plugin takes the player’s favorite items, applies sorting, and displays them in this special category. Reordering categories and items – categories and items can be moved up/down (or left/right) in the in‑game editor. This changes the order in which categories are shown in the UI and the default order of items when Sort Type = None. Q: How do I enable and use ADMIN MODE? A: ADMIN MODE is a visual in-game editor that allows you to manage your shop without editing files manually. Step 1: Enable ADMIN MODE Ensure you have the shop.admin permission Open shop with /shop command Click the "ADMIN MODE" button in the header (shows "■" when active) Step 2: Create/Edit Categories To create a new category: With ADMIN MODE enabled, click the "+" button in categories list Fill in category details (Title, Enabled, Type, Permission, Sort Type) Click "SAVE" To edit an existing category: Click the "Edit" button (pencil icon) next to the category Modify settings Click "SAVE" or "CANCEL" Step 3: Create/Edit Items To create a new item: Open the target category Click "+ADD ITEM" button Select item from the selection panel Configure all item properties (price, amount, permissions, etc.) Click "SAVE" To edit an existing item: Click the "Edit" button on the item Modify properties Click "SAVE" or "CANCEL" Additional ADMIN MODE Features: Use ↑↓ arrows to reorder categories Use ←→ arrows to reorder items within categories Use "DELETE" button in editor to remove categories/items All changes save automatically - no manual file editing needed Q: Where are shop files stored and what do they contain? A: Shop plugin data is organized in the following structure: Configuration (oxide/config/Shop.json or carbon/config/Shop.json) Plugin settings (permissions, commands, economy configuration) Notification settings Discord logging configuration Global plugin options Shop Data (oxide/data/Shop/Shops/Default.json or carbon/data/Shop/Shops/Default.json) This is the main shop inventory file All categories and their settings All items with prices, permissions, cooldowns, limits Item configurations (weapons, content, currencies, etc.) Edited through ADMIN MODE or manually UI Template (oxide/data/Shop/UI.json or carbon/data/Shop/UI.json) Interface template configuration Colors, sizes, positions Display settings Reset with: shop.reset template then shop.install Player Data (oxide/data/Shop/Players/ or carbon/data/Shop/Players/) Individual player files (one per player)
    $29.95
  7. Mevent

    Welcome UI

    To set the command to be executed when the button is pressed
  8. Mevent

    Crafts

    Version 2.10.23

    1,652 downloads

    Crafting system that allows you to create items, cars, vehicles, recyclers, etc! Commands craft open interface crafts.setwb [categories: cat1 cat2 ...] set new custom workbench Permissions You can set permission in config, for example: "Permission (ex: crafts.use)": "crafts.use", crafts.setworkbench - allows you to use the "crafts.setwb" command (set custom workbenches) Craft Types Command Vehicle Item Recycler ModularCar How to install a custom workbench 1. Spawn the workbench (for example, in RustEdit or a plugin) 2. In the game, go to him and use the command "crafts.setwb" and specify the necessary categories. Example: /crafts.setwb Misc 3. Go to config (oxide/config/Crafts.json) and configure this workbench (use SafeZone, workbench level, etc.) VIDEO FAQ Q: Where can I see an example of a config? A: Config
    $19.95
  9. Mevent

    Skills

    Version 2.1.9

    2,795 downloads

    Introducing Skills, the ultimate skill progression system for Rust servers featuring 71+ pre-configured skills across 13 categories! Complete with 4 UI templates, modal windows system, automatic migration from SkillTree/Skills V1, and comprehensive API. Transform your server into a world of specialization where players can master every aspect of Rust - from elite resource gathering and crafting to combat dominance and survival expertise. With intuitive progression, stunning visuals, and seamless integration, Skills delivers endless replayability and keeps players engaged for months! Why Choose Skills? Massive Skill Library - 71+ pre-configured skills covering every gameplay aspect Ready to Deploy - All skills are balanced and ready to use immediately Deep Progression - 10 levels per skill with meaningful advancement Visual Editor - Easy customization without coding knowledge Server Integration - Native support for ServerPanel V1/V2/V4, Notify/UINotify, and all major economy plugins Performance Focused - Optimized for high-population servers Seamless Migration - Automatic data conversion from SkillTree and Skills V1 Modal Windows - Advanced modal system for custom interfaces Multi-Template Support - Fullscreen, V1, V2, V4 ServerPanel templates Real-time Notifications - Integrated Notify/UINotify support Video Overview Showcase Templates Fullscreen Template ServerPanel V1 Template ServerPanel V2 Template ServerPanel V4 Template Modal Windows & Editor Modal Windows System Complete Skill Arsenal (71+ Skills) Skills comes with a massive library of pre-configured skills covering every aspect of Rust gameplay. All skills are ready to use with balanced 10-level progression systems! Mining Skills All Ores Mining - Boosts yields from stone, sulfur, metal, and HQM ore by up to 50% Stone Mining - Specialized stone gathering with up to 50% bonus Sulfur Mining - Enhanced sulfur ore collection up to 50% Metal Mining - Increased metal ore yields up to 50% HQM Mining - High-quality metal ore bonuses up to 50% Instant Ore Destruction - Chance to instantly destroy ore nodes (up to 20%) Durability Skills Tool Durability - Reduces wear on gathering tools Weapon Durability - Preserves weapon condition in combat Clothing Durability - Maintains armor integrity Wood Skills Wood Gathering - Increased wood collection from trees Instant Tree Chopping - Chance to fell trees instantly Coal Chance - Bonus coal drops from woodcutting Resources Skills Smelted Ore Chance - Bonus metal from ore smelting Animal Butchering - More meat from animal carcasses Instant Butchering - Chance to butcher animals instantly Plant Gathering - Better yields from bushes and hemp Crop Harvest - Increased vegetable production Fishing - Improved fishing success and rare catches Instant Barrel Destruction - Instant barrel breaking chance Crafting Skills Craft Duplicate - Chance for double crafted items Craft Speed - Faster crafting times Recycler Speed - Quicker recycling Furnace Smelting Speed - Faster ore smelting Component Find Chance - Bonus components from scrapping Cooking Speed - Faster food preparation Defense Skills Fire Resistance - Reduced fire damage Fall Damage Resistance - Less fall damage Temperature Resistance - Better cold/heat protection Radiation Resistance - Reduced radiation damage Explosive Resistance - Protection from explosions Stand Up Chance - Higher chance to stand when wounded Melee Damage Resistance - Less melee damage taken Damage From Scientists Resistance - Reduced scientist damage Damage From Players Resistance - PvP damage reduction Animal & Shark Defense Animal Damage Resistance - Protection from animal attacks Shark Damage Resistance - Reduced shark damage Metabolism Skills Hunger Metabolism - Slower hunger depletion Thirst Metabolism - Reduced thirst buildup Health Regeneration - Faster natural healing Horse Skills Horse Speed - Faster horse movement Horse Damage Resistance - Horse takes less damage Horse Fall Resistance - Better horse fall survival Underwater Skills Underwater Breathing - Extended underwater time Crate Skills Crate Unlocking Speed - Faster locked crate opening Crate Extra Loot - Bonus items from containers Building Skills Building Upgrade Cost - Reduced building upgrade costs Vehicle Skills Fuel Consumption - Reduced vehicle fuel usage Vehicle Repair Cost - Cheaper vehicle repairs Air Vehicle Takeoff Speed - Faster helicopter takeoff Damage Skills Damage To Scientists - Increased damage to scientists Damage To Animals - More damage to animals Damage To Players - Bonus PvP damage output Trap Damage - Increased trap and turret damage Combat Skills Magazine Size - Larger weapon magazines Effect Duration - Longer buff/debuff effects Revive Healing - More health from revives Special Skills Teleportation VIP - VIP teleport permissions Wipe Protection - Data protection across wipes Migration & Conversion Skills supports seamless data migration from popular skill plugins: SkillTree Plugin - Automatic conversion of player XP and skill levels Skills V1 - Full data transfer including custom skills and configurations Advanced Features Modal Windows System - Create custom modal interfaces for additional functionality Multi-Template UI - Support for Fullscreen, ServerPanel V1/V2/V4 templates Real-time Notifications - Integrated Notify/UINotify system for skill progression alerts Advanced API - Comprehensive developer API for third-party integrations ImageLibrary Integration - Offline image mode with automatic fallback Custom Economy Hooks - Flexible economy integration with plugin hooks XP Transfer System - Transfer XP between players on death (configurable) Cooldown System - Configurable action cooldowns to prevent spam Commands /skills or /skill - Opens the skills interface skills.modal <modalID> - Open specific modal window Admin Console Commands: skills.manage addxp <player> <amount> - Add XP to player skills.manage takexp <player> <amount> - Take XP from player skills.manage setxp <player> <amount> - Set player's XP balance skills.manage setskill <player> <skillId> <level> - Set skill level skills.manage giveskill <player> <skillId> <levels> - Increase skill level skills.manage resetskill <player> <skillId> - Reset specific skill skills.manage resetall <player> - Reset all skills skills.manage info <player> - Show player skill information Permissions skills.use - Access to skills interface (set in config as "Permission") skills.edit - Access to visual skill editor skills.xprate.vip - 1.5x XP rate bonus skills.xprate.premium - 2x XP rate bonus skills.xptransfer.vip - 75% XP transfer on death skills.xptransfer.premium - 100% XP transfer on death skills.gathering.level6-10 - Access to advanced gathering levels Developer API Skills provides a comprehensive API for developers: Methods: API_GetPlayerSkillLevel(ulong playerId, int skillId) - Get player's skill level API_AddPlayerXP(ulong playerId, float amount) - Grant XP to player API_GetSkillInfo(int skillId) - Get skill configuration data API_OnGather(BasePlayer player, Item item) - Handle gather events API_OnSkillLevelUp(BasePlayer player, int skillId, int level) - Skill level up events Hooks: OnSkillsPlayerLoaded(BasePlayer player) - When player data loads OnSkillsXPEarned(BasePlayer player, float amount) - When XP is earned OnSkillsSkillLevelUp(BasePlayer player, int skillId, int level) - Skill progression Web Config Editor Easily manage your Skills settings with our web-based configuration editor. This tool allows you to adjust plugin configurations through a user-friendly interface, eliminating the need to manually edit files on your server. P.S. Join our Discord at https://discord.gg/mevent and request the "Skills" group for access to the web configuration editor. FAQ Q: How many skills come with Skills? A: Skills includes 71+ pre-configured skills across 13 categories, all ready to use with balanced progression systems. Q: Do I need to configure anything? A: No! All skills are pre-configured and balanced. Simply install, enable desired skills, and grant permissions. Q: How does the XP system work? A: Players earn XP through gameplay activities (mining, combat, crafting, etc.) and spend it to unlock skill levels. Q: Can I customize skills? A: Yes! Use the visual editor to modify skill costs, bonuses, requirements, and create new custom skills. Q: What happens on server wipe? A: Fully configurable - you can preserve skills/XP, reset everything, or choose selective wipe protection. Q: Does it work with economy plugins? A: Yes! Full integration with ServerRewards, Economics, BankSystem, IQEconomic, and custom economy systems. Q: Can I migrate from SkillTree or Skills V1? A: Absolutely! Skills automatically converts data from both plugins. All player progress is preserved. Q: What are modal windows? A: Modal windows are custom popup interfaces you can create for additional features like shops, information displays, or mini-games. Q: Which ServerPanel versions are supported? A: Skills supports ServerPanel V1, V2, V4, and Fullscreen templates - all with dedicated banner images and layouts. Q: Can I use custom images? A: Yes! Skills supports ImageLibrary integration with offline image mode for custom skill icons and backgrounds. Q: Is there a cooldown system? A: Yes, configurable cooldowns prevent spam actions and maintain server performance. Q: How does XP transfer work? A: When enabled, defeated players can transfer a percentage of their XP to the killer, adding competitive depth. Q: Can I limit skill access? A: Yes! Skills support permission requirements, playtime requirements, and other prerequisites. Q: What's the performance impact? A: Skills is highly optimized with caching, batch processing, and efficient data structures for minimal server load. Q: How do I add Skills to the ServerPanel menu? A: You can do this directly from the ServerPanel in-game: 1. Open the ServerPanel menu in-game. 2. If you have permission to edit, switch the panel to edit mode so you can see the blue "EDIT CATEGORY" and "EDIT PAGES" buttons. 3. Choose the category where you want Skills to appear and click the "EDIT CATEGORY" button for that category. 4. While you are in this category in the ServerPanel, click the "EDIT PAGES" button to create a new page (or edit an existing one) for Skills. 5. For that page, set these exact parameters: Type: Plugin Plugin Name: Skills Plugin Hook: API_OpenPlugin 6. Save the changes. The Skills button will now appear in the ServerPanel in the category you selected.
    $24.95
  10. Mevent

    Kits

    Version 2.3.0

    8,883 downloads

    Unique kit system with the highest possible functionality and beautiful design. This will please you (no need to sit in the config every time and try to fill in some incomprehensible values, etc.), and your players (convenient, clear and informative interface). You just start editing items directly in the game) and your players (comfortable, clear, informative interface)! Features of Kits Beautiful User Interface: Experience a visually appealing and user-friendly design. High Performance: Optimized for fast, reliable performance. Automatic Kit Conversion (uMod): Easily convert your existing kits. In-Game Kit and Item Setup: Configure kits directly in the game. Auto Kits & Wipes (Optional): Automate kit distribution and server wipes. Custom Items & Commands: Assign unique items and commands to kits. Advanced Item Settings: Fine-tune every aspect of your items. CopyPaste Integration: Seamlessly work with CopyPaste. Optional Features: Delays after wipes, set blocking in Building Block, logging, and item chances. Skills & ServerPanel Support: Enhance player experience with integrated support. Commands kit – open the kit interface kit help – get help with kits kit autokit – enable or disable automatic kit. Requires the "kits.changeautokit" permission. You can set this permission up in the plugin configuration under "Permission to enable/disable autokit". kit list – display all available kits kit [name] – redeem a specific kit kits.resetkits – delete all kits kits.give [name/steamid] [kitname] – grant a kit to player kits.convert – convert from uMod Kits kits.wipe – clear players data kits.reset – resets the player data or kits in the kits system. kits.reset data [<targetID>/all] – resets the data of a player or all players. Parameters: <targetID>: The ID of the player whose data is to be reset. If you specify all, the data of all players will be reset. kits.reset kits – resets all kits in the data kits.template <interface_type> <interface_style> <template> [template_version] – allows the administrator to customize the appearance of the bundles interface by choosing between fullscreen and inmenu mode. Different styles and templates are available for each interface type. The old style (old) is only available for fullscreen mode, while the new Rust style (rust) is available for both interface types. When using the Rust style, you must specify a specific template such as normal, content, categories or content_categories. For inmenu rust templates, you can also specify the ServerPanel template version (1 or 2). Parameters: <interface_type>: The type of interface template. Valid values: fullscreen: Fullscreen interface template. inmenu: Menu interface template. <interface_style>: The style of the interface. Valid values: old: The old interface style (fullscreen only). rust: New Rust interface style (for fullscreen and inmenu). <template>: The name of the target template. Valid values depend on the interface style: normal, content, categories, content_categories. [template_version]: (Optional, only for inmenu rust) ServerPanel template version. Valid values: 1 or 2. Specifies the template version to be used with the selected inmenu rust template. Examples: kits.template fullscreen old - Sets the fullscreen interface to the old style. kits.template fullscreen rust normal - Sets the fullscreen interface to the Rust style with the normal template. kits.template fullscreen rust content - Sets the fullscreen interface to the Rust style with the content template. kits.template fullscreen rust categories - Sets the fullscreen interface to the Rust style with the categories template. kits.template fullscreen rust content_categories - Sets the fullscreen interface to the Rust style with the content_categories template. kits.template inmenu rust normal 1 - Sets the menu interface to the Rust style with the normal template for ServerPanel version 1. kits.template inmenu rust content 2 - Sets the menu interface to the Rust style with the content template for ServerPanel version 2. kits.template inmenu rust categories 1 - Sets the menu interface to Rust style with the categories template for ServerPanel version 1. kits.template inmenu rust content_categories 1 - Sets the menu interface to the Rust style with the content_categories template for ServerPanel version 1. Video P.S. Video of the old version, video for the V2+ version is now in development Showcase Full screen Templates Template OLD STYLE Template NEW RUST Default: Content: Categories: Content & Categories: In-Menu Templates Template V1 (V1.1) Default: Content: Categories: Content & Categories: Template V2 Default: Content: Categories: Content & Categories: Template V4 Default: Content: Categories: Content & Categories: Editor Web Config Editor Easily manage your Kits settings with our web-based configuration editor. This tool allows you to adjust plugin configurations through a user-friendly interface, eliminating the need to manually edit files on your server. P.S. Join our Discord at https://discord.gg/mevent and request the "Kits" group for access to the web configuration editor. TEST SERVER Join our test server to view and experience all our unique features yourself! Copy the IP Address below to start playing! connect 194.147.90.239:28015 FAQ Q: Where can I see an example of a config? A: Config Q: Where can I see an example of a data? A: Data Q: How do I add Kits to ServerPanel? A: To add Kits to your ServerPanel, create a new category in your ServerPanel configuration with these settings: "Type": "Plugin", "Plugin Name": "Kits", "Plugin Hook": "API_OpenPlugin". Q: Does the Kits plugin support other plugins? A: Yes, this Kits plugin has an API similar to other popular kits plugins. If the plugin works with Kits - it works with this plugin too. Q: How do I enable the sale of kits? A: You need to configure the plugin economy (which plugin, its hooks, etc.), enable "Enable sale" in the Kits data (oxide/data/Kits/Kits.json or carbon/data/Kits/Kits.json) and set the price to "Selling price" "Enable sale": true, "Selling price": 100, Q: How do I use Economics to pay for kits? A: Example configuration settings: "Economy": { "Type (Plugin/Item)": "Plugin", "Plugin name": "Economics", "Balance add hook": "Deposit", "Balance remove hook": "Withdraw", "Balance show hook": "Balance", "ShortName": "", "Display Name (empty - default)": "", "Skin": 0 }, Q: How do I use ServerRewards to pay for kits? A: Example configuration settings: "Economy": { "Type (Plugin/Item)": "Plugin", "Plugin name": "ServerRewards", "Balance add hook": "AddPoints", "Balance remove hook": "TakePoints", "Balance show hook": "CheckPoints", "ShortName": "", "Display Name (empty - default)": "", "Skin": 0 }, Q: How do I use scrap to pay for kits? A: Example configuration settings: "Economy": { "Type (Plugin/Item)": "Item", "Plugin name": "", "Balance add hook": "", "Balance remove hook": "", "Balance show hook": "", "ShortName": "scrap", "Display Name (empty - default)": "", "Skin": 0 }, Q: How do I resize the kit image? A: You can do this in the config, here's an example of the image setup (-32 and 32 are width, and -75 and -11 are height "Kit Image": { "AnchorMin": "0.5 1", "AnchorMax": "0.5 1", "OffsetMin": "-32 -75", "OffsetMax": "32 -11" }, Q: How can I remove the numbers on the kits ("#1", "#2", etc.)? A: You need to turn off "Show Number?" in the config: "Show Number?": false, Q: How do I make it so that others can see kits with different permissions without being able to claim them? A: You need to turn off "Show All Kits?" in the config: "Show All Kits?": true, Q: Where can I edit the names in the plugin or add my own language? A: You can edit lang files that are located (for example) at "oxide/lang/en/Kits.json" or "carbon/lang/en/Kits.json". Q: Players get "The plugin does not work correctly, contact the administrator!" message. How to fix? A: This error occurs when the ImageLibrary plugin is not working properly. Solutions: Install the ImageLibrary plugin if it's not installed. Make sure ImageLibrary is loaded and running properly (check with o.plugins command). Restart the server after installing ImageLibrary. Check server console for ImageLibrary errors and fix them. Q: I see black images with Rust logo or get error 429 when loading images. What should I do? A: These issues occur when there are problems downloading images from the internet. The Kits plugin sends images to ImageLibrary but is not responsible for the downloading process itself. Error 429 typically occurs due to rate limits imposed by image hosting services like Imgur (see HTTP 429 documentation for more details). To fix this, enable Offline Image Mode which will use local images instead: Enable the mode in config: Open "oxide/config/Kits.json" (or "carbon/config/Kits.json" for Carbon) Set "Enable Offline Image Mode": true Set up the images: Create folder "TheMevent" in "oxide/data" (or "carbon/data" for Carbon) Download PluginsStorage (click "CODE" → "Download ZIP") Extract the ZIP and copy all contents to the "TheMevent" folder Reload the plugin: Type o.reload Kits (Oxide) or c.reload Kits (Carbon) Note: If you want to add your own custom images, place them in the "TheMevent" folder and reference them with the "TheMevent/" prefix. For example: "TheMevent/Icon1.png", "TheMevent/MyCustomIcon.jpg", etc. Q: What placeholders are available for commands and what do they do? A: You can use these placeholders in kit commands and they will be automatically replaced: %steamid% - Replaced with the player's Steam ID (e.g., "76561198000000000") %username% - Replaced with the player's display name (e.g., "PlayerName") %player.x% - Replaced with the player's X coordinate position %player.y% - Replaced with the player's Y coordinate position %player.z% - Replaced with the player's Z coordinate position Example usage in kit commands: "Commands on receiving (via '|')": "say Welcome %username%!|teleport %steamid% %player.x% %player.y% %player.z%" Note: Multiple commands can be separated by the "|" character, and they will be executed in sequence when the kit is redeemed. HOOKS private string[] canRedeemKit(BasePlayer player) private void OnKitRedeemed(BasePlayer player, string kitName) private double OnKitCooldown(BasePlayer player, double cooldown) API private bool TryClaimKit(BasePlayer player, string name, bool usingUI) private string[] GetAllKits() private object GetKitInfo(string kitname) private string[] GetKitContents(string kitname) private double GetKitCooldown(string kitname) private double PlayerKitCooldown(ulong ID, string kitname) private int KitMax(string kitname) private double PlayerKitMax(ulong ID, string kitname) private string KitImage(string kitname) private bool IsKit(string kitname) private bool isKit(string kitname) private void GetKitNames(List<string> list) private double GetPlayerKitCooldown(ulong userId, string name) private double GetPlayerKitCooldown(string userId, string name) private void SetPlayerCooldown(ulong userId, string name, int amount) private int GetPlayerKitUses(ulong userId, string name) private int GetPlayerKitUses(string userId, string name) private void SetPlayerKitUses(ulong userId, string name, int amount) private JObject GetKitObject(string name) private int GetKitMaxUses(string name) private string GetKitDescription(string name) private string GetKitImage(string name) private bool GiveKit(BasePlayer player, string name, bool usingUI) private bool HasKitAccess(string userId, string name) private int GetPlayerKitAmount(string userId, string name)
    $34.95
2.3m

Downloads

Total number of downloads.

10.5k

Customers

Total customers served.

151.8k

Files Sold

Total number of files sold.

3.2m

Payments Processed

Total payments processed.

×
×
  • Create New...

Important Information

We have placed cookies on your device to help make this website better. You can adjust your cookie settings, otherwise we'll assume you're okay to continue.