
Mighty3z's Wishlist
-
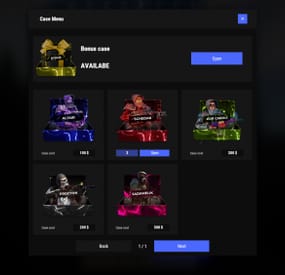
$25.95$17.95Cases
Revolutionary cases, the juiciest interface, scroll animations and much more!
Features
Beautiful user interface Opening animation Performance Each case is configured separately
Commands
cases (open cases interface) givecase <steamid> <caseid> <amount> (give a case to the player) givecase * <caseid> <amount> (give a case to all online players)
FAQ
Q: Where can I see an example of a config?
A: Config
Q: How do I use Economics to pay for cases?
A:
"Economy": { "Show Balance": true, "Type (Plugin/Item)": "Plugin", "Plugin name": "Economics", "Balance add hook": "Deposit", "Balance remove hook": "Withdraw", "Balance show hook": "Balance", "ShortName": "scrap", "Display Name (empty - default)": "", "Skin": 0 }, Q: How do I use ServerRewards to pay for cases?
A:
"Economy": { "Show Balance": true, "Type (Plugin/Item)": "Plugin", "Plugin name": "ServerRewards", "Balance add hook": "AddPoints", "Balance remove hook": "TakePoints", "Balance show hook": "CheckPoints", "ShortName": "scrap", "Display Name (empty - default)": "", "Skin": 0 }, Q: I have a question/problem. What should I do?
A: You can write to me in a PM on the site, create a ticket. Or write me in Discord: mevent
Q: How does a player give out Skill Tree XP?
A:
{ "Type": "Command", "ID": 7, "Image": "", "Title": "Give 1K XP from SkillTree", "Command (%steamid%)": "givexp %username% 1000", "Plugin": { "Hook": null, "Plugin name": null, "Amount": 0 }, "Display Name (empty - default)": "", "ShortName": "", "Skin": 0, "Amount": 1, "Chance": 65.0 }, Q: How can I add cases not for purchase, but just to have them?
A: For example, if you give cases with the "givecase" command:
givecase <steamid> <caseid> <amount> give a case to the player givecase * <caseid> <amount> give a case to all online players -

$20.00
NpcRaiders
By Iftebinjan in Plugins
Call in a squad of raider NPCs to hit your own base — a safe, self‑contained "raid yourself" event for solo players, small groups, or anyone who wants that raid‑night adrenaline without waiting on a real offline raider.
NpcRaiders lets any player start a fully scripted raid event against their own authorized base. Once the event begins, a wave of armed NPC raiders spawns near the target and pushes toward the player's tool cupboard — fighting through walls, doors, and turrets — until they breach the TC, run out of time, or get wiped out.
The event is sandboxed: only players authorized on the targeted cupboard can damage the raider NPCs, and the NPCs will only ever attack the players inside that event. Nobody outside the event can interfere, and the raiders can't wander off and bother the rest of the server. It's PvE-safe raid content that plugs straight into your existing loot, economy, and reward plugins.
Everything about a raid — how many NPCs spawn, how many waves, how tough they are, what they drop, what it costs to call one in, and what you win for surviving — is configurable per raid "type," so you can sell multiple raid tiers (Easy / Hard / Nightmare, for example) through permissions or a shop plugin.
⭐Key Features
Self-raid events — players call NPCs in on their own authed base; nobody else can be targeted. Locked-down combat — only players authorized on the target TC can hurt the raiders, and the raiders can only hurt them back. No griefing, no stray damage to bystanders. Wave-based assault — configurable number of NPCs per wave, number of waves, and delay between waves, so events can scale from a quick skirmish to a full siege. Multiple raid types/tiers — build unlimited raid presets (difficulty, NPC count, health, kits, loot, rewards) and gate each one behind its own permission. Kits integration — equip raider NPCs with clothing and weapons using the Kits plugin, so their loadout matches the raid tier. Flexible loot — drop AlphaLoot profiles, custom loot-profile files (build one straight from your own inventory with /raidme loot add), or nothing at all. Pay-to-raid economy — charge players an item (default Scrap), Economics balance, or ServerRewards points to start an event; permission-based cost bypass for admins/VIPs. Win rewards — reward successful defenders with an item, Economics funds, ServerRewards points, or a kit. VIP cooldown tiers — give specific permission groups their own shorter cooldowns and TC-auth cooldowns instead of the server default. Queueing — if the server is already at the max concurrent raid limit, new events queue up and notify the player when it's their turn. SimplePVE/ TruePVE / LifeSupport aware — plays nicely with TruePVE exception mapping and LifeSupport's revive handling during an active event. 🎬Video Showcase
📜Permissions
npcraiders.use - Use the /raidme chat command to view and start raids. npcraiders.admin - Access admin commands (reload, clear, loot). npcraiders.nocooldown - Skip the standard raid and TC-auth cooldowns. npcraiders.nocost - Start raids without being charged. 📌Chat Command
/raidmeShows the raid help menu — available raid types, cost, and NPC/wave counts you have access to. /raidme buyShows raid cost/help for every raid type. /raidme buy <type>Starts a raid event of the given type at your currently authorized TC. /raidme statsOpens your personal stats UI (games played, wins, losses, kills, deaths). /raidme terrainAdmin/debug tool — lists the terrain colliders at your current position, for building the block list. /raidme loot add <profile>Creates (or adds to) a loot profile using every item currently in your inventory. /raidme loot clear <profile>Clears a loot profile's items. /raidme reload all (admin)Force-cancels every currently running raid event. /raidme reload player <name> (admin)Force-cancels one player's raid event. /raidme clear - (admin)Wipes stored cooldowns and player data. /raidme - Will show raid help menu. /raidme buy - Will show raid buy help menu and costs. /raidme buy <type> - To start raid of the type. /raidme reload player <playerName> - Will cancel there raid event. /raidme reload all - Will cancel all events. /raidme terrain - Get Terrain name your standing on. /raidme loot - Generate a loot profile with all the items in your inventory When you create a loot profile you will need to edit its datafile and set the min and max amount of items to give.. There you can change other min/max for item ammounts default is 1 to Amount when created
📌Console Command
npcraiders buy <type> <optional playerID> - Lets an external plugin or command (e.g. a shop or GUI) trigger a raid purchase for a player server-side. ⚙️Configuration
🗃️Language
⚠️FAQ
Do players raid other players, or only themselves?
Only their own base. A player can only start an event while authorized on the target TC, so this is entirely self-contained PvE-style content — not a way to raid other players. Can I sell different difficulty levels?
Yes — create as many raid types as you want in the config, each with its own permission, NPC count, waves, loot, cost, and reward. Sell access to each tier separately or bundle them into a rank. What plugins does this depend on?
None are required to run the plugin. Kits (for equipping/rewarding NPC loadouts and kit rewards), AlphaLoot (for NPC corpse loot profiles), ServerRewards and Economics (for buy costs/rewards), and TruePVE/SimplePVE/LifeSupport (for smoother PvE-server behavior) are all optional integrations — the plugin works without them, but connects automatically if they're installed. Can players avoid paying or waiting on cooldown?
Yes, through permissions — npcraiders.nocost skips the charge and npcraiders.nocooldown skips both cooldown timers. Useful for staff testing or as a VIP perk. Will this let people abuse re-authing on TCs to farm rewards?
There's a dedicated TC-auth cooldown separate from the normal raid cooldown, specifically to stop players from re-authorizing on a cupboard just to immediately farm another event.
-
$15.00
AgileZones
AgileZones will create and remove ZoneManager zones around Player Bases as well as moving points of interest like CargoShip, Supply Drops, Bradley, Tugboats, and Heli-Crash sites. Great care has been taken to ensure the plugin does not impact server performance and that Zones are consistent and correct even after a server-crash.
TruePVE (default) and NextGenPVE integration allows you to configure detailed rules for each zone type, e.g., Cargo Ship versus Supply Drops, with Rulesets and ZoneFlags.
Add the ZoneManagerAutoZones plugin to generate ZoneManager zones around monuments and you've got a server-enforced hybrid PVP/PVE world.
Add the ZoneDomes plugin for optional visible domes.
Add the Zone PVx Info plugin to get whether the player is inside a PVP zone on the HUD. Set Entering and Leaving Zone messages to empty quotes ("") to disable them.
Demo
You should be able to find a demo server by searching modded servers for "AgileZones". Be sure to "Show Empty" servers.
Default Configuration
{ "Enable TruePVE": true, "Enable NextGenPVE": false, "Enable ZoneDomes": true, "Enable ZoneDomes For TCs": false, "Enable ZoneDomes For SupplyDrops": true, "Enable ZoneDomes For Cargo": true, "Enable ZoneDomes For HeliCrash": true, "Enable ZoneDomes For BradleyAPC": true, "Enable ZoneDomes For Tugboats": false, "Visible Domes for Moving Zones Darkness (Default 1)": 1, "Delay creating a zone after placing a TC in seconds": 600.0, "Delay removing a zone after a TC is destroyed": 900.0, "TC Zone Radius in meters - set zero to disable": 50, "TC RuleSet": "exclude", "TC Zone Flags": null, "CargoShip Zone Radius in meters - set zero to disable": 125, "Cargo RuleSet": "exclude", "Cargo Zone Flags": null, "SupplyDrop Zone Radius in meters - set zero to disable": 50, "SupplyDrop RuleSet": "exclude", "Supply Drop Zone Flags": null, "Apc Zone Radius in meters - set zero to disable": 50, "Apc RuleSet": "exclude", "Apc Zone Flags": null, "HeliCrash Zone Radius in meters - set zero to disable": 50, "Heli RuleSet": "exclude", "Heli Zone Flags": null, "Tugboats Zone Radius in meters - set zero to disable": 50, "Tugboats RuleSet": "exclude", "Tugboats Zone Flags": null, "Entering Zone Message": "WARNING: You are now entering a PVP Zone", "Leaving Zone Message": "Leaving a PVP Zone", "Zone Tag (Adds this string to zone names)": "_PVP" } I recommend changing ZoneDomes Darkness to 1 (down from 5 by default) as well.
Installation:
Just Drop the .cs file into the oxide/plugins directory/folder. AgileZones can be installed on existing servers as easily as a fresh wipe, at any time. Existing Bases, SupplyDrops, CargoShips, Bradley, even Heli Crashsites will be handled and have zones created, no restart required. A config file will be generated in oxide/config where you can modify the default configuration.
Use the admin only chat command "/ReloadTCs" to apply config changes to already created zones. Don't forget that config changes are not automatically loaded. You can "Oxide.Reload AgileZones" to load new config without restarting the server, and then use the /ReloadTCs chat command to apply those changes to existing zones.
Future:
This started as a 2 hour proof of concept for player-added PVP zones around TCs and ended up featuring-creeping it's way into weeks of work. There are still some things I'd like to add, but I wanted to get it out there, I hope this is a huge improvement for hybrid PVP servers.
TODO:
For now, you must modify the oxide/config/AgileZones.json file and reload the plugin. RCON Command: oxide.reload AgileZones
ZoneManager doesn't handle overlapping zones very well; you'll receive a notification for each zone you leave which might be confusing when you are still inside a PVP zone. I'd like to improve on this and some other issues with ZoneManager. I didn't realize the ZoneManager license allowed for branching; I wouldn't have jumped through some of the hoops had I known. You can improve on this by setting Entering and Leaving zone messages to empty quotes (""), and installing the Zone PVx Info plugin which will put a UI element on the HUD instead.
-
$35.00
Better Npc
This plugin adds variety of NPC sets with very high number of parameter sets on standard and custom monuments. Also it is added during dropping the server AirDrop, locked crate and destroying a tank or helicopter
Dependencies (optional, not required)
AlphaLoot CustomLoot True PVE Kits Economics Server Rewards IQEconomic PveMode
Custom maps
Maps that have default settings for their custom monuments. For these maps, you will not need to create places for the appearance of NPCs, they have already been created by the map developer and are located inside the archive when buying the map
You can also download all these files for all maps here
Detroit: Irreparable Damage Oregon 2: Last Hope Lostly Island Frontier – American Old West Oregon: Land of Dead Badlands Foreign Lands Namalsk Kong: Skull Island Destroyed World Deathland Dreamland Last Train Pandora Railway Island Wasteland Cataclysm: Fury of Nature Last Oasis Crazy Island
Standard monuments
This item of the plugin settings is used for appearing NPCs in all standard monuments. All these settings are located in the Monument folder (oxide/data/BetterNpc/Monument). Each file in this folder corresponds to a standard monument
If there is no standard monument file in the folder, you can create it (you need to name the file the same way as the standard monuments on the map inside the game). You can copy the settings from any other standard monument
Configuration parameters:
Enabled? [true/false] – It allows to enable/disable the appearance of NPC on the monument. If you need NPCs appearing on the map and don’t need it on another map, you can use this option simply The size of the monument – this parameter contains two values. It is the length and width of the monument. This parameter is necessary for random appearance of NPC on the monument and indication of limits of removal of standard NPCs on the monument (if it is necessary) Remove other NPCs? [true/false] – It deletes the standard NPCs inside the limits of this monument Presets – It is a list of all the NPC presets to appear on the monument (the description of the NPC preset settings is located below)
Custom monuments
This item of the plugin settings is responsible for the appearance of NPCs on custom monuments. All these settings are located in the Custom folder (oxide/data/BetterNpc/Custom). Each file in this folder corresponds to a custom monument
If you have bought a map with already configured NPC appearance files for custom monuments you will copy these files into the Custom folder. If you want to create and configure the appearance of NPC in your custom location on the map, you will use the command in the administrators’ chat /SpawnPointAdd {name} (see the description of this command below in the instruction)
Configuration parameters:
Enabled? [true/false] – It allows to enable/disable the appearance of NPC on the monument. If you need NPCs appearing on the map and don’t need it on another map, you can use this option simply Position – It is a position of the custom monument on the map Rotation – It is a rotation of the custom monument on the map (this parameter is necessary for using custom places to appear of NPC on the monument, if the monument is used on more than one map) Radius – It is the radius of the custom monument from the position on the map Remove other NPCs? [true/false] – It removes the standard NPCs inside the limits of this monument Presets – It is a list of all the NPC presets to appear on the monument (the description of the NPC preset settings is located below)
Roads
This item of the plugin settings is used to appear NPCs on all types of roads. All these settings are located in the Road folder (oxide/data/BetterNpc/Road). Each file in this folder corresponds to a particular road type
ExtraNarrow – It is a narrow, unpaved walkway
ExtraWide It is a wide, paved, two-lane, beltway road
Standard – It is a regular, paved road
Configuration parameters:
Enabled? [true/false] – It allows to enable/disable the appearance of NPC on the road. If you need NPCs appearing on the map and don’t need it on another map, you can use this option simply Presets – It is a list of all the NPC presets to appear on the road (the description of the NPC preset settings is located below)
Biomes
This item of the plugin settings is used to appear NPCs on all types of biomes. All these settings are located in the Biome folder (oxide/data/BetterNpc/Biome). Each file in this folder corresponds to a particular biome type (Arctic, Arid, Temperate, Tundra)
Configuration parameters:
Enabled? [true/false] – It allows to enable/disable the appearance of NPC on the biome. If you need NPCs appearing on the map and don’t need it on another map, you can use this option simply Presets – It is a list of all the NPC presets to appear on the biome (the description of the NPC preset settings is located below)
In-game events
This item of the plugin settings is used to appear the NPCs in standard Rust events. All of these settings are located in the Event folder (oxide/data/BetterNpc/Event). Each file in this folder corresponds to its own type of event
The supported events:
When the plane drops the server AirDrop, it will be guarded by specific NPC presets
CH47 – When the chinook drops a locked crate during patrolling the map, it will be guarded by specific NPC presets
Bradley – When someone destroys a tank, its crates will be guarded by specific NPC presets
Helicopter – When someone shoots down a patrol helicopter, its crates will be guarded by specific NPC presets
Configuration parameters:
Enabled? [true/false] – It allows to enable/disable the appearance of NPC on the event. If you need NPCs appearing on the map and don’t need it on another map, you can use this option simply Radius – NPC appearance radius Presets – It is a list of all the NPC presets to appear on the event (the description of the NPC preset settings is located below)
The NPC preset parameters
Enabled? [true/false] – It is enabling/disabling the preset Minimum numbers – Day – It is the minimum number of NPCs from the day preset Maximum numbers – Day – It is the maximum number of NPCs from the day preset Minimum numbers – Night – It is the minimum number of NPCs from the night preset Maximum numbers – Night – It is the maximum number of NPCs from the night preset NPCs setting – It is all NPC settings of this preset (see the description of NPC settings for details) Type of appearance (0 – random; 1 – own list) – It is a type of NPC appearance. You can create your own list of places of NPC appearance. The NPC will appear only randomly. This parameter is not used in Road appearance types Own list of locations – It is your own list of NPC appearances. You need to use the number of locations at least the maximum possible number of NPCs in this preset. This parameter is not used in Road appearance types The path to the crate that appears at the place of death – It is the full path to the crate prefab that appears at the place of death of an NPC. If you don’t need this parameter, you should leave this blank Which loot table should the plugin use (0 – default; 1 – own; 2 – AlphaLoot; 3 – CustomLoot; 4 – loot table of the Rust objects; 5 – combine the 1 and 4 methods) – It is the type of the NPC loot table in this preset. Type 5 includes two types (1 and 4) at the same time and locates items from both types Loot table from prefabs (if the loot table type is 4 or 5) – It is a setting of the loot tables from Rust objects. You can see the loot table of Rust objects description for more details Own loot table (if the loot table type is 1 or 5) – It’s NPC’s own loot table. You can see the description of your own loot table for more details
The NPC settings description
Names is a list of NPC names. It is selected from the list randomly Health – It’s the HP amount of the NPC Roam Range – It’s the patrolling area distance. It’s the distance that the NPC can move from the place of appearance during patrolling Chase Range – It’s the chase range of the target. It’s the distance that the NPC can chase his target from the place of appearance Attack Range Multiplier – It’s the attack range multiplier of the NPC’s weapon Sense Range – It’s a target detection radius Target Memory Duration [sec.] – It’s the time that the NPC can remember his target Scale damage – It’s the damage multiplier from NPC to the player Aim Cone Scale – It’s the spread of NPC shooting, the default value in Rust is 2. It doesn’t take negative values Detect the target only in the NPCs viewing vision cone? [true/false] – It’s the parameter that allows detecting the target only in a certain NPC viewing. If you want to detect the target in 360 degrees, you will set the parameter "False” Vision Cone – It’s the NPC viewing. The range of values is from 20 to 180 degrees. If the previous parameter is False, this parameter is not used Speed – It’s the NPC speed. The default value in Rust is 5 Minimum time of appearance after death [sec.] – It’s the minimum time of NPC appearance after the death. This parameter is not used in the NPC Event places Maximum time of appearance after death [sec.] – It’s the maximum time of NPC appearance after the death. This parameter is not used in the NPC Event places Disable radio effects? [true/false] – You can disable/enable radio effects Is this a stationary NPC? [true/false] – If this parameter is True, the NPC will not move or run Remove a corpse after death? [true/false] – This parameter can control the deleting of NPC corpses (only backpacks are left). This parameter improves efficiency if there are a lot of NPCs Wear items – It’s a list of NPCs’ clothes and armor Belt items – It’s a list of weapons and items NPCs’ fast slots. Medical syringes are used for healing. If you give grenades to an NPC, he will use them. Smoke grenades are used for creating smoke screens (if you don’t need them, you should remove them from your inventory). If you give a Rocket Launcher to an NPC, he will raid the target’s building (if the target is inside it) Kits – It gives a pack of Kits plugin. If you don’t need this parameter, you should leave this blank. I recommend using the previous 2 points to configure NPC items
A description of the Rust loot table settings
Minimum numbers of prefabs –It’s the minimum numbers of prefabs that are needed to appear in the NPC loot table Maximum numbers of prefabs –It’s the maximum numbers of prefabs that are needed to appear in the NPC loot table Use minimum and maximum values? [true/false] – this parameter specifies whether to use the minimum and maximum numbers to limit the number of items List of prefabs – It’s a list of prefabs that need to add in the loot table. It is necessary to indicate the full path to the prefab and the probability of falling out this prefab
A description of the own loot table settings
Minimum numbers of items – It’s the minimum number of items Maximum numbers of items – It’s the maximum number of items Use minimum and maximum values? [true/false] – this parameter specifies whether to use the minimum and maximum numbers to limit the number of items List of items – It’s a total list of all items that can fall out in the NPC loot table. You can specify any standard items, their blueprints and any skinned or custom items
The commands in the chat (for admins only)
/SpawnPointPos {name} – To show the local admin’s position coordinates relative to the place where the NPC {name} appears
/SpawnPointAdd {name} – To create the NPC appearance point {name} in the Admin’s custom coordinates. A file with this name will be created in the folder Custom and you can configure it as you need
/SpawnPointAddPos {number} {name} – To write the local admin’s coordinate into the preset with the positional number {number} (starting from 1) to the place where the NPC {name} appears
/SpawnPointAddWear {number} {name} – To write all the admin’s dressed clothes into the preset with the positional number {number} (starting from 1) to the place where the NPC {name} appears
/SpawnPointAddBelt {number} {name} – To write all the admins’ quick slots cells into a preset with the positional number {number} ( starting from 1) to the place where the NPC {name} appears
/SpawnPointShowPos {number} {name} – To show to the Admin all the custom NPC appearance points in the preset with the positional number {number} ( starting from 1) in the place where the NPC {name} appears
/SpawnPointReload {name} – Reload Spawn Point with the name {name}
Console commands (RCON only)
ShowAllNpc – Shows the number of all NPCs of the BetterNpc plugin on your server
Hooks
object CanAirDropSpawnNpc(SupplyDrop supplyDrop) – It is called before an NPC appearance to guard an AirDrop. The returning of a non-zero value stops an NPC appearance
object CanCh47SpawnNpc(HackableLockedCrate crate) – It is called before an NPC appearance to guard a locked chinook crate. The returning of a non-zero value stops an NPC appearance
object CanBradleySpawnNpc(BradleyAPC bradley) – It is called before an NPC appearance to guard the boxes from crushed Bradley. The returning of a non-zero value stops an NPC appearance
object CanHelicopterSpawnNpc(BaseHelicopter helicopter) – It is called before an NPC appearance to guard the crates from crushed patrol helicopter. The returning of a non-zero value stops an NPC appearance
API
void DestroyController(string name) – It destroys the place of appearance NPC with the name {name}
void CreateController(string name) – It creates the place of appearance NPC with the name {name}
These APIs can be used with standard monuments, custom monuments (NPC locations) and roads. The name of this monument is in standard monuments {name}. It is the name of the file in the Custom and Road folder in custom monuments and roads
My Discord: KpucTaJl#8923
Join the Mad Mappers Discord here!
Check out more of my work here!
Creator of the default configuration – jtedal
-
$5.99
Hit Damage
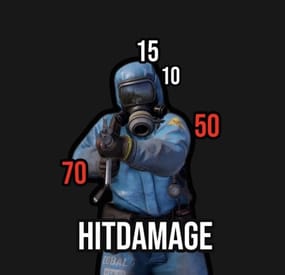
This plugin displays damage of your hits, both for melee and guns. Damage numbers can be displayed in three different colors, based on how much damage is dealt. When shooting at players, unlike other plugins, this one also takes into account the armor that the player is wearing. Therefore, the displayed numbers represent the actual damage that the victim is receiving.
Config file:
If you have any questions feel free to reach out on my discord Sarka#3530