
Aussie4life's Wishlist
-
$29.99
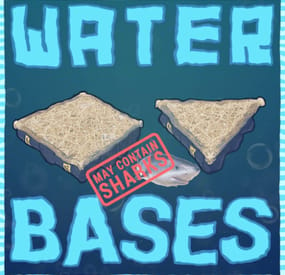
Water Bases
Water Bases rust plugin enables players with permissions to construct and expand structures on and underwater without the need for pillars, incorporating vanilla-like mechanics, special features like underwater nettings, and customizable settings for different player tiers.
Questions? Support? Join the discord: https://discord.nikhub.dev
In short
This Rust plugin enables players with the right permissions to construct structures on the water's surface and even extend them below water in a way that feels natural and in keeping with the game's original style. There's no need for tall, unstable pillars reaching down to the seabed; simply place your foundation on the water and use a building plan or hammer to expand it.
These aquatic constructions adhere to the same principles of stability, upkeep, and decay as traditional bases on your server but also introduce unique elements like underwater nettings for gathering random items (with fully customizable loot tables) and innovative building techniques.
The plugin accommodates various configuration profiles based on permissions, offering an excellent method to reward VIP players across different levels. It grants you control over who is allowed to build on the water, the size of their constructions, their proximity to the shore, and the highest tier of building blocks they can use, among other aspects.
Additionally, the plugin is designed to alert players if their construction interferes with the Cargo Ship's route. With the Submarine update on the horizon, it's time to prepare your server for aquatic adventures with Water Bases!
Watch the video below to see what water bases are all about.
"What about Cargo Ship, will it destroy structures in the way?"
By default, players will get a warning if they try to to build a water foundation in the path of the cargo ship, but their water foundation will stay. You can change this setting from "Warn" to "Prevent", and the player won't be able to build it in first place. Changing it to "None" will skip this check. Every ocean path node creates a "bubble" with a configurable radius. See Admin chat commands section below to visualise those bubbles and guide your players to areas where they will be able to build without issues.
Quick start (for players and admins)
Upload the WaterBases.cs file to your oxide/plugins folder and you should be good to go, it's all plug-and-play. No need to restart your server! Before you can build on water, you need some Water Foundations. Water foundations are re-skinned Inner Tube items (Shortname: innertube / Item ID: -697981032 ; mind the minus sign, it matters!) with a skin ID 2484982352 (https://steamcommunity.com/sharedfiles/filedetails/?id=2484982352) or 2485021365 (https://steamcommunity.com/sharedfiles/filedetails/?id=2485021365). That info is just in case you'd like to include those in your own Kits/Server Rewards shops/loot tables/custom crafting plugins. How to obtain those within the plugin?
Crafting water base foundations (with Building Planner)
By default, all players will be able to craft, deploy, expand and reinforce water foundations. More on the limits and how to change them (how far/close to the shore, min and max depth of the water, how many water foundations allowed per building etc) in the section Advanced Config. When a player equips a Building Plan, a small GUI will show in the bottom right (positions/colours etc can be changed in the config too). There, players will be able to craft deployable water foundations - both square and triangle. Those crafted items will also be consumed when players expand their already deployed foundations or reinforce them. The default permission profile requires a player to be close to a Level 2 Workbench - this requirement can be edited in the config to change the level needed, or you can turn off the need for a workbench altogether, per permission profile. If you don't want your players to be able to craft foundations - so they have to find them/buy them/earn them instead - you can disable it per-profile. In that case, they won't see the GUI.
Giving with chat commands (admins only)
Type /give_square [amount] or /give_triangle [amount] to give yourself some foundations of that type. If you don't specify an amount, you will only receive 1.
Deploying a "starter" foundation on water
Go out to the lake/ocean, select the water foundation as your active item and using the doughnut-shaped guide, deploy it on the water surface. After trying to deploy/expand upon an existing water foundation, a couple of checks will be performed according to global config and individual permission profile for that player:
Does the player have permission to deploy the first foundation/expand existing one? Is the player building blocked? How far is the player trying to build from shore (based on the map topology)? Too close/too far? How deep is the water where the player is trying to build? Is it too deep/too shallow? Is the player trying to build too close to the path of cargo/Oil Rig? Is the player allowed to have this many water foundations in the building? If all the checks have been successful, a new twig floor, with a stability 100% (like normal foundations) will be built. It will have some indestructible floatation barrels attached to it, partially covering the water foundation's soft side (the bottom). Then, a water foundation can be expanded, upgraded, protected with a Tool Cupboard (like any other buildings, really), or reinforced.
Expanding
Once you've deployed your first "starter" water foundation, all the subsequent foundations will be placed using vanilla building mechanics - just take a building plan and build some floors neighbouring your water foundation on the sides! If you have enough water foundation items of the required kind in your inventory, those newly placed floors will also turn into water foundations. And they can call be demolished/upgraded, just like normal twig structures, as soon as you place a Tool Cupboard. Expanding a single-sided water foundation requires 1 proper water foundation item, expanding a double sided water foundation (reinforced one) requires two.
Reinforcing
Reinforcing a water foundation means making it double sided - so it fully covers the soft side AND gives you the ability to build from the surface down, to the seabed/lakebed! To reinforce, make sure a built water foundation is fully repaired, and them hit it with a hammer. If you have a required water foundation item in your inventory, it will be consumed and the foundation will be reinforced: you will see another floor with floatation barrels attached upside down. If you try to expand a reinforced foundation (by attaching a floor at the bottom, reinforced side) and there's no water foundation above it (normal orientation), it will try to create one, provided you have enough items in your inventory. Reinforcements (upside down water foundations) are always associated with the water foundation they're attached to and cannot exist on their own - if you destroy the water foundation, its reinforcement will be destroyed too. However, destroying the reinforcement will not destroy is water foundation.
Upgrading Water base structures
Building blocks inside your water bases have certain tier limits associated with them - it's to help balance things out. By default, non-VIP and non-admin players will be able to upgrade water foundations to sheet metal tier, floor frames and wall frames to stone tier, and everything else (including walls, floors and reinforcement foundations) to wood tier. You can easily decide which permission profile has which max tier (per type of building block) in the config.
Water Base exclusive features
Because water foundations are treated as floors with the stability of a foundation, you can place roofs at "ground level", which is not possible with normal foundations! Similarly, you can leave a "hole" where a water foundation would be and place a floor frame with a hatch instead - now you can enter your base from the bottom, underwater! Reinforcing a water foundation means you'll be able to build down from the surface to the bottom of the water to create extra layers of protection, or... Nettings deployed in wall frames underwater will collect random junk items with editable loot tables, including fish and diving equipment! This feature is heavily configurable and can even be disabled. But also Sharks! Read just below.
NEW IN 1.0.5: Beware the Netting Sharks!
If enabled, Sharks will randomly spawn around Nettings underwater. Especially ones that have accumulated a lot of items, but only if there's at least 1 player within the distance of 100 meters from the Netting. As soon as the first item is caught in an empty Netting, a random silent timer will be set. Every additional item spawning reduces the timer left by a certain percentage (default by 8%). When it hits 0, AND local/global Netting Shark population limits haven't yet been reached (all in the config), a Shark will spawn somewhere near that Netting. The sharks have a configurable aggro distance and multipliers for speed and health. They will linger around the position of the netting that attracted them and try to pursue anyone in sight. Harvesting a Netting Shark corpse with a proper tool will yield some free items from its entrails - by default 5 times more than you'd normally get from a netting full of items from the default loot tables. Of course the default Shark loot tables in the config are, just like the Netting loot tables, completely configurable - check the config section below.
All in all, it's like any other base... just on water, without annoying seafloor supports.
The stability of the water foundation is always 100% and goes down the higher you built. The stability of a reinforcement foundation also starts at 100% and goes down the deeper towards the seafloor you build. All the decaying things (walls, floors, doors etc) will require appropriate upkeep materials in the Tool Cupboard. Structures can be repaired, demolished, upgraded and removed using plugins. Bases can be raided, taken over or left to decay.
Water Bases Permissions (Oxide.Grant user YourName [permission name starting with waterbases.])
By default, the plugin generates 3 permission profiles in the config - one for admins, one for normal players with no specific permissions (default) and one for VIP. More on permission profiles and config values they can handle can be found in the section Advanced Config. Unless you have added more permission profiles, only these two below are going to be used by your config:
waterbases.admin
Holders of the admin permission will also be able to run the /wb_cfg, /give_square and /give_triangle commands. Also, by default, they will be associated with the permission profile that has no limits on placing water foundations.
waterbases.vip1
Holders of this permission will follow settings and limits associated with with that permission profile. The permissions below are also registered, but not used by default. To use them, just create some permission profiles with those permissions as the key.
waterbases.vip2 waterbases.vip3 waterbases.vip4 waterbases.vip5
Admin chat commands (must have ownerid/moderatorid/waterbases.admin permission)
/give_square [optional arg: amount of items to receive] Will give the player a given amount of square-shaped water foundations. If no amount is provided, only 1 will be received. /give_triangle [optional arg: amount of items to receive] Will give the player a given amount of triangle-shaped water foundations. If no amount is provided, only 1 will be received. /draw_cargo This will draw a "bubble" (only for you, not every player) around every path node, and the bubble's radius will be taken from your config. If a player tries building inside one of these bubbles, they might get a warning or get prevent from doing so (because cargo ship destroys all structures in its way). Useful to visualise where your players can and cannot build, based on the cargo ship path. /shore_distance This will show you the current distance from the shore, to help you decide how close to/far from the shore to allow players to build. The unit used by Rust to measure shore distance is not in meters, it's something roughly equivalent to 1/10th of a map grid length. Mind you though, it's based off of the map's topology, so it should be fine on procgens, but if you have a custom map without topology layers reflecting the actual shoreline, you might want to disable relying on shore distance in your config. Admin console / chat command
This command will work both from the chat (in that case, prefix it with a forward slash / ) and the console, (F1 or server/RCON console). Running this command as a player will require the waterbases.admin permission for players that are not moderatorid/ownerid enabled.
wb.give [square/triangle] [partial player name or full steam ID] If a player executes it in the chat or console in-game and they don't specify a recipient, it will be given to the player executing this command. Executing from the server console requires specifying the player.
Configuration (oxide/config/WaterBases.json and /wb_cfg chat command)
Vast majority of the settings can be configured with the /wb_cfg chat command. Typing it in the chat with no parameters should dump a rundown of config fields and their values. In order to run any of the config commands, you will need to have ownerid or moderatorid (or the waterbases.admin permission).
/wb_cfg RelyOnShoreDistance [logical values (true or false)] /wb_cfg GlobalOceanLevelCheckBeforePlacing [logical values (true or false)] /wb_cfg GlobalOceanLevelBaseline [fractions (like 1.2345) between -1000.00 and 1000.00] /wb_cfg CargoShipPathHandling ["Warn", "Prevent" or "None"] /wb_cfg MinDistanceFromCargoShipNode [fractions (like 1.2345) between 0.00 and 10000.00] /wb_cfg UnderwaterNetsCollectJunk [logical values (true or false)] /wb_cfg UnderwaterNetsRandomTimerMin [fractions (like 1.2345) between 0.00 and 10000.00] /wb_cfg UnderwaterNetsRandomTimerMax [fractions (like 1.2345) between 0.00 and 10000.00] /wb_cfg UnderwaterNetsItemLimit [integers (like 12345) between 0 and 100] /wb_cfg UnderwaterNetsSpawnSharks [logical values (true or false)] /wb_cfg UnderwaterNetsSharkRandomTimerMin [fractions (like 1.2345) between 1.00 and 100000.0] /wb_cfg UnderwaterNetsSharkRandomTimerMax [fractions (like 1.2345) between 1.00 and 100000.0] /wb_cfg UnderwaterNetsSharkTimerShortenByPercent [fractions (like 1.2345) between 1.00 and 100000.0] /wb_cfg UnderwaterNetsSharkSpawningMinDistance [fractions (like 1.2345) between 2.00 and 100000.0] /wb_cfg UnderwaterNetsSharkSpawningMaxDistance [fractions (like 1.2345) between 2.00 and 100000.0] /wb_cfg UnderwaterNetsSharkPopulationLimitLocal [integers (like 12345) between 0 and 1000] /wb_cfg UnderwaterNetsSharkPopulationLimitGlobal [integers (like 12345) between 0 and 1000] /wb_cfg UnderwaterNetsSharkSleepDespawnTimer [fractions (like 1.2345) between 2.00 and 100000.0] /wb_cfg UnderwaterNetsSharkHealthMultiplier [fractions (like 1.2345) between 0.001 and 100.0] /wb_cfg UnderwaterNetsSharkSpeedMultiplier [fractions (like 1.2345) between 0.001 and 100.0] /wb_cfg UnderwaterNetsSharkAggroRange [fractions (like 1.2345) between 0.001 and 100.0] /wb_cfg SharkHarvestingLootEnabled [logical values (true or false)] /wb_cfg GuiNEW1AnchorMinX [fractions (like 1.2345) between 0.00 and 1.00] /wb_cfg GuiNEW2AnchorMinY [fractions (like 1.2345) between 0.00 and 1.00] /wb_cfg GuiNEW3AnchorMaxX [fractions (like 1.2345) between 0.00 and 1.00] /wb_cfg GuiNEW4AnchorMaxY [fractions (like 1.2345) between 0.00 and 1.00] /wb_cfg GuiNEW5OffsetMinX [fractions (like 1.2345) between 0.00 and 1.00] /wb_cfg GuiNEW6OffsetMinY [fractions (like 1.2345) between 0.00 and 1.00] /wb_cfg GuiNEW7OffsetMaxX [fractions (like 1.2345) between 0.00 and 1.00] /wb_cfg GuiNEW8OffsetMaxY [fractions (like 1.2345) between 0.00 and 1.00] /wb_cfg GuiTextSize [integers (like 12345) between 0 and 100] /wb_cfg GuiButtonColor [hexadecimal numbers WITHOUT preceding # (like 3db4b3)] /wb_cfg GuiTextColor [hexadecimal numbers WITHOUT preceding # (like 3db4b3)] /wb_cfg GuiButtonAlpha [fractions (like 1.2345) between 0.00 and 1.00] /wb_cfg GuiTextAlpha [fractions (like 1.2345) between 0.00 and 1.00] /wb_cfg EnableBarrelEntities [logical values (true or false)]
Advanced config (only editable through oxide/config/WaterBases.json) Water foundation crafting cost
Here you can adjust how much it costs to craft water foundations. Make it more expensive, less expensive, or add/remove required materials. The cost will stay the same for all permission profiles. A full list of short names for items can be found at https://www.corrosionhour.com/rust-item-list/
"CraftingCostSquare": [ { "Shortname": "wood", "Amount": 100 }, { "Shortname": "metal.fragments", "Amount": 200 } ], "CraftingCostTriangle": [ { "Shortname": "wood", "Amount": 50 }, { "Shortname": "metal.fragments", "Amount": 100 } ], Shortname should belong to one of the available items in-game. The amount should be a whole number larger than 0 and smaller than the limit of a signed 32-bit integer (2 147 483 647).
Permission profiles
Using profiles you can quickly create/edit different permissions for different players, for example, if you have more than 1 VIP tier on your server - just add some new profiles. Different players can have different limits and permissions associated with building water bases. To check which permission profile the player should fall under, the plugin goes through all permission profiles and checks whether the player has that permission granted. The permissions are checked in order, meaning that if the player doesn't have the first permission, it will try the next permission on the list, etc (similar to how Auto Kits checks which kit to give to a player based on their permissions in order). If the player doesn't have any permissions from the list granted, they will fall back to the "default" profile. That's the only one that you shouldn't remove! If you remove it, a new one with default values will be created. So if you don't want your default, non-VIP players to build water bases, don't remove the default profile, just take away privileges in that profile (like deploying/expanding/reinforcing). You don't have to use the built-in VIP permissions - any permission from any plugin will do just fine! By default, three permission profiles are generated in the config: default, waterbases.admin and waterbases.vip1. The default permission profile will apply to any player who doesn't have any permissions listed in the profile list - let's have a look at it:
"PermissionProfiles": { "default": { "PermissionRequired": "default", "MaxBuildingGradeGeneric": "Wood", "MaxBuildingGradeFrames": "Stone", "MaxBuildingGradeWaterFoundations": "Metal", "WaterDepthMin": 2.0, "WaterDepthMax": 100.0, "MaxWaterFoundationsPerBuilding": 25, "MinDistanceFromOilrig": 200.0, "MinDistanceFromShore": 2.0, "MaxDistanceFromShore": 20.0, "CanDeployWaterFoundations": true, "CanReinforceWaterFoundations": true, "CanExpandWaterFoundations": true, "CanExpandReinforcedFoundations": true, "CanCraftWaterFoundations": true, "RequireMaterialsForCrafting": true, "WorkbenchLevelRequired": 2.0, "CanDeployUnderwaterNets": true, }
PermissionRequired should contain an already existing permission registered by any plugin in the form of pluginname.permissionname MaxBuildingGradeGeneric, MaxBuildingGradeFrames andMaxBuildingGradeWaterFoundations define the highest allowed grade for a particular part of a water base. Generic means anything that's not a water foundation or a door/floor frame (that includes normal floors, walls, half walls, and inverse foundations). For those 3 settings, the accepted options are "Twigs", "Wood", "Stone", "Metal" or "TopTier". Set all of them to "TopTier" if you don't want any tier limits on water bases. WaterDepthMin and WaterDepthMax define the allowed range for water depth when placing water foundations - to make sure that certain players are not building in water that is too shallow/too deep. The unit meters. MaxWaterFoundationsPerBuilding is what it sounds like it will prevent a player under this permission profile from adding more water foundations to a water base, limiting their size. Set to a large value like 100000 for virtually no limits. MinDistanceFromOilrig will define the minimum distance from the closest oilrig (in meters) that has to be respected before placing a water foundation down. Decrease to let players build closer, increase to make them build farther away. MinDistanceFromShore and MaxDistanceFromShore both rely on your map topology. If you're sure that you're quite close to the shore, but the /shore_distance command shows you ridiculous values, it means your map does not have the topology map painted properly (contact the map dev and let them know!). In that case, you should set the RelyOnShoreDistance option in the config to false and instead rely on water depth (if shore distance is enabled, it will rely on both). The unit here is not a meter, but roughly 1/10th of a map grid (around 15 meters). CanDeployWaterFoundations if set to true, will allow players using this profile to deploy newly started foundations (using the doughnut guide, provided they have a properly shaped water foundation item to be consumed). CanReinforceWaterFoundations if set to true, will allow players using this profile to reinforce water foundations by hitting them with a hammer (provided they have a properly shaped water foundation item to be consumed). CanExpandWaterFoundations if set to true, will allow players using this profile to build more water foundations upon already existing ones by placing neighboring floors with their building plan (provided they have a properly shaped water foundation item to be consumed). CanExpandReinforcedFoundations if set to true, will allow players using this profile to attach a floor to the side of a reinforcement foundation - and as long as they have 2 water foundation items in their inventory, they will expand that reinforced foundation along with its water foundation. CanCraftWaterFoundations if set to true, will allow players using this profile to craft water foundations using a GUI in the bottom-right (showing while a Building Plan is equipped). Profiles with this setting set to false won't display those GUIs and players will have to find other ways of obtaining water foundations (loot, kits, server rewards etc). RequireMaterialsForCrafting if set to true, players using this profile will need to have required crafting materials in their inventory when trying to craft a Water Foundation. If set to false, the player will be able to craft an infinite amount of water foundations for free, so use them with caution. WorkbenchLevelRequired Set to 0.0 (no workbench nearby required), 1.0 (Level 1 required), 2.0 (Level 2 required) or 3.0 (Level 3 required) for crafting Water Foundations. CanDeployUnderwaterNets if set to true, players will be able to deploy nettings in underwater wall frames. Those settings will slowly accumulate underwater junk items if the feature is enabled on your server - look below for the loot table configuration.
Underwater junk & Netting Shark loot tables
If you have not disabled underwater nets collecting junk, this is where you can adjust the kind and rarity of certain items. You can even remove entries and add your own, including a custom skin and item name! A "loot table" is perhaps not the right term, as the list contains individual chances of a "caught" item being of a particular kind. There can be only 1 item caught at a time, and the table defines random weights for every possible entry. The larger the weight (compared to the sum of all weights), the bigger chance of encountering a particular item. So if you have 10 entries and each of them have a weight of 1, each item will have an equal 10% chance of being one of the random entries in the list (as the weights sum up to 10). Thus you can have some items really common, and some of them really rare. Here are 2 sample entries from the list:
{ "Shortname": "innertube", "CustomName": null, "SkinID": 2484982352, "RandomChanceWeight": 1.0, "MinRandomAmount": 1, "MaxRandomAmount": 1 }, { "Shortname": "innertube", "CustomName": null, "SkinID": 2485021365, "RandomChanceWeight": 1.0, "MinRandomAmount": 1, "MaxRandomAmount": 1 },
Shortname is the most important bit - make sure it's correct! You can find a link to a full list of those names above. CustomName lets you give items caught in the netting different names. You can leave that null to leave a default item name. In this example, the two items are water foundations - the proper name for those items will be applied automatically by the plugin anyway. Whatever you type there, make sure to encompass it in quotes, like "CustomName": "My Custom Item Name" if it's not null! SkinID is pretty self-explanatory - it's the long number in the URL of a Steam Workshop item. By default, it's 0 (no skin). RandomChanceWeight lets you decide the item's rarity when spawning - relative to the rarity of other items. Increase or decrease this number (it can be fractional) to make the item more or less rare. MinRandomAmount and MaxRandomAmount are what they sound like - they should both be larger than 0 (whole numbers) and when that particular item is caught, the stack will contain an amount between these two numbers.
Translation support (oxide/lang/en/WaterBases.json)
Almost every string the players see, including names for the water foundation items and messages displaying in the chat and the GUI, can be edited. Just load the plugin and let it generate the file - after you edit it, reload the plugin.
-

$20.00
NpcRaiders
By Iftebinjan in Plugins
NpcRaiders
Raid night, any night. Players call a squad of armed NPC raiders onto their own base and defend it wave after wave. It's safe, self-contained raid content for solo players, small groups and PvE servers, with no waiting for a real raider.
The raiders spawn near the base, pick a side and work through it layer by layer with rockets and explosives, then push in through the holes they make. Wipe out every wave before time runs out to win the reward. Lose the TC, or run out the clock, and the raiders win.
Fully sandboxed. Only players authorized on the targeted TC can hurt the raiders, and the raiders only fight those players. Nobody else can interfere, and the raiders never wander off to bother the rest of the server.
Note
New in 2.0.0: smarter raiding AI with roles, raiders that don't know where your TC is, pushing in through breaches, a fully configurable raid HUD you can move in game, Loottable and CustomLoot support, and SimplePVE support. Configs from 1.9.x upgrade themselves, there's nothing to delete.
Video Showcase
Features
The raid
Self-raid events. Players call raiders on a base they're authorized on. Nobody else's base can be targeted. Waves. Set the NPCs per wave, the number of extra waves and the delay between them, from a quick skirmish to a full siege. Time limit. Every wave has to be cleared before the event timer runs out. Chat warns you 60 and 30 seconds before the end. MLRS strikes (optional). On chosen waves an MLRS barrage spreads across the base. Set the spread, the damage and whether it can hurt building blocks. Block repairs (optional) during the event, so players can't just hammer their walls back. Raiders that actually raid
Real aim. Every rocket goes at the first wall or door between the raider and its target, so a base gets opened up layer by layer instead of splashing the outside. Roles. Each wave is split into Rocketeers who circle the base and fire rockets, Breachers who walk up and plant C4 or satchels, and Assault raiders who come in closer and hunt defenders. You set the split per tier. They don't always know where your TC is. Turn it off per tier and the raiders pick one random side and dig in from there, like a real raid group. On the wave you choose (the last wave by default) they find the TC and go straight for it. Pushing in. When a wall or door breaks, a few raiders go through the gap toward the TC. Breach alerts. Defenders get a chat message telling them which side was breached. No friendly fire. Raiders never kill each other, whatever the weapon, and the MLRS strike can't hurt them either. Raid HUD
Live raid card for everyone authed on the TC: wave, time left, raiders left, TC health and status lines such as MLRS strikes, the raiders finding your TC, or the next wave countdown. Fully configurable. Position, background color and material, frame, hazard tape, icon background, icon (image URL, png ID, or item shortname with skin) and every text color. All text comes from the lang file, so it can be translated. Move it in game. Admins nudge or snap it with /raidme hudpos, and the position is saved to the config. Players can hide it with /raidme hud. Tiers and economy
Unlimited raid tiers. Easy, Medium, Hard, Expert and Nightmare come built in, each with its own AI tuning. Add as many as you like, each with its own permission. Per-tier tuning. NPC count, waves, health, names, kits, aim, damage scales, AI behaviour, loot, cost and reward. Pay to raid. Charge any item (Scrap by default), Economics money or ServerRewards points. Win rewards. Give an item, Economics money, ServerRewards points or a kit, to the starter or to everyone on the TC. Sell it in your shop. A console command starts a raid for a player from any shop or GUI plugin. Fair play
Locked-down combat. No griefing and no stray damage to bystanders. Cooldowns. A raid cooldown, plus a separate TC-auth cooldown so nobody re-auths a cupboard to farm events. VIP cooldowns. Give permission groups their own shorter cooldowns. Queue. At the maximum number of running raids, new events wait in line and players are told when it's their turn. Location checks. No raids underground, in deep water, or on terrain you block (icebergs, ice sheets and cliffs by default). Loot and stats
NPC loot from anywhere. AlphaLoot profiles, Loottable presets, CustomLoot presets, your own loot files, or vanilla scientist loot. Build loot files in game. Put items in your inventory and type /raidme loot add <name>. Done. Corpses are locked to the raid's members, so nobody else can steal the loot. Leaderboards. /raidme stats opens a Top 25 screen for wins, losses, kills, deaths and waves, plus your own stats. Kits support. Dress and arm each tier's raiders to match its difficulty. Server friendly
PvE friendly. Works with SimplePVE, TruePVE and LifeSupport. The raid's damage rules keep working even while your PvE plugin is switched off for a PvP or purge schedule. Every message in the player's own language. All chat and HUD text is in the lang file. Light on the server. Raiders scan for targets twice a second instead of every frame. How a raid works
Start it. Stand in your building area and type /raidme buy <type>. The cost is taken, or you join the queue if the server is busy. Get ready. You get a short warning before the first wave, and the raid HUD appears. Defend. Raiders spawn around the base, take up positions and start working through your walls. Breachers walk in with explosives, and when a wall falls some raiders push inside. Chat tells you where they broke through. Win or lose. Result When ✅ Win Every raider in every wave is dead before the timer runs out ❌ Loss The raiders destroy your tool cupboard ⏱️ Time's up The timer runs out with raiders still alive: no reward Everyone authorized on that TC fights together. A win pays the reward and adds to your stats.
Raid tiers
Each tier is a preset in the config with its own permission, so you can sell them separately or bundle them into ranks. The built-in tiers come tuned like this:
Tier Permission NPCs per wave Waves Knows the TC Rockets every Pushers Easy npcraiders.easy 10 3 No (finds it on the last wave) 8-14s Off Medium npcraiders.medium 15 4 No (finds it on the last wave) 6-11s 2 Hard npcraiders.hard 20 5 Yes 5-9s 3 Expert npcraiders.expert 30 5 Yes 4-8s 4 Nightmare npcraiders.nightmare 30 6 Yes 3-6s 5 Note
Add your own tier: copy a tier block in the config, give it a new lowercase name and permission, then add matching entries under Raid Buy Options and Raid Reward Options. The new permission is registered on reload.
Raider AI
Every tier has an AI behaviour block in the config.
Roles
Role What it does Rocketeer Circles the base on the stand-off ring and fires rockets at whatever is between it and the target Breacher Walks up to the wall in its way, plants an explosive from the tier's explosive list, then falls back Assault Stands closer, sees further and goes after defenders on walls and roofs Rocketeers and Assault raiders also walk in to plant an explosive now and then, instead of firing a rocket (20% of the time by default).
Does the raid know where the TC is?
Yes: raiders circle the whole base and aim straight at the TC. No: they pick one random side and aim for the middle of the base. If the middle is already blown open, they switch to the nearest standing low wall. On the wave you set (0 = the last wave) they find the TC, move to its side and go for it, and the HUD tells the defenders. Pushing in
When a wall or door of the raided base breaks, up to the tier's max pushers go through the gap toward the target, shooting the next piece in their way. Only Breachers and Assault raiders push.
Tip
Raiders firing too many rockets? Seconds between rockets counts per raider, so 20 raiders firing every 5-10 seconds is still 2-4 rockets a second across the raid. Raise both numbers for a slower siege, or raise the Breacher share for more explosives.
Permissions
Permission Allows npcraiders.use Using /raidme to view and start raids npcraiders.<tier> Starting that raid tier (for example npcraiders.hard) npcraiders.admin Admin commands: cancel raids, clear data, loot files, HUD position, debug view npcraiders.nocooldown Skipping the raid and TC-auth cooldowns npcraiders.nocost Starting raids for free npcraiders.vip1 / vip2 / vip3 Shorter cooldowns (set in Raid Vip Options, add as many as you like) Commands
The chat command is /raidme by default. You can rename it in the config.
Players
Command Description /raidme Help menu: the tiers you can use, with NPC and wave counts /raidme buy Every tier you can buy, with its cost /raidme buy <type> Start a raid of that tier on the base you're authorized on /raidme stats Open the leaderboards and your personal stats /raidme hud Hide or show the raid HUD Admins
Command Description /raidme reload all Cancel every running raid /raidme reload player <name> Cancel one player's raid /raidme clear Wipe all stored cooldowns and player data /raidme loot add <name> Create a loot file from your inventory, or add your inventory to one /raidme loot clear <name> Remove all items from a loot file /raidme hudpos Show a preview of the raid HUD and its current position /raidme hudpos left|right|up|down [pixels] Move the HUD (10px by default) and save it to the config /raidme hudpos anchor <name> Snap the HUD to topleft, top, topright, left, center, right, bottomleft, bottom or bottomright /raidme hudpos reset Put the HUD back in its default spot /raidme debug Draw every raider's role, state, destination and aim, plus the ring, target and breaches (needs a real admin) /raidme terrain Debug: shows the terrain colliders and water depth where you stand (for the block list) Server console
Command Description npcraiders buy <type> <playerID> Start a raid purchase for a player (for shops and GUI plugins) npcraiders.debug One line per running raid: wave, raiders alive by role, fighting, pushing, breaches and time left NPC loot
Loot only drops when the tier has Npc drop loot on death set to true. Each corpse uses the first source that's set up, in this order:
AlphaLoot: profile names in AlphaLoot profile names For Npc Loot Loottable: custom preset names in Loottable custom preset names For Npc Loot CustomLoot: preset names in CustomLoot preset names For Npc Loot Your own loot files: names in Npc drop loot config names Vanilla scientist loot, when none of the above is set If a list has more than one name, each corpse gets one at random. If a plugin isn't loaded or a preset doesn't exist, that source is skipped and the console tells you once.
Making your own loot file
Put the items you want raiders to drop into your inventory. Type /raidme loot add <name>. (Optional) Open oxide/data/NpcRaiders/LootProfiles/<name>.json and set the min / max number of items to drop. If you leave them at 0, a corpse drops between 1 and all of the file's items. Each item's amount ranges from 1 to the amount you had when you created it, and you can change those too. Add the name to a tier's Npc drop loot config names. Hosting partner
Installation
Upload NpcRaiders.cs to oxide/plugins. Grant the basic and tier permissions, for example: oxide.grant group default npcraiders.use oxide.grant group default npcraiders.easy (Optional) Install Kits and create kits for each tier's raiders. Set the costs and rewards in the config, then reload. Stand in your base and type /raidme buy easy. Note
Updating from 1.9.x? Just replace the file. Your config keeps all its settings and gets the new ones added on load. Upgraded tiers get the standard AI values (raiders know the TC, rockets every 5-10s, up to 3 pushers). A fresh config gets the per-tier values from the table above.
Configuration
Key settings explained
Setting What it does BuyType Item ID (for example -932201673 = Scrap), economics or serverrewards BuyAmmount How much it costs to start the raid RewardType Item ID, economics, serverrewards or kit RewardAmmount Amount of the reward, or the kit name for kit rewardAll true = every online player authorized on the TC is rewarded (items for each, money or points split between them), false = only the starter How many extra waves Waves after the first one, so 2 means 3 waves in total Mlrs waves and amounts Which wave fires MLRS, and how many rockets ("1": 6 = 6 rockets on wave 1) Mlrs spread radius How wide the barrage lands around the base. 0 uses the size of the base Mlrs damages building blocks Whether the strike can damage the raided base. Only the raided base can ever be hit External Tc Scan Range How far from the event the target base's TC is searched for. If none is found, the event ends NPC aimConeScale Raider accuracy: lower = more accurate NPCs know where the TC is false = raid one random side until the TC is found Wave the NPCs find the TC The wave they find it on when they don't know it. 0 = the last wave Stand-off ring How far from the base centre Rocketeers stand. Bigger bases push the ring out on their own Seconds between rockets Per raider, the wait between rockets Role split in percent How each wave is split between Rocketeers, Breachers and Assault raiders Push into the base / Max NPCs pushing in at once Whether raiders go through breached walls and doors, and how many at a time Background material Any UI material. Blur materials are skipped unless Use blur materials is true, because they wash out on Rust's new render pipeline Icon image An image URL or a png ID. Leave it empty to show the item from Icon item shortname and Icon item skin Block raid in colider Terrain names where raids can't start. Use /raidme terrain to find names Optional plugins
None are required. NpcRaiders connects to these on its own when they're installed:
Plugin Used for Kits Raider loadouts and kit rewards AlphaLoot Raider corpse loot profiles Loottable Raider corpse loot from custom presets CustomLoot Raider corpse loot from presets Economics Raid costs and money rewards ServerRewards Raid costs and point rewards SimplePVE / TruePVE Raid combat works on PvE servers LifeSupport Revives are handled correctly during an event FAQ
Can players raid other players with this?
No. A player can only start an event on a base they're authorized on, so it's self-contained PvE content.
Can I sell different difficulty levels?
Yes. Every tier has its own permission, NPC count, waves, AI behaviour, loot, cost and reward. Sell each tier on its own or bundle them into ranks.
What does it depend on?
Nothing. Kits, AlphaLoot, Loottable, CustomLoot, Economics, ServerRewards, SimplePVE/TruePVE and LifeSupport are optional and connect on their own.
Do I need to delete my config when updating to 2.0.0?
No. New settings are added to your existing config on load, and everything you've set stays as it is.
The raiders only shoot rockets, I want more C4.
Raise the Breacher share in the role split, lower Seconds between explosive plants, or raise the walk-in plant chance. Make sure the tier's Explosive item shortnames list isn't empty.
Can I move or restyle the raid HUD?
Yes. As an admin use /raidme hudpos to move it in game. Colors, material, icon and every text color are in the Raid HUD section of the config, and the text itself is in the lang file.
The HUD background looks washed out or see-through.
Leave Use blur materials on false. Blur materials are broken on Rust's new render pipeline, so they're skipped unless you turn that on.
Can players skip paying or the cooldown?
With permissions: npcraiders.nocost makes raids free and npcraiders.nocooldown skips both cooldowns. That's useful for staff testing or as a VIP perk.
Can players re-auth on TCs to farm rewards?
No. A separate TC-auth cooldown stops players from authorizing on a cupboard and starting another event straight away.
What happens when too many raids are running?
New raids wait in a queue. Players see their place in line and get a warning 60 seconds before their event starts.
Can I start a raid from my shop plugin?
Yes. Run npcraiders buy <type> <playerID> from the shop as a server command.
Raids won't start on my map's terrain.
That terrain is in the Block raid in colider list. Stand there, use /raidme terrain to see the collider names, and remove the one you want to allow.
For developers
void NpcRaidersEventStart(BasePlayer player, ulong playerID, string raidType, Vector3 location, object raidEvent) void NpcRaidersEventEnd(BasePlayer player, ulong playerID, string raidType, Vector3 location) void NpcRaidersGenerateEventMembers(BasePlayer player, ulong playerID, string raidType, int totalWaves, Vector3 location, object raidEvent) Support
Need help or found a bug? Open a support ticket on this page.
Check out my other plugins
-
$45.95$31.95Clans
Clans gives your players one menu for everything a clan does: create it, invite people, hand out roles, make alliances, set gather quotas and clan skins, and check where the clan sits in the top. If you run ServerPanel, the menu opens inside it as its own category and matches your template, V1, V2 or V4. Without ServerPanel it opens fullscreen, in the Old Style or the New Rust look.
Clans also takes over Rust's own clan system. The F1 clan menu, the clan chat tab, clan names on the map and Rust+ all show Clans data, and in-game clan score events count toward your clan rating. Players get one clan, not two that disagree with each other.
Clan leaders build their own ranks. A role has a name, a color and twelve rights, from inviting and kicking to changing the avatar or toggling ally friendly fire, so a big clan can run itself without handing everyone leader rights. Data lives in JSON, Protobuf or MySQL, and one console command moves it between them. Updating from 1.x keeps your settings: old moderators become roles and the page settings move into the new menu.
🌟 Features of Clans
Five menu layouts: ServerPanel V1, V2 and V4, picked from your ServerPanel template on its own, plus two fullscreen styles, Old Style and New Rust. Every layout is a template file in data/Clans/Templates, where positions, colors and sizes can be changed Clan roles: leaders create roles with their own name and color and pick the rights: invite, kick, promote, demote, alliances, avatar, description, tag color, gather rates, skins, friendly fire and ally friendly fire Rust's clan system runs on Clans: the F1 clan menu, the clan chat tab, clan names on the map and Rust+, with in-game clan score events counting toward the rating Alliances: send, accept, cancel and revoke alliances, with a separate friendly fire switch for allies Friendly fire: per clan, with turret protection for clan mates as an option Gather rates: the clan sets how much of each resource every member has to bring in, and the menu shows how far each member got Clan skins: one set of skins for the whole clan, so you can tell your own people from the enemy at a glance Clan identity: avatar, tag color and a description, each behind its own role right Clan and player tops: pages with a page number field; the columns and the stat tiles on the About Clan page and in profiles are set in the config, each can be turned off or put behind a permission Player and clan profiles: open them from the member lists and the top tables Your menu, your pages: reorder, rename, hide or lock menu categories and pages behind permissions Paid actions: charge for creating, joining, leaving, kicking, disbanding, setting skins or the avatar, and for invites, through any economy plugin or with items Tag rules: minimum and maximum length, a blocked words list and an allowed characters filter. Errors show right in the Create a clan window Clan and alliance chat, with BetterChat support Clans Discord companion plugin: clan events and clan chat go to Discord through webhooks, and clan leaders can set their own webhook Storage: JSON, Protobuf or MySQL, and clans.convertstorage moves everything to another type Cleanup: purge inactive clans, and wipe clans, players or invites on a new map, each on its own switch Built for big servers: the top is rebuilt in small steps, data is written only when something changed, and the menu template is prepared in the background at startup
⚡ Performance
Clans is built for big servers. Statistics, friendly fire checks and turret targeting run without allocating memory on every call, the clan and player top is rebuilt in small steps instead of one long freeze, and data is written to storage only when something changed.
🖼️ Showcase
Fullscreen: Old Style
Fullscreen: New Rust
ServerPanel V1
ServerPanel V2
ServerPanel V4
✨ What makes it different
Clan roles: a name, a color and twelve rights per role
Rust's own clan menu shows the same clan
Clan events and chat in Discord
🎮 Commands
Players (the /clan and /clans names can be changed in the config):
/clan: open the clan menu /clan create <tag>: create a clan /clan disband: disband your clan /clan leave: leave your clan /clan join: open your invites /clan invite <name/steamid>, /clan withdraw <name/steamid>: invite a player, cancel an invite /clan kick <name/steamid>: kick a member /clan promote <name/steamid>, /clan demote <name/steamid>: move a member up or down a role /clan allyinvite <tag>, allywithdraw, allyaccept, allycancel, allyrevoke <tag>: manage alliances /clan ff, /clan allyff (also /cff, /aff😞 toggle friendly fire for the clan and for allies /clan description <text>, /clan tagcolor <hex>: set the description and the tag color /clan discord: set the clan's Discord webhook (Clans Discord) /cinfo <tag>: information about a clan /c, /cchat: clan chat; /a, /achat: alliance chat Admins: clans.manage (needs clans.admin)
list, listex: all clans, with members and online status in listex show [name/userId]: one clan and its members msg [clanTag] [message]: send a message to a clan create [name/userId] [clanTag], rename [oldTag] [newTag], disband [clanTag] invite, join, kick, owner, promote, demote [clanTag] [name/userId] Console:
clans.convertstorage <JSON|Protobuf|MySQL>: move all player and clan data to another storage type clans.refreshtop: rebuild the clan and player top now clans.refreshskins: reload the skins players can pick for clan skins clans.reborn.convert (Clans Converter) reads the data file of Clans Reborn (data/Clans.json) and makes clans from it clans.umod.convert (Clans Converter) does the same for the uMod Clans plugin (data/clan_data.json) clans.convert.olddata (Clans Converter) moves player settings from the data of Clans 1.x, such as friendly fire and clan skins clans.import.playerdatabase [field] (Clans Converter) brings player data over from the PlayerDatabase plugin. The field name defaults to Clans, and PlayerDatabase has to be loaded
🛡️ Permissions
clans.admin: the clans.manage command clans.cancreate, clans.canjoin, clans.canleave, clans.candisband, clans.cankick, clans.canskins: each is checked only when its switch is on in the "Permission Settings" section of the config Menu categories, pages, top columns, stat tiles, clan skins and the avatar change can each take a permission name of your own. The plugin registers it on load.
⚙️ Web Config Editor
Manage the Clans settings in our web config editor. Every section of the config has its own form, so you set up roles, pages, top columns, paid actions and storage in the browser instead of editing the JSON file by hand.
P.S. The web config editor is open to members of the "Clans" group in our Discord server. Join at https://discord.gg/mevent and ask for the group.
🎥 Video
🧪 TEST SERVER
Join our test server and try all the features yourself!
Copy the IP address below to start playing.
connect 155.103.86.38:28015
📚 FAQ
Q: What are the files in the download, and which ones do I need?
A: The archive has three plugin files, and only Clans.cs is required. It is the plugin itself, with the menu, roles, alliances, gather rates, skins, tops and storage, and it runs fine without the other two. ClansDiscord.cs is optional: it posts clan events and clan chat to Discord webhooks, so skip it if you do not use Discord. To use it, put your server webhook into "Admin webhook URL". Every event has its own switch and color, and team chat is off by default. Clan leaders can add their own webhook with the DISCORD button or /clan discord, and you can limit that to a permission and to the hosts you allow. ClansConverter.cs is optional and needed once, only when you move clan data from another plugin: install it, run the matching command from the server console or RCON (they do not work from the in-game F1 console), check that your clans came over, then delete the file. The commands are listed under Console above. If you start from scratch, you do not need it.
Q: How do I add Clans to ServerPanel?
A: In ServerPanel, create a category with Type: Plugin, Plugin Name: Clans, Plugin Hook: API_OpenPlugin. Clans reads your ServerPanel template and picks the matching layout: t1 and t1_1 give V1, t2 and t3 give V2, t4 gives V4. While that category exists, /clan opens it. To force a layout, set "UI Pattern" in the config to V1, V2, V4 or Fullscreen instead of Auto.
Q: Which storage type should I pick?
A: JSON is the default and works out of the box. Protobuf is faster and smaller on disk for big servers. MySQL lets several servers share clan data. You can switch any time with clans.convertstorage.
Q: I am updating from Clans 1.x. What happens to my data?
A: Clans and settings carry over. Old moderator settings and member colors become clan roles, and the page settings move into the new menu categories. The interface settings moved from the config to the template files in data/Clans/Templates. If you used PlayerDatabase, run clans.import.playerdatabase from Clans Converter once.
Q: Does Clans work with my other plugins?
A: Clans has the same API as other popular clans plugins, so plugins that support clans work with it too.
Q: How do I show the clan top on the screen?
A: Install Clans Top.
Q: Which other plugins do I need?
A: ImageLibrary on Oxide, for avatars and icons. Carbon has the image module built in.
Q: Where do I edit the text, or add my own language?
A: oxide/lang/en/Clans.json (or carbon/lang/en/). Copy it to lang/<code>/Clans.json and translate the values. English and Russian are included.
Q: Where can I see an example of the config?
A: Config
🔧 Hooks
void OnClanCreate(string tag) void OnClanCreated(IClan clan, ulong leaderId) void OnClanUpdate(string tag) void OnClanDestroy(string tag) void OnClanDisbanded(string tag, List<ulong> memberUserIDs) void OnClanRenamed(string oldTag, string newTag) void OnClanLeaderChanged(ulong newLeader, ulong oldLeader, string tag) void OnClanMemberJoined(ulong userId, string tag) void OnClanMemberLeft(ulong userId, string tag) void OnClanMemberGone(ulong userId, string tag) void OnClanMemberKicked(ulong userId, ulong actorId, string tag) void OnClanMemberPromoted(ulong userId, ulong actorId, string tag, string role) void OnClanMemberDemoted(ulong userId, ulong actorId, string tag, string role) void OnClanInvite(ulong inviterId, ulong targetId, string tag) void OnClanInviteRejected(ulong userId, string tag) void OnClanInviteWithdrawn(ulong inviterId, ulong targetId, string tag) void OnClanAllianceInvite(string tag, string targetTag, ulong actorId) void OnClanAllianceAccepted(string tag, string targetTag, ulong actorId) void OnClanAllianceInviteRejected(string tag, string targetTag, ulong actorId) void OnClanAllianceInviteWithdrawn(string tag, string targetTag, ulong actorId) void OnClanAllianceRevoked(string tag, string targetTag, ulong actorId) void OnClanChat(BasePlayer player, string message, string tag) void OnClanTopUpdated()
Questions, ideas and bug reports go to our Discord.