
baumer2k's Wishlist
-
$20.00
Gas Station Event
In a tense multiplayer event, players are thrust into a violent dispute between two warring gangs, witnessing a high-speed chase and explosive confrontation at Oxum's Gas Station, and then choosing sides or taking all the spoils for themselves, while customization options offer control over NPC settings, loot rooms, and crate contents
Description
The event begins with a message in chat that there has been a dispute between to warring gangs. One gang has taken members from their rivals hostage. A car chase ensues chase where the rival gang is coming to save or avenge their own!
The chase comes to an explosive end at Oxum's Gas Station when the car being pursued crashes into the gas pumps! This is the beginning of the event for your players. Both gangs jump out of their vehicles and a shootout immediately ensues! When a player decides to approach, they will have a few choices.
Will they take up arms with the ruthless gang willing to do anything? Will they stand beside the more honorable outlaws? Or will they simply kill both gangs and take all of the loot? The choice, is theirs!
If the player decides to kill the first gang, the second gang will give the player access to their loot room, a bunker inside the basement of the auto repair shop, as a sign of gratitude.
If the player decides to kill the second gang, then the first gang will give access to their hidden stash in the restroom inside the station, to show their appreciation.
If the player decides to just wipe both gangs out, well then they deserve all of the loot! And regardless of what team the player decides to destroy, the chasing vehicle is always left unattended at the end of the event. The player can grab this as a thank you for cleaning up the servers streets! It's a junker but you can take it for parts, drive to Junkyard to scrap it, or just use it to get home quick and take the parts you want from it.
The configuration file has many customization options, including NPC settings, their numbers, and you can fully customize the loot rooms, the crates and their loot for the event.
Dependencies (optional, not required)
True PVE PveMode GUI Announcements Notify Discord Messages AlphaLoot CustomLoot NTeleportation Economics Server Rewards IQEconomic Kits
Chat commands (only for administrators)
/gsstart - start the event
/gsstop - end the event
Console commands (RCON only)
gsstart - start the event
gsstop - end the event
Plugin Config
en - example of plugin configuration in English ru - example of plugin configuration in Russian
Hooks
void OnGasStationEventStart() – called when the event starts
void OnGasStationEventEnd() – called when the event ends
void OnGasStationEventWinner(ulong winnerId) – called at the end of the event, where the winnerId is the player who did more actions to complete the event
My Discord: KpucTaJl#8923
Join the Mad Mappers Discord here!
Check out more of my work here!
- #gas station
- #crates
- (and 20 more)
-

$20.00
NpcRaiders
By Iftebinjan in Plugins
NpcRaiders
Raid night, any night. Players call a squad of armed NPC raiders onto their own base and defend it wave after wave. It's safe, self-contained raid content for solo players, small groups and PvE servers, with no waiting for a real raider.
The raiders spawn near the base, pick a side and work through it layer by layer with rockets and explosives, then push in through the holes they make. Wipe out every wave before time runs out to win the reward. Lose the TC, or run out the clock, and the raiders win.
Fully sandboxed. Only players authorized on the targeted TC can hurt the raiders, and the raiders only fight those players. Nobody else can interfere, and the raiders never wander off to bother the rest of the server.
Note
New in 2.0.0: smarter raiding AI with roles, raiders that don't know where your TC is, pushing in through breaches, a fully configurable raid HUD you can move in game, Loottable and CustomLoot support, and SimplePVE support. Configs from 1.9.x upgrade themselves, there's nothing to delete.
Video Showcase
Features
The raid
Self-raid events. Players call raiders on a base they're authorized on. Nobody else's base can be targeted. Waves. Set the NPCs per wave, the number of extra waves and the delay between them, from a quick skirmish to a full siege. Time limit. Every wave has to be cleared before the event timer runs out. Chat warns you 60 and 30 seconds before the end. MLRS strikes (optional). On chosen waves an MLRS barrage spreads across the base. Set the spread, the damage and whether it can hurt building blocks. Block repairs (optional) during the event, so players can't just hammer their walls back. Raiders that actually raid
Real aim. Every rocket goes at the first wall or door between the raider and its target, so a base gets opened up layer by layer instead of splashing the outside. Roles. Each wave is split into Rocketeers who circle the base and fire rockets, Breachers who walk up and plant C4 or satchels, and Assault raiders who come in closer and hunt defenders. You set the split per tier. They don't always know where your TC is. Turn it off per tier and the raiders pick one random side and dig in from there, like a real raid group. On the wave you choose (the last wave by default) they find the TC and go straight for it. Pushing in. When a wall or door breaks, a few raiders go through the gap toward the TC. Breach alerts. Defenders get a chat message telling them which side was breached. No friendly fire. Raiders never kill each other, whatever the weapon, and the MLRS strike can't hurt them either. Raid HUD
Live raid card for everyone authed on the TC: wave, time left, raiders left, TC health and status lines such as MLRS strikes, the raiders finding your TC, or the next wave countdown. Fully configurable. Position, background color and material, frame, hazard tape, icon background, icon (image URL, png ID, or item shortname with skin) and every text color. All text comes from the lang file, so it can be translated. Move it in game. Admins nudge or snap it with /raidme hudpos, and the position is saved to the config. Players can hide it with /raidme hud. Tiers and economy
Unlimited raid tiers. Easy, Medium, Hard, Expert and Nightmare come built in, each with its own AI tuning. Add as many as you like, each with its own permission. Per-tier tuning. NPC count, waves, health, names, kits, aim, damage scales, AI behaviour, loot, cost and reward. Pay to raid. Charge any item (Scrap by default), Economics money or ServerRewards points. Win rewards. Give an item, Economics money, ServerRewards points or a kit, to the starter or to everyone on the TC. Sell it in your shop. A console command starts a raid for a player from any shop or GUI plugin. Fair play
Locked-down combat. No griefing and no stray damage to bystanders. Cooldowns. A raid cooldown, plus a separate TC-auth cooldown so nobody re-auths a cupboard to farm events. VIP cooldowns. Give permission groups their own shorter cooldowns. Queue. At the maximum number of running raids, new events wait in line and players are told when it's their turn. Location checks. No raids underground, in deep water, or on terrain you block (icebergs, ice sheets and cliffs by default). Loot and stats
NPC loot from anywhere. AlphaLoot profiles, Loottable presets, CustomLoot presets, your own loot files, or vanilla scientist loot. Build loot files in game. Put items in your inventory and type /raidme loot add <name>. Done. Corpses are locked to the raid's members, so nobody else can steal the loot. Leaderboards. /raidme stats opens a Top 25 screen for wins, losses, kills, deaths and waves, plus your own stats. Kits support. Dress and arm each tier's raiders to match its difficulty. Server friendly
PvE friendly. Works with SimplePVE, TruePVE and LifeSupport. The raid's damage rules keep working even while your PvE plugin is switched off for a PvP or purge schedule. Every message in the player's own language. All chat and HUD text is in the lang file. Light on the server. Raiders scan for targets twice a second instead of every frame. How a raid works
Start it. Stand in your building area and type /raidme buy <type>. The cost is taken, or you join the queue if the server is busy. Get ready. You get a short warning before the first wave, and the raid HUD appears. Defend. Raiders spawn around the base, take up positions and start working through your walls. Breachers walk in with explosives, and when a wall falls some raiders push inside. Chat tells you where they broke through. Win or lose. Result When ✅ Win Every raider in every wave is dead before the timer runs out ❌ Loss The raiders destroy your tool cupboard ⏱️ Time's up The timer runs out with raiders still alive: no reward Everyone authorized on that TC fights together. A win pays the reward and adds to your stats.
Raid tiers
Each tier is a preset in the config with its own permission, so you can sell them separately or bundle them into ranks. The built-in tiers come tuned like this:
Tier Permission NPCs per wave Waves Knows the TC Rockets every Pushers Easy npcraiders.easy 10 3 No (finds it on the last wave) 8-14s Off Medium npcraiders.medium 15 4 No (finds it on the last wave) 6-11s 2 Hard npcraiders.hard 20 5 Yes 5-9s 3 Expert npcraiders.expert 30 5 Yes 4-8s 4 Nightmare npcraiders.nightmare 30 6 Yes 3-6s 5 Note
Add your own tier: copy a tier block in the config, give it a new lowercase name and permission, then add matching entries under Raid Buy Options and Raid Reward Options. The new permission is registered on reload.
Raider AI
Every tier has an AI behaviour block in the config.
Roles
Role What it does Rocketeer Circles the base on the stand-off ring and fires rockets at whatever is between it and the target Breacher Walks up to the wall in its way, plants an explosive from the tier's explosive list, then falls back Assault Stands closer, sees further and goes after defenders on walls and roofs Rocketeers and Assault raiders also walk in to plant an explosive now and then, instead of firing a rocket (20% of the time by default).
Does the raid know where the TC is?
Yes: raiders circle the whole base and aim straight at the TC. No: they pick one random side and aim for the middle of the base. If the middle is already blown open, they switch to the nearest standing low wall. On the wave you set (0 = the last wave) they find the TC, move to its side and go for it, and the HUD tells the defenders. Pushing in
When a wall or door of the raided base breaks, up to the tier's max pushers go through the gap toward the target, shooting the next piece in their way. Only Breachers and Assault raiders push.
Tip
Raiders firing too many rockets? Seconds between rockets counts per raider, so 20 raiders firing every 5-10 seconds is still 2-4 rockets a second across the raid. Raise both numbers for a slower siege, or raise the Breacher share for more explosives.
Permissions
Permission Allows npcraiders.use Using /raidme to view and start raids npcraiders.<tier> Starting that raid tier (for example npcraiders.hard) npcraiders.admin Admin commands: cancel raids, clear data, loot files, HUD position, debug view npcraiders.nocooldown Skipping the raid and TC-auth cooldowns npcraiders.nocost Starting raids for free npcraiders.vip1 / vip2 / vip3 Shorter cooldowns (set in Raid Vip Options, add as many as you like) Commands
The chat command is /raidme by default. You can rename it in the config.
Players
Command Description /raidme Help menu: the tiers you can use, with NPC and wave counts /raidme buy Every tier you can buy, with its cost /raidme buy <type> Start a raid of that tier on the base you're authorized on /raidme stats Open the leaderboards and your personal stats /raidme hud Hide or show the raid HUD Admins
Command Description /raidme reload all Cancel every running raid /raidme reload player <name> Cancel one player's raid /raidme clear Wipe all stored cooldowns and player data /raidme loot add <name> Create a loot file from your inventory, or add your inventory to one /raidme loot clear <name> Remove all items from a loot file /raidme hudpos Show a preview of the raid HUD and its current position /raidme hudpos left|right|up|down [pixels] Move the HUD (10px by default) and save it to the config /raidme hudpos anchor <name> Snap the HUD to topleft, top, topright, left, center, right, bottomleft, bottom or bottomright /raidme hudpos reset Put the HUD back in its default spot /raidme debug Draw every raider's role, state, destination and aim, plus the ring, target and breaches (needs a real admin) /raidme terrain Debug: shows the terrain colliders and water depth where you stand (for the block list) Server console
Command Description npcraiders buy <type> <playerID> Start a raid purchase for a player (for shops and GUI plugins) npcraiders.debug One line per running raid: wave, raiders alive by role, fighting, pushing, breaches and time left NPC loot
Loot only drops when the tier has Npc drop loot on death set to true. Each corpse uses the first source that's set up, in this order:
AlphaLoot: profile names in AlphaLoot profile names For Npc Loot Loottable: custom preset names in Loottable custom preset names For Npc Loot CustomLoot: preset names in CustomLoot preset names For Npc Loot Your own loot files: names in Npc drop loot config names Vanilla scientist loot, when none of the above is set If a list has more than one name, each corpse gets one at random. If a plugin isn't loaded or a preset doesn't exist, that source is skipped and the console tells you once.
Making your own loot file
Put the items you want raiders to drop into your inventory. Type /raidme loot add <name>. (Optional) Open oxide/data/NpcRaiders/LootProfiles/<name>.json and set the min / max number of items to drop. If you leave them at 0, a corpse drops between 1 and all of the file's items. Each item's amount ranges from 1 to the amount you had when you created it, and you can change those too. Add the name to a tier's Npc drop loot config names. Hosting partner
Installation
Upload NpcRaiders.cs to oxide/plugins. Grant the basic and tier permissions, for example: oxide.grant group default npcraiders.use oxide.grant group default npcraiders.easy (Optional) Install Kits and create kits for each tier's raiders. Set the costs and rewards in the config, then reload. Stand in your base and type /raidme buy easy. Note
Updating from 1.9.x? Just replace the file. Your config keeps all its settings and gets the new ones added on load. Upgraded tiers get the standard AI values (raiders know the TC, rockets every 5-10s, up to 3 pushers). A fresh config gets the per-tier values from the table above.
Configuration
Key settings explained
Setting What it does BuyType Item ID (for example -932201673 = Scrap), economics or serverrewards BuyAmmount How much it costs to start the raid RewardType Item ID, economics, serverrewards or kit RewardAmmount Amount of the reward, or the kit name for kit rewardAll true = every online player authorized on the TC is rewarded (items for each, money or points split between them), false = only the starter How many extra waves Waves after the first one, so 2 means 3 waves in total Mlrs waves and amounts Which wave fires MLRS, and how many rockets ("1": 6 = 6 rockets on wave 1) Mlrs spread radius How wide the barrage lands around the base. 0 uses the size of the base Mlrs damages building blocks Whether the strike can damage the raided base. Only the raided base can ever be hit External Tc Scan Range How far from the event the target base's TC is searched for. If none is found, the event ends NPC aimConeScale Raider accuracy: lower = more accurate NPCs know where the TC is false = raid one random side until the TC is found Wave the NPCs find the TC The wave they find it on when they don't know it. 0 = the last wave Stand-off ring How far from the base centre Rocketeers stand. Bigger bases push the ring out on their own Seconds between rockets Per raider, the wait between rockets Role split in percent How each wave is split between Rocketeers, Breachers and Assault raiders Push into the base / Max NPCs pushing in at once Whether raiders go through breached walls and doors, and how many at a time Background material Any UI material. Blur materials are skipped unless Use blur materials is true, because they wash out on Rust's new render pipeline Icon image An image URL or a png ID. Leave it empty to show the item from Icon item shortname and Icon item skin Block raid in colider Terrain names where raids can't start. Use /raidme terrain to find names Optional plugins
None are required. NpcRaiders connects to these on its own when they're installed:
Plugin Used for Kits Raider loadouts and kit rewards AlphaLoot Raider corpse loot profiles Loottable Raider corpse loot from custom presets CustomLoot Raider corpse loot from presets Economics Raid costs and money rewards ServerRewards Raid costs and point rewards SimplePVE / TruePVE Raid combat works on PvE servers LifeSupport Revives are handled correctly during an event FAQ
Can players raid other players with this?
No. A player can only start an event on a base they're authorized on, so it's self-contained PvE content.
Can I sell different difficulty levels?
Yes. Every tier has its own permission, NPC count, waves, AI behaviour, loot, cost and reward. Sell each tier on its own or bundle them into ranks.
What does it depend on?
Nothing. Kits, AlphaLoot, Loottable, CustomLoot, Economics, ServerRewards, SimplePVE/TruePVE and LifeSupport are optional and connect on their own.
Do I need to delete my config when updating to 2.0.0?
No. New settings are added to your existing config on load, and everything you've set stays as it is.
The raiders only shoot rockets, I want more C4.
Raise the Breacher share in the role split, lower Seconds between explosive plants, or raise the walk-in plant chance. Make sure the tier's Explosive item shortnames list isn't empty.
Can I move or restyle the raid HUD?
Yes. As an admin use /raidme hudpos to move it in game. Colors, material, icon and every text color are in the Raid HUD section of the config, and the text itself is in the lang file.
The HUD background looks washed out or see-through.
Leave Use blur materials on false. Blur materials are broken on Rust's new render pipeline, so they're skipped unless you turn that on.
Can players skip paying or the cooldown?
With permissions: npcraiders.nocost makes raids free and npcraiders.nocooldown skips both cooldowns. That's useful for staff testing or as a VIP perk.
Can players re-auth on TCs to farm rewards?
No. A separate TC-auth cooldown stops players from authorizing on a cupboard and starting another event straight away.
What happens when too many raids are running?
New raids wait in a queue. Players see their place in line and get a warning 60 seconds before their event starts.
Can I start a raid from my shop plugin?
Yes. Run npcraiders buy <type> <playerID> from the shop as a server command.
Raids won't start on my map's terrain.
That terrain is in the Block raid in colider list. Stand there, use /raidme terrain to see the collider names, and remove the one you want to allow.
For developers
void NpcRaidersEventStart(BasePlayer player, ulong playerID, string raidType, Vector3 location, object raidEvent) void NpcRaidersEventEnd(BasePlayer player, ulong playerID, string raidType, Vector3 location) void NpcRaidersGenerateEventMembers(BasePlayer player, ulong playerID, string raidType, int totalWaves, Vector3 location, object raidEvent) Support
Need help or found a bug? Open a support ticket on this page.
Check out my other plugins
-
$29.95$21.95Shop
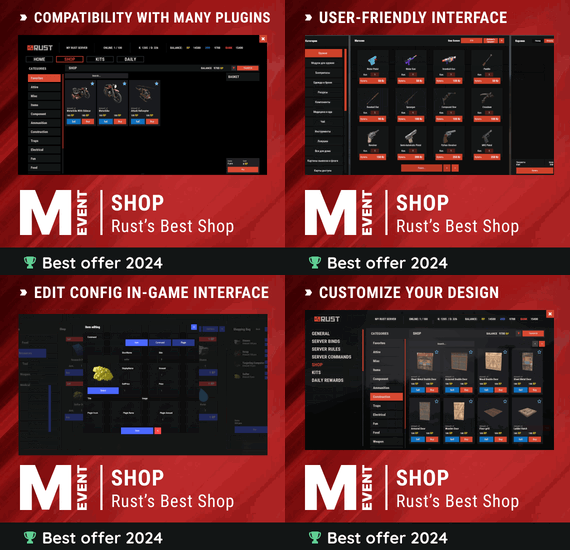
A highly customizable Shop that you configure in game. Use NPCs as shopkeepers and add, edit, or remove items right from the game interface.
⭐ Features of Shop
Beautiful user interface with multiple templates (Fullscreen, In-Menu V1/V2/V4) Shopping Basket: add multiple items to cart and purchase them all at once Search functionality: search for items by name across all categories Pagination: browse items page by page Discount system (by permissions) with per-item custom discounts Automatic shop filling (+ the plugin has support for the ItemCostCalculator plugin) Selling items (players can sell items to the store and receive money for it) Sell containers configuration: choose which containers (main, belt) players can sell from Blocked skins: prevent selling of specific item skins High performance with optimized item loading Adding/editing/removing items IN GAME with visual editor Supports NPC shops (HumanNPC integration) Supports Custom Vending Machines Supports NoEscape plugin integration Supports Duel/Duelist: blocks shop access during duels Convert from ServerRewards Favorite items system: players can mark items as favorites Buy Again feature: quick repurchase of previously bought items By default, the plugin has English, Russian and Chinese translations LangAPI integration for custom translations Transfer money between players directly in the plugin (including offline players option) Shop allows you to use multiple economy plugins at once (players can choose what they want to pay with) For each item, you can choose which payment methods are available and how much they will cost, based on the selected method Cooldown system: per-item buy/sell cooldowns with per-permission overrides Wipe cooldown: block items for purchase/sale after server wipe Respawn cooldown: block purchase/sale for a set time after respawn Buy/Sell limits: lifetime and daily limits per permission Max buy/sell amount: limit items per transaction Force buy: fast purchase without confirmation dialogs Plant genes configuration for plant items Weapon configuration: spawn weapons with ammo and attachments Content system: configure container contents (liquid, weapon mods, etc.) Customizable UI: full color customization and formatting options Offline Image Mode: use local images instead of downloading from internet Image loading on login: preload images when players connect Console and file logging of shop activity ServerPanel integration: add Shop to the ServerPanel menu Notify/UINotify integration for notifications Auto-wipe settings: automatically reset cooldowns, limits, and player data on wipe Discord Logging: track all purchases, sales, and transfers in your Discord server through webhooks with customizable embeds API methods for other plugins to interact with Shop
🎮 Commands
shop: open the shop interface shop.install: starts the shop installation shop.refill <recovery_rate>: refill the shop
recoveryRate: A value between 0 and 1 that determines the multiplier for the cost of selling items. For example, shop.refill 0.5 means that items will have a sale cost of 50% of their purchase cost. shop.convert.sr [clear]: convert items from ServerRewards to Shop. The clear option clears Shop items before converting shop.setvm [categories: cat1 cat2 ...]: add a custom VM to the config shop.setnpc [categories: cat1 cat2 ...]: add an NPC to the config shop.remove all: console command that removes all items and categories from the plugin shop.remove item [category name/all]: console command that removes an item (or all items) shop.remove category [category name/all]: console command that removes a category (or all categories) shop.fill.icc [all/buy/sell]: console command that updates item prices in the store using ItemCostCalculator. all updates both Price and SellPrice, buy updates Price, sell updates SellPrice shop.convert.from.1.2.26: converts Shop plugin version 1.2.26 to version 1.3.0+ shop.reset: resets store data, including templates, configurations, and items. shop.reset template: resets the store interface template data. shop.reset config: resets store configuration data. shop.reset items: resets store items data. shop.reset full: completely resets all store data (templates, configurations and items). shop.manage: manages the Shop plugin. shop.manage economy list: displays a list of all available economic systems in the plugin. shop.manage economy set <economy_ID> <name>: sets the economic system by plugin ID and name. The command updates that economic system on the server and saves the change to the configuration. FOR EXAMPLE:
shop.manage economy set 0 Economics: sets the main economy plugin to "Economics".
shop.manage economy set 1 ServerRewards: sets the additional economy system with ID 1 to "ServerRewards". shop.wipe: manually trigger wipe (resets cooldowns, limits, and player data) shop.change: change item category (used in editor) shop.item: console command for item actions
🛡️ Permissions
shop.setvm: for the "shop.setvm" command shop.setnpc: for the "shop.setnpc" command shop.free: for free item purchases shop.admin: admin permission shop.bypass.dlc: allows bypassing Facepunch ToS item restrictions (WARNING: your server may be banned for this)
📈 API Methods
The Shop plugin provides API methods for other plugins to interact with it:
API_OpenPlugin(BasePlayer player): opens the shop UI for a player. Returns empty string if failed, or UI data if successful. API_GetShopPlayerSelectedEconomy(ulong playerID): returns the economy ID (0 = main, 1+ = additional) that the player has selected for shopping. Note: Other plugins can call these methods using Shop.Call("API_MethodName", ...) syntax.
⚖️ Sort Types
None Name Amount PriceDecrease PriceIncrease
🧬 Category Types
None: normal category for items Favorite: category for favorite items Hidden: hidden category, available only in NPC stores or Vending Machines
🎥 Video
P.S. Video of the old version, video for the V2+ version is now in development
🖼️ Showcase
Full screen Templates
Template OLD STYLE
Template NEW RUST
In-Menu Templates
Template V1 (V1.1)
Template V1 (V1.1) with BASKET
Template V2
Template V2 with BASKET
Template V4
Template V4 with BASKET
Installer
Editor
⚙️ Web Config Editor
Manage the Shop settings in our web config editor. You change the config in a browser form instead of editing files on the server by hand.
P.S. The web config editor is open to members of the "Shop" group in our Discord server. Join at https://discord.gg/mevent and ask for the group.
📢 Discord Logging
Track all shop activity via Discord webhooks: purchases, sales, and money transfers.
🧪 TEST SERVER
Join our test server and try all the features yourself!
Copy the IP address below to start playing.
connect 155.103.86.38:28015
📚 FAQ
Q: I get the message "The plugin does not work correctly, contact the administrator!". What should I do?
A: It means the plugin is not installed. To install it, use the "/shop.install" command. You need the "shop.admin" permission for this command.
Q: Where can I see an example of a config?
A: Config
Q: How to use BankSystem to store the economy
A:
"Economy": { "Type (Plugin/Item)": "Plugin", "Plugin name": "BankSystem", "Balance add hook": "Deposit", "Balance remove hook": "Withdraw", "Balance show hook": "Balance", "ShortName": "", "Display Name (empty - default)": "", "Skin": 0, "Lang Key (for Title)": "LangTitle", "Lang Key (for Balance)": "BalanceTitle" }, Q: How to use ServerRewards to store the economy
A:
"Economy": { "Type (Plugin/Item)": "Plugin", "Plugin name": "ServerRewards", "Balance add hook": "AddPoints", "Balance remove hook": "TakePoints", "Balance show hook": "CheckPoints", "ShortName": "", "Display Name (empty - default)": "", "Skin": 0, "Lang Key (for Title)": "LangTitle", "Lang Key (for Balance)": "BalanceTitle" }, Q: How to use Economics to store the economy
A:
"Economy": { "Type (Plugin/Item)": "Plugin", "Plugin name": "Economics", "Balance add hook": "Deposit", "Balance remove hook": "Withdraw", "Balance show hook": "Balance", "ShortName": "", "Display Name (empty - default)": "", "Skin": 0, "Lang Key (for Title)": "LangTitle", "Lang Key (for Balance)": "BalanceTitle" }, Q: How to use IQEconomic to store the economy
A:
"Economy": { "Type (Plugin/Item)": "Plugin", "Plugin name": "IQEconomic", "Balance add hook": "API_SET_BALANCE", "Balance remove hook": "API_GET_BALANCE", "Balance show hook": "API_REMOVE_BALANCE", "ShortName": "", "Display Name (empty - default)": "", "Skin": 0, "Lang Key (for Title)": "LangTitle", "Lang Key (for Balance)": "BalanceTitle" }, Q: How to use scrap to pay for items
A:
"Economy": { "Type (Plugin/Item)": "Item", "Plugin name": "", "Balance add hook": "", "Balance remove hook": "", "Balance show hook": "", "ShortName": "scrap", "Display Name (empty - default)": "", "Skin": 0, "Lang Key (for Title)": "LangTitle", "Lang Key (for Balance)": "BalanceTitle" }, Q: How to add KIT as shop item
A: https://pastebin.com/4szBQCgz
Q: How to add Command as shop item
A: https://pastebin.com/bcCkzBEL
Q: How do I make a weapon spawn with ammo in it?
A: Configure the "Weapon" section in the item config:
"Weapon": { "Enabled": true, "Ammo Type": "ammo.rifle.explosive", "Ammo Amount": 128 } Q: How do I make items spawn some content (liquid, weapon modifications)?
A: Configure the "Content" section in the item config:
"Content": { "Enabled": true, "Contents": [ { "ShortName": "weapon.mod.lasersight", "Condition": 100.0, "Amount": 1, "Position": -1 } ] }, Q: How to turn off the sell feature?
A: Turn off "Enable item selling?" in the config, or in the item settings in game.
"Enable item selling?": false,
Q: How to use the ItemCostCalculator with Shop?
A: Use the "shop.refill" command (it refills the Shop).
Q: What should be the size of images for item icons?
A: Item icons are usually 512x512 pixels, but any square image works.
Q: I get the error "UI is unavailable for player. Reason: Menu UI is not initialized". How to fix it?
A: This error occurs when the interface template is not installed or configured. Follow these steps:
1. Reset the template using the command: shop.reset template (use only template to avoid data loss).
2. Install the interface via shop.install in the game (to visually select a template) or through the console.
Note: You need the shop.admin permission to execute these commands.
Q: How do I add Shop to the ServerPanel menu?
A: Follow these steps:
1. Open ServerPanel menu in-game and click "+ADD CATEGORY" button
2. Set these exact parameters:
Type: Plugin Plugin Name: Shop Plugin Hook: API_OpenPlugin 3. Click "SAVE" button to create the category
4. Reset Shop template and install it:
Type in console: shop.reset template (IMPORTANT: use only "template"!) Then type: shop.install Note: If Shop doesn't appear in ServerPanel menu, make sure both plugins are loaded and you typed the parameters exactly as shown above.
Q: I see black images with Rust logo or get error 429 when loading images. What should I do?
A: This happens when images fail to download from the internet. The Shop plugin passes images to ImageLibrary but does not download them itself. Error 429 usually comes from rate limits on image hosting services like Imgur (see HTTP 429 documentation for more details). To fix it, enable Offline Image Mode so the plugin uses local images:
Enable the mode in config: Open "oxide/config/Shop.json" (or "carbon/config/Shop.json" for Carbon) Set "Enable Offline Image Mode": true Set up the images: Create folder "TheMevent" in "oxide/data" (or "carbon/data" for Carbon) Download PluginsStorage (click "CODE" → "Download ZIP") Extract the ZIP and copy all contents to the "TheMevent" folder Reload the plugin: Type o.reload Shop (Oxide) or c.reload Shop (Carbon) Note: If you want to add your own custom images, place them in the "TheMevent" folder and reference them with the "TheMevent/" prefix. For example: "TheMevent/Icon1.png", "TheMevent/MyCustomIcon.jpg", etc.
Q: What placeholders are available for commands and what do they do?
A: Shop commands support these placeholders. They are replaced when a player buys a command item:
%steamid%: replaced with the player's Steam ID (e.g., "76561198000000000") %username%: replaced with the player's display name (e.g., "PlayerName") %player.x%: replaced with the player's X coordinate position %player.y%: replaced with the player's Y coordinate position %player.z%: replaced with the player's Z coordinate position Example usage in shop commands:
"Command (%steamid%)": "say Welcome %username%!|teleport %steamid% %player.x% %player.y% %player.z%" Note: Separate multiple commands with the "|" character. They run in order when the item is purchased.
Q: How to set different prices for different currencies (RP and balance)?
A: Each item can have its own price for each currency. Edit the file oxide/data/Shop/Shops/Default.json and find the item you want to modify. In the "Currencies" section, set different prices for each economy:
"Currencies": { "Enabled": true, "Currencies": { "0": {"Price": 1000}, "1": {"Price": 500} } } This means players pay 1000 from their main balance (Economics) or 500 RP from their ServerRewards balance. Economy ID 0 = main economy, ID 1 = ServerRewards.
Q: How to create a shop using HumanNPC plugin and set specific categories?
A: To create a shop with HumanNPC, follow these steps:
Create an NPC using HumanNPC plugin Get the NPC ID (you can find it in the HumanNPC config or use the command humannpc.list) Use the Shop command to add the NPC: shop.setnpc [categories: cat1 cat2 ...] Example:
shop.setnpc categories: Weapon Ammunition Tools: adds the NPC with Weapon, Ammunition, and Tools categories
shop.setnpc categories: *: adds the NPC with all available categories
Note: You need the shop.setnpc permission to use this command. Make sure both HumanNPC and Shop plugins are loaded on your server.
Q: How to add Custom Vending Machines to Shop plugin?
A: To add Custom Vending Machines to Shop, follow these steps:
Place a Custom Vending Machine in your world Look at the vending machine and use the command: shop.setvm [categories: cat1 cat2 ...] Example:
shop.setvm categories: Weapon Ammunition: adds the vending machine with Weapon and Ammunition categories
shop.setvm categories: *: adds the vending machine with all available categories
Note: You need the shop.setvm permission to use this command. The vending machine will be automatically added to the Shop configuration.
Q: How does the Shopping Basket feature work?
A: Players put several items into the basket, check what they picked, and buy everything at once. The basket shows the total cost, and players can remove items before checkout. The basket has to be enabled in the template settings.
Q: How does the Search functionality work?
A: Players search for items by name across all enabled categories. Type in the search box and the shop shows the matching items. Search respects permission settings and can be enabled/disabled in the template configuration.
Q: What are the wipe and respawn blocks?
A: These are time-based restrictions:
Wipe block: Blocks items from being bought/sold for a specified time after a server wipe. Use it to stop players from buying powerful items right after a wipe. Configure in config: "Wipe Block": true and "Wipe Cooldown": 3600 (seconds). Respawn block: Blocks buying and selling for a specified time after the player respawns. Helps prevent abuse. Configure in config: "Respawn Block": true and "Respawn Cooldown": 60 (seconds). Q: How do Daily and Lifetime Limits work?
A: Limits control how many times players can buy/sell items:
Lifetime Limits: Total number of times a player can buy/sell an item across their entire account. Set to 0 for unlimited. Daily Limits: Maximum number of times per day a player can buy/sell an item. Resets daily. Set to 0 for unlimited. Limits are per-permission, so you can set different limits for VIP players, regular players, etc. The plugin uses the highest limit among all permissions the player has. Q: What is the "Buy Again" feature?
A: Buy Again lets players quickly rebuy items they bought before. It shows a history button in the shop UI (if enabled) and requires a permission. To enable, set "Buy Again Settings": {"Enabled": true, "Permission": "shop.buyagain"} in the config.
Q: How do I configure blocked skins for selling?
A: You can prevent players from selling specific item skins. In the config, add entries to "Blocked skins for sell":
"Blocked skins for sell": { "rifle.ak": [52, 25], "pistol.m92": [100, 200] } Q: How do I configure which containers players can sell from?
A: In the config, set "Settings available containers for selling item":
"Settings available containers for selling item": { "Enabled": true, "Available Containers (main, belt, wear)": ["main", "belt"] } Available container names: "main" (inventory), "belt" (hotbar), "wear" (clothing), etc.
Q: What are Auto-Wipe Settings?
A: Auto-Wipe Settings automatically reset certain data when you run the shop.wipe command. Configure in config:
"Auto-Wipe Settings": { "Cooldown": true, "Players": true, "Limits": true } Cooldown: Resets all item cooldowns Players: Resets all player data (favorites, economy selection, etc.) Limits: Resets all buy/sell limits Q: How do I customize price formatting?
A: In the config, set "Formatting Settings" to control how prices are displayed:
"Formatting Settings": { "Buy Price Format": "G", "Sell Price Format": "G", "Shopping Bag Cost Format": "G", "Balance Format": "G" } Format options: "G" (general), "N" (number with separators), "C" (currency), "F" (fixed-point), etc. See .NET number formatting for all options.
Q: How do I enable transfers to offline players?
A: In the config, set "Allow money transfers to offline players?": true. By default, this is disabled for security reasons.
Q: How do I configure Duel/Duelist integration?
A: To block shop access during duels, set "Blocking the opening in duels?": true in the config. Make sure you have the Duel or Duelist plugin loaded.
Q: What do all shop item settings mean and how should I configure them?
A: Here are the most important item fields and what they do.
Type: what this entry does: Item (gives an in-game item), Command (runs server commands), Plugin (calls another plugin hook), Kit (gives a kit). ID: unique numeric ID of the item inside Shop. Used internally (for logs, favorites, editor); normally you don’t change it manually. Image: custom UI icon key. If empty, Shop will try to use the item icon found by ShortName. Permission: Oxide/Carbon permission required to see and use this item. Leave empty to make the item available to everyone, or set e.g. shop.vip for VIP‑only items. Title: custom title shown in the UI. If empty, the plugin will try to use DisplayName, then the in‑game display name of the item, or fall back to an empty string. Description: additional text shown in the item window. Optional, purely visual. Command (%steamid%): used when Type = Command. The plugin will execute this command on the server. You can use placeholders like %steamid%, %username%, %player.x%, %player.y%, %player.z%. Each purchase can run multiple commands (split internally by |). Kit: kit name for Type = Kit. The plugin will give a kit with this name when the player buys the item. Plugin: used for Type = Plugin. Contains plugin name, hook name and amount. When the item is purchased, the specified hook will be called in the target plugin. DisplayName (empty - default): overrides the in‑game item name shown to the player (for Type = Item). If empty, the plugin uses the original item display name (optionally via Lang API). ShortName: shortname of the item (e.g. rifle.ak). This is required for Type = Item; it is used to find ItemDefinition, icon, stack size, etc. Skin: workshop skin ID for the item. Only used when Type = Item. Is Blueprint: if enabled, Shop will give the item as a blueprint instead of the regular item. Amount: how many items are given/sold per one purchase. For blueprints this is how many separate blueprint items are created. Enable item buying? (CanBuy😞 if disabled, the item cannot be bought (only sold, if selling is enabled). Price: default purchase price. Can be overridden per‑economy in Currencies. If a currency is configured for buying, its price will be used instead of this value. Enable item selling? (CanSell😞 if disabled, players cannot sell this item back to the shop. Sell Price: default sell price. Can also be overridden in Currencies for selling. Buy Cooldown / Sell Cooldown: base cooldown in seconds between purchases/sales of this item. Can be overridden by per‑permission cooldowns below. Buy Cooldowns / Sell Cooldowns: per‑permission cooldowns. Keys are permission names (e.g. shop.vip), values are cooldown seconds. The plugin uses the lowest cooldown among permissions that the player has. Use custom discount?: if enabled, the item will use its own Discount map instead of the global discount configuration. Discount (%): per‑permission discount percentages for this item (only if custom discount is enabled). The highest discount from permissions that the player has will be applied. Sell Limits / Buy Limits: global lifetime limits per permission. A value of 0 means "no limit". The plugin selects the highest limit among permissions the player has. Daily Buy Limits / Daily Sell Limits: per‑day limits (reset by the plugin’s daily logic). 0 means "no daily limit". Max Buy Amount / Max Sell Amount: maximum number of items that can be bought/sold in a single transaction (0 disables this limit). Force Buy: if enabled, the item will use fast purchase flow (without extra confirmation windows, depending on UI settings). Prohibit splitting item into stacks?: if enabled, the plugin will try to give the item in a single stack instead of splitting it into multiple stacks, when possible. Purchase/Sale block duration after wipe: time (in seconds) after a wipe during which this item cannot be bought/sold. Useful for limiting powerful items early in the wipe. Localization: per‑language messages for the item title. If enabled and a translation exists for the player’s language, it will override the normal title. Content: configuration of contents for containers (e.g. boxes, weapons with attachments, etc.). You can add inner items (shortname, amount, condition, position). Weapon: additional settings for weapons (ammo type, ammo amount, etc.). Applied when the item is created. Genes: plant gene configuration. If enabled, the plugin will set specified genes on the created item. Currencies: per‑economy price configuration. You can set different prices for each enabled economy plugin (by economy ID) for both buying and selling. If a currency is configured and enabled for the player’s selected economy, its price takes priority over the default Price/Sell Price. Q: What do shop category settings mean and how should I configure them?
A: Categories group your shop items and control how they are shown, sorted and filtered for players.
Enabled: turns this category on or off. If disabled, the category and all its items will not appear in the shop UI at all. Category Type: controls special behavior of the category: None: a normal category that shows the items you added to Items. Favorite: a virtual category that shows each player’s favorite items (based on their own favorites list). Items here are taken from other categories the player marked as favorite. Hidden: a hidden category. It is stored in data and can be used for management, but is not shown in the normal category list in UI. Title: the name of the category displayed in the UI. If Localization is enabled and contains a translation for the player’s language, that localized text will be shown instead of this value. Permission: permission required to see and use this category. If you leave it empty, all players can see the category (subject to item‑level rules). If you set e.g. shop.category.vip, only players with that permission will see this category in the shop. Sort Type: how items inside the category are sorted: None: items are shown in the order they are stored/edited. Name: items are sorted alphabetically by their PublicTitle (what the player sees). Amount: items are sorted by Amount (stack size) in ascending order. PriceIncrease: items are sorted by price from cheaper to more expensive. PriceDecrease: items are sorted by price from more expensive to cheaper. Sorting is applied every time the category items are requested. Items: the list of ShopItem entries that belong to this category. For normal categories (Type = None/Hidden) this is what will be displayed in the item grid. For Favorite categories this list is not used for display. The plugin uses the player’s favorites instead. Localization: optional localized title for the category. When enabled, the plugin will try to show a translated title based on the player’s language. If no translation is found, it falls back to the Title field. How visibility and filtering work: when the shop builds a category: For normal categories, only items that are available for the player (permission, currencies, buy/sell rules, etc.) are included. Skip/take pagination is applied on top of that filtered list to show items page by page. For favorite categories, the plugin takes the player’s favorite items, applies sorting, and displays them in this special category. Reordering categories and items: categories and items can be moved up/down (or left/right) in the in‑game editor. This changes the order in which categories are shown in the UI and the default order of items when Sort Type = None. Q: How do I enable and use ADMIN MODE?
A: ADMIN MODE is a visual in-game editor that lets you manage your shop without editing files by hand.
Step 1: Enable ADMIN MODE
Ensure you have the shop.admin permission Open shop with /shop command Click the "ADMIN MODE" button in the header (shows "■" when active) Step 2: Create/Edit Categories
To create a new category:
With ADMIN MODE enabled, click the "+" button in categories list Fill in category details (Title, Enabled, Type, Permission, Sort Type) Click "SAVE" To edit an existing category:
Click the "Edit" button (pencil icon) next to the category Modify settings Click "SAVE" or "CANCEL" Step 3: Create/Edit Items
To create a new item:
Open the target category Click "+ADD ITEM" button Select item from the selection panel Configure all item properties (price, amount, permissions, etc.) Click "SAVE" To edit an existing item:
Click the "Edit" button on the item Modify properties Click "SAVE" or "CANCEL" Additional ADMIN MODE Features:
Use ↑↓ arrows to reorder categories Use ←→ arrows to reorder items within categories Use "DELETE" button in editor to remove categories/items All changes save automatically, so you don't need to edit files by hand Q: Where are shop files stored and what do they contain?
A: Shop plugin data is organized in the following structure:
📁 Configuration (oxide/config/Shop.json or carbon/config/Shop.json)
Plugin settings (permissions, commands, economy configuration) Notification settings Discord logging configuration Global plugin options 📁 Shop Data (oxide/data/Shop/Shops/Default.json or carbon/data/Shop/Shops/Default.json)
This is the main shop inventory file All categories and their settings All items with prices, permissions, cooldowns, limits Item configurations (weapons, content, currencies, etc.) Edited through ADMIN MODE or manually 📁 UI Template (oxide/data/Shop/UI.json or carbon/data/Shop/UI.json)
Interface template configuration Colors, sizes, positions Display settings Reset with: shop.reset template then shop.install 📁 Player Data (oxide/data/Shop/Players/ or carbon/data/Shop/Players/)
Individual player files (one per player) -
$24.99
Heavy Cargo Ship Event
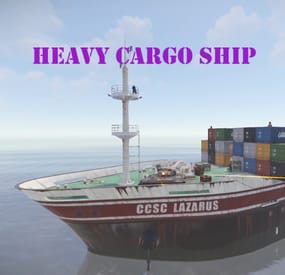
Heavy Cargo Ship Event is a configurable plugin that allows for a new type of random event. Randomly a message will appear letting players know that there's an incoming heavy cargo ship.
The ship is equipped with extra scientists, auto turrets, and a Bradley. Players must try to board the ship and kill the scientists in the lower decks to find the code to disable the auto turrets OR destroy all the turrets. If the code is found, it can be entered into the code lock in the lower decks to disable the turrets. Once the turrets are dealt with, players must defeat the Bradley. This can be a real challenge while on a moving ship. Finally, once the Bradley is defeated, players can collect all the loot. That's if someone else doesn't get to it first!
This is a great event to add to your server to give it a little more variety. It can be a fun PVP zone or a PVE event for non PVP servers.
EASY OPTIONAL SETUP - NO SETUP REQUIRED
You can simply drop the plugin in as-is and it will start the random event every 1 to 2 hours OR you can modify the config to change how often it should occur and/or how long until the Heavy Cargo Ship comes.
Configuration
"How many hackable loot crates should spawn.": 4,
"If this is true auto turrets will target and kill NPCs as well as players on the cargo ship.": false,
"If this is true it will spawn auto turrets on the cargo ship.": true,
"If this is true it will spawn the APC Bradley on the cargo ship.": true,
"Maximum time between events(minutes):": 180,
"Minimum number of players before event will start": 4,
"Minimum time between events(minutes):": 60,
"Set this to true if you want to use the custom loot table in this config. If it's false, it will use your server default.": false,
"Should the event start automatically(false if you only want manually start with HeavyCargoStart command": true
Admin Only Commands
/HeavyCargoStart
/HeavyCargoStop
Hooks
void HeavyCargoShipEventStarted()
void HeavyCargoShipEventStopped()
Discord: cahnu