VinniTV's Wishlist
-
$24.99
Skinner
By Whispers88 in Plugins
Skinner! The unrivaled no.1 performance skinning plugin. Skin any item in the game with a unique skinbox giving you live skinning, auto skinning and skin sets.
Thanks for everyone who has given feed back through the duration of the beta release. Skinner 3.0 is finally here!
Visual overhaul! - with dynamic UI menus for permission based player menus Automatic skin filtering and dev modes for new TOS Permission based skin sets Team share skins! Auto unlock owned skins! and More!!!
Live Skinning - Skin items in place without moving them Auto import - Automatically import and use all game approved skins Skin Sets - Create a variety of different skin sets for any item Skin Requests - Allows players to request and Admins to accept new skins in game Auto Skins - Automatically apply selected skins to every item that enters your inventory
Skinner 2.0 offers unrivaled performance in plugin efficiency. Our standard testing shows runtime results were 60x faster and memory usage was 200x more efficient than the closest peforming plugin.
SkinMenu Commands:
/Skin or /S - Live skin any item in your inventory by selecting a skin you wish to apply /SkinCraft or /Sc - Create multiple skin sets for use in other functions such as skinauto or skinteam /Skinitem or /Si - Skin a deployable item you are looking at ingame. Args - Spectify 1, 2 or 3 to automatically use a skin set. Automatic Commands:
/Skincon or /scon - sets all items in a container you are looking at to your default craft set Args - Optional, spectify 1, 2 or 3 to automatically use a skin set. /Skininv or /sinv - sets all items in your inventory to your default craft set Args - Optional, spectify 1, 2 or 3 to automatically use a skin set. /Skinauto or /Sauto - Automatically apply selected skins to every item that enters your inventory based off your skin sets. Args - Optional, spectify 1, 2 or 3 to automatically use a skin set. /Skinteam or /st - sets all items in your inventory and your teams to your default craft set Args - Optional, spectify 1, 2 or 3 to automatically use a skin set. Toggle - Use /skinteam toggle to opt in or out of the team skin set /SkinBase - Allows you to skin all deployables in your base to your default skincraft skins. Args - Optional, specify item name to filter items being skinned example: /Skinbase sleepingbag to only skin sleeping bags. /SkinAll Command - Skin all the items in all the containers in your base. Args - Optional, specify item by shortname example: /SkinAll rifle.ak to only skin ak47's. Skin Import Commands:
/Skinimport or /sip - Import custom workshop skins Args - WorkshopID example: /Skinimport 2397648701
/Colimport or /cip - Import custom workshop collection using /skinimport collectionID Args - Collection ID example: /Colimport 2921147807
/Skinrequest or /Sr - Request a skin to be added to skinner, requested skins will show in the /Skinrequests UI for approval Args - WorkshopID example: /Skinrequest 2397648701
/Skinrequests or /Srs - Opens the the skinner menu with a box of skins awating approval Button Usage - Select an option and remove the skin to enact the process
Try - Recieve a copy of an item with that skin
Approve - Adds the skin from the menu to the imported skins list
Deny - Removes the skin Note: All chat commands are universal meaning they can be used via the console, rcon(for import commands) and can be customized via the configuration.
Player Permissions:
Skinner.default - enables /skin command Skinner.items - enables /skinitem command Skinner.craft - enables /skincraft command Skinner.skinauto - enables /skinauto command Skinner.skincon - enables /skincon command Skinner.skininv - enables /skininv command Skinner.skinbase - for use of the /skinbase command Skinner.skinteam - Allows the use of the /skinteam command Skinner.skinall - for the use of the /skinall command Skinner.skinrequest - enables /skinrequest Cooldowns Permissions:
Cooldown settins can be adjusted via the plugin config. Applying the cooldown permission example skinner.default30 will enforce cooldowns on those with the permission. If no cooldown permission is applied no cooldowns will be enforced. If multiple cooldown perms are assigned to a single player they fastest cooldown will be used.
"Command based cooldowns ('permission' : 'command' seconds": { "Default30CD": { "skin": 30.0, "skinitem": 30.0, "skincraft": 30.0, "skincon": 30.0, "skininv": 30.0, "skinteam": 30.0, "skinbase": 60.0, "skinall": 60.0 } Admin Permissions:
Skinner.import – enables /Skinimport, /Colimport and /Skinrequests Skinner.bypassauth - bypasses the building auth requirement when using /Skinitem Skinner.permskintry - enables try feature when using /Skinrequests Warning: trying a skin will make a copy of that item. Only give this perm to admins who are allowed to spawn items. Other Permissions:
Skinner.skinautotoggled - applied when a player disables skinauto Skinner.skinteamblock - applied when a player disables team skins
Skinner offers multiple ways of importing skins including via the config and through commands:
Importing via the config:
To import skins via the config insert workshopIDs into the imported skins list as per the code snippet below, once finished reload skinner and the shortname and displayname fields will be automatically populated. You can add extra skins at any stage using this method.
"Imported Skins List": { "861142659": {}, "2617744110": {} },
Optionally entire workshop skin collections can be added to conifg, each item skin is automatically imported to your imported skins list on plugin load.
"Import Skin collections (steam workshop ID)": [496517795,2921147807],
Importing via commands:
Commands can be used to edit the config options for imported skins and collections via RCON, chat commands and the f1 console. Commands include:
/Skinimport WorkshopID /Colimport CollectionID Importing via Skin Requests:
Players can requests skins to be added to the game using the skinrequests feature. By using the command /skinrequest WorkshoID a skin gets automatically uploaded to the skin requests box. Admins with the skinner.import permission can open the requests box with the /skinrequests command.
Skins from the request box can then be "tried" approved or denied.
Each skin requested can be logged to discord using the webhook in the config.
Importing from other plugins:
Skinner now has a tool for windows to import data from skinbox, xskins and skincontroller. Simply select your json data file with imported skins into the tool and copy the new imported skins list into the skinner config.
https://github.com/Whispers88/SkinDataConverter/releases/tag/Main
Note: The "Imported Skins (skinid : 'shortnamestring', skinid2 : 'shortnamestring2'": {}" is now redundant and automatically converted to imported skins list.
{ "Skin Commands (skin items in you inventory": [ "skin", "s", "skinbox", "sb" ], "Skin Items Commands (skin items you have already placed": [ "skinitem", "si", "skindeployed", "sd" ], "Set default items to be skinned": [ "skincraft", "sc" ], "Automatically set all items in you inventory to your default skins": [ "skininv", "sinv" ], "Automatically set all items a container to your default skins": [ "skincon", "scon" ], "Automatically skin all deployables in your base": [ "skinbase", "skinbuilding" ], "Automatically skin all items in your base": [ "skinall", "sa" ], "Automatically skin all items that are moved into you inventory": [ "skinauto", "sauto" ], "Skin your teams inventories with your skin set": [ "skinteam", "st" ], "Request workshop skins via workshop ID": [ "skinrequest", "sr" ], "Approve workshop skin requests": [ "skinrequests", "srs" ], "Set your selected skin set": [ "skinset", "ss" ], "Import Custom Skins": [ "skinimport", "sip" ], "Import Workshop Collection Command": [ "colimport", "cip" ], "Skin Request Notification Discord Webhook": "", "Custom Page Change UI Positon anchor/offset 'min x, min y', 'max x', max y'": [ "0.5 0.0", "0.5 0.0", "198 60", "400 97" ], "Custom Searchbar UI Positon anchor/offset 'min x, min y', 'max x', max y'": [ "0.5 0.0", "0.5 0.0", "410 635", "572 660" ], "Custom Set Selection UI Positon anchor/offset 'min x, min y', 'max x', max y'": [ "0.5 0.0", "0.5 0.0", "250 610", "573 633" ], "Auto import approved skins": true, "Remove player data after inactivity (days)": 14, "Apply names of skins to skinned items": true, "Add Search Bar UI": true, "Use on itemcraft hook (skin items after crafting - not required when using skinauto)": false, "Override spraycan behaviour": false, "Use spraycan effect when holding spraycan and skinning deployables": true, "Blacklisted Skins (skinID)": [], "Blacklisted Itemms (itemID)": [], "Import Skin collections (steam workshop ID)": [], "Command based cooldowns ('permission' : 'command' seconds": { "Default30CD": { "skin": 30.0, "skinitem": 30.0, "skincraft": 30.0, "skincon": 30.0, "skininv": 30.0, "skinteam": 30.0, "skinbase": 60.0, "skinall": 60.0 } }, "Imported Skins List": {} }
//Get all Cached skins public Dictionary<int, List<ulong>> GetAllCachedSkins() { return _cachedSkins; } //Check if skin is a Redirect item public bool IsRedirectID(ulong uID) { return HasMask(uID); } //Convert Redirect ID to item ID public int RedirectIDtoItemID(ulong uID) { return (int)UnsetMask(uID); } //Get a list of skins for a particular item public List<ulong>? GetSkinsItemList(int itemid) { _cachedSkins.TryGetValue(itemid, out List<ulong>? cachedSkins); return cachedSkins; }
-

$25.00
Limit Entities
The purpose of this plugin is to restrict the entities that players can build. You can limit any entity based on its prefab. To get the full list of supported prefabs, use the limitentities.list console command.
There are three types of limits available: global, building, and radius. For building limit checks, if a cupboard is placed, the limits of the cupboard owner will apply. If no cupboard is present, the restrictions of the first block's owner will be used. When you run the plugin for the first time, no players will be restricted. To apply limits, you must assign one or more permissions from your config file to a player or group. The plugin also tracks permission changes, so you won't need to restart it after granting a player new permissions or adding them to a VIP group, for example. This plugin is designed to be efficient and performant, even on heavily loaded servers.
The plugin now supports Entity Groups, and group names are translatable. All newly created groups are automatically added to the language files when the plugin loads. You can create as many groups as you like or remove them entirely. Just keep in mind that if you add an entity to a group, you cannot also add it to Limits Entities — you must use the Group name instead.
Extended Power Lights (Deluxe Christmas Lights) support has been added: a new group of limits is now included in the config. The default values are set to -1, meaning no limits. Adjust them according to your needs.
Radius Limits allow you to restrict the number of specific entities within a certain radius. This feature is designed for static deployable entities (like turrets or lights) and helps prevent spam placement in concentrated areas.
ZoneManager integration (may affect performance): IncludeMode means, limits apply only inside the specified zones, if IncludeMode = false, limits apply only outside those zones.
Note: Radius limits only work for static entities (entities that don't move after placement). This feature can be resource-intensive if used with very large radius values or too many entities, so use it judiciously. Note: If you want to have "beautiful" names even on English only, please, install Rust Translation API plugin or you will have short prefab names only. ## Permissions
limitentities.immunity -- Allows player to not being limited by this plugin limitentities.admin -- Allows player to check other player limits and execute console command
More permissions with limits are created in config file (see Configuration section below) ## Commands
/limits <player name | steamid> (optional) -- Get current limits list for a player. If player doesn't have admin permission or player name/id is empty - current player limit will be shown limitentities.list (console only) - print all tracked prefabs list into log file. Requires admin rights (can be used in server console/RCON) ## Configuration
You can remove unnecessary default permissions and also add as many permissions as you want. For cases where the player has more than one, the permission with the higher priority will be applied. Note: For better performance, grant permissions only to players you want to limit, or use an immunity permission to disable limits entirely. Enable or disable notifications and logging. Set the Building Detection Range to be used when a building is not specified (e.g., not a decay entity). Do not set this value too high — it may significantly impact performance! Enable or disable tracking (and limiting) for Power Lights (Deluxe Christmas Lights). Enable or disable tracking (and limiting) for Growable Entities. Set the SteamIDIcon to a specific SteamID to customize the account icon in chat messages. Define the commands list (defaults are limits and limit). Set the percentage (%) at which limit notifications appear. If set to 0, notifications will only show when the limit is reached. Add entity prefab names to the Excluded List to make the plugin completely ignore those prefabs. Add entity skin ID to the Excluded skin IDs to make the plugin completely ignore prefabs with those skin IDs. Enable or disable integration with the ZoneManager plugin. May impact performance!
When IncludeMode is true, limits apply only to players/entities inside the specified zones.
When IncludeMode is false, limits apply only to players/entities outside those zones. Enabling Prevent Excessive Merging of buildings may affect performance, so use it at your own risk! Use Entity Groups to combine entities and set a shared limit for the entire group. Note: The same entity cannot be listed in both Group Entities and Limits Entities at the same time.
## Localization
Plugins phrases are available on 3 languages out of the box: English, Ukrainian and Russian Plugin supports Rust Translation API which allows you to have entities names on any language Rust supports There is a free version on uMod, why do you even need this plugin?
First of all, this plugin was designed to be efficient and performant. It uses unique caching system that should not consume no additional server resources Much more efficient building limit control system even without cupboard placed More accurate mechanism for notification messages Allows you to prevent entities placement if limit is set to 0 Supports Rust Translation API so you can have full support of any language Rust supports Supports Entity Groups ! Supports checks to prevent excessive merging of buildings Supports Abandoned Bases plugin Supports advanced limits for Power Lights (Deluxe Christmas Lights) Supports setting advanced building detection range Advanced radius-based limiting system for area control Supports Zone Manager plugin -
$8.99
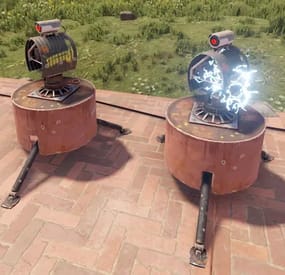
Auto Turret Interference & Settings
Auto Turret Interference & Settings
Auto Turret Interference allows you or your CLAN/TEAM to change the limit of turrets allowed for different players, based on your configurations and assigned roles. You can also make sure that the server or event turrets do not have interference, for example Raidable Base.
In addition, it offers commands to see the statistics on the auto turrets, the possibility of turning the turrets ON and OFF via command, automatic switching ON and OFF of the auto turrets and much more.
It also allows you to modify some automatic turret configurations, for example:
Customize rotation angle, Viewing angle and target scanning, Infinite Ammo: In the next release Health, Range, Bullet Speed, Aim Cone, Damage Scale
Oxide/Carbon compatibility
Basically, 4 groups are configured: Default, VIP1, VIP2, VIP3, in this way you can decide the limit of turrets in a given radius based on the group assigned to the user or the group they belong to
Permissions:
autoturretinterference.admin -- Allows you to execute some commands reserved for administrators autoturretinterference.show.allowed -- Allows you to use the /ati show command, to display text above the auto turrets with the status they are in.
---------------------------------------- autoturretinterference.default -- Assign configurations: Default autoturretinterference.vip1 -- Assign configurations: VIP1 autoturretinterference.vip2 -- Assign configurations: VIP2 autoturretinterference.vip3 -- Assign configurations: VIP3
These are the groups that are created by default, but you can add and/or edit groups as you wish.
For example, if you change the group vip1 to vip_elite, the permission autoturretinterference.vip_elite will be created
If you create a new group, for example vipvanilla, the permission autoturretinterference.vipvanilla will be created.
COMMANDS
Commands can be typed in chat (by putting the / character in front of the command), or from console.
/ati status or /ati st -- This command allows the player to see his auto turret statistics and limits /ati status <steamID> or /ati st <steamID> -- This command allows the administrator to see another players auto turret and limit statistics. To use this command you must have permission: autoturretinterference.admin
/ati start or /ati stop -- This command allows the player to turn on or off the single auto turret you are looking at. To use this command, you must enable the AllowCommandsToStartAndStop = true property in your configuration or have permission: autoturretinterference.admin NB: If you have autoturretinterference.admin permission, you can turn on or off the auto turret you are watching of any player.
/ati startall or /ati stopall -- This command allows the player to turn all of your auto turrets ON or OFF. To use this command, you must enable the AllowCommandsToStartAndStop = true property in your configuration or have permission: autoturretinterference.admin NB: If the player is part of a clan/team, all turrets of all members of the clan/team will be turned ON or OFF. /ati startall <steamID> or /ati stopall <steamID> -- This command allows you to turn ON or OFF all turrets of a player based on its SteamID. To use this command you must have permission: autoturretinterference.admin NB: If the player is part of a clan/team, all turrets of all members of the clan/team will be turned ON or OFF.
/ati show or /ati sh -- Command to display text above the auto turret with the status they are in.
Useful for finding turrets that are having problems.
To use this command you must have permission: autoturretinterference.show.allowed
You can pass one of these parameters: /ati show 0: Show all player auto turrets in all states. /ati show 1: Show text on all player active auto turrets /ati show 2: Show text on all player turned off auto turrets /ati show 3: Display text on all player auto turrets not connected to power /ati show 4: Display text on all player auto turrets with interference /ati show 5: Display text on all player auto turrets with information on the name of the weapon and the ammunition present in the auto turrets /ati show 6: Display text on all player auto turrets without a weapon /ati show 7: Display text on all player auto turrets without ammunition
/ati show <numbr> <steamID> or /ati sh <numbr> <steamID> -- Command to display text above the auto turret with the state it is in based on the players SteamID.
To use this command you must have permission: autoturretinterference.admin Commands can be added or modified in the configuration file: /oxide/config/AutoTurretInterference.json
Command output example (/ati status or /ati st) :
Command output example (/ati show or /ati sh) :
CLAN/TEAM
If you are part of a clan/team and there are 1 more members who have the VIP/ROLE, then all members of the clan/team will benefit.
Example: a clan/team member has the VIP/ROLE to be able to place 40 turrets, in this case all clan/team members will be able to place 40 turrets, but this does not mean that the total number of turrets you can place are added, the limit in in this case there are still 40 turrets, but they can be positioned by all members of the clan/team, rather than just the player who has the VIP/ROLE (in this case we assumed that the VIP/ROLE limited to 40 turrets).
You can enable this setting from the configuration file: "Share Group With Clan/Team members. Default FALSE": false": true
Configuration
The settings and options can be configured in the AutoTurretInterference under the config directory. The use of an editor and validator is recommended to avoid formatting issues and syntax errors.
{ "Remove interference for server auto turrets: default true (Useful for Raidable Bases or events)": true, "Share Group With Clan/Team members. Default FALSE": false, "PlayerShowTurretCountInfoMessage (Show the player, when he places a turret, a message with the number of turrets that are placed in the radius he is in. Default true.)": true, "AllowCommandsToStartAndStop (If set to TRUE, enables commands to allow the player or clan/team to turn their all auto turrets ON or OFF. Default FALSE)": false, "EnableAutomaticsStartAndStop (If set to TRUE, the player's turrets will be turned OFF when they go offline and ON when they come back online. For the clan/team, the entire clan must be offline to turn OFF the turrets automatically, but if at least one member of the clan comes back online, all the auto turrets will turn ON. Default FALSE)": false, "EnableMessageInfo (If set to TRUE, it shows a message info to the player, when he takes hold of an auto turret, of the commands that the plugin makes available to him)": true, "Auto Turret Draw Time (seconds). Default 60s": 60, "Auto Turret Draw Font Size (px). Default 16 pixel": 16, "Enable SentryTurrets plugin integration. If set to true, avoid conflicts with turret interference, interference will be handled by the AutoTurretInterference plugin. Default true": true, "Chat Command": [ "ati", "autoturretinterference" ], "RolePermission": { "vip1": { "Priority. (lower = higher priority)": 1, "Force the maximum number of Auto Turrets for player or entire clan/team (-1 no limit). Default -1": -1, "Player Auto Turrets without interference limit": 40, "Radius within which the system checks for other turrets (lower = more turrets)": 40, "Rotate Auto Turrets 180° degrees instead 90°. Default false": false, "Rotate Auto Turrets 270° degrees instead 90°. Default false": false, "Rotate Auto Turrets 360° degrees instead 90°. Default false": false, "Auto Turret Viewing angle and target scanning. Default 180° Degrees": 180, "Enable Auto Turrets custom settings": false, "Health (Default 1000)": 1000.0, "Range (Default 30)": 30.0, "Bullet Speed (Default 200)": 200.0, "Aim Cone (Default 4)": 4.0, "Damage Scale (Default 1.0)": 1.0 }, "vip2": { "Priority. (lower = higher priority)": 2, "Force the maximum number of Auto Turrets for player or entire clan/team (-1 no limit). Default -1": -1, "Player Auto Turrets without interference limit": 30, "Radius within which the system checks for other turrets (lower = more turrets)": 40, "Rotate Auto Turrets 180° degrees instead 90°. Default false": false, "Rotate Auto Turrets 270° degrees instead 90°. Default false": false, "Rotate Auto Turrets 360° degrees instead 90°. Default false": false, "Auto Turret Viewing angle and target scanning. Default 180° Degrees": 180, "Enable Auto Turrets custom settings": false, "Health (Default 1000)": 1000.0, "Range (Default 30)": 30.0, "Bullet Speed (Default 200)": 200.0, "Aim Cone (Default 4)": 4.0, "Damage Scale (Default 1.0)": 1.0 }, "vip3": { "Priority. (lower = higher priority)": 3, "Force the maximum number of Auto Turrets for player or entire clan/team (-1 no limit). Default -1": -1, "Player Auto Turrets without interference limit": 20, "Radius within which the system checks for other turrets (lower = more turrets)": 40, "Rotate Auto Turrets 180° degrees instead 90°. Default false": false, "Rotate Auto Turrets 270° degrees instead 90°. Default false": false, "Rotate Auto Turrets 360° degrees instead 90°. Default false": false, "Auto Turret Viewing angle and target scanning. Default 180° Degrees": 180, "Enable Auto Turrets custom settings": false, "Health (Default 1000)": 1000.0, "Range (Default 30)": 30.0, "Bullet Speed (Default 200)": 200.0, "Aim Cone (Default 4)": 4.0, "Damage Scale (Default 1.0)": 1.0 }, "default": { "Priority. (lower = higher priority)": 100, "Force the maximum number of Auto Turrets for player or entire clan/team (-1 no limit). Default -1": -1, "Player Auto Turrets without interference limit": 12, "Radius within which the system checks for other turrets (lower = more turrets)": 40, "Rotate Auto Turrets 180° degrees instead 90°. Default false": false, "Rotate Auto Turrets 270° degrees instead 90°. Default false": false, "Rotate Auto Turrets 360° degrees instead 90°. Default false": false, "Auto Turret Viewing angle and target scanning. Default 180° Degrees": 180, "Enable Auto Turrets custom settings": false, "Health (Default 1000)": 1000.0, "Range (Default 30)": 30.0, "Bullet Speed (Default 200)": 200.0, "Aim Cone (Default 4)": 4.0, "Damage Scale (Default 1.0)": 1.0 } }, "VersionNumber": { "Major": 1, "Minor": 3, "Patch": 1 } }
Remove interference for server auto turrets: default true (Useful for Raidable Bases or events): Whether or not to enable interference for server auto turrets. By default it is true, in this way the server's automatic turrets will not have interference, useful for events for example: Raidable Base. Share Group With Clan/Team members: If set to TRUE, the group assigned to a player is shared with all members of the clan/team. The group with the lowest priority is shared, then all members of the clan/team will benefit. Default FALSE PlayerShowTurretCountInfoMessage: Show the player, when he places a turret, a message with the number of turrets that are placed in the radius he is in. Default: TRUE. AllowCommandsToStartAndStop: If set to TRUE, enables commands to allow the player or clan/team to turn their all auto turrets ON or OFF. Default FALSE. EnableAutomaticsStartAndStop: If set to TRUE, the player's turrets will be turned OFF when they go offline and ON when they come back online. For the clan/team, the entire clan must be offline to turn OFF the turrets automatically, but if at least one member of the clan comes back online, all the auto turrets will turn ON. Default FALSE. EnableMessageInfo: If set to TRUE, it shows a message info to the player, when he takes hold of an auto turret, of the commands that the plugin makes available to him. Default: TRUE. Auto Turret Draw Time (seconds). Default 60s: Duration of display of text above the auto turret. Default 60 seconds. Auto Turret Draw Font Size (px). Default 16 pixel: Size of text above auto turret. Default 16 pixel Enable SentryTurrets plugin integration. If set to true, avoid conflicts with turret interference, interference will be handled by the AutoTurretInterference plugin: Enables integration with the SentryTurrets plugin to avoid conflicts with auto turrets interference management. If set to true, auto turrets interference will be handled by the AutoTurretInterference plugin. Default true
Chat Command: Here you can add, edit or delete Commands can be typed in chat (by putting the / character in front of the command), or from console.
Priority. (lower = higher priority) -- Each group has its own property, the lower this number is, the more important the group is.
This is useful in the case where a player has more roles assigned. In this case, the group with the lowest priority will be assigned, the most important group.
Negative numbers are also allowed. Player Auto Turrets without interference limit: How many automatic turrets can a player place within the radius within which the system controls the other turrets, without them interfering. For example, basic rust allows 12 turrets in a radius of 40 meters, you can set for example 30 turrets instead of 12. Radius within which the system checks for other turrets (lower = more turrets) Force the maximum number of Auto Turrets for player or entire clan/team (-1 no limit).
Maximum total number of auto turrets that can be active for player or entire clan/team.
When Auto Turrets are placed, only a certain number in a certain radius, configured in the configuration file, can be active at a given time.
However, this does not prevent you from being able to place unlimited Auto Turrets.
For example, you have set a limit of 20 Auto Turrets in a 40 meter radius, this means that in a 40 meter radius there can be a maximum of 20 Auto Turrets. But if you place another 20 Auto Turrets more than 40 meters away from the first ones, then you can place another 20 active Auto Turrets, and so on.
With this option you can establish the maximum number of Auto Turrets that can be active regardless of the radius, in order to avoid unlimited Auto Turrets.
It is always recommended to use this configuration together with the others.
For example you can decide that the forced maximum Auto Turrets limit is 5 times the number of active Auto Turrets in a given radius, it's up to you to decide. Default -1.
Auto Turrets rotation angle: Allows you to change the rotation angle of the turret. Targets will be acquired as usual, if they are in front of the turret which however can move to a larger angle. Rotate Auto Turrets 180° degrees instead 90°: If set to TRUE, the auto turrets will rotate 180° instead of the default 90° (degrees). Default False Rotate Auto Turrets 270° degrees instead 90°: If set to TRUE, the auto turrets will rotate 270° instead of the default 90° (degrees). Default False Rotate Auto Turrets 360° degrees instead 90°: If set to TRUE, the auto turrets will rotate 360° instead of the default 90° (degrees). Default False
Auto Turret Viewing angle and target scanning: This is a very powerful setting, it allows the auto turrets to see and acquire targets instantly based on the set angle, regardless of whether the target is in front of the auto turrets or not.
For example if set to 200°, the auto turrets will acquire targets instantly within 200°.
Or if set to 360°, the auto turrets will acquire targets instantly in all directions. You can choose the angle you prefer by entering a number between 1° and 360° (degrees). Default 180° Degrees.
Enable Auto Turrets custom settings: If set to TRUE, it allows you to change some Auto turret settings. Default FALSE Health (Default 1000): Auto Turrets maximum health.
Range (Default 30): Distance from which the weapon can see.
Bullet Speed (Default 200): Speed of bullets fired.
Aim Cone (Default 4): The weapon's aiming cone.
Damage Scale (Default 1.0): allows you to increase the damage of Auto turrets. A higher value indicates greater damage.
PlayerShowTurretCountInfoMessage EXAMPLE:
EnableMessageInfo EXAMPLE:
Localization
The plugin, therefore the automatic messages and statistics, are translated into the following languages:
English Italian Spanish French German Dutch Turkish Russian Ukrainian Translation files are located in the /oxide/lang folder, here is an example of a /oxide/lang/en/AutoTurretInterference.json translation file.
You can add translations for other languages by adding them to the folder: /oxide/lang
- #auto turret interference
- #auto turret
- (and 22 more)
-
$35.00
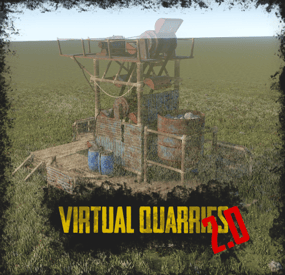
Virtual Quarries
By ThePitereq in Plugins
RUST Plugin Test Server
TEST MY PLUGINS THERE!
connect play.thepitereq.ovh:28050
Virtual Quarries plugin is a major upgrade to quarries. You can create and place quarries that extract any type of resource and access them from anywhere on the map. Set up an infinite number of quarry types, apply custom quarry limits with a permission system, grant friends access to resource storage, upgrade your quarry to get more resources, customize survey items and fuel, and much more! You can even customize the static quarries on the map to be instanced, allowing each player to have their own quarry.
Extensive customization and enhancements for quarries. Place an infinite number of quarries of various types and give access to friends and teammates, including offline players. Customize the output for each quarry type, allowing them to dig anything from stone and ores to rockets and C4, with full support for skins and display names. The permission system lets you limit the number of quarries per player, and you can upgrade your quarries for better output, capacity, and fuel efficiency. The items required to place quarries can be customized based on the quarry's resource output. M ultiple types of survey charges, each corresponding to different quarry types. Full data merge through wipes. Responsive RUST-themed UI. Customizable fuel types for each quarry. Custom digging method ensures quarries dig once every 60 seconds by default to improve performance, but this frequency is configurable. Supports static quarries, pumpjacks, and the giant excavator pit, with instanced inventories for each player and customizable outputs.
virtualquarries.use - Allows you to open /qr menu. (Needs to be enabled in config) virtualquarries.share - Allows players to give other teammates access to their quarries. (Needs to be enabled in config) virtualquarries.static.quarry - Gives access to static quarries. (Needs to be enabled in config) virtualquarries.static.pumpjack - Gives access to static pump jacks. (Needs to be enabled in config) virtualquarries.static.excavator - Gives access to giant excavator. (Needs to be enabled in config)
/qr - Opens Virtual Quarry Menu. (Configurable)
Economy Plugin Config
0 - None 1 - Economics 2 - ServerRewards 3 - IQEconomic 4 - BankSystem 5 - ShoppyStock Quarry Limit Extra
You can limit sum of quarries by adding "*" into your permission list, so players can mix quarry profiles until they reach overall limit.
Example: "virtualquarries.default": { "*": 3, "pumpjack": 1 }, Based on regular configuration this setup will limit player to have 3 of any type of quarrym but only 1 pumpjack, so he can have 2 quarries and 1 pumpjack or 3 quarries and no pumpjack.
OnQuarryUpgraded(BasePlayer player, int quarryLevel, string quarryProfile) - Called when quarry is successfully upgraded. OnQuarryRemoved(BasePlayer player, string quarryProfile) - Called when quarry is successfully removed. OnCustomSurveyThrow(BasePlayer player, string quarryProfile) - Called when custom survey is successfully throwed. OnQuarryPlaced(BasePlayer player, string quarryProfile) - Called when quarry is succesfully placed.
Example Config
With additional quarry types, more upgrade levels etc. (my private configuration)
VirtualQuarries.json
{ "Command List": [ "qr", "quarry", "quarries", "vq", "virtualquarry", "virtualquarries" ], "UI Action Cooldown (in seconds, 0 to disable)": 0.0, "Enable Console Logs": true, "PopUpAPI - Preset Name": "Legacy", "Override Custom Skinned Items With Steam Icons (no URLs needed)": false, "Additional Steam Image Download": false, "Require Permission For Use": false, "Lock Access To Quarry Profiles If Lost Permission": false, "Mining Quarry/Pump Jack Limit Permissions": { "virtualquarries.default": { "pumpjack": 1, "quarry": 2 }, "virtualquarries.vip": { "pumpjack": 2, "quarry": 3 } }, "Sharing - Require Permission": false, "Sharing - Remove Members If Owner Offline More Than X Days (0, to disable)": 0, "Sharing - Share Only To Teammates": false, "Data - Enable Data Wipe On Server Wipe": false, "Data - Store Container Data In File And Restore On Server Wipe": false, "Data - Store Container Interval (in seconds)": 1800, "Quarry Tick (how often quarries dig resources, in seconds)": 60, "Static Quarry Tick (how often quarries dig resources, in seconds)": 60, "Excavator Quarry Tick (how often quarries dig resources, in seconds)": 60, "Storage Prefab": "assets/prefabs/deployable/large wood storage/box.wooden.large.prefab", "Sound - Start Sound": "assets/prefabs/npc/autoturret/effects/online.prefab", "Sound - Stop Sound": "assets/prefabs/npc/autoturret/effects/offline.prefab", "Survey Charge - Allow Throwing Survey Charges": false, "Survey Charget Types": { "survey": { "Effect Path": "assets/bundled/prefabs/fx/survey_explosion.prefab", "Required Permission (empty, if not required)": "", "Chance For Resources (0-100)": 75, "Displayed Survey Title Translation Key": "SurveyCharge", "Required Item": { "Shortname": "surveycharge", "Skin": 0, "Amount": 1, "Display Name": null, "Icon URL": "" } } }, "Upgrades - Used Economy Plugin (0 - None, See Website For More Info)": 0, "Upgrades - Economy Currency (If Economy Plugin Is 5 - ShoppyStock)": "rp", "Removing Quarries - Refund Items": true, "Removing Quarries - Refund Upgrades": false, "Go Back Button - Position (1-2)": 1, "Upgrade UI - Responsive Position": true, "Static Quarries - Enable": false, "Static Quarries - Disable Running Effect": false, "Excavator Quarry - Enable": false, "Excavator Quarry - Lock Air Drops": false, "Excavator Quarry - Resource Container Size": 18, "Excavator Quarry - Fuel Container Size": 6, "Static Quarries - Quarry Requires Permission": false, "Static Quarries - Pump Jack Requires Permission": false, "Static Quarries - Excavator Requires Permission": false, "Static Quarries - Resource Container Size": 18, "Static Quarries - Fuel Container Size": 6, "Static Quarries - Fuel Item": { "Shortname": "lowgradefuel", "Skin": 0, "Amount": 1.0, "Display Name": null, "Icon URL": null }, "Excavator Quarry - Fuel Item": { "Shortname": "diesel_barrel", "Skin": 0, "Amount": 1.0, "Display Name": null, "Icon URL": null }, "Static Quarries - Metal Quarry Output": [ { "Shortname": "stones", "Skin": 0, "Amount Per Tick": 150.0, "Display Name": "" }, { "Shortname": "metal.ore", "Skin": 0, "Amount Per Tick": 22.5, "Display Name": "" } ], "Static Quarries - Sulfur Quarry Output": [ { "Shortname": "sulfur.ore", "Skin": 0, "Amount Per Tick": 22.5, "Display Name": "" } ], "Static Quarries - HQM Quarry Output": [ { "Shortname": "hq.metal.ore", "Skin": 0, "Amount Per Tick": 1.5, "Display Name": "" } ], "Static Quarries - Pump Jack Output": [ { "Shortname": "crude.oil", "Skin": 0, "Amount Per Tick": 6.0, "Display Name": "" } ], "Static Quarries - Excavator Outputs": { "HQM": [ { "Shortname": "hq.metal.ore", "Skin": 0, "Amount Per Tick": 50.0, "Display Name": "" } ], "Metal": [ { "Shortname": "metal.fragments", "Skin": 0, "Amount Per Tick": 2500.0, "Display Name": "" } ], "Stone": [ { "Shortname": "stones", "Skin": 0, "Amount Per Tick": 5000.0, "Display Name": "" } ], "Sulfur": [ { "Shortname": "sulfur.ore", "Skin": 0, "Amount Per Tick": 1000.0, "Display Name": "" } ] }, "Quarry Profiles": { "pumpjack": { "Required Permission (empty, if not required)": "virtualquarries.pumpjack", "Displayed Icon": { "Shortname": "mining.pumpjack", "Skin": 0, "Amount": 1, "Display Name": null, "Icon URL": "" }, "Survey Type": "survey", "Displayed Quarry Title Translation Key": "PumpjackTitle", "Chance": 5, "Minimal Resources Per Node": 1, "Maximal Resources Per Node": 2, "Fuel Required Per Tick": { "Shortname": "lowgradefuel", "Skin": 0, "Amount": 1.0, "Display Name": null, "Icon URL": null }, "Enable Upgrades": true, "Items Required To Place": [ { "Shortname": "mining.pumpjack", "Skin": 0, "Amount": 1, "Display Name": null, "Icon URL": "" } ], "Resources": { "crude": { "Output Item - Shortname": "crude.oil", "Output Item - Skin": 0, "Output Item - Display Name": "", "Output Item - Icon URL (Required if Skin not 0)": "", "Include Always": true, "Required Permission (empty if not required)": "", "Chance": 0, "Minimal Output Per Tick": 0.8, "Maximal Output Per Tick": 3.0, "Additional Items Required To Place": [] } }, "Upgrades": [ { "Required Items": [], "Required Currency (0 to disable)": 0, "Fuel Storage Capacity": 6, "Capacity": 6, "Gather Multiplier": 1.0, "Fuel Usage Multiplier": 1.0, "Additional Resources (Resources keys)": [] }, { "Required Items": [ { "Shortname": "wood", "Skin": 0, "Amount": 14000, "Display Name": null, "Icon URL": "" }, { "Shortname": "stones", "Skin": 0, "Amount": 10000, "Display Name": null, "Icon URL": "" } ], "Required Currency (0 to disable)": 12000, "Fuel Storage Capacity": 6, "Capacity": 9, "Gather Multiplier": 1.2, "Fuel Usage Multiplier": 1.0, "Additional Resources (Resources keys)": [] } ] }, "quarry": { "Required Permission (empty, if not required)": "", "Displayed Icon": { "Shortname": "mining.quarry", "Skin": 0, "Amount": 1, "Display Name": null, "Icon URL": "" }, "Survey Type": "survey", "Displayed Quarry Title Translation Key": "QuarryTitle", "Chance": 25, "Minimal Resources Per Node": 1, "Maximal Resources Per Node": 2, "Fuel Required Per Tick": { "Shortname": "lowgradefuel", "Skin": 0, "Amount": 1.0, "Display Name": null, "Icon URL": null }, "Enable Upgrades": true, "Items Required To Place": [ { "Shortname": "mining.quarry", "Skin": 0, "Amount": 1, "Display Name": null, "Icon URL": "" } ], "Resources": { "hq": { "Output Item - Shortname": "hq.metal.ore", "Output Item - Skin": 0, "Output Item - Display Name": "", "Output Item - Icon URL (Required if Skin not 0)": "", "Include Always": false, "Required Permission (empty if not required)": "", "Chance": 10, "Minimal Output Per Tick": 0.3, "Maximal Output Per Tick": 2.0, "Additional Items Required To Place": [] }, "metal": { "Output Item - Shortname": "metal.ore", "Output Item - Skin": 0, "Output Item - Display Name": "", "Output Item - Icon URL (Required if Skin not 0)": "", "Include Always": false, "Required Permission (empty if not required)": "virtualquarries.metal", "Chance": 50, "Minimal Output Per Tick": 22.5, "Maximal Output Per Tick": 45.0, "Additional Items Required To Place": [] }, "scrap": { "Output Item - Shortname": "scrap", "Output Item - Skin": 0, "Output Item - Display Name": "", "Output Item - Icon URL (Required if Skin not 0)": "", "Include Always": false, "Required Permission (empty if not required)": "virtualquarries.scrap", "Chance": 5, "Minimal Output Per Tick": 0.1, "Maximal Output Per Tick": 1.0, "Additional Items Required To Place": [ { "Shortname": "wood", "Skin": 0, "Amount": 7000, "Display Name": null, "Icon URL": "" } ] }, "stone": { "Output Item - Shortname": "stones", "Output Item - Skin": 0, "Output Item - Display Name": "", "Output Item - Icon URL (Required if Skin not 0)": "", "Include Always": true, "Required Permission (empty if not required)": "", "Chance": 0, "Minimal Output Per Tick": 150.0, "Maximal Output Per Tick": 300.0, "Additional Items Required To Place": [] }, "sulfur": { "Output Item - Shortname": "sulfur.ore", "Output Item - Skin": 0, "Output Item - Display Name": "", "Output Item - Icon URL (Required if Skin not 0)": "", "Include Always": false, "Required Permission (empty if not required)": "", "Chance": 50, "Minimal Output Per Tick": 15.0, "Maximal Output Per Tick": 30.5, "Additional Items Required To Place": [] } }, "Upgrades": [ { "Required Items": [], "Required Currency (0 to disable)": 0, "Fuel Storage Capacity": 6, "Capacity": 6, "Gather Multiplier": 1.0, "Fuel Usage Multiplier": 1.0, "Additional Resources (Resources keys)": [] }, { "Required Items": [ { "Shortname": "wood", "Skin": 0, "Amount": 7000, "Display Name": null, "Icon URL": "" }, { "Shortname": "stones", "Skin": 0, "Amount": 5000, "Display Name": null, "Icon URL": "" } ], "Required Currency (0 to disable)": 6000, "Fuel Storage Capacity": 6, "Capacity": 9, "Gather Multiplier": 1.2, "Fuel Usage Multiplier": 1.0, "Additional Resources (Resources keys)": [ "scrap" ] } ] } } } -

$5.00
Better Metabolism
By ThePitereq in Plugins
RUST Plugin Test Server
TEST MY PLUGINS THERE!
connect play.thepitereq.ovh:28050
Better Metabolism plugin allows you to surpass the limits of calories, hydration, and health.
Adjust the maximum values for hunger, hydration, and health. Flexibility to modify respawn metabolism values. Configure the functionality of health tea when the health bonus is active.
bettermetabolism.default - Permission for first default plugin configuration. Can be removed/modified. bettermetabolism.vip - Permission for second default plugin configuration. Can be removed/modified.
object OnModifyHealth(BasePlayer player) - Ran when player health is getting updated. Cancellable. float GetBetterMetabolismHealth(ulong userId) - Returns how much player health value is modified. Returns 0 if not modified. object OnHealthModified(BasePlayer player, float setHealth) - If returns float, overrides the maxHealthOverride with return value.
{ "Enable Max Health Option": true, "Metabolism Permissions": { "bettermetabolism.default": { "Health": 60.0, "Max Health": 100.0, "Max Calories": 500.0, "Calories": 250.0, "Max Hydration": 250.0, "Hydration": 100.0 }, "bettermetabolism.vip": { "Health": 100.0, "Max Health": 100.0, "Max Calories": 1000.0, "Calories": 600.0, "Max Hydration": 250.0, "Hydration": 100.0 } } }